USER MANUAL OW 610 110 MOULINEX
DELAYED START PROGRAM
To ensure that the food is ready at the desired time, the appliance can be programmed up to 15 hours in advance. This program cannot be used for programs 4, 8, 9, 10, 11, and 12.
This step can be performed after a program, crust color, and weight have been selected. The program time is displayed. Calculate the time difference between the moment you start the program and the time you want the food to be ready. The appliance automatically includes the duration of the program cycle. To set the delayed start, press the ♣ button, and the ♣ symbol will appear on the display with the default time (15:00). To set the time, press the ♣ button. It lights up. Press ♣ to start the delayed start program.
If you want to change the time setting, press and hold the button until a sound signal is heard. The default time is displayed. Start the operation again.
INFORMATION ABOUT INGREDIENTS
Flour: You can make bread with flour. There are different types of flour: small cubes of compressed fresh yeast, active dry yeast, which must be rehydrated, or instant dry yeast. Yeast is sold in supermarkets (in the baking section), but you can also buy fresh yeast from your bakery. The yeast must be mixed directly into the flour in the machine along with the other ingredients. For this, make sure to crumble the compressed yeast and mix it with your fingers to help it dissolve.
Follow the recommended quantities (see the table of equivalents below).
Equivalent quantities/ratio between dry yeast and compressed yeast: Dry yeast (g) 1 1.5 2 2.5 3 3.5 4 4.5 5 Compressed yeast (g) 9 13 18 22 25 31 36 40 45
FLOUR: The use of flour type 55 is recommended unless otherwise specified in the recipe. When using special bread flour mixes, for white or wholemeal bread, do not exceed a total of 750 g of dough (flour + water).
Depending on the quality of the flour, the result of the bread making may vary.
- Keep the flour in an airtight container, as flour reacts to changes in humidity. Adding whole grains, rye, wheat germ, or wholemeal flour to the bread dough will result in a denser and smaller loaf. - The more the flour is based on whole grains, the more it contains parts of the outer layers of the wheat grain (type 55), the less the dough will rise and the denser the bread will be. You can also find ready-to-use bread mixes in stores. You can follow the manufacturer's recommendations for using these mixes.
Gluten-free bread making with large quantities of this type of flour to make bread is only possible using the gluten-free program. There are many types of flour that do not contain gluten. The most common are rice flour, corn flour (regardless of whether it is wholemeal), chickpea flour, chestnut flour, buckwheat flour, millet flour, and sorghum flour.
For gluten-free bread, to improve the structure and to mix several types of flour, which are used for gluten-free bread and for making dough.
Making dough for gluten-free bread: to achieve a better consistency and to improve the structure, you can add a little xanthan gum or guar gum to your dough.
Ready-to-use gluten-free dough: they make the preparation of gluten-free bread easier, as they contain the necessary ingredients to guarantee a good gluten-free result - if they are followed exactly.
Different brands of ready-to-use gluten-free dough do not always give the same result.
Sugar: Do not use sugar cubes. Sugar improves the taste of the bread and gives a better color to the crust.
Salt: Strengthens the action of the yeast and gives taste to the bread.
It should not come into contact with the yeast before the preparation of the dough.
It also improves the structure of the dough.
Water: Water regulates and activates the yeast. It also hydrates the flour and allows the dough to form. Water can be replaced entirely or partially by milk or other liquids.
Use liquids at room temperature, except for gluten-free breads, which require the use of warm water (approximately 35°C).
Fat: Fats make the bread softer. They also preserve it better in quality and longer. Too much fat slows down the rising of the dough. If you use oil, add it to the liquid ingredients. Do not add melted fat. Prevent the fat from coming into contact with the yeast, as the fat can hinder the action of the yeast.
Eggs: They improve the color of the bread and contribute to the quality formation of the crust. If you use them, adjust the amount of liquid accordingly. Beat them and add the necessary liquid, until you get the amount of liquid indicated in the recipe.
Recipes are designed for a medium size loaf of 50 g, if the loaves are larger add a little more flour, if the loaves are smaller add a little less flour.
Milk: Milk has a beneficial effect, which helps in the formation of a more regular crumb and a more attractive appearance of the crust. You can use fresh milk or powdered milk. If you use powdered milk, add the amount of water that is previously intended for the milk. The total volume should be equal to the volume indicated in the recipe.
SURFACE PREPARATION
- Place the type of bread and the ingredients in the pan to cool naturally.
- Change the ingredients if the bread is not baked properly. If the bread remains in the pan, remove it after 5 to 10 minutes.
- Rinse the other components with a damp cloth. Dry them carefully.
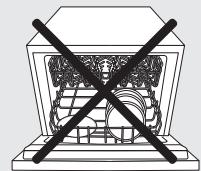
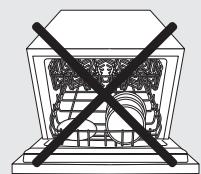
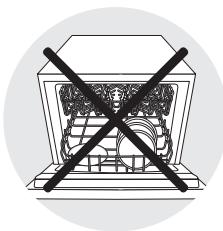
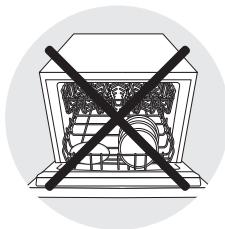
- Absolutely no part can be placed in the dishwasher.
- Do not use abrasive or alcohol-based cleaning products. Use a damp cloth.
- Never immerse the appliance in water.
TROUBLESHOOTING GUIDE FOR YOUR BREAD MAKER
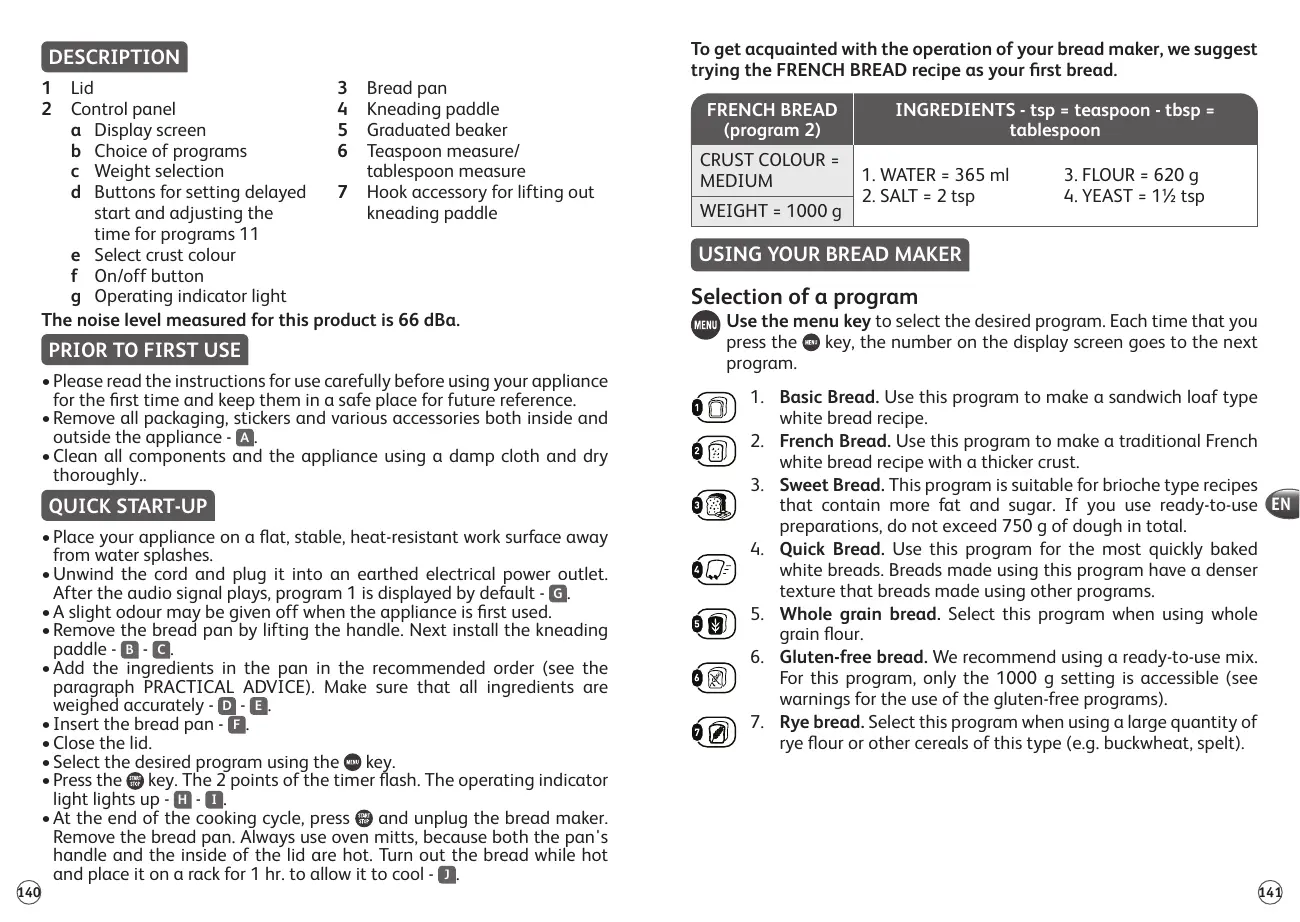
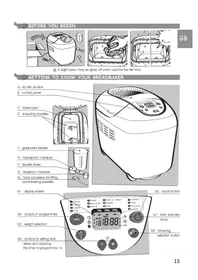
a Display screen b Choice of programs c Weight selection d Buttons for setting delayed start and adjusting the time for programs 11 e Select crust colour f On/off button g Operating indicator light
3 Bread pan 4 Kneading paddle 5 Graduated beaker 6 Teaspoon measure/ tablespoon measure 7 Hook accessory for lifting out kneading paddle
The noise level measured for this product is 66 dBa.
PRIOR TO FIRST USE
- Please read the instructions for use carefully before using your appliance for the first time and keep them in a safe place for future reference.
- Remove all packaging, stickers and various accessories both inside and outside the appliance - A.
- Clean all components and the appliance using a damp cloth and dry thoroughly.
QUICK START-UP
- Place your appliance on a flat, stable, heat-resistant work surface away from water splashes.
- Unwind the cord and plug it into an earthed electrical power outlet. After the audio signal plays, program 1 is displayed by default - 6.
- A slight odour may be given off when the appliance is first used.
- Remove the bread pan by lifting the handle. Next install the kneading paddle - B - C.
- Add the ingredients in the pan in the recommended order (see the paragraph PRACTICAL ADVICE). Make sure that all ingredients are weighed accurately - D - E.
- Insert the bread pan - F.
- Close the lid.
- Select the desired program using the key.
- Press the key. The 2 points of the timer flash. The operating indicator light lights up - H - I.
- At the end of the cooking cycle, press and unplug the bread maker. Remove the bread pan. Always use oven mitts, because both the pan's handle and the inside of the lid are hot. Turn out the bread while hot and place it on a rack for 1 hr. to allow it to cool -
To get acquainted with the operation of your bread maker, we suggest trying the FRENCH BREAD recipe as your first bread.
| FRENCH BREAD
(program 2) | INGREDIENTS - tsp = teaspoon - tbsp = tablespoon |
| CRUST COLOUR = MEDIUM | 1. WATER = 365 ml | 3. FLOUR = 620 g |
| 2. SALT = 2 tsp | 4. YEAST = 1½ tsp |
| WEIGHT = 1000 g | | |
USING YOUR BREAD MAKER
Selection of a program

Use the menu key to select the desired program. Each time that you press the key, the number on the display screen goes to the next program.

- Basic Bread. Use this program to make a sandwich loaf type white bread recipe.

- French Bread. Use this program to make a traditional French white bread recipe with a thicker crust.

- Sweet Bread. This program is suitable for brioche type recipes that contain more fat and sugar. If you use ready-to-use preparations, do not exceed 750 g of dough in total.

- Quick Bread. Use this program for the most quickly baked white breads. Breads made using this program have a denser texture than breads made using other programs.

- Whole grain bread. Select this program when using whole grain flour.

- Gluten-free bread. We recommend using a ready-to-use mix. For this program, only the 1000 g setting is accessible (see warnings for the use of the gluten-free programs).

- Rye bread. Select this program when using a large quantity of rye flour or other cereals of this type (e.g. buckwheat, spelt).

- Cooking only. Use this program to cook for 10 to 70 min. It can be selected on its own and be used:
a) after completion of the Leavened Dough program, b) to reheat or crisp the surface of already cooked breads that have cooled, c) to finish cooking in the event of a prolonged power outage during a bread cycle.

- Leavened Dough. Use this program to make recipes for pizza dough, bread dough and waffle dough. This program does not cook food.

- Cake. Use this program to make cakes using baking powder. Only the 1000 g setting is accessible for this program.

- Porridge. Use this program to make porridge and rice pudding recipes.

- Jam. Use this program to make home-made jams. When using programs 11 and 12, be careful of steam jets and the release of hot air when opening the lid.
Selecting the bread weight
Press the key to set the weight selected - 500 g, 750 g or 1000 g. The indicator light lights up opposite the selected setting. The weight is provided for information purposes only. For some programs, it is not possible to select the weight. Please refer to the cycle chart at the end of the instruction manual.
Selecting the crust colour
Three choices are available: light / medium / dark. If you wish to modify the default setting, press the key until the indicator light lights up opposite the selected setting. For some programs, it is not possible to select the crust colour. Please refer to the cycle chart at the end of the instruction manual.
Start/Stop
Press the key to turn on the appliance. The countdown starts. To stop the program or cancel the programmed delayed start, press the key for 3 seconds.
The cycle chart (see the end of the instruction manual) indicates the breakdown of the various steps, according to the selected program. An indicator light indicates which step is currently under way.
1. Kneading

Use this program to form the structure of the dough and its ability to rise properly.
During this cycle, you may add ingredients: dried fruits, olives, etc. An audio signal indicates when to do so.
Please refer to the cycle chart (see the end of the instruction manual) and to the "extra" column. This column indicates the time that will be displayed on your appliance's screen when the audio signal is emitted.
2. Rest
Allows the dough to expand to improve the quality of the kneading.
3. Rise
Time during which the yeast works to leaven the bread and develop its aroma.
4. Cooking
Transforms the dough into a loaf and ensures the desired crust colour and crispness level.
5. Keep warm
Keeps the bread warm for 1 hour after cooking. It is nonetheless recommended to turn out the bread once cooking is done.
The display screen continues to display "0:00" during the hour-long "Keep warm" cycle. At the end of the cycle, the appliance stops automatically after producing several audio signals.
DELAYED START PROGRAM
You may program the appliance to ensure that your preparation is ready at the time of your choice, up to 15 hrs. in advance. The delayed start program is not available for programs 4, 8, 9, 10, 11 and 12.
This step occurs after having selected the program, the crust colour and the weight. The program time is displayed. Calculate the time difference between the moment you start the programme and the time at which you want your recipe to be ready. The machine automatically includes the programme cycle duration. To access the delayed start, press the ● button and the ⊙ image will appear on the display as well as the default time (15:00). To set the time, press the ● button. The lights up. Press to launch the delayed start program.
If you make a mistake or wish to modify the time setting, hold down the key until it emits an audio signal. The default time is displayed. Start the operation again.
Some ingredients are perishable. Don't use the delayed start program for recipes containing: raw milk, eggs, yoghurt, cheese, fresh fruit.
PRACTICAL ADVICE
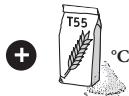
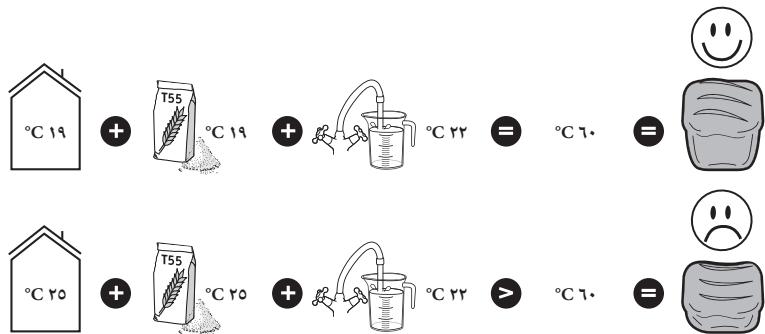
- All ingredients used must be at room temperature (unless otherwise indicated), and must be weighed accurately. Measure the liquids using the graduated cup provided. Use the spoon provided to measure tablespoons on one side and teaspoons on the other. Inaccurate measurements will yield bad results. Bread preparation is very sensitive to temperature and humidity conditions. During hot weather, it is recommended to use cooler liquids than usual. Likewise, during cold weather, it may be necessary to warm the water or milk (never exceed 35°C).
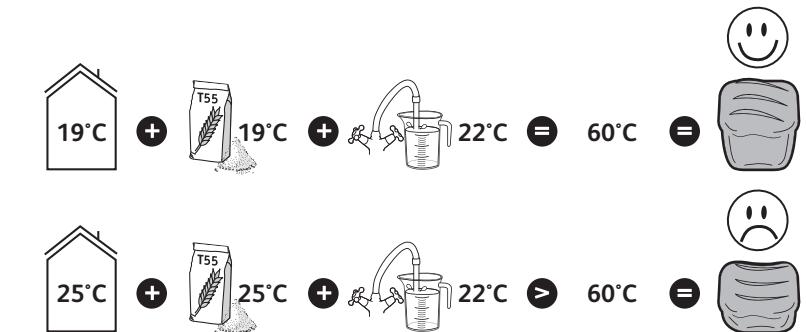
- Use ingredients prior to their best-before date and keep them in a cool, dry place.
- The flour must be weighed accurately using a kitchen scale. Use active dry baker's yeast (in pouches).
- Avoid opening the lid during use (unless otherwise indicated).
- Follow the exact order of the ingredients and the quantities indicated in the recipes. First the liquids, and then the solids. The yeast must not come into contact with the liquids or with the salt. Too much yeast weakens the dough structure, which will rise a lot and will subsequently sag during cooking.
General order to follow:
-Liquids (softened butter, oil, eggs, water, milk) -Salt -Sugar -First half of the flour - Powdered milk - Specific solid ingredients Second half of the flour - Yeast
- During a power outage under 7 minutes, the machine will save its status and will resume its operation once the power comes online.
- If you wish to have one bread cycle directly follow another, wait for approximately 1 hr. between both cycles to allow the machine to cool and prevent any potential impact on bread making.
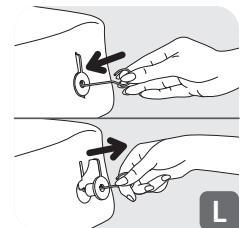
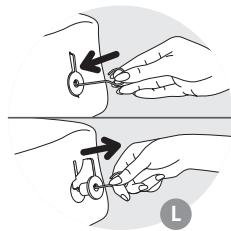
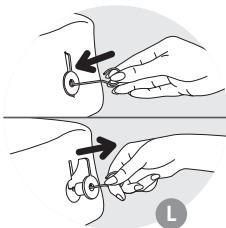
- When turning out your bread, the kneading paddle may remain stuck inside it. In this case, use the hook to gently remove it. To do so, insert the hook in the kneading paddle's shaft, and then lift to remove it.
Warnings for the use of gluten-free programs
- Blends of flour types must be sifted with the yeast to prevent lumps.
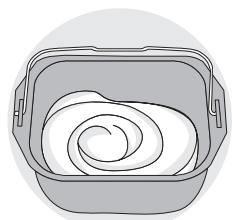
- When the program is launched, it is necessary to assist the kneading process: scrape down any unmixed ingredients on the sides towards the centre of the pan using a non-metallic spatula.
- Gluten-free bread cannot rise as much as a traditional bread. It will be of a denser consistency and lighter colour than normal bread.
- All premix brands do not yield the same results: the recipes may have to be adjusted. It is therefore recommended to conduct some tests (see example below).
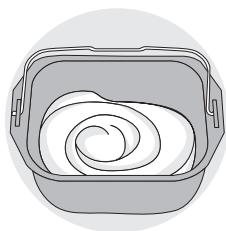
Example: adjust the quantity of liquid.
Too liquid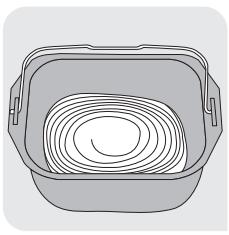
OK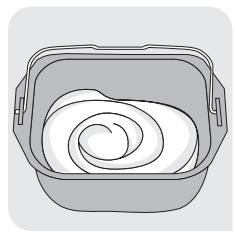
Too dry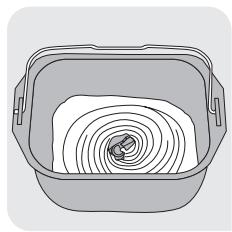
Exception: cake batter must remain quite liquid.
Yeast: Bread is made using baker's yeast. This type of yeast is sold in several forms: small cubes of compressed yeast, active dry yeast to be rehydrated, or instant dry yeast. Yeast is sold in supermarkets (bakery or fresh foods departments), but you can also buy compressed yeast from your baker.
The yeast must be directly incorporated in your machine's pan with the other ingredients. Nonetheless, consider thoroughly crumbling the compressed yeast between your fingers to facilitate its dispersion.
Follow the recommended amounts (see the equivalences chart below).
Quantity/weight equivalences between dry yeast and compressed yeast:
Dry yeast (in tsp) 1 1.5 2 2.5 3 3.5 4 4.5 5
Compressed yeast (in g) 9 13 18 22 25 31 36 40 45
Flours: Using T55 flour is recommended, unless otherwise indicated in the recipes. When using mixes of special flour types for bread, brioche, or milk bread, do not exceed 750 g of dough in total (flour + water).
Depending on the quality of the flour, the bread making results may also vary.
- Keep flour in a hermetically sealed container, since flour reacts to fluctuations in climate conditions (humidity). Adding oats, bran, wheat germ, rye, or whole grains to the bread dough will produce a bread that is denser and less fluffy.
- The more a flour is based on whole grains, that is, containing a part of the outer layers of a wheat grain (T>55), the less the dough will rise and the denser the bread will be.
- You will also find commercially available ready-to-use preparations for breads. Please refer to the manufacturer's recommendations for the use of these preparations.
Gluten-free flour: Using large quantities of these flour types to make bread calls for the use of the gluten-free bread program. There is a large number of flour types that do not contain any gluten. The best known are buckwheat flour, rice flour (either white or whole grain), quinoa flour, corn flour, chestnut flour, millet flour, and sorghum flour.
For gluten-free breads, in order to try to recreate the elasticity of gluten, it is essential to mix several types of non-bread-making flours and to add thickening agents.
Thickening agents for gluten-free breads: To obtain a proper consistency and to attempt to imitate the elasticity of gluten, you may add some xanthan gum and/or guar gum to your preparations.
Ready-to-use gluten-free preparations: They make it easier to make gluten-free bread since they contain thickeners and have the advantage of being completely guaranteed to be gluten-free — some are also organic.
All brands of ready-to-use gluten-free preparations do not yield the same results.
Sugar: Don't use sugar lumps. Sugar feeds the yeast, gives a good flavour to the bread and improves the crust colour.
Salt: It regulates the activity of the yeast and gives flavour to bread.
It must not come into contact with the yeast prior to the start of the preparation.
It also improves the structure of the dough.
Water: Water rehydrates and activates the yeast. It also hydrates the flour's starch and enables the loaf to be formed. Water may be replaced, in whole or in part, by milk or other liquids. Use liquids at room temperature, except for gluten-free breads, which require the use of warm water (approximately 35°C).
Fats and oils: Fats make the bread fluffier. It will also keep better and longer. Too much fat slows the rise of the dough. If you use butter, crumble it into small pieces or soften it. Do not incorporate melted butter. Prevent the fat from coming into contact with the yeast, since the fat could prevent the yeast from rehydrating.
Eggs: They improve the bread's colour and favour good development of the loaf. If you use eggs, reduce the quantity of liquid accordingly. Break the egg and add the necessary liquid until you obtain the quantity of liquid indicated in the recipe.
The recipes have been designed for a medium-sized egg of 50g. If the eggs are larger, add some flour; if the eggs are smaller, add a little less flour.
Milk: Milk has an emulsifying effect that leads to the creation of more regular cells, and therefore an attractive loaf appearance. You may use fresh milk or powdered milk. If you use powdered milk, add the quantity of water initially reserved for milk: the total volume must be equal to the volume indicated in the recipe.
CLEANING AND MAINTENANCE
- Unplug the appliance and wait for it to cool down completely.
- Wash the pan and the kneading paddle using hot soapy water. If the kneading paddle stays in the pan, soak it for 5 to 10 min.
- Clean the body of the appliance with a damp cloth sponge. Dry thoroughly.
- The appliance and removable parts are unsuitable for dishwasher use.
- Don't use any household cleanser, abrasive pads or alcohol. Use a soft, damp cloth.
- Never submerge the appliance's body or the lid in water or any other liquid.
TROUBLESHOOTING GUIDE TO IMPROVE YOUR RECIPES
| Not getting the expected results? This table will help you. | Bread rises too much | Bread falls after rising too much | Bread does not rise enough | Crust not golden enough | Sides brown but bread not fully cooked | Top and sides floury |
| The button was pressed during baking. | | | | ● | | |
| Not enough flour. | | ● | | | | |
| Too much flour. | | | ● | | | ● |
| Not enough yeast. | | | ● | | | |
| Too much yeast. | | ● | | ● | | |
| Not enough water. | | | ● | | | ● |
| Too much water. | | ● | | | ● | |
| Not enough sugar. | | | ● | | | |
| Poor quality flour. | | | ● | ● | | |
| Wrong proportions of ingredients (too much). | ● | | | | | |
| Water too hot. | | ● | | | | |
| Water too cold. | | | ● | | | |
| Wrong programme. | | | ● | ● | | |
TECHNICAL TROUBLESHOOTING GUIDE
| PROBLEMS | CAUSES - SOLUTIONS |
| The kneading paddle is stuck in the pan. | • Let it soak before removing it. |
| After pressing on Ⓞ, nothing happens. | • EO1 is displayed and flashes on the screen, the appliance beeps: the appliance is too hot. Wait 1 hour between 2 cycles.
• EOO is displayed and flashes on the screen, the appliance beeps: the appliance is too cold. Wait for it to reach room temperature.
• HHH or EEE is displayed and flashes on the screen, the appliance beeps: malfunction. The machine must be serviced by authorised personnel.
• A delayed start has been programmed. |
| After pressing on Ⓞ, the motor is on but no kneading takes place. | • The pan has not been correctly inserted.
• Kneading paddle missing or not installed properly.
In the two cases cited above, stop the appliance manually with a long press on the Ⓞ button. Start the recipe again from the beginning. |
| After a delayed start, the bread has not risen enough or nothing happens. | • You forgot to press on Ⓞ after programming the delayed start programme.
• The yeast has come into contact with salt and/or water.
• Kneading paddle missing. |
| Burnt smell. | • Some of the ingredients have fallen outside the pan: unplug the appliance, let it cool down, then clean the inside with a damp sponge and without any cleaning product.
• The preparation has overflowed: the quantity of ingredients used is too great, notably liquid. Follow the proportions given in the recipe. |
DESCRIPTION
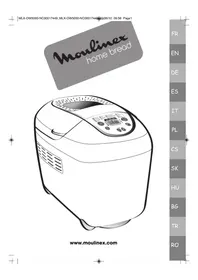
1 Lid
3 Baking pan
2 Control panel
4 Kneader
a Display
5 Measuring cup
6 Teaspoon/tablespoon
c Weight selection
Press the button on the control panel to set the weight - 500, 750 or 1000 g. The selected value is indicated by a light indicator. The weight is given as a guide. Some programs do not
provide for weight selection. See the table of programs in the operating instructions.
The degree of grinding is adjustable.
Possible grinding levels: fine/medium/coarse. If you want to change the grinding setting, press the button until the indicator light turns off for the selected value. Some programs do not allow selecting the grinding level. See the table of contents in the operating instructions.
Turning on/off
Press the button to turn on the appliance. The display lights up. To stop the program or turn off the appliance, press and hold the button for 3 seconds.
WORKING WITH THE BLENDER
The table of contents (see operating instructions) describes all steps of the preparation process depending on the selected program. The indicator light shows the current step.
1. Setting
Allows you to set the correct dough texture and, accordingly, ensure its readiness for baking.
During the kneading process, you can add various ingredients: dried fruits, nuts, etc. A sound signal indicates when your intervention is needed.
Some ingredients may be damaged. Do not cook with the delayed start program using recipes based on raw milk, kefir, yogurt, juice, or fresh fruits.
PRACTICAL TIPS
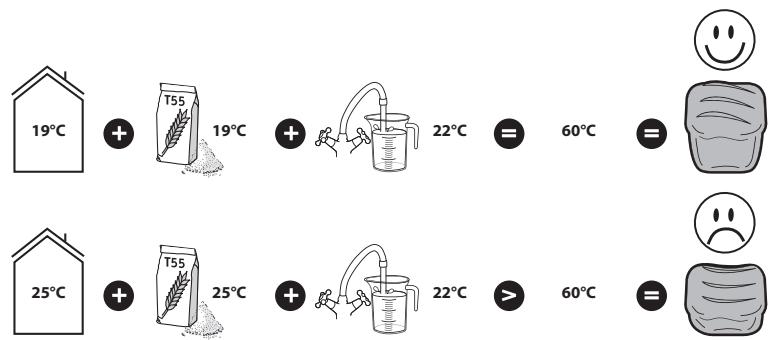
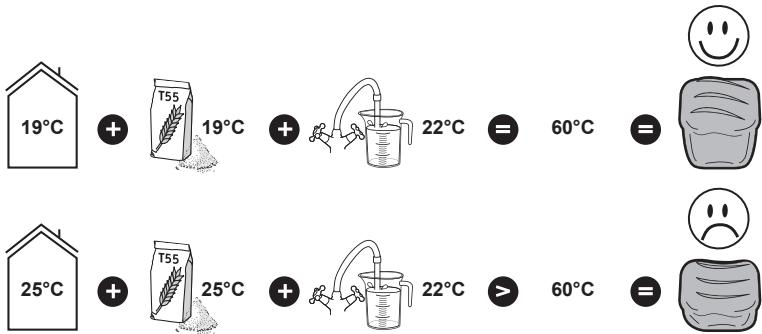
- All ingredients must be at room temperature (unless otherwise specified) and accurately weighed. Measure liquids using the measuring cup from the set. Use the full measuring cup to measure the required volume, specified in cups or tablespoons. Incorrect measurement can be the reason for unsatisfactory quality of the products. The dough for bread is very sensitive to temperature and humidity. In case of high temperature, it is worth adding more cooled liquid ingredients than usual. Similarly, in conditions of lower temperature, it is better to heat water or milk (but not above 35°C).
- Use all ingredients before their expiration date, store them in a cool dry place.
- It is necessary to pay attention to exact weights. Use dry active yeast in the package.
- Do not open the lid during cooking (unless otherwise specified).
- The order of adding ingredients and their quantity is indicated in the recipe. Add liquid ingredients first, then dry ones. The dough should not be too thick or too thin. The specified quantity of dough makes the bread structure more pronounced: the dough rises very high, and then falls strongly during baking.
General sequence to follow when necessary:
- Liquid ingredients (vegetable oil, oil, eggs, water, milk) - Salt - Sugar - First half of flour - Dry milk - Other dry ingredients - Second half of flour - Yeast
- In case of a short power outage (up to 7 minutes), the device maintains the current mode and continues working after power is restored. 7. If you want to start two bread-making cycles, you need to wait 1 hour between cycles to allow the device to cool down. Not following this recommendation may negatively affect the quality of the baked bread.
- When removing the bread from the mold, some may remain in the bread pan. In this case, use the hook to remove it. To do this, insert the hook into the remaining bread and pull it towards you.
Preliminary information before using programs for gluten-free tests
- To avoid the formation of lumps, it is necessary to thoroughly sift
the flour mixture with the dough hook.
After starting the program, it is necessary to ensure better mixing: remove the ingredients from the walls of the mold, pushing them towards the center with a metal spatula. - Gluten-free bread does not rise like regular bread. It has a denser structure and a more moist crumb compared to regular bread. - The final result may vary depending on the brand of ready-made mixture: it may be necessary to change the recipe. Therefore, we recommend starting with a test bake (see example below).
Example: Adjust the quantity of ingredients.
Too much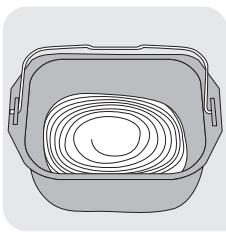
Normal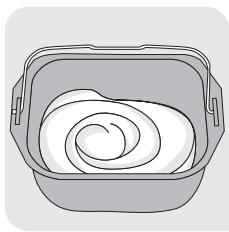
Too dry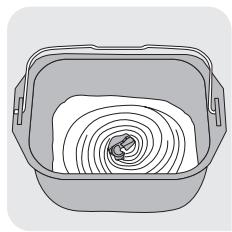
Result: the dough should start to rise a little.
Instructions for troubleshooting technical malfunctions
Salt: regulates yeast activity and gives bread flavor.
At the beginning of the bread-making process, salt should not come into contact with yeast.
Salt also improves the structure of the dough.
Water: Water moistens and activates the yeast. It also moistens the starch contained in the flour and contributes to the formation of the bread crumb. It is possible to partially or completely replace water with milk or other liquids. Use liquids at room temperature, except for yeast-free bread, for which warm water (approximately 35°C) is necessary.
Vegetable oils and fats: Fats make bread softer. Thanks to them, bread also keeps better and longer. Too much fat slows down the rise of the dough. When using butter, cut it into small pieces or melt it. Add melted butter. Do not allow fats to come into contact with yeast, as fat can hinder the hydration of the yeast.
Sugar: Sweetens the taste of bread and contributes to the formation of the bread crust. When using sugar, adjust the amount of liquid accordingly. Divide the sugar and add it to the liquid until the amount specified in the recipe is reached.
The recipe is developed taking into account an average weight of 50 g per piece. If the pieces are larger, add a little flour; if the pieces are smaller, add a little less flour.
Milk: Milk has an emulsifying and softening effect, as a result of which the dough becomes smoother and the bread has a nicer appearance. You can use fresh or powdered milk. If you use powdered milk, add water in the amount that would have been added as milk: the total amount should correspond to the amount specified in the recipe.
CLEANING AND MAINTENANCE
- Turn off the appliance and wait until it has completely cooled down.
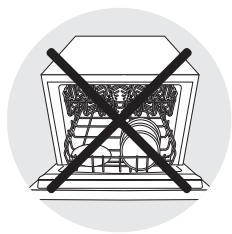
- Clean the bowl and the kneading blade with warm soapy water. If the blade remains in the bowl, soak it for 5 to 10 minutes. Clean the other elements with a damp sponge. Dry thoroughly. Do not wash any parts in the dishwasher. Do not use household products, abrasive sponges, or alcohol. Use only a soft damp cloth.
- Never immerse the housing of the appliance or the lid in water.
TROUBLESHOOTING GUIDE FOR IMPROVING YOUR RECIPES
The simplest dough
Dough for the simplest dough: 500g, 750g, 1000g. Dough parameters and indicators for the simplest dough. The simplest dough for the appliance. When adding kefir, the simplest dough. For making bread with additives, see the instructions.
For parameter values, the parameter values of the indicator lamps are displayed on the front panel. The preparation process for the indicators is standard. The indicator lamp is located on the front panel.
Turning on and off
To turn on the device, press the front panel. The power switch is activated. To turn off or reset the function, press the front panel for 3 seconds.
INDICATOR LAMPS
The indicator lamp on the front panel (indicator lamp) shows the set value. The indicator lamp lights up when the set value is reached.
1. Setting the value

Use this setting to set and adjust the value.
In this setting, the set value, step, etc. can be adjusted. When adjusting, the indicator lamp lights up.
The indicator lamp on the front panel (indicator lamp) and the set value are displayed. After the set value is adjusted, the indicator lamp lights up.
2. Changing the value
Use the setting to change the value.
3. Adjustment

Adjust the value by turning the knob.
4. Confirmation
Kambip 6eIke niinih anbIn, KaKeTTi KbI3apTy XeHe KbITbIpnay dpepeXecine caikec nicei.
5. Kblnydla caKray 155
PicKeHHEN KeiH, HAI 1 carf 6oBbl Kblbl 6oBbIn TpyaIbI. DereHMeH, NcKeHHEN KeiH, HANdbi 6ipEn Tycipren dypbc.
Bip cafatka cozbntbH 日 cakTay> Ke3eHi 6ab5bIHda 3KpaHda 0.00 Kepcetinlin Tpya bepedi. Byn ke3en 6itKeHde, KpybIbIb 6ipHewe dblbIcbIK cnHann Bepin, AbotamTtby Tpyde eweiD.
KEIN KOCY BAFDAPJAMACbI
15 cafat He odaa 3 aykbit 6ypbih TamaKtBih 3ep 6oNaTbH yaKbTbH TaDan KOHa fo 6oana. KewikTipinre Icke Kocy 6aFapnAmacbi 4,8,9,10,11 XeHe 12 6aFapnamnapbl yuih KonjXetIMcI.
Byn kadan baFapnamahbl, kbI3apTy aepexecin Xhe caJmaKtbl TaHaFaHAn H KeIH bIbIaBl. BaFapnamahbl yakblkepcetinei. C13 faDapnamahbl bactaTbH cTe neH peuentin3 daBH 60ybl Kepek yakbl apacblHa yakbl aibIpMaIbIbH bcEcnTeH3. Maunha baFapnama y3aKtblbH abOMaTTb Tpye KocabH. Keiikripinre I cke Kocyfa KaTbHacy yuih Tuymecin Bcsbl3. DncpneJe KeckHI, coBHMeH bipre eDenki yaBHT (15:00) Kepcetinei. YakblbOphaty uih TuymeCin Bcsbl3. XaHaAb. KeHH Kocy faFapnamacbl h icke Kocy yuih TepneCin Bcsbl3.
YaKbTTb KATE TaHdAn KoIcAHy3 HEme Ce KaE e3reptkH3 KeNce, Dbl6bIcTBK CnHAn 1bIKKaHw, nepHeCin 6acBIn TpyBHy3. ODenki YaBt KepcTeJnei. BacBHaH BaCTaHbI3.
By3bIbn KeTeiH a3bIK-TyIikTepe 6ap. 1uKi cyT, Xymblptka, Norypt, ipimuiK, Xemic-KeKocBilfah peuentinep ysiH keiH Kocy baFapnamacbi JapamaJbI.
ПАДAJБI KEHECTEP
- CanbHrah a3bIK-TyikTepe 6enMe TemnepaTpyacbHa (Hyckay backaHa Jaa3blmaca) 6onybJxhe dAn enIweHyKepe. CybIKbIKTapbIX HnHaKtaFbI eNweriSt cKaahmen EJIeH3. XnHaKtTaBfX KAcbIKbI Bip XaRbY LynKeH KaCbA, an EkiHsi XaFb Iwai KacbIK MeIwePimEn 6ipde. Dypbc EInWeHece, HtnXke Dpybc IuNAbI. Han TemnepaTpaM hBnFaIbIbIKka eTeCImTan KeJeI. BcIMehIH iUITbIM bCTbIK 6onfaHda, cybIKbIKTapdbCaNkBHaTbIN KyfA hDpybc. Con cNkTb CYbIK Ke3De cyDbI Hemece CTTI KBylbity (bipak 35°C -Tan acbipyra 60nmaDbI) KaXet BOnby MyMKH.
- A3bIK-TyIikTePdi JkapAMdbIbIK Mep3iMi 6iTKeHwe KOnDaHbIHb3 XaHe caKbIH, KyprakJepde caKTaHbI3.
- YHdb acy Tapa3bIcBImeH dAn eJIwey KaJcT. Kypfak aUbITKbI naJaIaNbIbI3 (naKeTke cAlbIHfaH).
- Icten Tpyfah KpybIJIfBiHbIH KaKnaFbIH aUNaHbI3 (Hyckay 6oBbIHla aUy Kepek 6oImaca). 5.A3bIK-TyIKeTepi peeNTide KepCetIInrH MOnIepeMEn KHe Tnicti petnH caIbHbI3. AaIbIMeH cyBik, apTbIH aATtBi 3aTTapDbI caIbHbI3. AawItkBi cyBikTkka
Hemece Tz3fa TikeJeT TMeyi Kepek. AusbitkbI TBIM KEN 60nca, KaMbIp WeKTeH TBIC KeTepinin, aptbIHah Tycin Ketyi MymKiH.
Lubricants for the tongue and throat:
- Dry food (pieces of meat, dry food, kumys, water, milk) - Salt - Pepper - Sour milk - Liquid for the tongue and throat - Sour cream
6. If the electric kettle does not turn off within 7 minutes, unplug it and contact the service center. 7. After the first boil, pour out the water and refill, then boil again for 1 minute to ensure the taste is clean. 8. Do not leave the appliance unattended while it is in operation. Unplug it after use.
For this, insert the plug into the socket, then turn it on.
Safety instructions for using the device
To avoid damage, the device must be used together with the original accessories. When the appliance is in operation, do not touch the metal parts with wet hands. - Do not use the device without liquid. Do not turn it on when it is empty. The device must be kept out of reach of children and pets. Follow the instructions in the manual (see below).
Example: using the device.
Warm water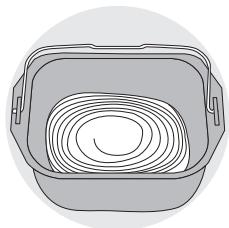
Correct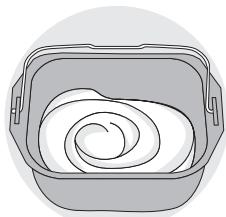
Warm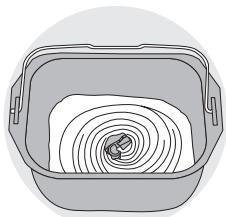
Caution: The appliance must be filled with water before use.
INFORMATION ABOUT THE TONGUE AND THROAT
Tongue: The tongue is a muscular organ. It has taste buds: sweet, salty, sour, and bitter. The tongue is located in the mouth (or in the throat), but it can also be seen when the mouth is open. The tongue should be cleaned with a tongue scraper. For hygiene, the tongue should be cleaned regularly.
Keep the device clean (see the cleaning section below).
Dry and wet cleaning of the device:
| Kyprakawbimkbl(w.k.) | 1 | 1,5 | 2 | 2,5 | 3 | 3,5 | 4 | 4,5 | 5 |
| CbifblraHawbimkbl(a) | 9 | 13 | 18 | 22 | 25 | 31 | 36 | 40 | 45 |
The product is a sealed container. When (if) the container or the pipeline is damaged, the contents may leak. The chamber pressure (oil + water) is 750 grams per square centimeter.
The oil level should be checked regularly.
The device (pipeline) should be checked for leaks. The contents are stored in a sealed container. If water, oil, or other liquids are added to the chamber, or if the temperature rises above 55°C, the chamber may rupture. If the contents are not properly sealed, the chamber may burst. Therefore, the chamber must be inspected regularly. If the chamber is damaged, it must be replaced immediately.
Dense oil: For pipelines that carry such oil, a dense or non-dense oil pump is required. Dense oil is also called heavy oil. Its main types are: dark oil, crude oil (or natural oil), fuel oil, diesel oil, lubricating oil, and waste oil.
To prevent the pump from being damaged by dense or non-dense oil, all types of oil should be filtered before use.
The filter installed in the pump: To ensure the consistency of the oil, it is necessary to add a filter and/or a strainer to the chamber.
Dense oil chambers: The filter should be cleaned regularly, and the oil should be changed if it becomes too thick (only if the manufacturer allows it). This is the type of chamber that is installed.
Dense oil chambers can be of various types, and they should be checked regularly.
Caution: Do not touch the hot parts. If you touch them, you may get burned. Wait until they cool down.
Salt: The salt content should be checked regularly, and salt should be added if necessary.
The chamber must be checked for salt deposits.
Clean the chamber regularly.
Water: Check the water level and the salt content. If the water level is too low, add water. The water should be clean and free of impurities. The water temperature should be between 35°C and 40°C.
Oil: The oil should be clean. It should be stored properly. If the oil is too thick, it should be replaced. The oil should be filtered and cleaned regularly. Do not let the oil become contaminated. The oil level should be checked regularly.
The chamber: The chamber should be cleaned and inspected regularly. If the chamber is damaged, it should be replaced. The chamber should be checked for leaks.
Pour 50 r optawa Kymbiptkana paphra, oan yken bocna, yndi Kebipeke KocbHb3, oan hkiIb cOnca, yhdIa3bpak calbHb3.
Cyt: CytTIn 3MynbraunnBk acepi 6ap, coNdbkTAn TpyaKbI kacywanaPkebipey Tz3in n, BkENHeH Typi jakcapa TycedI. CybIK HEmece yTAK CYKocyra 6oJadI. YHTAK CY KOnDaHblnca, TiCiTc cy MmUepiIN KocbHb3: XaJIbblMeIwepepeNTide KepcetirreHMeH 6ipde60bnbl KepeK.
TA3AJAY XHE KYTIM
KypblfblbTOK Ke3iHeH axbipaTbIn, TOnbIK cybifaHla KyTHi3. bICTbKcbHbIcymeNIIiHiJxHe apanaactbIpaTbIH kaiakTbI Jybl3. Kaan Tabada KaIca, 5-10 MInHT Xi6ITIN KOIBHbI3. Backa 6eniktepiH DbIMKblI ry6kamen Ta3aNaHbI3. KaKcblan KeTIPiH3. - Ewkaenin bldc xybfMaunHa canyfa 60nmaDb1 (K). TpymbIcTBk XHMn, KblprBll XeKEnepdi XeHene CnPiPTTI naanadhya 60mMaNbIb. KymcaK, DblMknJy6pekePneH cyptiHa3. KypbInfbHbH e3i Hemece KaKaNpaBHy cyFa Manyra 60MaJdbI.
AKAYIbIKTAPDbI XOIO HYCKAYIbIFbl
| Кутken
нэтухе
алынган жж.
na?
Мына
кесе сizre
Көмek ушin
берлген. | Нан Тым
Каты
Көтepinedi | Нан коты
Көтepinir-
Буннен кени
Тусin кетedi | Нан
Дурьс
Көтepin-
Мeйdi | Сырты
Дурьс
Кызар-
Мaйды | Бүлржakт彬
Коньлран-
Ганымен iwi
Дурьс nicпeйdi | Бүлріmen
Жогары
Жаç
Бетtersпide
Унkanады |
| | | | | |
| Пис
Жатдан,
Ту IMechi
Оасыган. | | | | ● | | |
| Чы a3. | | ● | | | | |
| Чы кeн. | | | ● | | | ● |
| Ашытсысы
a3. | | | ● | | | |
| Ашытсысы
Кeн. | | ● | | ● | | |
| Сы a3. | | | ● | | | ● |
| Сы кeн. | | ● | | | ● | |
| КаHTы a3. | | | ● | | | |
| Yнын
саласы
нашар. | | | ● | ● | | |
| Косылган
Затарын
apakaынасы
Дурьс emec
(Tыm кeн). | ● | | | | | |
| Сы Тым
ыICTыk. | | ● | | | | |
| Сы Тыm сувik. | | | ● | | | |
| Багдагпама
дурьс
тандаимаган. | | | ● | ● | | |
TEXHINKAJIbIK AKAYIbIKTAPdbI XOIO HYCKAYIbIFbl
.0000000000000000000000000000000000000000000
Joo 100000000000000000000000000000000000000000000000000000000000000000
aagol
50 50 50 aaln Jaae aai Laoa o aai 15i .aalbnaa Ll 1234567890123456789012345678901234567890123456789012345678901234567890123456789012345678901234567890123456789 aagolg aal gaaal gau gau gau gau gau gau gau gau gau gau gau gau gau gau gau gau gau gau gau gau gau gau gau gau gau gau gau gau gau gau gau gau gau gau gau gau gau gau gau gau gau gau gau gau gau gau
aJg
.
c 131 .jgallg jlll sLbplduw y jxqal g sLegll J
1 1000000000000000000000000000000
.1a
a 1
K
Therefore, a3 = a1 + 3 = 70
A. With ξ = μ - μ, ξ = μ and ξ = μ + μ, ξ = μ - μ
C. O2 reacts with acid to form salt H2S
[{x}_{0} = \frac{-b - \sqrt{{b}^{2} - {4ac}}}{2a}]
∴ l 2 = - 9/4l 1
θv 00 = - 1/3v 002
p 109
(2) = ( x 1,y 1) , = ( x 2,y 2)
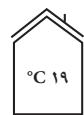
+ ° C 19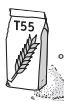
+ C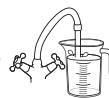
C7
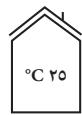
℃
C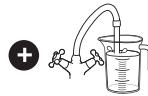
C7

.10g 2jLg 3g 4g 5g 6g 7g 8g 9g 10g 11g 12g
100 3
.
.(du)lo lo)lozwllo)
yL LALgbl gI yI. LaoIgI LJI LJI LJI LJI LJI
j j 10000000000000000000000000000000000000000000000
__SUPPIMER__
1
Therefore, pb = 17.
ju · l0r2t0 = s0 - 1
tsp 1.0 o
tsp r = zL o - r
- ω · sin α = ω · cos α + sin α
1j 1…=j0
| الله缺乏 | الله缺乏 |
| .الله缺乏 | .الله缺乏 |
| .الله缺乏 | .الله缺乏 |
| .الله缺乏 | .الله缺乏 |
| .الله缺乏 | .الله缺乏 |
| .الله缺乏 | .الله缺乏 |
| .الله缺乏 | .الله缺乏 |
| .الله缺乏 | .الله缺乏 |
| .الله缺乏 | .الله缺乏 |
| .الله缺乏 | .الله缺乏
.الله缺乏 |
| .الله缺乏 | .الله缺乏 |
| .الله缺乏 | .الله缺乏 |
| .الله缺乏 | .الله缺乏 |
| .الله缺乏 | .الله缺乏 |
| .الله缺乏 | .الله缺乏 |
| .الله缺乏 | .الله缺乏 |
| .الله缺乏 | .الله缺乏 |
| .الله缺乏 | .الله缺失 |
| .الله缺乏 | .الله缺乏 |
| .الله缺乏 | .الله缺乏 |
| .الله缺乏 | .الله缺乏 |
| .الله缺乏 | .الله缺乏 |
| .الله缺乏 | .الله缺乏 |
| .الله缺乏 | .الله缺乏 |
| .الله缺乏 | .الله缺乏 |
| .الله缺乏 | .الله缺乏 |
| .
.
.
.
.
.
.
.
.
.
.
.
.
.
.
.
.
.
.
.
.
.
.
.
.
.
.
.
.
.
.
.
.
.
.
.
.
.
.
.
.
.
.
.
.
.
.
.
.
.
.
.
.
.
.
.
.
.
.
.
.
.
.
.
.
.
.
.
.
.
.
.
.
.
.
.
.
.
.
.
.
.
.
.
.
.
.
.
.
.
.
.
.
.
.
.
.
.
.
.
、
.
.
.
.
.
.
.
.
.
.
.
.
.
.
.
.
.
.
.
.
.
.
.
.
.
.
.
.
.
.
.
.
.
.
.
.
.
.
.
.
.
.
.
.
.
.
.
.
.
.
.
.
.
.
.
.
.
.
.
.
.
.
.
.
.
.
.
.
.
.
.
.
.
.
.
.
.
.
.
.
.
.
.
.
.
.
.
.
.
.
.
.
.
.
.
.
.
.
.
•
•
•
•
•
•
•
•
•
•
•
•
•
•
•
•
•
•
•
•
•
•
•
•
•
•
•
•
•
•
•
•
•
•
•
•
•
•
•
•
•
•
•
•
•
•
•
•
•
•
• | |
| .الله缺乏 | .الله缺乏 |
| .الله缺乏 | .الله缺乏 |
| .الله缺乏 | .الله缺乏 |
| .الله缺乏 | .الله缺乏 |
| .الله缺乏 | .الله缺乏 |
| .الله缺乏 | .الله缺乏 |
| .الPHA缺乏 | .الPHA缺乏 |
| .الPHA缺乏 | .الPHA缺乏 |
| .الPHA缺乏 | .الPHA缺乏 |
| .الPHA缺乏 | .الPHA缺乏 |
| .الPHA缺乏 | .الPHA缺乏 |
| .الPHA缺乏 | .الPHA缺乏 |
| .الPHA缺乏 | .الPHA缺乏 |
| .الPHA缺乏 | .الPHA缺乏 |
| .الPHA缺乏 | .الPHA缺乏 |
S_xy^(ẋẏ) -
0 0 5 ÷ 0 0 5 = 0. 5 0 -
2 5 1 4 a + 2 a -
y a o u -
1
∴ 2g - 1 = Δg + ωg α
15 L 15
129.84 120110.84 120110.84
45 jolj 1234567890123456789012345678901234567890123456789012345678901234567890123456789012345678901234567890123456789
Lg 100000000000000000000000000000000000000000000000000000000000000000000
glac cIcIbI
1y g 0o ool jn 000000000000000000000000000000000000000000000000000000000000000000
.(a)jbjjSjLwJzj01jSj)uS j 1
.2
.3
aolj yds aegs glr. ggs ggs ggs
L 3 15
jli jololo sldac
J 1
100 100

Therefore, cos θ = 1


∴ SFR = 2 √ 1 - r
tsp 1, Δ = y _ 0 Δz - F
j j = 1 9 0 = 1. 1 - 1
tsp Y = S S - Y
I _ 2 wg _ 1 0 = I _ 2 wg _ 1 0 S _ 1 0
pj 5 1 ... = jj 5
| INTERNATIONAL GUARantee: COUNTRY LIST
SMALL HOUSEHOLD APPLIANCES |
| | | | | | | |
| ARGENTINA | 0800-122-2732 | EGYPT | 16622 | SLOVENIJA
SLOVENIA | 02 234 94 90 | MALAYSIA | 603 7802 3000 |
| JUUBUSUL
ARMENIA | 010 55-76-07 | EESTI
ESTONIA | 668 1286 | ELLADA
GREECE | 2106371251 | MEXICO | (01800) 112
8325 |
| AUSTRALIA | 1300307824 | SUOMI
FINLAND | 9 8946 150 | 鲁雅
HONG KONG | 8130 8998 | MOLDOVA | 22 929249 |
| ÖSTERREICH
AUSTRIA | 01 890 3476 | FRANCE Continationale
+ Guadeloupe,
Martingale, Réunion,
St-Martin | 09 74 50 47 74 | MAGYARDSZÁG
HUNGARY | 06 1 801 8434 | NEDERLAND
The Netherlands | 0318 58 24 24 |
| JOHN
BAHRAIN | 17716666 | DEUTCHLAND
GERMANY | 0212 387 400 | INDONESIA | +62 21 5793 7007 | NEW ZEALAND | 0800 700 711 |
| SENIAPYC
BELARUS | 017 2239290 | SINH
OMAN | 24703471 | ITALIA
ITALY | 1 99 207 354 | NORGE
NORWAY | 22 96 39 30 |
| BELGIQUE
BELGIIE
BELGIUM | 070 23 31 59 | POLSKA
POLAND | 801 300 420
koszt jak za
polaczenia klokne | 日本
JAPAN | 0570-07772 | SOUTH AFRICA | www.tefal.co.za |
| BOSNA I
HERCEGOVINA | Info-linja za
potsroša
033 551 220 | PORTUGAL | 808 284 735 | SRA
JORDAN | 5665505 | ESPaña
SPAIN | 902 31 24 00 |
| BRASIL
BRAZIL | 11 2915-4400 | JAK
QATAR | 44485555 | KAZAKCTAH
KAZAKHSTAN | 727 378 39 39 | SVERIGE
SWEDEN | 08 629 25 00 |
| Белогарma
BULGARIA | 0700 10 330 | REPUBLIC OF
IRELAND | 01 677 4003 | 한국어
KOREA | 080-733-7878 | SUISS CHWEIZ
SWITZERLAND | 044 837 18 40 |
| CANADA | 1-800-418-3235 | ROMANIA | 0 21 316 87 84 | Калл
KUWAIT | 180777 Ext. 2104 | Чинай
THAILAND | 02 769 7477 |
| CHILE | 02 2 884 46 06 | POCCIAM
RUSSIA | 495 213 32 30 | LATVIJ
LATVIA | 6 616 3403 | TURKYE
TURKEY | 444 40 50 |
| COLOMBIA | 018000520022 | swiss
SAUDI ARABIA | 920023701 | الله
LEBANON | 4414727 | الإستعمال
UAE | 8002272 |
| HRVATSKA
CROATIA | 01 30 15 294 | SRBILJA
SERBIA | 060 0 732 000 | LIETUVA
LITHUANIA | 5 214 0057 | Украли
UKRAINE | 044 300 13 04 |
| ČESKA
REPUBLIKA
CZECH REPUBLIC | 731 010 111 | SINGAPORE | 6550 8900 | LUXEMBOURG | 0032 70 23 31 59 | UNITED
KINGDOM | 0345 602 1454 |
| DANMARK
DENMARK | 44 66 31 55 | SLOvensKO
SLOVAKIA | 232 199 930 | MAKEDOHJIA
MACEDONIA | (02) 20 50 319 | U.S.A. | 800-395-8325 |
| VENEZUELA | 0800-7268724 | VIETNAM | 08 38645830 | | 26/06/2017 |
Date of purchase / Date d'achat / Fecha de compra / Kösbsdat / Ostopäivä / Kjopsdat / Inkopsdatum / Ostukupäev / Pirkuma datums / Įsigijimo data / Data zakupu / Datum izročila blaga / Datum kupovine / Vásárlás dátuma / Data achiziției / Data na zakupyvane / Data na pokupka / Üdvaunphn op. / Data na pokupka / Cetmáhlárnykh / 購入日 / Žúvánek / / Дулелега / Дулгун күні: Product reference / Référence produit / Référence del producte / Referencenummer / Tuotenumero / Artikkelnummer / Produktreferens / Toote viitenumber / Produkta atsauces numurs / Gaminio numeris / Referencja produktu / Oznaka proizvoda / Tip aparata / Készülék típusa / Cod produs / Model / Model / Model / Model / Model / 製品リファレンス番号 / Fräne lang / Modlauöra zu prónbodórg: Retailer name and address / Nom et adresse du revendeur / Nombre y dirección del minorista / Forhandler navn & adresse / Jälleenmyyjän nimi ja osoite / Forhandler navn og adresse / Återförsäljarens namn och adress / Müüja kauplus ja aadress / Veikala nosaukums un adrese / Parduotuvės pavadinimas ir adresas / Nazwa i adres sprzedawcy / Naziv i adresa prodajnog mjesta / Naziv in naslov trgovine / Forgalmazó neve és címe / Numele și adresa vânzătorului / Tърговец име и адрес / Hǎna ra tápeča prošavdúra / Tquúltúhui púmpúj uhlulmuhl uhl uhlh. / Hǎnbace nám epec prošavdúra / Cuyútsučnán atrayu men mecené-jaká/ 販売店名、住所/ Táteczová kýváčová/ S'ockem ngó Čořováho/ Ncmej nápeča na prošavdúva; Distributer stamp / Cachet / Sello del distribuidor / Forhandler stempel / Jälleenmyyjän leima / Forhandler stempel / Återförsäljarens stämpel / Tempel / Žmog / Antspaudas / Pieczęć sprzedawcy / Pečat distributera / Pečat trgovine / Forgalmazó pecsétje / Ștampila vânzătorului / Neur ha tynrocbius objekt / Neurkra pioiabu / Iupb / Pleura pioibu/ Curyanhui mopi / Bopf店铺印 / Ustnauvua uusvua / Udo erlangin klin / Neur ha nucrpobyr:
BS p. 4 - 12 ET p. 13 - 21 LT p. 22 - 30 LV p. 31 - 39 BG p. 40 - 51 HU p. 52 - 62 PL p. 63 - 74 CS p. 75 - 85 SK p. 86 - 96 RO p. 97 - 108 HR p. 109 - 119 SR p. 120 - 130 FR p.131 - 139 EN p. 140 - 150 p. 151 - 161 DE p.162 - 173 p. 174 - 182 PT p.183 - 191 ES p.192 - 202 UK p.203-215 RU p.216 - 224 KZ p.225 - 233 AR p.234 - 242 FA p.243 - 251