
BBS81PETM - BBS81PET - BBS81PETM - Cordless vacuum BOSCH - Free user manual and instructions
Find the device manual for free BBS81PETM - BBS81PET - BBS81PETM BOSCH in PDF.
Download the instructions for your Cordless vacuum in PDF format for free! Find your manual BBS81PETM - BBS81PET - BBS81PETM - BOSCH and take your electronic device back in hand. On this page are published all the documents necessary for the use of your device. BBS81PETM - BBS81PET - BBS81PETM by BOSCH.
USER MANUAL BBS81PETM - BBS81PET - BBS81PETM BOSCH
Please keep this instruction manual for future refe- rence When giving the vacuum cleaner to a third party, please also pass on this instruction manual Intended use This appliance is intended for domestic use and the household environment only. This appliance is intended for use up to a maximum height of 2000 metres above sea level In order to prevent injuries and damage, the vacuum cleaner must not be used for: M Vacuum-cleaning persons or animals. M Vacuuming up: - Hazardous, sharp-edged, hot or burning substan- ces - Damp substances or liquids. - Highly flammable or explosive substances and gases. - Ash, soot from tiled stoves and central heating systems. - Toner dust from printers and copiers. Spare parts, accessories Our original spare parts, original (special) accessories are designed to work with the features and require- ments of our vacuum cleaners. We therefore recom- mend that you only use our original spare parts, original special) accessories. This will ensure that your vacuum cleaner has a long service life and that the quality of its cleaning performance will remain consistently high throughout J Piease note + Using unsuitable or inferior-quality spare parts, (spe- cial) accessories can damage your vacuum cleaner. Damage caused by the use of such products is not covered by our guarantee. Safety information This vacuum cleaner complies with the generally accepted ru- les of good engineering practi- ce and the relevant safety re- gulations. “The appliance may be used by children over the age of 8, by persons with reduced physical, sensory or mental capacity, or by persons with
a lack of experience and/ or knowledge provided that they are supervised or have been instructed on how to use the appliance safely and that they have understood the potential dangers of using the appliance. = Do not let children play with the appliance also when it is placed in the docking station. =Cleaning and user mainte- nance must not be perfor- med by children unless they are supervised. = Plastic bags and film must be kept out of the reach of child- ren and disposed of. => Risk of suffocation! Proper use mTo charge the appliance, only use the charging cable. included with the appliance or the original quick charger. The charging cable and quick charger must only be connected and operated as specified on the rating plate. The appliance must only be stored and charged in- doors. Do not expose the appliance to temperatures below 0 °C or above 45 °C. Never vacuum-clean without the dust container, motor protection filter or exhaust filter. => Otherwise, this may damage the appliance. Keep the vacuum cleaner away from your head when using the tube and nozzles. => This could cause injury. Do not use the charging cable if it is damaged. Repla- ce it with an original charging cable. When disconnecting the charging cable from the mains, pull the plug itself to remove it — do not pull on the power cord. Do not pull the charging cable over sharp edges or allow it to become trapped. Before carrying out any work on the vacuum cleaner, switch off the appliance and disconnect it from the charging cable and the mains. Do not operate the vacuum cleaner if it is damaged In the event of à fault, switch off the appliance and disconnect it from the charging cable and the mains. For safety reasons, only authorised after-sales service personnel are permitted to carry out repairs and fit replacement parts to the vacuum cleaner.
In the following cases, you must stop using the appli- ance immediately and contact the after-sales service: — If you have accidentally vacuumed up some liquid or liquid has entered the inside of the appliance; - Ifthe appliance has been dropped and damaged. Protect the vacuum cleaner from outside weather con- ditions, moisture and sources of heat. Do not pour flammable substances or substances containing alcohol onto the filters (filter bag, motor protection filter, exhaust filter, etc.). The vacuum cleaner is not suitable for use on cons- truction sites. => Vacuuming up building rubble may damage the appliance. Switch off the appliance when it is not in use. The vacuum cleaner can not stand by itself. Avoid dropping the unit. Do not lean the vacuum cleaner on walls or table edges. The packaging is designed to protect the vacuum clea- ner from being damaged during transportation. We therefore recommend keeping the packaging in case the appliance needs to be transported in the future. Keep hair, loose clothing, fingers, and all parts of the body away from openings and moving parts, such as thebrush bar. Do not point the hose, wand or tools at Your eyes or ears or put them in your mouth.
on batteries m Read all the safety information and instructions. => Failure to act in accordance with the safety information and instructions may result in electric shock, fire and/or serious injury. Keep all the safety information and instructions for future reference. This safety information applies to Bosch Li-ion bat- teries only. Only batteries from the “Power for ALL" series are compatible with this appliance. Do not open the battery. => Risk of short circuit. Protect the battery from heat sources, for example avoiding long periods in the sun and exposure to fire, as well as from water and moisture. => Risk of explosion. Fumes may be released if the battery is damaged or used improperly. Circulate fresh air, and seek medical assistance in the event of physical symptoms arising as a result of exposure. => The fumes may irritate the airway. the battery is defective, liquid may leak out onto ob- jects in the vicinity. Check any components that may be affected by this. -> Clean these components, or replace them if necessary. Only use the battery in your Bosch electrical appli- ance. => Dangerous overloading may occur if the battery is used in other appliances. Only use chargers recommended by the manufacturer to charge batteries. => There is a risk of fire if a charger that is designed for a particular type of batteries is used to charge other batteries.
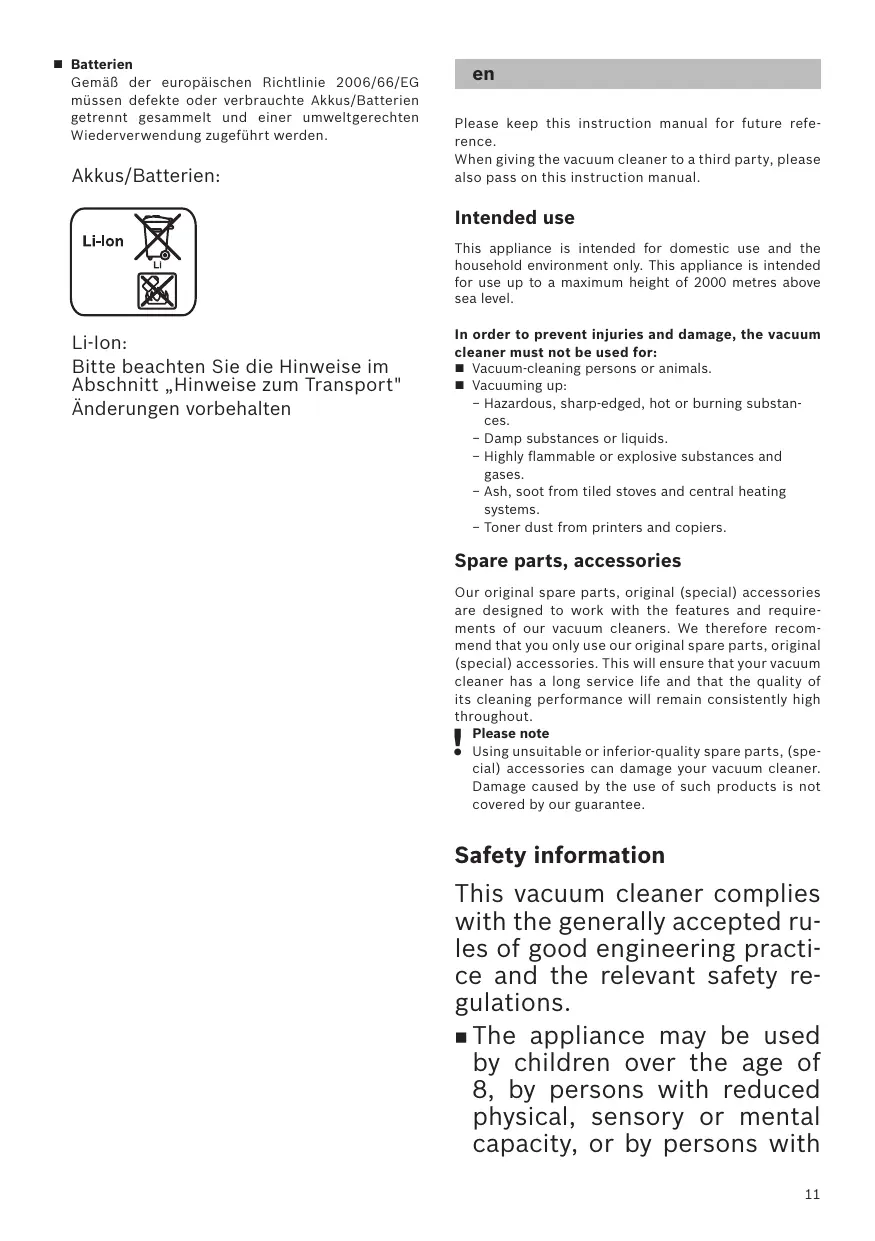
Always use the specified batteries in the electrical appliances. => Using other batteries may result in injury or fire. When not in use, keep the battery away from paper clips, coins, keys, nails, screws and other small metal objects that may cause the contacts to be bridged. => If a short circuit occurs between the battery con- tacts, this may result in burns or even fire. the battery is used incorrectiy, liquid may leak out of the battery. Avoid touching the liquid. In the event of accidental contact, rinse the affected area with water. If the liquid comes into contact with the eyes, seek medical assistance. => If battery liquid leaks, it can irritate or burn the skin. Transportation informati The Li-ion batteries in the appliance are subject to the requirements of dangerous goods legislation. The batte- ries can be transported by the user by road without any further requirements. In the event that they are shipped by a third party (e.g. transported by air or freight carrier), special requirements regarding packaging and identification must be met. In this case, a dangerous goods expert must be consulted when preparing the goods for dispatch Dispatch batteries only when the housing is undama- ged. Tape or mask off open contacts and pack up the battery in such a manner that it cannot move around in the packaging. Please also observe possibly more detailed national regulations. Disposal information Vacuum cleaners, batteries, accessories and packaging should be recycled in an environmentally responsible manner. Do not dispose of the vacuum cleaner or the batteries along with your normal household waste. M Packaging The packaging is designed to protect the vacuum cleaner from being damaged in transit. It is made of environmentally friendly materials and can therefore be recycled. Dispose of packaging that is no longer required at an appropriate recycling point. Old appliances Old appliances often still contain valuable materi- als. You should therefore take appliances that have reached the end of their service life to your dealer or a recycling centre so that they can be recycled. Please ask your dealer or your local council about current disposal methods. m Batteries According to the European Guideline 2006/66/EC, defective or used battery packs/batteries, must be collected separately and disposed of in an environ- mentally correct manner. Battery packs/batteries: Li-ion: Please observe the instructions in section “Notes on transport”
— A AA BR ET MR GENE
Charging* There are three different ways you can charge the bat- tery - directly using the charging cable (rie. EM), in the fitted docking station (rie. EM) or using an original quick charger. Charging with a charging cable only* Fie. EN To charge the vacuum cleaner, place it near to a so- cket. Plug the charging cable into the connection point at the bottom of the appliance. Plug the charging cable plug into the socket The vacuum cleaner's indicator light will slowly flash green as it charges. Once the battery is fully charged, the indicator light will remain continuously lit for a few minutes before going out. Disconnect the appliance from the mains briefly to check it. The indicator will then light up green again. It is normal for the charging cable and vacuum clea- ner to heat up and this is not a cause for concern. You can charge the vacuum cleaner whenever it is not in use. Fitting the docking station* Fig. EM Fit the docking station close to a socket. To do this, remove the front plate from the docking station. Insert your finger into the docking station from below, and push the front plate from the inside and out of the locking mechanism. Use the screws provided (or equivalent screws) to mount the do- cking station on the wall. Insert the small connector on the charging cable into the docking station from below, and then up and into the preformed recess. Put the front plate back on and lock it in place to secure the connection in place. Plug the charging cable’s mains plug into the socket Charging in the docking station* Fig. ES Place the vacuum cleaner into the docking station from above The vacuum cleaner's indicator light will start to flash slowly once the vacuum cleaner is connected to the mains power supply via the docking station The vacuum cleaner's indicator light will flash green as it charges. Once the battery is fully charged, the indicator light will remain continuously lit for a few minutes before going out. Disconnect the appliance from the mains briefly to check it. The indicator will then light up green again. It is normal for the charging cable and vacuum clea- ner to heat up and this is not a cause for concern. You can charge the vacuum cleaner whenever it is not in use
Charging using the quick charger* To use the quick charger for charging, the battery must be removed from the appliance (ris. EM) Please see the user manual provided for more infor- mation on how the quick charger works. Charge time The charge time stated here may vary due to charge status, battery temperature and battery age 18V 2,5Ah | 18V 3,0Ah | 18V6,0ah with the included 0,65A | with the charging cable included 1,0 char- ging cable Via charging | approx. | approx approx. cable or 85h ah 5h docking station (80%)** Via charging | approx. | approx approx. cable or do- | 4h 5h 6,5h cking station (100%)"** Via Bosch | Reference to quick charger User Ma- quick char | nual ger Assembling the appliance GPA 5] « Fit the end of the suction tube onto the vacuum cleaner's connection port and lock it in place. + To release the suction tube, press the release button and pull the suction tube down to remove it Fig. EH «Insert the end of the suction tube into the floor nozz- le and lock it into place + To release the floor nozzle, press the release button and pull the suction tube out of the floor nozzle Vacuum-cleaning Fig. The vacuum cleaner can be switched on and off by pushing the On/Off switch on the handle in the direc- tion of the arrow. When the vacuum cleaner is switched on, the indicator light will be lit green. *_ Depending on model **_ Charge condition of the battery approx. 80%. The batte- ry can be removed for immediate use **+ Gharging condition of the battery is 97%-100%
rie. F3 When the appliance is running the turbo function can be activated by pushing the turbo switch on the vacu- um cleaner in the direction of the arrow. The indicator light will flash green rapidly. Runtime* Like every other Li-lon battery the Power for ALL bat- tery is subject to natural wear as well. That means the battery capacity and thus runtime decrease over time. This is a natural aging process and not the result of a material/production failure or a product defect. Runtime optimized Perfor- mode mance optimized mode 18V2,5ah | 18v3,0ah | 18V6,0ah Onnormal |Upto35 |Upto4o | Upto40 mode min. min. min. with non- electrical accesso- ries Onnormal |Upto30 |Upto35s |Uptoss mode with | min. min. min. electrical nozzle Turbo Upto6 [Uptoio |Upto10 mode with | min. min. min. electri- cal floor nozzle Hint: The appliance has intelligent battery detection. With the 18V 3,0Ah and 2,5Ah Power for ALL batteries, the appliance is optimized for runtime. With the 18V 6,0Ah Power for ALL battery, the appliance is opti- mized for performance (see table) The natural wear can be prolonged with the following measures: Charge the battery only within a temperature range between 0 °C and 45 °C. Store the battery only within a temperature range between -20 °C and 50 °C. Do not store the battery fully-charged or completely discharged over a long period of time. Fig. EM Vacuum-cleaning with accessories Attach the nozzles to the suction tube or the appliance's connection port as required a) Crevice nozzle for vacuuming crevices and corners, etc b) 2-in-1 furniture brush with upholstery nozzle for vacu- um-cleaning window frames, cupboards, furniture, etc. + After use, reinsert the crevice nozzle and 2-in-1 fur- niture brush with upholstery nozzle into the acces- sories holder. After using the appliance «Switch off the appliance once you have finished va- cuuming. rie. Fig. HU Emptying the dust container In order to achieve the best possible vacuuming re- suits, the dust container should be emptied after every use or, at the latest, when dust at one point in the dust container has reached the mark. We recommend that you do not fill the dust container beyond the mark as this may lead to the filter becoming clogged with dust. When emptying the dust container, always check how much dust there is in the filter unit and, if necessary, clean it as detailed in the "Filter care" instructions. Caution: The filter can only be cleaned if the appli- + ance is switched off. Never vacuum-clean without the filter unit in place. e.Fl «Use the release button to release the dust container, and remove the dust container from the appliance. Fig. EW] «Take the filter unit out of the dust container + Empty the dust container. Fig. FE] Remove any dirt that may have been lodged under- neath the container ejector opening Insert the filter unit into the dust container, making sure it is correctly seated. Insert the dust container into the appliance, so that it clicks audibly into place Caution: If you notice any resistance when inserting the dust container, check that the filter is complete and that the filter unit and dust container are correct- Iy seated ilter care The filters should be cleaned at regular intervals in or- der to ensure that the vacuum cleaner operates opti- mally. Please switch off the appliance to clean the filters Caution: The filter can only be cleaned if the ap} ance is switched off. Remove the dust container from the appliance. rie. EE Take the filter unit out of the dust container. Fig Fig. FE cleaning the plate filter «To clean the plate filter, turn the knob at least three turns through 180°. «Then remove the plate filter from the outer filter unit and empty the dirt. We recommend that you clean the plate filter each time you empty the dust container. Depending on model a
If the plate filter is particularly dirty, the dirt can also be tapped out To do this, remove the plate filter from the outer fil- ter unit and tap it out over a dustbin. Once you have cleaned the plate filter, it is ready for use immediately, J Please note: The filter does not need to be rinsed + out. Tapping the dirt out of the plate filter Fig. BG cleaning the fluff filter «Take the filter unit out of the dust container. ris. EE a) It is usually sufficient to lightly shake or tap out the fluff filter when the dust container is emptied in order to dislodge any particles of dirt. b) If this is not sufficient, you can use a dry cloth to remo- ve dirt particles from the surface. Fig. Ed «Insert the plate filter into the outer filter unit and lock it in place by tuning it clockwise «Insert the filter unit into the dust container, making sure it is correctly seated. Insert the dust container into the appliance, so that it clicks audibly into place. Fig Es] Cleai Before carrying out any maintenance, switch off the vacuum cleaner and disconnect it from the charging cable Fig. a) Turn the rotary brush anti-clockwise À to unlock it and pull it out to the side of the floor nozzle. b) Use scissors to cut through threads and haïrs wound round the brush and then remove them ©) Slide the rotary brush in at the side of the flonr nozzle and along the guide bar, and turn it clockwise À to lock it in place. g the floor nozzle Please note: The floor nozzle must only be used with the rotary brush fitted Troubleshooting Problem Possible solution Please ensure that bat- tery is assembled in cor- rect way and/or battery is charged. Product doesn't work and/or no signal from battery status indicator Product doesn't work or continuos red battery status indicator for 10 | Please wait until bat- sec. tery/appliance reaches suitable temperatures. Battery/appliance might be over/under_heated.
Care Make sure that the cordeless handheld vacuum clea- ner is switched off and disconnected from the charging cable before cleaning it. The vacuum cleaner and plas- tic accessories can be cleaned with standard plastic cleaner. Caution: Do not use abrasive, glass-cleaning or + al-purpose cleaning products. Never immerse the vacuum cleaner in water. Subject to technical modifications. Battery state-of-charge indicator LED indicator Green LED lit Operating status Normal mode Turbo mode Green LED flashing quickly Battery capacity redu- ced by 20% Red LED flashing slowly Battery flat LED off Charging Green LED flashing slow
Green LED remains lit for a further 2 minutes, then goes out Battery fully charged Red LED remains lit continuously for 10 se- conds, then goes out Over-/undertemperature protection
RE, HSE NRA ER RME RER
is Ehi DATES DUCPELTELS
ENMXERÉETÉ UFR ARR At LEDHA2E PI
GB Great Britain BSH Home Appliances Lid. Grand Union House Old Wolverton Road Wolverton Milton Keynes MK12 5PT. To arrange an engineer visit, to order spare parts and accessories or for product advice please visit www.bosch-home.co.uk or call Tel.: 0344 892 8979
- Call are charged at the basic rate, please check with your telephone service provider for exact charges. GR Greece, EAAdG BSH Ikiakes Siskeves A.B.E. Central Branch Service 17 km E.O. Athinon-Lamias & Potamou 20 14564 Kifisia Tnhéguvo: 210 4277 500 Tnhéguvo: 210 4277 701 maito:nk-CustomerSemvice@bshg.com www.bosch-home.gr HK Hong Kong, &# BSH Home Appliances Limited Unit 1 & 2, 3rd Floor, North Block, Skyway House, 3 Sham Mong Road ‘Tai Kok Tsui, Kowloon Hong Kong Tel: 2626 9655 (HK) ‘Tol free 0800 863 (Macao) Fax. 2565 6681 mailto: bosch.hk.service@bshg.com mww.bosch-home. com.hk HR Hrvatska, Croatia BSH kuéanski uredal d.0.0. Ulica grada Vukovara 269F 10000 Zagreb Tel: 01 5520 888 Fax: 01 6403 603 mailto:informacije.servis-hr@bshg.com www.bosch-home.com/hr HU Magyarorszäg, Hungaï BSH Héztartési Készülék Kereskedelm KL Arpéd fejedelem üja 26-28 1023 Budapest Call Center: +06 80 200 201 mailo:BSH-szerviz@bshg.com ww.bosch-home com/hu IE Republic of Ireland BSH Home Appliances Ltd. M50 Business Park Ballymount Road Upper Wakinstown Dublin 12 To arrange an engineer visi, to order spare parts and accessories or for product advice please call Tel: 01450 2655* mww.bosch-home.ie
- Call are charged at tne basic rate, please check with your telephone service pronder for exact charges IL isræel CIS/B! Home Appliance Lid T, Hamasger St North Industrial Park Lod, 7129801 Tel: 08 9777 222 Fax: 08 9777 245 malto:csb-serv@csb-td.co.il www.bosch-home. col
Conditions of guarantee For this appliance the guarantee conditions as set out by our representatives in the country of sale apply. Details regarding same may be obtained from the dealer from whom the appliance was purchased. For claims under guarantee the sales receipt must be produced.
Thank you for buying a Bosch Home Appliance!
MyBosch Register your new device on MyBosch now and profit directly from + Expert tips & tricks for your appliance + Warranty extension options + Discounts for accessories & spare-parts - Digital manual and all appliance data at hand + Easy access to Bosch Home Appliances Service Free and easy registration - also on mobile phones. www.bosch-home.com/welcome HAMN Looking for help? You‘ll find it here. SERVICE Expert advice for your Bosch home appliances, need help with problems or a repair from Bosch experts. Find out everything about the many ways Bosch can support you www.bosch-home.com/service Contact data of all countries are listed in the attached service directory. Robert Bosch Hausgeräte GmbH Carl-Wery-StraBe 34 81739 München GERMANY www.bosch-home.com