Freego S10 Nova - Vacuum Cleaner CECOTEC - Free user manual and instructions
Find the device manual for free Freego S10 Nova CECOTEC in PDF.


User questions about Freego S10 Nova CECOTEC
0 question about this device. Answer the ones you know or ask your own.
Ask a new question about this device
Download the instructions for your Vacuum Cleaner in PDF format for free! Find your manual Freego S10 Nova - CECOTEC and take your electronic device back in hand. On this page are published all the documents necessary for the use of your device. Freego S10 Nova by CECOTEC.
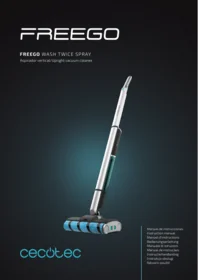
USER MANUAL Freego S10 Nova CECOTEC
cecòtec
Safety instructions 8
-
Parts and components 55
-
Before use 55
-
Assembly 56
-
Operation 57
-
Cleaning and maintenance 60
-
Troubleshooting 60
-
Recycling of electrical and electronic equipment 61
-
Copyright 61
-
Simplified EU Declaration of Conformity 62
SOMMAIRE
EN · The coding in this manual is generic and applies to all code variants of the appliance.
Read the following instructions carefully before using the appliance. Keep this instruction manual for future reference or new users.
- Make sure that the mains voltage matches the voltage stated on the rating label of the appliance and that the wall outlet is earthed.
- Avoid operating the appliance under extremely high or low temperatures.
- This appliance is intended for domestic use only and is not suitable for use in commercial establishments such as bars, restaurants, farms, hotels, motels, and offices.
- The appliance must be powered at a low safety voltage as stated on the marking.
- The appliance should not be left unattended while plugged to a power supply.
- The appliance should not be used if it has fallen, shows any visible sign of damage, or if it leaks.
- Keep the appliance out of the reach of children while in operation or cooling down.
- The appliance must be unplugged after use and before any user maintenance is carried out.
- Check the power cord regularly for visible damage. If the cord is damaged, it must be repaired by Cecotec's Official Technical Support Service to avoid any danger.
- Keep the cable away from heat sources. Do not pass the cable through gaps under doors or over sharp edges. Keep the cable away from movement areas and from places where it may obstruct passage.
- If the appliance does not operate as described in this manual, has suffered a severe impact, falls from height, is damaged,
or falls into water, do not use it and contact Cecotec's Official Technical Support Service immediately.
- Stop using the appliance if you notice an abnormal sound or sense a temperature higher than usual.
- Do not attempt to repair the appliance yourself. Contact Cecotec's Official Technical Support Service for any doubt.
- Do not use any accessory that is not recommended by Cecotec, as this may cause damage to the appliance.
- Do not place the appliance near heat sources, flammable substances, or surfaces where it can fall or be thrown into water from. Do not use outdoors.
- Keep the packaging materials out of the reach of children, they could be dangerous.
- Switch off and unplug the appliance from the mains when not in use, before cleaning, and before assembling or disassembling components. To unplug the appliance, pull the plug, not the cord.
- Do not immerse the cord, plug, or any other non-removable part of the appliance in water or any other liquid or expose electrical connections to water. Make sure your hands are completely dry before handling the plug or switching on the appliance.
- Do not use the appliance to vacuum flammable or explosive liquids such as gasoline, or use it where such liquids or vapours may be present.
- Do not use the appliance to pick up burning or smouldering objects such as cigarette butts, matches, or hot ashes.
- Non-rechargeable batteries must not be recharged.
- WARNING: the appliance has rotating parts which may pose a risk of entrapment. Exercise extreme caution.
- This appliance can be used by children aged 8 and above and people with reduced physical, sensory, or mental capabilities
or lack of experience and knowledge, as long as they have been given supervision or instruction concerning the use of the appliance in a safe way and understand the hazards involved. Children must not play with the appliance. Cleaning and maintenance must not be performed by unsupervised children.
- Supervise children to prevent them from playing with the appliance. Close supervision is necessary if the appliance is used by or near children.
Battery instructions
- Do not burn or expose the battery to high temperatures, as it may explode.
- Batteries may leak under extreme conditions. Should that be the case, do not touch the liquid. If the liquid comes into contact with skin, wash immediately with soap and water. If the liquid gets into the eyes, rinse them immediately with clean water for at least 10 minutes and seek medical attention. Wear gloves to handle the battery and dispose of it immediately in accordance with local regulations.
- Battery ingestion can cause burns, perforation of soft tissue, and death. It can cause severe burns within two hours of the ingestion.
- In case of battery ingestion, please seek medical help immediately.
- WARNING: to recharge the battery, use only the power supply provided with the appliance, with reference CZHQ13265050EUWP.
INSTRUCTIONS DE SÉCURITÉ
- Single-speed power button
- Water flow button
- Self-cleaning button
- Main body
- Charging port
- Power indicator lights
- Brush cover
- Storage tray
- Brush cover release button
- Floor brush
- Floor brush tab
- Spray indicator light
- Handle lock button
- Handle
- Clean water tank
- Clean water tank cap
- Dirty water tank cap
- Dirty water tank release latch
- Dirty water tank maximum fill mark
- Dirty water tank
- Dirty water tank maximum fill float
- Foam filter holder
- Foam filter
Note:
The graphics in this manual are schematic representations and may not exactly match the product.
2. BEFORE USE
- This appliance comes in a packaging designed to protect it during transport. Remove the appliance from its box. You can keep the original box and other packaging materials in a safe place to prevent damage to the appliance if you need to transport it in the future. If you wish to dispose of the original packaging, make sure all items are recycled properly.
- Check that all parts and components are included and in good condition. If any of them are missing or damaged, please contact Cecotec's Official Technical Support Service immediately.
ENGLISH
Box content:
- Electric floor mop
- Base
- Charger
- Cleaning brush
- Wet Jalisco brush
- Instruction manual
- Do not remove the product's serial number in order to keep proper traceability if technical assistance is required.
3. ASSEMBLY
- Remove the clean water tank following the instructions in the section «Filling the clean water tank».
- Place the electric floor mop main unit in an upright position and insert the metal tube into the handle opening on the main unit. Fig. 2
- Once the handle is fully inserted into the main unit, it will click into place.
- To remove the handle from the main unit, press the handle lock button and lift the handle away from the main unit.
Charging the electric floor mop
Before first use, the electric floor mop must be charged for approximately 5.5 hours.
Subsequent charging times will vary according to usage.
If the electric floor mop battery becomes depleted during use, it may take up to 5.5 hours to recharge fully.
- Ensure the electric floor mop is switched off and disconnected from the mains power supply. Empty both the clean and dirty water tanks and check that the electric floor mop is cool, clean, and dry.
- Connect the mains power adapter to the main unit and then plug into the mains power supply.
- The power indicator lights will flash while the electric floor mop is charging and, once fully charged, the power indicator lights will switch off.
NOTE: During charging, the electric floor mop may become warm.

WARNING: You must not use any foaming solutions or disinfectants with the electric floor mop, as this could cause damage.
Filling the clean water tank
- Remove the clean water tank by pressing down and pulling the clean water tank to separate it from the electric floor mop main unit.
- Unscrew and remove the clean water tank cap. Fill the tank with water, ensure the clean water tank cap is securely screwed on and oriented downwards before pushing the clean water tank into the housing on the main unit. The tank will click when secure.
NOTE: Check that the clean water tank is fully inserted into the electric floor mop. Fig. 3

CAUTION: Do not attempt to replace the clean water tank while the electric floor mop is switched on. Do not press the spray button if the clean water tank is empty or not fully inserted into the main unit.
4. OPERATION
Using the electric floor mop
- The electric floor mop is not designed to collect large debris; ensure the area to be cleaned is free from large debris before proceeding.
- Ensure the electric floor mop is disconnected from the power adapter and then fill the clean water tank following the instructions in the section «Filling the clean water tank».
- Switch on the electric floor mop by pressing the power button once. The power indicator lights will illuminate green to signal that the floor brush is rotating, while the spray indicator light will illuminate white to signal that the low spray function is active.
- If enhanced spray function is required, press the spray button again. The spray indicator light will illuminate red, indicating that the high spray function is active.
Note: To switch off the spray function, press the spray button again. The spray indicator light will switch off.
- Once the desired spray function is selected, step lightly on the front of the mop head to deactivate the head lock, pull the handle backwards and orientate the mop as required.
- To begin cleaning, slowly move the mop forwards and backwards over the desired area 3 to 4 times. To dry the floor once cleaning is completed, ensure the spray function is switched off.
- Once finished, switch off the electric floor mop by pressing the power button.
- To empty the dirty water tank, follow the instructions in the section «Emptying the dirty water tank».
NOTE: Always consult with the floor manufacturer or supplier before using any cleaning solutions to ensure they are suitable.
ENGLISH

CAUTION:
- Floors may be slippery once the electric floor mop has been used and the floor is wet.
- The electric floor mop must never be used without the foam filter inserted.
- Avoid tilting the electric floor mop to a horizontal position during use, as this could cause water leakage from the dirty water tank.
WARNING: The electric floor mop will continue operating for approximately three seconds after the power button has been pressed; this allows excess water to pass into the dirty water tank to prevent the unit from dripping when returning to the storage tray. Never allow the dirty water tank to exceed the maximum fill mark, as this will cause the maximum fill float to activate and the unit to switch off.
Floor brush roller access and maintenance
The floor brush contains a removable roller for easy drying, cleaning, and storage.
- Switch off the electric floor mop. Remove the floor brush cover by pressing the brush cover release button and pulling the cover outwards.
- Lift the roller using the release tab.
- Remove accumulated dust, debris, and hair from the roller and floor brush before placing the roller in the drying tray holder for easy storage.
- Once dry, replace the roller in the floor brush by inserting the right side first and pushing the roller down until it clicks into place.
- Align the floor brush cover hooks with the loops on the floor brush before pushing the cover into place until it clicks.
NOTE: Do not use water to clean the brush head and roller.
Emptying the dirty water tank
Fig. 4
- Switch off and disconnect the electric floor mop from the mains power supply.
- Press the dirty water tank release latch and remove the tank from the electric floor mop main unit.
- Open the dirty water tank lid and lift the lid containing the maximum fill float, separating it from the dirty water tank.
- Empty the dirty water tank and rinse under clean running water.
- Once clean, replace the dirty water tank lid with the maximum fill float into the tank until it fits securely.
- Reinsert the dirty water tank into the electric floor mop main unit, aligning the bottom of the tank with the main unit opening and pushing it into place until it clicks.
NOTE: Ensure not to exceed the maximum fill mark on the dirty water tank. The tank should be emptied after each use to prevent the build-up of undesirable odours.
Self-cleaning function
The self-cleaning function removes dirt and impurities from inside the electric floor mop and around the floor brush. It is recommended to use this function after each use of the electric floor mop.
- Switch off the electric floor mop and unplug it from the power adapter.
- Fill the clean water tank following the instructions in the section «Filling the clean water tank».
- Ensure the dirty water tank is empty before continuing.
- Place the electric floor mop in the storage tray and hold down the self-cleaning button for 2 seconds. This will activate the self-cleaning function.
- All four indicator lights will flash during this process. Allow the self-cleaning function to operate without interruption for approximately 2 minutes or until the electric floor mop switches off. If necessary, the self-cleaning function may be repeated several times.
- Then clean the foam filter following the instructions in the section «Cleaning the foam filter».
- Once the cycle is complete, remove and empty the dirty water tank following the instructions in the section «Emptying the dirty water tank».
- Remove the roller and foam filter and place them in the marked slots in the storage tray to dry.
NOTE: The self-cleaning function must not be interrupted while in operation.

CAUTION: Use the self-cleaning function only with the foam filter installed. Never use eaning without the filter in place.

WARNING: Do not use any foaming solutions or disinfectants during the self-cleaning period, as this could damage the electric floor mop.
Maximum fill safety float
If liquid in the dirty water tank exceeds the maximum fill mark, the safety float will activate and switch off the product. At this point, you must switch off the unit, empty the dirty water tank and replace it following the instructions in the section «Emptying the dirty water tank». After this, it is safe to resume use.
ENGLISH
5. CLEANING AND MAINTENANCE
- Before attempting any cleaning or maintenance, always switch off and disconnect the electric floor mop from the mains power supply.
- Drain any remaining water from both the clean and dirty water tanks.
- Clean the electric floor mop body with a soft, damp cloth and dry completely.
- Do not submerge the electric floor mop main unit in water or any other liquid.
- Do not use harsh or abrasive cleaning detergents or scouring pads.
Cleaning the foam filter
Fig. 5.
The foam filter is located at the top of the dirty water tank and must be removed after each use for cleaning and maintenance.
- To access the foam filter for cleaning, remove the dirty water tank from the main unit following the instructions in the section «Emptying the dirty water tank».
- Lift the foam filter holder from the dirty water tank.
- Lift the filter holder lid and remove the foam filter from the holder.
- Shake the foam filter until most debris has been removed, then wash under clean, warm water and allow to dry completely.
- Once the foam filter is completely dry, place it back into the filter holder and close the filter holder lid.
- Replace the filter holder into the dirty water tank and place the dirty water tank into the main unit following the instructions in the section «Emptying the dirty water tank».
NOTE: The storage tray contains a slot for the foam filter, ideal for drying the filter after each use.

WARNING: Never use external heat sources, such as a heater, to dry the foam filter.
Do not twist or wring the foam filter as this may damage it. Do not use the electric floor mop without the foam filter in place.
Storage
- Empty both the clean water tank and dirty water tank.
- Check that the electric floor mop is clean and dry before storing in a cool, dry place.
6. TROUBLESHOOTING
| Problem | Possible cause | Possible solution |
| The electric floor mop does not switch on. | The battery is not charged. | Charge the appliance following the instructions in the section “Charging the electric floor mop”. |
| The electric floor mop does not charge. | The power adapter is not properly connected. | Connect the power adapter to the charging port on the main unit, following the instructions in the section “Charging the electric floor mop”. |
| The electric floor mop does not suction water. | The maximum fill safety float has activated. | Follow the instructions in the section “Maximum fill safety float”. |
7. RECYCLING OF ELECTRICAL AND ELECTRONIC EQUIPMENT

This symbol indicates that, according to the applicable regulations, the product and/or battery must be disposed of separately from household waste. When this product reaches the end of its shelf life, you should dispose of the batteries/accumulators and take them to a collection point designated by the local authorities.
For detailed information on how to properly dispose of electrical and electronic equipment and/or the corresponding batteries, consumers should contact their local authorities.
Compliance with the above guidelines will help protecting the environment.
Information regarding national packaging recycling systems and their marking can be found on our website.
8. COPYRIGHT
The intellectual property rights over the texts in this manual belong to CECOTEC INNOVACIONES, S.L. All rights reserved. The content of this publication may not, either in part or in its entirety, be reproduced, stored in a retrieval system, transmitted or distributed by any means (electronic, mechanical, photocopying, recording or similar) without prior authorisation from CECOTEC INNOVACIONES, S.L.
9. SIMPLIFIED EU DECLARATION OF CONFORMITY
CE
Cecotec Innovaciones hereby declares that this appliance complies with the essential requirements and other relevant provisions of the regulations applicable in the European Union. This appliance has been designed, manufactured and tested in compliance with required safety and quality standards. The full text of the EU Declaration of Conformity can be found on
the following website: https://cecotec.es/es/information/declaration-of-conformity
1. PIÈCES ET COMPOSANTS
Image 1
6. PROBLEEMOPLOSSING
Fig./Img./Abb./Afb./Rys.1

Fig./Img./Abb./Afb./Rys. 2

Fig./Img./Abb./Afb./Rys. 3

Fig./Img./Abb./Afb./Rys. 4

Fig./Img./Abb./Afb./ Rys. 5
www.cecotec.es
- SOMMAIRE
- BATTERY INSTRUCTIONS
- INSTRUCTIONS DE SÉCURITÉ
- NOTE
- BEFORE USE
- ENGLISH
- BOX CONTENT
- ASSEMBLY
- CHARGING THE ELECTRIC FLOOR MOP
- FILLING THE CLEAN WATER TANK
- OPERATION
- USING THE ELECTRIC FLOOR MOP
- CAUTION
- FLOOR BRUSH ROLLER ACCESS AND MAINTENANCE
- EMPTYING THE DIRTY WATER TANK
- FIG. 4
- SELF-CLEANING FUNCTION
- MAXIMUM FILL SAFETY FLOAT
- CLEANING AND MAINTENANCE
- CLEANING THE FOAM FILTER
- STORAGE
- TROUBLESHOOTING
- RECYCLING OF ELECTRICAL AND ELECTRONIC EQUIPMENT
- COPYRIGHT
- SIMPLIFIED EU DECLARATION OF CONFORMITY
- CE
- PIÈCES ET COMPOSANTS
- IMAGE 1
- PROBLEEMOPLOSSING
Brand : CECOTEC
Model : Freego S10 Nova
Category : Vacuum Cleaner