SDZX2522 - Bread maker PANASONIC - Free user manual and instructions
Find the device manual for free SDZX2522 PANASONIC in PDF.
User questions about SDZX2522 PANASONIC
0 question about this device. Answer the ones you know or ask your own.
Ask a new question about this device
Download the instructions for your Bread maker in PDF format for free! Find your manual SDZX2522 - PANASONIC and take your electronic device back in hand. On this page are published all the documents necessary for the use of your device. SDZX2522 by PANASONIC.
USER MANUAL SDZX2522 PANASONIC
Automatic Bread Maker
OPERATING INSTRUCTIONS (Household Use)
Brotbackautomat
Representative in EU :
Panasonic Marketing Europe GmbH
Panasonic Testing Centre
Winsberging 15, 22525 Hamburg, Germany
Panasonic Taiwan Co., Ltd.
http://www.panasonic.com
© Panasonic Taiwan Co., Ltd. 2017
DZ52B208
MX0417E0
Printed in China
Thank you for purchasing the Panasonic product.
- For this product, there are 2 instructions. This is "OPERATING INSTRUCTIONS".
Please read 2 instructions carefully to use the product correctly and safely.
- Before using this product please give your special attention to “Safety
Precautions" and "Important Information" of this instructions. (P. GB3-GB5)
- This product is intended for household use only.
- Please keep 2 instructions for future use.
- Panasonic will not accept any liability if the product is subject to improper use, or failure to comply with these instructions.
Contents
OPERATING INSTRUCTIONS
(This instructions)
Safety Precautions . GB3
Important Information . . . . . . . . . . . . . . . . . . . . . . . . . . .
Parts Names and Instructions.. .GB6
Cleaning & Care. 1
Specifications . GB9
OPERATING MANUAL AND RECIPES
(Separate volume) include:
Bread-making ingredients
Menu Charts and Baking Options
Handling Instructions
Recipes
Troubleshooting
Disposal of Old Equipment
Only for European Union and countries with recycling systems.
This symbol on the products, packaging, and/or accompanying documents means that used electrical and electronic products must not be mixed with general household waste.
For proper treatment, recovery and recycling of old products, please take them to applicable collection points in accordance with your national legislation.
By disposing of them correctly, you will help to save valuable resources and prevent any potential negative effects on human health and the environment.
For more information about collection and recycling, please contact your local municipality.
Penalties may be applicable for incorrect disposal of this waste, in accordance with national legislation.
Safety Precautions
Please make sure to follow these instructions.
To reduce the risk of personal injury, electric shock or fire, please observe the following:
The following signals indicate the degree of harm and damage when the appliance is misused.

WARNING: Indicates potential hazard that could result in serious injury or death.

CAUTION: Indicates potential hazard that could result in minor injury or property damage.
The symbols are classified and explained as follows.

This symbol indicates prohibition.

This symbol indicates requirement that must be followed.
WARNING
To avoid risk of electric shock, fire due to short circuit, smoke, burn or injury.

- Do not allow infants and children to play with packaging material. (It may cause suffocation.)
- Do not disassemble, repair or modify this appliance. Consult the place of purchase or Panasonic service centre.
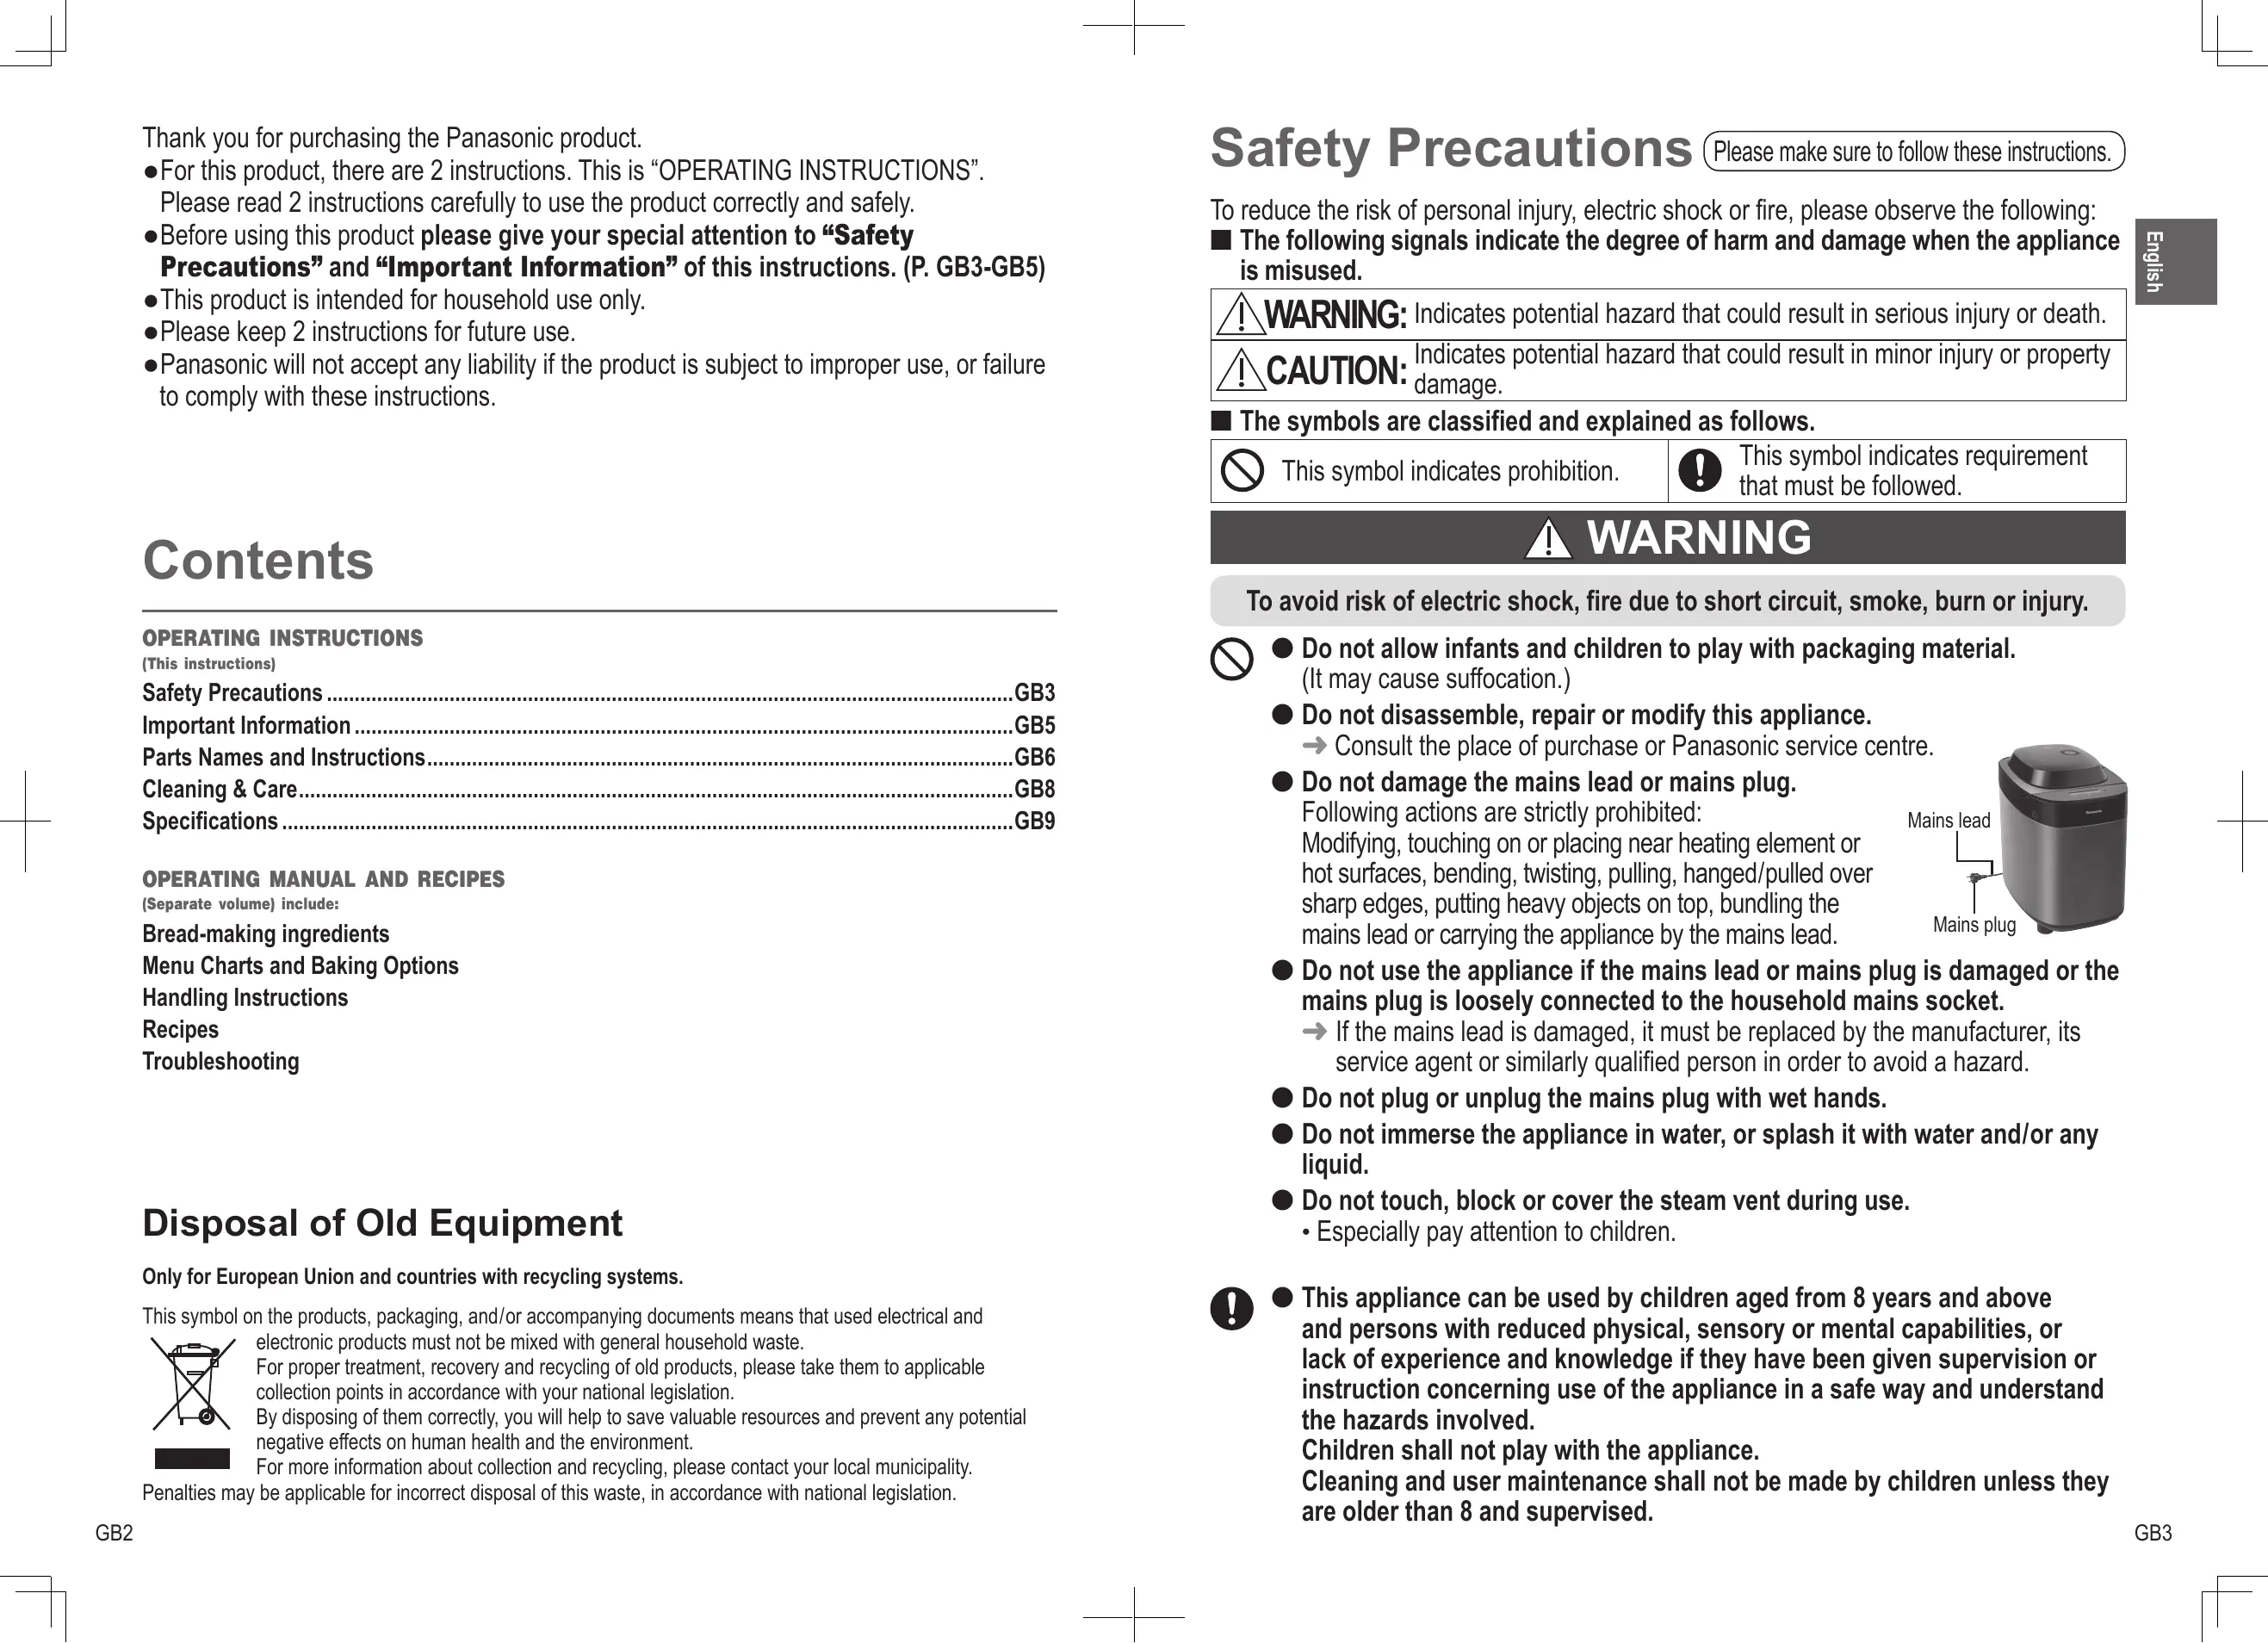
- Do not damage the mains lead or mains plug. Following actions are strictly prohibited:
Modifying, touching on or placing near heating element or hot surfaces, bending, twisting, pulling, hanged/pulled over sharp edges, putting heavy objects on top, bundling the mains lead or carrying the appliance by the mains lead.

- Do not use the appliance if the mains lead or mains plug is damaged or the mains plug is loosely connected to the household mains socket.
If the mains lead is damaged, it must be replaced by the manufacturer, its service agent or similarly qualified person in order to avoid a hazard. - Do not plug or unplug the mains plug with wet hands.
- Do not immerse the appliance in water, or splash it with water and/or any liquid.
-
Do not touch, block or cover the steam vent during use.
-
Especially pay attention to children.

- This appliance can be used by children aged from 8 years and above and persons with reduced physical, sensory or mental capabilities, or lack of experience and knowledge if they have been given supervision or instruction concerning use of the appliance in a safe way and understand the hazards involved.
Children shall not play with the appliance.
Cleaning and user maintenance shall not be made by children unless they are older than 8 and supervised.
Safety Precautions
Please make sure to follow these instructions.

WARNING
To avoid risk of electric shock, fire due to short circuit, smoke, burn or injury.

- Keep the appliance and its mains lead out of reach of children less than 8 years.
- Make sure the voltage indicated on the label of the appliance corresponds to your local supply.
Also avoid plugging other devices into the same household mains socket to prevent electrical overheating. However, if you are connecting a number of mains plugs, make sure the total wattage does not exceed the rated wattage of the household mains socket.
- Insert the mains plug firmly.
- Dust off the mains plug regularly.
Unplug the mains plug, and wipe with a dry cloth.
- Discontinue using the appliance immediately and unplug in the unlikely event that this appliance stops working properly.
Example for abnormal occurrences or breaking down:
- The mains plug and the mains lead become abnormally hot.
- The mains lead is damaged or the appliance power fails.
- The main body is deformed, has visible damage or is abnormally hot.
- There is abnormal turning noise while in use.
- There is unpleasant smell.
- There is another abnormality or failure.
Consult the place of purchase or Panasonic service centre for inspection or repair.

CAUTION
To avoid risk of electric shock, fire, burn, injury or property damage.

-
Do not use the appliance on following places.
-
On uneven surfaces, on electrical appliances such as a refrigerator, on materials such as tablecloths or on carpets, etc.
- Places where it may be splashed with water or near a heat source.
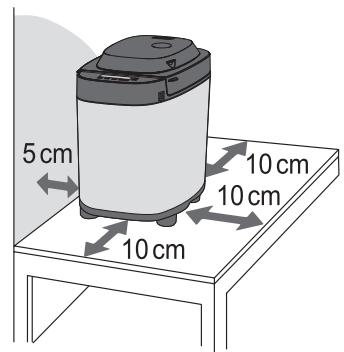
Position the appliance on a firm, dry, clean, flat heatproof worktop at least 10~cm from edge of worktop and at least 5cm from adjacent walls and other objects.

CAUTION

- Do not remove the bread pan or unplug the appliance during use.
- Do not touch hot area such as bread pan, inside of unit, heating element or inside of the lid while the appliance is in use or immediately after use.
The accessible surfaces may become hot during use. Be careful with the residual heat source especially after use.
To avoid burn, always use oven gloves to remove the bread pan or the finished bread. (Do not use wet oven gloves.)
- Do not use an external timer etc.
- This appliance is not intended to be operated by means of an external timer or separate remote-control system.
- Do not insert any object in the gaps.

- Unplug the mains plug when the appliance is not in use.
- Make sure to hold the mains plug when unplugging it.
Never pull on the mains lead.
- Before handling, moving or cleaning, unplug the appliance and allow it to cool down.
Important Information
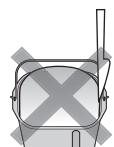
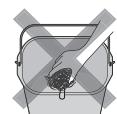
- Do not use the appliance outdoors, in rooms of high humidity, or use excessive force on the parts as is illustrated on the right to avoid malfunction or deformation.
- Do not use a knife or any other sharp tool to clean the heating element.
- Do not drop the appliance to avoid damaging it.
- Make sure to clean the appliance after every use.
- Do not store any ingredients or bread in the bread pan.
Temperature sensor
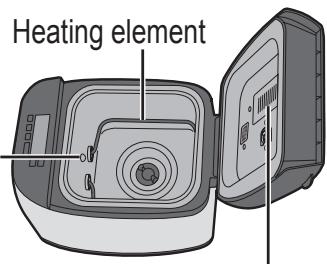
Inside of the lid

This symbol on the appliance indicates "Hot surface and should not be touched without caution".
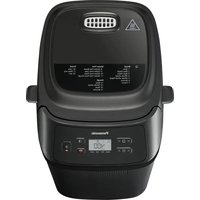
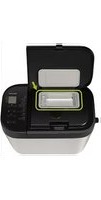
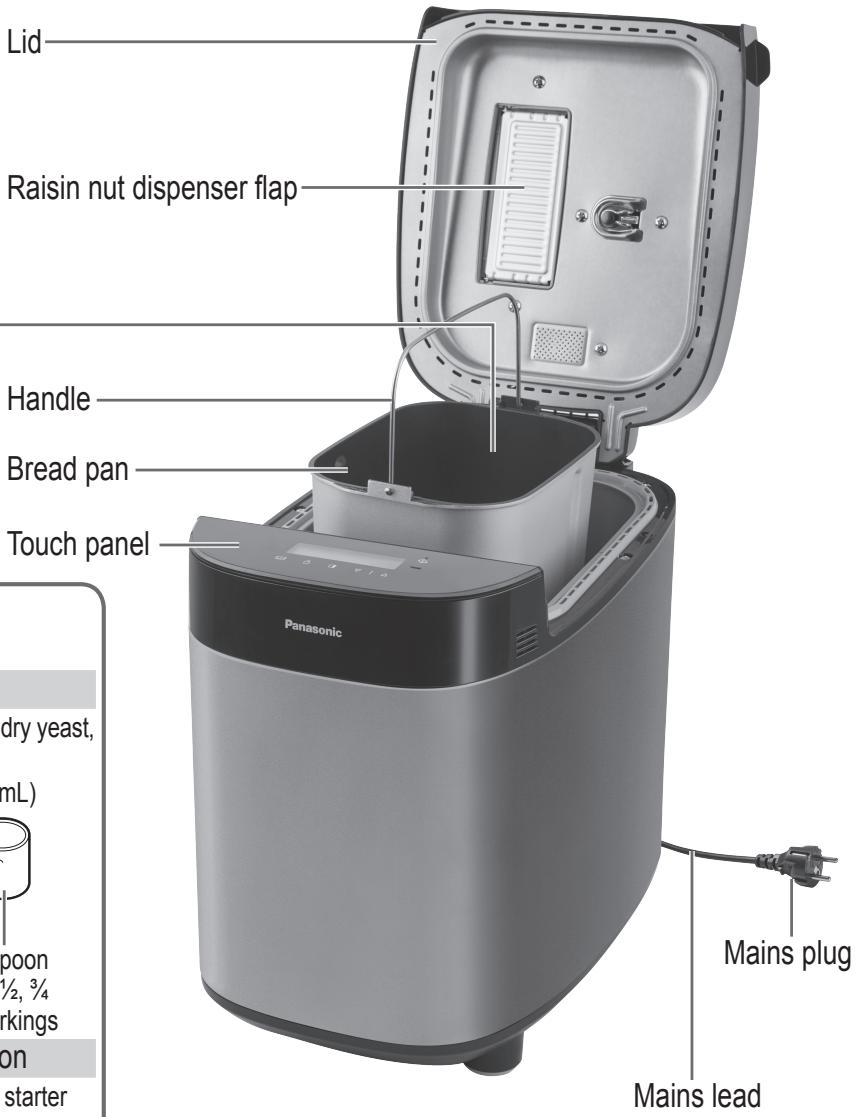
Parts Names and instructions
Main Unit
Raisin nut dispenser
The ingredients placed in the raisin nut dispenser will drop into the bread pan automatically upon selecting the menu on 3, 4, 5, 8, 16, 23, 24, 26 and 35.

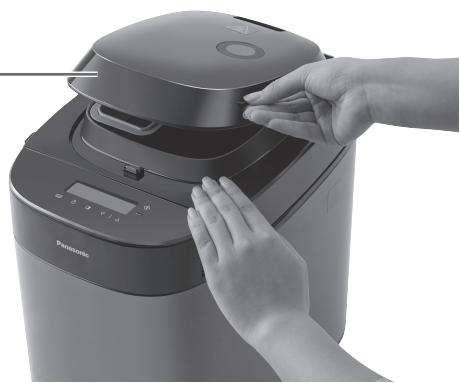
Dispenser lid
Press and hold the lid and grip the rib on the side of dispenser lid to open it.
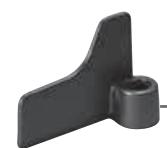
Kneading blade
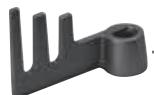
Kneading blade (rye menu)
approx. 0.1g
The shape of mains plug may be different from illustration.
Sourdough cup × 2
To measure out liquids, make sourdough starter
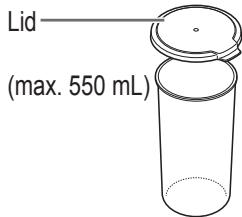
- 10mL increments
Measuring spoon
To measure out sugar, salt, dry yeast, etc.

• 1/2 marking • 1/4, 1/2, 3/4 markings
Sourdough starter spoon
To measure out sourdough starter yeast

approx. 0.1g
Touch Panel and Display
Operation status
Displayed for the current stage of the program except "√" and "→".
: Provide an indication of a power failure.
: Provide an indication of adding ingredients manually. (Menu 4, 5, 14, 24, 33)
- Provide an indication of doing scrape off or shape the surface during operation. (Menu 17, 20, 21)
Time showing
- Time remaining until ready.
- When adding ingredients manually, display will show the time until adding extra ingredients in the program.
- Menu required some manual steps, display will show the time until starting its process after touch "Start" icon.

Menu
1) Tap "Menu" icon once to be a setting mode.
2) Tap the icon to change "Menu" number. (To advance more quickly, hold the icon after step of 1.)
See P. GB4 and GB5 of "OPERATING
MANUAL AND RECIPES" for menu nu
Important Operation Procedure for Icon
- Tap the icon once at a time.
("Menu" and "Timer" icons have the fast-forward function.)
-
Tapping "Menu" icon is necessary for the actuation to be valid.
-
An error code e.g. U16 is displayed in some cases if you hold the icon more than a certain time. (Include AVEVE: Turn to P. GB19, "Troubleshooting" page of "OPERATING MANUAL AND RECIPES".) (Without AVEVE: Turn to P. GB17,
"Troubleshooting" page of "OPERATING MANUAL AND RECIPES".)
Timer
- Set delay timer (time until bread is ready). For available menu, it can be set up to 13 hours (except menu 11 only set up to 9 hours).
e.g.: It is 9:00 PM now, and you want the bread to be ready at 6:30 the next morning.
Set the timer to '9:30' (9 hours 30 minutes from now).


Current time

Ready time
- Set the baking/cooking time for menu 18, 36 and 37.
Touch this icon to increase the time.
Touch this icon to decrease the time.
- Touching the icon once will advance the timer by 10 minutes for menu 36 and 37, but menu 18 by 1 minute. (To advance more quickly, touch this icon once then hold it.)
- Setting the additional cooking time is available on menu 17, 18, 36 and 37.
Cleaning & Care
How to Clean
Before cleaning, unplug the machine and allow it to cool down.
To avoid damaging the machine.
- Do not use anything abrasive.
(cleansers, scouring pads etc) - Do not wash any part of the machine in the dishwasher.
- Do not use benzine, thinners, alcohol, or bleach.
After rinsing the washable parts, wipe with cloth. Always keep all parts clean and dry.
Dispenser lid
Remove and wash with water. Dry it completely especially the yeast dispenser lid.
- Raise the dispenser lid to an angle of approximately 75 degrees.
Align the connections and pull it in an upward direction to remove or push carefully back at the same angle to attach.
(Wait until the machine has cooled down first, because it will be very hot immediately after use.)
- Take care not to damage or pull the seal. (Damage could lead to leakage of steam, condensation or deformation.)

Lid
Wipe with a damp cloth.
Bread pan & kneading blade
Remove any leftover dough, and wash with a soft sponge.

- If difficult to remove the kneading blade, pour warm water into the bread pan and wait 5–10 minutes. Do not submerge the bread pan in water.

Raisin nut dispenser
Remove and wash with water.
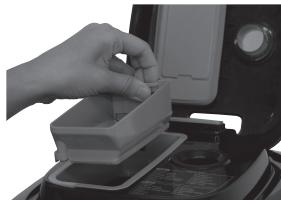
- Wash after each use to remove any residue.
Yeast dispenser
Wipe with a damp cloth and dry naturally.
- If wipe with a dry cloth, dry yeast will not drop into the bread pan due to static.

Yeast dispenser lid
- Wipe with dry cloth when it is wet.
Seal
Yeast dispenser lid


Steam vent
Wipe with a damp cloth.
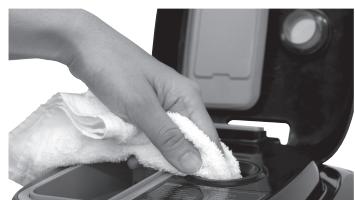
Body
Wipe with a damp cloth.
- Wipe gently to avoid damaging the temperature sensor and heating element.
- The colour of the inside of the unit may change with use.

Temperature sensor
Measuring spoon & sourdough
starter spoon
Wash with water.
Sourdough cups
Wash well with diluted kitchen detergent and dry, to prevent bacteria growth.

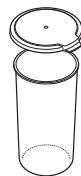
- Not dishwasher safe
To Protect the Non-stick Finish
Bread pan and kneading blade are coated with a non-stick finish to avoid stains and to make it easier when removing bread.
To avoid damaging it, please follow the instructions below.
- Do not use hard utensils such as a knife or a fork when removing the bread from the bread pan.
If the bread cannot be easily removed from the bread pan, leave the bread pan for 5-10 minutes to cool, making sure that it is not left unattended where somebody or something may get burnt. After that, shake the bread pan several times using oven gloves.
(Hold the handle down so that it does not get in the way of bread.)

- Ensure that the kneading blade is not embedded in the bread loaf before slicing it.
If it is embedded, wait for the loaf to cool and remove it.
(Do not use hard or sharp utensils such as a knife or a fork.)
Be careful not to get burn as the kneading blade may still be hot
- Use the soft sponge when cleaning the bread pan and the kneading blade
Do not use anything abrasive such as cleansers or scouring pads.
- Hard, coarse or large ingredients such as flours with whole or ground grains, sugar, or the addition of nuts and seeds may damage the non-stick finish of the bread pan. If using large chunk of ingredient, break into small pieces.
Please make sure to follow the recipe quantities stated.
Specifications
| Power supply | 230 V ~ 50 Hz | ||
| Power consumption | 550 W | ||
| Capacity | (Strong flour) | max. 600 g | min. 300 g |
| (Dry yeast) | max. 7 g | min. 2.1 g | |
| Capacity of raisin nut dispenser | Max. 150 g raisins | ||
| Timer | Digital timer (up to 13 hours) | ||
| Dimensions (H × W × D) | Approx. 38.2 × 26.0 × 38.9 cm | ||
| Weight | Approx. 7.6 kg | ||
| Accessories | 2 sourdough cups, measuring spoon, sourdough starter spoon | ||
Backform & Knethaken
-
No permitted that the children are not allowed to eat, drink or play with food. (Puede Cause asfixia.)
-
No desmonte, repare ni modifique este aparato.

m = 311