
SD-PT1001 - Bread maker PANASONIC - Free user manual and instructions
Find the device manual for free SD-PT1001 PANASONIC in PDF.
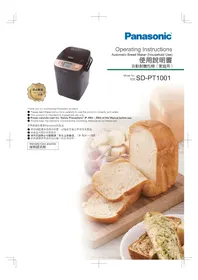


| Product Type | Automatic Bread Maker (Household Use) |
| Brand | Panasonic |
| Model | SD-PT1001 |
| Dimensions (Approx.) | 30.4 cm (depth) x 24.1 cm (width) x 34.7 cm (height) |
| Net Weight (Approx.) | 5.8 kg |
| Power Supply | 220 V, 50 Hz |
| Power Consumption (Heater) | 360 W |
| Power Consumption (Motor) | 60 W |
| Overheat Protector | Thermal fuse |
| Maximum Flour Capacity (Bread) | 300 g (for natural yeast menu); 250 g for standard bread menu |
| Raisin & Nut Dispenser Capacity | Max 100 g |
| Yeast Capacity (Instant Dry) | Max 4.2 g |
| Number of Menus | 34 (including bread, dough, desserts, jam, etc.) |
| Timer | Up to 13 hours (depending on menu) |
| Crust Color Control | Light, Standard, Dark |
| Raisin/Nut Addition | Automatic or manual with beep |
| Gentle Stir Function | Yes (for delicate ingredients) |
| Display | LCD with current time and menu settings |
| Lithium Battery | For time and previous settings memory |
| Safety Features | Steam vent, hot surface warnings, automatic shut-off |
| Cleaning Instructions | Use soft sponge; do not use metal brushes or nylon scourers |
| Accessories Included | Bread pan, kneading blade, blade for noodles/mochi, measuring spoon, natural yeast culture vessel with lid |
| Warranty | Warranty card attached |
Frequently Asked Questions - SD-PT1001 PANASONIC
User questions about SD-PT1001 PANASONIC
0 question about this device. Answer the ones you know or ask your own.
Ask a new question about this device
Download the instructions for your Bread maker in PDF format for free! Find your manual SD-PT1001 - PANASONIC and take your electronic device back in hand. On this page are published all the documents necessary for the use of your device. SD-PT1001 by PANASONIC.
USER MANUAL SD-PT1001 PANASONIC
Operating Instructions
Automatic Bread Maker (Household Use)
Instruction Manual
Automatic Bread Maker (Household Use)

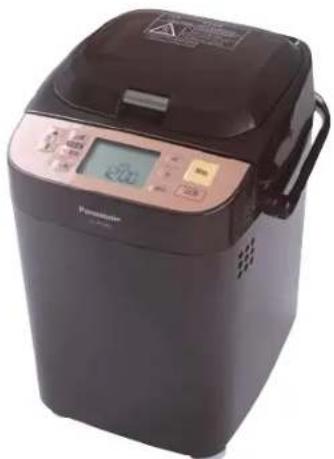
Model No.
Model
SD-PT1001
Thank you for purchasing Panasonic product.
- Please read these instructions carefully to use the product correctly and safely. ● This product is intended for household use only.
- Please carefully read the "Safety Precautions" (P. EN4 \~ EN5) of this Manual before use.
- Please keep the Warranty Card and this Operating Instructions for future use.
Warranty Card attached. Warranty Card attached.
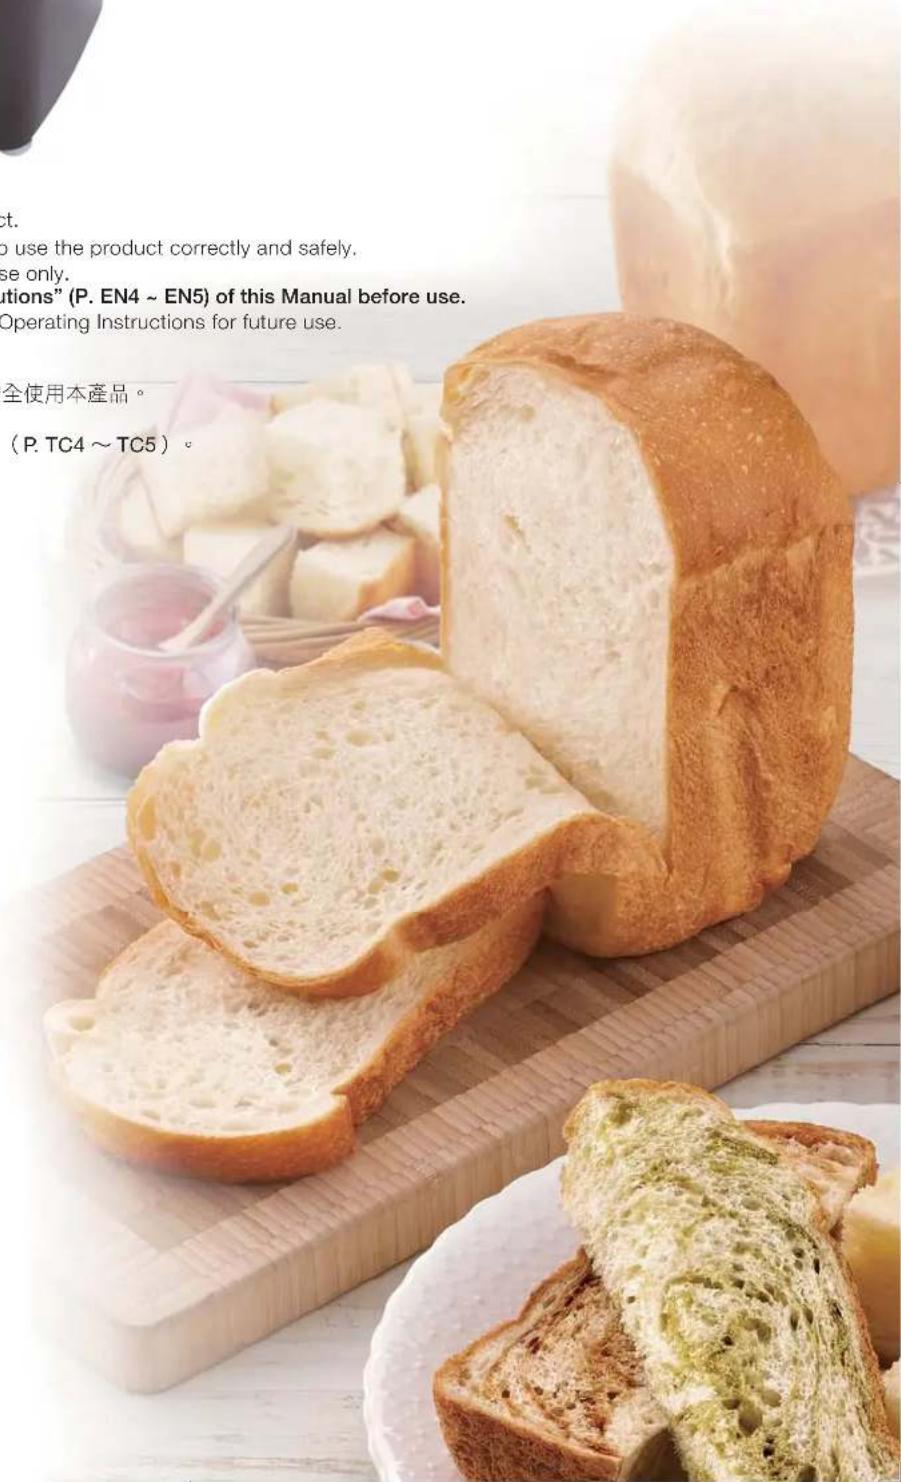
Make various delicious breads manually in a simple and convenient way!
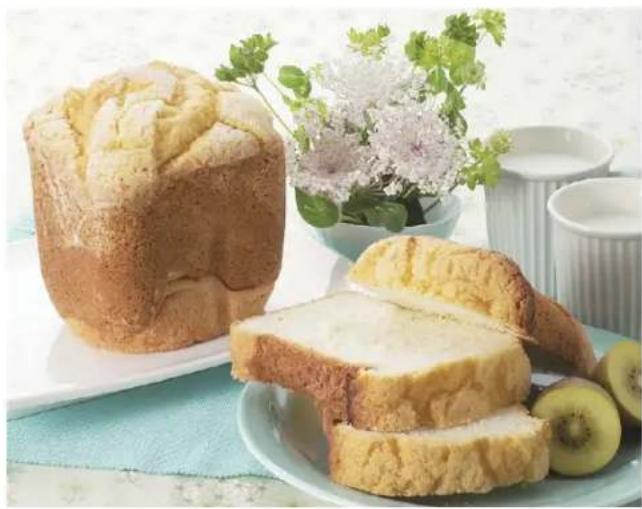
Soft and delicious Bread (Instant dry yeast)
Crispy crust and delicious taste
Bread (P. EN16)
Thin crust pain de mie with less yeast, which keeps the original wheat flavor (P. EN23)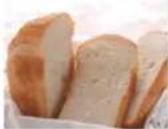
Yudane pain de mie is made with Yudane dough, giving a moist and fluffy texture (P. EN24)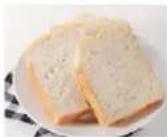
Low gluten flour is added to Chiffon pain de mie, giving it extra soft and fluffy texture (P. EN25)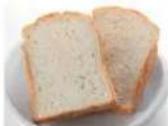
Soft and fine crust, soft bread (P. EN26)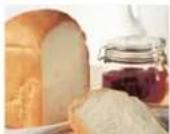
60-minute bread is sweet and can be finished in 60 minutes. (P. EN28)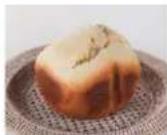
Add rice to make a high water content and soft rice bread (P. EN29)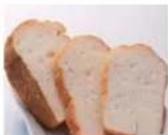
French rice bread is fat-free and has a crispy crust (P. EN30)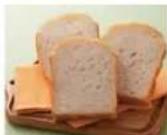
Crispy crust and original flour aroma, French bread (P. EN30)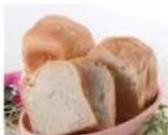
Slightly hard crust, fragrant, healthy and nutritious whole wheat bread (P. EN31)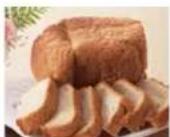
Crispy, rich cream and egg brioche (P. EN34)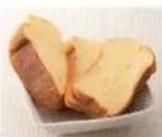
Marble bread with marble patterns in various colors can be easily made (P. EN35)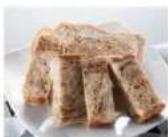
Two-layered bread with a crispy cookie crust, pineapple bread (P. EN36)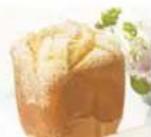
Red bean bread with agreeably sweet red bean paste added (P. EN38)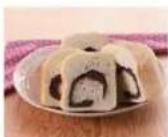
Half bread is smaller than usual, which can be finished by a small family (P. EN39)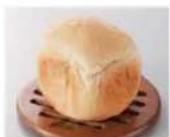
Various taste dedicated dough, pizza dough making
Rolls (P. EN58)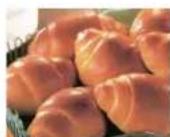
Croissant (P. EN59)
Bagel (P. EN60)
Yogurt bread (P. EN60) Chewy natural yeast bread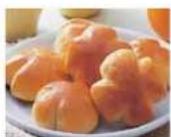
Pizza (P. EN61)
Focaccia (P. EN61)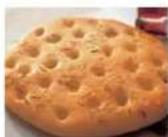
Crispy pizza (P. EN62)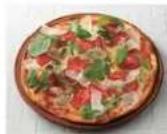
Easy dough due to time constraint - Naan (P. EN62) - Tortilla (P. EN62) - Red bean bun (P. EN62)
Dumpling skin dough (P. EN63)
Udon/Pasta dough (P. EN64)
Quick and easy Scone (P. EN66)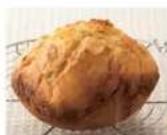
Cake (P. EN68)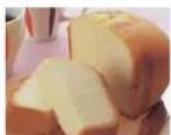
Various vegetables can be added into the vegetable cake and served as dessert (P. EN70)
Others Jam (P. EN74)
Compote (P. EN76)
Red bean
(P. EN78)
Mochi (P. EN80)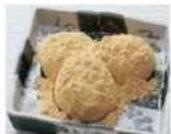
Table of Contents
Page
Page
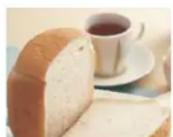
Speed up the whole baking process: Rapid bread (P. EN27)
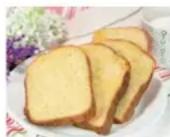
Popular Hokkaido bread, beautifully textured and radiating milky aroma (P. EN32)
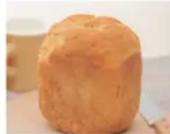
High water content, soft and chewy: Rice flour bread (P. EN40)
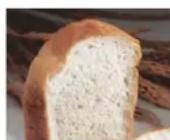
Natural yeast bread with unique flavor, made with natural yeast (P. EN52)
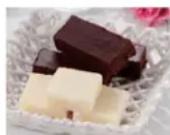
Chocolate (P. EN73)
Confirmation
Safety precautions ......EN4
Operating requirements ...... EN5
Parts names and accessories...... EN6
● Current time (Clock displays)...... EN7 adjustment - Replace lithium battery …… EN7
Basic ingredients and preparations
Procedures and key points of bread-making
List of bread types and baking options
Bread-making ingredients
Ingredients preparations
Operating methods
Bread
Baking basic bread
Convenient functions
● Raisin ● Gentle stir Crust colour Timer
Pain de mie Yudane pain de mie Chiffon pain de mie Soft bread Rapid bread 60 minutes bread Rice bread French rice bread/French bread Whole wheat bread Hokkaido bread Brioche Marble bread Pineapple bread
Red bean bread Half bread Rice flour bread Various flavored bread Natural yeast bread making
Operating methods
Dough
Natural yeast bread dough making Natural yeast fermentation Bread dough/Pizza dough making 8 minutes dough making Various flavored bread Dumpling skin dough making Udon/Pasta dough making
Dessert
Scone making...... EN66 Cake making...... EN68 Vegetable cake making...... EN70 Vegetable cake recipe...... EN72 Red bean making...... EN73 Chocolate making...... EN74 Jam making...... EN76 Compote making...... EN78 Mochi making...... EN80
Tips
Cleaning...... EN82 FAQ...... EN84 Abnormal shape of bread...... EN87 Remedies for misoperations...... EN92 Troubleshooting...... EN93 In case of the following displays..... EN94 Specifications...... EN95
Safety precautions
Please make sure to follow these instructions.
In order to prevent accidents or injuries to the user, other people, and damage to property, please follow the instructions below.
The following charts indicate the degree of damage caused by wrong operation.

Warning
Indicates serious injury or death.

Caution
Indicates risk of injury or property damage.
■ The symbols are classified and explained as follows.

This symbol indicates prohibition.

This symbol indicates requirement that must be followed.

Warning

In order to avoid fire, burns and electric shocks
Do not touch, block or cover the steam vent during use.

● Especially pay attention to children. (It may cause burns.)

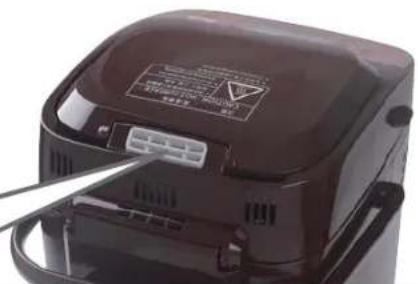
Please use the lithium battery carefully.
(In order to avoid heating, fire and crack.)
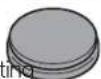

● Charging, short circuiting, heating and throwing it into fire are forbidden. - Do not mix with other metals and batteries. - Please keep it away from children. Please consult your doctor if it is swallowed accidentally. ● Please wind it with adhesive tape and keep it properly insulated before discarding or storage.

Properly use the power plug and the power cord.

- Do not use the sockets and wiring devices beyond their capacity. Do not use any power supply other than 220 V AC. (Because overheating may happen if the rated power of multiple circuits is exceeded.)
- Do not damage the power cord and the power plug. Do not damage, modify and approach hot devices. Do not bend, twist, stretch, load or bundle the cord in force. (Otherwise it may cause fire due to electric shock or short circuit.)
- Do not use when the power cord is damaged and the socket is loosened. (Otherwise it may cause fire due to electric shock or short circuit.)
If the supply cord is damaged, it must be replaced by the manufacturer, its service agent or similarly qualified person in order to avoid a hazard.
- Do not plug or unplug the power cord with wet hands. (It may cause an electric shock.)
- Insert the power plug firmly. (Otherwise it may cause electric shock, heating and fire.)
- Please clean away dust on the power plug regularly. (Take special care to see if the pins have too much dust on them. Poor insulations and fire due to moisture may occur.)
Unplug the power plug and wipe with a dry cloth.
When an abnormal incident or malfunction takes place, stop using the appliance immediately and pull the plug out from the electrical outlet.

(Otherwise it may cause smoke, fire, electric shock or burns.)
Abnormal ● The power plug and the power cord become or breaking abnormally hot.
● The power cord is damaged or power failure. ● The main body is deformed or is abnormally hot. ● The appliance makes abnormal turning noise during use. → Unplug the appliance immediately and contact the service centre for the check or the repair.


In order to avoid fire, burns and injury

This symbol on the products indicates "hot surface and should not be touched without caution".

Caution
The temperature of accessible surfaces may be high when the appliance is operating.

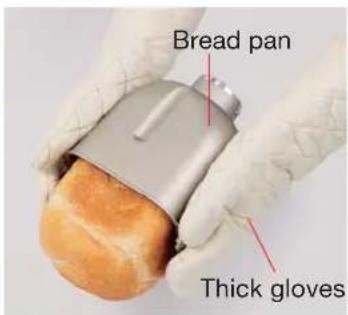

- Do not touch the bread pan, the main unit, the air vent, inner part of the appliance, the heater, the inner side of the lid and other high-temperature parts. Because of the heat while working, do not clean or perform maintenance until bread pan cools down. (Otherwise it may cause burns.) - Use thick oven gloves to take out the bread pan. - *Do not use wet thick gloves. (They are highly conductive and may cause burns.)
Please observe the following instructions to avoid any accident

- Please keep it away from infants and children. - This appliance is not intended for use by persons (including children) with reduced physical, sensory or mental capabilities, or lack of experience and knowledge, unless they have been given supervision or instruction concerning use of the appliance by a person responsible for their safety. Children should be supervised to ensure that they do not play with the appliance.
(May cause burns, electric shock and injury.)


- Do not immerse the appliance in water or splash it with water. - Otherwise it may cause electric shock or fire due to short circuit.


- Do not disassemble, repair or modify this appliance by yourself.
(It may cause fire, electric shock and injury.)
Please consult the service center for repairs.

* Thick gloves are not included with this product; please purchase them separately.
Do not use the appliance in the following places!
● On carpets or other objects that are not resistant to heat. (This may cause a fire.)
- On uneven surfaces or desktops covered with a tablecloth. (This may cause the appliance to fall or start a fire.) * Be careful to find an appropriate place to accommodate the hot bread pan.
- In places contaminated with flour, grease, dust, or other easily falling articles. (This may cause the appliance to slip and fall from the worktop.)
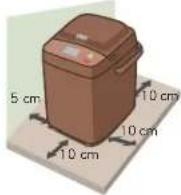
Remove flour and keep the appliance at least 10 cm away from the table edge.
● Near walls and furniture.
Keep a buffer space of more than 5 cm. (Otherwise, deformation and discoloration may occur.)
Properly use the power plug.
● Make sure to hold the power plug when unplugging it. (Otherwise, it may cause electric shock or fire due to a short circuit.) ● Unplug the power plug when the appliance is not in use. (Otherwise, it may cause electric shock or fire due to electric leakage.)
Install the lithium battery correctly.
- Do not reverse the anode and cathode of the battery. (This may cause heating, fire, and cracking. See P. EN7)
Operating requirements
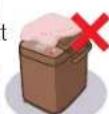
- Do not put any towel on the lid. (It may cause a malfunction or deformation.)
- Do not place it near a wet area or a fire source. (It may cause a malfunction or deformation.)
● Please consult your doctor before use if you are allergic to any food.
● The appliance is not intended to be operated by means of an external timer or separate remote control system.
- Do not apply excessive force to the parts illustrated below. (It may cause a malfunction or deformation.)
Temperature sensor
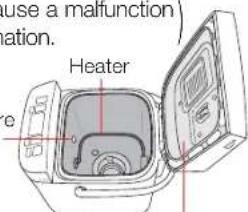
Inner side of the lid
Parts names and accessories
■ Please clean the bread pan, blades, and accessories before initial use (P. EN82)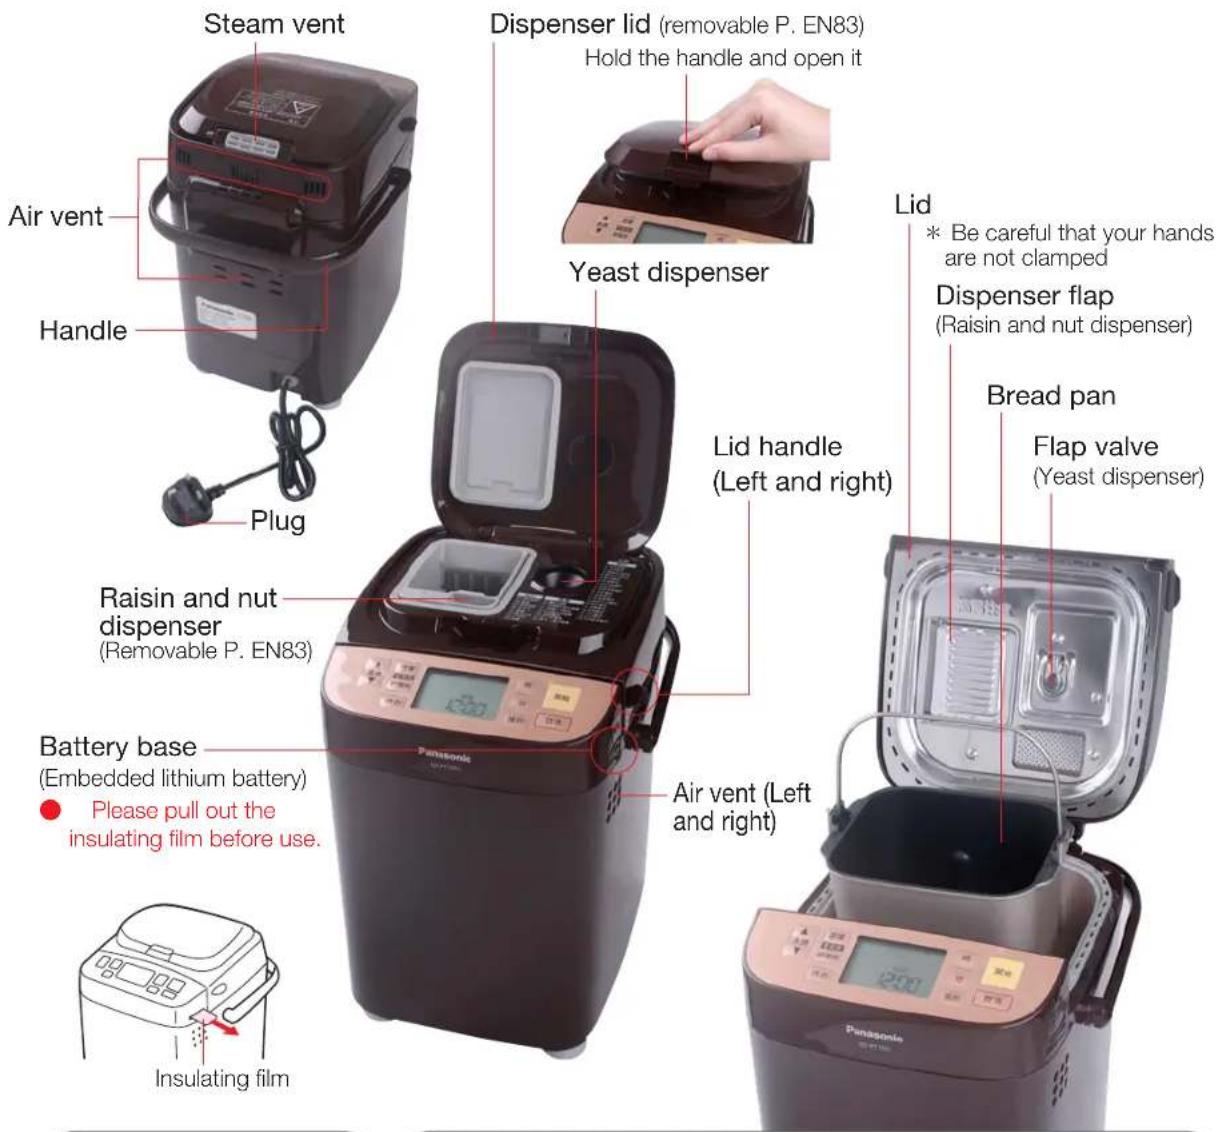
● Blade (P. EN16)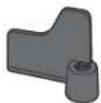
● Blade for noodles and mochi making (P. EN64, EN80)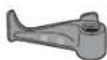
Accessories (1 piece each) ● Natural yeast culture vessel (Attached with lid P. EN55)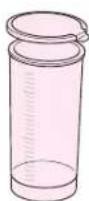
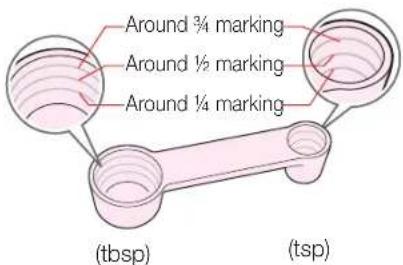
● Measuring spoon: "1 tbsp" indicates "1 tablespoon" for ingredients in these instructions.
Current time (clock display) adjustment
● Pull out the insulating film in advance (P. EN6) ● The time is displayed in the 24-hour system.
①Plug in
* You cannot adjust time if it is not plugged in. ②Press 時 (H) or 分 (M) (time display flashes)
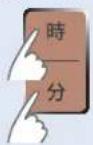
● Release fingers when a beep sound is heard.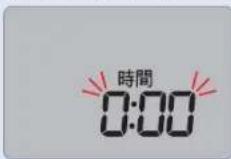
③Adjust time
* Adjust time when flashing (E.g. adjust the time to 3:30 p.m.)
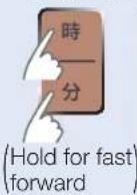
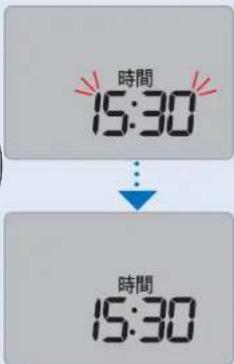
●Completed when flashing stops.
④Pull out the plug
* Time adjustment cannot be completed if you pull out the power plug before the flicker stops.
Replace lithium battery
* Use the lithium battery to enable the bread maker to memorize current time and previous settings.
①Take out the battery base
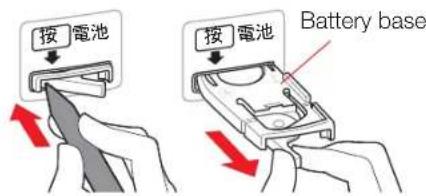
② Secure the battery with left hand by holding the base in front. Take out the battery.
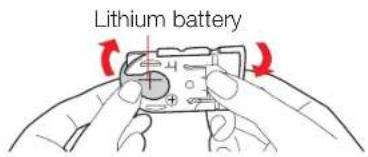
③ Turn the battery base upside down and install the battery. Install the battery base back in the main unit.
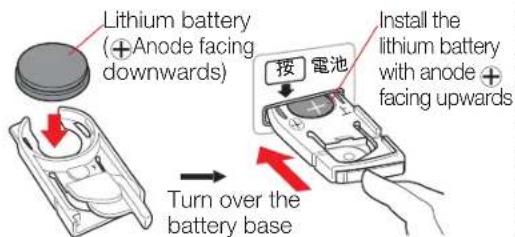
* Please confirm that the battery does not drop down.
* Baking can be started even if the lithium battery is not installed.
Procedures and key points
![graph TD A["Making Bread"] --> B["Prepare necessary tools"] B --> C["Add flour, water and other ingredients"] C --> D["Add instant dry yeast"] D --> E["Menu setting"] E --> F["P. EN53, EN54"] F --> G["For making various flavored bread"] G --> H["Automatic dispensing of instant dry yeast"] H --> I["P…](/content/2026/05/792740/images/f973e63b1fb83374e895d508fadc09df84214465ac1a1d35ffdc696a5f2ce251.jpg)
of bread-making
![graph LR A["When adding ingredients (P. EN18) and butter (P. EN34)"] --> B["Take out the dough"] B --> C["Forming"] C --> D["Fermentation"] D --> E["Bake with an oven"] E --> F["Take out the bread"] F --> G["Take out the bread"] style A fill:#00FF00,stroke:#333 style G fill:#00FF00,stroke:#333](/content/2026/05/792740/images/8033fa1a1821737b042633963a3f6a509d71040992ed3178b5e24ad752742775.jpg)
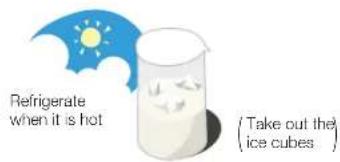
For high room temperature or during the summer, refrigerate beforehand
Water substantially affects swelling conditions. The temperature of ingredients will rise when it is summer or the room temperature is over 25 °C. Therefore, please add ice cubes in water and bring temperature down to 5 °C. (Use it after the ice cubes are taken out.)
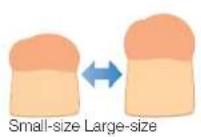
The shape and swelling condition of homemade bread may vary
Bread-making process is highly vulnerable to temperature, humidity, ingredients and setting time. When the above factors change slightly, conditions of shape and swelling extent will change accordingly, even if the same baking method is applied. (P. EN88, P. EN89)
The freshness of ingredients is critical! Is it properly kept?
Yeast for bread fermentation and swelling (P. EN12) is perishable like fish and meat. Therefore, instant dry yeast, natural yeast (raw) and natural yeast (fermented) must be kept in the refrigerator (natural yeast (fermented) must be used within one week). Remember to seal instant dry yeast when storing it. Don't forget to seal the lid during fermentation.
![graph TD A["0.7 days"] --> B["Recovery"] C["2 weeks"] --> D["Recovery"] B --> E["Expiration"] D --> E style A fill:#f9f,stroke:#333 style C fill:#f9f,stroke:#333 style B fill:#ccf,stroke:#333 style D fill:#ccf,stroke:#333](/content/2026/05/792740/images/690033796c4d1a20e0e4485021dafcd8b3256c89a8c3bdf86f2424c892dc4e99.jpg)
EN9
List of bread types and baking
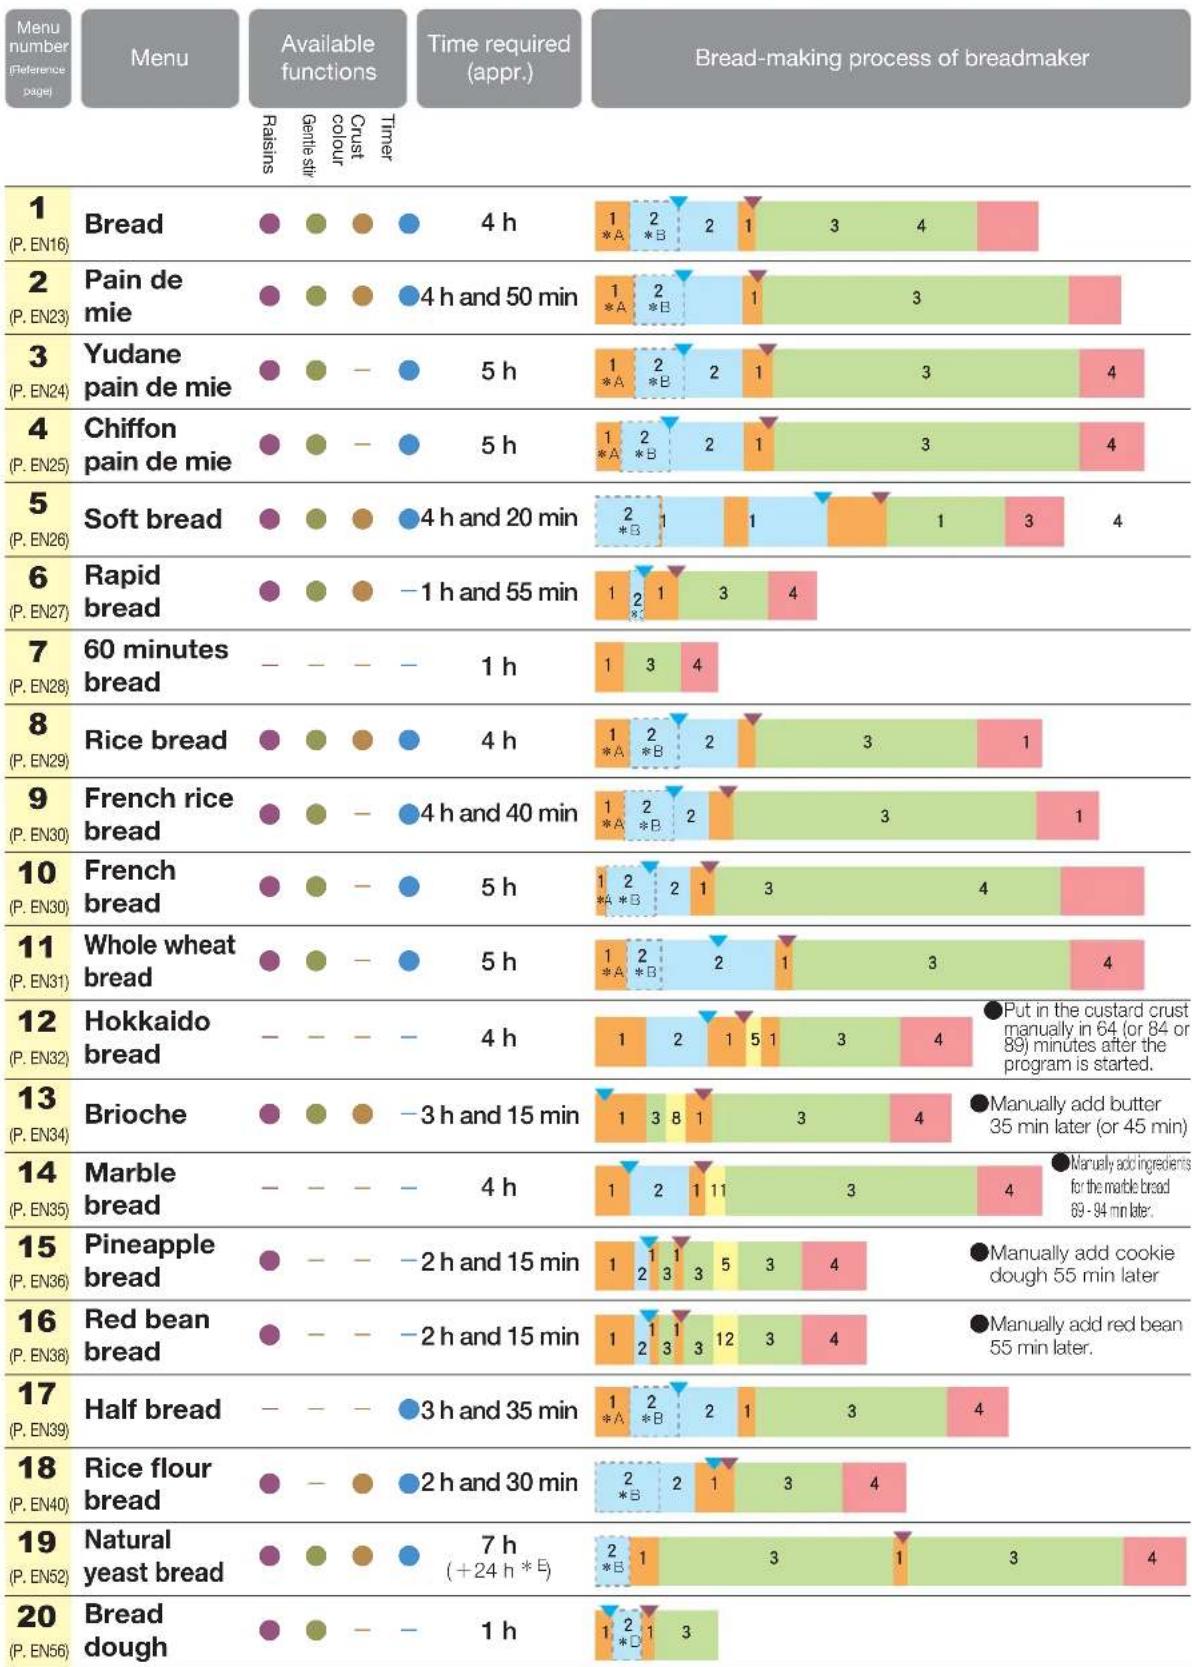
EN10
| Raisins | Genile stir | Crust colour | Timer | (Required time and time for adding yeasts depend on room temperature, crust colour, timer and other conditions) | ||||||
| 21(P. EN54) | Natural yeast bread dough | ● | ● | — | — | 4 h(+24 h *E) | 1 | 3 | 1 3 | |
| 22(P. EN55) | Natural yeast fermentation | — | — | — | — | 24 h | 3 | |||
| 23(P. EN57) | 8 minutes dough | — | — | — | — | 8 min | 1 | ●Add all the ingredients into the bread pan. | ||
| 24(P. EN56) | Pizza dough | — | — | — | — | 45 min | 1313 | |||
| 25(P. EN63) | Dumpling skin dough | — | — | — | — | 15 min | 1 | |||
| 26(P. EN64) | Udon/Pasta dough | — | — | — | — | 15 min | 1 | |||
| 27(P. EN66) | Scone | — | — | ● | — | 54 min | 619244 | ●Manually eliminate remaining flour 2 min after start up.Form the shape another minute later. | ||
| 28(P. EN68) | Cake | — | — | ● | — | 1 h and 30 min | 61244 | ●Manually eliminate remaining flour 12 min after start up. | ||
| 29(P. EN70) | Vegetable Cake | — | — | — | — | 55 min | 4 | 4 | ||
| 30(P. EN74) | Chocolate | — | — | — | — | 17 min | 7 | |||
| 31(P. EN76) | Jam | — | — | — | — | 1 h and 30 min ~2 h and 30 min | 4 | 4 | ●Set timer according to the menu | |
| 32(P. EN78) | Compote | — | — | — | — | 1 ~ 2 h | 4 | 4 | ●Set timer according to the menu | |
| 33(P. EN73) | Red bean | — | — | — | — | 1 h | 1 | |||
| 34(P. EN80) | Mochi | — | — | — | — | 1 h(+30 min *F) | 4 | 10 1 | ●Open the lid manually 50 min after start up (or 55 min later) | |
| *A Upon setting timer, "kneading" is performed after setting timer and the unit will stay in standby mode after kneading.*B Upon setting timer, standby mode is always maintained before the next process is started.Standby period of 11 hours at the maximum. | *C*D | This process may be skipped sometimes.May be omitted; continuous "kneading" may take place.It takes 24 hours to make natural yeast (fermented).Wash the glutinous rice, and then drain the rice o sieve for 30 minutes. | ||||||||
| *E*F | ||||||||||
Bread-making ingredients
In addition to the basic ingredients, you may add your favorite ingredients to make breads of various tastes.
(Ingredients and quantities may vary depending on the kinds of breads)
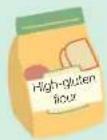
Flour
(High-gluten flour, Low-gluten flour)
Effects
Key points
Mixed with water, the protein will be combined to form gluten.
● Flour sifting is not necessary. ● The swelling may vary due to different protein contents. ● Use the ingredient which is produced recently. - Keep in a cool and dry place. - Be sure to use a scale to measure it in "weight".

For making bread
Generally, use high-gluten flour which has high protein content (12% \~ 15%). Non bread flour has an unobvious swelling effect. It will result in harder bread.
Furthermore, self-raising flour has no swelling effect.
* Please check the list of ingredients on the flour package in advance.
Fats and oils
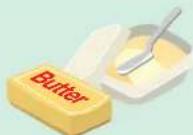
Butter, unsalted butter, margarine and shortening
Effects
It makes the bread texture fine, soft and moist.
● Applicable in solid form, unnecessary to be softened. * Unsalted butter is recommended.
Dairy products
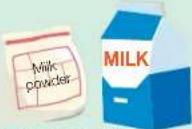
(Milk powder, milk)
Effects
Improve bread taste, smell and crust conditions.
Key points
Prevent hardening of bread.
●Please reduce the same quantity of water if milk is used. - Please use skim milk powder or whole milk powder with natural nutritional content.
Salt
Effects
It gives flavor to bread and makes bread chewy.
It can also avoid bacterial breeding.

Egg
Effects
Improve bread taste, smell and crust conditions.
It can also improve the elasticity of the bread.
Baking powder
For making scones, cakes and vegetable cakes.
* Even adding it into bread and soft bread would not make it swell.
Effects
Bread yeasts
Sugar is used as the source of nutrition to create carbon dioxide that makes the dough rise.
Bread texture


The dough rises with the carbon dioxide trapped inside.
Key points
● The yeast is alive. Freshness of yeast can affect the swelling and fermenting conditions of dough. Therefore, please use yeast within the expiry date and be sure to seal it well and keep it in a refrigerator. - If instant dry yeast gets wet, its fermentation ability will be reduced.
Instant Dry yeast
In order to make a soft and delicious bread, it is better to use instant dry yeast that doesn't require advance fermentation.
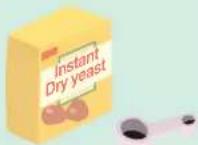
* Do not use fresh yeast and baking powder. - Instant dry yeast rather than active dry yeast is recommended.
Sugar
(Granulated sugar, brown) sugar and honey


Sugar is the nutrition for bread yeast which can speed up the fermentation. It can also improve taste, smell and the crust of bread.
● Large sugar particles should be pulverized. ● Do not use rock sugar or other crystal sugar.

- Increase the amount of sugar to darken the crust; decrease the amount to lighten the crust.
- Do not use low-calorie sugar substitutes.
Water

Gluten is produced by adding water to flour.

● Cold water is used for the following recipes (about 5 °C: almost the temperature of icy water)
- Rapid bread · French bread · Whole wheat bread • Brioche • Pineapple bread • Yudane pain de mie
- French rice bread · Red bean bread • Other menus with temperature above 25 °C ● Alkaline water is not applicable.
For making bread
● Please use water from a water dispenser. ● Distilled water is not applicable for bread swelling.
Natural yeast (Raw)
Natural yeast made from natural food is used to make natural yeast bread which has a unique texture. Natural yeast (fermented) can be made through "Cultivating natural yeast fermentation" (P. EN55)
● Natural yeast of the "Hoshino" brand is recommended to ensure bread quality and success rate.
Tips on Hoshino Natural Yeast:
Precautions on the use of Hoshino Natural yeast:
- Sterilize any container or tools that will come into contact with the natural yeast and let them dry before use. ● An off smell or abnormal color indicates food contamination. Discard ingredients if you notice these signs. ● Natural yeast (fermented) that is stored improperly may cause deteriorated bread quality. You can prepare a one-time dose of natural yeast (fermented) by following the instructions below.
Operating instructions (P. EN55)
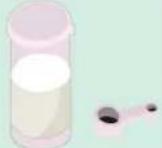
Rice flour
(include flour)

Rice flour does not contain the proteins necessary for dough to rise. Therefore, it is impossible to make bread using only rice flour. It is important to use different flours depending on the menu.

* As rice flour bread contains wheat (gluten), it is not recommended for people who are allergic to wheat. * Be sure to pay attention to the ingredients, cleaning methods, and maintenance. Use after consulting your doctor.
* About gluten
Gluten is formed when proteins in flour combine with water. Bread-making yeast produces carbon dioxide, which causes the dough to expand, ultimately creating the texture of the bread.
Tips
Please note the following to avoid damaging the fluorine coating on the bread pan and blade:
- Adding hard ingredients may cause the fluorine coating to peel off. ● Before adding dried fruits and nuts, cut them into pieces smaller than 5 mm.
- For large crystalline particles such as raw sugar and sea salt, dissolve them in room-temperature water before use. Subtract this solution amount from the original water amount for making bread. ● Insufficient water may lead to dough hardening, which can damage the coating during kneading.
- Be sure to put ingredients into the bread pan in the following order: flour → other ingredients → water.
- Do not use hard items such as knives, forks, or chopsticks to remove the bread. ● Always check whether the blade is attached to the bread (at the bottom) before cutting it, to avoid damaging the blade.
- Do not clean the bread pan or blade with metal brushes, scourers, the nylon side of a sponge, or sponges wrapped in nylon net. Wipe with a soft sponge. * The bread pan and kneading blade are consumable parts. Peeling of the coating is normal after prolonged use. Ingesting the peeled-off fluorine coating does not affect health.
Bread-making ingredients (Continued)
Basic weight of each spoon (Supplied measuring spoon)
| Tablespoon Teaspoon | ||
| Granulated sugar | Approx.12 g | Approx. 4 g |
| Milk powder | Approx. 6 g | Approx. 2 g |
| Salt | — | Approx. 5 g |
| Instant Dry yeast | — | Approx. 2.8 g |
| Natural yeast (raw) | Approx. 10 g | — |
| Natural yeast (fermented) | Approx. 12.5 g | — |
In case of changes of recipe and type of ingredients
Adjust according to personal preference based on the following quantities.
| Ingredients To increase To decrease | ||
| Butter | May be increased by 150% (except for brioche) | May be decreased by 50% |
| Granulated sugar | May be increased by 100% | May be decreased by 50% |
| Milk powder | May be increased by 100% | May be exempted |
| Salt | — | May be exempted(May be reduced by 50% for rice flour bread and natural yeast bread) |
- Increasing the amount of sugar will darken the crust. Decreasing the amount will lighten the crust and reduce the height.
- Bread will be less chewy without salt. Enzymatic activity of natural yeast is strong, while salt can control it. Enzymes will be over-activated without salt. Thus, the bread cannot form properly with gluten broken.
● Margarine can be used to substitute butter, honey can substitute sugar and milk can substitute milk powder. (P. EN12)
- Honey shall not exceed 25 g - One tablespoon of milk powder is equivalent to 70 g (Approx. 70 mL) milk.
In case of adding eggs or milk
Reduce the water in the same quantity of eggs or milk.
- Egg (1 at most)
- Milk (half of water amount at most)
● Put egg and other ingredients into the cup and then add water for measurement.
- Do not use timer. (Food may be contaminated in summer)
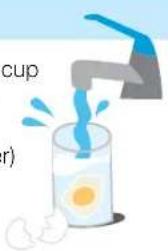
Ingredients preparations
The ingredients and the amount are introduced based on the basic bread (P. EN16).
You may also add your favorite ingredients in addition to the basic ingredients in order to make various flavored bread.
- Crust colour and height of fermentation pile vary with the materials.
On top of the basic ingredients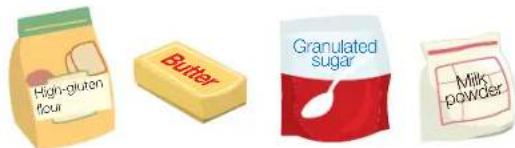
Add your favorite ingredients![graph LR A["Blue Box with Beaker"] + B["Blue Box with Blue Box"] --> C["Blue Box with Blue Box"] C --> D["Raw Material with Beaker"]](/content/2026/05/792740/images/9f1691a0ee93bd00924c4af64807b611b05bd1a09ce305bd86cefadb1bd33311.jpg)
Vegetable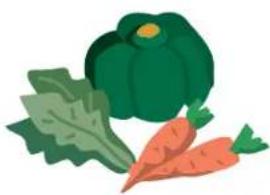
:about 15 \~ 20% of flour weight (Standard: 50 g)
E.g. · Carrot - grated
- Pumpkin – boil until softened, mashed into pieces and cooled
- Spinach – boil, cut into pieces and cooled
Cereals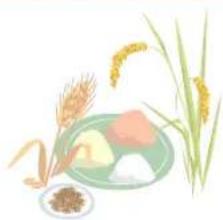
:about 10 \~ 20% of flour weight (Standard: 30 g)
E.g. · Rice flour · Oat meal
- Glutinous rice flour • Rye
- Whole wheat flour
- Beans powder
- Sesame

: cannot exceed the amount of water
E.g. · Orange juice
- Apple juice
- Tomato and other 100% fruit juice → Fully cool in a refrigerator in advance
Flour quantity
(Remain the same) (Remain the same)
- High-gluten flour 220 g
Water quantity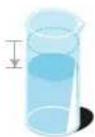
Deduct 80% of vegetable weight
E.g. pumpkin 50 g\ Water 140 g (mL)\ (180g(mL) - \ 80% of 50g(mL)) .
(Remain the same)
- Do not use timer function.
Decrease the amount of juice
E.g. \ Orange juice 100 g \ (Approx. 100 mL) \ Water 80 g (mL) \ (180 g (mL) - 100 g (mL)) .
- Do not use timer function.
Baking basic bread
Add the ingredients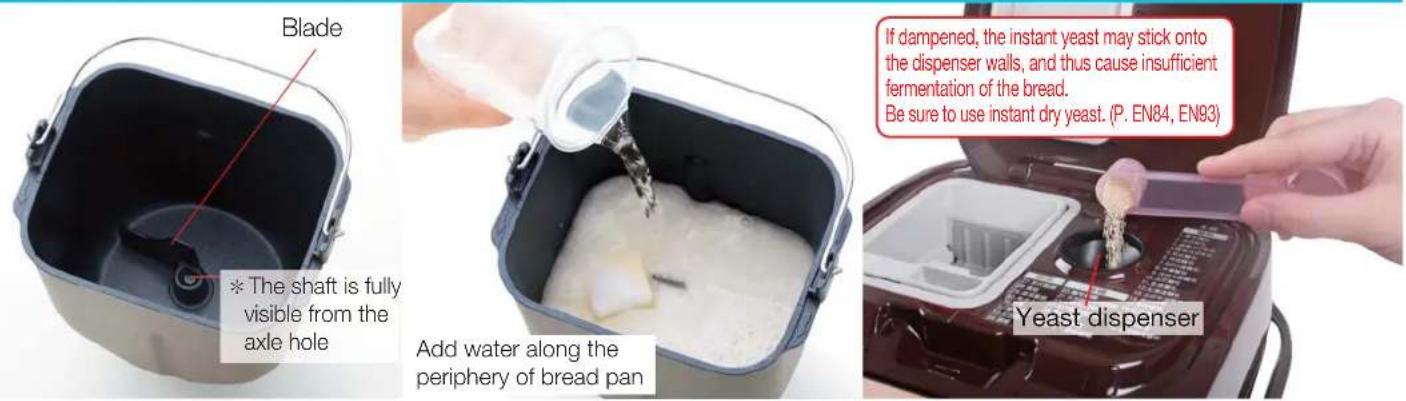
1 Remove the bread pan and set the kneading blade
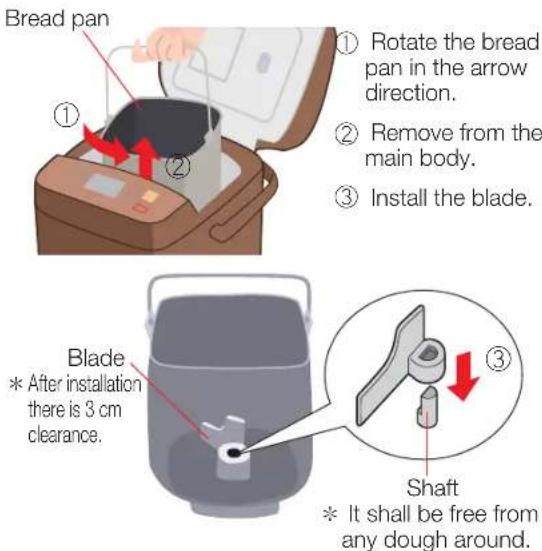
Bread
| High-gluten flour 250 | g |
| Butter 10 | g |
| Granulated sugar 18 | g(1 1/2 tbsp) |
| Milk powder 6 | g(1 tbsp) |
| Salt 5 | g(1 tsp) |
| Water * | 190 g (mL) |
| Instant dry yeast 2.8 | g (1 tsp) |
2 Add high-gluten flour, water and other ingredients to the bread pan, and add yeast.
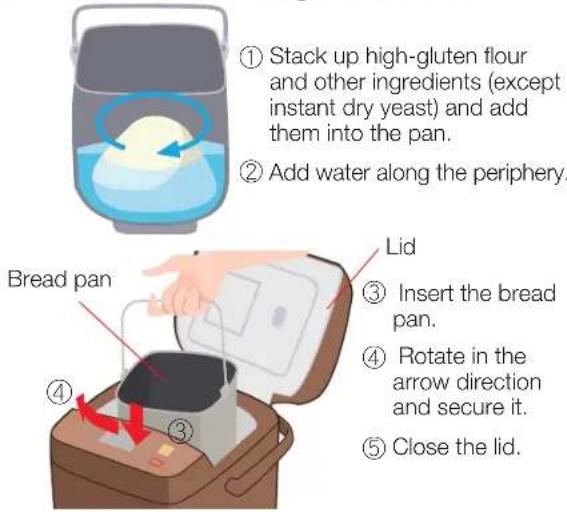
* The handle of the bread pan will stand up. (To make it convenient for taking out the pan) There is no need to lower it down to the bottom.
3 Add instant dry yeast into the yeast dispenser
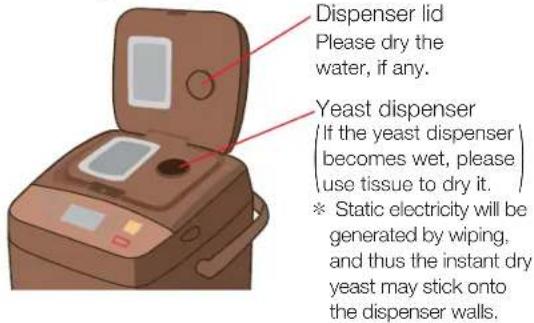
Time required: about 4 h
Be sure to use thick gloves
Take out Setting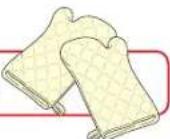
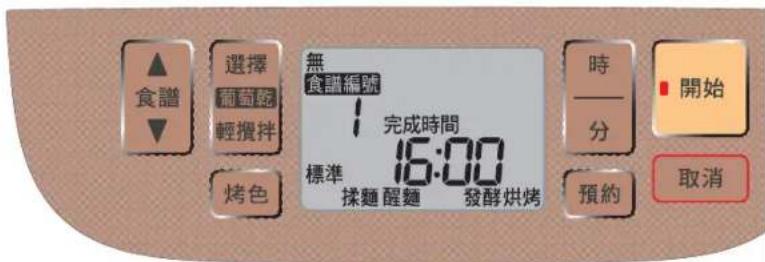
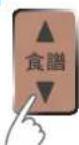
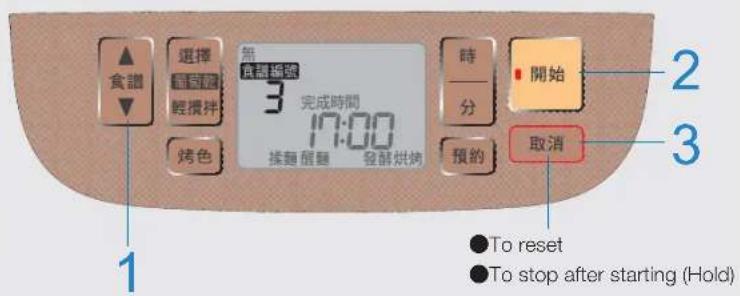
4 Select menu "1"
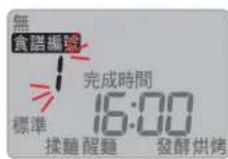
■ To select other types of bread
Recipe (P. EN23)
■ To add raisins and other ingredients
■ To set timer for completion time
Reservation (P. EN22)
5 Press Start
Flash -illuminated
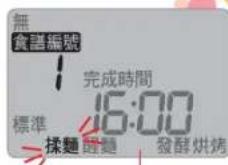
●Approximate time of completion
- Do not open the lid after it is started. Otherwise the instant dry yeast will spill out. However, the instant dry yeast has been added during manual addition of ingredients (P. EN19). Therefore, you may open the lid.
●Sound will be heard while the instant dry yeast is falling through the dispenser.
6 Baking completes (Beep sound) Turn off the power
Cancel
① Press Cancel
② Pull out the plug.
7 Take out the bread pan and put it on a table with a towelette under it. When handling the bread pan, be sure to wear thick oven gloves.
Cool down (about 2 min)
* Pay attention to the rest place of the bread pan. (The bread pan gives out heat) * The bread will cave in and shrink, if it is left inside the machine for a while.
8 Take out the bread for cooling down
Thick gloves — (Do not get wet)
Bread pan-
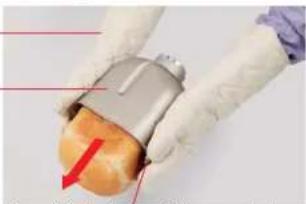
Hold the handle and shake it forcefully several times * Do not use a knife, a fork or chopsticks to take it out. (It will scratch the fluorine coating.) * Please don't touch the bottom of bread pan. (Blade rotation may damage bread shape.)
● Make sure blade is in the bread pan after bread is taken out. The kneading blade may stay inside of the bread (at the bottom). Please take it out.
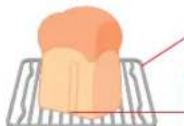
Baking grille or others
Make sure that the blade is not stuck on it.
(The blade will be damaged if you cut the bread before the blade is taken out of it.
Convenient functions
Raisin
Raisin for making bread that contains your favorite ingredients
You can add auxiliary ingredients as you like.
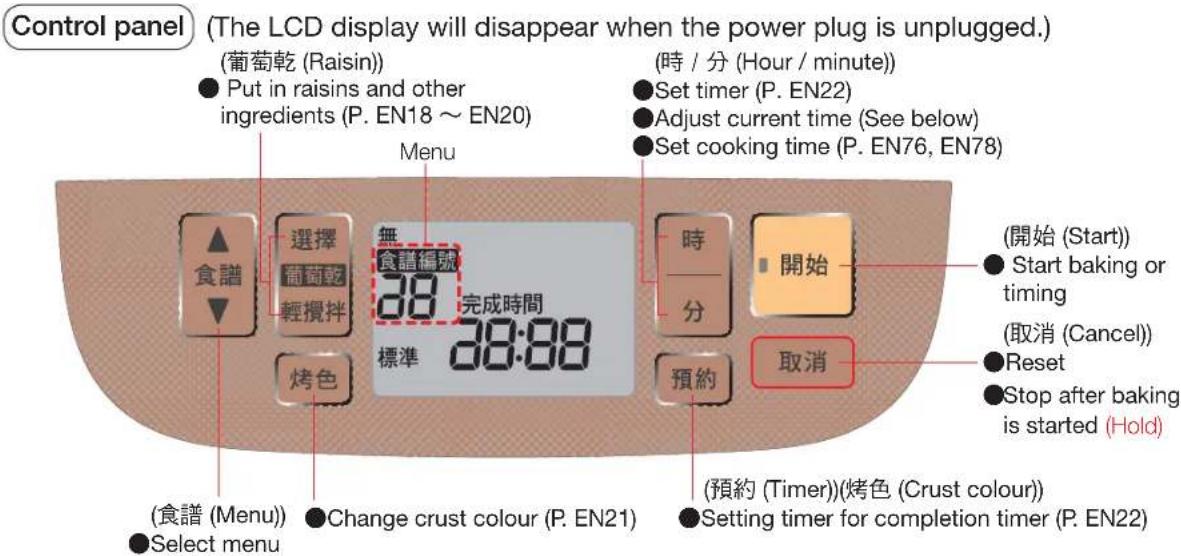
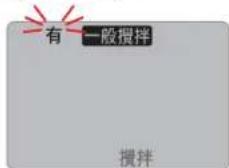
When adding auxiliary ingredients, you can choose Automatic Input (when the LCD displays Yes), or Manual Input (when the LCD displays Yes with a note symbol).
- Your favorite auxiliary ingredients, like raisins and walnuts, can be placed in the raisin and nut dispenser for automatic input.
- For cheese, chocolates and other ingredients (P. EN19) that cannot be automatically added, add them manually when you hear the beep sound from the buzzer. ● To retain the shape of auxiliary ingredients, select Gentle stir. (P. EN20)
Please follow the ratio and amount of ingredients of various recipes. Otherwise, the ingredients may fly out from the bread pan, to the heater and consequently burn and create smoke.
Automatically added (completed by the automatic bread maker)
Preparations
Put your favorite ingredients into the raisin and nut dispenser.
The total weight in the dispenser should not exceed 100 g
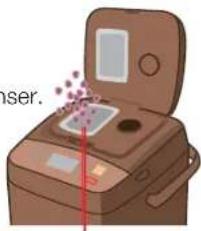
Raisin and nut dispenser
Ingredients that can be automatically added: dry ingredients and ingredients that hardly melt
Dried fruits (not over 100 g)
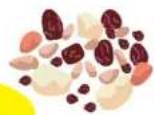
→ Cut into small pieces less than 5 mm
Raisin, plum, orange peel, etc.
Nuts (not over 100 g)
→ Cut into small pieces less than 5 mm
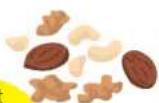
Cashew, walnut and others
No need to bake in advance.
No need to bake in advance.
Green beans * (Not over 100 g)
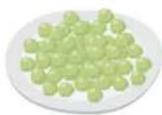
→ Sop up water
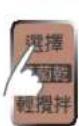
① Press 葡萄乾:選擇 (Raisin: Select), Select 有 (Yes) (make it flash)
(Ingredients are added automatically) * "Kneading" temporarily stops.
●A small quantity of ingredients will cling to the walls of the raisin and nut dispenser sometimes. ● The sugar coated fruits may not be added because the sugar may melt and stick onto the dispenser when the weather is hot or when using timer function.
Olive * (Not over 100 g)
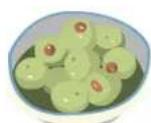
Core and cut it into 1/4 and sop up the water.
Ham, bacon and sausage * (Not over 100 g)

→ Cut it into pieces of 10 mm wide
- Please place ingredients evenly. When piled up with ingredients, the raisin and nut dispenser may not work normally. * Do not add ingredients if the timer function is used. (Particularly in summer, deterioration may occur)
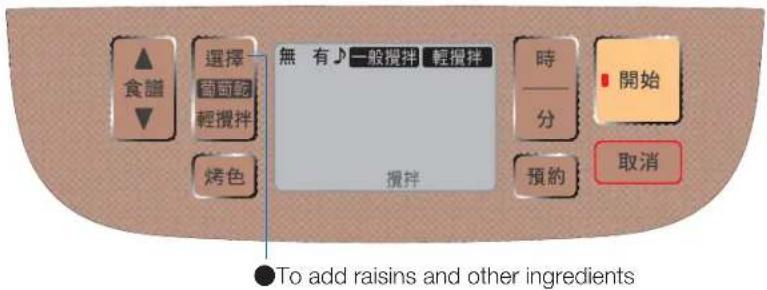
■Please manually add ingredients that cannot be added automatically.
Manually add when you hear beep sounds (♪)
① Press 葡萄乾:選擇 (Raisin: Select), and select 有♪ (Yes♪) (make it flash)
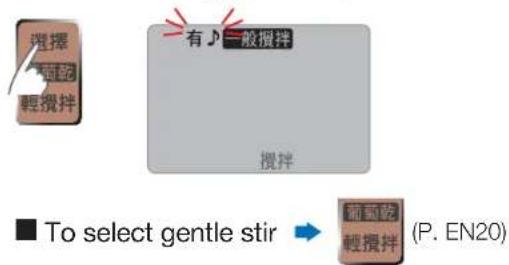
② Start
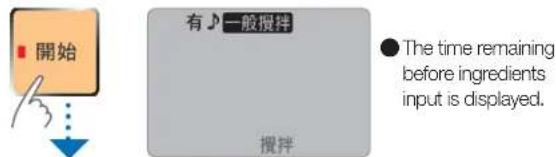
③ After hearing beep sounds Open the lid
● Raisin and nut dispenser flap will always remain open
④ Add ingredients into the bread pan, then close the lid
⑤ Restart
● Even without pressing start, the beeper will sound after 3 min and the unit will restart.
Ingredients that can't be automatically added (stick onto walls of dispenser, hard to fall) Ingredients that are sticky, easily melt or have a high content of water
Macerated fruits, onions and other chopped vegetables
Cheese, chocolate, etc
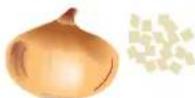
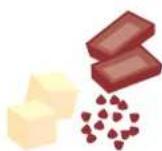
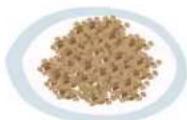
* Sesames and other small ingredients ought to be added in the bread pan before beginning. (Not over about 20% of flour weights)
● The more ingredients added, the poorer swelling of bread. ●Some ingredients may not keep their original shapes.
■ Proper time for adding ingredients when making stuffed breads ...
The time when beep sounds are heard varies with recipe and room temperature.
- Bread: after about 1 h ~ 1 h and 30 min
- Pain de mie: after about 1 h and 5 min ~ 1 h and 45 min
- Yudane Pain de mie: after about 1 h and 10 min ~ 1 h and 45 min
- Chiffon Pain de mie: after about 1 h and 20 min ~ 1 h and 50 min
- Soft: after about 1 h and 55 min ~ 2 h and 15 min
- Rapid: after about 30 min ~ 35 min
- Rice: after about 1 h and 5 min ~ 1 h and 35 min
- French rice: after about 50 min ~ 1 h and 20 min
- French: after about 40 min ~ 1 h and 25 min
- Whole wheat: after about 1 h and 35 min ~ 2 h and 50 min • Brioche: after about 1 h ~ 1 h and 10 min
- Pineapple: after about 35 min ~ 40 min
- Rice flour: after about 45 min ~ 1 h • Natural yeast bread: after about 3 h and 30 min ~ 3 h and 35 min
- Bread dough: after about 20 min ~ 35 min
- Natural yeast bread dough: after about 3 h and 30 min ~ 3 h and 35 min
Convenient functions Gentle stir
After selecting function and menu...
Set the convenient functions before startup!
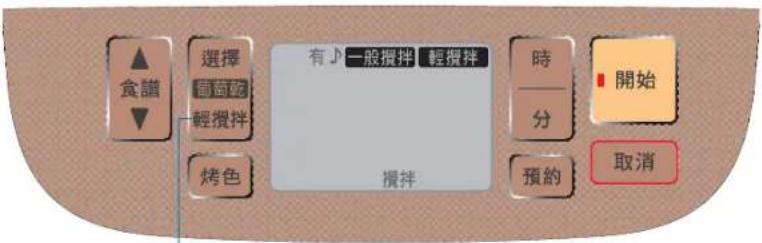
■First, refer to Raisin on Pages EN18 ~ EN19.
Gentle stir - Keeps the shape of easily distorted ingredients
① Press 葡萄乾:選擇 (Raisin: select), select 有 (Yes) or 有♪ (Yes).
Press 葡萄乾:選擇 (Raisin: Stir) and then select 輕攪拌 (Gentle stir)
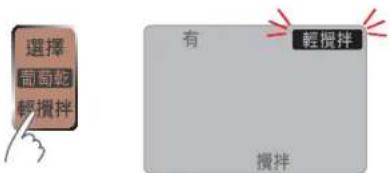
●You can set the options of 輕攪拌 (Gentle stir).
(P. EN10 \~ EN11)
* When using 輕攪拌 (Gentle stir),
●Add another 10 g (mL) water. (Except for Brioche)
●Freeze the chocolate first.
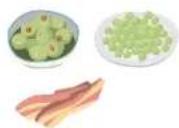
Ingredients suitable for 輕攪拌 (Gentle stir)
Soft and easily distorted ingredients
Auto input... “有 (Yes)”
Olive, Green beans,
Ham, bacon and
sausage
Poached beans, dried tomato, etc.
●Some ingredients may not be able to keep their forms.


Please pay attention to the following ingredients during adding!
- Addition of hard ingredients may damage the fluorine coatings inside the bread pan. Please use it carefully.
* Accidentally eating the fluorine coating will not harm your health.
• Cereal • Maple sugar cube - Fruit oatmeal · Pearl sugar - Sugar-coated nut · Sugar cubes and others
The dough won't rise if any fresh fruits with a rich content of protein-degradation is added.
• Honeydew melon, Hami melon - Kiwi fruit
• Fig - Mango - Pineapple - Papaya
Others
Crust colour
After selecting function and menu...
Set the convenient functions before startup!
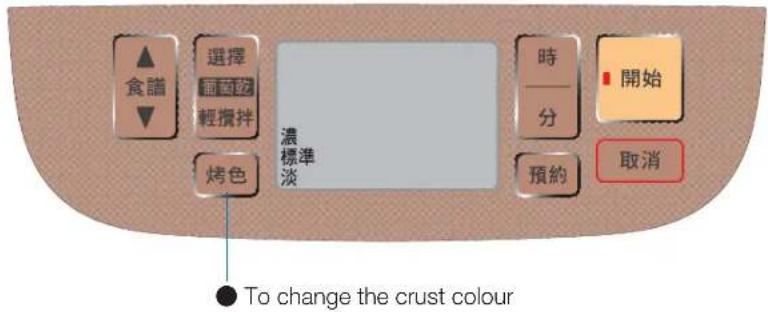
Bake your favorite crust colour
You can set the crust colour as light, standard or dark.
① Press Crust colour to select your favorite crust colour


② Start

- You can set options for crust colour.
- (P. EN10 ~ EN11) ● The more sugar added, the darker the bread crust will be. The height of the bread will be reduced as sugar is reduced.
Convenient functions
Timer
After selecting function and menu...
Set the convenient functions before startup!
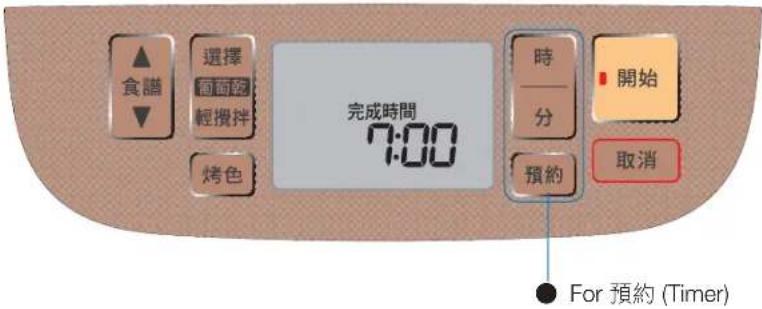
Use this function if you want to enjoy freshly-baked bread in the morning.
① Confirm if the current time is correct
●Adjust to current time if it is not (P. EN7)
② Press Timer

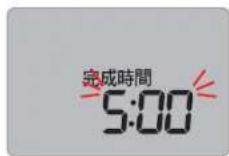
③ Set the time for completion of baking
(Hold it for fast forward)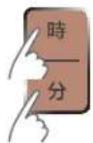
* It would only show the available time.
(The time described with reference to the right)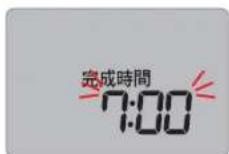
④ Start (timer setting completed)
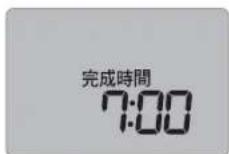
●For Raisin and Crust colour
①Set the Raisin: Select, Raisin: Stir, and Crust colour functions. ②Set Timer
[Standards on timer]
* Timer can be set from current time to
Bread : after 4 h and 10 min \~ 13 h
Pain de mie : after 5 h \~ 13 h
Yudane Pain de mie ; after 5 h and 10 min \~ 13 h
Chiffon Pain de mie : after 5 h and 10 min \~ 13 h
Soft bread : after 4 h and 30 min \~ 13 h
Rice bread : after 4 h and 10 min \~ 13 h
French rice bread : after 4 h and 50 min \~ 13 h
French bread : after 5 h and 10 min \~ 13 h
Whole wheat bread : after 5 h and 10 min \~ 13 h
Half bread : after 3 h and 40 min \~ 13 h
Rice flour bread ; after 2 h and 40 min \~ 13 h
Natural yeast bread : after 7 h and 10 min \~ 10 h
* You cannot set a time that is beyond the timer limit.
* Timer is not available for some menus. (P. EN10 ~ EN11)
[Timer setting examples]
Menu: bread
Current time: 08:30 p.m.
(LCD screen displays "20:30")
Scope of time settings: 00:40 a.m. to 09:30 a.m.
("0:40" ~ "9:30")
* It is impossible to set the time beyond the range above.
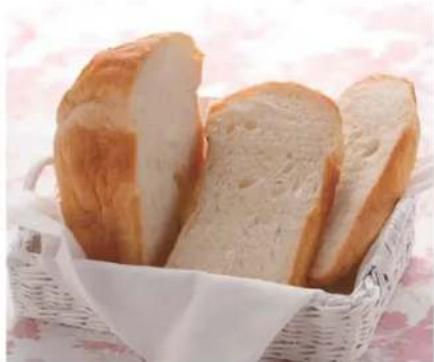
* Thin crust and white crumb Pain de mie with half portion of instant dry yeast, keeping the original flavor of wheat.
Pain de mie
Time required: about 4 h and 50 min
① Install blade in the bread pan. ② Add flour, water and other ingredients (except instant dry yeast) in the bread pan. ③ Put the bread pan into the main body and place instant dry yeast in the yeast dispenser.
Ingredients
Pain de mie
| High-gluten flour 250 | g |
| Butter 15 | g |
| Granulated sugar 18 | g (1 1/2 tbsp) |
| Milk powder 6 | g (1 tbsp) |
| Salt 5 | g (1 tsp) |
| Water* | 200 g (mL) |
| Instant dry yeast 1.4 | g ( 1/2 tsp) |
* Use 5 °C cold water and reduce the amount of water by 10 g (mL) if the room temperature is above 25 °C.
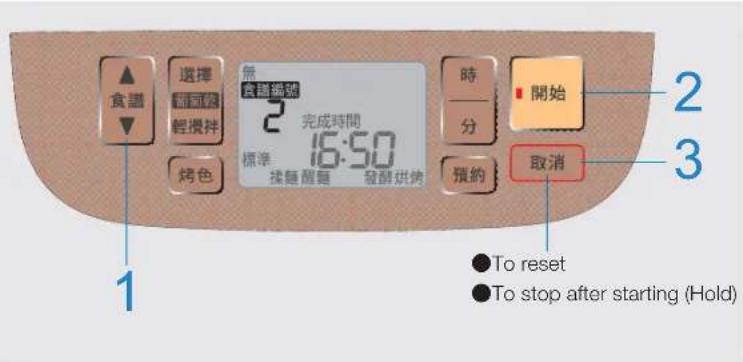
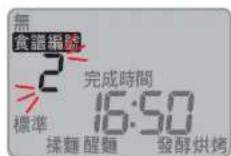
1 Select menu "2"
■ To add raisins and other ingredients
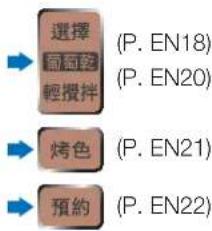
■ To set timer for completion time

2 Start
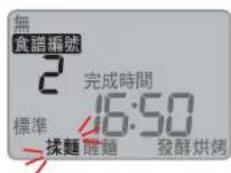
3 Press 取消 (Cancel) when you hear the beep sound. Take out the bread pan and cool it down for about 2 min. Then
take out the bread
Yudane pain de mie
Time required: about 5 h
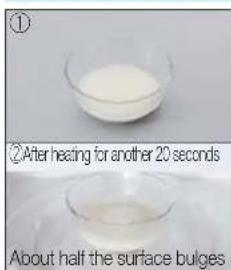
① Make the Yudane. ② Install blade in the bread pan. ③ Add flour, water and other ingredients (except instant dry yeast) in the bread pan. ④ Put the bread pan into the main body and place instant dry yeast in the yeast dispenser.
Ingredients
Yudane pain de mie
| Cold water (5 °C)* 1+Yudane*2 | 220 g |
| High-gluten flour 240 | g |
| Butter 15 | g |
| Granulated sugar 18 | g (1 1/2 tbsp) |
| Milk powder 6 | g (1 tbsp) |
| Salt 5 | g (1 tsp) |
| Instant dry yeast 1.4 | g (1 1/2 tsp) |
*1 Reduce by 10 g (mL) when the room temperature is above 25 °C.
*2 How to make Yudane
| High-gluten flour | 10 g |
| Water | 70 g (mL) |
①Put 10 g high-gluten flour into the deeper heat-resistant pan, add 70 g (mL) water to dissolve the flour, and stir until there are no particles. ②Put the mix into the microwave oven (600 W) to heat for about 30 \~ 40 seconds, and suspend heating when the surface of mixture bulges. Stir the mixture well and put it into the microwave oven to heat for about 20 seconds, stop heating when the surface of mixture bulges. Take it out and stir it until it becomes pasty. ③Cool the ② mixture until its temperature is similar to body temperature. Then add cold water (5 °C) and mix. (Total weight: 220 g) ●Adjust the time for heating according to the type of heat-resistant pan and microwave oven. ●Yudane paste cannot be preserved too long.
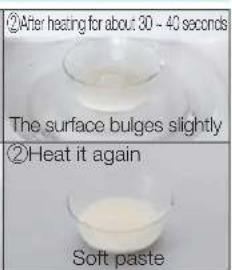
1 Select menu "3"
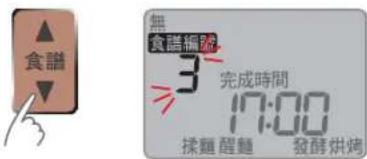
■ To add raisins and other ingredients ■ To set timer for completion time

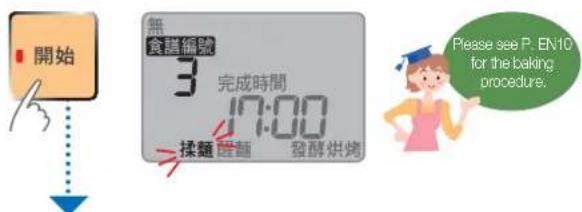
2 Start
3 Press 取消 (Cancel) when you hear the beep sound. Take out the bread pan and cool it down for about 2 min. Then take out the bread
Chiffon pain de mie
Time required: about 5 h
① Install blade in the bread pan. ② Add flour, water and other ingredients (except instant dry yeast) in the bread pan. ③ Put the bread pan into the main body and place instant dry yeast in the yeast dispenser.
Ingredients
Chiffon pain de mie
| High-gluten flour 200 | g |
| Low-gluten flour 50 | g |
| Butter 20 | g |
| Granulated sugar 18 | g (1 1/2 tbsp) |
| Milk powder 6 | g (1 tbsp) |
| Salt 5 | g (1 tsp) |
| Water* | 190 g (mL) |
| Instant dry yeast 1.4 | g (1 1/2 tsp) |
* Use 5 °C cold water and reduce the amount of water by 10 g (mL) if the room temperature is above 25 °C.
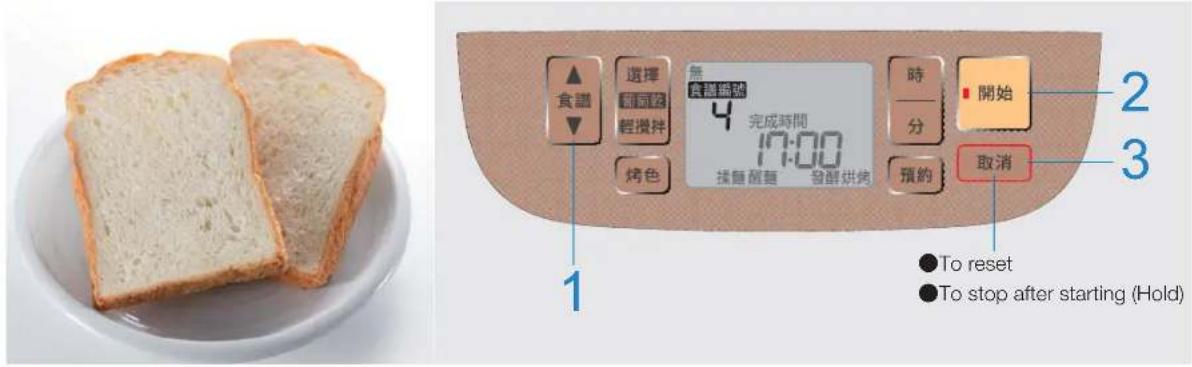
1 Select menu "4"
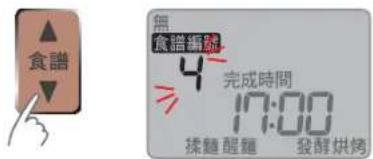
■ To add raisins and other ingredients ■ To set timer for completion time
3 Press 取消 (Cancel) when you hear the beep sound. Take out the bread pan and cool it down for about 2 min. Then take out the bread
Soft bread
Time required: about 4 h and 20 min
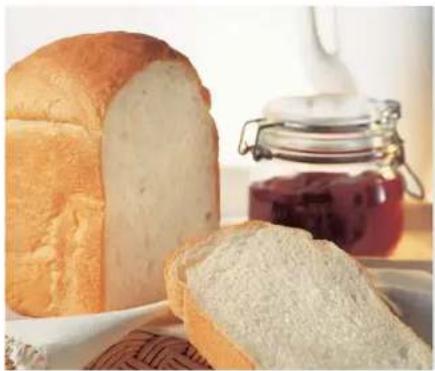
① Install blade in the bread pan. ② Add flour, water and other ingredients (except instant dry yeast) in the bread pan. ③ Put the bread pan into the main body and place instant dry yeast in the yeast dispenser.
Ingredients
| Soft bread | |
| High-gluten flour 250 | g |
| Butter | 15 g |
| Granulated sugar 18 | g (11⁄2 tbsp) |
| Milk powder 6 | g (1 tbsp) |
| Salt | 5 g (1 tsp) |
| Water* | 190 g (mL) |
| Instant dry yeast 2.8 | g (1 tsp) |
● The timer function will not start until after resting of the dough, so the kneading blade will not rotate even if you press Start.
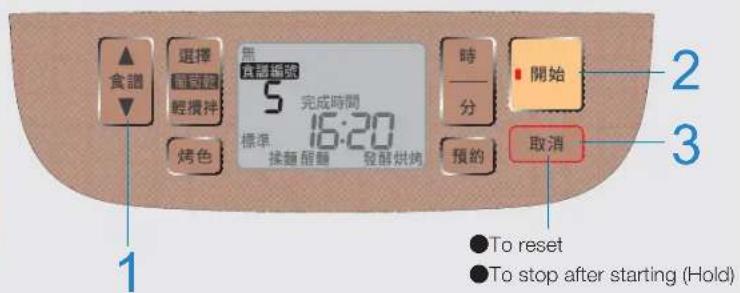
1 Select menu "5"
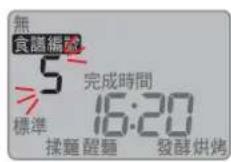
■ To add raisins and other ingredients
■ To set timer for completion time
Timer (P. EN22)
2 Start
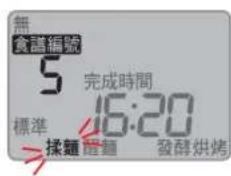
3 Press Cancel when you hear the beep sound. Take out the bread pan and cool it down for about 2 min. Then take out the bread
Rapid bread
Time required: about 1 h and 55 min
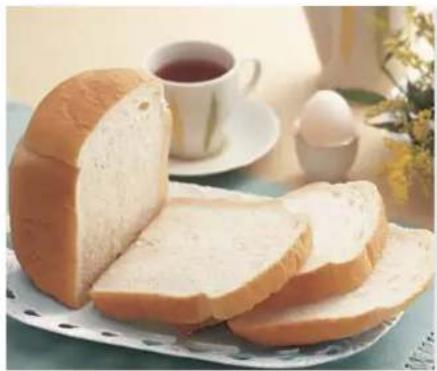
① Install blade in the bread pan. ② Add flour, water and other ingredients (except instant dry yeast) in the bread pan. ③ Put the bread pan into the main body and place instant dry yeast in the yeast dispenser.
Ingredients Rapid bread
| High-gluten flour 280 | g |
| Butter | 10 g |
| Granulated sugar 18 | g (1 1/2 tbsp) |
| Milk powder 6 | g (1 tbsp) |
| Salt | 5 g (1 tsp) |
| Cold water (5 °C)* | 210 g (mL) |
| Instant dry yeast 4.2 | g (1 1/2 tsp) |
*Reduce by 10 g (mL) when the room temperature is above 25 °C.
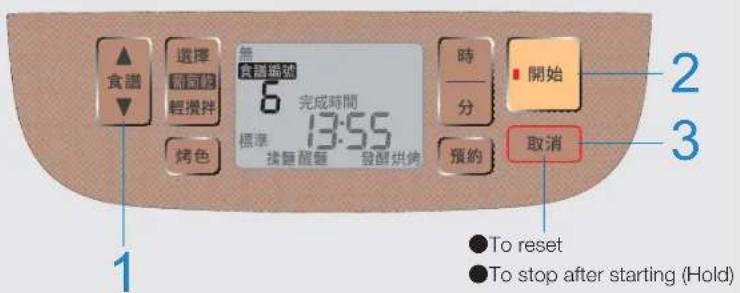
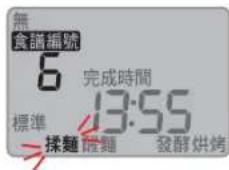
1 Select menu "6"
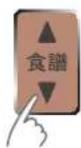
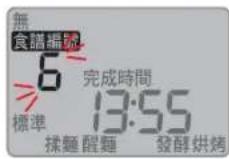
■ To add raisins and other ingredients
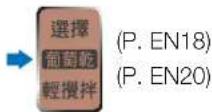
■ To select crust colour
2 Start
3 Press 取消 (Cancel) when you hear the beep sound. Take out the bread pan and cool it down for about 2 min. Then
take out the bread
60 minutes bread
Time required: about 1 h
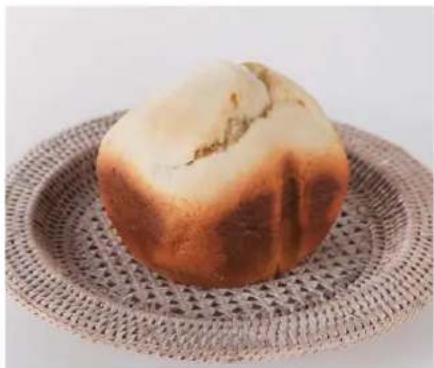
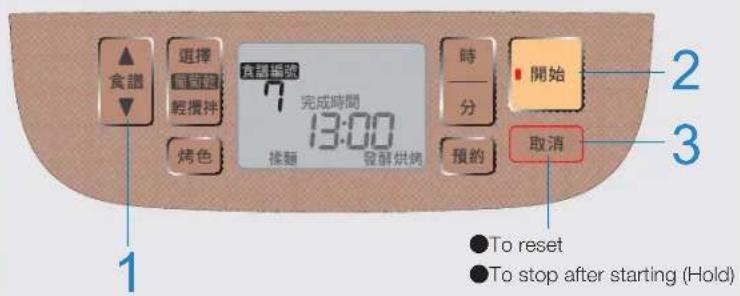
① Add 30g (mL) warm water to fully dissolve the 4.2 g (less than 1½ tsp) dried yeast until there are no particles. ② Install blade in the bread pan. ③ Put the flour and other ingredients (except ① and warm water) into the bread pan. ④ Put the bread pan into the main body, and then add in① and warm water.
Ingredients
60 minutes bread
| Warm water* | 30 g (mL) |
| Instant dry yeast 4.2 | g (11⁄2 tsp) |
| High-gluten flour 280 | g |
| Butter 25 | g |
| Granulated sugar 24 | g (2 tbsp) |
| Milk powder 12 | g(2 tbsp) |
| Salt 5 | g (1 tsp) |
| Eggs (evenly mixed) 25 | g |
| Warm water* | 150 g (mL) |
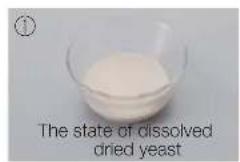
1 Select menu "7"
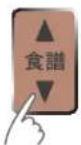
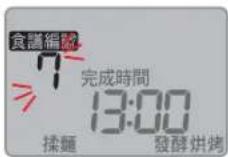
2 Start
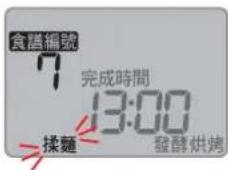
3 Press 取消 (Cancel) when you hear the beep sound. Take out the bread pan and cool it down for about 2 min. Then take out the bread
Rice bread
Time required: about 4 h
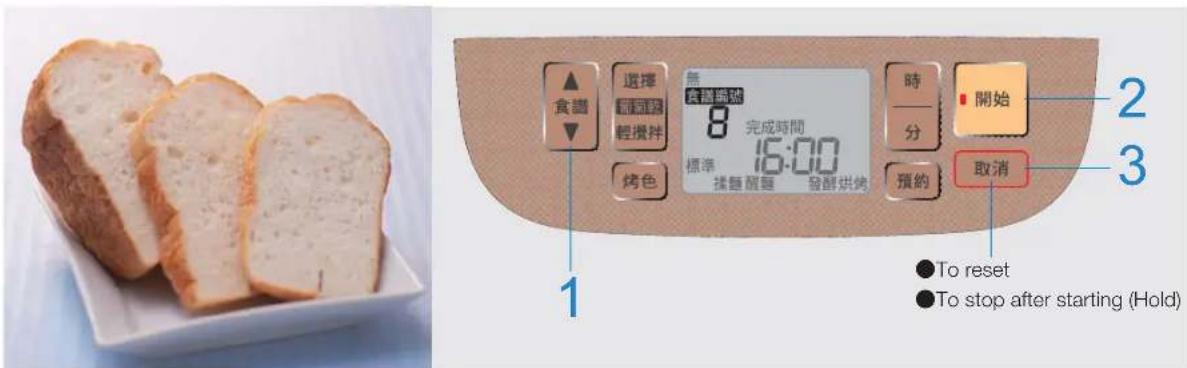
① Install blade in the bread pan. ② Add flour, water and other ingredients (except instant dry yeast) in the bread pan. ③ Put the bread pan into the main body and place instant dry yeast in the yeast dispenser.
Ingredients Rice bread
| High-gluten flour 230 | g |
| Cold rice (white rice) 100 | ~ 120 g |
| Butter | 10 g |
| Granulated sugar 18 | g (1 1/2 tbsp) |
| Milk powder 6 | g (1 tbsp) |
| Salt 5 | g (1 tsp) |
| Waler* | 160 g (ml.) |
| Instant dry yeast 2.1 | g(3⁄4 tsp) |
*Use 5 °C cold water and reduce the amount of water by 10 g (mL) if the room temperature is above 25 °C.
● You may also use brown rice or saffron rice to substitute rice. ● The height and taste of bread may vary depending on rice quantity. ● The more rice added, the softer the baked bread will be. (Please follow the above list for the portion besides rice) ● You may use timer function. But do not use cooked rice that has been stored (or defrosted) for more than one day. - Keep flours in a refrigerator for cooling when room temperature is above 30 °C. ● Rice may remain in granule form.
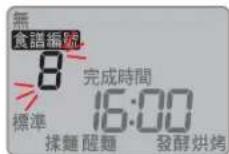
1 Select menu "8"
■ To add raisins and other ingredients
■ To select crust colour

■ To set timer for completion time
2 Start
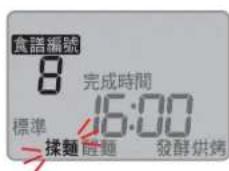
3 Press 取消 (Cancel) when you sound. Take out the bread pa for about 2 min. Then take out the bread
● Rice bread has a high content of water and may deteriorate easily. Please eat it as soon as possible. (Summer: within a day Winter: within two days)
French rice bread/
French bread
Time required:
French rice bread about 4 h and 40 min
French bread about 5 h
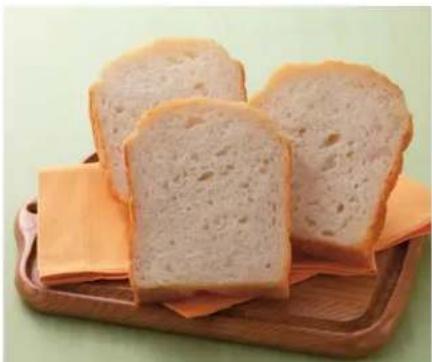
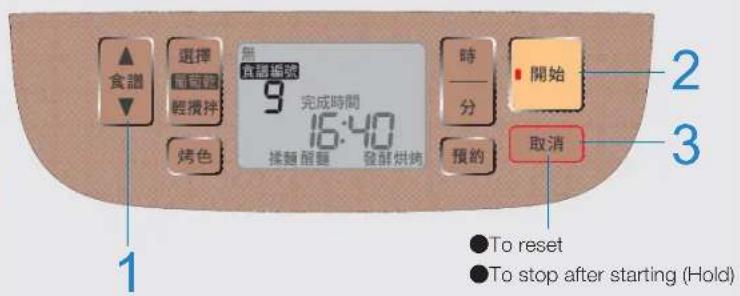
Compared with other bread, French rice bread/French bread may be hard to be taken out from the bread pan. Please take out the bread according to the following Step 3.
Preparations
① Install blade in the bread pan. ② Add flour, water and other ingredients (except instant dry yeast) in the bread pan. ③ Put the bread pan into the main body and place instant dry yeast in the yeast dispenser.
(P. EN16)
Ingredients French rice bread
| High-gluten flour 210 | g |
| Cold rice (white rice) 80 | g |
| Granulated sugar 6 | g ( 1/2 tbsp) |
| Salt 5 | g (1 tsp) |
| Cold water (5 °C)* | 150 g (mL) |
| Instant dry yeast 2.1 | g ( 3/4 tsp) |
* Reduce water by 10 g (mL) when the room temperature is above 25 °C.
● You may also use brown rice or mixed grains to substitute rice. ● The height and taste of bread may vary depending on rice quantity. ● The more rice added, the softer the baked bread will be. (Please follow the above list for the portion besides rice) ● You may use timer function. But do not use cooked rice that has been stored (or defrosted) for more than one day. ● Bread has a relatively poor quality when the room temperature is above 30 °C. ●Rice may remain in granule form. ●French rice bread has a high content of water and may deteriorate easily. Please eat it as soon as possible. (Summer: within a day Winter: within two days)
French bread
| High-gluten flour 225 | g |
| Low-gluten flour 25 | g |
| Salt 5 | g (1 tsp) |
| Cold water (5 °C)* | 190 g (mL) |
| Instant dry yeast 1.4 | g (1⁄2 tsp) |
* Reduce water by 10 g (mL) when the room temperature is above 25 °C.
● Bread has a relatively poor quality when the room temperature is above 30°C.
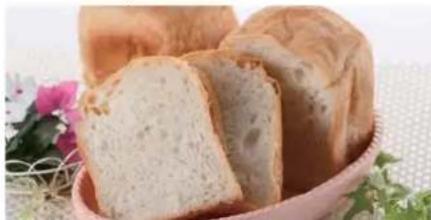
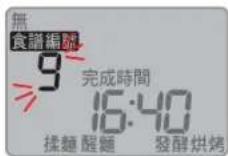
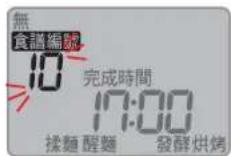
1 Select menu "9" "10"
■ To add raisins and other ingredients
Select Raisins Light stirring (P. EN18) (P. EN20)
■ To set timer for completion time
Reservation (P. EN22)
2 Start
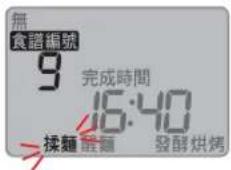
3 Press Cancel when you hear the beep sound. Take out the bread pan and cool it down for about 2 min. Then
take out the bread
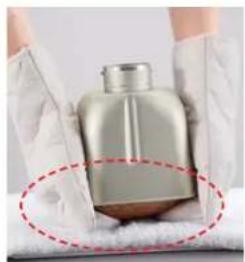
■ Take out the bread pan.
Tap the bread pan downward hard on a towel with your hands against the table.
(See the figure on the right)
- Please check if the kneading blade remains at the bottom of the blade.
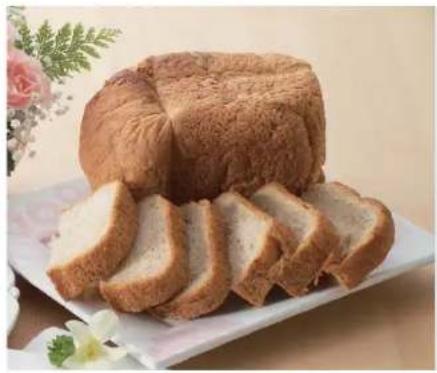
Whole wheat bread
Time required: about 5 h
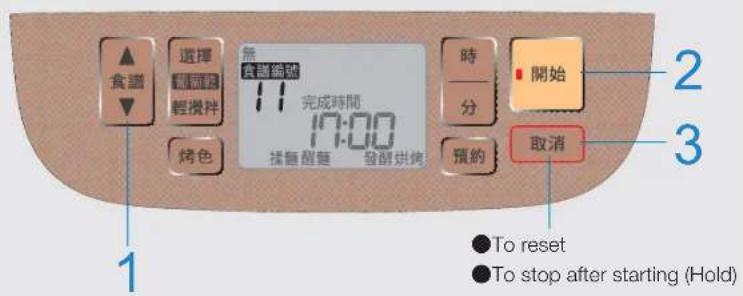
① Install blade in the bread pan. ② Add flour, water and other ingredients (except instant dry yeast) in the bread pan. ③ Put the bread pan into the main body and place instant dry yeast in the yeast dispenser.
Ingredients
Whole wheat bread (whole wheat flour 50%)
| Whole wheat flour (for breads)*1 | 125 g |
| High-gluten flour 125 | g |
| Butter | 10 g |
| Granulated sugar 18 | g (1 1/2 tbsp) |
| Milk powder 6 | g (1 tbsp) |
| Salt 5 | g (1 tsp) |
| Cold water (5 °C)*7 | 210 g (mL) |
| Instant dry yeast 2.8 | g (1 tsp) |
*1 Do not use the whole wheat flour which is exclusive for making dim sum bread (low-gluten flour). *2 Reduce water by 10 g (mL) when the room temperature is above 25 °C.
● Bread has a relatively poor quality when the room temperature is above 30 °C. * Bread shape and swelling degree vary according to the types of whole wheat flour.
1 Select menu "11"
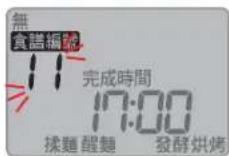
■ To add raisins and other ingredients ■ To set timer for completion time
2 Start
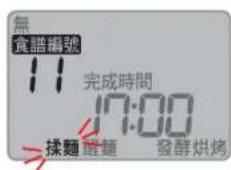
3 Press Cancel when you hear the beep sound. Take out the bread pan and cool it down for about 2 min. Then
take out the bread
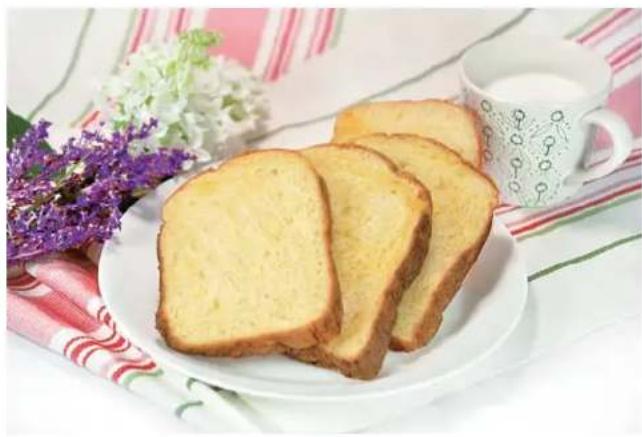
Hokkaido bread
① Make the custard crust and store it in the refrigerator.
(P. EN33①~⑦)
② Install blade in the bread pan. ③ Add flour, water and other ingredients (except instant dry yeast) in the bread pan. ④ Put the bread pan into the main body and place instant dry yeast in the yeast dispenser.
Ingredients
Hokkaido bread
| High-gluten flour 230 | g |
| Butter 20 | g |
| Granulated sugar 30 | g (2 1/2 tbsp) |
| Milk powder 12 | g (2 tbsp) |
| Salt 5 | g (1 tsp) |
| Water* | 160 g (ml) |
| Instant dry yeast 2.8 | g (1 tsp) |
* Use 5 °C cold water and reduce the amount of water by 10 g (mL) if the room temperature is above 25 °C.
Custard crust
| A | High-gluten | flour | 10 |
| Granulated | sugar | 30(21⁄2 tbsp) | |
| One egg + Milk 70 | g | ||
| Butter 20 | g | ||
| Vanilla essence Small quantity | |||
■ If Cancel is accidentally pressed in Step 3
press Start within 10 min to recover it.
This can only be performed once. Invalid if any other button is pressed
■ Beep sound will be heard and it will restart 10 min later in Step 3 even if the operation is not yet completed.
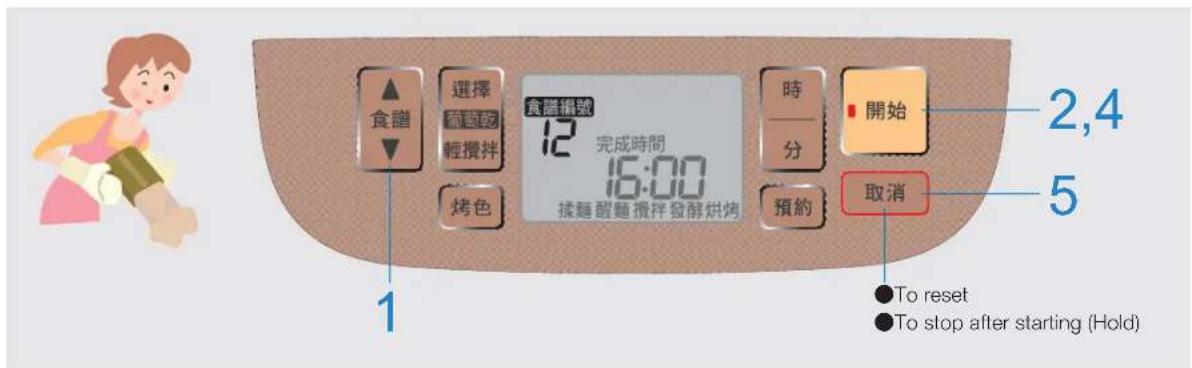
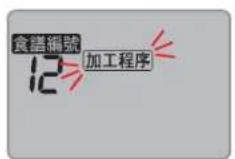
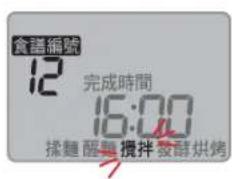
1 Select menu "12"
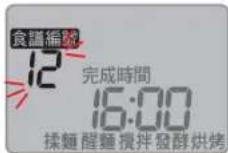
Start
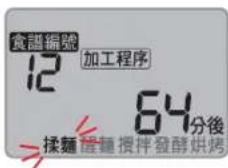
* It may take 84 or 89 minutes, depending on the room temperature.
3 Open the lid when you hear the beep sound. Add the custard crust within 10 min
● Cut the custard crust into 2-3 pieces, and cover the upper dough with them.
- Do not press 取消 (Cancel)
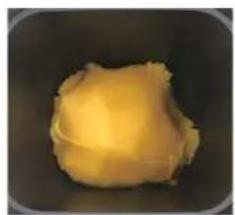
4 Close the lid. Restart
5 Press 取消 (Cancel) when you hear the beep sound. Take out the bread pan and cool it down for about 2 min. Then take out the bread
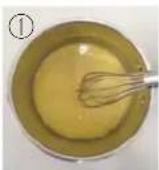
How to make custard crust
Making the crust
① Put the materials of A into the pot and stir them thoroughly.
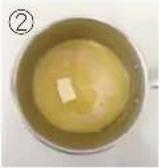
② Heat the mix at medium heat for 1 minute, and add butter, melt it, and then stir well.
* Stir the mix while heating. Otherwise, it may form lumps.
③ Add vanilla essence, and then stir well.
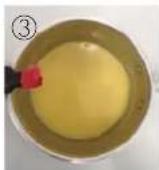
④ Heat it at medium heat and stir it well until the mix can be lumped together. (about 2 minutes)
* You can adjust the heating time depending on your cooker.
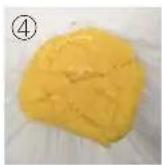
Rolling flat
⑤ Use a rolling pin to roll it into a 20 cm × 20 cm square.
* Cover the dough with a plastic wrap for the convenience of rolling.
⑥ When it cools down to body temperature, store it in the refrigerator for at least 30 minutes.
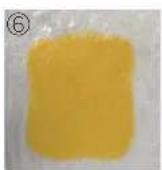
Tips for making hokkaido bread!
* The custard crust will be hardened after being stored in the refrigerator for long time. In this case, roll the crust again to make better bread.

Brioche
Time required: about 3 h and 15 min
① Install blade in the bread pan. ② Add flour, water and other ingredients (except instant dry yeast and frozen butter) in the bread pan. ③ Put the bread pan into the main body and place instant dry yeast in the yeast dispenser.
Ingredients
| High-gluten flour 170 | g |
| Low-gluten flour 30 | g |
| Butter 30 | g |
| Granulated sugar 24 | g (2 tbsp) |
| Milk powder 6 | g (1 tbsp) |
| Salt 3.8 | g (%4 tsp) |
| A mix of one egg, one yolks and cold water (5 °C) | 150 g |
| Instant dry yeast 2.1 | g (%4 tsp) |
| Frozen butter (for adding later) | 40 g |
| (Unsalted butter is recommended) | |
● Bread has a relatively poor quality when the room temperature is above 30 °C.
■ Prepare the frozen butter ! (for adding later) ①Cut the butter (for adding later) into 1 cm pieces. ② Wrap the butter with a plastic wrap or put them in a closed container to avoid the cream stick together. ③Store them in a refrigerator before adding them. * When the room temperature is over 25°C, be sure to keep them in a refrigerator at least one night (10 h). ■ If 取消 (Cancel) is accidentally pressed in Step 3
Press Start within 10 min to recover it. (This can only be performed once. Invalid if any other button is pressed.)
■10 min after Step 3 is started.
Even without adding butter, the beeper will sound and the unit will restart. (And then even after more butter is added, it will not mix the ingredients anymore. Do not add butter.)
■Baking is also possible even if butter (for adding later) is added at the beginning. Add all ingredients except instant dry yeast in the bread pan, and press Start. (Steps 1, 2 and 5) *The flavor, taste and swelling extent may vary.
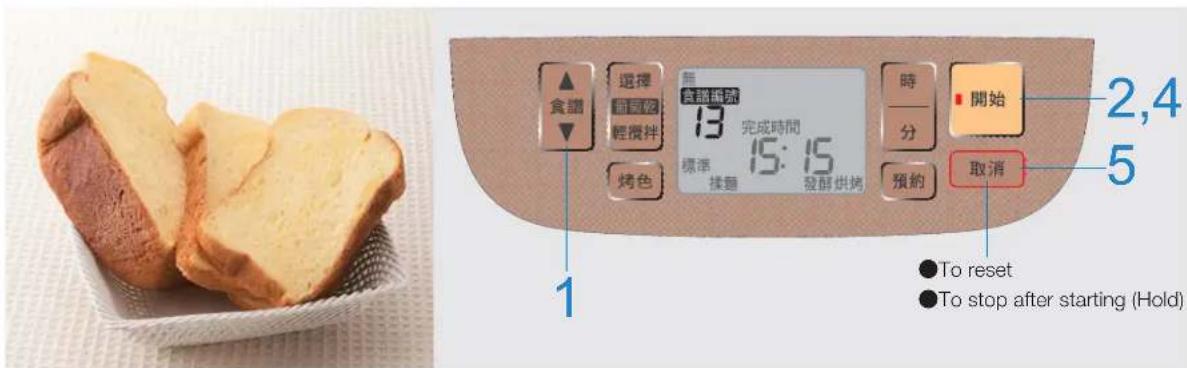
1 Select menu "13"
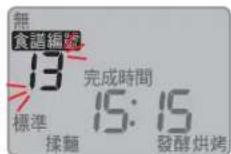
■ To add raisins and other ingredients
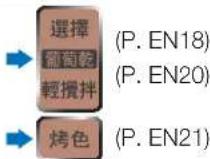
■ To select crust colour
Start
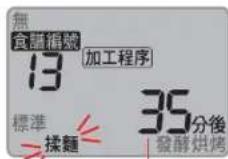

"45 min later" is displayed when the room temperature is high.
3 Open the lid when you hear the beep sound. Unwrap the plastic wrap and add in the cut frozen butter.
- Do not press Cancel
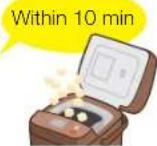
4 Close the lid Restart
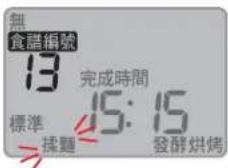
5 Press Cancel when you hear the beep sound. Take out the bread pan and cool it down for about 2 min. Then take out the bread
* The bread may become deformed upon over-exertion.
Marble bread
Time required: about 4 h
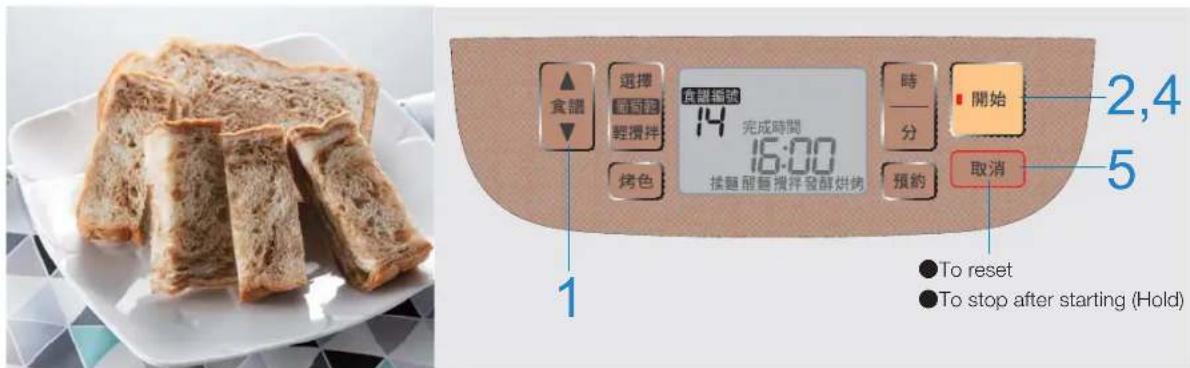
① Install blade in the bread pan. ② Add flour, water and other ingredients (except instant dry yeast and instant coffee powder) in the bread pan. ③ Put the bread pan into the main body and place instant dry yeast in the yeast dispenser.
Ingredients
| High-gluten flour 250 | g |
| Granulated sugar 18 | g (11⁄2 tbsp) |
| Salt 5 | g (1 tsp) |
| Milk powder 6 | g (1 tbsp) |
| Butter 10 | g |
| Water* | 190 g (mL) |
| Instant dry yeast 2.8 | g (1 tsp) |
| For adding later | |
| Instant coffee powder | 3 g |
- Do not use roasted coffee beans. ■If 取消 (Cancel) is accidentally pressed in Step 3 Press 開始 (Start) within 10 min to recover it. (This can only be performed once. Invalid if any other button is pressed.) ■5 min after Step 3 is started Even without adding instant coffee powder, the beeper will sound and the unit will restart. After than even instant coffee powder is added, it will not mix the ingredients anymore. So do not add in. ■The marble patterns vary from each baking.
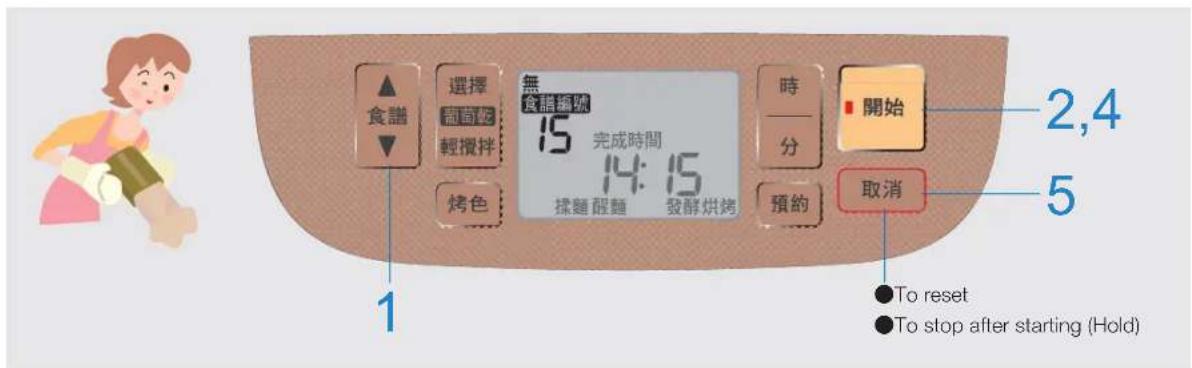
1 Select menu "14"
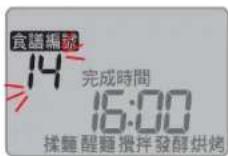
2 Start
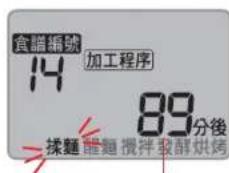
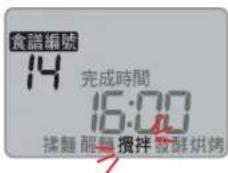
"94 min later" is displayed when the room temperature is high.
"69 min later" is displayed when the room temperature is low.
3 Open the lid when you hear the beep sound. Within 5 min
Place the instant coffee powder on the bottom of bread pan. *
- Do not press 取消 (Cancel)
4 Close the lid Restart
* Do not sprinkle the instant coffee powder on the dough. Place the instant coffee powder under the dough. (Take the dough out or move the dough to a corner. Place the instant coffee powder on the bottom of bread pan, and put the dough back.)
5 Press 取消 (Cancel) when you hear the beep sound. Take out the bread pan and cool it down for about 2 min. Then take out the bread
Pineapple bread
① Put cookie dough in the refrigerator after it is made. (P. EN37 ① ~ ⑥)
② Install blade in the bread pan. ③ Add flour, water and other ingredients (except instant dry yeast) in the bread pan. ④ Put the bread pan into the main body and place instant dry yeast in the yeast dispenser.
Ingredients
| High-gluten flour 150 | g |
| Butter 15 | g |
| Granulated sugar 18 | g (11⁄2 tbsp) |
| Milk powder 6 | g (1 tbsp) |
| Salt | 2.5 g (1⁄2 tsp) |
| Cold water (5°C) | 1 g (ml) 0 |
| Instant dry yeast 2.1 | g (3⁄4 tsp) |
| Cookie dough (crust of pineapple bread) | |
| Butter 50 | g |
| Granulated sugar 40 | g |
| Eggs (evenly mixed) 25 | g |
| Low-gluten flour 100 | g |
| Baking powder 3 | g |
| Vanilla essence | Small quantity |
| Granulated sugar (for final processing) | 2~3 tsp |
- Be sure to observe the foregoing amount. Excessive amount may cause the bread to spill out of the bread pan, overcooked bread, burning smells and smoke. If 取消 (Cancel) is accidentally pressed in Step 3 Press 開始 (Start) within 10 min to recover it. This can only be performed once. Invalid if any other button is pressed. Under step 3, even if the process hasn't been completed, a beep sound will be heard and the machine will restart operation after 15 min. ■ Add different ingredients to make bread of different flavors in Step 3 (15 min). → P. EN49, EN50
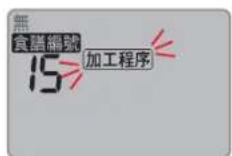
1 Select menu "15"
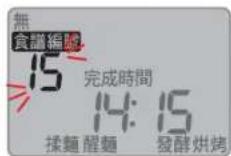
■ To add raisins and other ingredients
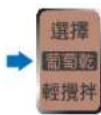
(P. EN18)
Start
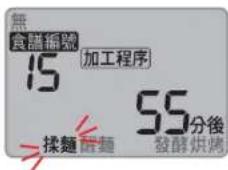
Roll the cookie dough flat when only 10 min of process work are left. (P. EN37 ⑦ ~ ⑧)
3
Open the lid when you hear the beep sound.
Within 15 min
Add the cookie dough.
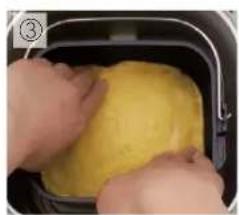
① Place the bread dough in the middle of the bread pan again. ② Place the cookie dough on the bread dough with the egg-coated side facing downward. ③ Slightly press the sides of the dough (do not press hard) ④ Sprinkle granulated sugar on top of the cookie dough.
- Do not press 取消 (Cancel)
4
Close the lid. Restart.
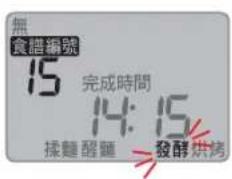
Press Cancel when you hear the beep sound. Take out the bread pan and cool it down for about 2 minutes. Then take out the bread.
* The bread may become deformed if you exert too much force.
Method for making cookie dough
Making the dough
① Mix low-gluten flour and baking powder and sift them together. ② Use a wooden spoon to mix the butter at room temperature until it becomes creamy.
③ Add granulated sugar in small quantities 2 to 3 times. Mix the butter after each addition until the butter becomes whitish and smooth.
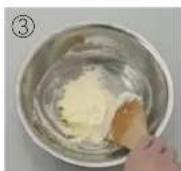
④ Add eggs in small quantities 3 to 4 times. Mix thoroughly after each addition. Finally, add the vanilla essence. * Reserve 1/2 teaspoon of the egg liquid.
⑤ Add the flour mixture from Step ① and mix evenly until the granules of flour disappear.
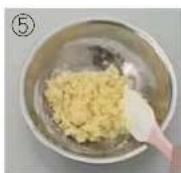
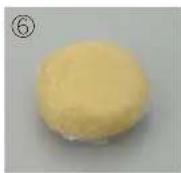
⑥ Shape the dough into a round ball, cover with plastic wrap, and refrigerate for over 20 minutes.
Rolling out flat
⑦ Use a rolling pin to roll the dough into a flat circle with a diameter of 14 to 15 cm. * Cover the dough with plastic wrap for easier rolling.
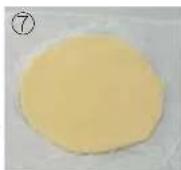
⑧ Brush one side of the dough with the reserved egg liquid (1/2 teaspoon).
Tips for making pineapple bread!
- You may also cut patterns on the surface of the cookie dough. Use a bamboo stick to cut patterns to a depth of no more than 1 mm.
The cookie dough may crack and slide down if the patterns are cut too deep.
- Do not put in the cookie dough before it is flexible and bendable enough. This helps the cookie dough to form a better shape.

Red bean bread
Time required: about 2 h and 15 min
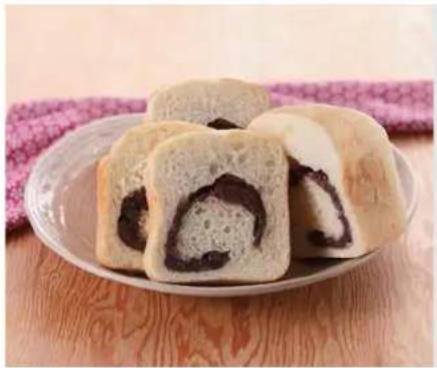
① Install blade in the bread pan. ② Add flour, water and other ingredients (except instant dry yeast) in the bread pan. ③ Put the bread pan into the main body and place instant dry yeast in the yeast dispenser.
Ingredients
Red bean bread
| A | High-gluten flour 180 | g |
| Butter 15 | g | |
| Granulated sugar 18 | g (11⁄2 tbsp) | |
| Milk powder 6 | g (1 tbsp) | |
| Salt 2.5 | g (1⁄2 tsp) | |
| Egg (evenly mixed) 25 | g | |
| Cold water (5°C)* | 120 g (mL) | |
| Instant dry yeast 2.1 | g (3⁄4 tsp) | |
Red bean paste (about 20 °C) 100 g
* Use 5 °C cold water and reduce the amount of water by 10 g (mL) if the room temperature is above 25 °C.
● The fermentation condition of bread becomes poor with more red bean paste added.
(The maximum volume of red bean paste can be 150 g). The temperature of red bean paste must be about 20 °C.
(Otherwise the fermentation of bread will be impacted.)
● The gap between the dough and red bean paste is reserved for the fermentation of bread.
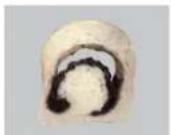
If the dough is too sticky to roll... Sprinkle some high-gluten flour on the hand or rolling pin.
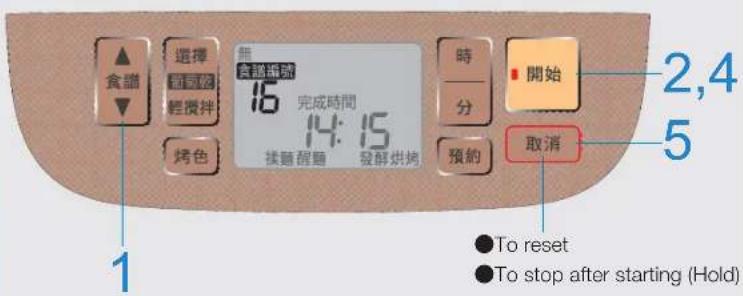
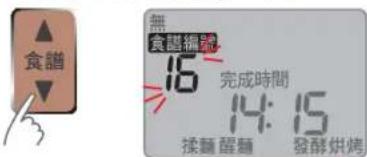
1 Select menu "16"
3 When you hear beep sound, open the lid and take out the dough from the bread pan, and remove the blade.
- Do not press 激(Cancel)
①Roll the dough into a long and thin shape (about 8 cm × 30 cm). (The width of dough should be shorter than that of the bread pan) ②Place the red bean paste evenly on the dough. (To avoid paste running out, leave a distance about 1 cm from the edge of dough) ③Roll the dough from the side nearby, extrude any air inside the dough. The end seam of dough should be stuck tightly. ④ Place the dough with the end seam facing down into the bread pan.
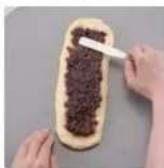
4 Close the lid Restart
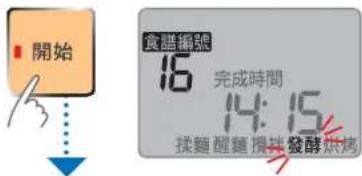
5 Press 取消 (Cancel) when you hear the beep sound. Take out the bread pan and cool it down for about 2 min. Then take out the bread
*The bread may become deformed upon over-exertion.
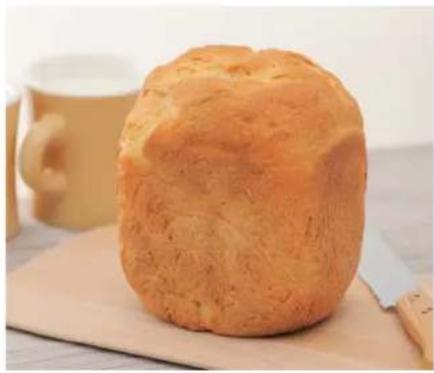
Half bread
Time required: about 3 h and 35 min
① Install blade in the bread pan. ② Add flour, water and other ingredients (except instant dry yeast) in the bread pan. ③ Put the bread pan into the main body and place instant dry yeast in the yeast dispenser.
Ingredients
| Half bread | |
| High-gluten flour 180 | g |
| Butter 10 | g |
| Granulated sugar 12 | g (1 tbsp) |
| Salt 2.5 | g (1⁄2 tsp) |
| Milk powder 6 | g (1 tbsp) |
| Water* | 140 g (mL) |
| Instant dry yeast 2.1 | g (3⁄4 tsp) |
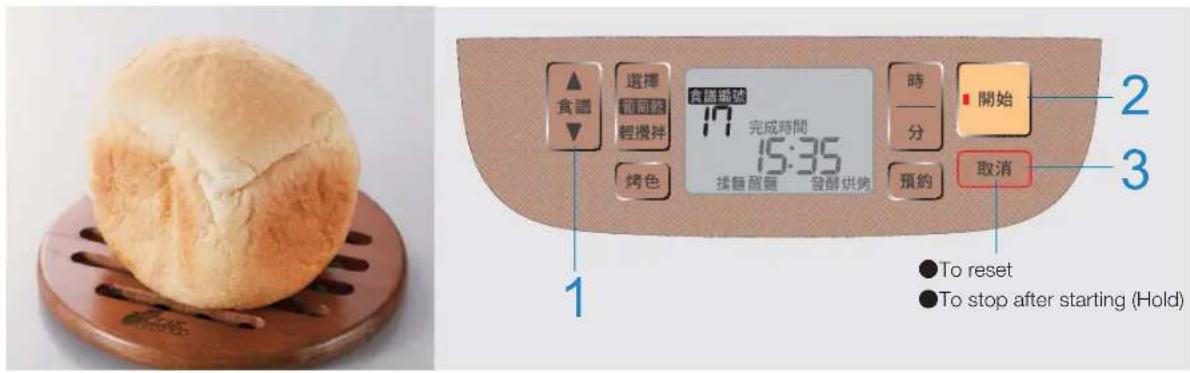
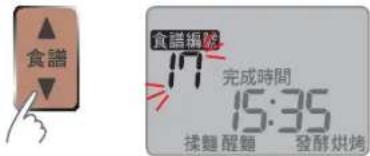
1 Select menu "17"
■ To set timer for completion time
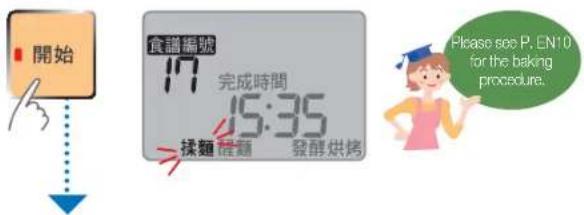
2 Start
3 Press 取消 (Cancel) when you hear the beep sound. Take out the bread pan and cool it down for about 2 min. Then take out the bread
Rice flour bread
Time required: about 2 h and 30 min
① Install blade in the bread pan. ② Add flour, water and other ingredients (except instant dry yeast) in the bread pan. ③ Put the bread pan into the main body and place instant dry yeast in the yeast dispenser.
Ingredients
| Rice flour 50 | g |
| High-gluten flour 200 | g |
| Butter 20 | g |
| Granulated sugar 18 | g (11⁄2 tbsp) |
| Milk powder 6 | g (1 tbsp) |
| Salt 5 | g (1 tsp) |
| Water* | 190 g (mL) |
| Instant dry yeast 4.2 | g (11⁄2 tsp) |
● Using timer may deteriorate the bread quality when the room temperature is over 25 °C. (P. EN90) - Be sure to store rice flour and other ingredients in the refrigerator when the room temperature is over 30 °C.
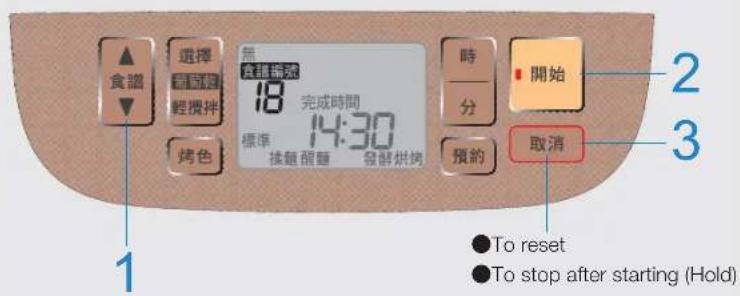
1 Select menu "18"
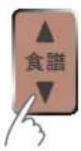
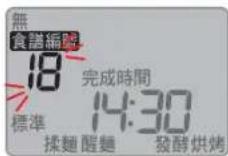
■ To add raisins and other ingredients
Raisins (P. EN18) Lightly mix
■ To select crust colour
→ Crust colour (P. EN21)
■ To set timer for completion time
Timer (P. EN22)
2 Start
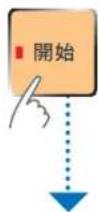
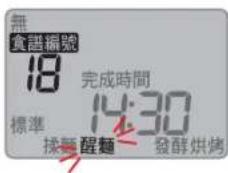
3 Press Cancel when you hear the beep sound. Take out the bread pan and cool it down for about 2 min. Then take out the bread
Various flavored bread
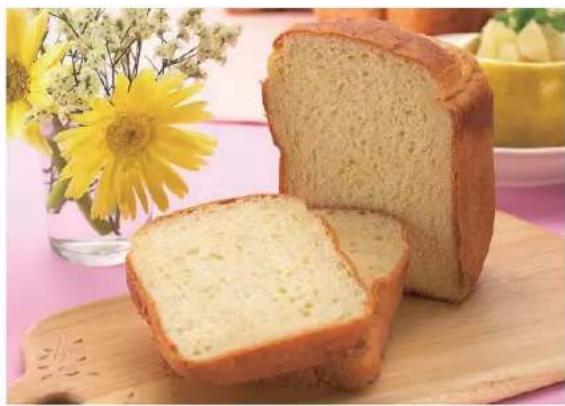
Bread with Danish flavor
Menu "1" Crust colour: dark
| High-gluten flour | 200 g |
| Low-gluten flour | 50 g |
| Butter (Unsalted butter is recommended) | 10 g |
| Granulated sugar 24 | g (2 tbsp) |
| Milk powder 6 | g (1 tbsp) |
| Salt 5 | g (1 tsp) |
| Eggs (evenly mixed) | 25 g |
| Cold water (5 °C) | 150 g (mL) |
| Instant dry yeast 2.1 | g (3⁄4 tsp) |
| * Frozen butter (chopped into 1 cm pieces and frozen in the refrigerator for 1 night) | 100 g |
* Use the Raisin function (P. EN18) → Manual feeding (P. EN19)
Dried fruit bread Menu "1"
| High-gluten flour 250 | g |
| Butter 10 | g |
| Granulated sugar 18 | g (1 1/2 tbsp) |
| Milk powder 6 | g (1 tbsp) |
| Salt 5 | g (1 tsp) |
| Water* | 200 g (mL) |
| Instant dry yeast 2.8 | g (1 tsp) |
| *Dried fruits (fig, apricot) (4 equal pieces) | 40 g each |
| *Dried fruits (cranberry) | 20 g |
* Reduce by 10 g (mL) when the room temperature is above 25 °C. (Cold water at a temperature of 5 °C) * Use the Raisin function (P. EN18) → Select Gentle stir (P. EN20)
Sunflower seed honey bread Menu "1" or Menu "5"
| High-gluten flour | 250 g |
| Butter | 15g |
| Granulated sugar 18 | g (1 1/2 tbsp) |
| Milk powder | 6 g (1 tbsp) |
| Salt 5 | g (1 tsp) |
| Honey | 21 g (1 tbsp) |
| Water* | 180 g (mL) |
| Instant dry yeast | 2.8 g (1 tsp) |
| *Sunflower seed | 20 g |
* Reduce by 10 g (mL) when the room temperature is above 25 °C. (Cold water at a temperature of 5 °C) * Use the Raisin function (P. EN18)
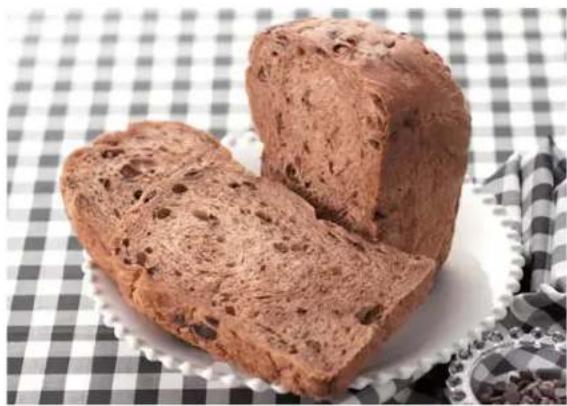
Pain de mie: chocolate bread Menu "2"
| High-gluten flour 230 | g |
| Butter 10 | g |
| Granulated sugar 18 | g (1 1/2 tbsp) |
| Milk powder 6 | g (1 tbsp) |
| Salt 5 | g (1 tsp) |
| Cocoa powder 6 | g (1 tbsp) |
| Water* | 190 g (mL) |
| Instant dry yeast 1.4 | g ( 1/2 tsp) |
| Chocolate bean (frozen in advance) 60 | g |
* Reduce by 10 g (mL) when the room temperature is above 25 °C. (Cold water at a temperature of 5 °C) * Use the Raisin function (P. EN18) Manual feeding (P. EN19) Select Gentle stir (P. EN20)
Pain de mie: Rich milky flavor Menu "2"
| High-gluten flour 250 | g |
| Butter 25 | g |
| Granulated sugar 18 | g (1 1/2 tbsp) |
| Salt 5 | g (1 tsp) |
| Water* | 150 g (mL) |
| Sweetened condensed milk 15 | g |
| Whipping cream(a butterfat content of about 47%) | 50 g |
| Instant dry yeast 1.4 | g ( 1/2 tsp) |
* Reduce by 10 g (mL) when the room temperature is above 25 °C. (Cold water at a temperature of 5 °C)
Pain de mie: Dairy-free Menu "2"
| High-gluten flour 250 | g |
| Shortening 10 | g |
| Granulated sugar 18 | g (1 1/2 tbsp) |
| Salt 5 | g (1 tsp) |
| Water* | 200 g (ml.) |
| Instant dry yeast 1.4 | g ( 1/2 tsp) |
* Reduce by 10 g (mL) when the room temperature is above 25 °C. (Cold water at a temperature of 5 °C)
Various flavored bread
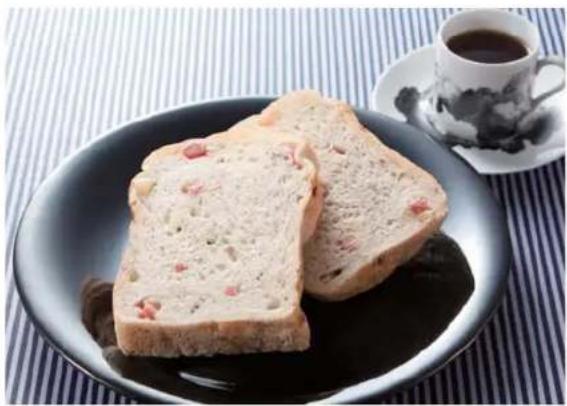
German potato flavored Yudane pain de mie Menu "3"
| Cold water (5 °C) *1 + Yudane*2 | 220 g |
| High-gluten flour 240 | g |
| Butter 15 | g |
| Granulated sugar 9 | g (3⁄4 tbsp) |
| Salt 5 | g (1 tsp) |
| Instant dry yeast 1.4 | g (1⁄2 tsp) |
| Black pepper 1 | g |
| Celery 0.5 | g |
| Foreign flavored condiments (clear soup seasoning) | 1 g |
| *Bacon (cut into 1 cm pieces) 50 | g |
| * Potato (cut into 1 cm pieces and boiled to a moderate degree) | 30 g |
| * Onion (cut into 1 cm pieces and boiled to a moderate degree) | 20 g |
* 1 Reduce by 10 g (mL) when the room temperature is above 25 °C.
*2 How to make Yudane (P. EN24)
* Use 葡萄乾 (Raisin) function (P. EN18) → Manual feeding (P. EN19)
Select 輕攪拌 (Gentle stir) (P. EN20)
Corn Yudane pain de mie Menu "3"
| Cold water (5 °C) *1 + Yudane*2 | 170 g |
| High-gluten flour 240 | g |
| Butter 15 | g |
| Granulated sugar 18 | g (1 1/2 tbsp) |
| Milk powder 6 | g (1 tbsp) |
| Salt 5 | g (1 tsp) |
| Instant dry yeast 1.4 | g ( 1/2 tsp) |
| Milk 60 | g (about 60 mL) |
| Celery 0.5 | g |
| * Corn (kernels) | 60 g |
| High-gluten flour (Flour the corn kemels before adding them in to dry the kernels completely) | An appropriate quantity |
* 1 Reduce by 10 g (mL) when the room temperature is above 25 °C. * 2 How to make Yudane (P. EN24)
* Use 葡萄乾 (Raisin) function (P. EN18) → Manual feeding (P. EN19)
Select 輕攪拌 (Gentle stir) (P. EN20)
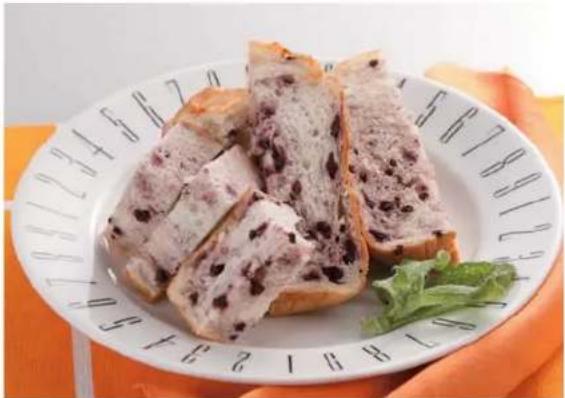
Yudane pain de mie with cream cheese and blueberry Menu "3"
| Cold water (5 °C) *1 + Yudane*2 | 220 g |
| High-gluten flour 240 | g |
| Butter 15 | g |
| Granulated sugar 18 | g (1 1/2 tbsp) |
| Milk powder 6 | g (1 tbsp) |
| Salt 5 | g (1 tsp) |
| Instant dry yeast 1.4 | g (1 1/2 tsp) |
| * Cream cheese (chopped into 1 cm pieces and frozen in the refrigerator) | 50 g |
| * Dried blueberry | 40g |
* 1 Reduce by 10 g (mL) when the room temperature is above 25 °C.
* 2 How to make Yudane (P. EN24)
* Use 葡萄乾 (Raisin) function (P. EN18) → Manual feeding (P. EN19)
Select 輕攪拌 (Gentle stir) (P. EN20)
Yudane pain de mie with sweet potato and sesame Menu "3"
| Cold water (5°C)*1 + Yudane*2 | 220 g |
| High-gluten flour 240 | g |
| Butter 15 | g |
| Granulated sugar 18 | g (1 1/2 tbsp) |
| Milk powder 6 | g (1 tbsp) |
| Salt 5 | g (1 tsp) |
| Instant dry yeast 1.4 | g (1 1/2 tsp) |
| * Sweet potato (cut into 1 mm pieces and boiled to a moderate degree) | 80 g |
| Cinnamon powder (sprinkled on the cooked sweet potato) | 1 g |
| * Black sesame seeds | 10 g |
* 1 Reduce by 10 g (mL) when the room temperature is above 25 °C. * 2 How to make Yudane (P. EN24)
* Use the Raisin function (P. EN18) → Manual feeding (P. EN19)
Select Gentle stir (P. EN20)
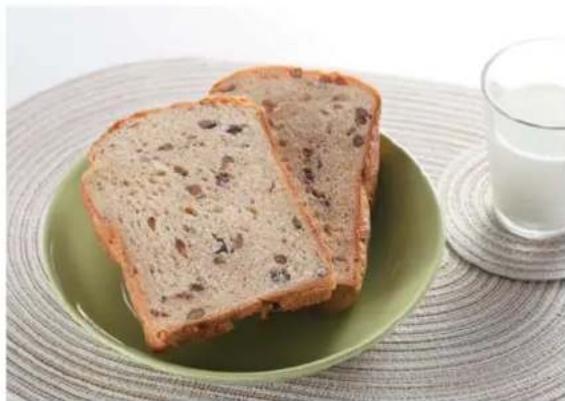
Chiffon pain de mie with beans powder and sweet natto Menu "4"
| High-gluten flour 200 | g |
| Low-gluten flour | 30 g |
| Bean powder | 20 g |
| Butter | 20 g |
| Granulated sugar 24 | g (2 tbsp) |
| Milk powder 6 | g (1 tbsp) |
| Salt 5 | g (1 tsp) |
| Water* | 200 g (mL) |
| Instant dry yeast 1.4 | g (1⁄2 tsp) |
| * Sweet natio | 70 g |
* Reduce by 10 g (mL) when the room temperature is above 25 °C. (Cold water at a temperature of 5 °C) * Use the Raisin function (P. EN18) → Select Gentle stir (P. EN20)
Chiffon pain de mie with tomato and basil Menu "4"
| High-gluten flour 200 | g |
| Low-gluten flour | 30 g |
| Butter | 20 g |
| Granulated sugar 24 | g (2 tbsp) |
| Milk powder 6 | g (1 tbsp) |
| Salt 5 | g (1 tsp) |
| Water* | 100 g (ml) |
| Instant dry yeast 1.4 | g ( 1/2 tsp) |
| Tomato sauce (salt free) | 90 g (about 90 mL) |
| Dried basil leaves | 0.3 g |
* Reduce by 10 g (mL) when the room temperature is above 25 °C. (Cold water at a temperature of 5 °C)
Chiffon pain de mie with fermented ginger Menu "4"
| High-gluten flour 200 | g |
| Low-gluten flour | 50 g |
| Butter | 20 g |
| Granulated sugar 24 | g (2 tbsp) |
| Milk powder 6 | g (1 tbsp) |
| Salt 5 | g (1 tsp) |
| Water* | 140 g (ml) |
| Instant dry yeast 1.4 | g (1⁄2 tsp) |
| Ginger (ground) | 20 g |
| Fermented | 50 g (about 50 mL) |
* Reduce by 10 g (mL) when the room temperature is above 25 °C. (Cold water at a temperature of 5 °C)

60 minutes bread with brown sugar and rice flour Menu "7"
| Warm water* | 30 g (mL) |
| Instant dry yeast 4.2 | g (1 1/2 tsp) |
| High-gluten flour 230 | g |
| Rice flour 50 | g |
| Butter 25 | g |
| Brown sugar (Powder) 34 | g (4 tbsp) |
| Milk powder 12 | g (2 tbsp) |
| Salt 5 | g (1 tsp) |
| Eggs (evenly mixed) 25 | g |
| Warm water* | 150 g (mL) |
*Warm water about 35 ~ 40 °C.
●Do not use the glutinous rice flour.
●Decorate it with sugar-coating. Add 25 g of brown sugar powder and 2.5 g (less than 1/2 tsp) water into a small bowl, put the bowl in 60 °C water, stir the sugar well in the bowl against the hot water outside, and then pour the sugar paste onto the bread.
60 minutes bread with white miso and shaddock Menu "7"
| Warm water* | 30 g (mL) |
| Instant dry yeast 4.2 | g ( 1/2 tsp) |
| High-gluten flour 280 | g |
| Butter 25 | g |
| Granulated sugar 24 | g (2 tbsp) |
| Salt 2.5 | g ( 1/2 tsp) |
| Eggs (evenly mixed) 25 | g |
| Warm water* | 150 g (mL) |
| White miso 25 | g |
| Shaddock (frozen green peels of shaddock (mashed)) | 2.5 g |
*Warm water about 35 ~ 40 °C.
Various flavored bread
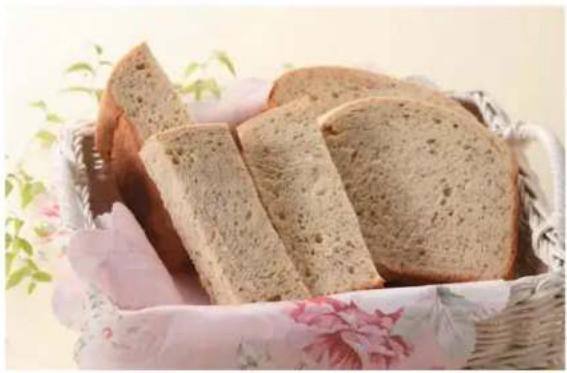
60 minutes bread with black tea and orange Menu "7"
| Warm water* | 30 g (mL) |
| Instant dry yeast 4.2 | g (1 1/2 tsp) |
| High-gluten flour 280 | g |
| Butter 25 | g |
| Granulated sugar 24 | g (2 tbsp) |
| Milk powder 12 | g (2 tbsp) |
| Salt 5 | g (1 tsp) |
| Eggs (evenly mixed) 25 | g |
| Warm water* | 90 g (mL) |
| 100% orange juice (warm) 60 | g (about 60 mL) |
| Orange peels (ground) | 5 g (amount for 1/4 size) |
| Black tea leaves (chopped) 2 | g |
*Warm water about 35 ~ 40 °C.
Whole wheat sesame 60 minutes bread Menu "7"
| Warm water* | 30 g (mL) |
| Instant dry yeast 4.2 | g (1 1/2 tsp) |
| High-gluten flour 230 | g |
| Whole wheat flour 50 | g |
| Butter 15 | g |
| Granulated sugar 18 | g (1 1/2 tbsp) |
| Milk powder 12 | g (2 tbsp) |
| Salt 5 | g (1 tsp) |
| Eggs (evenly mixed) 25 | g |
| Warm water* | 160 g (mL) |
| White sesame | 10 g |
*Warm water about 35 ~ 40 °C.
Fruit juice bread Menu "6"
| High-gluten flour 250 | g |
| Butter | 25 g |
| Granulated sugar | 8 g (2 tsp) |
| Milk powder | 12 g (2 tbsp) |
| Salt 3.8 | g (3⁄4 tsp) |
| Eggs (evenly mixed) | 50 g |
| 100% tomato fruit juice(stored in a refrigerator)* | 120 g (about 120 mL) |
| Instant dry yeast 4.2 | g (11⁄2 tsp) |
| *Assorted vegetables(Dry it through trickling and cool)down to room temperature | 70 g |
* Reduce by 10 g (mL) when the room temperature is above 25 °C. * Use Raisin function (P. EN18)
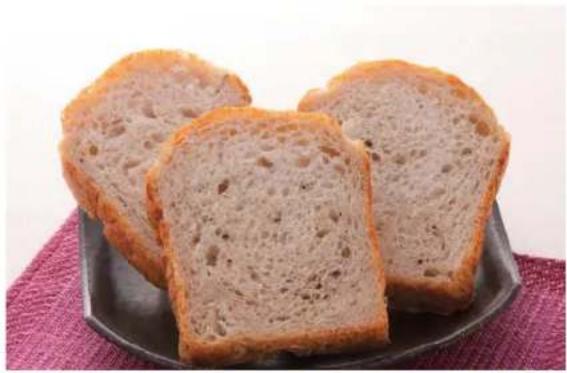
Rustic style French rice bread with mixed grains Menu "9"
| High-gluten flour 190 | g |
| Rye flour | 20 g |
| Cold rice (coarse grain) | 100 g |
| Granulated sugar 6 | g ( 1/2 tbsp) |
| Salt 5 | g (1 tsp) |
| Cold water (5 °C)* | 150 g (mL) |
| Instant dry yeast | 2.1 g ( 3/4 tsp) |
* Reduce by 10 g (mL) when the room temperature is above 25 °C.
French rice bread with sweet potato and ginger Menu "9"
| High-gluten flour 210 | g |
| Cold rice (brown rice) | 100 g |
| Brown sugar (Powder) | 8.5 g (1 tbsp) |
| Salt 5 | g (1 tsp) |
| Cold water (5 °C)* | 140 g (mL) |
| Instant dry yeast | 2.1 g (3⁄4 tsp) |
| *Sweet potato (cut into 1 cm pieces) | 80 g |
| *Minced ginger 5 | g |
* Reduce by 10 g (mL) when the room temperature is above 25 °C. * When using sugar and white rice, increase the amount of water by 10 g (mL). * Use Raisin function (P. EN18) → Select Gentle stir (P. EN20)
Curry rice bread Menu "8"
| High-gluten flour 210 | g |
| Cooled rice | 100 g |
| Butter | 20 g |
| Granulated sugar | 18g (1 1/2 tbsp) |
| Milk powder | 6 g (1 tbsp) |
| Salt 5 | g (1 tsp) |
| Curry powder | 5 g |
| Refined cheese (cut into small pieces) | 30 g |
| Black pepper powder | 3 g ( 1/2 tsp) |
| Water* | 110 g (mL) |
| Instant dry yeast 2.1 | g (%4 tsp) |
| *Potato (cut into small pieces; boiled to a moderate degree) | 20 g |
| *Carrot (cut into small pieces; boiled to a moderate degree) | 20 g |
| *Bacon | 20 g |
* Reduce by 10 g (mL) when the room temperature is above 25 °C. * Use Raisin function (P. EN18)
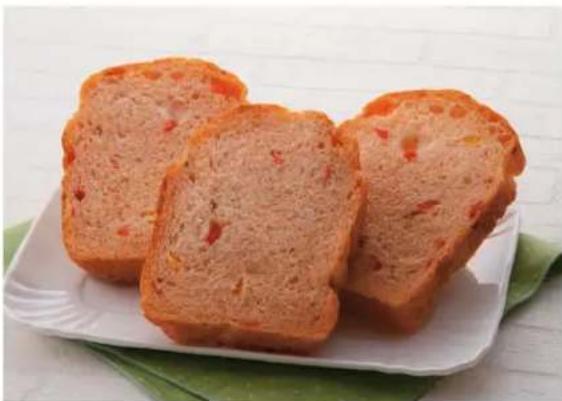
French rice bread with red pepper and tomato Menu "9"
| High-gluten flour 210 | g |
| Cold rice (white rice) 100 | g |
| Granulated sugar 6 | g (1⁄2 tbsp) |
| Salt 5 | g (1 tsp) |
| Cold water (5 °C)* | 70 g (mL) |
| Tomato sauce (salt free) 70 | g (about 70 mL) |
| Instant dry yeast 2.1 | g (%4 tsp) |
| * Pimento (red pepper and yellow pepper) (cut into 5 cm pieces) | 20 g each |
* Reduce by 10 g (mL) when the room temperature is above 25 °C. * Use Raisin function (P. EN18) Manual feeding (P. EN19)
French rice bread with green soybean and cheese Menu "9"
| High-gluten flour 210 | g |
| Cold rice (white rice) 100 | g |
| Granulated sugar 6 | g ( 1/2 tbsp) |
| Salt 5 | g (1 tsp) |
| Cold water (5 °C)* | 150 g (mL) |
| Instant dry yeast 2.1 | g ( 3/4 tsp) |
| * Green soybeans (peeled beans) (Drain the water completely and cut into halves) | 40 g |
| * Cheese 60 | g |
* Reduce by 10 g (mL) when the room temperature is above 25 °C. * Use the Raisin function (P. EN18) Manual feeding (P. EN19) Select Gentle stir (P. EN20)
Containing red pepper and olive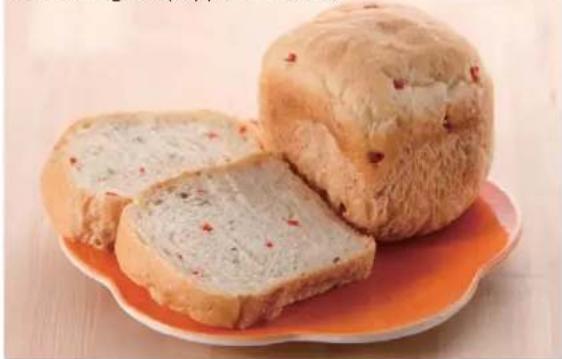
Italian bread Menu "10"
| High-gluten flour 225 | g |
| Low-gluten flour 25 | g |
| Salt 5 | g (1 tsp) |
| Olive oil | 24 g (2 tbsp) |
| Cold water (5 °C)* | 170 g (mL) |
| Instant dry yeast 1.4 | g ( 1/2 tsp) |
* Reduce by 10 g (mL) when the room temperature is above 25 °C.
You may add 20 g red peppers (or dried tomatoes) chopped into small pieces of 5 mm and 20 g olive (or 1 tsp of dried basil leaves) if you prefer. *Use the Raisin function (P. EN18)
French bread with tomato and cheese Menu "10"
| High-gluten flour 225 | g |
| Low-gluten flour 25 | g |
| Salt 5 | g (1 tsp) |
| Dried basil leaves 2 | g (1 tsp) |
| Water* | 200 g (mL) |
| Instant dry yeast 1.4 | g ( 1/2 tsp) |
| * Mozzarella cheese (diced) 75 | g |
| * Dried tomatoes (Divided into four equal parts after dried) | 10 g (dried) |
* Reduce by 10 g (mL) when the room temperature is above 25 °C. (Cold water at a temperature of 5 °C) * Use the Raisin function (P. EN18) manual feeding (P. EN19) Select Gentle stir (P. EN20)
Various flavored bread
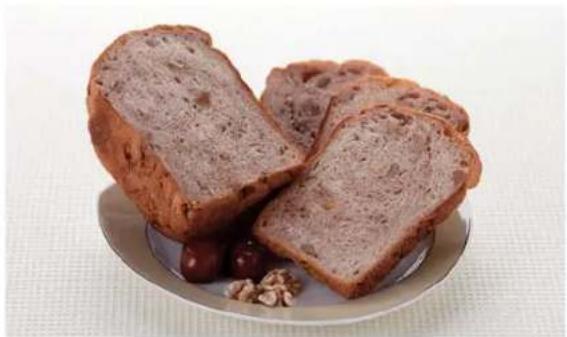
Whole wheat bread with chestnuts & nuts
Menu "11"
| High-gluten flour 125 | g |
| Whole wheat flour 125 | g |
| Butter 10 | g |
| Granulated sugar 18 | g (1 1/2 tbsp) |
| Milk powder | 6 g (1 tbsp) |
| Salt 5 | g (1 tsp) |
| Water* | 210 g (mL) |
| Instant dry yeast 2.8 | g (1 tsp) |
| *Sugar-soaked chestnuts and walnuts | 50 g each |
* Use the Raisin function (P. EN18) Manual feeding (P. EN19) Select Gentle stir (P. EN20)
Whole wheat bread with bacon, cheese and olive Menu "11"
| High-gluten flour 160 | g |
| Whole wheat flour 70 | g |
| Butter 10 | g |
| Granulated sugar 18 | g (11/2 tbsp) |
| Milk powder | 6 g (1 tbsp) |
| Salt 5 | g (1 tsp) |
| Cold water (5 °C)* | 180 g (mL) |
| Instant dry yeast 2.8 | g (1 tsp) |
| *Bacon 40 | g |
| *Cheese 30 | g |
| *Olive 30 | g |
* Reduce by 10 g (mL) when the room temperature is above 25 °C. * Use the Raisin function (P. EN18) manual feeding (P. EN19) Select Gentle stir (P. EN20)
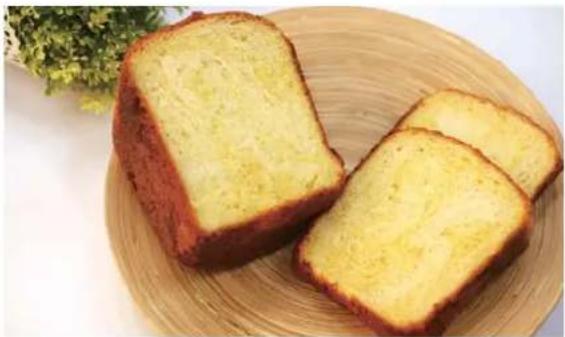
Desiccated coconut milky bread
Menu "12" Bread dough
| High-gluten flour | 230 g |
| Butter 15 | g |
| Granulated sugar 30 | g (2 1/2 tbsp) |
| Milk powder | 12 g (2 tbsp) |
| Salt 5 | g (1 tsp) |
| Water* | 160 g (mL) |
| Instant dry yeast | 2.8 g (1 tsp) |
* Reduce by 10 g (mL) when the room temperature is above 25 °C. (Cold water at a temperature of 5 °C)
Desiccated coconut crust
| Granulated sugar 24 | g (2 tbsp) |
| Milk powder | 6 g (1 tbsp) |
| Eggs (evenly mixed) | 30 g |
| Butter | 20 g |
| Coconut | 45 g |
●Mix the materials for making desiccated coconut crust, stir them well, roll the mix into a 15 mm diameter circle, and then store it in the refrigerator. When hearing the prompting sound, take out the desiccated coconut crust, lay it flat on the surface of the dough, and press the Start key again.
* The desiccated coconut crust must be prepared in advance.
Bread with peanut butter Menu "12" Bread dough
| High-gluten flour | 230 g |
| Butter 20 | g |
| Granulated sugar 30 | g (2 1/2 tbsp) |
| Milk powder | 12 g (2 tbsp) |
| Salt 5 | g (1 tsp) |
| Peanut butter | 30 g |
| Water* | 170 g (mL) |
| Instant dry yeast | 2.8 g (1 tsp) |
* Reduce by 10 g (mL) when the room temperature is above 25 °C. (Cold water at a temperature of 5 °C)
Custard crust
| High-gluten flour | 10 g |
| Granulated sugar 30 | g (2 1/2 tbsp) |
| One egg + Milk | 70 g |
| Butter 20 | g |
| Vanilla essence | Small quantity |
● Follow the Steps on P. EN33 to make a custard crust, and then put it in a refrigerator. When hearing the prompting sound, take out the custard crust, lay it flat on the surface of the dough, and press the Start key again. * The custard crust must be prepared in advance.
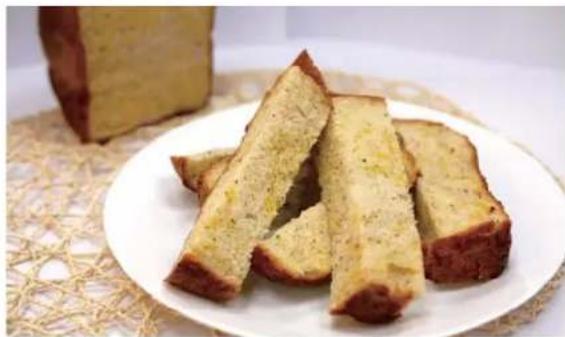
Black tea bread with condensed milk
Menu "12" Bread dough
| High-gluten flour 230 | g |
| Butter 20 | g |
| Granulated sugar 30 | g (2 1/2 tbsp) |
| Milk powder | 12 g (2 tbsp) |
| Salt 5 | g (1 tsp) |
| Black tea leaves (chopped) 2 | g |
| Sweetened condensed milk 20 | g |
| Water* | 150 g (mL) |
| Instant dry yeast 2.8 | g (1 tsp) |
* Reduce by 10 g (mL) when the room temperature is above 25 °C. (Cold water at a temperature of 5 °C)
Custard crust
| High-gluten flour 10 | g |
| Granulated sugar 30 | g (2 1/2 tbsp) |
| One egg + Milk 70 | g |
| Butter 20 | g |
| Vanilla essence Small quantity |
- Follow the Steps on P. EN33 to make a custard crust, and then put it in a refrigerator. When hearing the prompting sound, take out the custard crust, lay it flat on the surface of the dough, and press the Start key again.
* The custard crust must be prepared in advance.
Brioche (with rich butter and egg) Menu "13"
| High-gluten flour 170 | g |
| Low-gluten flour 30 | g |
| Butter 40 | g |
| Granulated sugar 36 | g (3 tbsp) |
| Salt 3.8 | g (3⁄4 tsp) |
| A mix of one egg, two yolks and milk | 160 g |
| Instant dry yeast 2.1 | g(3⁄4 tsp) |
| Frozen butter (for adding later) | 50 g |
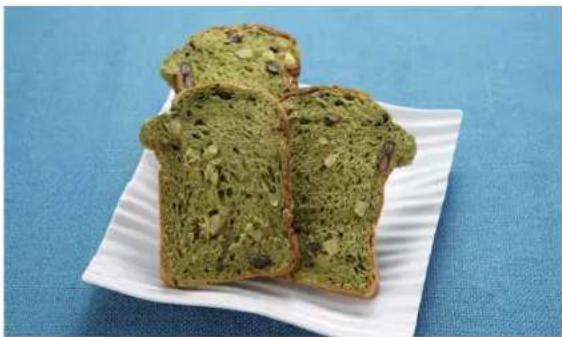
Matcha Brioche with black soybean and chestnut
Menu "13"
| High-gluten flour 170 | g |
| Low-gluten flour | 30 g |
| Butter 30 | g |
| Granulated sugar 36 | g (3 tbsp) |
| Milk powder | 6 g (1 tbsp) |
| Salt | 3.8 g (% tsp) |
| Matcha (green tea powder) 6 | g (1 tbsp) |
| Mixture of an egg, an egg yolk and cold water (5 °C) | 160 g |
| Instant dry yeast 2.1 | g (% tsp) |
| Frozen butter (for adding later) | 40 g |
| * Preserved black beans (after thorough draining) | 50 g |
| * Sugar soaked chestnuts (after thorough draining) | 50 g |
* Use the Raisin function (P. EN18) → Manual feeding (P. EN19) Select Gentle stir (P. EN20)
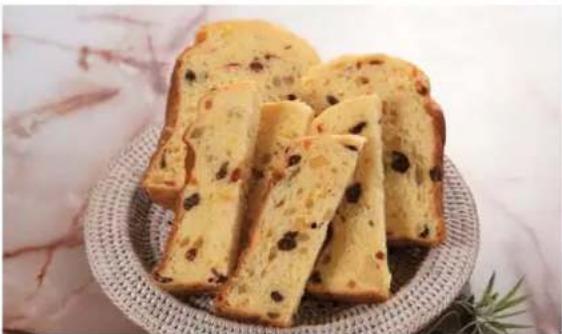
Panettone
Menu "13"
| High-gluten flour 170 | g |
| Low-gluten flour 30 | g |
| Butter 40 | g |
| Granulated sugar 24 | g (2 tbsp) |
| Salt 3.8 | g (% tsp) |
| Rum | 13 g (1 tbsp) |
| A mix of one egg, two yolks and plain yogurt (low fat) | 160 g |
| Instant dry yeast 2.8 | g (1 tsp) |
| Frozen butter (for adding later) | 40 g |
| * Dried fruits | 100 g |
* Use the Raisin function (P. EN18) → Manual feeding (P. EN19)
Various flavored bread
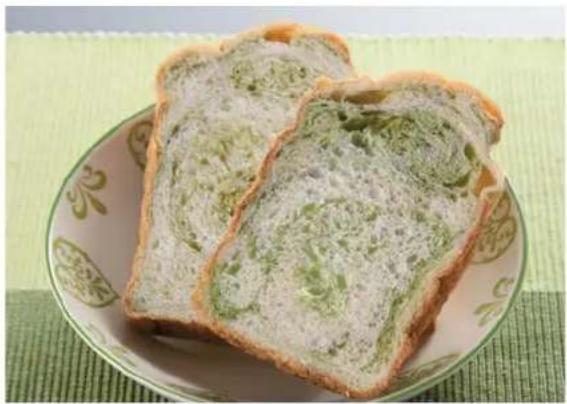
Matcha Marble bread Menu "14"
| High-gluten flour 250 | g |
| Granulated sugar 24 | g (2 tbsp) |
| Salt 5 | g (1 tsp) |
| Milk powder 6 | g (1 tbsp) |
| Butter 10 | g |
| Instant dry yeast 2.8 | g (1 tsp) |
| Water* | 190 g (mL) |
For adding later
| Matcha (green tea powder) 3 | g |
| Granulated sugar 17 | g |
| Water 5 | g (mL) (1 tsp) |
* Use 5 °C cold water and reduce the amount of water by 10 g (mL) if the room temperature is above 25 °C. ● Stir A until it becomes pasty.
Cocoa Marble bread Menu "14"
| High-gluten flour 250 | g |
| Granulated sugar 24 | g (2 tbsp) |
| Salt 5 | g (1 tsp) |
| Milk powder 6 | g (1 tbsp) |
| Butter 10 | g |
| Instant dry yeast 2.8 | g (1 tsp) |
| Water* | 190 g (mL) |
For adding later
| Cocoa powder | 10 g | |
| A | Granulated sugar 18 | g (1 1/2 tbsp) |
| Water 10 | g (mL) (2 tsp) |
* Use 5 °C cold water and reduce the amount of water by 10 g (mL) if the room temperature is above 25 °C. ● Stir A until it becomes pasty.
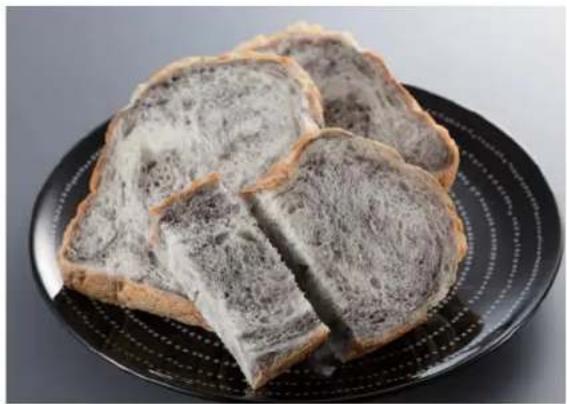
Black sesame Marble bread Menu "14"
| High-gluten flour 250 | g |
| Granulated sugar 24 | g (2 tbsp) |
| Salt 5 | g (1 tsp) |
| Milk powder 6 | g (1 tbsp) |
| Butter 10 | g |
| Instant dry yeast 2.8 | g (1 tsp) |
| Water* | 190 g (mL) |
For adding later
| Black sesame sauce | 10 g |
| * Use 5 °C cold water and reduce the amount of water by 10 g (mL) if the room temperature is above 25 °C. | |
Marble bread with orange and chocolate Menu "14"
| High-gluten flour 250 | g |
| Granulated sugar 24 | g (2 tbsp) |
| Salt 5 | g (1 tsp) |
| Milk powder 6 | g (1 tbsp) |
| Butter 10 | g |
| Instant dry yeast 2.8 | g (1 tsp) |
| Water* | 100 g (ml.) |
| 100% orange juice | 90 g (about 90 mL) |
For adding later
| Chocolate sauce | 10 g |
* Use 5 °C cold water and reduce the amount of water by 10 g (mL) if the room temperature is above 25 °C.

Ingredients
| High-gluten flour | 20g | |||
| Butter | 15 | g | ||
| Granulated sugar | 24 g (2 tbsp) | |||
| A | Milk powder 6 | g (1 tbsp) | ||
| Salt | 3.8 g (% tsp) | |||
| Egg (evenly mixed) | 25 g | |||
| Gold water (5°C) | 110 g (mL) | |||
| Instant dry yeast | 3.5 g (11⁄4 tsp) | |||
Ingredients
| Dried fruits (pickled with rum) | 100 g |
| Milk | 5 g (1 tsp) |
| Cinnamon sugar | An appropriate quantity |
For icing
| B | Granulated | sugar | g25 |
| Water | 2.5 g (1⁄2 tsp) |
If the dough is sticky and it is hard to roll it flat,
Sprinkle some high-gluten flour on hands and the rolling pin to make it easier for dough rolling.

Cinnamon brioche
Select menu "15" to make bread dough
① Put A into the blade-installed bread pan and install the bread pan into the main body. ② Add instant dry yeast into the yeast dispenser, select menu "15" and press (start).
Take out the dough.
③ When you hear beep sound, open the lid and take out the dough from the bread pan. - Do not press 取消 (Cancel)
Rolling flat
④ Roll the dough into a size of 15 cm × 25 cm (W × L).
Forming
⑤ Coat milk on 3/4 of dough near to you and sprinkle cinnamon sugar and dried fruits on it. ⑥ Start rolling from the side close to you. ⑦ Cut it into four even pieces and place them in the bread pan.
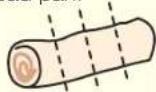
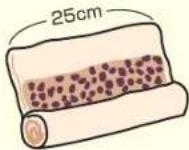
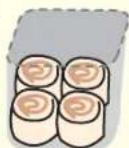
Start baking (press 📄 Start) again)
Making icing
⑧ Place B in a bowl and mix them on another bowl with 60°C hot water inside.
Final processing
⑨ Upon completion of baking, take the bread out from the bread pan and coat the bread with the icing.
To make various flavored bread on menu "15"
The total weight of the bread dough and the ingredients should not exceed 600 g!
* The dough may not rise or the baking may not be sufficient if there are too many ingredients. Avoid using ingredients with a high content of water! (Dry the boiled ingredients through trickling and cool them down to room temperature. * Otherwise, the dough fermentation may be affected. Prepare the ingredients in advance! * The operation time is 15 min.
Various flavored bread
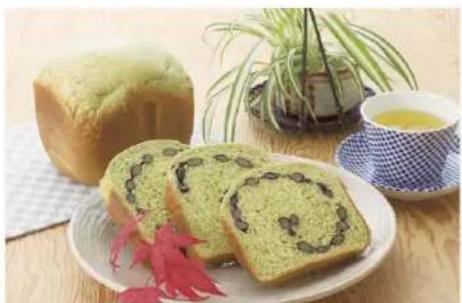
Ingredients
| High-gluten flour 200 | g | |
| Butter 15 | g | |
| Granulated sugar 18 | g (1 1/2 tbsp) | |
| A | Milk powder 6 | g (1 tbsp) |
| Salt 3.8 | g (3⁄4 tsp) | |
| Matcha (green tea powder) | 2 g (1 tsp) | |
| Egg (evenly mixed) 25 | g | |
| Cold water (5 °C) 110 | g (mL) | |
| Instant dry yeast 3.5 | g (1 1/4 tsp) | |
Contents
| Black beans boiled with sugar | 120 g |
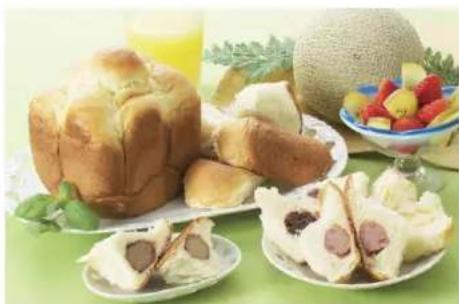
Ingredients
| High-gluten flour 200 | g |
| Butter 35 | g |
| Granulated sugar 18 | g (1 1/2 tbsp) |
| A Milk powder 6 | g (1 tbsp) |
| Salt 3.8 | g (3⁄4 tsp) |
| Egg (evenly mixed) 25 | g |
| Cold water (5 °C) 100 | g (mL) |
| Instant dry yeast 3.5 | g (1 1/4 tsp) |
| Stuffing ingredients | 12 pieces (15 g/piece) |
Matcha black bean roll
Select menu "15" to make bread dough
① Put A into the blade-installed bread pan and install it into the main body. ② Add instant dry yeast into the yeast dispenser, select menu "15", press 📄 (start).
Take out the dough.
③ When you hear beep sounds, open the lid, take out the dough from the bread pan and remove the blade.
●Do not press 取消 (Cancel)
This process should be completed within 15 min!
Dough rolling
④ Roll the dough into a slender shape which is slightly narrower than that of bread pan.
Add the contents and form the bread.
⑤ Sprinkle the black beans evenly with water fully drained. ⑥ Start rolling from the side close to you. ⑦ Put it in the bread pan.
Baking
(Press ·(Start))
Substitute green tea with cocoa powder. Add chocolate cubes and almond slices to make the chocolate almond bread rolls that are kids' favorites.

Stuffed bread
Select menu "15" to make bread dough
① Put A into the blade-installed bread pan and install it into the main body. ② Add instant dry yeast into the yeast dispenser, select menu "15", press (Start). This process should
Take out the dough.
③ When you hear beep sounds, open the lid, take out the dough from the bread pan and remove the blade. ●Do not press 取消 (Cancel)
Forming
④ Divide the dough into 12 even pieces.
Select your favorite ingredients.
(Ingredients with liquid are not allowed!)
Curry (cook till the sauce becomes thick), meat ball, potato salad, sausage, tuna (with water fully drained) and cheese (cut into small pieces) and many more
Fill in the stuffing
⑤ Fill the ingredients into each piece of dough. ⑥ Put it in the bread pan.
Baking
(Press (Start) again)

Pain de mie with chocolate bean and chestnut Menu "2"
| High-gluten flour 250 | g |
| Butter 15 | g |
| Granulated sugar 18 | g (1 1/2 tbsp) |
| Milk powder 6 | g (1 tbsp) |
| Salt 5 | g (1 tsp) |
| Water* | 200 g (mL) |
| Instant dry yeast 1.4 | g (1 1/2 tsp) |
| * Chocolate bean (white chocolate) 45 | g |
| * Sugar soaked cheslnuts (may also be boiled in sweetened water) | 55 g |
* Reduce by 10 g (mL) when the room temperature is above 25°C. (Cold water at a temperature of 5°C) * Use 葡萄乾 (Raisin) function (P. EN18) Manual feeding (P. EN19) Select 輕攪拌 (Gentle stir) (P. EN20)
Whole wheat Pain de mie Menu "2"
| High-gluten flour 200 | g |
| Whole wheat flour 50 | g |
| Butter 5 | g |
| Granulated sugar 9 | g (3⁄4 tbsp) |
| Milk powder 6 | g (1 tbsp) |
| Salt 5 | g (1 tsp) |
| Water* | 200 g (mL) |
| Instant dry yeast 1.4 | g (1⁄2 tsp) |
* Reduce by 10 g (mL) when the room temperature is above 25 °C. (Cold water at a temperature of 5 °C)
| Menu "13" Crust colour濃 (dark) | |
| High-gluten flour 170 | g |
| Low-gluten flour 30 | g |
| Butter 30 | g |
| Granulated sugar 18 | g (1 1/2 tbsp) |
| Milk powder 6 | g (1 tbsp) |
| Salt 5 | g (1 tsp) |
| Mixture of an egg, an egg yolk and cold water (5 °C) | 160 g |
| Instant dry yeast 2.8 | g (1 tsp) |
| Frozen butter (for adding later) | 40 g |
| *Bacon (roasted) | 50 g |
| *Walnut | 20 g |
| *Cheese | 20 g |
| * Fried onion | 10 g |
* Use the Raisin function (P. EN18) and manual feeding (P. EN19). Select Gentle stir (P. EN20)
Brioche with rice flour Menu "13"
| High-gluten flour 150 | g |
| Rice flour | 50 g |
| Butter 30 | g |
| Granulated sugar 24 | g (2 tbsp) |
| Milk powder 6 | g (1 tbsp) |
| Salt 3.8 | g (% tsp) |
| Mixture of an egg, an egg yolk and cold water (5 °C) | 160 g |
| Instant dry yeast 2.1 | g (% tsp) |
| Frozen butter (for adding later) | 40 g |
Hard bread Menu "2" Crust colour: dark
| High-gluten flour 225 | g |
| Low-gluten flour 25 | g |
| Shortening 5 | g |
| Granulated sugar 4 | g (1 tsp) |
| Milk powder 4 | g (2 tsp) |
| Salt 5 | g (1 tsp) |
| Water* | 210 g (mL) |
| Instant dry yeast 1.4 | g (1⁄2 tsp) |
* Reduce by 10 g (mL) when the room temperature is above 25 °C. (Cold water at a temperature of 5 °C)
Sweet peas Pain de mie Menu "2"
| High-gluten flour 250 | g |
| Butter 15 | g |
| Granulated sugar 18 | g (1 1/2 tbsp) |
| Milk powder 6 | g (1 tbsp) |
| Salt 5 | g (1 tsp) |
| Water* | 200 g (mL) |
| Instant dry yeast 1.4 | g ( 1/2 tsp) |
| *Your favorite cooked beans (soup stewed from the fully drained beans) | 100 g |
* Reduce by 10 g (mL) when the room temperature is above 25°C. (Cold water at a temperature of 5°C) * Use the Raisin function (P. EN18) and manual feeding (P. EN19). Select Gentle stir (P. EN20)
Brioche with flavedo and chocolate Menu "13"
| High-gluten flour 170 | g |
| Low-gluten flour 30 | g |
| Butter 30 | g |
| Granulated sugar 24 | g (2 tbsp) |
| Milk powder 6 | g (1 tbsp) |
| Salt 3.8 | g (3⁄4 tsp) |
| Orange peels (ground) | 2 g |
| Mixture of an egg, an egg yolk, orange juice (for 1 piece) and cold water (5 °C) | 150 g |
| Instant dry yeast 2.8 | g (1 tsp) |
| Frozen butter (for adding later) | 40 g |
| * Sugar soaked orange peels (5 mm slices) | 2 g |
| * Chocolate bean (frozen in advance) | 30 g |
* Use the Raisin function (P. EN18) and manual feeding (P. EN19). Select Gentle stir (P. EN20)
You can add icing sugar as you wish. Take 5 grams (less than 1 tsp) of orange juice, mix it with 25 grams of sieved brown sugar powder, and then smear the mix onto the freshly baked Brioche while it is hot.
Rice flour bread with orange flavor Menu "18"
| High-gluten flour | 200 g |
| Rice flour | 50 g |
| *Fresh orange jam | 20 g |
| Butter | 20 g |
| Milk powder | 6 g (1 tbsp) |
| Salt | 5 g (1 tsp) |
| Water* | 170 g (mL) |
| Instant dry yeast | 4.2 g (1 1/2 tsp) |
* Use cold water at a temperature of about 5 °C. When the room temperature is over 25 °C. * Put it in the bread pan at the very beginning.
Natural yeast bread making
Natural yeast (fermented) making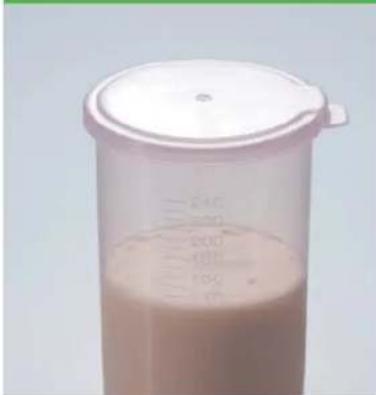
Add the ingredients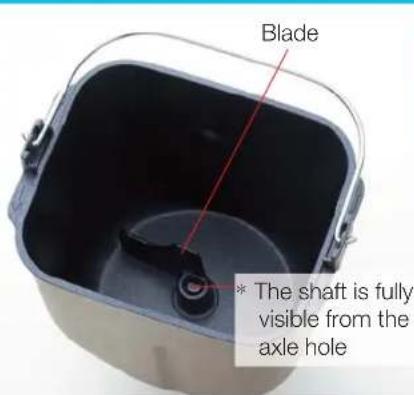
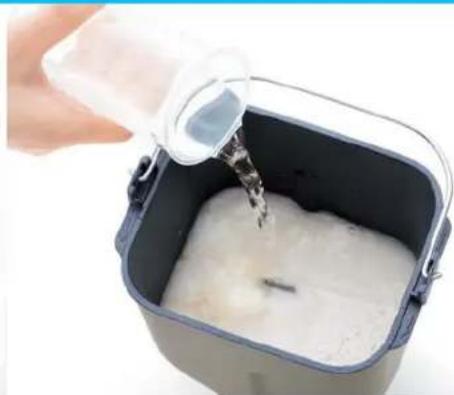
1 Natural yeast (fermented)
with a bread maker
(P. EN55)
It takes 24 hours to make fermented natural yeast.
2 Remove the bread pan and set the kneading blade
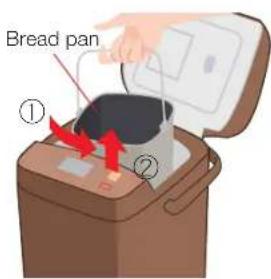
① Rotate the bread pan in the arrow direction. ② Remove from the main body. ③ Insert and install the blade.
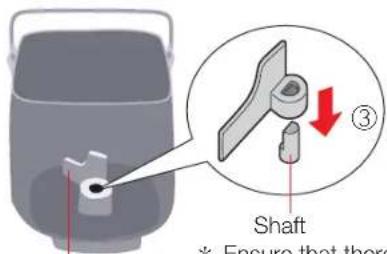
Blade
* After installation there is 3 cm clearance for side-to-side movement.
* Ensure that there is no dough, etc. sticking around.
Natural yeast bread
| High-gluten flour 300 | g |
| Granulated sugar 18 | g (1 1/2 tbsp) |
| Salt 5 | g (1 tsp) |
| Water* | 190 g (mL) |
| Natural yeast (fermented) | 25 g (2 tbsp) |
* Use cold water at a temperature of about 5 °C when the room temperature is over 25 °C. ●Bread has a relatively poor quality when the room temperature is above 30°C.
3 Add natural yeast (fermented) in the bread pan.
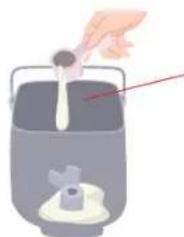
Add the natural yeast (fermented).
* Measure the weight after mixing the natural yeast (fermented).
4 Add high-gluten flour, water and other ingredients in the bread pan.
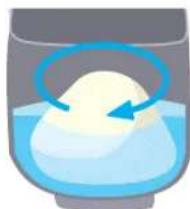
① Add high-gluten flour and other ingredients by stacking them up in the pan. ② Add water along the periphery.
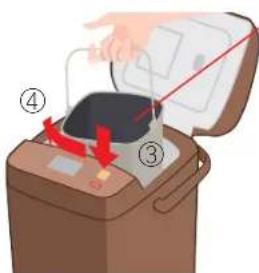
③ Insert the bread pan. ④ Rotate in the arrow direction and secure it. ⑤ Close the lid.
* The handle of bread pan will stand up. (To make it convenient for taking out the bread pan) There is no need to press it down to the bottom.
Time required: about 7 h
Be sure to use thick gloves
Setting
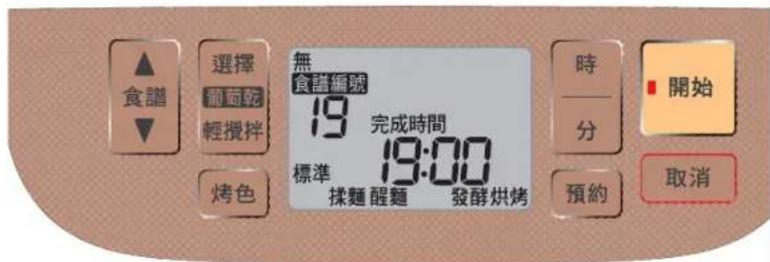
5
Select menu "19"
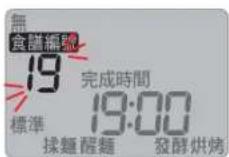
■ To add raisins and other ingredients
■ To select crust colour

■ To set timer for completion time

6
Press Start

Flash
illuminated
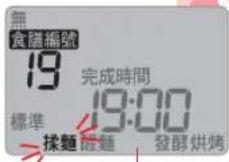
● Approximate time of completion.
7
Baking completes (Beep sound)
Turn off the power

① Press Cancel
② Pull out the plug.
8
Take out the bread pan and put it on a table with a towelette under it. When handling the bread pan, be sure to wear thick oven gloves.
Cool down (about 2 min)
* Pay attention to the rest place of the bread pan. (The bread pan gives out heat) * The bread will cave in and shrink after a while.
9
Take out the bread for cooling down
Thick gloves — (Do not get wet) Bread pan —
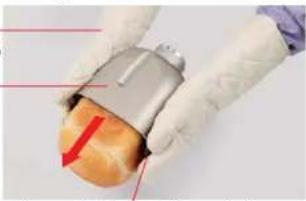
Hold the handle and shake it forcefully several times.
* Do not use a knife, a fork or chopsticks to take it out. (It will scratch the fluorine coating.) * Please don't touch the bottom of the bread pan (blade rotation may damage the bread shape). ● Make sure the blade is in the bread pan after the bread is taken out.
The kneading blade may remain at the bottom of the bread. Please take it out.
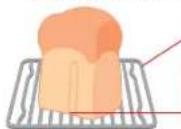
Baking grille or others
Make sure that the blade is not stuck on it.
(The blade will be damaged if you cut the bread before the blade is taken out.)
Natural yeast bread dough making
Time required: about 4 h
You can make various natural yeast bread with the dough. (P. EN58)
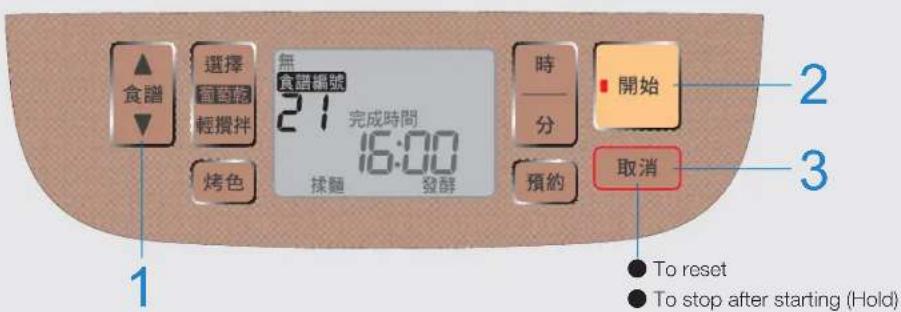
① Carry out natural yeast fermentation. (P. EN55) ② Install the bread blade in the bread pan. ③ Add the natural yeast (fermented) first and then the flour, water, and other ingredients. ④ Insert the bread pan into the main body.
Ingredients
| Natural yeast bread dough | |
| High-gluten flour 300 | g |
| Butter 10 | g |
| Granulated sugar 18 | g (1 1/2 Ibsp) |
| Salt 5 | g (1 tsp) |
| Water* | 170 g (mL) |
| Natural yeast (fermented) | 25 g (2 tbsp) |
■ If the bread dough is sticky
The dough made with natural yeast (fermented) is stickier than that made with instant dry yeast.
Put the dough in a metal bowl, cover it with plastic wrap, and place it in a refrigerator for 30 \~ 60 min. Sprinkle high-gluten flour (sprinkle some high-gluten flour on the dough rolling board, the rolling pin, and the dough. ● If the dough is sticky, sprinkle more high-gluten flour.)
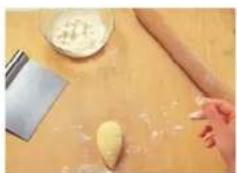
1 Select menu "21"
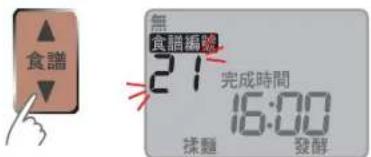
3 Press 取消 (Cancel) when you hear the beep sound, and take out the dough immediately.
Natural yeast fermentation
Time required: about 24 h
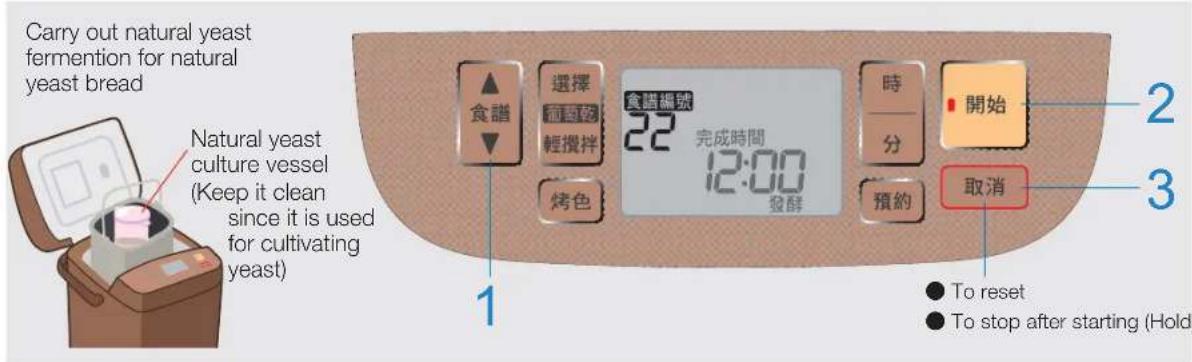
Preparations
① Add some water in the natural yeast culture vessel. ② Add the Natural yeast of “Hoshino” (Raw), and then mix the ingredients sufficiently. ③ Cover the natural yeast culture vessel with the lid. ④ Put the natural yeast culture vessel into the bread pan. (Do not install the blade.) ⑤ Insert the bread pan into the main body.
Ingredients
Use it up within one week!
Natural yeast fermentation
● Baking bread (the amount for about 4 to 5 times)
"Hoshino" natural yeast (raw) 50 g (5 tbsp) Water (about 30 °C) 100 g (mL)
● Baking bread (the amount for about 3 times)
"Hoshino" natural yeast (raw) 30 g (3 tbsp) Water (about 30 °C) 60 g (mL)
- If the water temperature is too high or too low, it may be impossible to ferment the natural yeast well.
■ Natural yeast (fermented) is raw and fresh!
It must be stored in a refrigerator and used up within one week. (It cannot ferment when frozen or at room temperature.)
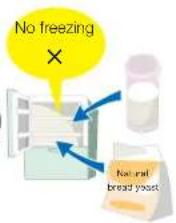
Do not mix new and old natural yeast (fermented) together.
- When well cultivated, it smells sour like alcohol from distillers' grains. If the room temperature is over 30°C, it may not be well cultivated.
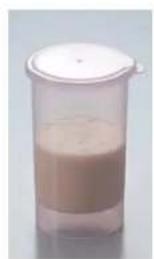
1 Select menu "22"
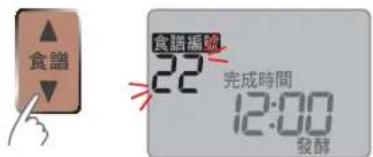
3 Press Cancel when you hear the beep sound, take out the natural yeast culture vessel quickly, and then store it in a refrigerator immediately
- If it is stored under room temperature, dough fermentation may be affected due to decreased fermentability.
Incorrect menu selection may cause the natural yeast culture vessel to melt.
Bread dough/ Pizza dough making
Time required: Bread dough about 1 h Pizza dough about 45 min
Through the making of bread dough, you can also make croissants (P. EN59), bagels (P. EN60) and other various flavored bread.
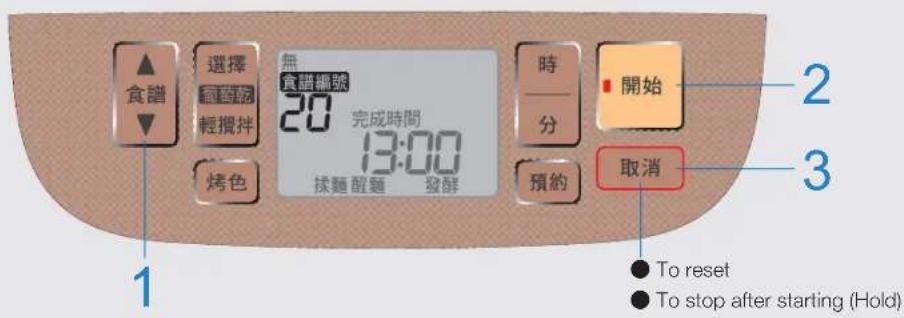
① Install blade in the bread pan. ② Add flour, water and other ingredients (except instant dry yeast) in the bread pan. ③ Put the bread pan into the main body and place instant dry yeast in the yeast dispenser.
Ingredients
| Bread dough | |
| High-gluten flour 280 | g |
| Butter 50 | g |
| Granulated sugar 24 | g (2 tbsp) |
| Milk powder 12 | g (2 tbsp) |
| Salt 5 | g (1 tsp) |
| Egg (evenly mixed) 25 | g |
| Water* | 160 g (mL) |
| Instant dry yeast 2.8 | g (1 tsp) |
| Pizza dough | |
| High-gluten flour 280 | g |
| Butter 15 | g |
| Granulated sugar 8 | g (2 tsp) |
| Milk powder 6 | g (1 tbsp) |
| Salt 5 | g (1 tsp) |
| Water* | 190 g (mL) |
| Instant dry yeast 2.8 | g (1 tsp) |
1 Select menu "20" "24"
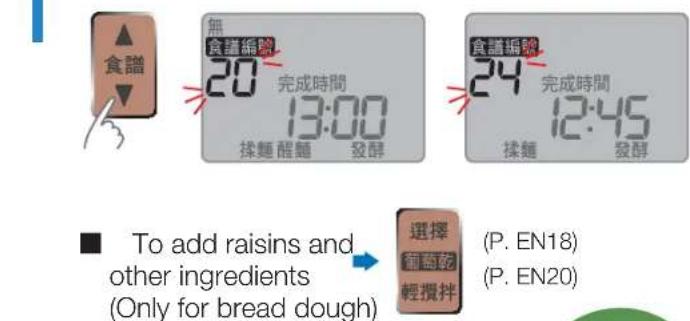
3 Press Cancel when you hear beep sounds. Take out the dough right away.
* If you leave it in the bread pan, the dough will ferment further. * Changing the ratio of dough ingredients may slow down the fermentation process. (P. EN86)
8 minutes dough making
Time required: about 8 min
You can make various doughs in a short period of time.
Do not put the instant dry yeast in the yeast dispenser!
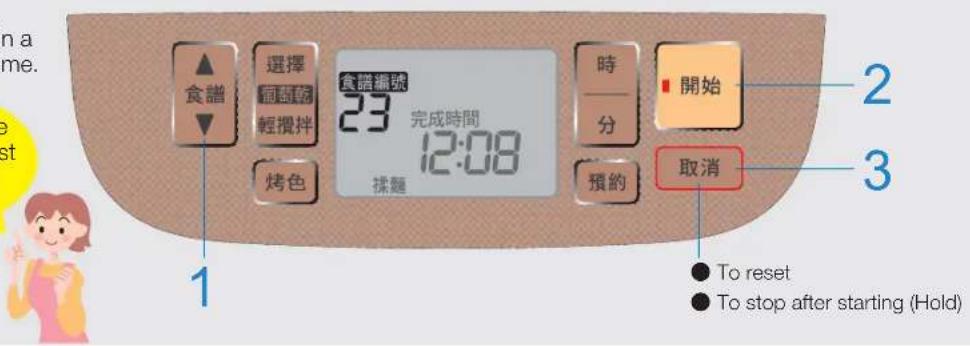
① Install blade in the bread pan. ② Add all ingredients into the bread pan. ③ Put the bread pan into the main body.
Ingredients
Crispy pizza dough
| High-gluten flour 250 | g |
| Olive oil 30 | g |
| Salt 2.5 | g (1⁄2 tsp) |
| Water* | 170 g (mL) |
| Instant dry yeast 1.4 | g (1⁄2 tsp) |
* Use cold water at a temperature of about 5 °C when the room temperature is over 25 °C.
Naan dough
| High-gluten flour 280 | g |
| Olive oil 13 | g |
| Granulated sugar 9 | g (3⁄4 tbsp) |
| Salt 2.5 | g (1⁄2 tsp) |
| Water* | 200 g (mL) |
| Instant dry yeast 2.8 | g (1 tsp) |
* Use cold water at a temperature of about 5 °C when the room temperature is over 25 °C.
Tortilla dough
| Corn starch* | 100 g |
| High-gluten flour 100 | g |
| Salt 2.5 | g (1⁄2 tsp) |
| Water | 130 g (mL) |
* The hardness of the dough may vary with the type and particle size of corn starch.
Red bean bun dough
| Low-gluten flour 180 | g |
| High-gluten flour 70 | g |
| Vegetable oil 13 | g |
| Granulated sugar 18 | g (1 1/2 tbsp) |
| Salt 2.5 | g (1 1/2 tsp) |
| A mixture of the white of one egg and milk | 160 g |
| Baking powder 5 | g |
| Instant dry yeast 2.8 | g (1 tsp) |
1 Select menu "23"
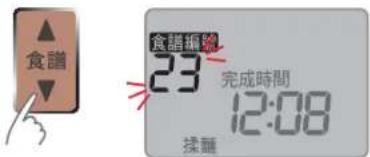
3 Press 取消 (Cancel) when you hear the beep sound. Take out the dough immediately.
Various flavored bread Use bread dough
Tools used for bread-making with dough
● Dough rolling board ● Scale (Unit: 1 g below)
- Scraper
- Rolling pin
● Small towel
(Soaked and wrung dry)
● Cooking paper
Atomizer
Brush ● Oven
Tools that may be used for making bread
● Kitchen scissors - Bread molds - Plastic wrap ● Thermometer and others
*Tools used for making bread dough should be separately bought by customer.
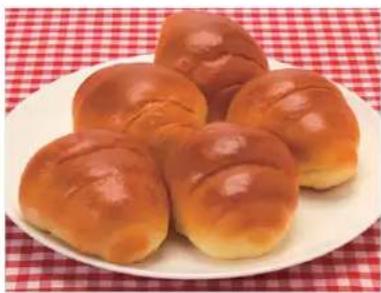
Ingredients (for 12 pieces)
Bread dough (P. EN54, 56) Quantity at a time
Egg (evenly mixed) 25 g
Rolls
Forming
① Use the scraper to divide the dough into 12 even pieces with 45 g each, shape them into balls, cover them with the small towel and place them to set for about 15 min. ② Shape them into ovals, cover them with the small towel and place them to set for 10-15 min. ③ Press gently with hands and use the rolling pin to roll the dough thin. ④ Catch one end of the dough, stretch it towards your body and roll tightly. (The dough may rise horizontally upon fermentation if it is not rolled up tightly) ⑤ Place them on the table with the closure facing downwards. Spray water on it. ⑥ Allow the dough to ferment for 40-60 min (till it rises to double its original size) at a temperature of 30-35 °C and then coat with egg liquids. ⑦ Bake them in an oven that is preheated to a temperature of 170-200 °C for about 15 min. Keep the remaining dough in a refrigerator to avoid excessive fermentation.
Fermentation
Baking
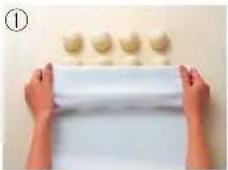
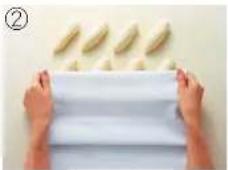
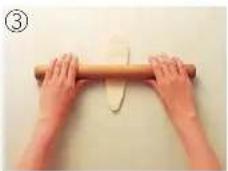
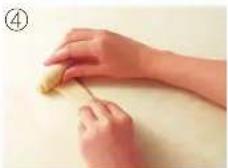
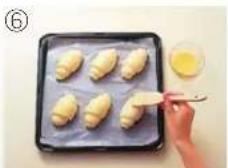
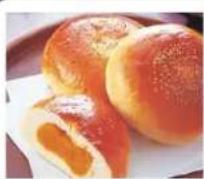
Stuffed bread with sweetened beans paste
① (After following Step ① of process) roll the dough into a round plate with a diameter of 10 cm. ② Wrap sweetened beans pastes with the dough made from Step ①, shape it into balls and press the middle so that it caves in. ③ Properly place balls made as according to ②, sprinkle on water and allow them to ferment for 20-30 min (till they rise to double their original size) at a temperature of 30-35 °C. ④ Coat with egg (evenly mixed), sprinkle poppy seeds and bake them in an oven that is preheated to a temperature of 170-190 °C for about 15 min.
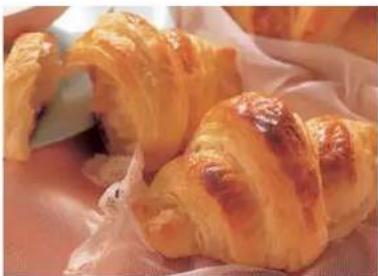
Ingredients (for 12 pieces) ●Instant dry yeast used
Bread dough
| High-gluten flour 225 g | |
| Low-gluten flour 55 g | |
| Butter 15 g | |
| Granulated sugar 24 g (2 tbsp) | |
| Milk powder 6 g (1 tbsp) | |
| Salt 5 g (1 tsp) | |
| Eggs(evenly mixed) 25 g | |
| Water 140 g (mL) | |
| Instant dry yeast 2.8 g (1 tsp) | |
| Butter (cut into 1 cm pieces) 140 g | |
| Egg (evenly mixed) 25 g |
*1 Make the dough according to the process in P. EN56.
●Natural yeast used Bread dough
| High-gluten flour 230 g | |
| Low-gluten flour 50 g | |
| Butter 15 g | |
| Granulated sugar 24 g (2 tbsp) | |
| * | Milk powder 6 g (1 tbsp) |
| 2 | Salt 5 g (1 tsp) |
| Eggs(evenly mixed) 25 g | |
| Water 130 g (mL) | |
| Natural yeast (fermented) 25 g (2 tbsp) | |
| Butter (cut into 1 cm pieces) | 140 g |
| Egg (evenly mixed) | 25 g |
*2 Make the dough according to the process in P. EN54.
Croissant
Add in butter
① Put the dough in a bowl, cover it with a plastic wrap and place it in a refrigerator for 30-60 min. (Prolong the refrigeration time when the room temperature is high) ② Apply flour on butter, place them on the plastic wrap, roll them into a 20 × 20 cm square and keep them in refrigerator for 15-30 min. ③ Use a rolling pin to tap and press the dough and roll it into a 30 × 30 cm square. ④ Wrap the butter of Step ② with the dough of step ③, cover it with the plastic wrap and keep it in a refrigerator for 10-20 min. ⑤ Tap and press the dough of step ④ with the rolling pin till the dough is thinner and roll it flat. ⑥ Fold up the dough three times, cover it with a plastic wrap and keep it in a refrigerator for 10-20 min. ⑦ Repeat steps ⑤ and ⑥ twice and keep it in a refrigerator for 30-60 min.
Forming
⑧ Divide the dough into two even pieces and roll them into a 18 × 40 cm rectangular shape. Divide them into 6 isosceles triangles. ⑨ Hold one end of the dough and roll it up. ⑩ Face the closure downwards.
Fermentation
⑪ Sprinkle water on it and cover it with plastic wrap. Allow it to ferment for 40–60 minutes (until it rises to double its original size) at room temperature, then coat with egg wash.
Baking
⑫ Bake in an oven preheated to 200–220 °C for about 10 minutes. Keep the remaining dough in the refrigerator to avoid excessive fermentation.
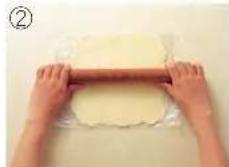
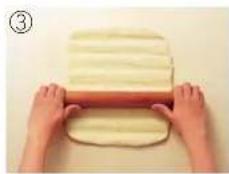
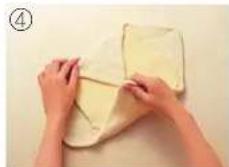
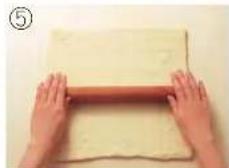
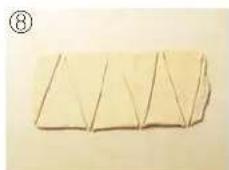
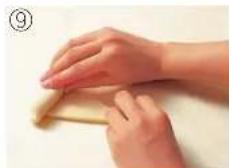
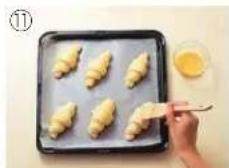

Doughnut
① Divide the dough into small pieces of 35 g each. Cover them with a small towel and let them rest for 10–20 minutes. ② Roll them into thin round shapes and press the dough with the doughnut mold. ③ Allow the dough to ferment for 20–30 minutes (until it rises to double its original size) at a temperature of 30–35 °C. ④ Deep-fry them at an oil temperature of 170 °C and sprinkle with cinnamon and refined white sugar.
Various flavored bread
Use bread dough
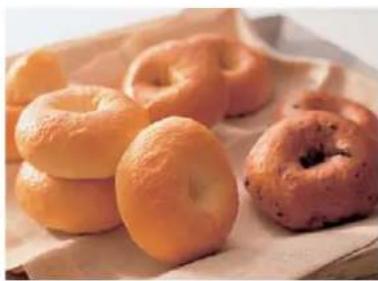
Ingredients (for 8 pieces)
Bread dough
| High-gluten flour 280 g | |
| A Granulated sugar | 24 g (2 tbsp) |
| Salt | 5 g (1 tsp) |
| Vegetable oil 8 | g (2 tsp) |
| Water 180 | g (mL) |
| Instant dry yeast 2.8 | g (1 tsp) |

Bagels are directly edible. But it would be more delicious to cut the bagel in half and add fresh vegetables, hams, cheeses, and jam.
Bagel
Making bread dough
① Place A ➔ vegetable oil ➔ water into the bread pan that is installed with a blade in sequence, and add instant dry yeast into the yeast dispenser. ② Make the dough according to the steps specified in "Bread dough making" (P. EN56).
Forming
③ Divide the dough into 8 small pieces that are 60 g each. Shape them into balls, cover them with a small towel and let them rest for 10 min. ④ Press the middle of the dough with one finger and rotate the dough until the hole becomes bigger and takes the shape of a bagel.
Fermentation
⑤ Place them onto a cooking paper sprinkled with flour and allow the dough to ferment for about 40 min (until it rises to double its original size) at a temperature of 30 \~ 35 °C.
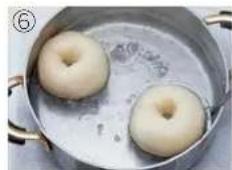
Water boiling
⑥ Boil both sides of them in boiling water for 30 seconds each and fully drain the water.
Baking
⑦ Put them on a baking pan covered with cooking paper and bake in an oven preheated to a temperature of 170 \~ 190 °C for 15 \~ 20 min.
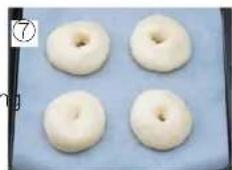
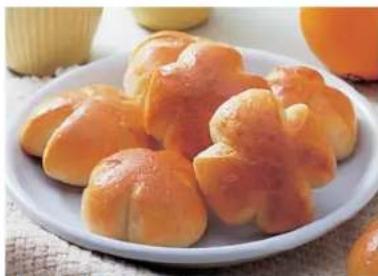
Ingredients (for 10 pieces)
Bread dough
| High-gluten flour 250 g | |
| Whole wheat flour 30 g | |
| Butter 15 g | |
| Granulated sugar 18 g (11⁄2 tbsp) | |
| Salt 5 g (1 tsp) | |
| Plain yogurt 150 g | |
| Milk 70 g (about 70 mL) | |
| Instant dry yeast 2.8 g (1 tsp) | |
| Egg (evenly mixed) 25 g |
Yogurt bread
Making bread dough
① Place A → yogurt → milk orderly into the bread pan, and add dry yeast into the yeast dispenser. ② Make the dough according to the steps specified in "Bread dough making" (P. EN56).
Forming
③ Divide the dough into 10 equal pieces that are 50 g each. Shape them into balls, cover them with a small towel and let them rest for 10 min. ④ Place the dough properly, cut it slightly and spray water on it.

Fermentation
⑤ Leave the dough to ferment for 40–60 minutes at a temperature of 30–35 °C (until it doubles in size).
Baking
⑥ Brush the dough with egg wash, then bake in a preheated oven at 180–200 °C for about 15 minutes.
Use Pizza dough
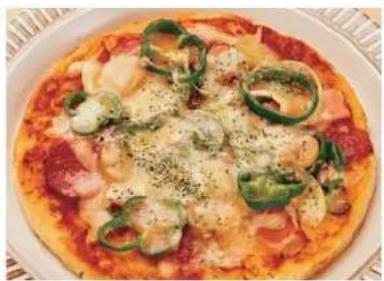
Ingredients
(for 2 pizzas, each 25 cm in diameter)
| Pizza dough (P. EN56) | Quantity at one time |
| Pizza seasoning 72 | g (4 tbsp) |
| Pizza cheese 200 | g |
| Ingredients (E.g.) | |
| Onion (thin slices) 1 | small |
| Sausage (thin slices) | 10 pieces |
| Bacon 2 pieces | |
| Mushroom (thin slices) | 6 pieces |
| Green pepper (thin slices) | 2 pieces |
Pizza
Forming
① Use a scraper to divide the dough into 2 pieces and shape them into balls. (Divide into 3 pieces for thin pizza dough.) ② Cover with a towel and let rest for 10–20 minutes. ③ Place on parchment paper and roll into a round disc, 25 cm in diameter. ④ Prick the dough with a fork.

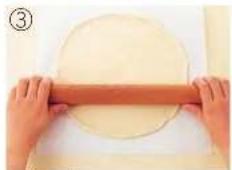
Add ingredients
⑤ Spread pizza sauce, then add toppings and cheese.
Baking
⑥ Bake in a preheated oven at 180–200 °C for about 15 minutes. Keep remaining dough in the refrigerator to prevent over-fermentation.
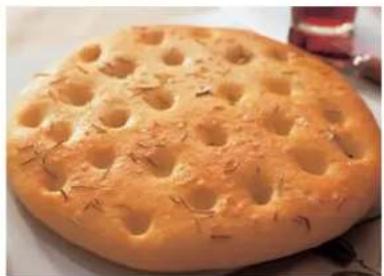
Ingredients (25 cm diameter, 2 servings)
Pizza dough
| High-gluten flour 280 g | |
| A Granulated sugar 9 | g(3/4 tbsp) |
| Salt 5 | g(1 tsp) |
| Olive oil | 12 g(1 tbsp) |
| Water 180 | g (mL) |
| Instant dry yeast | 2.8 g(1 tsp) |
| B Rosemary | An appropriate quantity |
| Refined salt (Sea salt or crude salt) | An appropriate quantity |
Focaccia
Pizza dough making
① Add the olive oil and water in order into the bread pan, and put the dry yeast into the yeast dispenser. ② Make the dough according to the steps specified in "Pizza dough making" (P. EN56).
Forming
③ Divide the dough into 2 equal pieces. Shape them into balls, cover them with a small towel and let them rest for 10 min.
Fermentation
④ Put the dough on the cooking paper and roll it into a round plate with a diameter of 25 cm. ⑤ Let it ferment for 40 ~ 60 min at a temperature of 30 ~ 35 °C.
Baking
⑥ Use your fingers to make indents on the dough surface, then apply the olive oil (in addition to the specified amount). ⑦ Sprinkle B on it, then bake it in an oven (already preheated to 180 ~ 200 °C) for 15 min.
Various flavored bread Use 8 minutes dough
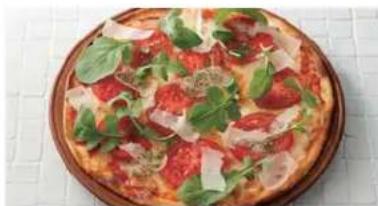
Ingredients (for 2 pizzas in a diameter of 25 cm each)
| Crispy pizza dough (P. EN57) | Quantity at one time |
| Pizza seasoning 80 | g |
| Pizza cheese 200 | g |
| Ingredients (E.g.) | |
| Dried basil | An appropriate quantity |
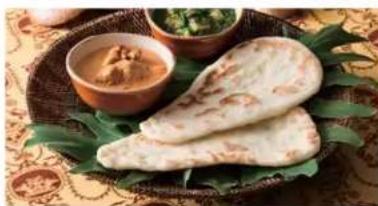
Ingredients (for 6 pieces)
| Naan dough (P. EN57) | Quantity at one time |
| Kneading flour | An appropriate quantity |
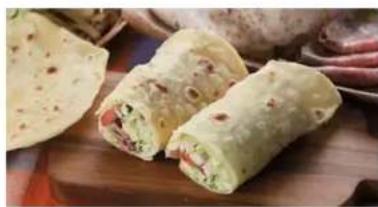
Ingredients (for 8 pieces)
| Tortilla dough (P. EN57) | Quantity at one time |
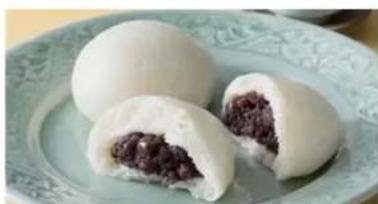
Ingredients (for 12 pieces)
| Red bean bun dough (P. EN57) | Quantity at one time |
| Red bean paste 300 | g |
Crispy pizza
Forming
① Use the scraper to divide the dough into 2 pieces and shape them into balls. ② Cover them with a towel and let them rest for 10 to 20 minutes. ③ Place the dough on cooking paper and roll it into a round disc with a diameter of 25 cm. ④ Prick the dough with a fork.
Add ingredients
⑤ Spread pizza sauce on the dough, then add your desired toppings and cheese.
Baking
⑥ Bake in an oven preheated to 200°C for about 15 minutes.
Keep the remaining dough in the refrigerator to prevent excessive fermentation.

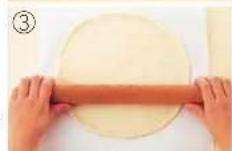
Naan
Forming
① Use the scraper to divide the dough into 6 equal pieces, each weighing 80 g, and shape them into balls. ② Cover them with a towel and let them rest for 10 minutes. ③ Roll each ball into a round disc with a thickness of 6 to 7 mm.
Frying and roasting
④ Place a naan in a frying pan, cover the pan, and fry until both sides are golden brown.
- Do not add oil to the pan.
- Fry each side for about 3 to 5 minutes over medium heat.
Tortilla
Forming
① Use the scraper to divide the dough into 8 even pieces with 40 g each, shape them into balls. ② Roll it into a round plate with a diameter of 15 cm.
Frying and roasting
③ Pour a thin layer of oil into the frying pan, and fry the dough till both sides are golden yellow.
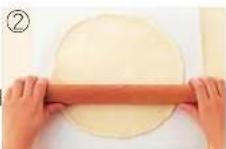
Red bean bun
Forming
① Use the scraper to divide the dough into 12 even pieces with 36 g each, shape them into balls. ② Cover them with towel and place it still for 10 min. ③ Divide the red bean paste into 12 equal parts (about 25 g each).
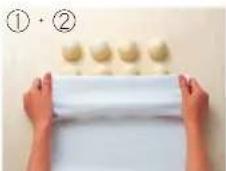
Fermentation
④ Fill in the red bean paste, and then allow the dough to ferment for 15 min at room temperature. (It is suggested to ferment till the dough rises to double its original size for sufficient fermentation and swelling)
Steaming
⑤ Put ④ into a steaming vessel, and steam it with medium heat for about 10 min.
Dumpling skin dough making
Time required: about 15 min
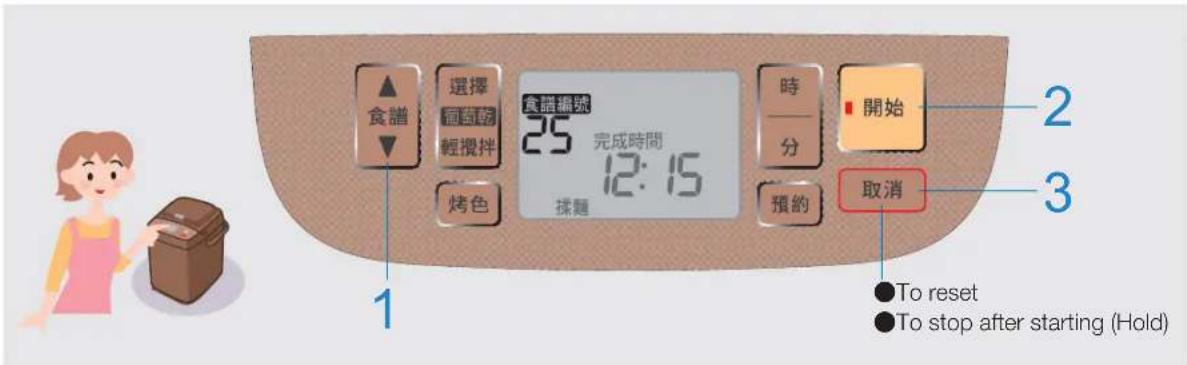
Preparations ① Install the blade into the bread pan
② Add ingredients into the bread pan. ③ Put the bread pan into the main unit.
Ingredients
Dumpling skin dough
Powder for dumpling 280 g
Warm water (about 35°C) 150 g (mL)
or
High-gluten flour 140 g
Low-gluten flour 140 g
Warm water (about 35°C) 170 g (mL)
1 Select menu "25"
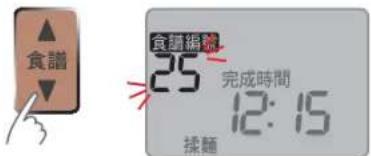
Press 取消 (Cancel) when you hear beep sounds.
3 Take out the dough right away
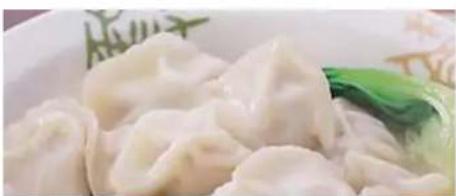
Ingredients
(for 30 ~ 40 pieces)
| Peanut oil 15 | g (1 tbsp) |
| Star aniseed 5 | g |
| Leeks 125 | g |
| Streaky pork 250 | g |
| Salt 2 | g |
| Gourmet powder 2 | g |
| Spice powder 6 | g |
| Soy sauce 18 | g (1 tbsp) |
(You can adjust the recipe based on your preference)
Dumpling
Making dumpling stuffing
① Fry star aniseeds with peanut oil. Cool down the peanut oil and mix them with leeks (to prevent water from coming out from leeks). Then evenly mix them with streaky pork and seasonings.
Rolling dough
② Take out the dough, shape it into long strips with a diameter of 3 cm and cut into 2 cm-wide small pieces. Use the rolling pin to roll the dough into a round plate with a diameter of about 8 cm. * Each dumpling skin weighs about 9 g and 30 \~ 40 dumplings can be made in total.
Making dumplings
③ Fill stuffing into the skin to make a dumpling. * You may make dumplings into a crescent or a triangle shape as you prefer.
Boiling dumplings
④ Boil half pot of water, pour the dumplings into the hot water. When the water boils again add half bowl of cold water into the pot. Repeat this procedure 3 times.
(This can improve the tenacity and elasticity of dumpling skins)
Udon/Pasta dough making
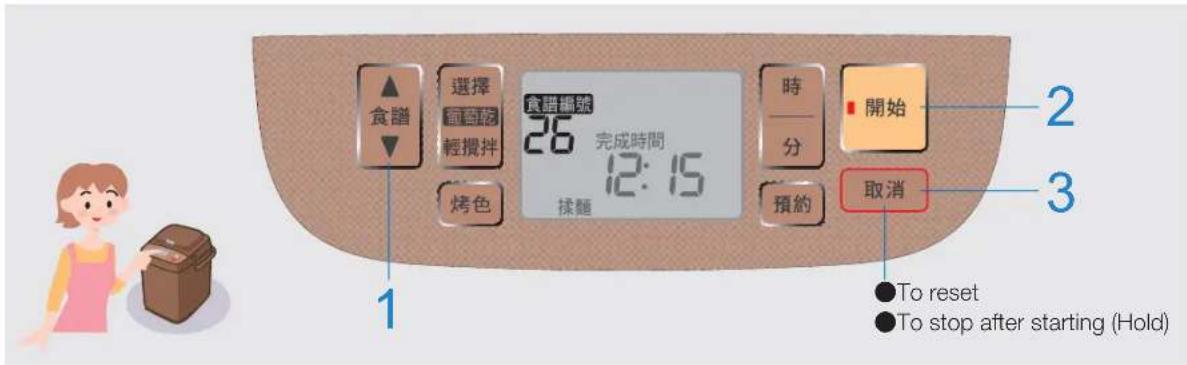
①Install blade for noodles and mochi making in the bread pan. ②Mix A in a metal bowl or the like. ③ Mix B in another container. ④ Add A→B in the bread pan sequentially. (Add olive oil to pasta dough last.)
Ingredients
not for making Soba
noodles and ramen dough /
Udon dough (3 \~ 4 servings)
| A | High-gluten flour | 150 g |
| Low-gluten flour 150 g | ||
| B | Salt 10 g (2 tsp) | |
| Warm water * | 160 g (mL) | |
| Kneading flour*2 | An appropriate quantity | |
| *1 Warm water about 35~40°C. | ||
| *2 You can use starch or high-gluten flour instead of kneading flour. | ||
Pasta dough (3 ~ 4 servings)
| A | High-gluten flourLow-gluten flour 150 g | 150 g |
| Salt 5 | g (1 tsp) | |
| B | Eggs (evenly mixed)Water 120 | 50 g |
| g (mL) | ||
| Olive oil 4 | g (1 tsp) | |
| Kneading flour*1 | An appropriate quantity | |
* 1 You can use starch or high-gluten flour instead of kneading flour.
■ You can also make colorful pasta!
Boil the vegetables in short time, use food processor to mash them into paste and then pour them into the bread pan. Reduce the same amount of water by 10 ~ 30 g (mL) as that of additional ingredients. (basic amount is 120 g (mL))
* Black sesame seed powder 1 tbsp..... water quantity of 120 g (mL)
Tomato mush 47 g (3 tbsp)..... water quantity of 90 g (mL)
Spinach mush 50 g..... water quantity of 90 g (mL)
1
Select menu "26"
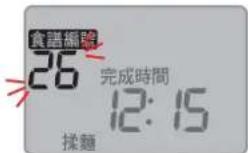
2
Start
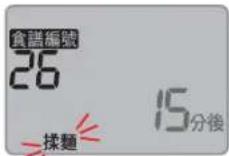
(About 15 min later)
3
Press 取消 (Cancel) when you hear beep sounds, and Take out the dough immediately.
4 Let the smooth surface face up, shape it into a ball and then wrap it with cling film and place still.
● Udon noodles...can be preserved about 2 h in room temperature (keep in a refrigerator in hot weather) ●Pasta...keep in a refrigerator for about 1 h
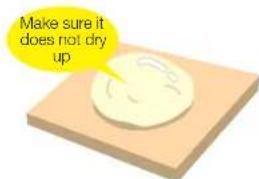
■When storing
- Refrigerator (can be preserved for 2 \~ 3 days) → Sprinkle high-gluten flour and then wrap it with a cling film. • Freezer (can be preserved for a month) → Cut it in width of noodles, and wrap it with a cling film. (P. EN65)
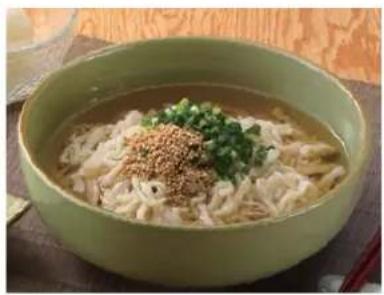
Udon
Dough rolling
① Cut it into 2\~4 equal parts with a kitchen knife or a spatula. ② Sprinkle kneading flour, and use rolling pin to roll the dough into a 3 mm thick round plate. (Refrigerated dough must bring to room temperature before rolling.)
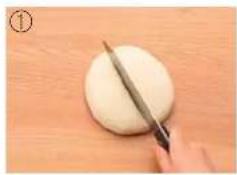
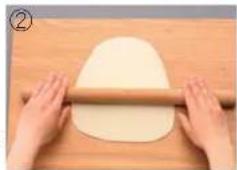
Cut dough
③ Fold the dough, and cut it from one side into noodles of 3 mm width. When it is difficult to cut the dough, sprinkle some kneading flour on the dough.
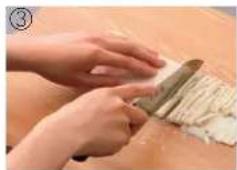
Cook noodle
④ Boil water in a big pot till bubbling, and then pat off the kneading flour on the noodle and put them in the pot for boiling (The time refer for boiling noodle is 8 \~ 13 min.)
⑤ Wash away viscous liquid with cold water and drain the water completely.

●The appearance and softness of dough and the taste of pasta is different from those of the pasta available in the market.
Pasta
Dough rolling
① Cut it into 4 equal parts with a kitchen knife or a spatula. ② Sprinkle kneading flour, and use rolling pin to roll the dough into a 1 mm thick round plate.
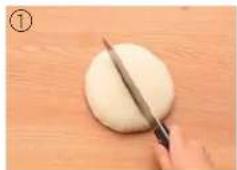
Cut dough
③ Sprinkle kneading flour on the dough and roll it from one side. Then cut it into noodles of 5 mm width.
The boiled noodles will grow slightly thicker, so it is better to cut the noodle thin.
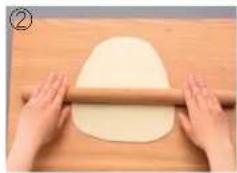
④ Shake the noodles to separate them from each other, then sprinkle kneading flour on them.
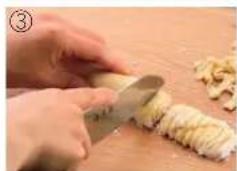
Cook noodles
⑤ Boil water in a big pot till bubbling. Then pat off the kneading flour on the noodles and put them in the pot for boiling.
(The time reference for boiling noodle is 3 ~ 5 min.)
- Step ① ~ ③ can be done by noodle machine. (Sprinkle sufficient kneading flour on the dough)
Scone making
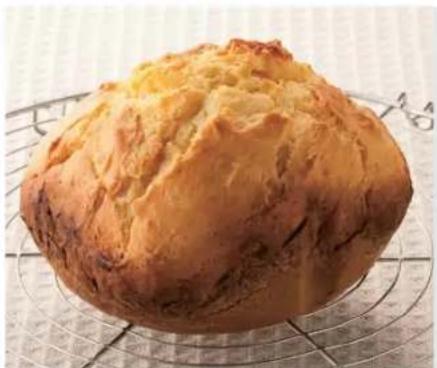
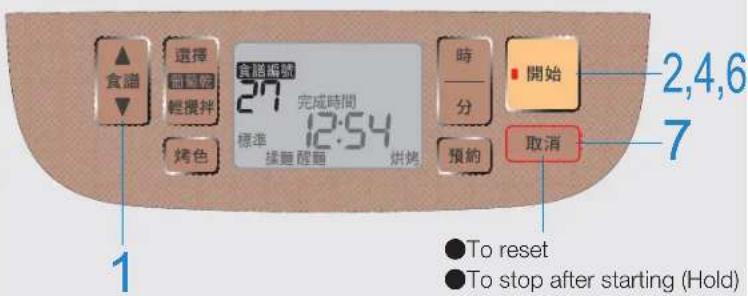
① Install bread blade in the bread pan and add the mixture of egg, milk and plain yogurt in sequence. ② Add ingredients in the bread pan. ③ Put the bread pan into the main unit.
Ingredients
| Mixture of an egg and milk 80 g | |
| Plain yogurt (low fat) | 50 g (about 50 mL) |
| Low-gluten flour 120 | g |
| High-gluten flour 60 | g |
| Baking powder 5 | g |
| Butter (cut into 1 cm pieces)* | 35 g |
| Granulated sugar 30 | g (21⁄2 tbsp) |
| Salt 2.5 | g (1⁄2 tsp) |
| * Cut it into 5 mm pieces when room temperature is below 15 °C. | |
■ You can select any ingredients or dressings for the baking! (The first collection of ingredients placed into the bread pan should not weigh over 120 g in all.) If Cancel (取消) is accidentally pressed at Step 3. Press Start (開始) button to recover within 10 min. (This can only be performed once; invalid if any other key is pressed) ■ 3 min after Step 3 is started, the beeper will sound and the unit will start "kneading". If Cancel (取消) is erroneously pressed at Step 5. Press Start (開始) button to recover within 10 min. (This can only be performed once; invalid if any other key is pressed) ■ 3 min after Step 5 is started, the beeper sounds and the unit starts "baking". (The surface of finished scone may be uneven due to its difficulty of forming.) ● Scone is different from the bread made with yeast powder.
1 Select menu "27"
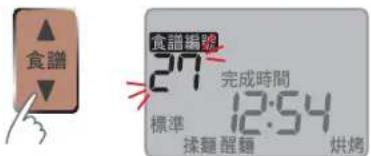
3 Beep sounds are heard. Open the lid and within 3 min clean the remaining flour.

- Use a rubber spatula to eliminate the residual powder around. (Using a metal spatula will damage the fluorine coating)
- Do not press the Cancel button.
4. Close the lid and restart.
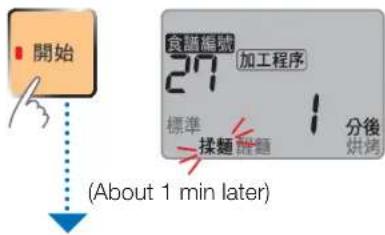
Open the lid when you hear the beep sound.
Finish the surface of the bread dough.
- Use a rubber spatula to shape the dough into a round and make it into a mountain shape. (See the figure on the right) (Using a metal spatula will damage the fluorine coating.) Do not press the Cancel button.
6.
Close the lid and restart.
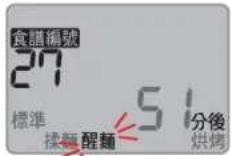
7.
The time range displayed is 45 to 51 minutes. Press the Cancel button when you hear beep sounds, take out the bread pan, and let it cool for about 2 minutes, then take out the scone.
Please make sure whether the kneading blade is stuck at the bottom of the bread. "Additional baking" in case of insufficient baking (see the following). The bread may become deformed upon overexertion.
"Additional baking" in case of insufficient baking.
Additional baking is allowed twice after baking is finished.
* "Additional baking" is allowed to be performed within 15 minutes
after previous baking.
It is invalid if the inner temperature drops.
① Select menu "27"
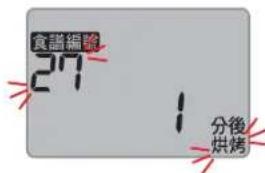
② Set baking time

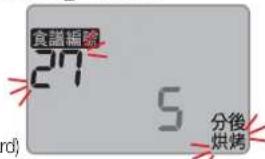
(Hold it for fast forward)
●It can be set to 1 ~ 20 min.
③ Start
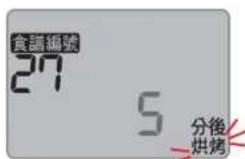
■Press and hold the Cancel (取消) to cancel additional baking.
■You can perform "additional baking" as follows. * Without pressing Cancel (取消) at step 7
① Press ▶ to set baking time ② Press to start
Within 3 min
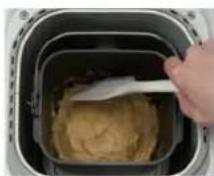
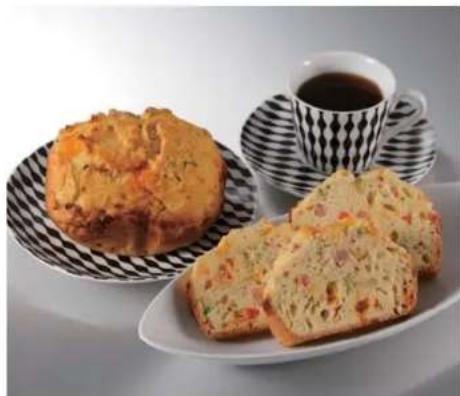
French bread
Menu "27" Crust colour dark (濃)
| Mixture of an egg and milk 60 | g |
| Low-gluten flour 150 | g |
| Baking powder 5 | g |
| Butter (cut into 1 cm pieces)* | 20 g |
| Granulated sugar 8 g (2 tsp) | |
| Salt 2.5 | g (1⁄2 tsp) |
| Potatoes (peeled and mashed) | 90 g |
| Black pepper (coarse) | Small quantity |
| Bacon (cut into 5 mm pieces) | 30 g |
| Cheese (cut into 5 mm pieces) | 30 g |
| Carrots(cut into 5 mm pieces and boiled toa moderate degree) | 20 g |
| Corn (kernels) | 20 g |
| Green soybeans (peeled beans) | 20 g |
* Cut into 5 mm pieces when the room temperature is below 15 °C. ●Put all the ingredients into the bread pan in the top-to-bottom order.
Scone with tomatoes and green soybeans Menu "27"
| Mixture of an egg and tomato juice | 100 g |
| Olive oil 24 | g (2 tbsp) |
| Low-gluten flour 120 | g |
| High-gluten flour 60 | g |
| Baking powder 5 | g |
| Granulated sugar | 18 g (1 1/2 tbsp) |
| Salt | 2.5 g (1 1/2 tsp) |
| Black pepper (coarse) Small quantity | |
| Your favorite dry herb (basil) | 1/2 tsp |
| Dried tomatoes (dried)(Divided into flour equal parts after dried) | 10 g |
| Green soybeans (peeled beans) | 50 g |
| Cheese (cut into 1 cm pieces) | 50 g |
●Put all the ingredients into the bread pan in the top-to-bottom order.
Cake making
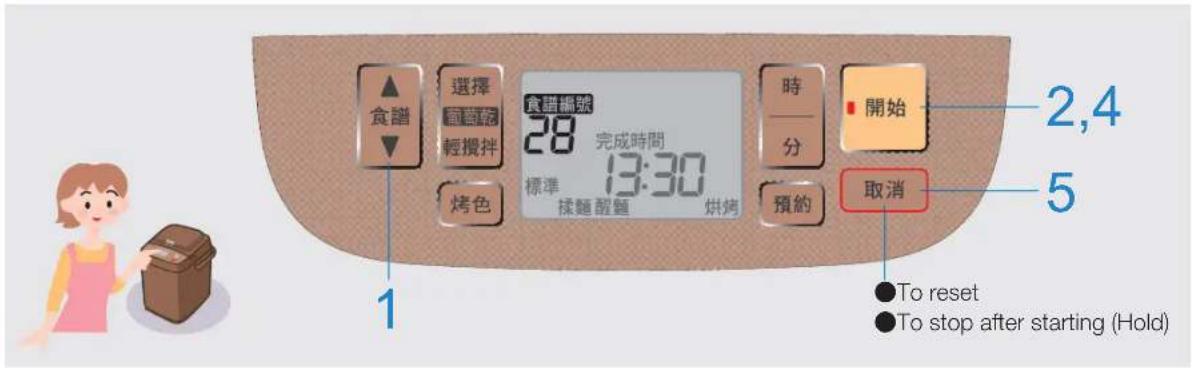
① Install blade in the bread pan. ② Add butter, granulated sugar, milk and eggs into the bread pan in sequence. ③ Add in the sieved A, then put the bread pan into main unit.
Ingredients
| Cake | |
| Unsalted butter* | 110 g |
| Granulated sugar 100 | g |
| Milk 15 | g(1 tbsp) |
| Egg (evenly mixed) 100 | g |
| A [Low-gluten flour 180]Baking powder 7 | g |
* Cool down to room temperature and cut it into small pieces of 1 cm.
■ You may add your favorite ingredients and stuffing!
(Solid ingredients must be added during cleaning of the residual flour)
Cocoa powder (15 g)
Chocolate bean (50 g)
Black tea
(Earl Grey tea)
(4 g)
Walnut (40 g)
■ If Cancel is accidentally pressed at Step 3, press Start to recover within 10 min.
(This can only be performed once; Invalid if any other key is pressed)
■ 15 min after Step 3 is started. Beep sounds are heard and kneading is started automatically.
If you fail to eliminate the remaining flour, they will be on the surface of the cake when it is completed.
● The finished cake is similar to butter cake.
(But not totally the same as the sponge cake available in the market.)
1 Select menu "28"
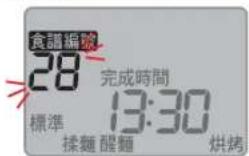

To select crust colour ▶ 烤色 (P. EN21)
2 Start 開始
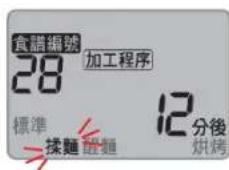
Beep sounds are heard.
Beep sounds are heard. Open the lid and, eliminate the remaining powder.
- Use a rubber spatula to clean the residual flour around. (Using a metal spatula will damage the fluorine coatings.)
- Do not press 取消 (Cancel)
4 Close the lid and Restart
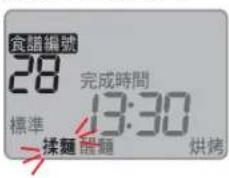
5. Press 取消 (Cancel) when you hear beep sounds.
Take out the cake
●“Additional baking” in case of insufficient baking. (P. EN69) ● Cake shape will be damaged if it is forced out.
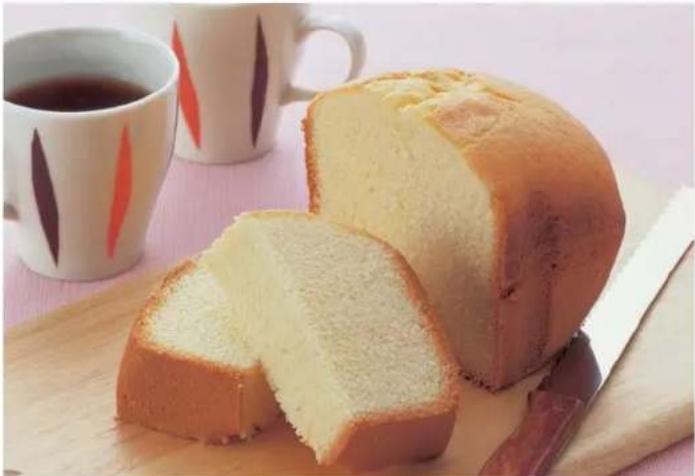
"Additional baking" in case of insufficient baking
Additional baking is allowed twice after baking is finished.
* "Additional baking" is allowed to be performed within 15 min after previous baking. It is invalid if the inner temperature drops.
① Select menu “28”
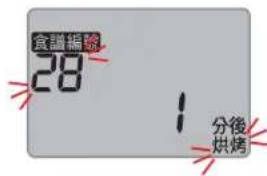
(Hold for fast forward)
It can be set to 1 to 20 minutes.
Start
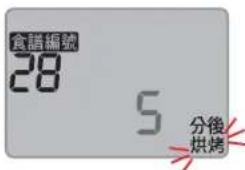
You can perform "additional baking" as follows. Without pressing Cancel at step 5 (see page EN68)
Press ▶ to set baking time
Press to start
Time required: about 1 hour and 30 minutes
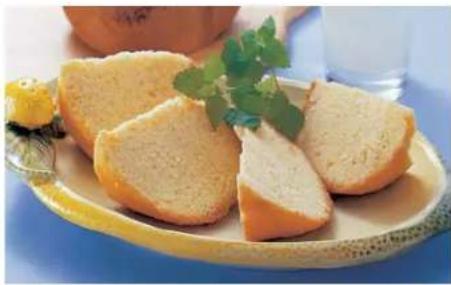
Lemon cake
| Unsalted butter (cut into small pieces of 1 cm) | 110 g |
| Granulated sugar 100 | g |
| Milk 15 | g (1 tbsp) |
| Egg (evenly mixed) | 100 g |
| Rum (or brandy) | 1 tbsp |
| A [Low-gluten flour 180]Baking powder 7 | g |
| Lemon peel (ground)* | For 1 piece |
To be added after residual flour is eliminated.
Chocolate cake
| Unsalted butter (cut into small pieces of 1 cm) | 100 g |
| Granulated sugar 100 | g |
| Egg (evenly mixed) | 100 g |
| A [Cocoa powder 15 Low-gluten flour 180 Baking powder 7] | g (21⁄2 tbsp) g |
| Chocolate bean* | 50 g |
| Citrus peel * (cut into small pieces 5 mm ~ 1 cm)* | 40 g |
To be added after residual flour is eliminated.
Pumpkin cake
| Unsalted butter (cut into small pieces of 1 cm) | 100 g |
| Granulated sugar 80 | g |
| Milk | 30 g (about 30 mL) |
| Egg (evenly mixed) | 100 g |
| Pumpkin (cut into small pieces of 1 cm and make it softer) | 50 g |
| A [Low-gluten flour 180]Baking powder 7 | g |
| g |
Matcha red bean cake
| Unsalted butter (cut into small pieces of 1 cm) | 80 g |
| Granulated sugar 100 | g |
| Egg (evenly mixed) | 150 g |
| Matcha (green tea powder) | 3 g (1 1/2 tsp) |
| Low-gluten flour 180 | g |
| LBaking powder 7 | g |
| Red bean *(cut into pieces of about 5 mm)* | 50 g |
To be added after residual flour is eliminated.
Vegetable cake making
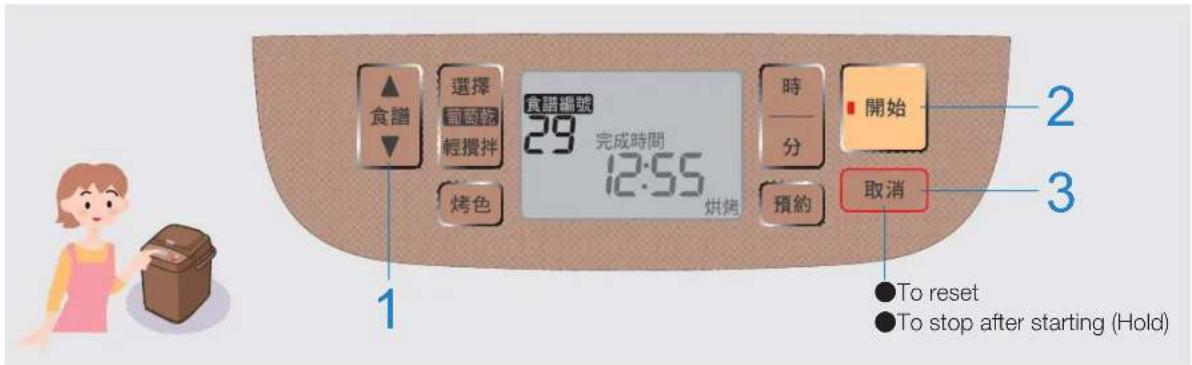
① Make the vegetable cake mixture. ② Remove the kneading blade from the bread pan and pour in the mixture. ③ Put the bread pan into the main unit.
Ingredients
Vegetable cake
| A | Egg 50 Carrot (ground) 50 | g |
| g | ||
| A + sugar-free soy milk 200 | g | |
| Granulated sugar 60 | g | |
| Vegetable oil | 40 g (3 tbsp + 1 tsp) | |
| B | Low-gluten flour 130 Baking powder 5 | g |
| g | ||
How to make vegetable cake mixture
① Adjust the weight of soy milk to make the total weight of A and soy milk reach 200 g. ② Place A and granulated sugar into a bowl and use a mixer to whisk A and sugar sufficiently. ③ Add some vegetable oil and stir it well. ④ Add the sifted B, and stir it well.

Low-gluten flour, granulated sugar and the baking powder can be replaced by 150 g of muffin mix
1 Select menu "29"
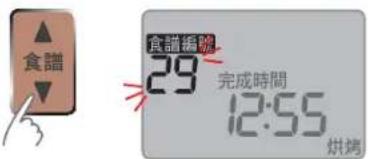
3 Press 取消 (Cancel) when you hear beep sounds. Take out the bread pan and cool it down for about 2 min. Then take out the vegetable cake
● "Additional baking" in case of insufficient baking. (P. EN71)
Time required: about 55 min
"Additional baking" in case of insufficient baking
If the baking is insufficient due to the ingredients (judging by inserting a prod into the dough. If the dough sticks to the prod, the baking is insufficient), additional baking is allowed twice after baking is finished.
* "Additional baking" is allowed to be performed within 15 min after previous baking. It is invalid if the inner temperature drops.
① Select menu "29"
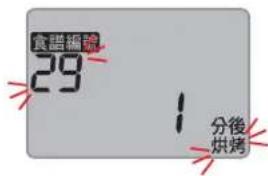
■You can perform "additional mixing" as follows. * Without pressing 取消 (Cancel) at step 3 (P. EN70)

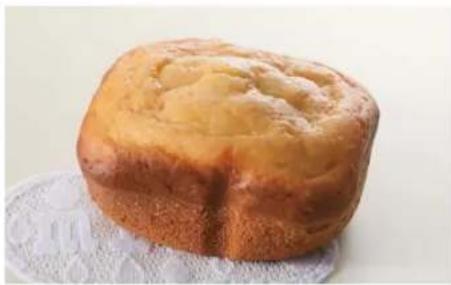
Vegetable cake recipe
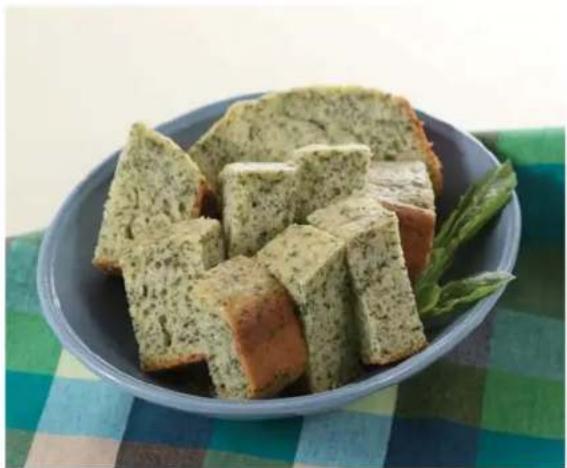
Spinach vegetable cake
Menu "29"
| A[Egg 50 Spinach*] | g |
| 50 g | |
| A + sugar-free soy milk 200 | g |
| Granulated sugar 60 | g |
| Vegetable oil | 40 g (3 tbsp + 1 tsp) |
| B[Low-gluten flour 130 Baking powder 5] | g |
| g |
Adjust the weight of soy milk to make the total weight of A and soy milk reach 200 g. Add other ingredients into the screened B, and mix them well.
* The following preparations must be made.
Wrap the ingredients with plastic wrap, put them into a microwave (600 W) to heat for about 1 min., or cook thoroughly, filter water, and chop the ingredients.
Sweet potato vegetable cake Menu "29"
| A: Egg 50 | g |
| A + sugar-free soy milk 150 | g |
| Sweet potato (cut 1 cm cubes)* | 50 g |
| Granulated sugar 60 | g |
| Vegetable oil | 40 g (3 tbsp + 1 tsp) |
| B[Low-gluten flour 130]Baking powder 5 | g |
| g |
Add sifted B and other ingredients into 150 g mixture of the egg and soy milk, and mix them well.
* The following preparations must be made.
Cut the sweet potato into 1 cm cubes, put them into the microwave oven (600 W) to heat for about 1 min, or after boiling, dry them with a paper towel.
- Adjust the time for heating according to the type of microwave oven.
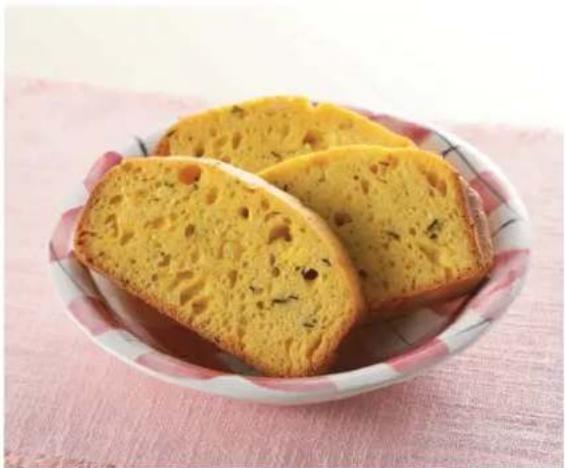
Pumpkin vegetable cake Menu "29"
| A: Egg 50 | g |
| A + sugar-free soy milk 150 | g |
| Pumpkin (chopped)* | 50 g |
| Granulated sugar 60 | g |
| Vegetable oil | 40 g (3 tbsp + 1 tsp) |
| B[Low-gluten flour 130]Baking powder 5 | g |
| g |
Add other materials and screened B into 150 g mixture of the egg and soy milk, and mix them well.
* The following preparations must be made.
Use a preservative film to pack the ingredients, put them into a microwave (600 W) to heat for about 2 min., or cook thoroughly, filter water, and chop the ingredients.
Onion and corn vegetable cake Menu "29"
| A\Egg 50Onion (chopped)*1 | g |
| 50 g | |
| A + sugar-free soy milk 200 | g |
| Granulated sugar 60 | g |
| Salt 5 | g |
| Vegetable oil | 40 g (3 tbsp + 1 tsp) |
| Cheese powder 10 | g |
| Corn (kernels) 20 | g |
| B\Low-gluten flour 130Baking powder 5 | g |
| Cheese powder*2 | 5 g |
Add soy milk, and ensure the total weight of soy milk and A is 200 g. Add other ingredients into the screened B, and mix them well.
*1 The following preparations must be made.
Use a preservative film to pack the ingredients, put them into microwave (600 W) to heat for about 1 min., or cook thoroughly, filter water, and chop the ingredients.
*2 Put the paste into the bread pan, and sprinkle the ingredients from above.
Red bean making
Time required: about 1 h
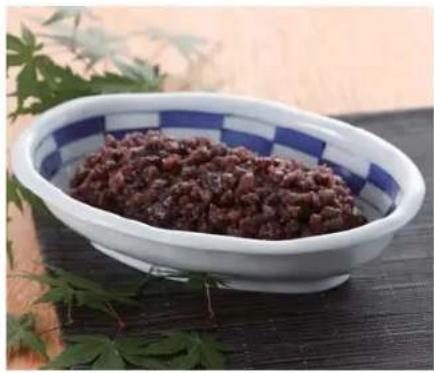
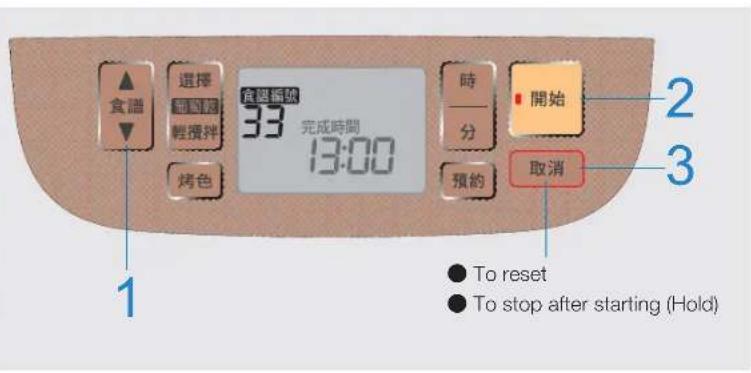
① Poach the red bean. (Refer to "How to poach the red bean" below) ② Install blade in the bread pan. ③ Add sugar and then the poached red bean. ④ Insert the bread pan into the main unit.
Ingredients (The total weight of made cake is 450 g)
Red bean paste
| Poached red bean* | (About 360 g) |
| Dry red bean 150 | g |
| LWater 450~600 | g(mL) |
| Granulated sugar 200 | g |
* Paste made with the poached red bean sold in the market are of poor quality.
- Be sure to observe the foregoing amount.
How to poach the red bean
① Wash the red bean, and filter the insect-damaged beans and impurities. ② Put red bean and water in a pot, and boil with burner on high-temp. ③ After boiling, switch the burner to a mid-temp., and boil for 4 ~ 5 min. ④ Filter the water. (And remove the impurities) ⑤ Add ④ and enough water in the pot, and boil with burner on mid-temp. After boiling, switch the burner to a low-temp., stir slightly, cover the pot and boil still on low-temp. (Standard: 60 min…The time will vary with different heat levels and red bean quality.) * In case of insufficient water, add some water to keep the water level higher than red bean. ⑥ When the red bean can be squashed easily by hand, stop boiling, and filter the water.
1 Select menu "33"
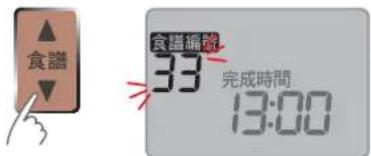
3 When you hear a beep sound, press Cancel, and then take the red bean paste out with a rubber spatula.
* Take the red bean paste out with a soft tool like a rubber spatula. (Hard utensils may damage the fluoride coating of the bread pan.)
- May add a small amount of salt according to your preference. - The red beans are very soft after boiling, but will become hard after cooling down.
■ When storing
Pack the red bean paste with a preservative film during reservation.
→ Reserve in refrigerating chamber (storage life: about 1 week) Reserve in freezing chamber (storage life: about 1 month)
Chocolate making
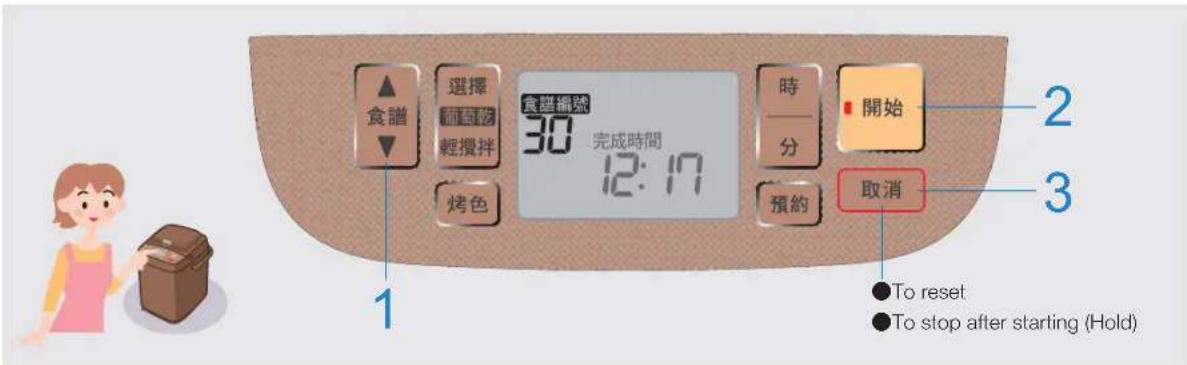
① Install blade in the bread pan. ② Break the chocolate and put them into the bread pan. ③ Add in cream and honey, and then install bread pan into main unit.
Ingredients (for about 13 cm × 13 cm × 1 cm (L × W × H))
Chocolate (milk chocolate)
| Milk chocolate(Chocolate plate available in the market) | 165 ~ 174 g(3 pieces) |
| Whipping cream(a butterfat content of about 35%) | 50 g (ml.) |
| Honey 10 | g |
Chocolate (white chocolate)
| White chocolate(Chocolate plate available in the market) | 160~180g(4 pieces) |
| Whipping cream(a butterfat content of about 35%) | 50g (mL) |
| Honey 10 | g |
Chocolate (black chocolate)
| Black chocolate(Chocolate plate available in the market) | 165 ~ 174 g(3 pieces) |
| Whipping cream(a butterfat content of about 35%) | 70 g (mL) |
| Honey 10 | g |
* When cream with a butterfat content of over 41% is used, please substitute 10 mL of cream with milk.
(E.g.) Black chocolate
Whipping cream: 60 g (mL)
Milk: 10 g (about 10 mL)
- Be sure to use the amount described above. Otherwise, the grease may become separated or the chocolate will become too soft.
1 Select menu "30"
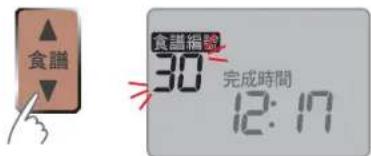
3 Press 取消 (Cancel) when you hear beep sounds, take out the bread pan and use a rubber spatula to eliminate the chocolate stuck on the blade.
Manually remove the blade.
●Perform Additional Mixing if the chocolate is not fully melted (P. EN75). ● Using a metal spatula, tongs, or other metal utensil may damage the surface of blade.
Pour it using a rubber spatula
into a pan lined with plastic wrap or cooking paper.
Keep in a refrigerator for more than 2 hours for
cooling until it sets
Cut into appropriate sizes
●Sprinkle cocoa powder or sugar powder on the cut chocolates.
Time required: about 17 min
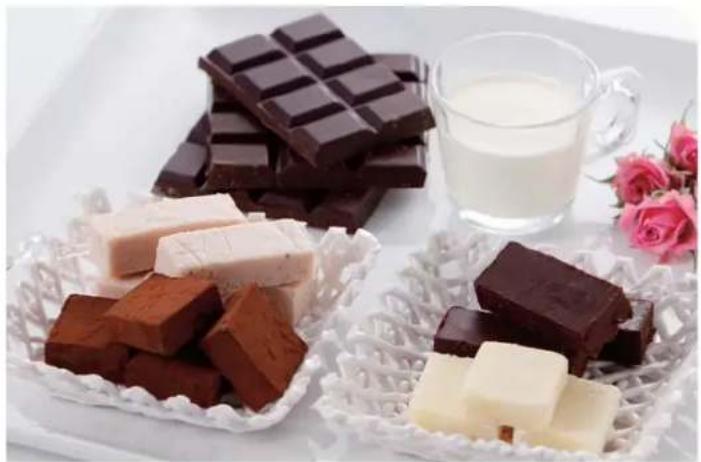
Perform additional mixing when the mixing is not sufficient
Additional mixing is allowed twice after mixing is finished
* Start additional mixing within 5 min after mixing is finished. Additional mixing cannot be continued if the temperature of inner part of automatic bread maker has dropped. *Use a rubber spatula to eliminate the chocolates stuck in the bread pan before additional mixing.
①Select menu “30”
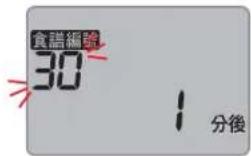
(Hold for fast forward)
●It can be set from 1 to 5 min.
③ Start
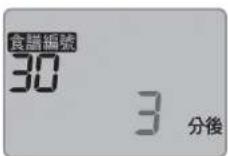
■To discontinue mixing → Hold 取消 (Cancel).
■You can perform "additional mixing" as following. * Without pressing 取消 (Cancel) at step 3 (P. EN74)
①Press
set mixing time
②Press
to start
Strawberry chocolate
| White chocolate (plate) 160 | g (4 pieces) |
| Butter 20 | g |
| Honey 10 | g |
| Strawberry(pounded into jams) | 40 g |
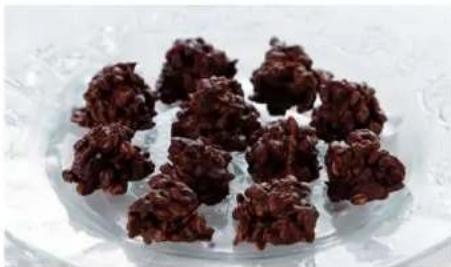
Corn chips chocolate (1 piece at each bite, about 20 pieces in total)
| A | Black chocolate (plate) 116 g (2 pieces) | |
| Whipping cream(a butterfat content of about 35%) | 40 g (mL) | |
| Honey 10 | g | |
| Corn chips 100 | g | |
① Use A for making chocolate. (P. EN74) ②Mix ① and corn chips. ③ Use a spoon to pour the chocolate onto a cooking paper for cooling in the refrigerator. You may freely decide the size.

Mousse chocolate
(For about 5 glasses)
| A | Black chocolate (plate) | 116 g (2 pieces) |
| Whipping cream(a butterfat content of about 35%) | 60 g (mL) | |
| Honey 10 | g | |
| Whipping cream | 180 g (mL) | |
| Your favorite fruits (for decoration) | An appropriate quantity | |
① Use A for making chocolate. (P. EN74) ② Whip the cream. ③ Mix hot ① with ②. ④ Pour it into a glass or other container for cooling and decorate it with your favorite fruits. ● You may also add grated chocolates and nuts if you prefer (10 ~ 20 g).
Jam making
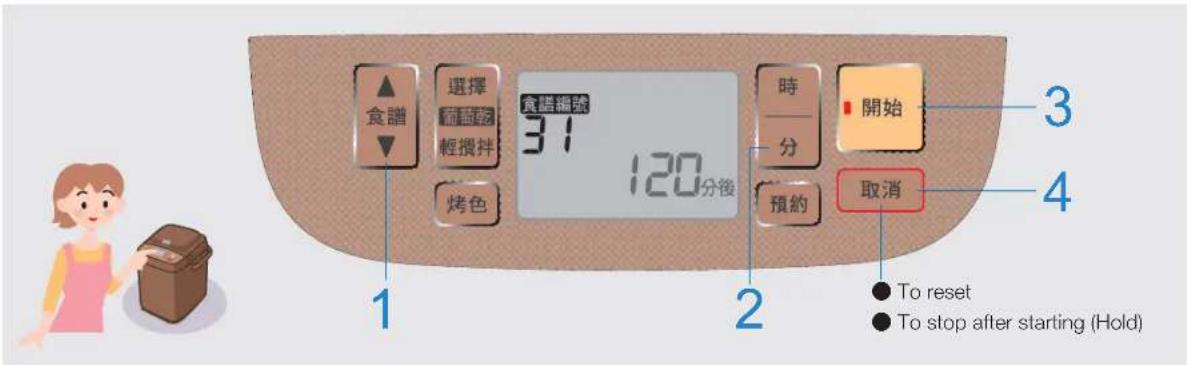
① Install bread blade in the bread pan. ② Add granulated sugar, fruit and lemon juice in the bread pan sequentially. ③ Then install the bread pan into the main unit.
Ingredients
| Strawberry jam | |
| Strawberry(Washed and stalks removed)(Cut into halves) | Net weight 400 g |
| Granulated sugar 140 | g |
| Lemon juice | 38 g (about 38 ml.) |
- Be sure to use the amount described in the above. Otherwise, the ingredients may spill out and be overcooked. ■ Be careful not to overcook! The jam will be thicker after cooling down. ■ Jam becomes more dilute due to less granulated sugar quantity and no additives. It cannot be stored for a long time! Please keep it in a refrigerator and eat it soon. ● Storage period: about 1 week
1 Select menu "31"
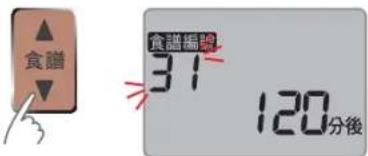
Set cooking time (120 min for strawberry jam)
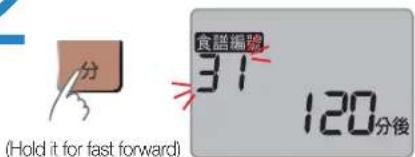
* Set time according to the types of fruits.
● It can be set to 90 ~ 150 min in increments of 10 min.
3 Start
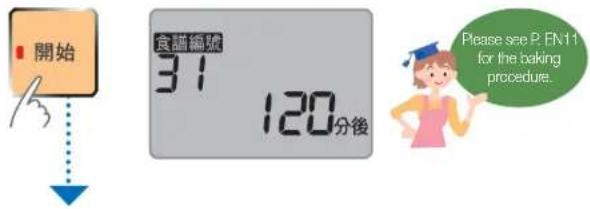
4 Press 取消 (Cancel) when you hear the beep sound and take out the bread pan for cooling (for about 10 min)
* Do not place on an uneven surface.
- If heating is insufficient (too much water and less sticky), perform "additional heating". (P. EN77)
5 When dumping the bread pan use a rubber spatula to pour jam into a container slowly
● Using metal spatula or similar utensils will damage the coating.
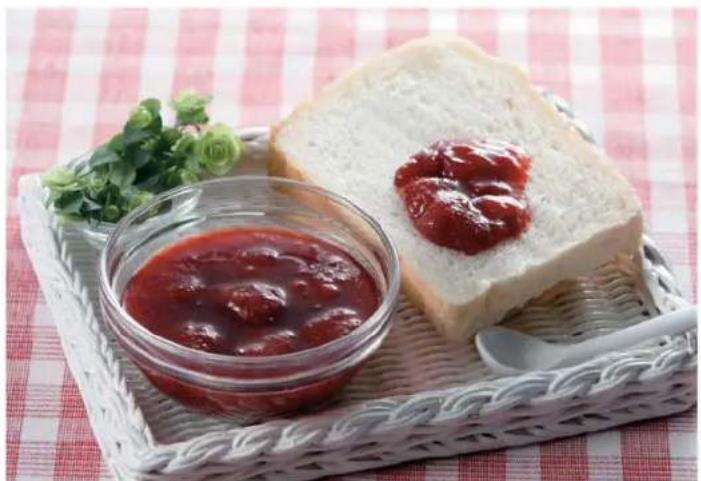
"Additional heating" in case of insufficient heating
Additional heating is allowed twice after first heating.
* "Additional heating" can be performed within 5 min after previous heating.
Additional heating can't be continued if the temperature of inner part of automatic breadmaker is dropped.
① Select menu “31”
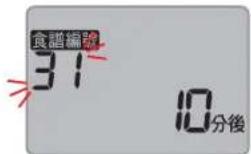
② Set cooking time
(Hold it for fast forward) - It can be set to 10 \~ 30 min by each press of 1 min.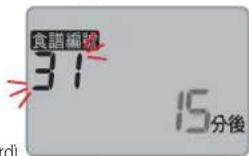
③ Start
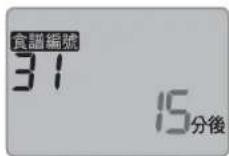
■Press and hold the 取消 (Cancel) to cancel additional heating.
■You can perform "additional heating" as following. * Without pressing 取消 (Cancel) at step 4 (P. EN76)
①Press
set cooking time
②Press
to start
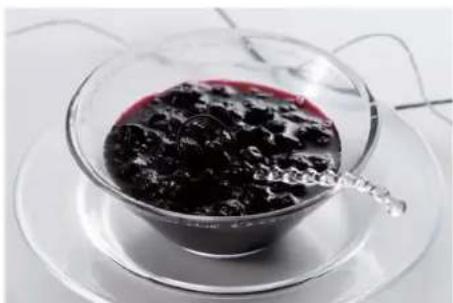
Blueberry jam
| Refrigerated blueberries | 400 g |
| Granulated sugar 140 | g |
| Lemon juice | 38 g (about 38 mL) |
Set cooking time to 150 min
(Set to 110 min when using fresh blueberries)
Apple jam
| Apples(peeled, cored and cut into8 pieces of 1 cm width) | Net weight 400g |
| Granulated sugar 140 | g |
| Lemon juice | 38 g (about 38 mL) |
Set cooking time to 100 min
Peach jam
| Peaches( peeled, cored andcut into 2 cm pieces) | Net weight 400g |
| Granulated sugar 140 | g |
| Lemon juice | 38g (about 38 mL) |
Set cooking time to 120 min
Orange jam
| Oranges (After washing, separate the fruit flesh and peel. Remove the flesh film, take out and divide the inner flesh into 2~3 equal parts. Remove the white substance of peel and then shred the peel. | 400g |
| Granulated sugar 140 | g |
Add peels and the water used for processing peels in the boiler and boil for 15 min.
Drain the boiled water and add water for boiling again.
Repeat 3 times and fully drain the water.
Add peels, granulated sugar and fruit flesh in the bread pan sequentially.
Install the bread pan
Set cooking time to 120 min
Compote making
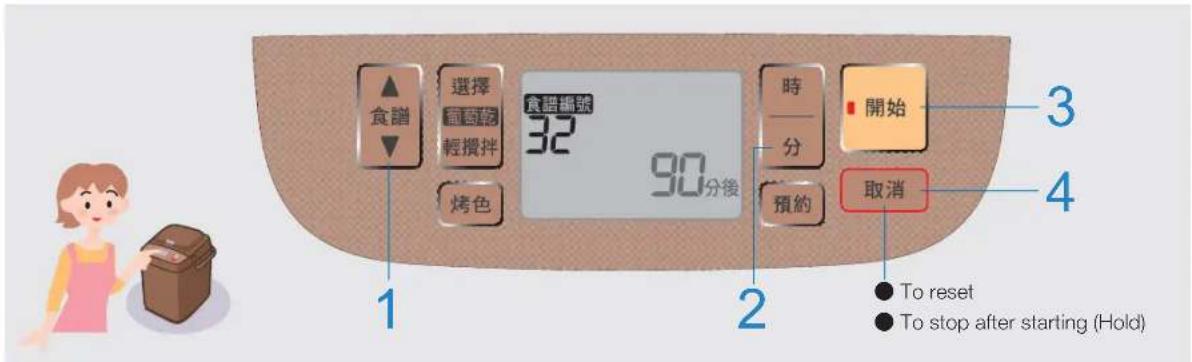
① Add water, granulated sugar, and lemon juice to the bread pan (without the blade), and use a rubber spatula to mix the ingredients thoroughly (until the granulated sugar melts completely). ② Add the fruits one by one, and do not stack them. ③ Cut a piece of cooking paper to fit the size of the bread pan, with a 1 cm hole in the center, to use as a lid. ④ Then install the bread pan into the main unit.
Ingredients
| Apple compote | |
| Apples *(peeled, cored, and)quartered | about 200 g(A medium sized) |
| Water 250 | g (mL) |
| Granulated sugar 60 | g |
| Lemon juice 10 | g (2 tsp) |
| * Some kind of fruits may be easily cooked. "Fuji" apples are recommended for their relatively firm flesh. | |
- Be sure to observe the amounts specified above. Failure to do so may result in uneven heating or scorching. ● Fruit placement (preparation ②)
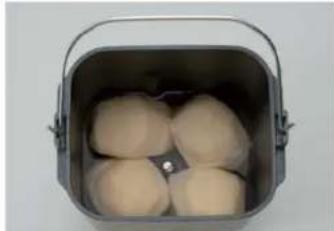
● Use a cooking paper as a lid (preparation ③)
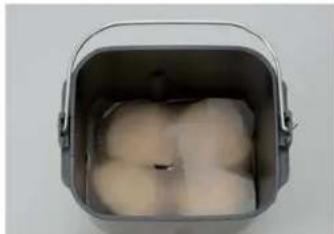
■ For best results, soak the fruit in the syrup for half a day after finishing, to allow the syrup to penetrate the fruits.
1 Select menu "32"
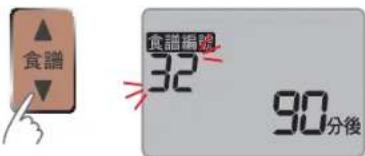
Set cooking time (90 minutes for candied apple)
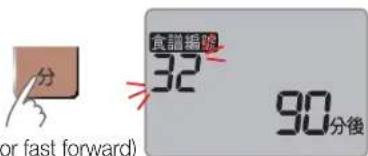
* Set the timer according to the type of fruit.
(Hold it for fast forward)
● It can be set from 60 to 120 minutes in 10-minute increments.
3 Start
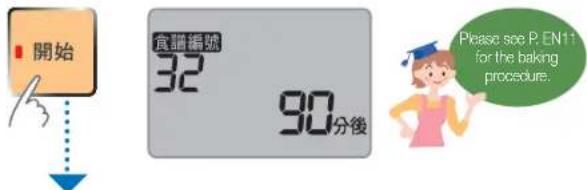
4 Press Cancel when you hear the beep sounds. Take out the bread pan and let it cool (about 10 minutes).
* Do not place on an uneven surface.
- If heating is insufficient (the color is too white and it is too hard when inserting a bamboo stick), perform "additional heating" (see P. EN79).
5 Pour slowly into the container, and cool it down with the syrup.
● Using a metal spatula or similar utensil will damage the coating. ● After pouring out into the container, flip the fruit up and down to cool it with the syrup. During cooling, the syrup will penetrate into the fruits.
Additional heating is allowed twice after the first heating.
* "Additional heating" is allowed to be performed within 5 minutes after the previous heating.
Additional heating cannot be continued if the temperature inside the automatic breadmaker has dropped.

Select menu "32"

Set cooking time
(Hold for fast forward)

Start
- It can be set from 10 to 30 minutes in 1-minute increments.
■ Press and hold the 取消 (Cancel) button to cancel additional heating.
■ You can perform "additional heating" as follows.
* Without pressing 取消 (Cancel) at step 4 (P. EN78)
① Press to set cooking time
② Press to start
Tomato compote
Tomatoes (peeled after boiling and stalks removed) 3 small ones (about 100 g each)
Water 300 g (mL)
Granulated sugar 60 g
Ginger (thin slices) 10 g
■ Set cooking time to 60 min
Loquat compote
Loquats (peeled, cored and cut into 2 parts) 3 ones (about 50 g each) Water 250 g (mL) Granulated sugar 60 g Lemon juice 10 g (2 tsp)
■ Set cooking time to 60 min
Pear compote
Pear about 180 g (peeled, cored and quartered, A medium sized) Water 250 g (mL) Granulated sugar 60 g Lemon juice 10 g (2 tsp)
■ Set cooking time to 60 min
Date compote
Date (dried) 250 g Water 100 g (mL) Red Wine 125 g (about 125 mL) Granulated sugar 40 g Lemon juice 10 g (2 tsp) Cinnamon An appropriate quantity
■ Set cooking time to 60 min
Mochi making
Soaking sticky rice is not recommended (otherwise it will make the mochi too soft).
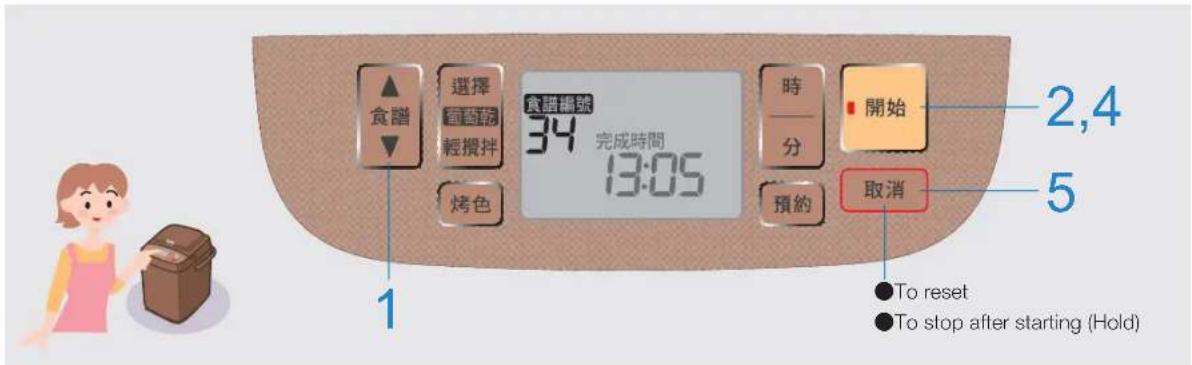
① Wash the sticky rice. (Wash till the water is clear.)
* Do not soak the sticky rice in water (otherwise the mochi will become soft).
② Use a screen to drain the water for 30 min. ③ Install blade for noodles and mochi making in the bread pan. ④ Add sticky rice and water.
Ingredients
| Mochi | ||
| (each round mochi) is about 35 g) | About 12 pieces | About 18 pieces |
| Sticky rice 280 g 420 g | ||
| Water 230 | g (mL) | 3 g (mL) |
| Kneading flour* | An appropriate quantity | An appropriate quantity |
●A cup of sticky rice is about 140 g. ■ If you want to make a mochi of your favorite hardness, you need to adjust the water amount!
![graph LR A["Soft"] -->|+20 g (mL)| B((cylindrical container)) B -->|-20 g (mL)| C["Hard"]](/content/2026/05/792740/images/10bb43009d4accebfab36aa10ae674377be9a7bab048416411399298dd2d67e2.jpg)
If 取消 (Cancel) is erroneously pressed in Step 3, press 開始 (Start) within 10 min to recover it.
(This can only be performed once.) Other buttons are invalid.
■30 min after step 3, a beep sound will be heard, and then the unit starts the next process automatically.
(in case the lid is closed)
* If mochi becomes soft, it is difficult to take out.
If the sticky rice has been soaked in water, deduct the water amount that the sticky rice has absorbed.
< Reduce quantity reference > [12 pieces] 80 g (mL) [18 pieces] 140 g (mL)
1 Select menu "34"
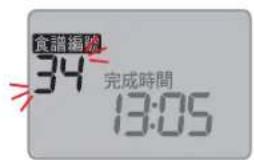
Display "55 min later" when the room temperature is low. ●The blade may rotate sometimes.
When you hear the beep sounds
open the lid
●Do not press Cancel
Within 30 min
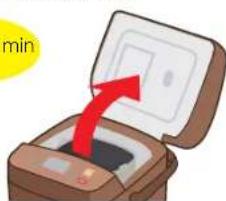
4 When the lid is open
start immediately
* Open the lid to dissipate extra water.
You can add red cherry shrimps when you begin to make mochi.
* Do not add hard ingredients such as beans! (may damage the fluorine coating of the bread pan)
Time required: about 1 h
■Add your favorite ingredients on your fresh mochi...
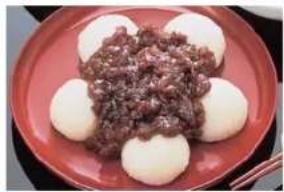
Red bean mochi
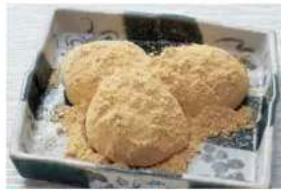
Peanut mochi

Radish mochi
5 When you hear the beep sounds, press Cancel, Take out the bread pan quickly and place it still till it can be touched by hand (5 ~ 10 min). 6 Take out the mochi (from the bottom)
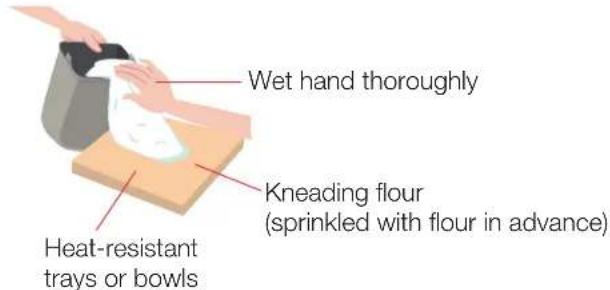
7 Take some mochi and knead it into a ball.
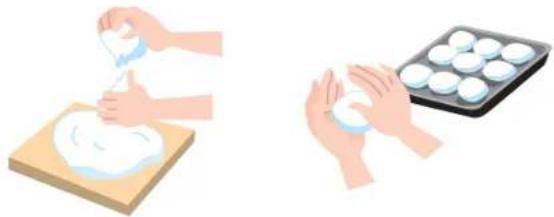
■ Eat immediately. Wet your hands with water in advance. ■ To store it, sprinkle some kneading flour on your hands in advance.
■ Mix with other ingredients in the middle...
Black sesame seed mochi
When making mochi, add 2 to 3 teaspoons of black sesame seeds and a small amount of salt bit by bit.
Shad dock mochi
When making mochi, add 1/2 cup of mashed shad dock peels (the yellow part) and a small amount of salt bit by bit.
● The taste of mochi may vary due to the amount of water, the amount and type of sticky rice, and whether new or old rice is used.
● The skin of mochi will become hard if it is left out for a long time.
■ The proper preservation method for mochi.
① When it has cooled down, dust off the kneading flour. ② "When it is placed indoors" It can be preserved for 2 days when placed in a place of low humidity and temperature. "When it is kept in a refrigerator" It can be preserved for a month when packed in well-sealed double bags.
Take out mochi from the bread pan directly and wrap it with cling film. It is easier to make Japanese mochi.

Cleaning
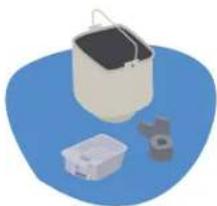
In order to avoid damaging the fluorine coating of the bread pan...
● Please clean and dry as quickly as possible!
Do not put an unclean or wet bread pan back into the machine.
● Clean with a soft sponge!
Do not use cleanser or metal brush to clean the bread pan. And do not use the nylon face of a sponge, sponges wrapped in nylon net or dish dryer as well.
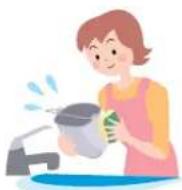
Bread pan, blade, lid
Wash with water after the residual dough is cleared.
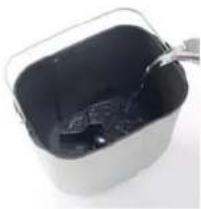
① Add a small amount of hot water into the bread pan and let it sit for a while.
● If blade is hard to remove, rotate the blade slightly to remove it.
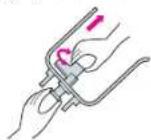
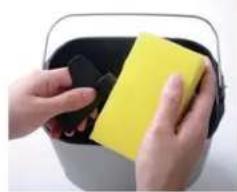
② Clean the bread pan and the blade with water.
● Do not leave any residual dough around the shaft or it may damage the fluorine coating.
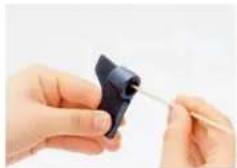
③ Use a bamboo stick to remove the dough stuck on the blade and the shaft.
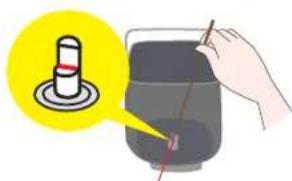
● Any residual dough on the shaft may cause the blade to be easily detached or left in the bread.
● Use kitchen detergents (neutral) to clean the shaft if it is very dirty.
Wipe with
a well-wrung cloth.
Use a well-wrung cloth to clean away the instant dry yeast on the flap valve and make sure that the vent of yeast dispenser is closed.
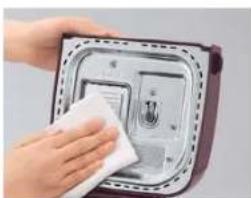
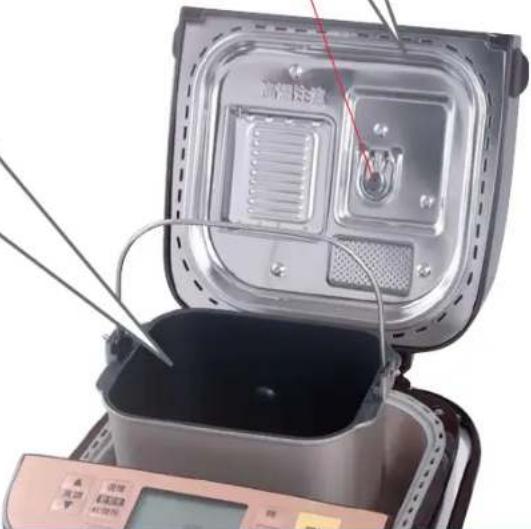
Natural yeast culture vessel
Use kitchen detergents (neutral) to
clean it thoroughly, then air dry it.

●The remaining yeast (fermented) will decay due to bacteria reproduction which will ruin its cultivation next time. ■ If decay occurs ①Sprinkle diluted chlorine bleach powder. ②Fully clean.
Dispenser lid
Remove and wash with water
[Removal method]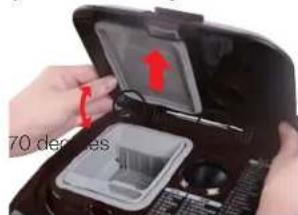
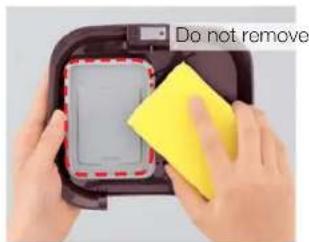
●Raise the dispenser lid to an angle of approximately 70 degrees and pull it upwards on the right.
Yeast dispenser
Wipe with
a well-wrung cloth and air dry.
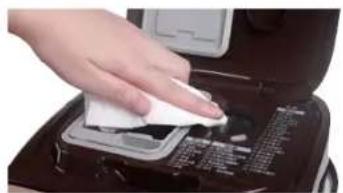
Do not wipe the yeast dispenser with a dry cloth! Otherwise, instant dry yeast may prove difficult to fall because of static electricity.
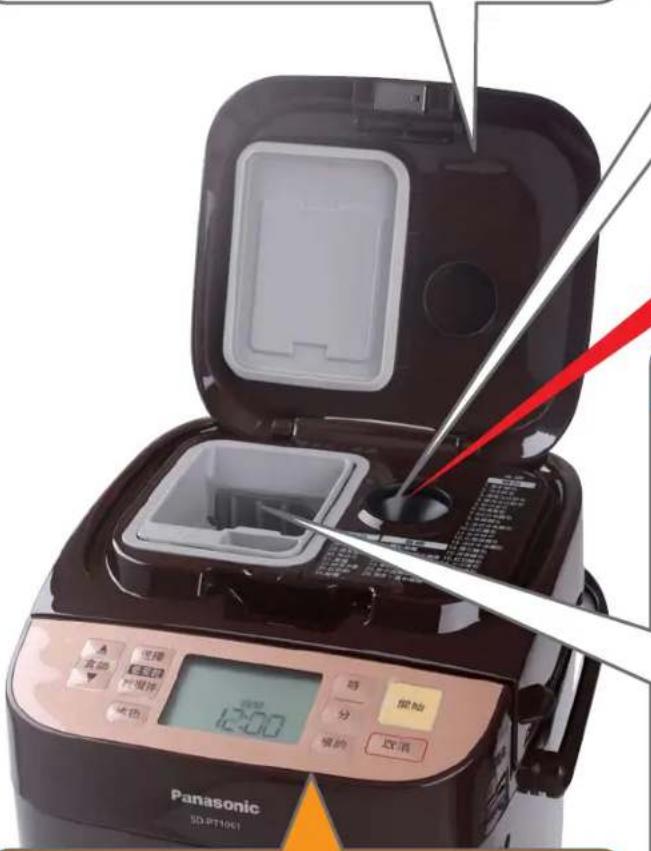
●Clean away the flour, instant dry yeast and ingredients left inside the main body.
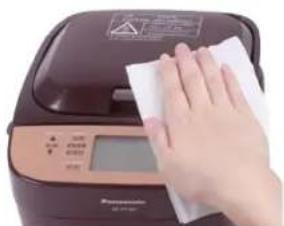
Raisin and nut dispenser
After removal, use kitchen detergents (neutral)
And wash with water
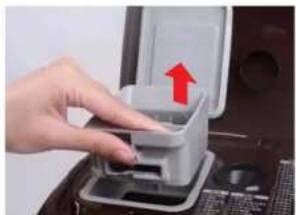
●Pull it upwards
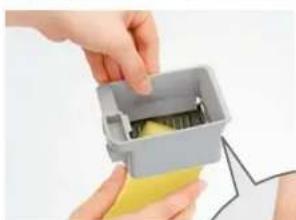
●Press and open the dispenser flap.
● No residual grease is allowed.
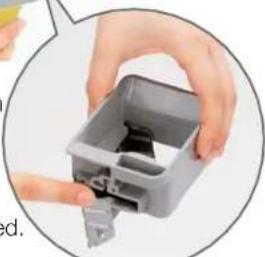
FAQ
Can I use dedicated bread flours?
Bread
You can make bread but need to adjust the amount of water. If excessive swelling or a cave-in occur, reduce water amount by 5 \~ 10%.
French bread
You can make French bread, but the quality and swelling extent of bread may vary.
Udon dough (all-purpose flour)
Add water by 10g (mL) when dough is too hard and reduce water by 10g (mL) when dough is too soft.
Is it possible to use other ingredients to substitute butter and milk powder?
Yes. Please use the same amount of margarine, shortening and other solid grease to substitute butter.
(Crust colour may vary from different fats.)
Milk powder 6 g (1 tbsp) is equivalent to 70 g (about 70 mL) milk.
●Please reduce the same amount of water if milk is used.
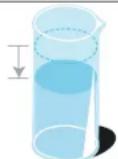
Can I use the amount specified in the recipe books available in the market?
The amount specified herein is applicable to this breadmaker. The cooking effects may be affected if any other recipes are used.

May I make a half sized loaf?
You can only make half bread. (P.EN39) When a half portion of ingredients is used with other menu, the baking procedures of the bread maker cannot be matched because it is very hard to control the conditions of “kneading” and “air discharge”.
Can I use self-made natural yeast?
The fermentation conditions are unstable and the bread may not be baked successfully.
“Hoshino” natural yeast (raw) is recommended to ensure bread quality and successful rate.
How do I keep natural yeast and natural yeast (fermented)?
Natural yeast (raw) (P. EN13)
Please keep it inside the refrigerator to avoid contamination.
● Please use them before expiry date (expiry date of unopened products which are stored according to instructions).
Natural yeast (fermented) (P. EN55)
Please keep it in refrigerator with the lid closed.
Please use it up within one week.
Storage in freezing or room temperature is forbidden; this will ruin its fermentation.
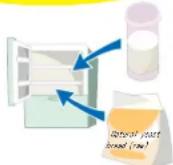
How do I store instant dry yeast?
Store it in the refrigerator. (Be sure to properly seal it and use it up as soon as possible after unpacking.)
Please use them before the expiry date (the expiry date of unopened products which are stored according to instructions).
Do not store them in a freezer. (Instant dry yeast may condensate and won't fall down from the yeast dispenser)
What rice can be used to make rice bread and French rice bread?
Cooled rice at a temperature below 30 °C.
The rice kept in a refrigerator is also applicable. Note that rice becomes hard and is not easily softened, so use a certain amount of water to soften it to make kneading easier. (P. EN89)
Frozen rice should be defrosted and recovered to room temperature before use.
Rice kept warm for less than 12 hours should be cooled down before use.
Is the pineapple bread cookie dough usable after being frozen?
Yes.
Please allow the cookie dough to defrost naturally in advance so that it is not so hard when it is placed on the bread dough.
| Ingredients | What should I use for kneading flour? | High-gluten flour is recommended for bread forming. Starch is recommended for mochi making. (Corn starch and high-gluten flour are also applicable.) | |
| Can I use the sticky rice soaked in water overnight? | It is applicable too, but the mochi made from it will be too soft, so it is not recommended. Deduct the water quantity that the sticky rice has absorbed. (12 pieces: 80 g (mL); 18 pieces: 140 g (mL)). | ||
| Can bread be baked in a square shape? | In the automatic bread maker, the dough rises to become hill-shaped (shape of the bottom of the bread pan) bread during baking. | 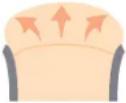 | |
| How to cut bread properly? | It is not easy to cut the bread when it is freshly baked. It is recommended that you wait for 30 min before slicing it. ●Lay the bread horizontally, move the bread knife forward and backward. | 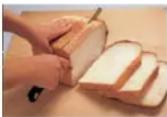 | |
| Is it hard to take out the bread smoothly? | If the bread is hard to take out after the bread pan has been cooled down for about 2 min, place the bread pan into the main unit and keep it there for 5 ~ 10 min before taking it out again. ●The bread will shrink and cave in if it is kept there for too long. ●Do not use a knife, a fork, chopsticks or other similar utensils to take out the bread. (Otherwise, the fluorine coating may be damaged.) | ||
| Is there any residual dough on the kneading blade? | If the dough is not sticky, there will be residual dough on the kneading blade. If you want to avoid it, you can apply some grease or sprinkle a layer of flour on the kneading blade before installing the blade in the main unit. | ||
| Upon completion of baking | Can bread and dough be kept frozen? | BreadCut it into thin pieces, wrap them with a plastic wrap one by one and keep them frozen. The bread will taste better if you freeze it as soon as possible when newly baked. ●The bread can be kept for 1 month if it is frozen. RollsPlace formed and fermented dough in a tray, cover it with plastic wrap and keep it frozen. After freezing, place it into a plastic bag for storage. Defrost at 30 ~ 35 °C and coat with egg liquids before baking. ●If time is limited, coat with egg liquid when it is still frozen and prolong the baking time by about 5 min.PizzaWrap the rolled dough with plastic wrap and freeze it. Place the ingredients when the dough is still frozen and then bake it. | 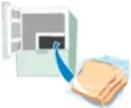 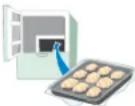 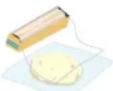 |
| Is the bread made by natural yeast different from that made by instant dry yeast? | The natural yeast bread has the following features: ●The bread is a bit shorter and the crust is a bit darker. ●Unique taste; the crust has a fried rice cake and sweet soy sauce smell: slightly sour and sweet. ●The dough texture is a little coarse. ●The bread is chewy. The bread gives fermentation smell which similarto yogurt. |
FAQ
Upon completion of baking
Is instant dry yeast not mixed during execution of bread dough menu?
The instant dry yeast will work during separation, forming and secondary fermentation as long as it is mixed into the dough.
The bread dough is too soft.
Please reduce water amount by 5 to 10 g (mL). Sprinkle flour for the convenience of operations.
The blade is coming out along with the bread.
The lock of the blade comes off when the bread rises, at that time, the blade may come off along with the bread. If you slice the bread as it is, the blade will be damaged. Be sure to take out the blade from the bread.
The dough does not ferment thoroughly during execution of bread dough menu.
Fermentation process may slow down due to different ratios of ingredients. Do not open the lid after process of bread dough making is over. Keep it there for further fermentation. (Standard: 20 to 30 min)
Can failed dough be used again?
It can be used to make doughnuts, pizza and other food. Please confirm at which status baking stopped and resume the subsequent operations.
E.g. The dough hasn't been baked. ...etc.
Recipe with use of instant dry yeast
- When there is still instant dry yeast in the yeast dispenser
Re-start making dough using the pizza dough procedure (menu "24") to make doughnuts (P. EN59) and pizza (P. EN61).
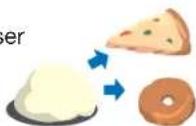
● When there is no instant dry yeast in the yeast dispenser
Take out the dough and make doughnuts (P. EN59) and pizza (P. EN61)!
Recipe using natural yeast
Take out the dough and make doughnuts (P. EN59)!
Is the taste of the pasta made by this bread maker different from that of the dry pasta available in the market?
Its form, softness and elasticity are different from those of dry pasta due to the different production methods.
Is it difficult to cut the noodles?
Weigh properly and sprinkle the dough with sufficient kneading flour.
Abnormal shape of bread
It is hard to control the bread-making process. The shape of bread varies every time ...

When the following conditions happen
Insufficient swelling
Height standards
Bread, Rapid bread, Brioche, Whole wheat bread

14 cm Lower than
Pain de mie, Yudane pain de mie, Chiffon pain de mie, Soft bread, Rice flour bread, Marble bread

13 cm Lower than
(Rice bread, Hokkaido bread)

12 cm Lower than
(Natural yeast bread)

11 cm Lower than
(French rice bread)

10 cm Lower than
(French bread, 60 minutes bread, Red bean bread, Pineapple bread, Half bread)

9 cm Lower than
Please confirm the following
● Shape and swelling conditions vary according to temperature, humidity, ingredient and timer conditions. ● Too many raisins and other ingredients added? ● Is the room temperature too high? (the shape will change if the room temperature is too high) Please store flour and other ingredients in the refrigerator.
| Flour | Do you measure the weight with a scale?Have you used flour with a protein content of over 12~15%?Have you used high-gluten flour?Have you used expired flour?<French bread, Brioche... >Is the ratio of high-gluten flour and low-gluten flour correct? |
| Water | Not enough?Yudane pain de mie, Rapid, French rice bread, French bread,Whole wheat, Pineapple bread, Brioche, Red bean bread...Have you used cold water of 5°C?<When room temperature exceeds 25°C ... >Have you used cold water of 5°C? |
| Granulated sugar | Not enough? |
| Instant dry yeast | <Except natural yeast bread...>Have you used the instant dry yeast that do not require advanced fermentation?Is it placed in the yeast dispenser?Not enough?Is it kept in the refrigerator? (P. EN9)Have you used expired instant dry yeast? |
| Natural yeast | < Natural yeast bread>Did you use “Hoshino” natural yeast (raw)?Is the natural yeast(fermented) weighed after being mixed?Is it put in a bread container?Too little? |
Bread (swelling)
Excessive swelling
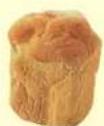
Height standards
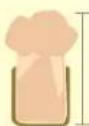
| Flour | ● Too much? ● Do you use the dedicated bread flour? (P. EN84) |
| Water | ● Too much? |
| Instant dry yeast Natural yeast (fermented) | ● Too much? ➔ If excessive swelling happens upon stated amount, reduce the quantity of instant dry yeast, natural yeast (fermented), or granulated sugars by 1/4 ~ 1/2. ● Excessive swelling may happen sometimes at altitudes over 1,000 metres high. ● Contact between inner part of the lid and the bread due to excessive swelling may damage the lid's coating. Accidentally eating the coating will not harm your health. |
Abnormal shape of bread
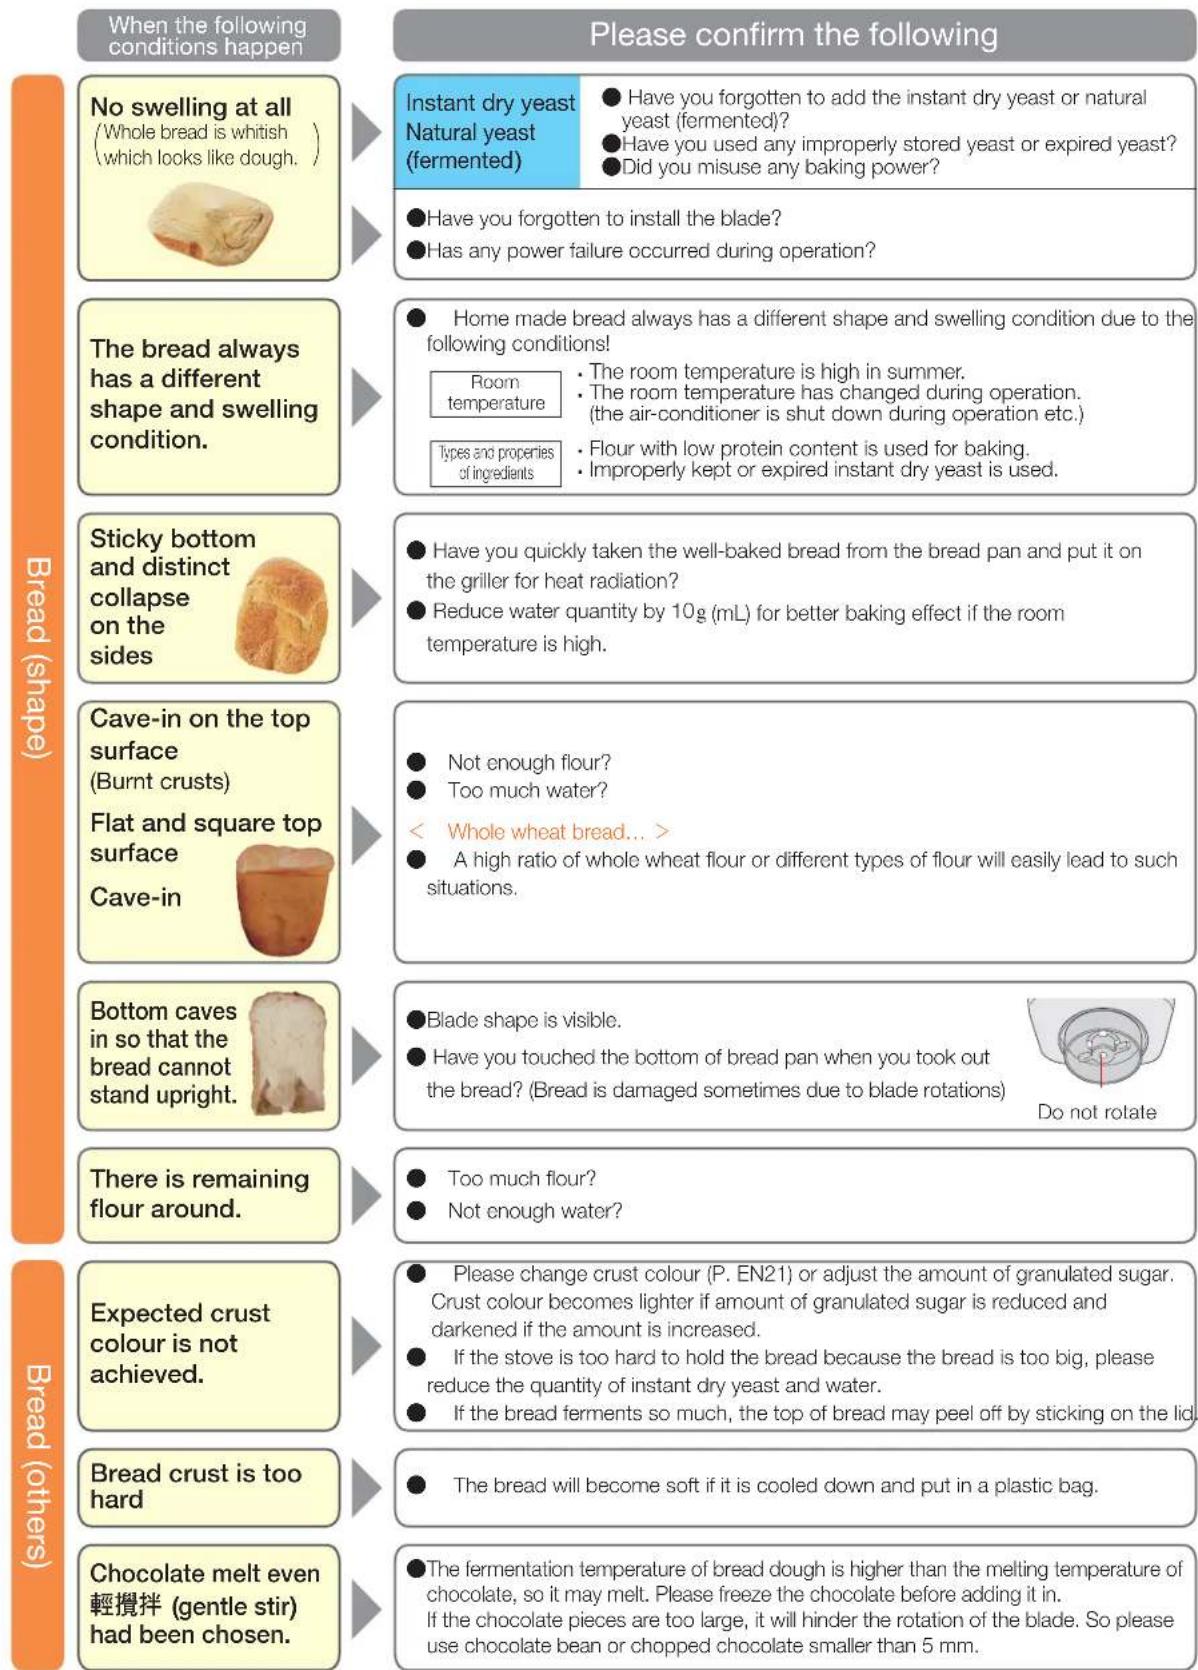
| When the following conditions happen | Please confirm the following | |
| Bread (others) | Ingredients focus on one side | ● Such phenomenon may occur due to difference of ingredients and dough hardness. |
| Dough becomes sticky after forming and fermentation | ● Excessive long fermentation will make the dough loose and sticky. The fermentation time depends on the type of bread. Normally, the fermentation is finished if you touch the rising dough with a finger slightly and it can recover slowly. | |
| It is hard to make croissants. | ● Melted butter cannot be well wrapped in dough. Please keep the dough in a refrigerator for complete cooling before butter is wrapped in it. * Please prolong the cooling time when the room temperature is high because the butter may easily melt down. 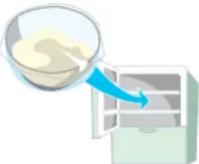 | |
| Yudane pain de me | The baked bread has a relative poor quality. | ● When the timer function is used, the toast has a relatively poor quality. ● Is the Yudane over heated? ● Are there any solid particles in the Yudane? |
| 60 minutes bread | No rising | ● Did you use warm water (35 °C ~ 40 °C)? ● Was the instant dry yeast dissolved during the preparation stage? |
| Rice bread/france not bread | The rice grains are notably visible in the rice bread. | ● Please put rice and water in another container. Fully soften the rice before putting it into the bread pan. |
| Hokkaida bread | If you find that the crust is rather black. | You can reduce granulated sugar in the dough by 1⁄2. |
| Pineapple bread | The pineapple bread cookie dough cracks. | ● Have you fully mixed the cookie dough? ● Have you kneaded the cookie dough till its surface becomes smooth? ● Have you forced the cookie dough into the bread dough? * You only need to place the cookie dough on the bread dough. (Slightly press it so that they stick together and make a good-looking shape.) ● Have you cut the patterns too deep? |
| The pineapple bread cookie dough becomes soft. | ● The reason is that the butter melts so that the dough has too much liquid in it. * If the butter melts, the dough will become soft and fragile even if the pin dough is cooled down. | |
| The pineapple bread cookie dough lean to one side. | ● Have you repositioned the bread dough in the middle? | |
| The pineapple bread cookie dough is too hard. | ● Has the cookie dough been over cooled and become hardened? * Take out the cookie dough from the refrigerator according to the instructions of "10 min of process work are left" and roll the dough flat with a rolling pin till the cookie dough becomes flexible and soft. | |
| The pineapple bread cookie dough overflows from the bread pan. | ● Did you slightly press the cookie dough on all edges when you put it in? * Excessive pressing may cause the baked cookie dough to crack. | |
Abnormal shape of bread
| When the following conditions happen | Please confirm the following | |
| (GA66) | There are holes inside. | ● The bread dough has swelled, but the red bean paste has not.Holes are caused by the water vapor pressure emitted by the red bean paste.Such holes are acceptable. |
| (Wave) | Observable butter oil gathers on the bottom, with butter spots on it. | ● Did you use frozen butter cut into 1 cm pieces?● Did you add the frozen butter within 10 min after beep sounds?● Did you break apart the frozen butter first, and then distribute them well in the pan?● Did you add the frozen butter when room temperature was over 25 °C? |
| (DWLT) | The rice flour bread has a bad shape | ● Is the room temperature too high?(The bread will not be good if the room temperature is too high.)● Have you used the timer at a room temperature of over 25 °C?※ Ingredient temperature rises too much when the room temperature is high so that it becomes deformed.Excessively long timing is not recommended. |
| (WUNT) | There are remaining flour around. | ● Too many flour?● Not enough water? |
| (BFA) | Insufficient swelling[IMAGE] | ● Did you add any baking powder?(Even instant dry yeast can't make it swell at all.)● Is the amount of ingredients correct? |
| (CWN) | Butter spots appears (colour spots, holes etc.) | ● Did you cut the butter into 1 cm pieces?● Did you cut the butter into 5 mm pieces when room temperature is below 15 °C ? |
| (CZB2) | Remaining flour is left around the scone. | ● Did you eliminate the residual powder?● Did you perform the forming procedure? |
| (BSHK) | There are solid particles in the dough | ● Did you misuse the blade for bread making as the blade for noodles and mochi making?● Not enough flour?● Did you mix the flours fully before putting it in bread pan?● Did you add too much water?● Did you add warm water when making udon? |
| (0) | It is difficult to put dough into shape because it is too sticky. | ● Not enough flour?● Did you sprinkle kneading flour?● Did you add too much water? |
| (WNT) | Noodles stick together | ● Has it been placed still for too long time after being cut into noodles?● Did you sprinkle enough kneading flour? |
| (BD20) | Insufficient swelling.When the following conditions happen | ● Is the amount of ingredients correct?● Did you add any baking powder?● Did you sieve the low-gluten flour and baking powder before adding them into bread pan?Please confirm the following |
| Cake | Remaining butter left on cake. | Have you cut butter into small pieces of 1 cm?Have you brought butter to the room temperature?Is the adding sequence of ingredients correct? |
| There is remaining flour around cake. | Have you cleared the remaining flour?Is the adding sequence of ingredients correct? | |
| The finished cake is different from expected. | The finished cake looks like butter cake but is still different from the sponge cake available in the market in terms of baking conditions.Reduce low-gluten flour to 160 g to make the cake soft. | |
| Vegetable cake | The baked bread is sticky. | Too much soy milk had been used? |
| Chocolate | Whipping cream and chocolates can not be merged together. | The cream with a high content of butterfat (over 41%) may not merge with chocolates with a high content of cocoa.Adding extra 10 g (about 2 tsp) of milk may help the two ingredients to merge better. |
| Too soft. | Chocolates with high content of milk will soften.Please reduce the amount of whipping cream by 10 ~ 20 g (about 10 ~ 20 mL). | |
| Chocolates stick on the inner sides of the bread pan. | Please use a rubber spatula to clean away the chocolates stuck on the bread pan within 5 min and mix for another 2 ~ 3 min. | |
| Jam | Not coagulated.(not viscous) | Jams become more diluted due to less granulated sugar quantity and no additives.Using unripe fruit, overripe fruit or stale fruit limits fruit pectin content, so it is difficult to become coagulated.Did you add too much fruit?Did you reduce the amount of granulated sugar and lemon juice? (Jam must have proper sugar content, acidity and pectin content for coagulation.) |
| Compote | Not cooked well. | Did you use overripe fruit?Some kinds of fruit may be easily cooked. |
| Some part of fruit did not absorb enough syrup. | Did you cover it with cooking paper?Take fruit out of the syrup and then put the part that did not absorb enough sugar into the syrup again and cool it down.Place still for half a day to 1 day, then it is edible. | |
| Read bean | The red bean does not turn into paste. | Have you boiled red bean until they become soft?Too much red bean? |
| Mochi | Mochi has remaining grains of rice stuck. | Did you add too much sticky rice?Did you add enough water?Was the sticky rice too dry after draining?(e.g. faced the air-conditioner outlet)Was it mixed with japonica rice?Did you use old rice? |
Remedies for misoperations
| Pressed 開始 (Start) before adding any ingredients.Ingredients cannot be supplemented when making 60-min bread, 8 minutes dough. | The ingredients other than natural yeast (fermented) can be added at the following time. However, the bread making process may fail if the ingredients are not fully mixed in the initial 揉麵 (kneading) procedure. | |
| Forgotten ingredients | Adding time | |
| Butter Granulated sugar Milk powder Salt | ●Tips for recipe of bread with instant dry yeastFeed into the bread pan before adding the instant dry yeast.Pizza dough......within 1 minBrioche......within 5 minHalf bread, bread dough......within 10 minRice flour......within 35 minOther menu......within 20 min* Open the lid to the minimum angle to avoid spill of instant dry yeast.●Tips for recipe of bread with natural yeastIt should be added into the bread pan within 10 minutes to make sure that it can be mixed in the initial kneading. | |
| Instant dry yeast | Add into the yeast dispenser before the instant dry yeast is dispensed.Pizza dough......within 1 minBrioche......within 5 minHalf bread, bread dough......within 10 minRice flour......within 35 minOther menu......within 20 min | |
| Pressed 開始 (Start) when the wrong menu, raisin and crust colour are selected! | Reselect if it is just started. Hold 取消 (Cancel) to stop operation, select the correct, menu*, raisin and crust colour and restart.* But if you chosen rice flour bread wrongly, the bread still fail even if you reselect the menu. (The initial working procedure is different.) | |
| Install the wrong blade and start the unit! | Press and hold 取消 (Cancel) button to stop the unit. Reinstall the correct blade and restart the unit.(The blade may stop rotating if it is not the correct one.) | |
| Pull out the power plug! | Plug in again within 10 min after unplugging and the operation will be resumed.* Do not press 開始 (Start). | |
| Pressed 取消 (Cancel) erroneously during operations! | Press 開始 (Start) to recover within 10 min.* This can only be performed once. Do not press other buttons. | |
■Failed dough can be used again to make pizza and doughnuts. (P. EN59, EN61)
Troubleshooting
Please confirm the following issues first. If any anomaly is still identified, please contact Panasonic customer service centre immediately.
![graph TD A["When the following conditions happen"] --> B["Causes Solutions"] B --> C["Key operation is disabled"] B --> D["Press 開始 (Start) but no operation (No kneading)"] B --> E["Instant dry yeast is not dispensed."] B --> F["Raisins and nuts cannot be added."] B --> G["Operation stops midway (Di…](/content/2026/05/792740/images/eeedc74002e5987b1ed22d178a0fda1ac02a4553db8f1f3a7d6529d7a68237e2.jpg)
Troubleshooting
Please confirm the following issues first. If any anomaly is still identified, please contact Panasonic customer service centre immediately.
![graph TD A["When the following conditions happen"] --> B["Abnormal sounds on the blade"] B --> C["Plug into the outlet, the current time on display is "0:00""] C --> D["Powders still remain and baking does not occur"] D --> E["Dough is leaking out at the bottom of the bread pan"] E --> F["…](/content/2026/05/792740/images/80a5093efe205d03670e65b832e3e011fb0f1767cf32ae14fcd0a54a34e73cee.jpg)
● Smoke or odors may occur upon initial use. However, they will disappear some time after use. Operations are not affected.
In case of the following displays
![graph TD A["Display 電源中斷"] --> B["●Notifies you of power failure during operations.<br>If power fails for less than 10 min, the operations will resume when power supply is resumed.<br>(Unsuccessful bread-making may occur sometimes)<br>●It will still display when the power plug is plugged in after it…](/content/2026/05/792740/images/c4de3cb2a1b77d4adb438983872cbad1b81e40c749aa25e53979b4bed2a8a3b4.jpg)
Specifications
| Power supply 220 V 50 Hz Overheat protector Thermal fuse | |||||
| Power consumption | Heater 360 W | Size (Appr.) | Depth 30.4 cm | ||
| Motor 60 W | Width 24.1 cm | ||||
| Height 34.7 cm | |||||
| Net weight (about) 5.8 k | g | Length of power cord 0.9 m | |||
| Capacity | Bread/bread dough (Flour) Maximum : 300 g | ||||
| Yeast | (Instant dry yeast) Maximum : 4.2 g(Natural yeast (fermented)) Maximum : 25 g | ||||
| Raisin and nut dispenser | (Raisin/nuts) Maximum : 100 g | ||||
| Function | Menu | Capacity | Timer |
| Bread | Bread | (Flour) Max.: 250 g | Timer for up to 13 hours |
| Pain de mie | (Flour) Max.: 250 g | Timer for up to 13 hours | |
| Yudane pain de mie | (Flour) Max.: 250 g | Timer for up to 13 hours | |
| Chiffon pain de mie | (Flour) Max.: 250 g | Timer for up to 13 hours | |
| Soft | (Flour) Max.: 250 g | Timer for up to 13 hours | |
| Rapid | (Flour) Max.: 280 g | - | |
| 60 minutes | (Flour) Max.: 280 g | - | |
| Rice | (Flour) Max.: 230g | Timer for up to 13 hours | |
| French rice | (Flour) Max.: 210 g | Timer for up to 13 hours | |
| French | (Flour) Max.: 250 g | Timer for up to 13 hours | |
| Whole wheat | (Flour) Max.: 250 g | Timer for up to 13 hours | |
| Hokkaido | (Flour) Max.: 230 g | - | |
| Brioche | (Flour) Max.: 200 g | - | |
| Marble | (Flour) Max.: 250 g | - | |
| Pineapple | (Flour) Max.: 200g | - | |
| Red bean | (Flour) Max.: 180 g | - | |
| Half | (Flour) Max.: 180 g | Timer for up to 13 hours | |
| Rice flour | (Flour) Max.: 250 g | Timer for up to 13 hours | |
| Natural yeast | (Flour) Max.: 300 g | Timer for up to 10 hours | |
| Dough | Bread dough | (Flour) Max.: 280 g | - |
| Natural yeast bread dough | (Flour) Max.: 300 g | - | |
| Natural yeast fermentation | Natural yeast (raw) 50 g | - | |
| 8 minutes dough | (Flour) Max.: 280 g | - | |
| Pizza dough | (Flour) Max.: 280 g | - | |
| Dumpling skin dough | (Flour) Max.: 280 g | - | |
| Udon Pasta dough | (Flour) Max.: 300 g | - | |
| Others | Scone | (Flour) Max.: 180 g | - |
| Cake | (Flour) Max.: 180 g | - | |
| Vegetable cake | (Flour) Max.: 130 g | - | |
| Chocolate | Chocolate 160~180 g | - | |
| Jam | Fruit 400 g | - | |
| Compote | Fruit 150~300 g | - | |
| Red bean | Red bean 150 g | - | |
| Mochi | Sticky rice 280~420 g | - |
Easily and conveniently make various delicious breads!
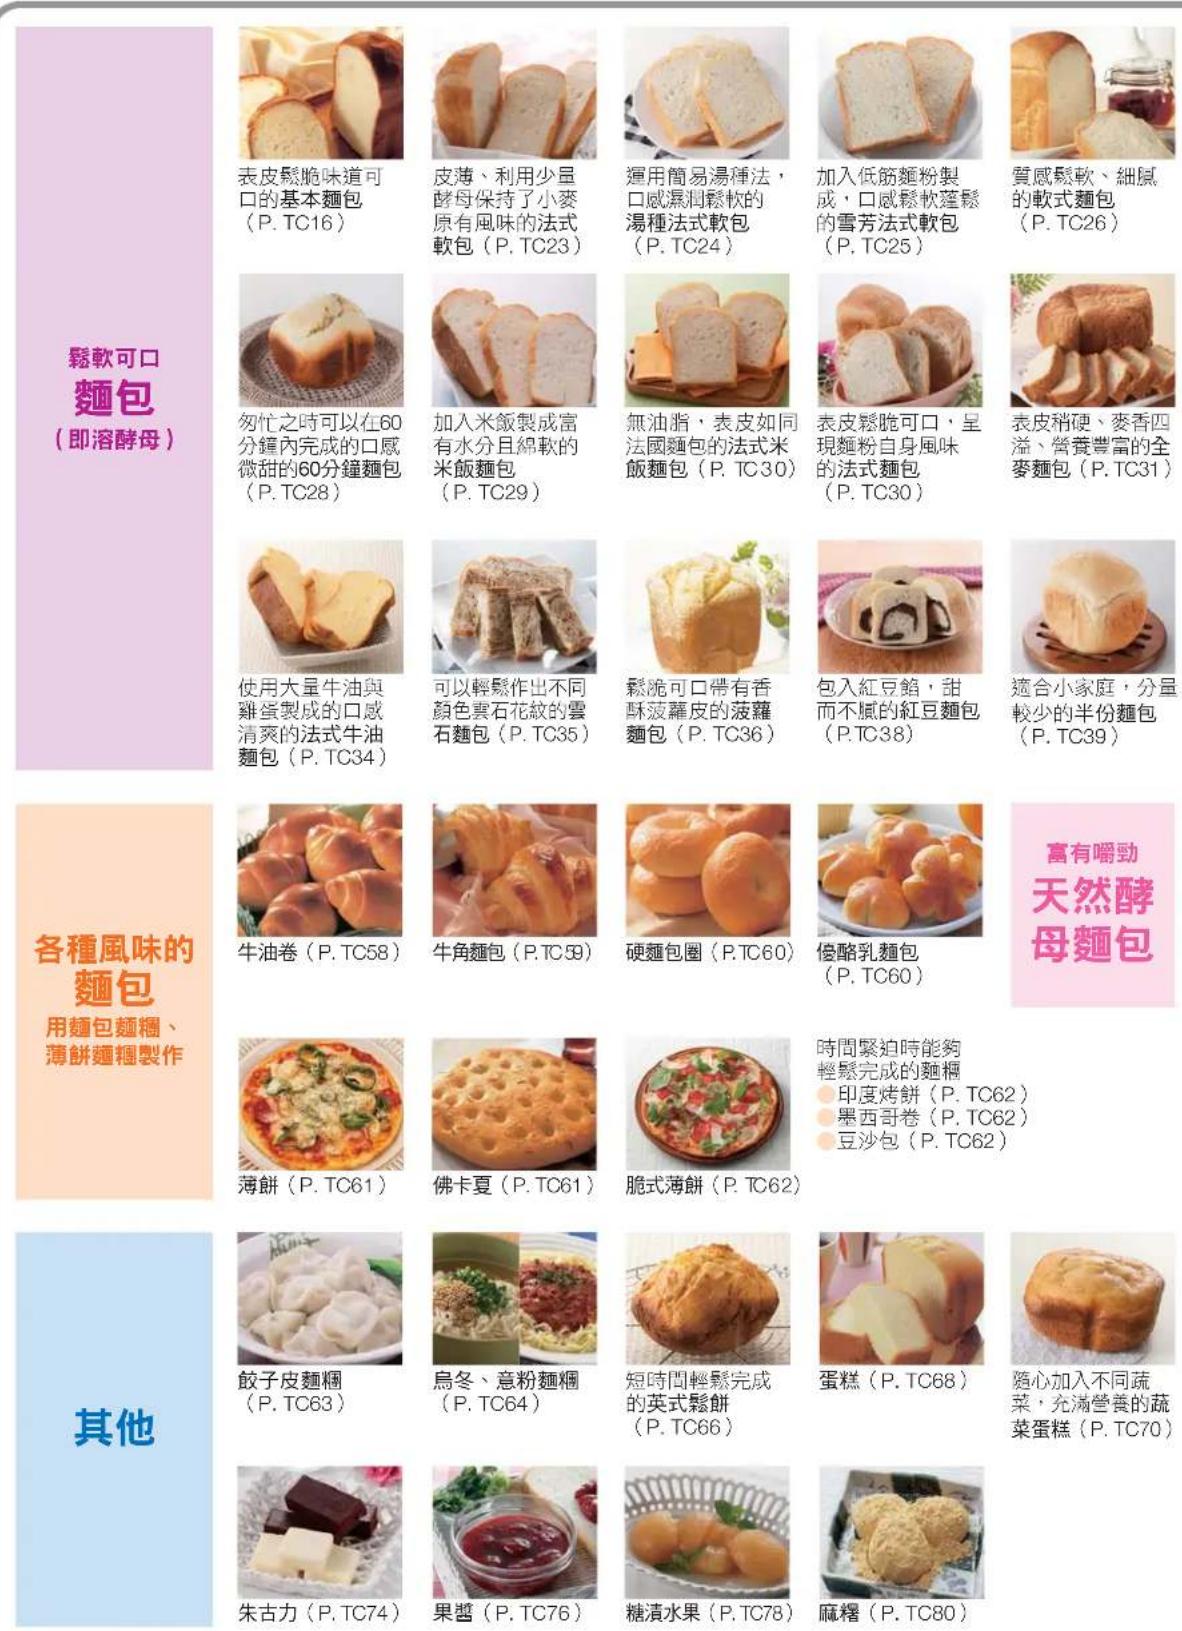
Various flavors of bread
Made with bread flour and pancake mix
Chewy texture, natural yeast bread
Dough that can be easily made when time is short
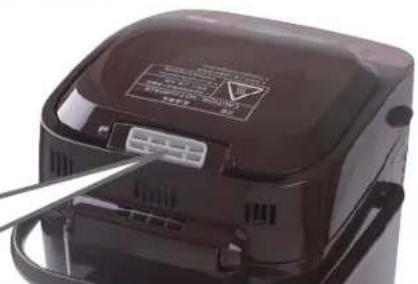
Please handle lithium batteries with care
(To avoid heat generation, fire, or rupture)

● Do not charge, short-circuit, heat, or dispose of in fire.


To avoid fire, burns, or injury

Preparation of related ingredients
: Do not exceed the amount of water
Example: · Orange juice · Apple juice · 100% juice such as tomato → Chill thoroughly in the refrigerator beforehand
Amount of flour
(Keep the original amount unchanged)
Subtract the weight of grains
Example: [Rye 30 g (12% of 250 g), Bread flour 220 g]
(Keep the original amount unchanged)
Amount of water
Subtract 80% of the water content of the vegetables
Example) [ Boiled pumpkin 50 g\ Water 140 g(mL)\ (180 g(mL) - 50 g(mL)\ times 80%)]
(Keep the original amount unchanged)
Deduct the amount of juice
Example) [ Orange juice 100 g( about 100 mL)\ Water 80 g( mL). (180 g( mL) - 100 g( mL))
● Do not use the timer function.
● Do not use the timer function.
Making basic bread
Put in ingredients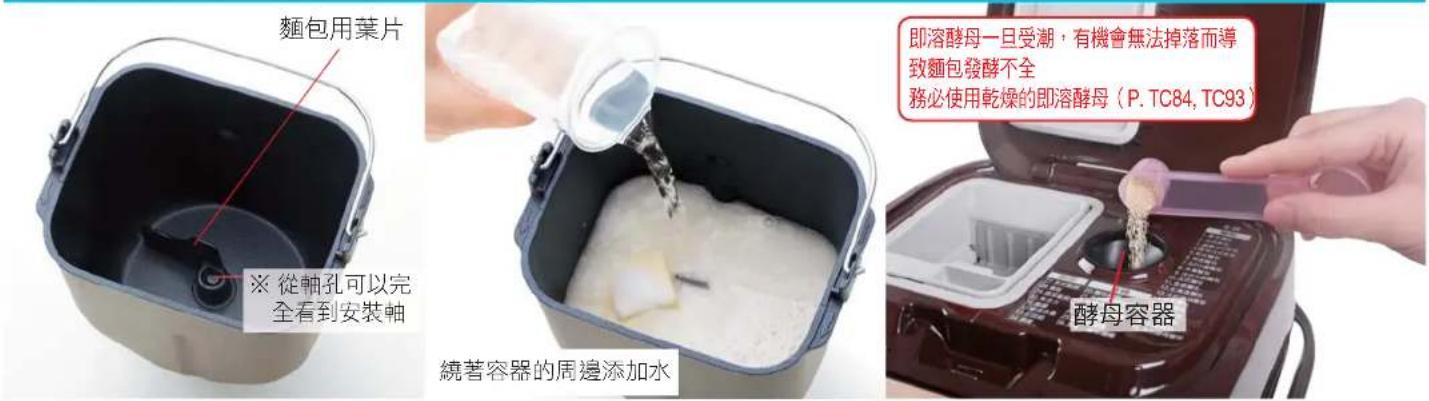
4 Select recipe "1"
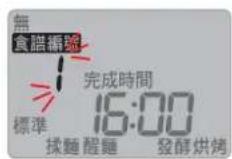
■ Selecting other types of bread
Recipes (P. TC23)
■ Adding raisins and other ingredients
Select ( P. TC18 ) ( P. TC20 )
■ Selecting crust color
→ Crust color (P. TC21)
■ Scheduled completion time
Reservation (P. TC22)
5 Start
Flashing - light on
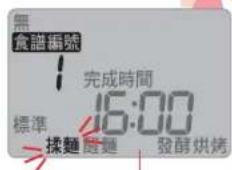
Raisin and nut container
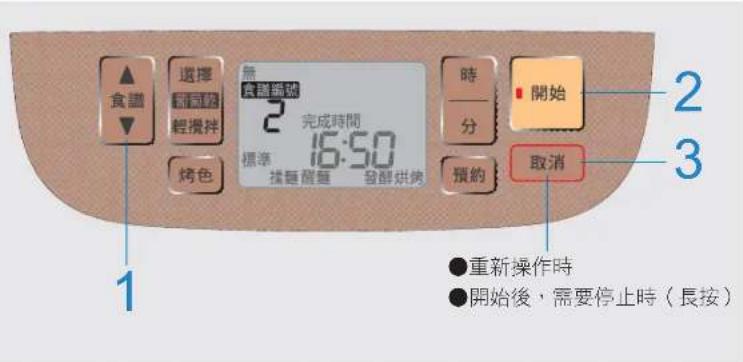
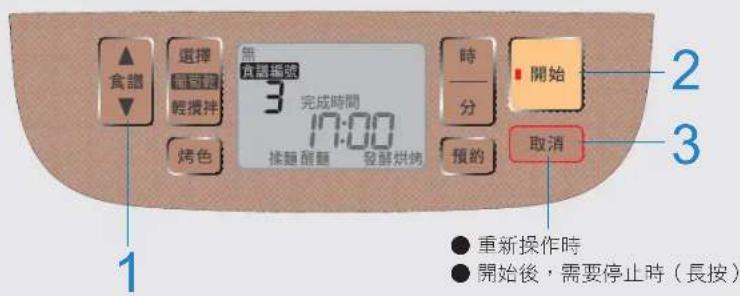
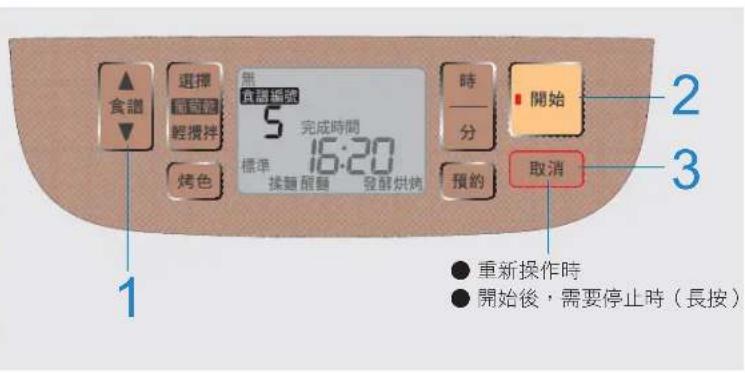
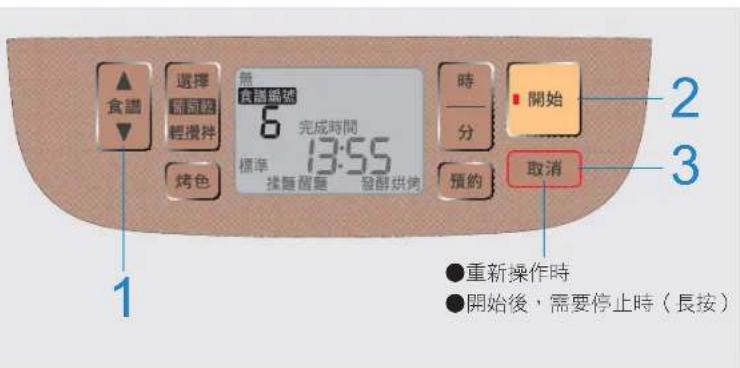
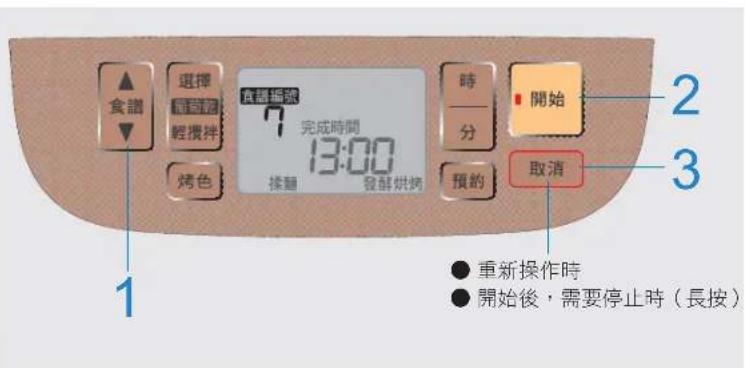
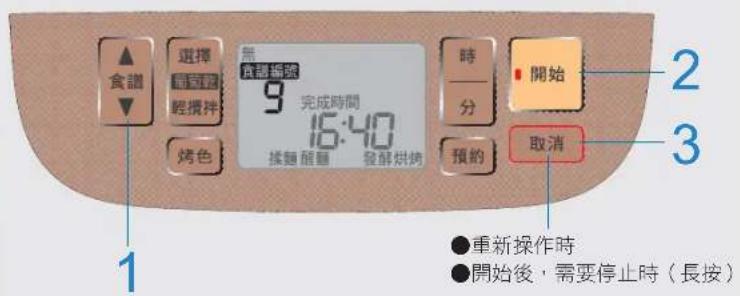
1 Select recipe "9" or "10"
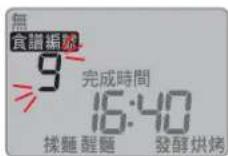
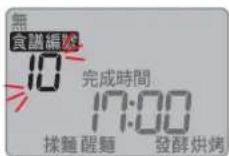
■ Adding raisins and other ingredients
Raisins Light stirring (P. TC18) (P. TC20)
■ Scheduled completion time
Reservation (P. TC22)
2 Start
Whole wheat bread
Required time: about 5 hours
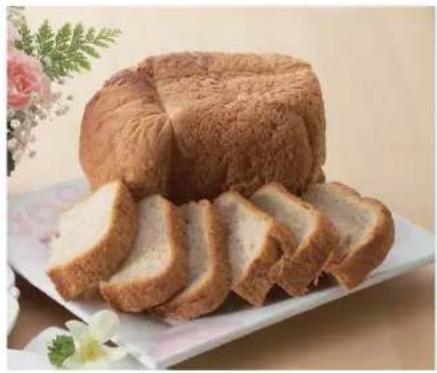
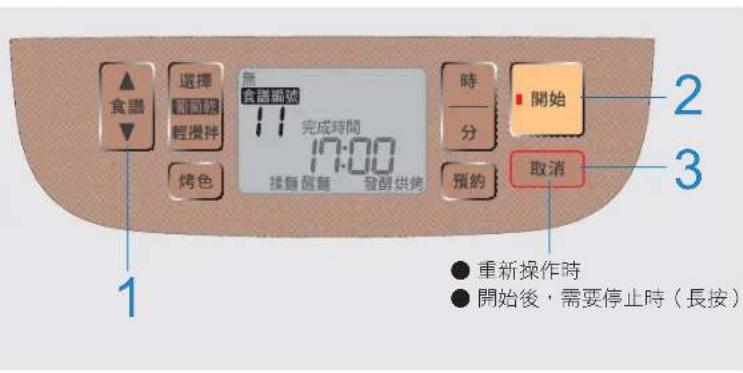
3 After the beep, open the lid and place the custard pastry
4 Close the lid and start again
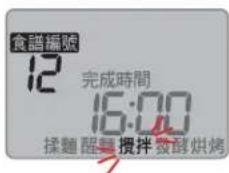
3 After the beeping sound, open the lid and place the cookie dough.
Within 15 minutes.
4 Close the lid and start again.
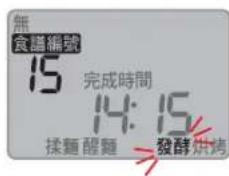
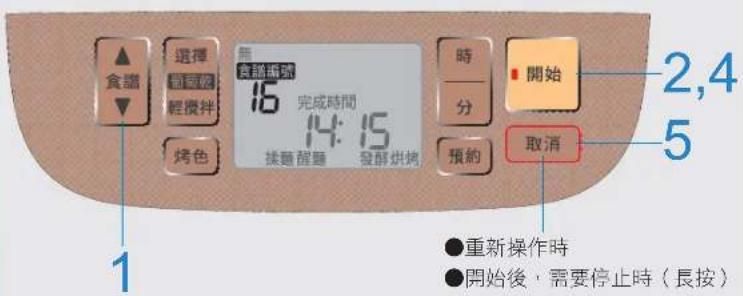
Close the lid.
Start again.
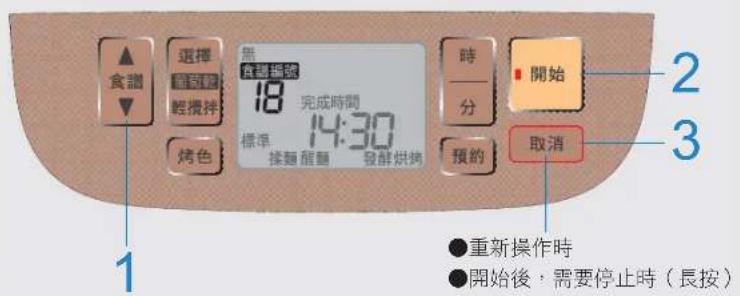
Danish-style basic bread.
Recipe "1", crust color "dark".
| 高筋麵粉 200 | g |
| 低筋麵粉 50 | g |
| 牛油(推薦使用無鹽牛油) 10 | g |
| 砂糖 24 | g(大2) |
| 奶粉 6 | g(大1) |
| 食鹽 5 | g(小1) |
| 雞蛋(打勻) | 25g |
| 冷水(5°C) | 150 g(mL) |
| 即溶酵母 2.1 | g(小3⁄4) |
| *後放牛油(切成1cm的小塊後放入急凍庫保存一晚) | 100 g |
French soft bread: chocolate bread, recipe "2".
German potato-style tangzhong French soft bread.
Recipe "3".
Cream cheese blueberry tangzhong French soft bread, recipe "3".
| 冷水(5°C)2+湯種2 | 220g |
| 高筋麵粉 240 | g |
| 牛油 15 | g |
| 砂糖 18 | g(大11⁄2) |
| 奶粉 6 | g(大1) |
| 食盤 5 | g(小1) |
| 即溶酵母 1.4 | g(小1⁄2) |
| *奶油芝士(切成1cm的小塊,在投入前放入急凍庫保存) | 50g |
| *蓝莓乾 | 40g |
Soy flour sweet natto chiffon French soft bread, recipe "4".
Brown sugar rice flour 60-minute bread, recipe "7".
Black tea orange 60-minute bread, recipe "7".
Five-grain rustic French rice bread, recipe "9".
| 高筋麵粉 190 | g |
| 裸麥粉 | 20 g |
| 冷米飯(雜糧) | 100g |
| 砂糖 6 | g(大1⁄2) |
| 食鹽 5 | g(小1) |
| 冷水(5°C) | 150 g (mL) |
| 即溶酵母 2.1 | g(小3⁄4) |
Red Pepper & Tomato French Rice Bread
| 高筋麵粉 210 | g |
| 冷米飯(白米) | 10g |
| 砂糖 | 6g(大1⁄2) |
| 食鹽 5 | g(小1) |
| 冷水(5°C) | 70g(mL) |
| 番茄汁(無食鹽添加) | 70g(約70mL) |
| 即溶酵母 2.1 | g(小3⁄4) |
| *甜椒(紅椒、黃椒)(切成5mm的小塊) | 各20g |
Chestnut & Nut Whole Wheat Bread Recipe "11"
Coconut Milk Bread
Recipe "12" Bread Dough
Black Tea Condensed Milk Bread
Recipe "12" Bread Dough
Matcha French Butter Bread with Black Beans & Chestnuts
Recipe "13"
| 高筋麵粉 170 | g |
| 低筋麵粉 30 | g |
| 牛油 30 | g |
| 砂糖 36 | g(大3) |
| 奶粉 6 | g(大1) |
| 食鹽 3.8 | g(小3⁄4) |
| 抹茶粉 | 6g(大1) |
| 雞蛋1個、蛋黃1個、冷水(5°C)的混合物 | 160g |
| 即溶酵母 2.1 | g(小3⁄4) |
| 後放牛油 40 | g |
| *甜黑豆(充分瀝乾水分) | 50g |
| *糖漬果子(充分瀝乾水分) | 50g |
Panettone Recipe "13"
Matcha Marble Bread
Recipe "14"
Black Sesame Marble Bread Recipe "14"
Ingredients
| 高筋麵粉 200 | g |
| 牛油 15 | g |
| 砂糖 24 | g(大2) |
| A奶粉 | 6g(大1) |
| 食鹽 3.8 | g(小3⁄4) |
| 雞蛋(打勻) | 25g |
| 冷水(5°C) | 110g(mL) |
| 即溶酵母 | 3.5g(小11⁄4) |
Toppings
When using Recipe "15" to make various flavors of bread
Ingredients
| A | 高筋麵粉 200 | g |
| 牛油 15 | g | |
| 砂糖 18 | g(大 11/2 ) | |
| 奶粉 6 | g(大1) | |
| 食鹽 3.8 | g(小 3/4 ) | |
| 抹茶 2 | g(小1) | |
| 雞蛋(打勻) 25 | g | |
| 冷水(5°C) 110 | g(mL) | |
| 即溶酵母 3.5 | g(小 11/4 ) | |
| 配料 | ||
| 甜黑豆 120 | g | |
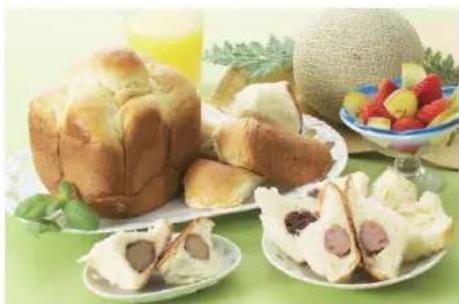
Ingredients
| 高筋麵粉 200 | g | |
| 牛油 35 | g | |
| 砂糖 18 | g(大 11/2 ) | |
| A奶粉 6 | g(大1) | |
| 食鹽 3.8 | g(小 3/4 ) | |
| 雞蛋(打勻) 25 | g | |
| 冷水(5°C) 100 | g(mL) | |
| 即溶酵母 3.5 | g(小 11/4 ) | |
| 餡料 | 12個(15g/個) | |
Matcha Black Bean Bread Rolls
Select recipe "15" to make bread dough
Add ingredients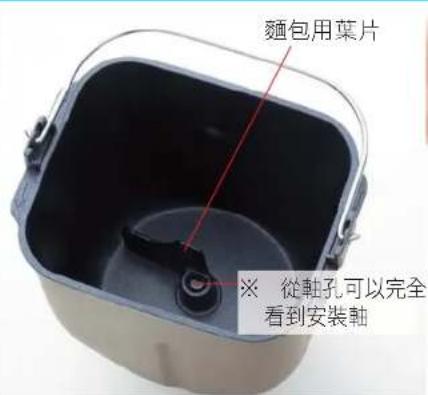
1. Using the bread maker to make natural yeast (raw starter)
(P. TC55)
●Making natural yeast (raw starter) takes 24 hours.
2. Remove the bread container and install the bread paddle
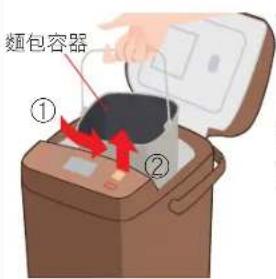
①Turn the bread container in the direction of the arrow.
②Lift it out.
③Insert and install the bread paddle.
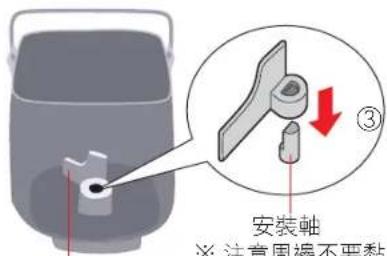
5
Select recipe "19"
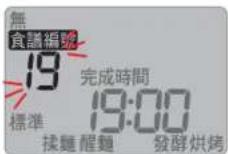
■Add raisins and other ingredients

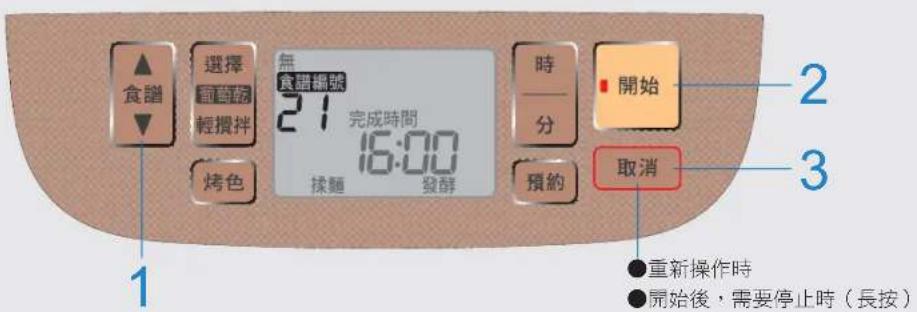
1 Select recipe "21"
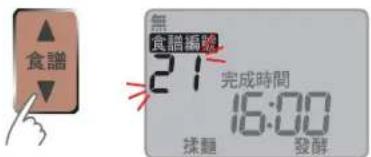
1 Select recipe "22"
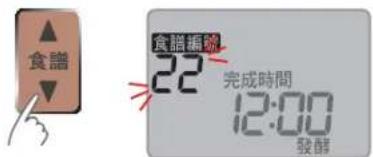
Ingredients (for 12 pieces)
| 麵包麵棚(P.TC54,56) | 1次的量 |
| 蛋液(打匀) | 25g |
Butter rolls
Shaping
Ingredients (for 12 pieces) ● Use instant yeast
Bread dough
Ingredients (for 8 pieces)
Bread dough
Boiling
⑥ Boil each side in boiling water for 30 seconds, then drain.
Baking
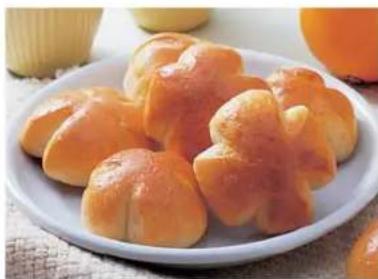
Ingredients (for 10 pieces)
Bread dough
Fermentation
Ingredients (for 2 crepes, 25 cm in diameter)
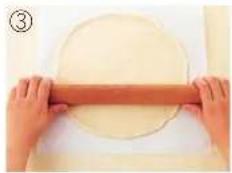
Add toppings
Ingredients (for 2 pieces, 25 cm in diameter)
Crepe batter
Ingredients (for 2 crepes, 25 cm in diameter)
Ingredients (for 6 pieces)
Ingredients (for 8 pieces)
| 墨西哥卷挺绸(P.TC57) | 1次的量 |
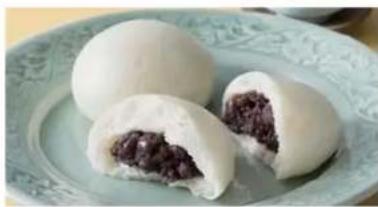
Ingredients (for 12 pieces)
Fermentation
④ Wrap the red bean paste in the dough and let it ferment at room temperature for 15 minutes.
Ingredients (for 30-40 pieces)
Udon
Rolling out the dough
Cutting the noodles
Boiling the noodles

Cut noodles
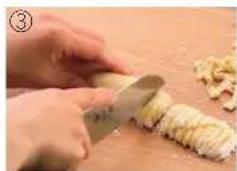
Boil noodles
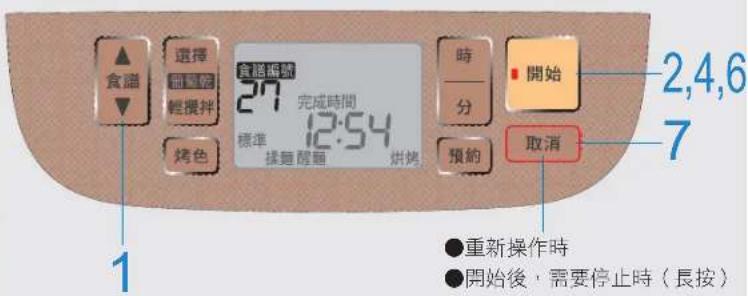
French savory bread
Recipe "27" Bake color "dark"
If underbaked, perform "additional baking"
After baking is complete, additional baking can be performed up to 2 times.
Lemon cake
| 無鹽牛油(切成1cm小塊) | 110g |
| 砂糖 100 | g |
| 牛奶 15 | g(大1) |
| 雞蛋(打勻) 100 | g |
| 麻酒(或白蘭地) 大1 | |
| A[低筋麵粉 180泡打粉 7] | g |
| g | |
| 檸檬皮(磨碎)※ | 1個份 |
* Add when clearing flour
Chocolate cake
| 無鹽牛油(切成1cm小塊) | 100g |
| 砂糖 100 | g |
| 雞蛋(打勻) 100 | g |
| A可可粉低筋麵粉 180泡打粉 7 | 15g(大21⁄2)g |
| g | |
| 朱古力豆※ | 50g |
| 橙皮(切成5mm~1cm的塊狀)※ | 40g |
* Add when clearing flour
Pumpkin cake
| 無鹽牛油(切成1cm小塊) | 100g |
| 砂糖80 | g |
| 牛奶30 | g(約30mL) |
| 雞蛋(打勻)100 | g |
| 南瓜(切成2cm小塊、加熱弄軟) | 50g |
| A低筋麵粉180泡打粉7 | g |
| g |
Matcha red bean cake
| 無鹽牛油(切成1cm小塊)80g | |
| 砂糖 100 | g |
| 雞蛋(打勻)150 | g |
| A抹茶 | 3g(小11⁄2) |
| 低筋麵粉 180 | g |
| 泡打粉7 | g |
| 紅豆洗淨煮熟並瀝乾 (切成大小5mm左右) | 50g |
* Add when clearing flour
Making vegetable cake
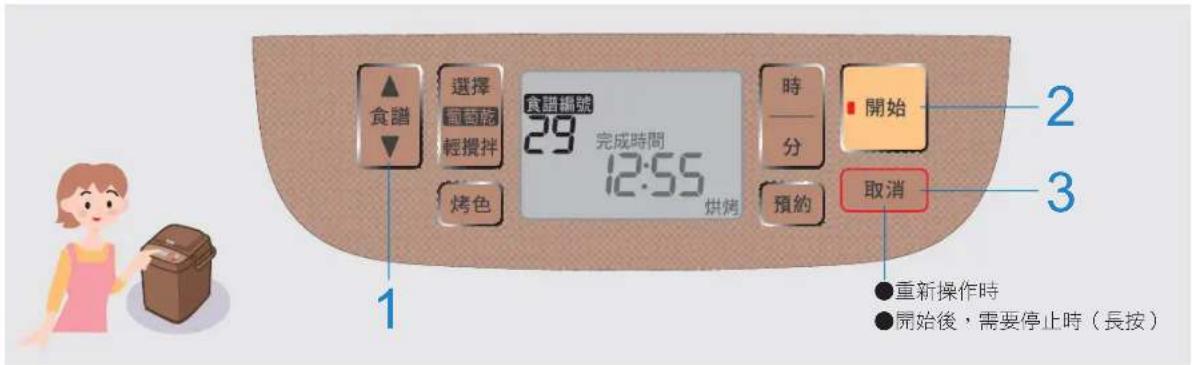
Vegetable cake recipes
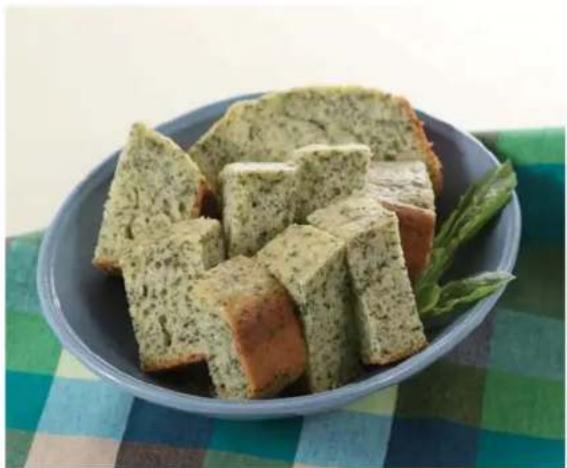
Spinach vegetable cake
Recipe "29"
| A[ 雞蛋 50 菠菜※] | g 50 g |
| A+無糖豆漿 200 | g |
| 砂糖 60 | g |
| 菜油 40 | g(大3+小1) |
| B[ 低飭麵粉 130 泡打粉 5] | g g |
Pumpkin vegetable cake
Recipe "29"
| A:雞蛋50 | g |
| A+無糖豆漿150 | g |
| 南瓜(切碎) | 50g |
| 砂糖60 | g |
| 菜油40 | g(大3+小1) |
| B[低筋麵粉 130泡打粉 5 | g |
| g |
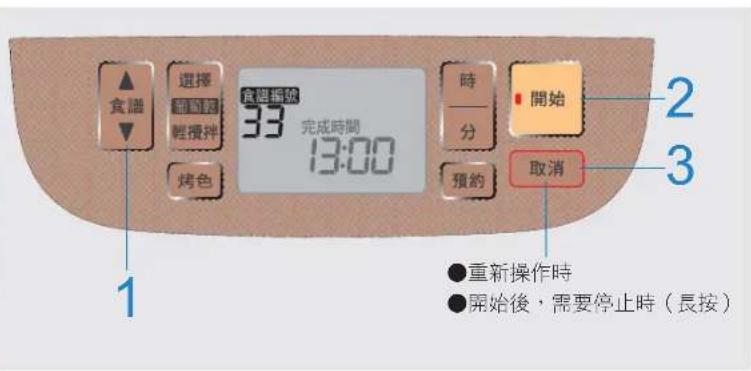
If mixing is insufficient, perform "additional mixing"
After mixing is complete, additional mixing can be performed up to 2 times.
Mousse chocolate (about 5 glasses' worth)
If heating is insufficient, perform "additional heating"
After heating is complete, additional heating can be performed up to 2 times.
Blueberry jam
| 冷凍藍莓 | 400g |
| 砂糖 140 | g |
| 檸檬汁 | 38g(約38mL) |
■ Cooking setting time... 150 minutes
(When using fresh blueberries 110 minutes)
Apple jam
| 蘋果 (削皮切成8塊,去芯, 切成1cm寬) | 淨重400g |
| 砂糖 140 | g |
| 榨檬汁 | 38g(約38mL) |
■ Cooking setting time... 100 minutes
Peach jam
● Use cooking paper as a lid (preparation ③)
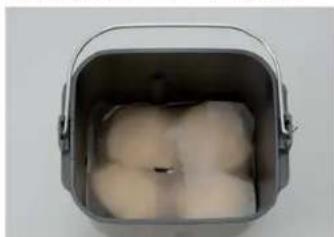
■ When eating
If not heated enough, perform "additional heating"
After heating, you can perform additional heating up to 2 times.
Sugar-preserved tomatoes
Red bean mochi
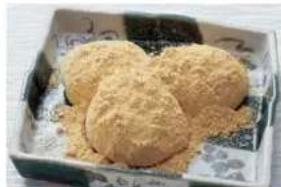
Peanut mochi

Radish mochi
■ When eating immediately: Wet your hands with water beforehand.
■ When storing: Sprinkle some flour on your hands beforehand.
Black sesame mochi
After starting to make mochi, add little by little
2-3 small measuring spoons of black sesame and a small amount of salt.
Yuzu mochi
After starting to make mochi, add little by little
To avoid damage Fluorine coating...
●Wash and dry promptly!
(Do not leave unwashed or with water)
●Wash with a soft sponge!
①Add a small amount of hot water to the bread container and let it sit for a while.
②Wash the bread container and blade with water.
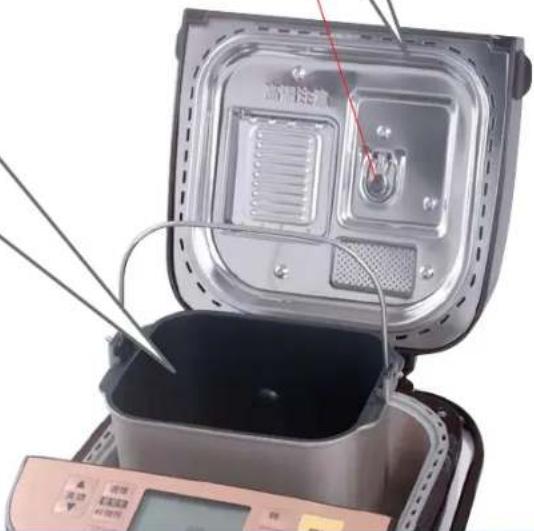
Do not wipe the yeast container with a dry cloth!
Static electricity generated can cause
instant yeast to not fall easily
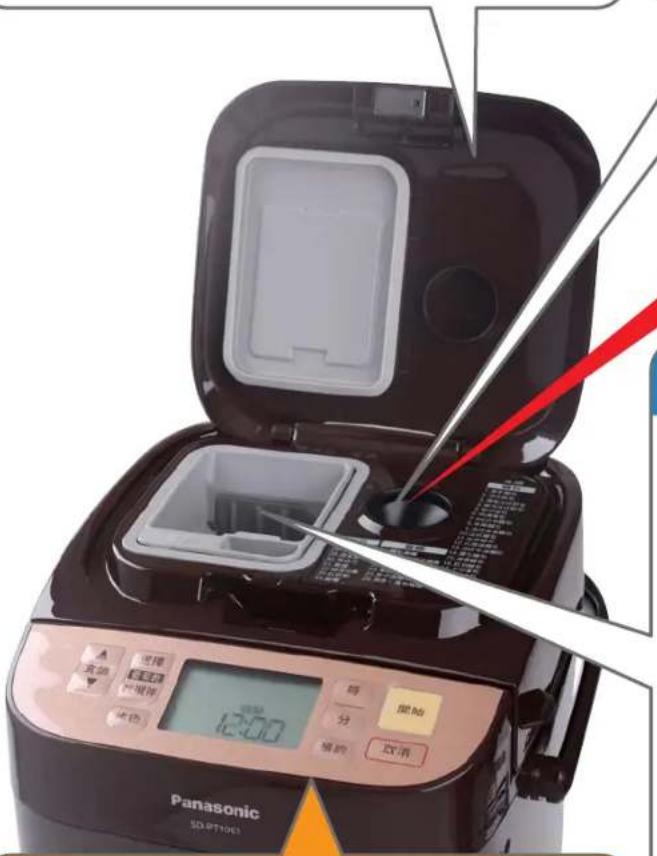
Raisin and nut container
Pull upward.
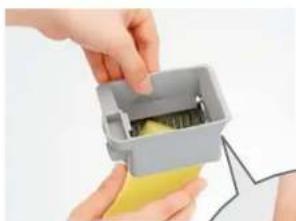
Frequently Asked Questions
Aftersales services
After-sales service
| NO. Menu | NO. Menu | NO. Menu | |||
| 1 | Bread | 13 | Brioche | 25 | Dumpling skin dough |
| 2 | Pain de mie | 14 | Marble bread | 26 | Udon/Pasta dough |
| 3 | Yudane pain de mie | 15 | Pineapple bread | 27 | Scone cake |
| 4 | Chiffon pain de mie | 16 | Red bean bread | 28 | Cake |
| 5 | Soft bread | 17 | Half bread | 29 | Vegatable cake |
| 6 | Rapid bread | 18 | Rice flour bread | 30 | Chocolate |
| 7 | 60 minutes bread | 19 | Natural yeast bread | 31 | Jam |
| 8 | Rice bread | 20 | Bread dough | 32 | Compote |
| 9 | French rice bread | 21 | Natural yeast bread dough | 33 | Red bean |
| 10 | French bread | 22 | Natural yeast fermentation | 34 | Mochi |
| 11 | Whole wheat bread | 23 | 8 minutes dough | ||
| 12 | Hokkaido bread | 24 | Pizza dough | ||
●Menu number table
Date of issue: August 2015
Printed in China
Date of issue: August 2015
Printed in China

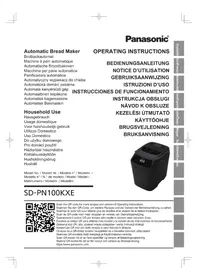
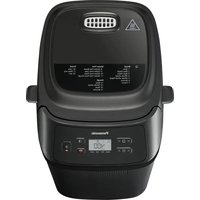
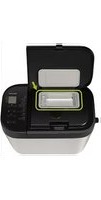
- OPERATING INSTRUCTIONS
- INSTRUCTION MANUAL
- MAKE VARIOUS DELICIOUS BREADS MANUALLY IN A SIMPLE AND CONVENIENT WAY
- TABLE OF CONTENTS
- CONFIRMATION
- BASIC INGREDIENTS AND PREPARATIONS
- OPERATING METHODS
- BREAD
- DOUGH
- DESSERT
- TIPS
- SAFETY PRECAUTIONS
- WARNING
- CAUTION
- DO NOT TOUCH, BLOCK OR COVER THE STEAM VENT DURING USE
- PLEASE USE THE LITHIUM BATTERY CAREFULLY
- PROPERLY USE THE POWER PLUG AND THE POWER CORD
- WHEN AN ABNORMAL INCIDENT OR MALFUNCTION TAKES PLACE, STOP USING THE APPLIANCE IMMEDIATELY AND PULL THE PLUG OUT FROM THE ELECTRICAL OUTLET
- PLEASE OBSERVE THE FOLLOWING INSTRUCTIONS TO AVOID ANY ACCIDENT
- DO NOT USE THE APPLIANCE IN THE FOLLOWING PLACES
- PROPERLY USE THE POWER PLUG
- INSTALL THE LITHIUM BATTERY CORRECTLY
- OPERATING REQUIREMENTS
- PARTS NAMES AND ACCESSORIES
- CURRENT TIME (CLOCK DISPLAY) ADJUSTMENT
- REPLACE LITHIUM BATTERY
- PROCEDURES AND KEY POINTS
- OF BREAD-MAKING
- FOR HIGH ROOM TEMPERATURE OR DURING THE SUMMER, REFRIGERATE BEFOREHAND
- THE SHAPE AND SWELLING CONDITION OF HOMEMADE BREAD MAY VARY
- THE FRESHNESS OF INGREDIENTS IS CRITICAL! IS IT PROPERLY KEPT
- LIST OF BREAD TYPES AND BAKING
- BREAD-MAKING INGREDIENTS
- FLOUR
- EFFECTS
- KEY POINTS
- FOR MAKING BREAD
- FATS AND OILS
- DAIRY PRODUCTS
- SALT
- EGG
- BAKING POWDER
- BREAD YEASTS
- INSTANT DRY YEAST
- SUGAR
- WATER
- NATURAL YEAST (RAW)
- TIPS ON HOSHINO NATURAL YEAST
- RICE FLOUR
- BREAD-MAKING INGREDIENTS (CONTINUED)
- IN CASE OF CHANGES OF RECIPE AND TYPE OF INGREDIENTS
- IN CASE OF ADDING EGGS OR MILK
- INGREDIENTS PREPARATIONS
- BAKING BASIC BREAD
- REMOVE THE BREAD PAN AND SET THE KNEADING BLADE
- ADD HIGH-GLUTEN FLOUR, WATER AND OTHER INGREDIENTS TO THE BREAD PAN, AND ADD YEAST
- ADD INSTANT DRY YEAST INTO THE YEAST DISPENSER
- SELECT MENU
- PRESS START
- BAKING COMPLETES (BEEP SOUND) TURN OFF THE POWER
- TAKE OUT THE BREAD PAN AND PUT IT ON A TABLE WITH A TOWELETTE UNDER IT. WHEN HANDLING THE BREAD PAN, BE SURE TO WEAR THICK OVEN GLOVES
- TAKE OUT THE BREAD FOR COOLING DOWN
- CONVENIENT FUNCTIONS
- RAISIN
- RAISIN FOR MAKING BREAD THAT CONTAINS YOUR FAVORITE INGREDIENTS
- AUTOMATICALLY ADDED (COMPLETED BY THE AUTOMATIC BREAD MAKER)
- PREPARATIONS
- INGREDIENTS THAT CAN BE AUTOMATICALLY ADDED: DRY INGREDIENTS AND INGREDIENTS THAT HARDLY MELT
- ① PRESS 葡萄乾:選擇 (RAISIN: SELECT), SELECT 有 (YES) (MAKE IT FLASH)
- PLEASE MANUALLY ADD INGREDIENTS THAT CANNOT BE ADDED AUTOMATICALLY
- MANUALLY ADD WHEN YOU HEAR BEEP SOUNDS (♪)
- ① PRESS 葡萄乾:選擇 (RAISIN: SELECT), AND SELECT 有♪ (YES♪) (MAKE IT FLASH)
- ② START
- ③ AFTER HEARING BEEP SOUNDS OPEN THE LID
- ④ ADD INGREDIENTS INTO THE BREAD PAN, THEN CLOSE THE LID
- ⑤ RESTART
- INGREDIENTS THAT CAN'T BE AUTOMATICALLY ADDED (STICK ONTO WALLS OF DISPENSER, HARD TO FALL) INGREDIENTS THAT ARE STICKY, EASILY MELT OR HAVE A HIGH CONTENT OF WATER
- PROPER TIME FOR ADDING INGREDIENTS WHEN MAKING STUFFED BREADS
- CONVENIENT FUNCTIONS GENTLE STIR
- FIRST, REFER TO RAISIN ON PAGES EN18 ~ EN
- GENTLE STIR - KEEPS THE SHAPE OF EASILY DISTORTED INGREDIENTS
- PLEASE PAY ATTENTION TO THE FOLLOWING INGREDIENTS DURING ADDING
- CRUST COLOUR
- BAKE YOUR FAVORITE CRUST COLOUR
- [STANDARDS ON TIMER]
- PAIN DE MIE
- INGREDIENTS
- START
- YUDANE PAIN DE MIE
- CHIFFON PAIN DE MIE
- SOFT BREAD
- RAPID BREAD
- MINUTES BREAD
- PRESS 取消 (CANCEL) WHEN YOU HEAR THE BEEP SOUND. TAKE OUT THE BREAD PAN AND COOL IT DOWN FOR ABOUT 2 MIN. THEN TAKE OUT THE BREAD
- RICE BREAD
- PRESS 取消 (CANCEL) WHEN YOU SOUND. TAKE OUT THE BREAD PA FOR ABOUT 2 MIN. THEN TAKE OUT THE BREAD
- FRENCH RICE BREAD
- FRENCH BREAD
- PRESS CANCEL WHEN YOU HEAR THE BEEP SOUND. TAKE OUT THE BREAD PAN AND COOL IT DOWN FOR ABOUT 2 MIN. THEN
- TAKE OUT THE BREAD
- WHOLE WHEAT BREAD
- HOKKAIDO BREAD
- OPEN THE LID WHEN YOU HEAR THE BEEP SOUND. ADD THE CUSTARD CRUST WITHIN 10 MIN
- CLOSE THE LID. RESTART
- HOW TO MAKE CUSTARD CRUST
- MAKING THE CRUST
- ROLLING FLAT
- TIPS FOR MAKING HOKKAIDO BREAD
- BRIOCHE
- OPEN THE LID WHEN YOU HEAR THE BEEP SOUND. UNWRAP THE PLASTIC WRAP AND ADD IN THE CUT FROZEN BUTTER
- CLOSE THE LID RESTART
- PRESS CANCEL WHEN YOU HEAR THE BEEP SOUND. TAKE OUT THE BREAD PAN AND COOL IT DOWN FOR ABOUT 2 MIN. THEN TAKE OUT THE BREAD
- MARBLE BREAD
- OPEN THE LID WHEN YOU HEAR THE BEEP SOUND. WITHIN 5 MIN
- PLACE THE INSTANT COFFEE POWDER ON THE BOTTOM OF BREAD PAN
- PINEAPPLE BREAD
- ADD THE COOKIE DOUGH
- METHOD FOR MAKING COOKIE DOUGH
- MAKING THE DOUGH
- ROLLING OUT FLAT
- TIPS FOR MAKING PINEAPPLE BREAD
- RED BEAN BREAD
- WHEN YOU HEAR BEEP SOUND, OPEN THE LID AND TAKE OUT THE DOUGH FROM THE BREAD PAN, AND REMOVE THE BLADE
- HALF BREAD
- RICE FLOUR BREAD
- VARIOUS FLAVORED BREAD
- CINNAMON BRIOCHE
- SELECT MENU "15" TO MAKE BREAD DOUGH
- TAKE OUT THE DOUGH
- FORMING
- START BAKING (PRESS 📄 START) AGAIN)
- MAKING ICING
- FINAL PROCESSING
- TO MAKE VARIOUS FLAVORED BREAD ON MENU
- MATCHA BLACK BEAN ROLL
- DOUGH ROLLING
- ADD THE CONTENTS AND FORM THE BREAD
- BAKING
- STUFFED BREAD
- SELECT YOUR FAVORITE INGREDIENTS
- FILL IN THE STUFFING
- NATURAL YEAST BREAD MAKING
- NATURAL YEAST (FERMENTED)
- ADD NATURAL YEAST (FERMENTED) IN THE BREAD PAN
- ADD HIGH-GLUTEN FLOUR, WATER AND OTHER INGREDIENTS IN THE BREAD PAN
- SETTING
- BAKING COMPLETES (BEEP SOUND)
- TURN OFF THE POWER
- COOL DOWN (ABOUT 2 MIN)
- NATURAL YEAST BREAD DOUGH MAKING
- IF THE BREAD DOUGH IS STICKY
- PRESS 取消 (CANCEL) WHEN YOU HEAR THE BEEP SOUND, AND TAKE OUT THE DOUGH IMMEDIATELY
- NATURAL YEAST FERMENTATION
- PRESS CANCEL WHEN YOU HEAR THE BEEP SOUND, TAKE OUT THE NATURAL YEAST CULTURE VESSEL QUICKLY, AND THEN STORE IT IN A REFRIGERATOR IMMEDIATELY
- BREAD DOUGH/ PIZZA DOUGH MAKING
- PRESS CANCEL WHEN YOU HEAR BEEP SOUNDS. TAKE OUT THE DOUGH RIGHT AWAY
- MINUTES DOUGH MAKING
- VARIOUS FLAVORED BREAD USE BREAD DOUGH
- TOOLS USED FOR BREAD-MAKING WITH DOUGH
- TOOLS THAT MAY BE USED FOR MAKING BREAD
- INGREDIENTS (FOR 12 PIECES)
- ROLLS
- FERMENTATION
- STUFFED BREAD WITH SWEETENED BEANS PASTE
- CROISSANT
- ADD IN BUTTER
- DOUGHNUT
- USE BREAD DOUGH
- BAGEL
- MAKING BREAD DOUGH
- WATER BOILING
- YOGURT BREAD
- USE PIZZA DOUGH
- PIZZA
- ADD INGREDIENTS
- FOCACCIA
- PIZZA DOUGH MAKING
- VARIOUS FLAVORED BREAD USE 8 MINUTES DOUGH
- CRISPY PIZZA
- NAAN
- FRYING AND ROASTING
- TORTILLA
- RED BEAN BUN
- STEAMING
- DUMPLING SKIN DOUGH MAKING
- DUMPLING SKIN DOUGH
- DUMPLING
- MAKING DUMPLING STUFFING
- ROLLING DOUGH
- MAKING DUMPLINGS
- BOILING DUMPLINGS
- UDON/PASTA DOUGH MAKING
- YOU CAN ALSO MAKE COLORFUL PASTA
- PRESS 取消 (CANCEL) WHEN YOU HEAR BEEP SOUNDS, AND TAKE OUT THE DOUGH IMMEDIATELY
- LET THE SMOOTH SURFACE FACE UP, SHAPE IT INTO A BALL AND THEN WRAP IT WITH CLING FILM AND PLACE STILL
- WHEN STORING
- UDON
- CUT DOUGH
- COOK NOODLE
- PASTA
- COOK NOODLES
- SCONE MAKING
- BEEP SOUNDS ARE HEARD. OPEN THE LID AND WITHIN 3 MIN CLEAN THE REMAINING FLOUR
- CLOSE THE LID AND RESTART
- FINISH THE SURFACE OF THE BREAD DOUGH
- ADDITIONAL BAKING" IN CASE OF INSUFFICIENT BAKING
- ① SELECT MENU
- ② SET BAKING TIME
- ③ START
- CAKE MAKING
- START 開始
- BEEP SOUNDS ARE HEARD
- PRESS 取消 (CANCEL) WHEN YOU HEAR BEEP SOUNDS
- TAKE OUT THE CAKE
- VEGETABLE CAKE MAKING
- HOW TO MAKE VEGETABLE CAKE MIXTURE
- PRESS 取消 (CANCEL) WHEN YOU HEAR BEEP SOUNDS. TAKE OUT THE BREAD PAN AND COOL IT DOWN FOR ABOUT 2 MIN. THEN TAKE OUT THE VEGETABLE CAKE
- VEGETABLE CAKE RECIPE
- RED BEAN MAKING
- HOW TO POACH THE RED BEAN
- WHEN YOU HEAR A BEEP SOUND, PRESS CANCEL, AND THEN TAKE THE RED BEAN PASTE OUT WITH A RUBBER SPATULA
- CHOCOLATE MAKING
- MANUALLY REMOVE THE BLADE
- PERFORM ADDITIONAL MIXING WHEN THE MIXING IS NOT SUFFICIENT
- JAM MAKING
- SET COOKING TIME (120 MIN FOR STRAWBERRY JAM)
- PRESS 取消 (CANCEL) WHEN YOU HEAR THE BEEP SOUND AND TAKE OUT THE BREAD PAN FOR COOLING (FOR ABOUT 10 MIN)
- WHEN DUMPING THE BREAD PAN USE A RUBBER SPATULA TO POUR JAM INTO A CONTAINER SLOWLY
- ADDITIONAL HEATING" IN CASE OF INSUFFICIENT HEATING
- ② SET COOKING TIME
- COMPOTE MAKING
- SET COOKING TIME (90 MINUTES FOR CANDIED APPLE)
- PRESS CANCEL WHEN YOU HEAR THE BEEP SOUNDS. TAKE OUT THE BREAD PAN AND LET IT COOL (ABOUT 10 MINUTES)
- POUR SLOWLY INTO THE CONTAINER, AND COOL IT DOWN WITH THE SYRUP
- SET COOKING TIME
- TOMATO COMPOTE
- LOQUAT COMPOTE
- PEAR COMPOTE
- DATE COMPOTE
- MOCHI MAKING
- WHEN YOU HEAR THE BEEP SOUNDS
- OPEN THE LID
- WHEN THE LID IS OPEN
- START IMMEDIATELY
- BLACK SESAME SEED MOCHI
- SHAD DOCK MOCHI
- CLEANING
- BREAD PAN, BLADE, LID
- WASH WITH WATER AFTER THE RESIDUAL DOUGH IS CLEARED
- WIPE WITH
- A WELL-WRUNG CLOTH
- NATURAL YEAST CULTURE VESSEL
- CLEAN IT THOROUGHLY, THEN AIR DRY IT
- DISPENSER LID
- REMOVE AND WASH WITH WATER
- YEAST DISPENSER
- RAISIN AND NUT DISPENSER
- AND WASH WITH WATER
- FAQ
- UDON DOUGH (ALL-PURPOSE FLOUR)
- NATURAL YEAST (RAW) (P. EN13)
- NATURAL YEAST (FERMENTED) (P. EN55)
- UPON COMPLETION OF BAKING
- ABNORMAL SHAPE OF BREAD
- WHEN THE FOLLOWING CONDITIONS HAPPEN
- INSUFFICIENT SWELLING
- PLEASE CONFIRM THE FOLLOWING
- BREAD (SWELLING)
- EXCESSIVE SWELLING
- REMEDIES FOR MISOPERATIONS
- TROUBLESHOOTING
- IN CASE OF THE FOLLOWING DISPLAYS
- SPECIFICATIONS
- EASILY AND CONVENIENTLY MAKE VARIOUS DELICIOUS BREADS
- VARIOUS FLAVORS OF BREAD
- CHEWY TEXTURE, NATURAL YEAST BREAD
- PLEASE HANDLE LITHIUM BATTERIES WITH CARE
- PREPARATION OF RELATED INGREDIENTS
- SUBTRACT THE WEIGHT OF GRAINS
- SUBTRACT 80% OF THE WATER CONTENT OF THE VEGETABLES
- DEDUCT THE AMOUNT OF JUICE
- MAKING BASIC BREAD
- SELECT RECIPE
- SELECT RECIPE "9" OR
- AFTER THE BEEP, OPEN THE LID AND PLACE THE CUSTARD PASTRY
- CLOSE THE LID AND START AGAIN
- AFTER THE BEEPING SOUND, OPEN THE LID AND PLACE THE COOKIE DOUGH
- MATCHA BLACK BEAN BREAD ROLLS
- SELECT RECIPE "15" TO MAKE BREAD DOUGH
- USING THE BREAD MAKER TO MAKE NATURAL YEAST (RAW STARTER)
- REMOVE THE BREAD CONTAINER AND INSTALL THE BREAD PADDLE
- BUTTER ROLLS
- SHAPING
- BOILING
- ADD TOPPINGS
- ROLLING OUT THE DOUGH
- CUTTING THE NOODLES
- BOILING THE NOODLES
- CUT NOODLES
- BOIL NOODLES
- IF UNDERBAKED, PERFORM "ADDITIONAL BAKING
- MAKING VEGETABLE CAKE
- VEGETABLE CAKE RECIPES
- IF MIXING IS INSUFFICIENT, PERFORM "ADDITIONAL MIXING
- IF HEATING IS INSUFFICIENT, PERFORM "ADDITIONAL HEATING
- IF NOT HEATED ENOUGH, PERFORM "ADDITIONAL HEATING
- BLACK SESAME MOCHI
- YUZU MOCHI
- RAISIN AND NUT CONTAINER
- FREQUENTLY ASKED QUESTIONS
- AFTERSALES SERVICES
- AFTER-SALES SERVICE
Brand : PANASONIC
Model : SD-PT1001
Category : Bread maker