
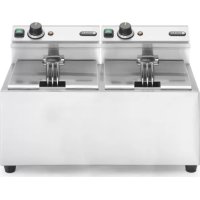
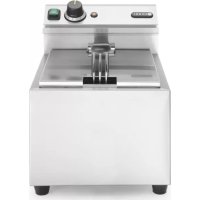
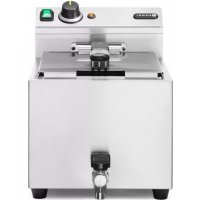
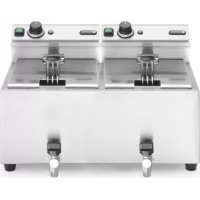
Goliath 209431 - Deep fryer Hendi - Free user manual and instructions
Find the device manual for free Goliath 209431 Hendi in PDF.


| Product type | Professional deep fryer |
| Brand | Hendi |
| Model | Goliath 209431 |
| Total capacity | 30 L (2 tanks of 15 L) |
| Dimensions (L x D x H) | 800 x 700 x 450 mm |
| Net weight | 25 kg |
| Power supply | 230 V / 50 Hz / 4000 W |
| Temperature range | 130 °C to 190 °C |
| Main functions | Frying with adjustable thermostat, safety shut-off, heating indicator |
| Tank material | Stainless steel |
| Control type | Mechanical thermostat |
| Safety | Manual reset safety thermostat, thermal fuse |
| Maintenance and cleaning | Drain via tap, removable tank, removable panels for cleaning |
| Spare parts available | Basket, heating element, thermostat, drain tap |
| Repairability index | 8.0 / 10 |
| Included accessories | 2 metal baskets, lid |
| Warranty | 2 years |
| Recommended use | Catering, institutions |
Frequently Asked Questions - Goliath 209431 Hendi
User questions about Goliath 209431 Hendi
0 question about this device. Answer the ones you know or ask your own.
Ask a new question about this device
Download the instructions for your Deep fryer in PDF format for free! Find your manual Goliath 209431 - Hendi and take your electronic device back in hand. On this page are published all the documents necessary for the use of your device. Goliath 209431 by Hendi.
USER MANUAL Goliath 209431 Hendi
DEEP FRYER XL GOLIATH
209431 v.02_s.01
| GB:User manual | 6 | LV:Lietotāja rokasgrāmata | 47 |
| DE:Benutzerhandbuch | 9 | LT:Naudojimo instrukcija | 50 |
| NL:Gebruikershandleiding | 12 | PT:Manual do utilizador | 53 |
| PL:Instrukcja obstugi | 15 | ES:Manual del usuario | 56 |
| FR:Manuel de l'utilisateur | 19 | SK:Použivatelšká priručka | 59 |
| IT:Manuale utente | 22 | DK:Brugervejledning | 62 |
| RO:Manual de utilizare | 25 | FI:Käyttöopas | 65 |
| GR:Eyxepičio xpnotn | 28 | NO:Brukerhändbok | 68 |
| HR:Korisnički priručnik | 32 | SI:Navodila za uporabo | 70 |
| CZ:Uživatelská priručka | 35 | SE:Árvándarhandbok | 73 |
| HU:Felhasználói kézikönyv | 38 | BG:Přkovodство за потребителя | 76 |
| UA:Посібник користувача | 41 | RU:Руководство пользователя | 79 |
| EE:Kasutusjuhend | 44 |
DEEP FRYER XL WITH DRAIN TAP HENDI GOLIATH
FRITTEUSE XL MIT ABLASSHAHN HENDI GOLIATH
FRITEUSE XL MET AFTAPKRAAN HENDI GOLIATH
FRYTOWNICA XL Z KRANEM SPUSTOWYM HENDI GOLIATH
FRITEUSE PROFONDE XL AVEC ROBINET DE VIDANGE HENDI GOLIATH
FRIGGITRICE PROFONDA XL CON RUBINETTO DI SCARICO HENDI GOLIATH
FRITEUZĂ ADÂNCĂ XL CU ROBINET DE SCURGERE HENDI GOLIATH
GB: Read user manual and keep this with the appliance.
GB: For indoor use only.

GB: NOTE: This manual is translated from original English manual using AI and machine translations.
3

GB: Technical specifications / DE: Technische Angaben / NL: Technische gegevens / PL: Dane techniczne / FR: Données techniques / IT: Parametri di base / RO: Parametrii de bază / GR: Bašukéç paráµetrot / HR: Tehnički podaci / CZ: Technická specifikace / HU: Můszaki adatok / UA: Texníční характеристики / EE: Tehnilised andmed / LV: Tehniskás specifikacijas / LT: Techninés specifikacijos / PT: Especificações técnicas / ES: Especificaciones técnicas / SK: Technické špecifikácie / DK: Tekniske specifikationer / FI: Tekniset tiedot / NO: Tekniske spesifikasjoner / SI: Tehnične specifikacije / SE: Tekniska specifikationer / BG: Texнически спецификации / RU: Texнические данные
| A 20 | 431 v.02_s.01 |
| B 380 | -400V ~ 50/60Hz / 380-400B ~ 50/60Гц |
| C 10 | 200W / Вт |
| D | I |
| E IPX3 | |
| F 50 | - 190°C |
| G 10 | L |
| H 300 | x585x(H)392mm / мм |
A: GB: Item no. / DE: Art.-Nr. / NL: Artikelnr. / PL: Nr pozycji / FR: N° d'article / IT: N. articolo / RO: Nr. articolului/ GR: Ap. εiδους / HR: Broj stavke / CZ: Položka č. / HU: Cikkszám / UA: Номер елемента / EE: Artikli nr / LV: Vienums Nr. / LT: Prekès Nr. / PT: Item n.o / ES: N.o de artículo / SK: Č. položky / DK: Varenr. / FI: Kohteen nro / NO: Varenr. / SI: Št. izdelka / SE: Art.nr / BG: Номер на елемент / RU: Номер позиции
B: Rated voltage and frequency
C: Rated input power
D: Protection class (Class)
E: GB: Waterproof protection rating / DE: Wasserdichtigkeitsschutzklasse / NL: Beschermingsgraad tegen water / PL: Klasa wodoodporności / FR: Indice de protection étanche / IT: Grado di protezione impermeabile / RO: Clasificare protecție impermeabilă / GR: Βαθμός αδιάβροχης προστασίας / HR: Vodootporna zaštita / CZ: Odolnost proti vodě / HU: Vízálló védelmi besorolás / UA: Рейтинг водонепроникності / EE: Veekindluse kaitseaste / LV: Ūdensnecaurlaidības klase / LT: Apsaugos nuo vandens klasė / PT: Classificação de proteção à prova de água / ES: Grado de impermeabilidad / SK: Stupeň ochrany proti vode / DK: Vandtæt beskyttelsesklassificering / FI: Vedenpitävä suojausluokitus / NO: Vanntett beskyttelsesklassifisering / SI: Stopnja zaščite pred vodo / SE: Vattentät skyddsklassning / BG: Клас на водоустойчивост / RU: Рейтинг водонепроницаемости
F: GB: Temperature settings / DE: Temperatur-Einstellungen / NL: Temperatuur instellingen / PL: Ustawienia temperatury / FR: Réglages de température / IT: Impostazioni della temperatura / RO: Setări de temperatură / GR: Ρυθμίσεις θερμοκρασίας / HR: Postavke temperature / CZ: Nastavení teploty / HU: Hőmérséklet-beállítások / UA: Налаштування температури / EE: Temperatuurisätted / LV: Temperatūras iestatījumi / LT: Temperatūros nuostatos / PT: Definições de temperatura / ES: Ajustes de temperatura / SK: Nastavenie teploty / DK: Temperaturindstillinger / FI: Lämpötila-asetukset / NO: Temperaturinnstillinger / SI: Nastavitve temperature / SE: Temperaturinställningar / BG: Настройки на температурата / RU: Настройки температуры
G: GB: Capacity / DE: Kapazität / NL: Capaciteit / PL: Pojemność / FR: Capacité / IT: Capacità / RO: Capacitate / GR: Χωρητικότητα / HR: Kapacitet / CZ: Kapacita / HU: Kapacitás / UA: Місткість / EE: Mahutavus / LV: Efektivitāte / LT: Pajėgumas / PT: Capacidade / ES: Capacidad / SK: Kapacita / DK: Kapacitet / FI: Tilavuus / NO: Kapasitet / SI: Zmogljivost / SE: Kapacitet / BG: Капацитет / RU: Вместимость H: GB: Dimensions / DE: Abmessungen / NL: Afmetingen / PL: Wymiary / FR: Dimensions / IT: Dimensioni / RO: Dimensiuni / GR: Διαστάσεις / HR: Dimenzije / CZ: Rozměry / HU: Méretek / UA: Розміри / EE: Mõõtmed / LV: Izmēri / LT: Matmenys / PT: Dimensões / ES: Dimensiones / SK: Rozmery / DK: Mål / FI: Mitat / NO: Mål / SI: Mere / SE: Mått / BG: Размери / RU: Размеры
GB: Remark: Technical specification is subjected to change without prior notification.
Thank you for purchasing this HENDI appliance. Read this user manual carefully, paying particular attention to the safety regulations outlined below, before installing and using this appliance for the first time.
Safety instructions
- Only use the appliance for the intended purpose it was designed for, as described in this manual.
- The manufacturer is not liable for any damage caused by incorrect operation and improper use.
• DANGER! RISK OF ELECTRIC SHOCK! Do not attempt to repair the appliance by yourself. Do not immerse the electrical parts of the appliance in water or other liquids. Never hold the appliance under running water.
- NEVER USE A DAMAGED APPLIANCE! Check the electrical connections and cord regularly for any damage. When damaged, disconnect the appliance from the power supply. Any repairs should only be carried out by a supplier or qualified person to avoid danger or injury.
- WARNING! When positioning the appliance, route the power cable safely if necessary to avoid unintentional pulling, being damaged, coming into contact with the heating surface, or causing a tripping hazard.
- WARNING! As long as the plug is in the socket the appliance is connected to the power supply.
- WARNING! ALWAYS switch off the appliance before disconnecting from the power supply, cleaning, maintenance or storage.
- Only connect the appliance to an electrical outlet with the voltage and frequency mentioned on the appliance label.
- Do not touch the plug/electrical connections with wet or damp hands.
- Keep the appliance and electrical plug/connections away from water and other liquids. If the appliance falls into water, remove the power supply connections immediately. Do not use the appliance until it has been checked by a certified technician. Failure to follow these instructions will cause life threatening risks.
- Connect the power supply into an easily accessible electrical outlet so you can disconnect the appliance immediately in case of emergency.
- Make sure the cord does not come in contact with sharp or hot objects and keep it away from open fire. Never pull the power cord to unplug it from the socket, always pull the plug instead.
- Never carry the appliance by its cord.
- Never try to open the housing of the appliance yourself.
- Do not insert objects into the housing of the appliance.
- Never leave the appliance unattended during use.
- This appliance should be operated by trained personnel in kitchen of the restaurant, canteens or bar staff, etc.
- This appliance should not be operated by persons with reduced physical, sensory or mental capabilities, or persons that have a lack of experience and knowledge.
- This appliance should, under any circumstances, not be used by children.
- Keep the appliance and its electrical connections out of reach of children.
- Never use accessories or any extra devices other than those supplied with the appliance or recommended by the manufacturer. Failure to do so could pose a safety risk to the user and could damage the appliance. Only use original parts and accessories.
- Do not operate this appliance by means of an external timer or remote-control system.
- Do not place the appliance on a heating object (gasoline, electric, charcoal cooker, etc.).
- Do not cover the appliance in operation.
- Do not place any objects on top of the appliance.
- Do not use the appliance near any open flames, explosive or flammable materials. Always operate the appliance on a horizontal, stable, clean, heat-resistant and dry surface.
- The appliance is not suitable for installation in an area where a water jet could be used.
- Leave a space of at least 20 cm around the appliance for ventilation during use.
- WARNING! Keep all ventilation openings on the appliance free from obstruction.
Special safety instructions
• This appliance is intended for commercial use. - CAUTION! RISK OF BURNS! HOT SURFACES! The temperature of the accessible surfaces are very high during use. Touch only the control panel, handles, switches, timer control knobs or temperature control knobs. - If the supply cord is damaged, it must be replaced by the manufacturer, its service agent or similarly qualified persons in order to avoid a hazard. - WARNING! Fat and oil become very hot during operation. Beware of this. - WARNING! There is a danger of fire if the oil level is below the "L" (Min) mark or if there is no oil in the oil container. Always use plenty of oil in the oil tank. - WARNING! Frying moist food or large quantities at the same time has a negative influence on the boiling point of the oil. Excessive foaming will occur and oil will spill out. The maximum batch load is approximately 1kg. - DANGER! Never use old oil because it has a low flash point and is more prone to boiling. It increases the risk of fire and dangerous situations. - WARNING! Do not open the drain cocks or other emptying devises until the pressure has been reduced to approximately atmospheric pressure. - Only use suitable oil or fat for frying. Replace the oil or fat at regular intervals. Overcooked or dirty oil or fat can be ignited if it is overheated. - Do not fill oil below the MIN - level nor beyond the MAX - level in the oil tank. - The fryer tank and element should be placed in a safe position in the kitchen before use due to the hot contents. - The appliance has to be installed and used in such a way that any water cannot contact the fat or oil. - Regularly change the old oil to reduce releasing of dioxins which are carcinogenic.
Intended use
This appliance is intended to be used for commercial applications, for example in kitchens of restaurants, canteens, hospitals, and in commercial enterprises such as bakeries, butcheries, etc., but not for continuous mass production of food.
eries, etc., but not for continuous mass production of food.
- The appliance is designed only for frying appropriate food, such as French fries, etc. Any other use may lead to damage of the appliance or personal injury.
- Operating the appliance for any other purpose shall be deemed a misuse of the device. The user shall be solely liable for improper use of the device.
This appliance is classified as protection class I and must be connected to a protective ground. Grounding reduces the risk of electric shock by providing an escape wire for the electric current.
This appliance is classified as protection class I and must be connected to a protective ground. Grounding reduces the risk of electric shock by providing an escape wire for the electric current.
This appliance is fitted with a power cord with grounding plug or electrical connections with grounding wire. The connections must be properly installed and grounded.
(Fig.1 on page 3)
Heating indication lamp
- Temperature control
- ON/OFF switch
- Preparation before use
Remove all protective packaging and wrapping.
- Remove all protective packaging and wrapping.
- Check that the device is in good condition and with all accessories. In case of incomplete or damaged delivery, please contact the supplier immediately. In this case, do not use the device.
- Clean the accessories and the appliance before use (See ==> Cleaning & Maintenance).
- Make sure the appliance is completely dry.
- Place the appliance on a horizontal, stable and heat resistant surface that is safe against water splashes.
- Keep the packaging if you intend to store your appliance in the future.
- Keep the user manual for future reference.
NOTE! Due to manufacturing residues, the appliance may emit a light odor during the first few uses. This is normal and does not indicate any defect or hazard. Make sure the appliance is well ventilated.
Power supply line connection
(Fig 2 on page 3)
ATTENTION: The power supply lines should be connected by authorized technician
Operating instructions
- Make sure the oil drain tap is closed.
- Disconnect the power from the mains.
- Fill the container with oil or hydrogenated oil until the MAX line.
- Note! Solid fats must be preheated before filling, this avoids burnt fat and overloading (See "Solid Fat").
- Connect the internal wires of the power cord to a suitable electrical supply outlet (See ==> Power supply line connection).
- Turn on the appliance by using the green on/off button on the operating panel. The green lamp in the switch will light.
- Set the thermostat to the desired temperature. The orange
lamp will light.
- When the set temperature is reached, the orange lamp goes out.
- During deep frying the temperature lamp will light off and on to indicate that the heating element will maintain its indicated temperature.
- You can now use the appliance.
After use
- Turn off the appliance by switching off the switch.
- Do not move the appliance until it and its contents have cooled down.
- Put the lid on the appliance, so that the fat does not age.
Operating tips
- This appliance is designed with a unique cold zone that allows crumbs and residues to go straight to the bottom. This also allows the fat/oil life to be extended considerably.
- Check regularly if there is sufficient oil or fat in the container. The level should never be below the MIN line.
- Preferably use only liquid frying oil or fat.
- The recommended temperature for frying chips and snacks is a maximum of 175°C.
- Remove ice and frozen food remnants.
- Do not fry too much at once. This can cool down the oil or fat too much and cause the food to absorb more fat/oil. When used intensively, the oil should be filtered to avoid traces of crumbs and other residues. Ensure that the oil is ready to use.
- Use test strips or equipment regularly to track when you should replace the oil/fat.
- Before the oil starts foaming, smoking, or becoming too sticky, you should replace it. Also replace the oil/fat when it has a strong smell or taste.
- Do not mix fresh oil with used oil.
Solid Fat
- If you decide to use solid fat, even though it is inadvisable, heat the oil slowly on the lowest setting until it melts. When the fat has melted, you can set the appropriate frying temperature.
- When using solid fat, let the fat blocks melt slowly over moderate heat in a normal frying pan. Carefully pour the melted fat into the appliance.
- Remove the fryer basket. This prevents the basket from getting stuck in the solidified fat.
RESET the safety cut-out (Hi-limiter or thermal cut-out)
(Fig.3 on page 3)
- Please note that the RESET button is equipped with a protective cap to avoid overheat.
- Disconnect the appliance from the power supply.
- Allow the appliance to completely cool down.
- Unscrew the protective cap of the RESET button.
- Press the RESET button of the Hi-limiter (thermal cut-out). You should hear a click sound.
- Screw back the protective cap on the RESET button.
- Connect to the power supply and you can use it again.
Cleaning & maintenance
- ATTENTION! Always disconnect the appliance from the power supply and cool down before storage, cleaning & maintenance.
- Do not use water jet or steam cleaner for cleaning and do not push the appliance under the water as the parts will get wet and electric shock might be resulted.
- If the appliance is not kept in a good state of cleanliness, this can adversely affect the life of the appliance and result in a dangerous situation.
- Food residues should be regularly cleaned and removed from the appliance. If the appliance is not cleaned properly, it will reduce its lifespan and may result in a dangerous condition during use.
Cleaning
- Clean the cooled exterior surface with a cloth or sponge slightly dampened with a mild soap solution.
- For reasons of hygiene, the appliance should be cleaned before and after use.
- Avoid water contacting the electrical components.
- Never immerse the appliance in water or other liquids.
- Never use aggressive cleaning agents, abrasive sponges, or cleaning agents containing chlorine. Do not use steel wool, metallic utensils, or any sharp or pointed objects for cleaning. Do not use petrol or solvents!
- No parts are dishwasher safe.
Maintenance
- Check the operation of the appliance regularly to prevent serious accidents.
- If you see that the appliance is not working properly or that there is a problem, stop using it, switch it off and contact the supplier.
- All maintenance, installation and repair work must be carried out by specialised and authorised technicians, or recommended by the manufacturer.
Transportation and Storage
- Before storage, always make sure that the appliance has been disconnected from the power supply and completely cooled down.
- Store the appliance in a cool, clean and dry place.
- Never place heavy objects on the appliance as this could damage it.
- Do not move the appliance while it is under operation. Disconnect the appliance from power supply when moving and hold it at the bottom.
Troubleshooting
If the appliance does not function properly, please check the below table for the solution. If you are still unable to solve the problem, please contact the supplier/service provider.
| Problem Possible cause | Use Possible solution | |
| Appliance does not work at all (Green switch indicator not lit & orange heating indicator not lit) | Control panel not seated properly on bracket | Properly seat the control panel on the bracket |
| No mains power Check | the electrical installation | |
| Appliance is switched off | Switch on the appliance | |
| Microswitch defective | Contact the supplier | |
| Appliance does not heat up (Green switch indicator is lit & orange heating indicator not lit) | Thermostat set to a low temperature | Set the thermostat to a higher temperature |
| Hi-limiter (thermal cut-out) tripped. | Reset the Hi-limiter (thermal cut-out) (See ==> RESET the safety cut-out (Hi-limiter or thermal cut-out)). | |
| Hi-limiter (thermal cut-out) defective. | Contact the supplier | |
| Thermostat defective | ||
| Appliance does not reach the set temperature (Green switch indicator is lit & orange heating indicator is lit, but excessive frying time or temperature) | Thermostat defective | Contact the supplier |
Warranty
Any defect affecting the functionality of the appliance which becomes apparent within one year after purchase will be repaired by free repair or replacement provided the appliance has been used and maintained in accordance with the instructions and has not been abused or misused in any way. Your statutory rights are not affected. If the appliance is claimed under warranty, state where and when it was purchased and include proof of purchase (e.g. receipt).
In line with our policy of continuous product development we reserve the right to change the product, packaging and documentation specifications without notice.
Discarding & Environment

When decommissioning the appliance, the product must not be disposed of with other household waste. Instead, it is your responsibility to dispose of your waste equipment by handing it over to a designated collection point. Failure to follow this rule may be penalized in accordance with applicable regulations on waste disposal. The separate collection and recycling of your waste equipment at the time of disposal will help conserve natural resources and ensure that it is recycled in a manner that protects human health and the environment.
For more information about where you can drop off your waste for recycling, please contact your local waste collection company. The manufacturers and importers do not take responsibility for recycling, treatment and ecological disposal, either directly or through a public system.
GERMAN
Safety instructions
HENDI Romania S.R.L.
Str. Sânzienei FN, DE 305
507075, Ghimbav, Braşov, Romania
Tel: +40 268 320330
Email: office@hendi.ro
PKS HENDI South East Europe SA
5 Metsovou Str.
18346 Moschato, Athens, Greece
Tel: +30 210 4839700
Email: info@pks-hendi.com
HENDI Italia S.R.L.
Via Leonardo da Vinci 4
39100 Bolzano (BZ), Italy
Tel: +39 800 727 438
Email: office.italy@hendi.eu
HENDI HK Ltd.
1201, 12/F Exchange Tower
33 Wang Chiu Road, Kowloon Bay, Hong Kong
Tel: +852 2154 2618
Email: info-hk@hendi.eu
Find HENDI on internet:
www.hendi.com
www.facebook.com/HendiToolsforChefs
https://www.linkedin.com/company/hendi-tools-for-chefs/
www.youtube.com/HendiEquipment
GB: Changes, printing and typesetting errors reserved.

- DEEP FRYER XL GOLIATH
- SAFETY INSTRUCTIONS
- SPECIAL SAFETY INSTRUCTIONS
- INTENDED USE
- THIS APPLIANCE IS CLASSIFIED AS PROTECTION CLASS I AND MUST BE CONNECTED TO A PROTECTIVE GROUND. GROUNDING REDUCES THE RISK OF ELECTRIC SHOCK BY PROVIDING AN ESCAPE WIRE FOR THE ELECTRIC CURRENT
- (FIG.1 ON PAGE 3)
- HEATING INDICATION LAMP
- REMOVE ALL PROTECTIVE PACKAGING AND WRAPPING
- POWER SUPPLY LINE CONNECTION
- (FIG 2 ON PAGE 3)
- OPERATING INSTRUCTIONS
- AFTER USE
- OPERATING TIPS
- SOLID FAT
- RESET THE SAFETY CUT-OUT (HI-LIMITER OR THERMAL CUT-OUT)
- (FIG.3 ON PAGE 3)
- CLEANING & MAINTENANCE
- CLEANING
- MAINTENANCE
- TRANSPORTATION AND STORAGE
- TROUBLESHOOTING
- WARRANTY
- DISCARDING & ENVIRONMENT
- GERMAN
- HENDI ROMANIA S.R.L
- PKS HENDI SOUTH EAST EUROPE SA
- HENDI ITALIA S.R.L
- HENDI HK LTD
- FIND HENDI ON INTERNET
Brand : Hendi
Model : Goliath 209431
Category : Deep fryer