VIAGGIO 2/3 SUREFIX - Car seat PEG PEREGO - Free user manual and instructions
Find the device manual for free VIAGGIO 2/3 SUREFIX PEG PEREGO in PDF.
| Product type | Car seat group 2/3 |
| Brand | PEG PEREGO |
| Model | VIAGGIO 2/3 SUREFIX |
| Category | Universal (with belt) and Semi-Universal (with Surefix/Isofix) |
| Approval standard | UN/ECE R44/04 |
| Recommended child weight | 15 to 36 kg (approx. 3 to 12 years) |
| Installation | Forward-facing only |
| Fastening system | Static or retractable three-point belt; Isofix (Surefix) attachments |
| Headrest adjustment | 6 positions, operated by handle at the back |
| Backrest recline | Yes, recline system by front handle |
| Accessories | Two removable side cup holders |
| Cover | Machine washable at 30°C, reduced mechanical action and spin; do not bleach, iron, dry clean, or tumble dry |
| Care of plastic parts | Clean with a damp cloth; do not use solvents |
| Safety device | Integrated polystyrene shock absorption |
| Spare parts | Available from Peg Perego after-sales service |
| Serial number | Under the seat cover |
| After-sales service | Tel: 0039/039/60.88.213, Fax: 0039/039/33.09.992, Email: assistenza@pegperego.it |
Frequently Asked Questions - VIAGGIO 2/3 SUREFIX PEG PEREGO
User questions about VIAGGIO 2/3 SUREFIX PEG PEREGO
0 question about this device. Answer the ones you know or ask your own.
Ask a new question about this device
Download the instructions for your Car seat in PDF format for free! Find your manual VIAGGIO 2/3 SUREFIX - PEG PEREGO and take your electronic device back in hand. On this page are published all the documents necessary for the use of your device. VIAGGIO 2/3 SUREFIX by PEG PEREGO.
USER MANUAL VIAGGIO 2/3 SUREFIX PEG PEREGO
EN Instructions for use
FR Notice d'emploi
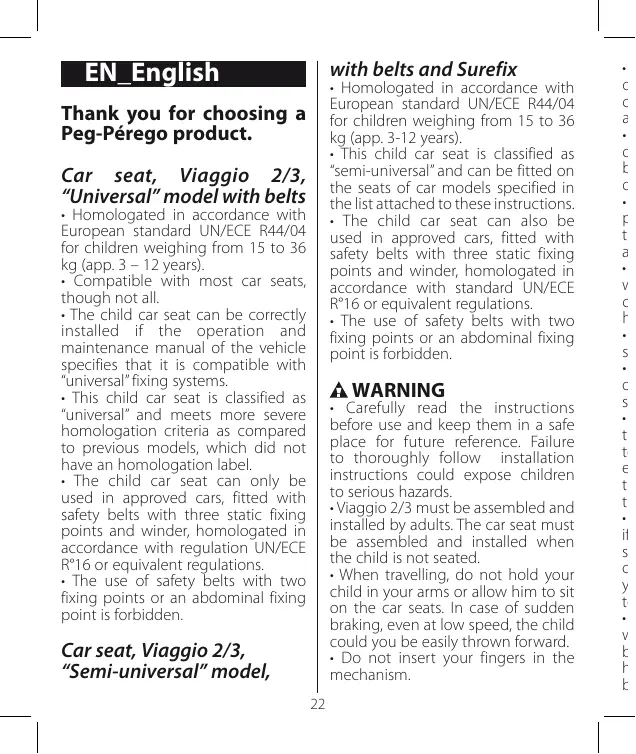
Thank you for choosing a Peg-Pérego product.
Car seat, Viaggio 2/3, "Universal" model with belts
- Homologated in accordance with European standard UN/ECE R44/04 for children weighing from 15 to 36 kg (app. 3 - 12 years).
- Compatible with most car seats, though not all.
- The child car seat can be correctly installed if the operation and maintenance manual of the vehicle specifies that it is compatible with "universal"fixing systems.
- This child car seat is classified as "universal" and meets more severe homologation criteria as compared to previous models, which did not have an homologation label.
- The child car seat can only be used in approved cars, fitted with safety belts with three static fixing points and winder, homologated in accordance with regulation UN/ECE R°16 or equivalent regulations.
- The use of safety belts with two fixing points or an abdominal fixing point is forbidden.
Car seat,Viaggio 2/3, "Semi-universal"model,
with belts and Surefix
Homologated in accordance with European standard UN/ECE R44/04 for children weighing from 15 to 36 kg (app. 3-12 years).
- This child car seat is classified as "semi-universal" and can be fitted on the seats of car models specified in the list attached to these instructions.
- The child car seat can also be used in approved cars, fitted with safety belts with three static fixing points and winder, homologated in accordance with standard UN/ECE R°16 or equivalent regulations.
- The use of safety belts with two fixing points or an abdominal fixing point is forbidden.
WARNING
- Carefully read the instructions before use and keep them in a safe place for future reference. Failure to thoroughly follow installation instructions could expose children to serious hazards.
Viaggio 2/3 must be assembled and installed by adults. The car seat must be assembled and installed when the child is not seated. - When travelling, do not hold your child in your arms or allow him to sit on the car seats. In case of sudden braking, even at low speed, the child could you be easily thrown forward.
-
Do not insert your fingers in the mechanism.
-
Pay particular attention to luggage or other objects that could injure the child seated in child seat in case of accident.
- Do not use installation methods other than those recommended because they could cause the detachment of the car seat.
- Verify that the belt with three fixing points, used to fix the child car seat to the car, is appropriately tensioned and untwisted.
- Do not leave the car unattended when the child is seated in the child car seat: watch your child even when he is asleep.
- Never remove the child from the seat when the car is moving.
- Verify that the child car seat is not obstructed by a moving part of the seat or a door.
- Adjust the height and tension of the belts, verifying that they adhere to the body of the child without exerting excessive pressure. Verify that the safety belt is not twisted and the child cannot unfasten it.
- Do not leave the car seat in the car if exposed to direct sunlight, because some parts could overheat and cause injuries to the delicate skin of your child. Verify that the seat is not too hot before seating your child.
- Do not use the child car seat without the lining. This lining cannot be replaced by another lining that has not been specifically approved by the manufacturer because it is
an integral part of the seat and is essential for safety purposes.
- Do not remove or replace parts in polystyrene because they are essential for safety purposes.
- In case of doubts, contact the manufacturer or retailer of this child car seat.
- This item has a progressive serial number.
- Do not remove the adhesive or sawn labels. The removal of these labels could result in the product not being compliant with standards.
- Do not use the child car seat if it is broken or if there are missing parts, if it is second-hand or if it has been subjected to heavy impacts as a result of accidents, because it may be structurally damaged.
- Do not alter the product.
- Contact the post-sales service for reparations, the replacement of components and information on the product.
Refer to the last page of this manual for further information.
If the child car seat has been fixed in place with Isofix fittings, do not detach it from the fittings.
If the car seat has been fixed in place with safety belts only, it is possible to remove it and store it in the luggage compartment if unused.
- Do not use accessories that have not been approved by the manufacturer or competent authorities.
1 important
- "Viaggio 2/3": this car seat, group 2/3, must be installed in the direction of travel.
- Do not install "Viaggio 2/3" in an opposite or transversal location as compared to the direction of travel.
- It is always advisable to fit the child seat on the rear seats and on the passenger's side.
- If the child seat is installed on the front seat, it is advisable to place it as far as possible from the dashboard.
If you experience problems during the installation of Viaggio 2/3, try lifting the headrest without removing it.
2_Components of the product
Inspect the content of the package and contact the Customer Care if some items are missing.
The child car seat includes: 1 headrest (a), 1 backrest (b), 1 seat (c). The product supplied in its original packaging is ready for use and does not require specific assembly operations.
Features of the product
3-Lift the backrest of the child seat until you hear it click (Fig.A).
The backrest can move between the two locks, as indicated in figure B.
4. The headrest can be adjusted in 6 positions. Lift the handle on the rear
of the backrest and position it at the desired height.
IMPORTANT: as the child grows, it is necessary to adjust the height according to the stature of the child.
A IMPORTANT: after completing the operation, try moving the headrest to verify that it is correctly fitted in place.
5-Viaggio2/3 is fitted with two lateral and removable drink holders.
6-Viaggio2/3 is fitted with a reclination system that guarantees maximum comfort. To recline the seat, pull the handle on the front and simultaneously lift the seat.
7. If possible, recline the car's backrest while the child is asleep and then recline the backrest of the child seat to the same slant.
The Viaggio 2/3 backrest will adapt to the slant of the car's backrest, guaranteeing greater comfort for your child.
Fitting the child car seat with the safety belts and Surefix fittings
For cars fitted with Isofix hooks
This method can be used only if the car is fitted with Isofix hooks.
For further information on the availability of these hooks and their location, refer to the instruction
manual of the car. Surefix fittings guarantee a greater safety, but cannot replace the function of safety belts.
- To stretch the Surefix hooks, press the button on the front inside the bag, as shown in the figure, and stretch them manually.
9- Fix the Surefix connectors to the Isofix hooks of the car seat, verifying that they "click" in place (Arrow A). Tension the belt and simultaneously push the child car seat (Arrow B) towards the backrest of the car seat (Arrow C).
IMPORTANT: after completing the operation, try moving the seat to verify that the Isofix fittings have been correctly hooked to the Isofix fittings.
- To detach the Surefix connectors of the child car seat from the Isofix hooks, press the button on the front inside the bag and release the connectors belts in order to be able to manually detach them by pressing the safety lever situated on the hooks, as shown in the figure.
Fitting the child car seat with the safety belts For cars that are NOT fitted with Isofix fittings
11- Place Viaggio 2/3 on the car seat in the direction of travel, as shown in the figure, and place the child on the seat.
How to secure your child on Viaggio 2/3
- Secure your child with the car safety belt as shown in the figure.
- Fix the car safety belt to the car, ensuring that it clicks in place. Position the two sections of the belt as shown in the figure.
- To complete the fixing, insert the safety belt diagonally in the upper slot above the child's shoulder.
IMPORTANT: if the belt is slack, tension it. Verify that the belt is always tensioned and untwisted.
15. The safety belts are correctly positioned if the child's shoulders are below the intersection point of the safety belts, as shown in the figure.
IMPORTANT: the safety belts should not be too above or below the child's shoulders.
How to remove the lining from the bag
When removing the lining of Viaggio 2/3, do NOT detach the three elements - headrest, backrest, seat - but keep them together.
REMOVE THE LINING FROM THE SEAT:
16- Detach the small hooks of the seat bag from the points and following the sequence shown in the figure. Remove the central belt.
17- Remove the rigid ties as shown in the Figure.
REMOVE THE LINING FROM THE BACKREST:
- Remove the rear cover by pulling it outwards as shown in the figure.
19- Remove all the elastic straps.
20- Remove the bag.
REMOVE THE LINING FROM THE HEADREST:
- Remove the cover from the rear of the headrest by pulling it outwards and releasing the two elastic bands as shown in the figure.
22- Remove the bag.
Maintenance of the padding
Brush the fabric parts to remove dust.
- Machine wash at a maximum of 30^ with a delicate wash setting and short spin cycle.
- Do not use chlorine bleach.
-Do not iron.
-Do not dry clean.
Do not remove stains with solvents.
-Do not tumble dry.

How to reline the bag RELINING THE SEAT:
- Insert the rigid ties in the fabric of the seat, verifying that that the hooks project.
Fix the small hooks to the seat, starting from the three more
external, insert the central belt into the slot, then fasten the two most internal hooks.
- Fasten the side automatic buttons.
RELINING THE BACKREST:
- Fit the bag in place, by inserting the lower section of the fabric behind the headrest, as shown in the figure.
- Fasten all the elastic straps in place.
- Fit the cover in place, starting with the lower section and proceeding with the upper section.
RELINING THE HEADREST:
Fix the bag in place paying attention to the white polystyrene section.
- Fasten all the elastic straps in place.
26. Put the headrest plastic cover in place as shown in the picture (lower part first, then upper snaps).
Serial numbers
- The following information on Viaggio 2/3 is provided below the seat: product name, production date and serial number.
28- The homologation label of Viaggio 2/3 can be found in the lower section on the rear of the back rest.
Product cleaning
-
This product requires a small amount of maintenance. Cleaning and maintenance must only be carried out by adults.
-
It is advisable to keep all the moving parts clean.
Clean the plastic parts periodically with a damp cloth. Do not use solvents or similar substances. - Brush the fabric parts to remove dust.
- Do not clean the polystyrene shock absorbing device with solvents or other similar products.
- Protect the product from atmospheric agents: humidity, rain or snow. Extended exposure to sunshine can cause colour changes in many materials.
-Store the product in a dry environment.
How to read the approval label
This paragraph explains how to interpret the approval label (orange label).
- The label is double because this car seat is approved for two types of installation in cars:
- SUREFIX fixing system (the indication SEMI-UNIVERSAL indicates that the child car seat is compatible with the ISOFIX).
- Attachment systems using static or inertia-reel three-point safety belts (the term UNIVERSAL indicates compatibility of the car seat with vehicles fitted with this type of belt). The top of the label displays the
trademark of the manufacturing company and the name of the product.
The letter E in a circle indicates the European approval mark and the number indicates the country that issued the approval (1: Germany, 2: France, 3: Italy, 4: Netherlands, 11: Great Britain, 24: Republic of Ireland).
Approval number: if it starts with 04, this indicates the fourth amendment (the one currently in force) of Regulation R44.
Reference standard: UN/ECE R44/04.
- Production serial number: on issue of approval, each car seat is personalized with its own number.
PEG-PEREGO S.p.A.

Peg-Pérego S.p.A. is anISO 9001 certifiedcompany . Thiscertification is aguarantee for customers
and consumers of the transparency and trustworthiness of the company's procedures and working methods. Peg Pérego can make changes at any time to the models described in this publication for technical or commercial reasons. Peg Pérego is at the disposal of its customers and consumers to ensure that all their demands and queries are fully satisfied. It is a key part of our policy to ensure we are always aware of our customers' views and requirements. We would therefore
be very grateful if, after using a Peg Pérego product, you take the time to fill in our CUSTOMER SATISFACTION QUESTIONNAIRE, making a note of any comments or suggestions you might have. You can find the questionnaire on the Peg Pérego website: www.pegperegoo.com
Peg-Perego after-sales service
If any parts of the item get lost or damaged, only use genuine Peg Pérego spare parts. For any repairs, replacements, information on the products and sales of genuine spare parts and accessories, contact the Peg Pérego Assistance Service and state the serial number of the product, if present.
tel. 0039/039/60.88.213
fax 0039/039/33.09.992
All intellectual property rights on the contents of this manual are property of PEG PEREGO S.p.A. and are protected by the laws in force.
FR_Français
Viaggio 2/3 oJusu JoojouoJooJooJooJooJooJooJooJooJooJooJooJooJooJooJooJooJooJooJooJooJooJooJooJooJooJooJooJooJooJooJooJooJooJooJooJooJooJooJooJooJooJooJooJooJooJooJooJooJooJooJOOO O
jLg jaially Jauj. LJI JJIy
aaii i 1
JUWU W
a. a.b. b.a. a.b. c. c. d. e.
iill jolj oJ LloJe Jg
.4LwJyleel20
j51jiaJIeao poJiw 8
g1. aio 5j281 jao 3a 1j g1, gws
j 131 g j 100 Lao: m w 15 131
1g>eggag aagcLoo
aIc0 g Ioo JooJooL 1
jsoa.baa jloai aojia hwlq?
gaoaigdaiabu
. solvable 100 all
Jc J3 1jIgWwS1 pssiw 2
aiai 1iie gai jao
A1
Viaggio 2/3
ol31 g 425jg 2/3 a9g0d1
. j-wJ_-w
"Viaggio 2/3"
102
Jc Jai 1
slll joljog oJwU gdl
.
Lc Lio Jabi Jao jS 1j Loi
JyjzJyJyJzJgJeooL JLoga
131 0eao g wlll lllab aai
A
111 111 111 111 111 111 111
Juaai jgj gjLgj.Lio gSii
15 15 JIJI IJIO
.
Jl JelJIeao cuiuipuoy gllg
Jg 100
Lg:Lo
15 1c 12
eall Lc LwLgLs Jbll
. aogj slij jg cllab 1 J
slll 1000
.
j0 1
a 15
Jabbil
- Laaig aegg aojx Jgbl
jIabllgai Li
jSli.LcLgE Lh+omega
gbiu 2 jalb jlg lgilo jLoXl
AC = 9
JLj oJoo JIJI JIJI JIJI JIJI JIJI
j 1
jocdi;0j,1j,2j,3j,4j,5j,6j,7j,8j
aJJI JabJI aJU
wLjLiLwJdai jsl
A. a b c
aillb jyj Jihll 20 pisiwi
21 5i jilaihJoi Jjuiuuiu u
auii jai jai jia i
aag aall no Lssj sji Lgi
. 出 1
j0 aegaiall gjzj Juiwgi gJx
Jg
Jolilg aLol
aLoLi JbJgLoic JwJ
JJI JabiJI aoi jbiJ si mo AJLoj.
J111 20
Viaggio 2/3 2e1 jbj
A
aJg aJi jnag. Jll
.11111111
J1 JlJI 1000000000000000000000000000000000000000000
Surefix
Isofix
131 baaayyall oia plsiwiwl ssc
.1sofix 1sli: i: jgjoo oJwJ L
JSLiJIIOJgJoLogLeI Joo
JgJgLgLo
1.
Lg:SLg.LeI, LiLoSurefix
Jooa oaoa aagc x
Surefix 8
Gg Gg LoS .
Lg 1
JSLiS Surefix 9
J 100
g>gJcJJ()G
.(Aagw)
jai jia jia oao oao g joi
(BogJU)
CgWJ) 0jLwJ wai jbi si
JgL.aogll JLaS:wl 20 :pLa A
a: 15111
Isofix
Surefix J
Isol. Isofix JSLwjc JabJl
Lp 1021
Lgla 10o oSll lJJg aJogll aojai
JLALI 1
juii i. joiuui yolai
aogjocjLsOx1
.aa
eai SjSli jLslo
JgViaggio 2/3
- g L : y 0
cuiuoligso_2
jLjuiiggglugina
aaii aai jL 1j aai
juiu jiu Jiajiie
.()gJ1iwo.(j)J1iwo
.()
jLdAaJgC J102ggt
suiuLac gClingJlaoWU
= ( x1,y1) , = ( x2,y2)
gai jahil neal gajl sinno 03
.(A a g 11) aai
B. BgOgJg CgoggLoS
L6 1
gbl sinnol dss ggl
glal glai 1c abg
ElaJxI JyJyJbJg 0pL A
aioljgljLj
JgL. aLgeJI JLoS:wiJ .pLa A
a:lo 1sllw
- g:100
Loloo 2/3 5
J 21
J 21
J 21
J 21
J 21
J 21
ailll lcl 1
ailll l o aalil 1
ailll l o aalil
aol aol aollll alwll 1
aol l o aol algio aol 30
aol aol aol aol alwll alwll
aol l o cullnna paaui 8
aol l o paaui 8
aol l o aai 8
aol aol abwgl g aol alljy aoi 8
aol aol ll 8
30 A 20
CioogogLoS.JSLiJ1Jic oogjI Jg
JolbI Jao Sj
Jol81 ao jg o 8uU
Joo joo joo oo u
Viaggio 2/3 Jalal jao 11
Jalal al 8g jai jao
jai jao
jai jao
Jai jao
eill lcllalb yolai 5 viaggio 2/3
Jol plj 12
.ogall g Cg oos go Ls a Jlll
SLI jgo oJyJLol Jol .13
.ogogg 1c Jai oJi Cog O Elawu
Lo 11
.ogaggl 11
.ogaggl 11
.ogaggl 11
.ogaggl 11
.ogaggl 11
.ogaggl 11
.ogaggl 11
.ogaggl 11
.ogaggl 11
.ogaggl 11
.ogaggl 11
.ogaggl 11
.ogaggl 11
cill
. ailll no Jla 111
aill Jlae j
. gll ysswahwglgdl
s281 2000 1c bLdL 2
a,b,c,d,e,f,g
a.s.lw11s>21 a.bii
pui 8. all.o loa aea b Lg9
"Peg Perego" aS, g
aS, g
aS, g
aS, g
aS, g
aS, g
aS, g
aS, g
aS, g
aS, g
aS, g
aS, g
aS, g
aS, g
aS, g
aS, g
aS, g
aS, g
aS, g
aS, g
Ae aee eae e ae aee
j 100000000000000000000000000000000000000000000000000000000000000000000000000000000000
00390396088213:
00390393309992:
assistenza@:
pegperego.it
www.pegperego. com
11 1
aLcJy ydy dy ydy E ay 1
ydy Lol ydy x121 ydy dx
ydy Lla ydy dy ydy Lla ydy
:4.L3:L2:L1:1
:24. ydy LlLyyy:11. ydy
.(1) ydy ydy
104,04,121 ydy dy dy
(LyLyL) ydy Lydy
R44 ayU
UN/ECE R44/04:ayLell ydy
ydy ydy LlLyyy:1
ydy LlLyyy LjLyyu ydy
.4y dy
PEG-PEREGO S.p.A
Peg-Perego" S.p.A
0001 9001

aag aiaa aie 5g wllg
o aell llllgl 4slll lal
Peg Pego" 4s gaa j sall
aag aag glc ag g aag aag
g aag aag g aag aag
g "Peg Pego" 4s gaa
laai I g aag lgllac aoss
a aag aag lllll gaa
g Jia Jia Jol5 Jss Wg Lwll
Lillg liu wu no gwlk
LiIac gJy Jy Gc Li Li Gc
jus ng siu lii lii g gil biaog
Juiuuiu Li Li Li Li Cai i
plasuiu liu olai
| It" Italiano | EN English | FR Français | DE Deutsch | E5-Espanol |
| Dichiarazione di conformitàDenominazione del prodottoVIAGGO 2-3 SUREFXVIAGGO HBB 120 | Declaration of conformityProduct nameVIAGGO 2-3 SUREFXVIAGGO HBB 120 | Declaration du conformitéDenomination du produitVIAGGO 2-3 SUREFIXVIAGGO HBB 120 | KonformitätsersklärkungBezeichnung des ProdukteVIAGGO 2-3 SUREFIXVIAGGO HBB 120 | declaración de conformidadDenominación del productoviAGGO 2-3 SUREFXVIAGGO HBB 120 |
| Codice identificativo del prodottoIMVi* | Product reference numberIMVi* | Identification du produitIMVi* | Kennechnungszcode desProduktivIMVi* | Códico de identificacion delproductIMVi* |
| Dichiarazione di conformitàLa PegPerego S.p.A. dichiarata sulla propria responsabilità che l'articolo in oggetto è stato sottosposto a testi di collaudotensori e certificato pressoLaboratori estend他们在conformità alle normativevigiunt. | Reference Standards (origin)UNI ECE 544/04 (EU)FMVSS 571-213 (USA)CMVSS 571-213 (CA) | Standard du refériment (origin)UNI ECE 544/04 (EU)FMVSS 571-213 (USA)CMVSS 571-213 (CA) | Bezugbestimmungen(Ürungsung)UNI ECE 544/04 (EU)FMVSS 571-213 (USA)CMVSS 571-213 (CA) | Normativas de referencia (origin)UNI ECE 544/04 (EU)FMVSS 571-213 (USA)CMVSS 571-213 (CA) |
| Dichiarazione di conformitàLa PegPerego S.p.A. dichiarata sulla propria responsabilità che l'articolo in oggetto è stato sottosposto a testi di collaudotensori e certificato pressoLaboratori estend他们在conformità alle normativesvigiunt. | Dedication of conformityPegPerego S.p.A. declares, underits own responsibility, that the item in question has undergone a series of internal tests and has been certified by external independent laboratories, in compliance with current legislation. | Dedication du conformitéLa société PegPerego S.p.A.declare sous社会责任 que la société en question a fait lebject d'affaires de réception internes et qu'il est certification par des laboratoires externes et indépendants conformément à la réglération en vigueur. | ConformitätserkrüfungDie PegPerego S.p.A. erflämt eigenerentwertlich, dass der betreffende Anteilet intermeden Abnahmepruifungen unterworben wurde und von externen und unabhängigen Laboros gemäß der geförderten Bestimmungen zertifiziert,wurde. | Declaración de conformidadPegPerego S.p.A. declara bajo supropria responsabilitad que elarticulo considerado ha sido sometado as ensayos propós yha sido certificado porlaboratorios externes eindependentes de conformidad con las normasvigientes. |
| Date and place of issueArcore, Gemmaio 2012 | Date et lieu du publicationArcore, janvier 2012 | |||
| Data e luogo di rilascioArcore, Gemmaio 2012 | PegPerego S.p.A.via De Gasperi, 5020862 Arcore (MB), ITALY | PegPerego S.p.A.Via De Gasperi, 5020862 Arcore (MB), ITALY | Datum und Ort der AusstellungArcore, Januar 2012 | Fecha y lugar de expelledArcore, de enero 2012 |
| PegPerego S.p.A.via De Gasperi, 5020862 Arcore (MB), ITALY | PegPerego S.p.A.via De Gasperi, 5020862 Arcore (MB), ITALY | PegPerego S.p.A.via De Gasperi, 5020862 Arcore (MB), ITALEN | PegPerego S.p.A.via De Gasperi, 5020862 Arcore (MB), ITALEN | PegPerego S.p.A.via De Gasperi, 5020862 Arcore (MB), ITALINA |
PEG PEREGO S.p.A. VIA DE GASPERI 50 20862 ARCORE MB ITALIA tel. 0039-039-60881 - fax 0039-039-615869-616454 Servizio Post Vendita/After Sale: tel. 0039-039-6088213 - fax: 0039-039-3309992

www.pegperego.com
Fi001203l145 - 02/10/2012