
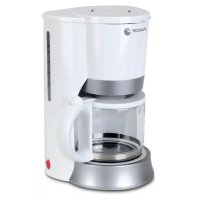
CR-1000 - 2008 - Coffee machine FAGOR - Free user manual and instructions
Find the device manual for free CR-1000 - 2008 FAGOR in PDF.
| Product type | Coffee machine |
| Brand | FAGOR |
| Model | CR-1000 |
| Year | 2008 |
| Capacity | Maximum 4 cups |
| Functions | Coffee preparation, cappuccino preparation, liquid heating |
| Power supply | 230 V ~ 50 Hz |
| Estimated power | 1000 W |
| Material | Plastic, glass (carafe) |
| Filter type | Permanent filter (reusable) |
| Steam nozzle | Yes, for frothing milk |
| Safety | Do not open the tank under pressure, do not immerse, use on a stable surface |
| Maintenance | Clean removable parts with warm water, wipe exterior with a damp cloth |
| Descaling | Recommended every month with a water/vinegar mixture |
| Included accessories | Glass carafe with lid, filter holder, filter, locking lever |
| Available spare parts | Carafe, filter, filter holder, steam nozzle, drip tray |
| Repairability | Contact an authorized technical support center |
Frequently Asked Questions - CR-1000 - 2008 FAGOR
User questions about CR-1000 - 2008 FAGOR
0 question about this device. Answer the ones you know or ask your own.
Ask a new question about this device
Download the instructions for your Coffee machine in PDF format for free! Find your manual CR-1000 - 2008 - FAGOR and take your electronic device back in hand. On this page are published all the documents necessary for the use of your device. CR-1000 - 2008 by FAGOR.
USER MANUAL CR-1000 - 2008 FAGOR
The manufacturer reserves the right to modify the models described in this User's Manual.
Pon3BOInTeIbOCTaBnAeT3aCobNpabo 3aMeHbMoJeN,OnncAHhBcB DAHHOM PyKOBoDCTBe Nolb3OBaTeJI.
aaii
FAGOR

N.I.F. F-20.020.517 - B°. San Andrés, n° 18
Apartado 49 - 20500 MONDRAGON (Guipuzcoa) ESPANA


Marzo 2008
CAFETERA EXPRESO / CAFETEIRA EXPRESSO / ESPRESSO
COFFEE MAKER / CAFETIERE EXPRESSO / ESPRESSO-MASCHINE /
CAFFETTIERA ESPRESSO / KAΦETIEPA ΕΣΠPEΣΣΟ / EXPRESSZ
KAVÉFÖZÖ/ KÁVOVAR ESPRESSO / EKSPRES DO KAWY „EXPRESSION"
/ KAFÉ MASSIHA ECNPECO / KOΦEBAPKA /
MOD.:
CR-1000
N.I.F. F-20.020.517 - B°. San Andres, n° 18 • Apartado 49 - 20500 MONDRAGON (Guipuzcoa) ESPANA

FAGOR

230V 1000W,5 bar, 200ml
ES
1.DESCRIPTION DEL APARATO
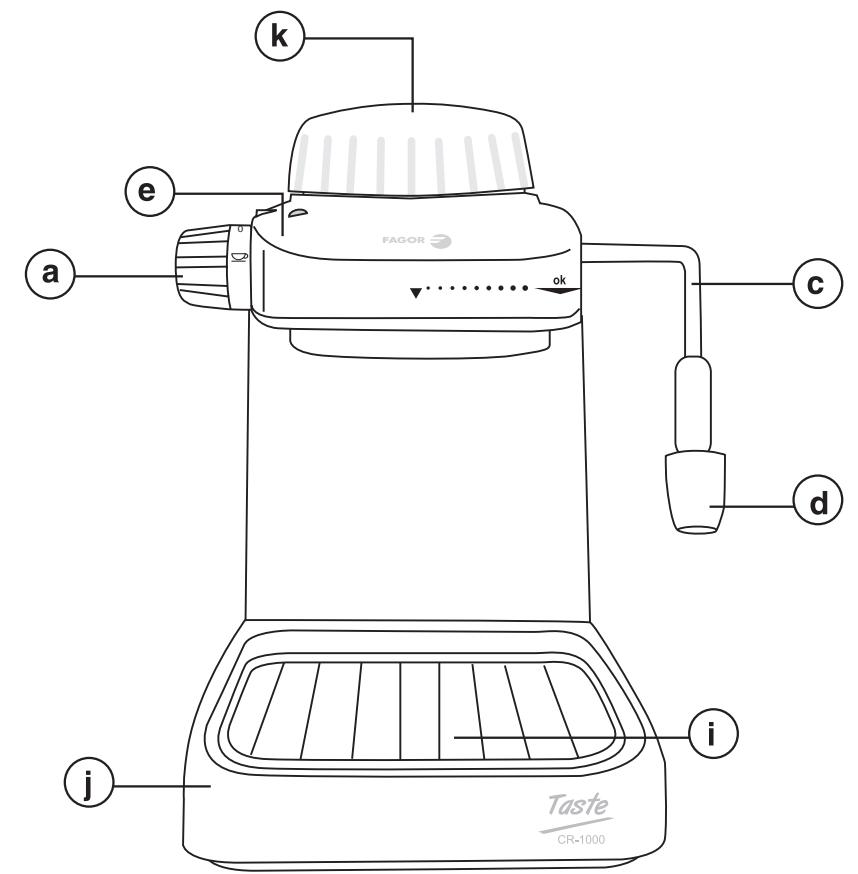
1. APPLIANCE DESCRIPTION
a. Switch / Function selector dial
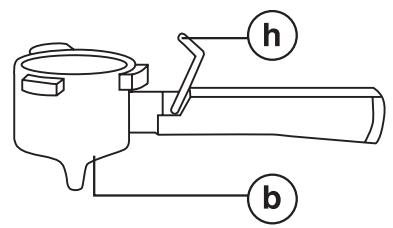
b. Filter holder
c. Steam pipe
d. Steam nozzle
e. Pilot light
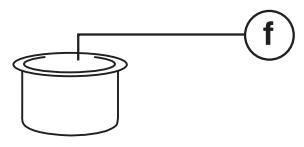
f. Filter
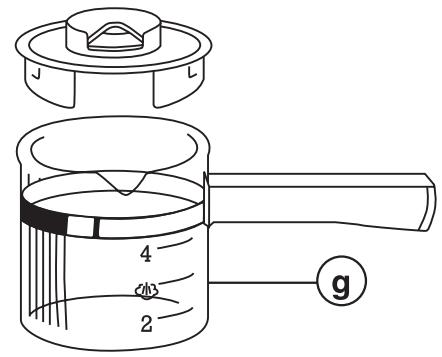
g. Carafe with lid
h. Filter holder lever
i. Removable drip grid
j. Removable drip tray
k. Water tank lid
Interference suppression: The interference of this appliance has been suppressed in accordance with interference suppression standards.
Electromagnetic compatibility: This appliance complies with the CEM standards of electromagnetic compatibility.
2. IMPORTANT SAFETY WARNINGS
- On removing the packaging, check the coffee maker is complete and not damaged. If in doubt, do not use the appliance. Contact an authorised Technical Assistance Service.
- Keep packaging items (plastic bags, polystyrene foam, etc.) out of the reach of children as they could be dangerous.
- The appliance must only be used for the domestic purposes for which it is designed, as described in this Manual. Any other use is considered dangerous.
When using electrical appliances, a series of basic safety guidelines must be followed to reduce the risk of fire, electric shock and/or personal injury.
PARTICULARLY:
- Read all the instructions and keep them for later reference.
- The electrical safety of this appliance is only guaranteed if it is connected to an efficient earth installation. In case of doubt, contact a qualified professional.
Before using the coffee maker for the
first time, check that the mains voltage in your home is the same as that indicated on the appliance.
- To prevent electric shock, do not submerge the appliance, cord or plug in water or any other liquids.
- Do not allow children or handicapped people to handle the appliance without supervision.
- Unplug the appliance when not in use and before cleaning. Allow it to cool down before fitting and removing its different parts and before cleaning it.
- Do not expose the coffee maker to the elements (rain, sunlight, ice, etc.).
- Do not use or place any part of this appliance on or near hot surfaces (gas or electric hotplates, ovens).
- Do not allow the cord to hang over the edge of the surface it is placed on.
- Do not touch the hot surfaces of the coffee maker. Use the handles or grips provided.
- If the cord is damaged, take the appliance to a Technical Assistance Service for it to be replaced.
- In case of breakdown and/or incorrect functioning, switch off the appliance. Do not try to repair it. Contact an authorised Technical Assistance Service and insist on the use of original spare parts and accessories.
- When the appliance is no longer useful, after unplugging it from the mains you should cut its cord so that it cannot be used again.
- This appliance is designed for making coffee and heating up liquids; on using it be very careful to avoid burns from the jets of hot water and steam.
- Do not touch the hot parts of the appliance (the steam and water pipes or the area in contact with the filter holder or filter).
- Do not switch on the appliance with no water in the tank.
- When the appliance is functioning, it is under pressure. Do not open the water tank lid or remove the filter holder.
- If the carafe breaks, the hot liquid inside it could cause burns. To avoid breaking the carafe, the following precautions
should be taken:
- Do not use a carafe that is cracked or if its handle is loose or deteriorated. Replace it as soon as you notice any signs of wear. A crack or chip to the glass could cause the whole carafe to break, or glass particles could enter the liquid.
- Do not clean the carafe with abrasive scouring pads or cleaners as these could scratch and deteriorate the glass.
- The carafe is designed for use with this coffee maker only. Do not place the carafe on or near hot surfaces (stoves, ranges, cooker hotplates, hot ovens, microwaves, etc.)
- Do not stand the carafe on wet or cold surfaces.
- Avoid any rough handling or knocks.
- This appliance should not be used by physically, sensorially or mentally handicapped people or people without experience or knowledge of it (including children), unless they are supervised or instructed in the use of the appliance by a person responsible for their safety.
Children should be watched to ensure they do not play with the appliance. - For greater protection, we recommend installing a residual current device (RCD) with an operational residual current not exceeding 30mA . Ask your installer for advice.
3. BEFORE USING FOR THE FIRST TIME
Before using the coffee maker for the first time, carefully clean all the removable parts with warm water and detergent (the filter, filter holder and glass carafe with its lid). To clean the inside of the coffee maker, run it twice without any coffee in the filter. For details of this procedure, see the instructions in the "Making coffee" section.
4. MAKING COFFEE
Always use cold water to make coffee.
- Take the lid off the water tank and fill it up with the desired amount of water (2 cups minimum and 4 cups maximum). Fit the lid correctly back onto the water tank again.
- Fit the filter into the filter holder (fig. 1). Place the desired amount of ground coffee for 2 or 4 cups in the filter (observe the marks on the inside of the filter). Clean any coffee residues from the edge of the filter holder. Do not compress the coffee or exceed the 4-cup mark.
- Fit the filter holder onto the coffee maker in the direction of the arrows and turn it to "OK" position (fig. 2).
- Place the glass carafe on the drip grid so that the hole in the centre of the lid is directly underneath the coffee nozzle.
-
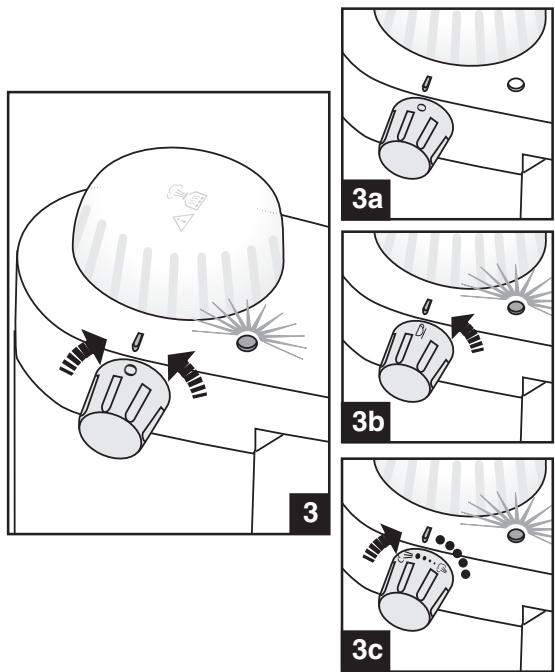
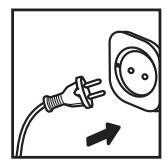
- Plug in the coffee maker and turn the function selector to (fig. 3.b). The appliance will take a few minutes to reach the correct temperature.
- When all the water has gone, turn the function selector to "0". The pilot light will switch off (fig. 3.a).
- Unplug the appliance and then turn the function selector to (fig. 3.c), so that all the steam left in the tank is expelled.
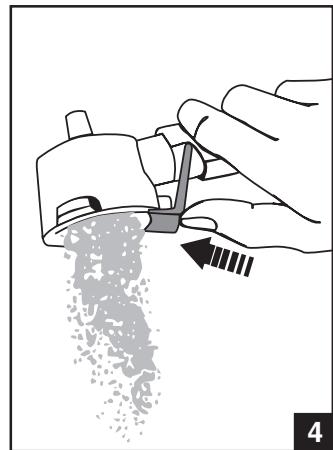
- Wait for approximately 2 minutes before removing the filter holder from the appliance. To remove the filter holder, turn it in the opposite direction. Hold it by its lever (h) and empty it (fig. 4).
5. MAKING CAPPUCCINO COFFEE
- Fill the water tank with the amount of water for the desired number of cups of coffee, and add 1 or 1_1/2 more cups of water to make steam.
- Fill a tall, narrow container (preferably metal) half-full of very cold low-fat milk.
-
Place the steam pipe (c) in the container, with the steam nozzle (d) submerged about 2cm in the milk, without touching the bottom of the container.
-
Turn the function selector to a position within the steam adjustment field, between the symbols and (fig. 3.c). Wait for a few seconds until the steam is expelled. When it has finished frothing up the milk, turn the function selector to "0" (fig. 3.a).
- Unplug the appliance and turn the function selector to to expel any steam left in the tank.
- Clean the steam pipe (c) and the steam nozzle (d) with a damp cloth after each use. Take care not to touch them directly with your hands (see section on cleaning).
6. HEATING UP LIQUIDS
Fill the carafe up with water to the mark and empty this water into the tank. Close the lid. Put the container with the liquid under the steam pipe (d) and turn the function selector to ^ .
When you have finished heating up the liquid, turn the function selector back to "0". Then repeat points 5 and 6 of the process described in the previous section above.
7. CLEANING
Before cleaning the appliance, unplug it and allow it to cool down. Clean the removable parts with warm water and dry them carefully before replacing them again. The drip tray and grid can be removed for cleaning.
Clean the outside of the coffee maker with a slightly damp cloth. Do not use solvents or abrasive products to clean it.
Do not submerge the appliance in water or place it under the tap.
Cleaning the steam nozzle:
Clean the outside of the steam pipe with a damp cloth immediately after use. Expel a short jet of steam after each use. If the obstruction persists, clean the nozzle carefully using a fine needle.
Important: Do not insert any objects into the steam nozzle while steam is being expelled, as this could cause burns.
8. DESCALING
We recommend descending the coffee maker once a month, although this may vary depending on water hardness and frequency of use.
Use water and vinegar as follows:
- Dissolve 4 spoonfuls of vinegar in 2 cups of water and pour this water/vinegar solution into the tank.
- Switch on the coffee maker. Allow half of the solution to come out through the water outlet filter and the other half through the steam pipe (c).
- Repeat this process twice.
- Then run the coffee maker 2 or 3 times with only water in it, to remove any vinegar residues.
9. INFORMATION FOR THE CORRECT DISPOSAL OF ELECTRICAL AND ELECTRONIC APPLIANCES
At the end of its working life, the product must not be disposed of as urban waste. It must be taken to a special local authority differentiated waste collection centre or to a dealer providing this
service. Disposing of a household appliance separately avoids possible negative consequences for the environment and health deriving from inappropriate disposal and enables the constituent materials to be recovered to obtain significant savings in energy and resources.
To remind you that you must collaborate with a selective collection scheme, the symbol shown appears on the product warning you not to dispose of it in traditional refuse containers.
For further information, contact your local authority or the shop where you bought the product.
1.DESCRIPTION DE L'APPAREIL
3. INPIN ANO TH INPQTH XPHSH
IpoTOU xPNOIOMOIOE autN tvN kaPtepa yia npwtn opora, kaqapioTe kala ola ta anoONmuVA EApntmuata TcS (sNaBnTo pIATPO, To EApTma unOdoxns Tou piTpou KAI TNV yuaivn Kavata u To KaLumuTaNc) ME ZeOTo Vepo KAI Liyo aonoppunavtiko.
jll jll jll jll jll jll jll jll jll jll jll jll jll jll jll jll jll jll jll jll jll jll jll jll jll jll jll jll jll jll jll jll jll jll jll jll jll jll jll jll
yai yai jia jia jia jia jia jia jia jia jia jia jia jia jia jia jia jia jia jia jia jia jia jia jia jia jia jia jia jia jia jia jia jia jia jia jia jia jia jia jia jia jia
a a a a a a a a a a a a a a a a a
5K all 1y jall
5
1
Jzll JlJn nn a
jlll jlll jlll2j j 4
ai a ai 分母最小值为 k .
iiaai iie
j 1
a_0 = 2 3 = 1
1 3j2
1
aagg jy g a yiyjg 111 111 111 111
9
- CAFETERA EXPRESO / CAFETEIRA EXPRESSO / ESPRESSO
- ES
- 1.DESCRIPTION DEL APARATO
- APPLIANCE DESCRIPTION
- IMPORTANT SAFETY WARNINGS
- PARTICULARLY:
- BEFORE USING FOR THE FIRST TIME
- MAKING COFFEE
- MAKING CAPPUCCINO COFFEE
- HEATING UP LIQUIDS
- CLEANING
- Cleaning the steam nozzle:
- DESCALING
- INFORMATION FOR THE CORRECT DISPOSAL OF ELECTRICAL AND ELECTRONIC APPLIANCES
- 1.DESCRIPTION DE L'APPAREIL
- INPIN ANO TH INPQTH XPHSH
Brand : FAGOR
Model : CR-1000 - 2008
Category : Coffee machine