
M0502 - Uncategorized Emos - Free user manual and instructions
Find the device manual for free M0502 Emos in PDF.


| Product Type | Laser Distance Meter |
| Brand | Emos |
| Model | M0502 |
| Laser Class | 2 |
| Max Output Power | <1 mW |
| Wavelength | 620–690 nm |
| Measuring Range | 0.05 m to 40 m |
| Measurement Accuracy | ±2 mm |
| Measuring Units | m, ft, in, m², ft², m³, ft³ |
| Measuring Time | 0.25 s |
| Automatic Switch-Off | After 3 minutes of inactivity |
| Laser Beam Auto-Off | After 30 seconds |
| Operating Temperature | 0°C to +40°C |
| Storage Temperature | -20°C to +65°C |
| Power Supply | 2× 1.5V AAA batteries (not included) |
| Weight | 65 g (without batteries) |
| Dimensions | 110 × 40 × 25 mm |
| Functions | Distance, Continuous, Area, Volume, Indirect (Pythagoras), Addition/Subtraction, Memory (20 values) |
| Safety | Class 2 laser; do not point at eyes |
| Care and Cleaning | Use soft cloth; no solvents; do not immerse in water |
Frequently Asked Questions - M0502 Emos
User questions about M0502 Emos
0 question about this device. Answer the ones you know or ask your own.
Ask a new question about this device
Download the instructions for your Uncategorized in PDF format for free! Find your manual M0502 - Emos and take your electronic device back in hand. On this page are published all the documents necessary for the use of your device. M0502 by Emos.
USER MANUAL M0502 Emos
The laser distance meter is designed to calculate surface, volume and to measure distance.
The device is only designed for personal use; not for use by professionals. Any other usage may lead to damage and injury.
The manufacturer takes no responsibility for damage caused due to tampering with the laser device and not following safety instructions.
Technical data:
Laser class: 2
Max. output power (P.max): <1 mW
Wavelength: 620–690 nm
Measuring distance: 0.05 m to 40 m
Measurement accuracy: ±2 mm
Measuring units: m, ft, in, m^2 , ft^2 , m^3 , ft^3
Measuring time limit: 0.25 s
Automatic switch-off: after 3 minutes since
the last press of a button
Laser beam switch-off when measuring: after 30 seconds
Operating temperature: 0 °C to +40 °C
Storage temperature: -20 °C to +65 °C
Power supply: 2× 1.5 V AAA (not included)
Weight: 65 g (without battery)
Dimensions: 110 × 40 × 25 mm
Button description:
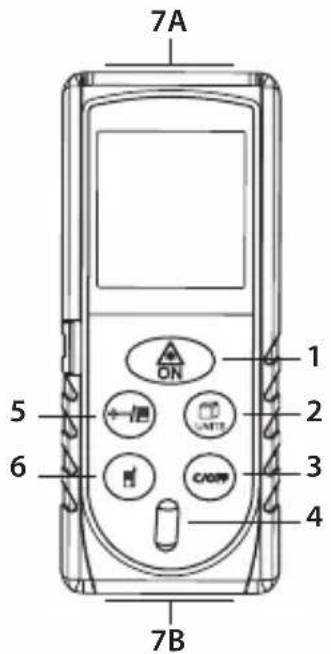
1 - ON button (turn on, measure)
2 - UNITS button (switch between meter functions)
3 - C/OFF button (reset values, turn off)
4 - water-level
5 – button for adding up/subtracting values, measurement memory
6 - button for changing measuring point
7A, 7B - measuring point
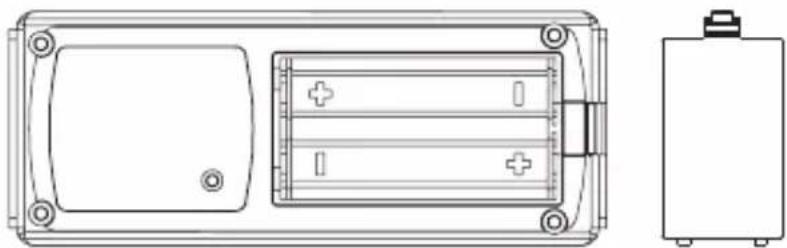
Battery compartment:
natural_image
Technical line drawing of a rectangular electronic device with internal components and a separate battery unit (no text or symbols)Note:
Never point the laser on persons or animals.
Never look directly into the laser, it can damage your eyes.
Inserting Batteries
Remove the battery cover at the rear of the meter.
Insert 2× 1.5 V AAA batteries. Always use alkaline batteries only, not rechargeable ones.
Replace the battery cover.
Turning the Device On/Off
Turn on the device by long pressing the ON button.
Turn off the device by long pressing the C/OFF button.
Distance Measurement/Changing Measuring Point
Long press the ON button.
An acoustic signal will sound and the screen will turn on.
Measurement starts in point 7B; the 📄 icon will be displayed.
If you wish to change the measuring point to 7A, press the ⏻ button; the 📁 con will be displayed.
Hold the device horizontally in front of the wall towards which you wish to measure distance.
The device must point to the wall at a right angle.
To this end, use the water-level. The bubble in the water-level must be in the middle between the black lines.
The device will focus the laser on the wall; the icon will be displayed.
Then, press the ON button again. The device will measure the distance and show the distance on the screen (the laser icon will disappear).
Changing Measuring Units
The default measuring unit is meter = m.
If you wish to change the measuring unit, repeatedly long press the button.
You can set the following measuring units: m, ft, in.
Continuous Distance Measurement
Long press the ON button.
An acoustic signal will sound and the screen will turn on.
Again long press the ON button; the device will start measuring continuously and the icon will be displayed.
The screen will display measured max. and min. values. The values will change as you move the device.
The bottom portion will display the currently measured value; see the picture.
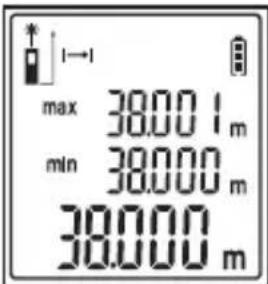
The device will emit an acoustic signal throughout the duration of continuous measurement.
You can temporarily pause continuous measurement by short pressing the ON button.
Long press the ON button if you wish to proceed with continuous measurement.
End continuous measurement by pressing the C/OFF button.
Adding Up/Subtracting Distances
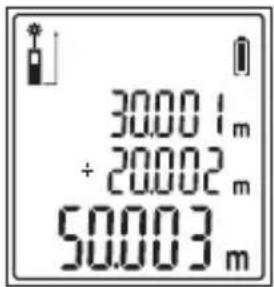
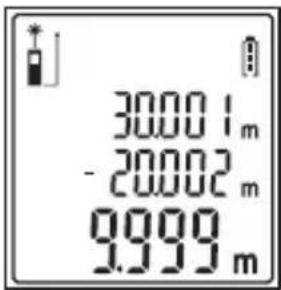
You can add up or subtract measured distances.
- Measure the first distance.
- Repeatedly press the ⏻ button; „-“ or „+“ will be displayed based on whether you want to add up or subtract.
- The measured distance will move to the top line.
- Measure another distance.
Both measured distances will move to the top lines and the result of the addition/subtraction will be displayed on the bottom line.
You can then continue repeatedly adding up/subtracting by following steps 1 to 4.
Repeatedly press the C/OFF button if you want to delete the measured values.
Each press will delete one line of the value from the bottom line.
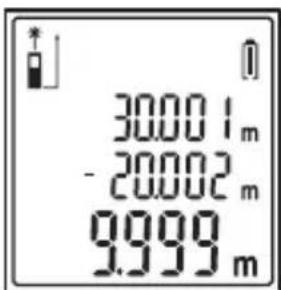
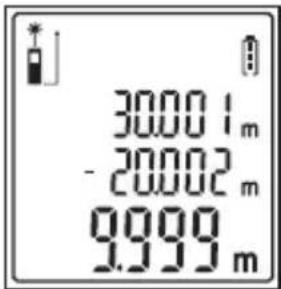
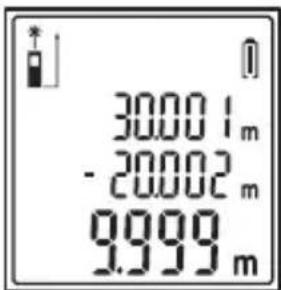
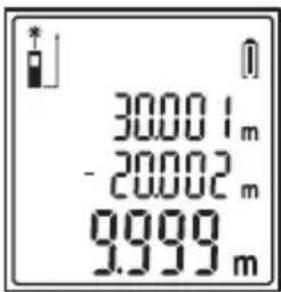
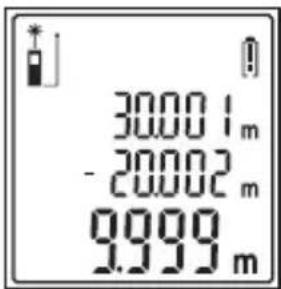
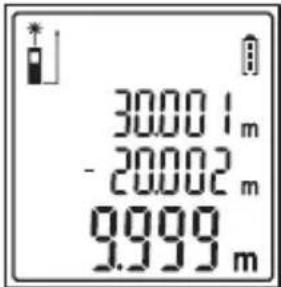
Example of screen when adding up Example of screen when subtracting
Measuring Surface
Turn on the device and short press the button. The screen will display the icon.
- Measure the first distance; the result will be displayed along with icon. (If you want to repeat the measurement of the first distance, press C/OFF. The result will be erased and you can proceed again from step 1.)

- Measure the second distance; the result will be displayed along with icon. The bottom line will display the total calculated surface area in m^2 .

If you wish to add up/subtract the total results, press the button after each total surface area result is displayed and repeat measurement in line with steps 1 and 2.
Erase all values on the screen by pressing the C/OFF button.
Measuring Volume
Turn on the device and 2× short press the button.
The screen will display the icon.

- Measure the first distance; the result will be displayed along with icon. (If you want to repeat the measurement of the first distance, press C/OFF. The result will be erased and you can proceed again from step 1.)

-
Measure the second distance; the result will be displayed along with icon. (If you want to repeat the measurement of the second distance, press C/OFF. The result will be erased and you can proceed again from step 2.)
-
Measure the third distance; the result will be displayed, along with total volume in m^3 and the icon.


If you wish to add up/subtract the total results, press the button after each total volume result is displayed and repeat measurement in line with steps 1, 2 and 3.
Erase all values on the screen by pressing the C/OFF button.
Indirect Measurement (Pythagoras)
You can calculate distance between two points which are difficult to measure (obstacles, scaffolding, reflective surfaces) by applying Pythagoras' theorem.
Note:
Correct result is guaranteed only if the two measured distances are at a right angle (90°).
- Both measurements must be made from the same point. - Always measure the longer distance first.
-
Turn on the device and 3× short press the button.
-
The screen will display a flashing section of the icon.
-
Measure the first distance and the result will be displayed on the screen.
-
Measure the second distance. Both results will be displayed in the top portion of the lines. The bottom line will display the calculated third distance.
Measurement Memory/Erasing Memory
The device automatically records 20 (0 to 19) last measured values.
Note:
Next measurement will overwrite the oldest measurement in the memory.
Long press the ⏻ button; the 📄 on and measurement number will be displayed.
Now repeatedly press the ⏻ button; this will display the results of individual measurements and the type of measurement.
Repeatedly press the C/OFF button when in the mode showing measurement memory. Each button press will erase the latest measurement.
Errors during Measurement
The following error codes may be displayed when measuring:
| Error code Likely cause Solution | ||
| Err10 Flat batteries Replace batteries | ||
| Err15 Measurement out of range Shorten the measuring distance | ||
| Err16 Weak return laser signal Use a brighter measuring point; hold the device steady in hand while measuring | ||
| Err18 Measuring point too bright Use a darker measuring point | ||
| Err26 Value outside of the screen's display range | Repeat the measuring process, adjust measuring distance | |
| Err08 Incorrect measuring procedure Repeat the measuring process | ||
| Err00 Error in communication Restart the device and repeat the measurement | ||
Errors in measurement may also appear if:
- measurement is made in strong sunlight
- measuring point has poor reflectance or very rough surface
- temperature during measurement is outside of the operating temperature limits listed in the manual
Care and Maintenance
The product is designed to provide trouble-free service for many years if used appropriately. Some advice for proper operation:
- Read the manual carefully before using this product.
- Do not expose the product to direct sunlight, extreme cold and moisture, and sudden changes in temperature. This would reduce accuracy of detection.
- Do not place the product in locations prone to vibration and shocks – these may cause damage.
- Do not expose the product to excessive force, impacts, dust, high temperatures or humidity - these may cause malfunction, shorter battery life, damage to batteries and deformation of plastic parts.
- Do not expose the product to rain or high humidity, dropping or splashing water.
- Do not place any open flame sources on the product, e.g. a lit candle, etc.
- Do not place the product to places with inadequate air flow.
- Do not tamper with the internal electric circuits of the product – doing so may damage the product, which will automatically void the warranty. The product should only be repaired by a qualified professional.
- To clean the product and laser lens, use a slightly moistened soft cloth. Do not use solvents or cleaning agents - they could scratch the plastic parts and cause corrosion of the electric circuits.
- Do not touch the lenses at the top of the device with your fingers.
- Do not immerse the product in water or other liquids.
- In the event of damage or defect of the product, do not perform any repairs by yourself. Have it repaired where you purchased the product.
- This device is not intended for use by persons (including children) whose physical, sensory or mental disability or lack of experience and expertise prevents them from safe use of the device, if they are not supervised or if they have not been instructed regarding the use of this appliance by a person responsible for their safety. It is necessary to supervise children to ensure they do not play with the device.
Do not dispose of the product or the batteries after the end of life as unsorted municipal waste, use sorted waste collection points instead. Correct disposal of the product will prevent adverse effects on human health and the environment. Recycling of materials contributes to the protection of natural resources. For more information about recycling of this product, contact the municipal authority, organization for processing household waste, or the point of sale where you purchased the product.
A declaration of conformity was issued for this product.
CZ | LASEROVÝ MĚŘIČ VZDÁLENOSTI
Měření ploch
natural_image
Technical line drawing of a rectangular electronic device with internal components and a separate battery unit (no text or symbols)Upozornenie:
Meranie plôch
natural_image
Technical line drawing of a rectangular electronic device with internal components and a separate battery unit (no text or symbols)Megjegyzés:
Felület mérése
natural_image
Technical line drawing of a rectangular device with internal components and a separate cylindrical component (no text or symbols)Opozorilo:
Z laserjem nikoli ne ciljajte proti osebam ali živalim.
Merjenje površin
Aparat vklopite in pritisnite na kratko na tipko
Na zaslonu bo prikazana ikona

- Izmerite prvo razdaljo, prikazana bosta rezultat in ikona.
(Če želite merjenje prve razdalje ponoviti, pritisnite na tipko C/OFF.
Mjerenje površine
Uključite uređaj i nakratko pritisnite gumb

Na zaslonu se prikazuje ikona
- Izmjerite prvu udaljenost. Prikazuje se rezultat zajedno s ikonom. (Ako želite ponoviti mjerenje prve udaljenosti, pritisnite C/OFF. Rezultat će se izbrisati i možete ponoviti mjerenje od koraka 1.)

- Izmjerite drugu udaljenost. Prikazuje se rezultat zajedno s ikonom. U donjem se retku prikazuje ukupna izračunata površina u m².

Messfläche
natural_image
Technical line drawing of a rectangular electronic device with internal components and a separate battery unit (no text or symbols)Попередження:
Вимірювання площі
natural_image
Technical line drawing of a battery pack with internal components and mounting holes (no text or symbols)Atentionare:
natural_image
Technical line drawing of a device casing with battery and indicator lights (no text or symbols)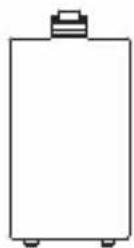
Pastaba.
Ploto matavimas
natural_image
Technical line drawing of a device rear panel with battery and housing (no text or symbols)Piezīmes
Virsmas mērišana
leslēdziet ierīci un piespiediet pogu.


- Technical data:
- Note:
- Inserting Batteries
- Turning the Device On/Off
- Distance Measurement/Changing Measuring Point
- Changing Measuring Units
- Continuous Distance Measurement
- Adding Up/Subtracting Distances
- Measuring Surface
- Measuring Volume
- Indirect Measurement (Pythagoras)
- Measurement Memory/Erasing Memory
- Errors during Measurement
- Care and Maintenance
- CZ | LASEROVÝ MĚŘIČ VZDÁLENOSTI
- Měření ploch
- Upozornenie:
- Meranie plôch
- Megjegyzés:
- Felület mérése
- Opozorilo:
- Merjenje površin
- Mjerenje površine
- Messfläche
- Попередження:
- Вимірювання площі
- Atentionare:
- Pastaba.
- Ploto matavimas
- Piezīmes
- Virsmas mērišana
Brand : Emos
Model : M0502
Category : Uncategorized