
E5010 - Uncategorized Emos - Free user manual and instructions
Find the device manual for free E5010 Emos in PDF.


| Product Type | Wireless Weather Station |
| Model | E5010 |
| Brand | Emos |
| Dimensions (Main Station) | 22 × 197 × 123 mm |
| Weight (Main Station, without batteries) | 355 g |
| Dimensions (Outdoor Sensor) | 21 × 60 × 100 mm |
| Weight (Outdoor Sensor, without batteries) | 53 g |
| Power Supply (Main Station) | 3 × 1.5 V AAA batteries (not included) |
| Power Supply (Sensor) | 2 × 1.5 V AAA batteries (not included) |
| Radio-Controlled Clock | DCF77 signal, time format 12/24 h, time zone adjustable |
| Indoor Temperature Range | 0 °C to +50 °C, resolution 0.1 °C |
| Outdoor Temperature Range | -50 °C to +70 °C, resolution 0.1 °C |
| Temperature Accuracy | ±1 °C (0 °C to +40 °C), ±2 °C (other ranges) |
| Indoor/Outdoor Humidity Range | 20% to 90% RH, resolution 1% |
| Humidity Accuracy | ±5% |
| Barometric Pressure Range | 850 hPa to 1050 hPa, units hPa/inHg |
| Pressure History | Last 12 hours |
| Number of Sensors Supported | Up to 3 (channel 1, 2, 3) |
| Transmission Frequency | 433 MHz, max 10 mW e.r.p. |
| Radio Signal Range | Up to 50 m in open area |
| Weather Forecast | Next 12-24 hours, accuracy 70-75% |
| Moon Phase Display | 8 phases |
| Alarm | 2 alarms with snooze (5 min) |
| Temperature Alerts | Adjustable min/max, range -50 °C to +70 °C |
| Comfort Level Indicator | Smiley: comfortable, dry, wet based on humidity and temperature |
| Cleaning | Use slightly moistened soft cloth; avoid solvents |
| Safety | Do not expose to extreme conditions, do not open, keep away from children |
| Compliance | EU Directive 2014/53/EU |
Frequently Asked Questions - E5010 Emos
User questions about E5010 Emos
0 question about this device. Answer the ones you know or ask your own.
Ask a new question about this device
Download the instructions for your Uncategorized in PDF format for free! Find your manual E5010 - Emos and take your electronic device back in hand. On this page are published all the documents necessary for the use of your device. E5010 by Emos.
USER MANUAL E5010 Emos
GB | Wireless Weather Station
Read this manual carefully before using the product.
Specifications
radio-controlled clock
time format: 12/24 h
indoor temperature: 0 °C to +50 °C, 0.1 °C resolution
outdoor temperature: -50 °C to +70 °C, 0.1 °C resolution
temperature measurement accuracy: ±1 °C for 0 °C to +40 °C range, ±2 °C for other ranges
indoor and outdoor humidity: 20 to 90 % RH, 1 % resolution
humidity measurement accuracy: 5 %
barometric pressure measurement range: 850 hPa to 1050 hPa
unit of pressure: hPa/inHg
radio signal range: up to 50 m in open area
transmission frequency: 433 MHz, 10 mW e.r.p. max.
number of sensors: max. 3
wire probe length: 1 m
power supply:
main station: 3× 1.5 V AAA batteries (not included)
sensor: 2× 1.5 V AAA batteries (not included)
dimensions and weight without batteries:
main station: 22 × 197 × 123 mm, 355 g
sensor: 21 × 60 × 100 mm, 53 g
Weather Station – Display
See fig. 1
| 1 – alarm no. 2 active | 15 – moon phase |
| 2 – alarm no. 1 active | 16 – weather forecast |
| 3 – day of the week | 17 – time |
| 4 – week no. | 18 – DCF signal reception |
| 5 – month | 19 – outdoor humidity |
| 6 – day | 20 – MAX/MIN measured outdoor values |
| 7 – sensor batteries low | 21 – outdoor temperature |
| 8 – outdoor humidity trend | 22 – outdoor temperature trend |
| 9 – comfort level indicator – smiley | 23 – sensor signal search |
| 10 – IN – indoor temperature and humidity, OUT – outdoor temperature and humidity | 24 – outdoor sensor channel number |
| 11 – indoor temperature trend | 25 – station batteries low |
| 12 – pressure trend | 26 – indoor humidity trend |
| 13 – pressure history function | 27 – indoor humidity |
| 14 – pressure history time difference | 28 – MAX/MIN measured indoor values |
| 29 – indoor temperature |
Button Descriptions – Top Side
See fig. 2
| Button Button press Button press and hold (3 seconds) | ||
| MODE(A*) | Display time, alarm 1, alarm 2 | Settings for time format, time zone, calendar format, year, month, day, hour, minute, language for day of the week, switching between hPa/inHg pressure units, °C/°F units. |
| CH (B*) | Display values for sensor 1/2/3 and activate cycling mode to display values from sensors 1/2/3 | Repeat search for sensor signal and pair sensors 1/2/3. |
| SNOOZE LIGHT (C*) | 1. Snooze – postpone alarm by 5 minutes2. Brief screen illumination. | Set altitude and change weather forecast icon. |
| ALERT (D*) | Turn temperature alert on/off Set temperature alert. | |
| UP (E*) | 1. View MAX/MIN measured values for temperature and humidity2. One step forward in settings mode. | 1. Erase MAX/MIN values from memory2. Fast forward in settings. |
| DOWN (F*) | 1. View pressure history in the last 0 to 12 h2. One step back in settings mode. | Fast backward in settings. |
G - hole for hanging on the wall
H - battery compartment
| - stand
Sensor Description
See fig. 3
A-LED
F - selector for channels (CH 1, 2, 3)
B-LCD screen
G - selector for temperature units (°C/°F)
C - hole for hanging on the wall
H – wired sensor with temperature probe (1 m)
D - battery cover
E - battery compartment
Getting Started
- Insert batteries into the weather station (3× 1.5 V AAA) first, and then into the wireless sensor (2× 1.5 V AAA). When inserting the batteries make sure the polarity is correct to avoid damaging the weather station or sensor. Only use 1.5 V alkaline batteries of the same type; do not use rechargeable 1.2 V batteries. Lower voltage may cause both of the units to not function.
- Place the two units next to each other. The weather station will detect the remote sensor signal within 3 minutes. If signal from the sensor is not detected, long press the CH button on the weather station to repeat the search.
- If the outdoor temperature reading disappears from the display, long press the CH button on the weather station. The weather station resets all values and repeats the search for sensor signal.
- If you want to have the sensor placed indoors and measure outdoor temperature and indoor humidity, thread the wire probe under a window that is not frequently used. Frequent opening may damage or destroy the probe. The outdoor portion of the temperature wire probe must be anchored so as to prevent its tearing off in the wind.
- We recommend placing the sensor on the north side of the house. The range of the sensor may decrease substantially in areas with large number of obstacles.
- The sensor is resistant to dripping water, however, it should not be permanently exposed to rain.
- Do not place the sensor onto metal objects; doing so will reduce the transmission range.
- If the low battery icon is displayed, replace batteries in the sensor or weather station.
Switching Channels and Connecting Additional Sensors
- Select channel 1, 2 or 3 for the sensor by repeatedly pressing the CH button. Then, long-press the CH button. The 📞 on will begin flashing.
-
Remove the cover from the sensor's battery compartment and insert batteries (2× 1.5 V AAA).
-
Set the desired sensor channel number (1, 2, 3) by repeatedly pressing the CH button located in the battery compartment of the sensor. The channel number will be shown on the sensor's display. Data from the sensor will be loaded within 3 minutes.
- If sensor signal is not detected, remove the batteries and reinsert them.
Displaying Data from Multiple Sensors, Automatic Cycling through Values from Connected Sensors
Press the CH button repeatedly to display data from all connected sensors one by one. You can also activate automatic cycling through data from all connected sensors:
- Turning on cycle mode
Repeatedly press the CH button until the display shows the C icon.
Data from all connected sensors will be shown automatically and repeatedly one after another.
- Turning off cycle mode
Repeatedly press the CH button until the icon disappears.
Radio-Controlled Clock (DCF77)
After being registered by the wireless sensor, the weather station will automatically start searching for DCF77 signal (DCF for short) for 7 minutes; the ▲icon flashes. During the search, no other data on the display will be updated and buttons will be disabled (except SNOOZE•LIGHT). Once the signal is found, the icon will stop flashing (■stays on the screen) and current time will be displayed. If no signal is detected, the DCF icon will not be shown.
To repeat the search for DCF signal, briefly hold the UP and DOWN button at the same time. To cancel the repeat search, long press the UP and DOWN buttons at the same time again. DCF signal will be synchronised daily between 2:00 and 3:00 am.
Note: If the weather station detects DCF signal but the current time on the display is incorrect (e.g. shifted ±1 hour), you must set the correct time zone for the country where you are using the station, see Manual Settings.
In standard conditions (at safe distance from sources of interference, such as TV sets or computer monitors), the reception of time signal takes several minutes. If the weather station does not detect the signal, follow these steps:
- Move the weather station to another location and try to detect DCF signal again.
- Check the distance of the device from sources of interference (computer monitors or television sets). The distance should be at least 1.5 to 2 m during the reception of signal.
- When receiving DCF signal, do not place the weather station in the proximity of metal doors, window frames and other metal structures or objects (washing machines, dryers, refrigerators etc.).
- DCF signal reception is weaker in reinforced concrete structures (cellars, high-rise buildings etc.), depending on the conditions. In extreme cases, place the weather station close to a window in the direction of a transmitter.
Reception of DCF77 radio signal is affected by the following factors:
- thick walls and insulation, basements and cellars;
- inadequate local geographical conditions (these are difficult to assess in advance);
- atmospheric disturbances, thunderstorms, electrical appliances with no interference elimination, television sets and computers located near the DCF receiver.
Manual Settings
- Long press the MODE button.
- Then, repeatedly press the MODE button to choose settings for: 12/24 time format – time zone – date format – year – month – day – hour – minute – calendar language – bar. pressure unit (hPa, InHg) – °C/°F temperature units. You can move between the values by pressing the MODE button, set values using UP and DOWN.
Calendar languages are as follows:
GE – German; EN – English; DU – Dutch; DA – Danish; IT – Italian; SP – Spanish; FR – French
Setting Altitude / Weather Forecast Icon
To achieve more accurate calculation of pressure values, it is advised to manually set the altitude for the location where the weather station is being used.
- Long press the SNOOZE•LIGHT button until the altitude value starts flashing.
- Use the UP and DOWN buttons to set the correct altitude. Setting range is from -190 m to 2 000 m, in 10 m increments. Holding the button adjusts value faster. Confirm the set altitude value by pressing SN00ZE·LIGHT.
- The weather forecast icon will start flashing. Use the UP and DOWN buttons to set the appropriate weather forecast icon to match the current weather – doing so accelerates the weather station's ability to calculate an accurate weather forecast. Confirm the set icon by pressing SNOOZE·LIGHT.
Atmospheric Pressure – History
The station shows atmospheric pressure in hPa or inHg and keeps a history of pressure readings for the last 12 hours.
Moving the weather station to another place will affect the measured values.
Measurement will stabilise within 12 hours of battery insertion or relocation of the weather station.
Press the DOWN button repeatedly to display measured pressure values for the last 12 hours.
The measured value + time difference will be displayed in fields no. 13 and 14.
Temperature, Humidity and Pressure Trends
| temperature, humidity and pressure trend indicator |  |  |  |
| rising constant | falling |
Moon Phase
The moon phase is displayed in field no. 15. Icons for the main phases of the moon are as follows:
 |  |  |  |  |  |  |  |
| new moon | waxing crescent | first quarter | waxing gibbous | full moon | waning gibbous | last quarter | waning crescent |
Displaying Maximum and Minimum Temperature and Humidity Readings
Press the UP button repeatedly to display the maximum and minimum temperature and humidity readings.
Holding the UP button while viewing MAX/MIN values will erase the values from memory.
Alarm Settings
The weather station allows setting 2 alarms.
Repeatedly pressing the MODE button will show the alarm time for alarm A1, A2 in field no. 17.
While viewing the alarm time, long press the MODE button and use UP and DOWN to set the alarm time of choice.
Activate the alarm by pressing DOWN while showing the alarm time in field no. 17.
After activation, the alarm will be indicated by icon A1 A2 in field no. 1, 2.
Pressing the DOWN button again will deactivate the alarm; the alarm icon disappears.
Snooze Function
Alarm ringing can be postponed by 5 minutes using the SNOOZE•LIGHT button located on the top of the weather station.
Press the button when the alarm starts ringing. The alarm icon will be flashing.
To cancel SNOOZE mode, press any other button – the icon will stop flashing and will remain on the screen.
The alarm will be re-activated the next day.
Brief Station Display Backlighting
The display will illuminate for 10 seconds after pressing the SNOOZE•LIGHT button.
Weather Forecast
The station uses changes in atmospheric pressure to forecast weather for the next 12–24 hours for an area within the range of 15–20 km.
The accuracy of weather forecast is 70–75 %. The forecast icon is displayed in field no. 16.
As the weather forecast may not be 100 % accurate, neither the manufacturer nor the seller can be held responsible for any loss caused by an incorrect forecast.
When you first set or reset the weather station, it takes approximately 12 hours before the weather station begins forecasting correctly.
Weather Forecast Icons
| [8wwx] | 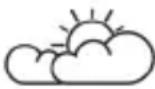 |  | 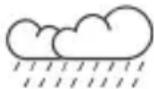 | 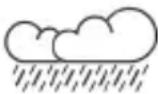 |
| Sunny Cloudy Overcast Rain Heavy rain | ||||

the snowflake icon will flash at outdoor temperature between -3 °C to +1 °C.
the snowflake icon will remain on the screen at outdoor temperature below -3 °C.
Comfort Level Indicator – Smiley
The comfort level indicator is displayed in field no. 9.
If humidity is between 40–70 % RH and temperature is between 20–28 °C, the screen will show the COMFORT Icon.
If humidity is lower than 40 % RH, the screen will show the DRY 😊 icon.
If humidity is higher than 70 % RH, the screen will show the WET 😊 icon.
If temperature is not between 20–28 °C and humidity is not between 40–70 % RH, no icon will be displayed.
Setting Temperature Limits for Maximum and Minimum Temperature
Temperature limits can be set independently for up to 3 outdoor temperature sensors.
Long press the ALERT button. The value for setting a maximum temperature alert will begin flashing.
Use the UP and DOWN buttons to set the desired temperature between -49 °C and 70 °C.
Holding the buttons speeds up the value adjustment.
Then press the ALERT button and set the minimum temperature alert between -50 °C and 69 °C.
Press the ALERT button to activate/deactivate the temperature alert function. ⬆ will be displayed.
Temperature limit range is -50 ^ to +70 ^ , with 1 ^ resolution.
When the set temperature limit is exceeded, an audio alarm will sound 5× and the value will begin flashing.
Pressing the ALERT button silences the audio signal and the value will stop flashing.
Battery Replacement Warning
Replace the batteries in the station or the sensor once the display of the station or the sensor shows the low battery icon
Upkeep and Maintenance
The product is designed to serve reliably for many years if used properly. Here are some tips for proper operation:
- Read the manual carefully before using this product.
- Do not expose the product to direct sunlight, extreme cold and humidity and sudden changes in temperature. This would reduce accuracy of detection. Do not place the product in locations prone to vibration and shocks – may cause damage.
- Do not subject the product to excessive force, impacts, dust, high temperatures or humidity – doing so may cause malfunction, shorten battery life, damage batteries and deform plastic parts.
-
Do not expose the product to rain or moisture if it is not designed for outdoor use.
-
Do not place any open flame sources on the product such as a lit candle, etc.
- Do not place the product in places with inadequate air flow.
- Do not insert any objects into the product's vents.
- Do not tamper with the internal electrical circuits of the product – doing so may damage the product and will automatically void the warranty. The product should only be repaired by a qualified professional.
- To clean the product, use a slightly moistened soft cloth. Do not use solvents or cleaning agents – they could scratch the plastic parts and cause corrosion of the electric circuits.
- Do not immerse the product in water or other liquids.
- The product may not be exposed to dripping or splashing water.
- In the event of damage or defect of the product, do not perform any repairs by yourself. Have it repaired in the shop where you bought it.
- This device is not intended for use by persons (including children) whose physical, sensory or mental disability or whose lack of experience or knowledge prevents them from using it safely. Such persons should be instructed in how to use the device and should be supervised by a person responsible for their safety.

Do not dispose with domestic waste. Use special collection points for sorted waste. Contact local authorities for information about collection points. If the electronic devices would be disposed in landfill, dangerous substances may reach groundwater and subsequently food, where it could affect human health.
Hereby, EMOS spol. s r.o. declares that the radio equipment type E5010 is in compliance with Directive 2014/53/EU. The full text of the EU declaration of conformity is available at the following internet address: http://www.emos.eu/download.
urni format: 12/24 h
Indikator razine ugrade – Smješko
Indikator razine ugrade prikazan je u polju br. 9.
Ako je vlažnost od 40 do 70 % RH a temperatura od 20 do 28 °C, zaslon će pokazati ikonu COMFORT (UGODNO) 😊.
Ako je vlaga ispod 40 % RH, pokazuje se ikona DRY (SUHO) 😊.
Ako je vlaga iznad 70 % RH, pokazuje se ikona WET (VLAŽNO) 😊.
sensors: 21 × 60 × 100 mm, 53 g


- GB | Wireless Weather Station
- Specifications
- Weather Station – Display
- Button Descriptions – Top Side
- Sensor Description
- Getting Started
- Switching Channels and Connecting Additional Sensors
- Displaying Data from Multiple Sensors, Automatic Cycling through Values from Connected Sensors
- Radio-Controlled Clock (DCF77)
- Reception of DCF77 radio signal is affected by the following factors:
- Manual Settings
- Setting Altitude / Weather Forecast Icon
- Atmospheric Pressure – History
- Temperature, Humidity and Pressure Trends
- Moon Phase
- Displaying Maximum and Minimum Temperature and Humidity Readings
- Alarm Settings
- Snooze Function
- Brief Station Display Backlighting
- Weather Forecast
- Weather Forecast Icons
- Comfort Level Indicator – Smiley
- Setting Temperature Limits for Maximum and Minimum Temperature
- Battery Replacement Warning
- Upkeep and Maintenance
- Indikator razine ugrade – Smješko
Brand : Emos
Model : E5010
Category : Uncategorized