
Swan OB100 - Vacuum Cleaner Eldom - Free user manual and instructions
Find the device manual for free Swan OB100 Eldom in PDF.


| Product Type | Upright and Handheld Vacuum Cleaner |
| Model | Swan OB100 |
| Brand | Eldom |
| Rated Power | 110W |
| Supply Voltage | 100-240V ~50Hz |
| Operating Voltage | 22.2V |
| Battery Type | Li-Ion 22.2V, 2200mAh |
| Charging Time | Approximately 4 hours |
| Runtime (Low Speed) | Up to 40 minutes |
| Runtime (High Speed) | Up to 20 minutes |
| Maximum Vacuum | 12kPa |
| Noise Level | <80dB |
| Dust Container Capacity | 0.51L |
| Filtration System | HEPA filter, Sponge filter, Filter cartridge |
| Brush Features | Rotating shaft, backlight for dark corners |
| Mop Function | Compatible with mopping set OBZ100 (not included) |
| Handheld Unit | Detachable, with suction nozzle and brush |
| Charging Station | Wall-mounted with bracket |
| Weight | Not specified in manual; estimated ~3-4 kg |
| Dimensions (HxWxD) | Not specified; typical upright size |
| Maintenance | Empty dust container after each use; wash filters under running water; dry thoroughly |
| Safety Features | Automatic shut-off when not in use; do not use without filters; keep away from heat |
| Warranty | Domestic use only; warranty void if misused |
Frequently Asked Questions - Swan OB100 Eldom
User questions about Swan OB100 Eldom
0 question about this device. Answer the ones you know or ask your own.
Ask a new question about this device
Download the instructions for your Vacuum Cleaner in PDF format for free! Find your manual Swan OB100 - Eldom and take your electronic device back in hand. On this page are published all the documents necessary for the use of your device. Swan OB100 by Eldom.
USER MANUAL Swan OB100 Eldom
natural_image
Exterior view of a silver and black handheld vacuum cleaner (no text or symbols visible)Disposal of used electrical and electronic equipment (applies to the European Union countries and other European countries with separate waste collection systems).
The symbol on the product or its packaging indicates that the product should not be classified as household waste. It should be handed over to a collection point that deals with the collection and recycling of electrical and electronic devices. Correct disposal of the product prevents potential negative consequences for the environment and human health that could be caused by improper disposal of the product. Material recycling helps to preserve natural resources. For detailed information on recycling of this product, please contact your local authority, a cleaning service provider or a shop where the product has been bought.
/CZ/
PRZEZNACZENIE
natural_image
Technical illustration showing a mechanical assembly with a downward arrow and a 3D model (no text or symbols)rys. 1
natural_image
Illustration of two different vacuum cleaner designs, one with a handle and arrow indicator (no text or symbols)rys. 2 rys. 3
natural_image
Technical line drawing of a mechanical component with cross-sectional and top views (no text or symbols)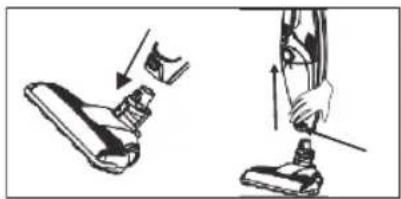
natural_image
Illustration of two-step shoe repair technique showing step-by-step assembly (no text or symbols)rys. 4
rys. 5 rys. 6
natural_image
Two technical line drawings of a mechanical component with arrows indicating motion or assembly (no text or symbols)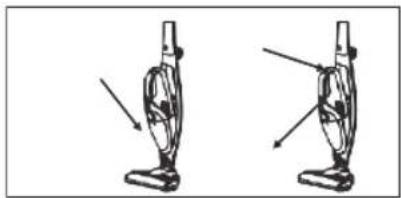
natural_image
Two views of a vacuum cleaner with arrows indicating motion direction (no text or symbols)rys. 7 rys. 8
AKUMULATOR
- Before first use, please carefully read the entire content of this manual;
- The appliance is intended for private domestic use only. This appliance is not intended for use as part of economic activity;
- Do not use in the open air;
- The connecting cable should be connected to the wall outlet whose parameters are in compliance with those provided in the manual;
- The power cable must be kept away from hot surfaces;
- Move the cleaner using the holder;
- Do not use the vacuum cleaner to collect the following:
- Hot ash;
- Cigarette butts and matches;
- Sharp objects (glass splinters);
- Plaster, cement, stone dust, and flour, etc.
- Debris;
- Water or other liquids;
- Do not operate the appliance, if the filter is damaged;
- Do not cover the ventilating holes;
- Do not use the vacuum cleaner to clean wet carpets after e.g. cleaning with a washing shampoo. Wait until the foam dries and the cleaned surface is dry;
- Do not clean people or animals with the vacuum cleaner, in particular do not put the suction inlet near eyes or ears;
- Always disconnect the appliance from the mains by pulling the plug, not by the power cable;
- The appliance must be disconnected from the mains, before cleaning or replacing parts, and when it is not used;
- Do not grab the appliance, if your hands are wet;
- Do not immerse the appliance in water;
- The vacuum cleaner should be protected from moisture; do not place any dish with a liquid on it;
- Do not leave the appliance unattended;
- This appliance can be used by children, who are at least 8 years old, by people with reduced physical and mental
capabilities, and by people with lack of experience and knowledge of the equipment, provided that supervision or instructions for use of the appliance in a safe manner are ensured, so that the risks related to it are understood. Children should not play with the appliance. Children should not carry out cleaning and maintenance of the appliance without supervision;
- Exercise extreme caution, when working with the appliance in the presence of children;
- Do not use the vacuum cleaner without the filters and the waste bin;
- Do not stand on the inlet hose;
- Do not block the inlet hole;
- Use only with the original accessories provided;
- Before each cleaning and emptying, disconnect the appliance from the mains;
- Do not use, if the power cable is damaged, or when the appliance has been damaged in any other way. The appliance shall be repaired by an authorized service; information about the method of servicing is included in the warranty card and provided on www.eldom.eu;
- The appliance may be repaired only be an authorised service centre. Any modernisation or use of spare parts or components of the appliance other than the original ones is prohibited and can compromise the safety of use;
- DO NOT use the device in a manner inconsistent with its intended use and this manual;
- ELDOM Sp. z o. o. shall not be liable for potential losses due to improper use of the device.
EN
INSTRUCTION MANUAL
VACUUM CLEANER OB100
eldom
GENERAL DESCRIPTION
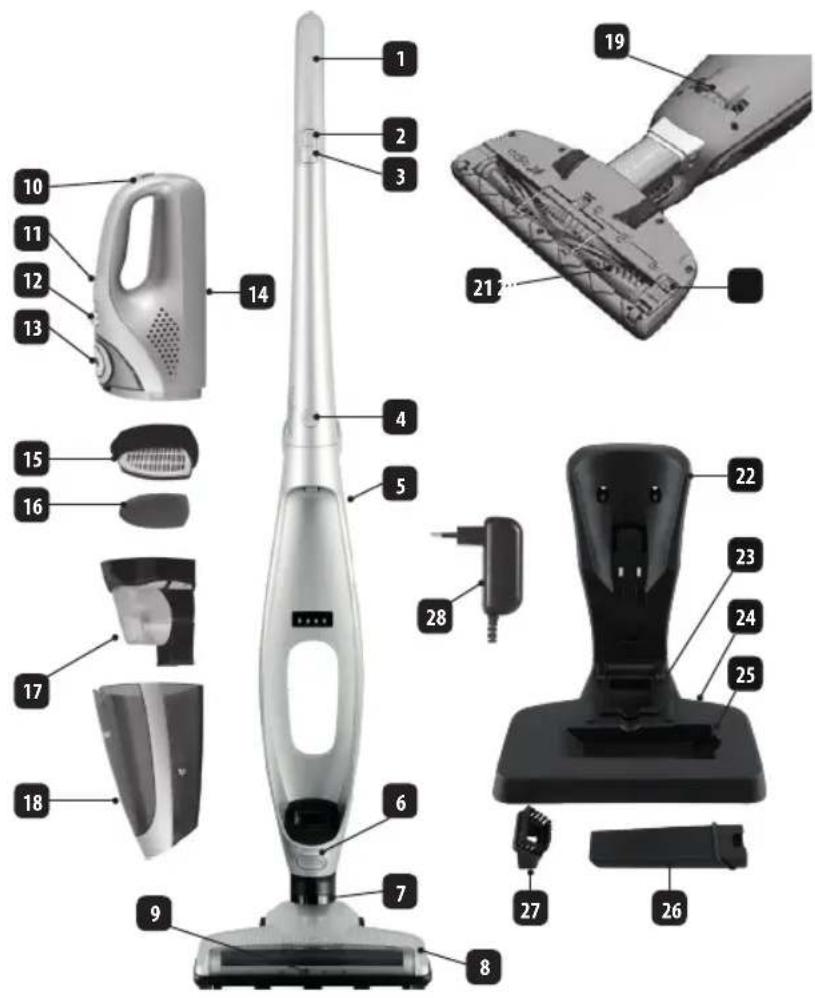
1 Upright-vacuum-cleaner handle
2 Upright-vacuum-cleaner ON/OFF button
3 Power control
4 Arm lock
5 Upright-vacuum-cleaner body
6 Brush lock
7 Brush handle
8 Brush
9 Brush backlight
10 Handheld-vacuum-cleaner lock
11 Handheld-vacuum-cleaner ON/OFF button
12 Dust-container lock
13 Indicator
14 Handheld vacuum cleaner
15 HEPA filter
16 Sponge filter
17 Filter cartridge
18 Dust container
19 Bracket
20 Clipboard
21 Brush-shaft lock
22 Brush shaft
23 Charging station - upper section
24 Seat
25 Charging station - bottom section
26 Handheld-vacuum-cleaner suction nozzle
27 Suction-nozzle brush
28 Power supply
TECHNICAL DATA
Rated power: 110W
Supply voltage: 100-240V, \~50 Hz
Maximum vacuum: 12kPa
Operating voltage: 22.2V
Charging voltage: 26.5V
Volume: <80dB
Operating times after full charge
- at high speed for up to 20 minutes,
- at low speed for up to 40 minutes.
Dust-container capacity: 0.51
Battery: Li-ION 22.2 V, 2200 mAh
ASSEMBLY
- Unpack the unit and check the components for damage.
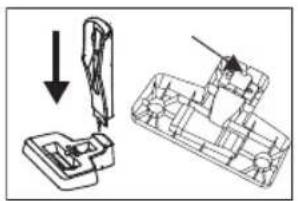
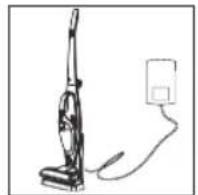
- Assemble the charging station (21+23) - Fig. 1. To disassemble the station, turn it round, move the lever, and pull out the upper section.
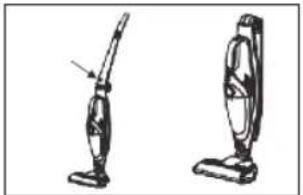
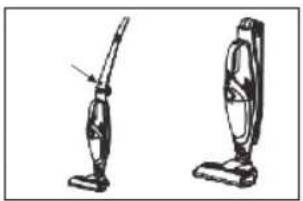
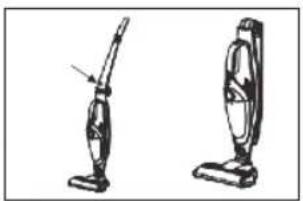
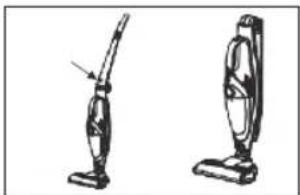
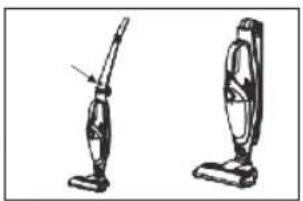
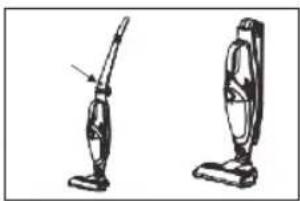
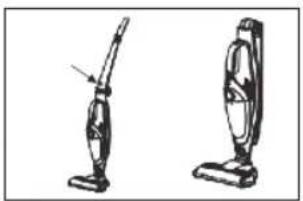
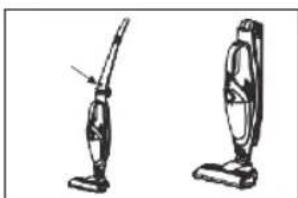
- Holding the handle (1) lift the arm, and lock it. To fold the arm, press the button (4) - Fig. 2.
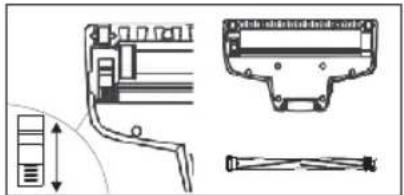
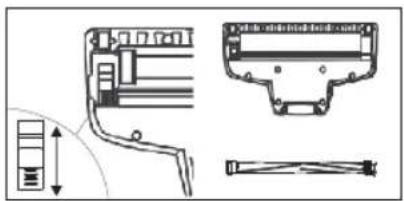
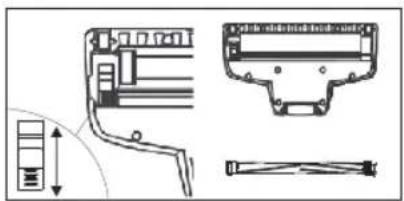
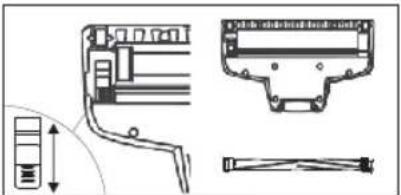
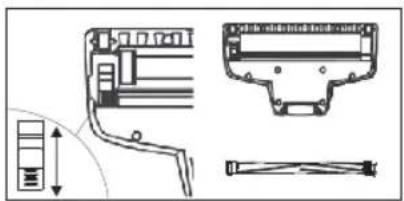
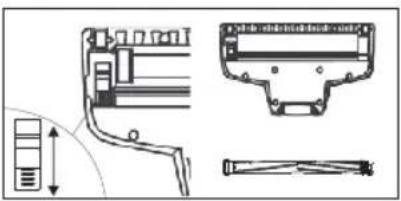
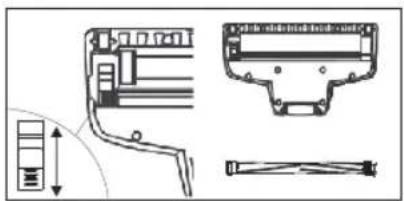
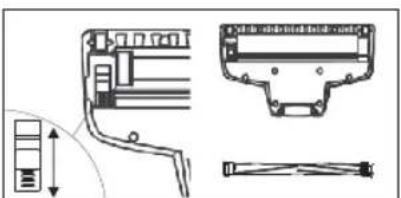
- Move the lock (6) in the brush (8), insert the shaft (22), and lock it (6) - Fig. 3. NOTE
Do not use the upright vacuum cleaner with the shaft (22) out of the brush (8).
- Install the complete brush (8) in the housing (7). To remove the brush, press the lock (6) and slide it out - Fig. 4.
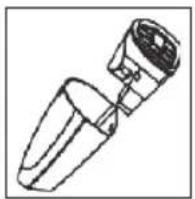
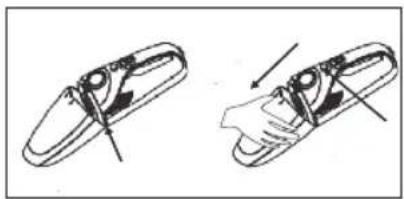
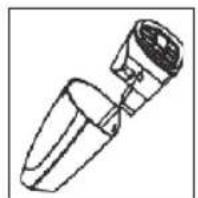
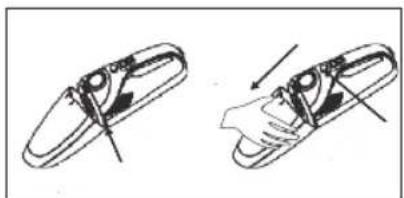
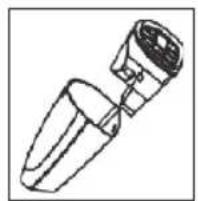
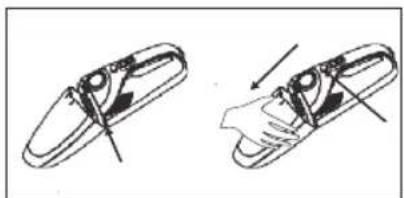
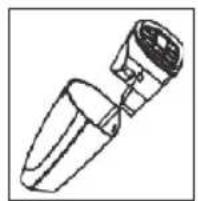
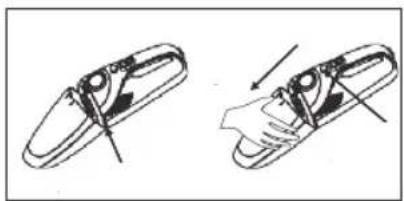
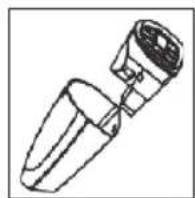
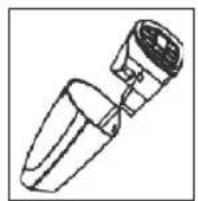
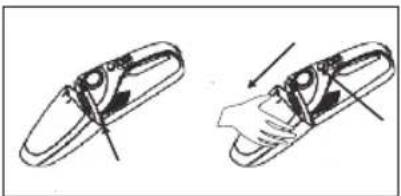
- Insert the filter cartridge (17), sponge filter (16), and HEPA filter (15), into the container (18), respectively - Fig. 5, and then assemble the entire set in the handheld vacuum cleaner (14) - Fig. 6.
NOTE
Do not use the upright and handheld vacuum cleaner without the filters (15, 16, 17) and container (18) in place.
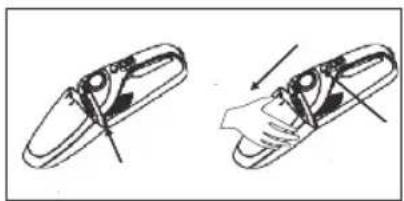
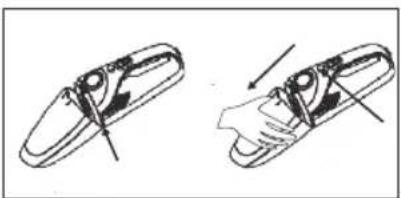
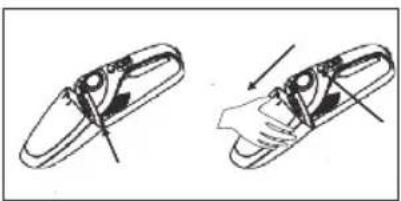
- Place the assembled handheld vacuum cleaner (14) in the body (5). To disconnect the handheld vacuum cleaner (14), press the button (10) and slide it out - Fig. 7.
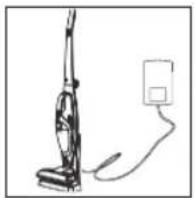
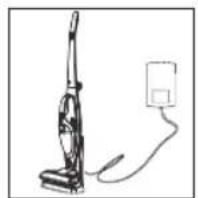
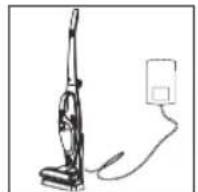
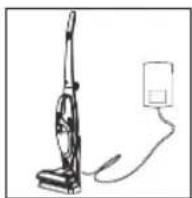
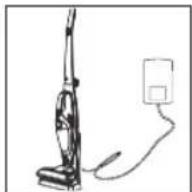
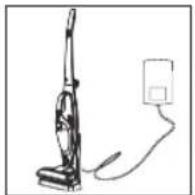
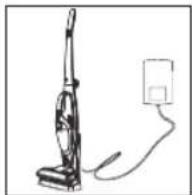
- Plug the tip of the power cord into the socket in the charging station (22), then connect the power cord to the mains according to the parameters given in the manual - Fig. 8.
Make sure that the assembled upright vacuum cleaner is turned off, and place it onto the charging station on the bracket (19). If the power cord is connected to the station, charging will start, signalled by the indicator (13).
natural_image
Technical diagram showing a mechanical assembly with an arrow indicating direction (no text or symbols present)Fig. 1
natural_image
Two types of vacuum cleaner models shown from front and side views (no text or labels)Fig. 2 Fig. 3
natural_image
Technical line drawing of a mechanical component with cross-sectional views and dimension lines (no text or symbols)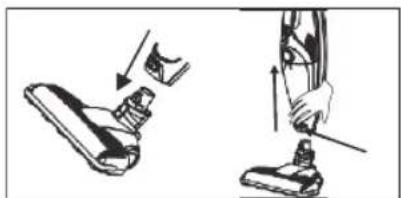
natural_image
Illustration of a shoe being adjusted for a foot (no text or symbols present)Fig. 4
natural_image
Line drawing of a mechanical component with a cylindrical body and flanged ends (no text or symbols)Fig. 5 Fig. 6
natural_image
Two technical line drawings of a mechanical component with arrows indicating motion or assembly (no text or symbols)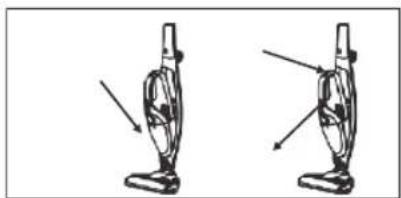
natural_image
Two identical illustrations of a vacuum cleaner with arrows indicating motion direction (no text or symbols)Fig. 7 Fig. 8
BATTERY
The vacuum cleaner may only be used if the internal battery is fully charged. The charging time is approximately 4 hours.
- Battery charging is signalled by the indicator (13).
- During charging, the indicator (13) flashes, and is lit continuously when the battery is fully charged.
- After unpacking and assembling the appliance, charge up the battery.
- Charge the vacuum cleaner at room temperature.
- To extend the battery life, the first 3 charges should be performed in continuous cycles after the battery is completely discharged.
- A fully charged vacuum cleaner will run for about 20 minutes. Then the suction power drops sharply, and it needs to be recharged.
- If the vacuum cleaner is not used for a long time, charge it at least once every 6 months.
OPERATING THE HANDHELD VACUUM CLEANER
- Make sure that the arm (1) is raised and locked, the brush (8) is in place, and the correctly assembled handheld vacuum cleaner (14) is installed in the body (5).
- The upright vacuum cleaner starts when the ON/OFF button (2) is pressed; the suction power can be adjusted by pressing the button (3).
- Different types of floor covering or short-hair carpeting can be vacuumed using the upright vacuum cleaner.
- The vacuuming efficiency is increased through the rotary shaft (22), which is powered separately, and is part of the brush (8) equipment.
- Lamps (9) for the easy cleaning of dark corners are located in the front part of the brush.
- Press the button (2) to turn off the vacuum cleaner.
- Clean the vacuum cleaner after use (see CLEANING AND MAINTENANCE) and leave it on the charging station connected to the mains.
NOTE Using the button (11) the vacuum cleaner can be started, but without brush shaft drive (8) and power control.
OBSŁUGA ODKURZACZA RĘCZNEGO
- Remove the handheld vacuum cleaner from the body (5) by pressing the button (10) - Fig. 7.
- Make sure the filters (15, 16, 17) are installed in the container (18).
- The handheld vacuum cleaner starts working after pressing the button (11).
NOTE. The suction power cannot be adjusted.
- Furniture, etc. can be vacuumed using the handheld vacuum cleaner.
- The suction nozzle (26) can be used to vacuum hard-to-reach areas.
- When vacuuming, e.g., upholstered items, the nozzle (27) can be used.
- Press the button (11) to turn off the vacuum cleaner.
- After use, clean the vacuum cleaner (see CLEANING AND MAINTENANCE) and put it into the body (5) and then put the upright vacuum cleaner on the charging station connected to the power supply.
Filters.
Check the state of filters (15, 16) at regular intervals, and replace them periodically.
Emptying the dust container (18)
It is recommended to empty the container after each vacuuming. Emptying the container on a regular basis ensures the proper operation of the vacuum cleaner and helps maintain the optimum suction power.
- Make sure the appliance is turned off.
- Remove the handheld vacuum cleaner (14) from the body (5) - Fig. 7.
- Remove the container - Fig. 6.
- Remove the HEPA filter (15), sponge filter (16) and filter insert (17), respectively from the container (18) above the bin, and clean all components.
- the HEPA filter (15), sponge filter (16), filter cartridge (17), and container (18), can be cleaned under running water,
NOTE
Do not use sharp tools to clean parts (15, 16, 17, 18), to avoid damage to the material.
Dry the parts (15, 16, 17, 18) thoroughly before assembling them. Do not use high temperatures for drying to avoid deformation of the material.
Cleaning the brush (8)
- Make sure the appliance is turned off.
- Press the lock button (6) and remove the brush (8) from the body.
- Push the shaft lock and slide it out - Fig. 3.
- It is best to use scissors to cut tangled hair.
- Clean the brush (8) with the addition of some dishwashing liquid, using a soft, damp cloth.
NOTE. – Do not immerse the brush (8) in water.
- After cleaning, insert the shaft into the brush and lock it in place - Fig. 3.
THE MOP FUNCTION
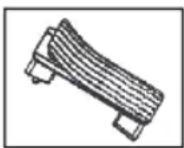
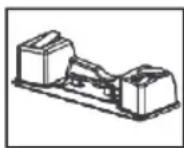
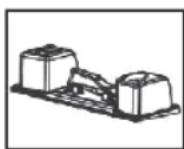
- The OB100 vacuum cleaner is adapted to work with the OBZ100 mopping set (not included in the appliance).
- Make sure the water outflow lock is closed.
- Attach a microfibre cloth evenly to the bottom of the mopping tank.
- Pour clean water into the tank of the mopping set.
NOTE
Fill the tank only with clean water. Do not use detergents.
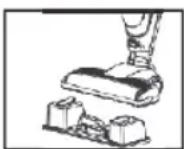
- Place the container on the floor and slide onto it the brush (8) mounted in the upright vacuum cleaner.
- Unlock the water outflow with your foot.
- Wait a moment for the cloth to absorb the water, and clean the floor.
- After use, hold the container with your foot and pull out the vacuum cleaner.
NOTE
After use, pour the remaining water out of the tank.
- Remove the cloth and rinse or wash it.
- Rinse and dry the tank.
ENVIRONMENTAL PROTECTION
- the appliance is made of materials which can be recovered or recycled
- the appliance should be handed over to the appropriate centre of collection and recycling of electrical and electronic equipment.
WARRANTY
• the appliance is intended for personal use at a household,
- it is not intended for professional purposes,
- in case of misuse, the warranty is rendered null and void.
BEZPEČNOSTNÍ POKYNY
MONTÁŽ
natural_image
Technical line drawing of a mechanical assembly with an arrow indicating direction (no text or symbols present)obr. 1
natural_image
Two line drawings of a vacuum cleaner, one with an arrow indicating motion (no text or symbols)obr. 2 obr. 3
natural_image
Technical line drawing of a mechanical component with cross-sectional and top views (no text or symbols)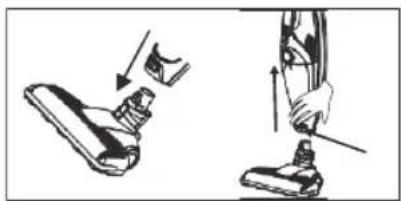
natural_image
Illustration of two-step shoe repair technique showing step-by-step assembly (no text or symbols)obr. 4
natural_image
Line drawing of a mechanical component with no visible text or symbolsobr. 5 obr. 6
natural_image
Two diagrams showing a mechanical component with arrows indicating motion or force direction (no text or symbols)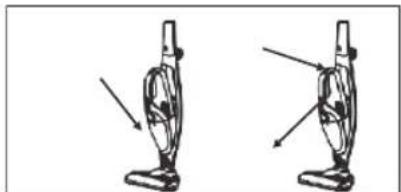
natural_image
Two diagrams of a vacuum cleaner with arrows indicating motion direction (no text or symbols)obr. 7 obr. 8
BATERIE
MONTAGE
natural_image
Technical illustration showing a drill bit and a mechanical assembly (no text or symbols)Abb. 1
natural_image
Two line drawings of a vacuum cleaner, one with a handle and arrow indicator, the other with a flat base (no text or symbols)Abb. 2 Abb. 3
natural_image
Technical line drawing of a mechanical component with cross-sectional views and dimension lines (no text or symbols)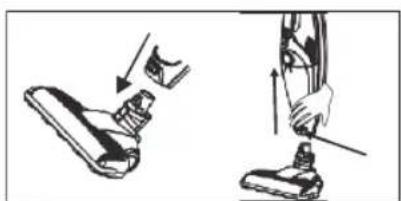
natural_image
Illustration of two different foot push-ups, showing a shoe being adjusted and then adjusting a seatbelt (no text or symbols present)Abb. 4
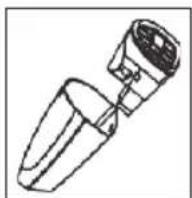
Abb. 5 rys. 6
natural_image
Two technical line drawings of a mechanical component, one showing a pin and the other a cutaway view with arrows indicating motion (no text or symbols)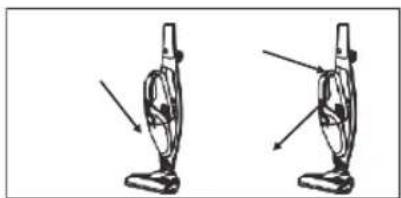
natural_image
Two identical illustrations of a vacuum cleaner with arrows indicating motion direction (no text or symbols)Abb. 7 Abb. 8
AKKU
СБОРКА
natural_image
Technical line drawing of a mechanical assembly with an arrow indicating direction (no text or symbols)рис. 1
natural_image
Two line drawings of a vacuum cleaner, one with an arrow indicating motion (no text or symbols)рис. 2 рис. 3
natural_image
Technical line drawing of a mechanical component with cross-sectional and top views (no text or symbols)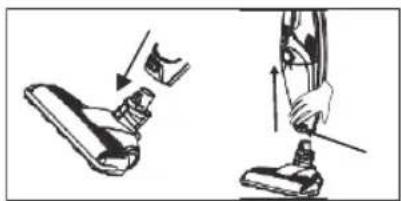
natural_image
Illustration of two-step shoe repair technique showing step-by-step assembly (no text or symbols)рис. 4
natural_image
Line drawing of a mechanical component with no visible text or symbolsрис. 5 рис. 6
natural_image
Two diagrams showing a mechanical component with arrows indicating motion or force direction (no text or symbols)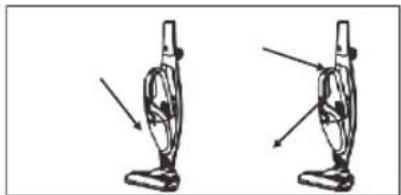
natural_image
Two identical illustrations of a vacuum cleaner with arrows indicating motion direction (no text or symbols)рис. 7 рис. 8
АККУМУЛЯТОР
natural_image
Technical diagram showing a mechanical assembly with a downward arrow and a 3D model (no text or symbols)obr. 1
natural_image
Two line drawings of a vacuum cleaner, one with a handle and arrow indicator, the other with a flat base (no text or symbols)obr. 2 obr. 3
natural_image
Technical line drawing of a mechanical component with cross-sectional and top views (no text or symbols)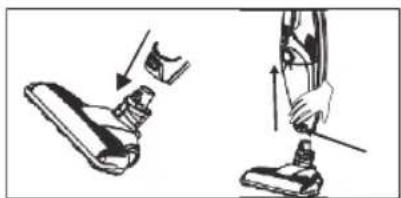
natural_image
Illustration of a shoe being adjusted to a foot, showing the step and angle (no text or symbols)obr. 4
obr. 5 obr. 6
natural_image
Two technical line drawings of a mechanical component with arrows indicating motion or assembly (no text or symbols)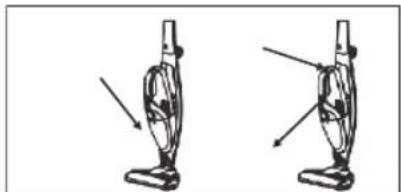
natural_image
Two diagrams of a vacuum cleaner with arrows indicating motion direction (no text or symbols)obr. 7 obr. 8
ÖSSZESZERELÉS
natural_image
Technical line drawing of a mechanical assembly with an arrow indicating direction (no text or symbols present)- ábra
natural_image
Two line drawings of a vacuum cleaner, one with an arrow indicating motion (no text or symbols)- ábra 3. ábra
natural_image
Technical line drawing of a mechanical component with cross-sectional and top views (no text or symbols)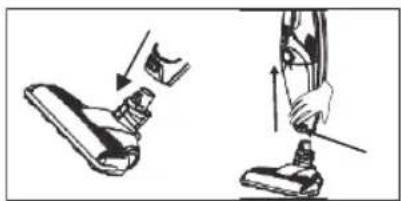
natural_image
Illustration of two-step shoe repair technique showing step-by-step assembly (no text or symbols)- ábra
natural_image
Line drawing of a mechanical component with no visible text or symbols- ábra 6. ábra
natural_image
Two technical diagrams showing a mechanical component with arrows indicating motion or assembly (no text or symbols present)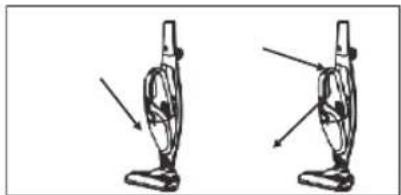
natural_image
Two identical illustrations of a vacuum cleaner with arrows indicating motion direction (no text or symbols)- ábra 8. ábra
AKKUMULÁTOR
MONTAJE
natural_image
Technical illustration showing a mechanical assembly with a downward arrow and a separate 3D model (no text or symbols)fig. 1
natural_image
Two line drawings of a vacuum cleaner, one with a handle and arrow indicator, the other with a flat base (no text or symbols)fig. 2 fig. 3
natural_image
Technical line drawing of a mechanical component with cross-sectional views and dimension lines (no text or symbols)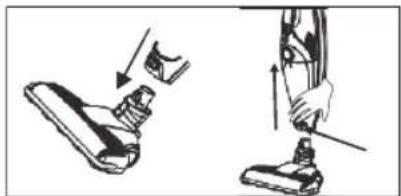
natural_image
Illustration of a shoe being adjusted for a seatbelt, showing the step and angle (no text or symbols)fig. 4
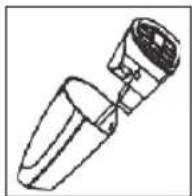
fig. 5 fig. 6
natural_image
Two technical line drawings of a mechanical component, one showing a pin and the other a handle (no text or symbols)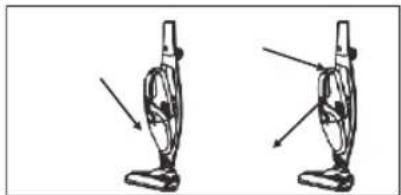
natural_image
Two identical illustrations of a vacuum cleaner with arrows indicating motion direction (no text or symbols)fig. 7 fig. 8
BATERÍA

- /CZ/
- PRZEZNACZENIE
- AKUMULATOR
- EN
- INSTRUCTION MANUAL
- VACUUM CLEANER OB100
- GENERAL DESCRIPTION
- TECHNICAL DATA
- ASSEMBLY
- NOTE
- BATTERY
- OPERATING THE HANDHELD VACUUM CLEANER
- OBSŁUGA ODKURZACZA RĘCZNEGO
- NOTE. The suction power cannot be adjusted.
- Filters.
- Emptying the dust container (18)
- Cleaning the brush (8)
- THE MOP FUNCTION
- ENVIRONMENTAL PROTECTION
- WARRANTY
- BEZPEČNOSTNÍ POKYNY
- MONTÁŽ
- BATERIE
- MONTAGE
- AKKU
- СБОРКА
- АККУМУЛЯТОР
- ÖSSZESZERELÉS
- AKKUMULÁTOR
- MONTAJE
- BATERÍA
Brand : Eldom
Model : Swan OB100
Category : Vacuum Cleaner