FX-LBP185TPRO - Leaf blower Fuxtec - Free user manual and instructions
Find the device manual for free FX-LBP185TPRO Fuxtec in PDF.

User questions about FX-LBP185TPRO Fuxtec
0 question about this device. Answer the ones you know or ask your own.
Ask a new question about this device
Download the instructions for your Leaf blower in PDF format for free! Find your manual FX-LBP185TPRO - Fuxtec and take your electronic device back in hand. On this page are published all the documents necessary for the use of your device. FX-LBP185TPRO by Fuxtec.
USER MANUAL FX-LBP185TPRO Fuxtec
natural_image
Line drawing of a FUTECV air purifier with attached hose and propeller (no text or symbols)
natural_image
Orange icon of a person reading a book (no text or symbols)
Deutsch....9
English Version....23
- Introduction and security....23
- Note on safe use 23
- Symbols displayed on the product....25
- Scope of delivery....26
- Assembly....26
- Operating instructions....26
- Operation....28
- storage....30
- Maintenance....30
- Fault diagnosis and measures....32
- Accessories and spare parts....33
- General description....34
-
Technical data....34
-
Warranty....34
- Disposal....35
- Customer service....35
- Copyright protection ....35
natural_image
Technical line drawing of a mechanical device with internal components and hoses (no text or symbols)natural_image
Close-up of two black mechanical components with a red arrow pointing to a detail (no text or symbols visible)natural_image
Close-up of a red and black industrial machine component with ventilation slots (no visible text or symbols)Startvorbereitung
natural_image
Two black and orange handheld device handles, one with a cat icon and the other with 'ON' and 'OUT' labels (no readable text beyond symbols)Motor abstellen
natural_image
Close-up of a black handle against an orange background (no text or symbols visible)Read these original operating instructions carefully before using the product for the first time and follow all instructions. Keep the document in a safe place for future reference or for subsequent owners. Familiarize yourself with the functions and proper use of the product. Observe all safety instructions listed in the service manual. Always act responsibly and considerably towards third parties. The operator is responsible for accidents or hazards to third parties.
Intended use
The product may only be used in accordance with its intended purpose. Any other use is considered improper use. The user or operator is solely liable for any resulting damage or injury of any kind; the manufacturer accepts no responsibility for this. Please note that the product is not designed for commercial, trade or industrial use. A guarantee or liability is excluded if the product is used in such areas of application or comparable activities.
Do not allow anyone who has not fully read and understood these instructions to install, commission, adjust or operate the product. This product is intended exclusively for well-insulated rooms or for non-permanent use.
Safety instructions
Read all safety instructions, operating instructions, illustrations and technical information supplied with the product. Failure to follow these instructions may result in serious injury or damage. The operator is obliged to use the product as intended, to pay attention to the surroundings and to take special care of other persons, especially children. Always adhere to the specified safety guidelines.
19. NOTE ON SAFE USE
Notes on the use of this manual
Graphical representations
All important components of the appliance are shown and explained in this manual. The operating and handling instructions are supported by corresponding illustrations.
Symbols in the text
The steps and procedures described in this manual may be labeled differently:
- Step or procedure without illustration
The work step is described purely in text form. - Step or procedure with illustration and item numbers
The action is additionally supported by a graphic with item numbers.
Example:
- Loosen screws (1)
- Operate lever (2)
Meaning of the symbols
Warning - risk of accident, injury or significant material damage
Caution - risk of damage to the device or components
Note - Not mandatory, but helpful for better understanding and optimal use
Equipment and features
This manual applies to several model variants with different equipment. Some of the components described are not installed in every model.
Corresponding applications and parts are marked and, if necessary, available from FUXTEC GmbH as special accessories.
Technological developments
Our corporate principle is the continuous improvement of quality and performance.
Our technology is therefore subject to continuous optimization.
If the functions or appearance of your device deviate from the illustrations in this manual, please contact your authorized specialist dealer.
We accept no responsibility for changes, modifications or further developments that are not described in this manual.
Safety precautions
Special safety measures must be observed when handling this power tool.
Please read all safety instructions and warnings carefully, ensure that you have fully understood them and follow them consistently.
Careless or improper use of a leaf blower can lead to serious or fatal injuries.
Your specialist dealer has demonstrated how to operate the appliance. Observe all applicable local safety regulations, standards and codes of practice.
General safety instructions
Minors may not operate a leaf blower.
Keep uninvolved persons, especially children and animals, away from the work area.
The operator is responsible for not endangering third parties or damaging their property.
Never lend or rent out the appliance without the accompanying operating instructions. Make sure that every person who uses the appliance knows and understands the instructions.
Suitability for operation
The appliance may only be operated by persons who:
are rested, healthy and physically and mentally fit,
take timely breaks when fatigue occurs,
are not under the influence of alcohol, drugs or medication that impair reaction, coordination or judgment.
Approved accessories
Only use accessories that have been specially approved and supplied for your model.
Other accessories must not be used - they increase the risk of accidents.
We accept no liability for damage or injury caused by unauthorized accessories.
Suitable clothing and protective equipment

Wear sturdy, tight-fitting clothing that offers sufficient freedom of movement.
Protective clothing is recommended.
Avoid loose jackets, scarves, ties, jewelry, flared pants or loose long hair that could be caught by the air inlet.

Wear sturdy, non-slip safety shoes, ideally with a steel toe cap.

Wear safety goggles, safety shields or safety glasses with side protection.
Wear hearing protection (e.g. earplugs or ear muffs).

Use non-slip, robust gloves, preferably made of leather (e.g. chrome leather).
Refueling and handling fuel
Always switch off the engine before refueling.
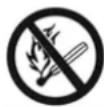
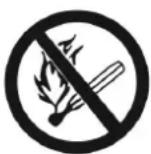
Fuel is highly flammable. Smoking and naked flames are prohibited in the vicinity of the tank.
Do not refuel a hot engine! Spilled fuel can ignite.
Carefully open the tank cap to release the pressure slowly.
Avoid skin contact with fuel. Change soiled clothing immediately.
Vibrations can cause the fuel filler cap to loosen - check and secure it regularly.
Tighten the fuel filler cap as tightly as possible by hand (screw cap) or as described in the "Refueling" chapter (with hinged handle).
Check the tank regularly for leaks. Do not start the engine if there are leaks.
Only store gasoline and oil in approved, safety-tested and correctly labeled containers.
20. SYMBOLS DISPLAYED ON THE PRODUCT
Symbols are used in this manual to draw your attention to possible dangers. The safety symbols and the accompanying explanations must be fully understood. The warnings themselves do not eliminate any danger and cannot replace suitable accident prevention measures.

Read these operating instructions carefully before using the product and keep them in a safe place for later use.

Wear suitable head protection (e.g. hard hat).
Wear safety goggles, a face shield or glasses with side protection.
Wear hearing protection, e.g. earplugs or ear muffs.

CE mark
The product complies with the requirements and regulations of the European Community.

Warning / Caution

Never touch rotating components such as fan wheels or turbines during operation or when the engine is running.

Caution: Objects can be thrown away by the airflow and people can be injured.
21. SCOPE OF DELIVERY
Please check the completeness of the item according to the scope of delivery described. If parts are defective, please contact our FUXTEC customer service.
22. ASSEMBLY
Mounting the device
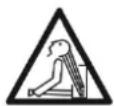
Adjusting the operating handle
- Place the device on your back.
- Loosen the clamping screw.
- Slide the operating handle along the bellows hose to the position that is most comfortable for you.
- Tighten the clamping screw again.
natural_image
Technical line drawing of a mechanical assembly with hoses and components (no text or symbols)Loosening the risers
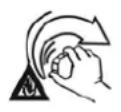
- Lift the tabs of the two belt adjusters.
- Adjust the straps so that the back plate fits snugly and comfortably against your back.
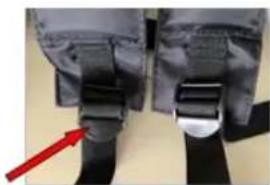
natural_image
Close-up of two black athletic belt buckle clips with a red arrow pointing to one (no text or symbols visible)23. OPERATING INSTRUCTIONS
Transporting the device
Always switch off the motor before transporting the appliance.
When transporting in a vehicle:
Secure the appliance carefully to prevent it from tipping over, leaking fuel or being damaged.
When the appliance is not in use, set it down so that there is no danger to other people.
Before starting - Please check:
The throttle lever must move freely and automatically return to the idle position when released.
It must be easy to switch the stop switch to the "Off" position.
The spark plug cap must be tight - a loose cap can cause sparks and ignite escaping fuel vapors.
Starting the device
Start the engine at least 3 meters away from the filling station - and only outdoors.
To avoid the risk of inhaling toxic fumes, never start or operate the appliance indoors.
Place the appliance on solid ground in a clear, open area.
Make sure you have a secure footing and a stable posture.
Hold the device securely when starting.
The leaf blower is designed for one-man operation. Keep other people - especially children - away from the running appliance, even during the starting process.
During operation
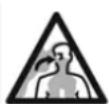
⚠ Warning - Exhaust gases
Your leaf blower produces toxic exhaust gases during operation. These gases (e.g. carbon monoxide) may be colorless and odorless.
To avoid the risk of serious or fatal poisoning from inhalation of these vapors:
Never operate the appliance in closed or poorly ventilated rooms.
Ensure adequate ventilation, especially when working in trenches, depressions or other confined areas.
Warning - Fire hazard
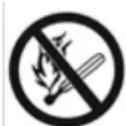
Do not smoke while working with or near the appliance, as fuel vapors are highly flammable.
Working safely with the device
Always hold the appliance securely with both hands. Ensure a firm footing and secure hold.
Examine the work area:
Never direct the airflow towards people, as small objects can be whirled up at high speed and thrown away.
Take care on slippery surfaces, e.g: On ice, in wet conditions or snow.
On felled terrain or uneven ground.
Watch out for obstacles such as roots, ditches, holes or garbage that you could trip over.
Warning for spray applications
To avoid inhaling toxic fumes from chemicals and exhaust gases, never use the appliance indoors.
Only move forward when operating the appliance.
In an emergency: release the quick-release fasteners, get out of the carrying strap and eject the device.
After completing the work: Empty and clean the container.
Vibrations
Prolonged use of the device can lead to vibration-related circulatory disorders in the hands.
The recommended duration of use varies from person to person and depends on several factors.
The useful life is extended by:
- Wear hand protection (e.g. warm gloves)
- Regular breaks
• The useful life is shortened by - Individual tendency to circulatory disorders (e.g. frequently cold or tingling fingers)
- Low outside temperatures
- Tight gripping, as this impedes blood circulation
Regular users should carefully monitor the condition of their hands and fingers.
Always seek medical advice if symptoms occur.
24. OPERATION
Refuel
Fuel
Your engine requires a mixture of gasoline and two-stroke engine oil in a mixing ratio of 30:1 (30 parts gasoline: 1 part oil). The quality of the components used and the exact mixing ratio have a decisive influence on the performance and service life of the engine.
⚠️ Incorrect fuels, unsuitable oils or an incorrect mixing ratio can lead to serious engine damage.
Gasoline
Only use commercially available branded gasoline with an octane rating of at least 90.
If the octane rating of the regular gasoline available in your region is lower, use a higher-grade product - leaded or unleaded.
For reasons of health and environmental protection, unleaded gasoline is recommended.
Note: If your appliance is equipped with a catalytic converter, only unleaded gasoline may be used.
Even small amounts of leaded gasoline can significantly impair the performance of the catalytic converter.
Engine oil
Only use high-quality two-stroke engine oil. Other two-stroke oils must at least comply with the TC classification.
Low-quality fuels or oils can cause damage to the engine, seals, hoses and fuel tank.
Preparing the fuel mixture
Avoid direct skin contact with fuel and the inhalation of fuel vapors.
Use an approved fuel tank.
Pour the oil into the container first, then the gasoline, and mix the mixture thoroughly.
Mixing ratio: 30 parts gasoline : 1 part two-stroke oil (TC classification)
Storing fuel
The fuel mixture ages over time. Only mix as much fuel as you will need over the next few weeks or months. Store the mixture in an approved safety container in a dry and safe place.
Further information:
Shake the container well before refueling, as components may settle. Caution: Pressure may build up in the tank - open carefully. Clean the tank and container regularly. Only dispose of cleaning fluids at approved disposal points.
Refueling the device
Before refueling: Clean the tank cap and surrounding area to prevent dirt from getting into the tank.
Set the appliance down so that the tank cap is facing upwards.
Do not spill fuel and do not overfill the tank.
After refueling: Close the tank cap as tightly as possible by hand.
Change fuel filter (recommended once a year)
• Empty the fuel tank completely
• Use a hook to pull the fuel filter out of the tank and remove it from the hose
- Slide the new filter onto the hose
- Put the filter back in the tank
Starting and stopping the engine
- Move the operating lever to the start position
- Move the control lever to the center position - this activates the fuel supply for starting.
Before the start
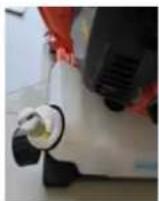
Adjusting the choke lever
- When the engine is cold: Close the choke.
- When the engine is warm: Open the choke completely.
natural_image
Close-up of an orange industrial machine component with black and orange parts (no visible text or symbols)This setting also applies if the engine has been running briefly but is not yet fully warm.
Start preparation
- Place the appliance on the floor.
- Make sure that there are no people or animals in the immediate working area or in front of the nozzle.
• Make sure that you have a secure footing: - Hold the appliance by the housing with your left hand and place one foot against the base plate to prevent it from slipping.
- Slowly pull the starter handle out about 20 cm with your right hand - then pull firmly.
- Never pull the starter rope as far as it will go, as it could break.
- Do not allow the starter handle to spring back, but guide it back in a controlled manner so that the starter rope winds up correctly.
As soon as the engine ignites:
- When the engine is cold: Open the choke and continue starting until the engine is running.
- When the engine is warm: continue starting until the engine is running.
As soon as the engine is running
Move the throttle lever to the idle position, between the two symbols, so that the engine switches to idle.
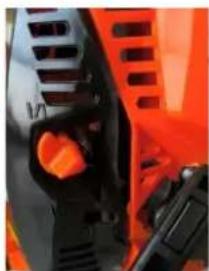
Switch off the engine
Move the lever to the "OFF" position - the motor is switched off.

natural_image
Two black and orange handheld devices side by side, one with a white animal icon and the other labeled 'ON' and 'OET' (no additional text or symbols visible)If the engine does not start
If you do not open the choke in time after the engine ignites, it may stall again. In this case:
- Remove spark plug cap
- Unscrew and dry the spark plug
- Set stop switch to "OFF
• Pull the starter rope several times to vent the combustion chamber - Reinsert spark plug and plug in connector
- Set stop switch to "ON
- Open the choke - even when the engine is cold
- Restart the engine

natural_image
Close-up of a black mechanical knob attached to an orange surface (no text or symbols visible)After empty tank (vent fuel line)
- When the tank was empty and was refueled:
• Pull the starter cable several times to bleed the fuel line.
25. STORAGE
For periods from approx. 3 months:
- Empty fuel tank
- Run the engine until the carburetor is empty - prevents sticking of the diaphragms
- Clean the appliance thoroughly - especially the cylinder area and air filter
- Store the appliance in a dry, elevated or locked location, out of the reach of children and unauthorized persons
- Do not expose the fuel tank to direct sunlight - UV radiation can make the material brittle, which can lead to leaks or breakages
26. MAINTENANCE
Only use original accessories and original spare parts.
Only a regularly maintained and treated device can serve as a satisfactory aid.
Inadequate maintenance and care can lead to unforeseen accidents and injuries.
During the first operating hours (running-in of the motor)
A new appliance should not be operated at full throttle during the initial period in order to avoid
unnecessary strain.
During the running-in period, all moving parts still have to adjust to each other optimally - which is why the friction in the engine is initially higher.
As a rule, full engine performance is only achieved after approx. 5 to 15 tank fillings.
In operation
After a long period of full load operation, the engine should continue to idle for a while so that the engine heat can be evenly distributed by the air flow.
This protects sensitive engine components such as ignition, carburetor, etc. from heat damage.
After work
- Short-term storage
- Wait until the motor has cooled down completely.
- To avoid condensation, fill the tank completely and store the appliance in a dry place until it is needed again.
For longer storage times, see chapter "Storing the appliance"
Check and clean the air filter
- Use the tool supplied to remove the air filter cover.
- Remove the filter from the cover and check it.
- If it is dirty or damaged, clean it or insert a new filter.
- Replace the cover and tighten the fastening screws.
Cleaning the air filter
A dirty air filter reduces engine performance, increases fuel consumption and makes starting more difficult.
When the engine power drops significantly:
- Close choke
- Remove the air filter cover with the tool
- Remove and check the filter
• In case of heavy soiling or damage: Clean or replace the filter - Refit the cover and tighten the screws
Carburetor
General information:
The carburetor is set to a standard value at the factory, which ensures an optimum fuel/air mixture in most cases.
The high-speed screw influences the engine power and the maximum engine speed.
⚠️ If the mixture is set too low in fuel, engine damage can occur due to insufficient lubrication and overheating.
Check spark plug
If the engine shows a loss of power, starts poorly or runs irregularly at idle, check the spark plug first:
- Remove spark plug (see chapter "Starting/stopping the engine")
- Check electrode gap A: 0.6-0.7 mm and adjust if necessary (see technical data)
- Eliminate the causes of spark plug fouling:
- Too much oil in the fuel mixture
- Dirty air filter
• Unfavorable operating conditions
Replace the spark plug after approx. 100 operating hours - or earlier if the electrodes are badly worn. If the spark plug is supplied with a screw-off adapter, tighten it firmly.
Press the spark plug cap on firmly.
Engine running behavior
If the engine runs unevenly or irregularly despite a clean air filter and correctly adjusted carburetor, the silencer may be dirty.
Have the silencer checked by a specialist dealer and cleaned if necessary.
Note: The following parts can be replaced as part of regular maintenance.
- Piston ring
- Spark plug
- Silencer seal
- Carburetor gasket
- Filter element
- Fuel filter
27. FAULT DIAGNOSIS AND MEASURES
| Starting problems | ||
| Description | Cause | Measure |
| No spark at the spark plug | Electrodes moist | Drying |
| Electrodes sooted | Cleaning | |
| Insulator damaged | Replace | |
| Incorrect electrode gap | Set to 0.6-0.7 mm | |
| Electrodes burnt out | Replace | |
| Ignition cable damaged | Replace | |
| Ignition coil defective | Replace | |
| Cable connection interrupted | Repair | |
| Ignition spark present | Too much fuel sucked in | Reduce supply |
| Fuel contaminated or mixed with water | Replace | |
| Fuel supply ok, compression poor | Cylinder/piston ring wornSpark plug loose | ReplaceTighten |
| No fuel supply | No fuel in the tank | Refuel |
| Fuel line clogged | Cleaning | |
| Tank cap valve blocked | Cleaning | |
| Power loss | ||
| Description | Cause | Measure |
| Compression normal, no misfire | Air filter clogged | Cleaning |
| Air leak at the carburetor connection | Tighten connection | |
| Poor fuel | Replace | |
| Motor overheating | Allow to cool down, avoid full load | |
| Exhaust sooted up | Cleaning | |
| Outlet duct sooted | Cleaning | |
| Overheating | Fuel mixture too low in fuel | Carburetor adjustment |
| Carbon in the cylinder | Cleaning | |
| Poor lubrication | Use 2-stroke oil, check mixing ratio | |
| Cylinder cooling fins clogged | Cleaning | |
| Abnormal knocking noise | Soot in the combustion chamber | Cleaning |
| Running parts worn | Check and replace | |
| Motor stops during operation | ||
| Description | Cause | Measure |
| Sudden stop | Piston damaged | Machining cylinders, replacing piston rings |
| Short circuit on the spark plug | Cleaning | |
| Fault in the ignition solenoid | Have it checked | |
| Gradual stop | Lack of fuel | Refuel |
| Carburetor dirty | Cleaning | |
| Fuel with water | Replace | |
28. ACCESSORIES AND SPARE PARTS
Only use original accessories and spare parts to ensure the safety and proper functioning of the device. Further information can be found at www.FUXTEC.com.
29. GENERAL DESCRIPTION
Item number: FX-LBP185TPRO
Article description: FUXTEC petrol leaf blower FX-LBP185TPRO (backpack)
30. TECHNICAL DATA
| Type | Specification |
| Engine type | Petrol |
| Design | Single-cylinder, air-cooled, 2-stroke petrol engine |
| Fuel | A mixture of petrol and 2-stroke engine oil in a ratio of 30:1 |
| Displacement | 85 cm ^3 |
| Rated speed | 7300 rpm |
| Power output | 4.0 kW |
| Carburetor | Throttle valve carburetor |
| Ignition system | Electronic, contactless |
| Starting system | Recoil starter |
| Air volume | 0.45 m ^3 /s |
| Air speed | 95 m/s |
| Idle speed | 3000 rpm |
| Maximum engine speed | 7500 rpm |
| Sound pressure level LpA | 105 dB (A) |
| Measured sound power level LWA | 109.7 dB (A) |
| Guaranteed sound power level LWA | 112 dB (A) |
| Fuel consumption | 2.9 L/h |
| Measured air volume flow rate | 0.45 m ^3 /s |
| Blower function | Yes |
| Vibration at handle | 2 m/s ^2 |
| Fuel tank capacity | 4.2 liters |
| Exhaust emissions | 550 g/kWh |
| Net weight | 10.5 kg |
| Dimensions LWH | 1550x550x510 mm |
31. WARRANTY
The warranty period begins on the date of purchase. Please keep the proof of purchase carefully as evidence. The warranty does not cover wearing parts and does not apply to damage caused by improper use, improper handling, the use of force, technical modifications, the use of unauthorized accessories or spare parts or repair attempts by unauthorized persons. Warranty work may only be carried out by authorized specialist companies or service partners. These conditions apply in addition
to the statutory warranty rights, which may be regulated differently depending on the country.
32. DISPOSAL
The packaging material consists mainly of recyclable materials. Please dispose of all packaging components in accordance with local waste separation regulations. By recycling the packaging, you are making a valuable contribution to environmental protection and the sustainable use of resources.
This product must not be disposed of with normal household waste. In accordance with the European Directive 2012/19/EU on Waste Electrical and Electronic Equipment (WEEE), the device must be handed over to an authorized collection point for waste electrical and electronic equipment at the end of its service life.
Proper disposal and recycling of materials helps to protect the environment and human health. For more information on return and disposal, please contact your local waste authority or the retailer where you purchased the product.
33. CUSTOMER SERVICE
If you have any questions regarding warranty, repair or spare parts, please contact:
FUXTEC GmbH
Kappstrasse 69
71083 Herrenberg
Herrenberg Germany
Phone: 070329560888
Note: Please do not send any returns or repairs to this address. For returns under warranty, please contact our customer service.
34. COPYRIGHT PROTECTION
All rights reserved. The contents of these instructions are protected by copyright. Their use is permitted within the scope of operation. Any other use or reproduction is not permitted without the written consent of FUXTEC GmbH. FUXTEC GmbH reserves the right to make changes to these operating instructions without prior communication.
VERSION FRANÇAISE
35. INTRODUCTION ET SÉCURITÉ
Remarques générales
natural_image
Technical line drawing of a mechanical device with internal components and hoses (no text or symbols)natural_image
Close-up of two black athletic belt buckle clips with a red arrow pointing to one (no text or symbols visible)40. INSTRUCTIONS D'UTILISATION
natural_image
Close-up of a black and orange industrial device component (no visible text or symbols)natural_image
Two black and orange handheld device handles, one with a cat icon and the other with 'ON' and 'OUT' labels (no readable text beyond symbols)Arrêter le moteur
natural_image
Close-up of a black handle attached to an orange surface (no text or symbols visible)natural_image
Technical line drawing of a mechanical assembly with internal components and hoses (no text or symbols)natural_image
Close-up of two black mechanical components with a red arrow pointing to one (no visible text or symbols)57. ISTRUZIONI PER L'USO
natural_image
Close-up of an orange and black industrial device with ventilation grilles (no visible text or symbols)natural_image
Close-up of two black and orange handheld device handles with control buttons labeled 'ON' and 'OET' (no additional text or symbols visible)Spegnere il motore
natural_image
Close-up of a black handle against an orange background (no text or symbols visible)62. ACCESSORI E RICAMBI
natural_image
Technical line drawing of a mechanical assembly with hoses and components (no text or symbols)Aflojar las bandas
natural_image
Close-up of two black athletic belt buckle clips with a red arrow pointing to the clip (no text or symbols visible)74. INSTRUCCIONES DE USO
Transporte del aparato
natural_image
Close-up of an orange industrial machine with black components and ventilation slots (no visible text or symbols)natural_image
Close-up of a black and orange handheld tool with white animal icons (no text or symbols visible)
natural_image
Close-up of a black handheld device with red control buttons labeled 'ON' and 'OFF', no readable text or symbols beyond labels.Apagar el motor
natural_image
Close-up of a black mechanical component against an orange background (no text or symbols visible)natural_image
Technical line drawing of a mechanical device with internal components and hoses (no text or symbols)natural_image
Close-up of two mechanical components with a red arrow pointing to a detail (no visible text or symbols)natural_image
Close-up of an orange and black industrial device with ventilation grilles (no visible text or symbols)natural_image
Two black and orange handheld devices side by side, one with a white animal icon and the other labeled 'ON' and 'OET' (no additional text or symbols visible)natural_image
Close-up of a black handle against an orange background (no text or symbols visible)natural_image
Technical line drawing of a mechanical assembly with internal components and hoses (no text or symbols)natural_image
Close-up of two black athletic belt buckle clips with a red arrow pointing to one (no text or symbols visible)108. BEDIENINGSINSTRUCTIES
natural_image
Close-up of a black and orange industrial machine component (no visible text or symbols)natural_image
Close-up of a black and orange handheld tool with white animal icons (no text or symbols visible)
natural_image
Close-up of a black handheld device with red control buttons labeled 'ON' and 'OFF' (no additional text or symbols visible)natural_image
Close-up of a black handle attached to an orange surface (no text or symbols visible)Na lege tank (ontluchtingsleiding)
122. SYMBOLER SOM VISAS PÅ PRODUKTEN
natural_image
Technical line drawing of a mechanical assembly with hoses and components (no text or symbols)natural_image
Close-up of two black mechanical components with a red arrow pointing to a detail (no text or symbols visible)125. BRUKSANVISNING
⚠ Varning - Brandfara

natural_image
Close-up of a black and orange industrial device component (no visible text or symbols)natural_image
Two black and orange handheld device handles with control buttons, shown from side by side (no text or symbols visible)natural_image
Close-up of a black mechanical component against an orange background (no text or symbols visible)e-post: info@fuxtec.de
natural_image
Technical line drawing of a mechanical assembly with hoses and components (no text or symbols)natural_image
Close-up of two mechanical components with a red arrow pointing to a specific part (no visible text or symbols)142. INSTRUKCJA OBSŁUGI
natural_image
Close-up of an orange and black industrial machine component with ventilation grilles (no visible text or symbols)natural_image
Close-up of a black and orange handheld tool with white animal icons (no text or symbols visible)
natural_image
Close-up of a black and red handheld device with 'ON' and 'OFF' labels, no readable text or symbols beyond the control buttons.Wyłącz silnik
natural_image
Close-up of a black mechanical component against an orange background (no text or symbols visible)www.fuxtec.com | info@fuxtec.com

www.FUXTEC.com