
C-PS100-X - Hedge Trimmers SCHEPPACH - Free user manual and instructions
Find the device manual for free C-PS100-X SCHEPPACH in PDF.


| Brand | Scheppach |
| Model | C-PS100-X |
| Product type | Cordless garden saw (chainsaw) |
| Rated voltage | 20 V |
| Bar type | JHC 5" CB05-28-43P |
| Chain type | JHC 030.043.28 |
| Max cutting speed | 4.8 m/s |
| Max cutting length | 127 mm |
| Chain gauge | 0.30" |
| Drive link thickness | 0.043" (1.09 mm) |
| Weight without bar and chain | 1.2 kg |
| Weight with battery | 1.79 kg |
| Sound pressure level (L_pA) | 82.5 dB (uncertainty 3 dB) |
| Sound power level (L_WA) | 90.5 dB (uncertainty 2 dB) |
| Vibration (hand-arm vibrations) | <2.5 m/s² (uncertainty 1.5 m/s²) |
| Power supply | 20 V lithium-ion battery (IXES series) |
| Hand guard | Front and rear |
| Command lockout | Yes, on front handle |
| Lubrication | Manual with included oil bottle |
| Storage temperature | 5 to 30 °C |
| Intended use | Sawing wood and branches outdoors (diameter ≤ cutting length) |
Frequently Asked Questions - C-PS100-X SCHEPPACH
User questions about C-PS100-X SCHEPPACH
0 question about this device. Answer the ones you know or ask your own.
Ask a new question about this device
Download the instructions for your Hedge Trimmers in PDF format for free! Find your manual C-PS100-X - SCHEPPACH and take your electronic device back in hand. On this page are published all the documents necessary for the use of your device. C-PS100-X by SCHEPPACH.
USER MANUAL C-PS100-X SCHEPPACH
natural_image
Technical line drawing of a mechanical device with no visible text or symbols
Made in P.R.C.
C-PS100-X
GB Battery-powered cordless pruning saw | Translation of the original operating instructions 20
natural_image
Technical diagram showing a mechanical joint or bracket with a highlighted section (no text or symbols)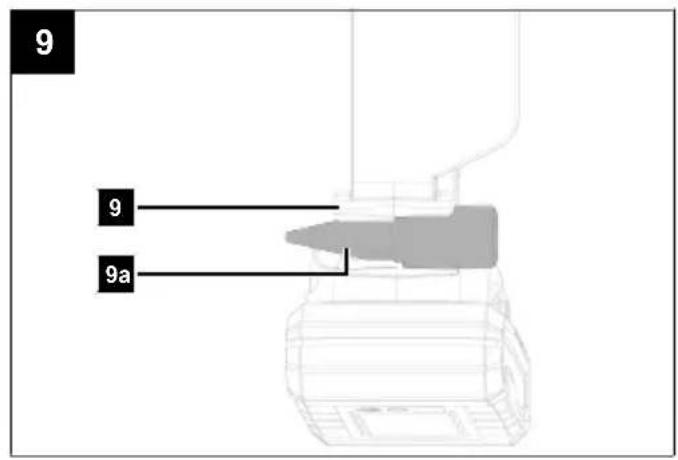
Inhaltsverzeichnis
Günzburger Straße 69
D-89335 Ichenhausen
Verehrter Kunde
Günzburger Straße 69
D-89335 Ichenhausen
Division Manager Product Center
Andreas Pecher
Head of Project Management
Table of contents
1 Introduction 21
2 Product description (Fig. 1-9).... 21
3 Scope of delivery (Fig. 1) 21
4 Proper use.... 21
5 Safety instructions.... 22
6 Technical data.... 25
7 Unpacking 25
8 Before commissioning.... 25
9 Operation 27
10 Working instructions.... 27
11 Cleaning.... 28
12 Maintenance.... 28
13 Storage and transport 30
14 Repair and ordering spare parts 30
15 Disposal and recycling 30
16 Troubleshooting 31
17 Warranty conditions - Scheppach 20V IXES series .... 31
18 EU Declaration of Conformity.... 33
19 Exploded view.... 364
Explanation of the symbols on the product
Symbols are used in this manual to draw your attention to potential hazards. The safety symbols and the accompanying explanations must be fully understood. The warnings themselves will not rectify a hazard and cannot replace proper accident prevention measures.
| Before commissioning, read and observe the operating manual and safety instructions! | |
| Attention! Failure to observe the safety signs and warning information affixed to the product and failure to observe the safety and operating manual can result in serious injury or even death. | |
| Wear safety goggles. | |
| Wear hearing protection. | |
| Always wear a safety helmet! | |
| Wear safety gloves! |
 | Wear sturdy footwear! |
 | It is important to wear protective clothing for hands, forearms, legs and feet. |
 | Installation direction of the saw chain |
 | Do not expose the product to rain. The product may only be stationed, stored and operated in dry ambient conditions. |
 | Always hold the product firmly with both hands. |
 | Do not use the product one-handed. |
 | Cordless pruning saw must be placed upright!Do not lie down! |
 | Weight kg. |
 | Blade length |
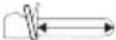 | Cutting length |
 | Warning! Risk of kick-back.Beware of the kick-back of the product and avoid making contact with the rail tip. |
 | Only carry out maintenance, modification, adjustment and cleaning work when the motor is switched off and the battery is removed. |
 | Switch lock |
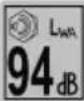 | Guaranteed sound power level of the product. |
 | Lithium-ion battery |
 | The product complies with the applicable European directives. |
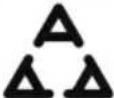 | The product complies with the applicable Serbian directives. |
1 Introduction
Manufacturer:
Scheppach GmbH
Günzburger Straße 69
D-89335 Ichenhausen
Dear Customer
We hope your new product brings you much enjoyment and success.
Note:
In accordance with the applicable product liability laws, the manufacturer of this product assumes no liability for damage to the product or caused by the product arising from:
- Improper handling
• Non-compliance with the operating manual
• Repairs carried out by third parties, unauthorised specialists
• Installing and replacing non-original spare parts - Improper use
- Failures of the electrical system in the event of the electrical regulations and VDE provisions 0100, DIN 57113 / VDE0113 not being observed.
Note:
The operating manual is part of this product.
It includes important instructions for the safe, proper and economic operation of the product, for avoiding danger, for minimising repair costs and downtimes and for increasing the reliability and extending the service life of the product. In addition to the safety instructions in this operating manual, you must also observe the regulations applicable to the operation of the product in your country.
Familiarise yourself with all operating and safety instructions before using the product. Only operate the product as described and for the specified areas of application. Keep the operating manual in a good place and hand over all documents when passing the product on to third parties.
2 Product description (Fig. 1-9)
- Front hand guard
- Screw for chain tensioning system
- Chain cover
- Front handle
- Switch lock
- On/off switch
- Rear handle
- Battery mount
- Oil bottle holder
9a. Oil bottle - Rear hand guard
- Saw chain
- Guide bar
- Spring tensioner
- Chain wheel
- Battery*
- Release button (battery)
- Guide bar and chain guard
* = not included in the scope of delivery!
3 Scope of delivery (Fig. 1)
Item QuantityDesignation
9a. 1 x Oil bottle (empty)
11. 1 x Saw chain (pre-fitted)
12. 1 x chainsaw guide bar (pre-fitted)
17. 1 x Guide bar and chain guard (pre-fitted)
1 x Battery-powered cordless pruning saw
1 x Operating manual
4 Proper use
The product may be used for sawing wood and branches outdoors, up to a diameter corresponding to the cutting length of the guide rail.
The product is not intended for felling trees or for any other type of use (e.g. cutting masonry, plastic, stone, metal, food or wood containing foreign objects such as nails or screws).
The product must be held by the handle with the right hand and by the grip surface with the left hand.
The product may only be used in the intended manner. Any use beyond this is improper. The user, not the manufacturer, is responsible for damages or injuries of any type resulting from this.
An element of the intended use is also the observance of the safety instructions, as well as the assembly instructions and operating information in the operating manual.
Persons who operate and maintain the product must be familiar with the manual and must be informed about potential dangers.
The liability of the manufacturer and resulting damages are excluded in the event of modifications of the product.
The product may only be operated with original parts and original accessories from the manufacturer.
The safety, operating and maintenance specifications of the manufacturer, as well as the dimensions specified in the technical data, must be observed.
Please note that our products were not designed with the intention of use for commercial or industrial purposes. We assume no guarantee if the product is used in commercial or industrial applications, or for equivalent work.
Explanation of the signal words in the operating manual

DANGER
Signal word to indicate an imminently hazardous situation which, if not avoided, will result in death or serious injury.

WARNING
Signal word to indicate a potentially hazardous situation which, if not avoided, could result in death or serious injury.

CAUTION
Signal word to indicate a potentially hazardous situation which, if not avoided, could result in minor or moderate injury.
ATTENTION
Signal word to indicate a potentially hazardous situation which, if not avoided, could result in product or property damage.
5 Safety instructions
WARNING
Read all safety warnings, instructions, illustrations and specifications provided with this power tool.
Failure to follow all instructions listed below may result in electric shock, fire and/or serious injury.
Save all warnings and instructions for future reference.
The term "power tool" in the warnings refers to your mains-operated (corded) power tool or battery-operated (cordless) power tool.
1) Work area safety
a) Keep your work area clean and well-lit. Cluttered or dark areas invite accidents.
b) Do not operate power tools in explosive atmospheres, such as in the presence of flammable liquids, gases or dust. Power tools create sparks which may ignite the dust or fumes.
c) Keep children and bystanders away while operating a power tool. Distractions can cause you to lose control.
2) Electrical safety
a) The connection plug of the electric tool must fit into the socket. Never modify the plug in any way. Do not use any adapter plugs with earthed (grounded) power tools. Unmodified plugs and matching outlets will reduce risk of electric shock.
b) Avoid body contact with earthed or grounded surfaces, such as pipes, radiators, ranges and refrigerators. There is an increased risk of electric shock if your body is earthed or grounded.
c) Do not expose power tools to rain or wet conditions. Water entering a power tool will increase the risk of electric shock.
d) Do not abuse the cord. Never use the cord for carrying, pulling or unplugging the power tool. Keep cord away from heat, oil, sharp edges or moving parts. Damaged or entangled cords increase the risk of electric shock.
e) When operating a power tool outdoors, use an extension cord suitable for outdoor use. Use of a cord suitable for outdoor use reduces the risk of electric shock.
f) If operating a power tool in a damp location is unavoidable, use a residual current device (RCD) protected supply. Use of an RCD reduces the risk of electric shock.
3) Personal safety
a) Stay alert, watch what you are doing and use common sense when operating a power tool. Do not use a power tool while you are tired or under the influence of drugs, alcohol or medication. A moment of inattention while operating power tools may result in serious personal injury.
b) Wear personal protective equipment and always safety goggles. Protective equipment such as a dust mask, non-skid safety shoes, safety helmet or hearing protection used for appropriate conditions will reduce personal injuries.
c) Prevent unintentional starting. Ensure the switch is in the off-position before connecting to power source and/or rechargeable battery, picking up or carrying the tool. Carrying power tools with your finger on the switch or energising power tools that have the switch on invites accidents.
d) Remove any adjusting tools or spanners/keys before turning the power tool on. A wrench or a key left attached to a rotating part of the power tool may result in personal injury.
e) Avoid abnormal postures. Keep proper footing and balance at all times. This enables better control of the power tool in unexpected situations.
f) Wear suitable clothing. Do not wear loose clothing or jewellery. Keep your hair and clothing away from moving parts. Loose clothes, jewellery or long hair can be caught in moving parts.
g) If devices are provided for the connection of dust extraction and collection facilities, ensure these are connected and properly used. Use of dust extraction can reduce dust-related hazards.
h) Do not let familiarity gained from frequent use of tools allow you to become complacent and ignore tool safety principles. A careless action can cause severe injury within a fraction of a second.
4) Power tool use and care
a) Do not force the power tool. Use the correct power tool for your application. The correct power tool will do the job better and safer at the rate for which it was designed.
b) Do not use the power tool if the switch does not turn it on and off. Any power tool that cannot be controlled with the switch is dangerous and must be repaired.
c) Disconnect the plug from the power source and/or remove the battery pack, if detachable, from the power tool before making any adjustments, changing accessories, or storing power tools. Such precautionary measures reduce the risk of starting the power tool accidentally.
d) Store idle power tools out of the reach of children and do not allow persons unfamiliar with the power tool or these instructions to operate the power tool. Power tools are dangerous in the hands of untrained users.
e) Maintain power tools and attachments. Check for misalignment or binding of moving parts, breakage of parts and any other condition that may affect the power tool's operation. If damaged, have the power tool repaired before use. Many accidents are caused by poorly maintained power tools.
f) Keep cutting tools sharp and clean. Properly maintained cutting tools with sharp cutting edges are less likely to bind and are easier to control.
g) Use electric tools, insertion tools, etc. according to these instructions. Take into account the working conditions and the work to be performed. Use of the power tool for operations different from those intended could result in a hazardous situation.
h) Keep handles and grasping surfaces dry, clean and free from oil and grease. Slippery handles and grasping surfaces do not allow for safe handling and control of the tool in unexpected situations.
5) Battery tool use and care
a) Only charge the batteries with battery chargers recommended by the manufacturer. A battery charger that is suitable for a particular type of battery poses a fire hazard when used with other batteries.
b) Only use the batteries in power tools that are designed for them. The use of other batteries can lead to injuries and a risk of fire.
c) Keep the unused battery away from paper clips, coins, keys, nails, screws or other small metal objects that could cause a short-circuit between the contacts. A short-circuit between the contacts of the battery could result in burns or fires.
d) Liquid may leak from the battery if used incorrectly. Avoid contact with it. In case of accidental contact, rinse with water. If the liquid gets into your eyes, seek additional medical attention. Leaking battery fluid may cause skin irritation or burns.
e) Do not use a damaged or modified battery. Damaged or modified batteries can behave unpredictably and cause fire, explosion or injury.
f) Do not expose a battery to fire or excessive temperatures. Fire or temperatures above 130°C may cause an explosion.
g) Follow all charging instructions and never charge the battery or rechargeable tool outside the temperature range specified in the operating manual. Incorrect charging or charging outside the approved temperature range can destroy the battery and increase the risk of fire.
6) Service
a) Only have your power tool repaired by qualified specialists and only with original spare parts. This will ensure that the safety of the power tool is maintained.
b) Never attempt to service damaged batteries. Any type of battery maintenance shall be carried out only by the manufacturer or an authorised customer service centre.
Safety instructions for pruning saw
a) Keep all body parts away from the saw chain when the saw is running. Before starting the pruning saw, ensure that the saw chain is not touching anything. When working with a chainsaw, a moment of carelessness can result in clothing or body parts being caught by the saw chain.
b) Always hold the chainsaw with your right hand on the rear handle and your left hand on the front handle. Holding the chainsaw using the opposite grip increases the risk of injuries and shall be avoided at all times.
c) Only hold the chainsaw by the insulated gripping surfaces, as the saw chain could hit hidden power lines or its own mains cable. Contact between the saw chain and a live power line can also electrify metal device parts and lead to an electric shock.
d) Wear eye protection. Further protective equipment for hearing, head, hands, legs and feet is recommended. Suitable protective clothing reduces the risk of injury from flying chips and accidental contact with the saw chain.
e) Do not work with the chainsaw in a tree, on a ladder, or from a roof or an unstable standing surface. There is a serious risk of injury if operated in such a manner.
f) Always make sure you have a firm footing and only use the chainsaw when standing on firm, safe and level ground. Slippery ground or unstable standing surfaces can cause loss of balance or loss of control of the chainsaw.
g) When cutting a branch that is under tension, expect it to spring back. If the tension in the wood fibres is released, the tensioned branch can hit the operator and/or wrest the chainsaw from control.
h) Be especially careful when cutting undergrowth and young trees. The thin material can get caught in the saw chain and hit you or throw you off balance.
i) Carry the chainsaw by the front handle when switched off, with the saw chain facing away from your body. Always put the protective cover on when transporting or storing the chainsaw. Careful handling of the chainsaw reduces the likelihood of accidental contact with the running saw chain.
j) Follow the instructions for lubrication, chain tensioning and replacing the guide bar and chain. An improperly tensioned or lubricated chain can break or increase the risk of kick-back.
k) Only saw wood. Do not use the chainsaw for work for which it is not intended. Example: Do not use the electric chainsaw to saw metal, plastic, brickwork or building materials other than wood. Using the chainsaw for unintended work can cause dangerous situations.
I) This chainsaw is not suitable for felling trees. Using the chainsaw for work other than that for which it is intended may result in serious injury to the user or other persons.
Causes and avoidance of kickback
Kickback can arise if the tip of the guide rail touches an object or if the wood bends and the saw chain jams in the cut.
Touching with the rail tip can sometimes lead to an unexpected backward reaction, whereby the guide rail whips up and in the direction of the user.
If the saw chain jams on the top edge of the guide rail, the rail can jerk back in the direction of the user suddenly.
Each of these reactions can lead to you losing control of the saw and possibly suffering a serious injury. Never rely solely on the safety equipment integrated in the chainsaw. As the chainsaw user, you should implement various measures to work without a risk of accidents and injuries.
Kickback is the result of incorrect use or misuse of the cordless chainsaw. It can be prevented by suitable precautionary measures, as described in the following:
a) Hold the saw firmly with both hands, with the thumbs and fingers enclosing the chainsaw handles. Bring your body and arms into a position in which you can absorb the kickback forces. If suitable measures are implemented, the user will be able to withstand the kickback forces. Never let go of the chainsaw.
b) Avoid an unusual body stance and never saw above shoulder height. This will help to avoid unintentional contact with the rail tip, and enable improved control of the chainsaw in unexpected situations.
c) Always use replacement guide rails and saw chains prescribed by the manufacturer. Incorrect replacement rails and saw chains may cause the chain to break and/or lead to kick-back.
d) Adhere to the instructions of the manufacturer when sharpening and maintaining the saw chain. If the depth limiter is too low, this increases the tendency towards kickback.
Additional safety instructions
- Carefully follow the maintenance, inspection and service instructions in this operating manual. Damaged protective devices and parts must be repaired properly or replaced by our service centre unless otherwise specified in the operating manual.
• We recommend that a person using the tool for the first time should at least practice by cutting logs on a sawhorse or stand. - Always stand above the tree trunk when sawing on slopes. In order to maintain full control at the moment of "cutting all the way through", reduce the pressing force towards the end of the cut, without loosening your firm grip of the handles of the product. Ensure that the saw chain does not come into contact with the ground. After completing the cut, wait for the product to stop before removing the product.
Always switch off the engine of the product and remove the battery before moving from tree to tree.
- Dirt, stones, loose bark, nails, staples and wire must be removed from the tree.
- Do not use accessories that are not recommended by the manufacturer. This can lead to electric shock or fire.
Residual risks
The product has been built according to state-of-the-art and the recognised technical safety rules. However, individual residual risks can arise during operation.
- Damage to hearing if the stipulated hearing protection is not worn.
- Residual risks can be minimised if the "Safety Instructions" and the "Intended Use" together with the operating manual as a whole are observed.
- Use the product in the way that is recommended in this operating manual. This is how to ensure that your product provides optimum performance.
• Furthermore, despite all precautions having been met, some non-obvious residual risks may still remain.

WARNING
This power tool generates an electromagnetic field during operation. This field can impair active or passive medical implants under certain circumstances. In order to prevent the risk of serious or deadly injuries, we recommend that persons with medical implants consult with their physician and the manufacturer of the medical implant prior to operating the power tool.

WARNING
In case of extended working periods, the operating personnel may suffer circulatory disturbances in their hands (vibration white finger) due to vibrations.
Raynaud's syndrome is a vascular disease that causes the small blood vessels on the fingers and toes to cramp in spasms. The affected areas are no longer supplied with sufficient blood and therefore appear extremely pale. The frequent use of vibrating products can cause nerve damage in people whose circulation is impaired (e.g. smokers, diabetics).
If you notice unusual adverse effects, stop working immediately and seek medical advice.
ATTENTION
The product is part of the 20V IXES series and may only be operated with batteries of this series. Batteries may only be charged with battery chargers of this series. Observe the manufacturer's instructions.

WARNING
Follow the safety and charging instructions and correct usage given in the instruction manual of your 20V IXES Series battery and charger. A detailed description of the charging process and further information are provided in this separate manual.
6 Technical data
| Rated voltage 20 V |
| Type of guide bar (pre-fitted) JHC 5" CB05-28-43P |
| Type of saw chain (pre-fitted) JHC 030,043.28 |
| Max. cutting speed 4.8 m/s |
| Max. cutting length 127 mm |
| Chain pitch 0.30" |
| Driving link thickness 0.043"/1.09 mm |
| Chain wheel tooth pitch 7T / 7.62 mm (0.3") |
| Weight (without set of blade and saw chain) 1.2 kg |
| Weight (with battery) 1.79 kg |
Subject to technical changes!
Noise and vibration

WARNING
Noise can have serious effects on your health. If the machine noise exceeds 85 dB, please wear suitable hearing protection for you and persons in the vicinity.
The noise and vibration values have been determined in accordance with EN 62841-1.
Noise data
| Sound pressure L_pA | 82.5 dB |
| Measurement uncertainty K_pA | 3 dB |
| Sound power L_wA | 90.5 dB |
| Measurement uncertainty K_wA | 2 dB |
Vibration parameters (hand/arm vibration)
| Vibration ah | <2.5 m/s2 |
| Measurement uncertainty K 1.5 m/s | 2 |
The total vibration emission values specified and the device emissions values specified have been measured in accordance with a standardised test procedure and can be used for comparison of one electric tool with another.
The total noise emission values specified and the total vibration emission values specified can also be used for an initial estimation of the load.

WARNING
The noise emission values and vibration emission value can vary from the specified values during the actual use of the power tool, depending on the type and the manner in which the electric tool is used, and in particular the type of workpiece being processed.
Try to keep the stress as low as possible. For example: Limit working time. In doing so, all parts of the operating cycle must be taken into account (such as times in which the power tool is switched off or times in which it is switched on, but is not running under a load).
7 Unpacking

WARNING
The product and the packaging material are not children's toys!
Do not let children play with plastic bags, films or small parts! There is a danger of choking or suffocating!
- Open the packaging and carefully remove the product.
- Remove the packaging material, as well as the packaging and transport safety devices (if present).
- Check whether the scope of delivery is complete.
- Check the product and accessory parts for transport damage. Immediately report any damage to the transport company that delivered the Product. Later claims will not be recognised.
- If possible, keep the packaging until the expiry of the warranty period.
- Familiarise yourself with the product by means of the operating manual before using for the first time.
- With accessories as well as wearing parts and replacement parts use only original parts. Spare parts can be obtained from your specialist dealer.
- When ordering please provide our article number as well as type and year of manufacture for the product.
8 Before commissioning

DANGER
Danger of injury!
If an incompletely assembled product is used, serious injuries can be caused.
- Do not use the product until it has been fully fitted.
- Before each use, carry out a visual inspection to check that the product is complete and does not contain any damaged or worn components. Safety and protective devices must be intact.

WARNING
Danger of injury!
Remove the battery from the power tool before carrying out any work on the power tool (e.g. maintenance, tool change, etc.) and when transporting and storing it. There is a risk of injury if the on/off switch is operated unintentionally.

WARNING
Danger of injury when handling the saw chain or the blade!
- Wear cut-resistant gloves.
Note:
- The chainsaw guide bar and the chain are already pre-fitted for packaging and transport reasons.
- A new saw chain stretches and needs to be re-tensioned more often. Check and adjust the chain tension regularly after each cut.
- Only use saw chains and blades designed for this product.
8.1 Fit/remove the chainsaw guide bar (12) and saw chain (11) (Fig. 2)
We recommend that you check the product and all accessories for tightness before using them for the first time and refit them if necessary.
- Place the product on a level, even surface.
- Turn the screw (2) for the chain tensioning system anti-clockwise to slacken the chain tension and remove the chain cover (3).
- Remove the guide bar (12) and the saw chain (11).
- Lay out the saw chain (11) in a loop so that the cutting edges are aligned clockwise. To align the saw chain (11), follow the symbols (arrows) on the saw chain or above the chain wheel (14).
- Place the saw chain (11) in the groove of the chain-saw guide bar (12).
- For assembly, hold the chainsaw guide bar (12) swivelled upwards at an angle of approx. 45 degrees to make it easier to feed the saw chain (11) into the groove of the chainsaw guide bar (12).
- Remove the chainsaw guide bar (12) and the saw chain (11) on the spring tensioner (13).
- Press the chainsaw guide bar (12) with the saw chain (11) down to slip the saw chain (11) over the sprocket (14).
- When the saw chain (11) is released, it will be automatically tensioned.
- Fit the chain cover (3) back on.
- Turn the screw for the chain tensioning system (2) clockwise until hand tight.
- Check the seating of the saw chain (11) again and tighten the screw (2) for the chain tensioning system and the chain cover (3).
8.2 Tensioning the saw chain (11) (Fig. 2)
WARNING
Risk of injury from the saw chain jumping off!
An insufficiently tensioned saw chain can come off during operation and cause injuries.
- Check the saw chain tension frequently.
- The chain tension is too low if the drive links come out of the groove on the underside of the guide rail.
-
Adjust the tension of the saw chain properly if the saw chain tension is too low.
-
The product is equipped with a saw chain quick clamping system. The saw chain (11) is automatically tensioned by the spring tensioner (13) fitted to the product. The rotating saw chain (11) is guided over the groove on the chainsaw guide bar (12).
The chain tension and chain lubrication have a considerable influence on the service life of the saw chain.
The saw chain is correctly tensioned when it does not sag on the chainsaw guide bar and can be pulled all the way round with a gloved hand. When pulling on the saw chain with 9 N (approx. 1 kg) tractive force, the saw chain and chainsaw guide bar must not be more than 2 mm apart.
Note:
- A new saw chain tends to loosen for a certain time after installation. Therefore, check the saw chain tension from time to time before use.
- The tensioning of the saw chain should be carried out in a clean place free from sawdust and the like.
- Correct tensioning of the saw chain is for the safety of the user and reduces or prevents wear and chain damage.
- We recommend that the user check the chain tension before starting work for the first time. The saw chain is correctly tensioned when it does not sag on the underside of the guide bar and can be pulled all the way round with a gloved hand.
- If the saw chain sags or the spring tensioner is defective, contact a specialist workshop.
ATTENTION
When working with the saw, the saw chain heats up and expands slightly as a result. This "stretching" is to be expected especially with new saw chains.
8.3 Lubricating the saw chain
(Fig. 1, 3, 9)
The chain tension and chain lubrication have a considerable influence on the service life of the saw chain.
The oil bottle (9a) can be stored in the oil bottle holder (9).
Note:
- Use saw chain oil that contains additives to reduce friction and wear or organic saw chain oil.
- For cutting trees, use organic saw chain oil. Mineral oil can damage trees.
- Clean the chainsaw guide bar and the saw chain to remove dirt, sawdust and old oil residues. (See 11)
-
Ensure that the saw chain is tensioned but not too tight. (See 8.2)
-
Hold the oil bottle (9a) at a slight angle so that the oil can flow into the links of the saw chain (11).
- Apply the oil along the saw chain (11) while turning the saw chain (11) by hand. Start at the lower part of the chainsaw guide bar (12). Ensure that the oil gets into the joints and links of the saw chain (11).
- Apply the oil to both sides of the saw chain (11). Use a brush* to distribute the oil evenly.
- Check that the saw chain (11) is evenly oiled.
- Wipe up any spilled oil carefully immediately and dispose of the cloth* according to local regulations.
* = not included in the scope of delivery!
8.4 Inserting/removing the battery (15) into/from the battery mount (8) (Fig. 4)

CAUTION
Danger of injury!
Do not insert the battery until the battery-powered tool is ready for use.
Inserting the battery
- Push the battery (15) into the battery mount (8). The battery (15) clicks into place audibly.
Removing the battery
- Press the unlock button (16) of the battery (15) and remove it from the battery mount (8).
9 Operation
ATTENTION
Always make sure the product is fully assembled before commissioning!
ATTENTION
Make sure that the ambient temperature does not exceed 50°C and does not fall below -20°C during work.
ATTENTION
The product is part of the 20V IXES series and may only be operated with batteries of this series. Batteries may only be charged with battery chargers of this series. Observe the manufacturer's instructions.

DANGER
Danger of injury!
If the product is jammed, do not try to pull the product out by using force.
- Switch off the engine.
- Use a lever arm or wedge to get the product free.
9.1 Hold and guide product

WARNING
Danger of injury due to kickback!
- Never use the product one-handed!

WARNING
Danger of injury!
- Never use the product without the front hand guard!
9.1.1 Front and rear hand guards (1, 10) (Fig. 1)
- The front hand guard (1) and the rear hand guard (10) protect the fingers from injuries caused by contact with the saw chain (11) if it breaks due to overloading.
- The rear hand guard (10) also protects the hand from branches and twigs.
- Before each start-up, check the functionality of the front handle guard (1). Keep front and rear hand guard (1, 10) clean to ensure proper functioning.
9.2 Switching the product on/off and operating it (Fig. 1, 5, 6)
Switching on
- Pull the blade and chain guard (17) off the chainsaw guide bar (12).
- Hold the front handle (4) with your right hand and the rear handle (7) with your left hand. Thumb and fingers must firmly grasp the handles (4, 7).
- Bring your body and arms into a position in which you can absorb the kickback forces.
- Press the switch-on lock (5) on the front handle (4) with your thumb.
- Press and hold the switch lock (5).
- To switch on the product, push the on/off switch (6).
- Release the switch lock (5).
Note:
It is not necessary to keep the switch lock pressed after starting the product. The switch lock is intended to prevent accidental starting of the product.
Switching off
- To switch it off, simply release the on/off switch (6).
- Put on the supplied guide bar and chain guard (17) after each instance of working with the product.
10 Working instructions
Notes:
Before switching on, make sure that the product does not touch any objects.
- Avoid abnormal postures. Keep proper footing and balance at all times. This enables better control of the power tool in unexpected situations.
- You have better control when you saw with the underside of the bar (with a pulling chain).
- The saw chain must not touch the ground or any other object during or after sawing.
- Ensure that the saw chain does not become jammed in the saw cut. The branch must not break or splinter.
- Also observe the precautions against kick-back (see safety instructions).
• Always stand above the branch when sawing on slopes. Ensure that the saw chain does not come into contact with the ground. After completing the cut, wait for the saw chain to stop before removing the product.
10.1 Sawing techniques
10.1.1 Cutting to length
This is the sawing of felled tree trunks into small sections. If possible, the trunk should be underpinned and supported by branches, beams or wedges.
- Ensure that the saw chain does not come into contact with the ground when sawing.
- Make sure you have a good footing and stand above the trunk on sloping terrain. In order to maintain full control at the moment of "cutting all the way through", reduce the pressing force towards the end of the cut, without loosening your firm grip of the handles of the pruning saw.
• After completing the cut, wait for the saw chain to stop before removing the pruning saw. - Always switch off the cordless pruning saw's engine before switching from tree to tree.
10.1.1.1 Sawing on a metal work trestle
- Hold the product firmly with both hands and guide the product in front of your body while sawing.
- When cutting the wood, guide the product past the body on the right. Watch out for the falling wood.
- Position yourself so that the severed branch does not pose a hazard.
- Pay attention to your feet. The cut wood could cause injuries if it falls.
• Make sure your body is balanced and that you have a secure stance.
10.1.2 Delimbing
WARNING
Danger of injury!
Many accidents happen during delimbing.
- Hold the product firmly with both hands and guide the product in front of your body while sawing.
- Do not lean too far forward during operation.
- Never saw off branches when standing on the tree trunk.
- Keep an eye on the kick-back area if branches are tensioned.
Delimbing is the term for removing branches and twigs from a tree.
- Remove supporting branches only after cutting to length.
- Tensioned branches must be sawn from the bottom upwards to prevent the product from jamming.
- When sawing off thicker branches, use the same technique as for cutting to length.
- Work to the left of the trunk and as close as possible to the product. If possible, let the weight of the product rest on the trunk.
- Change your position to cut branches on the other side of the trunk.
- Branched boughs are cut to length individually.
- When delimbing, leave larger downward branches that support the tree for the time being. Separate smaller branches with one cut.
11 Cleaning
WARNING
Have maintenance and repair tasks that are not described in this operating manual, carried out by a specialist workshop. Use only original spare parts.
There is a risk of accident! Always perform maintenance and cleaning work with the battery removed.
There is a danger of injury! Let the Product cool down before all maintenance and cleaning tasks. Elements of the engine are hot. There is a danger of injury and burning!
The product can start unexpectedly and cause injuries.
- Remove the battery.
- Allow the product to cool down.
- Remove the tool attachment.
WARNING
Danger of injury when handling the saw chain or the blade!
- Wear cut-resistant gloves.
- We recommend that you clean the product directly after every use.
- Use a brush or hand brush to clean the saw chain and no liquids.
- Keep handles and grasping surfaces dry, clean and free from oil and grease. Slippery handles and grasping surfaces do not allow for safe handling and control of the tool in unexpected situations.
- If necessary, clean the handles with a damp cloth washed in soapy water.
- Keep protective devices, air vents and the motor housing as free of dust and dirt as possible. Rub the product clean with a clean cloth* or blow it off with compressed air* at low pressure. We recommend that you clean the product directly after every use.
- Ventilation openings must always be free.
- Do not use any cleaning products or solvents; they could attack the plastic parts of the product. Make sure that no water can penetrate the product interior.
- Clean the groove of the chainsaw guide bar using a brush or compressed air.
- Clean the chain wheel and the spring tensioner.
12 Maintenance
12.1 Replacing the chainsaw guide bar (12) (Fig. 2)
- Switch the product off and remove the battery (15).
- Place the product on a level, even surface.
- Turn the screw (2) for the chain tensioning system and the chain cover (3) anti-clockwise to slacken the chain tension and remove the chain cover (3).
-
Remove the guide bar (12) and the saw chain (11).
-
For dismantling, hold the chainsaw guide bar (12) swivelled upwards at an angle of approx. 45 degrees to make it easier to remove the saw chain (11) from the groove of the guide bar.
- Replace the chainsaw guide bar (12) and fit the chain-saw guide bar (12) and saw chain (11) as described under 8.1.
12.2 Replace the saw chain (11) and allow it to run in (Fig. 2)

DANGER
Serious injuries possible due to tearing or jumping off of the sawtooth!
- Never fit a new saw chain on a worn sprocket or on a damaged or worn guide rail. The saw chain could jump off or break.
- Only use saw chains and blades designed for this product. - Before changing the saw chain, clean the groove of the guide bar, as the saw chain may jump out of the bar if it dirty. The deposits can also soak up the chain oil. The consequence would be that the chain oil does not reach the underside of the guide bar, or only to a small extent, and lubrication is reduced.
- Place the product on a level, even surface.
- Turn the screw (2) for the chain tensioning system anti-clockwise to slacken the chain tension and remove the chain cover (3).
- Remove the guide bar (12) and the saw chain (11).
- Lay out the saw chain (11) in a loop so that the cutting edges are aligned clockwise. To align the saw chain (11), follow the symbols (arrows) on the saw chain or above the chain wheel (14).
- Place the saw chain (11) in the groove of the chain-saw guide bar (12).
- For assembly, hold the chainsaw guide bar (12) swivelled upwards at an angle of approx. 45 degrees to make it easier to feed the saw chain (11) into the groove of the chainsaw guide bar (12).
- Remove the chainsaw guide bar (12) and the saw chain (11) on the spring tensioner (13).
- Press the chainsaw guide bar (12) with the saw chain (11) down to slip the saw chain (11) over the sprocket (14).
- When the saw chain (11) is released, it will be automatically tensioned.
- Fit the chain cover (3) back on.
- Turn the screw for the chain tensioning system (2) clockwise until hand tight.
- Check the seating of the saw chain (11) again and tighten the screw (2) for the chain tensioning system and the chain cover (3).
Note:
With a new saw chain, the tensioning force decreases after some time. Therefore, you must retension the saw chain after the first 5 cuts, or after 10 minutes of sawing at the latest.
12.3 Sharpening the saw chain (11)
WARNING
Increased risk of accidents due to an incorrectly sharpened saw chain!
Deviations from the dimensions of the cutting edge geometry during sharpening increase the risk of kickback of the product.
– Have the saw chain sharpened by a professional.
The saw chain can be resharpened at an authorised specialist workshop. Do not attempt to sharpen the saw chain yourself if you do not have a suitable tool and the necessary experience.
Notes:
A sharp saw chain ensures optimum cutting performance. It effortlessly eats through the wood, leaving behind large, long wood chips.
A saw chain is blunt if you have to push the cutting equipment through the wood and the wood chips are very small. With a very blunt saw chain, no chips are produced at all, only wood dust.
12.4 Checking the sprocket (14) (Fig. 2, 7)
- Place the product on a level, even surface.
- Turn the screw (2) for the chain tensioning system anti-clockwise to slacken the chain tension and remove the chain cover (3).
- Remove the guide bar (12) and the saw chain (11).
- Check the grooving on the chain wheel (14) with a test gauge (not included in the scope of delivery).
- If the grooves are deeper than a=0.5 mm, do not use the product and consult a specialist dealer. The chain wheel (14) must be replaced.
12.5 Checking the chainsaw guide bar (12) (Fig. 2, 8)
- Place the product on a level, even surface.
- Turn the screw (2) for the chain tensioning system anti-clockwise to slacken the chain tension and remove the chain cover (3).
- Remove the guide bar (12) and the saw chain (11).
-
Measure the groove depth of the chainsaw guide bar (12) with the scale on a file gauge (not included in scope of delivery).
-
The chainsaw guide bar (12) must be replaced if any of the following apply:
– The chainsaw guide bar is damaged.
- The measured groove depth is smaller than the minimum groove depth of the chainsaw guide bar (4 mm).
- The groove of the chainsaw guide bar has narrowed or spread.
13 Storage and transport
Store the product and its accessories in a dark, dry and frost-free place that is inaccessible to children.
The optimum storage temperature is between 5°C and 30°C.
Store the product in its original packaging.
Cover the product to protect it from dust or moisture.
Store the operating manual with the product.
13.1 Preparation for storage
- Attach the chain guide.
- Remove the battery.
- Empty the product completely.
- Clean and check the product for damage.
13.2 Transport

WARNING
Danger of injury!
Remove the battery from the power tool before carrying out any work on the power tool (e.g. maintenance, tool change, etc.) and when transporting and storing it. There is a risk of injury if the on/off switch is operated unintentionally.
- The product may only be transported on the handle provided for this purpose.
14 Repair and ordering spare parts
With this product, it is necessary to note that the following parts are subject to natural or usage-related wear, or that the following parts are required as consumables.
ATTENTION
According to the German Product Liability Act, no liability is accepted for damage caused by improper repairs or by not using original spare parts.
Such work should be performed by a customer service centre or an authorised specialists. The same applies to accessory parts.
Spare parts and accessories can be obtained from our Service Centre. To do this, scan the QR code on the front page.
14.1 Ordering spare parts
Please provide the following information when ordering spare parts:
- Model designation
- Item number
- Type plate data
Spare parts / accessories
| Chainsaw guide bar - Article no.: 7904201714 | |
| Saw chain - Article no.: 7904201715 | |
| Battery pack SBP2.0 - Article no.: 7909201708 | |
| Battery pack SBP4.0 - Article no.: 7909201709 | |
| Battery charger SBC2.4A - Article no.: 7909201710 | |
| Battery charger SBC4.5A - Article no.: 7909201711 | |
| Battery charger SDBC2.4A - Article no.: 7909201712 | |
| Battery charger SDBC4.5A - Article no.: 7909201713 | |
| StarterKit SBSK2.0 - Article no.: | 7909201720 |
| StarterKit SBSK4.0 - Article no.: | 7909201721 |
15 Disposal and recycling
Notes for packaging


The packaging materials are recyclable. Please dispose of packaging in an environmentally friendly manner.
Notes on the electrical and electronic equipment act (ElektroG)

Waste electrical and electronic equipment does not belong in household waste, but must be collected and disposed of separately!
- Used batteries or rechargeable batteries that are not installed permanently in the old device must be removed non-destructively before disposal! Their disposal is regulated by the battery act.
- Owners or users of electrical and electronic devices are legally obliged to return them after use.
- The end user is responsible for deleting their personal data from the old device being disposed of!
- The symbol of the crossed-out dustbin means that waste electrical and electronic equipment must not be disposed of with household waste.
- Waste electrical and electronic equipment can be handed in free of charge at the following places:
– Public disposal or collection points (e.g. municipal works yards)
- Points of sale of electrical appliances (stationary and online), provided that dealers are obliged to take them back or offer to do so voluntarily.
- Up to three waste electrical devices per type of device, with an edge length of no more than 25 centimetres, can be returned free of charge to the manufacturer without prior purchase of a new device from the manufacturer or taken to another authorised collection point in your vicinity.
- Further supplementary take-back conditions of the manufacturers and distributors can be obtained from the respective customer service.
- If the manufacturer delivers a new electrical device to a private household, the manufacturer can arrange for the free collection of the old electrical device upon request from the end user. Please contact the manufacturer's customer service for this.
• These statements only apply to devices installed and sold in the countries of the European Union and which are subject to the European Directive 2012/19/EU. In countries outside the European Union, different regulations may apply to the disposal of waste electrical and electronic equipment.
Notes on lithium-ion batteries

Remove the battery before disposing of the device!
- Do not dispose of the battery in household waste, in a fire (risk of explosion) or in water. Damaged batteries can harm the environment and your health if toxic vapours or liquids escape.
-
Defective or used batteries must be recycled in accordance with Directive 2023/1542/EC.
-
Hand in the device and the battery charger at a recycling centre. The plastic and metal parts used can be separated by type and thus recycled.
- Dispose of batteries when discharged. We recommend covering the poles with an adhesive strip to protect against a short circuit. Do not open the battery.
- Dispose of batteries according to local regulations. Return batteries to a used battery collection point where they can be recycled in an environmentally friendly manner. Ask your local waste disposal company about this.
16 Troubleshooting
| Fault Possible cause Remedy | ||
| The product cannot be started. The | the battery power is too weak. Charge the battery. | |
| The battery is not properly inserted. Push the battery into the battery mount. The battery clicks into place audibly. | ||
| On/off switch is defective. Please contact our service department. | ||
| The engine is defective. | ||
| Poor cutting performance. Saw chain fitted incorrectly. Fit the saw chain correctly. | ||
| Saw chain is blunt. Have the saw chain sharpened by a professional or replace the saw chain. | ||
| Chain tension insufficient. Check the saw chain. Tension the saw chain if necessary. | ||
| Product runs with difficulty/saw chain jumps off. | Chain tension insufficient. Check the saw chain. Tension the saw chain if necessary. | |
| Unusual vibration | Guide rail is loose. | Check that the guide rail is tightly fitted. |
17 Warranty conditions - Scheppach 20V IXES series
Revision date 25/04/2024
Dear customer,
our products are subject to strict quality checks. However, if a product does not function perfectly, we deeply regret this and ask that you contact our customer service at the address specified below. We will also be glad to assist you by telephone via the service number. The following information is intended to help you to process and settle your claim without any problems.
For the assertion of warranty claims, the following applies:
-
The warranty conditions govern our additional manufacturer warranty services for purchasers (private end consumers) of new products. The statutory warranty claims are not affected by this warranty. This is the responsibility of the dealer who you purchased the product from.
-
The manufacturer's warranty only covers defects in a new product purchased by you that are due to a material or manufacturing defect. If material or manufacturing defects occur during the warranty period, the manufacturer as guarantor shall provide one of the following services of its choice under this warranty:
– Free repair of the goods
- Free replacement of the goods with an item of equal value (if necessary also replacement with a successor model if the original goods are no longer available).
Replaced products or parts shall become our property. Please note that our products were not designed for commercial, trade or professional use. A warranty claim is therefore not valid if the product has been used in commercial, trade or industrial operations within the warranty period or has been subjected to equivalent stress.
3. The following are excluded from our warranty services:
- Damage to the product which was caused by non-observance of the assembly instructions, improper installation, non-observance of the operating instructions (e.g. connection to an incorrect mains voltage or type of current) or the maintenance and safety regulations or use of the product in unsuitable environmental conditions as well as by insufficient care and maintenance.
- Damage to the product caused by misuse or improper application (such as overloading the product or using non-approved tools and accessories), penetration of foreign bodies into the product (such as sand, stones or dust), transport damage, use of force or external influences (such as damage caused if dropped).
- Damage to the product or parts of the product which is due to intentional, normal (operational) or other natural wear as well as damage and/or wearing of wear parts.
- Defects in the product which have been caused by the use of accessories, expansions or spare parts that are not original parts or are not used as intended.
– Products on which changes or modifications have been made.
– Minor deviations from the target characteristics which are irrelevant for the value and usability of the product.
– Products on which unauthorised repairs have been carried out, in particular by an unauthorised third party.
- If the marking on the product or the identification information of the product (machine label) is missing or illegible.
– Products that are very dirty and are therefore refused by the service personnel.
- Claims for damages and consequential damages are generally excluded from this warranty.
-
The warranty period is usually 5 years (12 months for batteries/rechargeable batteries) and starts from the date of purchase of the product. The date on the original purchase receipt is decisive. Warranty claims must be made immediately after becoming aware of them. The assertion of warranty claims after expiry of the warranty period is excluded. The repair or replacement of the product does not result in an extension of the warranty period, nor does this service initiate a new warranty period for the product or for any installed spare parts. This also applies when using an on-site service. A prerequisite for a claim under the warranty is that the manufacturer, as the guarantor, is enabled to examine the warranty claim by sending in the goods at the manufacturer's request. Care must be taken to avoid damage during transport by using appropriate packaging. The product concerned is to be cleaned and returned to the service centre together with a copy of the purchase receipt, which must include the date of purchase and the product designation. If a product is sent in incomplete without the complete scope of delivery, the missing accessories will be charged / deducted in value if the product is exchanged or in the event of a refund. Partially or completely dismantled products cannot be accepted as a warranty claim. In the event of an unjustified complaint or if outside the warranty period, the purchaser shall generally bear the transport costs and the transport risk. Please report a warranty claim in advance to the service centre (see below). It is generally agreed upon that the defective product will be returned to the service address given below with a brief description of the fault by organised return or, in the case of repair outside the warranty period, with sufficient postage, taking the appropriate packaging and shipping guidelines into account. Please note that your product (depending on the model) will be free of all operating materials when returned for safety reasons. The product sent to our service centre must be packaged in such a way that damage to the product under complaint is avoided during transport. After successful repair / replacement, we will send the product back to you free of charge. If products cannot be repaired or replaced, a sum up to the purchase price of the defective product may be refunded at our own discretion, taking into account any deduction for wear and tear. These warranties are only for the benefit of the original private purchaser and cannot be assigned or transferred.
-
Extension of the warranty period to 10 years: Scheppach offers an additional warranty extension of 5 years on products of the Scheppach 20V series. Thus, the warranty period for these products totals 10 years. Batteries / rechargeable batteries, battery chargers and accessories are excluded from this. You can claim this warranty extension by registering your Scheppach product from this range at https://garantie.scheppach.com no later than 30 days from the date of purchase. After registering online successfully, you will receive confirmation for the item-related warranty extension.
-
In order to submit your warranty claim, please contact our service centre.
Preferably, please use our form on our homepage: https://www.scheppach.com/de/service
Please do not send us any products without first contacting and registering with our service centre.
Contacting our service centre first is mandatory to claim these warranty promises. Warranty claims must be made before expiry of the warranty period within 14 days of discovery of the defect. For this purpose, the original purchase receipt and, if necessary, confirmation of the item-related warranty extension are required.
- Processing time - We normally process complaint consignments within 14 days of receipt at our service centre. If, in exceptional cases, the processing time mentioned is exceeded, you will be informed in good time.
- Wear parts are generally excluded from the warranty! - Wear parts are: a) supplied, attached and/or installed batteries / rechargeable batteries as well as b) all model-dependent wear parts (i.e. belts, saw blades, tool attachments, grinding discs, filters, carbon brushes etc., see operating manual). The warranty does not cover batteries or rechargeable batteries that are deeply discharged or those with damaged housing or battery terminals.
- Cost estimate - Products that are not covered or no longer covered by the warranty will be repaired at extra cost. Upon request to our service centre, you can send in the defective products for a cost estimate and, if necessary, give the service centre approval for the repair in writing (by post, e-mail). No further processing will take place without approval for the repair.
The warranty conditions only apply in the current version at the time of the complaint and, if necessary, can be found on our homepage (www.scheppach.com).
In case of translations, the German version is decisive.
Scheppach GmbH · Günzburger Str. 69 · 89335 Ichenhausen (Germany)
Tel: +800 4002 4002 ·
E-Mail: customerservice.GB@scheppach.com
Internet: https://www.scheppach.com
We reserve the right to make changes to the warranty conditions at any time without prior notice.
18 EU Declaration of Conformity
Translation of the original Declaration of Conformity
Manufacturer:
Scheppach GmbH
Günzburger Straße 69
D-89335 Ichenhausen
We declare under our sole responsibility that the product described here complies with the applicable directives and standards.
Brand: SCHEPPACH
Art. designation: CORDLESS PRUNING SAW - C-PS100-X
Item No. 5904204900
EU directives:
2014/30/EU, 2006/42/EC, 2011/65/EU*
* The object of the declaration described above fulfils the regulations of the directive 2011/65/EU of the European Parliament and Council from 8th June 2011, on the restriction of the use of certain hazardous substances in electrical and electronic equipment.
2006/42/EG - Appendix IV
Notified body: TÜV SÜD Product Service
Certificate number: M6A 011284 0491 Rev. 00
2000/14/EG\_2005/88/EC - Appendix: V
Guaranteed sound power 94 dB
level (LWA):
Measured sound power 90.5 dB
level ( L_WA ):
Applied standards:
EN 62841-1:2015/A11:2022; EN ISO 12100:2010;
EN IEC 55014-1:2021; EN IEC 55014-2:2021
Documentation authorised representative:
David Rümpelein
Günzburger Str. 69
D-89335 Ichenhausen
Division Manager Product Center
Andreas Pecher
Head of Project Management
Sommaire
Günzburger Straße 69
D-89335 Ichenhausen
Cher client,
Günzburger Straße 69
D-89335 Ichenhausen
Division Manager Product Center

Andreas Pecher
Head of Project Management
Indice
Günzburger Straße 69
D-89335 Ichenhausen, Germania
Egregio cliente,
Günzburger Straße 69
D-89335 Ichenhausen
2000/14/EG\_2005/88/CE – Allegato: V
Division Manager Product Center
Andreas Pecher
Head of Project Management
Inhoudsopgave
1 Inleiding....65
Günzburger Straße 69
D-89335 Ichenhausen
Geachte klant,
Günzburger Straße 69
D-89335 Ichenhausen
Division Manager Product Center

Andreas Pecher
Head of Project Management
Índice
Günzburger Straße 69
customerservice.ES@scheppach.com -
Internet: https://www.scheppach.com
Günzburger Straße 69
D-89335 Ichenhausen
Division Manager Product Center
Andreas Pecher
Head of Project Management
Índice
Günzburger Straße 69
Utilize, de preferência, o formulário na nossa homepage: https://www.scheppach.com/de/service
Günzburger Straße 69
D-89335 Ichenhausen
Division Manager Product Center

Andreas Pecher
Head of Project Management
Obsah
Günzburger Straße 69
D-89335 Ichenhausen
Vážený zákazníku,
https://www.scheppach.com/de/service
Günzburger Straße 69
D-89335 Ichenhausen
Division Manager Product Center
Andreas Pecher
Head of Project Management
Obsah
Günzburger Straße 69
D-89335 Ichenhausen
Vážený zákazník,
https://www.scheppach.com/de/service
Günzburger Straße 69
D-89335 Ichenhausen
Division Manager Product Center

Andreas Pecher
Head of Project Management
Tartalomjegyzék
Günzburger Straße 69
D-89335 Ichenhausen
Tisztelt Ügyfelünk!
Günzburger Straße 69
D-89335 Ichenhausen
Division Manager Product Center

Andreas Pecher
Head of Project Management
Spis treści
Günzburger Straße 69
D-89335 Ichenhausen
Szanowny Kliencie
Günzburger Straße 69
D-89335 Ichenhausen
Division Manager Product Center
Andreas Pecher
Head of Project Management
Popis sadržaja
1 Uvod.... 167
2 Opis proizvoda (sl. 1 - 9) 168
3 Opseg isporuke (sl. 1).... 168
Günzburger Straße 69
D-89335 Ichenhausen
Poštovani kupče
Želimo vam mnogo zadovoljstva i uspjeha prilikom rada s novim proizvodom.
Napomena:
Prema važećem njemačkom Zakonu o odgovornosti za proizvode, proizvođač ovog proizvoda ne odgovara za štete koje nastanu na ovom proizvodu ili koje ovaj proizvod uzrokuje u slučaju:
https://www.scheppach.com/de/service
Ne šaljite nam proizvode bez prethodnog stupanja u kontakt i prijave našem servisnom centru.
Günzburger Straße 69
D-89335 Ichenhausen
2000/14/EZ\_2005/88/EZ - Prilog: V
Zajamčena razina zvučne 94 dB
snage (LWA):
Division Manager Product Center
Andreas Pecher
Head of Project Management
Kazalo
1 Uvod.... 181
2 Opis izdelka (sl. 1–9).... 182
3 Obseg dostave (sl. 1).... 182
4 Namenska uporaba.... 182
5 Varnostni napotki 183
6 Tehnični podatki.... 186
7 Razpakiranje 186
8 Pred zagonom.... 186
9 Uporaba 188
10 Delovna navodila.... 188
11 Čiščenje 189
12 Vzdrževanje 189
13 Skladiščenje in transport.... 190
14 Popravila in naročanje rezervnih delov ..... 191
15 Odlaganje med odpadke in reciklaža.... 191
16 Pomoč pri motnjah 192
17 Garancijski pogoji – serija Scheppach 20V
IXES....192
18 EU izjava o skladnosti.... 194
19 Eksplozijska risba.... 364
Razlaga simbolov na izdelku
Günzburger Straße 69
D-89335 Ichenhausen
Spoštovani kupec,
Želimo vam veliko veselja in uspeha pri delu z vašim novim izdelkom.
Napotek:
Proizvajalec tega izdelka skladno z veljavnim zakonom o odgovornosti za izdelke ne jamči za poškodbe na tem izdelku ali poškodbe s tem izdelkom, do katerih pride pri:
Günzburger Straße 69
D-89335 Ichenhausen
Division Manager Product Center
Andreas Pecher
Head of Project Management
Sisukord
1 Sissejuhatus.... 195
Günzburger Straße 69
D-89335 Ichenhausen
Austatud klient!
https://www.scheppach.com/de/service
E-post: customerservice.EE@scheppach.com
Internet: https://www.scheppach.com
Günzburger Straße 69
D-89335 Ichenhausen
Division Manager Product Center
Andreas Pecher
Head of Project Management
Turinys
Günzburger Straße 69
D-89335 Ichenhausen
Gerbiamas kliente,
Günzburger Straße 69
D-89335 Ichenhausen
Division Manager Product Center
Andreas Pecher
Head of Project Management
Satura rādītājs
Günzburger Straße 69
E-pasts: customerservice.LV@scheppach.com
Internets: https://www.scheppach.com
Günzburger Straße 69
D-89335 Ichenhausen
Division Manager Product Center
Andreas Pecher
Head of Project Management
Günzburger Straße 69
D-89335 Ichenhausen
Bästa Kund!
https://www.scheppach.com/de/service
Günzburger Straße 69
Division Manager Product Center

Head of Project Management
Sisällysluettelo
Günzburger Straße 69
D-89335 Ichenhausen
Arvoisa asiakas
Günzburger Straße 69
D-89335 Ichenhausen
Division Manager Product Center

Andreas Pecher
Head of Project Management
Indholdsfortegnelse
Günzburger Straße 69
D-89335 Ichenhausen, Tyskland
Kære kunde
Günzburger Straße 69
D-89335 Ichenhausen, Tyskland
Bemyndiget organ: TÜV SÜD Product Service
Division Manager Product Center
Andreas Pecher
Head of Project Management
Innholdsfortegnelse
Günzburger Straße 69
D-89335 Ichenhausen
Kjære kunde
E-post: customerservice.NO@scheppach.com Internett: https://www.scheppach.com
Günzburger Straße 69
D-89335 Ichenhausen
Oppnevnt instans: TÜV SÜD Product Service
Division Manager Product Center

Andreas Pecher
Head of Project Management
Съдържание
Günzburger Straße 69
D-89335 Ichenhausen, Германия
Уважаеми клиенти,
https://www.scheppach.com/de/service
Günzburger Straße 69
D-89335 Ichenhausen
Division Manager Product Center
Andreas Pecher
Head of Project Management
Günzburger Straße 69
D-89335 Ichenhausen
Αξιότιμε πελάτη
89335 Ichenhausen (Germany)
Tηλ: +800 4002 4002 ·
E-mail: customerservice.GR@scheppach.com
Internet: https://www.scheppach.com
Günzburger Straße 69
D-89335 Ichenhausen
Division Manager Product Center
V. Quadon
Andreas Pecher
Head of Project Management
Sadržaj
1 Uvod.... 323
2 Opis proizvoda (sl. 1-9).... 324
3 Opseg isporuke (sl. 1).... 324
4 Namenska upotreba.... 324
5 Sigurnosne napomene.... 325
6 Tehnički podaci 328
7 Raspakivanje.... 328
8 Pre stavljanja u pogon.... 328
9 Rukovanje 330
10 Radna uputstva.... 331
11 Čišćenje 331
12 Održavanje.... 332
13 Skladištenje i transport.... 333
14 Popravka i naručivanje rezervnih delova ...... 333
15 Odlaganje na otpad i reciklaža.... 333
16 Pomoć za otklanjanje smetnji.... 334
17 Uslovi garancije - Scheppach 20V IXES serija .. 334
Günzburger Straße 69
D-89335 Ichenhausen
Poštovani kupče
– Nosite rukavice otporne na posekotine.
Napomena:
- Mač lanca, kao i lanac su iz razloga pakovanja i transporta već fabrički montirani.
- Novi lanac testere se izdužuje i često mora da se do- tegne. Redovno posle svakog reza proveravajte za- tegnutost lanca i podesite je.
- Koristite samo lance testere i mačeve za lanac, koji su predviđeni za ovaj proizvod.
8.1 Montaža/demontaža mača lanca (12) i lanca testere (11) (sl. 2)
Preporučujemo da proizvod i sav pribor pre prve upotrebe proverite u pogledu čvrstog naleganja i po potrebi ponovo montirate.
- Postavite proizvod na planarnu, ravnu površinu.
- Okrećite zavrtanj za sistem zatezanja lanca (2) u smeru suprotnom od kazaljke na satu da biste smanjili zategnutost lanca i skinuli pokrivku za lančanik (3).
- Izvadite mač lanca (12) i lanac testere (11).
- Postavite lanac testere (11) u vidu omče tako da re-zne ivice budu okrenute u smeru kazaljke na satu. Ra-di poravnavanja lanca testere (11) se orijentišite po-moću simbola (strelica) na lancu testere odn. iznad lančanika (14).
- Umetnite lanac testere (11) u žleb mača lanca (12).
- Držite mač lanca (12) u svrhu montaže zakrenut prema gore pod uglom od oko 45 stepeni, da biste lanac testere (11) mogli da lakše vodite na žlebu mača lanca (12).
- Umetnite mač lanca (12) i lanac testere (11) na opružnom zatezaču (13).
- Pritisnite mač lanca (12) sa lancem testere (11) na do-le da biste navukli lanac testere (11) na lančanik (14).
- Lanac testere (11) se u slučaju puštanja automatski zateže.
- Ponovo stavite poklopac lančanika (3).
- Zategnite zavrtanj za sistem zatezanja lanca (2) u smeru kazaljke na satu tako da se ne može odvrnuti rukom.
- Još jednom proverite naleganje lanca testere (11) i zategnite zavrtanj za sistem zatezanja lanca (2) pokrivke lančanika (3).
8.2 Zatezanje lanca testere (11) (sl. 2)

UPOZORENJE
Opasnost od povrede zbog spadanja lanca!
Nedovoljno zategnut lanac testere tokom rada može da spadne i dovede do povreda.
– Često kontrolišite zategnutost lanca.
– Zategnutost lanca je previše mala, ako potisne karike izađu iz žleba na donjoj strani šine za vođenje.
– Propisno zategnite lanac testere, ako je zategnutost lanca previše mala.
- Proizvod je opremljen sistemom za brzo zatezanje lanca testere. Lanac testere (11) se putem opružnog zatezača (13) montiranog na proizvodu automatski zateže. Lanac testere (11) koji se okreće se vodi preko žleba na maču lanca (12).
Zategnutost i podmazivanje lanca u znatnoj meri utiču na vek trajanja lanca testere.
Lanac testere je pravilno zategnut, kada ne visi labavo na maču lanca i kada se rukom sa rukavicama može kompletno prevući. Prilikom povlačenja lanca testere vučnom silom od 9 N (oko 1 kg) lanac testere i mač lanca ne smeju da budu razmaknuti više od 2 mm.
Napomena:
- Nov lanac testere izvesno vreme posle montaže teži labavljenju. Zato povremeno pre upotrebe proverite zategnutost lanca testere.
- Zatezanje lanca testere treba da se izvodi na čistoj lokaciji, koja je očišćena od opiljaka od sečenja testerom i sličnog.
- Ispravna zategnutost lanca testere služi bezbednosti i korisnika i smanjuje odn. sprečava habanje i oštećenja lanca testere.
- Preporučujemo korisniku da pre prvog početka rada prekontroliše zategnutost lanca. Lanac testere je pravilno zategnut, kada ne visi labavo na donjoj strani mača i kada se rukom sa rukavicama može kompletno prevući.
- Ako lanac testere visi labavo ili ako je opružni zatezač neispravan, obratite se servisnoj radionici.
PAŽNJA
Prilikom rada sa testerom se lanac testere zagreva i usled toga izdužuje. Sa takvim „Naknadnim izduženjem“ treba računati posebno kod novih lanaca testere.
8.3 Podmazivanje lanca testere (sl. 1, 3, 9)
Zategnutost i podmazivanje lanca u znatnoj meri utiču na vek trajanja lanca testere.
Bocu za ulje (9a) možete da čuvate u držaču boce za ulje (9).
Napomena:
- Koristite ulje za lanac testere koje sadrži aditive za smanjenje trenja i istrošenosti ili biološko ulje za lanac testere.
-
Za sečenje drveća koristite biološko ulje za lanac testere.
Mineralno ulje može da ošteti drveće. -
Očistite mač lanca i lanac testere da biste uklonili prljavštinu, prašinu od sečenja testerom i ostatke starog ulja. (Vidi 11)
- Uverite se da je lanac testere zategnut, ali ne previše jako. (Vidi 8.2)
- Držite bocu za ulje (9a) pod malim uglom tako da ulje može da teče u karike lanca testere (11).
- Nanesite ulje duž lanca testere (11) dok rukom okrećete lanac testere (11). Počnite na donjem delu mača lanca (12). Pazite da ulje dospe u zglobove i karike lanca testere (11).
- Nanesite ulje na obe strane lanca testere (11). Koristite četkicu* da biste ravnomerno raspodelili ulje.
- Proverite da li je lanac testere (11) ravnomerno nau- ljen.
- Odmah pažljivo obrišite eventualno proliveno ulje i odložite krpu* u skladu sa lokalnim propisima.
* = Nije sadržano u obimu isporuke!
8.4 Umetanje akumulatora (15) u prihvat za akumulator (8) i vađenje iz njega (sl. 4)

OPREZ
Opasnost od povreda!
Umetnite akumulator tek kada je akumulatorski alat pri-premljen za upotrebu.
Umetanje akumulatora
- Gurnite akumulator (15) u prihvat za akumulator (8). Akumulator (15) čujno naleže.
Vađenje akumulatora
- Pritisnite taster za otključavanje (16) akumulatora (15) i izvucite isti iz prihvata za akumulator (8).
9 Rukovanje
PAŽNJA
Pre stavljanja u pogon, proizvod obavezno montirati u potpunosti!
PAŽNJA
Pazite da ambijentalna temperatura tokom rada ne prekorači 50 °C i ne potkorači -20 °C.
PAŽNJA
Proizvod je deo 20V IXES serije i sme da radi samo sa akumulatorima iz ove serije. Akumulatori smeju da se pune samo punjačima ove serije. Pritom se pridržavajte podataka proizvođača.

OPASNOST
Opasnost od povreda!
Ako se proizvod zaglavi, nemojte pokušavati da ga si-lom izvučete.
- Ugasite motor.
– Koristite krak poluge ili klin da biste oslobodili proizvod.
– Nosite rukavice otporne na posekotine.
- Preporučujemo da proizvod čistite neposredno posle svakog korišćenia.
- Za čišćenje lanca testere koristite četkicu ili ručnu metlicu, a ne tečnosti.
- Vodite računa da su ručke i rukohvati suvi, čisti i da na njima nema tragova ulja i masti. Klizave ručke i površine za hvatanje ne dozvoljavaju bezbedno rukovanje i kontrolu nad električnim alatom u nepredviđenim situacijama.
- Po potrebi čistite ručke vlažnom krpom ispranom u sapunici.
- Održavajte zaštitnu opremu, ventilacione proreze i kučište motora što je moguće čistijim od prašine i prljavštine. Obrišite proizvod čistom krpom* ili ga izduvajte komprimovanim vazduhom* pod niskim pritiskom. Preporučujemo da proizvod čistite neposredno posle svakog korišćenja.
- Ventilacioni otvori uvek moraju biti slobodni.
- Nemojte koristiti sredstva za čišćenje ili rastvarače, jer bi mogli da oštete plastične delove proizvoda. Vodite računa da u unutrašnjost proizvoda ne može da prodre voda.
- Očistite žleb mača lanca pomoću kist četkice ili komprimovanog vazduha.
- Očistite lančanik i opružni zatezač.
12 Održavanje
12.1 Zamena mača lanca (12) (sl. 2)
- Isključite proizvod i izvadite akumulator (15).
- Postavite proizvod na planarnu, ravnu površinu.
- Okrećite zavrtanj za sistem zatezanja lanca (2) pokrivke za lančanik (3) u smeru suprotnom od kazaljke na satu da biste smanjili zategnutost lanca i skinuli pokrivku za lančanik (3).
- Izvadite mač lanca (12) i lanac testere (11).
- Držite mač lanca (12) u svrhu demontaže zakrenut prema gore pod uglom od oko 45 stepeni, da biste lanac testere (11) mogli da lakše skinete sa žleba mača lanca.
- Zamenite mač lanca (12) i montirajte mač lanca (12) i lanac testere (11) kao što je opisano pod 8.1.
12.2 Zamenite lanac testere (11) i pustite ga da se uhoda (sl. 2)

OPASNOST
Moguće su teške povrede usled kidanja ili spadanja lanca testere!
– Nikada nemojte pričvršćivati nov lanac testere na istrošeni mali zupčanik lanca testere ili na oštećenoj ili istrošenoj šini za vođenje. Lanac tastera bi mogao da spadne ili da se pokida.
- Koristite samo lance testere i mačeve za lanac, koji su predviđeni za ovaj proizvod.
-
Pre zamene lanca testere očistite žleb mača lanca, jer u slučaju postojanja naslaga prljavštine lanac testere može da iskoči iz šine. Naslage takođe mogu da upiju ulje za lanac. Posledica bi bila da ulje za lance ne ili samo delimično dospeva na donju stranu šine i da se smanjuje podmazivanje.
-
Postavite proizvod na planarnu, ravnu površinu.
- Okrećite zavrtanj za sistem zatezanja lanca (2) u smeru suprotnom od kazaljke na satu da biste smanjili zategnutost lanca i skinuli pokrivku za lančanik (3).
- Izvadite mač lanca (12) i lanac testere (11).
- Postavite lanac testere (11) u vidu omče tako da re-zne ivice budu okrenute u smeru kazaljke na satu. Ra-di poravnavanja lanca testere (11) se orijentišite po-moću simbola (strelica) na lancu testere odn. iznad lančanika (14).
- Umetnite lanac testere (11) u žleb mača lanca (12).
- Držite mač lanca (12) u svrhu montaže zakrenut prema gore pod uglom od oko 45 stepeni, da biste lanac testere (11) mogli da lakše vodite na žlebu mača lanca (12).
- Umetnite mač lanca (12) i lanac testere (11) na opružnom zatezaču (13).
- Pritisnite mač lanca (12) sa lancem testere (11) na do-le da biste navukli lanac testere (11) na lančanik (14).
- Lanac testere (11) se u slučaju puštanja automatski zateže.
- Ponovo stavite poklopac lančanika (3).
- Zategnite zavrtanj za sistem zatezanja lanca (2) u smeru kazaljke na satu tako da se ne može odvrnuti rukom.
- Još jednom proverite naleganje lanca testere (11) i zategnite zavrtanj za sistem zatezanja lanca (2) pokrivke lančanika (3).
Napomena:
Kod novo lanca testere sila zatezanja posle nekog vreme-na popusti. Zbog toga posle prvih 5 rezova, a najkasnije posle 10 minuta testerisanja morate da zategnete lanac testere.
12.3 Oštrenje lanca testere (11)

UPOZORENJE
Povećana opasnost od nezgoda zbog pogrešno naoštrenog lanca testere!
Odstupanjima od zadatih dimenzija geometrije sečenja kod oštrtenja se povećava opasnost od povratnog udara proizvoda.
Günzburger Straße 69
D-89335 Ichenhausen
Division Manager Product Center
Andreas Pecher
Head of Project Management
Cuprins
Günzburger Straße 69
D-89335 Ichenhausen
Stimate client
Günzburger Straße 69
D-89335 Ichenhausen
Division Manager Product Center
Andreas Pecher
Head of Project Management
İçindekiler
Günzburger Straße 69
D-89335 Ichenhausen
ithalatçı:
Günzburger Straße 69
D-89335 Ichenhausen
Division Manager Product Center
Andreas Pecher
Head of Project Management
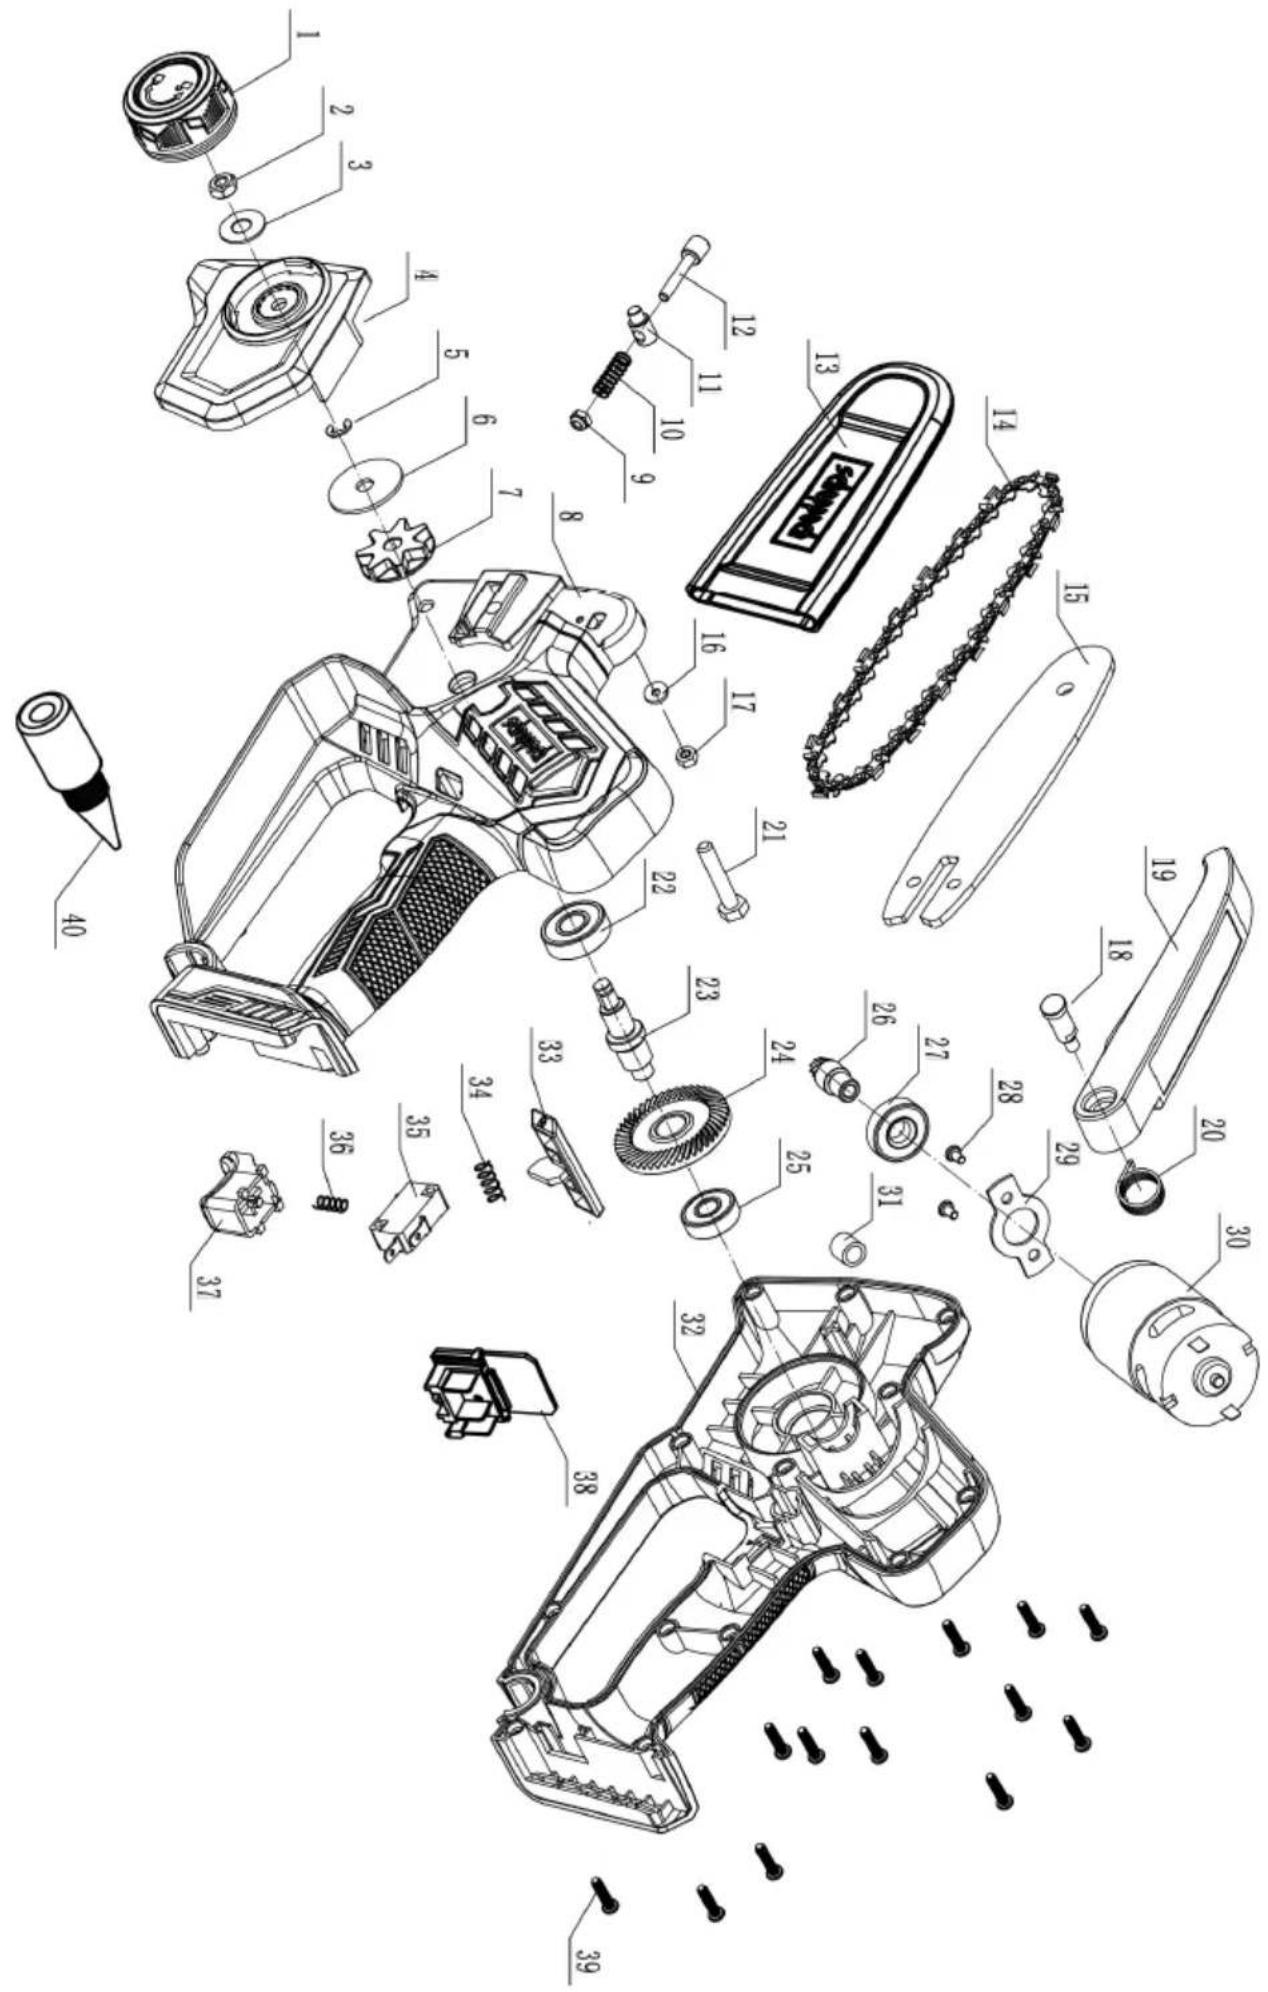
Notizen
CE
SCHEPPACH GMBH
Günzburger Str. 69
D-89335 Ichenhausen

Stand der Informationen · Status of the information · Version des informations · Versione delle informazioni · Stand van de informatie · Información disponible · Versão das informações · Stav informaci · Stav informácií · Az információk kelte · Stan informacji · Verzija informacija · Stanje informacij · Informatsiooni seis · Informacijos data · Informácijas stāvoklis · Informationens status · Tietojen tila · Informationsstatus · Status for informasjon · Последна редакция на информацията · Έκδοση των πληροφοριών · Izdanje informacija · Stadiul informațiilor · Bilgilerin güncelliği Update: 03/2025 · Ident.-No.: 5904204900


- C-PS100-X
- Inhaltsverzeichnis
- Verehrter Kunde
- Table of contents
- Explanation of the symbols on the product
- Introduction
- Manufacturer:
- Dear Customer
- Note:
- Product description (Fig. 1-9)
- Scope of delivery (Fig. 1)
- Item QuantityDesignation
- Proper use
- Explanation of the signal words in the operating manual
- DANGER
- WARNING
- CAUTION
- ATTENTION
- Safety instructions
- Save all warnings and instructions for future reference.
- 1) Work area safety
- 2) Electrical safety
- 3) Personal safety
- 4) Power tool use and care
- 5) Battery tool use and care
- 6) Service
- Safety instructions for pruning saw
- Causes and avoidance of kickback
- Additional safety instructions
- Residual risks
- Noise and vibration
- Unpacking
- Before commissioning
- Danger of injury!
- Fit/remove the chainsaw guide bar (12) and saw chain (11) (Fig. 2)
- Tensioning the saw chain (11) (Fig. 2)
- Risk of injury from the saw chain jumping off!
- Lubricating the saw chain
- (Fig. 1, 3, 9)
- Inserting/removing the battery (15) into/from the battery mount (8) (Fig. 4)
- Inserting the battery
- Removing the battery
- Operation
- Hold and guide product
- Danger of injury due to kickback!
- Front and rear hand guards (1, 10) (Fig. 1)
- Switching the product on/off and operating it (Fig. 1, 5, 6)
- Switching on
- Switching off
- Working instructions
- Notes:
- Sawing techniques
- Cutting to length
- Sawing on a metal work trestle
- Delimbing
- Cleaning
- Danger of injury when handling the saw chain or the blade!
- Maintenance
- Replacing the chainsaw guide bar (12) (Fig. 2)
- Replace the saw chain (11) and allow it to run in (Fig. 2)
- Serious injuries possible due to tearing or jumping off of the sawtooth!
- Sharpening the saw chain (11)
- Increased risk of accidents due to an incorrectly sharpened saw chain!
- Checking the sprocket (14) (Fig. 2, 7)
- Checking the chainsaw guide bar (12) (Fig. 2, 8)
- Storage and transport
- Preparation for storage
- Transport
- Repair and ordering spare parts
- Ordering spare parts
- Disposal and recycling
- Notes for packaging
- Notes on the electrical and electronic equipment act (ElektroG)
- Notes on lithium-ion batteries
- Remove the battery before disposing of the device!
- Troubleshooting
- Warranty conditions - Scheppach 20V IXES series
- Dear customer,
- For the assertion of warranty claims, the following applies:
- The following are excluded from our warranty services:
- EU Declaration of Conformity
- 2006/42/EG - Appendix IV
- 2000/14/EG\_2005/88/EC - Appendix: V
- Documentation authorised representative:
- Sommaire
- Cher client,
- Indice
- Egregio cliente,
- 2000/14/EG\_2005/88/CE – Allegato: V
- Inhoudsopgave
- Geachte klant,
- Índice
- Obsah
- Vážený zákazníku,
- Vážený zákazník,
- Tartalomjegyzék
- Tisztelt Ügyfelünk!
- Spis treści
- Szanowny Kliencie
- Popis sadržaja
- Poštovani kupče
- Napomena:
- 2000/14/EZ\_2005/88/EZ - Prilog: V
- Kazalo
- Razlaga simbolov na izdelku
- Spoštovani kupec,
- Napotek:
- Sisukord
- Turinys
- Gerbiamas kliente,
- Satura rādītājs
- Bästa Kund!
- Sisällysluettelo
- Indholdsfortegnelse
- Kære kunde
- Innholdsfortegnelse
- Kjære kunde
- Съдържание
- Уважаеми клиенти,
- Αξιότιμε πελάτη
- Sadržaj
- Montaža/demontaža mača lanca (12) i lanca testere (11) (sl. 2)
- Zatezanje lanca testere (11) (sl. 2)
- UPOZORENJE
- Opasnost od povrede zbog spadanja lanca!
- PAŽNJA
- Podmazivanje lanca testere (sl. 1, 3, 9)
- Umetanje akumulatora (15) u prihvat za akumulator (8) i vađenje iz njega (sl. 4)
- OPREZ
- Opasnost od povreda!
- Umetanje akumulatora
- Vađenje akumulatora
- Rukovanje
- OPASNOST
- Održavanje
- Zamena mača lanca (12) (sl. 2)
- Zamenite lanac testere (11) i pustite ga da se uhoda (sl. 2)
- Moguće su teške povrede usled kidanja ili spadanja lanca testere!
- Oštrenje lanca testere (11)
- Povećana opasnost od nezgoda zbog pogrešno naoštrenog lanca testere!
- Cuprins
- Stimate client
- İçindekiler
- ithalatçı:
Brand : SCHEPPACH
Model : C-PS100-X
Category : Hedge Trimmers