STHL 2000 C2 - Fan heater SILVERCREST - Free user manual and instructions
Find the device manual for free STHL 2000 C2 SILVERCREST in PDF.


User questions about STHL 2000 C2 SILVERCREST
0 question about this device. Answer the ones you know or ask your own.
Ask a new question about this device
Download the instructions for your Fan heater in PDF format for free! Find your manual STHL 2000 C2 - SILVERCREST and take your electronic device back in hand. On this page are published all the documents necessary for the use of your device. STHL 2000 C2 by SILVERCREST.
USER MANUAL STHL 2000 C2 SILVERCREST
This product is suitable only for well-insulated rooms or for occasional use.
For EU market: Imported for GB market by:
HOYER Handel GmbH Lidl Great Britain Ltd
Kühnehöfe 12
Lidl House - 14 Kingston Road
22761 Hamburg
Surbiton · KT5 9NU
GERMANY
Stand der Informationen - Status of information - Version des informations Stand van de informatie - Stan informacji - Slav informaci
natural_image
Simple line drawing of a device with an arrow indicating direction, no text or symbols present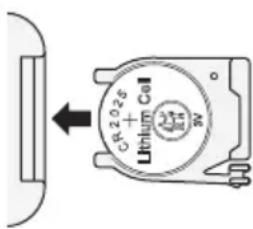
text_image
GR2026 + LiHUM Cell Wnatural_image
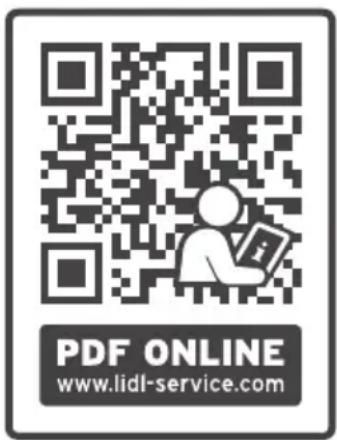
Symbol of a trash bin crossed with a diagonal line and a horizontal bar below (no text or labels)This document is an abridged print version of the complete user instructions. Scanning the QR code will take you directly to the Lidl service page (www.lidl-service.com) and by entering the article number (IAN)
425862_2301 you can view and download the complete user instructions. The short manual is a component of this product. Familiarise yourself with all user and safety information before using the product. Keep the short manual in a safe place and hand over all documents when passing the product on to third parties.
Overview
1 Operating panel
2 Display
3 Carrying recess with separate storage compartment for the remote control
4 Tower heater
5 Air inlet
6 Air outlet
7 1 /○ On/off switch
8 Cable spool with mains plug socket
9 Mains power cable with mains plug
10 Base
11 M Mode button: cycle through functions
12 Button for switching on the device / switching to standby mode
13 + Button for increasing values/heat output level / button lock
14 - Button for reducing values/heat output level / button lock
15 Button for switching swivel function on/off
16 Remote control
17 - Button for reducing values/power
18 + Button for increasing values/power
19 Button for setting the temperature
20 Button for selecting the heat output
LO: fan only without heating
L1: fan with heat output level 1
(1,000 W)
L2: fan with heat output level 2
(2,000 W)
21 Battery compartment
22 Button for setting the Timer
23 Button for switching swivel function on/off
24 Button for switching on the device / switching to standby mode
25 Back half of the base
26 Front half of the base
27 Nut
28 Recess
29 Guide pin
Intended purpose
The device can be used as an additional heater for dry indoor spaces up to approx. 15 m^2 .
This product is suitable only for well-insulated rooms or for occasional use.
The device is designed for private home use and must not be used for commercial purposes. The device must only be used indoors.
The device must only be set up on the floor.
Foreseeable misuse

FIRE HAZARD!
- Never use the device to dry textile materials or other objects on, above or in front of the device.
- The device must not be used in vehicles of any kind.
Symbols on your device
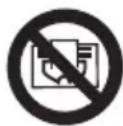
Do not cover
The adjacent symbol warns against covering the device, as the resulting heat accumulation could lead to damage and a fire hazard.
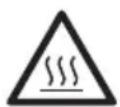
This symbol warns you against touching the hot surface.
Safety information
Warnings
If necessary, the following warnings are used in these user instructions:

DANGER! High risk: failure to observe this warning may result in injury to life and limb.
WARNING! Moderate risk: failure to observe this warning may result in injury or serious material damage.
CAUTION: low risk: ignoring this warning may result in minor injuries or damage to property.
NOTE: circumstances and specifics that must be observed when handling the device.
Instructions for safe operation
- Children under the age of 3 must be kept away, unless they are constantly being supervised.
Children aged 3 and over, who are younger than 8 years old, may only switch the device on and off if they are supervised or they have been instructed in the device's safe use and they have understood the resulting dangers, provided that the device is placed or installed in its normal operating position. Children aged 3 and over, who are younger than 8 years old, may not insert the plug into the wall socket, adjust the device, clean the device and/or carry out any maintenance work, which the user is required to carry out.
- This device can be used by children from the age of 8 and people with restricted physical, sensory or intellectual abilities or a lack of experience or knowledge if they are supervised or have been instructed in how to use this device safely and if they have understood the resulting dangers. Children must not play with the device. Cleaning and maintenance by the user must not be performed by children without supervision.
Some parts of the device may become very hot and may cause burns. Particular caution is necessary when children or vulnerable persons are present.
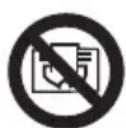
Do not cover! In order to prevent overheating of the heating device, the heating device must not be covered.
- The device must never be set up directly under a wall socket, as the forming heat may lead to damage to the electric system.
- Do not use the device:
- in the immediate vicinity of a sink, bathtub, shower or swimming pool
- if it has been previously dropped
- if it shows visible signs of damage
- Use the device on a horizontal and stable surface.
- The heater must not be used in small rooms occupied by persons who cannot leave the room by themselves unless they are under constant supervision.
- Please make sure to always keep a minimum distance of 1 m between any textiles, curtains or other flammable materials and the air outlet in order to minimise the risk of fire.
- If the mains power cable of this device should become damaged, it must be replaced by the manufacturer, the manufacturer's customer service department or a similarly qualified specialist, in order to avoid any hazards.
- This device is not intended to be operated using an external timer or a separate remote control system.
- The remote control requires a CR2025 (3 V) battery.
- Be sure to observe the correct polarity when inserting the battery.
- DANGER OF EXPLOSION batteries must not be charged or re-activated by other means, nor must they be dismantled, thrown into a fire or short-circuited.
- The connection terminals of the remote control must not be short-circuited.
- Remove the batteries from the remote control if you do not intend to use the remote control for a prolonged period of time, or if the battery runs out of power. The battery might leak and damage the remote control.
- Do not subject batteries to extreme conditions, e.g. do not place the remote control on radiators or expose it to direct sunlight. Otherwise, there is an increased danger of batteries leaking.
- If battery acid has leaked, avoid contact with the skin, eyes and mucous membranes. In case of contact with the acid, rinse the affected area at once with plenty of clean water and seek medical assistance immediately.
- Batteries can be life-threatening if swallowed. Therefore you should store batteries out of the reach of young children. If a battery has been swallowed, medical assistance must be sought immediately.
- New and used batteries must be kept away from children.
- If you suspect that the batteries could have been swallowed or have gotten into any body cavities, immediately seek medical assistance.
- Batteries must be properly disposed of after use.
- Packing materials are not children's toys. Children should not be allowed to play with the plastic bags: there is a risk of suffocation.
- Keep the device out of the reach of children.
Electrical devices can represent a danger to pets and livestock. In addition, animals can also cause damage to the device. For this reason you should keep animals away from electrical devices at all times.
- The device, the mains power cable and the mains plug must not be immersed in water or any other liquids.
- Protect the device from moisture, water drops and water splashes: failure to observe this instruction may result in an electric shock hazard.
- If liquid gets into the device, disconnect the mains plug immediately. Have the device checked before reusing.
- Never touch the device with wet hands.
- If the device has fallen into water, pull out the mains plug immediately, and only then remove the device from the water. Do not use the device again, and have it checked by a specialist workshop.
- Do not use the device if the device or the mains power cable has any visible damage, or if the device has previously been dropped.
- Only connect the mains plug to a properly installed and easily accessible wall socket whose voltage corresponds to the specifications on the rating plate. The wall socket must still be easily accessible after the device is plugged in.
- Ensure that the mains power cable cannot be damaged by sharp edges or hot points.
- When using the device, ensure that the mains power cable cannot be trapped or crushed.
- Even after it has been switched off, the device is not completely disconnected from the power supply. In order to fully disconnect it, pull out the mains plug.
- When removing the mains plug from the wall socket, always pull on the plug and never the cable.
- Pull the mains plug out of the wall socket: - when a malfunction occurs - when you are not using the device - before you clean the device - during thunderstorms
- Never attempt to reach into the device interior by sticking your fingers or objects through the ventilation gratings.
- To avoid any risk, do not make modifications to the product.
- During operation, completely unwind the mains power cable, to prevent overheating and the cable from melting.
- When using an extension cable, this must correspond to the applicable safety regulations.
- There must be no flammable objects (e.g. curtains, paper, etc.) in close proximity to the device during operation.
- Never use the device to dry textile materials or other objects on, above or in front of the device.
- The device must only be set up on a solid, level, dry and non-flammable surface. For example, the device must not be placed on a deep-pile carpet.
- When setting up the device, keep a minimum distance of 50 cm all around from other devices and walls. The distance upwards must be at least 100 cm.
- Never operate the device in a potentially explosive environment or close to flammable gases or liquids.
- Ensure at all times that the air can enter and exit freely. Heat can otherwise accumulate in the device.
- The device remains very hot after it is switched off, and must not be touched.
- Prior to cleaning, let the device cool down until there is no longer a risk of burning.
- Only transport the device when it has cooled down, and when doing so only use the handle provided.
- Never place the device on hot surfaces (e.g. hot plates) or near to heat sources or open fire.
- Only use the original accessories.
- Do not clean using sharp objects or abrasive cleaning agents.
Items supplied
1 tower heater 4
1 base (consisting of 2 parts) 10
1 nut 27
1 remote control 16 with CR2025 (3 V) battery inserted
1 short manual (included)
1 copy of the user instructions (online)
Unpacking
- Remove all parts from the packaging.
- Check that all parts are present and intact.
How to use
Assembling the device
Before the device can be put into operation, the base 10 must be screwed on and the cable spool holders 8 must be attached.
- Figure A: put the back half of the base 25 and the front half of the base 26 together. Ensure that the connection audibly clicks into place.
- Figure B: place the base 10 on the tower heater 4. Align the base so that the guide pin 29 on the underside of the tower heater 4 is inserted into the recess 28 on the base.
- Screw the tower heater 4 onto the base 10. For this purpose, use the nut 27 supplied.
Setting up the device

FIRE HAZARD!
The device must only be set up on a solid, level, dry and non-flammable surface. For example, the device must not be placed on a deep-pile carpet.
- When setting up the device, keep a minimum distance of 50 cm all around from other devices and walls. The distance upwards must be at least 100 cm.
- There must be no flammable objects (e.g. curtains, paper, etc.) in close proximity to the device during operation.
- Select a location which complies with the safety information.
- Select a location where people, animals or plants are not in the immediate proximity.
- Ensure that the device is standing securely.
Remote control
The remote control 16 is supplied with a CR2025 (3V) battery inserted.
- Before switching on, remove the plastic strip from the remote control.
Changing the battery in the remote control

DANGER!
- There is a danger of explosion if the battery is not correctly replaced. Replace only with the same or an equivalent type.
natural_image
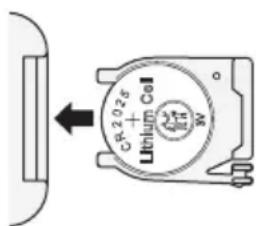
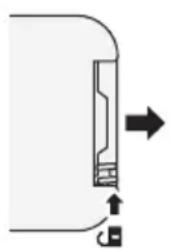
Simple line drawing of a mechanical component with arrows indicating direction (no text or symbols)- Press the small lever on the side of the battery compartment 21 gently in the direction of the middle, and then pull the battery compartment out of the remote control 16 in the direction of the arrow.
- Replace the old battery with a new one. The positive pole (+) of the battery must be pointing upwards.
- Slide the battery compartment 21 into the remote control 16.
Putting the device into operation and switching it off
- Insert the mains plug 9 into a mains socket corresponding to the technical specifications.
- Switch on the power supply by setting the on/off switch 7 on the back of the tower heater 4 to 1. An audio signal sounds. The device is now ready to use.
- Press the ⏻ 24 button to switch on the device from standby mode. An audio signal sounds. The device starts in fan
mode. The current temperature is shown in the display 2.
- Press the ⏻ 24 button in order to switch the device to standby mode. An audio signal sounds.
NOTE: if the device is disconnected from the mains power supply, the selected settings are lost. To disconnect from the mains power supply, set the on/off switch 7 to 0 or pull the mains plug 9 out of the wall socket.
- Turn off the power supply by setting the on/off switch 7 to 0.
NOTE: high electricity costs when in continuous operation!
Please note that a lot of electricity is consumed in continuous operation (24 hours) due to the high output of 2,000 watt. At a price of 35 cents per kilowatt hour, this would mean costs of about €16.80 a day or about €504 a month.
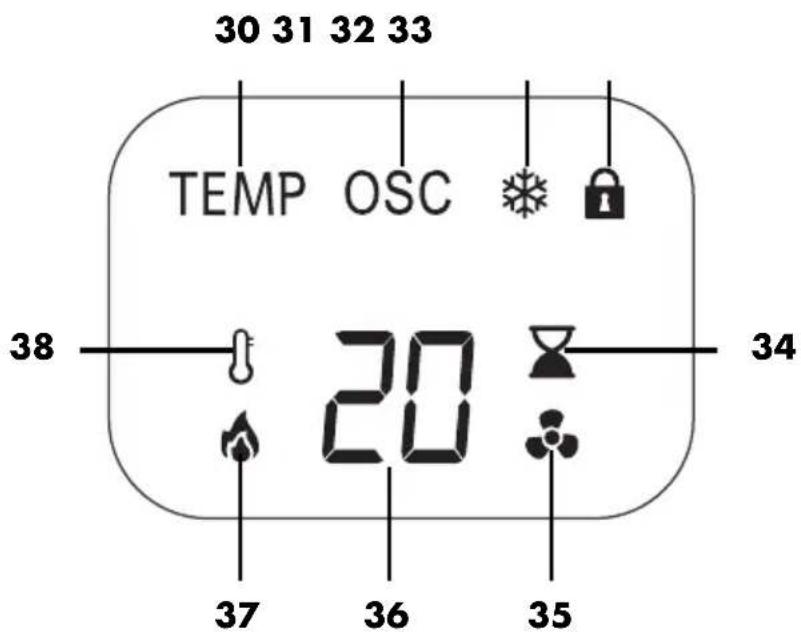
Display overview
text_image
30 31 32 33 TEMP OSC 38 20 34 37 36 3530 TEMP The temperature is shown on the display.
The current room temperature is displayed when TEMP is permanently lit.
The desired temperature is displayed when TEMP flashes.
31 OSC Swivel function is switched on.
32 Frost monitor function is switched on.
33 The operating panel button lock is active.
34 The Timer function is switched on.
35 The fan is switched on without heating.
36 Display of temperature and heat output levels
The current room temperature is displayed when TEMP is permanently lit.
The desired temperature is displayed during setting when TEMP flashes.
The heat output levels LO / L1 / L2 are displayed when they are set.
37 The heater is switched on.
38 Flashes when setting the desired temperature. Is lit when a temperature is set and a heat output level is activated.
Operation
The device can be operated using the buttons on the operating panel 1 or using the remote control 16. The buttons and functions are largely identical.
Button lock
NOTE: the button lock only locks the operating panel 1, not the remote control 16.
- Press and hold the -14 and +13 buttons on the operating panel 1 for approx. 1 second to lock the buttons on the operating panel. The symbol appears in the display 2.
- Press and hold the -14 and +13 buttons for approx. 1 second to cancel the button lock. The symbol goes out in the display 2.
Overview of the button functions
You can control the following functions with the buttons on the device and the remote control:
| Function | Operating panel button | Remote control button |
| Switching on the device / switching to standby mode | Press the 12 button | Press the 24 button |
| Increasing values/power | Press the + 13 button | Press the + 18 button |
| Reducing values/power | Press the - 14 button | Press the - 17 button |
| Operating panel button lock | Press the + 13 and - 14 button for approx. 1 second | - |
| Function | Operating panel button | Remote control button |
| Swivel function | Press the 15 button | Press the 23 button |
| Selecting the heat output | Press the + 13 or - 14 button several times if necessary | Press the 20 button |
| Setting the thermostat | Press the M button: appears in the display, then press the + 13 or - 14 button several times if necessary | Press the 19 button |
| Switching the Timer on/off | Press the M button for approx. 1 second: appears in the display, then press the + 13 or - 14 button several times if necessary | Press the 22 button |
For further information on operation and protective functions, please refer to the online user instructions.
Cleaning
In order to enjoy your device for a long time, you should regularly clean it.

DANGER! Risk of electric shock!
- Disconnect the mains plug 9 before any cleaning.
- Never immerse the device in water.
- Do not let water or cleaning agent run into the device.
WARNING! Risk of material damage!
- Do not clean using sharp objects or abrasive cleaning agents.
For additional information on cleaning and looking after the device and accessories, please see the online user instructions.
Disposal
This product is subject to the provisions of European Directive 2012/19/EC. The symbol showing a wheelie bin crossed through indicates that the product requires separate refuse collection in the
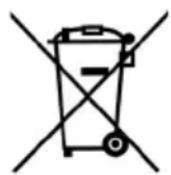
European Union. This applies to the product and all accessories marked with this symbol. Products identified with this symbol may not be discarded with normal household waste, but must be taken to a collection point for recycling electric and electronic appliances.
This recycling symbol marks e.g. an object or parts of the material as valuable for recycling. Recycling helps to reduce the consumption of raw
materials and protect the environment.

Batteries must not be discarded with your household waste. Spent batteries must be disposed of properly. Special containers are available for this purpose in shops selling batteries and at municipal collection points.
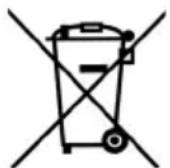
(Rechargeable) batteries marked with the following letters contain harmful substances such as: Cd (cadmium), Hg (mercury), Pb (lead).
Packaging
When disposing of the packaging, make sure you comply with the environmental regulations applicable in your country.
Technical specifications
| Model: STHL 2000 C2 | |
| Mains voltage: 220 - 240 V ~ 50 - 60 Hz | |
| Protection class: | II □ |
| Power rating: 2,000 W | |
| Specification | Symbol | Value Unit | |
| Heat output | |||
| Nominal heat output | P_nom | 2.00 kW | |
| Minimum heat output (reference value) | P_min | 1.00 kW | |
| Maximum continuous heat output | P_max,c | 2.00 kW | |
| Auxiliary power consumption | |||
| at nominal heat output | eI_max | 2.00 | kW |
| Specification | Symbol | Value Unit |
| at minimum heat output | el_min | 1.00 kW |
| in standby mode | el_SB | 0.00017 kW |
| Specification Unit | |
| Only for electrical single-room storage heaters: type of control for heat supply (please select one option) | |
| Manual control of heat supply with integrated thermostat | No |
| Manual control of heat supply with feedback of room and/or exterior temperature | No |
| Electronic control of heat supply with feedback of room and/or exterior temperature | No |
| Fan-assisted heat emission No | |
| Type of heat output/room temperature control (please select one option) | |
| Single-setting heat output, no room temperature control | No |
| Two or more manually adjustable settings, no room temperature control | No |
| Room temperature control with mechanical thermostat | No |
| With electronic room temperature control | Yes |
| Electronic room temperature control and daily time control | No |
| Electronic room temperature control and weekly time control | No |
| Other control options (multiple selections possible) | |
| Room temperature control with presence sensor | No |
| Specification Unit | |
| Room temperature control with open window detector | No |
| With remote control option No | |
| With adaptive control of heating start | No |
| With operating time limiter No | |
| With black bulb sensor No | |
| Contact details | |
| HOYER Handel GmbHKühnehöfe 12DE-22761 HamburgGERMANY | |
Trouble-shooting
If your device fails to function as required, please read the corresponding chapter in the online user instructions.
Symbols used
 | Double insulation |
 | Geprüfte Sicherheit (certified safety): devices must comply with the generally acknowledged rules of technology and the German Product Safety Act (Produkt-sicherheitsgesetz - ProdSG). (Not for UK) |
 | With the CE marking, HOYER Handel GmbH declares the conformity with EU guidelines. |
 | This symbol reminds you to dispose of the packaging in an environmentally friendly manner. |
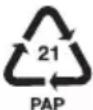 | Recyclable materials are marked with the recycling symbol (3 arrows). The material can be specified by the recycling number in the centre (here: 21) and/or an abbreviation (here: PAP). |
| ~ | AC voltage |
 | It is a recyclable product which is subject to an extended producer responsibility and for which the rules of waste separation apply. |
 | With the UKCA marking, HOYER Handel GmbH declares that the product is in conformity with the UKCA requirements. |
 | The symbol identifies the product manufacturer. |
Subject to technical modifications.
Service Centre
If you require service, please contact our Service Centre:
GB Service Great Britain
Tel.: 0800 404 7657
E-Mail: hoyer@lidl.co.uk
IE Service Ireland
Tel.: 1800 101010
E-Mail: hoyer@lidl.ie
CY Service Cyprus
Tel.: 8009 4241
E-Mail: hoyer@lidl.com.cy
IAN: 425862_2301
Notice succincte
text_image
PDF ONLINE www.lidl-service.comnatural_image
Simple line drawing of a device with an arrow indicating direction, no text or symbols present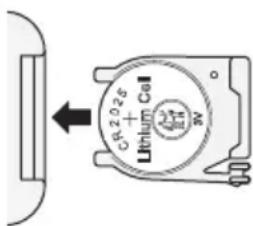
text_image
GR2026 +Lithium Coil Wnatural_image
Symbol of a trash bin with crossed lines indicating no waste or discharge (no text or labels)natural_image
Pure diagram of a mechanical component with arrows indicating direction, no text or symbols presentnatural_image
Symbol of a trash bin crossed with no text or labels, accompanied by a black rectangular block below (no readable text or symbols)
natural_image
Pure diagram of a mechanical component with directional arrows, no text or symbols presentnatural_image
Symbol of a trash bin crossed out by two crossed lines, with no text or labels present.natural_image
Pure diagram of a mechanical component with directional arrows, no text or symbols present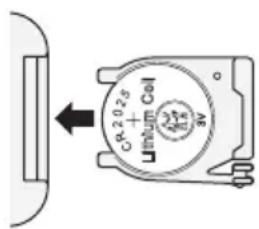
text_image
CR 2025 Linum Cell Wnatural_image
Symbol of a trash bin crossed with no text or labels, accompanied by a black rectangular block below (no readable text or symbols)
natural_image
Pure diagram of a mechanical component with directional arrows, no text or symbols present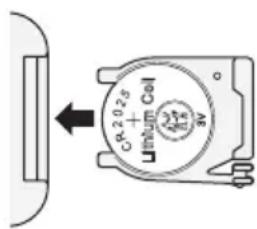
text_image
CR 2026 + Linbum Cell Wnatural_image
Symbol of a trash bin crossed with no text or labels, accompanied by a black rectangular block below (no readable text or symbols)
natural_image
Simple line drawing of a device with an arrow indicating direction and a small icon below (no text or symbols)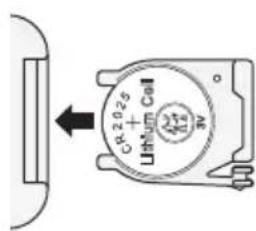
text_image
CR2025 + Ummol Coil Wnatural_image
Symbol of a trash bin with crossed lines indicating no waste or discharge, and a solid black rectangle below (no text or labels)
natural_image
Simple line drawing of a device with an arrow indicating direction, no text or symbols present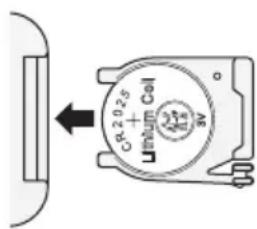
text_image
CR 2025 + Linbum Cell 8Vnatural_image
Symbol of a trash bin crossed out by two crossed lines, with no text or labels present.
natural_image
Pure diagram of a mechanical component with directional arrows, no text or symbols present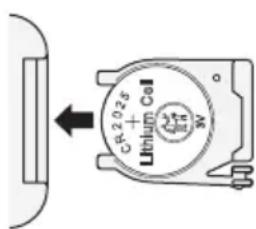
text_image
GR2028 + Lithium Cell Wnatural_image
Symbol of a trash bin crossed out by two crossed lines, with no text or labels present.
natural_image
Simple line drawing of a device with an arrow indicating direction, no text or symbols present