
BK-UM03 - Electric bike SHARP - Free user manual and instructions
Find the device manual for free BK-UM03 SHARP in PDF.
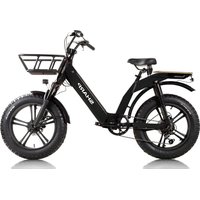


| Product type | Electric pedal-assist bicycle |
| Brand and model | Sharp BK-UM03 |
| Wheel size | 20 inches (alloy wheels) |
| Bicycle weight | 38 kg |
| Maximum load | 100 kg |
| Motor | 48 V, 250 W rear hub motor |
| Battery | Lithium 48 V, 13.5 Ah / 648 Wh, removable with lock |
| Charging time | Approximately 6 hours |
| Range | Up to 60 km (depending on weight, terrain, etc.) |
| Maximum assisted speed | 25 km/h (legal limit) |
| Transmission | Shimano REVOSHIFT 6-speed derailleur |
| Brakes | Hydraulic disc brakes |
| Suspension | Front (lockable) and rear suspension |
| Display | Color LCD screen with battery indicator, speed, ODO, assistance levels |
| Lighting | Integrated front headlight and rear light, controlled via display |
| Walk assistance | Walk mode at 5 km/h (hold Down button for 3 seconds) |
| Assistance levels | 5 levels (0 to 5) selectable |
| Frame material | Aluminum alloy |
| Safety | Disc brakes, lighting, reflectors, helmet recommended |
| Box contents | Bicycle, charger, pedals, battery keys, guides (quick start, warranty) |
| Maintenance | Check brakes, tire pressure, tightness before each ride; battery: charge after use, storage at partial charge |
Frequently Asked Questions - BK-UM03 SHARP
User questions about BK-UM03 SHARP
0 question about this device. Answer the ones you know or ask your own.
Ask a new question about this device
Download the instructions for your Electric bike in PDF format for free! Find your manual BK-UM03 - SHARP and take your electronic device back in hand. On this page are published all the documents necessary for the use of your device. BK-UM03 by SHARP.
USER MANUAL BK-UM03 SHARP
Quick start guide
BK-UM03
Electric Bike

*Product images are for illustration purposes only. Actual product may vary.
Use this Quick Guide to set up and start using your e-bike. For more detailed information on your model of e-bike, please refer to the online manual, which can be found by following the link below or scanning the QR Code and searching by model name BK-UM03.
https://www.sharpconsumer.com/support/

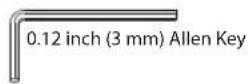
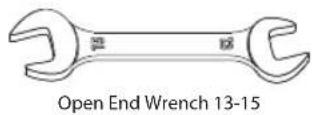
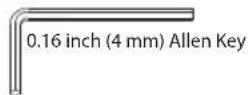
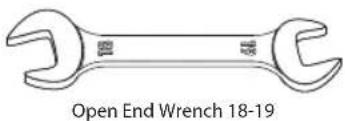
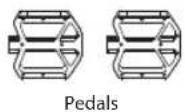
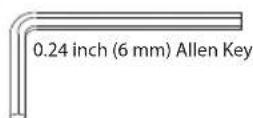
Useful tools for assembling and using the bike (not included). Accessories (included).
Battery locking keys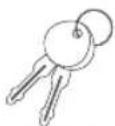
Quick start guide
Charger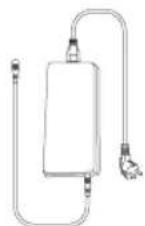
Warranty guide
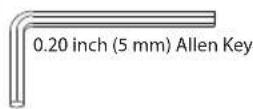
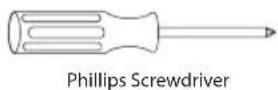

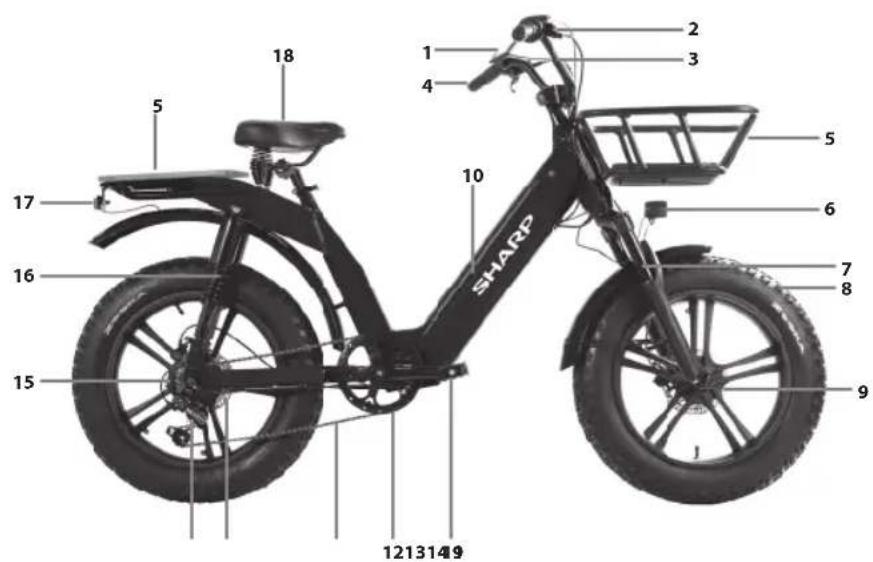
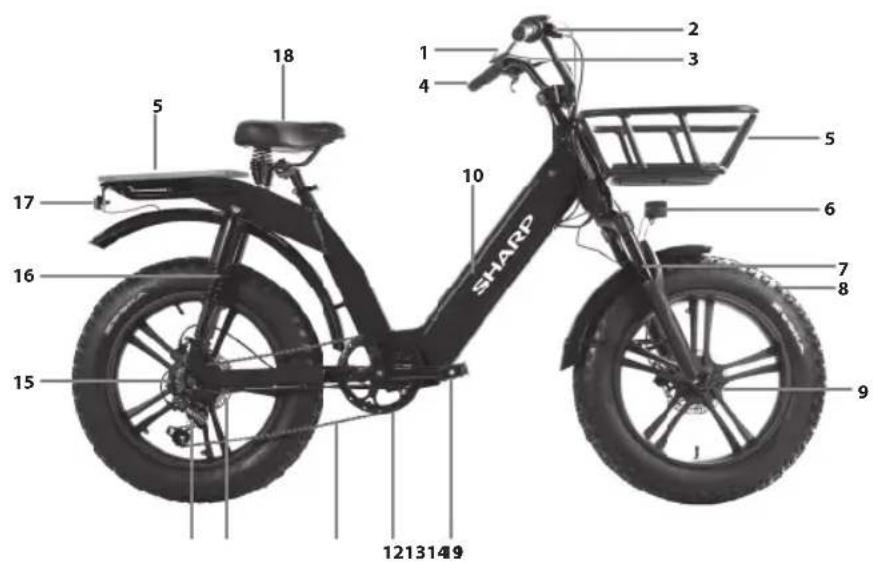
- Display
- Brake levers
- Handlebar
- Grips
- Carrier
- Front light
- Front suspension
- Tire
- Disc Brake
- Battery
- Pedal
- Crank set
- Chain
- Rear derailleur
- Hub motor
- Rear suspension
- Taillight
- Saddle
Important safety instructions
Please read these safety instructions and respect the following warnings before operating the appliance:

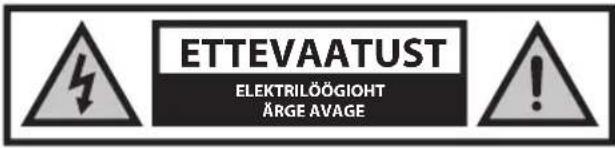
The lightning flash with an arrowhead symbol within an equilateral triangle is intended to alert the user to the presence of uninsulated dangerous voltage within the product's enclosure that may be of sufficient magnitude to constitute a risk of electric shock to persons.

The exclamation point within an equilateral triangle is intended to alert the user to the presence of important operating and maintenance (servicing) instructions in the literature accompanying the appliance.

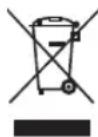
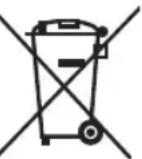
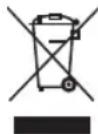
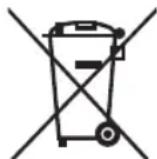
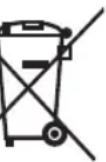
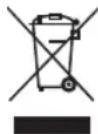
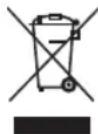
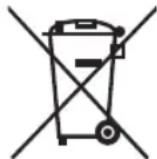
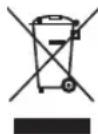
This symbol means that the product should be disposed of in an environmentally friendly manner and not with general household waste.

AC voltage

Class II equipment
To prevent fire, always keep candles and other open flames away from this product.

IMPORTANT: Read the following carefully and keep it for future reference.
CAUTION: Wear a protective helmet!
To reduce the risk of injury, wear a suitable helmet when riding!
Risk of accident and injury
- Incorrect operation of the e-bike due to insufficient knowledge may cause an accident. Please familiarize yourself with the features of the e-bike before riding.
- Familiarize yourself with the brake lever in advance if you are not sufficiently aware of the placement of the front and rear brakes. Please also adjust accordingly before riding.
- Please make sure the brakes are properly adjusted and function well.
CAUTION: Hardware may not be fully tightened, including but not limited to bolts, nuts, the front hub shaft, the rear wheel, steering mechanisms (handlebar, stem), the brake system, the driving system, pedals, etc. To reduce the risk of injury, ensure that all bike hardware is locked tightly and correctly into position and that there is no loss of equipment, breakage, or other types of damage.
CAUTION: This bike is designed for adults. Children may only ride under the supervision of adults.
To reduce the risk of accident and injury, make sure that the bike and any of its structures are not within the reach of children under the age of 3.
CAUTION: Component breakage due to improper use of the bicycle may occur.


Risk of accident and injury!
- Do not ride over ramps or mounds with the bicycle.
- Do not ride this bicycle in cross-country cycling.
- Do not ride the bicycle over stairs, rocks, or other steps with a height greater than 15 cm.
Improper additions or alterations to the bicycle and incorrect accessories can cause the bicycle to malfunction.
To reduce the risk of accident and injury, do not add any extra accessories that are not purchased from the seller or without getting permission from the seller, including but not limited to child safety seats, trailers, etc.
CAUTION: Do not ride the bicycle in a risky way.
To reduce the risk of accident and injury, ride the bicycle only in the correct way. Make sure you are able to control the bike and do not try dangerous actions, including but not limited to riding with no hands, jumps, and wheelies.
DANGER: Lack of bicycle maintenance presents the risk of accident and injury.
Check the bike before every ride, including but not limited to brake function, tire wear and PSI, bolt and nut condition, steering, and spoke tension.
If you hear any abnormal noise while riding, stop immediately and check the entire bike.
CAUTION: Ensure full compliance with local law.
Risk of fines and confiscation!
Before riding the bike, make sure the bike aligns with the standards of your local law.
Reflectors are not a substitute for required lights. Riding at dawn, at dusk, at night, or at other times of poor visibility without an adequate bicycle lighting system and without reflectors is dangerous and may result in serious injury or death.
If your bicycle does not fit properly, you may lose control and fall.
Bolts that are too tight can stretch and deform.
Do not expose your battery to high temperatures.
Riding with improperly adjusted brakes or worn brake pads is dangerous and can result in serious injury or death.
Never inflate a tire beyond the maximum pressure marked on the tire's sidewall or the wheel rim. If the maximum pressure rating for the wheel rim is lower than the maximum pressure shown on the tire, always use the lower rating. Exceeding the recommended maximum pressure may blow the tire off the rim or damage the wheel rim, which could cause damage to the bike and injury to the rider and bystanders. The best and safest way to inflate a bicycle tire to the correct pressure is with a bicycle pump which has a built-in pressure gauge.
Applying brakes too hard or too suddenly can lock up a wheel, which could cause you to lose control and fall. Sudden or excessive application of the front brake may pitch the rider over the handlebars, which may result in serious injury or death.
Stop the charging procedure immediately if you notice a strange smell or smoke.
- SHARP is not responsible for injury/death caused by improper use.
- Sharp is not responsible if you do not comply with local regulations and restrictions.
- The warranty does not cover damages caused by improper use of the device, especially in case of use for non-domestic purposes and alterations and/or adaptations necessary for countries or regions for which it was not originally designed.
- Always abide by local traffic rules and national laws and regulations while using your e-bike.
- Always adhere to the local speed limit. DO NOT exceed the speed limit for your e-bike. • Always wear safety protection equipment when in use. • Always wear a safety helmet when riding your e-bike.
- Always ride with both hands holding the handles, never ride with one hand.
- Do not ride in bad weather.
- Do not use this e-bike to perform stunts or dangerous maneuvers. It is a bike designed for domestic use.
- Do not carry people or items such as bags.
- Ride slowly in crowded places.
- Ensure that all screws and fasteners are tight and normal before use.
- Make sure that the folding shaft enters the slot when unfolding the e-bike.
- Do not ride on uneven roads, water, oil or ice.
- Do not weave through traffic or make moves which are unpredictable to other people.
- Do not ride the e-bike if outside of the country's age limits.
- Do not ride the e-bike over the country's legal speed limit for e-bikes.
- Do not use the e-bike if it is damaged.
- Do not use the e-bike if the battery emits a peculiar smell and/or heats up.
- Do not use the e-bike if liquid leaks out of it, avoid contact and place out of the reach of children.
- Before use, ensure that the e-bike is not damaged. Do not ride if there is any damage.
- Ensure that you read all of this User Manual before using the e-bike.
- Learn how to ride your e-bike before using it in a public space.
- This e-bike can be identified by the model and serial number located on the rating plate.
- Propulsion is via an electric motor located in the driving wheel.
- Only one person may ride on the e-bike.
- Do not modify this e-bike in any way.
- Do not use any parts or accessories unless recommended or approved by SHARP.
- Ride the e-bike on level surfaces. Do not exceed the specified incline.
- Excessive use will reduce the lifetime of this e-bike.
- Caution, brakes and associated parts may become hot during use. Do not touch after use.
- Do not power on the e-bike while charging. After the battery is fully charged, disconnect the charging cable.
- The battery indicator on the display will show the battery lifetime.
- When the battery is low, it may result in weakened electric power assistance. It is recommended that you start charging at 20-40% charge.
- Charge the battery after every use.
- If the e-bike is not used for a long time, charge it at least once a month. Note that if the battery is not charged for a long time, the battery will enter a self-protection state and will fail to charge. In this case, please contact your dealer.
- When charging, plug the charger into the charging port before plugging it into the wall socket.
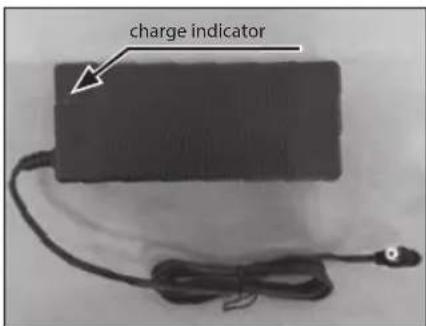
- While charging, the indicator light of the charger is red; this means the charging is normal. When the indicator light turns green, charging is complete.
- Only use the original charger to charge the battery.
- The charger has an overcharge protection function. If the e-bike is 100% fully charged, the charger will automatically stop charging.
- Dispose of batteries and e-bikes in compliance with the applicable regulations in your country.
Battery and Charger Warnings
Batteries
- Do not expose batteries to high temperatures and do not place them in locations where the temperature might increase quickly, e.g., near fire or in direct sunshine.
- Do not expose batteries to excessive radiant heat, do not throw them into the fire, do not disassemble them, and do not try to recharge non-rechargeable batteries; they could leak or explode.
- Disposal of a battery into fire or mechanically crushing or cutting a battery can result in an explosion.
- Leaving a battery in an extremely high temperature surrounding environment can result in an explosion or the leakage of flammable liquid or gas.
- A battery subjected to extremely low air pressure may result in an explosion or the leakage of flammable liquid or gas.
- CAUTION: Risk of explosion or damage to equipment, if incorrect type batteries are used.
- Never use different batteries together or mix new and old batteries.
- Do not use any batteries other than those specified.
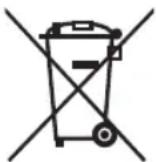
Disposal of this equipment and batteries
- Do not dispose of this product or its batteries as unsorted municipal waste. Return it to a designated collection point for the recycling of WEEE in accordance with local law. By doing so, you will help to conserve resources and protect the environment.
- Most of the EU countries regulate the disposal of batteries by law. A recycling symbol appears on electrical equipment, packaging and batteries to remind users to dispose these items correctly. Users are requested to use existing return facilities for used equipment and batteries. Contact your retailer or local authorities for more information.
- The battery and battery charger contain hazardous materials. Always keep the battery and battery charger away from children, animals, or persons incapable of understanding the potential hazards.

CE statement:
- Hereby, Sharp Consumer Electronics Poland sp. z o.o. declares that this equipment is in compliance with the essential requirements and other relevant provisions of RED Directive 2014/53/EU.
- The full text of the EU Declaration of Conformity is available by following the link www.sharpconsumer.com and then entering download section of your model and choosing "CE Statements".
www.sharpconsumer.com/contact/
www.sharpconsumer.com/support/
www.sharpconsumer.com/documents-of-conformity/
What's in the Box:
E-Bike Parts
- 1 × E-bike
Accessories Box
- 1 × Quick Start Guide
- 1 × Warranty guide
- 1 × Charger
- 2 × Pedal
- 2 × Battery keys
Accessories Box
(Refer to 1 on page 1)
Bike Parts
(Refer to 2 on page 1)
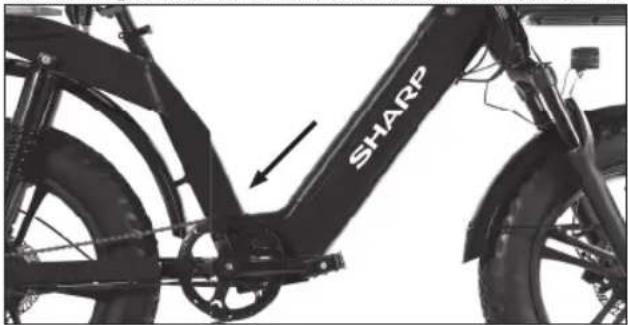
Bike Frame Number
The bike frame number can be found stamped on the tube, as shown in the figure. This is the unique identifier of the electric bicycle. When the bike is stolen, the serial number gives you the best chance of recovering it. It would be a good idea to write it down somewhere or take a picture of it.
Assembling the E-bike
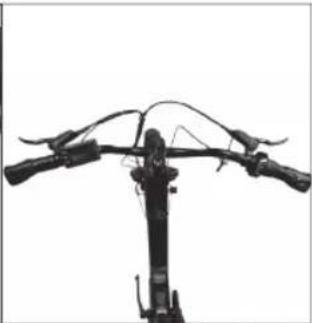
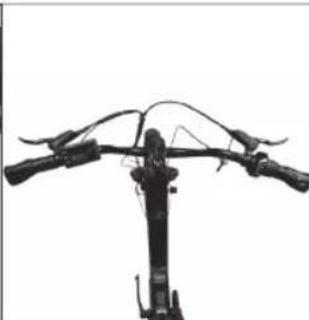
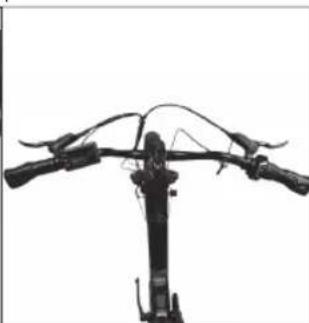
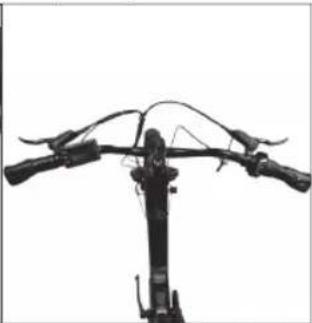
The bicycle is delivered with the handlebar folded. Rotate the handlebar as instructed in the relevant section. Install the pedals. Refer to the relevant section for detailed instructions.
Remove all transport protection before use.
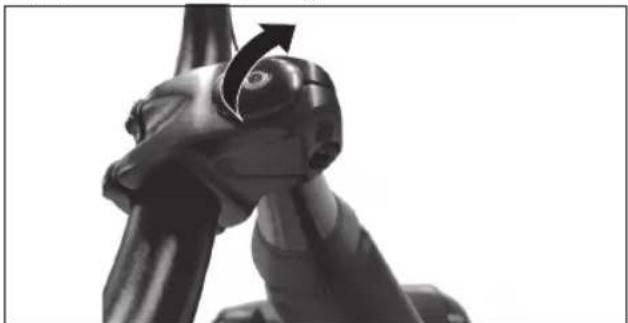
STEP 1: Install and adjust the handlebar
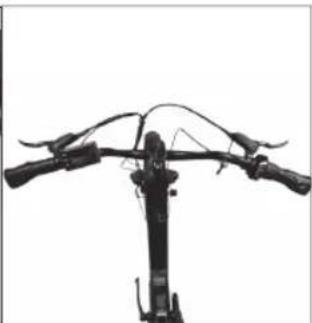
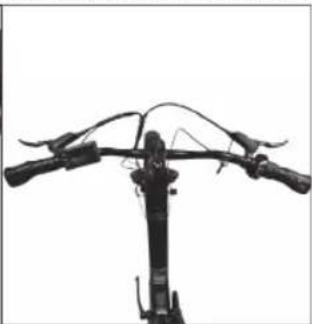
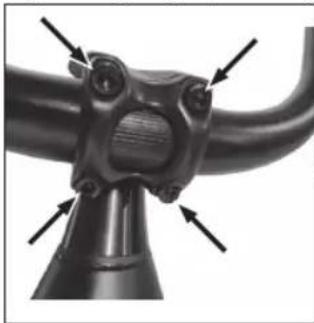
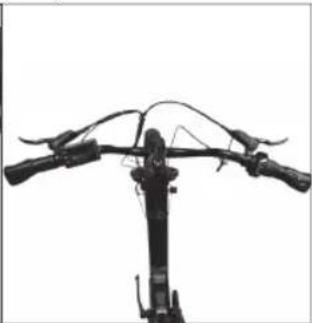
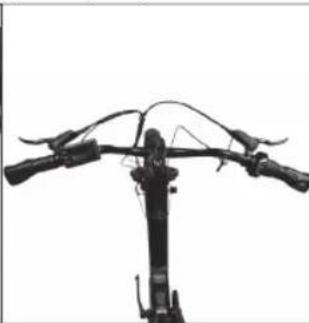
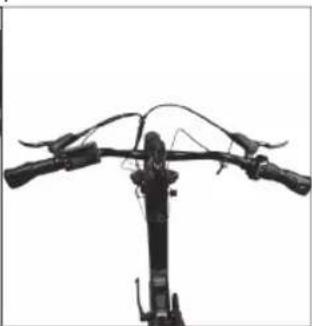
a. Use a 6mm Allen key and loosen the screws to turn the handlebars perpendicular to the bike, then tighten the screws.
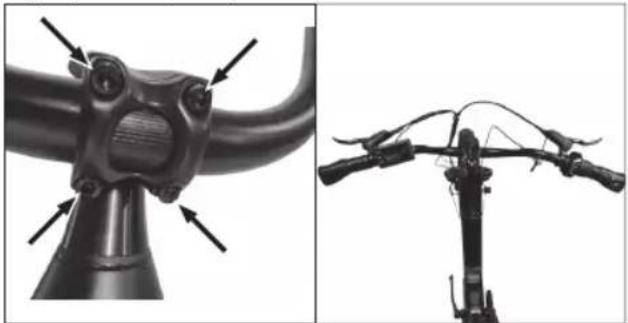
b. Use a 5mm Allen key and loosen the screws to adjust the handlebars to your preference, then tighten the screws.
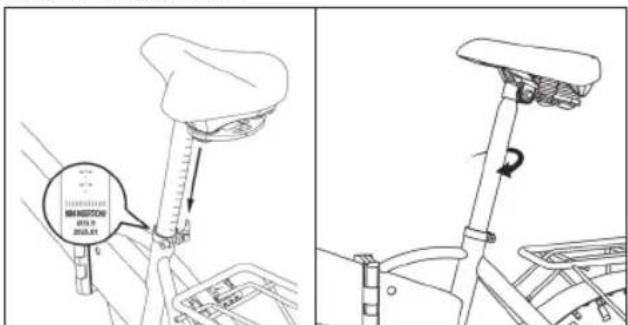
STEP 2: Adjust the seatpost
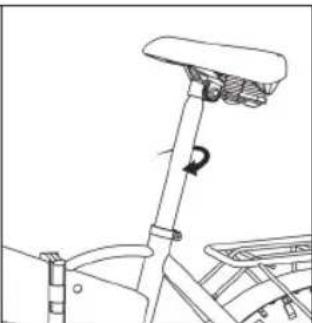
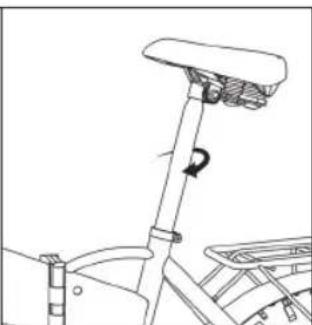
a. Release the seatpost quick release. b. Adjust the seatpost height and saddle angle to find your most comfortable riding position, please be careful not to exceed the minimum safety scale line. c. Tighten the quick release.
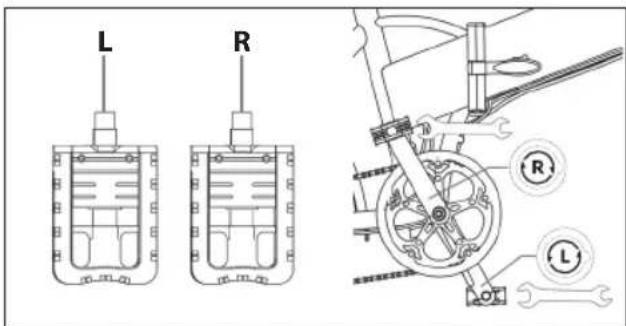
STEP 3: Install the pedals
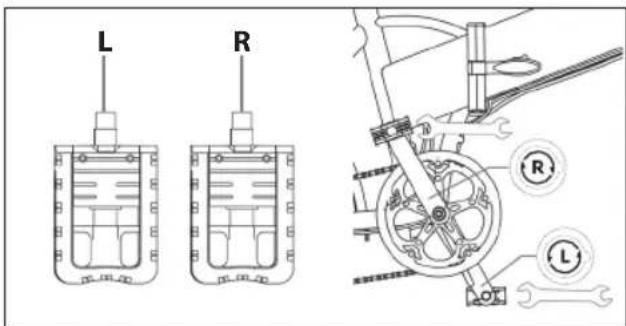
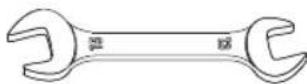
Use the 15 mm wrench to mount the pedals, as shown in figure.
NOTES:
Pedal thread must be lubricated before being assembled. Check the end cap on both pedals to identify the left pedal and right pedal. Please note that the right pedal will tighten clockwise, while the left pedal will tighten anticlockwise. Make sure the torque is about 35 N·m.
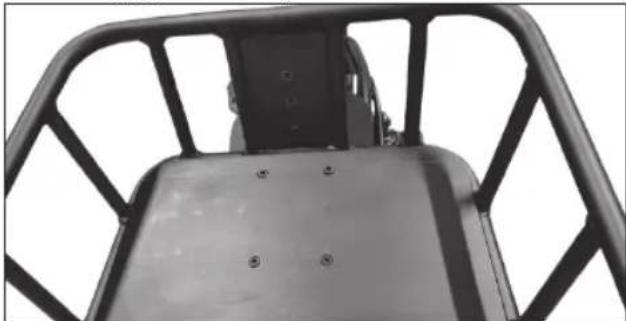
STEP 4: Install luggage rack
Secure the luggage rack to the bicycle frame with bolts.
How to use the E-bike
Fully charge the battery before first use. Check tire pressure regularly for best performance.
How to charge
a. Open the rubber cap and plug the charger into the e-bike charge port. Make sure that the charger port is in the given direction.
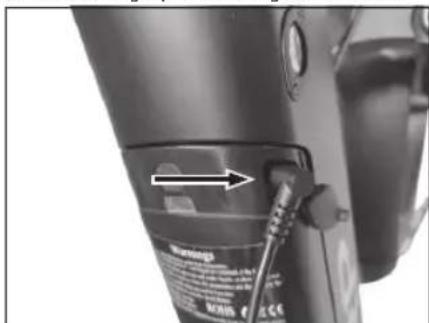
b. Plug the charger into the mains wall socket. c. When connected to the battery charger, the battery will start to charge and the charge indicator on the charger will turn red. d. After the charging is complete, the charge indicator will turn green. Remove the battery charger when fully charged.
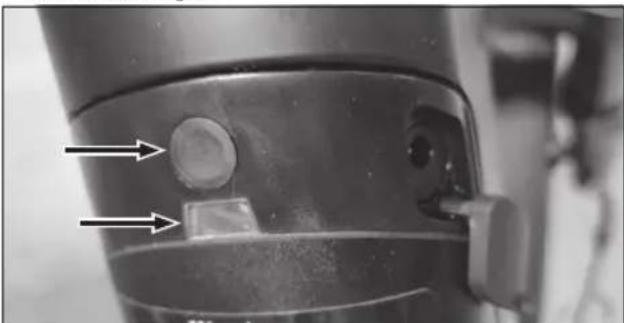
e. Close the rubber cap after charging. f. To check the level of charge press the button on the battery. Blue LED - battery charged Red LED - discharged
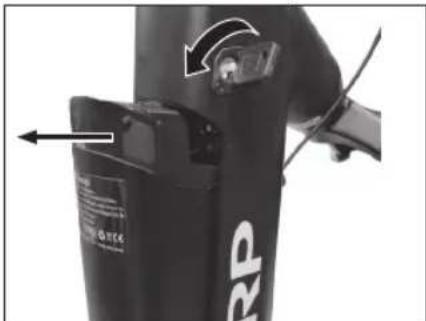
Remove battery:
To remove the battery, follow these steps:
a. Using the supplied keys (hanging on the handlebar), insert the key and turn counterclockwise to unlock the battery.
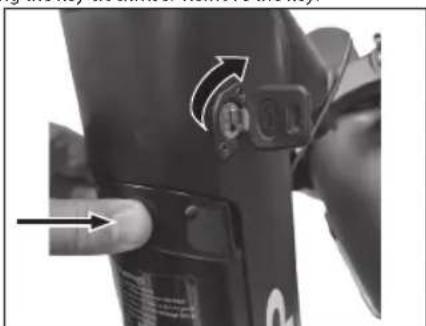
b. To install the battery, place it in the frame, press it in firmly, and lock it by turning the key clockwise. Remove the key.
The Assisted Pedalling
This electric bicycle is equipped with an "assisted pedalling system", consisting of a motor, a battery and a speed sensor. It is important to know that when the system is on, the engine undertakes to supply energy only while you are pedalling. When you stop pedalling, the motor switches off and the electrical assistance for pedalling is missing.
In all pedal-assisted bicycles the engine switches off and the electrical assistance stops when the maximum speed allowed for electric bicycles of 25 km/h is reached.
When the speed drops below this value, the electrical assistance starts again until you stop pedalling.
How to start an E-bike
ON/OFF
Switch on e-bike by long pressing the power button on the display to activate.
The motor offers five assist modes: 0-5. Short press Up (+) or Down (-) to switch the pedal assist level. The display interface is shown in the figure. Start pedaling to activate pedal assistance.
We recommend that you start slowly and gradually increase your pedaling speed.
Walk Assist
Pressing and holding the DOWN button for 3 seconds activates Walk-Assist Mode. The e-bike will go at a speed of 5 km/h automatically.
Display functions:
Through the display you turn the bicycle on and off, adjust the pedaling assistance, and view the following information:
- Plus Key or Minus/Walk Key to switch assist levels. To turn on/off integrated lights, press the "plus" button for more than 2 seconds.
- Battery level.
- ODO (total range), Trip (single trip range), TIME (riding time). Short press the M button to change options.
- Current speed.
- Error codes.
- PAS level: There are 5 levels by default: 0/1/2/3/4/5. 0 means no assist power.
- ON/OFF Key: Pressing changes the information on the display: TRIP/RIDE TIME/Power/Mileage.
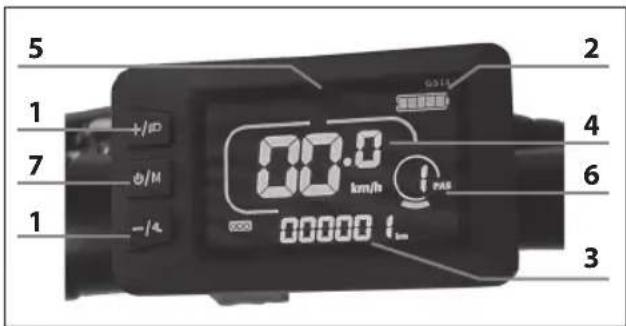
- Power button – Turns the bicycle ON and OFF with a press of more than 3 seconds. (The display auto shuts off after a few minutes.) • + & - button - Selects pedal assistance.
Here are definitions of the error codes.
Table Error codes:
| How to read the error codes indicated by the display | Description |
| E02 Brake Error | |
| E03 PAS Sensor Error (Riding Mark) | |
| E04 Walk Assist Mode | |
| E06 Low Voltage Protection | |
| E07 Motor Error | |
| E09 Controller Error | |
| E10 Communications Error |
Change gears
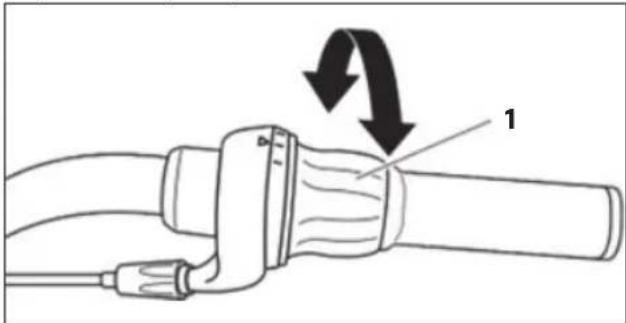
Use the twist grip on the right side of the handlebars to operate the rear derailleur. A gear engaged indicator, gear selected, is visible next to the rotating handle.
To operate the derailleur with a twist grip, follow these steps:
a. Press the pedals forward. b. Turn the ring (1) by hand clockwise to shift to a smaller sprocket, where the pedaling effort will be greater. c. Turn the gear shift ring by hand counterclockwise to move to a larger gear, where the pedaling effort will be less.
Turning the lighting ON and OFF
To turn the lighting ON or OFF, proceed as follows:
Press and hold the "+" button on the display for more than 2 seconds.
NOTES: If you use the light even in broad daylight, other road users will be more likely to see you.
Suspension
The suspension lockout allows the front suspension to be locked for improved efficiency when climbing inclines. To activate or deactivate the lockout, turn the control knob to the desired position.
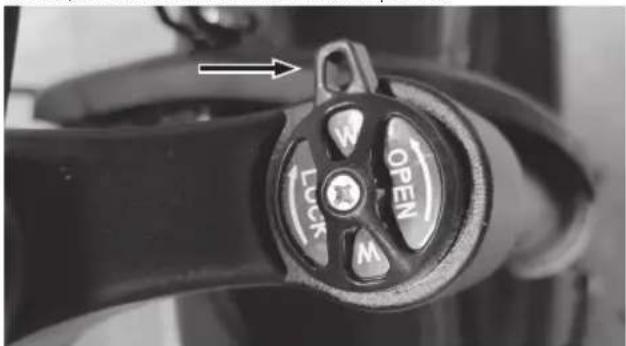
NOTES: Adjusting the rear suspension requires specialized tools. We do not recommend attempting this adjustment on your own.
Battery & Charger maintenance
LITHIUM BATTERY
At the end of each use of the bicycle or if the battery is flat, recharge the battery.
After prolonged use, the battery capacity will slowly decrease.
The average life of the battery depends on personal use and storage conditions. Even with proper maintenance, rechargeable batteries are not eternal. On average, a lithium battery remains active for about 500 charging cycles. It should be considered, however, that with each recharge the "capacity" of the battery drops proportionally. Even partial recharges (for example, a 1-hour recharge) are to be considered, for the purpose of the
number of possible cycles, as a complete recharge. Periodically fully discharge the battery and recharge it.
If the bicycle is not used for a long period, do not leave the battery connected to the charger for more than 8 hours. Leave it to charge for about 4 hours. In this case, do not pay attention to the battery charger lights.
When the battery is completely discharged, it must be immediately recharged. Do not leave the battery discharged and unused; immediately proceed with a recharge cycle. In this case, provide for a longer charging cycle of about 6 hours to allow complete activation of the battery.
It is recommended to use the bicycle once or twice a year until the battery is completely discharged. Then fully charge it. This process has a beneficial effect on battery life.
Battery capacity on the display
When you turn on the bicycle engine and start pedalling, the battery icon on the display indicates the instantaneous charge measured and not the actual charge availability.
In case of uphill routes, when the engine is more stressed, the indicator may show a reduced residual charge (the number of LEDs lit on the display decreases). When the motor is stopped, in case of a stop or advance by inertia (for example, downhill), the indicator may show a higher available charge (in the absence of load on the engine, the battery voltage increases).
The best time, therefore, to achieve the amount of residual charge is when reaching a constant speed and on a flat and straight path after stabilizing the work of the battery.
Battery charging
Recharge the battery without removing it from the frame.
At the end of each use of the bicycle, we do consider it worthwhile to always recharge the battery. Keeping the battery charged at all times extends its life.
It is compulsory to use the battery charger supplied and follow the instructions on it. Do not use battery chargers not approved by SHARP. They may damage the battery and limit its life. By using personal accessories not supplied with the bicycle, the legal guarantee will automatically expire.
Before charging the battery, carefully read the following instructions and follow them during the process.
- Use only the supplied battery charger.
- Keep both the battery charger and the battery away from children and pets.
- The charging operation must be carried out in a spacious, cool and dry place; away from direct heat sources and humidity.
- If the charging operation takes place with the battery housed in the bicycle, make sure that it is stable on the stand and turned off.
- It is normal for the battery charger to heat up during charging.
- Do not cover the battery charger.
- Keep the plugs always clean and dry.
- Do not get the battery charger wet.
- Do not use the battery charger and/or the battery if they are damaged.
- Always connect the battery charger to the battery first and then to the power socket.
- Do not carry out the charging process in direct sunlight.
- Do not use the battery charger for other purposes or for other devices.
• Voltage drops during charging cycles could damage the battery.
Do not leave the battery connected to the charger for more than 8 hours. If the temperature of the battery rises too high, an unpleasant smell will be felt: stop charging immediately and contact the Service Centre.
Battery FAQs
Is it normal for the battery to get warm during charging?
Yes, it is normal for the battery to be warm during the charging process.
Battery charger maintenance
Follow the following maintenance instructions for the battery charger:
- When the battery is fully charged, first disconnect the cable from the socket and then the battery power cable.
- Store the battery charger in a dry and clean place.
- The battery charger requires no maintenance. Any opening or tampering is prohibited.
- If you suspect that the battery charger is damaged, contact the service centre.
- If the cable is damaged, contact the service centre to replace it.
- If the temperature of the battery charger rises too high (over 65°C), an unpleasant smell will be felt: stop charging immediately and contact the Service Centre.
Technical specification
| Model BK-UM03 | |
| General | |
| Colors Black | |
| Size M | |
| Nominal speed approx. 25 km/h | |
| Km range with mid assistance on a mostly fl at urban route up to 60 km* | |
| Weight 38 kg | |
| Max load 100 kg | |
| Electronics | |
| Rear-hub motor 48 V 250 W | |
| Motor Electric Motor pedal assist bike | |
| Battery 48 V 13,5 Ah 648 Wh Lithium cells | |
| Display LCD colour display | |
| Battery charger AC 100 V - 240 V Output DC 52V / 2A Model: XVE-5460200 Smart charger | |
| Charging time 6 hours | |
| Battery charging cycles | approx. 500 |
| Battery body | removable with safety lock |
| Derailleurs | Shimano REVOSHIFT 6 speed |
| Frame Set | |
| Frame Aluminium alloy | |
| Wheels | |
| Wheels size | 20 inch alloy wheels |
| Brakes | |
| Brake type | hydraulic disc brakes |
* - The range of travel (approx. 60 Km) of the bicycle with the aid of pedal assistance may vary according to the different conditions of use and the weights to be transported. These values can be influenced by the weight of the user, the type of route (steep climbs), transport of heavy objects, tire pressure, adverse weather conditions, as well as repetitive stops and restarting of travel, thus significantly reducing the travel range.


What's in the box:
E-Bike dele
- 1 × E-cykel
Tilbehørsboks
- 1 × Hurtig start guide
- 1 × Garantikort
- 1 × oplader
- 2 × Pedal
- 2 × Batterinøgler
Tilbehørsboks
Samling af E-cyklen
TRIN 2: Juster sadelstang
TRIN 3: Installer pedalerne
Fjern batteri:
Assisteret Pedalering
https://www.sharpconsumer.com/support/

www.sharpconsumer.com/contact/
www.sharpconsumer.com/support/
www.sharpconsumer.com/documents-of-conformity/
What's in the box:
E-bike parts
- 1 × E-bike
Accessory box
Assembling the e-bike
Removing the battery:
https://www.sharpconsumer.com/support/

www.sharpconsumer.com/support/
www.sharpconsumer.com/documents-of-conformity/
https://www.sharpconsumer.com/support/

www.sharpconsumer.com/contact/
www.sharpconsumer.com/support/
www.sharpconsumer.com/documents-of-conformity/

What's in the box:
Parts of the E-Bike
Assembling the E-bike
Remove the battery:
Pedal assist
https://www.sharpconsumer.com/toetus/
Important safety instructions
Disposal of this equipment and batteries
www.sharpconsumer.com/documents-of-conformity/
What's in the box:
E-bike parts
- 1 × E-bike
Accessory box
- 1 × Quick guide
- 1 × Warranty guide
- 1 × Charger
- 2 × Pedals • 2 × Battery wrench
Accessory box
(Refer to page 1, figure 1)
Bicycle parts
(Refer to page 1, figure 2)
Bicycle frame number
Assembly of the e-bike
STEP 2: Adjust the seat post
Remove the battery:
Riding with assistance
https://www.sharpconsumer.com/support/

www.sharpconsumer.com/support/
www.sharpconsumer.com/documents-of-conformity/
What's in the box:
E-bike components
• 1 × E-bike
Accessory package
b. Plug the charger into a wall outlet.
Remove the battery:


Pedal assist

Disposal of this equipment and batteries
b. Use a 5mm Allen key and loosen the screws to adjust the handlebar to your preference, then tighten the screws.
STEP 2: Adjust the seat
STEP 3: Install the pedals
How to use the E-bike
Fully charge the battery before first use.
Remove the battery:
Pedal assist
NOTE: Adjusting the rear suspension requires specialized tools. We do not recommend attempting this adjustment yourself.
Battery and charger maintenance
LITHIUM BATTERY
At the end of each use of the bike or if the battery is empty, charge the battery. After prolonged use, the battery capacity will slowly decrease. The average battery life depends on personal use and storage conditions. Even with proper maintenance, rechargeable batteries are not eternal. On average, a lithium battery remains active for approximately 500 charge cycles. However, it should be noted that with each charge, the battery's "capacity" decreases proportionally. Even partial charges (e.g., 1H charge) should be considered, for the number of possible cycles, as a full charge. Periodically fully discharge and recharge the battery.

What's in the box:
E-bike parts
- 1 × E-bike
Accessories box
https://www.sharpconsumer.com/support/
www.sharpconsumer.com/contact/
www.sharpconsumer.com/support/
www.sharpconsumer.com/documents-of-conformity/
STEP 3: Install the pedals
https://www.sharpconsumer.com/support/


www.sharpconsumer.com/support/
www.sharpconsumer.com/documents-of-conformity/
What's in the box:
STEP 3: Install the pedals
Assist pedal
https://www.sharpconsumer.com/support/

Instructions for assembling and using the electric bicycle (not included). Accessories (included).
0.12 inch (3 mm) Allen key
Disposal of this equipment and batteries
www.sharpconsumer.com/support/
www.sharpconsumer.com/documents-of-conformity/
What's in the box:
Assembling the e-bike
Remove the battery:
To remove the battery, follow these steps:
Assist pedal
https://www.sharpconsumer.com/support/

www.sharpconsumer.com/support/
www.sharpconsumer.com/documents-of-conformity/

STEP 2: Adjust the seat post
Remove battery:
The support bracket
https://www.sharpconsumer.com/support/

www.sharpconsumer.com/contact/
www.sharpconsumer.com/support/
www.sharpconsumer.com/documents-of-conformity/

What's in the box:
Removing the battery:
https://www.sharpconsumer.com/support/

www.sharpconsumer.com/contact/
www.sharpconsumer.com/support/
www.sharpconsumer.com/documents-of-conformity/

Assembling the E-bike
STEP 3: Install the pedals
Use the 15 mm wrench to install the pedals, as shown in the figure.
NOTES:
How to use the E-bike
Remove battery:
Pedal assist
https://www.sharpconsumer.com/support/

www.sharpconsumer.com/support/
www.sharpconsumer.com/documents-of-conformity/

What's in the box:
E-bike parts
• 1 × E-bike
Accessory box
- 1 × Quick start guide
- 1 × Warranty guide
- 1 × Charger
- 2 × Pedals
- 2 × Battery keys
Accessory box
STEP 2: Adjust the saddle post
Remove the battery:
The assisted pedaling
Sharp Consumer Electronics Poland sp. z o.o. Ostaszewo 57B, 87-148 Łysomice, Poland
EBK/QSG/0012
www.sharpconsumer.eu
SHARP
- QUICK START GUIDE
- IMPORTANT SAFETY INSTRUCTIONS
- PLEASE READ THESE SAFETY INSTRUCTIONS AND RESPECT THE FOLLOWING WARNINGS BEFORE OPERATING THE APPLIANCE
- TO PREVENT FIRE, ALWAYS KEEP CANDLES AND OTHER OPEN FLAMES AWAY FROM THIS PRODUCT
- IMPORTANT: READ THE FOLLOWING CAREFULLY AND KEEP IT FOR FUTURE REFERENCE
- RISK OF ACCIDENT AND INJURY
- BATTERY AND CHARGER WARNINGS
- BATTERIES
- DISPOSAL OF THIS EQUIPMENT AND BATTERIES
- CE STATEMENT
- WHAT'S IN THE BOX
- E-BIKE PARTS
- ACCESSORIES BOX
- BIKE PARTS
- BIKE FRAME NUMBER
- ASSEMBLING THE E-BIKE
- STEP 1: INSTALL AND ADJUST THE HANDLEBAR
- STEP 2: ADJUST THE SEATPOST
- STEP 3: INSTALL THE PEDALS
- NOTES
- STEP 4: INSTALL LUGGAGE RACK
- HOW TO USE THE E-BIKE
- HOW TO CHARGE
- REMOVE BATTERY
- THE ASSISTED PEDALLING
- HOW TO START AN E-BIKE
- ON/OFF
- WALK ASSIST
- DISPLAY FUNCTIONS
- HERE ARE DEFINITIONS OF THE ERROR CODES
- CHANGE GEARS
- TURNING THE LIGHTING ON AND OFF
- SUSPENSION
- BATTERY & CHARGER MAINTENANCE
- LITHIUM BATTERY
- BATTERY CAPACITY ON THE DISPLAY
- BATTERY CHARGING
- BATTERY FAQS
- BATTERY CHARGER MAINTENANCE
- E-BIKE DELE
- TILBEHØRSBOKS
- SAMLING AF E-CYKLEN
- TRIN 2: JUSTER SADELSTANG
- TRIN 3: INSTALLER PEDALERNE
- FJERN BATTERI
- ASSISTERET PEDALERING
- ACCESSORY BOX
- REMOVING THE BATTERY
- PARTS OF THE E-BIKE
- REMOVE THE BATTERY
- PEDAL ASSIST
- BICYCLE PARTS
- BICYCLE FRAME NUMBER
- ASSEMBLY OF THE E-BIKE
- STEP 2: ADJUST THE SEAT POST
- RIDING WITH ASSISTANCE
- E-BIKE COMPONENTS
- ACCESSORY PACKAGE
- STEP 2: ADJUST THE SEAT
- BATTERY AND CHARGER MAINTENANCE
- ASSIST PEDAL
- THE SUPPORT BRACKET
- STEP 2: ADJUST THE SADDLE POST
- THE ASSISTED PEDALING
Brand : SHARP
Model : BK-UM03
Category : Electric bike