SSPM 6 B1 - Salt/pepper mill SILVERCREST - Free user manual and instructions
Find the device manual for free SSPM 6 B1 SILVERCREST in PDF.

| Product type | Electric milk frother |
| Brand | SilverCrest |
| Model | SSPM 6 B1 |
| Power supply | 220–240 V~, 50–60 Hz |
| Rated power | 500 W |
| Standby consumption | 0.4 W |
| Min. milk volume | 70 ml |
| Max. volume for frothing | 150 ml |
| Max. volume for heating | 300 ml |
| Main functions | Heating with thick foam, creamy foam, light foam, stirring, cold foam |
| Whisks included | 2 whisks: A (stirring) and B (foam) |
| Interior coating | Non-stick |
| Safety | Automatic shut-off, overheating and dry boiling protection |
| Cleaning | Hand wash, do not immerse base, do not wash in dishwasher |
| Removable sealing ring | Yes, for easy cleaning |
| Color | White / Silver (standard) |
| Cable length | Approx. 1 m |
| Warranty | 3 years |
| Spare parts available | Whisks, seal, lid |
| Intended use | Domestic, for cow's milk |
Frequently Asked Questions - SSPM 6 B1 SILVERCREST
User questions about SSPM 6 B1 SILVERCREST
0 question about this device. Answer the ones you know or ask your own.
Ask a new question about this device
Download the instructions for your Salt/pepper mill in PDF format for free! Find your manual SSPM 6 B1 - SILVERCREST and take your electronic device back in hand. On this page are published all the documents necessary for the use of your device. SSPM 6 B1 by SILVERCREST.
USER MANUAL SSPM 6 B1 SILVERCREST
natural_image
Exterior view of a modern stainless steel water heater with control buttons (no text or symbols visible)MILCHAUFSCHÄUMER / MILK FROTHER / MOUSSEUR À LAIT SMA 500 H1
DE AT CH
MILCHAUFSCHÄUMER
Operation and safety notes
FR BE
MOUSSEUR À LAIT
GB/IE Operation and safety notes Page 15
Warnings and symbols used Page 16
Introduction Page 16
Proper use Page 16
Safety information Page 17
Package contents Page 18
Unpacking Page 18
Description of parts.... Page 18
Technical data Page 18
Setting up Page 18
Tips for good frothy milk Page 18
Operation.... Page 19
Recipe ideas Page 21
Italian-style cappuccino Page 21
Marocchino Page 21
Vienna melange.... Page 21
Cleaning Page 21
Storage Page 22
Troubleshooting Page 22
Disposal Page 22
Warranty Page 23
Warranty claim procedure.... Page 23
Service Page 23
| Warnings and symbols usedThe following warnings and symbols are used in these operating instructions, on the packaging and on the device (where applicable): | |||
 | DANGER! A warning with this symbol and the signal word "DANGER" indicates an imminently hazardous situation which will result in death or serious injury if not avoided. |  | WARNING! A warning with this symbol and the signal word "WARNING" indicates a potentially hazardous situation which could result in death or serious injury if not avoided. |
 | CAUTION! A warning with this symbol and the signal word "CAUTION" indicates a potentially hazardous situation which could result in a minor or moderate injury if not avoided. |  | ATTENTION! A warning with this symbol and the signal word "ATTENTION" indicates a potential situation which could result in property damage if not avoided. |
 | A note identifies additional information that facilitates the use of the device. |  | Do not immerse in water! |
 | All of the parts of this appliance that come into contact with food are food-safe. |  | Do not clean in a dishwasher! |
MILK FROTHER
● Introduction
We congratulate you on the purchase of your new product. You have chosen a high quality product. The instructions for use are part of the product. They contain important information concerning safety, use and disposal. Before using the product, please familiarise yourself with all of the safety information and instructions for use. Only use the product as described and for the specified applications. If you pass the product on to anyone else, please ensure that you also pass on all the documentation with it.
● Proper use
This appliance has been designed exclusively for heating milk and whisking milk into froth (hot or cold) in domestic households. It must not be used outside of closed rooms.
This appliance is intended solely for use in private households. Not for commercial or industrial use!

Safety information

DANGER!

Never immerse the appliance, the mains cable or the plug in water or any other liquids!
This could lead to a potentially fatal electric shock!
- Ensure that the base containing the electrical connections never comes into contact with water! Allow the base to dry completely if it accidentally becomes wet.
Do not allow any liquid to run over the appliance's plug connections.
Use the appliance only with the supplied base. Should not place the appliance in a cabinet when in use. - Ensure that the power cable never becomes wet or damp when the appliance is in use. Route the cable so that it cannot be trapped or damaged in any way.
To avoid potential risks, a damaged mains cable should be replaced by the manufacturer or the manufacturer's customer service department or a similarly qualified person.
Prior to use, check the appliance for visible external damage. Do not use an appliance that has been damaged or dropped. - Never open any parts of the housing. There are no user serviceable parts inside.
All repairs must be carried out by authorised specialist companies or by the Customer Service department. Improper repairs may put the user at risk. It will also invalidate any warranty claims.

WARNING!
- Never use the appliance for purposes other than those described in these instructions. There is a risk of injury if the appliance is misused!
This appliance may be used by children aged 8 years and above and by persons with limited physical, sensory or mental capabilities or lack of experience and knowledge, provided that they are under supervision or have been told how to use the appliance safely and are aware of the potential risks.
- Cleaning and user maintenance tasks may not be carried out by children unless they are aged 8 years or more and are supervised.
The appliance and its mains cable must be kept away from children younger than 8 years old.
- Do not allow children to play with the appliance.
The appliance must always be disconnected from the mains when left unsupervised and before assembly, disassembly or cleaning.
Before replacing any accessories or additional parts that move during operation, the appliance must be switched off and disconnected from mains power.
- Ensure that the appliance is stable and vertical before switching it on. Otherwise, the appliance may tip over and the hot milk will spill out.
- Do not touch the rotating parts during operation!
Parts of the appliance get hot during use! Therefore, touch the heated appliance only by the handle.
■ After use, the surfaces of the heating elements will still have some residual heat.
■ Always remove the plug from the mains power socket when the appliance is not in use or when you want to clean it.
■ Clean the product (see "cleaning" section).

CAUTION!
- Do not use an external timer switch or a separate remote control system to operate the appliance.
- Never leave the appliance unattended during operation.
- Ensure that the appliance, the power cable and the plug do not come into contact with sources of heat, such as hotplates or open flames.
- Only operate the appliance when the lid is in place.
■ Never operate the appliance when it is empty.
The appliance could be irreparably damaged.
- Do not clean the appliance or any parts of it in
the dishwasher!
● Technical data
Power supply: 220-240 V\~, 50-60 Hz
Rated power: 500 W
● Package contents
The appliance is supplied with the following components as standard:
- Milk frother (container and lid)
- Base
- Whisk
- Operating instructions
NOTE: Check the package for completeness and signs of visible damage. If the delivery is incomplete or damage has occurred as a result of defective packaging or during transport, contact the Service hotline (see section Service).
● Unpacking
⚠️ DANGER! Do not allow children to play with packaging materials. There is a risk of suffocation.
■ Remove all parts of the appliance and the operating instructions from the box.
■ Remove all packaging material.
- Clean the appliance as described in the section Cleaning.
● Description of parts
1 Lid
2 Sealing ring
3 Whisk B (for frothing)
4 Container
5 Control lamp
6 Control lamp 📌
7 Control lamp
8 Control lamp
9 Function ⏻ button
10 Base
11 Cable retainer
12 Whisk A (for stirring)
Power consumption
(standby mode): 0.4 W
Min. Milk quantity: approx. 70 ml
Frothing milk
Max. usable volume: approx. 150 ml
Heating milk
Max. usable volume: approx. 300 ml
Setting up
☐ If you have not already done so, unwind the mains cable completely from around the cable retainer 11 and guide it through the notch on the base 10.
Place the appliance on a dry and level surface. Ensure that the mains plug is within easy reach.
☐ Push the whisk 3 or 12 on the drive shaft inside the container 4.
☐ Insert the plug into a mains power socket. The appliance is now ready for use.
● Tips for good frothy milk
☐ Froth only cow's milk with this appliance. Other types of milk can only be frothed to a certain extent, or may cause the appliance to overflow.
☐ Low fat or skimmed milk does not burn on as easily as whole milk; how-ever, if the fat content is too low, there is a risk that the milk will not froth well. You should therefore use milk with a fat content of 3.5% when possible.
☐ Chilled milk can be frothed better than warm milk.
☐ Do not froth the milk a second time, otherwise it may burn.
Leave frothed milk to stand for about 30 seconds before you add the foam to cappuccino, espresso, etc. During this time the larger bubbles burst and the still-liquid milk sinks to the bottom. You can then use the fine foam.
☐ The milk should be cool.
Operation
DANGER! Risk of fatal injury from electrocution! Ensure that the base 10 containing the electrical connections never comes into contact with liquids!
CAUTION! For safety reasons, you should not open the lid 1 while the appliance is in operation. There is a risk of scalding.
Parts of the appliance get hot during use! Therefore, touch the heated appliance only by the handle.
Always use fresh milk. Do not consume milk which has been standing in the container 4 for extended periods.
NOTE: If you want to stop the preparation process before it is finished, press the function button 9 or remove the appliance from the base 10. You will have to reselect the programme when you resume the preparation process.
☐ Remove the container 4 from the base 10 and fill it with milk. Add at least enough milk to reach the MIN mark (= 70 ml) inside the container 4. However, do not fill it with milk beyond the corresponding MAX marking, otherwise the appliance will overflow.
MIN and MAX markings:

- Up to the lower MAX marking (= 150 ml) when using whisk B (for frothing), if you want to froth milk.
- Up to the upper MAX marking (= 300 ml) when using whisk A (for stirring), if you only want to heat up and stir the milk.
CAUTION! A program must never be selected at this fill capacity for making milk froth! It would not be possible to prevent the milk from overflowing.
- The MIN marking indicates the minimum fill capacity: 70 ml.
□ Put the lid 1 on.
☐ Place the container 4 on the base 10.
NOTE: There is a notch on the lid 1 near the sealing ring 2. Make sure that the notch is not directly next to the spout of the container 4. Otherwise, milk may leak through the opening. Turn the notch to another position on the container wall.
☐ Use the function ⏻ button 9 to select the appropriate programme:
Function of the whisks
| Whisk A | 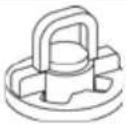 | Stirring |
| Whisk B |  | Frothing |
Control lamp Whisk Programme Selection
| 5 | 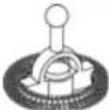 | Heat milk with stiff froth Press 1x |
| 6 | 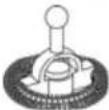 | Heat milk with creamy froth Press 2x |
| 7 | 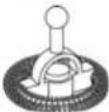 | Heat milk with little froth Press 3x |
| 7 | 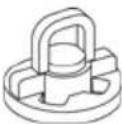 | Heat up and stir milk Press 3x |
| 8 | 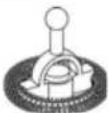 | Froth cold milk Press 4x |
Once a programme is selected by pressing the function ⏻ button 9, the corresponding control lamp 5/6/7/8 lights up continuously.
Remark: To achieve a better milk foam effect, the milk frother will automatically pause several times during work, without any operation, the milk frother will automatically start after the pause.
☐ The control lamp 5/6/7/8 indicates the end of the programme by flashing. The appliance switches off automatically. If you want to stop the preparation process before it is finished, press the function 🔊 button 9 or remove the appliance from the base 10. You will have to reselect the programme when you resume the preparation process.
Once the control lamp 5/6/7/8 stops flashing, remove the lid 1 and pour the milk/milk froth into the desired container.
ATTENTION! If the milk froth does not pour well, you can use a spoon. However, when doing so, make sure you do not scratch the non-stick coating on the interior of the container 4 with the metal of the spoon!
☐ Allow the appliance to cool down for around 2-3 minutes before you heat up another portion of milk.
NOTE: The overheating protection may cause the appliance to turn off immediately after selecting a programme. Allow the appliance to cool down and, if necessary, add chilled milk before reselecting the programme.
If you start a programme when the container 4 is empty, the boil-dry protection device switches the appliance off. You need to add milk and then reselect the programme.
Standby mode:
The product enters standby mode when the control lamp 5/6/7/8 indicates the end of the programme by flashing. The appliance switches off automatically. / If you stop the preparation process before it is finished, press the function button 9 or remove the appliance from the base 10.
- Recipe ideas
You can use the milk froth for a range of drink variations such as:
Italian-style cappuccino
Pour an espresso (about 25–30 ml) into an approx. 120–180 ml cup.
Then pour milk froth onto it until the cup is filled to the brim.
Marocchino
Melt about a teaspoon of milk chocolate.
Spread the melted chocolate onto the inside of a glass and pour in an espresso.
Add around 3–4 teaspoons of frothed milk and then sprinkle with cocoa powder.
Vienna melange
Pour about 125 ml of strong black coffee into a mocha coffee cup.
Froth up around 110 ml of milk and add as much milk froth as is needed to fill the cup to just below the rim.
Depending on personal taste, you can add a little sugar.
● Cleaning
⚠️ DANGER! Risk of fatal injury from electrocution! Before cleaning the appliance, disconnect the power plug from the mains power socket! Never immerse the appliance, the mains cable or the plug in water or any other liquids!
⚠️ CAUTION! Allow the appliance to cool down before cleaning it. Risk of burns!
⚠️ ATTENTION! Do not use abrasive or caustic cleaning agents. These can corrode the surface and damage the appliance beyond repair. Do not clean the appliance or any parts of it in the dishwasher!
To prevent the milk residue from drying on, clean the container 4 after each use once it has cooled down. Proceed as follows:
☐ For initial basic cleaning, fill the container 4 with water and, if required, a little detergent (the whisk 12 is inserted). Add water up to the lower MAX marking (= 150 ml).
☐ Start the appliance so that the whisk 12 swirls through the water for around 10 seconds. Remove the container 4 from the base 10 to stop the programme. Afterwards, rinse the appliance out with clean water.
For a thorough cleaning and for the initial cleaning, proceed as follows:
☐ Remove the whisk 12 from the appliance and clean the inside of the appliance with warm water and mild detergent if required. Wipe out the interior with a soft cloth or sponge. Pay special attention to the area around the drive shaft. Afterwards, rinse out the appliance thoroughly with fresh water and dry it.
☐ There is a notch on the lid 1 near the sealing ring 2. Use this to pull the sealing ring 2 off. Clean both parts thoroughly in a mild soapy water. Rinse off detergent residues with fresh water and dry the parts well. Push the sealing ring 2 back onto the lid 1.
□ Clean the whisk 3 & 12 in mild soapy water and then rinse it thoroughly with fresh water. Allow it to dry.
☐ Clean all exterior surfaces, the base 10 and the mains cable with a slightly damp cloth. For stubborn soiling add a little mild detergent to the cloth. Wipe off any detergent residues using a cloth moistened only with clean water. Always dry the appliance thoroughly before using it again.
Storage
- Allow the appliance cool down completely before putting it into storage.
Wind the power cable around the cable retainer 11 in a clockwise direction. The arrows show you which direction to use for winding. Note that the mains cable must be removed from the cable retainer in the opposite direction to the arrow.
■ Store the appliance in a clean and dry location.
● Troubleshooting
| Malfunction Cause Remedy | ||
| The appliance is not working. The | plug is not inserted into a mains power socket. | Check that the mains plug is correctly inserted into the power socket. |
| The appliance is not switched on. | Switch the appliance on. | |
| The appliance is defective. Contact the Customer Service department. | ||
| The control lamp 5/6/7/8 flashes and the appliance will not start. | The container 4 is empty and the boil-dry protection device has been triggered. | Add cold milk and restart the programme. |
| The overheating protection has been triggered. | Allow the appliance to cool down and replace the hot milk with cold milk. | |
● Disposal
The packaging is made of environmentally friendly materials, which may be disposed of through your local recycling facilities.

Observe the marking of the packaging materials for waste separation, which are marked with abbreviations (a) and numbers (b) with following meaning: 1–7: plastics/20–22: paper and fibreboard/80–98: composite materials.
Product:
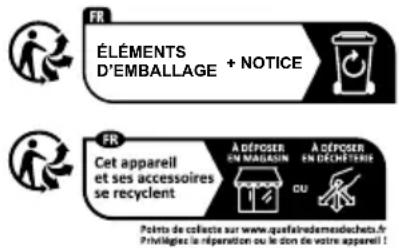
The product incl. accessories, manual and packaging materials are recyclable and are subject to extended producer responsibility.
Dispose them separately, following the illustrated Info-tri (sorting information), for better waste treatment.
The Triman logo is valid in France only.
Contact your local refuse disposal authority for more details of how to dispose of your wornout product.

To help protect the environment, please dispose of the product properly when it has reached the end of its useful life and not in the household waste. Information on collection points and their opening hours can be obtained from your local authority.
● Warranty
The product has been manufactured to strict quality guidelines and meticulously examined before delivery. In the event of material or manufacturing defects you have legal rights against the retailer of this product. Your legal rights are not limited in any way by our warranty detailed below.
The warranty for this product is 3 years from the date of purchase. The warranty period begins on the date of purchase. Keep the original sales receipt in a safe location as this document is required as proof of purchase.
Any damage or defects already present at the time of purchase must be reported without delay after unpacking the product.
Should the product show any fault in materials or manufacture within 3 years from the date of purchase, we will repair or replace it – at our choice – free of charge to you. The warranty period is not extended as a result of a claim being granted. This also applies to replaced and repaired parts.
This warranty becomes void if the product has been damaged, or used or maintained improperly.
The warranty covers material or manufacturing defects. This warranty does not cover product parts subject to normal wear and tear, thus considered consumables (e.g. batteries, rechargeable batteries, tubes, cartridges), nor damage to fragile parts, e.g. switches or glass parts.
● Warranty claim procedure
To ensure quick processing of your claim, observe the following instructions:
Make sure to have the original sales receipt and the item number (IAN 467211_2501) available as proof of purchase.
You can find the item number on the rating plate, an engraving on the product, on the front page of the instruction manual (bottom left), or as a sticker on the rear or bottom of the product.
If functional or other defects occur, contact the service department listed below either by telephone or by e-mail.
Once the product has been recorded as defective you can return it free of charge to the service address that will be provided to you. Ensure to enclose the proof of purchase (sales receipt) and a short, written description outlining the details of the defect and when it occurred.
Service
GB Service Great Britain
Tel.:08000569216
E-Mail:owim@lidl.co.uk
IE Service Ireland
Tel.:1800200736
E-Mail:owim@lidl.ie

- Až po spodnú značku MAX (= 150 ml) pri použití šl'ahača B (na napenenie), ak chcete napenit' mlieko.