Babyline 9.1 - Baby monitors Lionelo - Free user manual and instructions
Find the device manual for free Babyline 9.1 Lionelo in PDF.

| Product type | Baby monitor with screen and rotating camera |
| Brand and model | Lionelo Babyline 9.1 |
| Screen power supply | Rechargeable battery, mains adapter 5V DC 2A (USB-C) |
| Camera power supply | Mains adapter 5V DC 2A (USB-C) |
| Frequency | 2.4 GHz Wi-Fi (2.412-2.472 GHz) |
| Range (via app) | Unlimited (via Wi-Fi network and internet) |
| Maximum number of cameras | 4 |
| Night vision | Yes, with automatic night mode |
| Two-way communication | Yes |
| Motion detection | Yes, 3 sensitivity levels (via app) |
| Temperature sensor | Yes, with high and low temperature alarms |
| Built-in lullabies | Yes, with playback on screen or camera |
| Recording on microSD card | Yes, up to 128 GB (class 10 or higher), continuous or motion-triggered recording |
| Mobile app | Lionelo Smart (iOS and Android) |
| VOX mode | Yes, with 5 sensitivity levels |
| Digital zoom | Yes |
| Reminder functions | Breastfeeding, diaper change, others |
| Operating temperature range | -10°C to 50°C |
| Maintenance and cleaning | Clean with a soft, dry cloth. Do not use abrasive products. |
| Safety | This product is not a toy. Keep out of reach of children (cables, small parts). Do not use near water or heat sources. Use only the provided power adapters. |
| Repairability | Contact customer service at help@lionelo.com |
Frequently Asked Questions - Babyline 9.1 Lionelo
User questions about Babyline 9.1 Lionelo
0 question about this device. Answer the ones you know or ask your own.
Ask a new question about this device
Download the instructions for your Baby monitors in PDF format for free! Find your manual Babyline 9.1 - Lionelo and take your electronic device back in hand. On this page are published all the documents necessary for the use of your device. Babyline 9.1 by Lionelo.
USER MANUAL Babyline 9.1 Lionelo
natural_image
Line drawing of a digital camera and a lionelo device (no text or symbols)Apple Store:

Google Play:

natural_image
Line drawing of a portable electronic device with control buttons and a blank screen (no text or symbols)
natural_image
Technical line drawing of a mechanical component with circular top and base, labeled '2' (no text or symbols on the diagram itself)
natural_image
Simple line drawing of a rectangular electronic component with two leads (no text or symbols)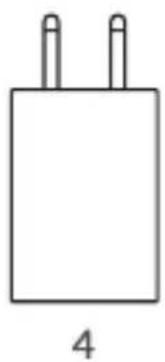
natural_image
Simple line drawing of a rectangular electronic component with two leads (no text or symbols)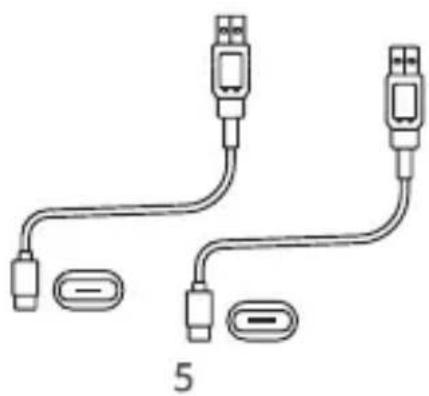
natural_image
Pure electrical connector diagram showing two USB connectors and two terminal blocks, no text or symbols present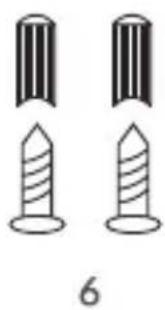
natural_image
Two identical screwdrivers with ribbed heads, shown in side-by-side illustrations (no text or symbols)A
B
natural_image
Diagram showing a cable being inserted into a device, with no visible text or symbolsDear Customer!
In case of any questions or comments on the purchased product, please
contact us: help@lionelo.com
Producer:
BrandLine Group Sp. z o. o.
RF output power of the monitor: 12.78 dBm (2.4G Wi-Fi)
RF output power of the camera: 15.74 dBm (2.4G WiFi)
Card format: microSD
Maximum capacity of microSD card: 128 GB
IMPORTANT INFORMATION
-
This product is not a toy. Do not let children play with it.
-
The camera and power supplies included in the set are suitable for use in dry places only.
-
Do not touch the product with wet hands.
-
If the product does not work as it should or has been dropped or flooded, contact the manufacturer's service department.
-
Do not place the product near a cooker or other heat sources.
-
Installation must be undertaken by an adult only. Keep smaller pieces of the set away from the child.
-
An electronic nanny is not a substitute for proper parental care and attention.
-
Do not place the product and its cords in the playpen or within reach of the child. Place them at least 1 m apart.
-
Do not place the product near water or a fire source.
-
Do not touch the plug contacts with sharp or metallic objects.
-
The use of the included power supplies is recommended.
-
Important! The power cord plug serves as a disconnecting device for the camera – ensure that the socket is easily accessible during installation.
COMPONENTS OF THE SET (FIG. A)
- Receiver
- Rotating camera
- AC adapter 5V / 2A
-
AC adapter 5V / 2A
-
2x USB-C cable 2.6 m
- 2x screws and plugs for wall mounting
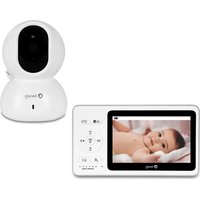
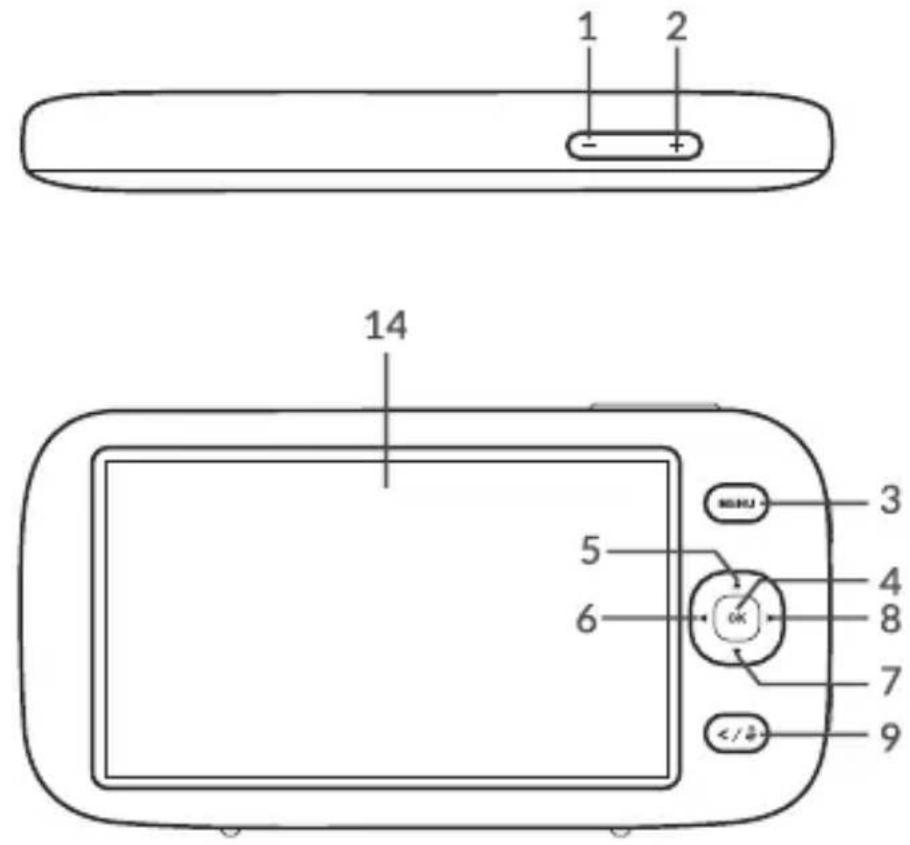
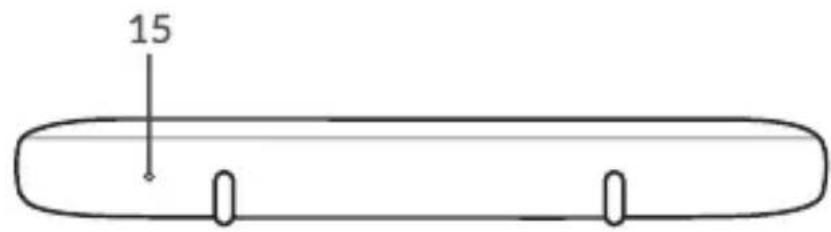
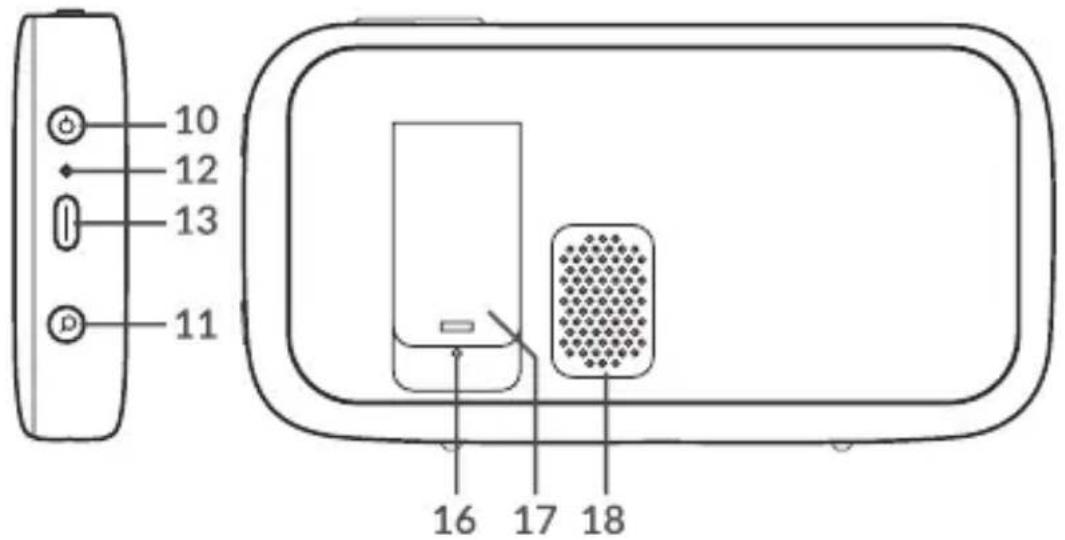
MONITOR DESCRIPTION (FIG. B)
- Turn down the volume
- Turn up the volume
- Menu
- OK button
- Up
- Left
- Down
- Right
-
Two-way communication button
-
On/off switch
- Zoom button
- Charging light indicator
- USB-C port
- Screen
- Microphone
- Reset button
- Support
- Speaker
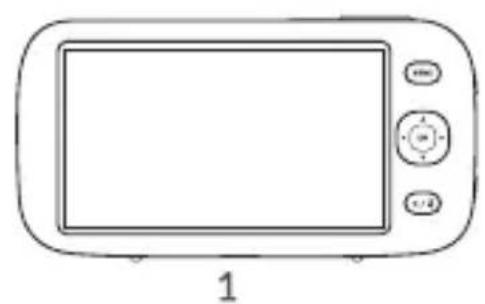
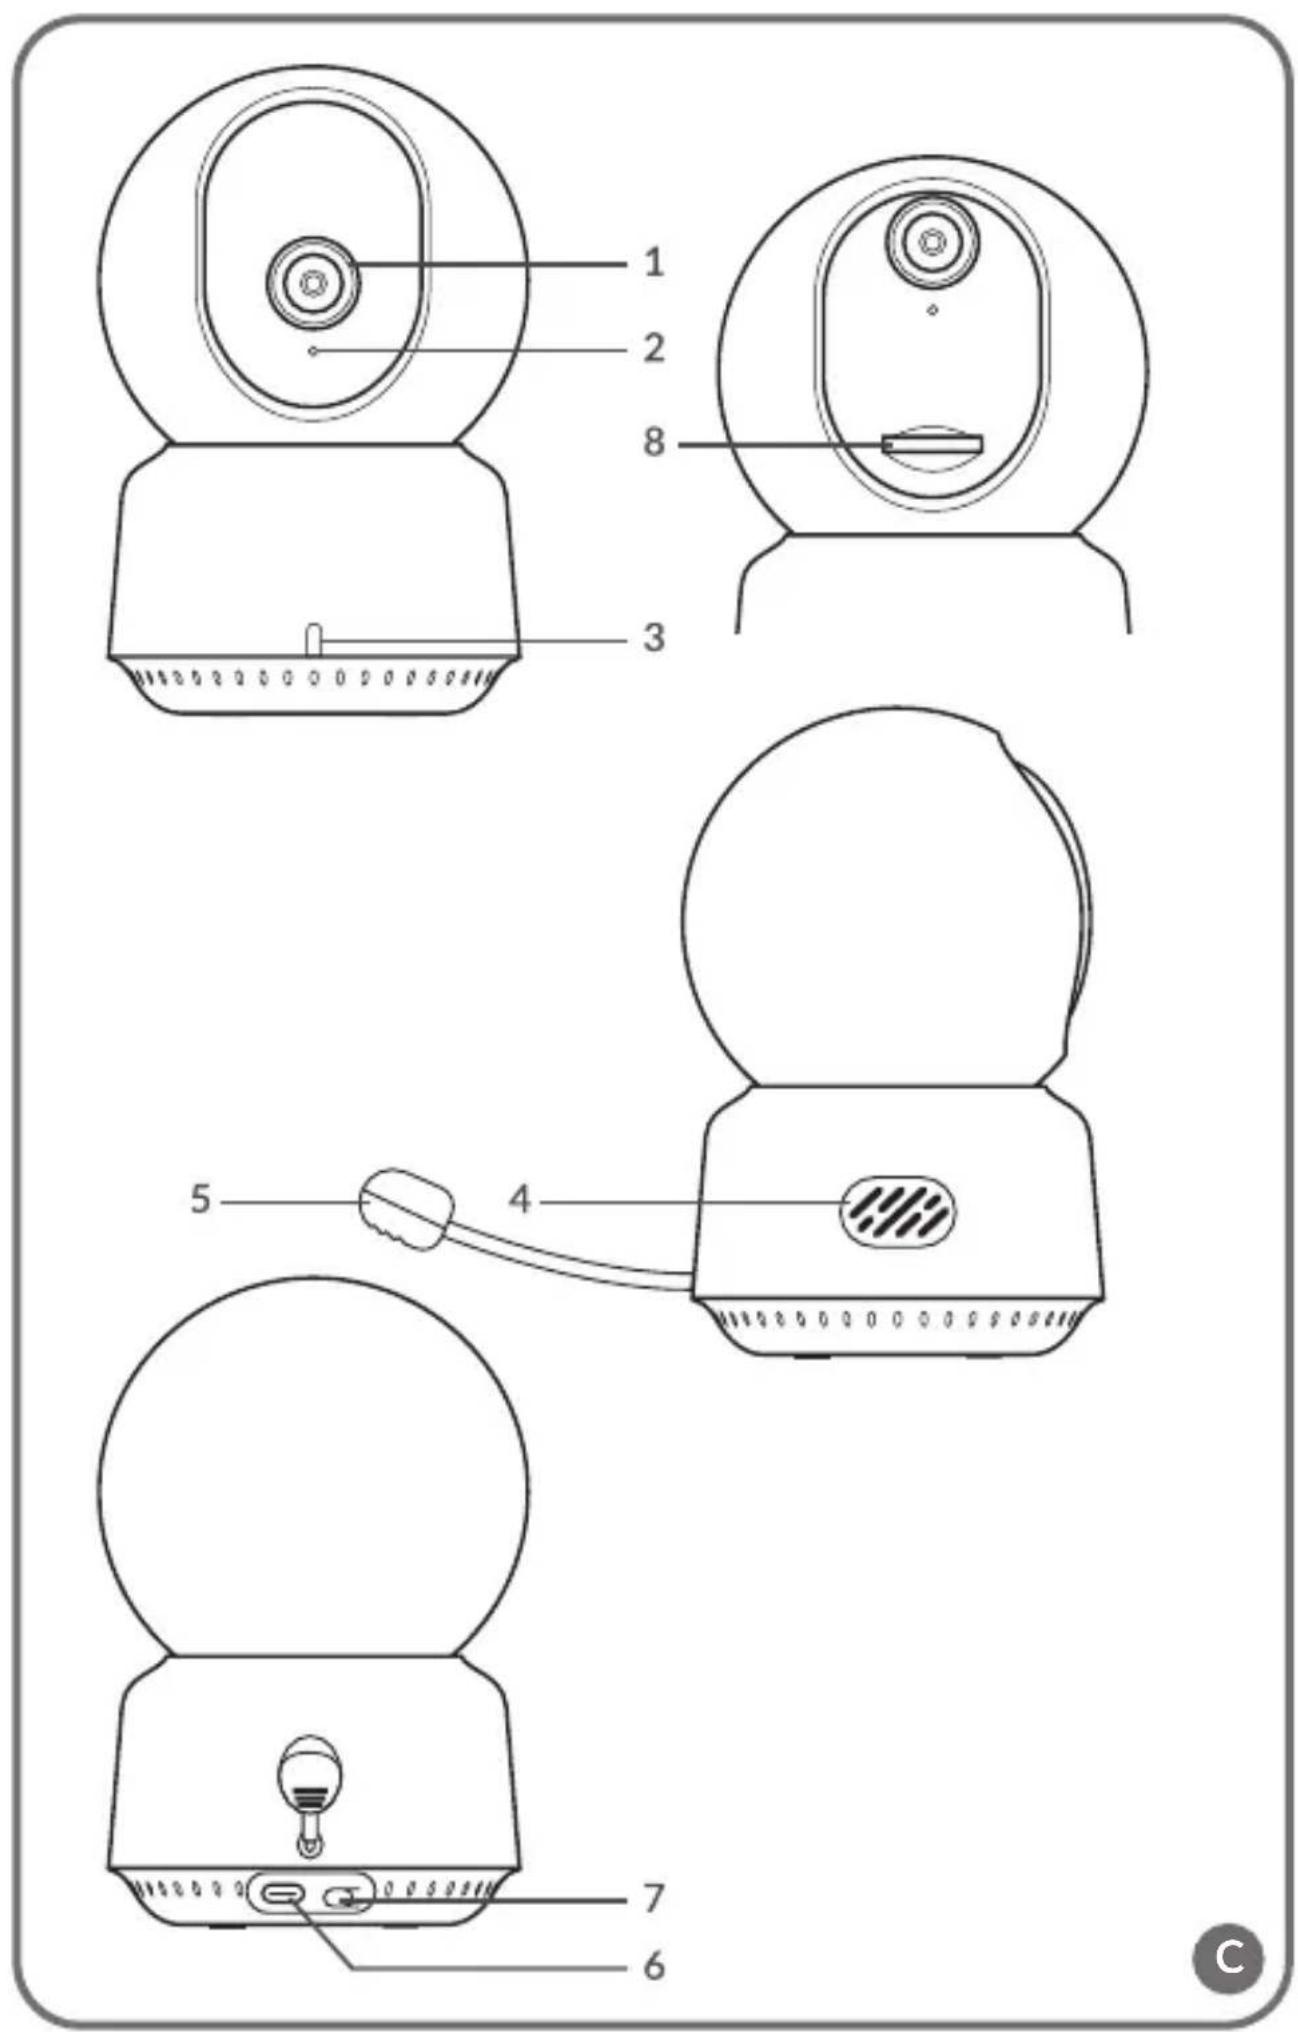
CAMERA DESCRIPTION (FIG. C)
- Wide angle lens
- Microphone
- Light indicator
-
Speaker
-
Temperature sensor
- USB-C port
- Pairing button
- MicroSD card slot
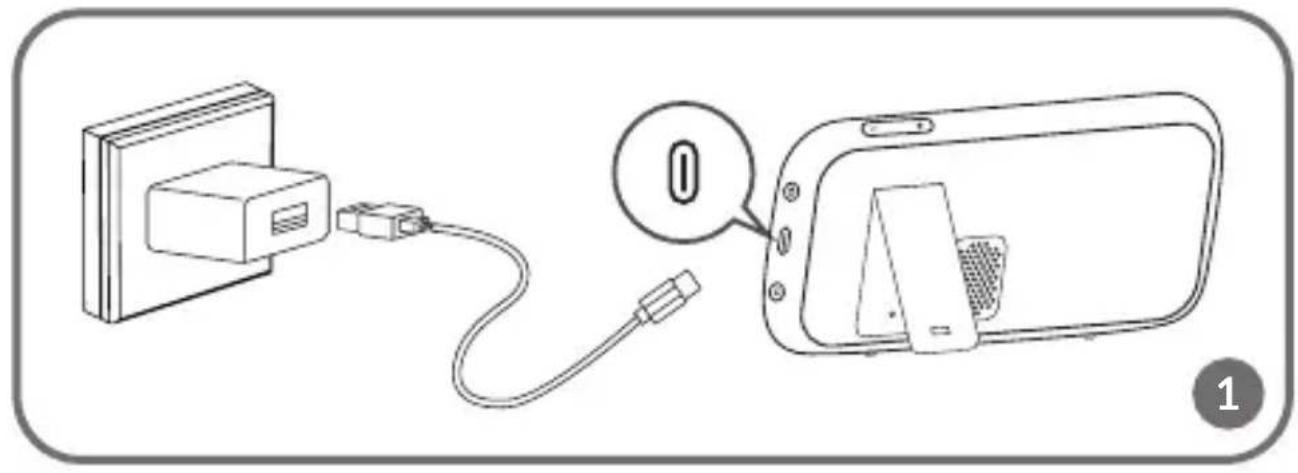
LOADING THE MONITOR
Connect the plug of the USB-C power cable to the monitor and the other end to the power supply. Connect the power supply to the power socket (fig. 1). The indicator light (12, fig. B) will illuminate red.
A loading icon will appear in the top right corner.
Once the device has finished charging, the current charge level is indicated by the icon in the top right corner: ☐. The light indicator (12, fig. B) will light up green.
NOTE: Use only a 5V 2A power supply unit. The product can be powered by a power bank device, for example.
It is recommended to fully charge the monitor before first use.
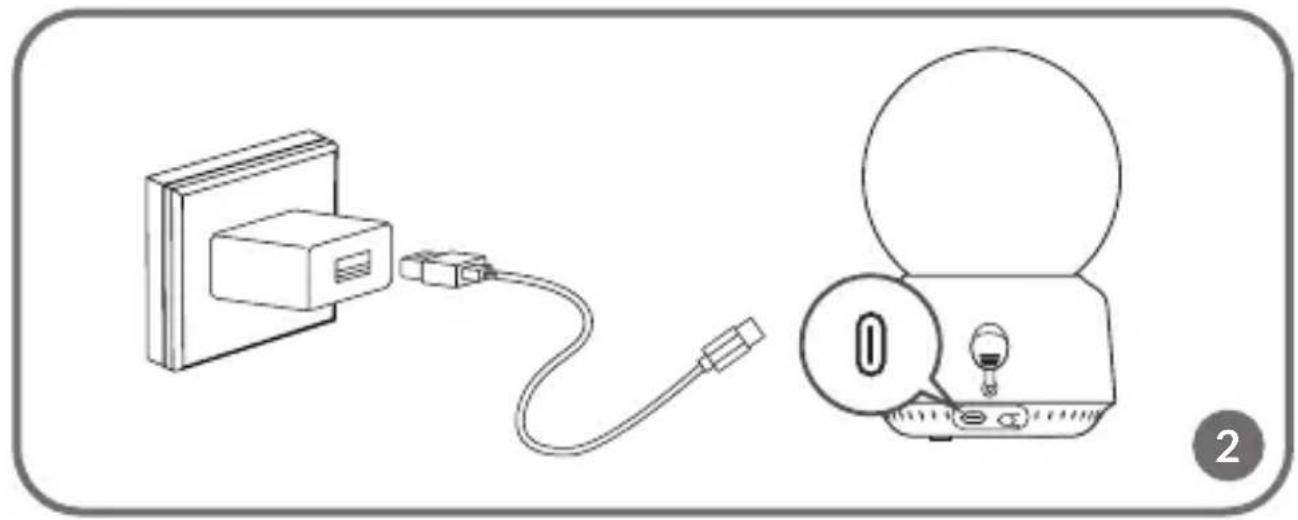
CAMERA POWER SUPPLY
Connect the plug of the USB-C power cable to the camera and the other end to the power supply. Connect the power supply to the power socket (fig. 2). NOTE: Use only a 5V 2A power supply unit. The product can be powered by a power bank device, for example.
ADDING AND DELETING A CAMERA
A total of 4 cameras can be paired.
- Press the Menu button to access the main menu.
- Select Camera settings and then Camera pairing. Select the camera number and then select Add.
- Press the pairing button on the back of the camera and hold until you hear a signal. The camera was paired with the monitor.
- To remove a camera, select Camera settings and then Camera pairing. Select the camera number and then select Delete.
If you have problems adding the camera, check that the camera is connected to a power source. Ensure that the camera and monitor are within 2 metres of each other. Placing the camera and monitor too close together can cause audio interference.
CAMERA CHANGE
If more than one camera is used, it is possible to manually or automatically change the image to that of another camera.
- To change the camera manually, press and hold the OK button.
- To change the camera automatically, select Camera settings > Display mode, then select the option marked with the icon and the time at which you want the display to change.
- To return to the display of the image from one selected camera, select the option marked with the icon ☐.
- To view the image from multiple cameras at the same time, select Camera settings > Display mode, then select the option marked with the icon and split the screen into two, three or four parts.
The number of the selected camera will appear in the top left corner of the display.
TWO-WAY AUDIO COMMUNICATION
Press and hold the two-way audio communication button (9, fig. B) to start audio transmission. Release to abort.
MENU
The following options are available in the main menu: Monitor mode, Alarm, Camera settings, Reminders, Lullabies and More settings
Monitor mode
Select Monitor mode in the main menu, then select:
- VOX mode – when the VOX mode is activated, the dormant screen will automatically wake up when a sound is detected above a pre-set level. Five sensitivity levels are available.
- VOX threshold – select the sound level above which the alarm will be triggered. Five volume thresholds are available.
- Sound only – enable this function if you want the display to remain off and the device to emit only sounds detected by the camera.
- Operating mode – changing the operating mode of the device can help in case of possible interference.
Important! If more than one camera is connected, the selected audio threshold in the VOX mode will be the same for each camera.
Alarm
In the main menu, select Alarm and then select:
- Audible alarm – alarm sensitivity: volume threshold beyond which the alarm will be triggered.
- Alarm if too high a temperature is detected (temperature value can be adjusted).
- Alarm if too low a temperature is detected (temperature value can be adjusted).
- Alarm duration (5, 10, 20 or 30 seconds). The default setting is 10 seconds.
- Alarm volume. The default setting is volume level "2". There are 3 alarm volume levels available.
Important! The level of noise around the camera can affect the triggering of the alarm.
Camera settings
Select Camera settings in the main menu, then select:
- Camera pairing (see: Adding and deleting a camera).
- Display mode (see: Camera change).
- Video screen settings – select this option to rotate the image of the selected camera by 180° when the camera is inverted.
- Recording mode – select no recording, cyclic recording or cyclic recording when motion is detected by the camera.
Important! Recordings are stored on a microSD card. If the microSD card becomes full, the oldest recordings are automatically deleted. Use the microSD card with a capacity of 16 to 128 GB and class 10 or higher.
- Time stamp – select this option to enable or disable the time stamp on video recordings.
- MicroSD card status – select this option to check the microSD card's full status or to format the microSD card.
- LED - turn on or off the LED light indicator located on the camera.
Reminders
From the main menu, select Reminders and then select every how many hours or at what time the reminder will be triggered:
- Feeding times
- Changing a nappy
- Other
Press the OK button to deactivate the reminder. Press any other button to activate the reminder again after 10 minutes.
Lullabies
Select Lullabies in the main menu and then select:
- Monitor – select one of the available sounds or play them all in a loop.
- Camera 1/2/3/4 – select one of the available lullabies or play them all in a loop. Important! Activating the sounds will automatically disable the alarms and VOX mode. The lullaby/white noise sound will automatically switch off after 30 minutes.
Important! Sounds can drown out your baby's cries.
More settings
In the main menu, select More settings and then select:
- Night mode – when switched on, the monitor will automatically change
the colours of the image received by the camera, depending on the level of ambient light.
- Time settings – set the date and time.
- Screen brightness settings.
- Standby mode – select the time after which the display goes into standby mode (1, 3 or 5 minutes). Select “OFF” to completely switch off the standby mode.
- Language settings – select the language of the device.
- Temperature unit settings.
- Screen flicker reduction – in case of screen flicker, select another available screen flicker reduction mode (50 or 60Hz).
- Default settings – restore default settings.
- Version information – information about the device.
- Contact us – contact details.
LIONELO SMART APP
Search for and download the Lionelo Smart app from the iOS Store / Google Play, or scan the QR code at the beginning of the user guide.
Note: Only 2.4GHz Wi-Fi networks are supported. 5GHz networks are not supported.
- Register with the application using your email address. Accept the terms of use.
- Select a user name and password, then click "Confirm". Enter the code sent to your email address.
- During setup, position the camera as close as possible to the Wi-Fi router to speed up the pairing process.
Note: a camera can only be added to one account in the app. To add the camera to another account, it must be removed from the previous account.
- Connect the camera to the power supply using the USB cable.
- Select "Add new device".
- Reset the camera by pressing and holding the reset button for 5 seconds
- Select the Wi-Fi network you want to connect to and enter the password.
- The app will display a QR code. Place the phone approximately 20 cm from the camera. Wait for the camera to beep. Configuration should complete in approximately 30 seconds.
Functions available in the Lionelo Smart app
- Range: unlimited
- Motion detection – 3 sensitivity levels
- Tracking the child's movement
- Two-way communication
• Volume control of the device - 10 levels - Sound detection
- Temperature sensor
- Message about ambient temperature readings exceeding the values set in the application
- Possibility to take photos in the app or on the SD card in the device
- Possibility to record videos in the app or on the SD card in the device
The photos are for illustrative purposes only, the actual appearance of the products may differ from that shown in the photos.
PL
Drogi Kliencie!
APLIKACJA LIONELO SMART
APPLICAZIONE LIONELO SMART
APPLICATION LIONELO SMART
AÑADIR Y ELIMINAR LA CÁMARA
INFORMATIE OVER HET APPARAAT
PROGRAMA LIONELO SMART
APLIKACE LIONELO SMART
LIONELO SMART ALKALMAZÁS
Format card: microSD
ELEMENTE SET (FIG. A)
APLICATIE LIONELO SMART
INFORMATION OM PRODUKTEN
Drifttemperaturens omfäng: -10°C - 50°C
Frekvens: 2.412-2.472GHz (2.4G WiFi)
SETETS DELAR (FIG. A)
SET KOMPONENTER (FIG. A)
- Mottaker
- Roterende kamera
- 5V DC 2A strømforsyning
-
5V DC 2A strømforsyning
-
USB-C-kabel (2,6 m) x2
- Skruer og dybler for montering av kameraet på veggen x2
MONITORBESKRIVELSE (FIG. B)
TO-VEIS LYDKOMMUNIKASJON
LIONELO SMART -SOVELLUS
ΕΦΑΡΜΟΓΗ LIONELO SMART
LIETOTNE LIONELO SMART
EN: The product complies with the requirements of European Union directives. In accordance with Directive 2012/19/EU, this product is subject to separate collection. The product should not be disposed of with municipal waste as it may pose a risk to the environment and human health. Return the used product to the recycling centre for electrical and electronic equipment.
EN: Simplified EU declaration of conformity
BrandLine Group Sp. z o. o. hereby declares that the “BABYLINE 9.1” product complies with the directive: 2014/53/EU - RED Directive, 2011/65/EU - RoHS Directive. Full content of EU declaration of conformity is available on the following website: