CCS165-20ProS - Saw SCHEPPACH - Free user manual and instructions
Find the device manual for free CCS165-20ProS SCHEPPACH in PDF.


User questions about CCS165-20ProS SCHEPPACH
0 question about this device. Answer the ones you know or ask your own.
Ask a new question about this device
Download the instructions for your Saw in PDF format for free! Find your manual CCS165-20ProS - SCHEPPACH and take your electronic device back in hand. On this page are published all the documents necessary for the use of your device. CCS165-20ProS by SCHEPPACH.
USER MANUAL CCS165-20ProS SCHEPPACH
natural_image
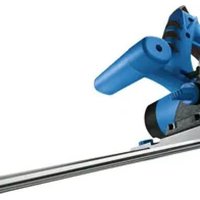
Close-up of a Scheppach circular cutter with visible blade and cutting edge (no text or symbols on the cutter body)
text_image
https://www.scheppach.com/de/service scheppachCCS165-20ProS
| DE | HandkreissägeOriginalbedienungsanleitung | 5 |
| GB | Circular sawTranslation of original instruction manual | 17 |
| FR | Scie circulaireTraduction des instructions d'origine | 28 |
| PL | Ręczna piła tarczowaPrzekład z oryginału instrukcji obsługi | 39 |
| CZ | Ruční kotoučová pilaPřekład originálního návodu k obsluze | 51 |
| SK | Ručná kotúčová pílaPreklad originálu návodu na obsluhu | 61 |
Günzburger Straße 69
D-89335 Ichenhausen
Verehrter Kunde
text_image
https://www.scheppach.com/de/service scheppachExplanation of the symbols on the equipment
The use of symbols in this manual is intended to draw your attention to possible risks. The safety symbols and the explanations that accompany them must be perfectly understood. The warnings in themselves do not remove the risks and cannot replace correct actions for preventing accidents.
 | Caution - Read the operating instructions to reduce the risk of inquiry |
 | Wear ear-muffs! The impact of noise can cause damage to hearing. |
 | Wear a breathing mask! Dust which is injurious to health can be generated when working on wood and other materials. Never use the device to work on any materials containing asbestos! |
 | Wear safety goggles! Sparks generated during working or splinters, chips and dust emitted by the device can cause loss of sight. |
Table of contents: Page:
- Introduction.... 19
- Device description (Fig. 1, 2).... 19
- Technical data 19
- Scope of delivery....20
- Unpacking 20
- Safety information .... 20
- Additional Safety Warnings 21
- Intended use....24
- Installation 25
- Cleaning 26
- Storage....26
- Maintenance....26
- Disposal and recycling 26
- Troubleshooting....27
1. Introduction
Manufacturer:
scheppach
Günzburger Straße 69
D-89335 Ichenhausen
Dear customer,
we wish you a pleasant and successful working experience with your new machine.
Note:
According to the applicable product liability law the manufacturer of this device is not liable for damages which arise on or in connection with this device in case of:
- improper handling,
• non-compliance with the instructions for use, - repairs by third party, non authorized skilled workers,
- installation and replacement of non-original spare parts,
- improper use,
- failures of the electrical system due to the non-compliance with the electrical specifications and the VDE 0100, DIN 57113 / VDE 0113 regulations
Recommendations:
Read the entire text of the operating instructions prior to the assembly and operation of the device.
These operating instructions are intended to make it easier for you to get familiar with your device and utilize its intended possibilities of use.
The operating instructions contain important notes on how to work safely, properly and economically with your machine and how to avoid dangers, save repair costs, reduce downtime, and increase the reliability and working life of the machine.
In addition to the safety regulations contained herein, you must in any case comply with the applicable regulations of your country with respect to the operation of the machine.
Put the operating instructions in a clear plastic folder to protect them from dirt and humidity, and store them near the machine. The instructions must be read and carefully observed by each operator prior to starting the work. Only persons who have been trained in the use of the machine and have been informed on the related dangers and risks are allowed to use the machine. The required minimum age must be met.
In addition to the safety notes contained in the present operating instructions and the special regulations of your country, the generally recognized technical rules for the operation of wood working machines must be observed.
We accept no liability for accidents or damage that occur due to a failure to observe this manual and the safety instructions.
2. Device description (Fig. 1, 2)
- Auxiliary handle
- Safety lock-out
- ON / OFF switch with rotation speed regulation
- Sawdust removal connector
- Automatic blade guard
- Release lever for the automatic blade guard
- Saw blade
- Base plate
- Guide fence slot
- Guide fence
- Cutting angle setting clamp
- Cutting angle scale
- Wing screw for guide fence
- Allen key
- Cutting depth setting clamp
- Cutting depth scale
- Spindle lock
- Drive spindle
- Mounting flange
- Clamping flange
- Clamping screw with plain washer
3. Technical data
Motor power supply 20 V
| Rated speed 3650 min | -1 |
| Max. wheel diameter | 165 mm |
| Depth of cut max. 90° | 50 mm |
| Depth of cut max. 45° | 34 mm |
| Weight | 2,9 kg |
Subject to technical changes!
Noise and vibration
⚠ Warning: Noise at the workplace can exceed 85 db(A). In this case, noise protection measures are necessary for the user (wear hearing protection!).
Noise output in dB
| Sound pressure level L_pA | 84 db(A) (EN Iso 3744) |
| sound power level L_WA | 95 db(A) (EN ISO 3744) |
| uncertainty K_wa/pA | 3 db(A) |
Vibration value
| Vibration a_h | 1,8 m/s ^2 |
| Uncertainty K_h | 1,5 m/s ^2 |
4. Scope of delivery
1 Circular saw
1 Guide fence
1 Allen key
1 Blade
1 Operating instructions
5. Unpacking
- Open the packaging and remove the device carefully.
- Remove the packaging material as well as the packaging and transport bracing (if available).
- Check that the delivery is complete.
- Check the device and accessory parts for transport damage. Inform the transport agent immediately of any faults. Later complaints cannot be considered.
- If possible, store the packaging until the warranty period has expired.
- Familiarize yourself with the machine with the help of the operating instructions manual before using it.
- Use only original parts for accessories as well as consumables and spare parts. Spare parts can be obtained from your scheppach retailer.
- Please quote our article numbers as well as type and production year in all your orders.
ATTENTION
The device and packaging materials are not toys! Children must not be allowed to play with plastic bags, film and small parts! There is a risk of swallowing and suffocation!
6. Safety information
⚠ WARNING! Read all safety warnings, instructions, illustrations and technical data provided with this power tool.
Failure to follow the warnings and instructions may result in electric shock, fire and/or serious injury.
Save all warnings and instructions for future reference.
The term “power tool” used in the safety instructions refers to mains powered power tools (with power cord) and cordless power tools (without power cord).
1. Workplace safety
a) Keep your working area clean and well lit. Untidy or poorly lit working areas can lead to accidents.
b) Do not work with the device in potentially explosive environments in which there are inflammable liquids, gases or dusts. Electrical power tools create sparks, which can ignite dusts or fumes.
c) Keep children and other people away while you are operating the electrical tool. Distractions can cause you to lose control of the device.
2. Electrical safety
a) The mains plug on the device must match the mains socket. The plug must not be modified in any way. Do not use an adapter plug with devices fitted with a protective earth. Unmodified plugs and matching sockets reduce the risk of electric shock.
b) Avoid touching earthed surfaces such as pipes, radiators, ovens and refrigerators with any part of your body. There is an increased risk of electric shock if your body is earthed.
c) Keep the device away from rain or moisture.
Water entering an electrical device increases the risk of electric shock.
d) Do not use the mains lead for any purpose for which it was not intended, e.g. to carry the device, to hang up the device or to pull the mains plug out of the mains socket. Keep the mains lead away from heat, oil, sharp edges or moving parts of the device. Damaged or tangled mains leads increase the risk of electric shock.
e) When working outdoors with an electrical power tool always use extension cables that are also approved for use outdoors. The use of an extension cable suitable for outdoor use reduces the risk of electric shock.
f) Use a residual current device (RCD) for protection if operating the electrical power tool in a moist environment is unavoidable. The use of an RCD reduces the risk of electric shock.
3. Personal safety
a) Remain alert at all times, watch what you are doing and always proceed with caution. Do not use the device if you are tired or under the influence of drugs, alcohol or medication.
One moment of carelessness when using the device can lead to serious injury.
b) Wear personal protective equipment and always wear safety glasses. The wearing of personal protective equipment such as dust masks, non-slip safety shoes, safety helmets or ear protectors, appropriate to the type of electrical power tool used and work undertaken, reduces the risk of injury.
c) Avoid unintentional operation of the device. Check that the electrical power tool is switched off before you connect it to the mains, pick it up or carry it. Accidents can happen if you carry the device with your finger on the ON / OFF switch or with the device switched on.
d) Remove any setting tools or spanners before you switch the device on. A tool or spanner left attached to a rotating part of a device can lead to injury.
e) Avoid placing your body in an unnatural position. Keep proper footing and balance at all times. By doing this you will be in a better position to control the device in unforeseen circumstances.
f) Wear suitable clothing. Do not wear loose clothing or jewellery. Keep your hair, clothing and gloves clear of moving parts. Loose clothing, jewellery or long hair can become trapped in moving parts.
g) If vacuum dust extraction and collection devices are fitted do not forget to check that they are properly connected and correctly used. The use of these devices reduces the hazard presented by dust.
h) Do not let familiarity gained from frequent use of the tool allow you to become complacent and ignore tool safety principles. A careless action can cause severe injury within a fraction of a second.
4. Careful handling and use of electrical power tools
a) Do not overload the device. Always use an electrical power tool that is intended for the task you are undertaking. By using the right electrical power tool for the job you will work more safely and achieve a better result.
b) Do not use an electrical power tool if its switch is defective. An electrical power tool that can no longer be switched on and off is dangerous and must be repaired.
c) Pull the mains plug from the socket before you make any adjustments to the device, change accessories or when the device is put away.
This precaution is intended to prevent you from unintentionally starting the device.
d) When not in use always ensure that electrical power tools are kept out of reach of children. Do not let anyone use the device if he or she is not familiar with it or has not read the instructions and advice. Electrical power tools are dangerous when they are used by inexperienced people.
e) Look after the device carefully. Check that moving parts are working properly and move freely. Check for any parts that are broken or damaged enough to detrimentally affect the functioning of the device. Have damaged parts repaired before you use the device. Many accidents have their origins in poorly maintained electrical power tools.
f) Keep cutting tools clean and sharp. Carefully maintained cutting tools with sharp cutting edges are less likely to jam and are easier to control.
g) Use the electrical power tool, accessories, inserted tools etc. in accordance with these instructions and advice, and the stipulations drawn up for this particular type of device. In doing this, take into account the working conditions and the task in hand. The use of electrical power tools for purposes other than those intended can lead to dangerous situations.
h) Keep handles and grasping surfaces dry, clean and free from oil and grease. Slippery handles and grasping surfaces do not allow for safe handling and control of the power tool in unexpected situations.
5. Service
a) Have your power tool repaired by qualified specialists only, and always use original spare parts for repair. This is to maintain the safety of the power tool.
7. Additional Safety Warnings
Safety advice relating specifically to this device
Ensure that the device is always used in accordance with the advice in these operating instructions and only by persons over 16 years of age.
Note: Do not use grinding discs. Failure to observe this advice may result in injury or damage. To avoid danger to life from electric shock:
- Frequently check the condition of the device, mains lead and plug. Do not use the device if these kinds of parts are damaged. Never open up the device. A damaged device, mains lead or plug presents a serious danger to life from electric shock. Always have any repairs carried out or replacement parts fitted at the service centre or by an electrical equipment repair specialist.
- Do not operate the device if it is damp and do not use it in a damp environment.
- If you use the device outdoors, always connect it through a residual current device (RCD) with a maximum trip current of 30 mA. If using an extension lead, always use one that is approved for outdoor use.
CAUTION! To avoid the risk of injury:
a) △ DANGER: Keep your hands away from the area around the saw and clear of the saw blade. Hold the auxiliary handle or the motor housing with your free hand. If both hands hold the circular saw, they cannot be injured by the saw blade.
b) Do not grip the underside of the workpiece. The blade guard cannot protect you from the saw blade under the workpiece.
c) Set the cutting depth to match the thickness of the workpiece. Less than a full tooth height should be visible below the workpiece.
d) Never hold the workpiece in your hand or steady it with your leg whilst sawing. Keep the workpiece steady on a stable supporting surface. It is important to see that the workpiece is firmly held in place to minimise any danger of it making contact with your body, jamming of the saw blade or loss of control.
e) When performing work during which the electrical tool can meet with concealed power lines or its own power cord, hold the electrical tool by the insulated handle surfaces. Contact with a live cable will also energise the metal parts of the electrical tool and will lead to an electric shock.
f) When cutting longitudinally always use a guide fence or a straight edge guide. This will improve the accuracy of your cut and reduce the risk of the blade jamming.
g) Always use a saw blade of the correct size and with the appropriate central fixing hole bore (e.g. diamond-shaped or round). Saw blades that do not correspond with the attachment components on the saw will not run true and could lead to loss of control.
h) Never use a damaged or incorrect saw blade washer or screw. The saw blade washer and screw have been specially designed to give your saw optimum performance and safety in use.
Kickback - causes and corresponding safety instructions:
-
A kickback is a sudden reaction to a saw blade becoming hooked, jammed or misaligned. This causes an out of control circular saw to raise itself and move out of the workpiece and towards the operator.
-
If the sawblade becomes hooked or trapped in a narrowing saw gap, it is suddenly prevented from rotating and the force of the motor throws the device back in the direction of the operator.
- If the sawblade distorts or becomes misaligned in the saw cut, the teeth at the rear edge of the saw-blade may hook themselves into the workpiece surface causing the sawblade to move out of the saw gap and the circular saw to jump backwards in the direction of the operator.
Kickback occurs as a result of incorrect use or misuse of the saw. It can be prevented by taking the appropriate precautions as described below.
a) Hold the saw firmly with both hands and bring your arms into a position in which you can absorb the kickback forces. Always stand to the side of the saw blade and never bring your body in line with the saw blade. During kickback, the circular saw can jump backwards, although the operator is able to control the kickback forces using suitable measures.
b) If the saw blade jams or sawing stops for another reason, release the ON / OFF switch and hold the saw in the workpiece without moving it until the saw blade comes to a complete stand still. Never try to remove the saw from the tool or to pull it backwards as long as the saw blade is still moving otherwise this could cause a recoil action. Determine and remedy the cause of the saw blade jamming.
c) If you wish to restart a saw that has been inserted into the workpiece, centre the saw blade in the saw gap and check that the saw teeth do not catch on the workpiece. If the saw blade jams, it may move itself out of the workpiece or cause a kickback when the saw is restarted.
d) Support boards whilst cutting to reduce the risk of kickback caused by a jammed saw blade. Large boards may bend under their own weight. Panels must be supported on both sides, that is both close to the sawing gap and at the edge.
e) Do not use blunt or damaged saw blades. Saw blades with blunt or misaligned teeth are in effect too wide for the designed saw gap and this gives rise to increased friction, jamming and kickback.
f) Make sure that the cutting depth and angle setting fastenings are tightened before sawing starts. If these settings move during sawing, this can lead to the saw blade jamming and kickback.
g) Apply particular caution when sawing in existing walls or other areas that are not visible. The plunging blade could jam in a hidden object and cause kickback.
Special safety advice for circular saws and automatic blade guards
Function of the lower protective hood
a) Before you use the saw, always check that the automatic blade guard (5) closes properly. Do not use the saw if the bottom compartment of the blade guard does not move freely or close immediately. Never jam or tie the automatic blade guard in the open position. The bottom part of automatic blade guard may become bent if the saw falls on to the floor. Open the blade guard with the release lever and make sure that it moves freely and does not touch the saw blade or other parts at all cutting angles and depths.
b) Check that the spring on the automatic blade guard functions properly. If the automatic blade guard or spring does not function properly, have the device serviced before you use it. Damaged parts, sticky deposits or accumulations of splinters can delay the operation of the bottom blade guard.
c) Open the automatic blade guard by hand only for certain cuts such as plunge or angle cuts. Open the automatic blade guard with the release lever (6) and let it go again as soon as the saw blade penetrates the workpiece. The automatic blade guard must be allowed to operate automatically for all saw cuts.
d) Do not put the saw down on a work bench or the floor without the automatic blade guard covering the saw blade. If unprotected, a rotating saw blade moves the saw against the cutting direction and saws whatever is in its way. Always be aware that the saw blade takes some time to stop.
Working safely:
- Never use the device for a purpose for which it was not intended.
- Always keep the device clean, dry and free of oil or grease.
- Make sure the device is switched on before placing it against the workpiece.
• Always work away from your body. - Do not saw materials containing asbestos.
- The course of the cut must have no obstructions above or below it.
- The saw blade must not project more than 3 mm out of the workpiece.
- When you are sawing, always make sure that you do not cut through any nails, screws or the like.
- Do not work with the device in the overhead position.
-
Protect the saw blade from sharp blows or impacts and prevent it from becoming tilted.
-
When you switch off the saw, allow the blade to slow down naturally - do not assist this process in any way.
- Cracked or distorted blades are not to be used. HSS (High Speed Steel) saw blades are not to be used.
- Never remove sawdust or splinters whilst the saw is running.
- Have a suitable, tested vacuum removal device attached to the saw when working with woods or materials that create dusts that may be hazardous to health.
- Always use the safety devices integrated into the circular saw, e.g. the safety lock-out (2) and automatic blade guard (5).
- Ensure that all moving parts of the saw blade protection system function properly and all the assemblies and components involved in covering the saw blade are in perfect working order.
- Do not lock on the ON / OFF switch (3) in hand-guided operation.
Information on the rechargeable battery
- The battery pack of the rechargeable device is not charged when delivered. It is therefore necessary to charge the battery before first commissioning.
- For optimum battery capacity avoid deep discharge cycles! Charge your battery frequently.
- Store your battery in a cool place, ideally at 15^ C and with at least 40% charge.
- Lithium-ion batteries are subject to natural ageing. The rechargeable battery must be replaced no later than when its capacity is just 80% of the capacity in new condition! Weakened cells in an aged battery pack are no longer able to cope with the high capacity requirements and therefore constitute a safety risk.
- Do not throw old rechargeable batteries into an open fire. Risk of explosion!
- Do not ignite or burn rechargeable batteries.
- Do not deep discharge rechargeable batteries! Deep discharge damages the battery cells. The most frequent cause of deep discharge in battery packs is lengthy storage or a lack of use of partially discharged rechargeable batteries. End the working process as soon as the capacity is notably reduced or the protection electronics trigger. Only store the rechargeable battery after fully charging.
-
Protect rechargeable batteries or device from overloading! Overloading quickly leads to overheating and cell damage inside the rechargeable battery housing, without overheating being externally visible.
-
Avoid damage and impacts! Replace rechargeable batteries immediately if these fall more than one metre or if they have been exposed to hefty impacts, even if the battery pack housing appears undamaged. The battery cells inside may be seriously damaged. Also observe the disposal instructions here.
- With overloading or overheating, the protective shut-down integrated in the device switches off for safety reasons. Attention! Do not actuate the on/off switch again if the protective shut-down has switched the device off. This can lead to damage to the rechargeable battery.
- Only use original rechargeable batteries. The use of other batteries can lead to injuries, explosion and a risk of fire.
Warning! This electric tool generates an electromagnetic field during operation. This field can impair active or passive medical implants under certain conditions. In order to prevent the risk of serious or deadly injuries, we recommend that persons with medical implants consult with their physician and the manufacturer of the medical implant prior to operating the electric tool
Information on the charging unit and charging process
- Observe the data provided on the type plate of the charging unit. Only connect the charging unit to the mains voltage provided on the type plate.
- Protect the charging unit and cable from damage and sharp edges. Have damaged cables replaced by an electrician immediately.
- Keep the charging unit, rechargeable batteries and rechargeable device out of reach of children.
- Do not use damaged charging units.
- Do not use the charging unit supplied to charge other rechargeable devices.
- The rechargeable battery pack will heat up with heavy loads. Leave the rechargeable battery pack to cool down before starting the charging process.
- Do not over-charge rechargeable batteries! Observe the maximum charging times. These charging times only apply to discharged batteries. Inserting a charged or partially charged rechargeable battery multiple times leads to overloading and cell damage. Do not leave rechargeable batteries in the charging unit for multiple days.
-
Never use or charge rechargeable batteries if you suspect that they were last charged more than 12 months ago. The probability is high that the rechargeable battery is already dangerously damaged (deep discharge).
-
Charging at a temperature of less than 10^ C leads to chemical damage to the cell and can result in a fire.
- Do not use rechargeable batteries that have heated up during charging, because the battery cells could be dangerously damaged.
- Do not use rechargeable batteries that are bulging or deformed, or that exhibit unusual symptoms (out-gassing, hissing, crackling, etc.)
- Do not discharge the rechargeable battery fully (recommended final discharge level max. 80%). Fully discharging leads to premature ageing of the battery cells.
- Never leave batteries to charge unsupervised!
Residual risks
The machine has been built according to the state of the art and the recognised technical safety requirements. However, individual residual risks can arise during operation.
- Health hazard due to electrical power, with the use of improper electrical connection cables.
- Furthermore, despite all precautions having been met, some non-obvious residual risks may still remain.
- Residual risks can be minimised if the „safety instructions“ and the „Proper use“ are observed along with the whole of the operating instructions.
- Avoid accidental starting of the machine. Use the tool that is recommended in this manual. This ensures that your machine performs optimally.
- Hands may never enter the processing zone when the machine is in operation.
8. Intended use
The equipment is to be used only for its prescribed purpose. Any other use is deemed to be a case of misuse. The user / operator and not the manufacturer will be liable for any damage or injuries of any kind caused as a result of this.
To use the equipment properly you must also observe the safety information, the assembly instructions and the operating instructions to be found in this manual.
All persons who use and service the equipment have to be acquainted with this manual and must be informed about the equipment's potential hazards.
It is also imperative to observe the accident prevention regulations in force in your area.
The same applies for the general rules of health and safety at work.
The manufacturer will not be liable for any changes made to the equipment nor for any damage resulting from such changes.
The machine may be used only with original accessories and original tools of the manufacturer.
The safety-, workplace- and maintenance speci cations of the manufacturer as well as the dimensions speci ed in the technical data must be observed.
Please note that our equipment has not been designed for use in commercial, trade or industrial applications. Our warranty will be voided if the equipment is used in commercial, trade or industrial businesses or for equivalent purposes.
9. Installation
⚠ IMPORTANT!
You must fully assemble the appliance before using it for the first time!
To ensure that the Li battery pack provides long service you should take care to recharge it promptly. You must recharge the battery pack when you notice that the power of the cordless equipment drops.
Switching on and o
Switching on:
- Press the safety lock-out (2) to the left or right and keep it pressed.
- Press the ON / OFF switch (3). Once the saw is running you can release the safety lock-out (2) again. The circular saw is tted with an electronic soft start system. The motor starts with a delay.
Switching o :
- Release the ON / OFF switch (3).
Setting the cutting angle
You can set the cutting angle accurately with the help of the cutting angle scale (12).
- Release the wing screws / locking bolts of the cutting angle preselector (11) on both sides, set the desired angle on the cutting angle scale (12) and retighten the wing screws / locking bolts.
Setting the cutting depth
Note: If possible we recommend that the cutting depth is set approximately 3 mm greater than the material thickness. This should help to ensure you achieve a clean cut.
- Release the wing screw on the cutting depth etting clamp (15), set the required cutting depth on the scale (16) and retighten the wing screw.
Setting the guide fence
- Release the wing screw (13) of the base plate (8) and insert the guide fence (10) into the slot (9). Retighten the wing screw (13).
Working with the circular saw
- Switch on the device as described in the section about "Switching on and o" and then place it first with the front edge of the base plate (8) against the material.
- Align the device using the guide fence (10) or with reference to marked-out line or by using the laser.
- Hold the machine with both hands by the handles and saw the material with moderate pressure.
Changing a saw blade
Warning! Press the spindle lock only after the battery pack has been removed!
- Then remove the guide fence (10) by releasing the wing screw (13).
- Set the cutting depth (by means of the wing screw for cutting depth setting clamp (15)) to the minimum position, 0 mm.
- Swing back the retractable blade guard (5) with the help of the retracting lever (6) and put the device down.
- Press the spindle lock button (17) (until it engages) and release the clamping screw (21) using the Allen key (14). Now remove the clamping screw with integral washer head (21) and the clamping angle (20) (see Fig. 3).
- Detach the saw blade.
- The installation of a sawblade (7) is done in the reverse order.
- Press the spindle lock button (17) (until it engages) and tighten the clamping screw (21) using the Allen key.
Warning! The arrow on the saw blade must agree with the arrow showing the direction of rotation (running direction shown on the device).
Tips and tricks
- Breaking out of the cut edges of delicate surfaces, e.g. coated chipboard or doors, can be avoided by applying masking tape in advance along the cutting line. This has the additional advantage that masking tape shows up the cutting line better than a smooth surface. An even more effective way of stopping the cut edges from being broken out is to clamp a thin piece of wood along the cutting line, which is then also sawn through
10. Cleaning
Danger!
Always pull out the battery pack before starting any cleaning work.
Cleaning
- Keep all safety devices, air vents and the motor housing free of dirt and dust as far as possible. Wipe the equipment with a clean cloth or blow it with compressed air at low pressure.
- We recommend that you clean the device immediately each time you have finished using it.
- Clean the equipment regularly with a moist cloth and some soft soap. Do not use cleaning agents or solvents; these could attack the plastic parts of the equipment. Ensure that no water can seep into the device. The ingress of water into an electric tool increases the risk of an electric shock.
11. Storage
Store the device and its accessories in a dark, dry and frost-proof place that is inaccessible to children. The optimum storage temperature is between 5 and 30°C. Store the electrical tool in its original packaging. Cover the electrical tool in order to protect it from dust and moisture. Store the operating manual with the electrical tool.
12. Maintenance
There are no parts inside the equipment which require additional maintenance.
Connections and repairs
Connections and repairs of electrical equipment may only be carried out by an electrician.
Please provide the following information in the event of any enquiries:
• Type of current for the motor
- Machine data - type plate
• Machine data - type plate
Service information
Please note that the following parts of this product are subject to normal or natural wear and that the following parts are therefore also required for use as consumables.
Wear parts*: saw blade
* Not necessarily included in the scope of delivery!
13. Disposal and recycling

The equipment is supplied in packaging to prevent it from being damaged in transit. The raw materials in this packaging can be reused or recycled. The equipment and its accessories are made of various types of material, such as metal and plastic. Defective agents must be disposed of as special waste. For dealer or your local council.
Old devices must not be disposed of with household waste!
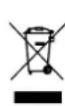
This symbol indicates that this product must not be disposed of together with domestic waste in compliance with the Directive (2012/19/EU) pertaining to waste electrical and onic equipment (WEEE). This product must be used of at a designated collection point. This can, for example, by handing it in at an authorised setting point for the recycling of waste electrical electronic equipment. Improper handling of the equipment may have negative consequences the environment and human health due to poten-hazardous substances that are often contained electrical and electronic equipment. By properly using of this product, you are also contributing the effective use of natural resources. You can find information on collection points for waste management from your municipal administration, public waste disposal authority, an authorised body for disposal of waste electrical and electronic equipment or your waste disposal company.
Batteries and rechargeable batteries do not belong in the household waste!

As the consumer you are required by law to bring all batteries and rechargeable batteries, regardless whether they contain harmful substances* or not, to a collection point run by the local authority or to a retailer, so that they can be disposed of in an environmentally friendly manner.
*labelled with: Cd = cadmium, Hg = mercury, Pb = lead
- Remove the batteries from the machine before disposing of the machine and the batteries.
14. Troubleshooting
The table below contains a list of fault symptoms and explains what you can do to remedy the problem if your equipment fails to work properly. If the problem still persists after working through the list, please contact your nearest service workshop.
| Fault Possible cause Remedy | ||
| Device does not start | Battery empty Check the battery, have it repaired by a certified elec-trician if necessary | |
| On/off switch defective Repair by an authorised service centre | ||
| Motor defective Repair by an authorised service centre | ||
| Motor stops during operation | Battery empty Charge battery | |
| Battery not inserted correctly Re-insert battery | ||
| Battery defective Clean contacts, replace original battery | ||
| Reduced power | Battery depleted Replace battery | |
| Battery not fully charged Charge battery | ||
Günzburger Straße 69
D-89335 Ichenhausen
Cher client,
Günzburger Straße 69
D-89335 Ichenhausen
Szanowny kliencie,
Günzburger Straße 69
D-89335 Ichenhausen
Vážení zákazníci,
Günzburger Straße 69
D-89335 Ichenhausen
Vážený zákazník,
Günzburger Straße 69
D-89335 Ichenhausen
Tisztelt vásárló!
Günzburger Straße 69
D-89335 Ichenhausen
Austatud klient!
Günzburger Straße 69
D-89335 Ichenhausen
Gerbiamas kliente,
Günzburger Straße 69
D-89335 Ichenhausen
Godātais klient!
Günzburger Straße 69
D-89335 Ichenhausen
Arvoisa asiakas
Günzburger Straße 69
D-89335 Ichenhausen
Bästa Kund!
text_image
Exploded view diagram of a mechanical assembly with numbered parts for identificationCE - Declaration of Conformity
| 2014/29/EU | 2004/22/EC | 89/686/EC_96/58/EC | 2000/14/EC_2005/88/EC | ||||
| X | 2014/35/EU | 2014/68/EU | 90/396/EC | Annex V | |||
| X | 2014/30/EU | X | 2011/65/EU* | Annex VINoise: measured L_WA = xx dB(A); guaranteed L_WA = xx dB(A)P = xx KW; L/∅ = cmNotified Body: Notified Body No.: | |||
 | |||||||
| Annex IVNotified Body:Notified Body No.:Certificate No.: | 2010/26/EC | ||||||
| Emission. No: | |||||||
| 2014/29/EU | 2004/22/EC | 89/686/EC_96/58/EC | |||
| X | 2014/35/EU | 2014/68/EU | 90/396/EC | ||
| X | 2014/30/EU | X | 2011/65/EU* |
Standard references:
EN 62841-1:2015; EN 62841-2-5:2014; EN 55014-1:2017; EN 55014-2:2015
This declaration of conformity is issued under the sole responsibility of the manufacturer.
The object of the declaration described above fulfils the regulations of the directive 2011/65/EU of the European Parliament and Council from 8th June 2011, on the restriction of the use of certain hazardous substances in electrical and electronic equipment.
Subject to change without notice
134
Documents registrar: Thomas Schuster
Günzburger Str. 69, D-89335 Ichenhausen
Garantie DE
Apparent defects must be notified within 8 days from the receipt of the goods. Otherwise, the buyer's rights of claim due to such defects are invalidated. We guarantee for our machines in case of proper treatment for the time of the statutory warranty period from delivery in such a way that we replace any machine part free of charge which provably becomes unusable due to faulty material
or defects of fabrication within such period of time. With respect to parts not manufactured by us we only warrant insofar as we are entitled to warranty claims against the upstream suppliers. The costs for the installation of the new parts shall be borne by the buyer. The cancellation of sale or the reduction of purchase price as well as any other claims for damages shall be excluded.