COLUMBA-KARAOKE - Speaker IBIZA SOUND - Free user manual and instructions
Find the device manual for free COLUMBA-KARAOKE IBIZA SOUND in PDF.

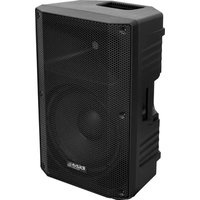
| Type de produit | Portable karaoke speaker |
| Marque | Ibiza Sound |
| Modèle | COLUMBA-KARAOKE |
| Puissance maximale | 1000 W |
| Consommation | 60 W |
| Alimentation | 220-240 V~, 50/60 Hz |
| Woofers | 2 x 10" (25 cm) |
| Tweeter | 2 x 1" |
| Impédance | 4 Ohms |
| Bande passante | 50 Hz - 20 kHz |
| Fréquence Bluetooth | 2402 - 2480 MHz |
| Fréquence micros VHF | 215.2 MHz and 212 MHz |
| Dimensions (L x P x H) | 310 x 320 x 710 mm |
| Poids | 9.1 kg |
| Fonctions principales | Karaoke, USB/AUX/Bluetooth playback, recording, vocal effects, LED lighting |
| Entrées | USB, USB-C, AUX, 2 x mic (6.3 mm jack) |
| Connectivité | Bluetooth, TWS (wireless stereo pairing) |
| Effets vocaux | Multiple effects via MIC VOICE+ / MIC VOICE- buttons |
| Éclairage LED | Multiple modes via MODE LED button |
| Sécurité | Do not open the housing, do not expose to water, indoor use only |
| Entretien | Clean with a dry, lint-free cloth |
| Pièces détachées / réparabilité | No user-serviceable parts |
| Informations générales | Manual available for free download at notice-facile.com in multiple languages |
Frequently Asked Questions - COLUMBA-KARAOKE IBIZA SOUND
User questions about COLUMBA-KARAOKE IBIZA SOUND
0 question about this device. Answer the ones you know or ask your own.
Ask a new question about this device
Download the instructions for your Speaker in PDF format for free! Find your manual COLUMBA-KARAOKE - IBIZA SOUND and take your electronic device back in hand. On this page are published all the documents necessary for the use of your device. COLUMBA-KARAOKE by IBIZA SOUND.
USER MANUAL COLUMBA-KARAOKE IBIZA SOUND
natural_image
Abstract black-and-white dot pattern forming a stylized letter 'N' shape (no text or symbols)
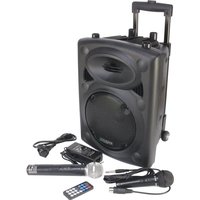
HIGH POWER KARAOKE SPEAKER WITH LED
natural_image
Abstract black dot pattern forming a stylized letter N shape (no text or symbols)COLUMBA-KARAOKE
CODE: 17-2047
natural_image
Black electronic device with glowing blue and green sound waves, emitting light (no text or symbols visible)MANUAL
EN- Instruction Manual - p. 3
Congratulations to the purchase of your new speaker.
WARNINGS

CAUTION
DO NOT OPEN THE HOUSING
SHOCK HAZARD

EXPLANATION OF SIGNS
The triangle containing a lightning symbol is used to indicate whenever your health is at risk (due to electrocution, for example).
An exclamation mark in a triangle indicates particular risks in handling or operating the appliance.
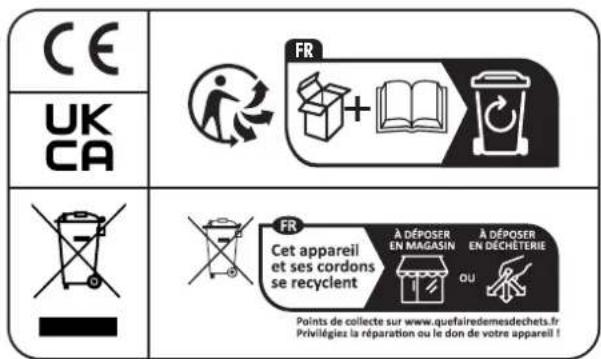
UK CA
Accordance with the requirements of UK standards
□
Class II protection without earth connection
#
The product is for indoor use only
[NO TEXT]
This marking indicates that this product should not be disposed with other household wastes throughout the EU. To prevent possible harm to the environment or human health from uncontrolled waste disposal, recycle it responsibly to promote the sustainable reuse of material resources. To return your used device, use the return and collection systems or contact the retailer where the product was purchased. They can see this product for environmentally safe recycling.
IMPORTANT SAFETY INSTRUCTIONS AND DANGER WARNINGS
- Please read the manual carefully and keep it for future reference.
- The unit shall be connected to a power supply only of the type described.
• To reduce the risk of fire or electrical shock, do not expose this unit to rain or moisture. - Unplug the unit from the wall socket when it will not be used for a long time.
- Make sure that neither objects nor liquids can enter the housing.
- Do not open the housing, as there are no user-serviceable parts inside.
- The appliance may not be exposed to extreme temperatures ( < +5^ / > +35^ ), strong vibrations or heavy mechanical strain during operation.
- The appliance is approved for operation in dry, closed rooms only. Do not operate the device nearby water, such as in bathrooms or nearby swimming pools.
- Do not expose to dripping or splashing water and don't place objects filled with liquids, such as vases, on the apparatus.
- Do not place on the apparatus close to naked flames, such as lighted candles.
- Do not use the unit in a tropical climate. Only for use in temperate climates.
- Please place the equipment on a level and stable surface. Never place the appliance on an unstable or mobile surface. Persons could be injured or the appliance damaged by it falling down.
- Any warranty claims are rendered invalid if damage occurs due to non-observance of these operating instructions. We assume no liability for any consequent damage. Any warranty claims expire in such cases.
- Unauthorized conversions and/or modifications of the appliance are not permitted for safety and licensing reasons (CE).
- DISCONNECT DEVICE: Where the MAINS plug or an appliance coupler is used as the disconnect device, the disconnect device shall remain readily operable
DESCRIPTION OF THE TOP PANEL CONTROLS & CONNECTORS
- POWER button: Press to switch the speaker ON/OFF.
- USB Input: Insert a USB storage device to playback your stored music
- USB-C input: Insert a USB type C storage device to playback your stored music.
-
AUX Input: Connect to external device via the supplied AUX lead.
-
Microphone1 input: Insert a microphone to sing along to the music.
- Microphone2 input: Insert a microphone to sing along to the music.
- REC: Record function in BT/AUX mode
- MIC VOICE+: Short press to cycle upwards through the various voice effects. Long press to activate the Microphone Priority function that reduces the music volume during speech.
- MIC VOICE-: Press to cycle through the various voice effects. Keep the button pressed to restore the original voice.
- LED MODE: Press to switch between different light effects.
- MIC Vol: Rotate to adjust microphone volume to your desired level.
- Mic Bass control: Rotate BASS knob to adjust the microphone bass effect. Rotate the knob clockwise to increase and counterclockwise to reduce the effect.
- VOLUME/MENU dial: Rotate the knob clockwise to increase the volume, rotate counterclockwise to reduce the master volume. Display will show the corresponding volume value between 0 and 32. Press once to set the basses of the overall output. "b" is displayed. Press twice to set the treble of the overall output. "t" is displayed. Press three times to set the overall volume. "U" is displayed.
- Mic Treble control: Rotate TREBLE knob to adjust microphone treble effect. Rotate the knob clockwise to increase and counterclockwise to reduce the effect.
- Mic Reverb control: Rotate REVERB knob to adjust microphone reverb effect. Rotate the knob clockwise to increase and counterclockwise to reduce the effect.
- MODE: Cycle through USB/AUX/BLUETOOTH
- Next button: Press to skip to next track stored on your USB drive.
- Play/Pause button: Press to pause the music, press again to resume play.
- Previous button: Press to move back to previous track stored on your USB drive
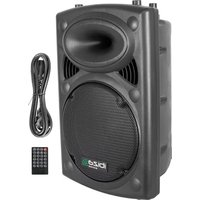
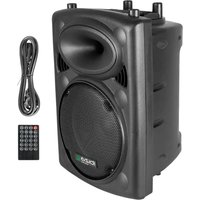
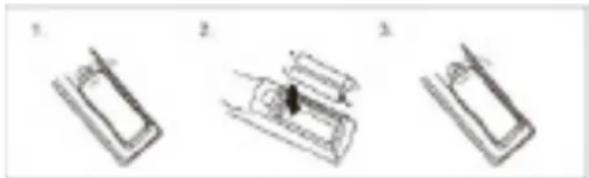
INSTALLATION OF THE BATTERIES IN THE VHF MICS
Unscrew the lower part of the microphone and insert two AA batteries in the holder with the correct polarity. Screw the lower part back on.
natural_image
Three-step diagram showing a mechanical assembly with labeled steps (no text or symbols present)RECOMMENDATIONS FOR BATTERIES

This symbol indicates that used batteries should not be disposed of with household waste but deposed correctly in accordance with your local regulations.
Batteries shall not be exposed to excessive heat such as sunshine, fire or the like.
When you will not use the microphone for a longer period, remove the batteries to avoid damage caused by battery leakage or corrosion.
ATTENTION: Danger of explosion if batteries are incorrectly placed. Only replace by the same or equivalent type.
WARNING : Do not swallow the battery. Danger of chemical burns. Keep new and old batteries out of the reach of children. If the battery compartment doesn't close properly, stop using the product and keep it out of the reach of children.
If you are in doubt whether the batteries have been swallowed or introduced into any other part of the body, contact immediately a doctor.
TO PLAY MP3 MUSIC
- Switch power source to ON.
- Insert a USB stick or a USB-C device into the relevant input
- Select a title via the ◀ or ▶ buttons and press ▶
AUX INPUT (LINE-IN)
- Press the MODE button and select AUX (Line) mode.
- Connect the supplied AUX lead to the AUX IN jack on the box and the other end into the headphones socket of the external device.
- Turn on the external device
- Once connected, you can listen to the music of your external device.
Caution: Please turn off the unit before you connect the AUX cable to avoid unexpected noise.
MIC VOICE±
Press MIC VOICE+ or MIC VOICE- button to change the vocal effect when using the microphone. It changes the voice of male into female and vice a versa, and offers many other cool voice changing effects. Keep pressing to test the different vocal effects.
BASS ADJUSTMENT ON MASTER OUTPUT
Press the VOLUME/MENU wheel once. "b" is displayed. Rotate the wheel to the desired value between -6 and +6.
TREBLE ADJUSTMENT ON MASTER OUTPUT
Press the VOLUME/MENU wheel twice. "t" is displayed. Rotate the wheel to the desired value between -6 and +6.
MICROPHONE JACK
There are two microphone inputs on the speaker. Connect wired microphones to the 6.3mm MIC jacks on the top panel to sing along to the music. Rotate the MIC VOL knob to increase or decrease the microphone volume to your desired level. To adjust the microphone Reverb, Treble or Bass and rotate the knob to match your preference.
REC FUNCTION
- Disconnect the speakerbox from your Bluetooth device.
- Insert a USB stick. The speaker will automatically switch into USB mode. Connect the speaker box to your Bluetooth device and start play.
- Keep the REC button pressed to start recording the sound of the music and the microphone to a connected USB device. Keep the REC button pressed to stop recording. Press REC button to play the recorded file. Keep the REC button pressed to delete the recorded file.
BLUETOOTH FUNCTION
- Press the MODE button on the top panel to switch into BLUETOOTH mode,
- Activate the Bluetooth function on the external device. Select "COLUMBA KARAOKE" in the list of found devices.
- Once connected, the speaker will make a low sound.
- Control the tracks of the external device via the ◀ and ▶ buttons.
Note: This speaker does not require a password.
TWS FUNCTION
This model offers TWS function, allowing you to wirelessly connect 2 speakers of the same model. To connect the speakers together, follow the instructions hereafter:
- Turn off the Bluetooth feature on your smartphone.
- Turn on both speakers and set them into Bluetooth mode
- Press and hold the MODE button on one of the speakers (master speaker).
- When the connection is established, you will hear the message "left channel" from the master speaker, and "right channel" from the slave speaker.
- Activate the Bluetooth function of your smartphone and select "COLUMBA KARAOKE" in the list of found devices.
- Now the master speaker is connected to your Bluetooth source. After that, you can use any mode to play music in TWS mode.
NOTE: To make the TWS connection, neither unit must be previously connected to any device. Please disconnect both speakers from all other Bluetooth connections.
SPECIFICATIONS
Maximum power 1000W
Consumption....60W
Power supply 220-240V\~50/60Hz
Woofers.... 2 x 10"/25cm
Tweeter 2 x 1"
Impedance 4 Ohms
Frequency range 50Hz - 20kHz
Bluetooth frequency 2402-2480MHz
Max. RF emission value 1.26dBm
VHF freq. of mics....215.2MHz & 212MHz
Max. RF power 7.63dBm
Microphone batteries .......requires 2x AA 1.5V batteries/microphone
Dimensions 310 x 320 x 710mm
Weight.... 9.1kg
ENCEINTE KARAOKE HIGH POWER A LED 2 X 10"/25CM - 1000W
INTRODUCTION
natural_image
Three technical line drawings of mechanical components or parts, no text or symbols presentRECOMMANDATIONS POUR LES PILES

natural_image
Three technical diagrams showing mechanical components or assemblies, no visible text or symbolsAANBEVELINGEN VOOR BATTERIJEN

MANUAL DE INSTRUÇÕES
natural_image
Three technical diagrams showing mechanical components or parts, labeled 1, 2, and 3, with no visible text or symbols.RECOMENDAÇÕES PARA BATERIAS

RECOMANDĂRI PRIVIND BATERIILE

natural_image
Three technical diagrams showing mechanical components or assemblies, no visible text or symbolsZALECENIA DOTYCZĄCE AKUMULATORÓW

natural_image
Three technical line drawings of a mechanical component or tool, showing different assembly states (no text or symbols present)REKOMMENDATIONER FÖR BATTERIER

natural_image
Three technical line drawings of a mechanical component or device, showing different assembly states (no text or symbols present)EU Declaration of Conformity
Hereby we, LOTRONIC SA
Rue F. Englert 17 Bte2
1480 TUBIZE
Belgique
+32.2.390.91.91
Certify and declare under our sole responsibility that the following product:

SOUND

Trade name:
Product name: KARAOKE SPEAKER BOX
Type or model: COLUMBA KARAOKE
Conforms to the essential requirements of the RED directive 2014/53/EU, ErP Directive 2009/125/EC and commissions regulations (EC) No 1275/2008 and No 107/2009, RoHS directive 2011/65/EU and the Commission Delegated Directive (EU) 2015/863
Based on the following specifications applied:
EN IEC 62368-1:2020+A11:2020
EN 62479 : 2010
EN 50663 : 2017
ETSI EN 301 489-1 V2.2.3 : 2019-11
Place and date of issue: Tubize (Belgium), on 05/08/2024
M. De Sousa
Quality manager
LOTRONIC SA
Zoning Tubize II
Download the manual in other languages
Any questions or problems?
Contact us

IBIZALIGHTSOUND
Follow us on Instagram
Assembled in PRC • Designed by LOTRONIC S.A. •
https://ibizashop.eu/
©Copyright LOTRONIC 2024