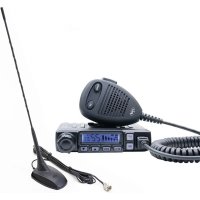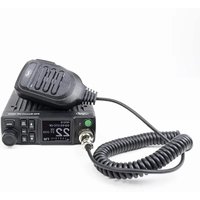
Escort HP 8900 - Talkie Walkie PNI - Free user manual and instructions
Find the device manual for free Escort HP 8900 PNI in PDF.


User questions about Escort HP 8900 PNI
0 question about this device. Answer the ones you know or ask your own.
Ask a new question about this device
Download the instructions for your Talkie Walkie in PDF format for free! Find your manual Escort HP 8900 - PNI and take your electronic device back in hand. On this page are published all the documents necessary for the use of your device. Escort HP 8900 by PNI.
USER MANUAL Escort HP 8900 PNI
Read the warnings below to prevent fire, personal injury, or damages to the CB radio or to the CB antenna.
Do not try to operate the radio while driving. Doing so expose yourself to the risk of road accidents.
This radio is designed for 12V/24V DC power supply. Do not use a voltage higher than the recommended one.
Do not place the radio on an excessively dusty, damp or unstable surface.
Do not connect the antenna during transmission; risk of electric shock.
Please keep away from interfering devices (such as: tv, generator, etc.)
Those who use pacemakers are advised to keep their distance from the antenna during transmission and especially not to touch it.
Do not bring metal objects close to the internal electrical part of the radio; danger of electric shock.
Avoid exposing the radio to temperatures lower than -26°C and higher than +80°C, the temperature on board a vehicle can sometimes exceed 80°C, which can cause irreparable damage to the radio in case of prolonged exposure. Do not expose the radio to sunlight for a long time.
Do not cover the redio, it will prevent it from cooling.
Check that the vehicle battery is sufficiently charged to avoid rapid discharge.
It is important to turn off the radio before starting the engine to avoid damage caused by high starting voltage.
When replacing the fuse, you must use a 2A 250V type F fuse. Do not use a higher value fuse.
If an abnormal odor or smoke is detected coming out of the radio, turn off the radio immediately.
Do not transmit for a long time, the radio may heat up and malfunction.
Keep the radio away from children.
Other warnings:
Before connecting or using this product, please read the instructions for use carefully. Keep this manual for future reference.
Before using the radio, connect the antenna. Check the SWR before transmitting. A too high SWR can lead to the destruction of the radio
terminals, internal components that are not covered by the warranty.
There are no components of the radio that can be repaired by the user. For repairs, contact an authorized service center.
To prevent the risk of fire, use a suitable power supply.
Installation instructions
Before installing the radio in your car, choose the most suitable location so that when using it, it does not disturb you while driving.
To install the radio, use the bracket and accessories in the package. The screws must be tightened well to avoid vibration of the radio while driving. The mounting bracket can be positioned above or below the radio, and it can be tilted depending on the installation method.
Power the radio
The power cable of the radio includes a protection fuse, installed in the cigarette lighter socket. To power the radio, insert the cigarette lighter plug into the dedicated slot under your car's dashboard.
WARNINGS
Make sure that you power the radio at 12V/24V.
If the fuse burns, do not replace it with a higher value one. The one in the factory has 2A.
The installation of the antenna
To use the radio you need an antenna that operates in the frequency range 26-28MHz.
To install and calibrate the antenna, consult a specialized technician.
Usually, the antenna must be positioned on the highest part of the vehicle, without being shielded by obstacles and as far as possible from any electrical source or electromagnetic noise. The coaxial cable of the antenna must not be interrupted or pressed. Connect the plug on the end of the antenna coaxial cable to the antenna plug on the back of the radio.
Testing the radio
Once the radio is installed and powered, test its correct operation:
- Check that the radio is powered correctly
- Check the antenna connection to the radio
- Connect the microphone to the jack on the front panel of the radio
- Turn on the radio by long pressing the multifunction button on the front panel of the radio
- Adjust the volume to the comfort level
- Select the channel using the keys ▲ and ▼ from the microphone or the front panel of the radio.
- Adjust the squelch level to the limit where the background noise disappears. (Instructions on activating and adjusting the ASQ/SQ function can be found on page 8)
- Press the PTT button on the microphone to emit and release it to receive
- Check the level of the signal transmitted/received via the signal bars on the front panel of the radio
Key features
- Manual Squelch (SQ) and Automatic Squelch (ASQ)
- Multifunctional screen
- Frequency display
- S-meter
• NB and HI-CUT filters - Scan function
• Additional settings menu - Dual Watch function
- Key beep
- CTCSS/DCS codes
- Key lock
- Emergency channels
• Screen brightness adjustment
Front panel description
text_image
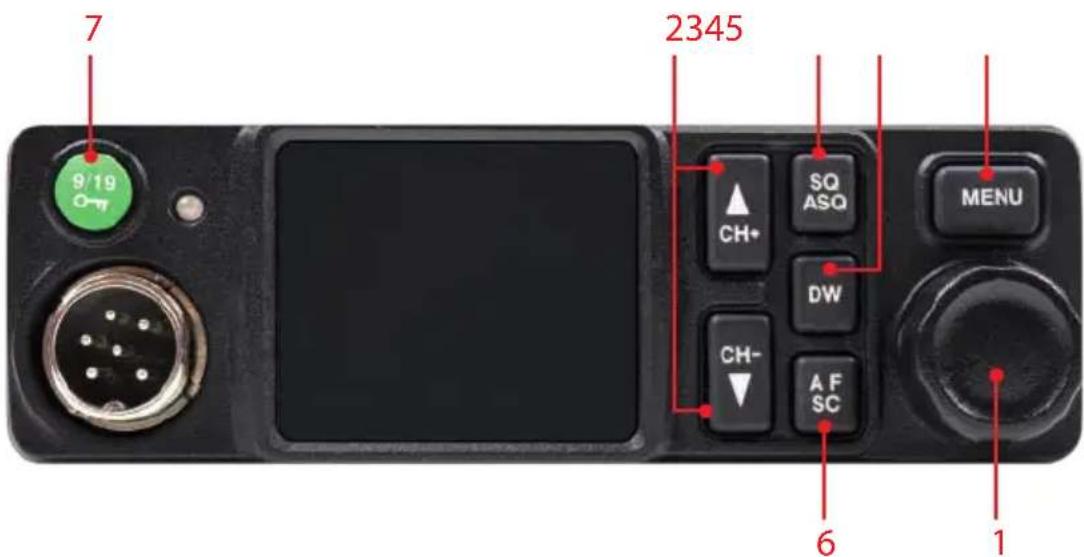
7 9/19 2345 CH+ SQ ASQ MENU DW CH- A F SC 6 1- Multifunction button. Long press this button to turn on/off the radio. Turn this knob to adjust the volume. If you have accessed the settings menu, press this button to access a sub-menu and rotate it to change an option.
- ▲/▼. Press these buttons to change the channel (Channel +/Channel-).
- DW. Press this button to activate, deactivate and configure the Dual Watch function.
- MENU. Long press this button to access the menu with additional settings.
- SQ/ASQ. Press this button to activate, deactivate and select the manual and automatic squelch level.
- AF/SC. Press this button to switch the modulation (AM/FM) and to activate the Scan function.
- 9 19/Lock. Press this button to switch to emergency channels (9/19) and to activate/deactivate the Key lock function.
Basic operations
Turn the radio on/off
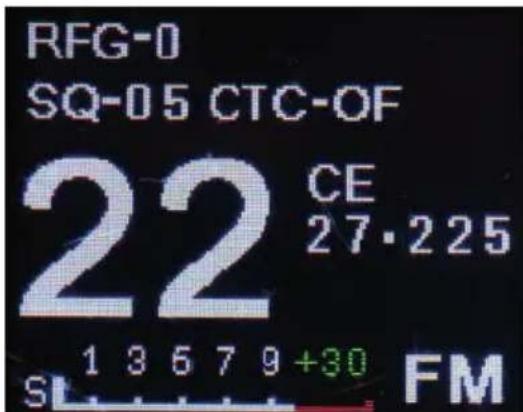
Long press the multifunction button [1] to turn on the radio. The screen will light up and will first display the PNI logo, then the channel, standard, frequency, modulation and active functions.
Note: If you have activated the AUTO ON function in the radio's menu, the radio will start automatically immediately after power up.
text_image
RFG-0 SQ-05 CTC-OF 22 CE 27·225 1 3 6 7 9 +30 FMAdjust the volume
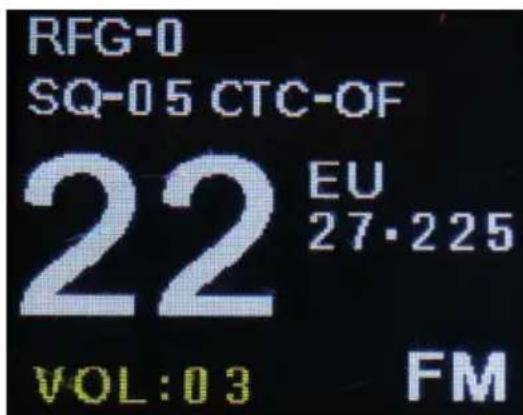
After turning on the radio, rotate the multifunction knob left or right to adjust the volume. 28 volume levels are available. Briefly press the multifunction button to turn off the speaker. The text MUTE will appear on the screen. Briefly press the multifunction button again or rotate it to reactivate the speaker. The screen will return to the standard display mode and to the last set volume level.
text_image
RFG-0 SQ-05 CTC-OF 22 EU 27·225 VOL:03 FM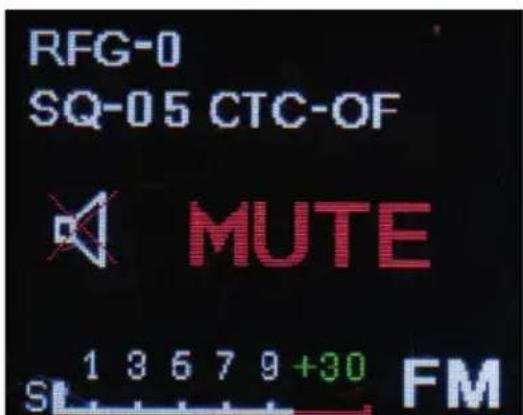
text_image
RFG-0 SQ-05 CTC-OF MUTE 1 3 6 7 9 +30 FMSelect the channel
Briefly press the buttons ▲ and ▼ on the microphone or the front panel of the radio to change the channel. Press and hold to switch over 5 channels at once.
Functions
Activate SQ. Sensitivity level setting.
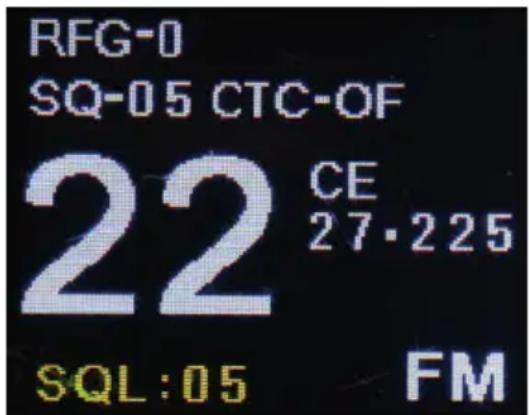
Briefly press the SQ/ASQ button [5]. The SQL text accompanied by the current sensitivity level will appear in the lower left corner of the screen. Turn the multifunction knob [1] to set the desired level. 28 levels of squelch sensitivity are available (00 - 28). Press the multifunction button to confirm or wait 5 seconds, afterwards the screen will return to the standard display mode. The set squelch level will be displayed in the upper left corner of the screen.
text_image
RFG-0 SQ-05 CTC-OF 22 CE 27·225 SQL:05 FMActivate ASQ. Sensitivity level setting.
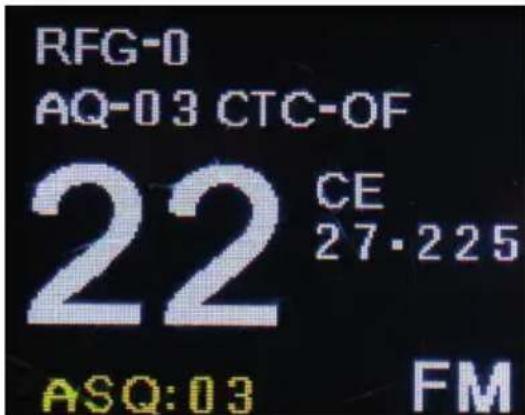
Briefly press the SQ/ASQ button [5] or the ASQ button on the microphone to activate the Automatic Squelch function. The text ASQ will appear in the lower left corner of the screen accompanied by the current sensitivity level. Turn the multifunction knob [1] to set the desired level. 9 levels of automatic squelch sensitivity are available (01 - 09). Press the multifunction button to
confirm or wait 5 seconds, afterwards the screen will return to the standard display mode. The set squelch level will be displayed in the upper left corner of the screen.
text_image
RFG-0 AQ-03 CTC-OF 22 CE 27·225 ASQ:03 FMAM/FM modulation
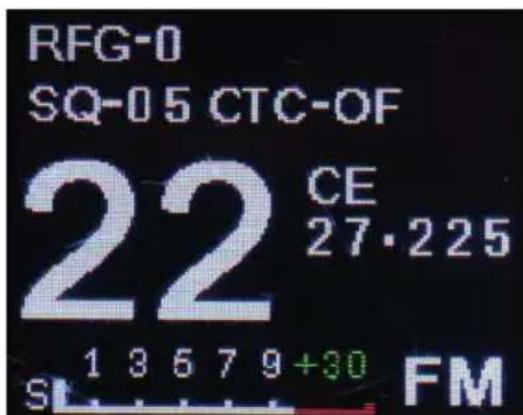
Briefly press the AF/SC button [6] to switch between AM and FM.
Note: If the radio is set to a standard that does not support AM, pressing the AF/SC key will have no effect. Only the FM icon will remain displayed on the screen.
text_image
RFG-0 SQ-05 CTC-OF 22 CE 27·225 1 3 6 7 9+30 FM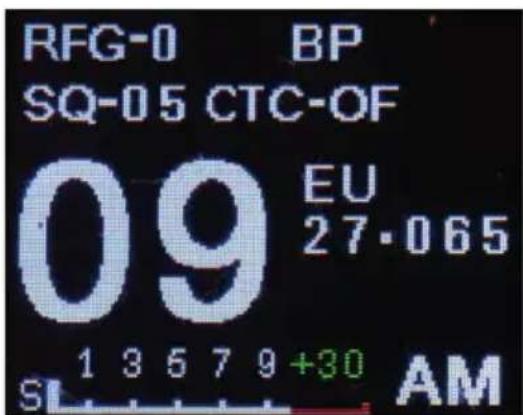
text_image
RFG-0 BP SQ-05 CTC-OF 09 EU 27·065 1 3 5 7 9+30 AMDual Watch
-
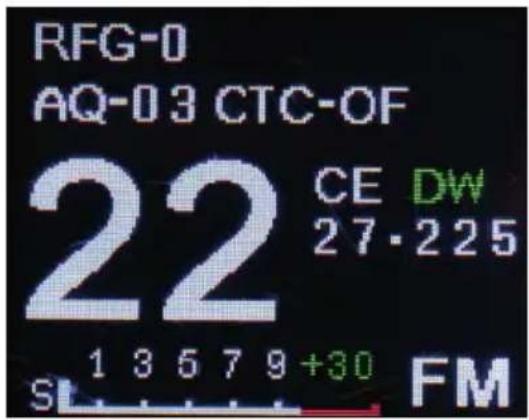
Briefly press the DW [3] button to activate the Dual Watch function.
-
The channel number and DW icon will flash on the screen. Use the ▲ and ▼ keys to select the second channel you want to monitor.
-
Briefly press the DW key again to confirm.
-
The two monitored channels, accompanied by the DW icon, will be displayed alternately on the screen.
-
Briefly press the DW key again to deactivate the Dual Watch function.
text_image
RFG-0 AQ-03 CTC-OF 22 CE DW 27·225 S 1 3 5 7 9 +30 FMScan
-
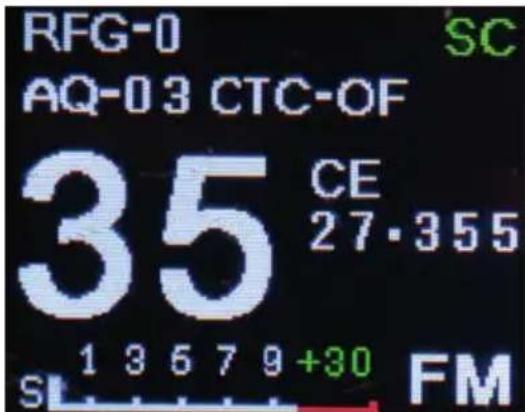
Long press the AF/SC button [6] to activate the channel scan function.
-
The SC icon will appear on the screen in the upper right corner, and the channel number will increase or decrease. Briefly press the ▲ and ▼ buttons to change the scan direction.
-
If during the scan, the radio receives a signal on one of the channels, the scan will stop for 10 seconds. If you want to continue scanning, press and hold the ▲ or ▼ button. If you want to stay on the signal channel, press and hold the AF/SC button or press the PTT button.
-
To stop scanning, press and hold the AF/SC button again or press and hold the PTT button briefly.
text_image
RFG-0 AQ-03 CTC-OF 35 CE 27·355 1 3 6 7 9 +30 FMEMG (Emergency channels)
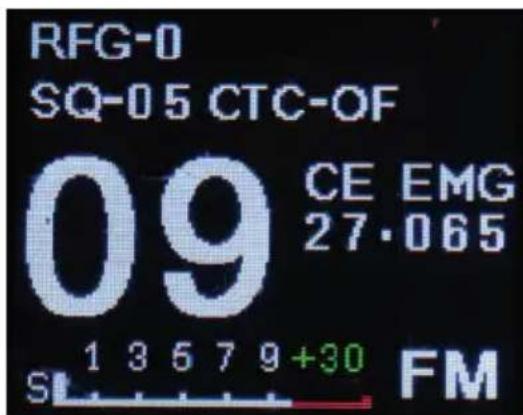
- Briefly press button 9 19/Lock [7] to switch to emergency channel 09.
- Press the 9 19/Lock button again to switch to the emergency channel 19.
- The EMG icon will flash on the screen.
- Press once more to return to the standard mode of operation of the radio.
text_image
RFG-0 SQ-05 CTC-OF 09 CE EMG 27·065 1 3 6 7 9+30 FM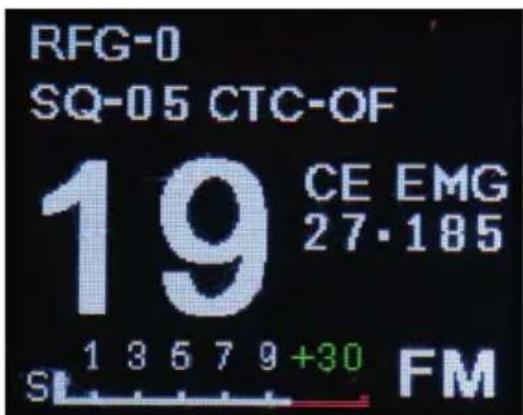
text_image
RFG-0 SQ-05 CTC-OF 19 CE EMG 27·185 S 1 3 5 7 9 +30 FMLock (Key lock)
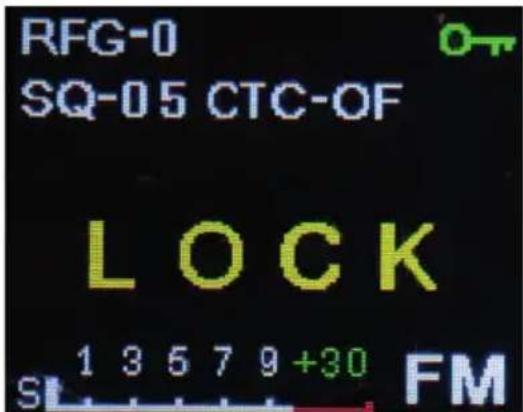
- Long press the 9 19/Lock [7] button to lock the keys (except the PTT key).
- The text LOCK and the icon will appear on the screen.
- Press and hold the 9 19/Lock button again to unlock the keys.
text_image
RFG-0 SQ-05 CTC-OF LOCK 1 3 5 7 9 +30 FMAdditional settings menu
- Long press the MENU button [4] to access the settings menu.
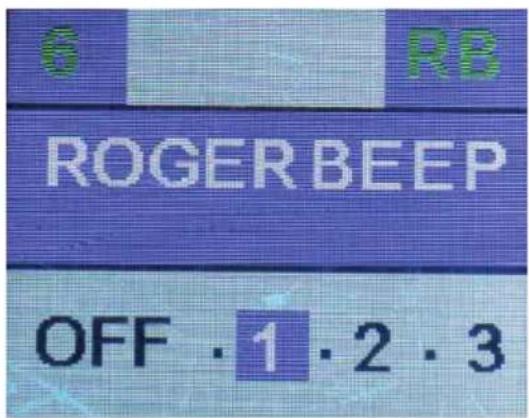
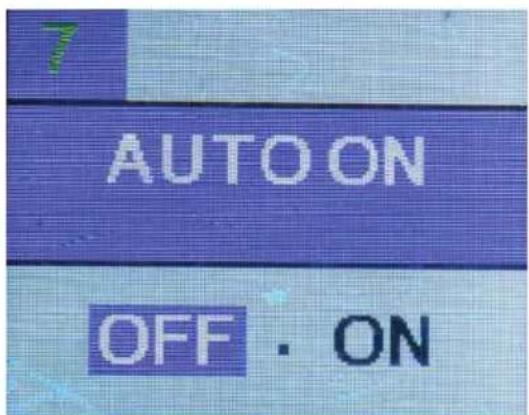
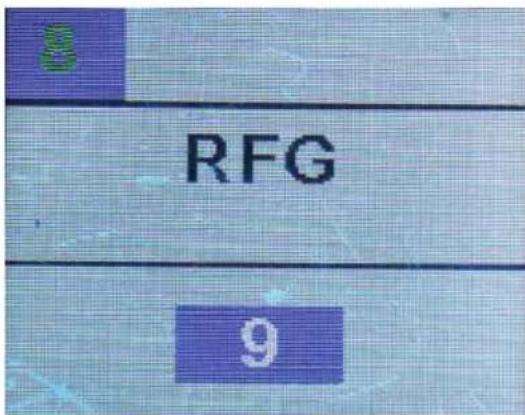
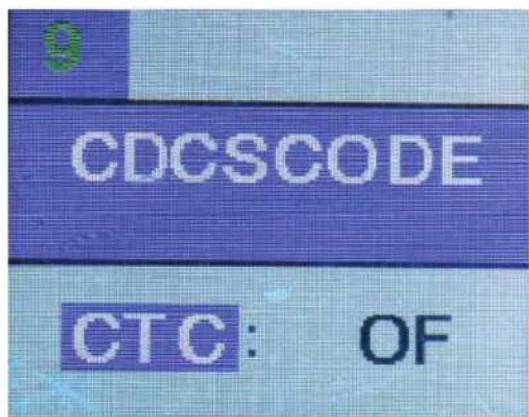
- Press the multifunction button [1] to access one of the settings: BRIGHT, KEYTONE, NOISE BLANK, HIGH CUT, TIMEOUT TIMER, ROGER BEEP, AUTO ON, RFG, CDCSCODE, FACTORY RESET.
- Rotate the multifunction knob to select the desired option.
- Press the multifunction button to confirm.
- Turn the multifunction knob to move to the next setting.
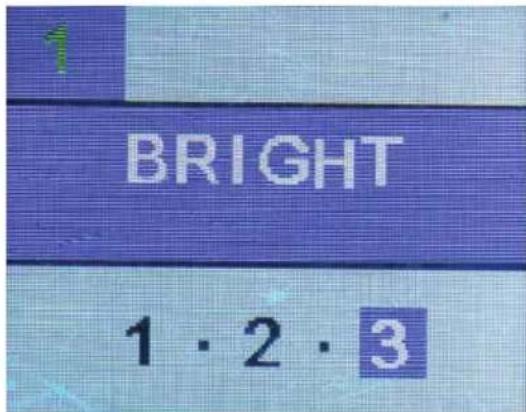
BRIGHT (Display brightness)
Options: 1 - 2 - 3 (1 - the least bright, 3 - the brightest)
text_image
BRIGHT 1·2·3KEYTONE
Options: OFF - ON
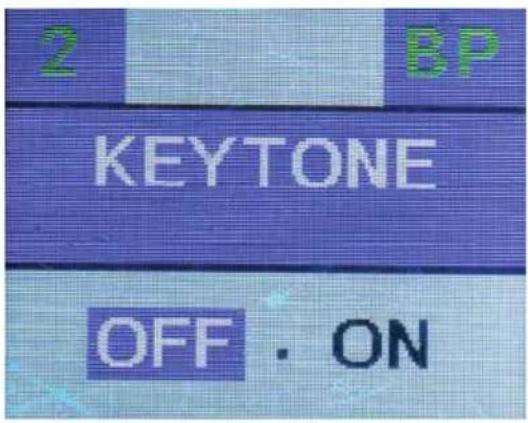
text_image
2 BP KEYTONE OFF . ONNOISE BLANKER
Options: OFF - ON
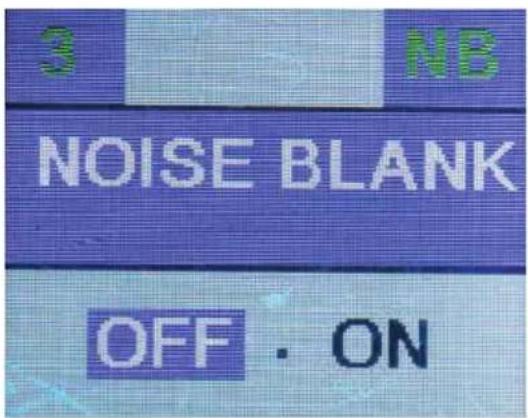
text_image
3 NB NOISE BLANK OFF . ONHIGH CUT
Options: OFF - ON
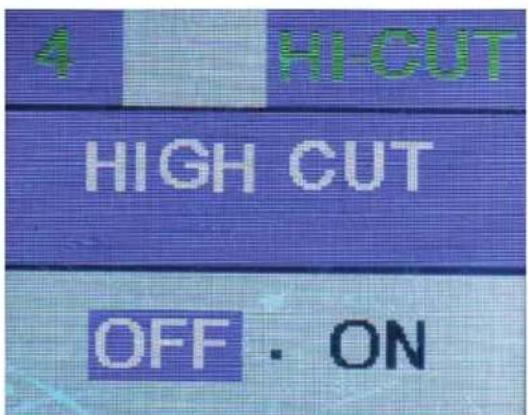
text_image
4 HI-CUT HIGH CUT OFF . ONTIMEOUT TIMER
Options: OFF - 1 MIN - 2 MIN - 3 MIN - 4 MIN - 5 MIN - 6 MIN - 7 MIN - 8 MIN - 9 MIN
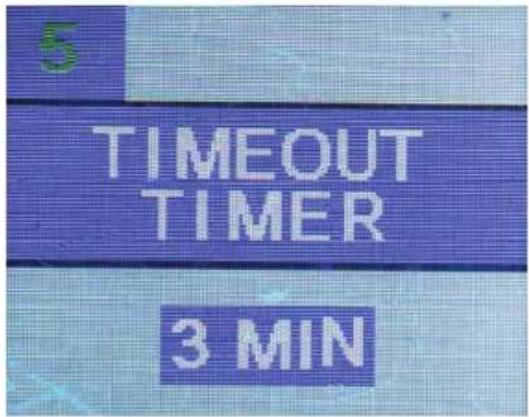
text_image
5 TIMEOUT TIMER 3 MINROGER BEEP
Options: OFF - 1 - 2 - 3
text_image
6 RB ROGER BEEP OFF · 1 · 2 · 3AUTO ON
Options: OFF - ON
text_image
7 AUTO ON OFF . ONRFG (RF Gain)
Options: OFF - 1 - 2 - 3 - 4 - 5 - 6 - 7 - 8 - 9.
text_image
8 RFG 9CTCSCODE (CTCSS/DCS codes)
Options CTC: OFF and from 01 to 50.
Options DCS: OFF and from 01 to 104.
Note: We do not recommend activating CTCSS/DCS codes unless the person you are communicating with has this feature enabled too.
text_image
CDCSCODE CTC: OF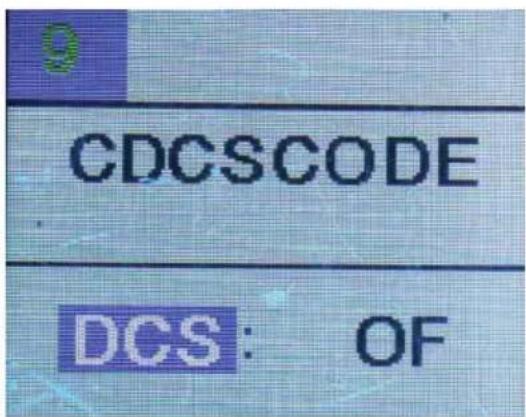
text_image
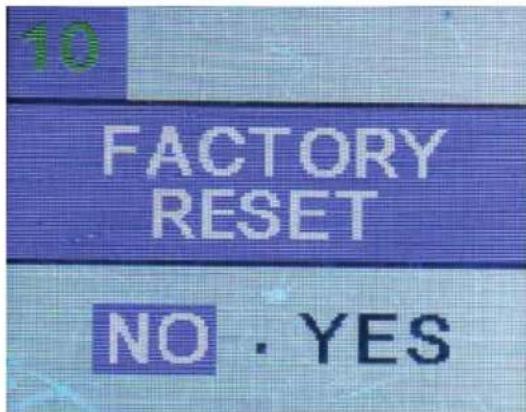
CDCSCODE DCS: OFFACTORY RESET
Options: YES - NO
Note: The radio can also be reset by the key combination: MENU + multifunction button (hold down the two buttons simultaneously when the radio is turned off).
text_image
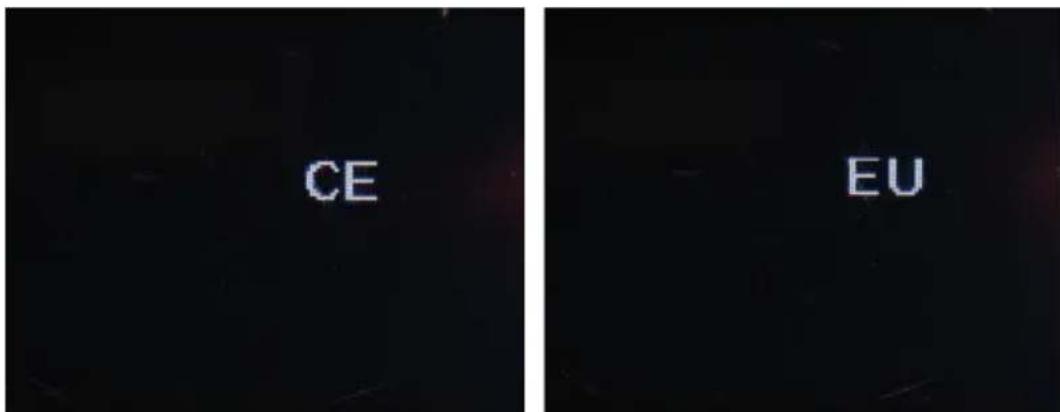
10 FACTORY RESET NO . YESSetting the standard
- Turn off the radio.
- Hold down the 9 19/Lock button [7] and the multifunction button [1] simultaneously.
- Only the current standard will be displayed on the screen.
- Turn the multifunction knob to the right or left to select the standard for your country.
- Turn the radio off and back on.
- The selected standard will be displayed on the screen.
text_image
CE EUAvailable standards
| Norme | Frequency (MHZ) | Channels Country | EMG (9/19) | |
| EU 26.96 | 5-27.405 | 40CH (4W) AM/FM | AT, BE, BG, CH, CY, DK, EE, ES, FI, FR, GR, HR, HU, IE, IS, IT, LT, LU, LV, NL, NO,, PT, RO, SE, SI | CH09: 27.065MHz AM/FMCH19: 27.185MHz AM/FM |
| FR 26.96 | 5-27.405 | 40CH (4W) AM/FM | FR | CH09: 27.065MHz AM/FMCH19: 27.185MHz AM/FM |
| PL | 26.960-27.400 | -5KHZ40CH (4W) AM/FM | PL | CH09: 27.060MHz AM/FMCH19: 27.180MHz AM/FM |
| UK | 27.60125-27.99125 | 40CH (4W) FM only | UK | CH09: 27.68125MHz FMCH19: 27.78125MHz FM |
| DE | 26.965-27.405 | 01CH-40CH (4W) AM/FM | DE | CH09: 27.065MHz AM/FMCH19: 27.185MHz AM/FM |
| 26.565-26.955 | 41CH-80CH (4W) FM only | |||
| CE 26.96 | 5-27.405 | 40CH (4W) FM only | RO, MT | CH09: 27.065MHz FMCH19: 27.185MHz FM |
| IN 26.96 | 5-27.275 | 27CH (4W) AM/FM | IN | CH09: 27.065MHz AM/FMCH19: 27.185MHz AM/FM |
Technical specifications
| Power voltage 12V/24V | |
| Frequency error ≤300Hz | |
| Output power 4W | |
| FM frequency deviation 1.9KHz | |
| AM modulation index 70-90% | |
| Frequency control PLL | |
| Frequency response 300-3000HZ | |
| Distortion 8% | |
| Reception sensitivity | >1μV |
| Audio power max. 3W | |
| Consumption 1.8A | |
| Dimensions 122 x 130 x 37 mm | |
| Weight | 660 g |
| Working temperature | -26°C ~ +80°C |
text_image
RFG-0 SQ-05 CTC-OF MUTE 1 3 5 7 9 +30 FMИзберете канала
text_image
RFG-0 AQ-03 CTC-OF 22 CE 27·225 ASQ:03 FMAM / FM модулация
text_image
RFG-0 AQ-03 CTC-OF 22 CE DW 27·225 S 1 3 6 7 9 +30 FMСканиране
text_image
RFG-0 SC AQ-03 CTC-OF 35 CE 27·355 S 1 3 6 7 9 +30 FMtext_image
RFG-0 SQ-05 CTC-OF LOCK S 1 3 5 7 9 +30 FMtext_image
RFG-0 SQ-05 CTC-OF MUTE 1 3 5 7 9 +30 FMSender auswählen
text_image
RFG-0 AQ-03 CTC-OF 22 CE 27·225 ASQ:03 FMModulation AM/FM
text_image
RFG-0 AQ-03 CTC-OF 22 CE DW 27·225 S 1 3 6 7 9 +30 FMScannen
text_image
RFG-0 AQ-03 CTC-OF 35 CE 27·355 1 3 6 7 9 +30 FMEMG (Notfall-Sender)
text_image
RFG-0 SQ-05 CTC-OF LOCK 1 3 5 7 9 +30 FMtext_image
RFG-0 SQ-05 CTC-OF MUTE 1 3 6 7 9 +30 FMSeleccione el canal
text_image
RFG-0 AQ-03 CTC-OF 22 CE 27·225 ASQ:03 FMModulación AM/FM
text_image
RFG-0 AQ-03 CTC-OF 22 CE DW 27·225 S 1 3 5 7 9 +30 FMScan
text_image
RFG-0 AQ-03 CTC-OF 35 CE 27·355 1 3 6 7 9 +30 FMtext_image
RFG-0 SQ-05 CTC-OF LOCK 1 3 5 7 9 +30 FMtext_image
RFG-0 SQ-05 CTC-OF MUTE 1 3 6 7 9 +30 FMtext_image
RFG-0 AQ-03 CTC-OF 22 CE 27·225 ASQ:03 FMModulation AM/FM
text_image
RFG-0 AQ-03 CTC-OF 22 CE DW 27·225 S 1 3 5 7 9 +30 FMScan
text_image
RFG-0 AQ-03 CTC-OF 35 CE 27·355 S 1 3 6 7 9 +30 FMtext_image
RFG-0 SQ-05 CTC-OF LOCK 1 3 5 7 9 +30 FMtext_image
RFG-0 SQ-05 CTC-OF MUTE 1 3 6 7 9 +30 FMtext_image
RFG-0 AQ-03 CTC-OF 22 CE 27·225 ASQ:03 FMAM/FM moduláció
text_image
RFG-0 AQ-03 CTC-OF 22 CE DW 27·225 S 1 3 5 7 9 +30 FMScan
text_image
RFG-0 AQ-03 CTC-OF 35 CE 27·355 S 1 3 6 7 9 +30 FMtext_image
RFG-0 SQ-05 CTC-OF LOCK 1 3 5 7 9 +30 FMtext_image
RFG-0 SQ-05 CTC-OF MUTE 1 3 6 7 9 +30 FMSezione canale
text_image
RFG-0 AQ-03 CTC-OF 22 CE 27·225 ASQ:03 FMModulazione AM/FM
text_image
RFG-0 AQ-03 CTC-OF 22 CE DW 27·225 S 1 3 5 7 9 +30 FMScan
text_image
RFG-0 AQ-03 CTC-OF 35 CE 27·355 1 3 6 7 9 +30 FMtext_image
RFG-0 SQ-05 CTC-OF LOCK 1 3 5 7 9 +30 FMtext_image
RFG-0 SQ-05 CTC-OF MUTE 1 3 6 7 9 +30 FMtext_image
RFG-0 AQ-03 CTC-OF 22 CE 27·225 ASQ:03 FMAM / FM-modulatie
text_image
RFG-0 AQ-03 CTC-OF 22 CE DW 27·225 S 1 3 5 7 9 +30 FMScan
text_image
RFG-0 AQ-03 CTC-OF 35 CE 27·355 1 3 6 7 9 +30 FMEMG (Noodkanalen)
text_image
RFG-0 SQ-05 CTC-OF LOCK 1 3 5 7 9 +30 FMExtra instellingenmenu
text_image
RFG-0 SQ-05 CTC-OF MUTE 1 3 6 7 9 +30 FMWybierz kanał
text_image
RFG-0 AQ-03 CTC-OF 22 CE 27·225 ASQ:03 FMModulacja AM/FM
text_image
RFG-0 BP SQ-05 CTC-OF 09 EU 27:065 1 3 5 7 9 +30 AMDual Watch
text_image
RFG-0 AQ-03 CTC-OF 22 CE DW 27·225 S 1 3 5 7 9 +30 FMScan
text_image
RFG-0 AQ-03 CTC-OF 35 CE 27·355 S 1 3 6 7 9 +30 FMtext_image
RFG-0 SQ-05 CTC-OF MUTE 1 3 6 7 9 +30 FMSelectie canale
text_image
RFG-0 AQ-03 CTC-OF 22 CE 27·225 ASQ:03 FMModulatie AM/FM
text_image
RFG-0 AQ-03 CTC-OF 22 CE DW 27·225 S 1 3 5 7 9 +30 FMScan
text_image
RFG-0 AQ-03 CTC-OF 35 CE 27·355 1 3 6 7 9 +30 FMEMG (Canale de urgenta)
text_image
RFG-0 SQ-05 CTC-OF LOCK S 1 3 6 7 9 +30 FMMeniu setari suplimentare
Countries in which there are particular restrictions (License/Register)
text_image
UP ASQ DOWN PTT MIC- GND (braid)
- MIC (white)
- TX (yellow)
- ASQ (red)
- UP (green)
- DOWN (black)
EN:
EU Simplified Declaration of Conformity
SC ONLINESHOP SRL declares that CB Radio PNI Escort HP 8900 complies with the Directive EMC 2014/30/EU and RED 2014/53/UE. The full text of the EU declaration of conformity is available at the following Internet address:
https://www.mypni.eu/products/7592/download/certifications
DE:
https://www.mypni.eu/products/7592/download/certifications
ES:
https://www.mypni.eu/products/7592/download/certifications
FR
https://www.mypni.eu/products/7592/download/certifications
HU:
https://www.mypni.eu/products/7592/download/certifications
IT:
https://www.mypni.eu/products/7592/download/certifications
PL:
https://www.mypni.eu/products/7592/download/certifications
RO:
Declaratie UE de conformitate simplificata
SC ONLINESHOP SRL declara ca Statie radio CB PNI Escort HP 8900 este in conformitate cu Directiva EMC 2014/30/EU si Directiva RED 2014/53/UE. Textul integral al declaratiei UE de conformitate este disponibil la urmatoarea adresa de internet:
https://www.mypni.eu/products/7592/download/certifications