
Mizar 90 - Range hood FALMEC - Free user manual and instructions
Find the device manual for free Mizar 90 FALMEC in PDF.
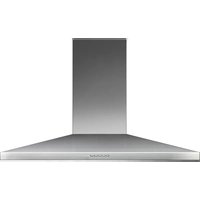


| Product type | Wall-mounted range hood |
| Brand | Falmec |
| Model | Mizar 90 |
| Width | 90 cm |
| Number of speeds | 4 (speed 1, 2, 3 and intensive) |
| Control | Touch electronic |
| Lighting | High efficiency LED spots |
| Metal grease filters | Washable (every 30 hours of use) |
| Activated carbon filter | Replacement every 3-4 months (depending on use) |
| Timer function | Automatic shut-off after 15 minutes |
| Filter saturation alarm | Steady red light indicator |
| Version | External exhaust or internal recirculation |
| Minimum distance above a gas cooktop | 65 cm (may be reduced according to EN60335-2-31 standard) |
| Power supply | 230 V ~ 50 Hz (refer to rating plate) |
| Maximum motor power | 800 m³/h (depending on version) |
| Weight | Approximately 18 kg |
| Material | Brushed stainless steel |
| Exterior cleaning | Damp cloth with mild detergent or denatured alcohol |
| Safety | Mandatory grounding, accessible circuit breaker |
| Spare parts | Metal filters, carbon filters, LED spots |
| Warranty | Manufacturer (refer to retailer) |
Frequently Asked Questions - Mizar 90 FALMEC
User questions about Mizar 90 FALMEC
0 question about this device. Answer the ones you know or ask your own.
Ask a new question about this device
Download the instructions for your Range hood in PDF format for free! Find your manual Mizar 90 - FALMEC and take your electronic device back in hand. On this page are published all the documents necessary for the use of your device. Mizar 90 by FALMEC.
USER MANUAL Mizar 90 FALMEC
INSTRUCTIONS BOOKLET

Mizar
parete/wall
IT LIBRETTO ISTRUZIONI
EN INSTRUCTIONS BOOKLET
SAFETY INSTRUCTIONS AND WARNINGS
INSTALLATION WARNINGS
TECHNICAL SAFETY

Installation operations are to be carried out by skilled and qualified installers in accordance with the instructions in this booklet and in compliance with the regulations in force.
Before installing the hood, check the integrity and function of each part. Should anomalies be noted, do not proceed with installation and contact the Dealer. - Do NOT install the hood if an aesthetic defect has been detected. Put it back into its original package and contact the dealer. No claim can be made for aesthetic defects once the hood has been installed. - During installation, always use personal protective equipment (e.g. accident-prevention shoes) and adopt prudent and proper conduct. - The fixing kit (screws, plugs, and brackets) supplied with the hood can only be used on masonry walls: should it be necessary to install the hood onto walls in a different material, assess other fixing systems, keeping the wall resistance and weight of the hood in mind (indicated on page 2). - Keep in mind that installations with different types of fixing systems from those supplied, or which are not compliant, can cause electrical and mechanical seal danger. - Do not modify the electrical, mechanical and functional structure of the equipment. - Do not install the hood outdoors and do not expose it to atmospheric agents (rain, wind, etc.). After the stainless steel hood has been installed, it will need to be cleaned to remove any residues from the protection adhesive as well as any grease and oil stains which, if not removed, can cause irreversible damage to the hood surface. To do so the manufacturer recommends using the supplied moist wipes, which are also available sold separately.
ELECTRICAL SAFETY

The electrical system to which the hood is to be connected must be according to standard and compulsorily supplied with earthed connection in compliance with safety regulations in the country of use. It must also comply with European standards regarding radio antistatic proper
ties.
- Before installing the hood, check that the electrical mains power supply corresponds with what is reported on the identification plate located inside the hood.
- The socket used to connect the installed equipment to the electrical power supply must be within reach: if this is not possible, install a mains switch in an accessible position in order to disconnect the hood when required.
- Any changes to the electrical system required to install the hood must be carried out by a qualified electrician.
- The maximum length of the flue fixing screws (supplied by the manufacturer) must be 10 mm. Use of non-compliant screws with these instructions can lead to danger of an electrical nature.
- It is dangerous to change, or try to change, the features of this equipment. Do not try to solve the problem yourself in the event of equipment malfunction, but contact the Dealer or an authorised Servicing Department for repairs.
- When installing the hood, disconnect the equipment by removing the plug or switching off the main switch.
FUMES DISCHARGE SAFETY
- Do not connect the equipment to discharge pipes of fumes produced from combustion (for example boilers, fireplaces, etc.) Before installing the hood, ensure that all standards in force regarding discharge of air out of the room have been complied with.
USER WARNINGS
GENERAL WARNINGS

These warnings have been drawn up for your personal safety and those of others. You are therefore kindly asked to read the booklet carefully in its entirety before installing and using the equipment or carrying out cleaning operations.
The Manufacturer declines all responsibility for any damage caused directly, or indirectly, to persons,
things and pets as a consequence of failing to comply with the safety warnings indicated in this booklet.
It is imperative that this instructions booklet is kept together with the equipment for any future consultation. If the equipment is sold or transferred to another person, make sure that the booklet is also supplied so that the new user can be made aware of the hood's operation and relative warnings. Installation operations are to be carried out by a skilled and qualified installer in accordance with the instructions in this booklet and in compliance with the regulations in force. - DO NOT use the hood if the power supply cable or other components are damaged. Disconnect the hood from the electrical power supply and contact the Dealer or an authorised Servicing Department for repairs. Insist on original spare parts. Do not personally try to carry out repairs or replacements. Interventions carried out by incompetent and unauthorised persons can cause damage, even serious, to things and/or persons not covered by the Manufacturer's warranty. - Do not modify the electrical, mechanical and functional structure of the equipment. Any changes to the electrical system required to install the hood must be carried out by a qualified electrician.
INTENDED USE
- The equipment is solely intended to be used to extract fumes generated from cooking food in non-professional domestic kitchens: any other use is improper, can cause damage to persons, things and pets and exempts the Manufacturer from any liability.
- The equipment can be used by children above the age of 8 and by persons with reduced physical, sensory, or mental abilities, or with no experience or knowledge, as long as they do so under supervision or after having received instructions regarding the safe use of the equipment and understanding of the dangers connected to it. Children are not to play with the equipment. Cleaning and maintenance operations intended for the user must not be carried out by children without supervision.
USE AND CLEANING WARNINGS
Before cleaning or carrying out maintenance operations, disconnect the equipment by removing the plug or switching off the main switch. - Do not use the hood with wet hands or bare feet. - Always check that all electrical parts (lights, extractor fan) are off when the equipment is not used. The maximum overall weight of any objects placed or hung (if applicable) on the hood must not exceed 1.5 Kg. - Check the deep-fryers during use: Overheated oil can catch fire. - Do not light naked flames under the hood. - Do not flambé foods under the hood. - Never use the hood without the metal anti-grease filters: in this case, grease and dirt will deposit in the equipment and compromise its operation. - Accessible parts of the hood can be hot if used together with cooking appliances. - Do not carry out any cleaning operations when parts of the hood are still hot. - There can be a risk of fire if cleaning is not carried out according to the methods and products indicated in this booklet. - Disconnect the main switch when the equipment is not used for long periods of time.

If other appliances that use gas or other fuels are being used at the same time (boiler, stove, fireplaces, etc.), make sure the room where the fumes are extracted is well-ventilated, in compliance with the current regulations.
WARNING IN CASE OF MALFUNCTION
- DO NOT use the hood if the power supply cable or other components are damaged. Disconnect the hood from the electrical power supply and contact the Dealer or an authorized Servicing Department for repairs. Insist on original spare parts. Do not personally try to carry out repairs or replacements. Interventions carried out by incompetent and unauthorized persons can cause damage, even serious, to things and/or persons not covered by the Manufacturer's warranty.
The manufacturer reserves the right to make changes to the equipment at any time and without prior notice. Printing, translation, and reproduction, even partial, of this manual are bound by the Manufacturer's authorization.
Technical information, graphic representations, and specifications in this manual are for information purposes and cannot be divulged.
This manual is written in Italian. The Manufacturer is not responsible for any transcription or translation errors.

Before installing the hood, carefully read Chap. "Safety instructions and warnings" on page 13.
TECHNICAL FEATURES
The technical specifications are reported on the identification plate located inside the hood.
POSITIONING
The minimum distance between the highest part of the cooking equipment and the lowest part of the hood is indicated in Fig. A on page 4.
Generally, when the hood is placed over gas cookers, this distance must be at least 65 cm (25.6 inches). However, according to an interpretation of standard EN60335-2-31 dated 11-07-2002 of TC61 (sub-clause 7.12.1 meeting 15 agenda item 10.11), the minimum distance between the cooker and the lower part of the hood can be reduced to the reported value.
If the instructions for the gas cooker specify a greater distance, take this into consideration.
Do not install the hood outdoors and do not expose it to atmospheric agents (rain, wind, etc.).
ELECTRICAL CONNECTION (ONLY INTENDED FOR PERSONNEL QUALIFIED TO INSTALL THE HOOD)

Disconnect the equipment from the electrical mains power supply before carrying out any operations on the hood.
Make sure that the wires inside the hood are not disconnected or cut. Should this occur, contact your nearest Servicing Department. Refer to qualified personnel for electrical connections.
Connection must be carried out in compliance with the provisions of law in force.
Before connecting the equipment to the electrical mains power supply, check that:
- voltage supply corresponds with what is reported on the identification plate located inside the hood;
the electrical system is compliant and can withstand the load of the equipment (refer to the technical specifications on the identification plate located inside the hood);
- once connected, the plug and cable do not come into contact with hot parts having temperatures that exceed 70°C;
the power supply system is effectively and properly connected to earth in compliance with regulations in force.
- the socket outlet to connect the installed equipment is within reach.
Some types of equipment can be equipped with a cable without a plug; in this case, the type of plug to use is a "standardised" one, keeping in mind that the yellow-green wire must be used for earthing, the blue wire must be used for neutral, and the brown wire must be used for the phase.
The power supply cable must be assembled with a plug suitable for the load and connected to an adequate safety plug.
If the fixed equipment is not provided with a power supply cable and plug, or any other device that ensures disconnection from the electrical mains, with an opening gap of the contacts that enables total disconnection in overvoltage category III conditions, said disconnection devices must be provided in the mains power supply in compliance with installation regulations.
The yellow/green earth cable must not be cut off by the switch.
The Manufacturer declines all responsibility for failure to comply with the safety regulations.
FUMES DISCHARGE (only intended for personnel qualified to assemble the hood)
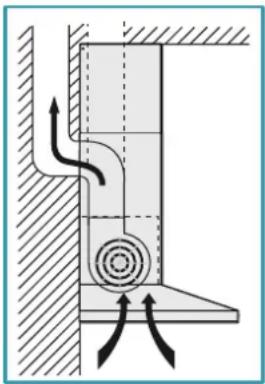
EXTERNAL EXHAUST HOOD VERSION (SUCTION)
In this version, the kitchen fumes and vapours are conveyed outside through an exhaust pipe.
The air outlet fitting that extends from the upper part of the hood must be connected with the pipe that conducts the fumes and vapours to an external output.
Do not connect the equipment to discharge pipes of fumes produced from combustion (for example boilers, fireplaces, etc) and you are to comply with the regulations in force regarding external air discharge.
The fumes outlet pipe must have:
- a diameter not less than that of the hood fitting;
- a slight slope downwards (drop) in the horizontal sections to prevent any formation of condensation from flowing back to the hood;
- the minimum required number of bends;
- minimum required length (long pipes with various bends can reduce suction performance of the hood and trigger vibrations of the check valve).
If the fumes outlet pipe passes through cold environments such as attics, etc., it is possible that water condensation forms due to sudden changes in temperature. In this case, you are required to insulate the pipes.
The hood supplied with an 800 m3/h motor is equipped with a check valve whose function is to prevent external air exchange
when the hood is not operating: refer to the instructions on page 4 for assembly.
When the kitchen hood is used simultaneously with other appliances that use gas or other fuels, the room must have sufficient ventilation, in accordance with regulations in force.

The active carbon filters in this version are to be removed. Refer to the instructions on page 6 for removal.
Deviation for Germany: when the kitchen hood is used at the same time as appliances that are powered by energy other than electricity, the negative pressure in the room must not exceed 4 Pa (4 x 10⁻⁵ bar).
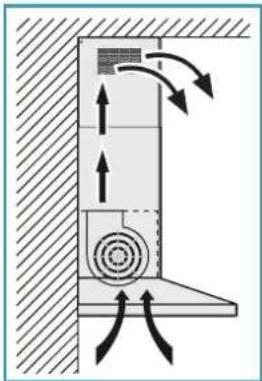
HOOD VERSION WITH INTERNAL RECIRCULATION (FILTERING)
In this model, air passes through the active carbon filters to be purified and is then recycled into the kitchen environment.

Check that the active carbon filters are assembled onto the hood, if not, install them as indicated in the instructions on page 6.
If the hood is set up with a filtering version, the check valve must not be assembled; remove it if it is on the air outlet fitting of the motor (carry out operations described in the instructions on page 4 in reverse order).
ASSEMBLY INSTRUCTIONS (only intended for personnel qualified to assemble the hood)
- Place the support bar (S) on the installation wall at a height (H) from the cooker as indicated in the figure (Fig. ①). Use a spirit level to check the horizontal alignment and draw 2 marks at each end of the support bar; these will be the drilling points (Fig. 2 - 3).
- Drill the holes, insert 2 expansion plugs (ø 8mm), and fasten the bar with the corresponding screws (V1) (Fig. 4).

The fixing kit (screws, plugs, and brackets) supplied with the hood is intended for masonry walls only. If installation on walls of a different material is required, assess alternative fixing systems, taking into account the wall's resistance and the weight of the hood (indicated on page 2).
- Hook the hood onto the support bar (Fig. ①).
- Adjust the alignment of the hood using the fixing screws (Fig. ②). The upper screw (B) adjusts the distance from the wall, while the lower screw (C) adjusts vertical positioning. To prevent the hood from falling due to pressure from below, secure it to the wall with expansion plugs and corresponding screws (V2) using the appropriate holes on the back of the hood (Fig. 3).
EXTERNAL EXHAUST HOOD VERSION (SUCTION)
- Only for versions with a 800 m 3/h motor: if desired, install the check valve (M) as indicated in figure C.
- Connect the air outlet connection of the hood to the external discharge using a suitable pipe.
HOOD VERSION WITH INTERNAL RECIRCULATION (FILTERING)
- Check that the active carbon filters are assembled onto the hood; if not, install them as indicated in the instructions on page 6. If installed, remove the check valve assembled on the hood's air outlet fitting (follow the instructions on page 4 in reverse order).
Insert the extension (H) into the chimney (G) (Fig. 1) and fasten the assembly to the body of the hood using screws (V3) (Fig. 2). For external exhaust (suction) versions, it is possible to insert extension (H) with the slots facing downwards so they are not visible when the installation height allows it.
- Slide the extension (H) until it is positioned at the desired height (Fig. 1).
- Following what is indicated in Fig. 2, draw a line on the wall that will be used to position the bracket (L) correctly.
- Place the bracket (L) on the wall by following the line drawn on it. With a spirit level, check the horizontal alignment and mark the 2 drilling points at the ends (Fig. 3).
- Drill the holes, insert 2 expansion plugs (ø 6mm) and fasten the bracket (L) with the relative screws (V4) (Fig. 4).
- Tighten the extension (H) to the bracket (L) using screws (V5) (Fig. 5). Electrically power the hood in accordance with regulations in force.
OPERATION
WHEN SHOULD THE HOOD BE SWITCHED ON AND OFF?
Switch on the hood at least one minute before starting to cook: this enhances the airflow to convey fumes and vapours towards the suction surface. After cooking, leave the hood operating until complete extraction of all vapours and odours. If required, by means of the Timer function, it is possible to set hood auto switch-off after 15 minutes of operation.
WHICH SPEED IS TO BE SELECTED?
The first speed is a low consumption energy-saving way of keeping the air clean, the second speed is used in normal conditions, and the third speed is used when there are strong odours and vapours.
WHEN SHOULD THE FILTERS BE WASHED OR REPLACED?
The hood is assembled with two different types of filters: metal ones (washable) and active carbon ones (non-washable). The former must be cleaned every 30 hours of use (for versions with electronic push button control panel, the fixed red light indicates that they need to be washed), the latter are to be replaced every 3-4 months, depending on the use of the hood. For further information, please read the chapter regarding "Maintenance" on page 17.
| 600 m³/h | ||||
| Light button Press this button to turn the hood light on (button pressed in) or off (button out) | 1 | Button 1: Press this button (button in) to start or set the motor at min- imum speed | ||
| 2 | Button 2: Press this button (button in) to start or set the motor at me- dium speed | |||
| OFF Press this button to switch the motor off | 3 | Button 3: Press this button (button in) to start or set the motor at max- imum speed | ||
USE OF ELECTRONIC PUSH BUTTON CONTROL PANEL
| 800 m³/h | |||
| Timer/Filters alarm Pressing the key with the motor active at any speed activates the Timer function: this function determines the auto switch-off of the hood after 15 minutes of operation. Activation of the function is signalled by a RED flashing light. With the Timer function active, the hood can still be switched off by the user at any time by pressing the key + : the function will be automatically disabled and the RED light will turn off. Should the speed be changed with the Timer function active, the latter will be automatically disabled. On the other hand, ignition of the fixed RED light indicates a grease filter alarm: this alarm notifies that it is time to wash the metal anti-grease filters (the alarm is triggered after approximately 30 hours of use). After cleaning the filters, disable the alarm and reset the counters by keeping the key pressed for 3 seconds. To disassemble and assemble the anti-grease metal filters, refer to the instructions on drawing G on page 6. | + | Mode button (ON/OFF) Pressing the key switches on (or off) the hood motor; it starts at the previously selected speed prior to switching it off (desired speed func- tion). Should you wish to use a different speed, set if by using the + and - keys. | |
| + | Button + By pressing the key, the motor speed increases. Speeds 1, 2 and 3 are displayed by the number of LEDs switched on, excluding the light and timer LEDs. The + key in the version with 4 speeds has an intermittent light: the 4th speed or intensity is timed and after approximately 7 minutes the motor automatically switches to 3rd speed. | ||
| - | Button - By pressing the key, the motor speed reduces. Speeds 1, 2 and 3 are displayed by the number of LEDs switched on, excluding the light and timer LEDs. | ||
| Light button ON: light on (lit button) OFF: light off | |||
LIGHTING
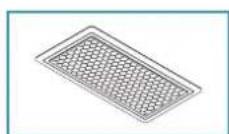
The range hood is equipped with high efficiency, low consumption LED spotlights with extremely long duration under normal use conditions.
Should the LED spotlight need to be replaced, proceed as shown in the figure on page 6.
MAINTENANCE

Before cleaning or carrying out maintenance operations, disconnect the equipment by removing the plug or switching off the main switch.
Regular maintenance guarantees proper operation and good performance over time.
Special attention is to be paid to the metal anti-grease filters and active carbon filters. In fact, frequent cleaning of the filters and their supports ensures that
no grease is accumulated on the hood, which is dangerous and can cause fires.
EXTERNAL CLEANING
You are advised to clean the external surfaces of the hood at least once every 15 days to prevent oily substances and grease from sticking to them.
To clean the brushed stainless steel hood, the Manufacturer recommends using "Magic Steel" wipes. Alternatively, it can be cleaned using a damp cloth, slightly moistened with neutral, liquid detergent or denatured alcohol. Finish off cleaning by rinsing well and drying with soft cloths.

Do not use too much water next to the push button control panel and lighting devices in order to prevent humidity from reaching electronic parts. You must not use detergents containing abrasive, acid or corrosive substances or abrasive cloths: a direct consequence of not complying with these warnings will result in irreversible deterioration of the hood's surface.
The Manufacturer declines all responsibility for failure to comply with these instructions.
CLEANING OF INTERNAL PARTS

It is forbidden to clean electrical parts, or parts related to the motor inside the hood, with liquids or solvents.
Do not use abrasive products. All these operations are to be carried out after having disconnected the equipment from the electrical mains power supply.
METAL ANTI-GREASE FILTERS
to insert them.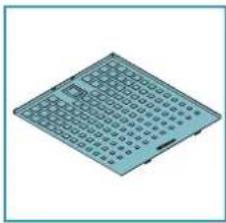
The metal anti-grease filters are there to contain suspended grease particles: deposited on the filters, these feed on any flames released when cooking, generate unpleasant odours, and compromise the passage of air, thus reducing suction performance of the hood.
For this reason, it is advised to frequently wash the metal filters (at least once a month) leaving them to soak in boiling water and dish washing liquid for 1 hour, taking care not to bend them. Do not use corrosive, acid or alkaline detergents.
Rinse them well and wait for them to be completely dry before reassembling them.
Washing in a dishwasher is permitted, however, it may cause the filter material to darken: to reduce the possibility of this problem from happening, use low-temperature washes (55°C max.).

Use the handle to take out the metal anti-grease filters (see instructions on page 6). Carry out operations in reverse order
ACTIVE CARBON FILTERS
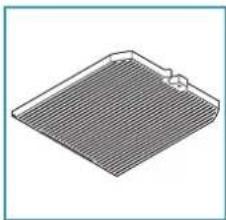
Active carbon filters have the function of retaining odours in the air flow passing through them. The air, purified by running many times through the filter, is recirculated into the kitchen. Active carbon filters cannot be washed and are to be immediately replaced every 3-4 months (depending on the frequency of use of the hood).
Dispose of the active carbon filters in compliance with the regulations in force in the country of use.

To change active carbon filters, take out the metal anti-grease filters (see instructions on page 6) and follow the instructions on page 6.

DISPOSAL AFTER END OF USEFUL LIFE
This symbol on products and/or in accompanying documents means that electrical and electronic products used must not be disposed of with general domestic waste. For personal treatment, recovery and recycling, you are kindly asked to take these products to designated waste collection points where they will be accepted freely. Alternatively, in other countries, it is possible to take products back to the local dealer and purchase a new similar product. Proper disposal of these products contributes to saving valuable resources and avoid potential negative effects on personal health and the environment, which may be caused by inappropriate disposal of waste. You are kindly asked to contact your local authorities for further information regarding the designated waste collection points nearest to you. Penalties for improper disposal of such waste can be applied in compliance with national regulations.
INFORMATION REGARDING DISPOSAL IN EU COUNTRIES
The EU Directive with regard to WEEE has been implemented differently by each nation, therefore, should you wish to dispose of this equipment, we advise you to contact the local authorities or the dealer to ask for the correct method of disposal.
INFORMATION REGARDING DISPOSAL IN OTHER NON-EU COUNTRIES.
This symbol is only valid in the European Union: if you wish to dispose of this product in other countries, we advise you to contact your local authorities or dealer to ask for the proper method of disposal.
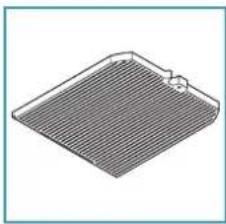
ACTIVE CARBON FILTERS
ELECTRICAL SAFETY

The electrical system to which the hood is connected must comply with current regulations and must be grounded in accordance with the regulations in force in the country of use; it must also comply with European regulations on interference suppression devices.
- Make sure that the voltage in the electrical system matches the one indicated on the rating plate, which is located inside the hood. The socket used for connecting to the electrical mains must be easily accessible after installation. If this is not possible, a switch must be provided in an accessible place to disconnect the hood in case of need. Any electrical system modifications for the installation of the hood must be carried out only by a qualified electrician.
- The maximum length of the screws for fixing the hood (supplied by the manufacturer) is 10 mm. Using screws that do not comply with these instructions may lead to danger of an electrical nature.
- It is dangerous to change or attempt to change the characteristics of this appliance. In case of malfunction, do not attempt to repair it yourself; contact the distributor or an authorized technical support center for repair. During installation of the hood, disconnect the appliance, remove the plug from the socket, or use the main switch.
SAFETY OF SMOKE DISCHARGE
Do not connect the appliance to smoke ducts for discharging fumes produced by combustion (boilers, fireplaces, etc.). Before installing the hood, make sure that all current regulations regarding air discharge outside the room are complied with.
PRECAUTIONS FOR THE USER
GENERAL PRECAUTIONS

These precautions have been written for your safety and also for the safety of others, so please read them carefully before operating the appliance.
- The manufacturer is not liable for damage, direct or indirect, caused to people, property, or domestic animals due to failure to comply with the instructions given in this manual. It is very important that this manual with instructions is kept with the equipment for future use. In case of sale or transfer of the device to another person, make sure that the manual is also transferred so that the new user can familiarize themselves with the operation of the extractor and the corresponding warnings. Installation must be carried out by qualified and experienced installers in accordance with the instructions in this manual and applicable regulatory requirements. If the power cord or other parts are damaged, do not use the extractor. Disconnect the extractor from the power supply and contact the distributor or an authorized technical support center for repair. Require original spare parts. Do not attempt to replace parts or repair the device yourself. Work performed by incompetent persons or unqualified personnel may cause damage, including serious damage, to property and/or persons, for which the manufacturer's warranty does not apply. Do not make electrical, mechanical, or functional modifications to the device. Any electrical connection for the installation of the extractor must be carried out only by a qualified electrician.
INTENDED USE
The device is intended exclusively for extracting fumes generated during cooking in domestic kitchens, not professional kitchens. Any use other than this is considered improper and may cause damage to people, property, and domestic animals, and voids all liability of the manufacturer. The device may be used by children aged 8 and above, and by persons with reduced physical, sensory, or mental capabilities, or lack of experience and knowledge, provided they are supervised or have been given instruction on safe use of the device and understand the hazards involved. Children must not play with the device. Cleaning and maintenance performed by the user must not be carried out by children without supervision.
PRECAUTIONS FOR USE AND CLEANING
Before performing any maintenance operations, disconnect the appliance from the electrical supply by removing the plug from the socket or using the main switch. Do not touch the hood with wet hands or use it without a filter. When the appliance is not in use, always check that all electrical components (light, motor) are switched off. - The total weight of objects placed on or hung from the hood (where provided) must not exceed 1.5 kg. Observe the filters during use: rancid oil may catch fire. - Do not use an open flame under the hood. Do not cook with an open flame under the hood. Never use the hood without metal grease filters; in this case, grease and dirt will settle in the appliance, negatively affecting its operation. - Accessible parts of the hood may become hot when used with gas appliances. Do not touch the hood when its parts are still hot. - If cleaning is not carried out in accordance with the methods and using the means specified in these instructions, there is a risk of fire. When the hood is not used for an extended period of time, it is necessary to turn off the main switch.

In the case of simultaneous use of other devices (boilers, stoves, fireplaces, etc.) operating on gas or other fuel, provide appropriate ventilation of the room in which the extraction of fumes is carried out, in accordance with applicable regulatory requirements.
PRECAUTIONS IN CASE OF MALFUNCTION
If the power cord or other parts are damaged, do not use the hood. This
disconnect the hood from the electrical supply and contact the service center or authorized technical support for its repair. Require original spare parts. Do not attempt to replace parts or repair the appliance yourself. Work performed by incompetent persons or unqualified personnel may cause damage, including serious damage, to property and/or persons, for which the manufacturer's warranty does not apply.
The manufacturer reserves the right to make changes to the appliance at any time without prior notice. Translation, reproduction, including partial, of this manual is possible only after obtaining prior permission from the manufacturer.
Technical information, graphic images, and specifications provided in this manual are indicative and are not subject to disclosure.
This manual has been compiled in Italian. The manufacturer is not responsible for possible typos or translation errors.
INSTALLATION
Section intended only for qualified personnel engaged in the installation of the hood.

Before proceeding with the installation of the hood, carefully read the section "Safety instructions and precautions" on page 37.
TECHNICAL CHARACTERISTICS
The technical data of the appliance are given on the factory plates, which are located inside the hood.
POSITIONING
The minimum distances between the top of the appliance and the bottom of the hood, and between the bottom of the appliance and the top of the hood, are indicated in fig. on page 4.
The hood, when installed on the equipment, must be at a distance of no less than 65 cm (25.6"). However, based on the requirements of standard EN60335-2-31 of 11-07-2002 from the BTS61 (point 7.12.13 and 15, paragraph 10.11), the minimum distance between the cooking surface and the lower part of the hood may be reduced according to the specified marking.
If the installation instructions for the gas hob specify a greater distance, this must be taken into account.
Do not install the hood outdoors or in places where it may be exposed to atmospheric conditions (rain, wind, etc.).
CONNECTION TO THE ELECTRICAL POWER SUPPLY (SECTION INTENDED ONLY FOR QUALIFIED PERSONNEL INVOLVED IN CONNECTION)

Before performing any operations on the hood, disconnect the appliance from the electrical power supply.
Check that the power cord has not been disconnected or damaged inside the hood; if this is detected, contact the nearest service center. Electrical connection must be performed by qualified personnel.
Connection must be carried out in compliance with the requirements of current legislation.
Before connecting the appliance to the power supply, check that:
The voltage in the electrical system corresponds to that indicated on the manufacturer's data plate, which is located inside the hood; the electrical system complies with current standards and can withstand the load created by the appliance (see technical characteristics on the plate located inside the hood); - after installation, the plug and socket are not in contact with hot parts whose temperature exceeds 70°C; the electrical system is equipped with proper grounding, in accordance with current standards; the socket used for installation and connection to the electrical system is easily accessible after installation of the appliance.
Some types of appliances may be supplied with a cable without a plug; in this case, the plug must be of a "standardized" type, taking into account that the yellow-green wire must be connected to the ground, the blue wire to the neutral, and the brown wire to the phase. Install a power cable with a suitable plug, corresponding to the load, and connect it to a suitable socket safely.
For a fixed appliance not equipped with a power cord and plug or other device that ensures disconnection from the electrical supply with a contact opening distance that allows complete disconnection under overvoltage category III conditions, these disconnecting devices must be provided in the electrical system, in accordance with installation rules.
The yellow-green ground wire must not be disconnected by the disconnecting switch.
The manufacturer assumes no responsibility in case of failure to comply with safety regulations.
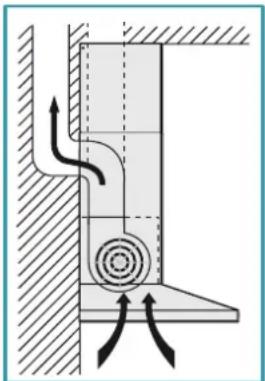
EXHAUST DUCT (section intended only for qualified personnel involved in hood installation)
If the hood is not equipped with a non-return valve, it must be installed. Install it, if not already installed, on the air inlet duct of the motor (following the operations described in the instructions).
Ha ctp.6)
HCTPYKUINIPOMOHTAXY(pa3den,npedHa3naeHbIToBkoIgKaBnHnepoBaHoro nepcoHana,3aHmuaoeroCAyctaHOKOBvBtTAAKKN)
3ran A ctp. 4
PnIOXKb KCTHe KpeNExKHyO peKy (S) Ha BScote (H) O TBapouHOI NOBepxHocTH, yKa3aHHo HA pncyHke (pnc. ① PpOBepnTb TropaHbHocbIIOXeHNpeKn npIOMouIpyoBHO IOMeNTb Ha KOHax OIOPOHpeKN 2 TOKN DIBBIOHHeHnOETBcTN (DNC.②-③). - PpocBepnntb OTBepCTnB, BCTaBtB HmX 2 dio6eN 0 8 MM n pniKpeNTb peKy COOTBeTcTBYIOUMM BHTAMN (V1) (PNC. 4).

Kpenexhbl KOMnIeKT (BHTb, DIO6eN N CKO6bl), NOCTaBnREMbI BMeCTe C BtTAAKoN, HcONb3yeTcNCKHou THe HO KnPnHbIX CTeHX: np HeOxOdIMOCNT yCTaHOBt BtTAAKy Ha CTExH X3 DpyTN MaepnAIOB, CNeDyET PpHrTb BO BHIMAHne DpyTM KpeNXHbIE CNTEmC cyTeOM npOHCTN CTEHb IN BECA BtTAKK (Yka3aHO HA cTp.2).
3ran B crp.4
-Пицentьвытarkукpenekhopeke(pnc.1). BbpoBHbBbTtKBy CTPPOrTOpRn3HTaHbOM NIOXKeHm PnNMOU BnHTOB HaepxAteIAX (Pc. 2).BepxHn BnHT (B) perynpyet pacctOAHne oT cTeHb, a HNNHN BnHT (C) peynpyET BEpTKaJIbHOe CmeueHHe. Bo n36eHnne OTcIeJIeHn BbTAAKKn no npuHHe DabHeHn cH3y, npKpeHnB eK CTeHe IIO6eAMn COOTBeTCTByUWMn BHTAMn (V2),NCNtOB3yR COOTBeTCTByUHn OE TBPCTn, HaxoDAHnecCa Ha 3aDHe CToPOHne BbTAAKKn (PNC. 3).
3Tanbi C uD ctp.4
KXYOHHAB BbITJXKA B BEPCNU C BbIBODOM HAPYKU (BCACbIBAIOUJIAR)
ToIbKO dIy BepcN cDnBraTeTEnEM 800 m 3 / γ no JeaHIO MOKHO yCTaHOBTb OpaTHbIKaHaH (M) KaK nokaHaHo Ha pncyHke CoenHbBbXoHOB03dyuHBnNaTpy6OBK BbITAJKN C HApyHbIM BBBOOM npN NMOOHN OaXoAeero TpyoepoBa.
BbITAKBA B BEPCN C BYHTPEHEN PEUKNPKYILNEIEN (ΦNJIbTPYIOUJA)
- y6eHb7cA,TO 0nBpC AKNBPOBAHHM yIeN CMOHTIPPOBAHb Ha BbITAXKE, B nPOTINHOM Cnyae yCTaHOBHb VIX, KAK OTNCAHO H NHCPTyKIMn H a CTp.6.
- DEMOHTHIOPOBAtb 6oPAHTHbK KtIaH, eCN OH yCTaHOBHcHb HA BxOHDOM BO3yHOM HATpy6Ke BbTAAKK (BbHONHITb B O6pAHTOM NOPAKe JeNCTBn, ONHCANHbE BVHCTpykUHX C Ha cTp.4).
3ran ctp.5
BCTaBHTb yDHHHnTeJIb (H) B JbIMOXOJ (G) (pnc. 1) n npHKpeNTb ero K KopnyCy BHTAKK BHTAMN (V3) (pnc. 2) Bcnyae Bepcnn C bblbOdom HApky (BCacbBAIOa) MOXHO BCTaBHTy yINHInTeNb (H) cOTBepCTnMn BH3y, YTObI IN He 6bI NO BNDHO, ECNI TO N03BOJAE TBCOTAYCTAHOBKIN.
Install the hood (H) at the required height (fig. 1). First, following fig. 2, draw a line on the wall that serves as a guide for correct positioning of the bracket (L). - Attach the bracket (L) to the wall along the marked line, check its horizontality, and mark the drilling points for the two holes at the ends (fig. 3). Drill the holes, insert the 6 mm dowels, and fix the bracket (L) with the corresponding screws (V4) (fig. 4). Tighten the screws (V5) to extend (H) and the bracket (L) (fig. 5). - Connect the electrical supply to the hood in accordance with applicable standards. FUNCTIONING
Install the bracket (L) at the required height (fig. 1). Using the template in fig. 2, draw a line on the wall that serves as the correct positioning guide for the bracket (L). - Place the bracket (L) against the wall on the marked line, check the level, and mark the drilling points for the two holes of the bracket (fig. 3). Drill the holes, insert the 6 mm dowels, and secure the bracket (L) with the corresponding screws (V4) (fig. 4). Tighten the screws (V5) to extend (H) the bracket (L) (fig. 5). - Connect the electrical supply to the outlet in accordance with applicable standards. Operation
WHEN TO TURN THE HOOD ON AND OFF?
The hood should be turned on a few minutes before starting to cook. This helps create an air flow that directs fumes and steam towards the suction surface. After cooking, the hood should be left on until all fumes and odors are completely extracted.
If necessary, when using the timer, you can set the automatic switch-on of the hood 15 minutes before the start of cooking.
WHICH SPEED TO SELECT?
The first speed is used for light cooking with low energy consumption, the second speed is used under normal conditions, and the third speed is used for intense cooking with strong odors and large amounts of steam.
WHEN TO CHANGE THE FILTERS?
The hood is equipped with two types of filters: metal (washable) or activated carbon filters (not washable). The first type of filter should be washed every 30 hours of operation (in versions with electronic control, a red light indicates that the filters need cleaning), the second type of filter should be replaced approximately every 3-4 months, depending on the intensity of use of the hood. Additional information is provided in
"Maintenance on page 42
USING THE MECHANICAL CONTROL PANEL
If it is necessary to replace the light bulbs, proceed as shown in the figure on page 6
MAINTENANCE

Before performing any cleaning or maintenance operation, disconnect the appliance from the electrical supply by unplugging it from the socket or using the main switch.
Regular care and maintenance guarantee correct functioning and good performance over time.
It is necessary to take into account that metal grease filters can be cleaned with water and detergents, since regular cleaning of the filters ensures that no grease residues remain that could cause a fire hazard.
EXTERNAL CLEANING
We recommend cleaning the external surface of the hood at least every 15 days to prevent damage from oily or greasy substances.
For cleaning, use a soft cloth dampened with warm water and a mild detergent, or a suitable cleaning product for the surface of the hood. Do not use abrasive sponges or harsh cleaning agents. Rinse the cloth thoroughly and wipe the surface dry.

Do not use too much water when cleaning the control panel or the lighting devices to avoid water entering the electrical parts. Do not use cleaning products containing abrasive, acidic, or corrosive substances, nor hard or rough cloths. Failure to follow these instructions may result in damage to the surface.
of the hood.
The manufacturer is not responsible for any damage resulting from misuse of these instructions.
CLEANING OF INTERNAL PARTS

It is forbidden to clean electrical components or parts of the motor with water or solvents. Do not use abrasive products. Perform all operations after disconnecting the appliance from the power supply.
METAL GREASE FILTERS
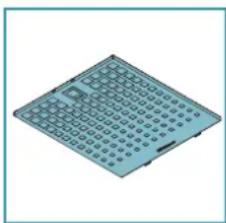
The metal grease filters retain the particles present in the air. Their cleaning prevents the risk of fire, reduces the formation of unpleasant odors, and maintains the suction capacity of the hood.
For these reasons, it is recommended to wash the metal filters (at least once a month) by hand or in the dishwasher with a suitable detergent, taking care not to bend the filters. Do not use corrosive, acidic, or alkaline cleaning products. Rinse thoroughly and let them dry completely before reinstalling them.
The filters can be washed in the dishwasher, but this may cause darkening of the filter material. To reduce these effects, use a low-temperature program (maximum 55°C).

To remove the metal grease filters, use the handle (see instructions G on page 6). When reinstalling them, make sure they are correctly positioned and secured.
FILTERS WITH ACTIVATED CARBON

The filter with activated carbon is intended for use in the air flow. It is not a result of several passes through the carbon filter; it returns to the air.
Filters with activated carbon cannot be washed; they need to be replaced every 3-4 months on average (depending on the frequency of use of the hood).
Filters with activated carbon must be disposed of in accordance with the relevant standards and regulations.

Only replace the activated carbon filters with metal grease filters (see instructions on page 6) following the instructions on page 6.

DISPOSAL AT END OF SERVICE LIFE
This symbol on the products and/or accompanying documents means that used electrical and electronic products should not be mixed with general household waste. For proper treatment, recovery, and recycling, please take this product to designated collection points where it will be accepted free of charge. Alternatively, in some countries, you may return your product to your local retailer upon purchase of an equivalent new product. Correct disposal of this product can help save valuable resources and prevent any potential negative effects on human health and the environment, which could otherwise arise from inappropriate waste handling. Please contact your local authorities for further details of your nearest designated collection point. Penalties may be applicable for incorrect disposal of this waste, in accordance with national legislation.
INFORMATION ON DISPOSAL IN EUROPEAN UNION COUNTRIES
The European Union Directive WEEE (on waste electrical and electronic equipment) has been implemented differently in various countries, therefore, if you need to dispose of this equipment, we recommend contacting your local administration or dealer for information on the correct disposal method.
INFORMATION ON DISPOSAL IN COUNTRIES OUTSIDE THE EUROPEAN UNION.
This symbol is only valid in European Union countries. If you wish to dispose of this product in other countries, please contact your local authorities or dealer for information on proper disposal.
UNIT WITH EXTERNAL EXTRACTION (DUCTED)
UNIT WITH INTERNAL RECIRCULATION (FILTERING)
UNIT WITH EXTERNAL EXTRACTION (DUCTED)
UNIT WITH INTERNAL RECIRCULATION (FILTERING)
WHICH SPEED SHOULD BE SELECTED?
DOME VERSION WITH EXTERNAL EXHAUST PIPE (SUCTION)
DOME VERSION WITH EXTERNAL EXHAUST PIPE (SUCTION)


- INSTRUCTIONS BOOKLET
- MIZAR
- SAFETY INSTRUCTIONS AND WARNINGS
- INSTALLATION WARNINGS
- TECHNICAL SAFETY
- ELECTRICAL SAFETY
- TIES
- FUMES DISCHARGE SAFETY
- USER WARNINGS
- GENERAL WARNINGS
- INTENDED USE
- USE AND CLEANING WARNINGS
- WARNING IN CASE OF MALFUNCTION
- TECHNICAL FEATURES
- POSITIONING
- ELECTRICAL CONNECTION (ONLY INTENDED FOR PERSONNEL QUALIFIED TO INSTALL THE HOOD)
- FUMES DISCHARGE (ONLY INTENDED FOR PERSONNEL QUALIFIED TO ASSEMBLE THE HOOD)
- EXTERNAL EXHAUST HOOD VERSION (SUCTION)
- HOOD VERSION WITH INTERNAL RECIRCULATION (FILTERING)
- ASSEMBLY INSTRUCTIONS (ONLY INTENDED FOR PERSONNEL QUALIFIED TO ASSEMBLE THE HOOD)
- OPERATION
- WHEN SHOULD THE HOOD BE SWITCHED ON AND OFF
- WHICH SPEED IS TO BE SELECTED
- WHEN SHOULD THE FILTERS BE WASHED OR REPLACED
- LIGHTING
- MAINTENANCE
- EXTERNAL CLEANING
- CLEANING OF INTERNAL PARTS
- METAL ANTI-GREASE FILTERS
- ACTIVE CARBON FILTERS
- DISPOSAL AFTER END OF USEFUL LIFE
- INFORMATION REGARDING DISPOSAL IN EU COUNTRIES
- INFORMATION REGARDING DISPOSAL IN OTHER NON-EU COUNTRIES
- SAFETY OF SMOKE DISCHARGE
- PRECAUTIONS FOR THE USER
- GENERAL PRECAUTIONS
- PRECAUTIONS FOR USE AND CLEANING
- PRECAUTIONS IN CASE OF MALFUNCTION
- INSTALLATION
- TECHNICAL CHARACTERISTICS
- HCTPYKUINIPOMOHTAXY(PA3DEN,NPEDHA3NAEHBITOBKOIGKABNHNEPOBAHORO NEPCOHANA,3AHMUAOEROCAYCTAHOKOBVBTTAAKKN)
- RAN A CTP
- RAN B CRP
- TANBI C UD CTP
- KXYOHHAB BBITJXKA B BEPCNU C BBIBODOM HAPYKU (BCACBIBAIOUJIAR)
- BBITAKBA B BEPCN C BYHTPEHEN PEUKNPKYILNEIEN (ΦNJIBTPYIOUJA)
- RAN CTP
- INSTALL THE HOOD (H) AT THE REQUIRED HEIGHT (FIG. 1). FIRST, FOLLOWING FIG. 2, DRAW A LINE ON THE WALL THAT SERVES AS A GUIDE FOR CORRECT POSITIONING OF THE BRACKET (L). - ATTACH THE BRACKET (L) TO THE WALL ALONG THE MARKED LINE, CHECK ITS HORIZONTALITY, AND MARK THE DRILLING POINTS FOR THE TWO HOLES AT THE ENDS (FIG. 3). DRILL THE HOLES, INSERT THE 6 MM DOWELS, AND FIX THE BRACKET (L) WITH THE CORRESPONDING SCREWS (V4) (FIG. 4). TIGHTEN THE SCREWS (V5) TO EXTEND (H) AND THE BRACKET (L) (FIG. 5). - CONNECT THE ELECTRICAL SUPPLY TO THE HOOD IN ACCORDANCE WITH APPLICABLE STANDARDS. FUNCTIONING
- WHEN TO TURN THE HOOD ON AND OFF
- WHICH SPEED TO SELECT
- WHEN TO CHANGE THE FILTERS
- USING THE MECHANICAL CONTROL PANEL
- OF THE HOOD
- METAL GREASE FILTERS
- FILTERS WITH ACTIVATED CARBON
- DISPOSAL AT END OF SERVICE LIFE
- INFORMATION ON DISPOSAL IN EUROPEAN UNION COUNTRIES
- INFORMATION ON DISPOSAL IN COUNTRIES OUTSIDE THE EUROPEAN UNION
- UNIT WITH EXTERNAL EXTRACTION (DUCTED)
- UNIT WITH INTERNAL RECIRCULATION (FILTERING)
- WHICH SPEED SHOULD BE SELECTED
- DOME VERSION WITH EXTERNAL EXHAUST PIPE (SUCTION)
Brand : FALMEC
Model : Mizar 90
Category : Range hood