P125 - Sewing machine Prixton - Free user manual and instructions
Find the device manual for free P125 Prixton in PDF.

User questions about P125 Prixton
0 question about this device. Answer the ones you know or ask your own.
Ask a new question about this device
Download the instructions for your Sewing machine in PDF format for free! Find your manual P125 - Prixton and take your electronic device back in hand. On this page are published all the documents necessary for the use of your device. P125 by Prixton.
USER MANUAL P125 Prixton
natural_image
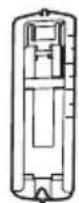
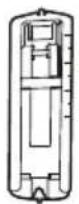
Line drawing of a sewing machine with needle and base mount (no text or symbols)MÁQUINA DE COSER SEWING MACHINE
INDEX
ES 3
EN 18
FR 33
IT 48
DE 63
PT 78
NL 93
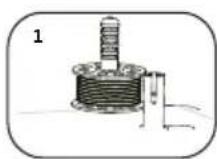
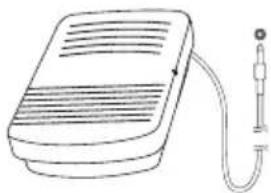
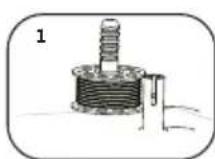
Conexión del pedal
natural_image
Simple line drawing of a plug inserted into an electronic device labeled 'C' (no text or symbols beyond label)natural_image
Sequence of six images showing a sewing machine being adjusted, with red arrows indicating motion direction (no text or symbols present)natural_image
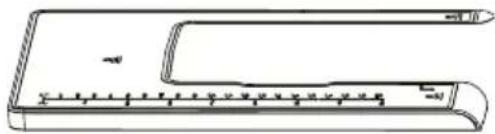
Line drawing of a mechanical component with no visible text or symbolsTabla 40x20x26 cm
Accesorios
natural_image
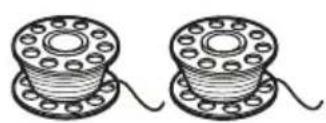
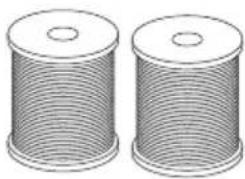
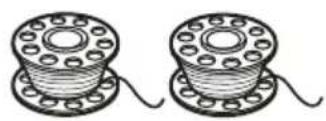
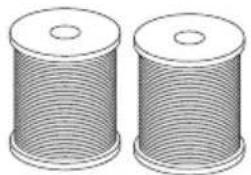
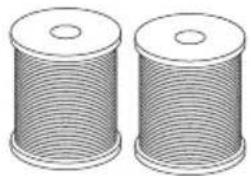
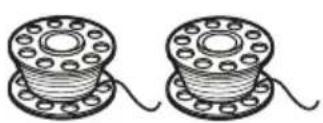
Two identical spools of thread with coiled ends, shown side by side (no text or symbols)Bobina
natural_image
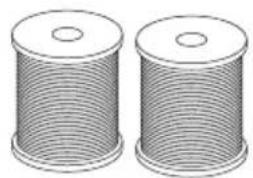
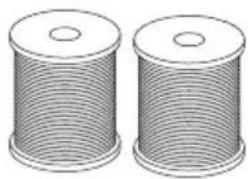
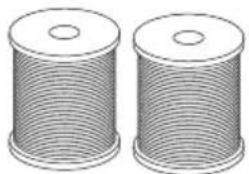
Two identical cylindrical spools with parallel grooves, no text or symbols visibleCarrete de hilo

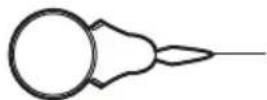
Enhebrador

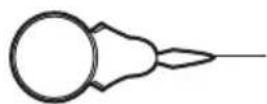
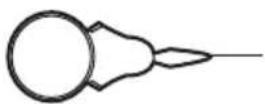
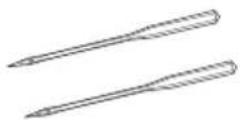
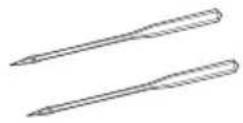
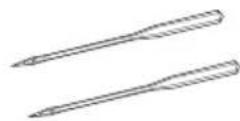
Aguja
natural_image
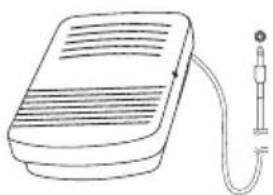
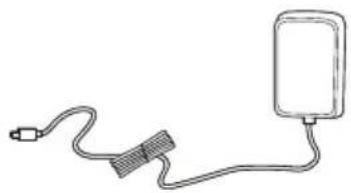
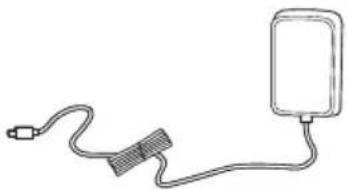
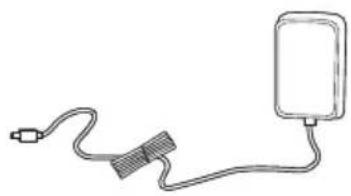
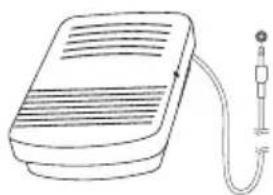
Line drawing of a portable electronic device with a cable and indicator gauge (no text or symbols)Pedal

natural_image
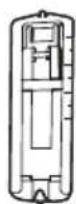
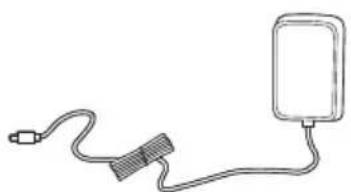
Simple line drawing of a plug connected to a rectangular device (no text or symbols)Adaptador
natural_image
Diagram showing three stages of a mechanical or electrical component with arrows indicating direction (no text or symbols present)natural_image
Technical line drawing of a sewing machine needle and base plate (no text or symbols)natural_image
Line drawing of a sewing machine needle stitching a circular component (no text or symbols)natural_image
Diagram showing two sewing machine footprints with arrows indicating movement (no text or symbols)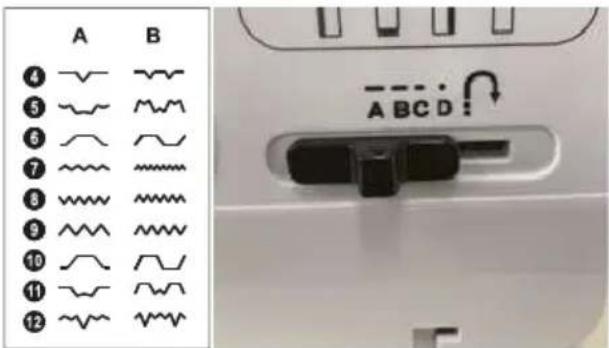
Costura de ojales
natural_image
Technical line drawing of a sewing machine with base mount and clamping mechanism (no text or symbols)natural_image
Technical line drawing of a sewing machine with internal components and exploded view (no text or labels)natural_image
Close-up of a hand using a sewing machine to adjust electrical components (no visible text or symbols)Mesa de extensión
AVISO

natural_image
Three-step stages of a sewing machine: cutting, pressing, and finishing (no text or symbols visible)
Voltaje nominal: 6V ---
Consumo de corriente: 1.5A
Read these instructions carefully and retain them for future use. If this product is passed to a third party, then these instructions must be included.
When using electrical appliances, basic safety precautions should always be followed to reduce the risk of fire, electric shock, and/
or injury to persons including the following:
CAUTION
Risk of injury!
Risk of damage!
This appliance can be used by children aged from 8 years and above and persons with reduced physical, sensory or mental capabilities or lack of experience and knowledge if they have been given supervision or instruction concerning use of the appliance in a safe way and understand the hazards involved.
Children shall not play with the appliance.
Cleaning and user maintenance shall not be made by children without supervision.
The appliance is only to be used with the power supply unit provided with the appliance.
Appliance must only be supplied at safety extra low voltage corresponding to the marking on the appliance.
Unplug the appliance before carrying out maintenance or replacing lamps.
Unplug the appliance and remove the batteries when making any adjustment in the needle area, such as threading needle, changing needle, threading bobbin, or changing presser foot, and the like.
Switch off or unplug the appliance when leaving it unattended.
Use this appliance only for its intended use as described in this manual.
Keep fingers away from all moving parts. Special care is required around the sewing machine needle.
CAUTION
Risk of electric shock!
Do not attempt to repair the appliance yourself. In case of malfunction, repairs are to be conducted by qualified personnel only.
Do not immerse the electrical parts of the appliance in water or other liquids. Never hold the appliance under running water.
Do not operate the appliance with wet hands or while standing on a wet floor. Do not touch the power plug with wet hands.
Disconnect the plug from socket outlet when not in use, before any maintenance and before cleaning.
Regularly check the plug and supply cord for damage. If the cord is damaged the power adapter should be scrapped.
Never use accessories which are not recommended by the manufacturer. Only use original parts and accessories.
Place the appliance on a level, dry and sufficiently stable surface.
Do not place the appliance on or near hot surfaces.
Lay out the supply cord in such a way that no unintentional pulling or tripping over it is possible.
Never look away from the needle while sewing.
Do not pull or push fabric while stitching. It may deflect the needle causing it to break.
Do not use bent, blunt or damaged needles.
Before First Use
ATTENTION
Power adapter and foot switch shall comply with the socket.
Power adapter and foot switch are only allowed for application with this product.
It is forbidden to apply other power adapter to this product.
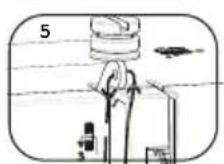
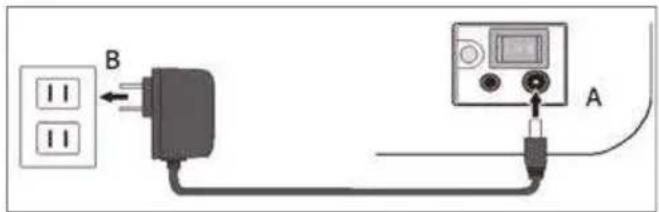
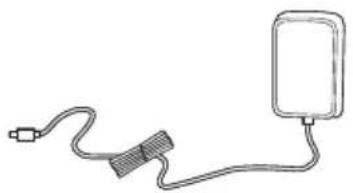
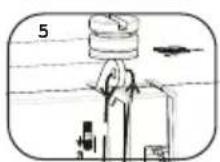
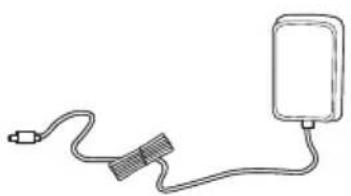
Power connection
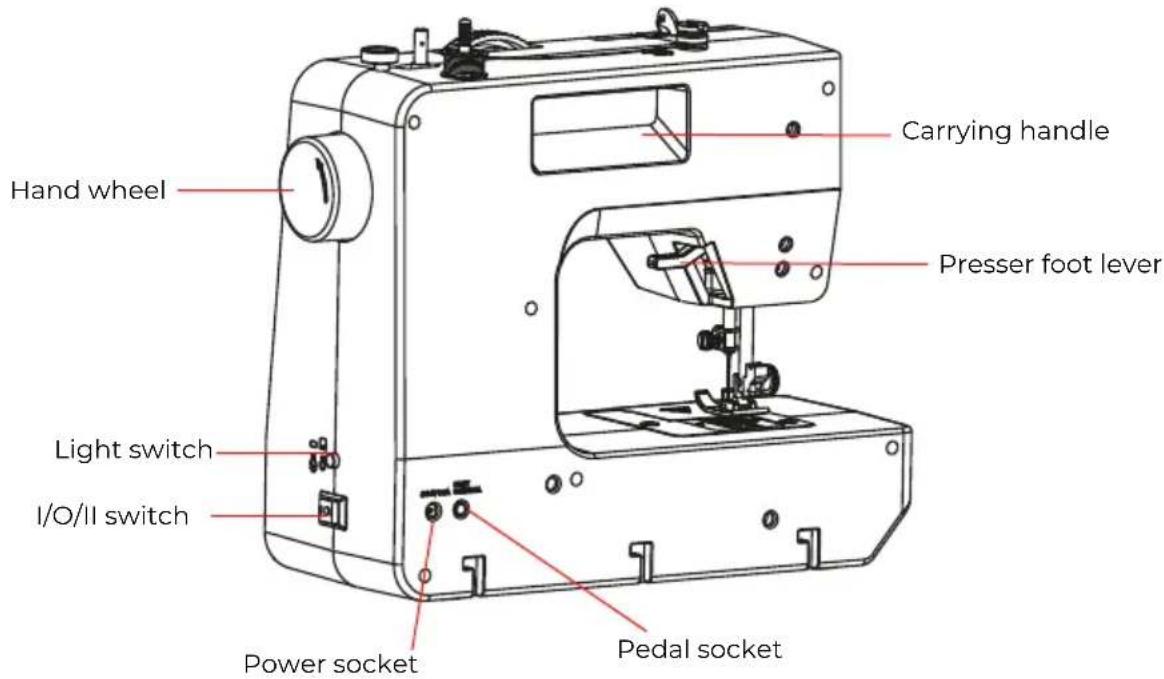
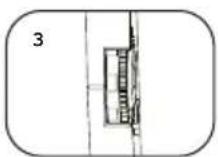
The power jack of the sewing machine locates in the bottom right, show in Fig. Plug the power adapter into A.
Plug the power plug of the power adapter to B, show in the Fig.
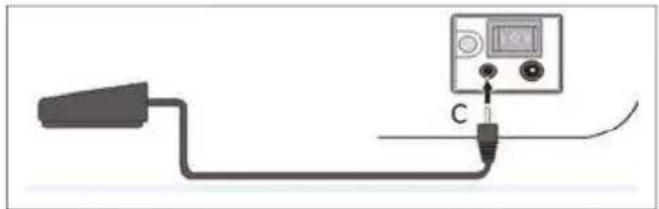
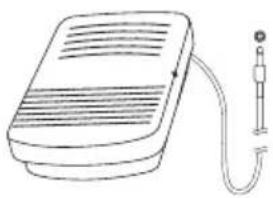
Foot switch connection
The foot switch jack lines in the bottom right of the sewing machines, show in the Fig. Plug the foot switch into C.
Plug the power plug of the power adapter to B, show in the Fig.
natural_image
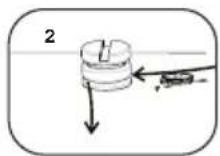
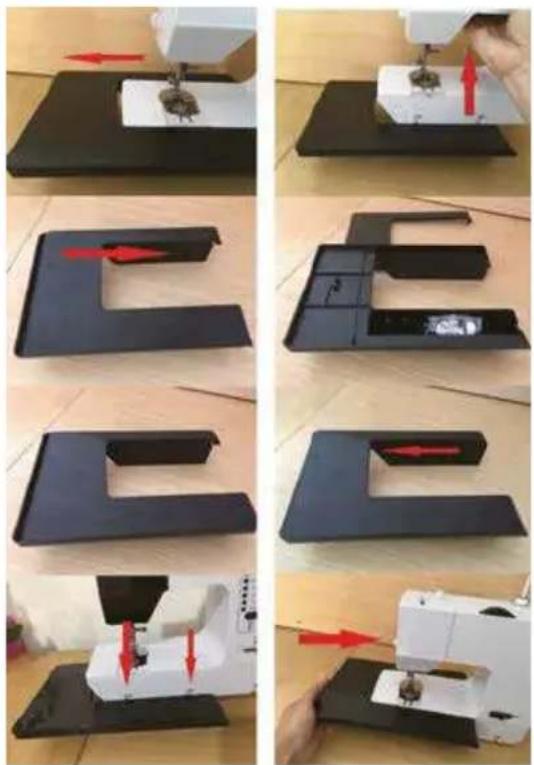
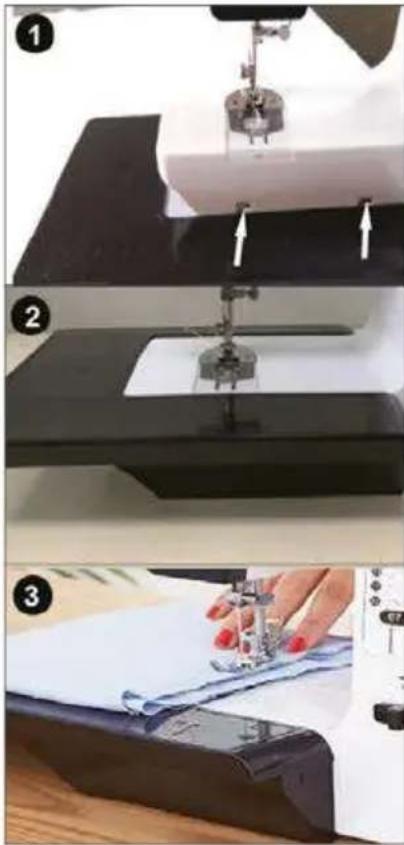
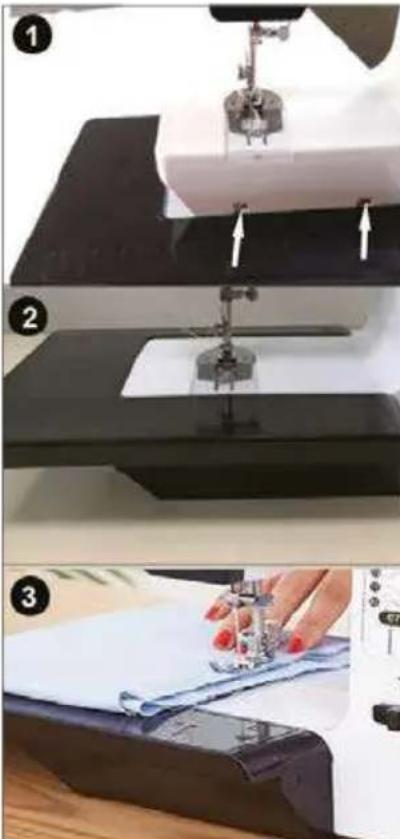
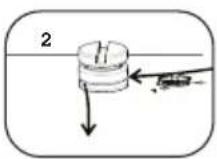
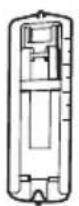
Simple line drawing of a cable with a plug inserted into a digital display unit (no text or symbols)How to remove and install the accessory box
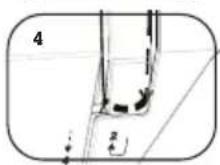
Pull the accessories box from the left side of the machine to 0.8CM.
The machine is pulled up and the accessories box is removed.
Move the accessories cover to the right by 1CM.
Open the accessories cover and take out the accessories you want to use.
After using the accessories, put it back to the right side of the accessories box at 1CM.
Cover the accessories box and push the box to the left.
Place the machine in the specified position.
Push the accessories box to the right to install the machine.
natural_image
Sequence of six images showing a sewing machine being adjusted, with red arrows indicating motion direction (no text or symbols present)Component introduction

natural_image
Line drawing of a mechanical part with a curved base and ruler, no text or symbols presentTable 40x20x26 cm
Accessories
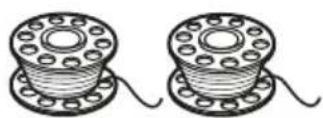
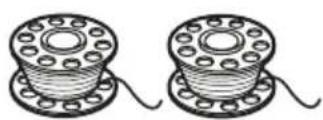
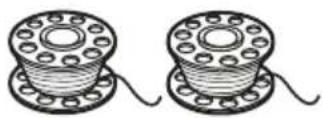
Bobbin
natural_image
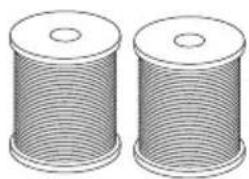
Two identical cylindrical spools of thread, no text or symbols visibleThread spool
Threader

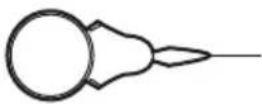
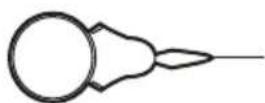
Needle

natural_image
Line drawing of a portable electronic device with a cable and terminal connector (no text or symbols)Foot pedal
natural_image
Simple line drawing of a medical or electrical device with a bulb, coiled cable, and rectangular block (no text or symbols)Adaptor
Button hole presser foot
Sewing setup
CAUTION
Risk of injury! Risk of damage!
Unplug the appliance when making any adjustment in the needle area, such as threading needle, changing needle, threading bobbin, or changing presser foot.
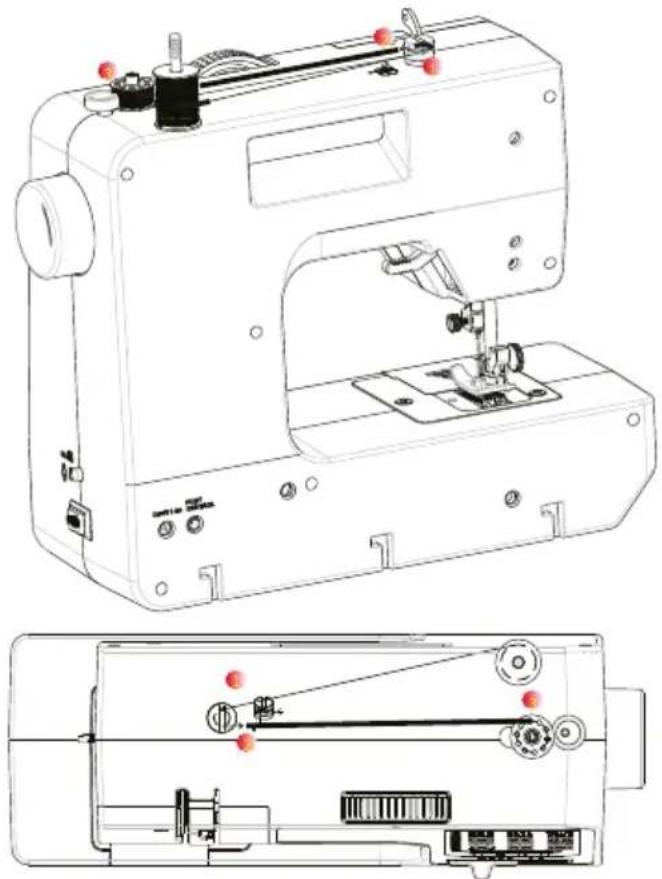
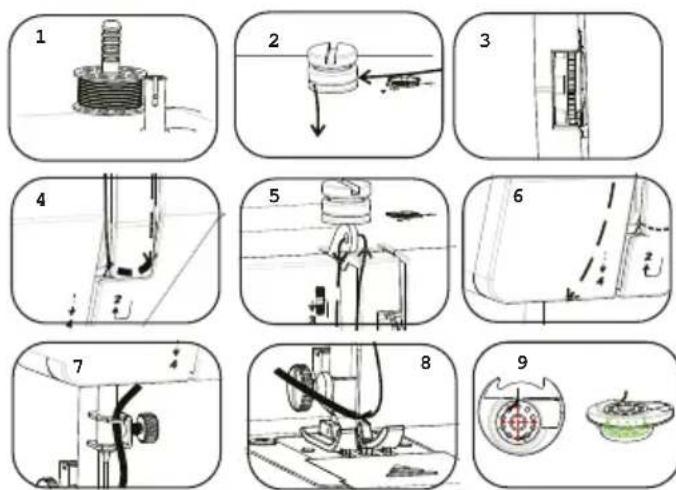
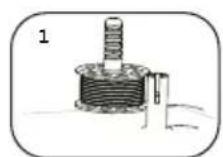
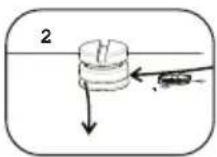
Threading the upper thread
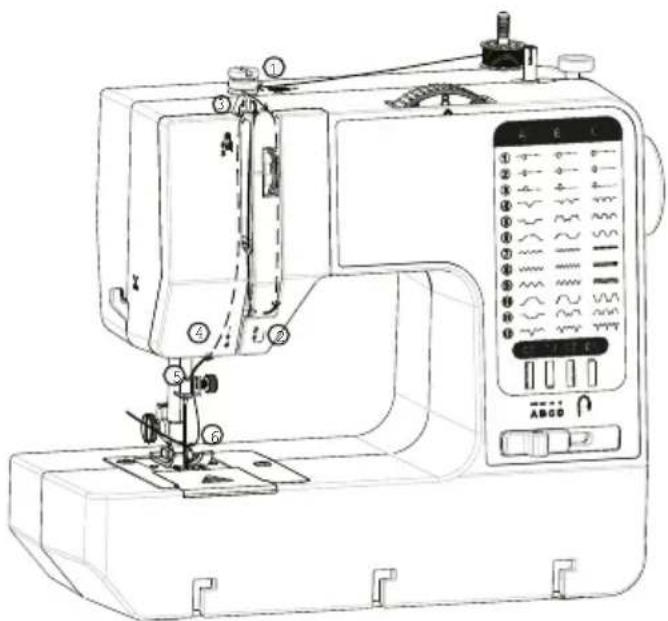
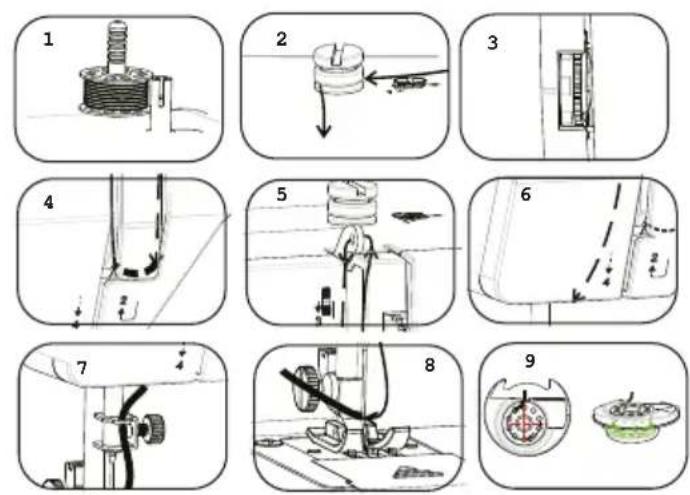
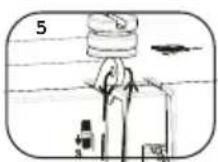
Open the head cover, Put the bobbin clockwise on the spool pin, show in Fig1.
Pass the thread of the bobbin through the hole of winding slice from back to front, show in Fig 2.
Pull the thread clamp and place the thread from top to bottom into the clamping piece, then release, show in Fig3.
Wrap the thread from the bottom into the casing marked 3 and then up, show in Fig 4.
Pass the thread from left to right through the pull rod hole, show in Fig 5.
Pass the thread through the ring, show in Fig 6.
Pass the thread through the needle clamp, show in Fig 7.
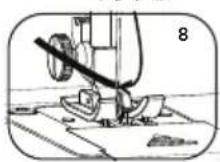
Wind the thread end to the needle eye, show in Fig 8.
Place the bottom thread in clockwise direction, show in the figure.
NOTICE
Make sure the thread passes through the thread clamp. When through the upper thread tension adjustment wheel, poke the thread clamp slightly to make sure there is no thread jamming. It is strictly required to follow the above steps during threading.
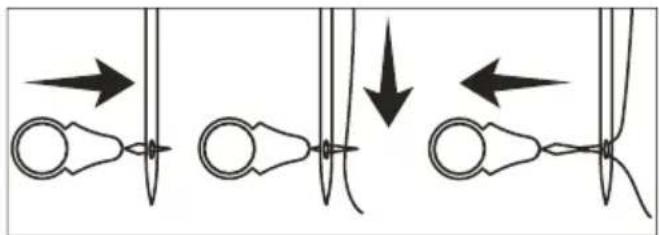
Using the needle threader
- Insert the needle threader through the eye of the needle from the back to the front.
- Pass the thread through the wire loop of the needle threader.
- Pull the needle threader together with the thread back through the eye.
natural_image
Diagram showing three stages of a mechanical or electrical component with arrows indicating direction (no text or symbols)Adjusting the thread tension
The thread tension should be adjusted for different fabrics. The required tension depends on the weight and thickness of the fabric.
Turn the thread tension adjustment wheel to adjust the tension of the upper thread: To increase the tension, turn the thread tension adjustment wheel to a higher number. To reduce the tension, turn the thread tension adjustment wheel to a lower number.
- Normal thread tension
- Upper thread tension too loose
- Upper thread tension too tight
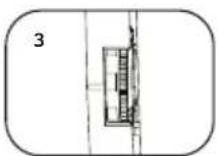
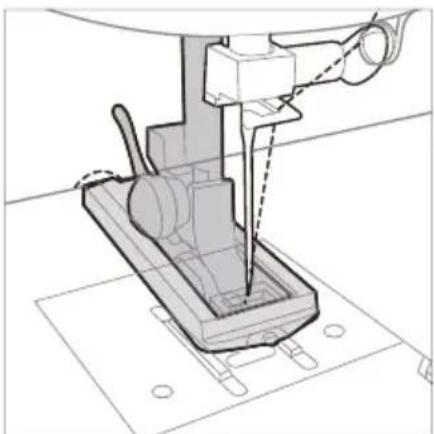
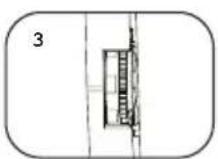
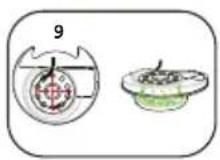
Inserting the bobbin
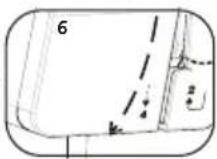
- Turn the hand wheel anti-clockwise to raise the needle to the highest point.
- Slide the bobbin cover to remove it.
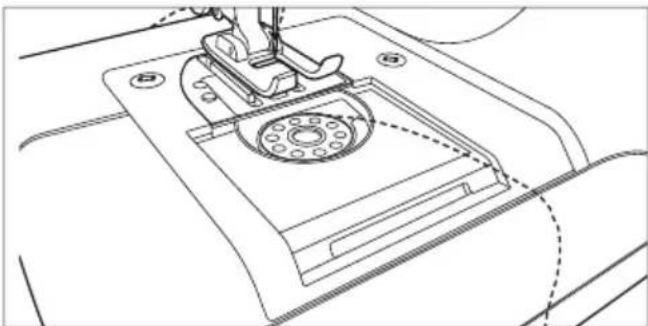
natural_image
Technical line drawing of a sewing machine needle and base plate (no text or symbols)- Place a bobbin in its chamber with
its thread going clockwise. Pull the thread towards the back so there is at least 10 cm of loose thread. - Hold the end of the upper thread and turn the hand wheel anti-clockwise with the other hand until the needle is raised again.
- Pull on the upper thread to draw up the bobbin thread through the stitch hole of the presser foot.
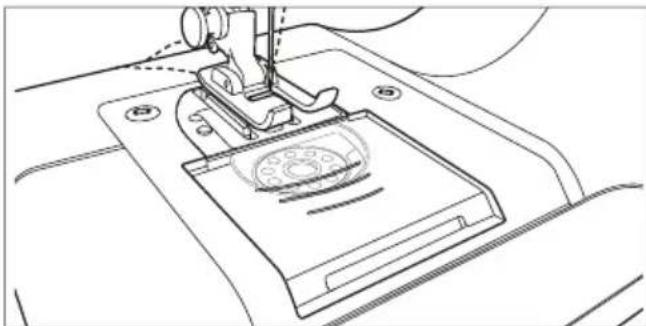
natural_image
Line drawing of a sewing machine needle stitching a circular component (no text or symbols)- Refit the bobbin cover. Pull out approximately 10 cm of both threads and lay them to the back under the presser foot.
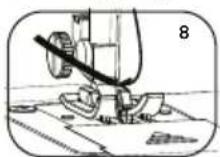
Replacing the needle
NOTICE
Change the needle regularly. Bent, blunt or damaged needles can cause damage to the product or fabric. To achieve optimal sewing results, the needle should be straight and sharp
This method can be used to attach the normal needles and the twin needle.
- Turn the hand wheel anti-clockwise to raise the needle to the highest point. Lower the presser foot lever.
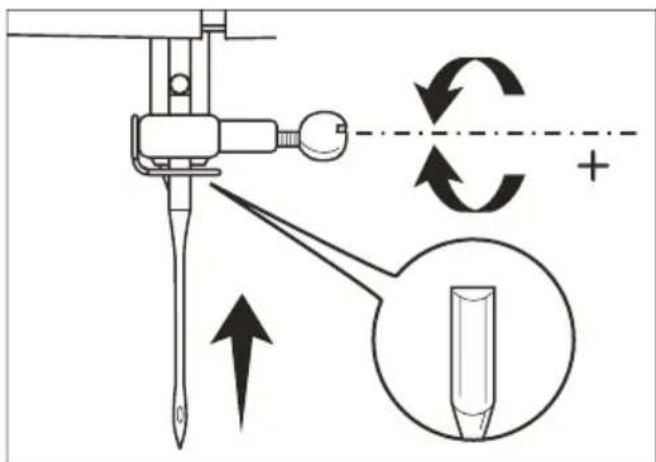
- Turn the needle clamp screw anti clockwise to loosen it and remove the needle from the needle clamp.
- Insert a new needle into the needle clamp with the flat side of its shank facing towards the back of the product.
- Push the needle all the way into the needle clamp and tighten the needle clamp screw to secure the needle.
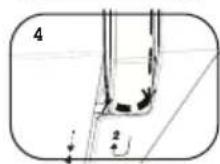
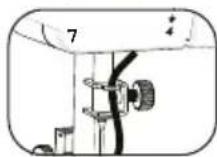
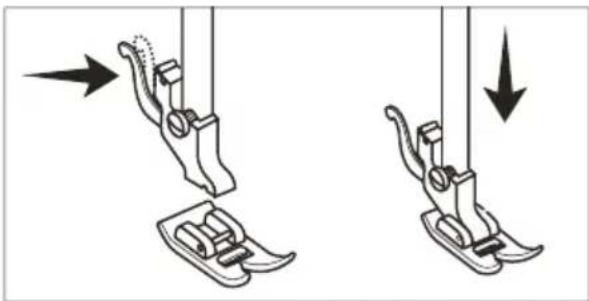
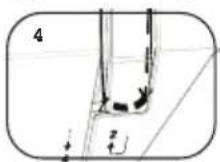
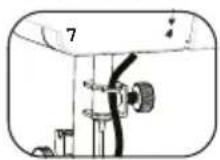
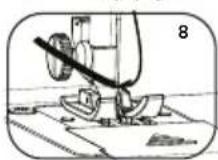
Removing or attaching the presser foot
The presser foot is used to hold down the fabric while sewing. Always place the upper and bobbin threads under the presser foot before sewing.
NOTICE
Use this method to install the presser foot , the button hole presser foot and the zipper presser foot.
natural_image
Diagram showing two sewing machine footprints with arrows indicating movement (no text or symbols)- Turn the hand wheel anti-clockwise to raise the needle to the highest point. Raise the presser foot lever.
- Press the presser foot locking lever. The presser foot drops off.
- Place the presser foot under the presser support, lower the pressure foot lever and press the presser foot locking lever. The presser foot locks into place.
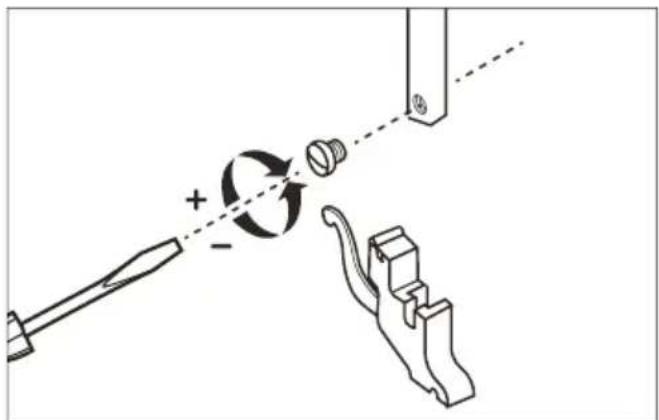
Removing or attaching the presser support
NOTICE
Remove the presser foot before you remove the presser support. See section "Replacing the presser foot" for details.
- Turn the hand wheel anti-clockwise to raise the needle to the highest point. Raise the presser foot lever.
- Loosen the presser set screw by turning the screwdriveranti-clockwise. Remove the presser support.
- To attach the presser support, refit and secure it by turning clockwise, tightening the presser set screw.
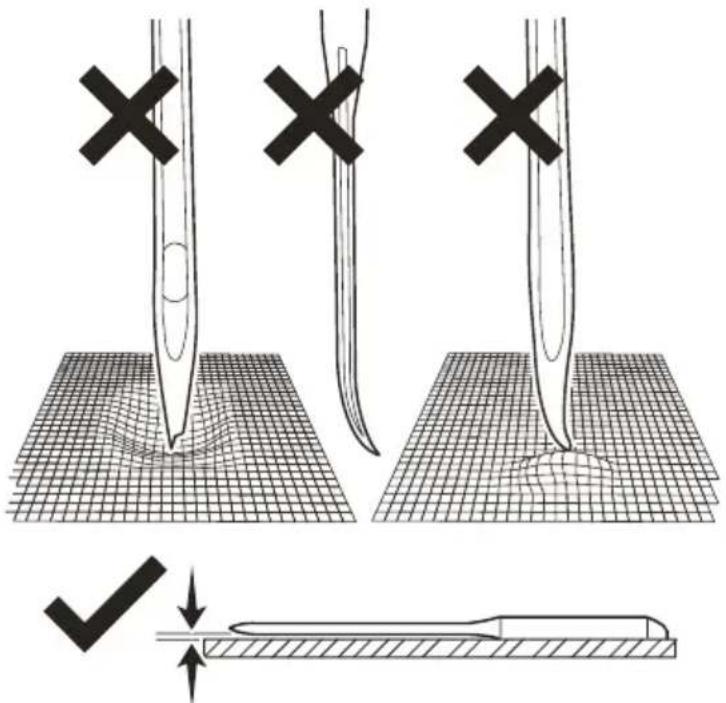
Change and installation of sewing needle
NOTICE
Only use 14#(90) needles far home use, Other needles may bend ar break and cause injury. Never sew with a bent needle . A bent needle will be easily break and cause injury.

Extraction and installation of sewing needle must be implemented with power off and comply with the following steps:
Turn "OFF" the power and rotate the hand wheel.
Lift the needle bar and sewing needle to the height shown in the Fig after the hand wheel rotated, and then stop rotating hand wheel to keep it in static.
Screw counterclockwise to screw off thimble screw.
Take out the sewing needle to be replaced.
Pass the sewing needle through the thread guiding spring by right bottom-up approach and insert needle bar to its bottom. Then screw clockwise to screw on thimble screw.
Make sure install the sewing needle in place until it can't insert into any more. Normal sewing needle installation must insert 7.5mm into the end of needle bar(shown in Fig), otherwise, it will cause firing-pin, thread hook, or skipped stitches.
The plane position of the needle needs to be behind.
Operation
NOTICE
Texture-relative attentions:
The machine can't provide ordinary sewing to elastic textures, such as towel cloth, lint, elastic knitted fabric, etc.
Keep in strict accordance with the following steps in sewing.
Function adjustment wheel is not allowed to rotate when the machine is running.
Adjustment of function adjustment wheel requires rotating counterclockwise the hand wheel to lift the sewing needle to the highest position.
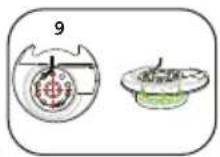
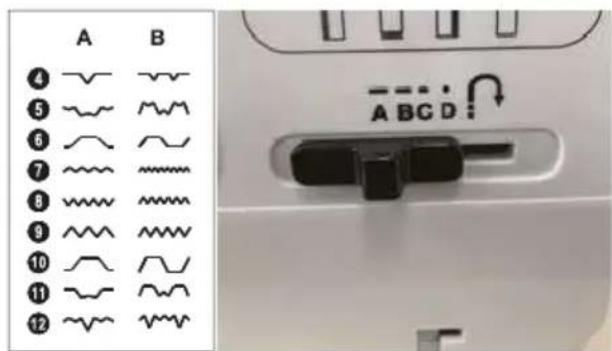
Pattern selecting
CAUTION
Risk of damage!
Do not turn the pattern selection wheel when the needle is down into the fabric.
Otherwise, the needle may bend or break.
It requires accomplishing "preparation before operation" step by step described in the instructions before sewing.
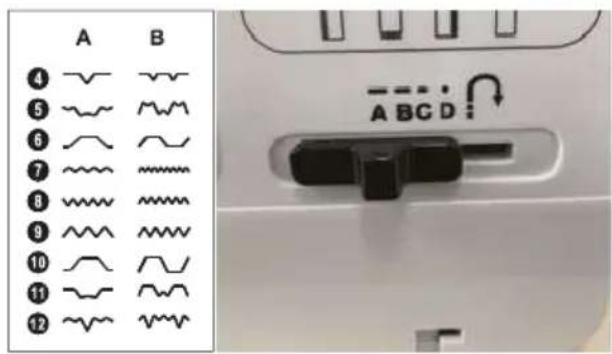
Different stitches of sewing can be selected by the function adjustment wheel whose numbers are corresponding to the figure shown on functions indication panel, enabling you to choose different stitches according to different needs. Please refer to the fallowing Figs for more information.
Straight sewing
CAUTION
Risk of damage!
The upper and bobbin threads must be threaded properly.
The correct upper thread tension must be set.
- Select different stitch. Stitch 1-3 for Straight line sewing.
- Move presser bar lifter upward, lift press faot and pull the bobbin thread and upper thread backward far about 10cm.
- Put fabric under the press faot and move presser bar lifter downward to hold the fabric.
- Turn to A or B.
- O is pedal mode(manual), I and II are automatic mode. I is low speed, 11 is high speed.
- Switch on O, then stamp foot pedal gently to start sewing.
- Rotate counter clockwise the hand wheel after finishing sewing to lift
the needle to highest position. Then move presser bar lifter upward and lift presser fact to move out the texture and cut thread with cutter.
Reverse sewing
NOTICE
Do not add more than 6 reverse stitches at a time.
Move button to reverse when finishing sewing and sew several stitches to strengthen stitches for loose prevention, show in Fig. Reverse stitches shall not exceed 5cm. After sewing, move button to A/B position, and the machine will start sewing forward again. Reverse sewing distance is 1.5\~4.5mm.
Reverse sewing is used to finish off a line of stitches or to reinforce places that needs extra strength.
The feed dog's movement reverses to move back the cloth while sewing to make a locking knot over the stitches.
Hold down the reverse button to sew back over the previous stitches to secure them.
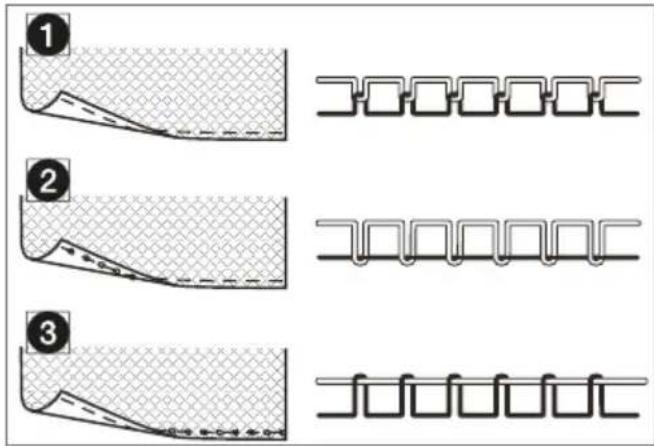
Blind sewing
The blind sewing is the same way as the straight sewing, except that the function adjustment wheel needs to be adjusted to the 4/5/6/7/8/9/10/11/12 position when selecting the stitch. The button is in the A or B position. (The difference between A and B is that A is longer than B for each stitch).
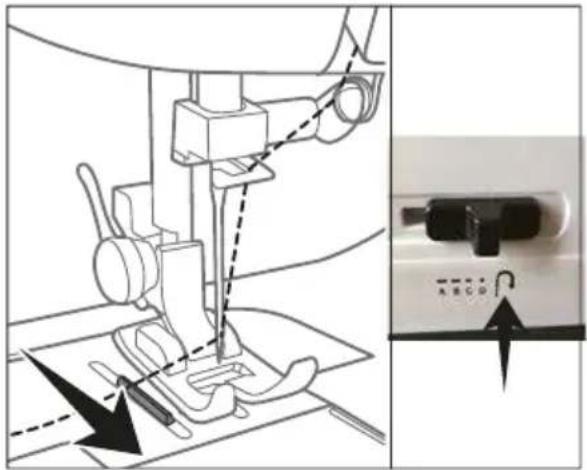
Buttonhole sewing
Turn the Hand wheel counterclockwise (toward you) to raise the needle to the highest point. Raise the presser foot lifter.
Remove the presser foot for instructions on how to remove the presser foot, refer to the section "Removing or attaching the presser foot" on this instruction manual. Attach the buttonhole presser foot to the presser foot holder.
natural_image
Technical line drawing of a mechanical assembly with no visible text or symbolsMark the desired length of the buttonhole on the fabric.
Place the fabric under the presser foot and set the presser foot lifter down to secure the fabric in place, aligning the distance set on the presser foot to length of the marked fabric.
Follow the 4-Step buttonhole sewing sequence.
Raise the needle to the highest point then raise the presser foot lifter.
Pull out the fabric and cut the threads. Cut the buttonhole opening with the seam ripper.
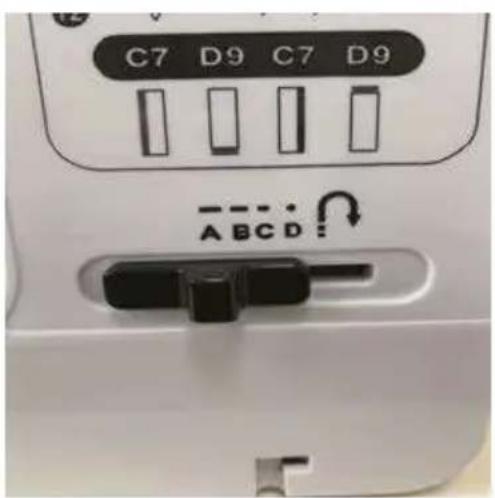
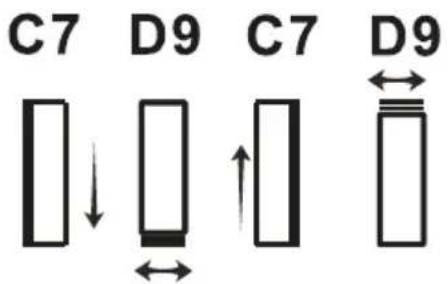
4-Step buttonhole sewing process
Set the pattern to C7, then sew at low speed to the marked length.
Change the pattern to D9 for sewing 5-6 stitches at low speed.
Raise the presser foot, rotating the cloth for 180°
Change the pattern to C7 at low speed to the marked length.
Change the pattern to D9 for sewing 5-6 stitches at low speed.
NOTE: When moving from step to step through the buttonhole process, be sure that the needle is raised before turning the pattern selector dials to the next step. Take care not to sew too many stitches in steps 1 and 3 of this 4-step buttonhole sequence.
Do not move the bobbin winder while the product is running. The sewing motion of the sewing product is disengaged in the winding process
natural_image
Technical line drawing of a sewing machine with internal components and exploded view (no text or labels)Place the thread onto spool pin.
Pull the thread out and cross the winding slice.
Insert the empty bobbin into the winding bar.
Turn on the power.
Step on the foot pedal to start winding.
After winding, cut the thread.
Thread cutting
Use thread cutter to cut thread, show in the Fig.
natural_image
Close-up of a hand holding a small electronic component with wires, next to a damaged electrical socket (no visible text or symbols)Extension table
NOTICE
The power needs to be turned off during installation.
First, install the extension table in the groove position of the machine.
Lift the presser foot and place the fabric under the presser foot, lower the presser foot, adjust the thread adjustment wheel to the stitch to be sewn, and then press the seam
Sewing cuffs
NOTICE
The power needs to be turned off during installation.
Put the expansion table in reverse, and install the machine on the groove.
Lift the presser foot and put the cuff (or the trousers) into the free cantilever directly under the presser foot, and put down the presser foot to press the cuff (or the trousers).
Turn power switch to I or II art sewing, stamp foot pedal gently to start sewing.
natural_image
Three-step procedure images showing sewing machine stitching a fabric, with arrows indicating steps (no text or symbols present)
Cleaning and maintenance
WARNING
Risk of electric shock!
To prevent electric shock, unplug the product before cleaning.
During cleaning do not immerse the electrical parts of the product in water or other liquids.
Never hold the product under running water.
Cleaning the main unit
To clean the product, wipe with a soft, slightly moist cloth.
Dry the product after cleaning.
Never use corrosive detergents, wire brushes, abrasive scourers, metal or sharp utensils to clean the product.
Cleaning the area inside the bobbin cover
Lint and bits of thread may accumulate under the bobbin cover. Check regularly and clean it with the lint brush (not included) when necessary.
Storage
Store the product in its original packaging in a dry area. Keep away from children and pets.
Store accessories in the accessories box.
Maintenance
Any other servicing than mentioned in this manual should be performed by a professional repair centre.
Troubleshooting
Problem
The product does not start.
Solution
Check if the power plug is connected to the socket outlet. Check if the power socket works.
Check if the foot control is correctly connected to the foot control socket.
Problem
The thread breaks.
Solution
The thread tension is not set correctly for the chosen stitch pattern or the type of fabric.
Adjust the tension by using the thread tension adjustment wheel.
Check if the needle is bent or if the
needle shank is not properly seated. Re-insert or change to a new needle.
Check if the upper and bobbin threads are placed towards the back and under the presser foot.
Check if there is any lint collected in the bobbin chamber. Clean with a lint brush (not included).
Problem
Stitches are skipped.
Solution
Check if the product is threaded properly. Re-thread if needed.
Check if the presser foot is too loose. Make sure the presser foot lever is set down.
Check if the needle is bent or
damaged. Re-insert or change to a new needle.
Problem
The needle breaks.
Solution
Change to a new needle and make sure it is inserted correctly and securely.
Specifications
Sewing machine
Rated voltage 6V --- Current consumption 1.5a Power consumption 9W
Power supply
Input voltage 100-240 V\~ Input AC frequency 50/60 Hz Output voltage 6V--- Output current 1.5A Output power 9W
Warranty policy
This product complies with the warranty law in force in the country of purchase. When you have a problem that you can not solve, you must access the web www.prixton.com and click on the contact option to send us your assistance form.
These technical and electrical specifications are those of typical units and may be changed without prior notice in order to provide improved equipment.
Simplified EU Declaration Of Conformity
We, La Trastienda Digital located in Avenida Cervantes 49, módulo 25, Basauri 48970, Bizkaia hereby declare that the following goods, imported and selling at European market:
| BRAND | MODEL NAME DESCRIPTION | CATEGORY | |
| Prixton | P125 | Sewing machine | Home |
Are in compliance with the EC Council Directive of 2014/53/EU (EM DIRECTIVE) and harmonized standards and with the board of the 16th of April 2014.
The complete text of the UE Declaration of conformity is available anytime at this website address:
www.prixton.com
LA TRASTIENDA DIGITAL
natural_image
Simple line drawing of a plug connected to a digital display unit with labeled point C (no text or symbols beyond label)natural_image
Sequence of six images showing a sewing machine being adjusted, with red arrows indicating motion direction (no text or symbols present)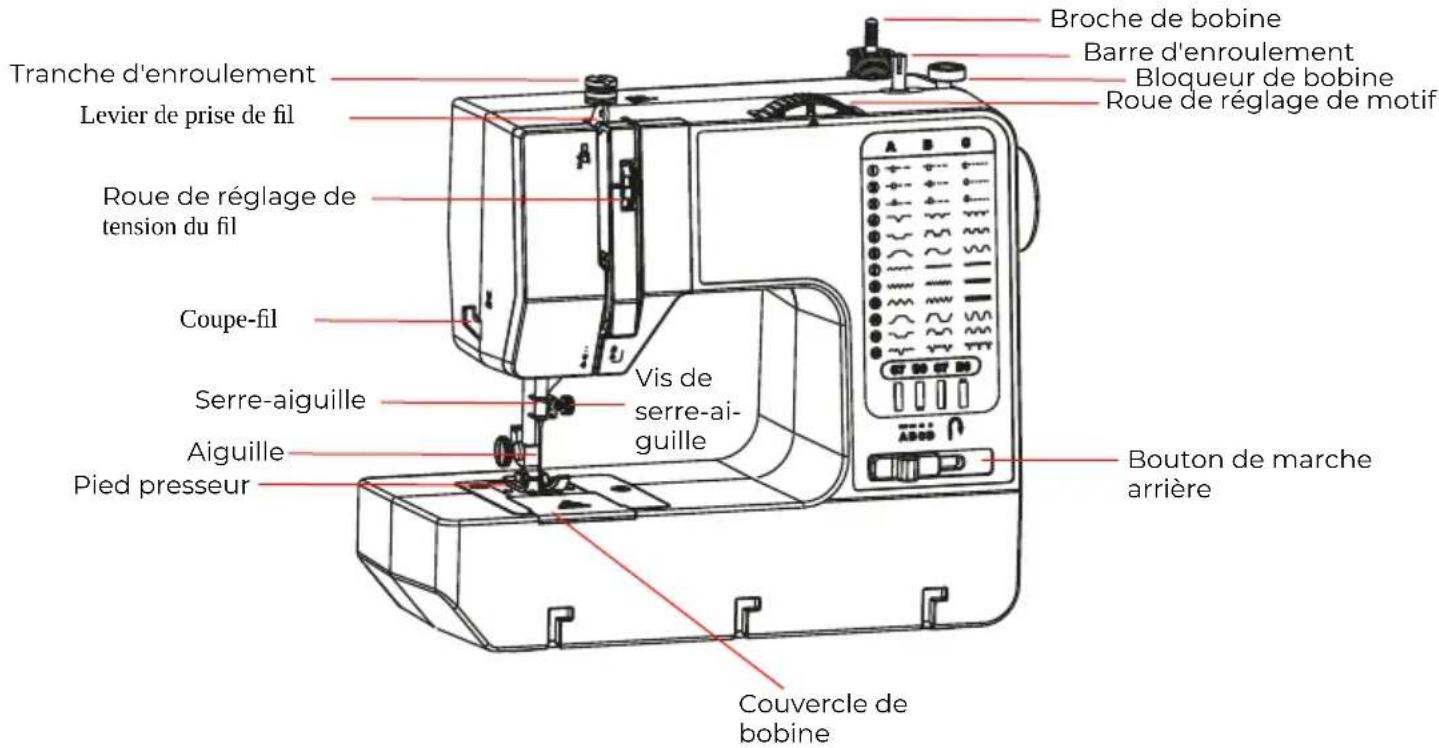
natural_image
Line drawing of a U-shaped mechanical part with a central ruler and flange (no text or symbols)Table 40x20x26 cm
Accessoires
Bobine
natural_image
Two identical cylindrical spools of thread, no text or symbols visibleBobine de fil
Enfileur

Aiguille
natural_image
Line drawing of a portable electronic device with ventilation grilles and a connected plug (no text or symbols)Pédale
natural_image
Simple line drawing of a cable and plug connected to a rectangular device (no text or symbols)Adaptateur
natural_image
Technical line drawing of a sewing machine needle and base plate (no text or symbols)natural_image
Line drawing of a sewing machine needle stitching a circular component (no text or symbols)natural_image
Diagram showing two sewing machine footprints with arrows indicating movement (no text or symbols)natural_image
Technical diagram showing a tool interacting with a mechanical component, no text or symbols present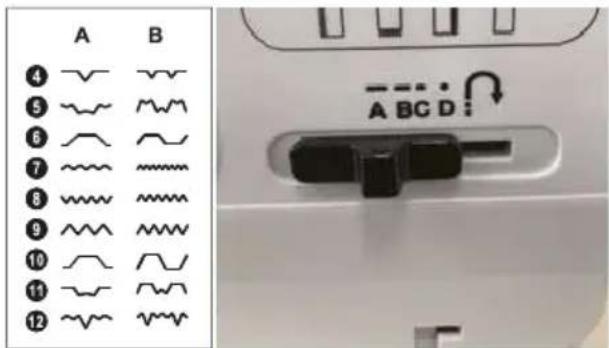
natural_image
Technical line drawing of a mechanical assembly with no visible text or symbolsnatural_image
Technical line drawing of a sewing machine with internal components and exploded view (no text or labels)natural_image
Technical line drawing of a mechanical part with no visible text or symbolsTavolo 40x20x26 cm
Accessori
Bobina
natural_image
Two identical cylindrical spools of thread, no text or symbols visibleBobina di filo
Infila ago
Ago

natural_image
Line drawing of a portable electronic device with ventilation slots and a cord (no text or symbols)Pedale
natural_image
Simple line drawing of a cable and plug connected to a rectangular device (no text or symbols)Adattatore
Piedino per asole
natural_image
Diagram showing three stages of a mechanical or electrical connection with arrows indicating direction (no text or symbols present)natural_image
Technical line drawing of a sewing machine needle and base plate (no text or symbols)natural_image
Technical line drawing of a sewing machine needle stitching a circular component (no text or symbols)natural_image
Diagram showing two different foot pushings with arrows indicating movement, no text or symbols present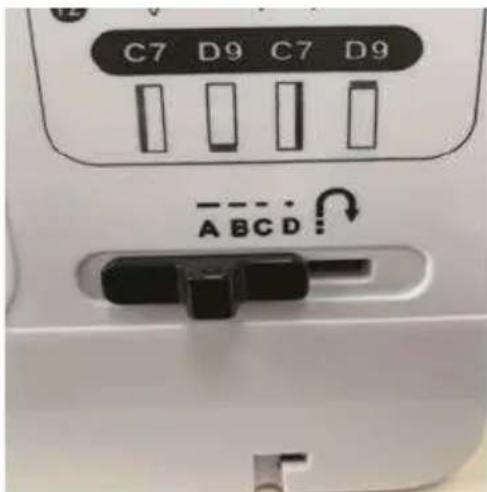
Cucitura del bottone
natural_image
Technical line drawing of a mechanical assembly with no visible text or symbolsnatural_image
Technical line drawing of a sewing machine with internal components and exploded view (no text or labels)natural_image
Close-up of a sewing machine needle stitching fabric, with visible wiring and metal components (no text or symbols)Tavolo di prolunga
AVVISO
natural_image
Three-step procedure images showing sewing machine stitching, with arrows indicating measurement points (no text or symbols present)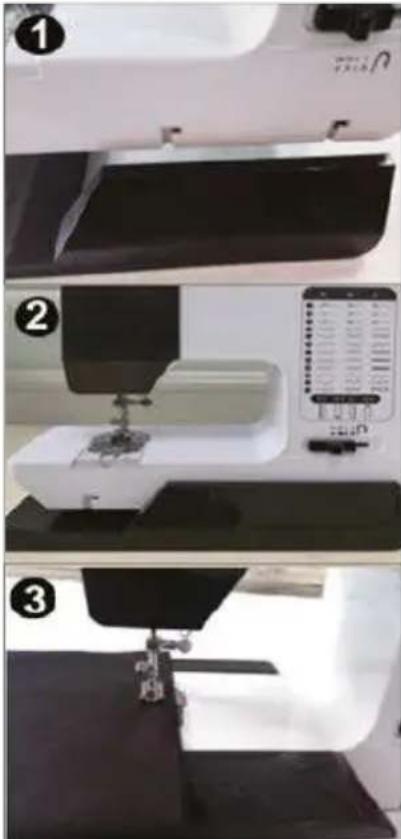
natural_image
Three-panel image showing a sewing machine with a control panel and mechanical components, no visible text or symbols.natural_image
Simple line drawing of a medical or electrical device with a plug and terminal block (no text or symbols)natural_image
Sequence of six images showing a sewing machine being adjusted, with red arrows indicating motion direction (no text or symbols present)natural_image
Line drawing of a mechanical component with a curved handle and internal grooves (no text or symbols)Tisch 40x20x26 cm
Zubehör
Spule
natural_image
Two identical cylindrical spools with coiled lines, no text or symbols visibleFadenspule
Einfädler
Nadel
natural_image
Line drawing of a portable electronic device with a cable and indicator gauge (no text or symbols)Fußpedal
natural_image
Simple line drawing of a plug connected to a rectangular device (no text or symbols)Adapter
Knopflochnähfuß

natural_image
Diagram showing three stages of a mechanical or electrical component with arrows indicating direction (no text or symbols)natural_image
Technical line drawing of a sewing machine needle and base plate (no text or symbols)natural_image
Line drawing of a sewing machine needle stitching a circular component (no text or symbols)natural_image
Diagram showing two mechanical foot manipulator mechanisms with directional arrows indicating movement (no text or symbols)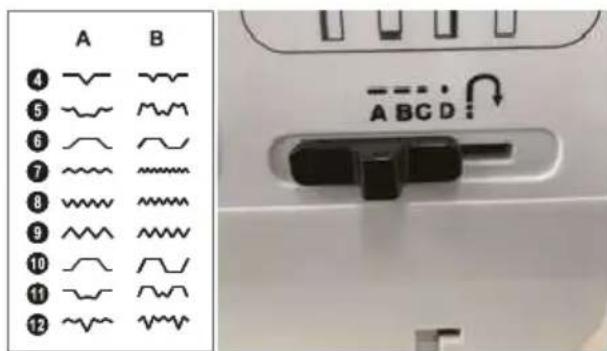
Knopflochnähen
natural_image
Technical line drawing of a sewing machine with base mount and clamping mechanism (no text or symbols)natural_image
Technical line drawing of a sewing machine with internal components and exploded view (no text or labels)natural_image
Close-up of a sewing machine needle stitching a white plastic component (no visible text or symbols)Erweiterungstisch
ACHTUNG
natural_image
Three-step sewing process showing a machine needle stitching fabric, with arrows indicating the step and a close-up of the sewing machine needle (no text or symbols visible)
natural_image
Three-panel image showing a sewing machine with a control panel and base, no visible text or symbols.Conexão do Pedal
natural_image
Simple line drawing of a plug connected to an electronic device labeled 'C' (no text or symbols beyond label)natural_image
Sequence of six images showing a sewing machine being adjusted, with red arrows indicating motion direction (no text or symbols present)natural_image
Line drawing of a mechanical device with a handle and base (no text or symbols)Mesa 40x20x26 cm
Acessórios
Bobina
natural_image
Two identical cylindrical spools with uniform internal threading, no text or symbols visibleCarretel de linha
Passador de
linha
Agulha

natural_image
Line drawing of a portable electronic device with ventilation slots and a terminal connector (no text or symbols)Pedal
natural_image
Simple line drawing of a plug connected to a rectangular device with a cable (no text or symbols)Adaptador
natural_image
Diagram showing three stages of a mechanical or electrical component with arrows indicating direction (no text or symbols)natural_image
Technical line drawing of a sewing machine needle and base plate (no text or symbols)natural_image
Line drawing of a sewing machine needle stitching a circular component (no text or symbols)natural_image
Diagram showing two different foot positioning techniques for fabric or sewing, with arrows indicating movement direction (no text or symbols present)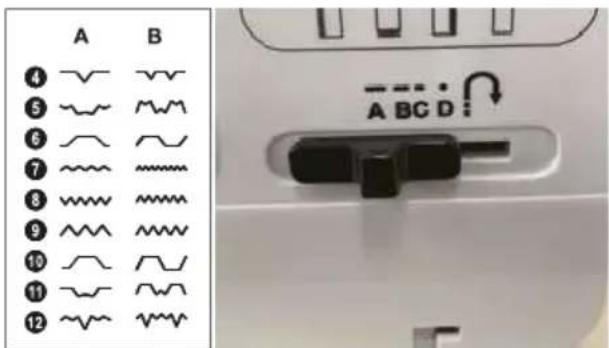
natural_image
Technical line drawing of a mechanical assembly with no visible text or symbolsnatural_image
Technical line drawing of a sewing machine with internal components and exploded view (no text or labels)natural_image
Close-up of a hand using a sewing machine to adjust electrical wiring on a tiled floor (no visible text or symbols)Mesa de extensão
AVISO
natural_image
Technical line drawings of two sewing machines with no visible text or symbols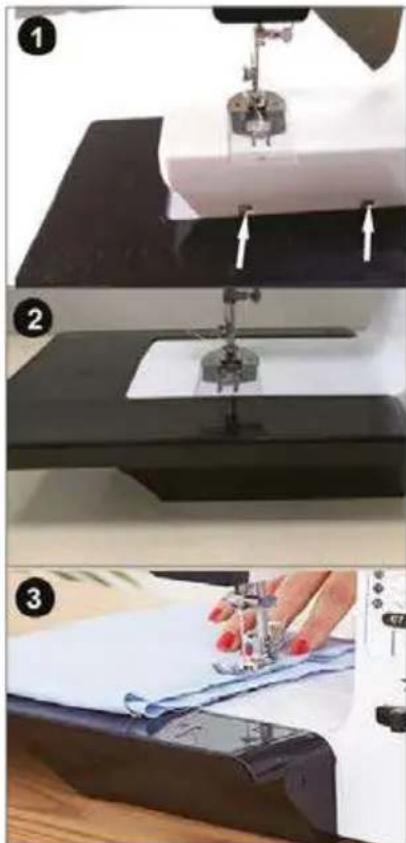
natural_image
Three-step stages of a sewing machine: cutting, pressing, and stitching (no text or symbols visible)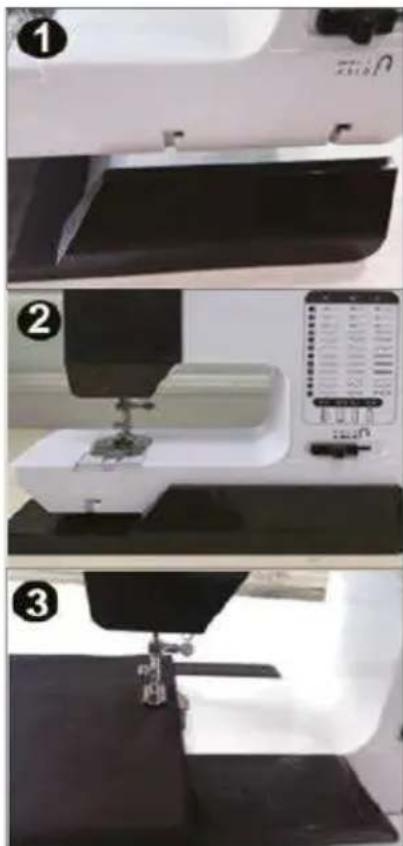
natural_image
Pure electrical circuit lines without any symbolsnatural_image
Sequence of six images showing a sewing machine being adjusted, with red arrows indicating motion direction (no text or symbols present)natural_image
Line drawing of a mechanical component with no visible text or symbolsTafel 40x20x26 cm
Accessoires
natural_image
Two spools of thread with circular holes and coiled ends, no text or symbols presentSpoel
natural_image
Two identical cylindrical spools of thread, no text or symbols visibleGarenklos
Draadinrijger

Naald
natural_image
Line drawing of a portable electronic device with ventilation grille and connected cable (no text or symbols)Voetpedaal
natural_image
Simple line drawing of a cable and plug connected to a rectangular device (no text or symbols)Adapter
Knoopsgatpersvoet
Naaiset-up
VOORZICHTIG


natural_image
Diagram showing three stages of a mechanical or electrical component with arrows indicating direction (no text or symbols present)natural_image
Technical line drawing of a sewing machine needle and base plate (no text or symbols)natural_image
Line drawing of a sewing machine needle stitching a circular component (no text or symbols)natural_image
Diagram showing two different foot pushings with arrows indicating movement, no text or symbols present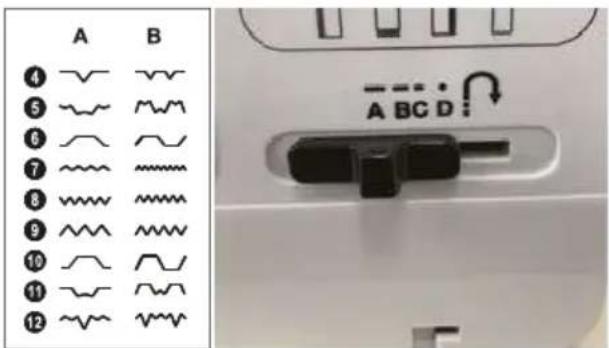
Knoopsgat naaien
natural_image
Technical line drawing of a mechanical assembly with no visible text or symbolsnatural_image
Technical line drawing of a sewing machine with internal components and exploded view (no text or labels)natural_image
Close-up of a hand using a tool to wire components on a white surface, with no visible text or symbols.Verlengtafel OPMERKING

natural_image
Three-step procedure images showing sewing machine stitching process, with no visible text or symbols
natural_image
Three-panel image showing a sewing machine with a control panel and a sewing machine, no visible text or symbols.Nominale spanning 6V ---
Stroomverbruik 1.5a
Stroomverbruik 9W
Stroomvoorziening
Ingangsspanning 100-240 V\~
Ingangsfrequentie AC 50/60 Hz
Uitgangsspanning 6V---
Uitgangsstroom 1,5A
Uitgangsvermogen 9W