
T7009 - Tablet Prixton - Free user manual and instructions
Find the device manual for free T7009 Prixton in PDF.


| Product Type | Tablet |
| Brand | Prixton |
| Model | T7009 |
| Display Size | 10.1 inches |
| Display Resolution | 1280 x 800 pixels (HD) |
| Processor | Quad-core, 1.3 GHz |
| Operating System | Android 10 |
| RAM | 2 GB |
| Storage | 32 GB (expandable via microSD) |
| Battery Capacity | 6000 mAh |
| Dimensions (W x D x H) | 240 x 160 x 9 mm |
| Weight | 510 g |
| Power Adapter Input | 100-240 V AC, 50/60 Hz |
| Power Adapter Output | 5 V DC, 2 A |
| Camera (Rear) | 8 MP |
| Camera (Front) | 2 MP |
| Connectivity | Wi-Fi 802.11 b/g/n, Bluetooth 4.2 |
| Ports | 1x micro USB, 1x microSD slot, 1x 3.5 mm headphone jack |
| Maintenance | Wipe with soft dry cloth; avoid liquids |
| Safety Precautions | Do not expose to extreme temperatures or moisture |
| Spare Parts | Contact authorized service center for replacement battery, screen |
| Repairability | Professional repair recommended; user-replaceable battery only |
| Package Contents | Tablet, USB cable, power adapter, user manual |
Frequently Asked Questions - T7009 Prixton
User questions about T7009 Prixton
0 question about this device. Answer the ones you know or ask your own.
Ask a new question about this device
Download the instructions for your Tablet in PDF format for free! Find your manual T7009 - Prixton and take your electronic device back in hand. On this page are published all the documents necessary for the use of your device. T7009 by Prixton.
USER MANUAL T7009 Prixton
natural_image
Illustration of a tablet device displaying a scenic landscape with green fields and hills, shown from front and side views (no text or symbols)Introducción básica
natural_image
Desktop interface with a white clock icon on a colorful gradient background (no readable text or symbols)natural_image
Grid of nine nature and landscape photos including mountains, forests, landscapes, and waterfalls at sunset (no text or symbols)natural_image
Colorful pencil spools arranged in a circular pattern on a textured surface (no text or symbols visible)Cámara
natural_image
Digital camera interface showing a circular dial with a blue center and control buttons (no text or symbols visible)Grabadora


natural_image
Scenic landscape photo showing green fields, trees, and hills under a cloudy sky (no text or symbols visible)


natural_image
Completely black image with no visible content or text.Device description
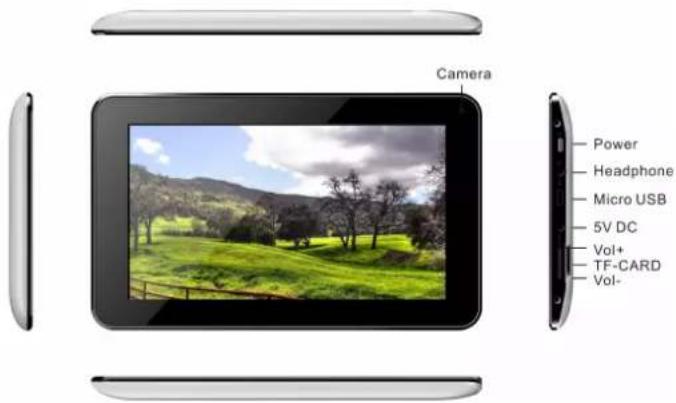
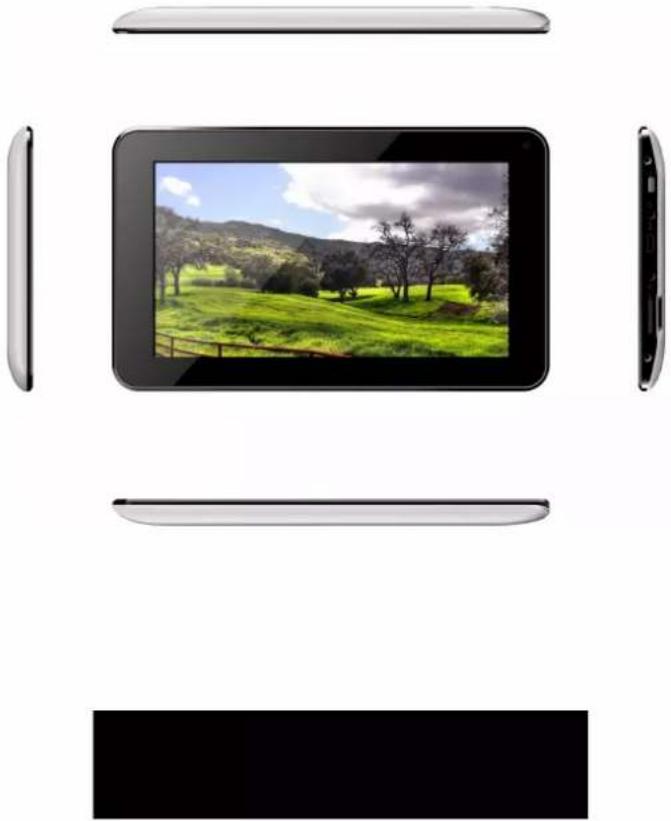
①Camera: You can take photos and videos etc.
②POWER:
- Turn on/off the device by long pressing this button.
-- When the power indicator is on, press the power key
the device will turn on. (It will take some time)
-- Press for 3 seconds when it is off.
The system would indicate MID Option. Click "Power off" to shut it down. Press the return key to stay.
- Press the Power key for a short time, you can shut /start
the screen.
③Headphone: 3.5mm standard earphone jack.
④Micro USB: Support connect the mouse, keyboard, U disk, MP3, USB, USB adapter
CARDS: Support connected PC exchange data, etc
⑤DC: Connect the power cable to charge to the device.
⑥Vol+:Volume increase key
⑦TF-card: TF card slot.
⑧. Vol-: Volume decrease key
Basic specification
CPU: RK3026 Cortex A9-1.0Ghz
● Display Screens: 7inch, 1024*600 LED-backlit
● Camera: Front 0.3M P+ rear 0.3MP
● Operating System: Google Android 4.4
● Network Connection: Built-in 802.11b/g/n wireless Wi-Fi
● Audio format: MP3, WMA, APE, FLAC, WAV, OGG, AAC, MP1, MP2, AC3, AMR, DST, RA, M4A
- Video format: max 1080p full IID video
(AVI, 3GP, MP4, MPG, RM, RMVB, MOV, FLV, WMV, MKV)
● Language: support multiple languages
- Ports: micro USB *1(OTG), Earphone * 1, TF card slot * 1, DC IN*1
- Buttons: Power /Vol+/Vol-
Quick Start
Boot and Shutdown
Boot: Press and hold the power button, the system will enter the boot process
System has been started, entering the Android system:

System into the main interface.

Shutdown: Press the power button, pop-up device options, select Power off
Click OK, you can safely shut down.
Connect with PC
By micro USB (OTG) interface of the device, You can connect with PC by micro USB cable attached with the device. USB Data transferring is available. You can operate the files through the PC.
When your device is connected successfully, to pull up the notification area of the status bar, can see the following icon.
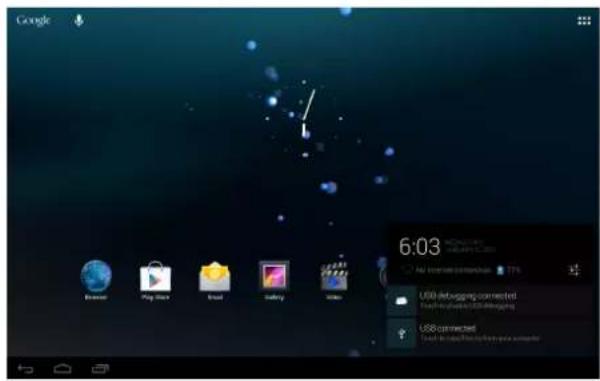
Then click to enter the next.
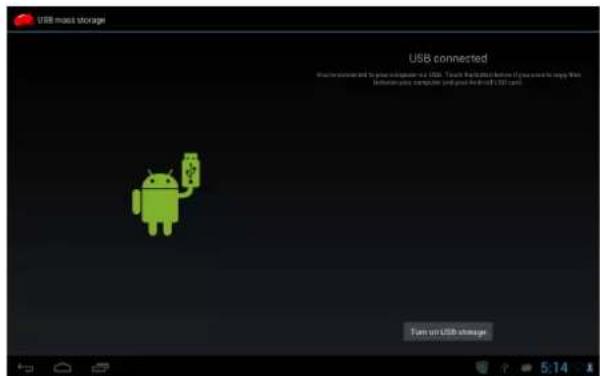
Click Turn on USB storage. Then the device can transmission data with PC.
Note: The device also supports the FAT32 format for external devices, for example U disk, Micro SD card to Transfer data.
Top bar of the Interface

A. USB connected. Select to copy files to/from your computer.
B. USB debugging connected. Select to disable USB debugging.
C. Time display: Display the time of the current system, which has been set.
D. WIFI signal status icon: If connected to the WIFI wireless network, the icon will be displayed.
E. Battery status icon: Displaying the current battery level and the charging status.
F. Back, Home, recent apps Screen menu virtual buttons.
Desktop
When sliding around with your finger to switch the main screen, the desktop fixed on the main screen, will not move. User could drag the application icon placed on the desktop area in the main screen.

Basic Operation

Click the "Settings" icon in the main applications area, you can open the system settings interface, as shown below:

Select the appropriate operation of the relevant items, such as: wireless and network, Display, date and time settings, about Device, etc
Date and time settings:
Click "Date & time" to enter the Date and time settings interface:
Select to set the date, select the time zone, set the time, time format, date format and other information.
For example, choose to set the date, as follows:
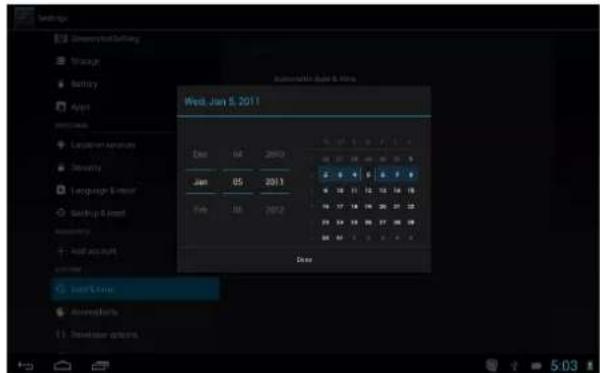
Click upward: that the increase of 1 unit,
Click down: that the reduction of 1 unit.
Also you can choose the number, enter the input mode. Directly entering the desired number, then click "Done" to set the Date.
Display settings
In the settings interface choose "Display" to enter the display settings interface, select "Brightness", Pull the progress bar to adjust the brightness, as below interface:
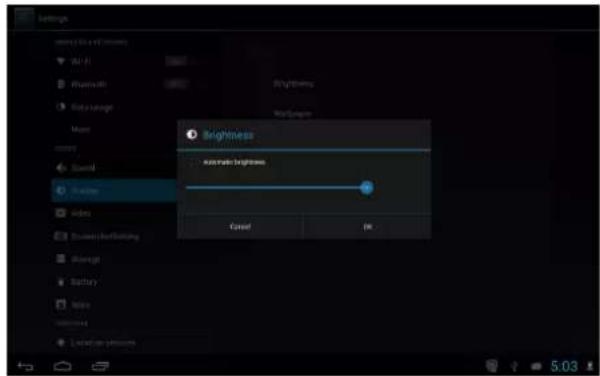
Click Sleep, Adjust the inactivity time of the device. You can press power key to activate the device. When display "Screen locked" interface, follow the prompts to unlock it

Wireless Connection:
Click the main menu "Settings" icon, go to "Settings" screen, click on "Wireless and networks" into the "Wireless and networks settings" interface. Turn on Wi-Fi switch, the Wi-Fi module built-in the device will search AP lists automatic, click the searched AP can be used, will pop up settings dialog, please follow the prompts to complete the WIFI network links. Some encrypted network, need to enter a valid key. As shown below:
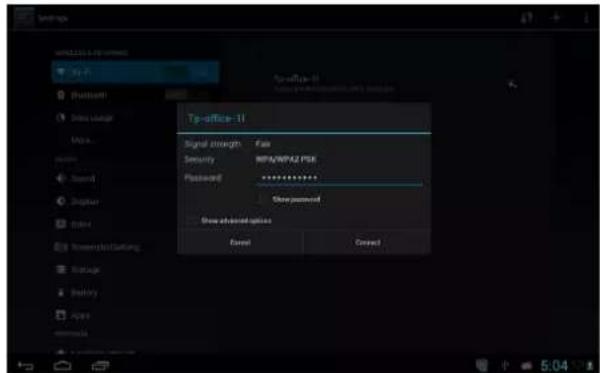
According to the above method to connected Wi-Fi, as shown below:

Applications install and uninstall
Install applications
- First you should select the Unknown sources which allow installation of non-Marekt apps.

- Copy the APK installer software to Micro SD or NAND FLASH.

- click FileManage to find the app directory, then Select applications to install.
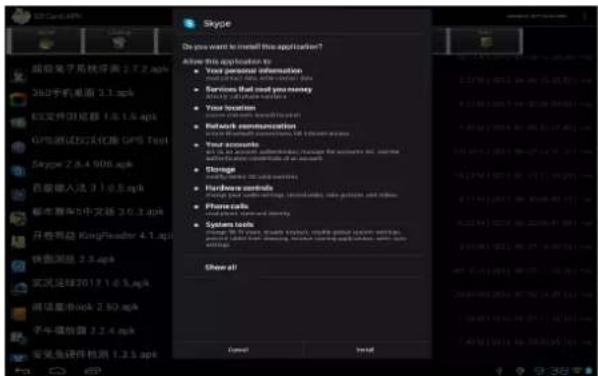
Users can "Android market" online installation, or download via the computer, or online through the machine built-in browser to download and install.
Uninstall applications
Pitch on the item "Settings - Apps -DOWNLOAD", select the appropriate application
has been installed, click the applications which you need to uninstall.
Browser
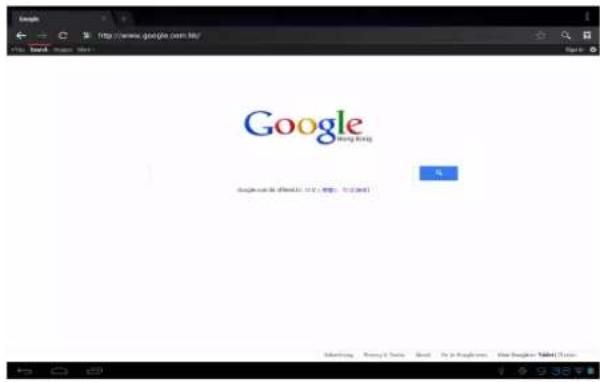
When the network connected, open the Web browser enter the URL, you can quickly browse the Web; or through the main desktop search bar enter the URL, open the web page.
Video player:
Online video: The product supports HTML5 online video playback.
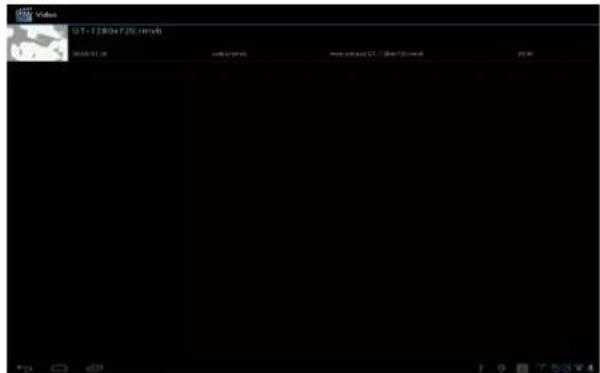
Local video: Click on the video icon, can load the local video play.

Click the music icon

, you can enter the music player interface.
Click the music files you will enter the player to play music.

Click “ Play the previous music, long press to fast reverse.
Click “ ” Click it to suspend, the icon turn to “ ▶”, click and return to the
normal playing again.
Click " ▶ " [To play the next song, long press to do function.
Click “ ≡ ” [To display the present playing list.
Click “ ✗” [To select the random playing mode.]
Click “ ” [To select the repeat playing mode.
Photo Browser

Click to get into Photo Browser directly. there will list all the picture files and video files. As shown below:

Select a picture file; enter the picture playback interface, as shown below. Can the following operation: double click image scaling, in the dropdown menu has "delete", "slideshow" and "Edit", "Crop," "Set picture as", "Details".

Camera
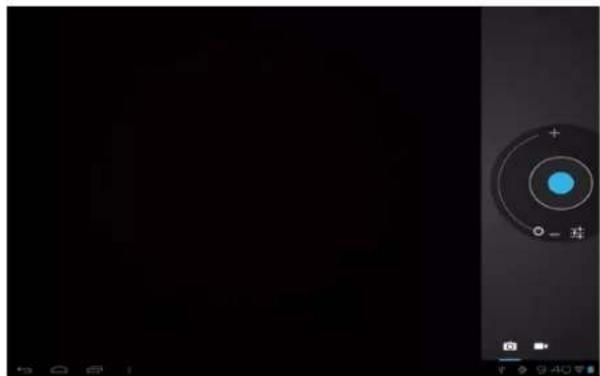
Photo Mode
Click the Camera icon

in the applications menu, as shown below.
Click the camera shutter

ake photos.
natural_image
Black background with a circular control knob and plus/minus signs, no readable text or symbols.Video mode:

Click on
the icon, conversion to video mode.
Click the camera shutter

ke videos.

natural_image
Black background with a circular target and red dot, no readable text or symbolsSound Recorder
Click the recorder icon

in the applications menu, as show below:

Note: Select "Record" button to record, when it is completed, select
"Stop" button. Choose "play" button to play already recorded voice.
Already the recorded voice can choose to "save" or "give up".

Google Play Store
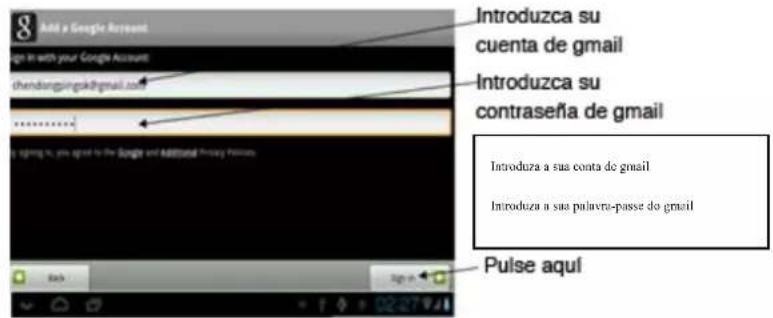
Click the icon into the "Play Store" interface. If have no Gmail account,
should create a Gmail account
Select "Accept" to enter market, as shown below

Frequently Asked Questions
Android
Q: What Android OS version is on my Device?
A: 4.2
APK
Q: What is APK?
A: APK is Android Package acronym that Android installation package.
Q: How to obtain the APK?
A: You can download via PC-side installation, you can also "Android market" online to download and install.
Q: Can I use any of my personal email addresses to send/receive email?
A: The device supports POP3 and SMTP accounts. Some free email accounts are not supported on mobile devices. Check with your email provider to see if you account is supported.
Q: Which media cards are compatible with my Device?
A: micro SD cards.
Music
Q: What type of music files can I play on my device?
A: MP3, WMA, MP2, OGG, AAC, M4A, FLAC, APE, WAV
Photos.
Q: What type of photo files can I view on my device?
A: JPG, JPEG, BMP, JPG and PNG.
Video
Q: What type of video files can I play on my device?
A: AVI ^3 GPMP4MPGRMRMVBMOVFLVWMV, MKV(max 1080p full HD video)
Q: Can I play YouTube videos on my device?
A: Yes. You can tap the YouTube application icon to quick access videos.
Wi-Fi
Q: Do I need a Wi-Fi adapter to connect to the Internet?
A: No. The Wi-Fi adapter is built-in to the device.
Important Safety Precautions
Always follow these basic safety precautions when using your Tablet. This reduces the risk of fire, electric shock, and injury.
Do not expose this product to rain or moisture.
Keep the device out of direct sunlight and heat sources.
Protect the power cord. Route power cords so that they are not likely to be walked on or pinched by items placed on or against them. Pay particular attention to the point where the cord attaches to the device.
Only use the AC adapter included with the device. Using any other power adapter voids your warranty.
Do not remove the cover. There are no user-serviceable parts inside.
Clean your Device.
Treat the screen gently. To clean fingerprints or dust from the screen, we recommend using a soft, non-abrasive cloth such as a camera lens cloth.

TABLET PC PRIXTON
T7009 Flavours
natural_image
Illustration of a tablet device displaying a scenic landscape with green fields and hills, shown from front and side views (no text or symbols)Introdução básica
natural_image
Digital display screen showing a clock face and a camera icon, no readable text or symbols present.Conexão sem fios:
- Copie o software do instalador APK no cartão Micro SD ou NAND FLASH.

Leitor de vídeo
Pressio
natural_image
Grid of 20 grayscale photo thumbnails displayed in a photo editing interface (no text or symbols on images)natural_image
Colorful pencils arranged in a circular pattern on a textured surface (no text or symbols visible)Câmara
natural_image
Close-up of a black camera module with a blue circular dial and control buttons (no text or symbols visible)Gravador


Prima aqui

Prima aqui

- Introducción básica
- Cámara
- Grabadora
- Device description
- Basic specification
- Quick Start
- Boot and Shutdown
- Connect with PC
- Top bar of the Interface
- Desktop
- Basic Operation
- Date and time settings:
- Display settings
- Wireless Connection:
- Applications install and uninstall
- Install applications
- Uninstall applications
- Browser
- Video player:
- Photo Browser
- Camera
- Sound Recorder
- Google Play Store
- Frequently Asked Questions
- APK
- Q: What is APK?
- Important Safety Precautions
- TABLET PC PRIXTON
- Introdução básica
- Conexão sem fios:
- Leitor de vídeo
- Câmara
Brand : Prixton
Model : T7009
Category : Tablet