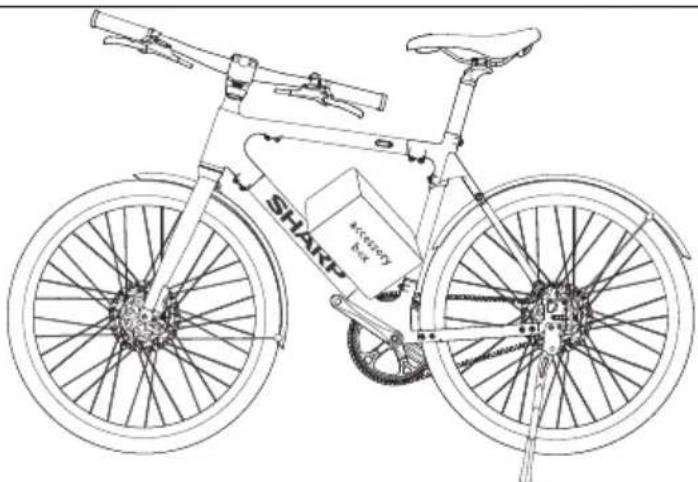
BK-RS08EB - Electric bike SHARP - Free user manual and instructions
Find the device manual for free BK-RS08EB SHARP in PDF.

| Product type | Electric bike |
| Brand | Sharp |
| Model | BK-RS08EB |
| Frame size | 21 inches (53 cm) |
| Seat height | 880 mm - 1100 mm (adjustable) |
| Wheelbase | 1034 mm |
| Weight | 19 kg |
| Maximum load | 120 kg |
| Motor | 36V, 250W, rear wheel hub |
| Battery | LG Lithium-Ion, 36V, 7Ah/252Wh (integrated into down tube) |
| Charging time | 2 to 3 hours |
| Maximum range | Up to 80 km (depending on conditions) |
| Maximum speed | 25 km/h (EU compliant) |
| Drive | Gates® CDN carbon belt, single-speed |
| Brakes | Tektro® HD-M285 hydraulic disc brakes, 180 mm rotors |
| Tires | Kenda® 700C × 28C, Presta valves |
| Display | Color TFT LCD, IP66 waterproof |
| Lighting | Battery-powered front and rear lights (20 lux) |
| Connectivity | Bluetooth, compatible with SHARP Life app |
| Assistance levels | 5 modes: ECO, NORMAL, TOUR, POWER, BOOST |
| Sensor | Cadence sensor |
| Maintenance | Weekly, monthly, and semi-annual checks; clean with a damp cloth |
| Safety | Helmet mandatory; obey traffic rules; check brakes and lights before each ride |
| Spare parts / Repairability | Brake pads, tires, belt, battery, motor and other replaceable parts; contact a professional for complex repairs |
Frequently Asked Questions - BK-RS08EB SHARP
User questions about BK-RS08EB SHARP
0 question about this device. Answer the ones you know or ask your own.
Ask a new question about this device
Download the instructions for your Electric bike in PDF format for free! Find your manual BK-RS08EB - SHARP and take your electronic device back in hand. On this page are published all the documents necessary for the use of your device. BK-RS08EB by SHARP.
USER MANUAL BK-RS08EB SHARP
BK-RS08EB, BK-RS08ES
Electric Bike

*Product images are for illustration purpose only. Actual product may vary.
Trademark:

Bluetooth®
The Bluetooth ^® word mark and logos are registered trademarks owned by Bluetooth SIG, Inc.
Use this Quick Guide to set up and start using your e-bike. For more detailed information on your model of e-bike, please refer to the on-line manual which can be found by following the link below or scanning the QR Code:

www.sharpconsumer.com/RS08EB/#down

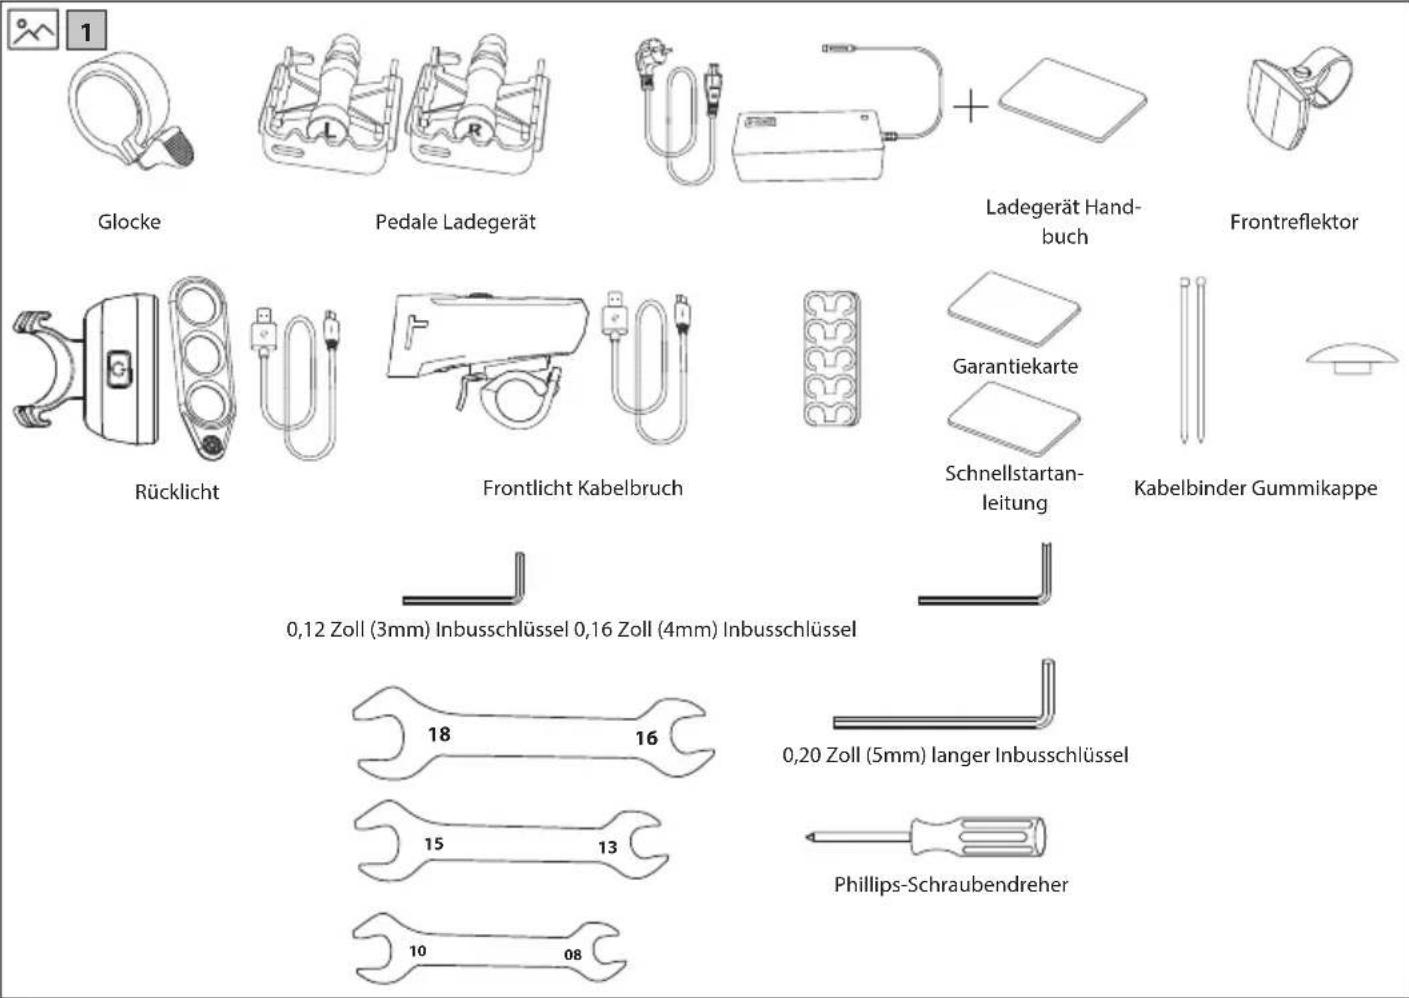
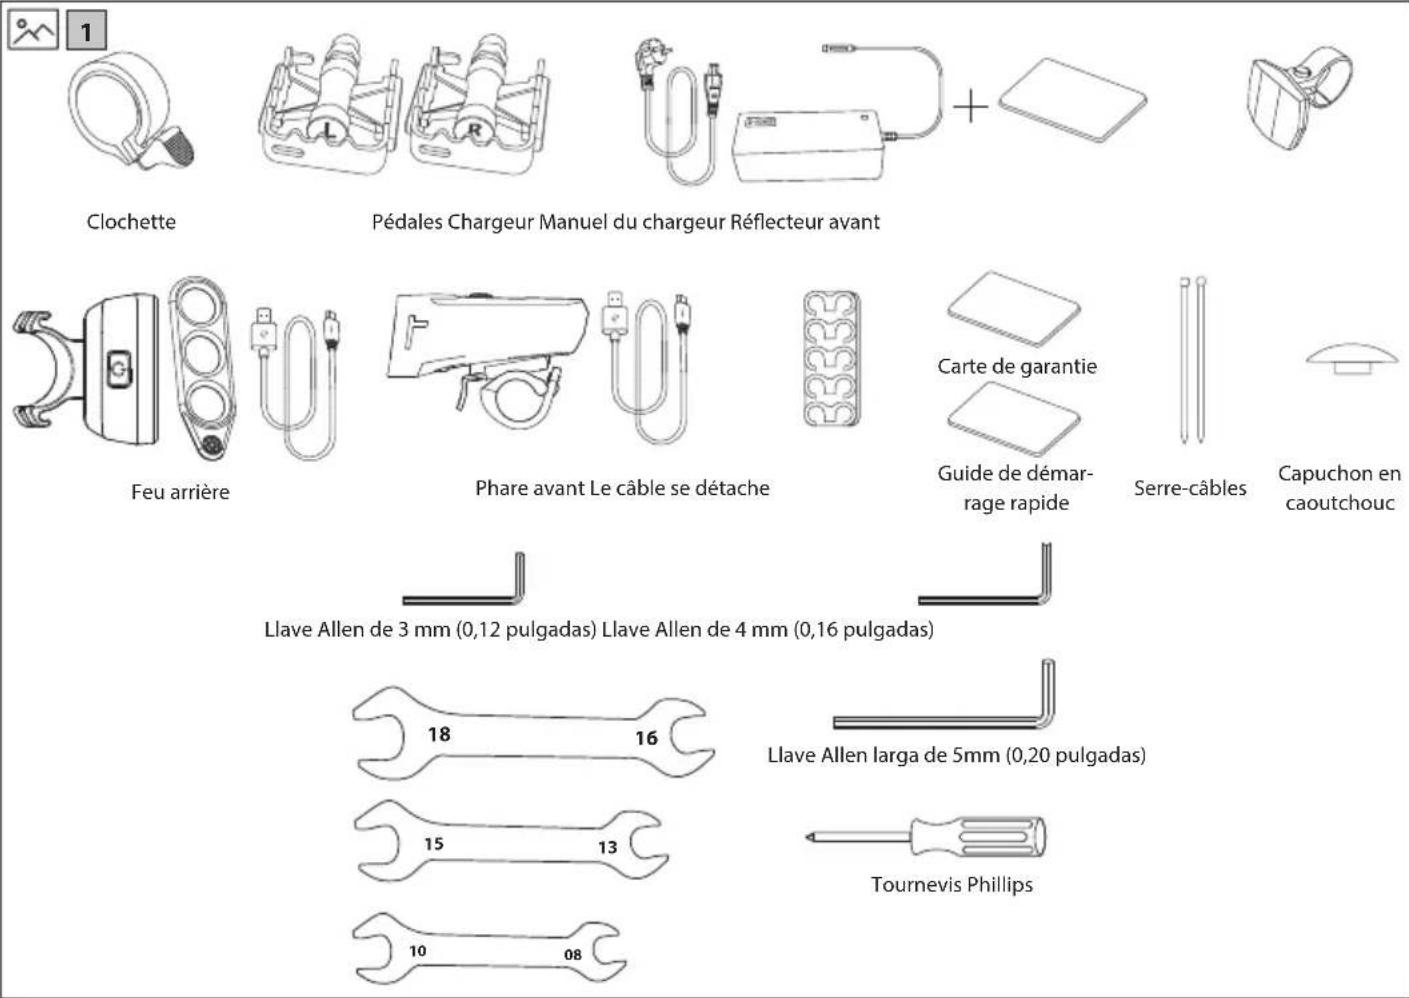
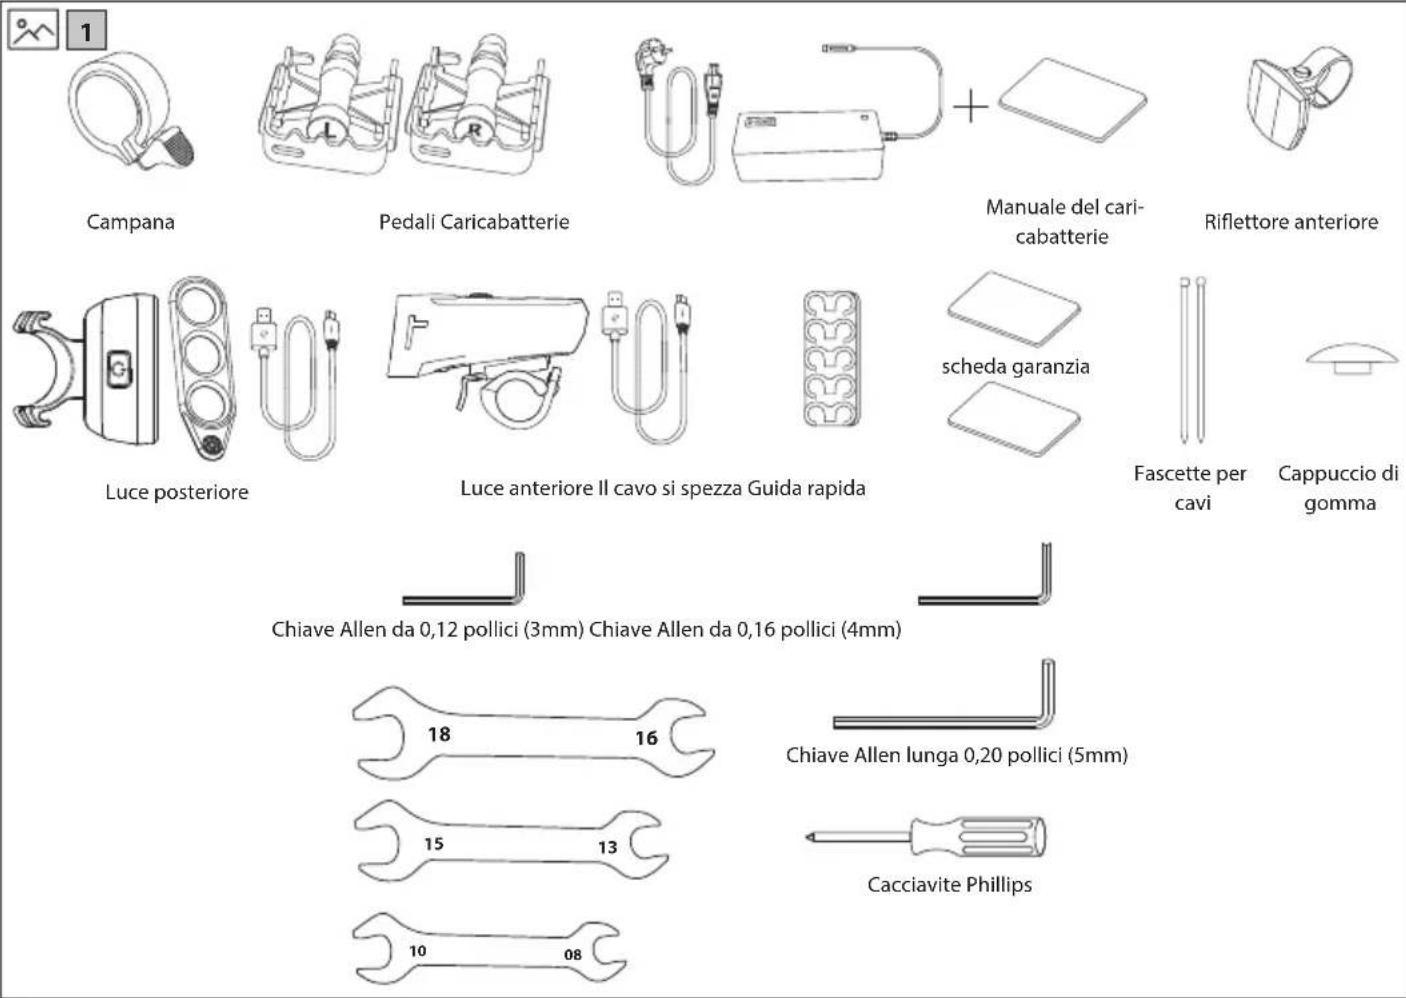
1
Bell
natural_image
Technical line drawing of two mechanical components with labeled parts L and R (no text or symbols beyond labels)
natural_image
Simple line drawing of a medical or laboratory setup with tubing, a box, and a separate rectangular block (no text or symbols)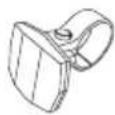
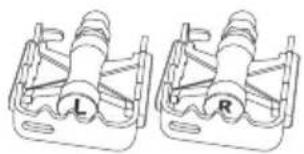
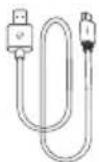
Pedals Charger Charger manual Front reflector

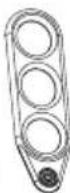
Rear light
natural_image
Line drawing of a handheld device with a coiled cable and plug, no text or symbols present
Front light Cable snaps Quick start guide
Warranty card


Cable ties Rubber Cap
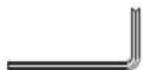
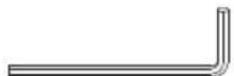
0.12 inch (3mm) Allen Key 0.16 inch (4mm) Allen Key
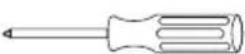
Phillips Screwdriver

2
natural_image
Line drawing of a Shark bicycle with visible front wheel, rear wheel, and front basket (no text or symbols)Important safety instructions
Please, read these safety instructions and respect the following warnings before the appliance is operated:

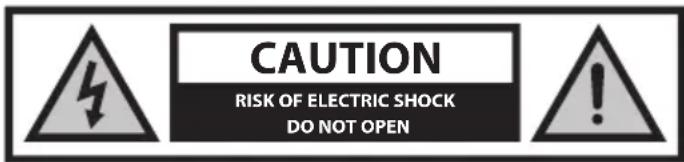
The lightning flash with arrowhead symbol, within an equilateral triangle, is intended to alert the user to the presence of uninsulated "dangerous voltage" within the product's enclosure that may be of sufficient magnitude as to constitute a risk of electric shock to persons.

The exclamation point within an equilateral triangle is intended to alert the user to the presence of important operating and maintenance (servicing) instructions in the literature accompanying the appliance.

This symbol means that the product should be disposed of in an environmentally friendly manner and not with general household waste.

AC voltage

Class II equipment
In order to prevent fire always keep candles and other open flames away from this product.

IMPORTANT: Read the following carefully and keep for future reference.
CAUTION: Wear a protective helmet!
To reduce the risk of injury, wear a suitable helmet when riding!
Risk of accident and injury
- Incorrect operation of the e-bike due to insufficient knowledge may cause an accident. Please familiarize yourself with the features of the e-bike before riding.
- Familiarize yourself with the brake lever in advance if you are not sufficiently aware of the front and rear brakes' placement. Please also adjust accordingly before riding.
- Please make sure the brakes are properly adjusted and function well.
CAUTION: Hardware may not be fully tightened, including but not limited to bolts, nuts, the front hub shaft, the rear wheel, steering mechanisms (handlebar, stem), the brake system, the driving system, pedals, etc. To reduce the risk of injury, ensure that all bike hardware is locked tightly and correctly into position and that there is no loss of equipment, breakage, or other types of damage.
CAUTION: This bike is designed for adults. Children may only ride under the supervision of adults.
To reduce the risk of accident and injury, make sure that the bike and any of its structures are not within the reach of children under the age of 3.
CAUTION: Component breakage due to improper use of the bicycle may occur.


Risk of accident and injury!
- Do not ride over ramps or mounds with the bicycle.
- Do not ride this bicycle in cross-country cycling.
- Do not ride the bicycle over stairs, rocks, or other steps with a height greater than 15 cm.
Improper additions or alterations to the bicycle and incorrect accessories can cause the bicycle to malfunction.
To reduce the risk of accident and injury, do not add any extra accessories that are not purchased from the seller or without getting permission from the seller, including but not limited to child safety seats, trailers, etc.
CAUTION: Do not ride the bicycle in a risky way.
To reduce the risk of accident and injury, ride the bicycle only in the correct way. Make sure you are able to control the bike, and do not try dangerous actions, including but not limited to riding with no hands, jumps, and wheelies.
DANGER: Lack of bicycle maintenance presents risk of accident and injury Check the bike before every ride, including but not limited to brake function, tire wearing and PSI, bolt and nut condition, steering, and spokes tension.
If you hear any abnormal noise while riding, stop immediately and check the entire bike.
CAUTION: Ensure full compliance with local law.
Risk of fines and confiscation!
Before riding the bike, make sure the bike aligns with the standards of your local law.
Reflectors are not a substitute for required lights. Riding at dawn, at dusk, at night or at other times of poor visibility without an adequate bicycle lighting system and without reflectors is dangerous and may result in serious injury or death.
If your bicycle does not fit properly, you may lose control and fall. Bolts that are too tight can stretch and deform.
Do not expose your battery to high temperatures.
Riding with improperly adjusted brakes or worn brake pads is dangerous and can result in serious injury or death.
Never inflate a tire beyond the maximum pressure marked on the tire's sidewall or the wheel rim. If the maximum pressure rating for the wheel rim is lower than the maximum pressure shown on the tire, always use the lower rating. Exceeding the recommended maximum pressure may blow the tire off the rim or damage the wheel rim, which could cause damage to the bike and injury to the rider and bystanders. The best and safest way to inflate a bicycle tire to the correct pressure is with a bicycle pump which has a built-in pressure gauge.
Applying brakes too hard or too suddenly can lock up a wheel, which could cause you to lose control and fall. Sudden or excessive application of the front brake may pitch the rider over the handlebars, which may result in serious injury or death.
Stop the charging procedure immediately if you notice a strange smell or smoke.
- SHARP is not responsible for injury/death caused by improper use.
- Sharp is not responsible if you do not comply with local regulations and restrictions.
- The warranty does not cover damages caused by improper use of the device, especially in case use for non-domestic purposes and alterations and / or adaptations necessary for countries or regions, for which it was not originally designed.
- Always abide by local traffic rules and national laws and regulations while using your e-bike.
- Always adhere to the local speed limit. DO NOT exceed the speed limit for your e-bike.
• Always wear safety protection equipment when in use.
• Always wear a safety helmet when riding your e-bike. - Always ride with both hands holding the handles, never ride with one handed.
- Do not ride in bad weather.
-
Do not use this e-bike to perform stunts or dangerous maneuvers. It is a bike designed for domestic use.
-
Do not carry people or items such as bags.
- Ride slowly in crowded places.
- Ensure that all screws and fasteners are tight and normal before use.
- Make sure that the folding shaft enters the slot when unfolding the e-bike.
- Do not ride on uneven roads, water, oil or ice.
- Do not weave through traffic or make moves which are unpredictable to other people.
- Do not ride the e-bike if outside of the countries age limits.
- Do not ride the e-bike over the countries legal speed limit for e-bikes.
- Do not use the e-bike if it is damaged.
- Do not use the e-bike if the battery emits a peculiar smell and/or heats up.
- Do not use the e-bike if liquid leaks out of it, avoid contact and place out of the reach of children.
- Before use, ensure that the e-bike is not damaged. Do not ride if there is any damage.
- Ensure that you read all of this User Manual before using the e-bike.
- Learn how to ride your e-bike before using in a public space.
- This e-bike can be identified by the model and serial number located on the rating plate.
- Propulsion is via an electric motor located in the driving wheel.
- Only one person may ride on the e-bike.
- Do not modify this e-bike in any way.
- Do not use any parts or accessories unless recommended or approved by SHARP.
- Ride the e-bike on level surfaces. Do not exceed the specified incline.
- Excessive use will reduce the lifetime of this e-bike.
- Caution, brakes and associated parts may become hot during use. Do not touch after use.
Battery and Charger Warnings
- Do not power on the e-bike while charging
• After the battery is fully charged, disconnect the charging cable.
- The battery indicator in the display will show the battery lifetime.
- During discharge, when the battery is in its final stage, there may be a drop in the power output transmitted to the motor, stop riding and recharge the battery.
- When the battery is low, it may result in weakened electric power assistance. It is recommended that you start charging at 20 - 40% charge.
- Charge the battery after every use.
- If the e-bike is not used for a long time, charge it at least once a month. Note that if the battery is not charged for a long time, the battery will enter a self-protection state and will fail to charge. In this case, please contact your dealer.
- When charging, plug the charger into the charging port before plugging to the wall socket.
- While charging the indicator light of the charger is red; this means the charging is normal. When the indicator light turns green, charging is complete.
- Only use the original charger to charge the battery.
- The charger has an overcharge protection function, if the e-bike is 100% fully charged, the charger will automatically stop charging.
- Dispose of batteries and e-bikes in compliance with the applicable regulations in your country.
Batteries
- Do not expose batteries to high temperatures and do not place them in locations where the temperature might increase quickly, e.g. near fire or in direct sunshine.
- Do not expose batteries to excessive radiant heat, do not throw them into the fire, do not disassemble them and do not try to recharge non-rechargeable batteries; they could leak or explode.
- Disposal of a battery into fire or mechanically crushing or cutting a battery can result in an explosion.
• Leaving a battery in an extremely high temperature surrounding environment can result in an explosion or the leakage of flammable liquid or gas. - A battery subjected to extremely low air pressure may result in an explosion or the leakage of flammable liquid or gas.
- CAUTION: Risk of explosion or damage to equipment, if incorrect type batteries are used.
- Never use different batteries together or mix new and old batteries together.
- Do not use any batteries other than those specified.
Disposal of this equipment and batteries
- Do not dispose of this product or its batteries as unsorted municipal waste. Return it to a designated collection point for the recycling of WEEE in accordance with local law. By doing so, you will help to conserve resources and protect the environment.
- Most of the EU countries regulate the disposal of batteries by law. Recycling symbol appears on electrical equipment, packaging and batteries to remind users to dispose these items correctly. Users are requested to use existing return facilities for used equipment and batteries. Contact your retailer or local authorities for more information.
Removal of battery for disposal
- The battery is hidden inside the down-tube. Both tube sides have hot melt adhesive to fix the battery and cable. To remove the battery, please remove all the screws on the bike frame and remove the down-tube.
CE statement:
- Hereby, Sharp Consumer Electronics Poland sp. z o.o. declares that this equipment is in compliance with the essential requirements and other relevant provisions of RED Directive 2014/53/EU.
- The full text of the EU declaration of conformity is available by following the link www.sharpconsumer.com and then entering download section of your model and choosing "CE Statements".

www.sharpconsumer.com/contact/

www.sharpconsumer.com/support/

www.sharpconsumer.com/documents-of-conformity/

What's in the Box:
Quick Start Guide (this document)
E-Bike Parts
- 1 × Frame and Rear Wheel
- 1 × Front Wheel
- 1 × Thru-axle
- 1 × Handlebar
- 1 × Saddle and Saddle Pipe
- 2 × Fender
- 1 × Kickstand
Accessories Box
- 5 × Cable Snaps
- 1 × Charger
- 1 × Manual
- 3 × Allen key
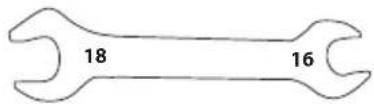
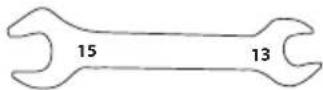
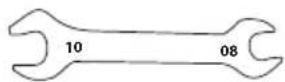
- 3 × Open End Wrench
- 1 × Phillips Screwdriver
Accessories Box
(Refer to 1 on page 1)
Bike Parts
(Refer to 2 on page 1)
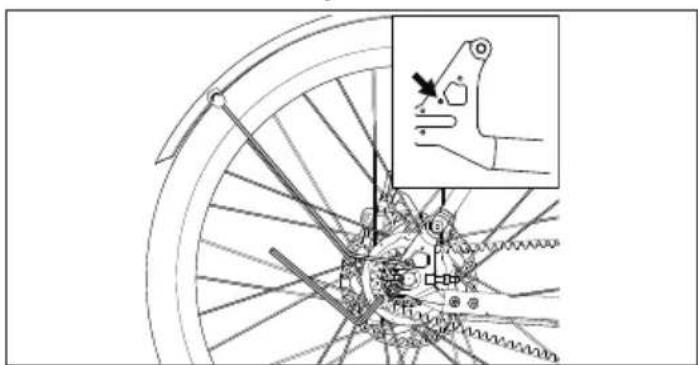
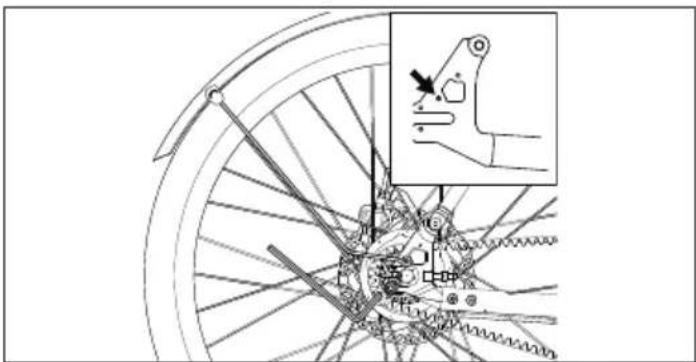
Bike Frame Number
The bike frame number can be found stamped on the bottom bracket, as shown in the Figure. It is the unique identifier for your e-bike. When your bike is stolen, it's the serial number that gives you the biggest chance of getting it back. It would be a good idea to write it somewhere or take a picture.
Assembling the E-bike
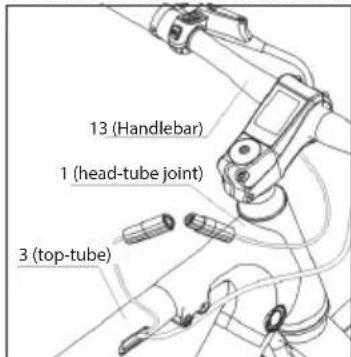
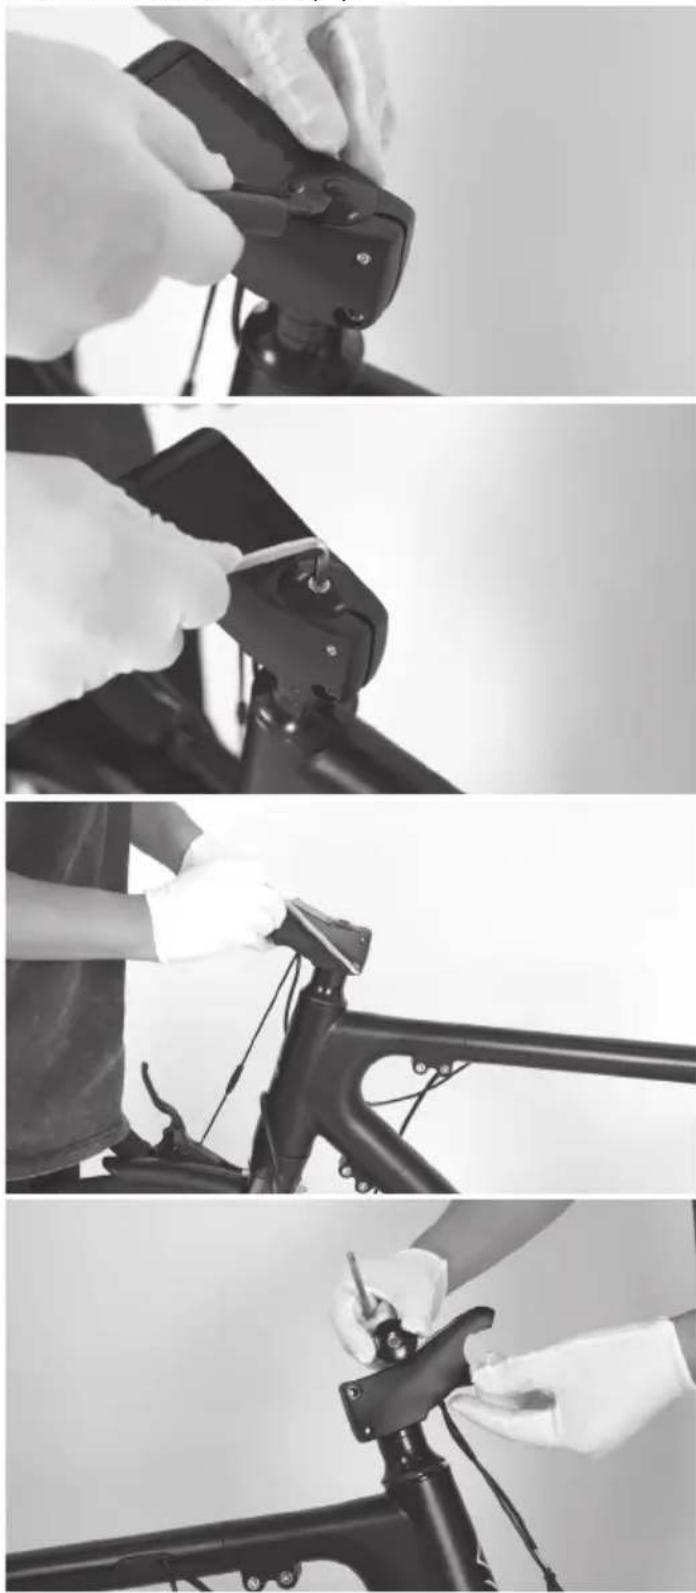
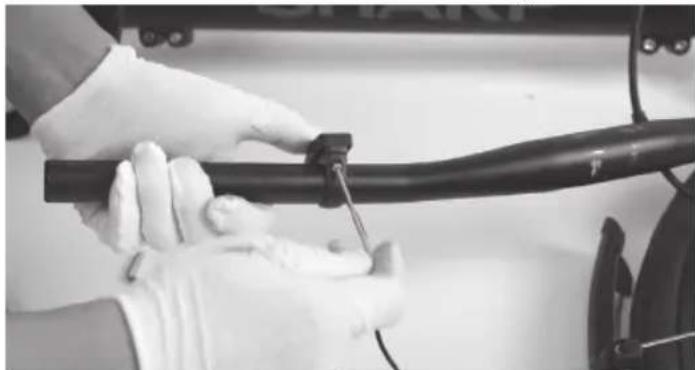
STEP 1: Install and adjust the handlebar
a. Remove the rubber cap on the top of the stem.
b. Loosen the two screws on the side of the stem and the long screw on the top of the stem with a 5 mm Allen key, then turn the display 180 degrees, as shown in Figure 1-1 and 1-2.
c. Re-tighten the screws.
d. Put back the rubber cap on the top of the stem.
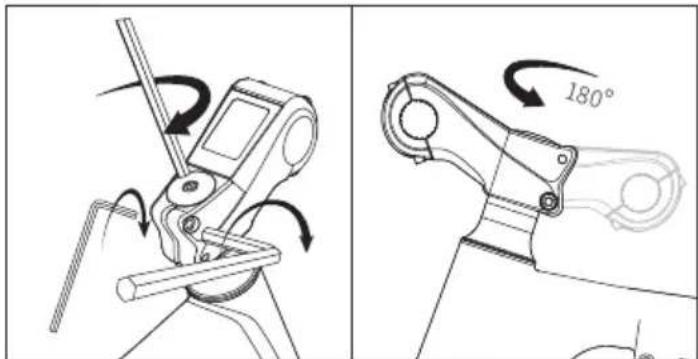
Figure 1-1 Figure 1-2
NOTE:
Make sure the torque of the screw on the top is about 4-6 N·m.
Make sure the torque of the ones on the side is about 10-12 N·m.
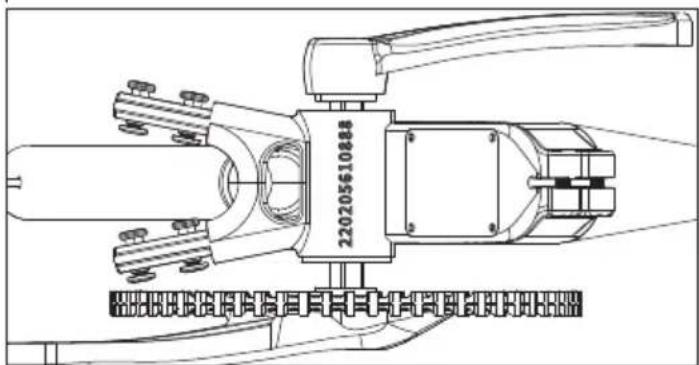
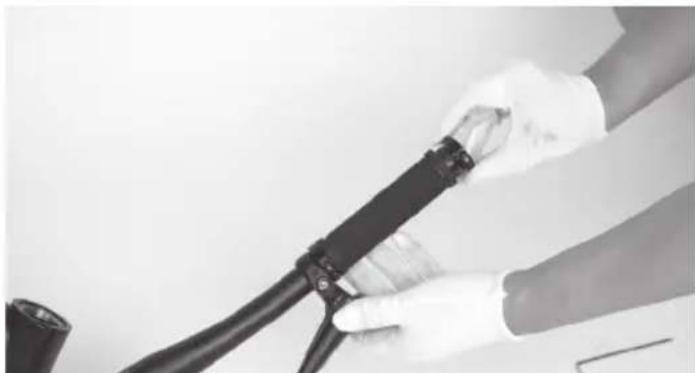
a. Loosen the four screws on the handlebar clamp in a counterclockwise direction with a 5 mm Allen key, then remove the screws and front cover, as shown in Figure 1-3 and 1-4.

natural_image
Technical line drawing of a robotic arm with articulated joints and control knobs (no text or symbols)Figure 1-3 Figure 1-4
b. Place the handlebar in the center of the stem clamp when the user is on the saddle and make sure it is oriented correctly. The control buttons on the left. Reinstall the front cover and tighten the screws securely, but not completely.

natural_image
Line drawing of a bicycle with propeller and wheel (no text or symbols)c. Push the handlebars left and right to center them; rotate them slightly so that the brake levers are angled downwards. Then, gradually tighten the screws in an A-B-C-D sequence, as shown in Figure 1-5.

natural_image
Line drawing of a mechanical device with lever and base (no text or symbols)
Figure 1-5
NOTE: Make sure the torque of bolts ABCD is about 6-8 N·m.
STEP 2: Cable management
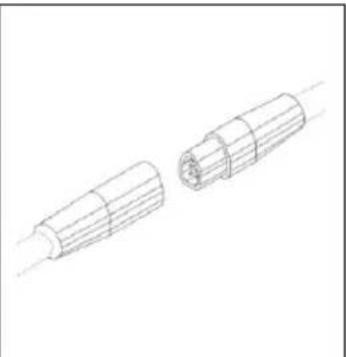
a. Connect the display sensor cable, as shown in Figure 2-1 and Figure 2-2.
b. Add cable snaps to manage the cables.

natural_image
Line drawing of two cylindrical electronic components with internal structure, shown from different angles (no text or symbols)Figure 2-1 Figure 2-2
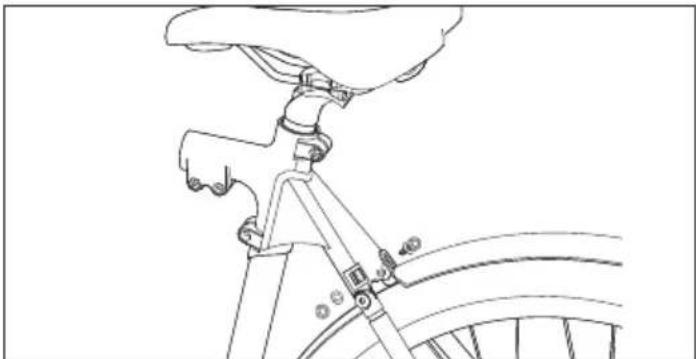
STEP 3: Install the seat
a. Loosen the bolts F and J in a counterclockwise direction with a 5 mm Allen key, insert the seat post in frame, as shown in Figure 3-1.
b. Adjust the saddle height to your proper height. Do not exceed themaximum height limit of the saddle, as shown in Figure 3-2. Then tighten bolts F and J.
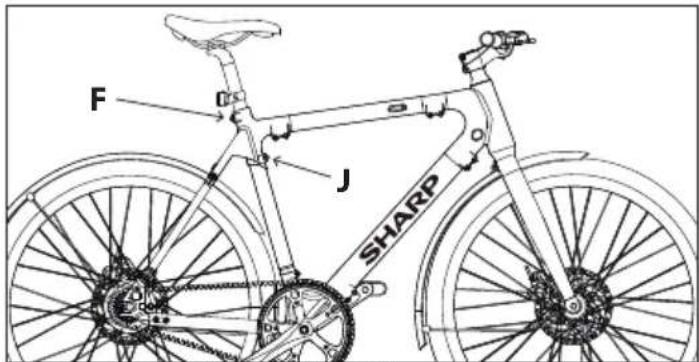
Figure 3-1

natural_image
Line drawing of a bicycle leg and seat assembly (no text or symbols)Figure 3-2
NOTE: Make sure the torque of bolts F and J is about 20 N·m
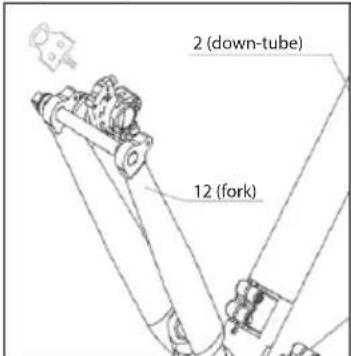
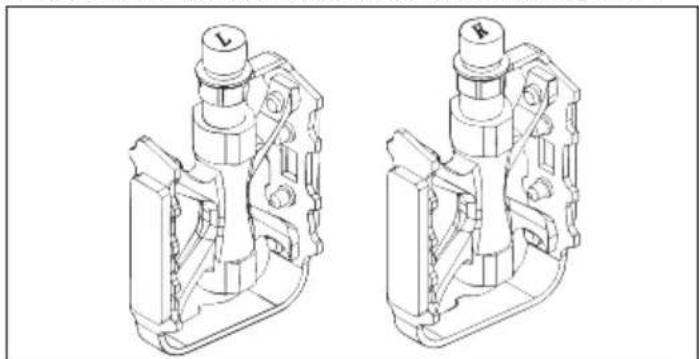
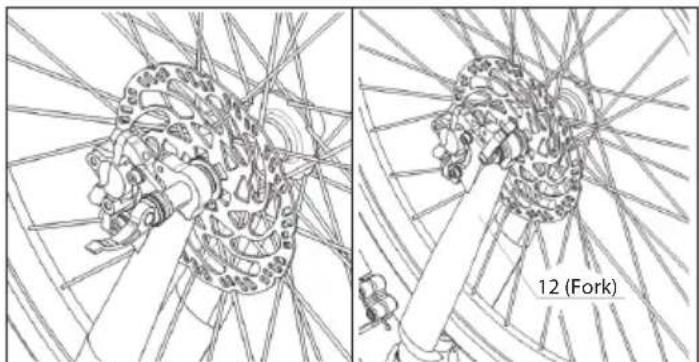
STEP 4: Install the front wheel
You need to turn the e-bike upside down before installing front wheel.
a. Pull off the plastic chip from the brake caliper, as shown in Figure 4-1.
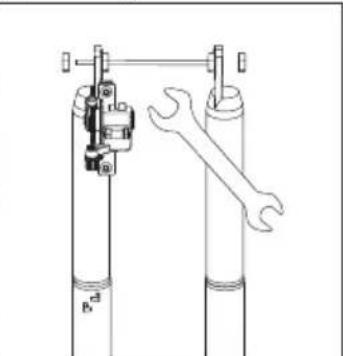
b. Use a 15 mm open-end wrench to loosen screws and in sequence, as shown in the Figure 4-2, and remove the front fork protector.
c. Place the front wheel into front fork, making sure to carefully insert the disc in between the brake calipers, as shown in Figure 4-3.
d. Insert the quick release lever from the disc side as far as you can. You may need to slightly adjust the front wheel so that the quick release lever can pass smoothly. Screw clockwise it in until it feels tight, as shown in Figure 4-4.
e. Lock the quick release lever, as shown in Figure 4-5. It is much better to put the quick release lever pointing upwards aligned with the fork arm.
natural_image
Technical line drawing of two cylindrical mechanical components with a wrench, no text or symbols presentFigure 4-1 Figure 4-2

Figure 4-3

natural_image
Technical line drawing of a mechanical assembly with intersecting rods and a fork, no text or symbols presentFigure 4-4 Figure 4-5
NOTES:
If there is no tension when locking the quick release lever, you will need to tighten it more.
This step is very important and related to ride safety. If you cannot complete the installation as required, please seek the help of a professional.
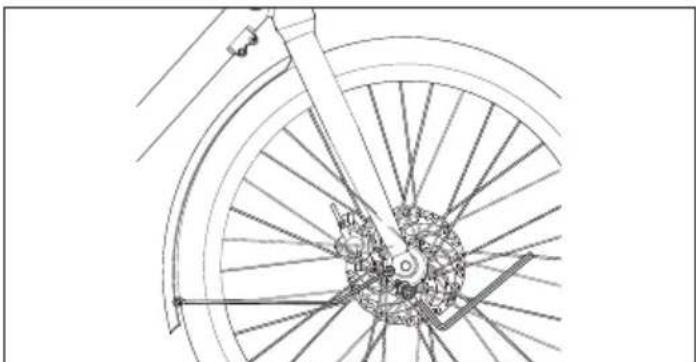
STEP 5: Install the front fender
a. Use a 10 mm open-end wrench to loosen the fender bolt nut on the inside of the front fork bridge, and then remove the bolt and nut.
b. After aligning the fender with the screw hole, retighten the mounting screws to affix it onto the front fork, as shown in Figure 5-1.
c. After confirming that the front fender is aligned with the screw hole, use a 5 mm Allen key to push the bolt and a 10 mm open-end wrench to retighten the nut on the other side. Don't forget the spacers.
d. After fastening the upper bracket, use a 4 mm Allen key to remove the 2 screws at the bottom of the front fork. Then, align the legs of the front fender with the installation holes at the bottom of the front fork, as shown in Figures 5-2 and 5-3, and then re-tighten the screws to about 3-5 N·m.

natural_image
Line drawing of a bicycle wheel with visible frame and hub (no text or symbols)Figure 5-1

natural_image
Technical line drawing of a bicycle wheel with visible spokes, hub, and gear mechanism (no text or symbols)Figure 5-2

natural_image
Line drawing of a bicycle wheel and suspension bracket (no text or symbols)Figure 5-3
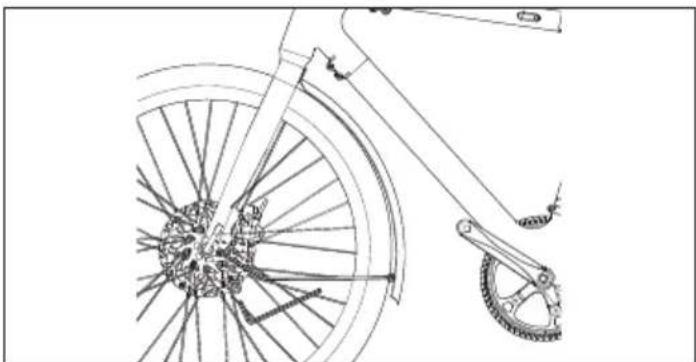
STEP 6: Install the rear fender
a. Use a 10 mm open-end wrench to loosen the fender bolt nut on the seat tube joint, and then remove the bolt and nut.
b. After aligning the fender with the screw hole, retighten the mounting screws to affix it onto the seat tube joint, as shown in Figure 6-1.
c. After confirming that the front fender is aligned with the screw hole, use a 5 mm Allen key to push the bolt and a 10 mm open-end wrench to retighten the nut on the other side to the torque of 4-6 N·m. Don't forget the spacers.
d. After fastening the upper bracket, use a 4 mm Allen key to remove the 2 screws at the dropout. Then, align the legs of the fender with the installation holes, as shown in Figures 6-2 and 6-3, and then re-tighten the screws.
natural_image
Line drawing of a bicycle's front wheel and seat assembly (no text or symbols)Figure 6-1

natural_image
Technical line drawing of a bicycle wheel assembly with gear and hub components (no text or symbols)Figure 6-2

natural_image
Mechanical assembly diagram showing a wheel with levers and gear mechanism, no text or symbols presentFigure 6-3

natural_image
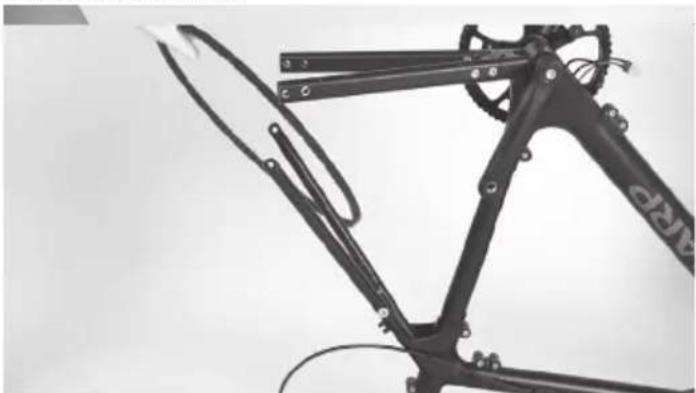
Technical line drawing of a bicycle wheel assembly with labeled components (no text or symbols)Figure 8-1
STEP 7: Connect the Cable
Turn your bike up side down.
a. Loosen the four screws on the cover next to the bottom bracket in a counterclockwise direction with a 3 mm Allen key, then remove the screws and the cover, as shown in Figure 7-1.
b. Connect the cable between the battery and the controller, as shown in Figure 7-2.
c. Put the cover back and re-tighten the screws.

Figure 7-1
NOTES:
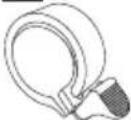
Check the end cap on both pedals to identify the left pedal and right pedal. Please note that the right pedal will tighten clockwise, while the left pedal will tighten counterclockwise. Make sure the torque is 18 N·m.
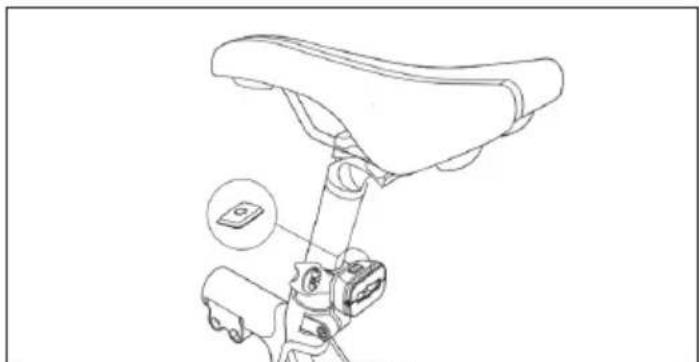
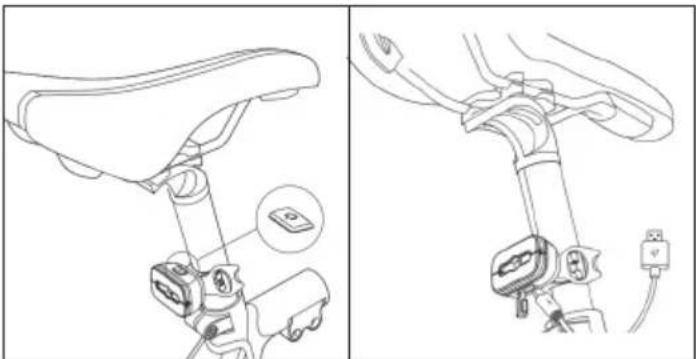
STEP 9: Install the lights, reflector, etc.
a. Mount the front light on the handlebar, as shown in Figure 9-1.
b. Mount the tail light on the saddle pipe, as shown in Figure 9-2.
c. Mount the front reflector and bell on the handlebar, as shown in Figure 9-3.

natural_image
Technical line drawing of mechanical components including a tool, bracket, and clamp (no text or symbols)Figure 9-1

Figure 7-2

natural_image
Technical line drawing of a bicycle seat assembly with a close-up inset showing a small device (no text or symbols present)Figure 9-2
STEP 8: Install the pedals
a. Use the 15 mm wrench to mount the pedals, as shown in Figure 8-1.
natural_image
Technical line drawing of two mechanical components with no visible text or symbols
natural_image
Technical line drawing of a mechanical device with lever and grip assembly (no text or symbols)Figure 9-3
STEP 10: Install the kickstand
a. Loosen screws and washers and then remove them from the dropout, as shown in Figure 10-1.
b. Use a 5 mm Allen key to mount the kickstand onto the dropout, and retighten the screws to the torque of 10-12 N·m.

natural_image
Technical line drawing of a bicycle wheel assembly with visible spokes and hub (no text or symbols)Figure 10-1
Pumping a bicycle tire
To pump your tires, you will need:
Bicycle pump with Presta valve compatibility
or
Presta valve adapter (if your pump does not have a built-in Presta valve head) not included.
How to pump a tire
a. If your pump has a dual head (fits both Presta and Schrader valves), make sure it's set up for Presta valves. If your pump is not Presta-compatible, you'll need a Presta valve adapter. Attach the adapter to the pump head.
b. On the bicycle, unscrew the small nut at the top of the Presta valve by turning it anti-clockwise. This allows the valve to open and allows air to flow into the tire.
c. Press down on the Presta valve to release a small amount of air. This helps ensure that the valve is not stuck and allows the pump to engage properly.
d. Press your pump onto the Presta valve as far as you can.
e. If your pump has a lever, flip it down to secure the pump head onto the Presta valve. This creates an airtight seal.
f. Begin pumping air into the tire.
g. Once you've reached the desired tire pressure, disconnect the pump head by releasing the lever or unscrewing it.
h. Screw the small nut at the top of the Presta valve clockwise to close it.
How to use the E-bike
Fully charge the battery before first use.
How to charge
a. Open the rubber cap and plug the charger into the e-bike charge port Figure 11-1. Make sure that the charger port is in the given direction, as shown in Figure 11-2.
b. Plug the charger into the mains wall socket.
c. When connected to the battery charger, the battery will start to charge and the charge indicator on the charger will turn red.
d. After the charging is complete, the charge indicator will turn green. Remove the battery charger when fully charged.
e. Close the rubber cap after charging.

Figure 11-1 Figure 11-2
How to start an E-bike
ON/OFF
Press and hold the power button ON/OFF for 3 seconds to turn on the display.
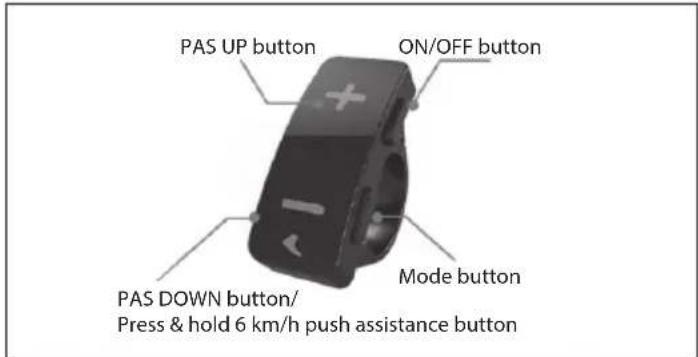
Pedal Assist Level
The Motor offers five Bike Assists Models: ECO, NORMAL, TOUR, POWER, BOOST. Short press Up or Down to switch the pedal assist level.
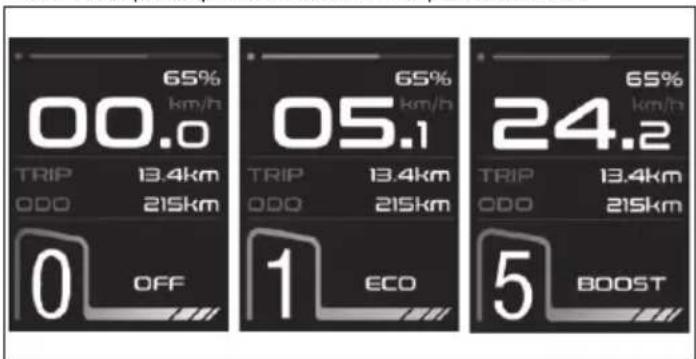

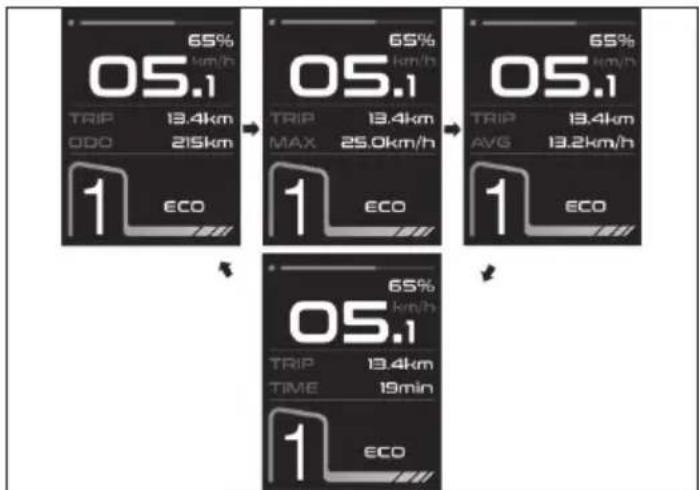
Display Interface
By default the display shows real-time speed (km/h), the single mileage (km), and the Total mileage (km). Press the MODE button briefly to switch.
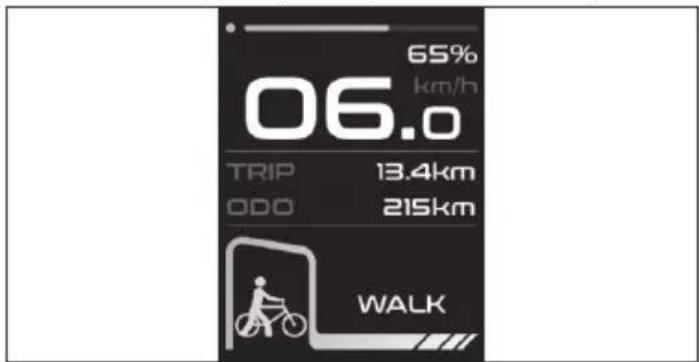
Walk Assist
Pressing and holding the Down Button for 3 seconds activates Walk-Assist Mode. The e-bike will go in a speed of up to 6 km/h automatically.
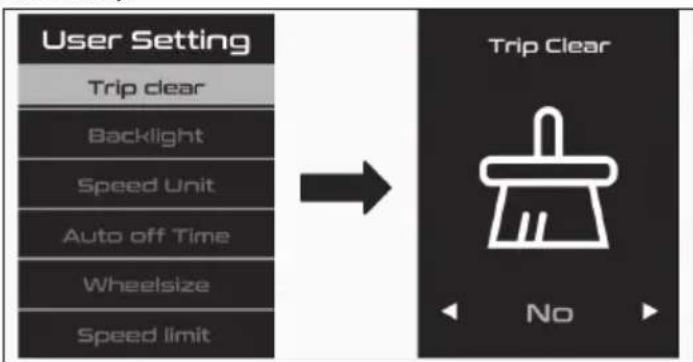
Settings Menu
Press and hold the Mode button for 2 seconds, and enter the Settings interface.
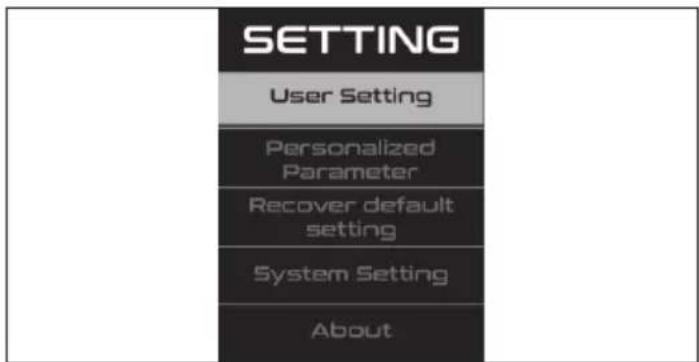
How to set
Press the UP or Down to switch and press the Mode button to save. When done, press the Mode button to go back to main settings menu. If there is no action in one minute, it will exit the setting page automatically.
Connect to SHARP Life APP
Press and hold the Mode button for 2 seconds, and enter the Settings interface.
Select the About and scan the QR Code to download the SHARP Life APP on your phone. Then link your lovely e-bike to your phone on the APP.

flowchart
graph LR
    A["SETTING"] --> B["User Setting"]
    A --> C["Personalized Parameter"]
    A --> D["Recover default setting"]
    A --> E["System Setting"]
    A --> F["About"]
    G["SharpLife"] --> H["QR"]
    H --> I["→"]
Error Code
If something is wrong with the electrical system, it will show an error code on the display. Don't hesitate to get in touch with our service center to troubleshoot the problems.
Here are definitions of the error codes.
| Error code Definition | |
| 21 Abnormal current | |
| 23 Motor out of phase | |
| 24 Motor Hall signal Fault | |
| 30 Communication Problem |
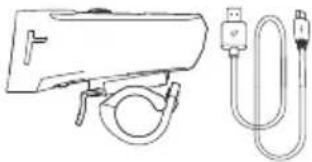
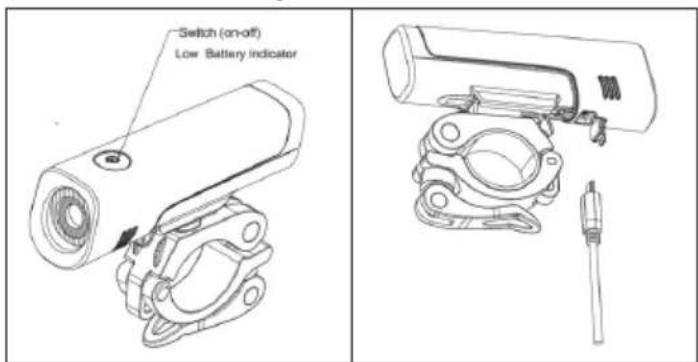
How to use the lights
How to charge
a. Open the rubber cap and connect the light to a power supply with the attached USB cable.
b. It finishes charging when the indicator light turns green.
c. Close the rubber cap after charging.
How to use the front light
Push the button to turn the light on.
Then Push to dim the brightness. Push again to turn the light off.
How to use the tail light
Push the button to turn the light on or off.

natural_image
Technical line drawing of a bicycle seat assembly with labeled components (no text or symbols)SHARP Life App
Add the SHARP Life app to your mobile device to start enjoying the benefits of additional functionality. This includes:
ü Speed monitoring on your device.
ū Changing the speed/distance units between kilometers and miles.
Click on "Add Device", when the e-bike is turned on and the Bluetooth icon is flashing on the display.
Your device will scan automatically for your e-bike. Make sure that the Bluetooth function is enabled on your phone. Allow location services if requested.
Once the device is found, Bluetooth pairing is complete.
NOTE:
If you want to connect to the e-bike with a new account, there are two ways:
- Remove device from previous account.
- Press and hold the button 'i' Mode and the button '-' at the same time for 2 second to unbind the Bluetooth of the display, and then the new account can connect with it.
To add your e-bike to the app.

https://www.sharpconsumer.com/sharp-life-app
natural_image
Close-up of a gloved hand holding a black bicycle brake lever with wires (no visible text or symbols)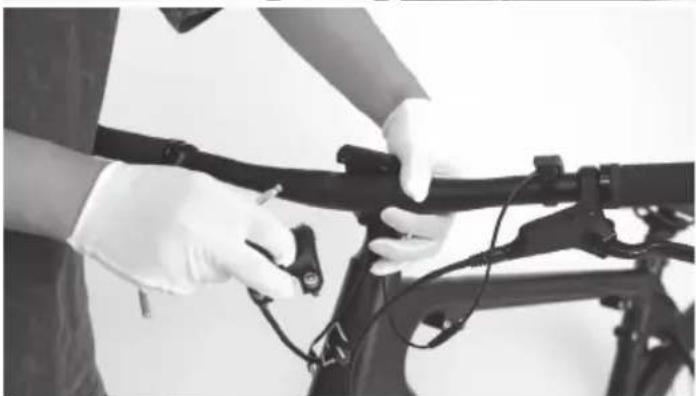
natural_image
Person in gloves adjusting a bicycle frame with tools (no visible text or symbols)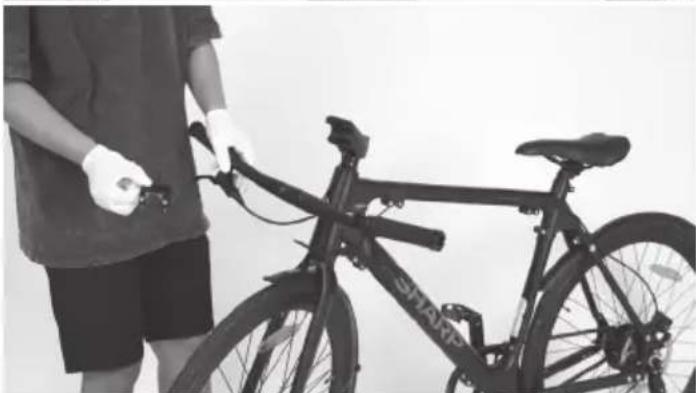
natural_image
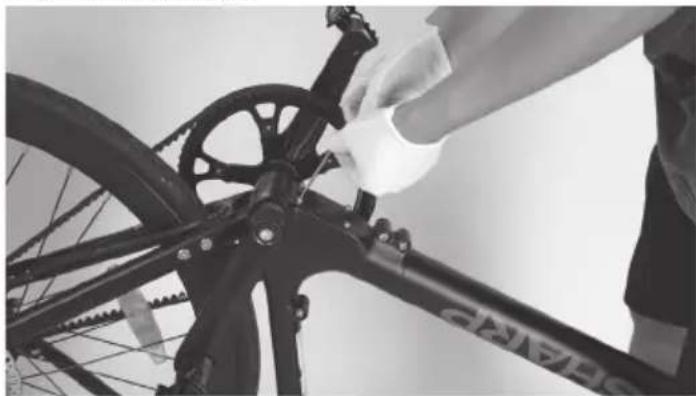
Person holding a bicycle with visible 'SHAMP' branding, standing beside it (no text or symbols on the bicycle itself)Disassembly instructions
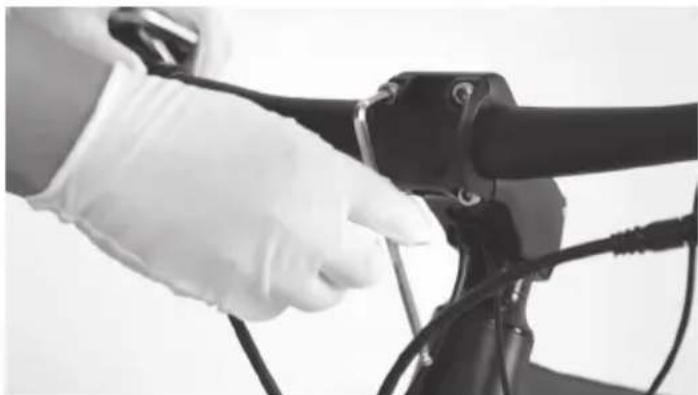
STEP 1: Remove the handlebar
a. Disconnect the display and assist switch cables.
b. Remove the four screws on the front cover in a counterclockwise direction with a 5 mm Allen key.
c. Remove the cover.
d. Then Remove the handlebar.
Step 2: Remove the stem and display
a. Remove the rubber cap on the top of the stem.
b. Loosen the two screws on the side of the stem and the long screw on the top of the stem with a 5 mm Allen key.
c. Then Remove the stem and display.
Step 3: Remove the front fork and front wheel
Remove the front fork and front wheel.

natural_image
Person standing beside a bicycle with visible frame and wheels (no text or symbols)Step 4: Remove the grip
a. Loosen the screws on the grip with a 3 mm Allen key.
b. Then remove the grip.

natural_image
Person cleaning a bicycle wheel with a blue racing wheel (no visible text or symbols)
natural_image
Close-up of gloved hands holding a black brake stopper and a small black ring component (no visible text or symbols)
natural_image
Close-up of hands using a tool to adjust or install a bicycle brake lever (no visible text or symbols)
natural_image
Close-up of a hand holding a black bicycle brake lever with attached cable (no visible text or symbols)Step 5: Remove the brake lever
a. Loosen the screws on the brake lever with a 5 mm Allen key. b. Then remove the brake lever.
natural_image
Close-up of a bicycle tire being adjusted for cleaning or repair (no visible text or symbols)
natural_image
Close-up of a bicycle tire being adjusted by hand, showing mechanical components and wiring (no text or symbols visible)
natural_image
Person cleaning a bicycle tire with a handbag and cable (no visible text or symbols)Step 6: Remove the assist switch
a. Loosen the screw on the brake lever with a 5 mm Allen key. b. Then remove the assist switch with a 2.5 mm Allen key.
natural_image
Person in white gloves and gloves handling a black cable or cable connector (no visible text or symbols)
natural_image
Close-up of hands holding a black cable or hose next to a tire, with no visible text or symbols.Step 7: Remove the brake lever on the other side
a. Repeat step 4 and 5 on the other side of the handlebar. b. And then remove the handlebar from the bike.
natural_image
Close-up of hands using a black cable to handle a wire, no visible text or symbols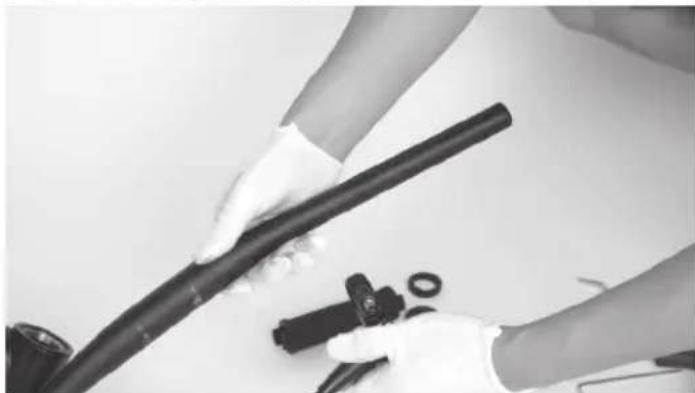
natural_image
Close-up of hands holding a black cylindrical pipe with attached fasteners and rings (no visible text or symbols)Step 8: Remove the cover next to the bottom bracket
a. Turn the bike upside down.
b. Loosen the four screws on the cover next to the bottom bracket in a counterclockwise direction with a 3 mm Allen key.
c. Then Remove the cover.
natural_image
Close-up of a person adjusting a bicycle wheel and chain (no visible text or symbols)
natural_image
Close-up of hands adjusting a bicycle wheel assembly (no visible text or symbols)Step 9: Disconnect the cables
Disconnect the cable between the battery and the motor.

natural_image
Close-up of hands adjusting a bicycle wheel assembly (no visible text or symbols)
natural_image
Close-up of hands adjusting a bicycle wheel component (no visible text or symbols)
natural_image
Close-up of hands adjusting a bicycle wheel and gear mechanism (no visible text or symbols)Step 10: Remove the kickstand
a. Loosen the screws on the kickstand with a 5 mm Allen key. b. Then remove the kickstand.
natural_image
Close-up of a person adjusting a bicycle wheel with visible gears and chains (no text or symbols)
natural_image
Close-up of hands assembling a bicycle wheel with visible gears and blades (no text or symbols)
natural_image
Close-up of a bicycle wheel with visible mechanical components and a hand adjusting the wheel (no text or symbols)Step 11: Remove the belt
Loosen the end caps on the rear hub with a 19 open-end wrench. Then remove them.

natural_image
Two-panel black-and-white photo showing a bicycle wheel assembly and hand positioning on its wheel (no text or symbols visible)Loosen the screws on the R-gaskets with a 3 mm Allen key. Then remove them.

natural_image
Close-up of hands assembling a bicycle wheel assembly with metal rings and chains (no text or symbols visible)Loosen the screws in the dropout with a 4 mm Allen key. Then remove them.
You can remove the belt easily now.
natural_image
Four-panel black-and-white photo showing bicycle wheel assembly and maintenance, with no visible text or symbols.Step 12: Remove the rear fender
a. Loosen the screws on the dropout with a 4 mm Allen key.

natural_image
Two black-and-white photos showing hands assembling a bicycle wheel and a mechanical assembly (no visible text or symbols)b. Use a 5 mm Allen key to push the bolt. Loosen the nut on the other side with a 10 mm open-end wrench.
c. Then remove the rear fender.

natural_image
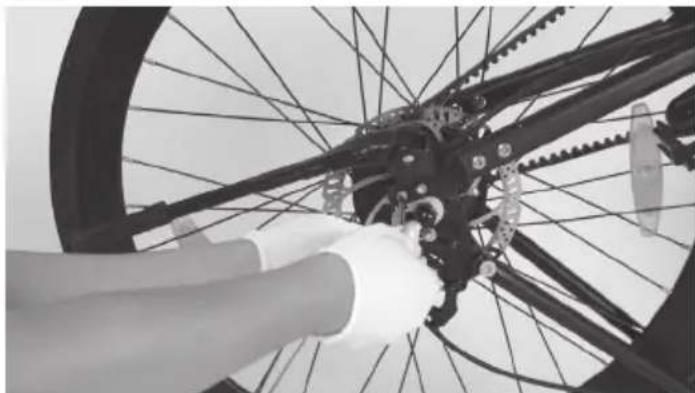
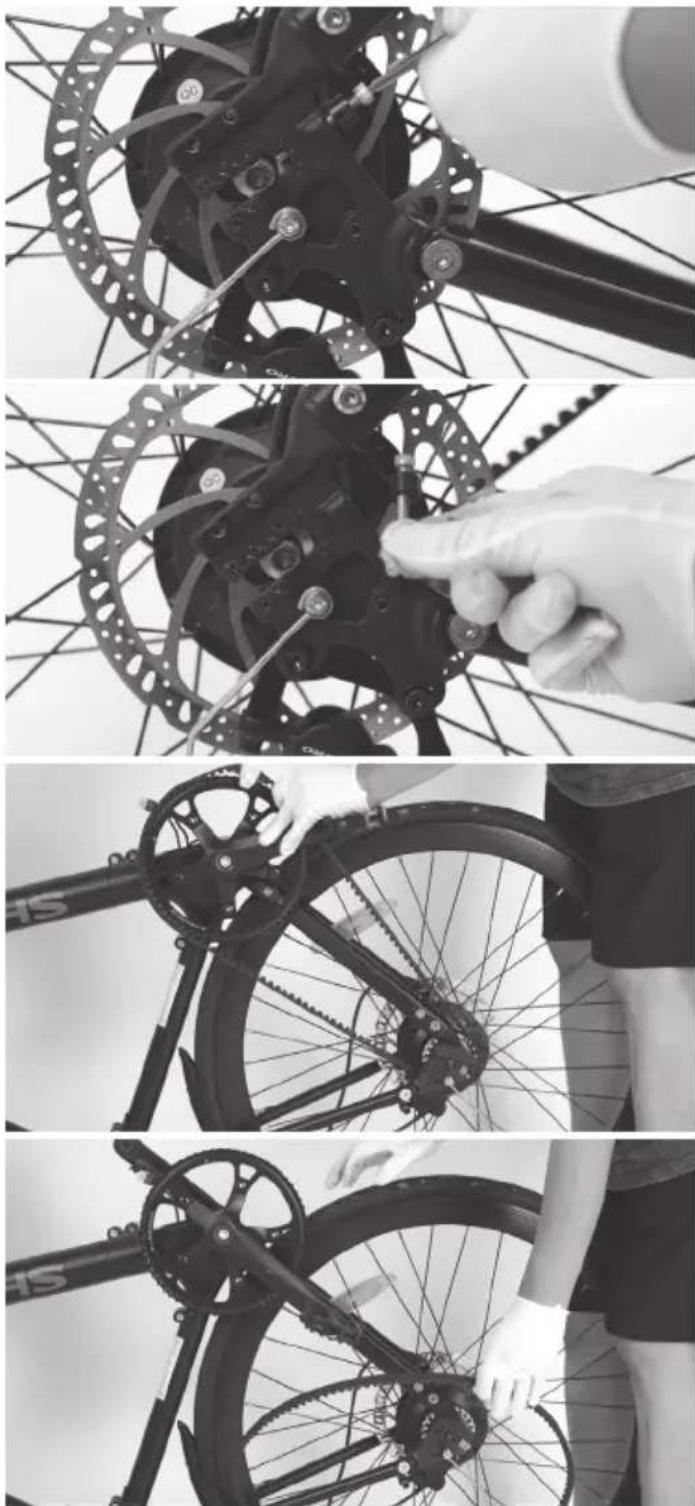
Close-up of hands using a bicycle gear to trim a black frame, no text or symbols visibleStep 13: Remove the cable cover, rear brake caliper and rear wheel
a. Loosen 2x Philips screws then remove cable cover.
b. Loosen the screws with a 5 mm Allen key. Then remove the rear brake caliper.
c. Then you can remove the whole rear wheel easily from the bike.

natural_image
Close-up of a bicycle's wheel assembly with a hand adjusting the component (no visible text or symbols)
natural_image
Close-up of hands assembling a bicycle wheel frame with a mechanical component (no visible text or symbols)
natural_image
Person adjusting a bicycle tire with hands, no visible text or symbolsStep 14: Remove the pedals
Loosen the pedals with a 15 mm open-end wrench. Then remove them.

natural_image
Person assembling a bicycle frame with a tool, no visible text or symbols
natural_image
Person assembling a bicycle frame with visible wheels and structural components (no text or symbols)Step 15: Remove the dropout
a. Use a 4 mm Allen key to push the bolts on the chain stay. Loosen the screws on the other side with another 4 mm Allen key.
b. Loosen the screws on the seat stay with a 5 mm Allen key.
c. Then remove the dropout.

natural_image
Person assembling a bicycle frame with a tool, no visible text or symbols
natural_image
Person assembling a bicycle frame with a tool, no visible text or symbols
natural_image
Close-up of hands installing a black metal bracket with screws, no visible text or symbols
natural_image
Close-up of hands adjusting a mechanical linkage component (no visible text or symbols)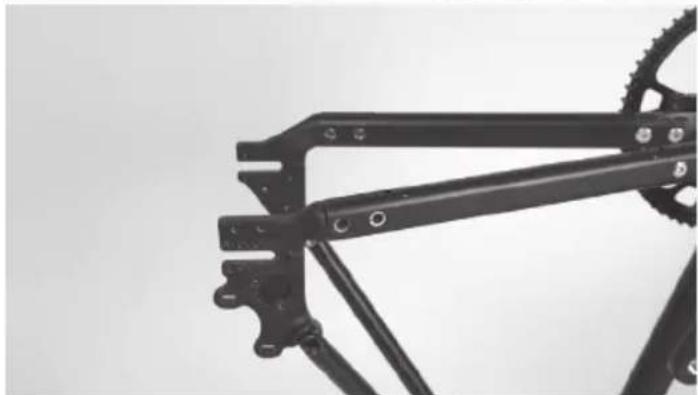
natural_image
Close-up of a black bicycle frame structure with gear and mounting brackets (no text or symbols visible)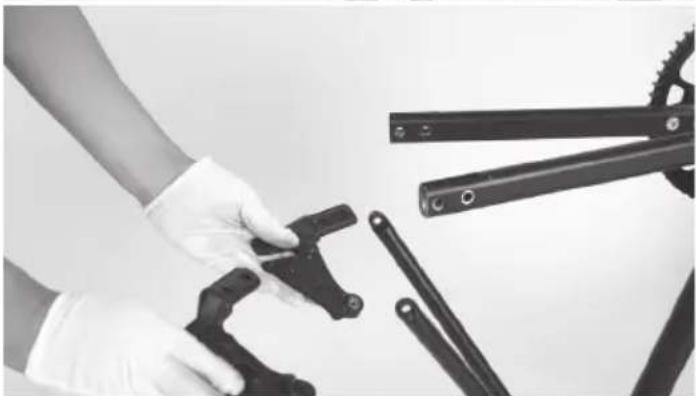
natural_image
Close-up of hands in gloves handling mechanical components (no visible text or symbols)Then remove the belt.
natural_image
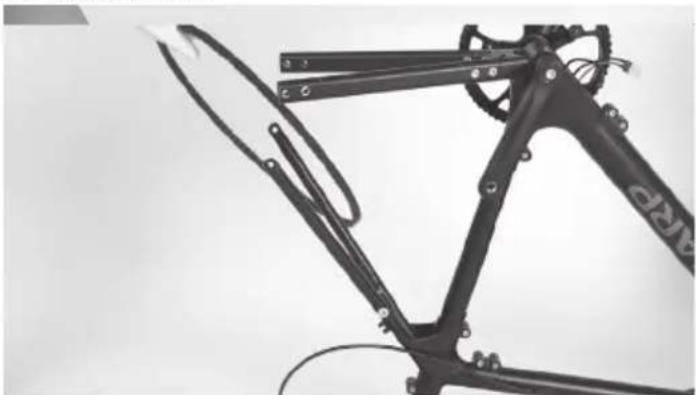
Close-up of a bicycle frame structure with visible joints and brackets (no text or symbols)Step 16: Remove the chain stays and seat stays
Repeat the action. And then remove the chain stays and seat stays.

natural_image
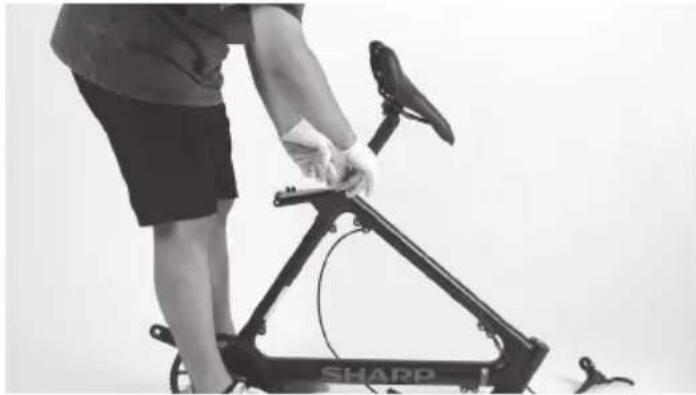
Three-panel black-and-white photo sequence showing a person using a bicycle-mounted device, demonstrating step-by-step assembly (no text or symbols visible)Step 17: Remove the saddle post
Loosen the bolt on the seat-tube joint with a 5 mm Allen key. Then remove the saddle post.
natural_image
Person using a shared stationary bike with a headrest, showing body positioning and legs (no text or symbols visible)
natural_image
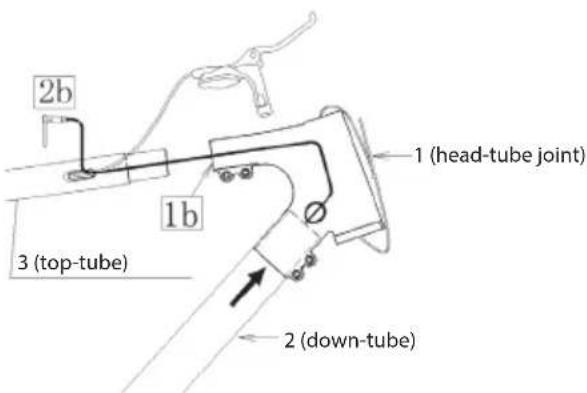
Person using a Sharp bicycle on a stationary platform (no visible text or symbols)Step 18: Take the frame apart
Loosen all the bolts on the front triangle of the frame with a 5 mm Allen key.

natural_image
Black-and-white photo of a bicycle frame with a hand adjusting it, no visible text or symbols on the main subject.Remove the rubber clamp from the top tube.
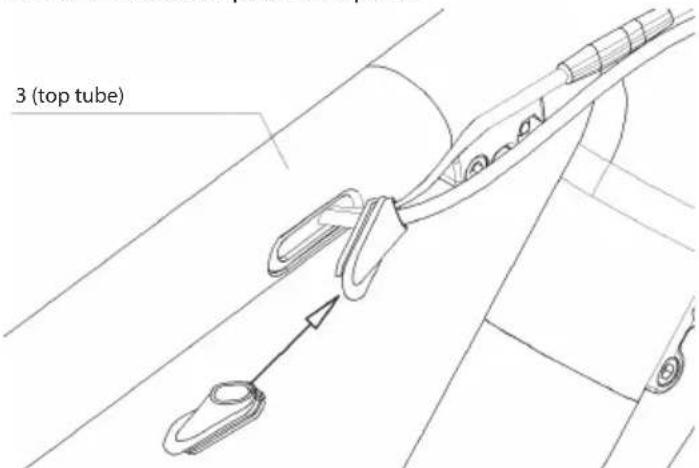
Then disconnect the cable of the battery and let it be tugged easily out of the hole later.
Take the frame apart in following sequence.
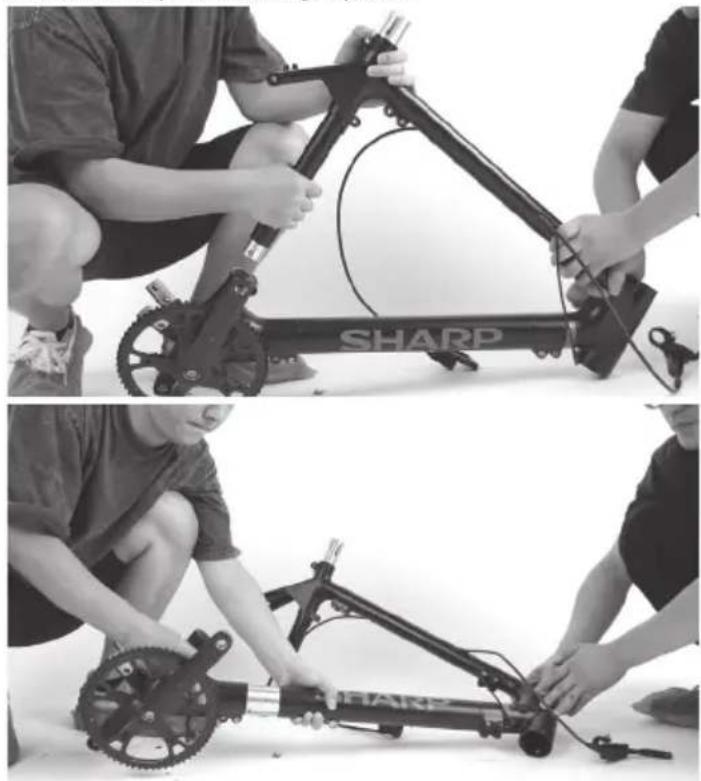
natural_image
Two black-and-white photos showing a person assembling a Sharp bicycle frame, with no visible text or symbols.
natural_image
Person assembling a mechanical device with a wheel and sensor components (no visible text or symbols)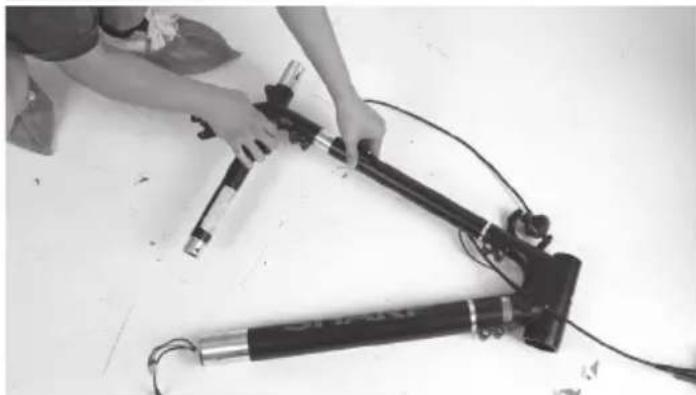
natural_image
Person assembling mechanical devices on a white surface (no visible text or symbols)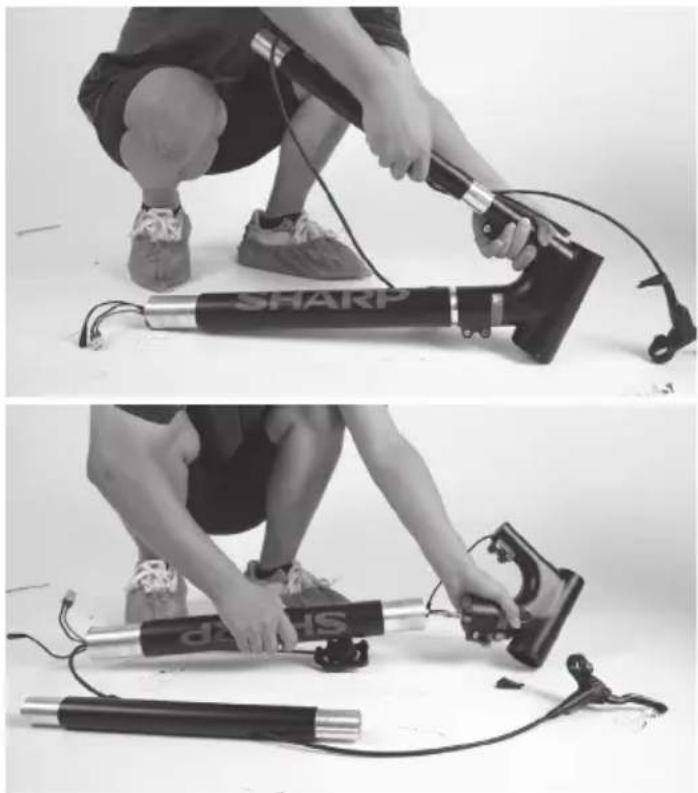
natural_image
Two black-and-white photos showing a person using a sharp oxygen shaver and a handheld device, both demonstrating the same setup (no text or symbols visible)The battery is hidden inside the downtube. Both tube sides have hot melt adhesive to fix the battery and cable.
Mission Completed!
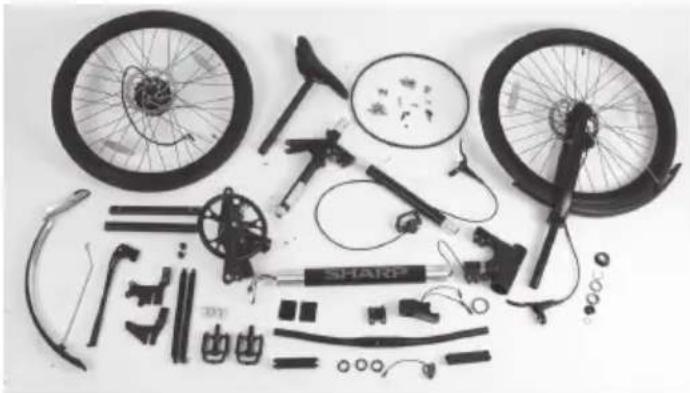
natural_image
Assorted bicycle components including bicycles, shakers, pedals, and gear (no text or symbols visible)Tightening Torques:
| Part Torque Nm | |
| Triangle Frame 20Nm | |
| Steam Top / Side 6Nm/12Nm | |
| Steam clamp 8Nm | |
| Seat stay 20Nm | |
| Chain stay 10Nm | |
| Crank bolt 40Nm | |
| Adjust R-gasket belet screws 6Nm | |
| Rear whell end caps 45Nm | |
| Service door 5Nm | |
| Brake caliper 8Nm | |
| Grips end cap 3Nm | |
| Brake levers 8Nm | |
| L/R pedals 18Nm | |
| Fenders 5Nm |
Re-assembly:

Lock the bolts by sequence A-B-C-D-a-b-c-d
Maintenance
| Interval Inspect Service Replace | |||
| Weekly, 160-321km (100-200 mi) | Check hardware for proper torque.Check drivetrain for proper alignment and function (including the belt, freewheel, chainring).Check wheel trueness and for quiet wheel operation on (without spoke noise)Check condition of the frame for any damage. | Clean frame by wiping frame down with damp cloth.Use barrel adjuster(s) to tension derailleur/brake cables if needed. | Replace any components confirmed by our product support or a certified reputable bike mechanic to be damaged beyond repair or broken. |
| Monthly, 402-1207 km (250-750 mi) | Check brake pad alignment, brake cable tension.Check belt stretch.Check brake and shifter cables for corrosion or fraying.Check spoke tension.Check accessory mounting (rack mounting bolts, fender hardware, and alignment). | Check crankset and pedal torque.Clean brake and shift cables.True and tension wheels if any loose spokes are discovered. | Replace brake and shift cables if necessary.Replace brake pads if necessary. |
| Every 6 Months, 1207-2011 km (750-1250 mi) | Inspect drivetrain (belt, chainring, freewheel).Inspect all cables and housings. | Standard tune-up by certified, reputable bike mechanic is recommended.Grease bottom bracket. | Replace brake pads.Replace tires if necessary.Replace cables and housings if necessary. |
If you use the bike under challenging conditions or ride more than 2,000 km/1,250 mi per year, shorten the inspection intervals and have an inspection carried out by bike service shop every 6 months.
Screw joints
- Check the vehicle regularly for loose screw connections according to the maintenance schedule and tighten loose screws with a torque wrench.
- Do not ride the bike if you find that any screw joints have loosened.
- Have loose screw joints checked by a professional if you lack the necessary expertise and required tools.
Frame and forks
- Check the frame and rigid fork for cracks, deformation, or discoloration.
- If the frame or the forks is cracked, deformed, or discolored, contact a professional immediately.
- Do not use the bike if you find any cracks, deformation, or discoloration.
Saddle
- Check whether you can twist the saddle.
- If you can twist the saddle, tighten the seat post clamp. Observe applicable torques.
- Check whether you can move the saddle horizontally in the direction of travel or the opposite direction.
- If you can move the saddle, adjust the saddle clamp.
Wheels
- Check whether the front or rear wheel can move sideways and whether
the wheel nuts move.
- If the wheel nuts move, have a professional check the screw joints.
- If the quick-release axle moves, adjust the axle.
- If the front or rear wheel moves sideways, have a professional check the wheel.
- Check whether there is equal distance on both sides between the front wheel and the front fork and between the rear wheel and the frame.
- If the distances are not identical, have a professional check the front and rear wheels.
- Lift the bike and turn the front or rear wheel. Check whether the front or rear wheel swings sideways or outwards.
- If the front or rear wheel swings sideways or outwards, have a professional check the wheel.
- Check the front and rear rims for cracks, deformation, or color changes at regular intervals.
- Check whether the rim is under the inner tube and the rim tape.
- Do not use the bike if the rim is cracked, deformed, or discolored.
- Have a professional check whether there is any damage on the rim, materials, or aluminum.
- Squeeze the spokes together gently with your thumb and fingers to check whether the tension is the same for all spokes.
- If the tension varies or spokes are loose, have a professional check the spokes' tension.
Tires
- Check whether the tire pressure is correct according to the data on the tire side wall.
- Check whether the tires are free of cracks and damage from foreign bodies.
- Check whether you can clearly feel the tire tread.
- If a tire is cracked or damaged, or the tread depth is too low, have the tire replaced by a professional.
Brake
It's important that you learn and remember which brake lever controls which brake (front/rear) in order to ensure your safety. To check which configuration your bike is set up with, squeeze one brake lever and see if the front or rear brake engages. Now do the same with the other brake lever. Remember this configuration.
While you are testing the brake configuration, make sure that your hands can comfortably reach and squeeze the levers with no issues. If you experience any issues or discomfort when operating the brakes, please reach out to us before riding.
Review the brake manufacturer's user manuals and be sure to properly maintain your brakes. It's your responsibility to be able to recognize when your brake pads need to be replaced.
Battery
It's essential to follow these instructions and safety tips in order to preserve the longevity of your battery's life and ensure proper performance.
- Fully charge the battery before each ride to ensure it is ready to go the entire trip. It will help reduce the chance of overdischarging the battery.
- If the battery becomes physically damaged or non-functional, if it has been dropped or involved in a crash, or if you notice that it is performing abnormally, please discontinue use and contact the seller immediately.
- Store the battery in a dry, climate-controlled indoor location at a temperature between 0^ and 40^ .
The voltage drops when the battery is low, which may result in weakened electric power assist. It's recommend that you start charging at 20-40% charge.
| Charge 80-1 | 00% 80% 60 | % 40% 20 | 0% 0-20% | ||
| Battery Voltage/V | 42 38 36 | 34 32 30 |
Charging your battery
- The charger is rated for 100–240V. Be sure to check the charger, the charger cables, and the battery for damage before beginning each charge.
- Charging takes about 3–4 hours. On rare occasions, it may take longer to fully charge the battery, particularly when the bike is new or left unused for a long time.
- Only charge the battery with the supplied charger, as others may cause damage to the battery or increase the possibility of fire or explosion.
- While the charger is designed to automatically stop charging once the battery is full, do not leave it plugged in for more than 12 hours.
- Make sure your charger is isolated from liquids, dirt, and debris.
The range on one charge strongly depends on several circumstances, such as (but not limited to):
- Weather conditions, such as ambient temperature and wind;
- Road conditions, such as elevation and road surface;
- Bike conditions, such as tire pressure and maintenance level;
- Bike usage, such as acceleration and shifting;
- Rider and luggage weight;
- Amount of charge and discharge cycles;
• Age and condition of battery.
Charger notes
- The charger should only be used indoors in a cool, dry, well-ventilated area on a flat, stable, hard surface.
- Avoid exposing the charger to liquids, dust, debris, or metallic objects. Do not cover the charger with anything while in use.
- Store and use the charger in a safe area away from children.
- Charging the battery to full before each use helps to prolong its lifespan and reduces the risk of over discharge.
- Do not use any charger other than the original charger you received with your order or a charger designed specifically for the particular bike that you purchased directly from SHARP.
- This charger is designed for standard household AC power sockets with 110-240V 50/60 Hz input voltage, and it automatically detects and calculates the input voltage. Do not attempt to open the charger or modify the voltage input.
- Do not yank or pull on the charging cable. When unplugging, pull on the plastic plug to carefully remove the AC/DC cable.
- It is normal for the charger to become moderately warm during charging. If the charger is too hot to touch, or if you smell an odor or notice any other signs of overheating, stop using the charger and contact the SHARP Service Center.
- Keep the indicator facing up when using the charger. Do not invert the charger, as this can inhibit cooling and shorten its lifespan.
- Only use the original charger provided by SHARP or one designed for your specific bike model that is approved by SHARP. Do not use aftermarket chargers, which may cause damage, serious injury, or death.
- Not following the battery charging information listed here may cause unnecessary damage to the charging components, battery, or charger and may result in poor battery performance or failure to work properly. Battery damage incurred this way is not covered by warranty.
Balancing your battery
When you first receive your bike, it is important to follow these steps to ensure that your battery cells are properly balanced in order to keep them as efficiently as possible.
- For the first initial charge upon receiving your bike (or after prolonged storage time), be sure to charge the battery for at least 4 hours before riding.
NOTE: We recommend letting the battery charge for at least 4 hours for the first three charges to ensure that the cells balance properly.
- After the first three rides, you may begin routine charging procedures.
Checking the electric drive system
- Check all cables to ensure that there is no damage.
- Examine the display for cracks and damage. Check if it is firmly in place.
- Check the control unit for cracks and damage. Check if it is firmly in place.
- Check the rechargeable battery to ensure that there is no damage.
- Check that all plug contacts are correctly in place and reconnect them if necessary.
- Check the cable and the outer casing to confirm that there is no damage.
- Check the motor to ensure that there is no damage.
Cleaning
- Always turn the battery off and remove the charger from the charge port and wall socket before cleaning the battery or bicycle.
- Use a dry or slightly damp cloth for cleaning the battery or bicycle frame. If there is dirt in or around the charge port, trying using low air pressure or a soft brush to remove it. For instructions on how to clean drivetrain components, please refer to the drivetrain manufacturer's instructions.
- When cleaning, make sure the charge port on the bicycle is fully closed and no water comes into contact with the electrical components. If wet, leave the charge port open to dry out completely before connecting the charger.
- Be careful not to damage or expose electrical components to water. Do not pressure wash your battery, motor, or any other electrical components. Damaging electrical components or exposing them to water may start a fire which can result in serious injury or even death. Do not use or charge a battery you believe had water seep inside. Likewise, all connectors, including the charge port, must be completely dry and clean before using or charging the bicycle.
- Do not use alcohol, solvents, or abrasive cleaners to clean the charger. Instead, use a dry or slightly damp cloth. Surface cleaning the bike ONLY.
Service Info
WARNING
TECHNOLOGICAL ADVANCES HAVE MADE BICYCLES AND BICYCLE COMPONENTS MORE COMPLEX, AND THE PACE OF INNOVATION IS INCREASING.
IT IS IMPOSSIBLE FOR THIS MANUAL TO PROVIDE ALL THE INFORMATION REQUIRED TO PROPERLY REPAIR AND/OR MAINTAIN YOUR BICYCLE.
To help minimize the chances of an accident and possible injury, you must have any repair or maintenance, including those not specifically described in this manual, performed by a professional. Equally important is that your individual maintenance requirements will be determined by everything from your riding style to geographic location.
Consult a professional for help in determining your maintenance requirements.
WARNING
MANY BICYCLE SERVICE AND REPAIR TASKS REQUIRE SPECIAL KNOWLEDGE AND TOOLS.
Do not begin any adjustments or service on your bicycle until you have learned from a professional how to properly complete them. Improper adjustment or service may result in damage to the bicycle or in an accident which can cause serious injury or death.
If you want to learn to carry out major service and repair work on your bike, you have three options:
- Ask the Service Center for copies of the manufacturer's installation and service instructions for the components on your bike or contact the component manufacturer.
- Ask the Service Center to recommend a book on bicycle repair.
- Ask the Service Center about the availability of bicycle repair courses in your area.
We recommend that you ask a professional to check the quality of your work the first time you work on something and before you ride the bike, just to make sure that you did everything correctly. Since that will require the time of a mechanic, there may be a modest charge for this service.
We also recommend that you ask a professional for guidance on obtaining spare parts, such as inner tubes, light bulbs, etc., as it would be useful once you have learned how to replace such parts when they require replacement.
Troubleshooting
| Symptoms Possible Causes Most Common Solutions | ||
| The bike does not work. | 1. Insufficient battery power2. Faulty connections3. Improper turn on sequence4. Brakes are applied | 1. Charge the battery2. Clean and repair connectors3. Turn on bike with proper sequence4. Disengage brakes |
| Irregular acceleration and/or reduced top speed. | 1. Insufficient battery power2. Loose or damaged throttle | 1. Charge or replace battery2. Replace throttle |
| The motor does not respond when the bike is powered on. | 1. Loose wiring2. Loose or damaged throttle3. Loose or damaged motor plug wire4. Damaged motor | 1. Repair and or reconnect2. Tighten or replace3. Secure or replace4. Repair or replace |
| Reduced range. | 1. Low tire pressure2. Low or faulty battery3. Driving with too many hills, headwind, braking, and/or excessive load4. Battery discharged for long period of time without regular charges, aged, damaged.5. Brakes rubbing | 1. Adjust tire pressure2. Check connections or charge battery.3. Assist with pedals or adjust route.4. Contact Product Support if range decline persists.5. Adjust the brakes |
| The battery will not charge. | 1. Charger not well connected2. Charger damaged3. Battery damaged4. Wiring damaged | 1. Adjust the connections2. Replace3. Replace4. Repair or replace |
| Wheel or motor makes strange noises. | 1. Loose or damaged wheel spokes or rim2. Loose or damaged motor wiring | 1. Tighten, repair, or replace2. Reconnect or replace motor. |
Service Info
| Typical lifespan of wearing parts Normal | Use Inspection Comment | |||
| 1 Disc brake / Brake pads 5,000 km | 12 monthsReplace when | Rotor/Pads - min 1.5mm thickness / min 1mm thickness. | ||
| 2 Gates belt drive 30,000 km Replace when wornout or cracked. | ||||
| 3 Flywheel / Crankwheel 15,000 km | Replace when shifting is not smooth or when there is abnormal noise. | |||
| 4 Tire | 5,000 km | Replace when cracked or the pattern is worn and smooth. | ||
| 5 Inner tube Replace when leaking. | ||||
| 6 Saddle | Wornout or loose. | |||
| 7 | Grips, pedals | Replace when wornout or loose. | ||
| 8 | Rims/Spokes | Check whether the spokes are loose. | ||
| 9 | Side support | Replace when wornout or loose. | ||
| 10 | Battery | 500 recharge cycles | Recharge every 6 months if not used for a long time. | |
| 11 | Motor | 15,000 km | 36 months | Replace when shifting is not smooth or when there is abnormal noise. |
Technical specification
| Model BK-RS08EB BK-RS08ES | ||
| General | ||
| Colors Black Silver | ||
| Size M M | ||
| Max Speed (EU/UK) 25 km/h 25 km/h | ||
| Mileage up to 80 km up to 80 km | ||
| Weight 19 kg 19 kg | ||
| Max Load 120 kg 120 kg | ||
| Rider height 170-190 cm | 170-190 cm | |
| Electronics | ||
| Motor | 36V 250W | 36V 250W |
| Battery | 36V 7Ah/252Wh LG Cell Lithium-Ion Downtube Battery | 36V 7Ah/252Wh LG Cell Lithium-Ion Downtube Battery |
| Sensor Cadence Sensor | Cadence Sensor | |
| Display | IP66 Waterproof TFT Color LCD Display | IP66 Waterproof TFT Color LCD Display |
| Charger 100V-240V/2A Smart Charger | 100V-240V/2A Smart Charger | |
| Charging Time | 2-3 Hours | 2-3 Hours |
| Frame Set | ||
| Frame | 21" 6061 Aluminum Alloy Frame | 21" 6061 Aluminum Alloy Frame |
| Front Fork | Rigid Front Fork Aluminum Alloy with Disc Mounting, Thru-Axle | Rigid Front Fork Aluminum Alloy with Disc Mounting, Thru-Axle |
| Wheels | ||
| Tires | 700C ×28C Kenda® Tires, Presta Valves | 700C ×28C Kenda® Tires, Presta Valves |
| Rims | Aluminum Alloy Double-Wall | Aluminum Alloy Double-Wall |
| Front Hub | 3/8 ×13G ×36H Thru-Axle | 3/8 ×13G ×36H Thru-Axle |
| Spokes | Stainless Steel, 13g | Stainless Steel, 13g |
| Brakes | ||
| Brakes | Tektro® HD-M285 Hydraulic Disc Brakes with 180mm rotors | Tektro® HD-M285 Hydraulic Disc Brakes with 180mm rotors |
| Brake Levers | Tektro® HD-M285 | Tektro® HD-M285 |
| Drivetrain | ||
| Belt | Gates® CDN ^TM Carbon Belt | Gates® CDN ^TM Carbon Belt |
| Chainwheel | Gates® CDXT ^TM 63T | Gates® CDXT ^TM 63T |
| Cassette | Gates® CDXT ^TM 22T, Single-speed | Gates® CDXT ^TM 22T, Single-speed |
| Crank | 170mm | 170mm |
| Pedals | Wellgo® | Wellgo® |
| Components | ||
| Saddle Black Selle Royal® Saddle | Brown Justek® Urban Saddle | |
| Seat post | Promax® AluminumAlloy, Φ30.4mm with Offset | Promax® Aluminum Alloy, Φ30.4mm with Offset |
| Handlebar | Promax® Aluminum Alloy, 630mm | Promax® Aluminum Alloy, 630mm |
| Stem | Aluminum Alloy with Integrated Display, Φ31.8 | Aluminum Alloy with Integrated Display, Φ31.8 |
| Lights | 20lux, Battery Powered | 20lux, Battery Powered |
| Fenders Matte Black | Silver | |
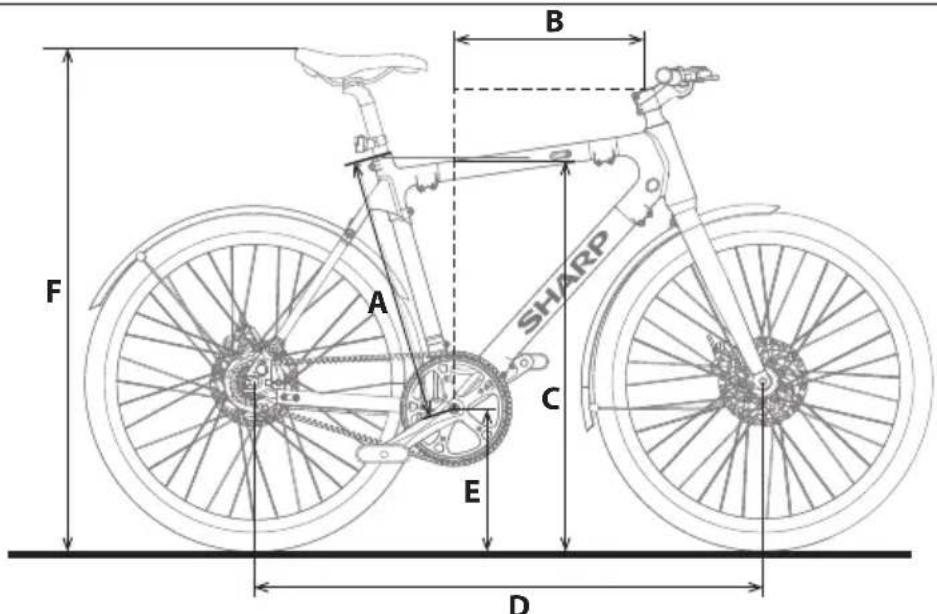
| Frame Size 21 inches (53 cm) | ||
| Suggested Rider Height 5'8"-6'3" 170 cm-190 cm | ||
| A Seat Tube Length 21 inches 533 mm | ||
| B Reach 15.3 inches 389 mm | ||
| C StandoverHeight 31.9 inches 810 mm | ||
| D Wheelbase 40.7 inches 1034 mm | ||
| E Bottom Bracket Height 11.4 inches 290 mm | ||
| F Seat Height 34.6-43.3 inches 880-1100mm | ||
www.sharpconsumer.com/RS08EB/#down
natural_image
Line drawing of a shared bicycle with a compact box and wheels (no text or symbols)
www.sharpconsumer.com/contact/

www.sharpconsumer.com/support/

www.sharpconsumer.com/documents-of-conformity/

Was ist in der Box:
natural_image
Technical line drawing of a mechanical device with no visible text or symbolsMontage des E-Bikes
natural_image
Technical line drawing of a robotic arm showing two views (no text or symbols)natural_image
Line drawing of a bicycle with front wheel, side arm, and wheel rim (no text or symbols)natural_image
Line drawing of a mechanical device with lever and handle (no text or symbols)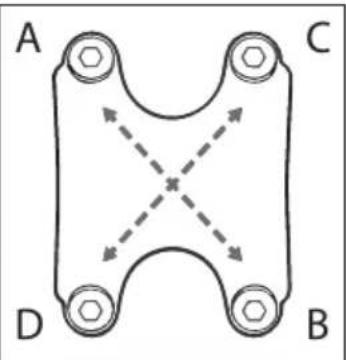
Abbildung 1-5
SCHRITT 2: Kabelmanagement
natural_image
Two cylindrical electronic components with internal wires, shown from different angles (no text or symbols)Abbildung 3-1

natural_image
Line drawing of a bicycle leg with seat and support bracket (no text or symbols)Abbildung 3-2
natural_image
Technical line drawing of two cylindrical mechanical components with a wrench and clamping mechanism (no text or symbols)Abbildung 4-3
natural_image
Technical line drawing of a mechanical assembly with intersecting rods and gears, labeled '12 (Fork)' (no other text or symbols)natural_image
Line drawing of a bicycle wheel assembly with no text or symbolsAbbildung 5-1
natural_image
Technical line drawing of a bicycle wheel assembly with visible spokes and hub (no text or symbols)Abbildung 5-2
natural_image
Line drawing of a bicycle wheel and suspension mechanism (no text or symbols)Abbildung 5-3
natural_image
Line drawing of a bicycle's front wheel and seat assembly (no text or symbols)Abbildung 6-1

natural_image
Technical line drawing of a bicycle wheel assembly with mechanical components and a close-up inset showing a hand tool (no text or symbols)Abbildung 6-2

natural_image
Mechanical assembly diagram showing a wheel with gear and a close-up inset of a component (no text or symbols)Abbildung 6-3
natural_image
Technical line drawing of two mechanical components with no visible text or symbols
natural_image
Mechanical gear assembly diagram showing wheel, gear, and wrench components (no text or labels)Abbildung 8-1
NOTIZEN:
natural_image
Technical line drawing of mechanical components including a tool, cylindrical part, and bracket (no text or symbols)Abbildung 9-1
natural_image
Technical line drawing of a bicycle seat assembly with a close-up inset showing a device (no text or symbols present)Abbildung 9-2

natural_image
Technical line drawing of a firearm assembly (no text or symbols)Abbildung 9-3
natural_image
Technical line drawing of a bicycle wheel assembly with visible gears and levers (no text or symbols)Abbildung 10-1

natural_image
Technical line drawing of a bicycle seat assembly with two views (no text or symbols)SHARP Life App

https://www.sharpconsumer.com/sharp-life-app
Demontageanleitung
natural_image
Close-up of a gloved hand adjusting a bicycle brake lever (no text or symbols visible)
natural_image
Person in gloves adjusting a bicycle frame with cable and sensors (no visible text or symbols)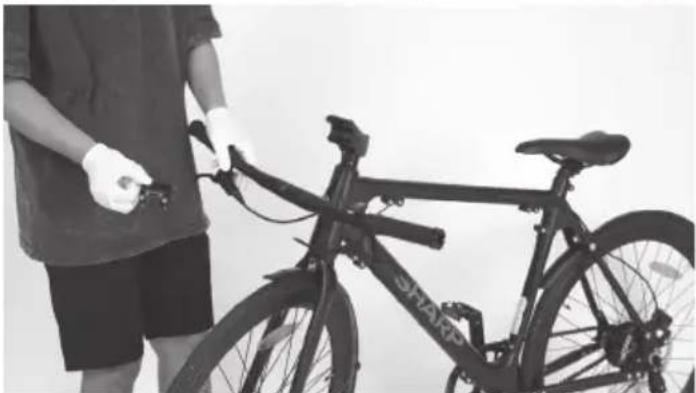
natural_image
Person holding a shared bicycle with visible branding, standing beside it (no text or symbols on the bicycle itself)natural_image
Person standing beside a bicycle with visible frame and wheels (no text or symbols)natural_image
Person assembling a shared bicycle wheel with a wrench, no visible text or symbols
natural_image
Close-up of gloved hands holding a black brake lever and a small black ring component (no visible text or symbols)
natural_image
Close-up of hands using a tool to adjust or install a bicycle brake lever (no visible text or symbols)
natural_image
Close-up of hands holding a bicycle brake lever with visible wiring (no text or symbols)natural_image
Close-up of a bicycle tire being adjusted by a tool, no visible text or symbols
natural_image
Close-up of a bicycle tire being adjusted by a tool, with no visible text or symbols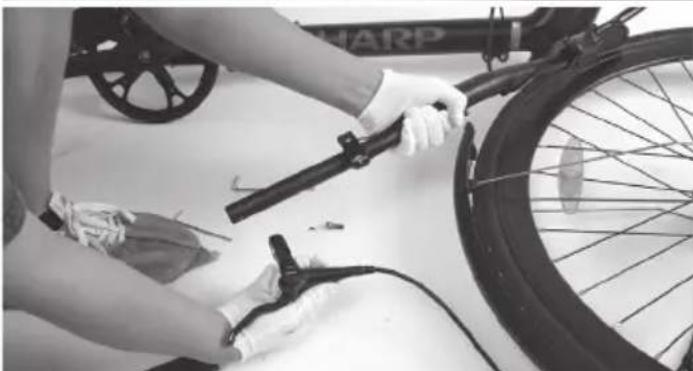
natural_image
Person cleaning a bicycle tire with a hand pump, no visible text or symbolsnatural_image
Close-up of gloved hands installing a black cable or wire component on a vehicle (no visible text or symbols)
natural_image
Close-up of hands cleaning a black cable with a tire, no visible text or symbolsnatural_image
Close-up of hands holding a black cable with wire handles, no visible text or symbols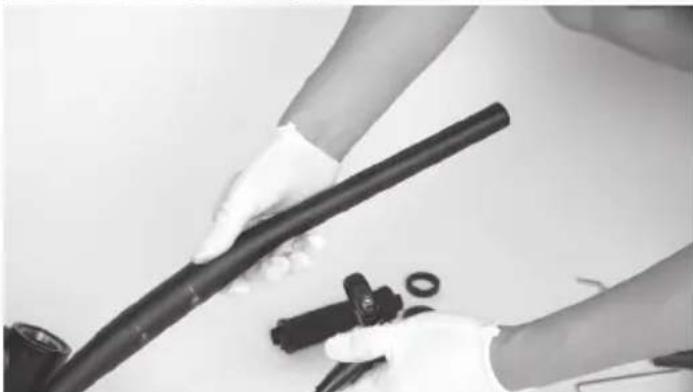
natural_image
Close-up of hands holding a black cable with plastic components nearby (no visible text or symbols)natural_image
Two black bicycle wheel assembly steps showing hand positioning and mounting details (no text or symbols visible)natural_image
Two-panel black bicycle wheel assembly photo showing hands adjusting components (no text or symbols visible)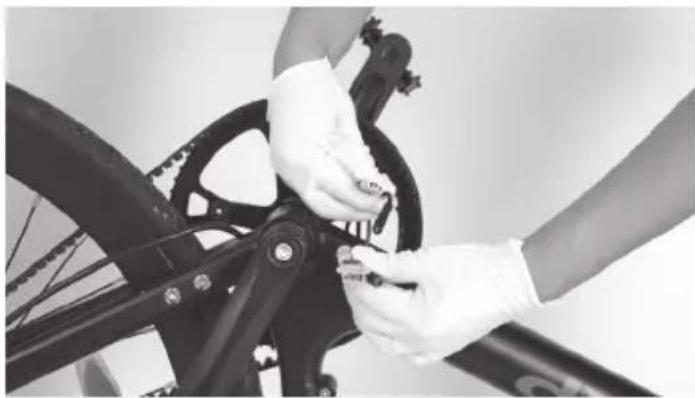
natural_image
Close-up of hands adjusting a bicycle wheel and gear mechanism (no visible text or symbols)natural_image
Close-up of a person adjusting a bicycle wheel with visible gears and chains (no text or symbols)
natural_image
Close-up of hands assembling a bicycle wheel with visible gears and spokes (no text or symbols)
natural_image
Close-up of a bicycle wheel with visible mechanical components and a hand adjusting the wheel (no text or symbols)natural_image
Two-panel black-and-white photo showing a bicycle wheel assembly and hand positioning on its wheel (no text or symbols visible)natural_image
Close-up of hands assembling a bicycle wheel assembly with gear links (no text or symbols visible)natural_image
Four-panel black-and-white photo showing bicycle wheel assembly and maintenance, including hand tooling and cleaning steps (no text or symbols visible)natural_image
Two black-and-white photos showing hands assembling a bicycle wheel and a mechanical assembly (no visible text or symbols)natural_image
Close-up of a hand using a saw to cut the bicycle frame, no visible text or symbols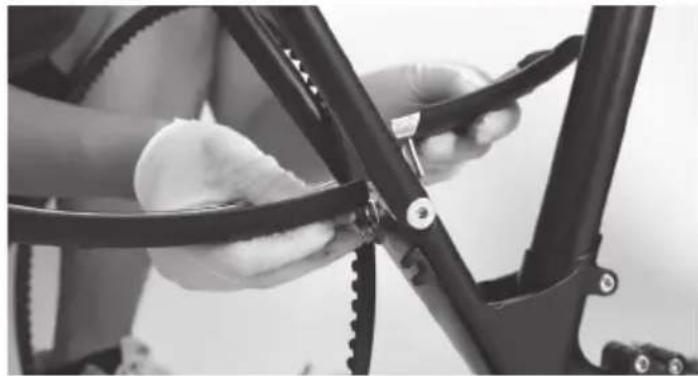
natural_image
Close-up of a person using a bicycle gear to adjust the wheel (no text or symbols visible)natural_image
Close-up of hands assembling a bicycle wheel assembly, showing mechanical components and wiring (no text or symbols visible)
natural_image
Person adjusting a bicycle wheel on a stationary bike (no text or symbols visible)natural_image
Person using a bicycle brake system with visible wheel and sensor components (no text or symbols)
natural_image
Person assembling a bicycle frame with visible wheels and structural components (no text or symbols)natural_image
Three-panel black-and-white photo showing hands assembling a bicycle frame with tools, no visible text or symbols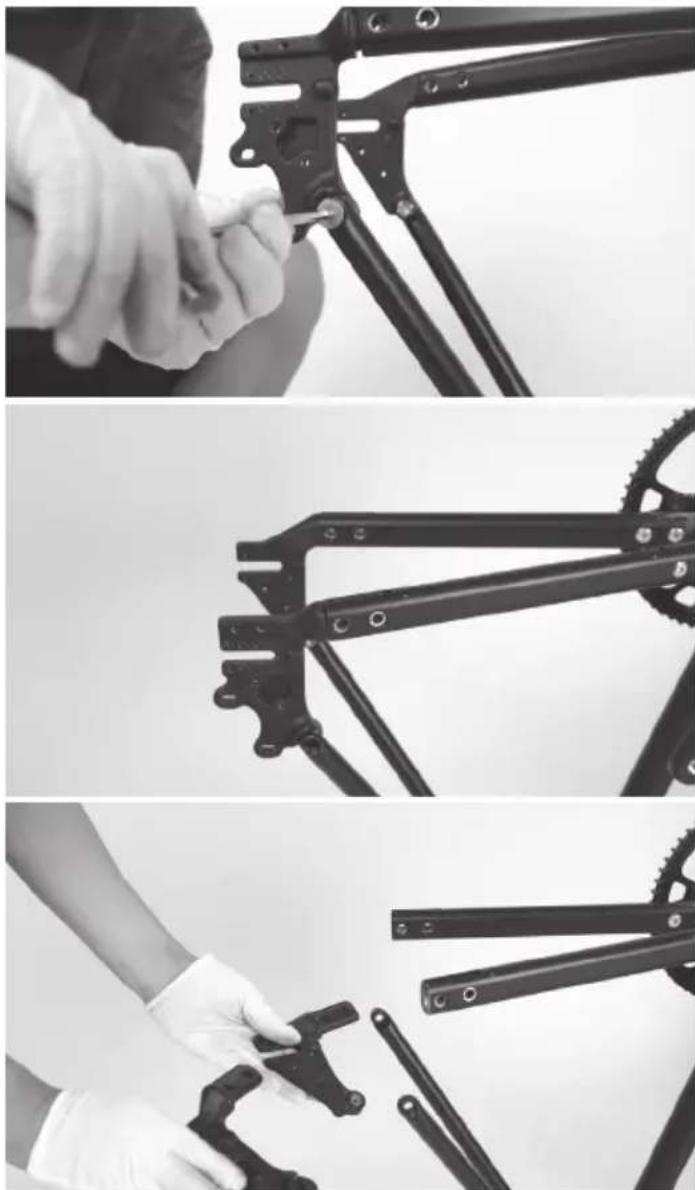
natural_image
Three-panel black bicycle frame installation procedure showing hand tool, gear mechanism, and final assembly (no text or symbols visible)natural_image
Close-up of a bicycle frame structure with visible joints and brackets (no text or symbols)natural_image
Person using a shared stationary bike with a hand on the seat (no visible text or symbols)
natural_image
Person using a Sharp bicycle on a stationary platform (no visible text or symbols)natural_image
Black-and-white photo of a bicycle brake system with a hand adjusting it, no visible text or symbols on the main body.natural_image
Person assembling a Sharp bicycle frame with visible branding (no text or symbols on the diagram itself)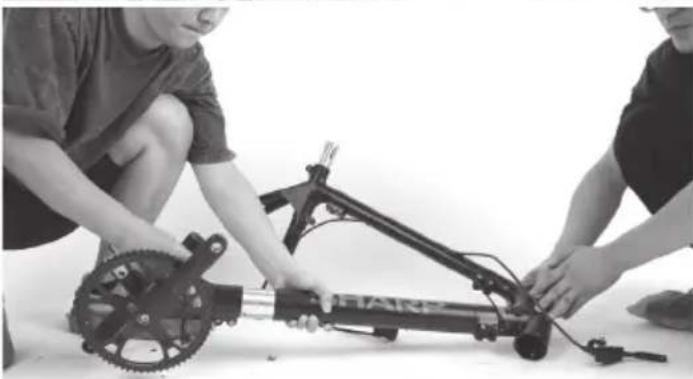
natural_image
Two people assembling a bicycle frame with visible gears and sensors (no text or symbols)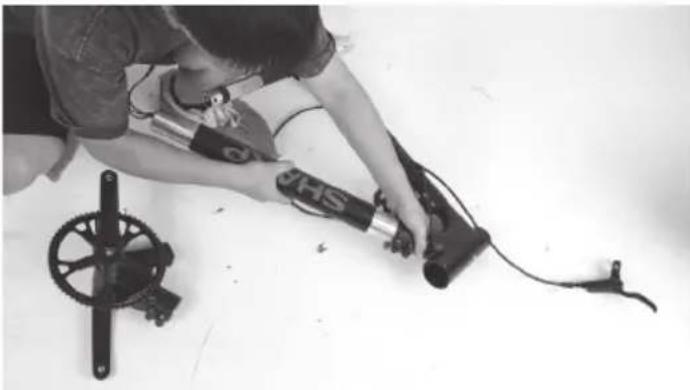
natural_image
Person using a handheld device with a mechanical scale nearby (no visible text or symbols)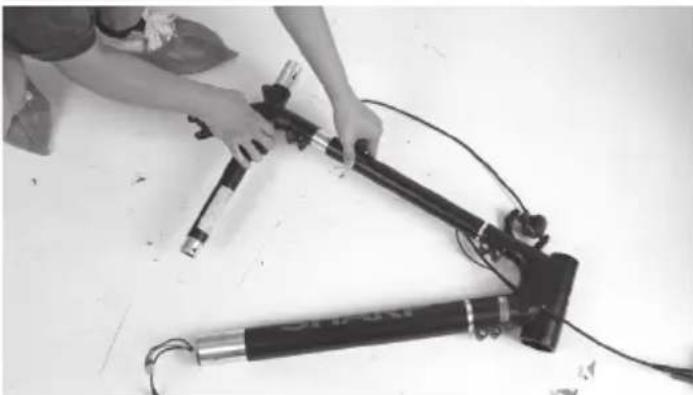
natural_image
Person assembling a mechanical device with attached lever and cable (no visible text or symbols)
natural_image
Person kneeling with a handheld device connected to a black SHARP tool, no visible text or symbols on the device itself.
natural_image
Person kneeling on a bench with a device and two cylindrical equipment (no visible text or symbols)natural_image
Assorted bicycle components including bicycles, shakers, and tools arranged on a plain surface (no text or symbols visible)Anzugsmomente:
www.sharpconsumer.com/RS08EB/#down
natural_image
Line drawing of a shared bicycle with a compact box and wheels (no text or symbols)
www.sharpconsumer.com/contact/

www.sharpconsumer.com/support/

www.sharpconsumer.com/documents-of-conformity/


natural_image
Technical line drawing of a mechanical device with no visible text or symbolsFigure 1-1 Figure 1-2
REMARQUE:
natural_image
Technical line drawing of a robotic arm with articulated joints and base mount (no text or symbols)Figure 1-3 Figure 1-4
natural_image
Line drawing of a bicycle with visible wheel, spokes, and handle (no text or symbols)natural_image
Line drawing of a mechanical device with lever and base (no text or symbols)

natural_image
Two cylindrical electronic components with internal wiring, shown from different angles (no text or symbols)Figure 2-1 Figure 2-2
Figure 3-1

natural_image
Line drawing of a bicycle leg and seat assembly (no text or symbols)natural_image
Technical line drawing of two cylindrical mechanical components with a wrench, no text or symbols presentFigure 4-1 Figure 4-2

Figure 4-3

natural_image
Technical line drawing of a mechanical assembly with intersecting rods and a fork, no text or symbols presentFigure 4-4 Figure 4-5
NOTES:
natural_image
Line drawing of a bicycle wheel assembly with no text or symbolsFigure 5-1

natural_image
Technical line drawing of a bicycle wheel assembly (no text or symbols)Figure 5-2

natural_image
Technical line drawing of a bicycle wheel and suspension bracket (no text or symbols)Figure 5-3
natural_image
Line drawing of a bicycle's front wheel and seat assembly (no text or symbols)Figure 6-1
natural_image
Mechanical assembly diagram of a bicycle wheel with gear and hub, showing internal components and a close-up inset (no text or labels)Figure 6-2

natural_image
Mechanical assembly diagram showing a wheel with levers and gears, no text or symbols presentFigure 6-3

natural_image
Technical line drawing of two mechanical components with no visible text or symbolsnatural_image
Technical line drawing of a mechanical assembly with no visible text or symbolsFigure 7-1

Figure 8-1

Figure 7-2
NOTES:
natural_image
Technical line drawing of mechanical components including a tool, clamping bracket, and cylindrical device (no text or symbols)Figure 9-1
natural_image
Technical line drawing of a bicycle seat assembly with a close-up inset showing a device (no text or symbols present)Figure 9-2

natural_image
Technical line drawing of a firearm assembly (no text or symbols)Figure 9-3
natural_image
Technical line drawing of a bicycle wheel assembly with visible gears and hub (no text or symbols)Figure 10-1
Figure 11-1 Figure 11-2
natural_image
Technical line drawing of a bicycle seat assembly with two views (no text or symbols)Application SHARP Life

https://www.sharpconsumer.com/sharp-life-app
natural_image
Close-up of a gloved hand adjusting a bicycle brake lever (no text or symbols visible)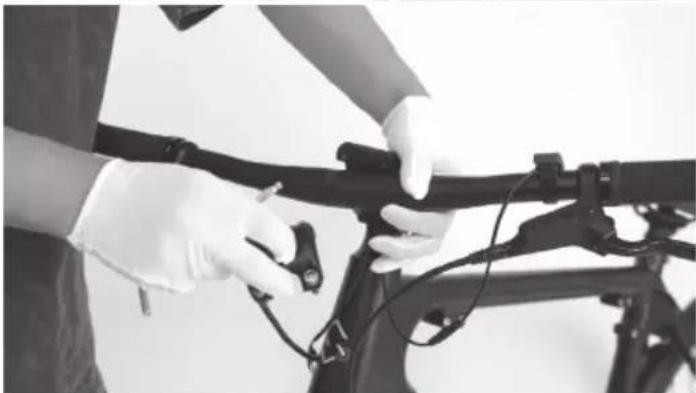
natural_image
Person in gloves adjusting a bicycle frame with cable (no visible text or symbols)
natural_image
Person adjusting a shared bicycle with visible 'SHAK' branding (no text or symbols on the bicycle itself)natural_image
Close-up of hands holding a black mechanical device with a small component, no visible text or symbols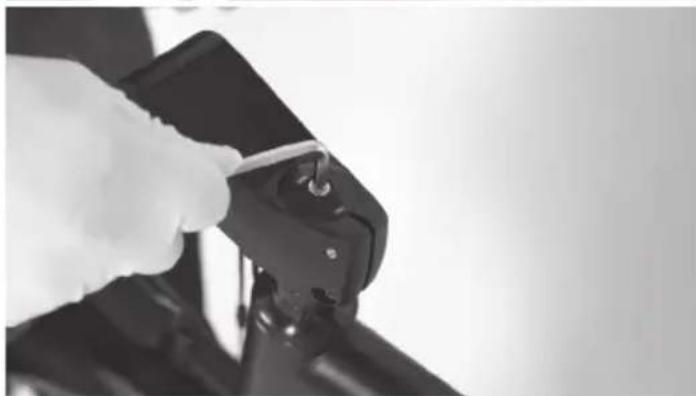
natural_image
Close-up of a hand holding a black mechanical component with a white clip, against a plain background (no text or symbols visible)
natural_image
Person wearing gloves handling a bicycle frame (no visible text or symbols)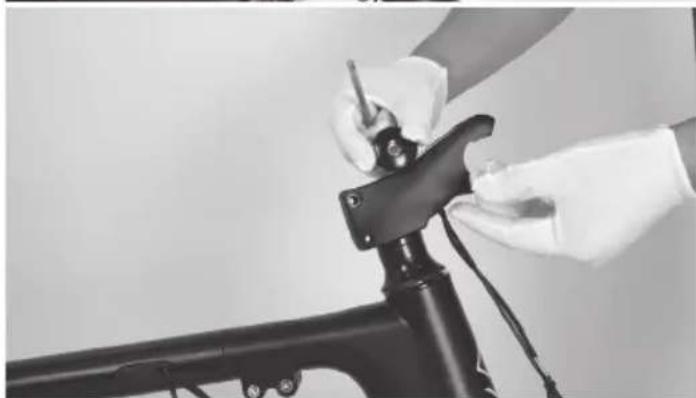
natural_image
Close-up of hands using a tool to adjust or install a black mechanical component (no visible text or symbols)natural_image
Person standing beside a bicycle with visible frame and wheels (no text or symbols)natural_image
Person assembling a shared bicycle with visible wheel rim and headrest (no text or symbols)
natural_image
Close-up of gloved hands holding a black brake stopper and a small black ring component (no visible text or symbols)
natural_image
Close-up of hands using a tool to adjust or install a bicycle brake lever (no visible text or symbols)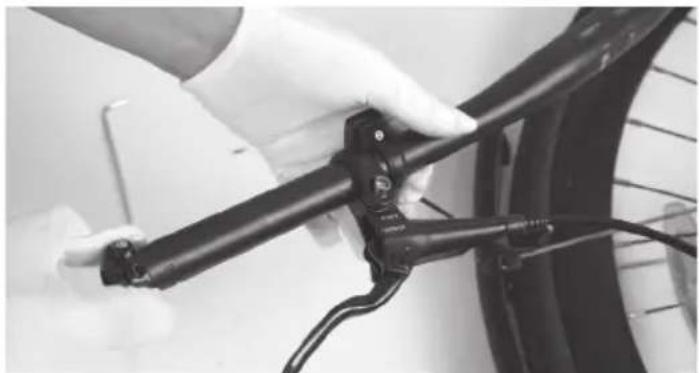
natural_image
Close-up of hands holding a bicycle brake lever with wires (no visible text or symbols)natural_image
Close-up of a bicycle tire being adjusted by a tool, no visible text or symbols
natural_image
Close-up of a bicycle tire being adjusted for a cable, with gloved hands visible (no text or symbols)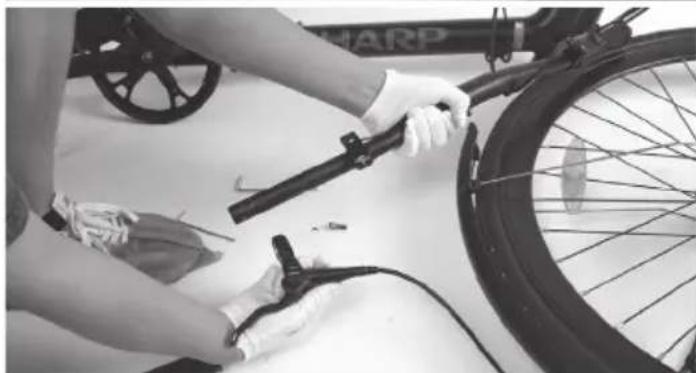
natural_image
Person cleaning a bicycle tire with a handbar, no visible text or symbolsnatural_image
Close-up of a gloved hand holding a black cable or cable connector, no visible text or symbols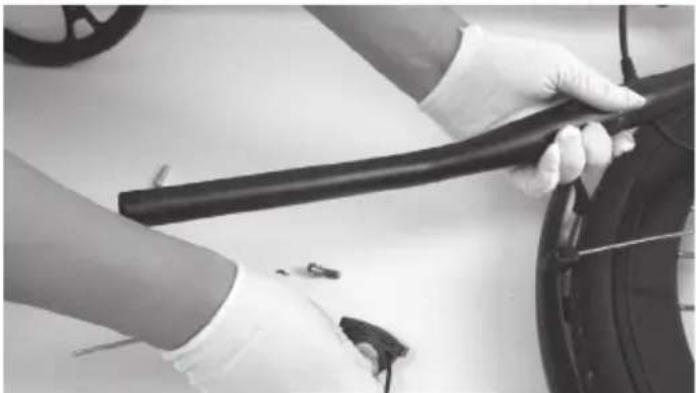
natural_image
Close-up of hands holding a black cable or hose, with a film reel in the background (no visible text or symbols)natural_image
Close-up of hands holding a black cable with a white plastic clip, no visible text or symbols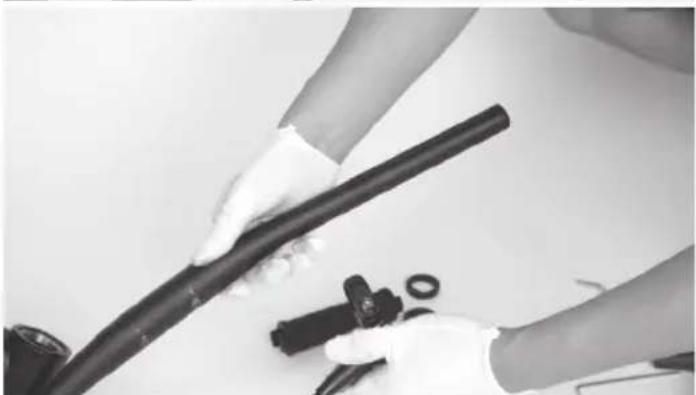
natural_image
Close-up of hands adjusting a black cylindrical pipe with mechanical components nearby (no visible text or symbols)natural_image
Close-up of a person adjusting a bicycle wheel and gear assembly (no visible text or symbols)
natural_image
Close-up of hands adjusting a bicycle wheel and chain, no visible text or symbolsnatural_image
Close-up of a person adjusting a bicycle wheel assembly (no visible text or symbols)
natural_image
Close-up of hands assembling a bicycle wheel assembly (no visible text or symbols)
natural_image
Close-up of hands adjusting a bicycle wheel and gear mechanism (no visible text or symbols)natural_image
Close-up of a person adjusting a bicycle wheel assembly (no visible text or symbols)
natural_image
Close-up of hands assembling a bicycle wheel with visible gears and spokes (no text or symbols)
natural_image
Close-up of a bicycle wheel assembly with a hand adjusting the wheel rim (no visible text or symbols)natural_image
Two-panel black-and-white photo showing a bicycle wheel assembly with a hand adjusting the gear and a close-up of the wheel rim (no text or symbols visible)natural_image
Close-up of hands assembling a bicycle wheel assembly with gear links (no text or symbols visible)natural_image
Four-panel black-and-white photo showing bicycle wheel assembly and maintenance, including hand tooling and cleaning steps (no text or symbols visible)natural_image
Two black-and-white photos showing hands assembling a bicycle wheel and a mechanical component (no visible text or symbols)natural_image
Close-up of hands using a tool to adjust bicycle frame structure, showing two sequential steps (no text or symbols visible)natural_image
Close-up of a bicycle's front wheel assembly with a hand adjusting the component (no visible text or symbols)
natural_image
Close-up of hands assembling a bicycle wheel frame with a mechanical component (no visible text or symbols)
natural_image
Person adjusting a bicycle tire with hands, no visible text or symbolsnatural_image
Person assembling a bicycle frame with a tool, no visible text or symbols
natural_image
Person assembling a bicycle frame with visible wheels and structural components (no text or symbols)natural_image
Person assembling a bicycle frame with a tool, no visible text or symbols
natural_image
Person assembling a bicycle frame with a tool, no visible text or symbols
natural_image
Close-up of hands using a tool to adjust or install a black metal bracket (no visible text or symbols)
natural_image
Close-up of hands using a mechanical clamp or crimping tool to adjust a black metal bracket (no text or symbols visible)
natural_image
Close-up of a black bicycle frame structure with gear and mounting brackets (no text or symbols visible)
natural_image
Close-up of hands in gloves handling mechanical components (no visible text or symbols)Ensuite, retirez la ceinture.
natural_image
Close-up of a bicycle frame structure with visible joints and brackets (no text or symbols)natural_image
Three-panel black-and-white photo showing a person using a bicycle brake system to adjust the wheel and foot (no text or symbols visible)natural_image
Person using a Sharp bicycle on a stationary platform (no visible text or symbols)
natural_image
Person using a Sharp bicycle on a stationary platform (no visible text or symbols)natural_image
Close-up of a hand holding a black bicycle brake lever with visible 'SHARP' branding (no text or symbols on the device itself)natural_image
Person assembling a Sharp bicycle frame with visible wiring and components (no text or symbols)
natural_image
Two people assembling a bicycle frame with visible gears and components (no text or symbols)
natural_image
Person assembling mechanical components including a wheel, sensor, and detector on a white surface (no visible text or symbols)
natural_image
Person assembling mechanical devices on a white surface (no visible text or symbols)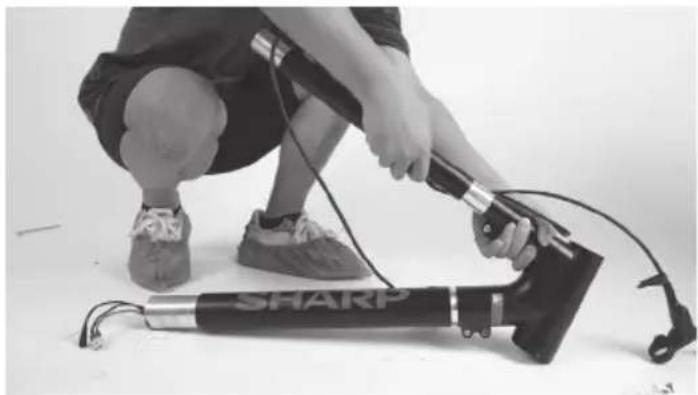
natural_image
Person kneeling with a handheld device labeled 'SHARP' on a flat surface (no text or symbols on device body)
natural_image
Person kneeling on a bench with a device and two cylindrical equipment (no visible text or symbols)natural_image
Assorted bicycle components including bicycles, shakers, and tools arranged on a plain surface (no text or symbols visible)www.sharpconsumer.com/RS08EB/#down
natural_image
Line drawing of a shared bicycle with a compact box and wheels (no text or symbols)natural_image
Two circular icons showing a shoe and helmet, no text or symbols present
www.sharpconsumer.com/contact/

www.sharpconsumer.com/support/

www.sharpconsumer.com/documents-of-conformity/


natural_image
Technical line drawing of a mechanical device with no visible text or symbolsFigura 1-1 Figura 1-2
NOTA:
natural_image
Technical line drawing of a robotic arm with articulated joints and base mount (no text or symbols)Figura 1-3 Figura 1-4
natural_image
Line drawing of a bicycle with propeller and wheel (no text or symbols)natural_image
Line drawing of a mechanical device with articulated arms and cylindrical body (no text or symbols)

natural_image
Two cylindrical electronic components with internal wiring, shown from different angles (no text or symbols)Figura 2-1 Figura 2-2
Figura 3-1

natural_image
Line drawing of a bicycle leg with seat and support bracket (no text or symbols)natural_image
Technical line drawing of two cylindrical mechanical components with a wrench and clamp (no text or symbols)Figura 4-1 Figura 4-2

Figura 4-3

natural_image
Technical line drawing of a mechanical assembly with intersecting rods and a fork, no text or symbols presentFigura 4-4 Figura 4-5
NOTE:
natural_image
Line drawing of a bicycle wheel with visible frame and hub (no text or symbols)Figura 5-1

natural_image
Technical line drawing of a bicycle wheel assembly with visible spokes and hub (no text or symbols)Figura 5-2

natural_image
Line drawing of a bicycle wheel and suspension bracket (no text or symbols)Figura 5-3
natural_image
Line drawing of a bicycle's front wheel and seat assembly (no text or symbols)Figura 6-1
natural_image
Mechanical diagram of a bicycle wheel with gear and hub assembly, showing mechanical components and a close-up inset (no text or labels)Figura 6-2

natural_image
Mechanical assembly diagram showing a bicycle wheel with levers and gear components, no text or symbols presentFigura 6-3
natural_image
Technical line drawing of two mechanical components with no visible text or symbols
natural_image
Mechanical gear assembly diagram showing a wheel and shaft components (no text or labels)Figura 8-1
NOTE:
natural_image
Technical line drawing of mechanical components including a crimping tool, a cylindrical component, and a clamp bracket (no text or symbols)Figura 9-1

natural_image
Technical line drawing of a bicycle seat assembly with a close-up inset showing a small device (no text or symbols present)Figura 9-2
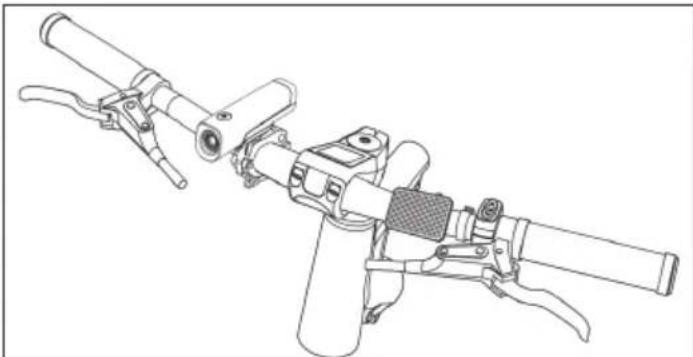
natural_image
Technical line drawing of a mechanical device with lever and grip assembly (no text or symbols)Figura 9-3
natural_image
Technical line drawing of a bicycle wheel assembly with visible gears and levers (no text or symbols)Figura 10-1
Figura 11-1 Figura 11-2
Interfaccia Display

natural_image
Technical line drawing of a bicycle seatbelt mechanism with two views (no text or symbols)App SHARP Life

https://www.sharpconsumer.com/sharp-life-app
natural_image
Close-up of a gloved hand adjusting a bicycle brake lever (no text or symbols visible)
natural_image
Person in gloves adjusting a bicycle frame with cable (no visible text or symbols)
natural_image
Person holding a shared bicycle with visible 'SHARP' branding, standing beside it (no text or symbols on the bicycle itself)natural_image
Four-panel black-and-white photo sequence showing hands using a bicycle to adjust the camera, demonstrating mechanical assembly (no text or symbols visible)natural_image
Person standing beside a bicycle with visible frame and wheels (no text or symbols)natural_image
Person assembling a shared bicycle wheel with a wrench, no visible text or symbols
natural_image
Close-up of gloved hands holding a black brake lever and a small black ring component (no visible text or symbols)
natural_image
Close-up of a hand using a tool to adjust or install a bicycle brake lever (no text or symbols visible)
natural_image
Close-up of hands holding a bicycle brake lever with visible wiring (no text or symbols)natural_image
Close-up of a bicycle tire being adjusted by a tool, with no visible text or symbols
natural_image
Close-up of a bicycle tire being adjusted by hand, showing mechanical components and wiring (no text or symbols visible)
natural_image
Person cleaning a bicycle tire with a hand using a tool (no visible text or symbols)natural_image
Close-up of gloved hands installing a black cable or cable connector on a vehicle (no visible text or symbols)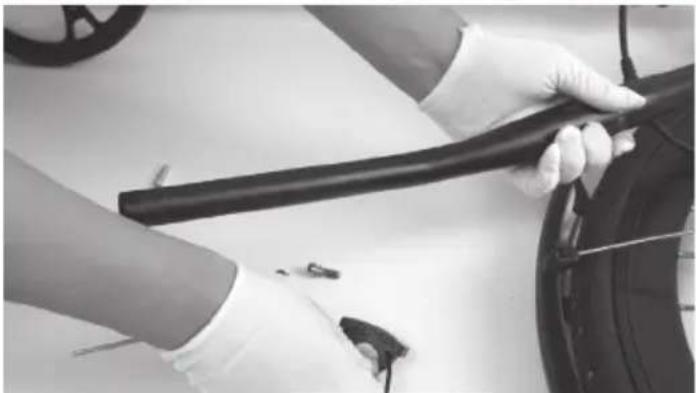
natural_image
Close-up of hands holding a black cable or wire on a white surface, with a film reel in the background (no visible text or symbols)natural_image
Close-up of gloved hands holding a black cable or wire component (no visible text or symbols)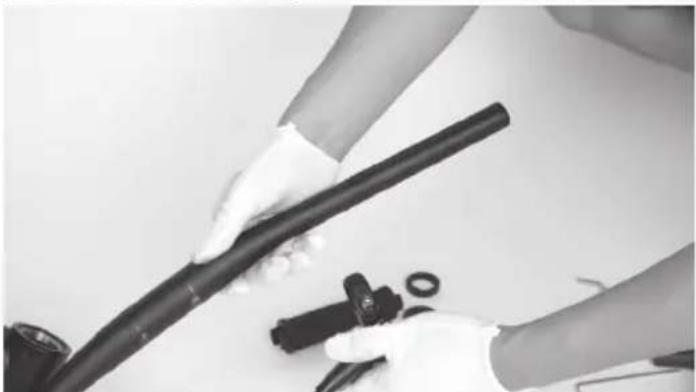
natural_image
Close-up of hands holding a black cable with plastic components nearby (no visible text or symbols)natural_image
Two black-and-white photos showing hands adjusting a bicycle wheel and gear assembly (no text or symbols visible)natural_image
Two-panel black bicycle wheel assembly photo showing hands adjusting components (no text or symbols visible)
natural_image
Close-up of hands adjusting a bicycle wheel and gear mechanism (no visible text or symbols)natural_image
Three-panel black-and-white photo showing hands assembling a bicycle wheel, showing mechanical components and assembly (no text or symbols visible)natural_image
Two-panel black-and-white photo showing a bicycle wheel assembly and hand positioning on its wheel (no text or symbols visible)natural_image
Close-up of hands assembling a bicycle wheel assembly with gear links (no text or symbols visible)natural_image
Four-panel black-and-white photo showing bicycle wheel assembly and maintenance, including hand tool and hands adjusting components (no text or symbols visible)natural_image
Two black-and-white photos showing hands assembling a bicycle wheel and a mechanical component (no visible text or symbols)natural_image
Close-up of hands using a saw to adjust bicycle frame structure (no text or symbols visible)natural_image
Three-panel black-and-white photo showing a bicycle wheel assembly: hand, close-up of mechanical components, and close-up of hands assembling a bicycle wheel (no text or symbols visible)natural_image
Person assembling a bicycle frame with a tool, no visible text or symbols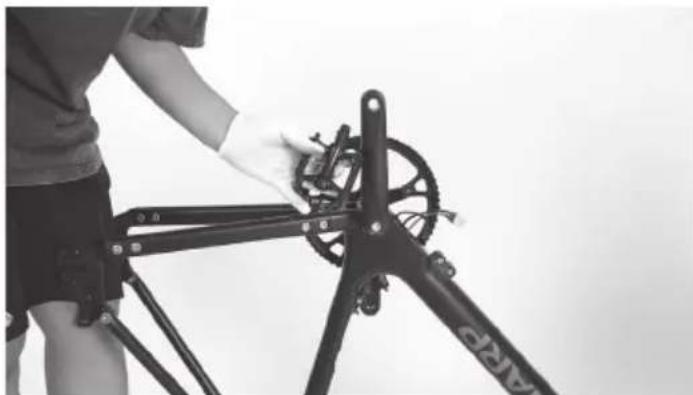
natural_image
Person assembling a bicycle frame with visible wheels and structural components (no text or symbols)natural_image
Person assembling a bicycle frame with visible gears and tools (no text or symbols)
natural_image
Person using a mechanical tool to adjust a bicycle frame (no visible text or symbols)
natural_image
Close-up of hands using a tool to adjust or install a black mechanical component (no visible text or symbols)
natural_image
Close-up of hands using a mechanical clamp or bracket to adjust a cable (no visible text or symbols)
natural_image
Close-up of a black bicycle frame with gear and mounting brackets (no text or symbols visible)
natural_image
Close-up of hands in gloves handling mechanical tools and crimping components (no visible text or symbols)natural_image
Close-up of a bicycle frame structure with visible joints and brackets (no text or symbols)natural_image
Three-panel black-and-white photo showing a person using a bicycle-mounted device, demonstrating step-by-step assembly (no text or symbols visible)natural_image
Person using a shared stationary bike with a head-mounted sensor (no visible text or symbols)
natural_image
Person using a Sharp bicycle on a stationary platform (no visible text or symbols)natural_image
Close-up of a hand holding a black bicycle brake lever with visible 'SHARP' branding (no text or symbols on the device itself)natural_image
Person assembling a Sharp bicycle frame with visible wiring and components (no text or symbols)
natural_image
Two people assembling a bicycle frame with visible gears and wiring (no text or symbols)
natural_image
Person using a handheld device with a mechanical scale nearby (no visible text or symbols)
natural_image
Person assembling a mechanical device with tools and cables on a white surface (no visible text or symbols)
natural_image
Person kneeling on a floor using a sharp pressure tool, no visible text or symbols
natural_image
Person kneeling on a bench with a mechanical device and two cylindrical components, no visible text or symbolsnatural_image
Assorted bicycle components including bicycles, shakers, and tools arranged on a white surface (no text or symbols visible)www.sharpconsumer.com/RS08EB/#down

natural_image
Line drawing of a shared bicycle with a compact box and wheels (no text or symbols)natural_image
Two circular icons showing a sneaker and a helmet, no text or symbols present.
www.sharpconsumer.com/support/

www.sharpconsumer.com/documents-of-conformity/

Qué hay en la caja:
natural_image
Technical line drawing of a mechanical device with no visible text or symbolsMontando la E-bike
Figura 1-1 Figura 1-2
NOTA:
natural_image
Technical line drawing of a robotic arm with articulated joints and base mount (no text or symbols)Figura 1-3 Figura 1-4
natural_image
Line drawing of a bicycle with visible wheel, spokes, and handle (no text or symbols)natural_image
Line drawing of a mechanical device with articulated arms and legs (no text or symbols)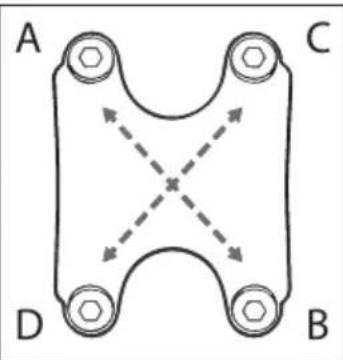
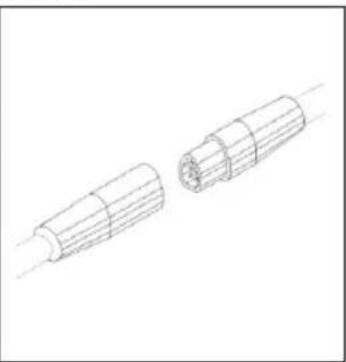
natural_image
Two cylindrical mechanical components with internal grooves, shown from different angles (no text or symbols)Figura 2-1 Figura 2-2
Figura 3-1
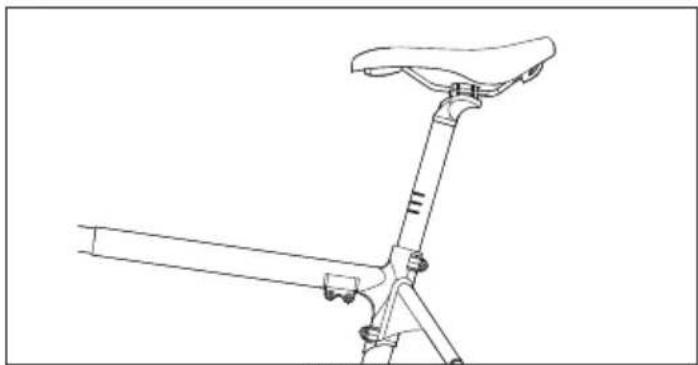
natural_image
Line drawing of a bicycle leg with seat and support bracket (no text or symbols)natural_image
Technical line drawing of two cylindrical mechanical components with a wrench, no text or symbols presentFigura 4-1 Figura 4-2

Figura 4-3

natural_image
Technical line drawing of a mechanical assembly with intersecting rods and a fork, no text or symbols presentFigura 4-4 Figura 4-5
NOTAS:
natural_image
Technical line drawing of a bicycle wheel assembly (no text or symbols)Figura 5-1

natural_image
Technical line drawing of a bicycle wheel assembly with visible spokes and hub (no text or symbols)Figura 5-2

natural_image
Technical line drawing of a bicycle wheel and suspension bracket (no text or symbols)Figura 5-3
PASO 6: Instale el guardabarros trasero
natural_image
Line drawing of a bicycle's front wheel and seat assembly (no text or symbols)Figura 6-1

natural_image
Mechanical diagram of a bicycle wheel assembly with gear and hub, showing mechanical components and a close-up inset (no text or labels)Figura 6-2

natural_image
Mechanical assembly diagram showing a wheel with levers and gear mechanism, no text or symbols presentFigura 6-3
PASO 7: Conecta el Cable
natural_image
Technical line drawing of a mechanical device with no visible text or symbolsFigura 7-1

Figura 7-2
natural_image
Technical line drawing of two mechanical components with no visible text or symbols
natural_image
Technical line drawing of a bicycle wheel assembly with labeled components (no text or symbols present)Figura 8-1
NOTAS:
natural_image
Technical line drawing of mechanical components including a tool, clamping bracket, and cylindrical housing (no text or symbols)Figura 9-1
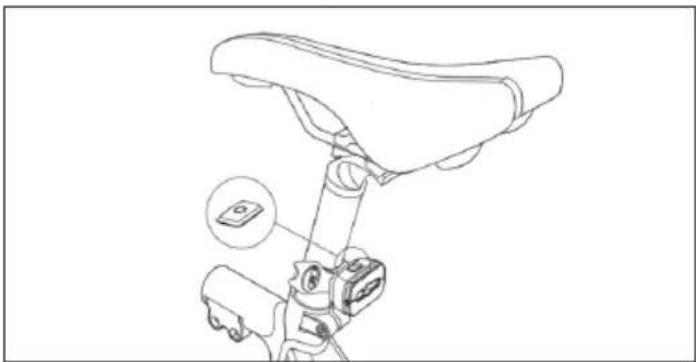
natural_image
Technical line drawing of a bicycle seat assembly with a close-up inset showing a small device (no text or symbols present)Figura 9-2

natural_image
Technical line drawing of a mechanical device with lever arms and handle (no text or symbols)Figura 9-3
PASO 10: Instale la pata de cabra
natural_image
Technical line drawing of a bicycle wheel assembly with visible gears and levers (no text or symbols)Figura 10-1
Figura 11-1 Figura 11-2
Conéctate a la APP SHARP Life
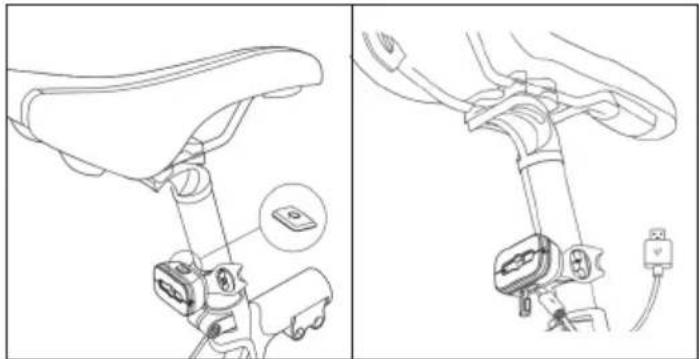
natural_image
Technical line drawing of a bicycle seatbelt mechanism (no text or symbols)
https://www.sharpconsumer.com/sharp-life-app
natural_image
Close-up of a gloved hand adjusting a bicycle brake lever (no text or symbols visible)
natural_image
Person in gloves adjusting a bicycle frame with cable (no visible text or symbols)
natural_image
Person holding a shared bicycle with visible 'SHAK' branding, standing beside it (no text or symbols on the bicycle itself)natural_image
Person standing beside a bicycle with visible frame and wheels (no text or symbols)natural_image
Person assembling a bicycle frame with a hand tool, no visible text or symbols
natural_image
Close-up of gloved hands holding a black brake lever and a small black ring component (no visible text or symbols)
natural_image
Close-up of a hand using a tool to adjust or install a bicycle brake lever (no text or symbols visible)
natural_image
Close-up of hands holding a black bicycle brake lever with wires (no visible text or symbols)Paso 5: Retire la palanca de freno
natural_image
Close-up of a bicycle tire being adjusted by a hand, showing mechanical components and wiring (no text or symbols visible)
natural_image
Close-up of a bicycle tire being adjusted by a tool, no visible text or symbols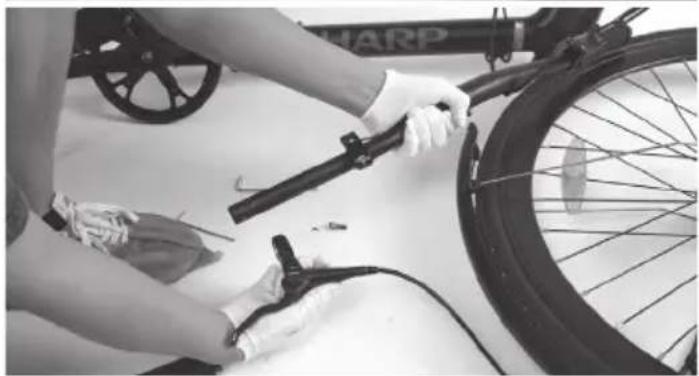
natural_image
Person cleaning a bicycle tire with a hand using a tool (no visible text or symbols)natural_image
Person in gloves handling a black cable or pipe fitting (no visible text or symbols)
natural_image
Person in gloves handling a black cable or hose on a tire, with no visible text or symbolsnatural_image
Close-up of hands holding a black cable with wire, no visible text or symbols
natural_image
Close-up of hands holding a black cylindrical pipe with mechanical components nearby (no visible text or symbols)natural_image
Close-up of a person adjusting a bicycle wheel assembly (no visible text or symbols)
natural_image
Close-up of hands adjusting a bicycle wheel assembly (no visible text or symbols)Paso 9: Desconecte los cables
natural_image
Close-up of hands adjusting a bicycle wheel assembly (no visible text or symbols)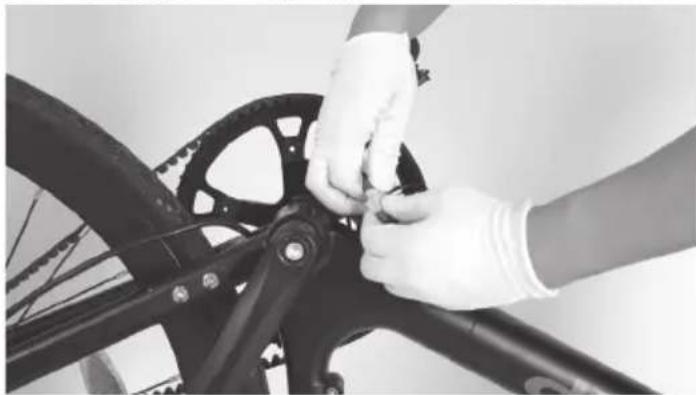
natural_image
Close-up of hands adjusting a bicycle wheel component (no visible text or symbols)
natural_image
Close-up of hands adjusting a bicycle wheel and gear mechanism (no visible text or symbols)Paso 10: Retire la pata de cabra
natural_image
Close-up of a person adjusting bicycle wheel components (no visible text or symbols)
natural_image
Close-up of hands assembling a bicycle wheel with visible gears and blades (no text or symbols)
natural_image
Close-up of a bicycle wheel with visible mechanical components and a hand adjusting the wheel (no text or symbols)natural_image
Two-panel black-and-white photo showing a bicycle wheel assembly with a hand adjusting the gear and a close-up of the wheel rim (no text or symbols visible)natural_image
Close-up of hands assembling a bicycle wheel assembly with gear links (no text or symbols visible)natural_image
Four-panel black-and-white photo showing bicycle wheel assembly and maintenance, including hand tooling and cleaning steps (no text or symbols visible)Paso 12: Retire el guardabarros trasero
natural_image
Two black-and-white photos showing hands assembling a bicycle wheel and a mechanical component (no visible text or symbols)natural_image
Close-up of hands using a saw to cut the bicycle frame, showing mechanical components and tool path (no text or symbols visible)natural_image
Close-up of a bicycle wheel assembly with a hand adjusting the component (no visible text or symbols)
natural_image
Close-up of hands assembling a bicycle wheel frame with a mechanical component (no visible text or symbols)
natural_image
Person adjusting a bicycle tire with hands, no visible text or symbolsnatural_image
Person assembling a bicycle frame with a tool, no visible text or symbols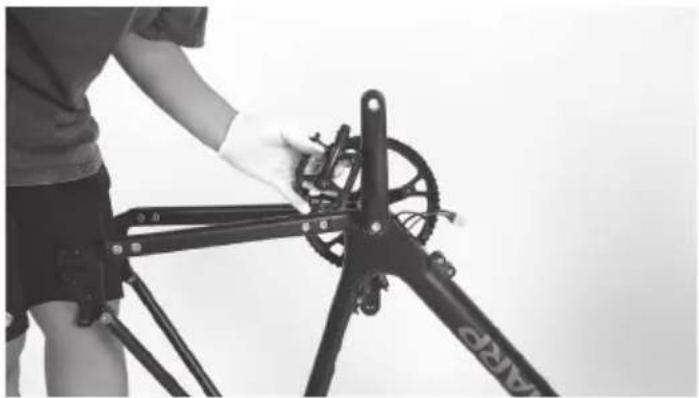
natural_image
Person assembling a bicycle frame with visible wheels and structural components (no text or symbols)natural_image
Person assembling a bicycle frame with a tool, no visible text or symbols
natural_image
Person assembling a bicycle frame with a tool, no visible text or symbols
natural_image
Close-up of hands installing a black metal bracket with screws, no visible text or symbols
natural_image
Close-up of hands adjusting a mechanical linkage component (no visible text or symbols)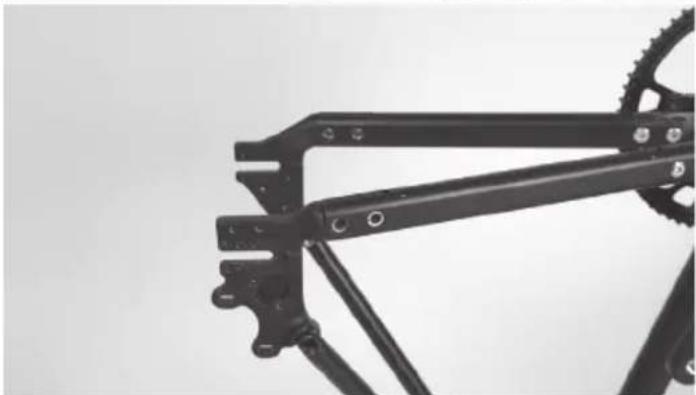
natural_image
Close-up of a black bicycle frame structure with visible gears and mounting brackets (no text or symbols)
natural_image
Close-up of hands in gloves handling mechanical components (no visible text or symbols)natural_image
Close-up of a bicycle frame structure with visible joints and brackets (no text or symbols)natural_image
Person using a shared stationary bike with a head-mounted sensor (no visible text or symbols)
natural_image
Person using a Sharp bicycle on a stationary platform (no visible text or symbols)natural_image
Black-and-white photo of a bicycle frame with a hand holding it, showing mechanical components and a 'SHARP' label (no other text or symbols visible)natural_image
Two black-and-white photos showing a person assembling a Sharp bicycle frame, with no visible text or symbols.
natural_image
Person assembling a mechanical device with a wheel and sensor components (no visible text or symbols)
natural_image
Person assembling mechanical components on a white surface, including a lever and tripod (no visible text or symbols)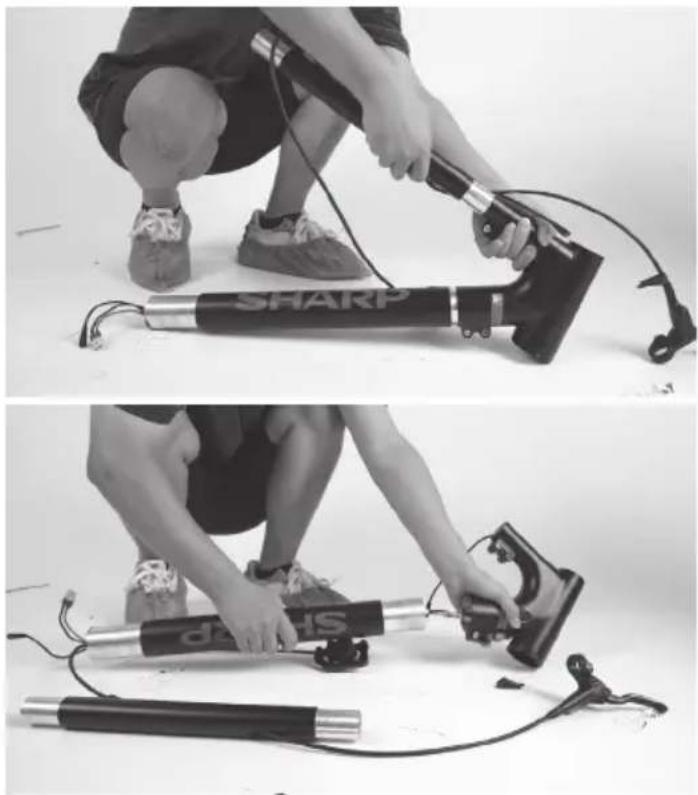
natural_image
Two black-and-white photos showing a person using a sharp pen and a handheld device, both demonstrating a step-up (no text or symbols visible)natural_image
Assorted bicycle components including bicycles, shakers, pedals, and gear (no text or symbols visible)Par de apriete:
www.sharpconsumer.com/RS08EB/#down


natural_image
Line drawing of a shared bicycle with a compact box and wheels (no text or symbols)
www.sharpconsumer.com/contact/

www.sharpconsumer.com/support/

www.sharpconsumer.com/documents-of-conformity/


natural_image
Technical line drawing of a mechanical device with no visible text or symbolsMontando a E-bike
natural_image
Diagram of a mechanical device with rotating arms and a handle, showing motion direction (no text or symbols)
Figura 1-1 Figura 1-2
NOTA:
natural_image
Line drawing of a robotic arm joint (no text or symbols)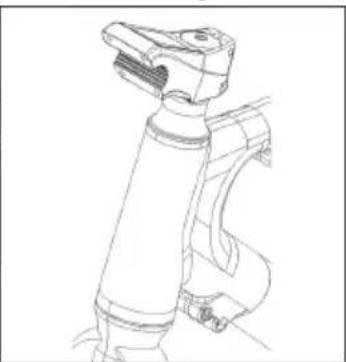
natural_image
Line drawing of a robotic arm joint (no text or symbols)Figura 1-3 Figura 1-4
natural_image
Line drawing of a bicycle with visible wheel, spokes, and propeller (no text or symbols)natural_image
Line drawing of a robotic arm with articulated joints and lever arms (no text or symbols)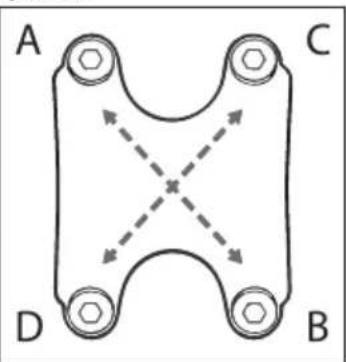
Figura 1-5

natural_image
Two cylindrical electronic components with ribbed leads, shown from different angles (no text or symbols)Figura 2-1 Figura 2-2
Figura 3-1

natural_image
Line drawing of a bicycle leg with seat and support bracket (no text or symbols)Figura 3-2
natural_image
Technical line drawing of two cylindrical mechanical components with a wrench and clamping mechanism (no text or symbols)Figura 4-1 Figura 4-2
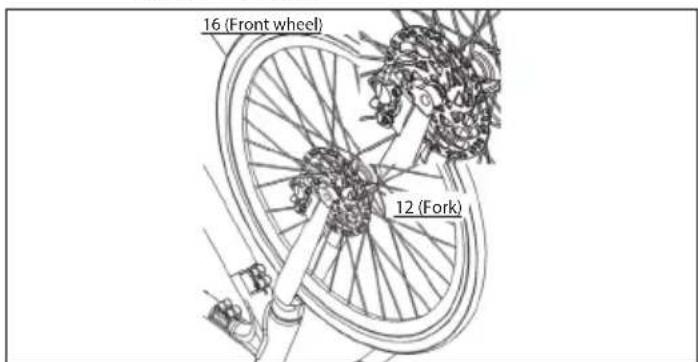
Figura 4-3

natural_image
Technical line drawing of a mechanical assembly with intersecting rods and a fork, no text or symbols presentFigura 4-4 Figura 4-5
NOTAS:
natural_image
Line drawing of a bicycle wheel with visible frame and hub (no text or symbols)Figura 5-1

natural_image
Technical line drawing of a bicycle wheel assembly (no text or symbols)Figura 5-2

natural_image
Line drawing of a bicycle wheel and suspension bracket (no text or symbols)Figura 5-3
PASSO 6: Instale o guarda-lamas traseiro
natural_image
Line drawing of a bicycle's front wheel and seat assembly (no text or symbols)Figura 6-1

natural_image
Technical diagram of a bicycle wheel assembly with gear and hub, showing mechanical components and a close-up inset (no text or labels)Figura 6-2

natural_image
Mechanical assembly diagram showing a wheel with levers and a close-up inset of a mechanical component (no text or symbols)Figura 6-3
PASSO 7: Conecte o Cabo
natural_image
Technical line drawing of two mechanical components with no visible text or symbols
natural_image
Mechanical gear assembly diagram showing a wheel and shaft components (no text or labels)Figura 8-1
NOTAS:
PASSO 9: Instale as luzes, refletor, etc.
natural_image
Technical line drawing of mechanical components including a crimping tool, a cylindrical component, and a clamp bracket (no text or symbols)Figura 9-1
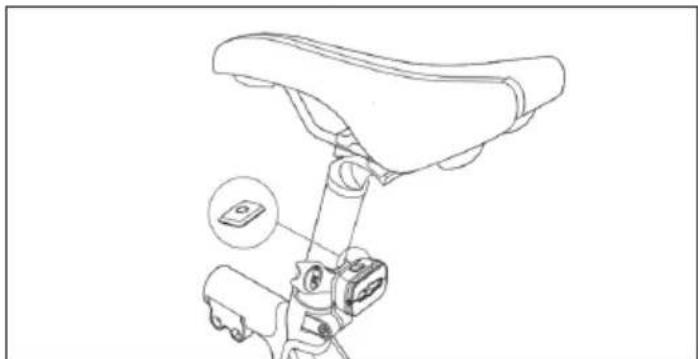
natural_image
Line drawing of a bicycle seat assembly with a highlighted device (no text or symbols)Figura 9-2

natural_image
Technical line drawing of a mechanical device with lever and grip assembly (no text or symbols)Figura 9-3
PASSO 10: Instale o descanso
natural_image
Technical line drawing of a bicycle wheel assembly with visible gears and spokes (no text or symbols)Figura 10-1
Figura 11-1 Figura 11-2

natural_image
Technical line drawing of a bicycle seatbelt mechanism with labeled components (no text or symbols)Aplicativo SHARP Life
natural_image
Close-up of a gloved hand adjusting a bicycle brake lever (no text or symbols visible)
natural_image
Person in gloves adjusting a bicycle frame with cable (no visible text or symbols)
natural_image
Person holding a shared bicycle with visible 'SHARP' branding, standing beside it (no text or symbols on the bicycle itself)
https://www.sharpconsumer.com/sharp-life-app
Passo 2: Remova o caule e o visor
natural_image
Four-panel black-and-white photo sequence showing hands using a bicycle to adjust the camera, demonstrating mechanical assembly (no text or symbols visible)natural_image
Person standing beside a bicycle with visible frame and wheels (no text or symbols)natural_image
Person assembling a shared bicycle frame with visible wheel and spokes (no text or symbols)
natural_image
Close-up of gloved hands holding a black mechanical component, no visible text or symbols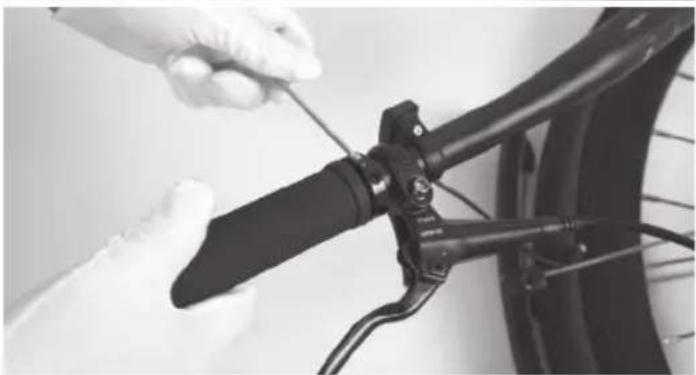
natural_image
Close-up of a hand using a tool to adjust the bicycle wheel (no text or symbols visible)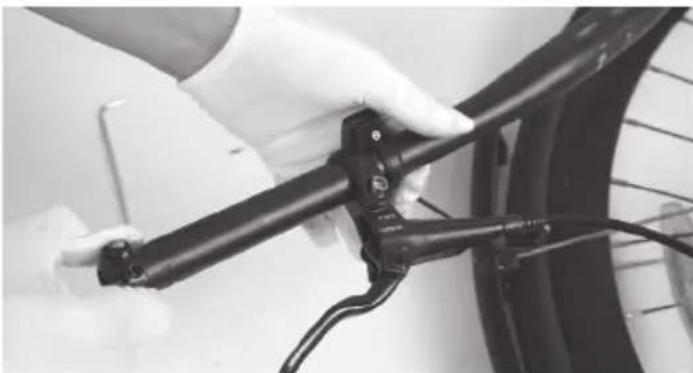
natural_image
Close-up of hands holding a black bicycle brake lever with cable (no visible text or symbols)Passo 5: Remova a alavanca de travão
natural_image
Close-up of a bicycle tire being adjusted for a cable, with a hand partially visible (no text or symbols)
natural_image
Close-up of a bicycle wheel being adjusted for a cable, with a wire mesh fence visible (no text or symbols)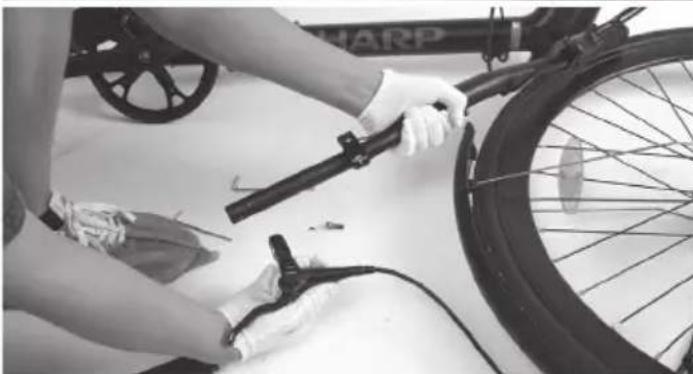
natural_image
Person cleaning a bicycle tire with a hand tool, no visible text or symbolsnatural_image
Close-up of gloved hands adjusting a black cable or wire component (no visible text or symbols)
natural_image
Close-up of hands holding a black cable or hose with a tire, no visible text or symbolsnatural_image
Close-up of hands holding a black cable or connector with a transparent clip, no visible text or symbols
natural_image
Close-up of hands holding a black cable with a small inset showing a ring and nut (no text or symbols visible)natural_image
Close-up of a person adjusting a bicycle wheel assembly (no visible text or symbols)
natural_image
Close-up of hands assembling a bicycle wheel and chain (no visible text or symbols)natural_image
Close-up of hands adjusting a bicycle wheel assembly (no visible text or symbols)
natural_image
Close-up of hands adjusting a bicycle wheel component (no visible text or symbols)
natural_image
Close-up of hands adjusting a bicycle wheel and gear mechanism (no visible text or symbols)Passo 10: Remova o descanso
natural_image
Close-up of a person adjusting a bicycle wheel, showing mechanical components and wiring (no text or symbols visible)
natural_image
Close-up of hands assembling a bicycle wheel with visible tracks and gear (no text or symbols)
natural_image
Close-up of a bicycle wheel with visible mechanical components and a hand adjusting the wheel (no text or symbols)Passo 11: Remova o cinto
natural_image
Two-panel black-and-white photo showing a bicycle wheel assembly and hand positioning on its wheel (no text or symbols visible)natural_image
Close-up of hands assembling a bicycle wheel assembly with gear links (no text or symbols visible)natural_image
Four-panel black-and-white photo showing bicycle wheel assembly and maintenance, including hand tool and hands operating a bicycle (no text or symbols visible)natural_image
Two black-and-white photos showing hands assembling a bicycle wheel and a mechanical assembly (no visible text or symbols)natural_image
Two black bicycle frame components being adjusted for a tool, showing the blade and handle (no text or symbols visible)natural_image
Close-up of a bicycle wheel with visible mechanical components and a hand adjusting the gear (no text or symbols)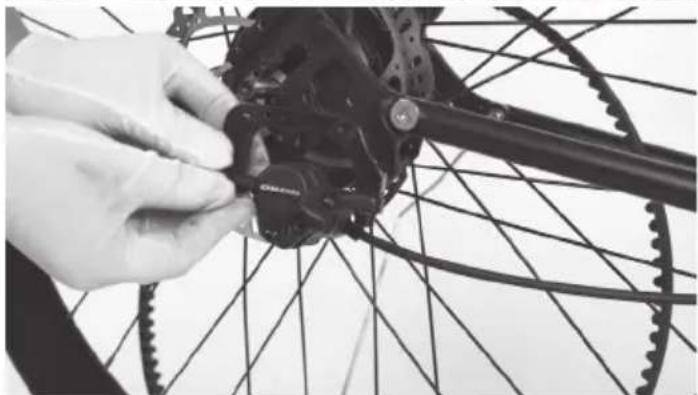
natural_image
Close-up of hands assembling a bicycle wheel frame with a black brake caliper (no visible text or symbols)
natural_image
Person adjusting a bicycle wheel on a white surface, no visible text or symbolsPasso 14: Remova os pedais
natural_image
Person using a bicycle-mounted device with visible wheels and a handle (no text or symbols)
natural_image
Person assembling a bicycle frame with visible wheels and structural components (no text or symbols)Passo 15: Remova o dropout
natural_image
Person assembling a bicycle frame with visible gears and tools (no text or symbols)
natural_image
Person using a mechanical tool to adjust a bicycle frame (no visible text or symbols)
natural_image
Close-up of hands using a tool to adjust or install a black mechanical component (no visible text or symbols)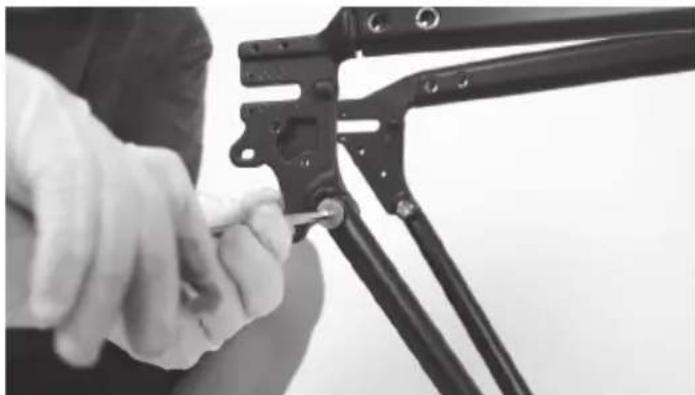
natural_image
Close-up of hands using a mechanical clamp or bracket to adjust a cable (no visible text or symbols)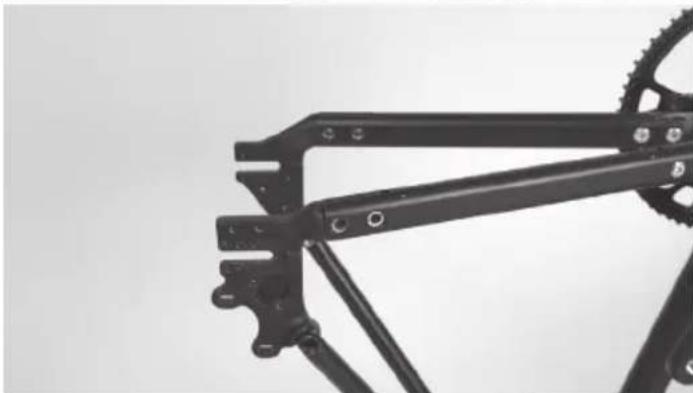
natural_image
Close-up of a black bicycle frame structure with visible gears and brackets (no text or symbols)
natural_image
Close-up of hands in gloves handling mechanical tools and crimping components (no visible text or symbols)natural_image
Close-up of a bicycle frame structure with visible joints and brackets (no text or symbols)natural_image
Close-up of a person adjusting a bicycle frame with visible gears and components (no text or symbols)
natural_image
Person wearing gloves and shoes working on a bicycle leg assembly (no visible text or symbols)
natural_image
Person using a stationary bike with a leg, showing the mechanism and body positioning (no text or symbols visible)Passo 17: Remova o poste do selim
natural_image
Person using a Sharp stationary exercise bike (no visible text or symbols)
natural_image
Person using a Sharp bicycle on a stationary platform (no visible text or symbols)natural_image
Black-and-white photo of a SHARP bicycle with visible branding and mechanical components (no text or symbols on the main subject)Remova a braçadeira de borracha do tubo superior.
natural_image
Person assembling a Sharp bicycle frame with visible wiring and mechanical components (no text or symbols)
natural_image
Two people assembling a bicycle frame with visible gears and components (no text or symbols)
natural_image
Person using a handheld device with a mechanical scale nearby (no visible text or symbols)
natural_image
Person assembling a mechanical device with attached lever and cable (no visible text or symbols)
natural_image
Person kneeling with a handheld device labeled 'SHARP' attached to a cylindrical device (no visible text or symbols on the device itself)
natural_image
Person kneeling on a bench with a mechanical device and two cylindrical components, no visible text or symbolsnatural_image
Assorted bicycle components including bicycles, shakers, and tools arranged on a white surface (no text or symbols visible)Binários de Aperto:
| Peça Torque Nm | |
| Quadro Triangular 20 Nm | |
| Topo / Lado a Vapor 6 Nm/12 Nm | |
| Gancho a vapor 8 Nm | |
| Poste do assento 20 Nm | |
| Cadeia permanece 10 Nm | |
| Parafuso da manivela 40 Nm | |
| Ajuste os parafusos da junta R 6 Nm | |
| Tampas finais da roda traseira 45 Nm | |
| Porta de serviço 5 Nm | |
| Pinça de travão 8 Nm | |
| Tampa final das pegas 3 Nm | |
| Manetes de Travão 8 Nm | |
| Pedais L/R 18 Nm | |
| Guarda-lamas 5 Nm |
Re-montagem:
www.sharpconsumer.com/RS08EB/#down
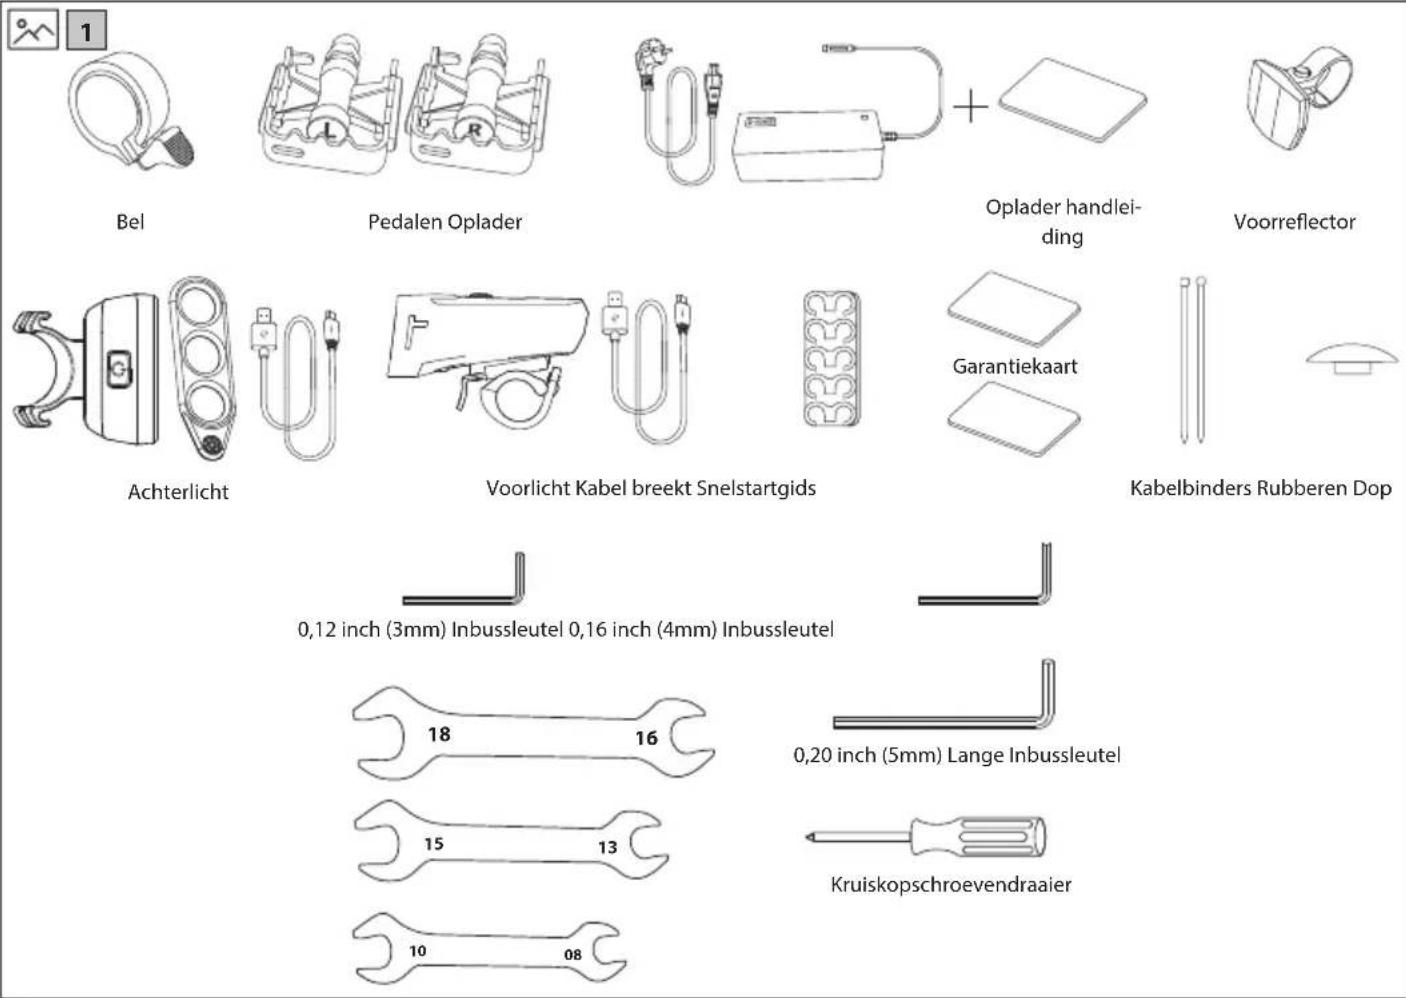
natural_image
Line drawing of a shared bicycle with a compact box and wheels (no text or symbols)
www.sharpconsumer.com/contact/

www.sharpconsumer.com/support/

www.sharpconsumer.com/documents-of-conformity/

Snelstartgids (dit document)
E-Bike Onderdelen
natural_image
Technical line drawing of a mechanical device with no visible text or symbolsnatural_image
Technical line drawing of a robotic arm showing two views (no text or symbols)natural_image
Line drawing of a bicycle with visible wheel, spokes, and handle (no text or symbols)natural_image
Line drawing of a mechanical device with lever and base (no text or symbols)
flowchart
graph TD
    A["A"] --> B["B"]
    B --> C["C"]
    C --> D["D"]
    D --> A
    style A fill:#fff,stroke:#000
    style B fill:#fff,stroke:#000
    style C fill:#fff,stroke:#000
    style D fill:#fff,stroke:#000
    style X stroke-dasharray: 5 5
Figuur 1-5

natural_image
Two cylindrical electronic components with internal wiring, shown from different angles (no text or symbols)Figuur 3-1

natural_image
Line drawing of a bicycle leg with seat and support bracket (no text or symbols)Figuur 3-2
natural_image
Technical line drawing of two cylindrical mechanical components with a wrench and clamp (no text or symbols)Figuur 4-3

natural_image
Technical line drawing of a mechanical assembly with intersecting rods and a fork, no text or symbols presentnatural_image
Technical line drawing of a bicycle wheel assembly (no text or symbols)Figuur 5-1

natural_image
Technical line drawing of a bicycle wheel assembly with spokes and hub (no text or symbols)Figuur 5-2
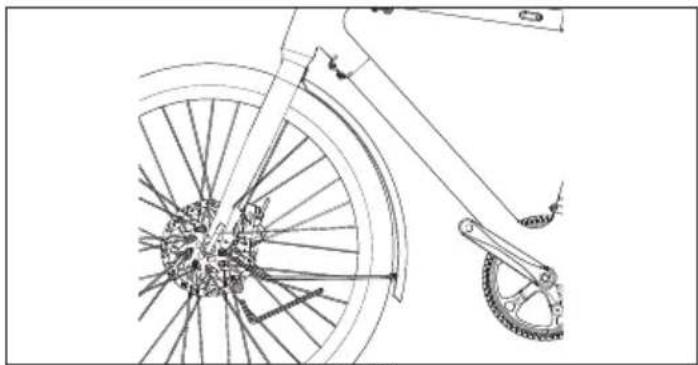
natural_image
Technical line drawing of a bicycle wheel and suspension bracket (no text or symbols)Figuur 5-3
natural_image
Line drawing of a bicycle's front wheel and seat assembly (no text or symbols)Figuur 6-1

natural_image
Diagram of a bicycle wheel assembly with gear and mechanical components, showing no text or symbolsFiguur 6-2

natural_image
Mechanical assembly diagram showing a wheel with levers and gear mechanism (no text or labels)Figuur 6-3

natural_image
Technical line drawing of a bicycle wheel assembly with labeled components (no text or symbols present)Figuur 8-1
natural_image
Technical line drawing of two mechanical components with no visible text or symbolsNOTITIES:
natural_image
Technical line drawing of mechanical components including a crimping tool, a cylindrical component, and a clamp bracket (no text or symbols)Figuur 9-1

natural_image
Technical line drawing of a bicycle suspension system with attached sensors and a device (no text or symbols)Figuur 9-2
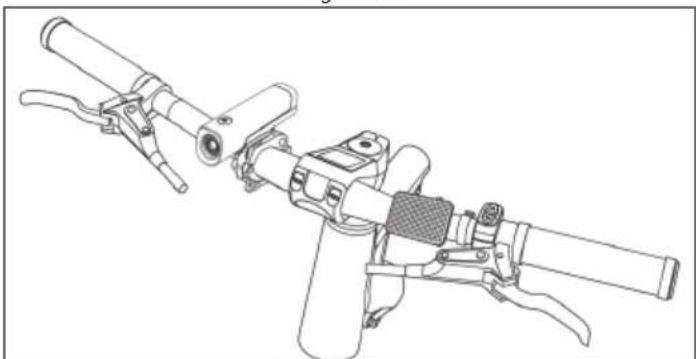
natural_image
Technical line drawing of a mechanical device with lever arms and handle (no text or symbols)Figuur 9-3
natural_image
Technical line drawing of a bicycle wheel assembly with visible spokes and levers (no text or symbols)Figuur 10-1
Weergave-interface
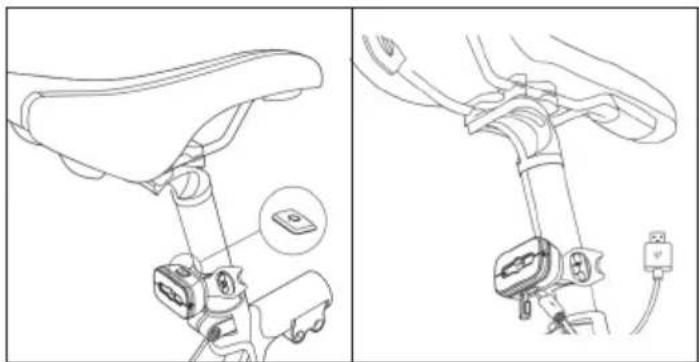
natural_image
Technical line drawing of a bicycle seat assembly with two views (top and side), no text or symbols present.SHARP Life App

https://www.sharpconsumer.com/sharp-life-app
natural_image
Close-up of a gloved hand adjusting a bicycle brake lever (no text or symbols visible)
natural_image
Person in gloves adjusting a bicycle frame with cable (no visible text or symbols)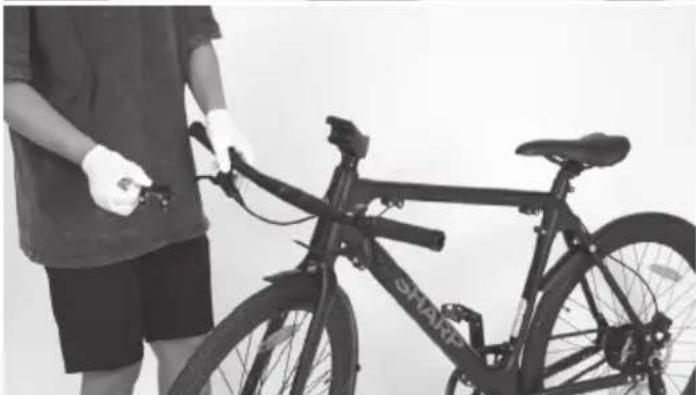
natural_image
Person holding a shared bicycle with visible 'SHARP' branding, standing beside it (no text or symbols on the bicycle itself)natural_image
Close-up of hands using a black mechanical tool to adjust or install a component (no visible text or symbols)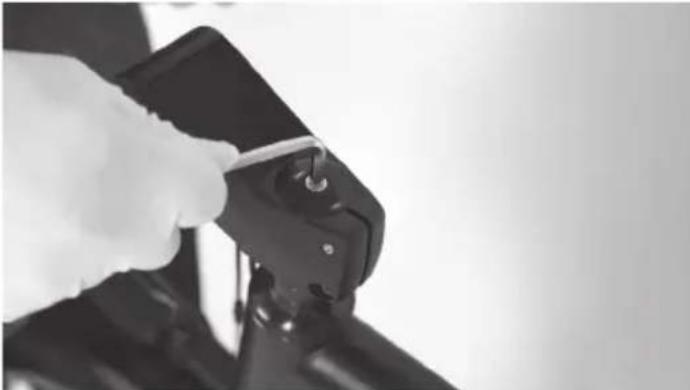
natural_image
Close-up of a hand holding a black mechanical component, possibly a tool or clamp, with no visible text or symbols.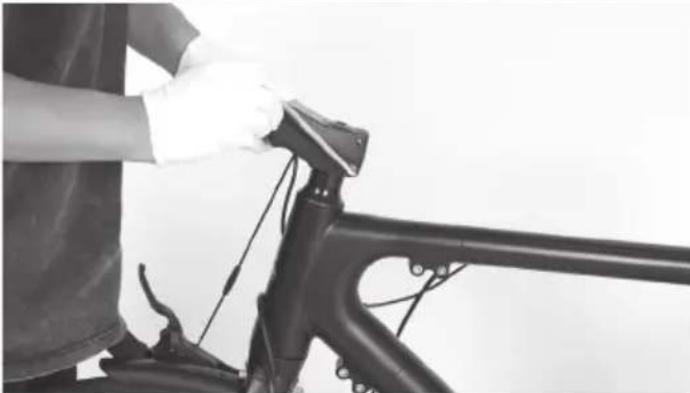
natural_image
Person wearing gloves working on a bicycle frame with a tool (no visible text or symbols)
natural_image
Close-up of hands using a tool to adjust or install a black mechanical component (no visible text or symbols)natural_image
Person standing beside a bicycle with visible frame and wheels (no text or symbols)natural_image
Person assembling a shared bicycle wheel with a hand tool, no visible text or symbols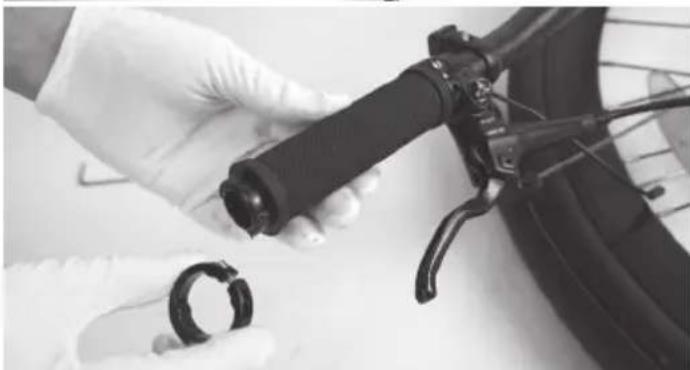
natural_image
Close-up of gloved hands holding a black mechanical component next to a car tire (no visible text or symbols)
natural_image
Close-up of a hand using a tool to adjust the bicycle wheel (no text or symbols visible)
natural_image
Close-up of a hand holding a black bicycle brake lever with wires, no visible text or symbolsnatural_image
Close-up of a bicycle tire being adjusted by a tool, no visible text or symbols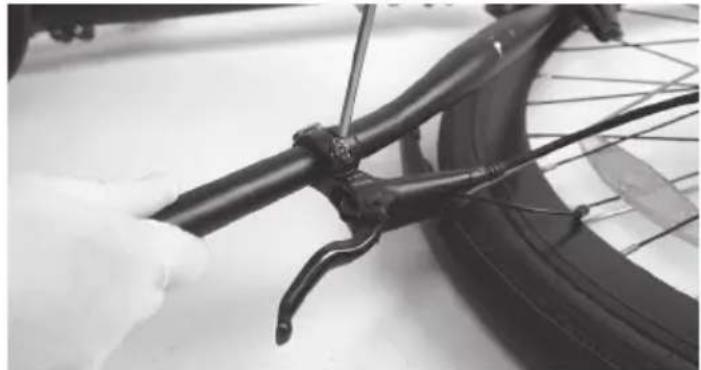
natural_image
Close-up of a bicycle tire being adjusted by a tool, with no visible text or symbols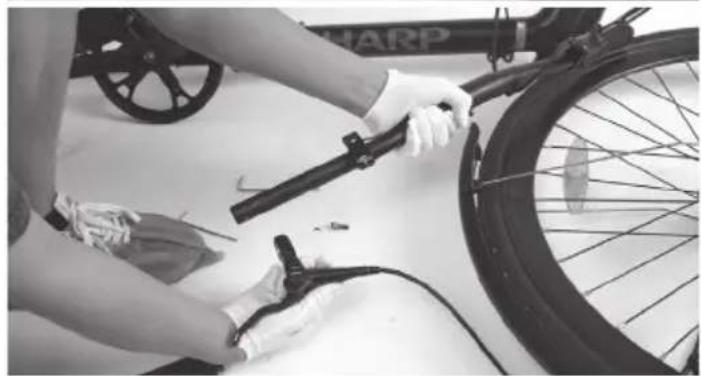
natural_image
Person cleaning a bicycle tire with a hand using a tool (no visible text or symbols)natural_image
Person in white gloves and gloves handling a black cable or cable connector (no visible text or symbols)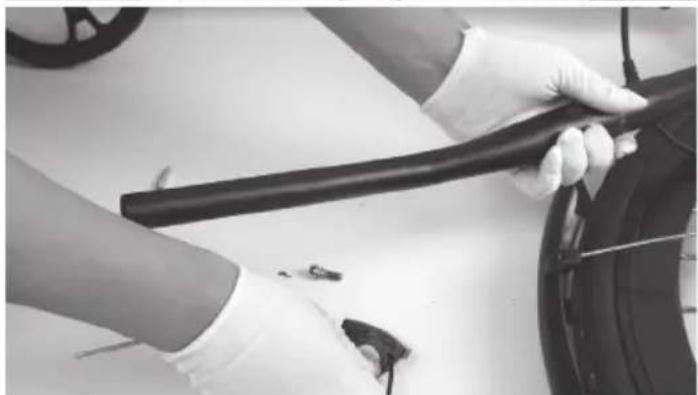
natural_image
Close-up of hands holding a black cable or hose, with a tire and mechanical components visible (no text or symbols)natural_image
Close-up of hands holding a black cable or connector, no visible text or symbols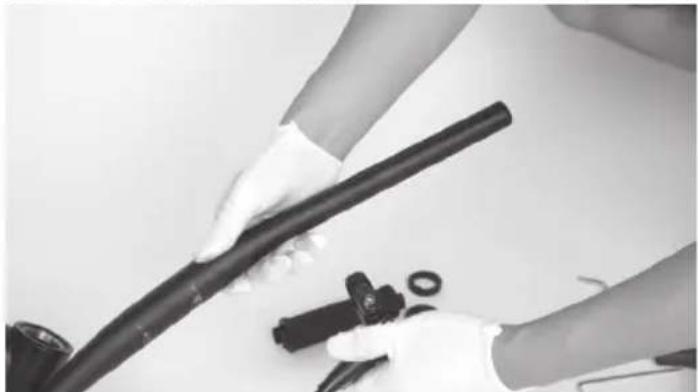
natural_image
Close-up of hands holding a black cable with mechanical components nearby (no visible text or symbols)natural_image
Two-panel black-and-white photo showing hands adjusting a bicycle wheel and bracket (no text or symbols visible)Stap 9: Koppel de kabels los
Koppel de kabel tussen de batterij en de motor los.
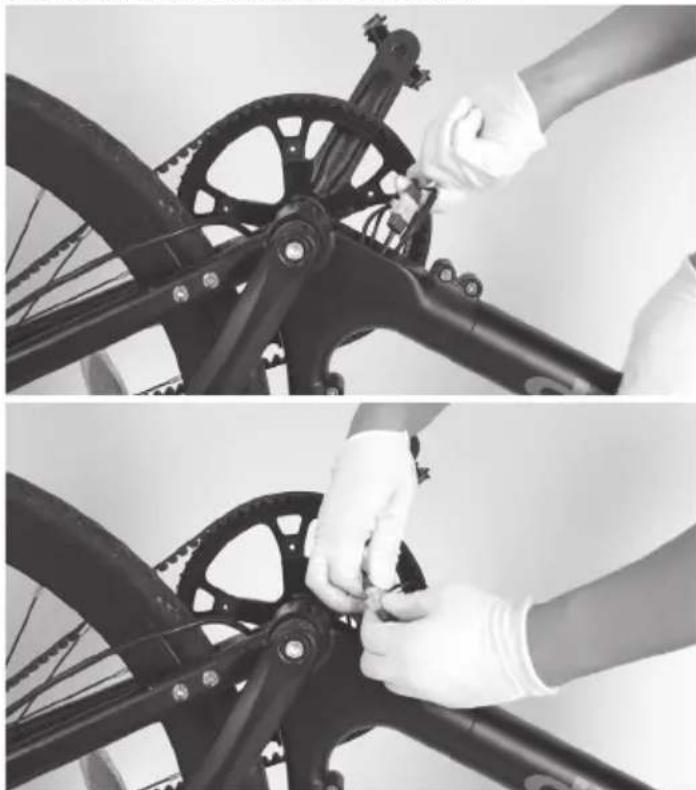
natural_image
Two-panel black-and-white photo showing hands adjusting a bicycle wheel assembly, no visible text or symbols
natural_image
Close-up of hands adjusting a bicycle wheel and gear mechanism (no visible text or symbols)natural_image
Three-panel black-and-white photo showing hands assembling a bicycle wheel, showing mechanical components and assembly (no text or symbols visible)natural_image
Two-panel black-and-white photo showing a bicycle wheel assembly with a hand adjusting the gear and a close-up of the wheel rim (no text or symbols visible)natural_image
Close-up of hands assembling a bicycle wheel assembly with gear links (no text or symbols visible)natural_image
Four-panel black-and-white photo showing bicycle wheel assembly and maintenance, with no visible text or symbols.natural_image
Two black-and-white photos showing hands assembling a bicycle wheel and a mechanical clamp (no text or symbols visible)natural_image
Close-up of hands using a bicycle gear to adjust the frame (no text or symbols visible)natural_image
Three-panel black-and-white photo showing a bicycle wheel assembly: hand, close-up of gear, and close-up of hands adjusting the wheel (no text or symbols visible)natural_image
Person using a bicycle brake system to adjust the wheel (no visible text or symbols)
natural_image
Person assembling a bicycle frame with visible wheels and structural components (no text or symbols)natural_image
Person assembling a bicycle frame with a tool, no visible text or symbols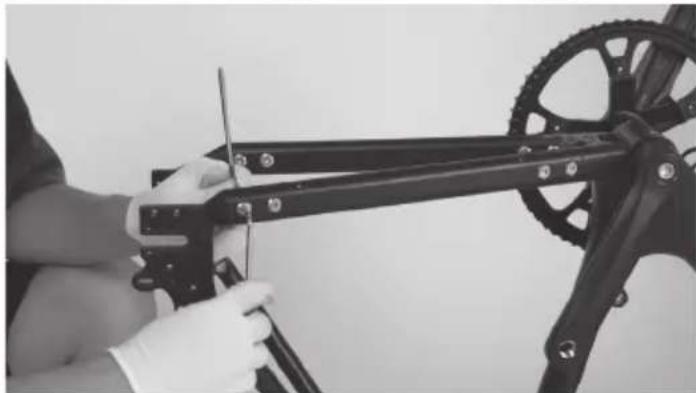
natural_image
Person assembling a bicycle frame with a tool, no visible text or symbols
natural_image
Close-up of hands using a tool to adjust or install a black metal bracket (no visible text or symbols)
natural_image
Close-up of hands using a mechanical clamp or crimping tool to adjust a flexible metal bracket (no text or symbols visible)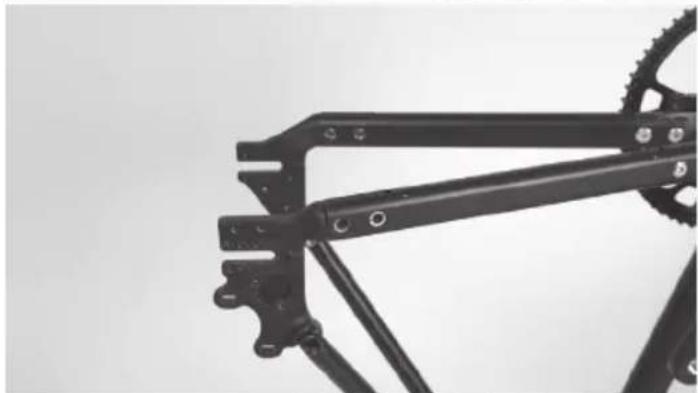
natural_image
Close-up of a black bicycle frame structure with visible gears and mounting brackets (no text or symbols)
natural_image
Close-up of hands in gloves handling mechanical components (no visible text or symbols)natural_image
Close-up of a bicycle frame structure with visible joints and brackets (no text or symbols)natural_image
Three-panel black-and-white photo sequence showing a person using a bicycle brake system, demonstrating step-by-step assembly (no text or symbols visible)natural_image
Person using a stationary exercise bike with a headrest, no visible text or symbols on the bike or background
natural_image
Person using a Sharp bicycle on a stationary platform (no visible text or symbols)natural_image
Black-and-white photo of a bicycle frame with a hand adjusting it, no visible text or symbols on the main body.natural_image
Two black-and-white photos showing a person assembling a Sharp bicycle frame, with no visible text or symbols.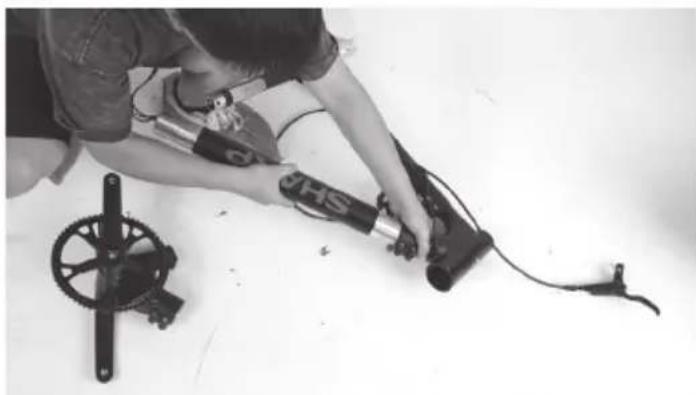
natural_image
Person assembling mechanical components on a white surface, including a wheel and sensor device (no visible text or symbols)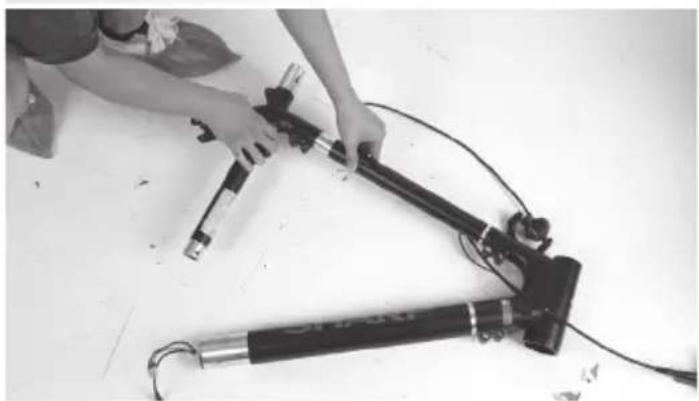
natural_image
Person assembling mechanical components on a white surface, including a lever and support device (no visible text or symbols)
natural_image
Two black-and-white photos showing a person using a sharp pen and a handheld device, both demonstrating a step-up (no text or symbols visible)natural_image
Assorted bicycle components including bicycles, wheelbars, and shakers arranged on a white surface (no text or symbols visible)Aandraaimomenten:
www.sharpconsumer.com/RS08EB/#down
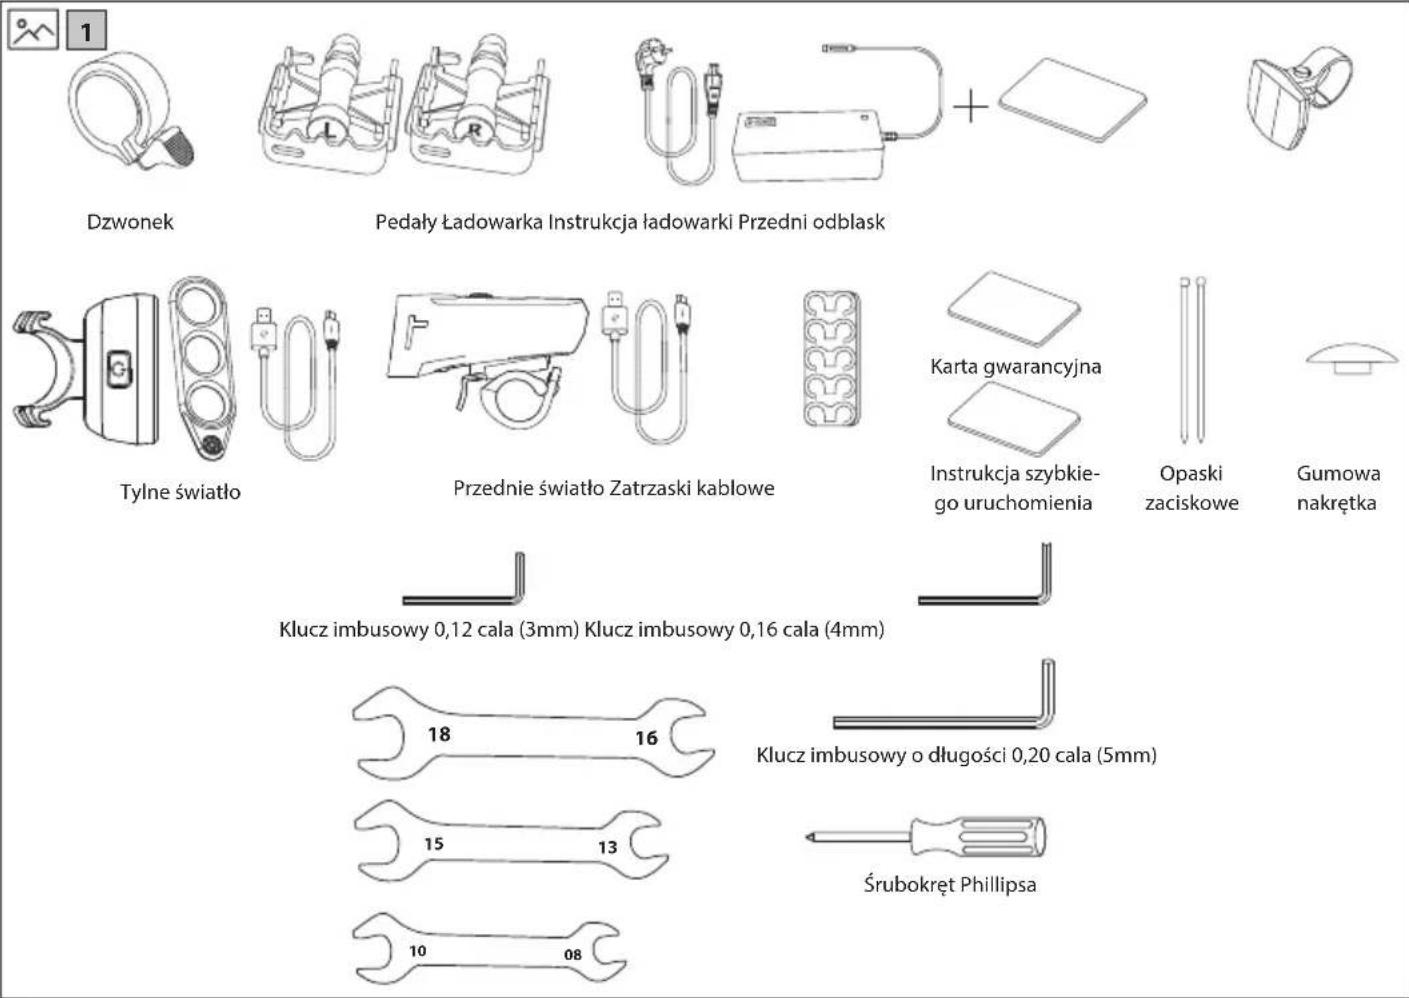
natural_image
Line drawing of a shared bicycle with a compact box and wheels (no text or symbols)
www.sharpconsumer.com/contact/

www.sharpconsumer.com/support/

www.sharpconsumer.com/documents-of-conformity/

Co jest w pudełku:
natural_image
Technical line drawing of a mechanical device with no visible text or symbolsnatural_image
Technical line drawing of a robotic arm with articulated joints and base mount (no text or symbols)natural_image
Line drawing of a bicycle with propeller and wheel (no text or symbols)natural_image
Line drawing of a mechanical device with articulated arms and cylindrical body (no text or symbols)
flowchart
graph TD
    A["A"] --> B["B"]
    B --> C["C"]
    C --> D["D"]
    D --> A
    style A fill:#fff,stroke:#000
    style B fill:#fff,stroke:#000
    style C fill:#fff,stroke:#000
    style D fill:#fff,stroke:#000
    style X stroke-dasharray: 5 5
Rysunek 1-5

natural_image
Two cylindrical electronic components with internal connectors, shown from different angles (no text or symbols)Rysunek 3-1

natural_image
Line drawing of a bicycle leg and seat assembly (no text or symbols)Rysunek 3-2
natural_image
Technical line drawing of two cylindrical mechanical components with a wrench and clamp (no text or symbols)Rysunek 4-3

natural_image
Technical line drawing of a mechanical assembly with intersecting rods and a fork, no text or symbols presentnatural_image
Line drawing of a bicycle wheel with visible frame and hub (no text or symbols)Rysunek 5-1
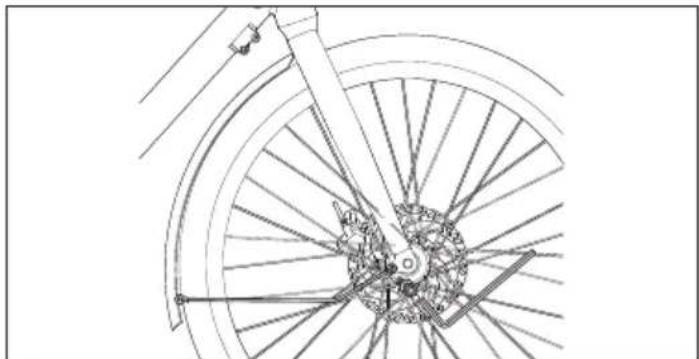
natural_image
Technical line drawing of a bicycle wheel assembly with visible spokes and hub (no text or symbols)Rysunek 5-2

natural_image
Line drawing of a bicycle wheel and suspension bracket (no text or symbols)Rysunek 5-3
natural_image
Line drawing of a bicycle seat and wheel assembly (no text or symbols)Rysunek 6-1

natural_image
Technical line drawing of a bicycle wheel assembly with gear and hub components (no text or symbols)Rysunek 6-2

natural_image
Mechanical assembly diagram showing a bicycle wheel with internal components and a close-up inset of a mechanical component (no text or symbols)Rysunek 6-3
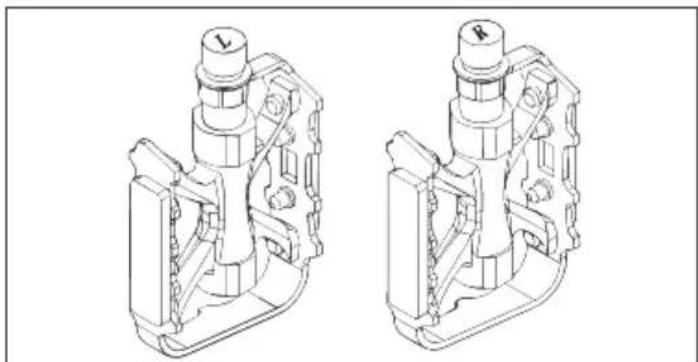
natural_image
Technical line drawing of two mechanical components with no visible text or symbolsnatural_image
Technical line drawing of a mechanical device with no visible text or symbolsRysunek 7-1

Rysunek 8-1
NOTATKI:
natural_image
Technical line drawing of mechanical components including a tool, clamping bracket, and cylindrical device (no text or symbols)Rysunek 9-1
natural_image
Line drawing of a bicycle seat assembly with a close-up inset showing a device (no text or symbols)Rysunek 9-2

natural_image
Technical line drawing of a firearm assembly (no text or symbols)Rysunek 9-3
natural_image
Technical line drawing of a bicycle wheel assembly with visible gears and spokes (no text or symbols)Rysunek 10-1

natural_image
Technical line drawing of a bicycle seat assembly with two views (top and side), no text or symbols present.
https://www.sharpconsumer.com/sharp-life-app
natural_image
Close-up of a gloved hand adjusting a bicycle brake lever (no text or symbols visible)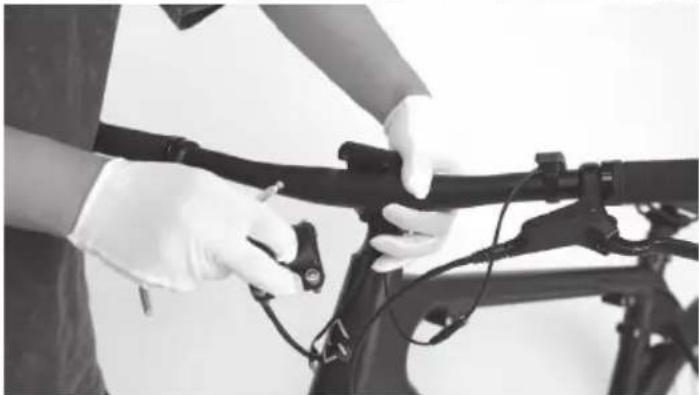
natural_image
Person in gloves adjusting a bicycle frame with cable (no visible text or symbols)
natural_image
Person holding a shared bicycle with visible branding and no text or symbols on the bike itselfnatural_image
Close-up of hands using a handheld device to adjust or install a black mechanical component (no visible text or symbols)
natural_image
Close-up of a hand holding a black mechanical component with a white clip, no visible text or symbols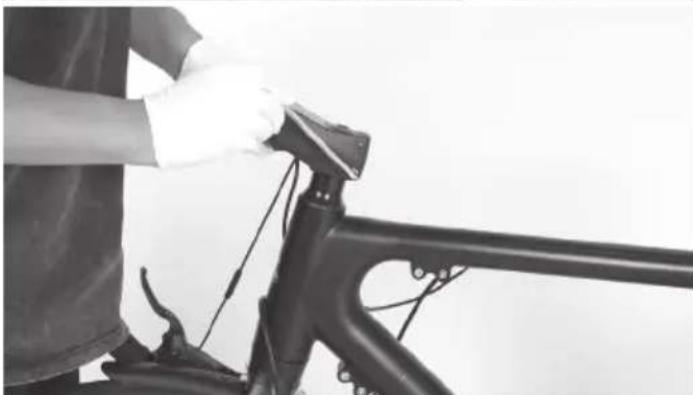
natural_image
Person cleaning a bicycle frame with a tool, no visible text or symbols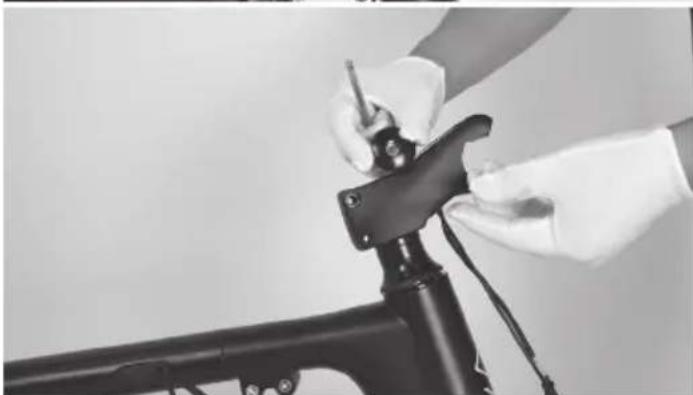
natural_image
Close-up of hands operating a black mechanical device with a tool, no visible text or symbolsnatural_image
Person standing beside a bicycle with visible frame and wheels (no text or symbols)Krok 4: Usuń uchwyt
natural_image
Person using a bicycle to adjust the wheel of the bicycle (no visible text or symbols)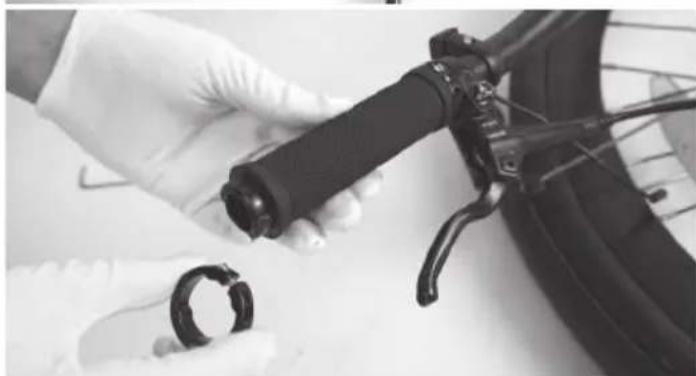
natural_image
Close-up of gloved hands adjusting a black brake lever with a coiled spring (no visible text or symbols)
natural_image
Close-up of a hand holding a black bicycle steering wheel with visible blades and wires (no text or symbols)
natural_image
Close-up of hands holding a bicycle brake lever with visible wiring (no text or symbols)natural_image
Close-up of a bicycle tire being adjusted by a tool, no visible text or symbols
natural_image
Close-up of a bicycle tire being adjusted by a tool, no visible text or symbols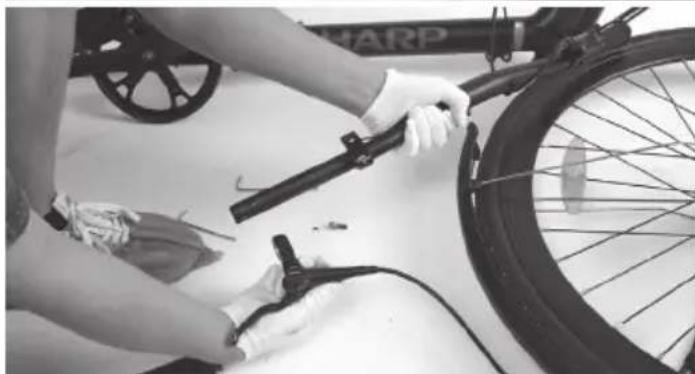
natural_image
Person cleaning a bicycle tire with a hand pump, no visible text or symbolsnatural_image
Close-up of gloved hands holding a black cable or wire connector (no visible text or symbols)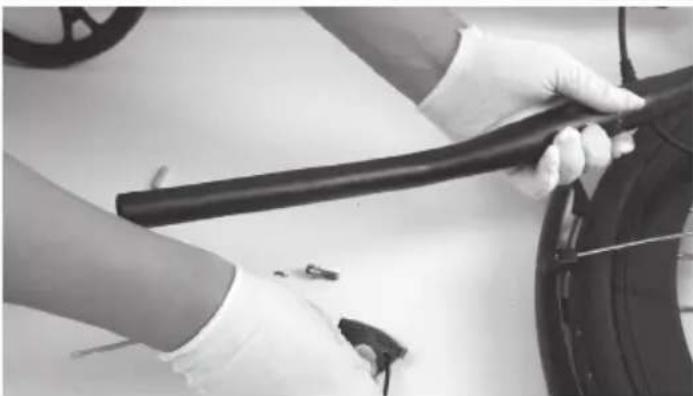
natural_image
Person in gloves handling a black cable or hose on a white surface, with no visible text or symbols.natural_image
Close-up of gloved hands holding a black mechanical component (no visible text or symbols)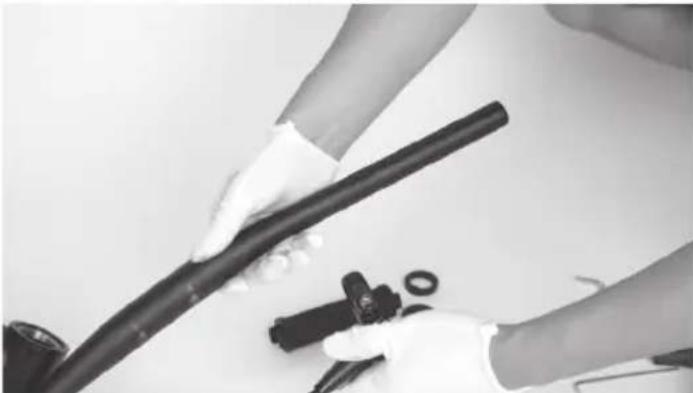
natural_image
Close-up of hands holding a black cable with mechanical components nearby (no visible text or symbols)natural_image
Close-up of a person adjusting a bicycle wheel and gear assembly (no visible text or symbols)
natural_image
Close-up of hands assembling a bicycle wheel assembly (no visible text or symbols)natural_image
Close-up of a person adjusting a bicycle wheel assembly (no visible text or symbols)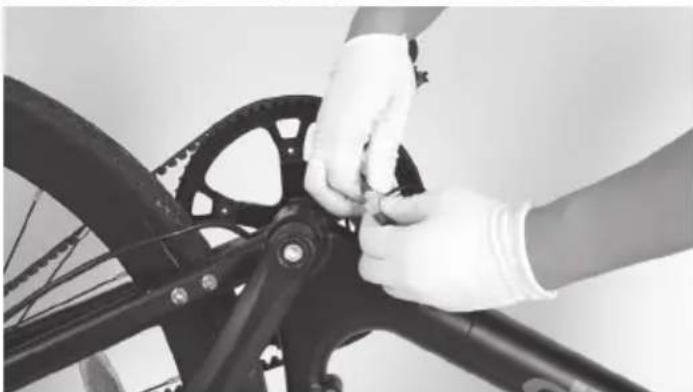
natural_image
Close-up of hands adjusting a bicycle wheel and gear assembly (no visible text or symbols)
natural_image
Close-up of hands assembling a bicycle wheel assembly (no visible text or symbols)natural_image
Close-up of a person adjusting bicycle wheel components (no visible text or symbols)
natural_image
Close-up of hands assembling a bicycle wheel with visible gears and spokes (no text or symbols)
natural_image
Close-up of hands cleaning a bicycle wheel with visible mechanical components (no text or symbols)natural_image
Close-up of a bicycle wheel with visible mechanical components and a hand adjusting the wheel (no text or symbols)
natural_image
Close-up of hands adjusting a bicycle wheel rim with a gear mechanism (no text or symbols visible)natural_image
Close-up of a bicycle wheel assembly with visible gears and levers (no text or symbols)
natural_image
Close-up of a hand adjusting a bicycle wheel and gear mechanism (no text or symbols visible)natural_image
Four-panel black-and-white photo showing bicycle wheel assembly and maintenance, including disassembly, cleaning, and repair steps (no text or symbols visible)natural_image
Two black-and-white photos showing hands assembling a bicycle wheel and a mechanical component (no visible text or symbols)natural_image
Close-up of hands using a bicycle gear to adjust the frame (no text or symbols visible)natural_image
Three-panel black-and-white photo showing bicycle wheel assembly: hand, close-up of gear, and close-up of a person's wheel (no text or symbols visible)natural_image
Person using a bicycle brake system with visible wheel and head components (no text or symbols)
natural_image
Person assembling a bicycle frame with visible wheels and structural components (no text or symbols)natural_image
Two-panel black bicycle frame installation procedure showing hand tool and tool path (no text or symbols visible)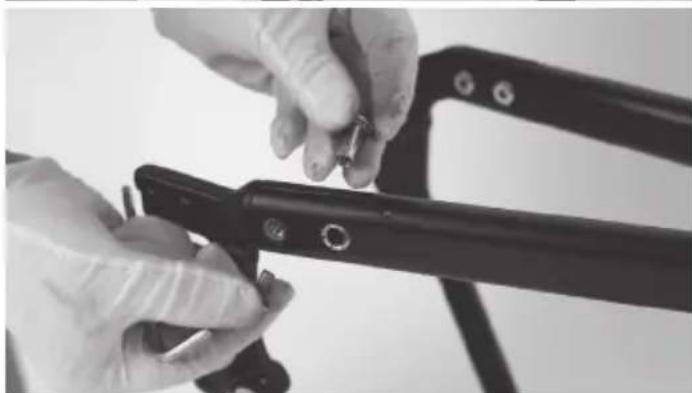
natural_image
Close-up of hands using a metal tool to adjust or install a mechanical component (no visible text or symbols)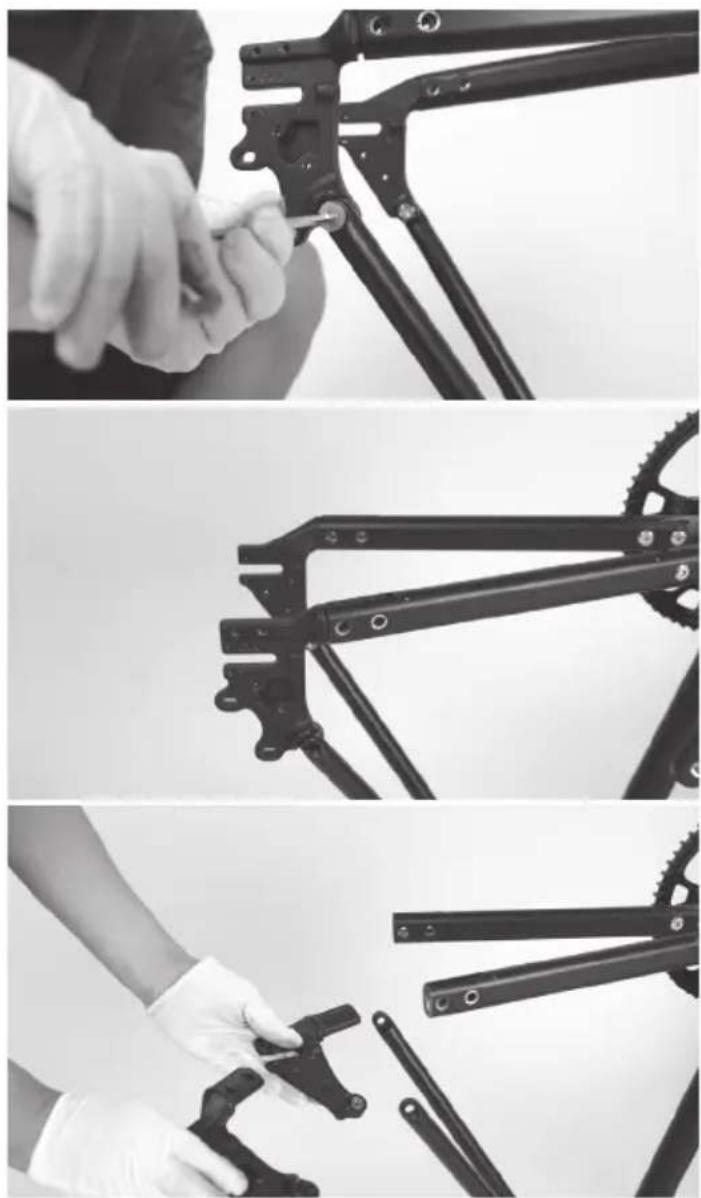
natural_image
Three-panel black bicycle frame assembly procedure showing hand tool, gear mechanism, and clamping steps (no text or symbols visible)natural_image
Close-up of a bicycle frame structure with visible brackets and joints (no text or symbols)natural_image
Three-panel black-and-white photo showing a person using a bicycle-mounted device, demonstrating step-by-step assembly (no text or symbols visible)natural_image
Person using a Sharp stationary bike on a white background (no text or symbols visible)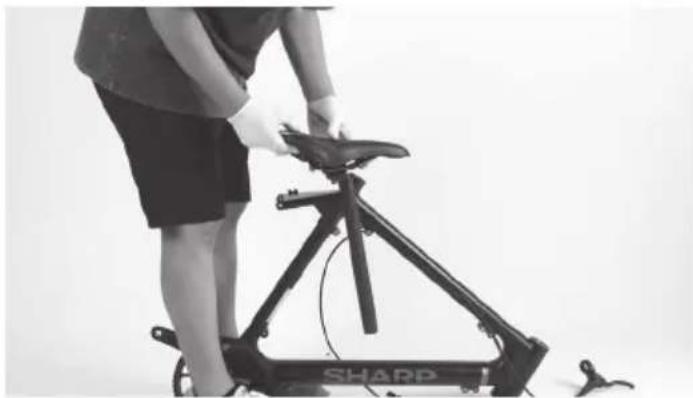
natural_image
Person using a Sharp exercise bike (no visible text or symbols)natural_image
Black-and-white photo of a bicycle with a Sharp brake lever and attached cable, no visible text or symbols on the main subject.natural_image
Person assembling a Sharp bicycle frame with visible wheels and cable (no text or symbols)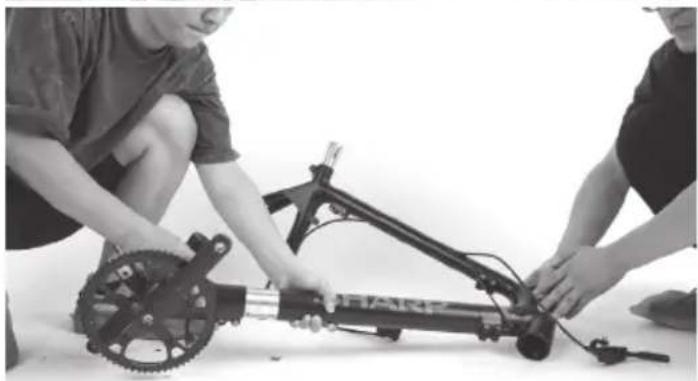
natural_image
Two people assembling a bicycle frame with visible gears and components (no text or symbols)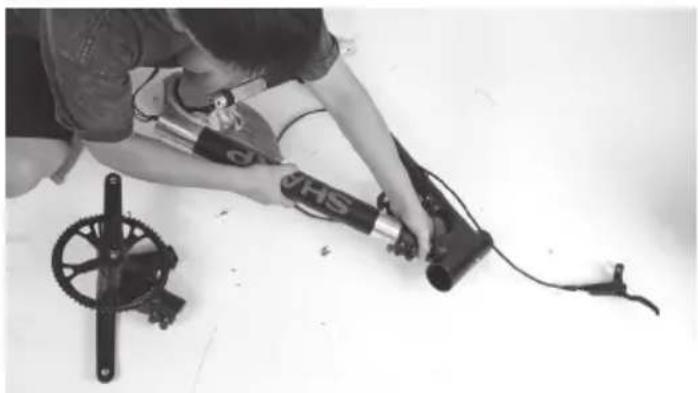
natural_image
Person using a mechanical device with a wheel and sensor components on a white surface (no visible text or symbols)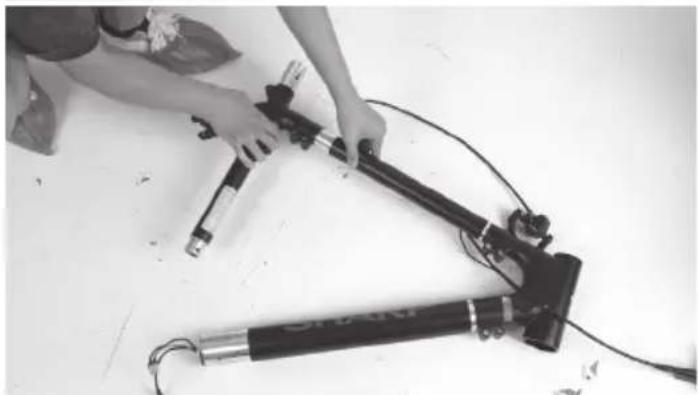
natural_image
Person assembling a mechanical device with a stand and cable (no visible text or symbols)
natural_image
Person kneeling with a handheld device connected to a black SHARP tool, no visible text or symbols on the device itself.
natural_image
Person kneeling on a bench using a CD4P device with attached cable and clamp (no visible text or symbols)natural_image
Assorted bicycle components including bicycles, shakers, and a sharp wrench (no text or symbols visible)Momenty dokręcania:
www.sharpconsumer.com/RS08EB/#down
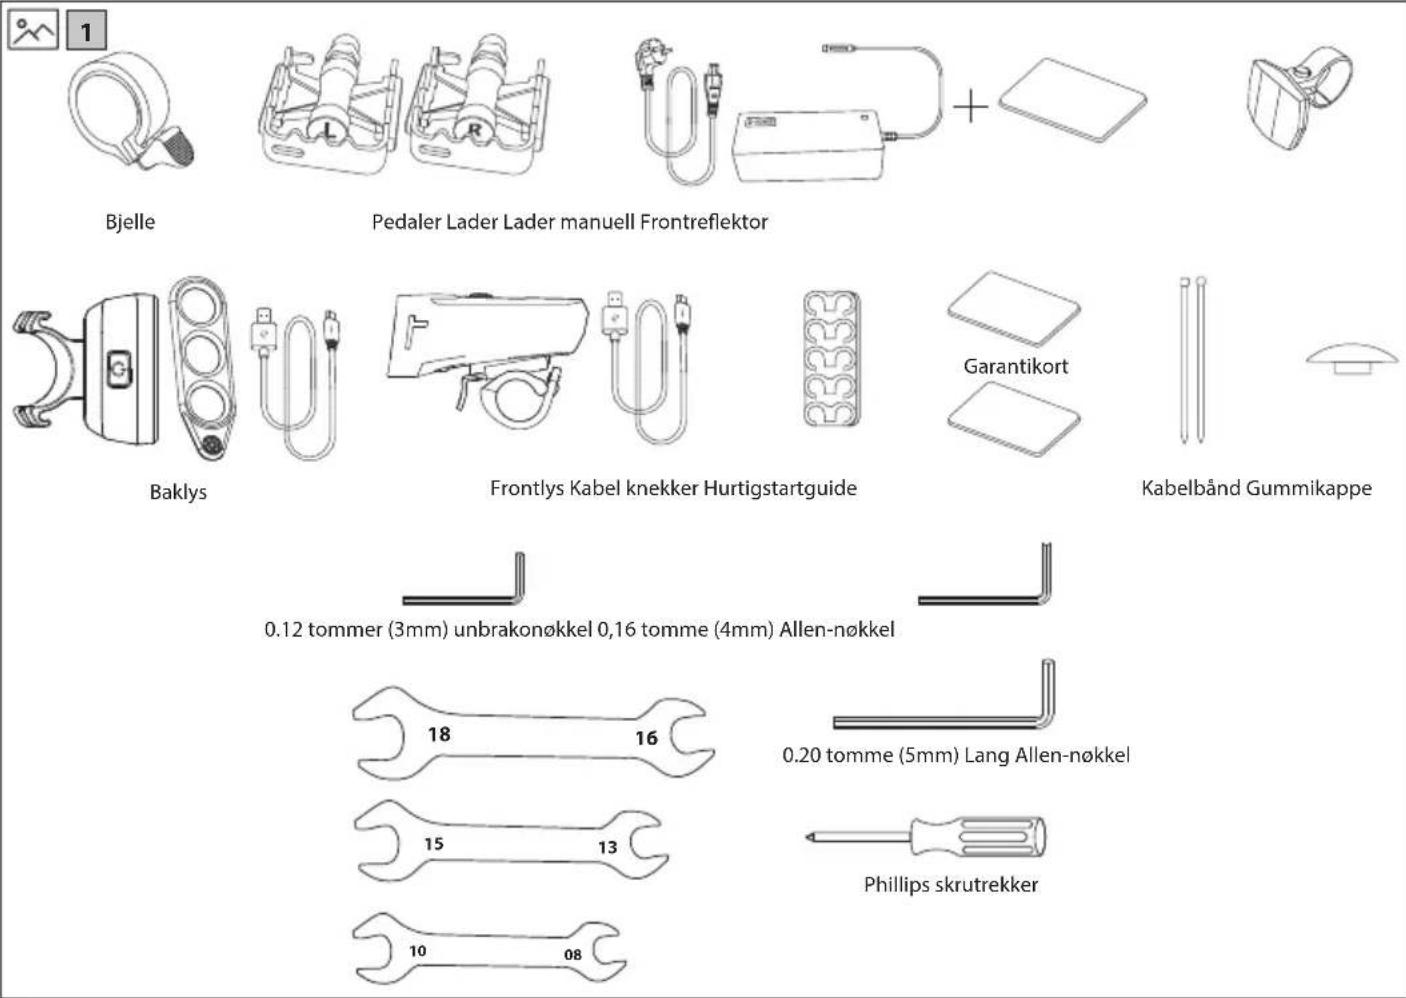

natural_image
Line drawing of a shared bicycle with a compact box and wheels (no text or symbols)
www.sharpconsumer.com/contact/

www.sharpconsumer.com/support/

www.sharpconsumer.com/documents-of-conformity/


Hva er i esken:
Hurtigstartveiledning (dette dokumentet)
E-sykkel deler
natural_image
Technical line drawing of a mechanical device with no visible text or symbolsFigur 1-1 Figur 1-2
MERK:
Sørg for at momentet på skruen på toppen er omtrent 4-6 N·m. Sørg for at momentet på sidene er omtrent 10-12 N·m.
a. Løsne de fire skruene på styreklemmen i en moturs retning med en 5 mm unbrakonøkkel, fjern deretter skruene og frontdekselet, som vist i [Figur 1-3] og [1-4].
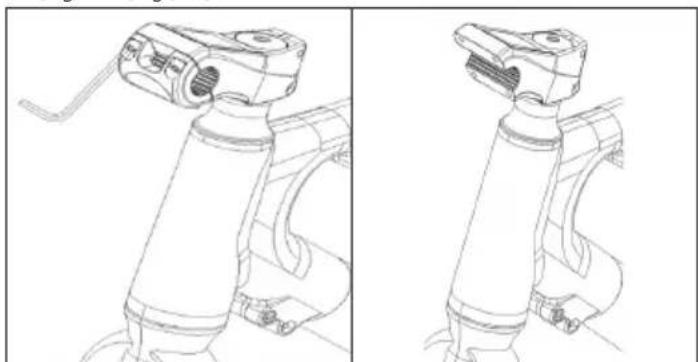
natural_image
Technical line drawing of a robotic arm with articulated joints and control knobs (no text or symbols)Figur 1-3 Figur 1-4
natural_image
Line drawing of a bicycle with propeller and wheel (no text or symbols)natural_image
Line drawing of a mechanical device with lever and handle (no text or symbols)
flowchart
graph TD
    A["A"] --> B["B"]
    B --> C["C"]
    C --> D["D"]
    D --> A
    style A fill:#fff,stroke:#000
    style B fill:#fff,stroke:#000
    style C fill:#fff,stroke:#000
    style D fill:#fff,stroke:#000
    style X stroke-dasharray: 5 5
Figur 1-5

natural_image
Two cylindrical electronic components with internal wires, shown from different angles (no text or symbols)Figur 2-1 Figur 2-2
TRINN 3: Installer setet
Figur 3-1
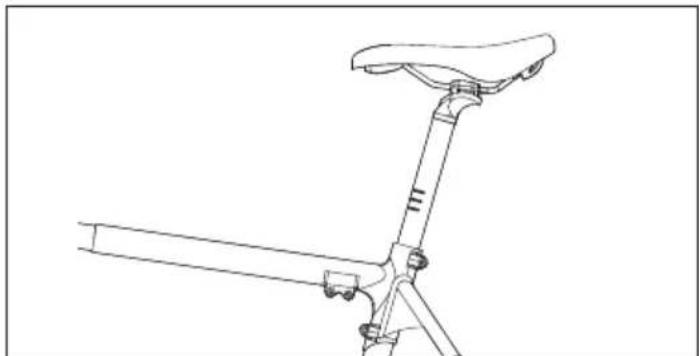
natural_image
Line drawing of a bicycle leg with seat and support bracket (no text or symbols)Figur 3-2
natural_image
Technical line drawing of a mechanical clamp and wrench assembly (no text or symbols)Figur 4-1 Figur 4-2
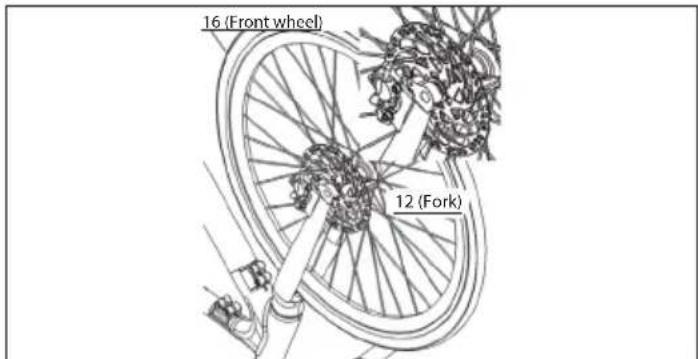
Figur 4-3
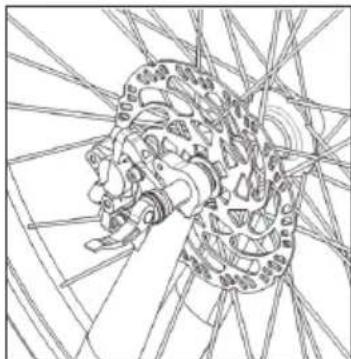
natural_image
Technical line drawing of a bicycle wheel assembly with no visible text or symbols
natural_image
Diagram of a fork structure with intersecting lines and a labeled section '12 (Fork)' (no other text or symbols)Figur 4-4 Figur 4-5
MERKNADER:
natural_image
Line drawing of a bicycle wheel assembly with no text or symbolsFigur 5-1
natural_image
Technical line drawing of a bicycle wheel assembly with visible spokes and hub (no text or symbols)Figur 5-2

natural_image
Technical line drawing of a bicycle wheel assembly (no text or symbols)Figur 5-3
TRINN 6: Installer baskjermen
natural_image
Line drawing of a bicycle seat and wheel assembly (no text or symbols)Figur 6-1

natural_image
Technical line drawing of a bicycle wheel assembly with gear and mechanical components (no text or symbols)Figur 6-2
natural_image
Mechanical assembly diagram of a bicycle wheel with gear and mounting bracket (no text or labels)Figur 6-3
natural_image
Technical line drawing of a mechanical assembly with no visible text or symbolsFigur 7-1
Figur 7-2

natural_image
Technical line drawing of mechanical components including a tool, clamping bracket, and cylindrical housing (no text or symbols)Figur 9-1
TRINN 8: Installer pedalene
natural_image
Technical line drawing of two mechanical components with no visible text or symbols
Figur 8-1

natural_image
Line drawing of a bicycle seat assembly with a device and a magnified inset showing a small electronic device (no text or symbols)Figur 9-2
natural_image
Technical line drawing of a mechanical device with lever arms and handle (no text or symbols)Figur 9-3
MERKNADER:
natural_image
Technical line drawing of a bicycle wheel assembly with visible spokes and levers (no text or symbols)Figur 10-1
Figur 11-1 Figur 11-2
Koble til SHARP Life APP
Trykk og hold inne Modus-knappen i 2 sekunder, og gå inn i Innstillinger-grensesnittet.
Velg Om og skann QR-koden for å laste ned SHARP Life APP på telefonen din. Deretter kobler du din elskede e-sykkel til telefonen din på APPen.

flowchart
graph LR
    A["SETTING"] --> B["User Setting"]
    A --> C["Personalized Parameter"]
    A --> D["Recover default setting"]
    A --> E["System Setting"]
    A --> F["About"]
    G["SharpLife"] --> H["QR Code"]
Feilkode
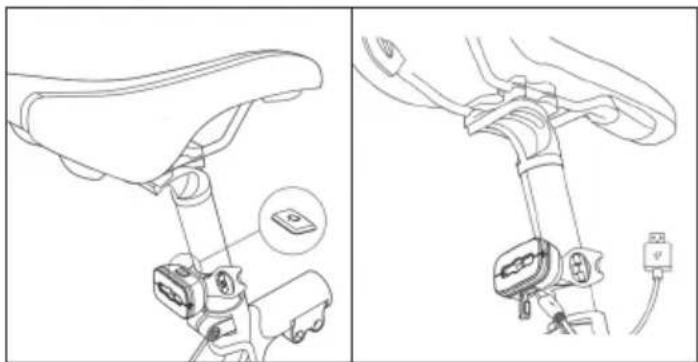
natural_image
Technical line drawing showing two views of a bicycle seat assembly with labeled components (no text or symbols present)SHARP Life-appen
https://www.sharpconsumer.com/sharp-life-app
natural_image
Close-up of a gloved hand adjusting a bicycle brake lever (no text or symbols visible)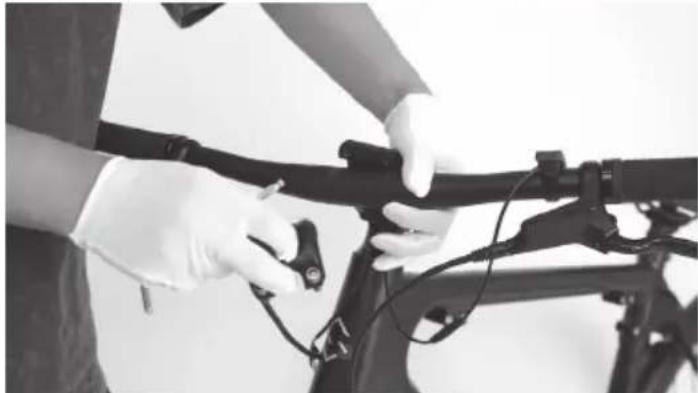
natural_image
Person in gloves adjusting a bicycle frame with cable (no visible text or symbols)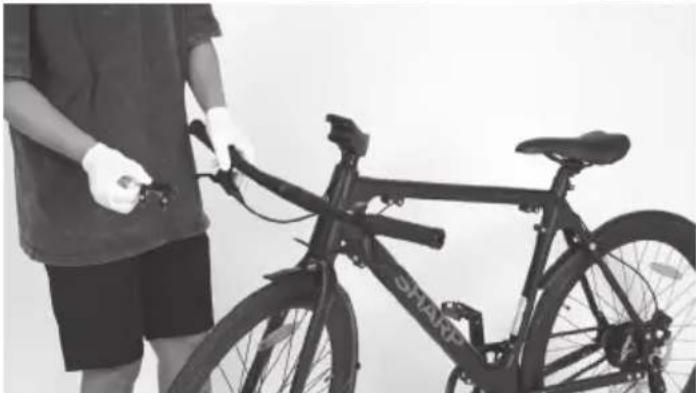
natural_image
Person holding a shared bicycle with visible branding, standing beside it (no text or symbols on the bicycle itself)natural_image
Close-up of hands using a handheld device to adjust or install a black mechanical component (no visible text or symbols)
natural_image
Close-up of a hand holding a black mechanical component with a white clip, against a plain background (no text or symbols visible)
natural_image
Person wearing gloves handling a bicycle frame with cable (no visible text or symbols)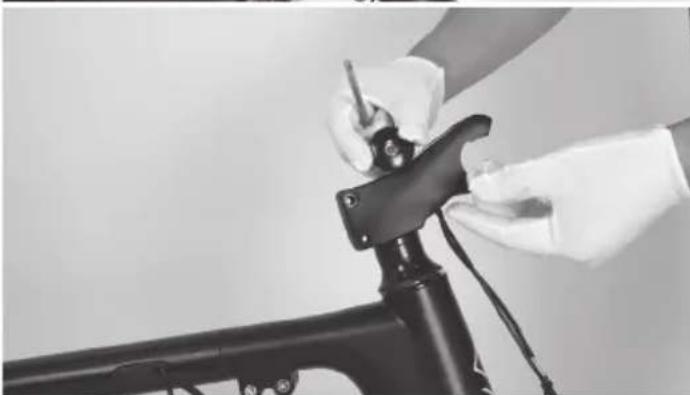
natural_image
Close-up of hands using a tool to adjust or install a black bicycle component (no visible text or symbols)natural_image
Person standing beside a bicycle with visible frame and wheels (no text or symbols)natural_image
Person assembling a shared bicycle with visible wheel rim and suspension components (no text or symbols)
natural_image
Close-up of gloved hands holding a black brake lever and a small black ring component (no visible text or symbols)
natural_image
Close-up of hands using a tool to adjust or install a bicycle brake lever (no visible text or symbols)
natural_image
Close-up of hands holding a black bicycle brake lever with wires (no visible text or symbols)Trinn 5: Fjern bremsespaken
a. Løsne skruene på bremsehendelen med en 5 mm unbrakonøkkel. b. Deretter fjerner du bremsespaken.
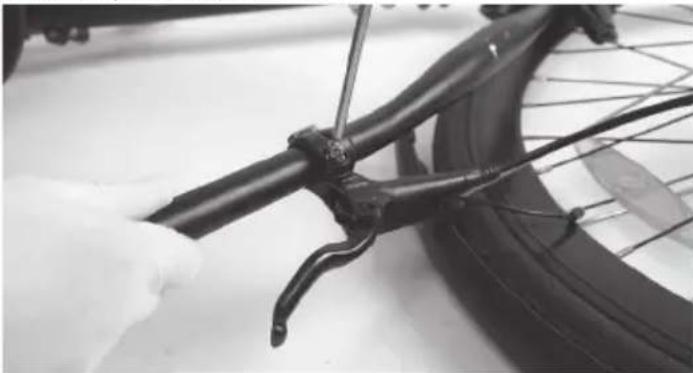
natural_image
Close-up of a bicycle tire being adjusted for cleaning or repair (no text or symbols visible)
natural_image
Close-up of a bicycle tire being adjusted by a hand, showing the blade and wheel (no text or symbols visible)
natural_image
Person cleaning a bicycle tire with a hand using a tool (no visible text or symbols)natural_image
Person in gloves handling a black cable or hose with a clip, no visible text or symbols
natural_image
Close-up of hands holding a black cable or hose next to a tire, with no visible text or symbols.natural_image
Close-up of hands holding a black cable with a white plastic clip, no visible text or symbols
natural_image
Close-up of hands holding a black cable with small components nearby (no visible text or symbols)natural_image
Two black-and-white photos showing hands adjusting a bicycle wheel and bracket (no text or symbols visible)natural_image
Two-panel black bicycle frame installation procedure showing hands adjusting components (no text or symbols visible)
natural_image
Close-up of hands adjusting a bicycle wheel and gear assembly (no visible text or symbols)natural_image
Three-panel black-and-white photo showing hands assembling a bicycle wheel, showing mechanical components and wiring (no text or symbols visible)natural_image
Two black-and-white photos showing bicycle wheel assembly and hand positioning, no text or symbols visibleLøsne skruene på R-pakningene med en 3 mm unbrakonøkkel. Fjern dem deretter.
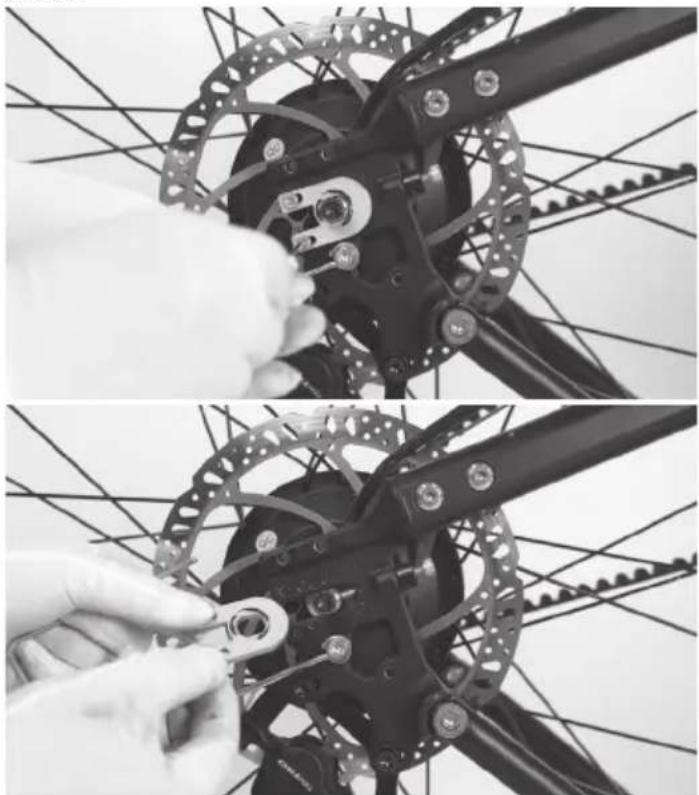
natural_image
Close-up of a bicycle wheel assembly with metal gear and mechanical components, showing hands adjusting parts (no text or symbols visible)Løsne skruene i utkoblingen med en 4 mm unbrakonøkkel. Deretter fjerner du dem.
natural_image
Four-panel black-and-white photo showing bicycle wheel assembly and maintenance, with no visible text or symbols.natural_image
Two black-and-white photos showing hands assembling a bicycle wheel and a mechanical assembly (no visible text or symbols)b. Bruk en 5 mm unbrakonøkkel for å dytte bolten. Løsne mutteren på den andre siden med en 10 mm fastnøkkel.
c. Deretter fjerner du baskjermen.
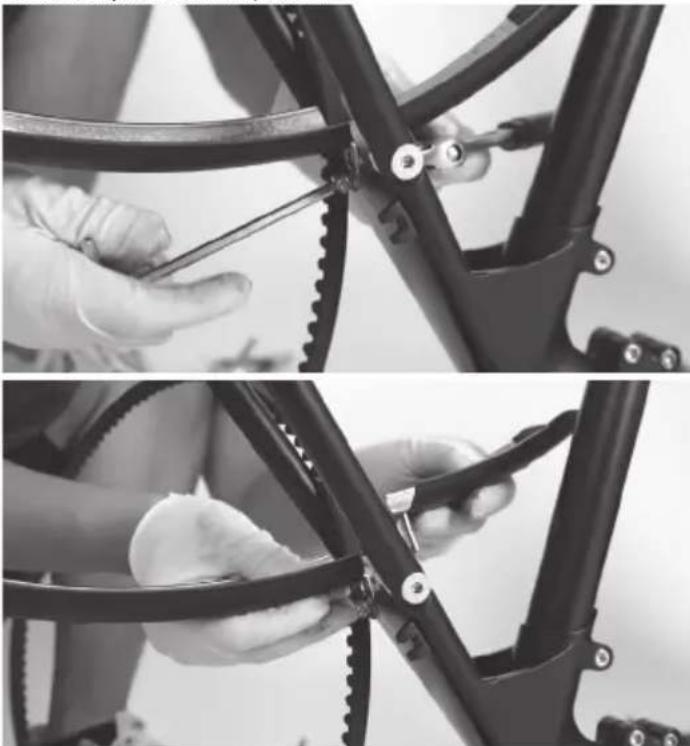
natural_image
Close-up of hands using a saw to cut the bicycle frame, showing mechanical components and tool path (no text or symbols visible)Trinn 13: Fjern kabeldekselet, bakbremskaliperen og bakhjulet
a. Løsne 2x Philips-skruer, deretter fjern kabeldekselet.
b. Løsne skruene med en 5 mm unbrakonøkkel. Deretter fjerner du bakbremskaliperen.
c. Deretter kan du enkelt fjerne hele bakhjulet fra sykkelen.
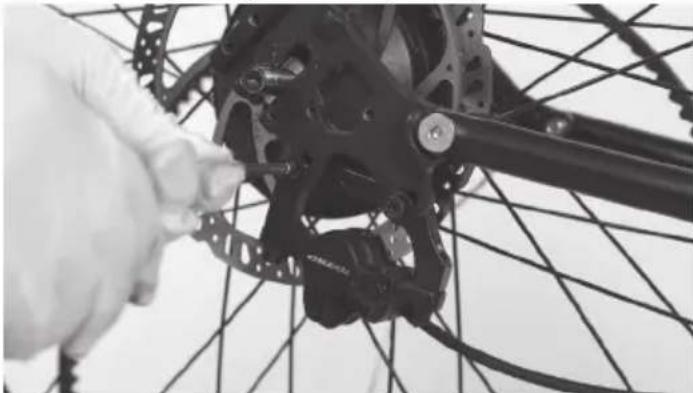
natural_image
Close-up of a bicycle wheel assembly with a hand adjusting the component (no visible text or symbols)
natural_image
Close-up of hands assembling a bicycle wheel frame with a mechanical component (no visible text or symbols)
natural_image
Person adjusting a bicycle wheel on a white surface, no visible text or symbolsTrinn 14: Fjern pedalene
natural_image
Person assembling a bicycle frame with a tool, no visible text or symbols
natural_image
Person assembling a bicycle frame with visible gears and base plate (no text or symbols)natural_image
Person using a bicycle-mounted tool to adjust the frame (no visible text or symbols)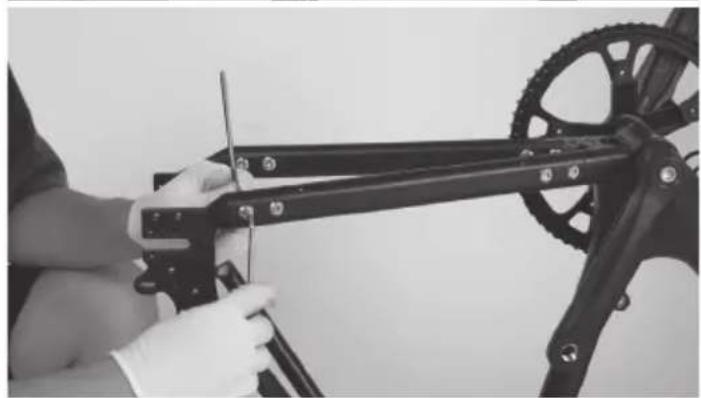
natural_image
Person assembling a bicycle frame with a tool, no visible text or symbols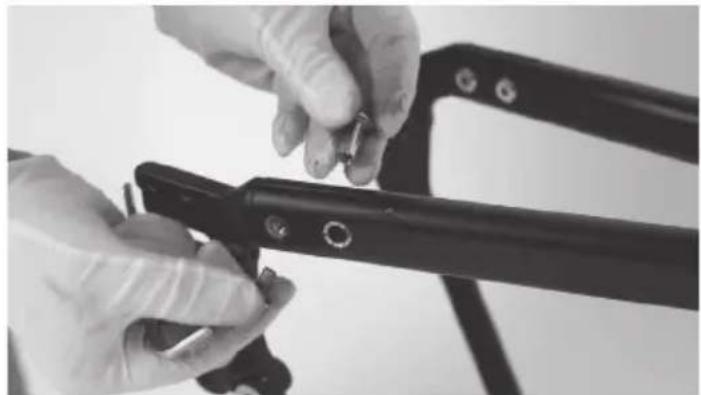
natural_image
Close-up of hands installing or adjusting a black metal bracket component (no visible text or symbols)
natural_image
Close-up of hands using a crimping tool to adjust or install a mechanical component (no visible text or symbols)
natural_image
Close-up of a black bicycle frame structure with visible gears and mounting brackets (no text or symbols)
natural_image
Close-up of hands in gloves handling mechanical tools and crimping components (no visible text or symbols)natural_image
Close-up of a bicycle frame structure with visible joints and brackets (no text or symbols)natural_image
Three-panel black-and-white photo sequence showing a person using a bicycle brake system, demonstrating step-by-step assembly (no text or symbols visible)Trinn 17: Fjern sadelposten
Løsne bolten på seterørsleddet med en 5 mm unbrakonøkkel. Deretter fjerner du seteposten.

natural_image
Person using a stationary exercise bike with a headrest, no visible text or symbols on the bike or background
natural_image
Person using a Sharp bicycle on a stationary platform (no visible text or symbols)natural_image
Black-and-white photo of a bicycle frame with a hand adjusting it, no visible text or symbols on the main body.natural_image
Two black-and-white photos showing a person assembling a Sharp bicycle frame, with no visible text or symbols.
natural_image
Person assembling a mechanical device with a wheel and sensor components (no visible text or symbols)
natural_image
Person assembling mechanical devices on a white surface (no visible text or symbols)
natural_image
Two black-and-white photos showing a person using a sharp pen and a handheld device, both demonstrating a step-up (no text or symbols visible)natural_image
Assorted bicycle components including bicycles, levers, and tools arranged on a white surface (no text or symbols visible)Strammingsmomenter:
| Del Dreiemoment Nm | |
| Trekantet ramme 20 Nm | |
| Damp Topp / Side 6 Nm/12 Nm | |
| Dampklemme 8 Nm | |
| Setestag 20 Nm | |
| Kjedestag 10 Nm | |
| Krankbolt 40 Nm | |
| Juster R-pakning belet skruer 6 Nm | |
| Bakre hjulendehetter 45 Nm | |
| Service dør 5 Nm | |
| Bremsekaliper 8 Nm | |
| Grepets endehette 3 Nm | |
| Bremsespaker 8 Nm | |
| L/R pedaler 18 Nm | |
| Skjermer 5 Nm |
Montering på nytt:

Lås boltene i sekvens A-B-C-D-a-b-c-d
Vedlikehold
| Lade 80-100% | 80% | 60% | 40% | 20% | 0-20% | |||
| Batterispenning/V | 42 | 38 | 36 | 34 | 32 | 30 |
Lader batteriet ditt
www.sharpconsumer.com/RS08EB/#down
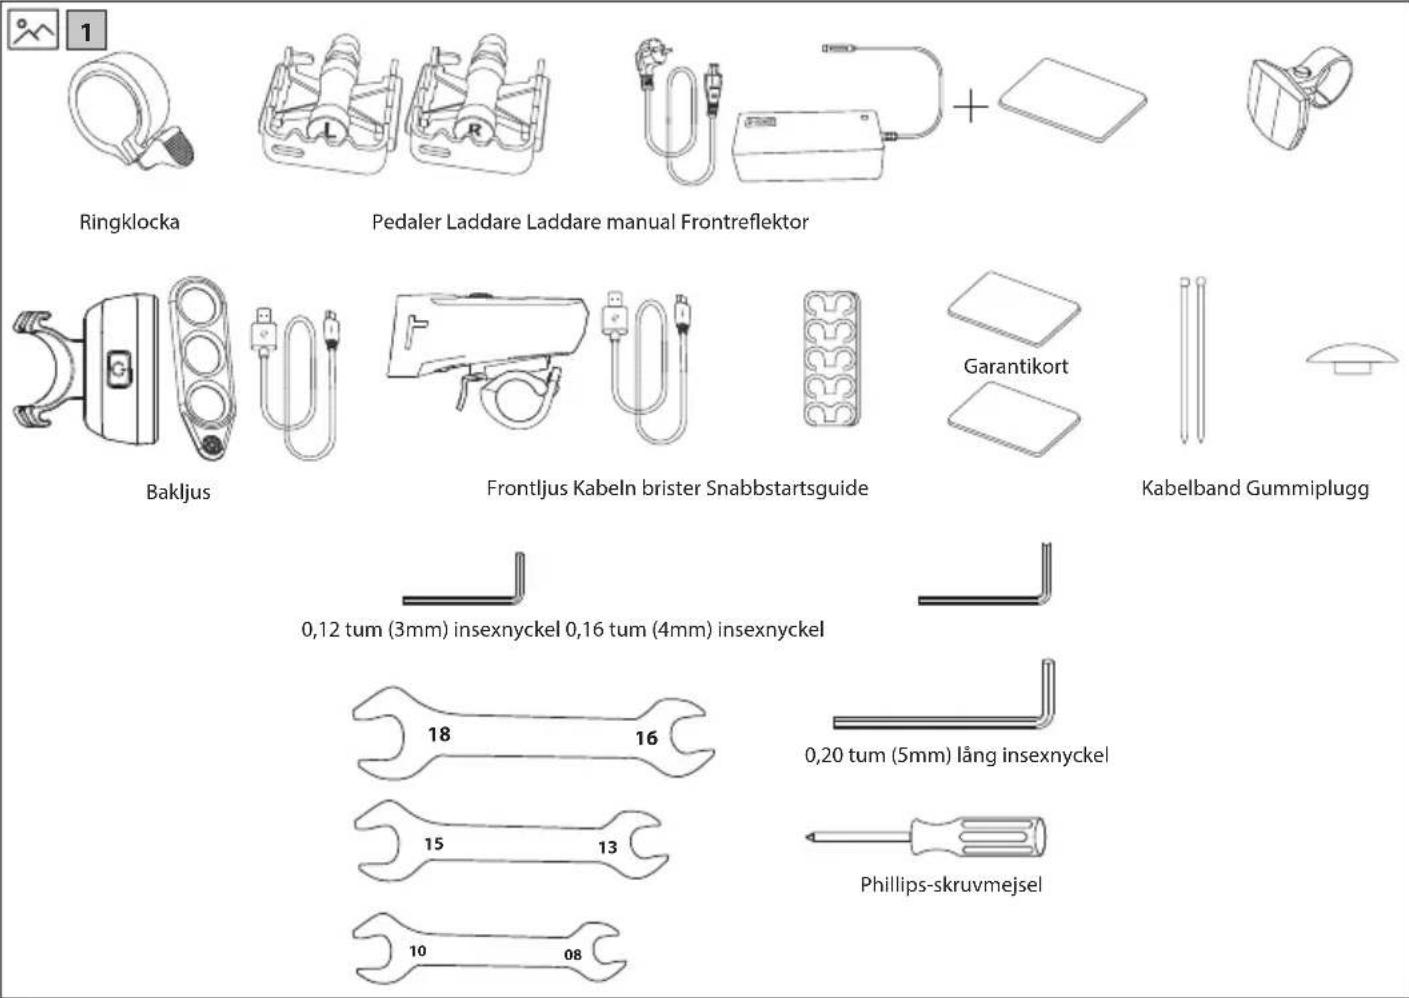


natural_image
Line drawing of a shared bicycle with a compact box and wheels (no text or symbols)natural_image
Two circular icons showing a sneaker and a helmet, no text or symbols present.natural_image
Technical line drawing of a mechanical device with no visible text or symbolsFigur 1-1 Figur 1-2
OBS:
natural_image
Technical line drawing of a robotic arm with articulated joints and a handle (no text or symbols)Figur 1-3 Figur 1-4
natural_image
Line drawing of a bicycle with visible wheel, spokes, and handle (no text or symbols)natural_image
Line drawing of a mechanical device with lever and handle (no text or symbols)
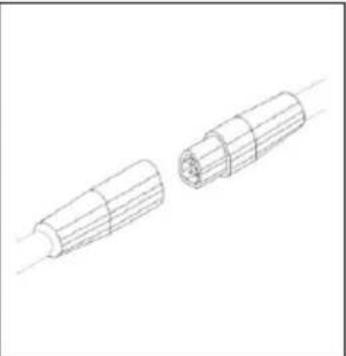
natural_image
Two cylindrical electronic components with internal wiring, shown from different angles (no text or symbols)Figur 2-1 Figur 2-2
STEG 3: Installera sadeln
Figur 3-1

natural_image
Line drawing of a bicycle leg with seat and support bracket (no text or symbols)Figur 3-2
natural_image
Technical line drawing of two cylindrical mechanical components with a wrench and clamp (no text or symbols)Figure 4-1 Figure 4-2

Figur 4-3

natural_image
Technical line drawing of a mechanical gear assembly with intersecting blades (no text or symbols)
natural_image
Diagram of a mechanical assembly with intersecting rods and a labeled component '12 (Fork)' (no readable text or symbols beyond label)Figur 4-4 Figur 4-5
ANTECKNINGAR:
natural_image
Line drawing of a bicycle wheel assembly with no text or symbolsFigur 5-1
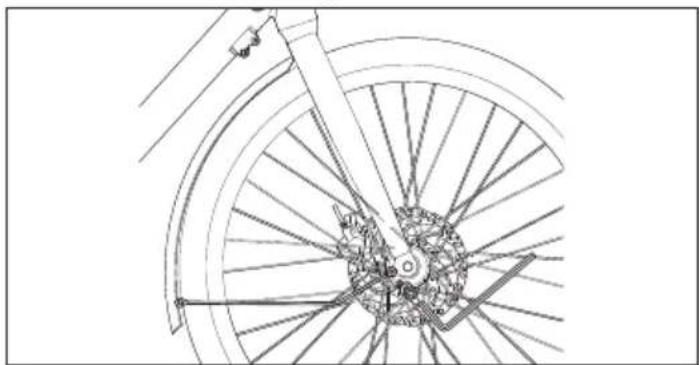
natural_image
Technical line drawing of a bicycle wheel assembly with visible spokes and hub (no text or symbols)Figur 5-2

natural_image
Technical line drawing of a bicycle wheel and suspension bracket (no text or symbols)Figur 5-3
STEG 6: Installera bakskärmen
natural_image
Line drawing of a bicycle's front wheel and seat assembly (no text or symbols)Figur 6-1

natural_image
Mechanical assembly diagram of a bicycle wheel with gear and hub, showing internal components and a close-up inset (no text or labels)Figur 6-2
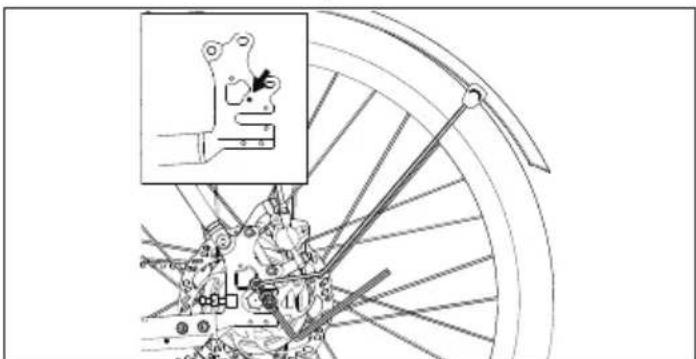
natural_image
Mechanical assembly diagram showing a wheel with levers and a close-up inset of a component (no text or symbols)Figur 6-3
STEG 7: Anslut kabeln
natural_image
Technical line drawing of a mechanical device with no visible text or symbolsFigur 7-1
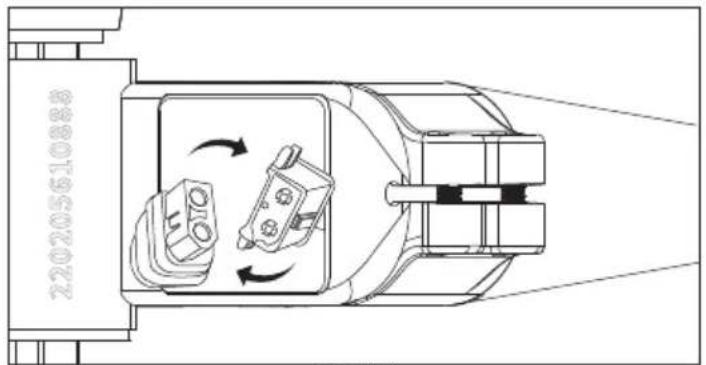
Figur 7-2
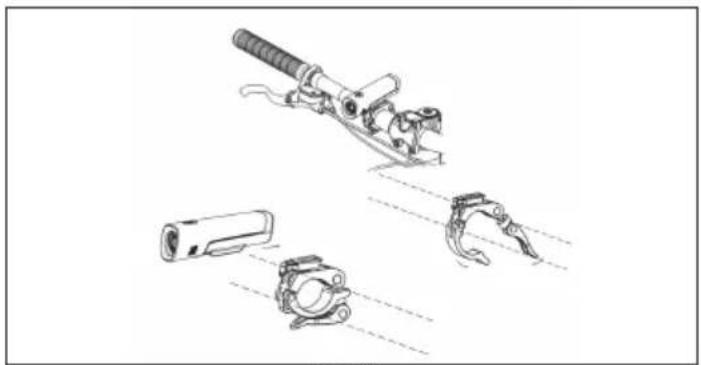
natural_image
Technical line drawing of mechanical components including a tool, clamping mechanism, and cylindrical device (no text or symbols)Figur 9-1
STEG 8: Installera pedalerna
natural_image
Technical line drawing of two mechanical components with no visible text or symbols
Figur 8-1
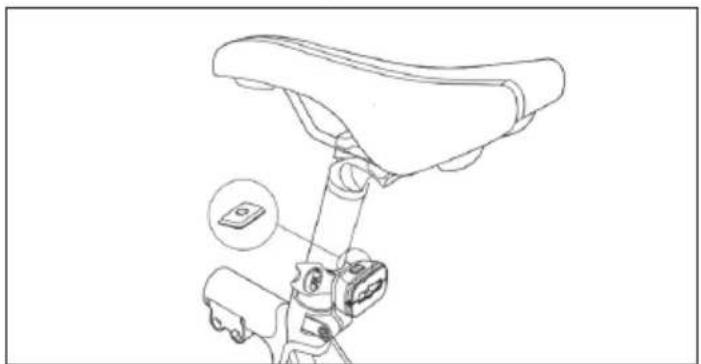
natural_image
Line drawing of a bicycle seat with attached camera and sensor components (no text or symbols)Figur 9-2
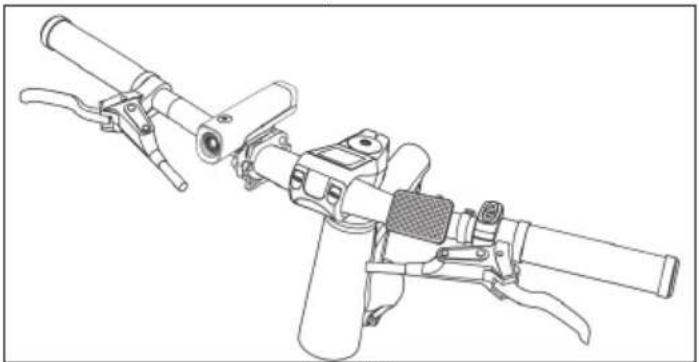
natural_image
Technical line drawing of a firearm assembly (no text or symbols)Figur 9-3
ANTECKNINGAR:
natural_image
Technical line drawing of a bicycle wheel with visible spokes and levers (no text or symbols)Figur 10-1
Pumpa ett cykeldäck
Figur 11-1 Figur 11-2
Anslut till SHARP Life APP
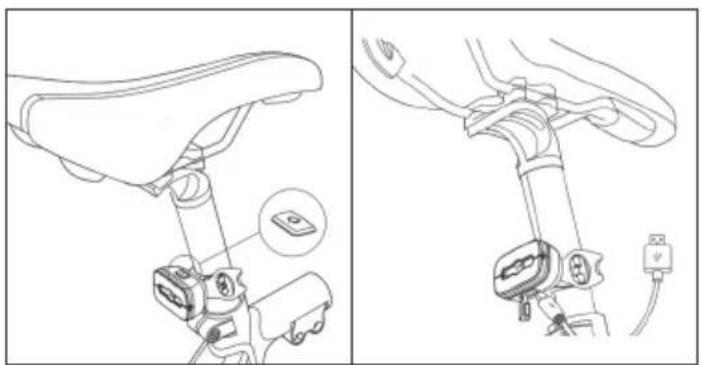
natural_image
Technical line drawing of a bicycle seat assembly with two views (top and side), no text or symbols present.SHARP Life-appen
https://www.sharpconsumer.com/sharp-life-app
natural_image
Close-up of a gloved hand holding a black bicycle brake lever (no text or symbols visible)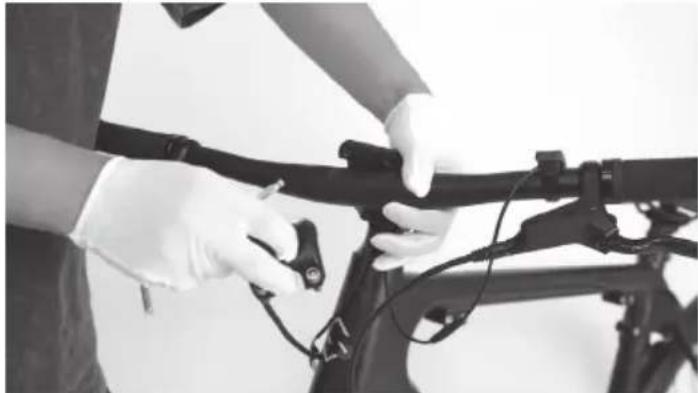
natural_image
Person in gloves handling a bicycle frame with wires and sensors (no visible text or symbols)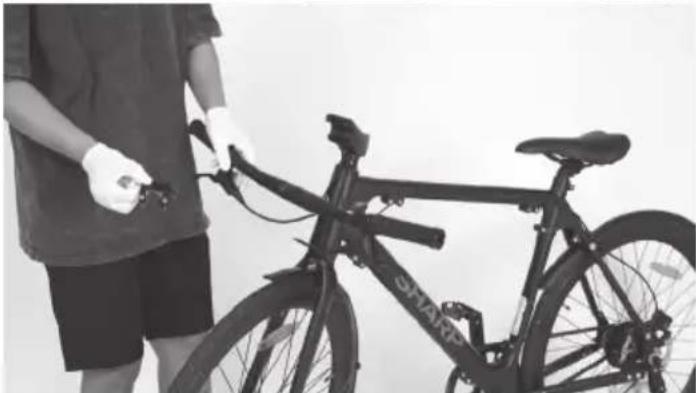
natural_image
Person holding a shared bicycle with visible branding and control panel (no text or symbols on the bicycle itself)natural_image
Close-up of hands using a handheld device to adjust or install a black mechanical component (no visible text or symbols)
natural_image
Close-up of a gloved hand holding a black mechanical component with a small metallic clip (no visible text or symbols)
natural_image
Person wearing gloves handling a bicycle frame (no visible text or symbols)
natural_image
Close-up of hands using a tool to adjust or install a black electronic device component (no visible text or symbols)natural_image
Person standing beside a bicycle with visible frame and wheels (no text or symbols)Steg 4: Ta bort handtaget
natural_image
Person cleaning a bicycle frame with a hand tool (no visible text or symbols)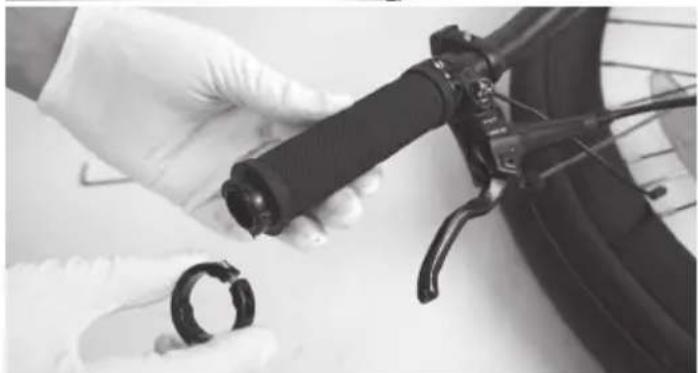
natural_image
Close-up of gloved hands holding a black plastic clip and a small ring, next to a bicycle handle (no visible text or symbols)
natural_image
Close-up of a hand using a tool to adjust the bicycle wheel (no text or symbols visible)
natural_image
Close-up of hands holding a black bicycle brake lever with wires (no visible text or symbols)Steg 5: Ta bort bromshandtaget
natural_image
Close-up of a bicycle tire being adjusted by a tool, with no visible text or symbols
natural_image
Close-up of a bicycle tire being adjusted with a tool, no visible text or symbols
natural_image
Person cleaning a bicycle tire with a hand pump, no visible text or symbolsSteg 6: Ta bort assistansbrytaren
natural_image
Person in gloves handling a black cable or pipe with a clamp, no visible text or symbols
natural_image
Close-up of hands holding a black cable or hose next to a tire, with no visible text or symbols.natural_image
Close-up of hands holding a black cable or wire component, no visible text or symbols
natural_image
Close-up of hands holding a black cable with a small inset image showing a connector (no text or symbols visible)natural_image
Two black-and-white photos showing hands adjusting a bicycle wheel and chain, no visible text or symbolsSteg 9: Koppla bort kablarna
natural_image
Two black bicycle wheel assembly steps showing hands adjusting the wheel (no text or symbols visible)
natural_image
Close-up of hands adjusting a bicycle wheel and gear mechanism (no visible text or symbols)Steg 10: Ta bort stödet
natural_image
Three-panel black-and-white photo showing hands assembling a bicycle wheel, showing mechanical components and wiring (no text or symbols visible)natural_image
Two-panel black-and-white photo showing a bicycle wheel assembly and hand positioning on its wheel (no text or symbols visible)natural_image
Close-up of hands assembling a bicycle wheel assembly with gear links (no text or symbols visible)natural_image
Four-panel black-and-white photo showing bicycle wheel assembly and maintenance, including hand tool and hands adjusting components (no text or symbols visible)Steg 12: Ta bort baskärmen
natural_image
Two black-and-white photos showing hands assembling a bicycle wheel and a mechanical component (no visible text or symbols)natural_image
Close-up of hands using a bicycle gear to trim a bicycle wheel, no text or symbols visiblenatural_image
Close-up of a bicycle wheel assembly with a hand adjusting the component (no visible text or symbols)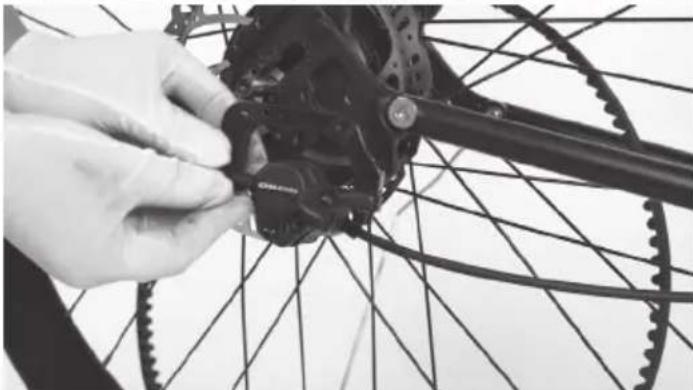
natural_image
Close-up of hands adjusting a bicycle wheel rim with a mechanical component (no visible text or symbols)
natural_image
Person adjusting a bicycle wheel on a white surface, no visible text or symbolsSteg 14: Ta bort pedalerna
natural_image
Person assembling a bicycle frame with a tool, no visible text or symbols
natural_image
Person assembling a bicycle frame with visible wheels and structural components (no text or symbols)natural_image
Person assembling a bicycle frame with a tool, no visible text or symbols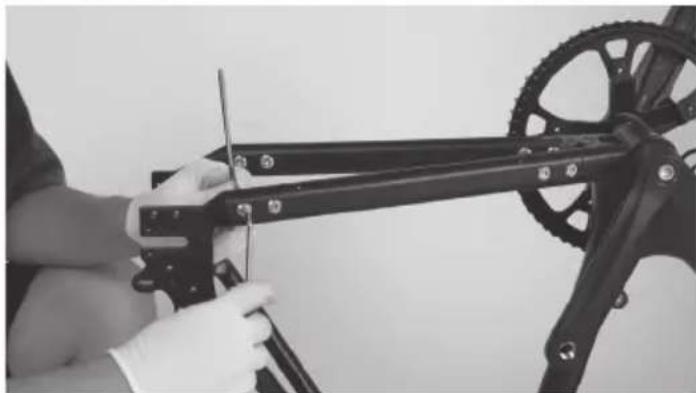
natural_image
Person assembling a bicycle frame with a tool, no visible text or symbols
natural_image
Close-up of hands installing a black metal bracket component (no text or symbols visible)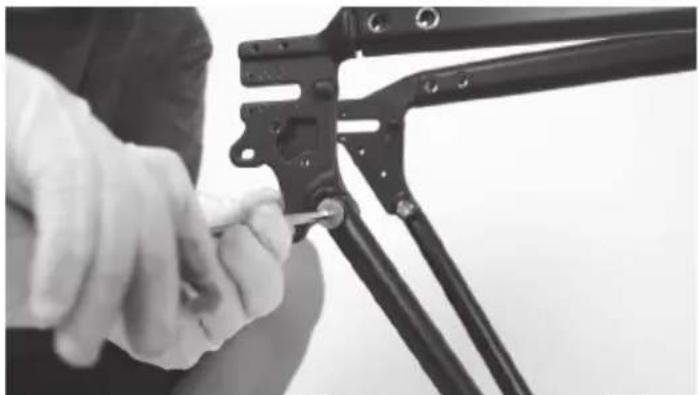
natural_image
Close-up of hands adjusting a mechanical linkage component (no visible text or symbols)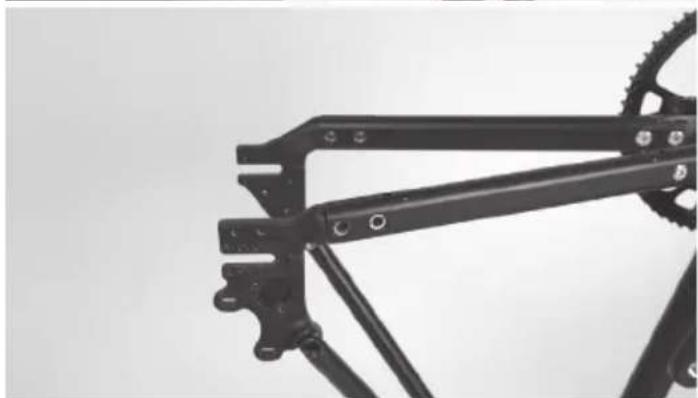
natural_image
Close-up of a black bicycle frame structure with gear and mounting brackets (no text or symbols visible)
natural_image
Close-up of hands in gloves handling mechanical tools and crimping gears (no text or symbols visible)Sedan tar du bort bältet.

natural_image
Close-up of a bicycle frame structure with visible joints and brackets (no text or symbols)natural_image
Three-panel black-and-white photo sequence showing a person using a bicycle-mounted device, demonstrating step-by-step assembly (no text or symbols visible)Steg 17: Ta bort sadelstolpen
natural_image
Person using a stationary bike with a head-mounted sensor, no visible text or symbols on the bike or background
natural_image
Person using a Sharp bicycle on a stationary platform (no visible text or symbols)Steg 18: Ta isär ramen
natural_image
Black-and-white photo of a bicycle brake system with a hand adjusting it, no visible text or symbols on the main body.natural_image
Person assembling a Sharp bicycle frame with visible wiring and components (no text or symbols)
natural_image
Two people assembling a bicycle frame with visible gears and wiring (no text or symbols)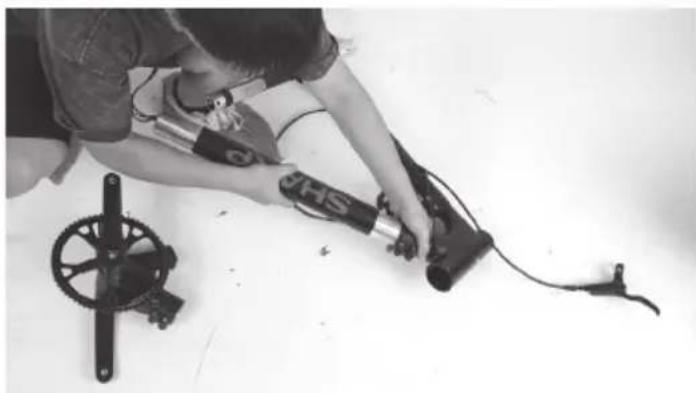
natural_image
Person using a handheld device with a mechanical scale nearby (no visible text or symbols)
natural_image
Person assembling a mechanical device with tools and cables on a white surface (no visible text or symbols)
natural_image
Person kneeling on a floor using a sharp pressure tool, no visible text or symbols
natural_image
Person kneeling on a bench with a mechanical device and two cylindrical components, no visible text or symbolsnatural_image
Assorted bicycle components including bicycles, shakers, and tools arranged on a white surface (no text or symbols visible)Åtdragningsmoment:
Lås bultarna i sekvens A-B-C-D-a-b-c-d
Underhåll
www.sharpconsumer.com/RS08EB/#down

natural_image
Line drawing of a shared bicycle with a compact box and wheels (no text or symbols)
www.sharpconsumer.com/contact/

www.sharpconsumer.com/support/

www.sharpconsumer.com/documents-of-conformity/

Hvad er i kassen:
HurtigstartsvejledningQuick Start Guide (dette dokumentthis document)
E-Bike dele
natural_image
Technical line drawing of a mechanical device with no visible text or symbolsSamling af E-cyklen
Figure 1-1 Figure 1-2
BEMÄRK:
Sørg for, at momentet på skruen i toppen er omkring 4-6 N·m. Sørg for, at momentet for dem på siden er omkring 10-12 N·m.
a. Løsn de fire skruer på styreklemmen i en mod uret retning med en 5 mm unbrakonøgle, og fjern derefter skruerne og frontdækslet, som vist i [Figur 1-3] og [1-4].

natural_image
Technical line drawing of a robotic arm showing two views (no text or symbols)Figure 1-3 Figure 1-4
natural_image
Line drawing of a bicycle with visible wheel, spokes, and handle (no text or symbols)natural_image
Line drawing of a mechanical device with lever and handle (no text or symbols)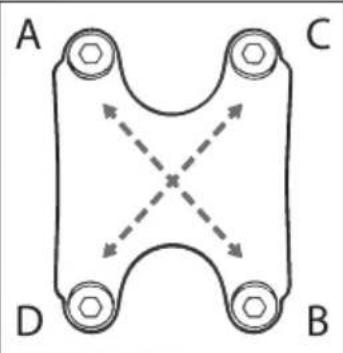
Figure 1-5
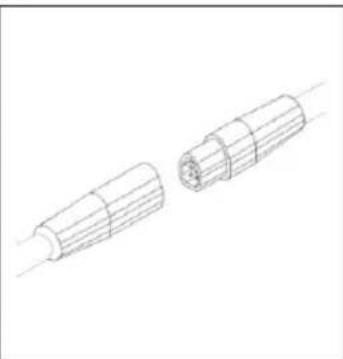
natural_image
Two cylindrical electronic components with internal wires, shown from different angles (no text or symbols)Figure 2-1 Figure 2-2
natural_image
Line drawing of a bicycle's front wheel and rear wheel, labeled 'SHARP' (no additional text or symbols)Figure 3-1

natural_image
Simple line drawing of a long rectangular object with a small protrusion at the end (no text or symbols)
natural_image
Line drawing of a bicycle leg with seat and tripod base (no text or symbols)Figure 3-2
natural_image
Technical line drawing of two cylindrical mechanical components with a wrench and clamp (no text or symbols)Figure 4-1 Figure 4-2

Figure 4-3
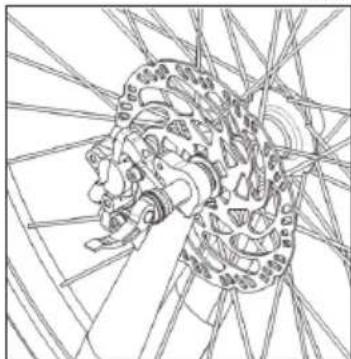
natural_image
Technical line drawing of a mechanical gear assembly with intersecting rods (no text or symbols)
natural_image
Line drawing of a mechanical component with intersecting lines and a labeled section '12 (Fork)' (no other text or symbols)Figure 4-4 Figure 4-5
NOTER:
natural_image
Line drawing of a bicycle wheel assembly with no text or symbolsFigure 5-1

natural_image
Technical line drawing of a bicycle wheel assembly with visible spokes and hub (no text or symbols)Figure 5-2
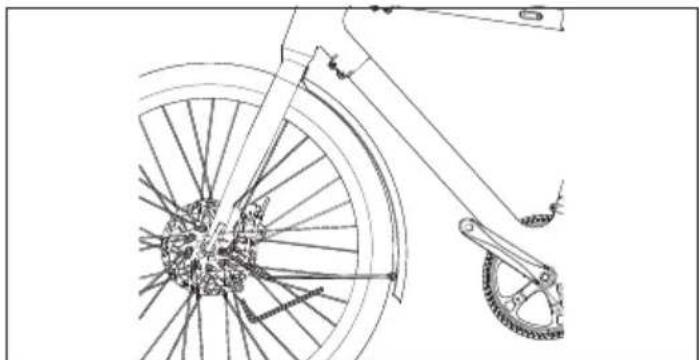
natural_image
Technical line drawing of a bicycle wheel and suspension bracket (no text or symbols)Figure 5-3
TRIN 6: Installer bagklappen
natural_image
Line drawing of a bicycle seat and wheel assembly (no text or symbols)Figure 6-1

natural_image
Technical line drawing of a bicycle wheel assembly with mechanical components and a magnified inset showing a component detail (no text or symbols)Figure 6-2

natural_image
Mechanical assembly diagram of a bicycle wheel with gear and suspension components (no text or labels)Figure 6-3
TRIN 7: Tilslut kablet
natural_image
Technical line drawing of a mechanical device with no visible text or symbolsFigure 7-1

Figure 7-2

natural_image
Technical line drawing of mechanical components including a tool, clamping bracket, and cylindrical housing (no text or symbols)Figure 9-1
TRIN 8: Installer pedalerne
a. Brug den 15 mm nøgle til at montere pedalerne, som vist i [Figur 8-1].

natural_image
Technical line drawing of two mechanical components with no visible text or symbols
Figure 8-1

natural_image
Technical line drawing of a bicycle seat assembly with two labeled components (no text or symbols)Figure 9-2

natural_image
Technical line drawing of a mechanical device with lever arms and handle (no text or symbols)Figure 9-3
NOTER:
natural_image
Technical line drawing of a bicycle wheel assembly with visible spokes and levers (no text or symbols)Figure 10-1
Figure 11-1 Figure 11-2
Opret forbindelse til SHARP Life APP
Tryk og hold Mode-knappen nede i 2 sekunder, og gå ind i Indstillinger-interfacet.
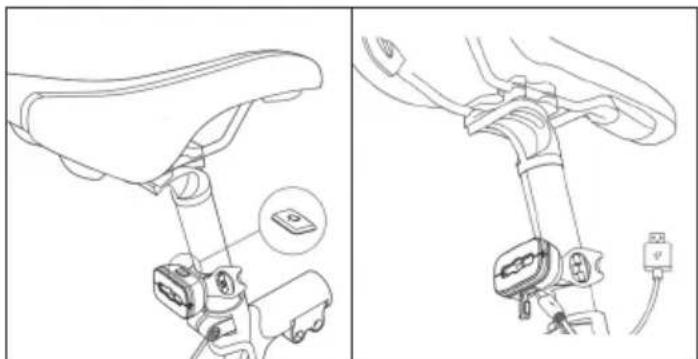
natural_image
Technical line drawing of a bicycle seat assembly with two views (top and side), no text or symbols present.SHARP Life App

https://www.sharpconsumer.com/sharp-life-app
natural_image
Close-up of a gloved hand adjusting a black cable connector (no text or symbols visible)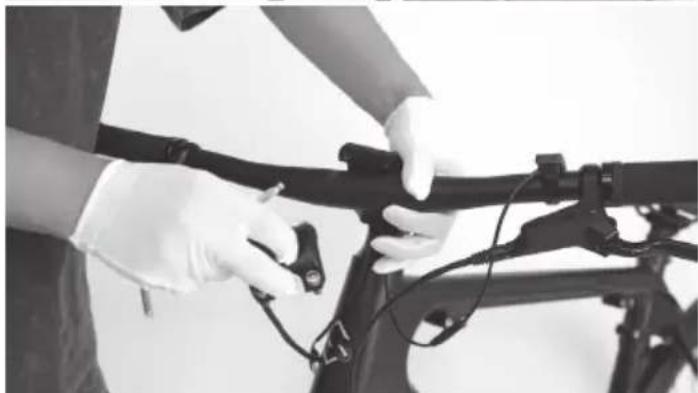
natural_image
Person in gloves adjusting a bicycle frame with cable (no visible text or symbols)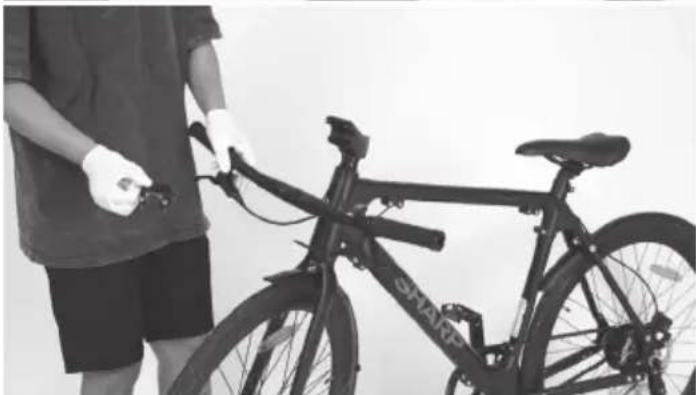
natural_image
Person holding a shared bicycle with visible 'SHARP' branding, standing beside it (no text or symbols on the bicycle itself)natural_image
Four-panel black-and-white photo sequence showing hands using a bicycle to adjust the camera, demonstrating the process (no text or symbols visible)natural_image
Person standing beside a bicycle with visible frame and wheels (no text or symbols)natural_image
Person repairing a shared bicycle with visible wheel rim and headrest (no text or symbols)
natural_image
Close-up of gloved hands holding a black brake lever and a black ring component (no visible text or symbols)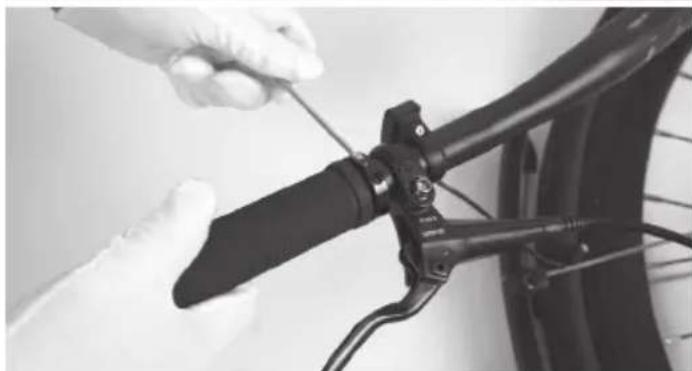
natural_image
Close-up of hands using a cable to adjust a bicycle wheel (no text or symbols visible)
natural_image
Close-up of hands holding a black bicycle brake lever with wires (no visible text or symbols)natural_image
Close-up of a bicycle tire being adjusted by a hand, showing mechanical components and wiring (no text or symbols visible)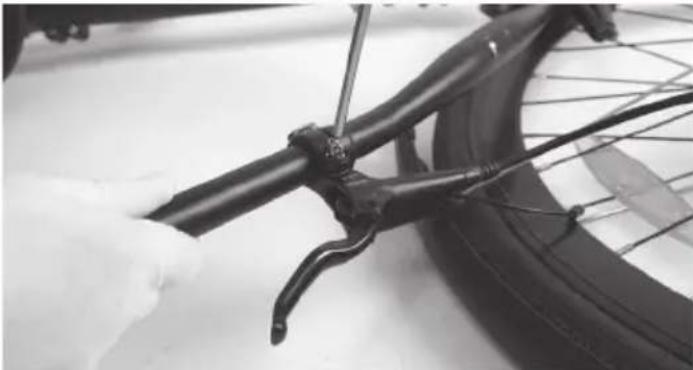
natural_image
Close-up of a bicycle tire being adjusted by a hand, showing the blade and wheel (no text or symbols visible)
natural_image
Person cleaning a bicycle tire with a hand using a tool (no visible text or symbols)natural_image
Person in gloves handling a black cable or hose with a clip, no visible text or symbols
natural_image
Close-up of hands cleaning a tire with a black plastic wrap (no text or symbols visible)natural_image
Close-up of hands holding a black cable or connector, no visible text or symbols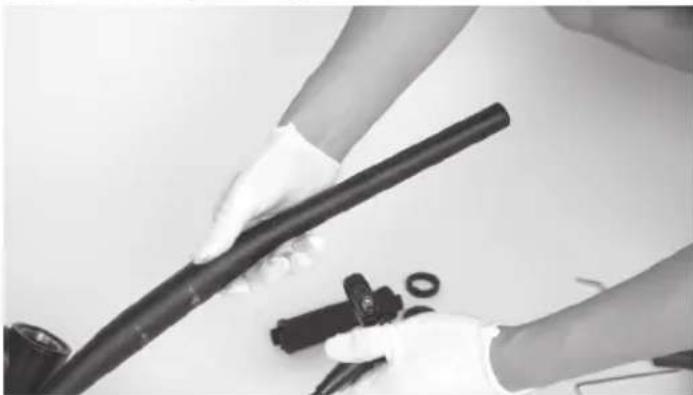
natural_image
Close-up of hands holding a black cylindrical pipe with small components nearby (no visible text or symbols)natural_image
Close-up of a person adjusting a bicycle wheel assembly (no visible text or symbols)
natural_image
Close-up of hands adjusting a bicycle wheel assembly (no visible text or symbols)natural_image
Close-up of hands adjusting a bicycle wheel assembly (no visible text or symbols)
natural_image
Close-up of hands adjusting a bicycle wheel component (no visible text or symbols)
natural_image
Close-up of hands adjusting a bicycle wheel and gear mechanism (no visible text or symbols)natural_image
Close-up of a person adjusting a bicycle wheel with visible gears and chains (no text or symbols)
natural_image
Close-up of hands assembling a bicycle wheel with visible gears and spokes (no text or symbols)
natural_image
Close-up of a bicycle wheel with visible mechanical components and a hand adjusting the wheel (no text or symbols)natural_image
Two-panel black-and-white photo showing a bicycle wheel assembly with a hand adjusting the gear and a close-up of the wheel rim (no text or symbols visible)natural_image
Close-up of hands assembling a bicycle wheel assembly with gear links (no text or symbols visible)natural_image
Four-panel black-and-white photo showing bicycle wheel assembly and maintenance, including hand tooling and cleaning steps (no text or symbols visible)Trin 12: Fjern bagklappen
a. Løsn skruerne på dropout med en 4 mm unbrakonøgle.

natural_image
Two black-and-white photos showing hands assembling a bicycle wheel and a mechanical assembly (no visible text or symbols)natural_image
Close-up of hands using a saw to cut the bicycle frame, showing mechanical components and tool path (no text or symbols visible)natural_image
Close-up of a bicycle wheel assembly with a hand adjusting the component (no visible text or symbols)
natural_image
Close-up of hands assembling a bicycle wheel frame with a mechanical component (no visible text or symbols)
natural_image
Person adjusting a bicycle tire with hands, no visible text or symbolsTrin 14: Fjern pedalerne
natural_image
Person assembling a bicycle frame with a tool, no visible text or symbols
natural_image
Person assembling a bicycle frame with visible gears and base plate (no text or symbols)Trin 15: Fjern dropout
natural_image
Person using a bicycle-mounted tool to adjust the frame (no visible text or symbols)
natural_image
Person assembling a black bicycle frame with a tool, no visible text or symbols
natural_image
Close-up of hands installing or adjusting a black metal bracket component (no visible text or symbols)
natural_image
Close-up of hands using a crimping tool to adjust or install a mechanical component (no visible text or symbols)
natural_image
Close-up of a black bicycle frame structure with visible gears and mounting brackets (no text or symbols)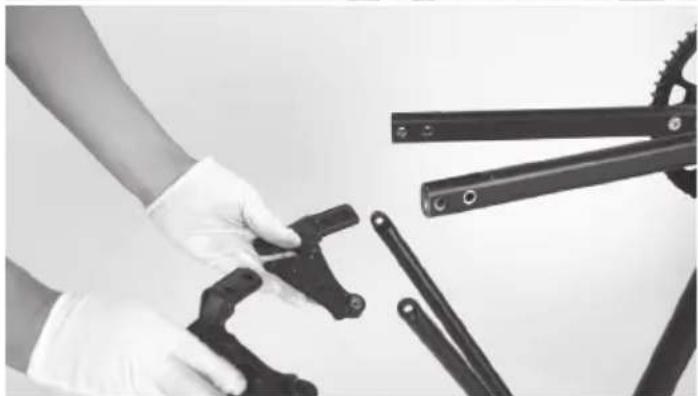
natural_image
Close-up of hands in gloves handling mechanical tools and crimping components (no visible text or symbols)natural_image
Close-up of a bicycle frame structure with visible joints and brackets (no text or symbols)natural_image
Three-panel black-and-white photo sequence showing a person using a bicycle brake system, demonstrating step-by-step assembly (no text or symbols visible)Trin 17: Fjern sadelpinden
natural_image
Person using a shared stationary bike with a head-mounted sensor (no visible text or symbols)
natural_image
Person using a Sharp bicycle on a stationary platform (no visible text or symbols)Trin 18: Tag rammen fra hinanden
natural_image
Black-and-white photo of a bicycle frame with a hand adjusting it, no visible text or symbols on the main subject.natural_image
Person assembling a Sharp bicycle frame with visible wiring and components (no text or symbols)
natural_image
Two people assembling a bicycle frame with a gear mechanism (no visible text or symbols)
natural_image
Person using a handheld device with visible mechanical components and a wheel nearby (no text or symbols)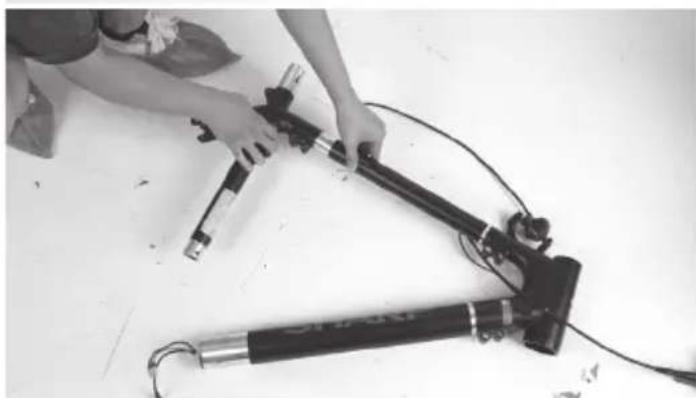
natural_image
Person assembling a mechanical device with tools and cables on a white surface (no visible text or symbols)
natural_image
Person kneeling with a handheld device labeled 'SHARP' on a flat surface (no other text or symbols visible)
natural_image
Person kneeling on a bench with a mechanical device and cable, no visible text or symbolsnatural_image
Assorted bicycle components including bicycles, shakers, pedals, and gear (no text or symbols visible)Spændingsmomenter:
Lås bolterne i sekvensen A-B-C-D-a-b-c-d
Vedligeholdelse
www.sharpconsumer.com/RS08EB/#down
natural_image
Line drawing of a shared bicycle with a compact box and wheels (no text or symbols)
www.sharpconsumer.com/contact/

www.sharpconsumer.com/support/

www.sharpconsumer.com/documents-of-conformity/


Mitä paketissa on:
natural_image
Technical line drawing of a mechanical device with no visible text or symbolsKuvio 1-1 Kuvio 1-2
HUOMIO:
natural_image
Technical line drawing of a robotic arm showing two views (no text or symbols)Kuvio 1-3 Kuvio 1-4
natural_image
Line drawing of a bicycle with visible wheel, spokes, and handle (no text or symbols)natural_image
Line drawing of a mechanical device with lever and handle (no text or symbols)
Kuvio 1-5

natural_image
Two cylindrical electronic components with internal wires, shown from different angles (no text or symbols)Kuvio 2-1 Kuvio 2-2
natural_image
Line drawing of a bicycle wheel with 'SHARP' branding and no visible text or symbols on the diagram itselfKuvio 3-1

natural_image
Simple line drawing of a long rectangular object with a small protrusion at the end (no text or symbols)
natural_image
Line drawing of a bicycle leg with seat and tripod base (no text or symbols)Kuvio 3-2
natural_image
Technical line drawing of two cylindrical mechanical components with a wrench and clamp (no text or symbols)Kuvio 4-1 Kuvio 4-2

Kuvio 4-3
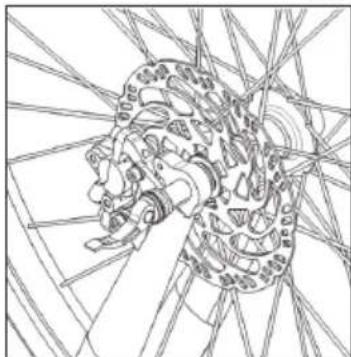
natural_image
Technical line drawing of a mechanical gear assembly with intersecting blades (no text or symbols)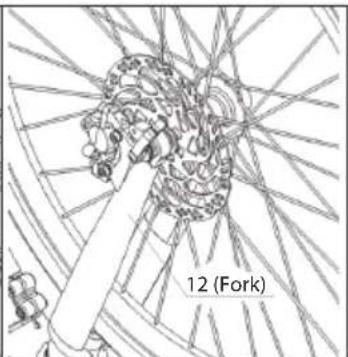
natural_image
Diagram of a mechanical assembly with intersecting rods and a labeled component '12 (Fork)' (no readable text or symbols beyond label)Kuvio 4-4 Kuvio 4-5
HUOMAUTUKSIA:
natural_image
Technical line drawing of mechanical components including a tool, clamping bracket, and cylindrical device (no text or symbols)Kuvio 9-1
natural_image
Technical line drawing of two mechanical components with no visible text or symbols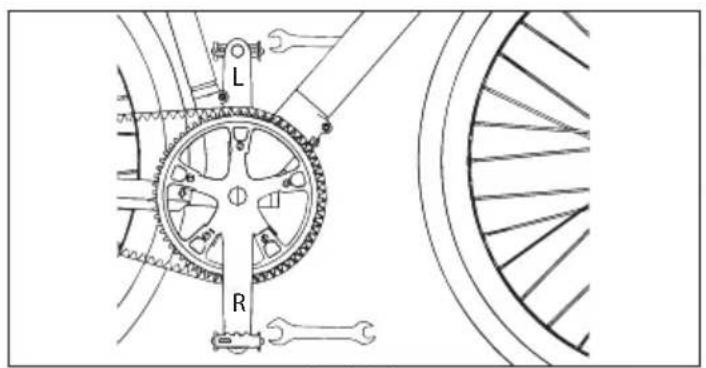
Kuvio 8-1

natural_image
Line drawing of a bicycle seat with attached camera and sensor components (no text or symbols)Kuvio 9-2

natural_image
Technical line drawing of a mechanical device with lever and grip assembly (no text or symbols)Kuvio 9-3
HUOMAUTUKSIA:
natural_image
Technical line drawing of a bicycle wheel assembly with visible gears and levers (no text or symbols)Kuvio 10-1
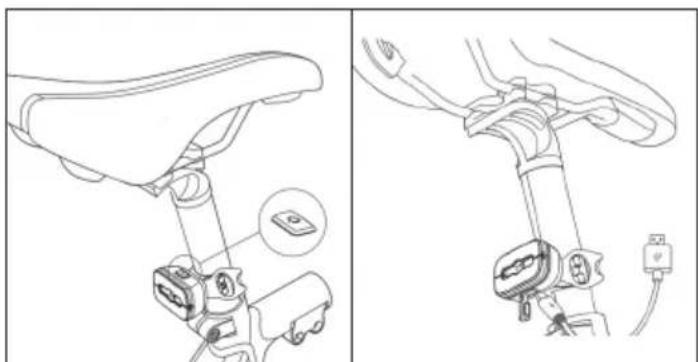
natural_image
Technical line drawing of a bicycle seat assembly with mounting hardware (no text or symbols)SHARP Life -sovellus

https://www.sharpconsumer.com/sharp-life-app
Purkamisohjeet
natural_image
Close-up of a gloved hand holding a black cable connector (no visible text or symbols)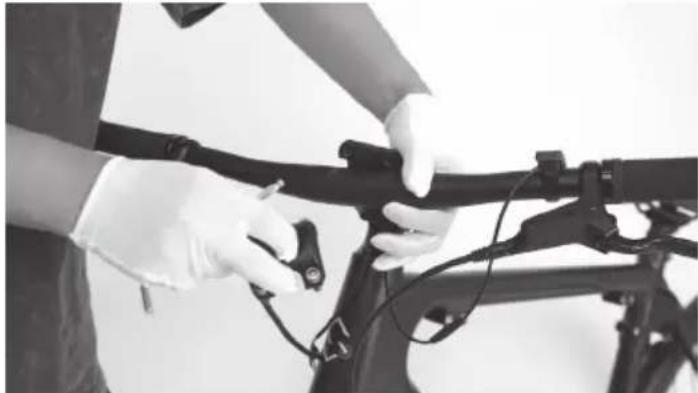
natural_image
Person in gloves adjusting a bicycle frame with cable (no visible text or symbols)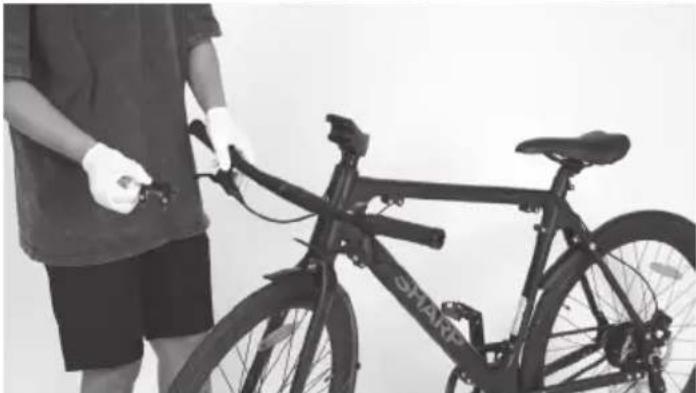
natural_image
Person holding a shared bicycle with visible branding, standing beside it (no text or symbols on the bicycle itself)natural_image
Close-up of hands holding a black mechanical device with a handle, no visible text or symbols
natural_image
Close-up of a gloved hand holding a black mechanical component with a small attached pin (no visible text or symbols)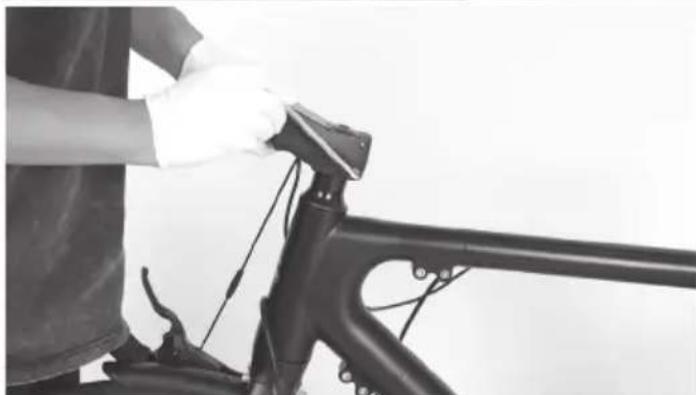
natural_image
Person wearing gloves handling a bicycle frame (no visible text or symbols)
natural_image
Close-up of hands using a tool to adjust or install a black mechanical component (no visible text or symbols)natural_image
Person standing beside a bicycle with visible frame and wheels (no text or symbols)Vaihe 4: Poista kahva
natural_image
Person cleaning a bicycle frame with visible wheel rim and headrest (no text or symbols)
natural_image
Close-up of gloved hands holding a black plastic clip and a coiled black ring, next to a bicycle (no visible text or symbols)
natural_image
Close-up of a hand using a tool to adjust the bicycle wheel (no text or symbols visible)
natural_image
Close-up of hands holding a black bicycle brake lever with wires (no visible text or symbols)natural_image
Close-up of a bicycle tire being adjusted by a tool, with no visible text or symbols
natural_image
Close-up of a bicycle tire being adjusted by a tool, with no visible text or symbols
natural_image
Person cleaning a bicycle tire with a hand using a tool (no visible text or symbols)natural_image
Close-up of hands in white gloves installing a black cable or wire component on a vehicle (no visible text or symbols)
natural_image
Close-up of hands holding a black cable or hose next to a tire, with no visible text or symbols.natural_image
Close-up of hands holding a black cable or connector with a white plastic cap, no visible text or symbols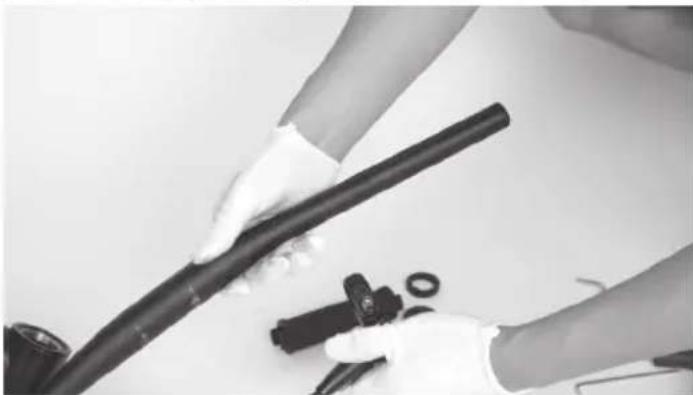
natural_image
Close-up of hands holding a black cable with a small inset image showing a connector (no text or symbols visible)natural_image
Close-up of a person adjusting a bicycle wheel assembly (no visible text or symbols)
natural_image
Close-up of hands assembling a bicycle wheel and chain (no visible text or symbols)Vaihe 9: Irrota kaapelit
natural_image
Close-up of hands adjusting a bicycle wheel assembly (no visible text or symbols)
natural_image
Close-up of hands adjusting a bicycle wheel component (no visible text or symbols)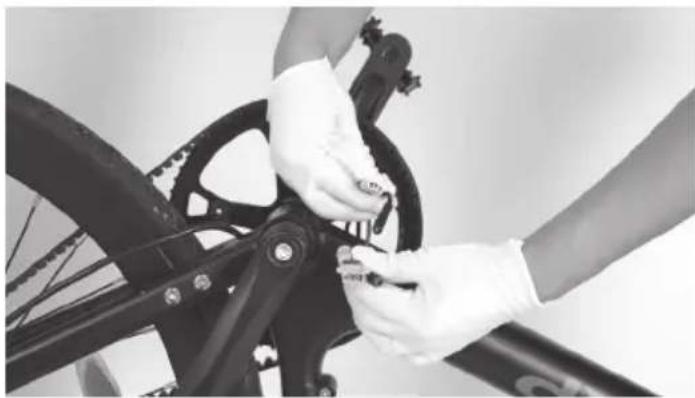
natural_image
Close-up of hands adjusting a bicycle wheel and gear mechanism (no visible text or symbols)natural_image
Close-up of a person adjusting a bicycle wheel with visible gears and chains (no text or symbols)
natural_image
Close-up of hands assembling a bicycle wheel with visible tracks and gear (no text or symbols)
natural_image
Close-up of a bicycle wheel with visible mechanical components and a hand adjusting the wheel (no text or symbols)natural_image
Two-panel black-and-white photo showing bicycle wheel assembly and hand tool (no text or symbols visible)natural_image
Close-up of hands assembling a bicycle wheel assembly, showing mechanical components and wiring (no text or symbols visible)natural_image
Four-panel black-and-white photo showing bicycle wheel assembly and maintenance, including hand tooling and cleaning steps (no text or symbols visible)natural_image
Two black-and-white photos showing hands assembling a bicycle wheel and a mechanical component (no visible text or symbols)natural_image
Close-up of hands using a bicycle gear to trim a bicycle wheel, no text or symbols visiblenatural_image
Three-panel black-and-white photo showing a bicycle wheel assembly: hand, close-up of gear, and close-up of hands assembling the wheel (no text or symbols visible)Vaihe 14: Irrota polkimet
natural_image
Person using a bicycle-mounted device with visible wheels and a handle (no text or symbols)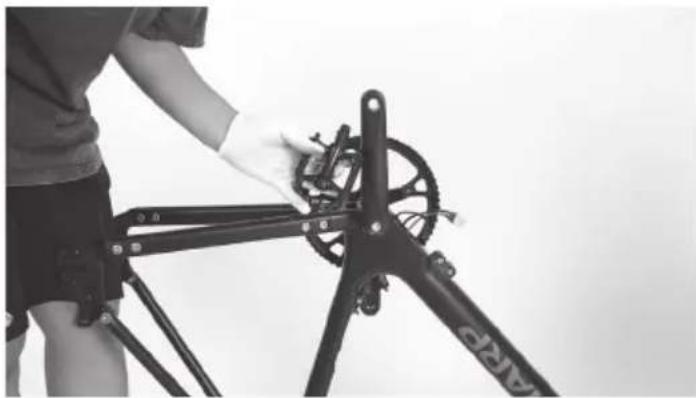
natural_image
Person assembling a bicycle frame with visible wheels and structural components (no text or symbols)natural_image
Person assembling a bicycle frame with a tool, no visible text or symbols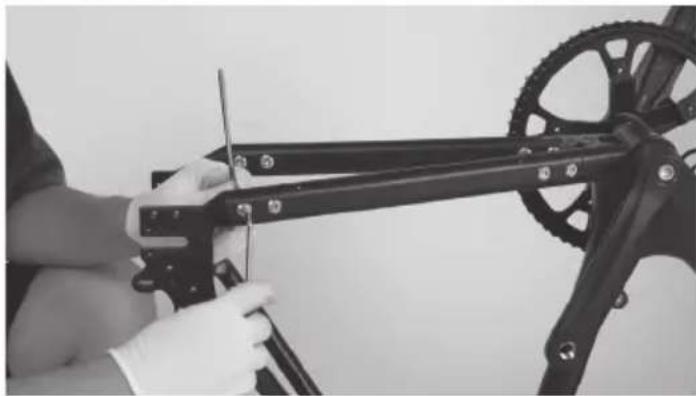
natural_image
Person using a mechanical bicycle frame to adjust the wheel (no visible text or symbols)
natural_image
Close-up of hands installing a black metal bracket component (no text or symbols visible)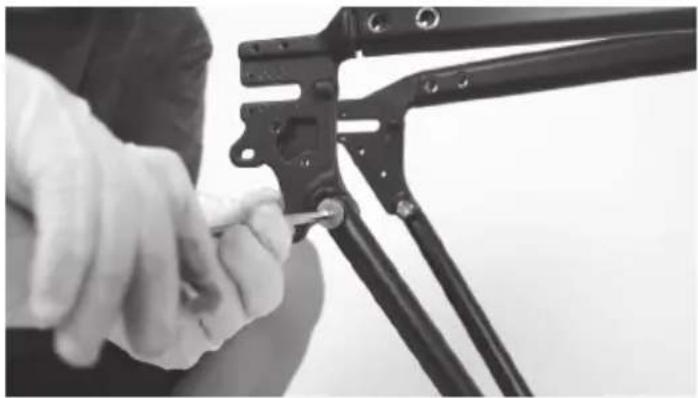
natural_image
Close-up of hands using a mechanical clamp or crimping tool to adjust a black metal bracket (no visible text or symbols)
natural_image
Close-up of a black bicycle frame structure with visible joints and brackets (no text or symbols)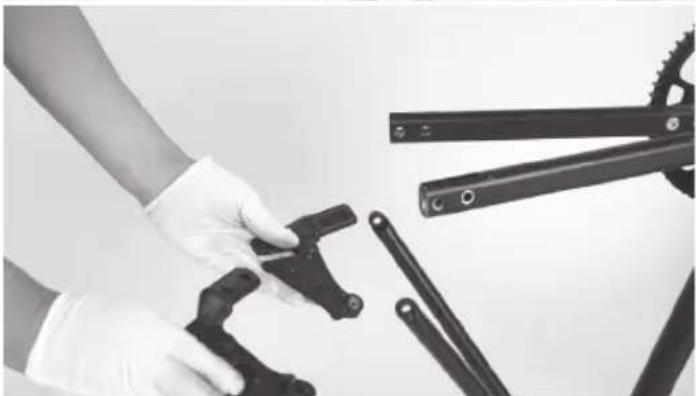
natural_image
Close-up of hands in gloves handling mechanical tools and crimping gears (no text or symbols visible)Sitten poista vyö.

natural_image
Close-up of a bicycle frame structure with visible joints and brackets (no text or symbols)natural_image
Three-panel black-and-white photo sequence showing a person using a bicycle-mounted device, demonstrating step-by-step assembly (no text or symbols visible)Vaihe 17: Poista satulaputki
natural_image
Person using a shared stationary bike with a head-mounted sensor (no visible text or symbols)
natural_image
Person using a Sharp bicycle on a stationary platform (no visible text or symbols)natural_image
Black-and-white photo of a bicycle with a Sharp brake lever and attached cable, held by hands (no visible text or symbols)natural_image
Person assembling a Sharp bicycle frame with visible wiring and mechanical components (no text or symbols)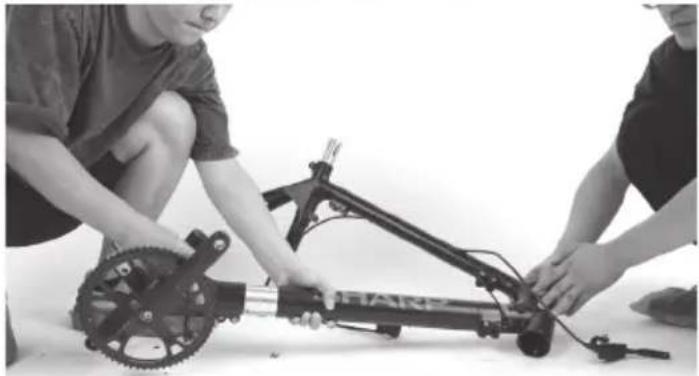
natural_image
Two people assembling a bicycle frame with visible gears and components (no text or symbols)
natural_image
Person using a handheld device with a mechanical scale nearby (no visible text or symbols)
natural_image
Person assembling a mechanical device with attached lever and cable (no visible text or symbols)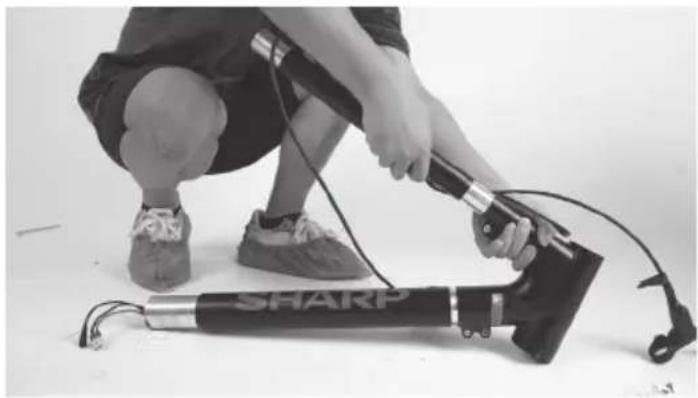
natural_image
Person kneeling with a handheld device labeled 'SHARP' attached to a cylindrical device (no visible text or symbols on device body)
natural_image
Person kneeling on a bench with a mechanical device and two cylindrical components, no visible text or symbolsnatural_image
Assorted bicycle components including bicycles, wheelbars, and sharps arranged on a white surface (no text or symbols visible)Kiristysmomentit:
www.sharpconsumer.com/RS08EB/#down

natural_image
Line drawing of a shared bicycle with a compact box and wheels (no text or symbols)
www.sharpconsumer.com/contact/

www.sharpconsumer.com/support/

www.sharpconsumer.com/documents-of-conformity/


Kas yra děžěje:
natural_image
Technical line drawing of a mechanical device with no visible text or symbolsnatural_image
Technical line drawing of a robotic arm with articulated joints and base mount (no text or symbols)natural_image
Line drawing of a bicycle with visible wheel, spokes, and handle (no text or symbols)natural_image
Line drawing of a mechanical device with lever and base (no text or symbols)
flowchart
graph TD
    A["A"] --> B["B"]
    B --> C["C"]
    C --> D["D"]
    D --> A
    style A fill:#fff,stroke:#000
    style B fill:#fff,stroke:#000
    style C fill:#fff,stroke:#000
    style D fill:#fff,stroke:#000
    style X stroke-dasharray: 5 5
Paveiksle 1-5

natural_image
Two cylindrical electronic components with internal wiring, shown from different angles (no text or symbols)Paveiksle 3-1

natural_image
Line drawing of a bicycle leg and seat assembly (no text or symbols)Paveiksle 3-2
natural_image
Technical line drawing of two cylindrical mechanical components with a wrench and clamp (no text or symbols)Paveiksle 4-3

natural_image
Technical line drawing of a mechanical assembly with intersecting rods and a fork, no text or symbols presentnatural_image
Line drawing of a bicycle wheel and suspension mechanism (no text or symbols)Paveiksle 5-1

natural_image
Technical line drawing of a bicycle wheel with visible spokes, hub, and gear mechanism (no text or symbols)Paveiksle 5-2

natural_image
Line drawing of a bicycle wheel and suspension bracket (no text or symbols)Paveiksle 5-3
natural_image
Line drawing of a bicycle seat and wheel assembly (no text or symbols)Paveiksle 6-1

natural_image
Mechanical diagram of a bicycle wheel assembly with gear and hub, showing mechanical components and a close-up inset (no text or labels)Paveiksle 6-2

natural_image
Mechanical assembly diagram showing a wheel with levers and gear mechanism, no text or symbols presentPaveiksle 6-3

natural_image
Technical line drawing of a bicycle wheel assembly with labeled components (no text or symbols present)Paveiksle 8-1
ŽINGSNIS 7: Prijunkite kabelj
natural_image
Technical line drawing of a mechanical assembly with no visible text or symbolsPaveiksle 7-1

Paveiksle 7-2
ŽINGSNIS 8: Idiekite pedalus
natural_image
Technical line drawing of two mechanical components with no visible text or symbolsPASTABOS:
natural_image
Technical line drawing of mechanical components including a tool, bracket, and clamp (no text or symbols)Paveiksle 9-1
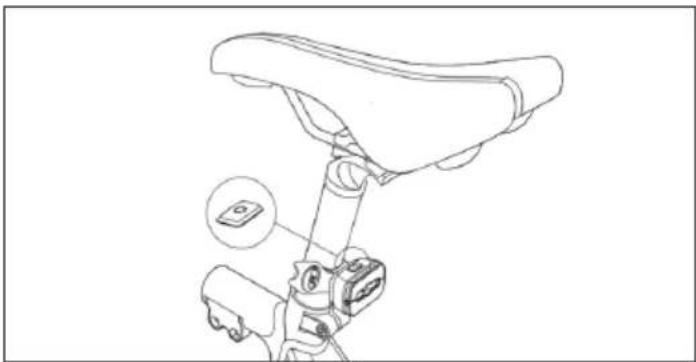
natural_image
Technical line drawing of a bicycle seat assembly with a close-up inset showing a small device (no text or symbols present)Paveiksle 9-2
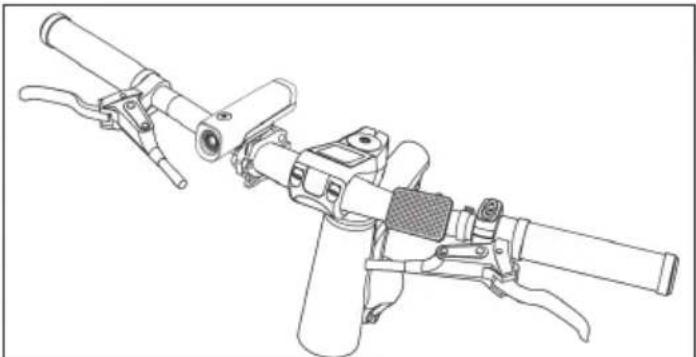
natural_image
Technical line drawing of a mechanical device with lever arms and handle (no text or symbols)Paveiksle 9-3
natural_image
Technical line drawing of a bicycle wheel assembly with visible gears and levers (no text or symbols)Paveiksle 10-1
Prisijunkite prie "SHARP Life" programèlès

natural_image
Technical line drawing of a bicycle seatbelt mechanism, showing front and side views with no text or symbolsSHARP Life programèle

https://www.sharpconsumer.com/sharp-life-app
natural_image
Close-up of a gloved hand adjusting a bicycle brake lever (no text or symbols visible)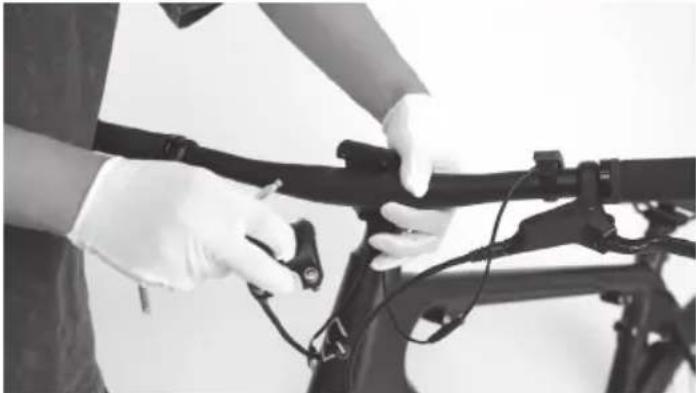
natural_image
Person in gloves adjusting a bicycle frame with cable (no visible text or symbols)
natural_image
Person holding a shared bicycle with visible 'SHAK' branding, standing beside it (no text or symbols on the bicycle itself)natural_image
Close-up of hands using a handheld device to adjust or install a black mechanical component (no visible text or symbols)
natural_image
Close-up of a hand holding a black mechanical component with a white clip, against a plain background (no text or symbols visible)
natural_image
Person wearing gloves handling a bicycle frame with cable (no visible text or symbols)
natural_image
Close-up of hands using a tool to adjust or install a black bicycle component (no visible text or symbols)natural_image
Person standing beside a bicycle with visible frame and wheels (no text or symbols)natural_image
Person assembling a shared bicycle with visible wheel rim and suspension components (no text or symbols)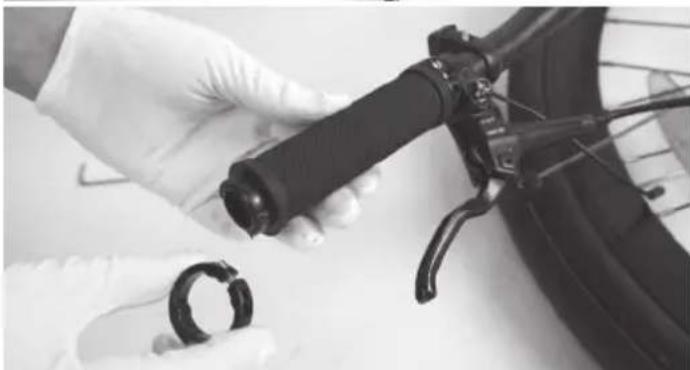
natural_image
Close-up of gloved hands holding a black mechanical component, with a coiled spring attached (no visible text or symbols)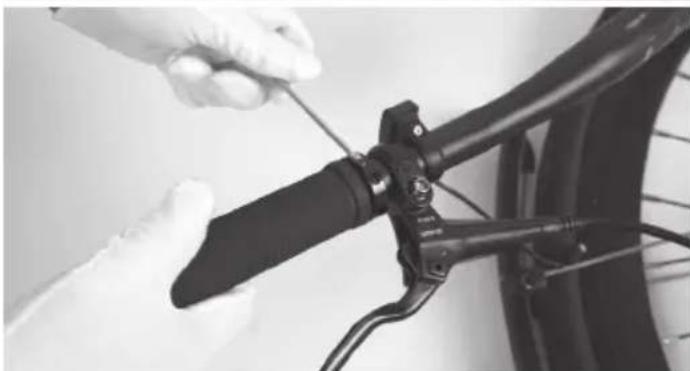
natural_image
Close-up of hands using a tool to adjust the bicycle wheel (no text or symbols visible)
natural_image
Close-up of hands holding a black bicycle brake lever with wires (no visible text or symbols)natural_image
Close-up of a bicycle tire being adjusted by a hand, showing mechanical components and wiring (no text or symbols visible)
natural_image
Close-up of a bicycle tire being adjusted by a hand, showing the blade and wheel (no text or symbols visible)
natural_image
Person cleaning a bicycle tire with a hand using a tool (no visible text or symbols)Žingsnis 6: Pašalinkite pagalbini jungiklj
natural_image
Close-up of hands cleaning a tire with a black plastic wrap (no text or symbols visible)natural_image
Close-up of hands holding a black cable or connector, no visible text or symbols
natural_image
Close-up of hands holding a black cylindrical pipe with small components nearby (no visible text or symbols)natural_image
Two-panel black-and-white photo showing hands adjusting a bicycle wheel and bracket (no text or symbols visible)natural_image
Two-panel black-and-white photo showing hands adjusting a bicycle wheel assembly, no visible text or symbols
natural_image
Close-up of hands adjusting a bicycle wheel and gear mechanism (no visible text or symbols)natural_image
Three-panel black-and-white photo showing hands assembling a bicycle wheel, showing mechanical components and assembly (no text or symbols visible)natural_image
Two-panel black-and-white photo showing a bicycle wheel assembly with a hand adjusting the gear and a close-up of the wheel rim (no text or symbols visible)natural_image
Close-up of hands assembling a bicycle wheel assembly with gear links (no text or symbols visible)natural_image
Four-panel black-and-white photo showing bicycle wheel assembly and maintenance, including hand tooling and cleaning steps (no text or symbols visible)natural_image
Two black-and-white photos showing hands assembling a bicycle wheel and a mechanical component (no visible text or symbols)natural_image
Close-up of hands using a tool to cut the bicycle frame, showing mechanical components and cleaning steps (no text or symbols visible)natural_image
Close-up of a bicycle's wheel assembly with a hand adjusting the component (no visible text or symbols)
natural_image
Close-up of hands assembling a bicycle wheel frame with a mechanical component (no visible text or symbols)
natural_image
Person adjusting a bicycle tire with hands, no visible text or symbolsnatural_image
Person assembling a bicycle frame with a tool, no visible text or symbols
natural_image
Person assembling a bicycle frame with visible wheels and structural components (no text or symbols)natural_image
Person assembling a bicycle frame with a tool, no visible text or symbols
natural_image
Person assembling a bicycle frame with a tool, no visible text or symbols
natural_image
Close-up of hands using a tool to adjust or install a black metal bracket (no visible text or symbols)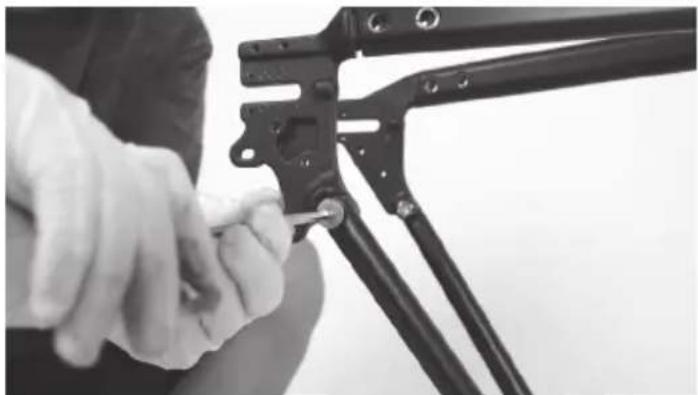
natural_image
Close-up of hands adjusting a mechanical linkage component (no visible text or symbols)
natural_image
Close-up of a black bicycle frame structure with gear and mounting brackets (no text or symbols visible)
natural_image
Close-up of hands in gloves handling mechanical components (no visible text or symbols)natural_image
Close-up of a bicycle frame structure with visible joints and brackets (no text or symbols)natural_image
Two black-and-white photos showing a person assembling a Sharp bicycle frame, with no visible text or symbols.
natural_image
Person assembling a mechanical device with a wheel and sensor components (no visible text or symbols)
natural_image
Person assembling a mechanical device with a lever and handle (no visible text or symbols)
natural_image
Two black-and-white photos showing a person using a sharp pen and a handheld device, both demonstrating a step-up (no text or symbols visible)natural_image
Assorted bicycle components including bicycles, shakers, pedals, and gear (no text or symbols visible)Suspaudimo momentai:
www.sharpconsumer.com/RS08EB/#down
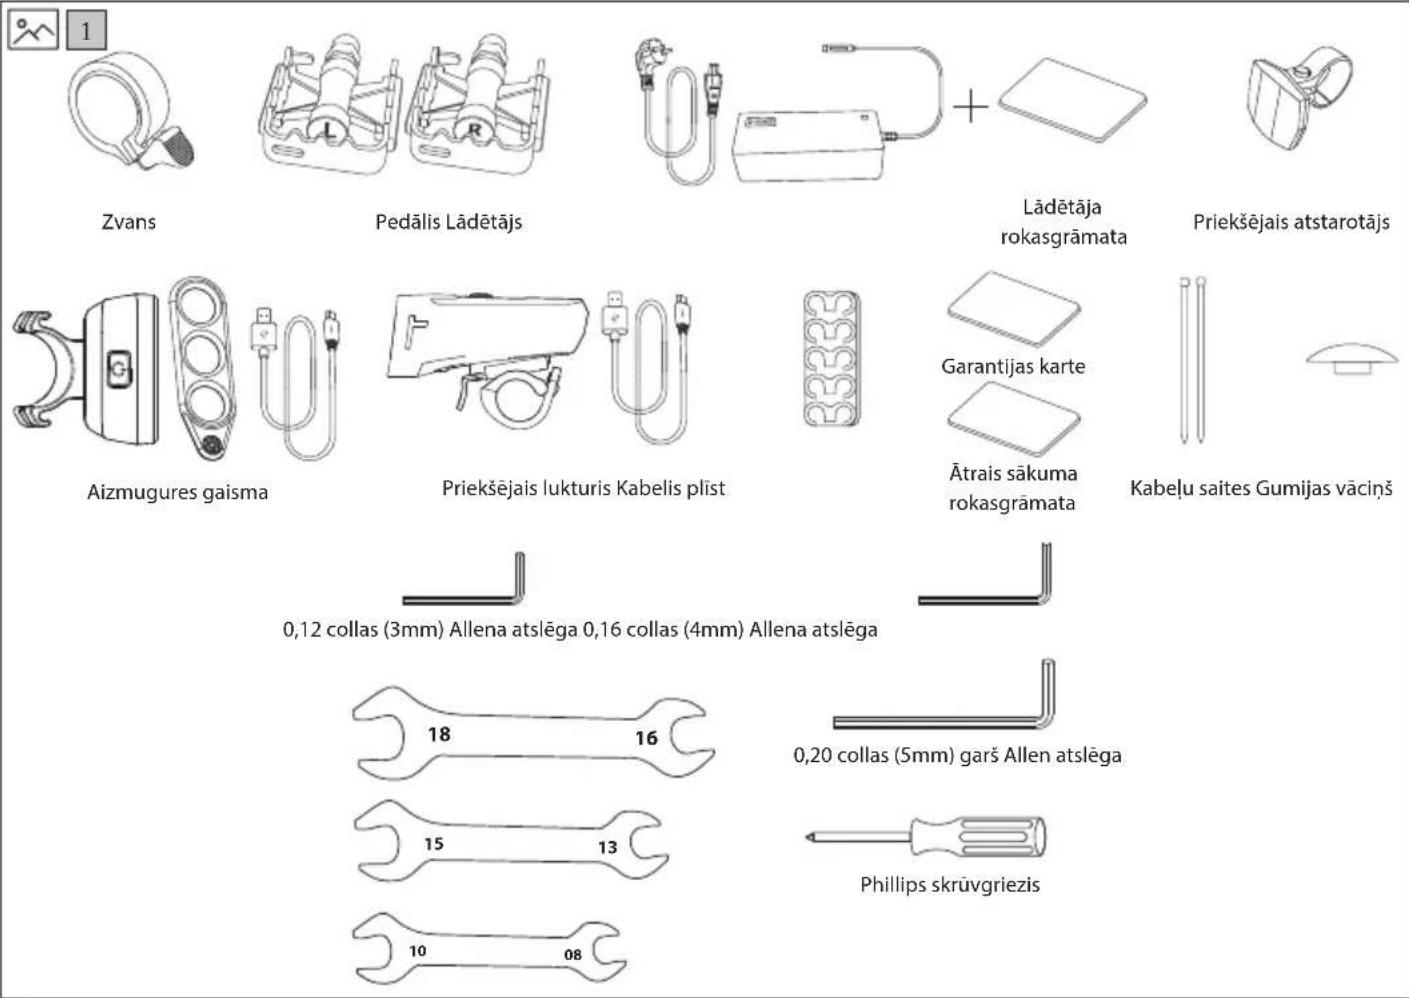
natural_image
Line drawing of a shared bicycle with a compact box and wheels (no text or symbols)
www.sharpconsumer.com/contact/

www.sharpconsumer.com/support/

www.sharpconsumer.com/documents-of-conformity/
Kas ir kastītē:
natural_image
Technical line drawing of a mechanical device with no visible text or symbolsnatural_image
Technical line drawing of a robotic arm with articulated joints and control knobs (no text or symbols)natural_image
Line drawing of a bicycle with visible wheel, spokes, and handle (no text or symbols)natural_image
Line drawing of a mechanical device with lever and shaft (no text or symbols)

natural_image
Two cylindrical electronic components with internal connectors, shown from different angles (no text or symbols)Attelā 2-1 Attelā 2-2
Attēlā 3-1

natural_image
Line drawing of a bicycle leg with seat and support bracket (no text or symbols)Attēlā 3-2
PIEZIME: Pârliecinieties, ka bultu [F] un [J] moments ir aptuveni 20 N·m
natural_image
Technical line drawing of two cylindrical mechanical components with a wrench and clamp (no text or symbols)Figure 4-1 Figure 4-2
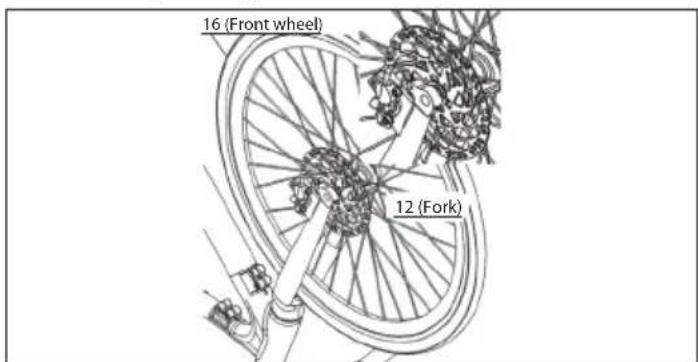
Attēlā 4-3

natural_image
Technical line drawing of a mechanical assembly with intersecting rods and a fork, no text or symbols presentnatural_image
Line drawing of a bicycle wheel assembly with no text or symbolsAttēlā 5-1

natural_image
Technical line drawing of a bicycle wheel assembly with visible spokes and hub (no text or symbols)Attēlā 5-2

natural_image
Line drawing of a bicycle wheel and suspension bracket (no text or symbols)Attēlā 5-3
natural_image
Line drawing of a bicycle seat and wheel assembly (no text or symbols)Attēlā 6-1

natural_image
Mechanical diagram of a bicycle wheel assembly with gear and hub, showing mechanical components and a close-up inset (no text or labels)Attēlā 6-2

natural_image
Mechanical assembly diagram showing a wheel with gear and a close-up inset of a component (no text or symbols)Attēlā 6-3
SOLIS 7: Pieslëdziet kabeli
natural_image
Technical line drawing of two mechanical components with no visible text or symbols
natural_image
Mechanical gear assembly diagram showing wheel, shaft, and gear components (no text or labels)Attēlā 8-1
PIEZIMES:
natural_image
Technical line drawing of mechanical components including a tool, clamping bracket, and cylindrical housing (no text or symbols)Attēlā 9-1

natural_image
Line drawing of a bicycle seat assembly with a close-up inset showing a small device (no text or symbols)Attēlā 9-2

natural_image
Technical line drawing of a mechanical device with lever and grip assembly (no text or symbols)Attēlā 9-3
natural_image
Technical line drawing of a bicycle wheel assembly with visible spokes and hub (no text or symbols)Attēlā 10-1
Displeja interfeiss
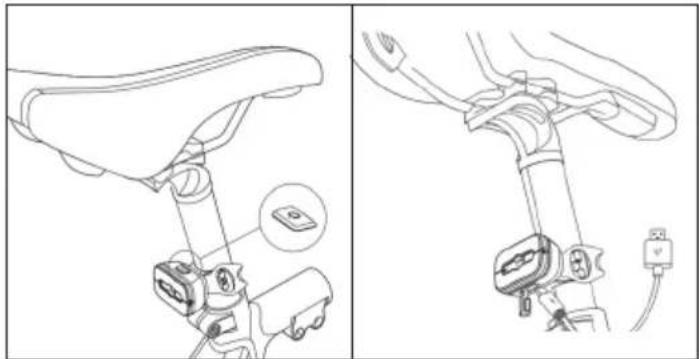
natural_image
Technical line drawing of a bicycle seatbelt mechanism with labeled components (no text or symbols)SHARP Life lietotne

https://www.sharpconsumer.com/sharp-life-app
natural_image
Close-up of a gloved hand adjusting a bicycle brake lever (no text or symbols visible)
natural_image
Person in gloves adjusting a bicycle frame with cable (no visible text or symbols)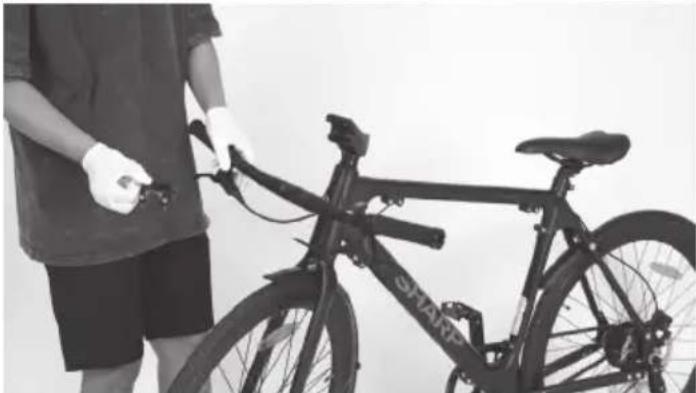
natural_image
Person holding a shared bicycle with visible 'SHARP' branding, standing beside it (no text or symbols on the bicycle itself)Solis 2: Nonemiet stabu un displeju
natural_image
Four-panel black-and-white photo sequence showing hands using a bicycle to adjust the camera, demonstrating mechanical assembly (no text or symbols visible)Solis 3: Nonemiet priekšejo vilku un priekšejo riteni
Nonemiet priekšejo vilku un priekšejo riteni.

natural_image
Person standing beside a bicycle with visible frame and wheels (no text or symbols)Solis 4: Nonemiet rokturi
a. Atvienojiet skrūves uz roktura ar 3 mm Imbusa atslēgu.
b. Tad nonemiet rokturi.

natural_image
Person assembling a shared bicycle with visible wheel rim and headrest (no text or symbols)
natural_image
Close-up of gloved hands holding a black plastic clip and a coiled black ring, next to a bicycle (no visible text or symbols)
natural_image
Close-up of hands using a tool to adjust the bicycle wheel (no text or symbols visible)
natural_image
Close-up of hands holding a black bicycle brake lever with wires (no visible text or symbols)Solis 5: Nonemiet bremžu rokturi
a. Atvienojiet skrūves uz bremžu roktura ar 5 mm Imbusa atslēgu. b. Tad nonemiet bremžu sviru.

natural_image
Close-up of a bicycle tire being adjusted by a tool, with no visible text or symbols
natural_image
Close-up of a bicycle tire being adjusted by a tool, with no visible text or symbols
natural_image
Person cleaning a bicycle tire with a hand pump, no visible text or symbolsnatural_image
Person in gloves handling a black cable or pipe with a clamp, no visible text or symbols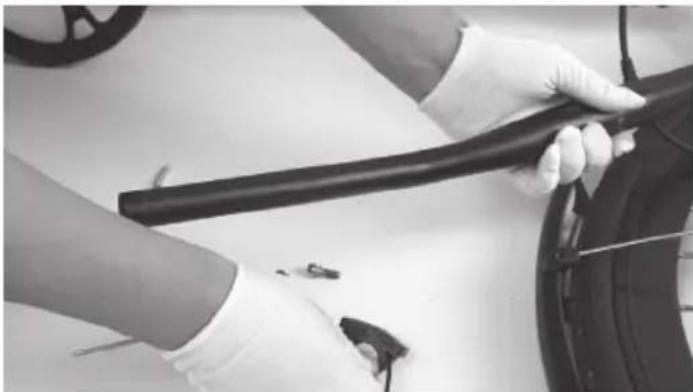
natural_image
Close-up of hands holding a black cable or hose next to a tire, with no visible text or symbols.Solis 7: Nonemiet bremžu rokturi no otras puses
natural_image
Close-up of hands holding a black cable or connector with a white plastic cap, no visible text or symbols
natural_image
Close-up of hands holding a black cable with a small inset image showing a ring and plug (no text or symbols visible)natural_image
Two black-and-white photos showing hands adjusting a bicycle wheel and chain, no visible text or symbolsSolis 9: Atvienojiet kabelus
Atvienojiet kabeli starp akumulatoru un motoru.
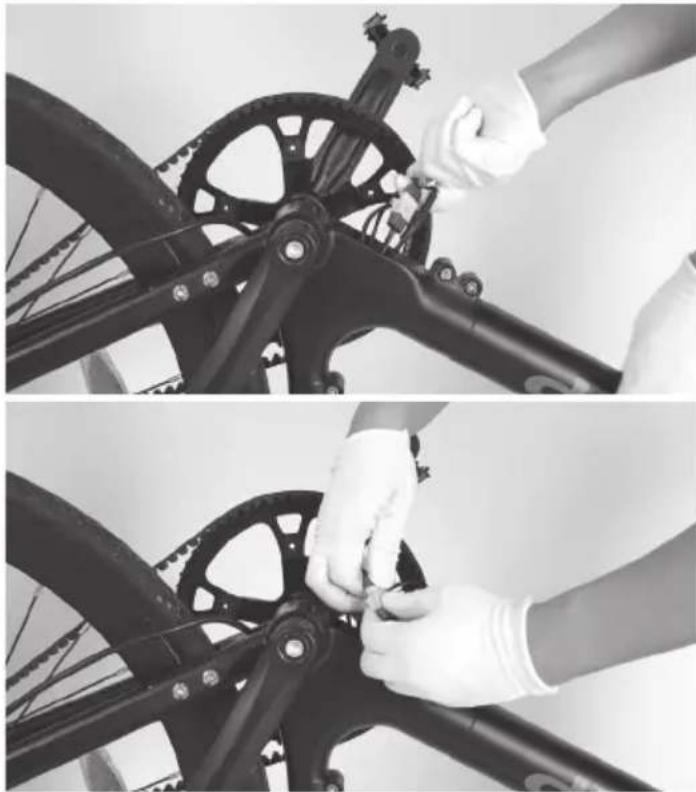
natural_image
Two black bicycle wheel assembly steps showing hands adjusting the wheel (no text or symbols visible)
natural_image
Close-up of hands adjusting a bicycle wheel and gear assembly (no visible text or symbols)Solis 10: Nonemiet atbalsta stieni
natural_image
Three-panel black-and-white photo showing hands assembling a bicycle wheel, showing mechanical components and assembly (no text or symbols visible)Solis 11: Nonemiet jostu
natural_image
Two-panel black-and-white photo showing a bicycle wheel assembly and hand positioning on its wheel (no text or symbols visible)natural_image
Close-up of hands assembling a bicycle wheel assembly with gear links (no text or symbols visible)natural_image
Four-panel black-and-white photo showing bicycle wheel assembly and maintenance, including hand tool and hands adjusting components (no text or symbols visible)Solis 12: Nonemiet aizmugurējo błodu
natural_image
Two black-and-white photos showing hands assembling a bicycle wheel and a mechanical assembly (no visible text or symbols)natural_image
Close-up of hands using a saw to cut the bicycle frame, showing mechanical components and tool path (no text or symbols visible)natural_image
Close-up of a bicycle wheel assembly with a hand adjusting the component (no visible text or symbols)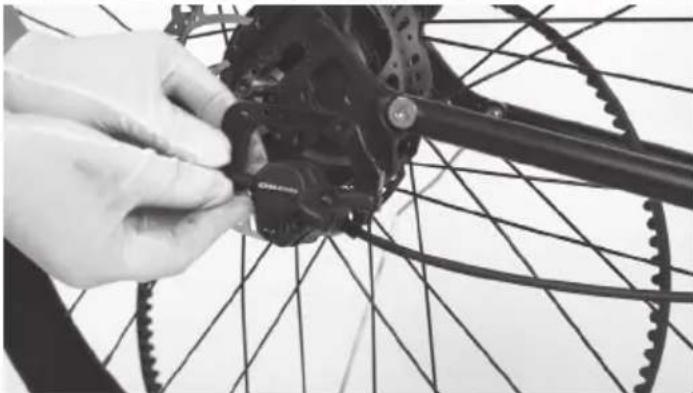
natural_image
Close-up of hands adjusting a bicycle wheel rim with a tool (no visible text or symbols)
natural_image
Person adjusting a bicycle wheel on a white surface, no visible text or symbolsSolis 14: Nonemiet pedālus
natural_image
Person assembling a bicycle frame with a tool, no visible text or symbols
natural_image
Person assembling a bicycle frame with visible wheels and structural components (no text or symbols)natural_image
Person assembling a bicycle frame with a tool, no visible text or symbols
natural_image
Person using a tool to adjust or install a bicycle frame (no visible text or symbols)
natural_image
Close-up of hands using a tool to adjust or install a black metal bracket (no visible text or symbols)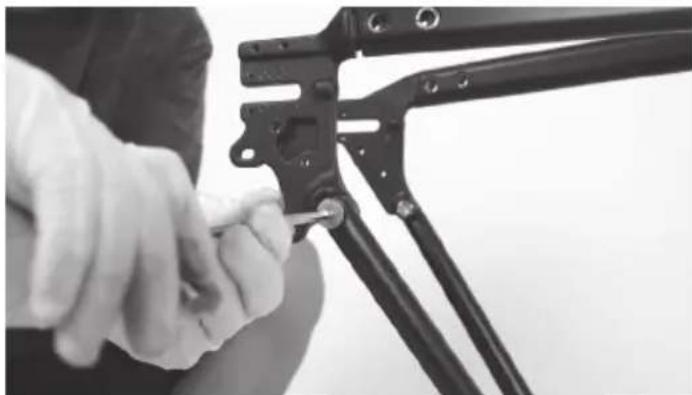
natural_image
Close-up of hands using a mechanical clamp or bracket to adjust a cable (no visible text or symbols)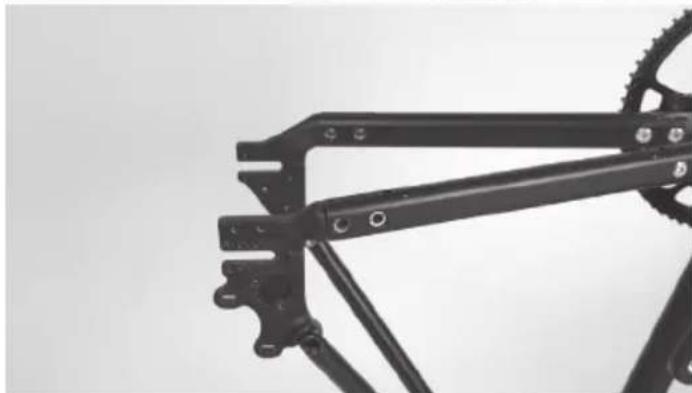
natural_image
Close-up of a black bicycle frame structure with visible gears and mounting brackets (no text or symbols)
natural_image
Close-up of hands in gloves handling mechanical tools and crimping components (no visible text or symbols)Tad nonemiet jostu.
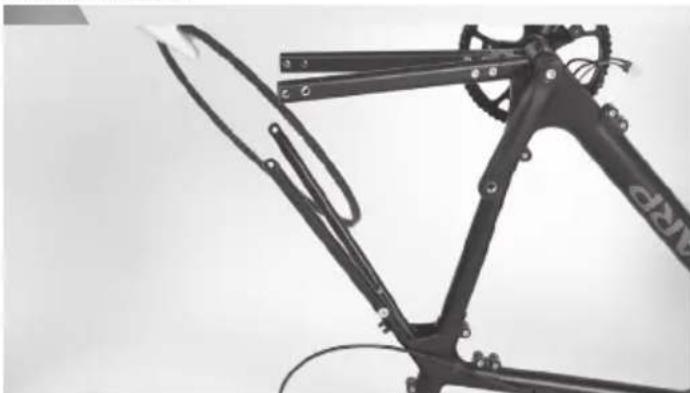
natural_image
Close-up of a bicycle frame structure with visible joints and brackets (no text or symbols)Solis 16: Noņemiet kēdes paliktnus un sēdekļa paliktnus
natural_image
Person using a shared stationary bike with a hand on the seat (no visible text or symbols)
natural_image
Person using a Sharp bicycle on a stationary platform (no visible text or symbols)Solis 18: Iznemiet rāmi no salikuma
natural_image
Black-and-white photo of a hand holding a SHARP bicycle brake lever with visible gears and cable (no text or symbols on the device itself)natural_image
Person using a Sharp bicycle bike with visible suspension components (no text or symbols)
natural_image
Two people assembling a bicycle frame with visible gears and wiring (no text or symbols)
natural_image
Person using a handheld device with a mechanical scale nearby (no visible text or symbols)
natural_image
Person assembling a mechanical device with tools and cables on a white surface (no visible text or symbols)
natural_image
Person kneeling on a floor using a sharp pressure tool, no visible text or symbols
natural_image
Person kneeling on a bench with a mechanical device and two cylindrical components, no visible text or symbolsnatural_image
Assorted bicycle components including bicycles, shakers, and tools arranged on a white surface (no text or symbols visible)www.sharpconsumer.com/RS08EB/#down

natural_image
Line drawing of a shared bicycle with a compact box and wheels (no text or symbols)Olulised ohutusjuhised

www.sharpconsumer.com/contact/

www.sharpconsumer.com/support/

www.sharpconsumer.com/documents-of-conformity/


Mis on karbis:
natural_image
Technical line drawing of a mechanical device with no visible text or symbolsE-ratta kokkupanek
Joonisel 1-1 Joonisel 1-2
MÄRKUS:
natural_image
Technical line drawing of a robotic arm with articulated joints and control knobs (no text or symbols)Joonisel 1-3 Joonisel 1-4
natural_image
Line drawing of a bicycle with visible wheel, spokes, and handle (no text or symbols)natural_image
Line drawing of a mechanical device with lever and base (no text or symbols)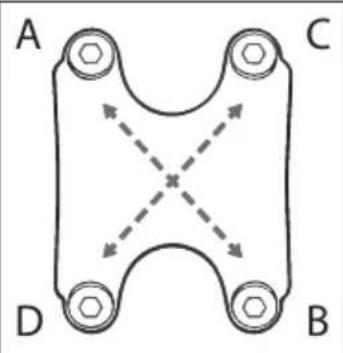
Joonisel 1-5
MÄRKUS: Veenduge, et poldid ABCD on pingutatud umbes 6-8 N·m.
SAMM 2: Kaabli haldamine

natural_image
Two cylindrical electronic components with internal wires, shown from different angles (no text or symbols)Joonisel 2-1 Joonisel 2-2
SAMM 3: Paigaldage iste
Joonisel 3-1

natural_image
Line drawing of a bicycle leg and seat assembly (no text or symbols)Joonisel 3-2
MÄRKUS: Veenduge, et poldid [F] ja [J] on pingutatud umbes 20 N·m
SAMM 4: Paigaldage esiratas
natural_image
Technical line drawing of two cylindrical mechanical components with a wrench and clamp (no text or symbols)Joonisel 4-1 Joonisel 4-2
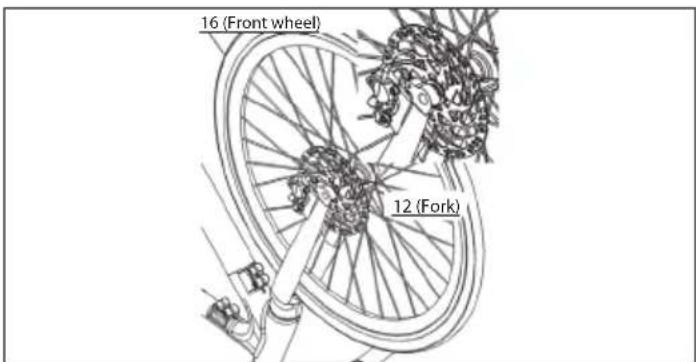
Joonisel 4-3

natural_image
Technical line drawing of a mechanical assembly with intersecting rods and a fork, no text or symbols presentJoonisel 4-4 Joonisel 4-5
MÄRKUSED:
natural_image
Line drawing of a bicycle wheel with visible frame and hub (no text or symbols)Joonisel 5-1

natural_image
Technical line drawing of a bicycle wheel with spokes and hub (no text or symbols)Joonisel 5-2

natural_image
Technical line drawing of a bicycle wheel and suspension bracket (no text or symbols)Joonisel 5-3
SAMM 6: Paigaldage tagumine porilaud
natural_image
Line drawing of a bicycle seat and wheel assembly (no text or symbols)Joonisel 6-1

natural_image
Mechanical diagram of a bicycle wheel assembly with gear and hub components, showing no text or symbolsJoonisel 6-2

natural_image
Mechanical assembly diagram showing a wheel with levers and gear mechanism (no text or labels)Joonisel 6-3

natural_image
Technical line drawing of a bicycle wheel assembly with labeled components (no text or symbols present)Joonisel 8-1
natural_image
Technical line drawing of mechanical components including a tool, cylindrical part, and clamp bracket (no text or symbols)Joonisel 9-1

Joonisel 7-2

natural_image
Line drawing of a bicycle seat assembly with a close-up inset showing a small device (no text or symbols)Joonisel 9-2
SAMM 8: Paigaldage pedaalid
natural_image
Technical line drawing of two mechanical components with no visible text or symbols
natural_image
Technical line drawing of a firearm assembly (no text or symbols)Joonisel 9-3
SAMM 10: Paigaldage tugijalg
natural_image
Technical line drawing of a bicycle wheel assembly with visible spokes and levers (no text or symbols)Joonisel 10-1
Jalgratta rehvi pumpamine
Joonisel 11-1 Joonisel 11-2
Kuidas alustada E-rattaga
SEES/VÄLJAS
Kuva liides

natural_image
Technical line drawing of a bicycle seatbelt mechanism, showing front and side views with no text or symbolsSHARP Life rakendus

https://www.sharpconsumer.com/sharp-life-app
natural_image
Close-up of a gloved hand adjusting a bicycle brake lever (no text or symbols visible)
natural_image
Person in gloves adjusting a bicycle frame with cable (no visible text or symbols)
natural_image
Person holding a shared bicycle with visible 'SHAK' branding, standing beside it (no text or symbols on the bicycle itself)natural_image
Close-up of hands holding a black bicycle brake lever with wires (no visible text or symbols)Samm 5: Eemaldage pidurikang
natural_image
Close-up of a bicycle tire being adjusted for cleaning, with a hand partially visible (no text or symbols)
natural_image
Close-up of a bicycle tire being adjusted by a hand, showing the blade and wheel (no text or symbols visible)
natural_image
Person cleaning a bicycle tire with a hand using a tool (no visible text or symbols)Samm 6: Eemaldage abilüliti
natural_image
Person in white gloves and gloves handling a black cable or cable connector (no visible text or symbols)
natural_image
Close-up of hands holding a black cable or hose next to a tire, with no visible text or symbols.Samm 7: Eemaldage teisel pool olev pidurikang
natural_image
Close-up of hands holding a black cable with a white plastic clip, no visible text or symbols
natural_image
Close-up of hands holding a black cable with small components nearby (no visible text or symbols)natural_image
Two-panel black-and-white photo showing hands adjusting a bicycle wheel and bracket (no text or symbols visible)Samm 9: Lahutage kaablid
natural_image
Two-panel black-and-white photo showing hands adjusting a bicycle wheel assembly, no visible text or symbols
natural_image
Close-up of hands adjusting a bicycle wheel and gear mechanism (no visible text or symbols)natural_image
Three-panel black-and-white photo showing hands assembling a bicycle wheel, showing mechanical components and assembly (no text or symbols visible)natural_image
Two-panel black-and-white photo showing a bicycle wheel assembly with a hand adjusting the gear and a close-up of the wheel rim (no text or symbols visible)natural_image
Close-up of hands assembling a bicycle wheel assembly with metal rings and chains (no text or symbols visible)natural_image
Four-panel black-and-white photo showing bicycle wheel assembly and maintenance, with hands adjusting the gear (no visible text or symbols)Samm 12: Eemaldage tagumine porilaud
natural_image
Two black-and-white photos showing hands assembling a bicycle wheel and a mechanical component (no visible text or symbols)natural_image
Close-up of hands using a saw to cut the bicycle frame, showing mechanical components and tool path (no text or symbols visible)Samm 13: Eemaldage kaablikate, tagumine pidurisadul ja tagaratas
natural_image
Close-up of a bicycle's wheel assembly with a hand adjusting the component (no visible text or symbols)
natural_image
Close-up of hands assembling a bicycle wheel frame with a mechanical component (no visible text or symbols)
natural_image
Person adjusting a bicycle tire with hands, no visible text or symbolsSamm 14: Eemaldage pedaalid
natural_image
Person assembling a bicycle frame with a tool, no visible text or symbols
natural_image
Person assembling a bicycle frame with visible wheels and structural components (no text or symbols)natural_image
Person using a bicycle-mounted tool to adjust the frame (no visible text or symbols)
natural_image
Person assembling a bicycle frame with a tool, no visible text or symbols
natural_image
Close-up of hands installing or adjusting a black metal bracket component (no visible text or symbols)
natural_image
Close-up of hands using a crimping tool to adjust or install a mechanical component (no visible text or symbols)
natural_image
Close-up of a black bicycle frame structure with visible gears and mounting brackets (no text or symbols)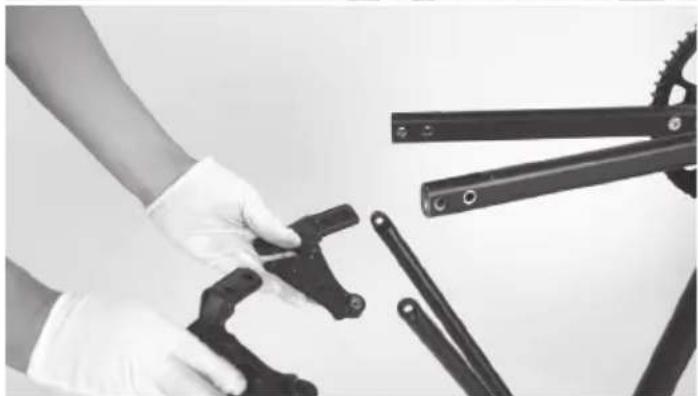
natural_image
Close-up of hands in gloves handling mechanical tools and crimping components (no visible text or symbols)natural_image
Close-up of a bicycle frame structure with visible joints and brackets (no text or symbols)natural_image
Three-panel black-and-white photo sequence showing a person using a bicycle brake system, demonstrating step-by-step assembly (no text or symbols visible)Samm 17: Eemaldage sadulapost
natural_image
Person using a shared stationary bike with a head switch (no visible text or symbols)
natural_image
Person using a Sharp bicycle on a stationary platform (no visible text or symbols)natural_image
Black-and-white photo of a bicycle brake system with a hand adjusting it, no visible text or symbols on the main body.Kinnitage poldid järjekorras A-B-C-D-a-b-c-d
Hooldamine
www.sharpconsumer.com/RS08EB/#down
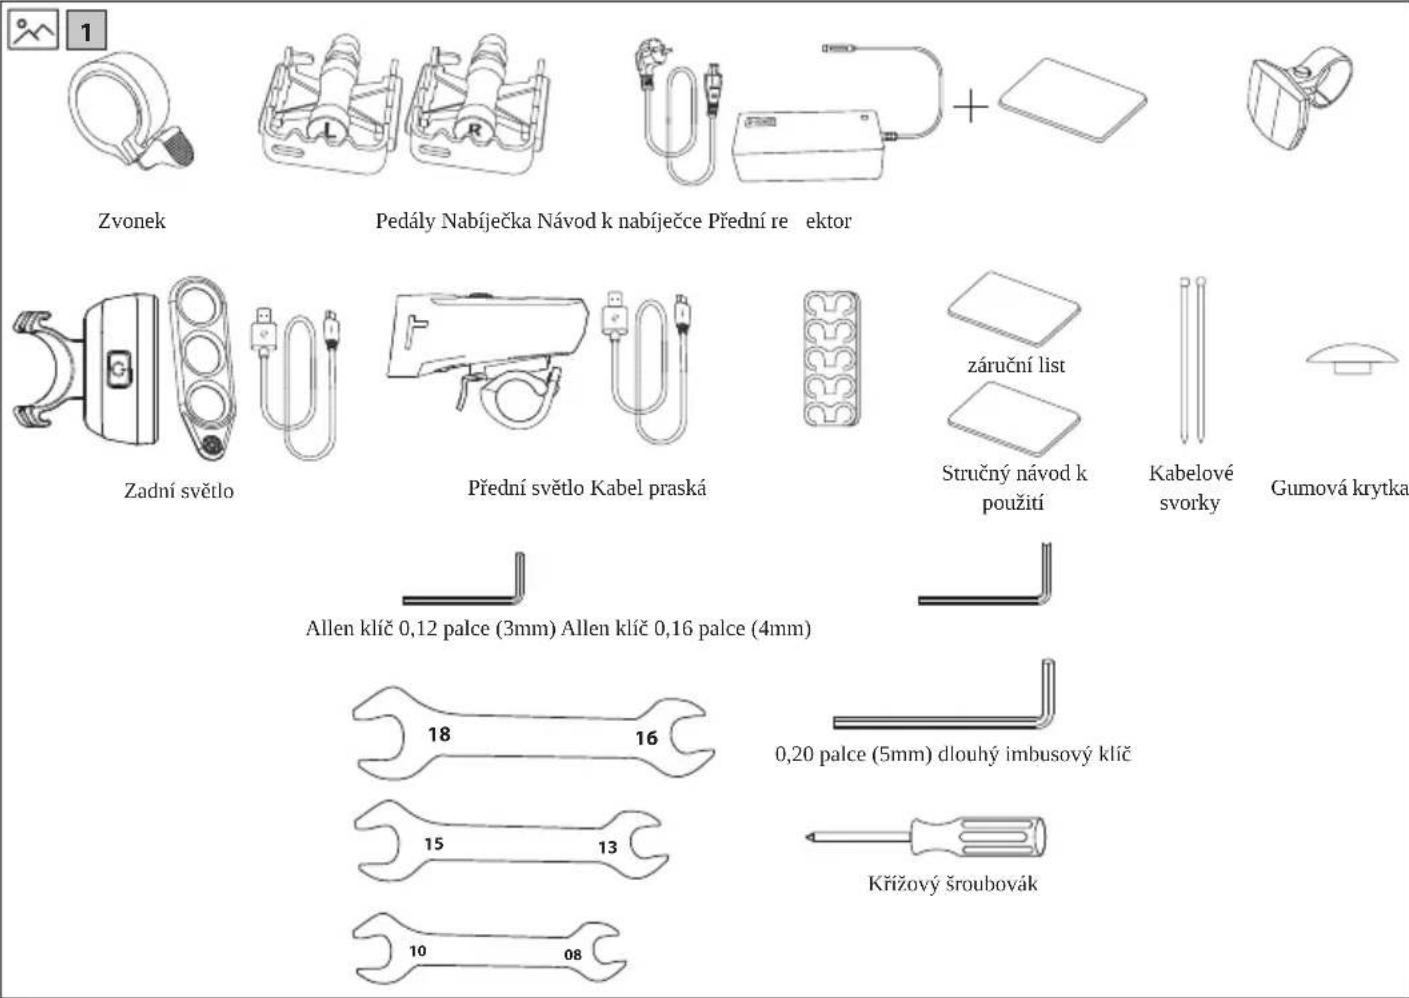
natural_image
Line drawing of a shared bicycle with a compact box and wheels (no text or symbols)
www.sharpconsumer.com/contact/

www.sharpconsumer.com/support/

www.sharpconsumer.com/documents-of-conformity/
Co obsahuje balení:
natural_image
Line drawing of a mechanical device with lever and shaft (no text or symbols)
flowchart
graph TD
    A["A"] --> B["B"]
    B --> C["C"]
    C --> D["D"]
    D --> A
    style A fill:#fff,stroke:#000
    style B fill:#fff,stroke:#000
    style C fill:#fff,stroke:#000
    style D fill:#fff,stroke:#000
    style X stroke-dasharray: 5 5
Obrázok 1-5

natural_image
Two cylindrical electronic components with internal connectors, shown from different angles (no text or symbols)Obrázok 3-1

natural_image
Line drawing of a bicycle leg with seat and support bracket (no text or symbols)Obrázok 3-2
natural_image
Technical line drawing of two cylindrical mechanical components with a wrench and clamp (no text or symbols)Obrázok 4-3

natural_image
Technical line drawing of a mechanical assembly with intersecting rods and a fork, no text or symbols presentnatural_image
Line drawing of a bicycle wheel assembly with no text or symbolsObrázok 5-1

natural_image
Technical line drawing of a bicycle wheel with visible spokes and hub (no text or symbols)Obrázok 5-2

natural_image
Line drawing of a bicycle wheel and suspension bracket (no text or symbols)Obrázok 5-3
natural_image
Line drawing of a bicycle's front wheel and seat assembly (no text or symbols)Obrázok 6-1

natural_image
Mechanical diagram of a bicycle wheel assembly with gear and hub, showing mechanical components and a close-up inset (no text or labels)Obrázok 6-2

natural_image
Mechanical assembly diagram showing a wheel with levers and gear components, no text or symbols presentObrázok 6-3
natural_image
Technical line drawing of a mechanical assembly with no visible text or symbolsObrázok 7-1
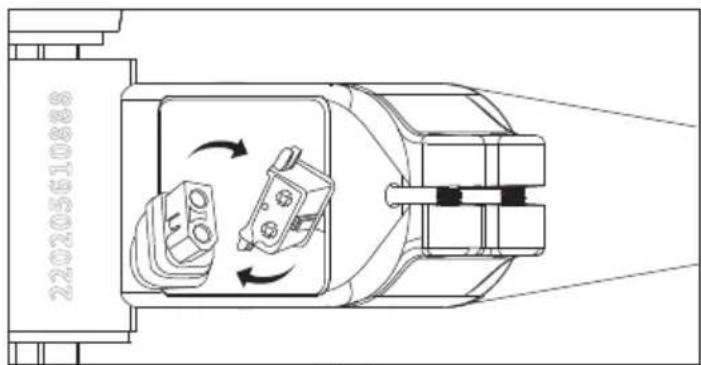
Obrázok 7-2
natural_image
Technical line drawing of two mechanical components with no visible text or symbols
natural_image
Mechanical diagram showing a wheel assembly with labeled components (L, R) and gear mechanism (no text or symbols beyond labels)Obrázok 8-1
POZNÁMKY:
natural_image
Technical line drawing of mechanical components including a crimping tool, a cylindrical component, and a clamp bracket (no text or symbols)Obrázok 9-1

natural_image
Technical line drawing of a bicycle seat assembly with a highlighted component (no text or symbols)Obrázok 9-2

natural_image
Technical line drawing of a mechanical device with lever and grip assembly (no text or symbols)Obrázok 9-3
natural_image
Technical line drawing of a bicycle wheel assembly with visible gears and spokes (no text or symbols)Obrázok 10-1
Rozhraní displeje

natural_image
Technical line drawing of a bicycle seatbelt mechanism, showing front and side views with no text or symbolsAplikace SHARP Life

https://www.sharpconsumer.com/sharp-life-app
Pokyny k demontáži
KROK 1: Odstraňte rukojeť
natural_image
Close-up of a gloved hand adjusting a bicycle brake lever (no text or symbols visible)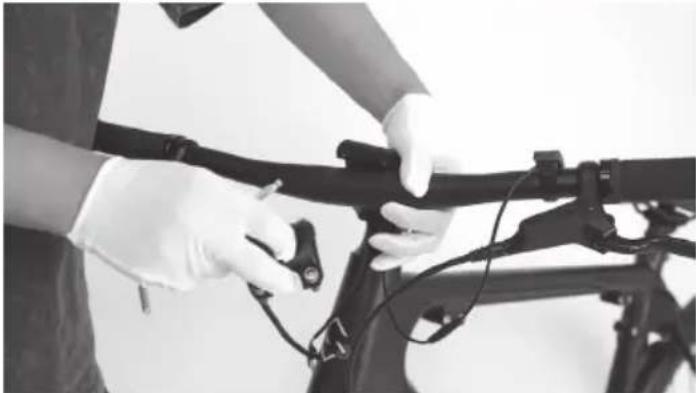
natural_image
Person in gloves adjusting a bicycle frame with cable (no visible text or symbols)
natural_image
Person holding a shared bicycle with visible 'SHARP' branding, standing beside it (no text or symbols on the bicycle itself)Krok 2: Odstraňte stonku a displej
natural_image
Close-up of hands using a handheld device to adjust or install a black mechanical component (no visible text or symbols)
natural_image
Close-up of a gloved hand holding a black mechanical component with a tool, against a plain background (no text or symbols visible)
natural_image
Person cleaning a bicycle frame with a tool, no visible text or symbols
natural_image
Close-up of hands installing or adjusting a black mechanical component with wires (no visible text or symbols)natural_image
Person standing beside a bicycle with visible frame and wheels (no text or symbols)Krok 4: Odstraňte rukojeť
natural_image
Person assembling a shared bicycle with visible wheel rim and frame (no text or symbols)
natural_image
Close-up of gloved hands holding a black plastic clip and a black ring, next to a bicycle handle (no visible text or symbols)
natural_image
Close-up of hands using a tool to adjust the bicycle wheel (no text or symbols visible)
natural_image
Close-up of hands holding a black bicycle brake lever with cable (no visible text or symbols)natural_image
Close-up of a bicycle tire being adjusted for a cable, with a hand partially visible (no text or symbols)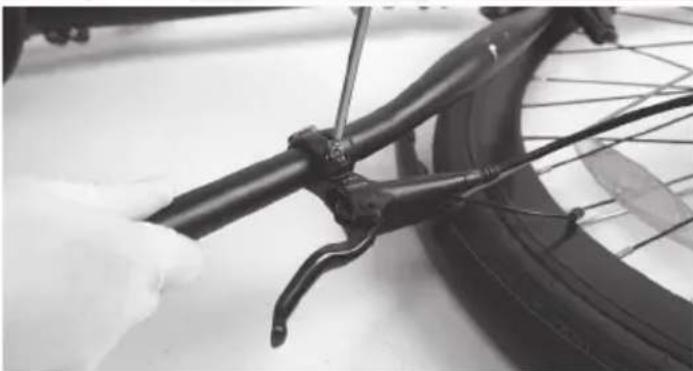
natural_image
Close-up of a bicycle wheel being adjusted for a cable, with a hand partially visible (no text or symbols)
natural_image
Person cleaning a bicycle tire with a hand tool, no visible text or symbolsnatural_image
Close-up of gloved hands adjusting a black cable or wire component (no visible text or symbols)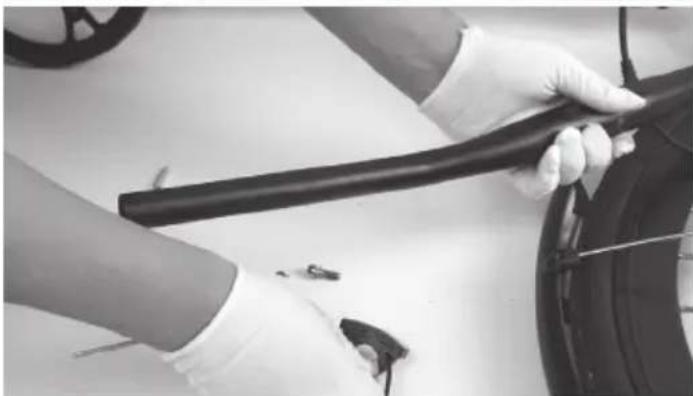
natural_image
Close-up of hands holding a black cable or hose with a tire, no visible text or symbolsnatural_image
Close-up of hands holding a black cable or wire component, no visible text or symbols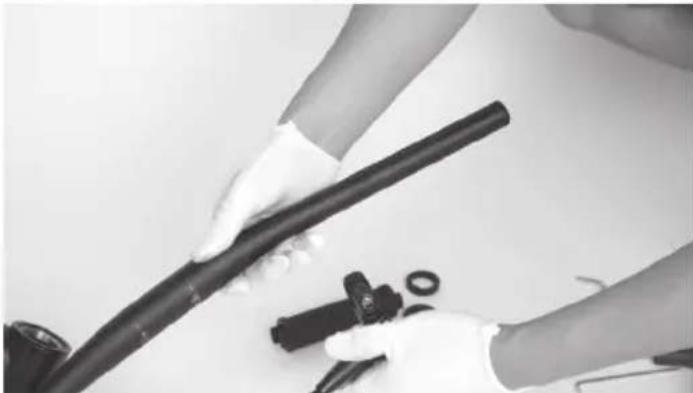
natural_image
Close-up of hands holding a black cable with a small inset showing a mechanical component (no text or symbols visible)natural_image
Close-up of a person adjusting a bicycle wheel assembly (no visible text or symbols)
natural_image
Close-up of hands adjusting a bicycle wheel and chain (no visible text or symbols)Krok 9: Odpojte kabely
natural_image
Close-up of hands adjusting a bicycle wheel assembly (no visible text or symbols)
natural_image
Close-up of hands assembling a bicycle wheel (no text or symbols visible)
natural_image
Close-up of hands adjusting a bicycle wheel and gear mechanism (no visible text or symbols)natural_image
Close-up of a person adjusting bicycle wheel components with chains (no visible text or symbols)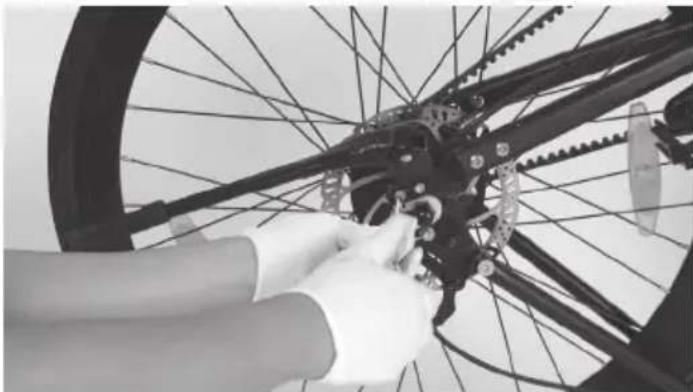
natural_image
Close-up of hands assembling a bicycle wheel with visible gears and blades (no text or symbols)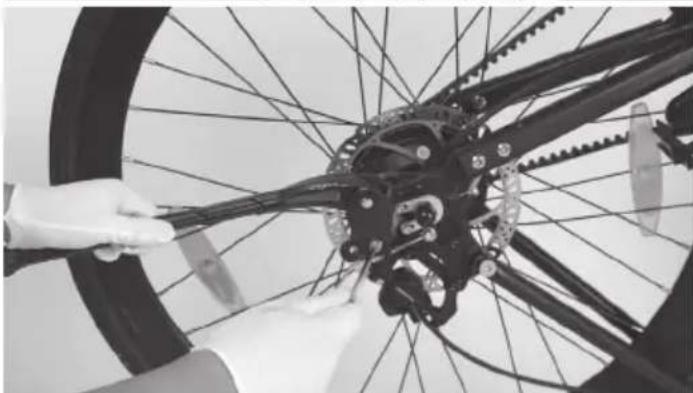
natural_image
Close-up of hands adjusting a bicycle wheel rim with visible gears and blades (no text or symbols)Krok 11: Odstraňte pás
natural_image
Two-panel black-and-white photo showing a bicycle wheel assembly and hand positioning on its wheel (no text or symbols visible)natural_image
Close-up of hands assembling a bicycle wheel assembly with gear links (no text or symbols visible)natural_image
Four-panel black-and-white photo showing bicycle wheel assembly and maintenance, including hand tool and hands adjusting components (no text or symbols visible)natural_image
Two black-and-white photos showing hands assembling a bicycle wheel and a mechanical component (no visible text or symbols)natural_image
Close-up of hands using a saw to cut the bicycle frame, no visible text or symbols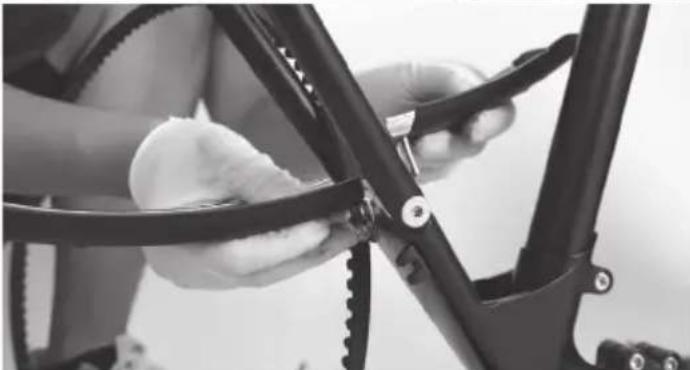
natural_image
Close-up of a person using a bicycle frame to adjust the wheel rim (no text or symbols visible)natural_image
Close-up of a bicycle wheel assembly with a hand adjusting the component (no visible text or symbols)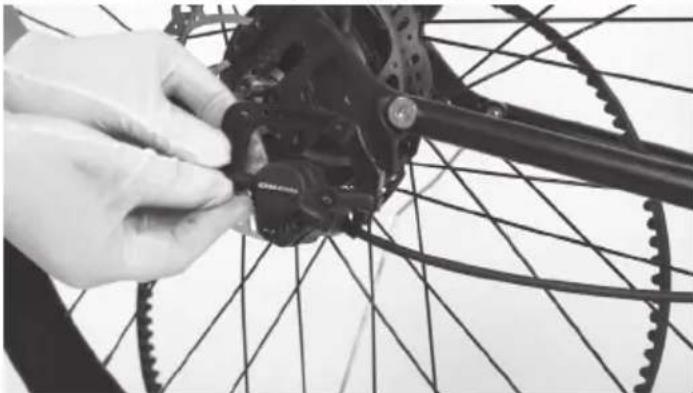
natural_image
Close-up of hands assembling a bicycle wheel frame with a black mechanical component (no visible text or symbols)
natural_image
Person adjusting a bicycle wheel on the ground, no visible text or symbolsnatural_image
Person assembling a bicycle frame with a tool, no visible text or symbols
natural_image
Person assembling a bicycle frame with visible wheels and structural components (no text or symbols)natural_image
Person assembling a bicycle frame with a tool, no visible text or symbols
natural_image
Person using a mechanical tool to adjust a bicycle frame (no visible text or symbols)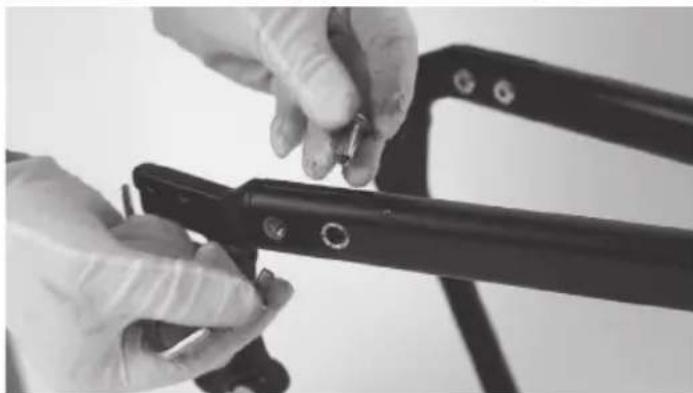
natural_image
Close-up of hands using a tool to adjust or install a black mechanical component (no visible text or symbols)
natural_image
Close-up of hands using a mechanical clamp or bracket to adjust a cable (no visible text or symbols)
natural_image
Close-up of a black bicycle frame structure with visible gears and brackets (no text or symbols)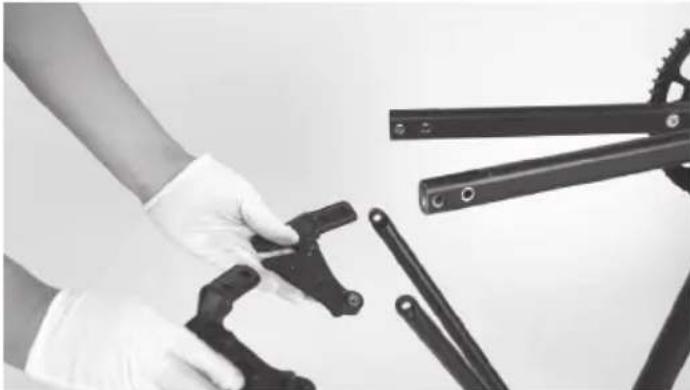
natural_image
Close-up of hands using crimping tools to adjust mechanical parts (no text or symbols visible)natural_image
Close-up of a bicycle frame structure with visible joints and brackets (no text or symbols)natural_image
Three-panel black-and-white photo showing a person using a bicycle-mounted device, demonstrating step-by-step assembly (no text or symbols visible)natural_image
Person using a shared stationary bike with a head-mounted sensor (no visible text or symbols)
natural_image
Person using a Sharp bicycle on a stationary platform (no visible text or symbols)natural_image
Black-and-white photo of a bicycle brake system with a hand adjusting it, no visible text or symbols on the main body.natural_image
Person assembling a Sharp bicycle frame with visible wiring and components (no text or symbols)
natural_image
Two people assembling a bicycle frame with visible gears and wiring (no text or symbols)
natural_image
Person using a handheld device with a mechanical scale nearby (no visible text or symbols)
natural_image
Person assembling a mechanical device with tools and cables on a white surface (no visible text or symbols)
natural_image
Person kneeling on a floor using a sharp pressure tool, no visible text or symbols
natural_image
Person kneeling on a bench with a mechanical device and two cylindrical components, no visible text or symbolsnatural_image
Assorted bicycle components including bicycles, shakers, and tools arranged on a white surface (no text or symbols visible)www.sharpconsumer.com/RS08EB/#down
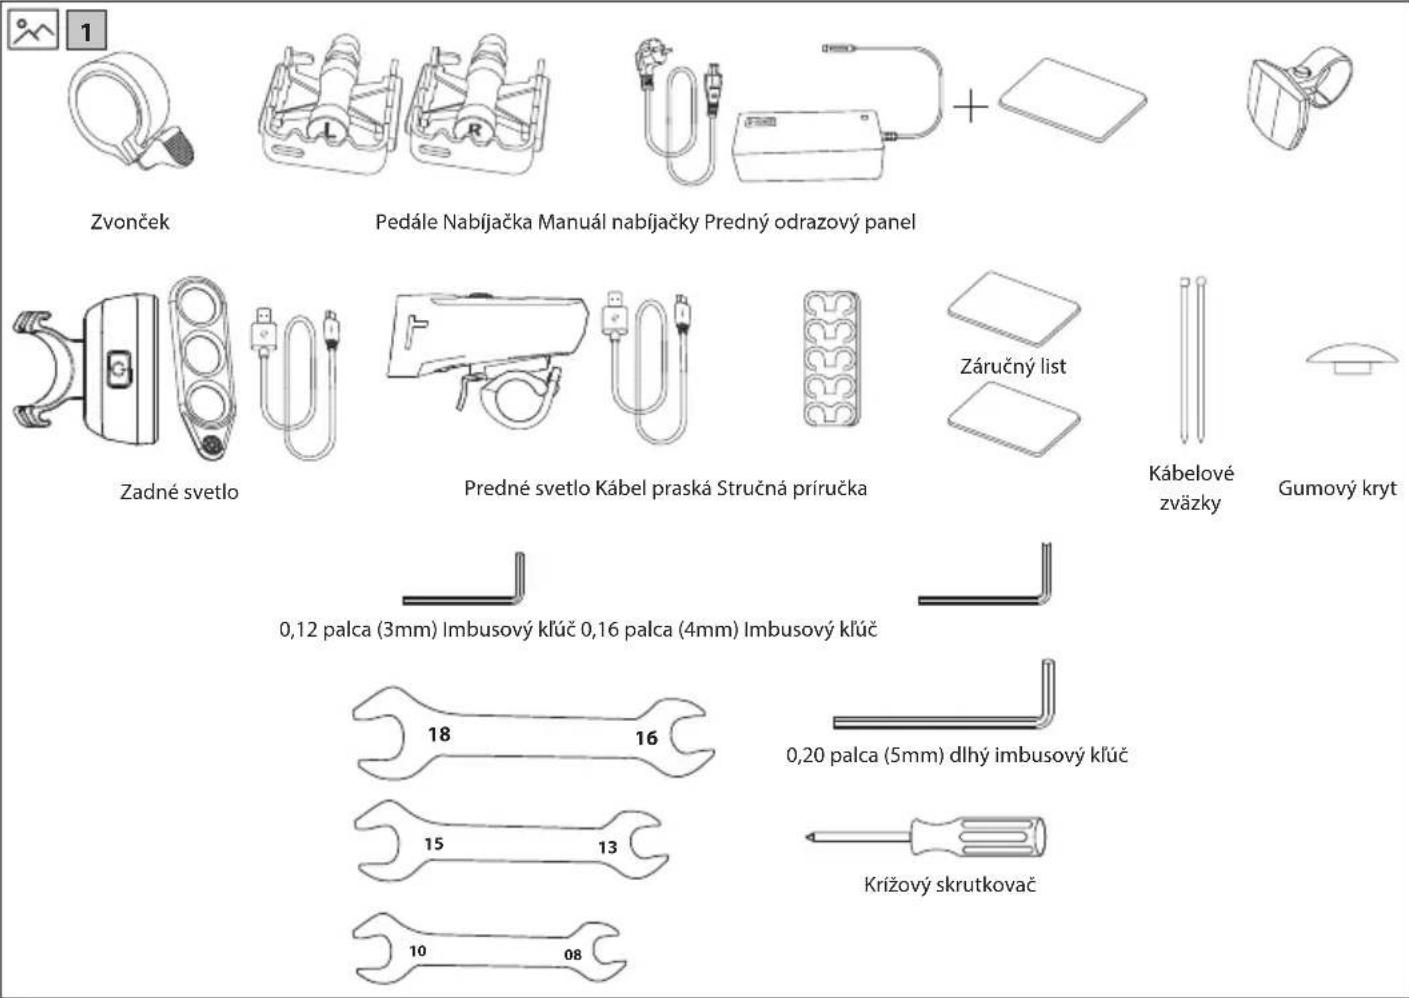
natural_image
Line drawing of a shared bicycle with a compact box and wheels (no text or symbols)
www.sharpconsumer.com/contact/

www.sharpconsumer.com/support/
- Likvidujte batérie a elektrické bicykle v súlade s platnými predpismi vo vašej krajine.
Batérie

www.sharpconsumer.com/documents-of-conformity/
natural_image
Technical line drawing of a mechanical device with no visible text or symbolsZostavenie E-bike
natural_image
Technical line drawing of a robotic arm with articulated joints and base mount (no text or symbols)natural_image
Line drawing of a bicycle with propeller and wheel (no text or symbols)c. Posúvajte riadidlá dolava a doprava, aby ste ich vycentrovali; mierne ich otočte, aby boli brzdové páky naklonené nadol. Potom postupne utiahnite skrutky v poradí A-B-C-D, ako je zobrazené v [Obrázku 1-5].

natural_image
Line drawing of a mechanical device with lever and base (no text or symbols)
Obrázok 1-5
POZNÁMKA: Uistite sa, že krútiaci moment skrutiek ABCD je približne 6-8 N·m.

natural_image
Two cylindrical electronic components with internal wires, shown from different angles (no text or symbols)Obrázok 3-1

natural_image
Line drawing of a bicycle leg and seat assembly (no text or symbols)Obrázok 3-2
POZNÁMKA: Uistite sa, že krútiaci moment skrutiek [F] a [J] je približne 20 N·m.
Obrázok 4-3

natural_image
Technical line drawing of a mechanical assembly with intersecting rods and a fork, no text or symbols presentnatural_image
Line drawing of a bicycle wheel assembly with no text or symbolsObrázok 5-1

natural_image
Technical line drawing of a bicycle wheel assembly with visible spokes and hub (no text or symbols)Obrázok 5-2

natural_image
Technical line drawing of a bicycle wheel and suspension bracket (no text or symbols)Obrázok 5-3
natural_image
Line drawing of a bicycle's front wheel and seat assembly (no text or symbols)Obrázok 6-1
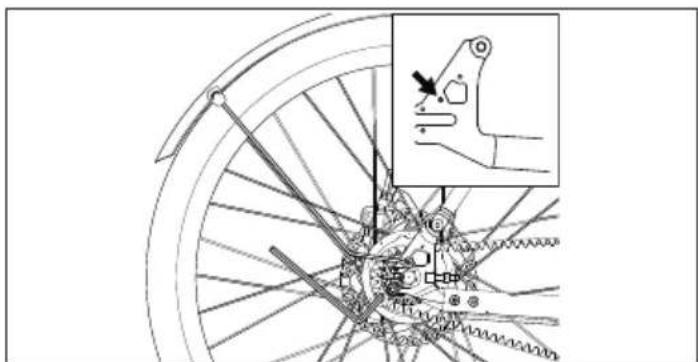
natural_image
Mechanical diagram of a bicycle wheel assembly with gear and hub components, showing no text or symbolsObrázok 6-2

natural_image
Mechanical assembly diagram showing a wheel with gear and a close-up inset of a component detail (no text or symbols)Obrázok 6-3

natural_image
Technical line drawing of a bicycle wheel assembly with labeled components (no text or symbols present)Obrázok 8-1
natural_image
Technical line drawing of two mechanical components with no visible text or symbolsPOZNÁMKY:
natural_image
Technical line drawing of mechanical components including a crimping tool, a cylindrical component, and a clamp bracket (no text or symbols)Obrázok 9-1

natural_image
Line drawing of a bicycle seat assembly with a close-up inset showing a small device (no text or symbols)Obrázok 9-2

natural_image
Technical line drawing of a mechanical device with lever arms and handle (no text or symbols)Obrázok 9-3
KROK 10: Inštalujte stojan
natural_image
Technical line drawing of a bicycle wheel assembly with visible gears and hub (no text or symbols)Obrázok 10-1

natural_image
Technical line drawing of a bicycle seatbelt mechanism (no text or symbols)
https://www.sharpconsumer.com/sharp-life-app
Pokyny na demontáž
KROK 1: Odstráňte riadidlá
natural_image
Close-up of a gloved hand adjusting a bicycle brake lever (no text or symbols visible)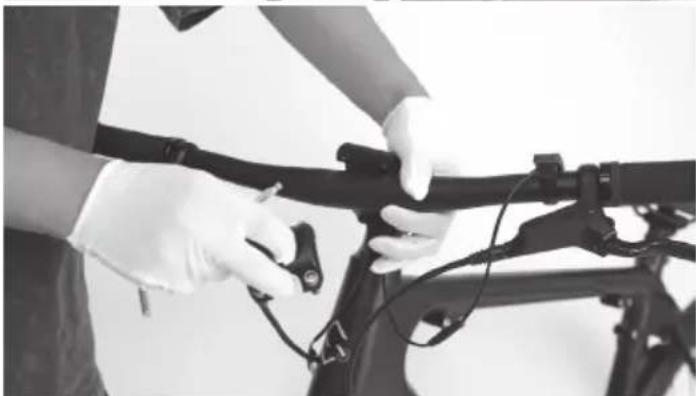
natural_image
Person in gloves adjusting a bicycle frame with cable (no visible text or symbols)
natural_image
Person holding a shared bicycle with visible 'SHAK' branding, standing beside it (no text or symbols on the bicycle itself)Krok 2: Odstráňte stonku a displej
natural_image
Close-up of hands using a handheld device to adjust or install a black mechanical component (no visible text or symbols)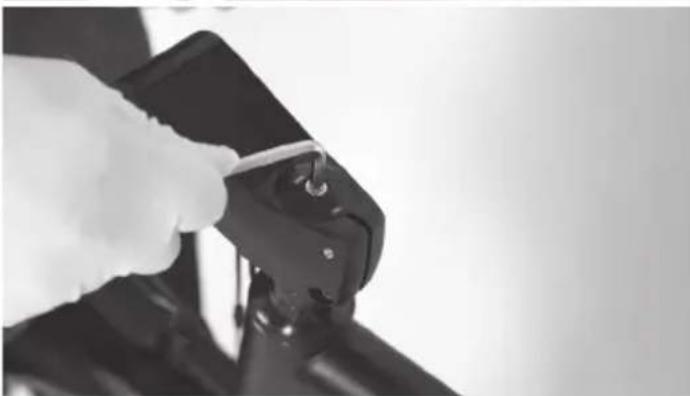
natural_image
Close-up of a hand holding a black mechanical component with a white clip, no visible text or symbols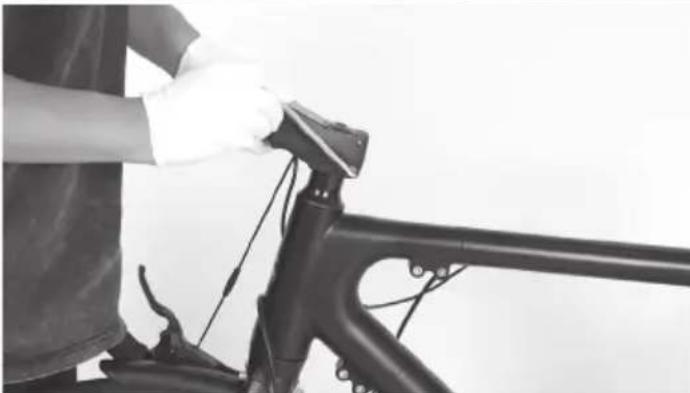
natural_image
Person wearing gloves handling a bicycle frame with cable (no visible text or symbols)
natural_image
Close-up of hands operating a black mechanical device with a tool, no visible text or symbolsnatural_image
Person standing beside a bicycle with visible frame and wheels (no text or symbols)Krok 4: Odstráňte rukovát
natural_image
Person assembling a shared bicycle with visible wheel rim and suspension components (no text or symbols)
natural_image
Close-up of gloved hands holding a black plastic brake lever and a black ring component (no visible text or symbols)
natural_image
Close-up of hands using a tool to adjust or install a bicycle wheel (no visible text or symbols)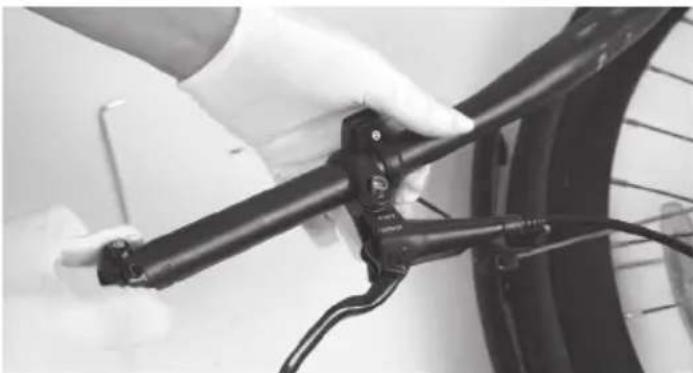
natural_image
Close-up of hands holding a bicycle brake lever with wires and sensors (no visible text or symbols)natural_image
Close-up of a bicycle tire being adjusted by hand, showing mechanical components and wiring (no text or symbols visible)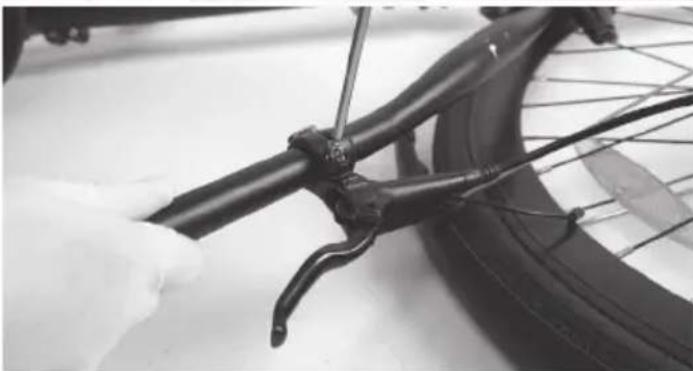
natural_image
Close-up of a bicycle tire being adjusted with a wrench, no visible text or symbols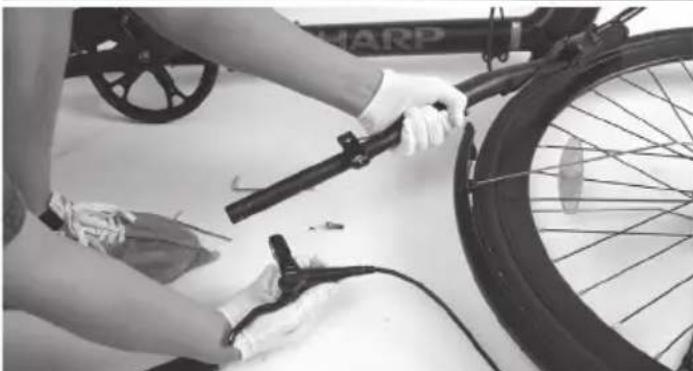
natural_image
Person cleaning a bicycle tire with a handbar, no visible text or symbolsnatural_image
Person in gloves handling a black cable or pipe fitting (no visible text or symbols)
natural_image
Close-up of hands cleaning a car tire with a black cable (no visible text or symbols)Krok 7: Odstráňte brzdovú páku na druhej strane
natural_image
Close-up of hands holding a black cable or wire component, no visible text or symbols
natural_image
Close-up of hands holding a black cylindrical pipe fitting with small components nearby (no visible text or symbols)natural_image
Close-up of a person adjusting a bicycle wheel assembly (no visible text or symbols)
natural_image
Close-up of hands assembling a bicycle wheel assembly (no visible text or symbols)natural_image
Close-up of a hand adjusting a bicycle wheel assembly (no visible text or symbols)
natural_image
Close-up of hands adjusting a bicycle wheel assembly (no text or symbols visible)
natural_image
Close-up of hands adjusting a bicycle wheel and gear mechanism (no visible text or symbols)Krok 10: Odstráňte stojan
natural_image
Close-up of a person adjusting bicycle wheel components with chains (no visible text or symbols)
natural_image
Close-up of a person adjusting a bicycle wheel assembly (no visible text or symbols)
natural_image
Close-up of a person adjusting bicycle wheel components with a tool (no visible text or symbols)Krok 11: Odstráňte pás
natural_image
Two-panel black-and-white photo showing a bicycle wheel assembly and hand positioning, no text or symbols visible.Uvolnite skrutky na R-tesneniach pomocou imbusového klúča o velkosti 3 mm. Potom ich odstránte.

natural_image
Close-up of hands assembling a bicycle wheel assembly with metal rings and chains (no text or symbols visible)natural_image
Four-panel black-and-white photo showing bicycle wheel assembly and maintenance, with no visible text or symbols.natural_image
Two black-and-white photos showing hands assembling a bicycle wheel and a mechanical component (no visible text or symbols)natural_image
Close-up of hands using a saw to cut a bicycle frame (no text or symbols visible)
natural_image
Close-up of hands using a bicycle tire to trim a white object (no text or symbols visible)natural_image
Close-up of hands adjusting bicycle wheel components on a wire rack (no text or symbols visible)
natural_image
Person adjusting a bicycle wheel on a white surface, no visible text or symbolsnatural_image
Person assembling a bicycle frame with a tool, no visible text or symbols
natural_image
Person assembling a bicycle frame with visible gears and base plate (no text or symbols)natural_image
Person using a bicycle frame with a wrench, no visible text or symbols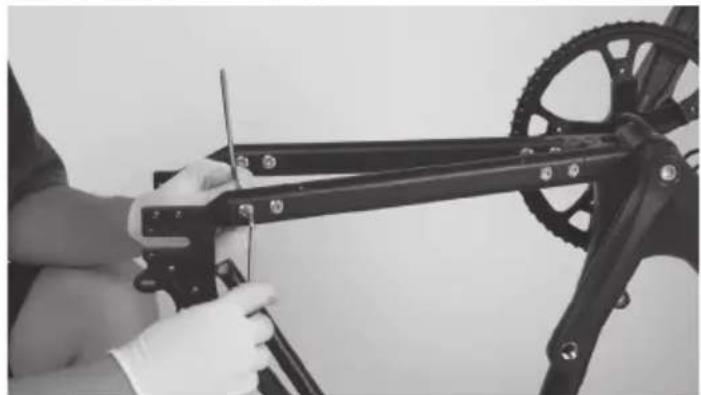
natural_image
Person using a mechanical tool to adjust a bicycle frame (no visible text or symbols)
natural_image
Close-up of hands using a tool to adjust or install a black mechanical component (no visible text or symbols)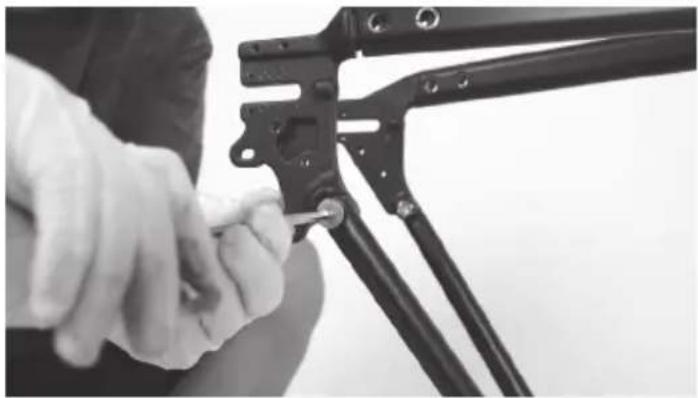
natural_image
Close-up of hands using crimping tools to adjust a mechanical bracket (no visible text or symbols)
natural_image
Close-up of a black bicycle frame structure with visible gears and mounting brackets (no text or symbols)
natural_image
Close-up of hands in gloves handling mechanical tools and crimping components (no visible text or symbols)natural_image
Close-up of a bicycle frame structure with visible joints and brackets (no text or symbols)natural_image
Three-panel black-and-white photo sequence showing a person using a bicycle-mounted device, demonstrating step-by-step assembly (no text or symbols visible)natural_image
Person using a stationary exercise bike with a head-mounted sensor (no visible text or symbols)
natural_image
Person using a Sharp bicycle on a stationary platform (no visible text or symbols)Krok 18: Rozoberte rám
natural_image
Black-and-white photo of a bicycle frame with a hand adjusting it, no visible text or symbols on the main subject.natural_image
Person assembling a Sharp bicycle frame with visible wiring and components (no text or symbols)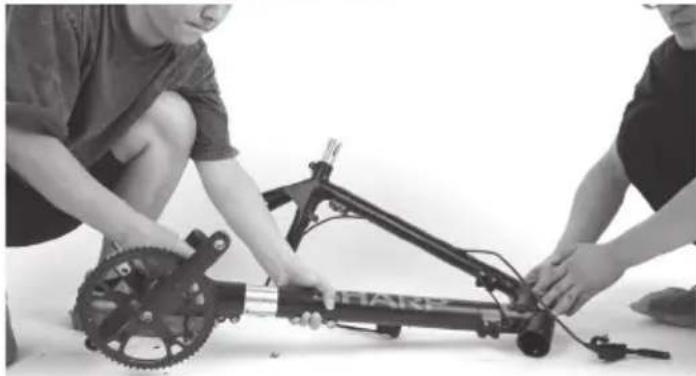
natural_image
Two people assembling a bicycle frame with a gear mechanism (no visible text or symbols)
natural_image
Person using a handheld device with a GPS sensor and mechanical components nearby (no visible text or symbols)
natural_image
Person assembling a mechanical device with tools and cables on a white surface (no visible text or symbols)
natural_image
Person kneeling on a floor using a sharp pressure tool, no visible text or symbols
natural_image
Person kneeling on a bench with a device and two cylindrical equipment (no visible text or symbols)natural_image
Assorted bicycle components including bicycles, wheel rim, and safety gear (no text or symbols visible)Uzamknite skrutky v poradí A-B-C-D-a-b-c-d
Údržba
www.sharpconsumer.com/RS08EB/#down
1
Csengő
natural_image
Technical line drawing of a mechanical device with no visible text or symbolsÁbra 1-1 Ábra 1-2
MEGJEGYZÉS:
natural_image
Technical line drawing of a robotic arm with articulated joints and control knobs (no text or symbols)Ábra 1-3 Ábra 1-4
natural_image
Line drawing of a bicycle with visible wheel, spokes, and handle (no text or symbols)natural_image
Line drawing of a mechanical device with articulated arms and cylindrical body (no text or symbols)
Ábra 1-5

natural_image
Two cylindrical electronic components with internal wiring, shown from different angles (no text or symbols)Ábra 2-1 Ábra 2-2
Ábra 3-1

natural_image
Line drawing of a bicycle leg with seat and support bracket (no text or symbols)Ábra 3-2
natural_image
Technical line drawing of two cylindrical mechanical components with a wrench and clamp (no text or symbols)Ábra 4-1 Ábra 4-2
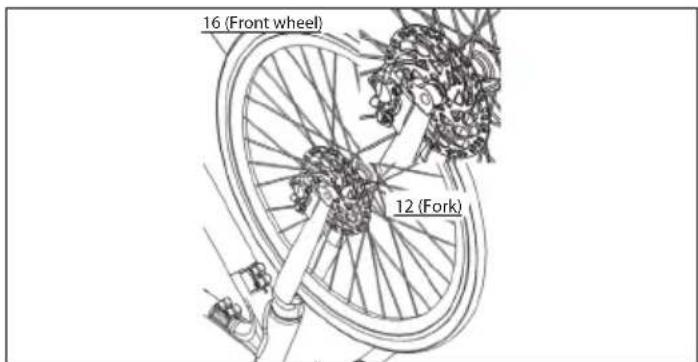
Ábra 4-3

natural_image
Technical line drawing of a mechanical assembly with intersecting rods and gears, labeled '12 (Fork)' (no text or symbols on the diagram itself)Ábra 4-4 Ábra 4-5

natural_image
Technical line drawing of a bicycle wheel and suspension bracket (no text or symbols)Ábra 5-3
MEGJEGYZÉSEK:
natural_image
Line drawing of a bicycle wheel assembly with no text or symbolsÁbra 5-1
natural_image
Line drawing of a bicycle seat and wheel assembly (no text or symbols)Ábra 6-1
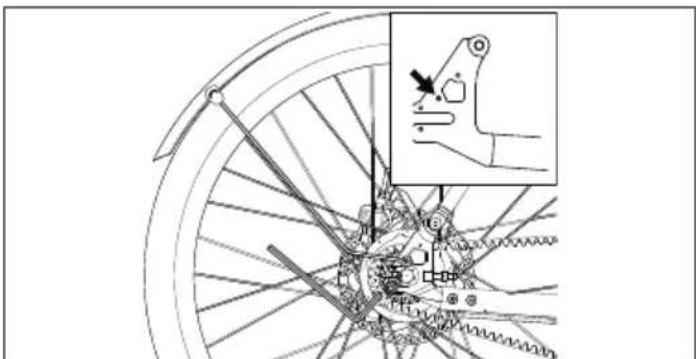
natural_image
Technical line drawing of a bicycle wheel assembly with mechanical components and a magnified inset showing a hand tool (no text or symbols)Ábra 6-2

natural_image
Technical line drawing of a bicycle wheel and wheel rim assembly (no text or symbols)Ábra 5-2
L
R
Ábra 6-3
natural_image
Technical line drawing of a mechanical device with lever and grip assembly (no text or symbols)Ábra 9-3
natural_image
Technical line drawing of a bicycle wheel assembly with visible gears and levers (no text or symbols)Ábra 10-1
Ábra 11-1 Ábra 11-2
Kijelző felület

natural_image
Technical line drawing of a bicycle seatbelt mechanism, showing front and side views with no text or symbols
https://www.sharpconsumer.com/sharp-life-app
natural_image
Close-up of a gloved hand adjusting a bicycle brake lever (no text or symbols visible)
natural_image
Person in gloves adjusting a bicycle frame with cable (no visible text or symbols)
natural_image
Person holding a shared bicycle with visible 'SHARP' branding, standing beside it (no text or symbols on the bicycle itself)natural_image
Person standing beside a bicycle with visible frame and wheels (no text or symbols)natural_image
Person cleaning a bicycle frame with a hand tool (no visible text or symbols)
natural_image
Close-up of gloved hands holding a black plastic clip and a black ring, next to a bicycle (no visible text or symbols)
natural_image
Close-up of hands using a tool to adjust the bicycle wheel (no text or symbols visible)
natural_image
Close-up of hands holding a black bicycle brake lever with wires (no visible text or symbols)natural_image
Close-up of a bicycle tire being adjusted by a tool, with no visible text or symbols
natural_image
Close-up of a bicycle tire being adjusted by a tool, with no visible text or symbols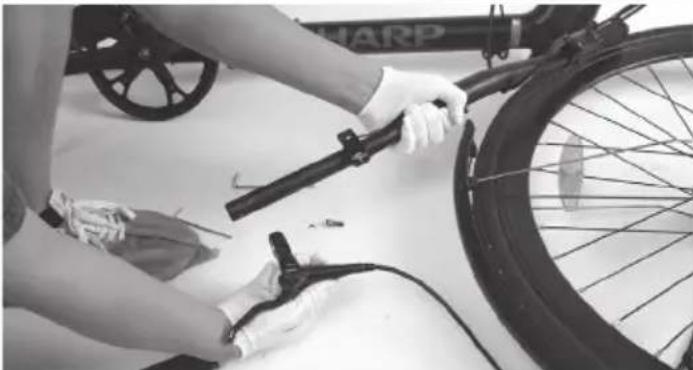
natural_image
Person cleaning a bicycle tire with a hand pump, no visible text or symbolsnatural_image
Close-up of hands in white gloves installing a black cable or wire component on a vehicle (no visible text or symbols)
natural_image
Close-up of hands holding a black cable or hose next to a tire, with no visible text or symbols.natural_image
Close-up of hands using a black cable or wire tool to handle a cable, no visible text or symbols
natural_image
Close-up of hands holding a black cable with a small inset image showing a connector (no text or symbols visible)natural_image
Close-up of a person adjusting a bicycle wheel assembly (no visible text or symbols)
natural_image
Close-up of hands assembling a bicycle wheel and chain (no visible text or symbols)natural_image
Close-up of hands adjusting a bicycle wheel assembly (no visible text or symbols)
natural_image
Close-up of hands assembling a bicycle wheel and gear assembly (no visible text or symbols)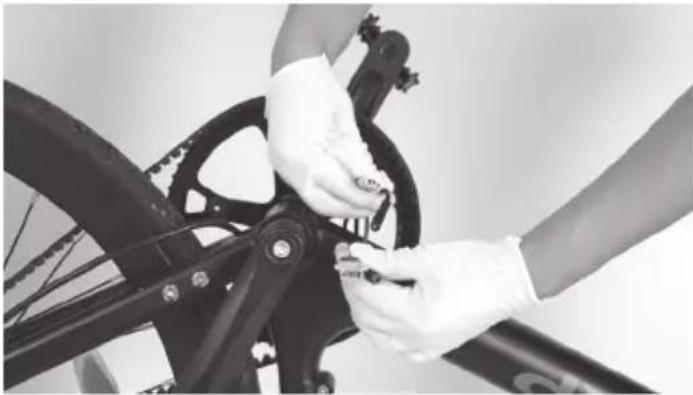
natural_image
Close-up of hands assembling a bicycle wheel assembly (no visible text or symbols)natural_image
Close-up of a person adjusting bicycle wheel components (no visible text or symbols)
natural_image
Close-up of hands assembling a bicycle wheel with visible gears and spokes (no text or symbols)
natural_image
Close-up of a bicycle wheel with visible mechanical components and a hand adjusting the wheel (no text or symbols)natural_image
Two-panel black-and-white photo showing a bicycle wheel assembly and hand positioning on its wheel (no text or symbols visible)natural_image
Close-up of hands assembling a bicycle wheel assembly with gear links (no text or symbols visible)natural_image
Four-panel black-and-white photo showing bicycle wheel assembly and maintenance, including hand tool and hands adjusting components (no text or symbols visible)natural_image
Two black-and-white photos showing hands assembling a bicycle wheel and a mechanical assembly (no visible text or symbols)natural_image
Close-up of hands using a bicycle gear to trim the frame, no text or symbols visiblenatural_image
Close-up of a bicycle wheel assembly with a hand adjusting the component (no visible text or symbols)
natural_image
Close-up of hands adjusting a bicycle wheel rim with a tool (no visible text or symbols)
natural_image
Person adjusting a bicycle tire with hands, next to a partially assembled bicycle (no visible text or symbols)natural_image
Person using a bicycle brake system with visible wheel and keyway (no text or symbols)
natural_image
Person assembling a bicycle frame with visible wheels and structural components (no text or symbols)natural_image
Three-panel black-and-white photo showing hands assembling a bicycle frame with tools, no visible text or symbols
natural_image
Three-panel black bicycle frame installation procedure showing hand tool, gear mechanism, and final assembly (no text or symbols visible)natural_image
Close-up of a bicycle frame structure with visible joints and brackets (no text or symbols)natural_image
Three-panel black-and-white photo showing a person using a bicycle-mounted device, demonstrating step-by-step assembly (no text or symbols visible)natural_image
Person using a shared stationary bike with a head-mounted support (no visible text or symbols)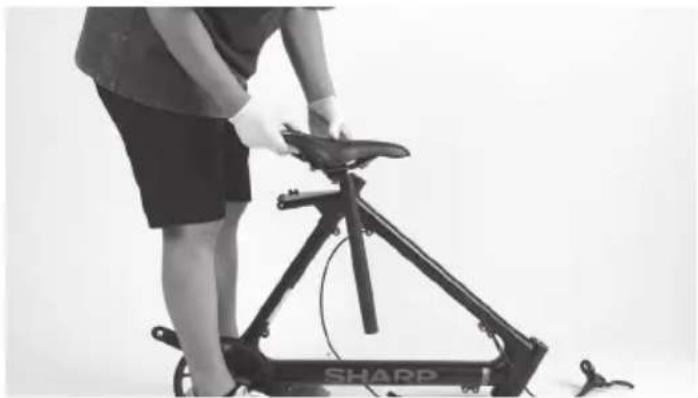
natural_image
Person using a Sharp bicycle on a stationary platform (no visible text or symbols)natural_image
Black-and-white photo of a bicycle frame with a hand adjusting it, no visible text or symbols on the main subject.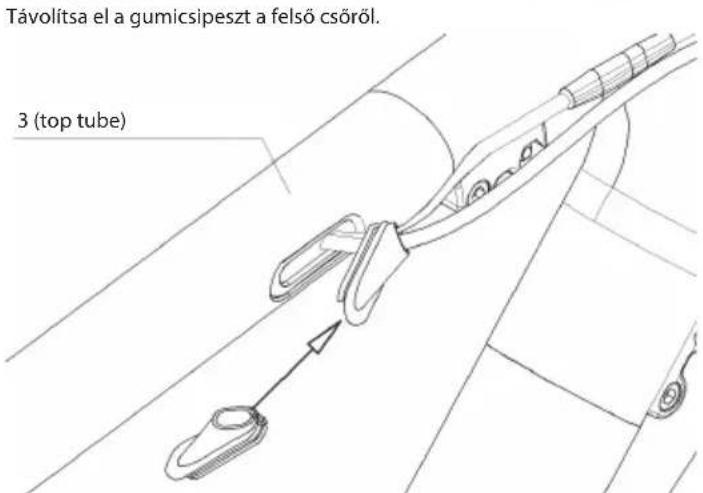
natural_image
Person assembling a Sharp bicycle frame with visible wiring and components (no text or symbols)
natural_image
Two people assembling a bicycle frame with visible gears and wiring (no text or symbols)
natural_image
Person using a handheld device with a GPS sensor and mechanical components nearby (no visible text or symbols)
natural_image
Person assembling a mechanical device with tools and cables on a white surface (no visible text or symbols)
natural_image
Person kneeling on a floor using a sharp pressure tool, no visible text or symbols
natural_image
Person kneeling on a bench with a mechanical device and two cylindrical components, no visible text or symbolsnatural_image
Assorted bicycle components including bicycles, shakers, and tools arranged on a white surface (no text or symbols visible)www.sharpconsumer.com/RS08EB/#down

natural_image
Line drawing of a shared bicycle with a compact box and wheels (no text or symbols)
www.sharpconsumer.com/contact/

www.sharpconsumer.com/support/

www.sharpconsumer.com/documents-of-conformity/


natural_image
Technical line drawing of a mechanical device with no visible text or symbolsAsamblarea bicicletei electrice
natural_image
Diagram of a mechanical device with rotating arrows indicating motion (no text or symbols)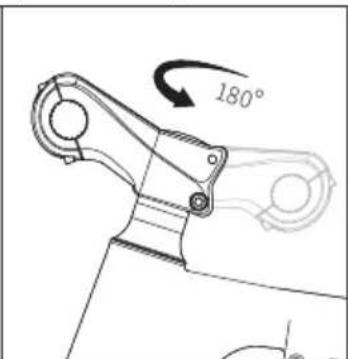
Figura 1-1 Figura 1-2
NOTĂ:
natural_image
Line drawing of a robotic arm joint (no text or symbols)
natural_image
Technical line drawing of a robotic arm joint (no text or symbols)Figura 1-3 Figura 1-4
natural_image
Line drawing of a bicycle with visible wheel, spokes, and handle (no text or symbols)natural_image
Line drawing of a mechanical device with articulated arms and lever (no text or symbols)
Figura 1-5

natural_image
Two cylindrical mechanical components with internal grooves, shown from different angles (no text or symbols)Figura 2-1 Figura 2-2
Figura 3-1

natural_image
Line drawing of a bicycle leg and seat assembly (no text or symbols)Figura 3-2
natural_image
Technical line drawing of two cylindrical mechanical components with a wrench and clamp (no text or symbols)Figura 4-1 Figura 4-2

Figura 4-3
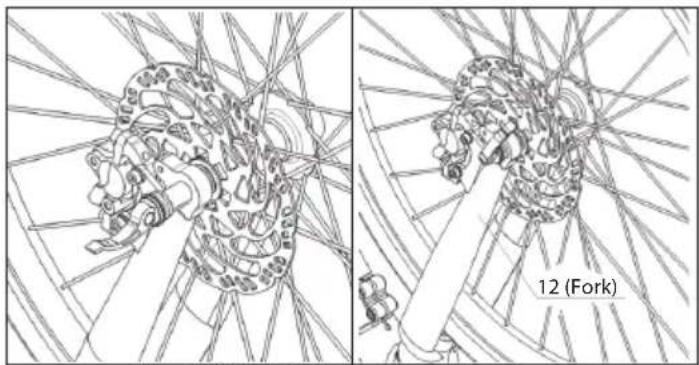
natural_image
Technical line drawing of a mechanical assembly with intersecting rods and a fork, no text or symbols presentFigura 4-4 Figura 4-5
NOTE:
natural_image
Line drawing of a bicycle wheel assembly with no text or symbolsFigura 5-1
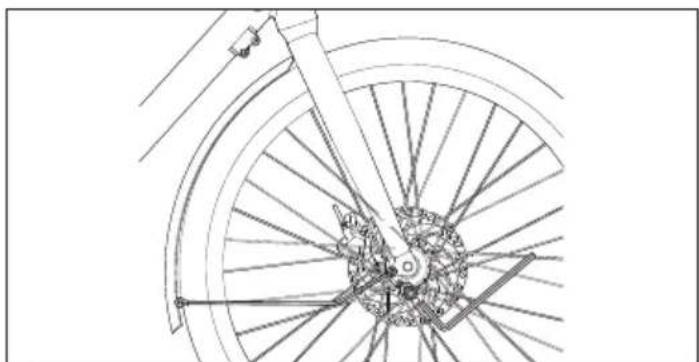
natural_image
Technical line drawing of a bicycle wheel with spokes and hub (no text or symbols)Figura 5-2

natural_image
Technical line drawing of a bicycle wheel and suspension bracket (no text or symbols)Figura 5-3
PASUL 6: Instalati aripa spate
natural_image
Line drawing of a bicycle seat and wheel assembly (no text or symbols)Figura 6-1

natural_image
Mechanical diagram of a bicycle wheel assembly with gear and hub, showing internal components and a close-up inset (no text or labels)Figura 6-2

natural_image
Mechanical assembly diagram showing a wheel with levers and gear mechanism (no text or labels)Figura 6-3
natural_image
Technical line drawing of two mechanical components with no visible text or symbols
natural_image
Technical line drawing of a bicycle wheel assembly with labeled components (no text or symbols present)Figura 8-1
NOTE:
natural_image
Technical line drawing of mechanical components including a crimping tool, a cylindrical component, and a clamp bracket (no text or symbols)Figura 9-1

natural_image
Technical line drawing of a bicycle seat assembly with a close-up inset showing a small device (no text or symbols present)Figura 9-2

natural_image
Technical line drawing of a mechanical device with lever arms and handle (no text or symbols)Figura 9-3
natural_image
Technical line drawing of a bicycle wheel assembly with visible spokes and hub (no text or symbols)Figura 10-1
Figura 11-1 Figura 11-2
Interfață Afisaj
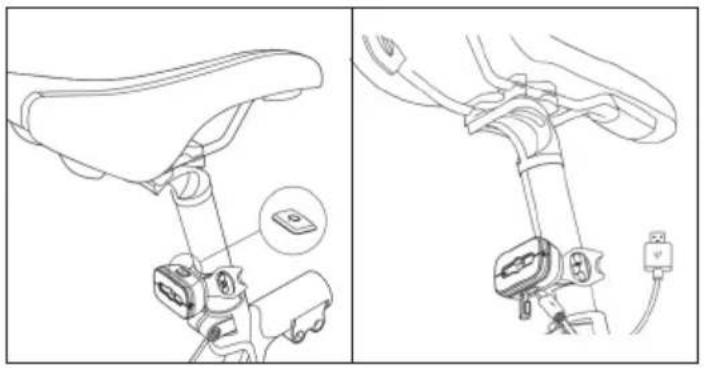
natural_image
Technical line drawing of a bicycle seat assembly with labeled components (no text or symbols)
https://www.sharpconsumer.com/sharp-life-app
natural_image
Close-up of a gloved hand adjusting a bicycle brake lever (no text or symbols visible)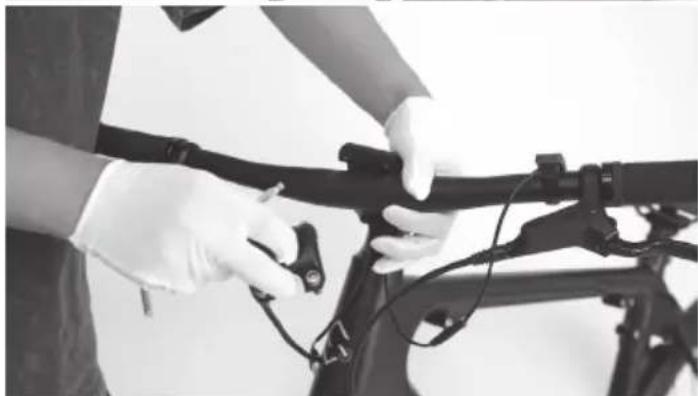
natural_image
Person in gloves adjusting a bicycle frame with tools (no visible text or symbols)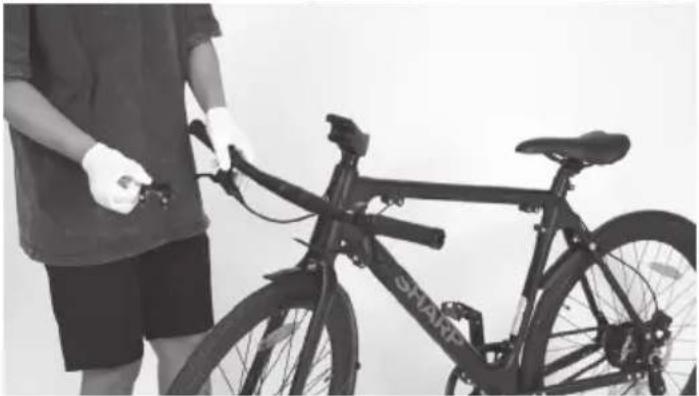
natural_image
Person holding a shared bicycle with visible branding, standing beside it (no text or symbols on the bicycle itself)natural_image
Four-panel black-and-white photo showing a person using a bicycle to adjust the camera, with no visible text or symbols.natural_image
Person standing beside a bicycle with visible frame and wheels (no text or symbols)natural_image
Person assembling a shared bicycle with visible wheel rim and headrest (no text or symbols)
natural_image
Close-up of gloved hands holding a black brake stopper and a small black ring component (no visible text or symbols)
natural_image
Close-up of hands using a tool to adjust or install a bicycle brake lever (no visible text or symbols)
natural_image
Close-up of hands holding a black bicycle brake lever with wires (no visible text or symbols)natural_image
Close-up of a bicycle tire being adjusted by a hand, showing mechanical components and wiring (no text or symbols visible)
natural_image
Close-up of a bicycle tire being adjusted by a hand, showing the blade and wheel (no text or symbols visible)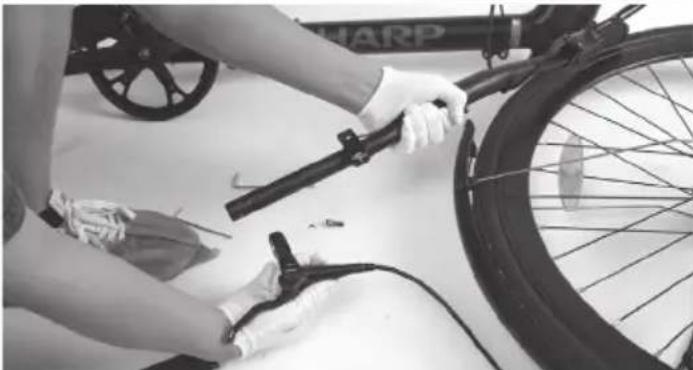
natural_image
Person cleaning a bicycle tire with a hand pump, no visible text or symbolsnatural_image
Close-up of hands holding a black cable or hose next to a tire, with no visible text or symbols.natural_image
Close-up of hands using a black tool to apply or install a cable or wire (no visible text or symbols)
natural_image
Close-up of hands holding a black cable with a small inset showing a mechanical component (no text or symbols visible)natural_image
Person assembling a bicycle frame with visible wheels and structural components (no text or symbols)natural_image
Person using a bicycle-mounted tool to adjust the frame (no visible text or symbols)
natural_image
Person assembling a bicycle frame with a tool, no visible text or symbols
natural_image
Close-up of hands installing or adjusting a black metal bracket component (no visible text or symbols)
natural_image
Close-up of hands using a crimping tool to adjust or install a mechanical component (no visible text or symbols)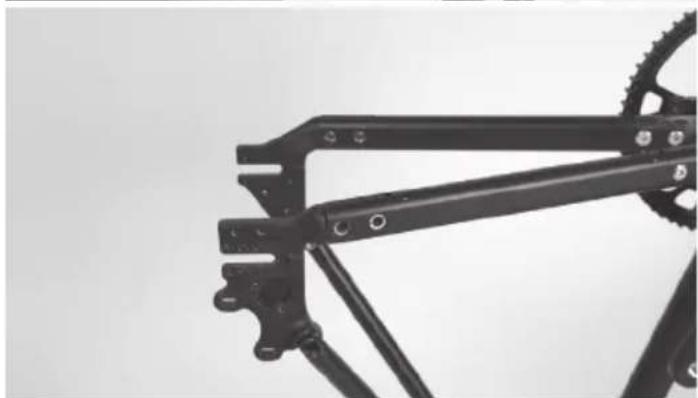
natural_image
Close-up of a black bicycle frame structure with visible gears and mounting brackets (no text or symbols)
natural_image
Close-up of hands in gloves handling mechanical tools and crimping components (no visible text or symbols)natural_image
Close-up of a bicycle frame structure with visible joints and brackets (no text or symbols)natural_image
Three-panel black-and-white photo sequence showing a person using a bicycle brake system, demonstrating step-by-step assembly (no text or symbols visible)natural_image
Person using a stationary exercise bike with a headrest, no visible text or symbols on the bike or background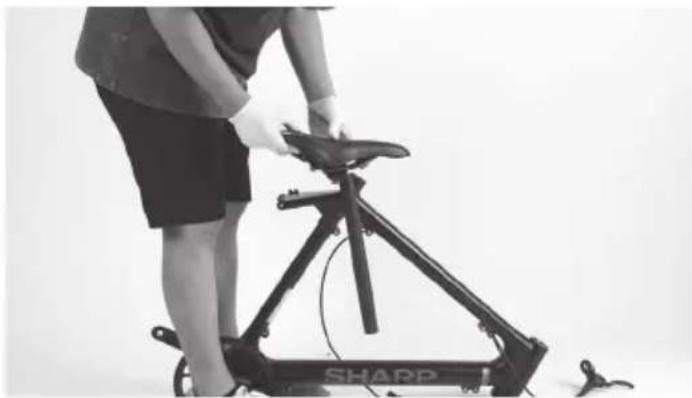
natural_image
Person using a Sharp bicycle on a stationary platform (no visible text or symbols)Pasul 18: Dezasamblati cadru
natural_image
Black-and-white photo of a bicycle frame with a hand adjusting it, no visible text or symbols on the main subject.natural_image
Two black-and-white photos showing a person assembling a Sharp bicycle frame, with no visible text or symbols.
natural_image
Person assembling a mechanical device with a wheel and sensor components (no visible text or symbols)
natural_image
Person assembling a mechanical device with a lever and handle (no visible text or symbols)
natural_image
Two black-and-white photos showing a person using a sharp pen and a handheld device, both demonstrating a step-up (no text or symbols visible)natural_image
Assorted bicycle components including bicycles, wheelbars, and shakers arranged on a white surface (no text or symbols visible)www.sharpconsumer.com/RS08EB/#down
1
Звънец

www.sharpconsumer.com/contact/

www.sharpconsumer.com/support/

www.sharpconsumer.com/documents-of-conformity/
natural_image
Line drawing of a mechanical device with lever and shaft (no text or symbols)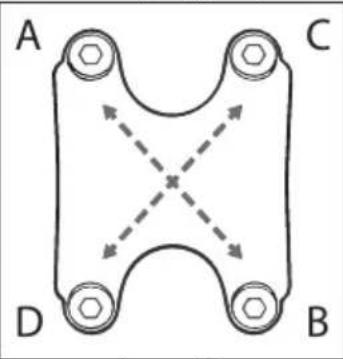
Фигура 1-5

natural_image
Two cylindrical electronic components with internal wiring, shown from different angles (no text or symbols)Фигура 3-1

natural_image
Line drawing of a bicycle leg with seat and support bracket (no text or symbols)Фигура 3-2
Фигура 4-3

natural_image
Technical line drawing of a mechanical assembly with intersecting rods and a fork, no text or symbols presentnatural_image
Technical line drawing of a bicycle wheel assembly (no text or symbols)Фигура 5-1

natural_image
Technical line drawing of a bicycle wheel assembly with visible spokes and hub (no text or symbols)Фигура 5-2

natural_image
Technical line drawing of a bicycle wheel and suspension bracket (no text or symbols)Фигура 5-3
natural_image
Line drawing of a bicycle's front wheel and seat assembly (no text or symbols)Фигура 6-1

natural_image
Mechanical diagram of a bicycle wheel assembly with gear and hub, showing mechanical components and a close-up inset (no text or labels)Фигура 6-2

natural_image
Mechanical assembly diagram showing a wheel with levers and gear mechanism (no text or labels)Фигура 6-3
natural_image
Technical line drawing of two mechanical components with no visible text or symbolsФигура 8-1
ЗАБЕЛЕЖКИ:
Проверете капачката на края на двете педали, за да идентифицирате левия и десния педал.
natural_image
Technical line drawing of mechanical components including a crimping tool, a flashlight, and clamp (no text or symbols)Фигура 9-1
Фигура 7-2
natural_image
Line drawing of a bicycle seat assembly with a close-up inset showing a device (no text or symbols)Фигура 9-2

natural_image
Technical line drawing of a firearm assembly (no text or symbols)Фигура 9-3
natural_image
Technical line drawing of a bicycle wheel assembly with visible gears and levers (no text or symbols)Фигура 10-1
natural_image
Line drawing of a cable connector and a connected device (no text or symbols)
natural_image
Technical line drawing of a bicycle seat assembly with two views (top and side), no text or symbols present.
https://www.sharpconsumer.com/sharp-life-app
natural_image
Close-up of a gloved hand adjusting a bicycle brake lever (no text or symbols visible)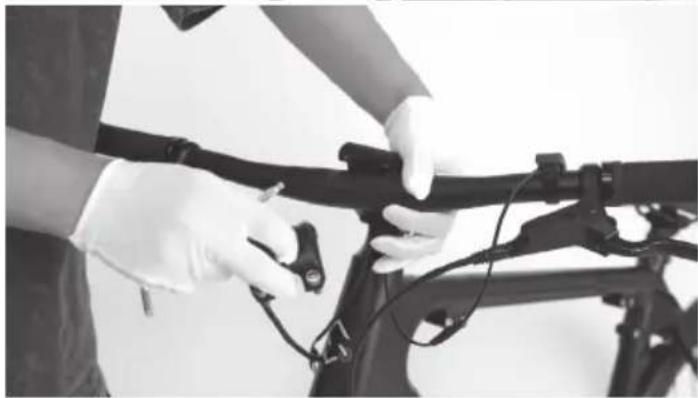
natural_image
Person in gloves adjusting a bicycle frame with cable and sensors (no visible text or symbols)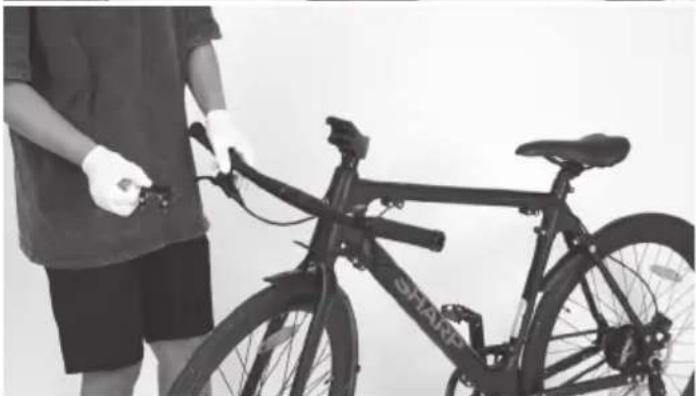
natural_image
Person holding a shared bicycle with visible branding and control buttons (no text or symbols on the bicycle itself)natural_image
Four-panel black-and-white photo showing a person using a bicycle to adjust the camera, with no visible text or symbols.natural_image
Person standing beside a bicycle with visible frame and wheels (no text or symbols)natural_image
Person assembling a bicycle frame with a hand tool, no visible text or symbols
natural_image
Close-up of gloved hands holding a black brake lever and a small black ring component (no visible text or symbols)
natural_image
Close-up of a hand using a tool to adjust or install a bicycle wheel (no visible text or symbols)
natural_image
Close-up of hands holding a bicycle brake lever with cable and switch (no visible text or symbols)natural_image
Close-up of a bicycle tire being adjusted by a tool, with no visible text or symbols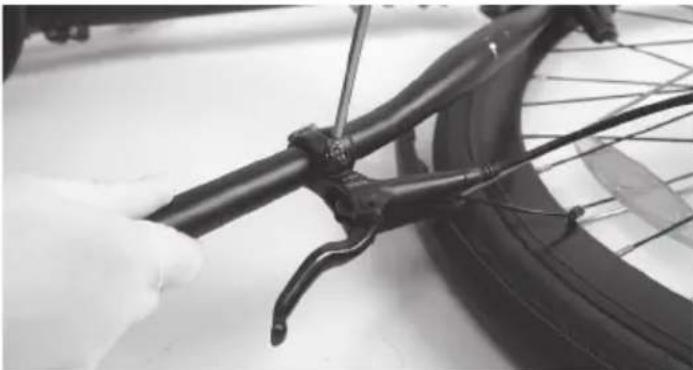
natural_image
Close-up of a bicycle tire being adjusted by a tool, with no visible text or symbols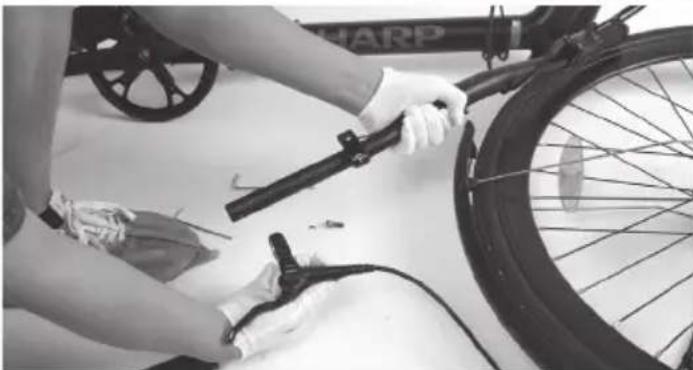
natural_image
Person cleaning a bicycle tire with a hand using a tool (no visible text or symbols)natural_image
Person in gloves handling a black cable or pipe fitting (no visible text or symbols)
natural_image
Close-up of hands holding a black cable or hose next to a tire, with no visible text or symbols.natural_image
Close-up of hands using a black tool to apply or install a cable, no visible text or symbols
natural_image
Close-up of hands holding a black cable with plastic components nearby (no visible text or symbols)natural_image
Close-up of a person adjusting a bicycle wheel assembly (no visible text or symbols)
natural_image
Close-up of hands assembling a bicycle wheel and attached bracket (no visible text or symbols)natural_image
Close-up of hands adjusting a bicycle wheel assembly (no visible text or symbols)
natural_image
Close-up of hands adjusting a bicycle wheel component (no visible text or symbols)
natural_image
Close-up of hands adjusting a bicycle wheel and gear mechanism (no visible text or symbols)natural_image
Close-up of a person adjusting a bicycle wheel with visible gears and chains (no text or symbols)
natural_image
Close-up of hands assembling a bicycle wheel with visible gears and blades (no text or symbols)
natural_image
Close-up of a bicycle wheel with visible mechanical components and a hand adjusting the wheel (no text or symbols)natural_image
Two-panel black-and-white photo showing a bicycle wheel assembly with a hand adjusting the gear and a close-up of the wheel rim (no text or symbols visible)natural_image
Close-up of hands assembling a bicycle wheel assembly with gear meshing (no text or symbols visible)natural_image
Four-panel black-and-white photo showing bicycle wheel assembly and maintenance, including hand tooling and cleaning steps (no text or symbols visible)natural_image
Two black-and-white photos showing hands assembling a bicycle wheel and a mechanical device (no visible text or symbols)natural_image
Close-up of hands using a bicycle gear to trim a bicycle wheel, no text or symbols visiblenatural_image
Close-up of a bicycle wheel assembly with a hand adjusting the component (no visible text or symbols)
natural_image
Close-up of hands assembling a bicycle wheel frame with a mechanical component (no visible text or symbols)
natural_image
Person adjusting a bicycle wheel on a white surface, no visible text or symbolsnatural_image
Person using a bicycle-mounted device with visible wheels and a handle (no text or symbols)
natural_image
Person assembling a bicycle frame with visible gears and branding (no text or symbols)natural_image
Person using a mechanical tool on a bicycle frame, no visible text or symbols
natural_image
Person assembling a bicycle frame with a tool, no visible text or symbols
natural_image
Close-up of hands installing or adjusting a black metal bracket component (no visible text or symbols)
natural_image
Close-up of hands using a crimping tool to adjust or install a mechanical component (no visible text or symbols)
natural_image
Close-up of a black bicycle frame structure with gear and mounting brackets (no text or symbols visible)
natural_image
Close-up of hands in gloves handling mechanical components (no visible text or symbols)natural_image
Close-up of a bicycle frame structure with visible joints and brackets (no text or symbols)natural_image
Close-up of a person adjusting a black bicycle frame with visible gears and components (no text or symbols)
natural_image
Person wearing gloves and shoes using a bicycle pedal device (no visible text or symbols)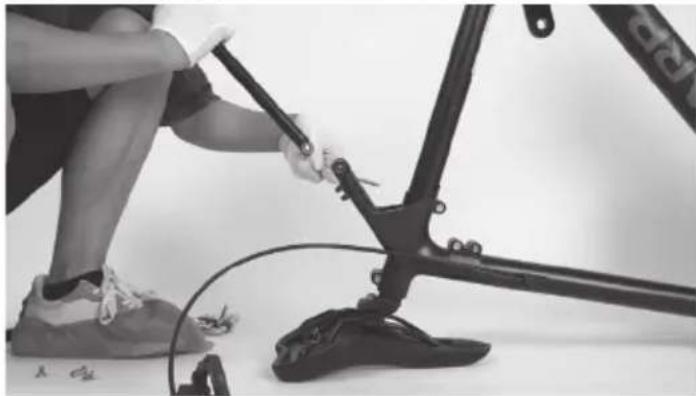
natural_image
Person using a bicycle leg presser to lift a person's legs (no visible text or symbols)natural_image
Person using a Sharp stationary bike frame, no visible text or symbols on the bike body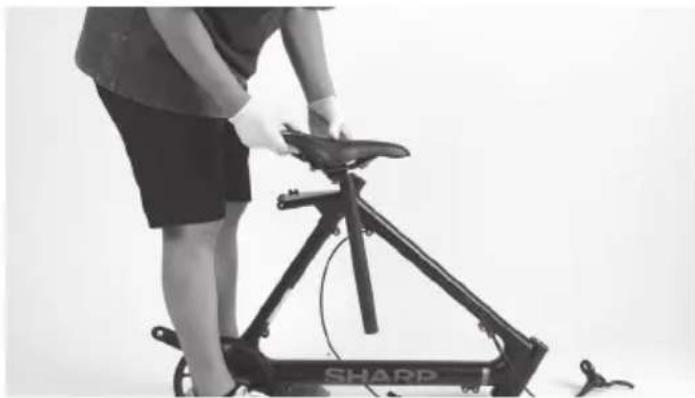
natural_image
Person using a Sharp bicycle on a stationary platform (no visible text or symbols)natural_image
Black-and-white photo of a bicycle brake system with a hand adjusting it, no visible text or symbols on the main body.natural_image
Person assembling a Sharp bicycle frame with visible wiring and components (no text or symbols)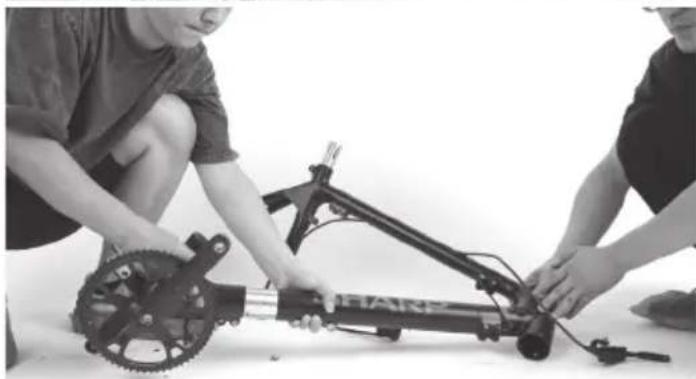
natural_image
Two people assembling a bicycle frame with visible gears and components (no text or symbols)
natural_image
Person assembling mechanical components including a wheel, sensor, and detector on a white surface (no visible text or symbols)
natural_image
Person assembling mechanical devices on a white surface (no visible text or symbols)
natural_image
Person kneeling on a floor using a sharp pressure tool, no visible text or symbols
natural_image
Person kneeling on a bench with a device and two cylindrical equipment (no visible text or symbols)natural_image
Assorted bicycle components including bicycles, shakers, and tools arranged on a plain surface (no text or symbols visible)www.sharpconsumer.com/RS08EB/#down
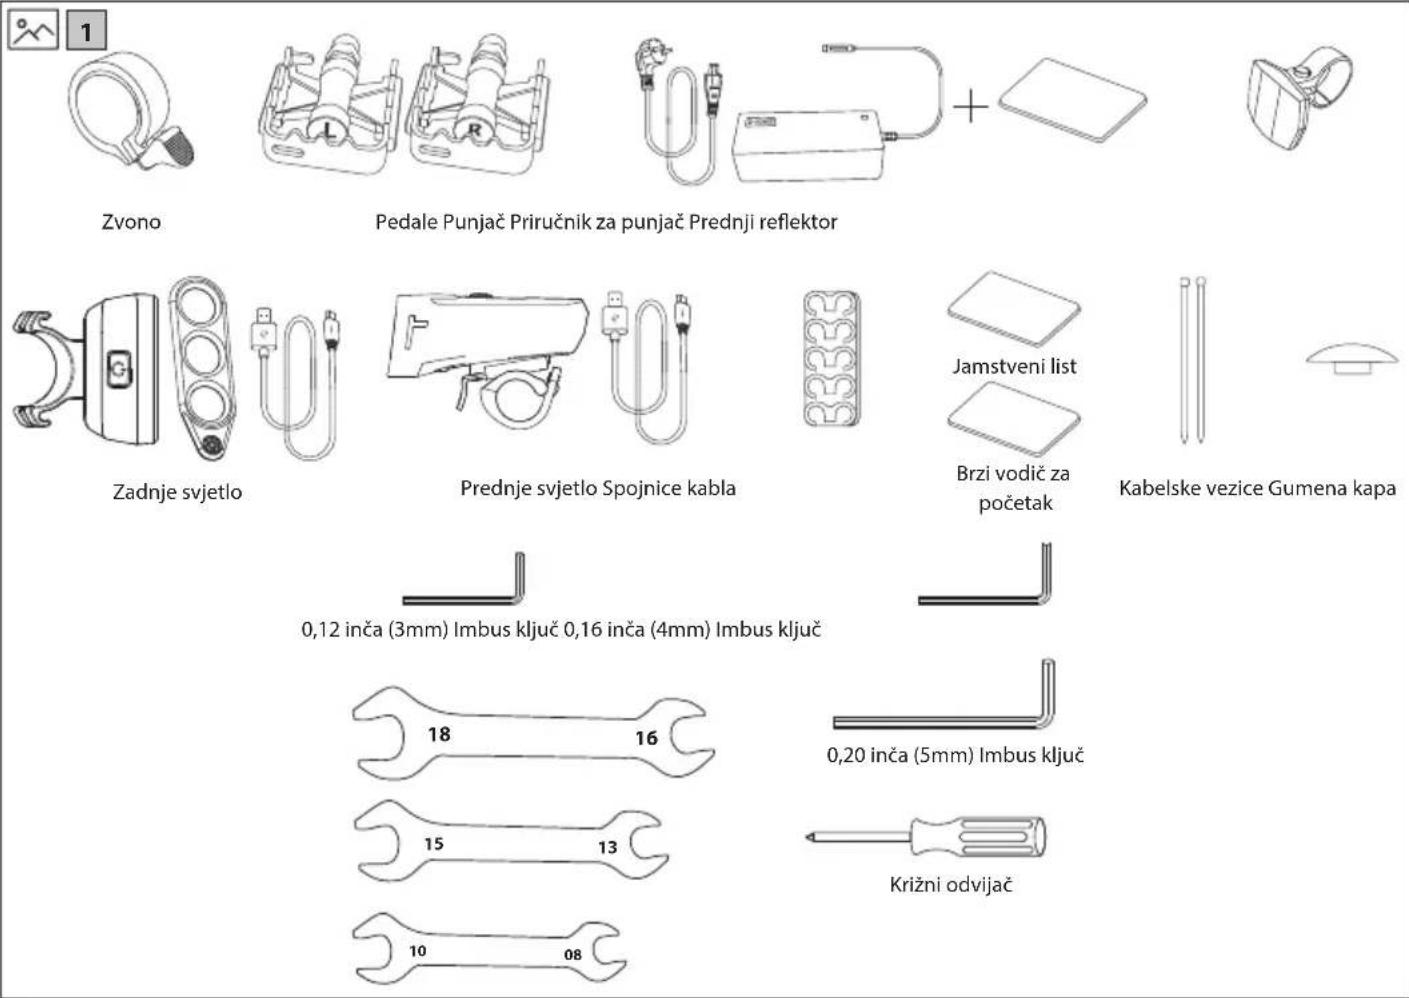

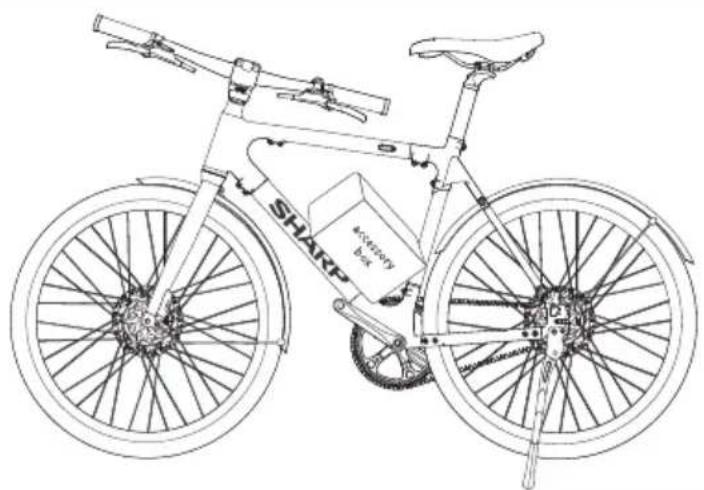
natural_image
Line drawing of a shared bicycle with a compact box and wheels (no text or symbols)Važne sigurnosne upute
natural_image
Two circular icons showing a sneaker and a helmet, no text or symbols present.Neprimjerene dodatke ili izmjene na biciklu i neispravna dodatna oprema mogu uzrokovati kvar bicikla.
Da biste smanjili rizik od nesreće i ozljede, ne dodavajte dodatnu opremu koja nije kupljena od prodavatelja ili bez njegove dozvole, uključujući, ali ne ograničavajući se na, dječje sigurnosne sjedalice, prikolice, itd.
OPREZ: Ne vozite bicikl na rizičan način.
Da biste smanjili rizik od nesreće i ozljede, vozite bicikl samo na ispravan način. Provjerite možete li kontrolirati bicikl i ne pokušavajte opasne radnje, uključujući, ali ne ograničavajući se na vožnju bez ruku, skokove i podizanje prednjeg kotača.
OPASNOST: Nedostatak održavanja bicikla predstavlja rizik od nesreće i ozljede
Prije svake vožnje provjerite bicikl, uključujući, ali ne ograničavajući se na, funkciju kočnica, trošenje guma i PSI, stanje vijaka i matica, upravljanje i napetost žbica.

www.sharpconsumer.com/contact/

www.sharpconsumer.com/support/

www.sharpconsumer.com/documents-of-conformity/


natural_image
Technical line drawing of a mechanical device with no visible text or symbolsSlika 1-1 Slika 1-2
NAPOMENA:
Provjerite je li okretni moment vijka na vrhu otprilike 4-6 N·m. Pobrinite se da je okretni moment onih s boka otprilike 10-12 N·m.
natural_image
Technical line drawing of a robotic arm with articulated joints and base mount (no text or symbols)Slika 1-3 Slika 1-4
b. Postavite upravljač u središte stezne spojke kada je korisnik na sedlu i provjerite je li ispravno orijentiran. Kontrolne tipke su s lijeve strane. Ponovno postavite prednji poklopac i čvrsto zategnite vijke, ali ne potpuno.

natural_image
Line drawing of a bicycle with visible wheel, spokes, and handle (no text or symbols)natural_image
Line drawing of a mechanical device with articulated arms and cylindrical body (no text or symbols)
flowchart
graph TD
    A["A"] --> B["B"]
    B --> C["C"]
    C --> D["D"]
    D --> A
    style A fill:#fff,stroke:#000
    style B fill:#fff,stroke:#000
    style C fill:#fff,stroke:#000
    style D fill:#fff,stroke:#000
    style X stroke-dasharray: 5 5
Slika 1-5
NAPOMENA: Provjerite je li okretni moment vijaka ABCD otprilike 6-8 N·m.
KORAK 2: Upravljanje kabelima
a. Spojite kabel senzora zaslona, kako je prikazano na [Slici 2-1] i [Slici 2-2].
b. Dodajte spojnice za kabele kako biste uredili kabele.


natural_image
Two cylindrical electronic components with internal wiring, shown from different angles (no text or symbols)Slika 2-1 Slika 2-2
Slika 3-1

natural_image
Line drawing of a bicycle leg with seat and support bracket (no text or symbols)Slika 3-2
natural_image
Technical line drawing of two cylindrical mechanical components with a wrench, no text or symbols presentSlika 4-1 Slika 4-2

Slika 4-3
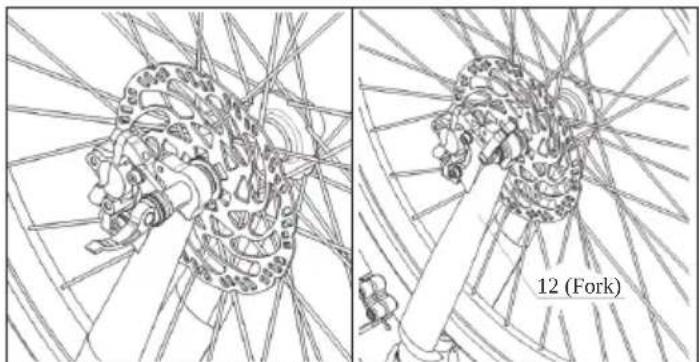
natural_image
Technical line drawing of a mechanical assembly with intersecting rods and gears, labeled '12 (Fork)' (no text or symbols on the diagram itself)Slika 4-4 Slika 4-5
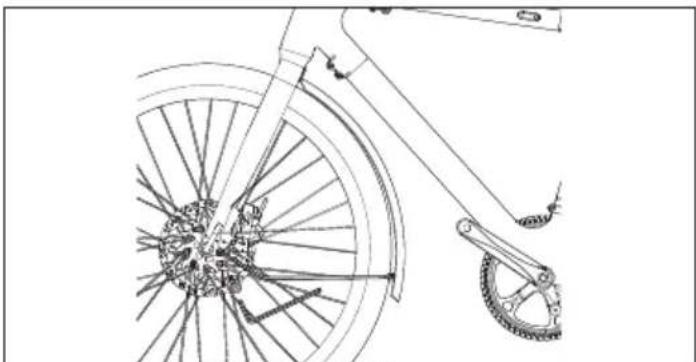
natural_image
Technical line drawing of a bicycle wheel and suspension bracket (no text or symbols)Slika 5-3
BILJEŠKE:
Ako nema napetosti prilikom zaključavanja ručice za brzo otpuštanje, morat ćete je dodatno stegnuti.
natural_image
Line drawing of a bicycle wheel and suspension mechanism (no text or symbols)Slika 5-1
KORAK 6: Instalirajte stražnji blatobran
a. Koristite otvoreni ključ od 10 mm za popuštanje matice vijka blatobrana na spoju sjedala, a zatim uklonite vijak i maticu.
b. Nakon usklađivanja blatobrana s rupom za vijak, ponovno zategnite montažne vijke kako biste ga pričvrstili na spoj cijevi sjedala, kako je prikazano na [Slici 6-1].
c. Nakon potvrde da je prednji blatobran poravnan s rupom za vijak, koristite Allen ključ od 5 mm za guranje vijka i otvoreni ključ od 10 mm za ponovno zatezanje matice s druge strane na okretni moment od 4-6 N·m. Ne zaboravite na razmake.
d. Nakon što ste pričvrstili gornji nosač, koristite imbus ključ od 4 mm za uklanjanje 2 vijka na ispustu. Zatim, poravnajte noge blatobrana s rupama za instalaciju, kako je prikazano u [Slikama 6-2] i [6-3], a zatim ponovno zategnite vijke.
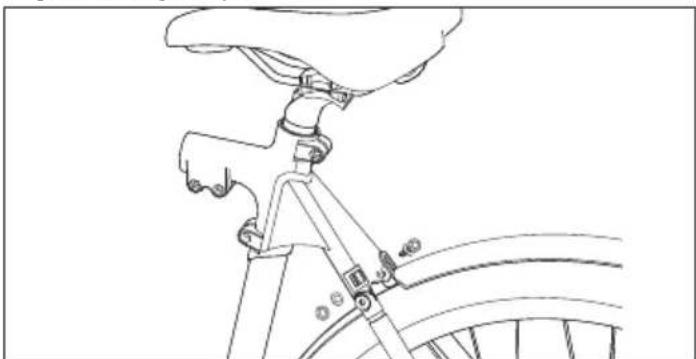
natural_image
Line drawing of a bicycle's front wheel and seat assembly (no text or symbols)Slika 6-1

natural_image
Mechanical diagram of a bicycle wheel assembly with gear and hub, showing mechanical components and a close-up inset (no text or labels)Slika 6-2

natural_image
Technical line drawing of a bicycle wheel with visible spokes, hub, and gear mechanism (no text or symbols)Slika 5-2
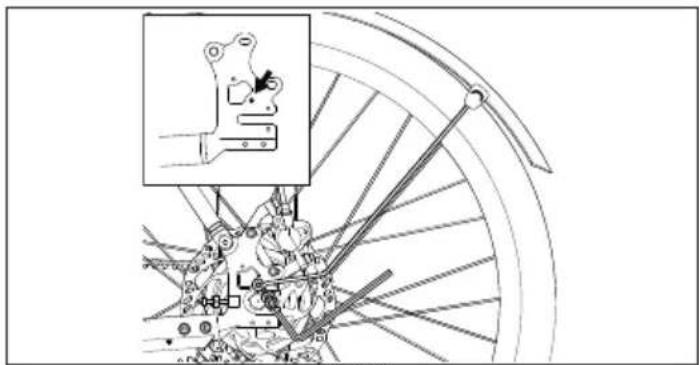
natural_image
Mechanical assembly diagram showing a wheel with levers and gear components, no text or symbols presentSlika 6-3
KORAK 7: Povežite kabel
Okrenite svoj bicikl naopako.
natural_image
Technical line drawing of a mechanical device with no visible text or symbolsSlika 7-1
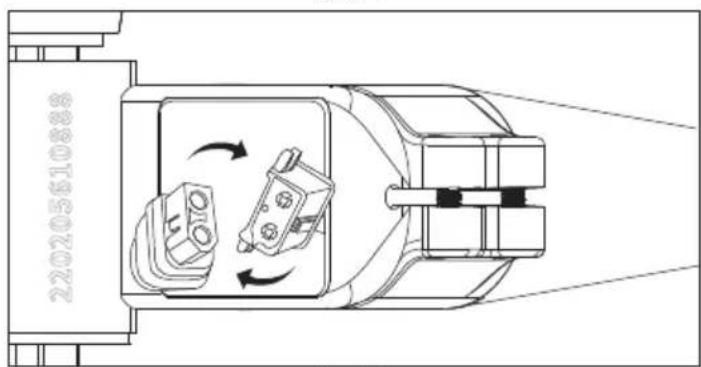
Slika 7-2
KORAK 8: Instalirajte pedale
natural_image
Technical line drawing of two mechanical components with no visible text or symbols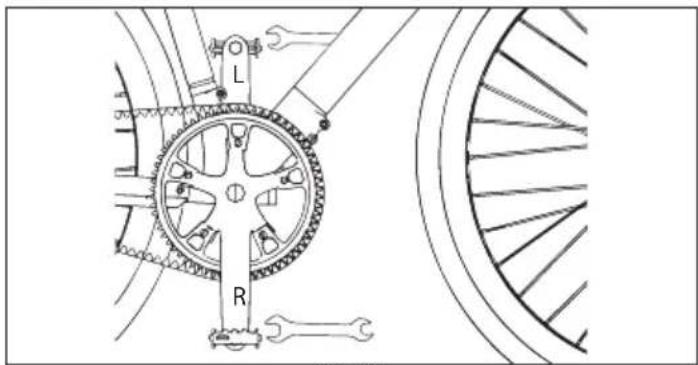
natural_image
Mechanical gear assembly diagram showing wheel, shaft, and gear components (no text or labels)Slika 8-1
BILJEŠKE:
Pogledajte poklopce na svakom vijku pedale kako bi razlikovali ljevu i desnu pedalu.
natural_image
Technical line drawing of mechanical components including a crimping tool, a cylindrical component, and a clamp bracket (no text or symbols)Slika 9-1

natural_image
Technical line drawing of a bicycle seat assembly with a close-up inset showing a small device (no text or symbols present)Slika 9-2
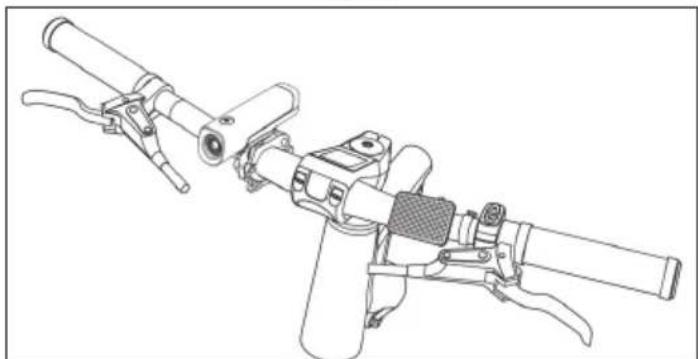
natural_image
Technical line drawing of a mechanical device with lever arms and handle (no text or symbols)Slika 9-3
KORAK 10: Instalirajte nogar
a. Popustite vijke i podloške, zatim ih uklonite iz ispusta, kako je prikazano na [Slici 10-1].
b. Koristite imbus ključ od 5 mm za montiranje nogara na ispust, i ponovno zategnite vijke na moment od 10-12 N·m.
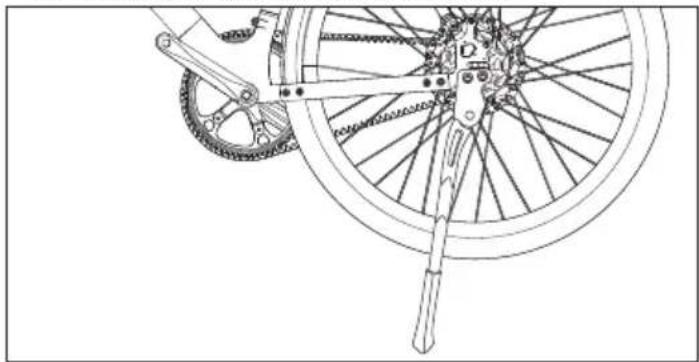
natural_image
Technical line drawing of a bicycle wheel assembly with visible spokes and hub (no text or symbols)Slika 10-1
Pumpanje biciklističke gume
Slika 11-1 Slika 11-2
Kako pokrenuti E-bicikl
UKLJUČENO/ISKLJUČENO
Sučelje digitalnog zaslona
Prema zadanim postavkama, zaslon prikazuje stvarnu brzinu (km/h), pojedinačnu kilometražu (km) i ukupnu kilometražu (km). Kratko pritisnite tipku MODE da biste prebacili.
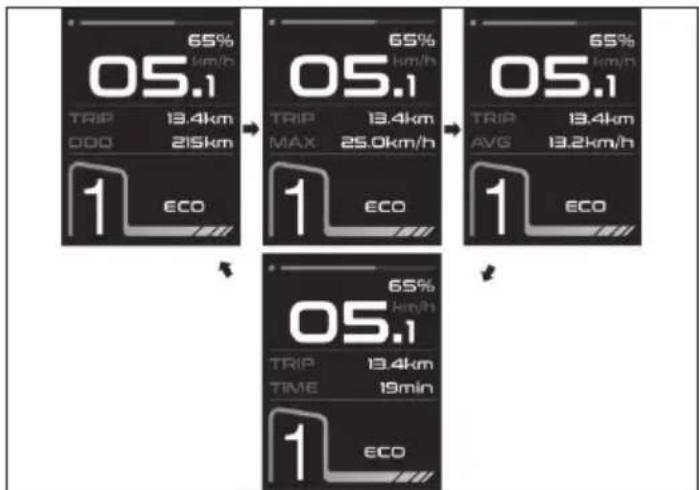
Pomoć pri hodanju
Pritiskom i držanjem tipke za smanjivanje 3 sekunde aktivira se način pomoći pri hodanju. E-bicikl će automatski ići brzinom do 6 km/h.
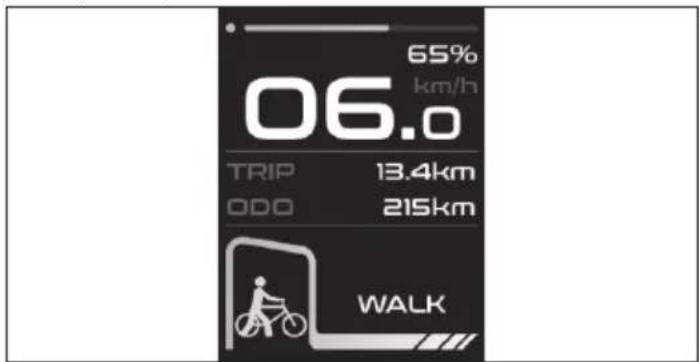
Izbornik postavki
Pritisnite i držite tipku Mode 2 sekunde i uđite u sučelje postavki.
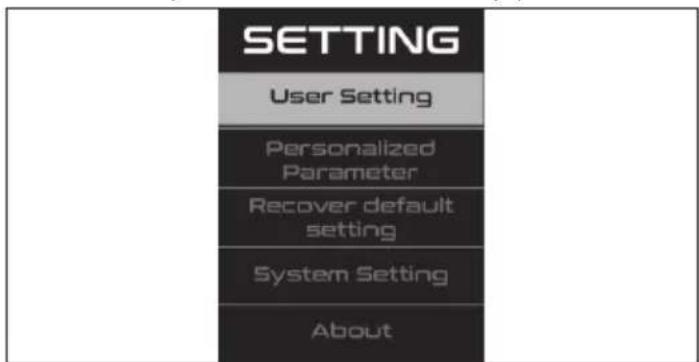
Kako postaviti
Pritisnite GORE ili DOLJE za prebacivanje i pritisnite gumb Mode za spremanje.
Kada završite, pritisnite gumb Mode da se vratite na glavni izbornik postavki.
Ako nema akcije u jednoj minuti, automatski će izaći iz stranice za postavke.
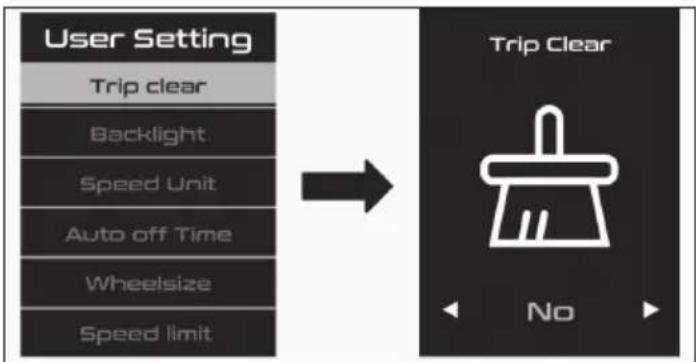
flowchart
graph LR
    A["User Setting"] --> B["Trip clear"]
    B --> C["Backlight"]
    C --> D["Speed Unit"]
    D --> E["Auto off Time"]
    E --> F["Wheelsize"]
    F --> G["Speed limit"]
    H["Trip Clear"] --> I["No"]
Connect to SHARP Life APP
Pritisnite i držite tipku Mode 2 sekunde i uđite u sučelje postavki.
Odaberite opciju O aplikaciji i skenirajte QR kod za preuzimanje SHARP Life aplikacije na vaš telefon. Zatim povežite svoj prekrasan e-bicikl s telefonom putem aplikacije.

flowchart
graph LR
    A["SETTING"] --> B["User Setting"]
    A --> C["Personalized Parameter"]
    A --> D["Recover default setting"]
    A --> E["System Setting"]
    A --> F["About"]
    G["SharpLife"] --> H["QR Code"]
Kod pogreške
Ako je nešto pogrešno s električnim sustavom, na zaslonu će se prikazati kod pogreške. Ne oklijevajte se obratiti našem servisnom centru za rješavanje problema.
Ovdje su definicije kodova pogrešaka.
| Kod pogreške Definicija | |
| 21 Neispravna struja | |
| 23 Motor izvan faze / kvar motora | |
| 24 Kvar signala motornog Halla | |
| 30 Problem u komunikacijom sa aplikacijom | |

natural_image
Technical line drawing of a bicycle seatbelt mechanism, showing front and side views with no text or symbolsSHARP Life aplikacija
Instalirajte aplikaciju SHARP Life na svoj mobilni uređaj kako biste uživali u dodatnim funkcijama. One obuhvaćaju:

https://www.sharpconsumer.com/sharp-life-app
Upute za rastavljanje
KORAK 1: Uklonite upravljač
natural_image
Close-up of a gloved hand adjusting a bicycle brake lever (no text or symbols visible)
natural_image
Person in gloves adjusting a bicycle frame with cable (no visible text or symbols)
natural_image
Person holding a shared bicycle with visible 'SHARP' branding, standing beside it (no text or symbols on the bicycle itself)natural_image
Close-up of hands holding a black mechanical device with a handle, no visible text or symbols
natural_image
Close-up of a gloved hand holding a black mechanical component with a small attached pin (no visible text or symbols)
natural_image
Person wearing gloves handling a bicycle frame (no visible text or symbols)
natural_image
Close-up of hands using a tool to adjust or install a black mechanical component (no visible text or symbols)Korak 3: Uklonite prednju vilicu i prednji kotač
Uklonite prednju vilicu i prednji kotač.

natural_image
Person standing beside a bicycle with visible frame and wheels (no text or symbols)Korak 4: Uklonite dršku
a. Otpustite vijke na dršci pomoću imbus ključa od 3 mm.
b. Zatim uklonite dršku.
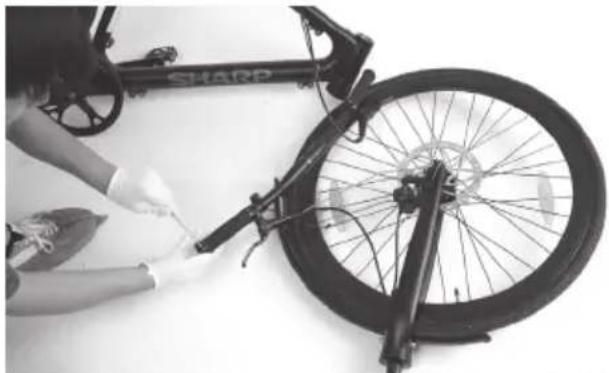
natural_image
Person cleaning a bicycle frame with visible wheel rim and headboard (no text or symbols)
natural_image
Close-up of gloved hands holding a black plastic clip and a coiled black ring, next to a bicycle (no visible text or symbols)
natural_image
Close-up of a hand using a tool to adjust the bicycle wheel (no text or symbols visible)
natural_image
Close-up of hands holding a black bicycle brake lever with wires (no visible text or symbols)Korak 5: Uklonite polugu kočnice
a. Otpustite vijke na ručici kočnice pomoću imbus ključa od 5 mm. b. Zatim uklonite ručicu kočnice.

natural_image
Close-up of a bicycle tire being adjusted by a tool, with no visible text or symbols
natural_image
Close-up of a bicycle tire being adjusted with a tool, no visible text or symbols
natural_image
Person cleaning a bicycle tire with a hand pump, no visible text or symbolsKorak 6: Uklonite prekidač za pomoć
a. Otpustite vijak na ručici kočnice pomoću imbus ključa od 5 mm. b. Zatim uklonite pomoćni prekidač s imbus ključem od 2,5 mm.
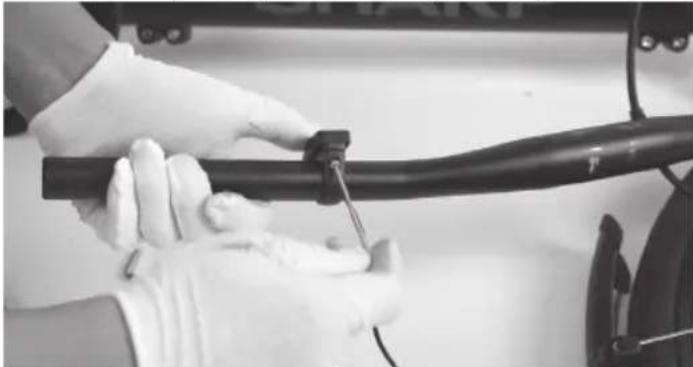
natural_image
Person in gloves handling a black cable or pipe with a clamp, no visible text or symbols
natural_image
Close-up of hands holding a black cable or hose next to a tire, with no visible text or symbols.Korak 7: Uklonite polugu kočnice s druge strane
a. Ponovite korak 4 i 5 na drugoj strani upravljača. b. A zatim uklonite upravljač s bicikla.

natural_image
Close-up of hands using a black cable or wire tool to handle a cable, no visible text or symbols
natural_image
Close-up of hands holding a black cable with a small inset image showing a ring and plug (no text or symbols visible)Korak 8: Uklonite poklopac pored donjeg nosača
natural_image
Close-up of a person adjusting a bicycle wheel assembly (no visible text or symbols)
natural_image
Close-up of hands adjusting a bicycle wheel and chain (no visible text or symbols)Korak 9: Iskopčajte kabele
natural_image
Close-up of hands adjusting a bicycle wheel assembly (no visible text or symbols)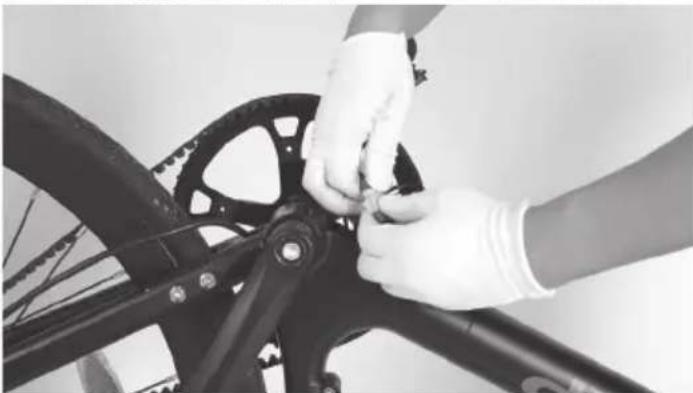
natural_image
Close-up of hands adjusting a bicycle wheel and gear assembly (no visible text or symbols)
natural_image
Close-up of hands assembling a bicycle wheel assembly (no visible text or symbols)Korak 10: Uklonite nogar
a. Otpustite vijke na nogaru pomoću imbus ključa od 5 mm. b. Zatim uklonite nogar.
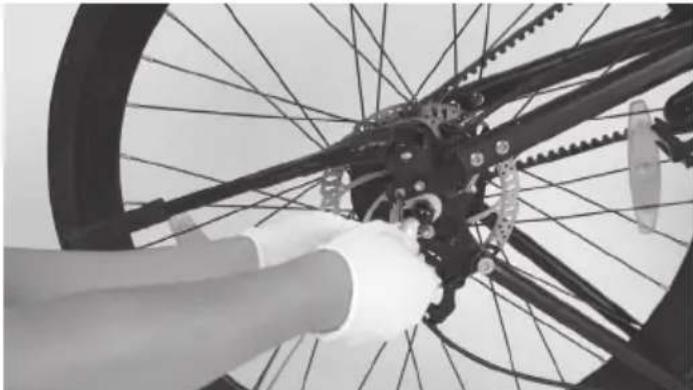
natural_image
Close-up of a person adjusting a bicycle wheel with visible tracks and gear (no text or symbols)
natural_image
Close-up of hands assembling a bicycle wheel with visible tracks and gear (no text or symbols)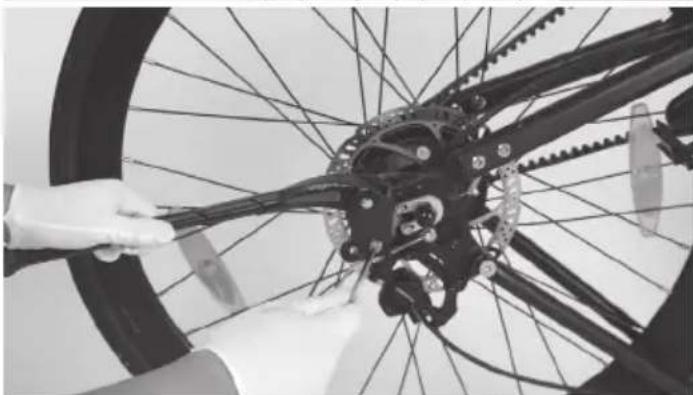
natural_image
Close-up of a bicycle wheel with visible mechanical components and a hand adjusting the wheel (no text or symbols)Korak 11: Uklonite pojas
Popustite završne kapice na stražnjoj glavi s ključem otvorenog kraja od 19. Zatim ih uklonite.
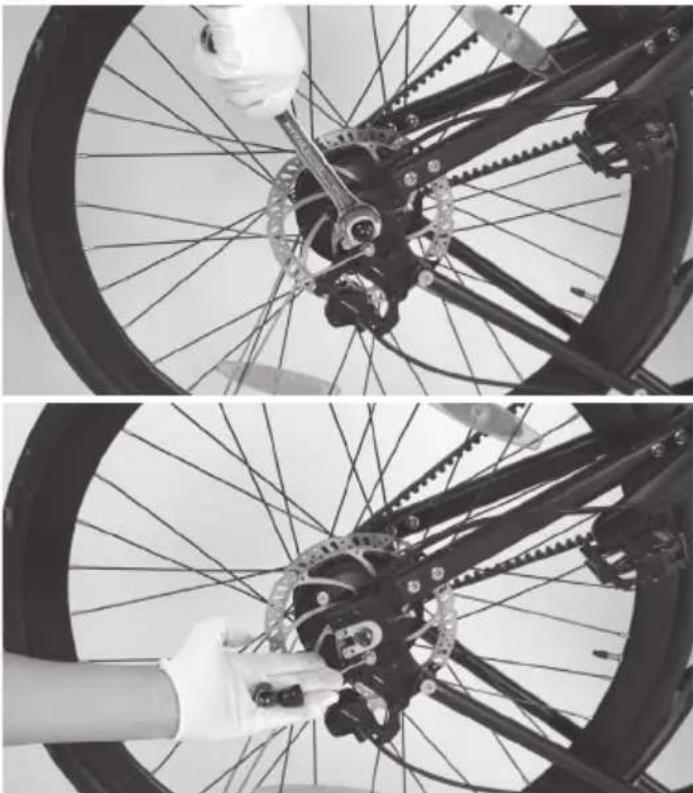
natural_image
Two-panel black-and-white photo showing a bicycle wheel assembly and hand positioning on its wheel (no text or symbols visible)Popustite vijke na R-brtvama pomoću imbus ključa od 3 mm. Zatim ih uklonite.
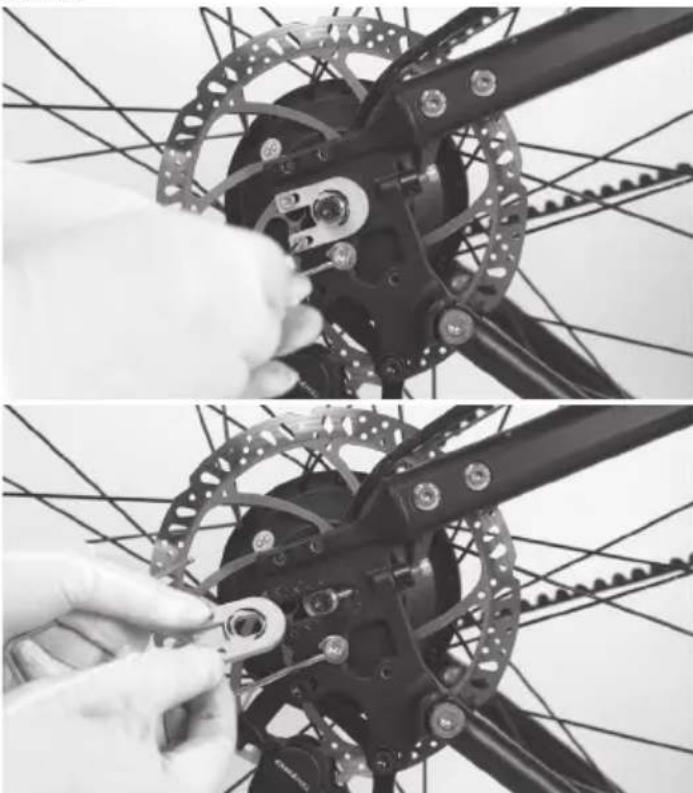
natural_image
Close-up of hands assembling a bicycle wheel assembly with gear links (no text or symbols visible)Popustite vijke na ispustu pomoću imbus ključa od 4 mm. Zatim ih uklonite.
natural_image
Four-panel black-and-white photo showing bicycle wheel assembly and maintenance, including hand tool and hands adjusting components (no text or symbols visible)Korak 12: Uklonite stražnji blatobran
a. Otpustite vijke na ispustu pomoću imbus ključa od 4 mm.
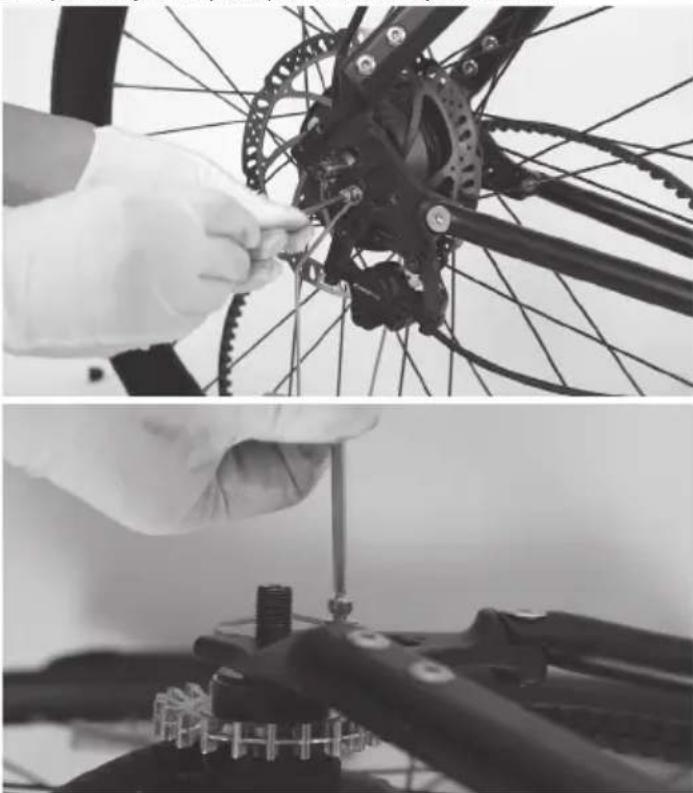
natural_image
Two black-and-white photos showing hands assembling a bicycle wheel and a mechanical assembly (no visible text or symbols)b. Koristite imbus ključ od 5 mm za guranje vijka. Otpustite maticu s druge strane pomoću otvorenog ključa od 10 mm.
c. Zatim uklonite stražnji blatobran.

natural_image
Close-up of hands using a bicycle gear to adjust the frame (no text or symbols visible)Korak 13: Uklonite poklopac kabela, stražnji kočioni kliješta i stražnji kotač
a. Popustite 2x Philips vijka, zatim uklonite poklopac kabela.
b. Otpustite vijke pomoću imbus ključa od 5 mm. Zatim uklonite stražnji kočioni kliješta.
c. Zatim možete lako ukloniti cijeli stražnji kotač s bicikla.

natural_image
Close-up of a bicycle wheel assembly with a hand adjusting the component (no visible text or symbols)
natural_image
Close-up of hands adjusting a bicycle wheel rim with a tool (no visible text or symbols)
natural_image
Person adjusting a bicycle wheel on a white surface, no visible text or symbolsKorak 14: Uklonite pedale
Popustite pedale s ključem otvorenog kraja od 15 mm. Zatim ih uklonite.
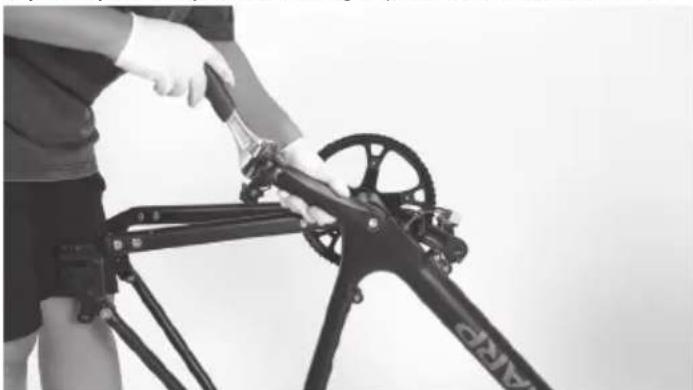
natural_image
Person assembling a bicycle frame with a tool, no visible text or symbols
natural_image
Person assembling a bicycle frame with visible wheels and structural components (no text or symbols)Korak 15: Uklonite ispust
a. Koristite imbus ključ od 4 mm za guranje vijaka na stražnjoj vilici.
Otpustite vijke s druge strane pomoću drugog imbus ključa od 4 mm.
b. Otpustite vijke na nosaču sjedala pomoću imbus ključa od 5 mm.
c. Zatim uklonite ispust.
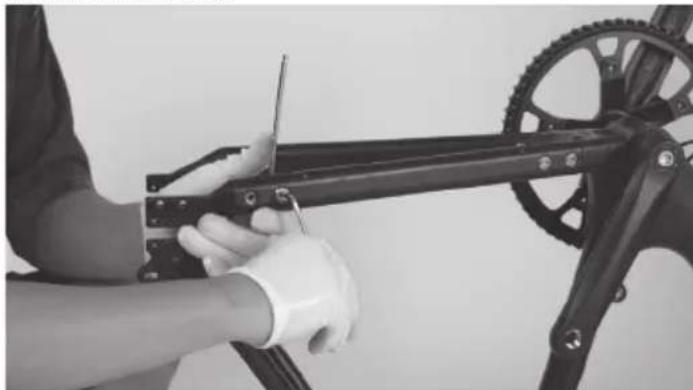
natural_image
Close-up of a person using a bicycle frame with a tool, no visible text or symbols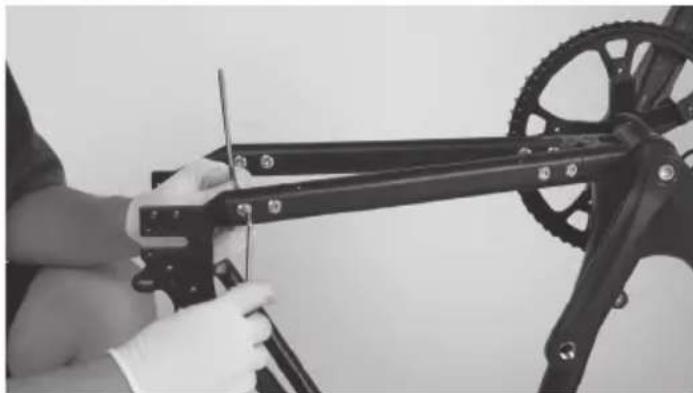
natural_image
Person assembling a bicycle frame with a tool, no visible text or symbols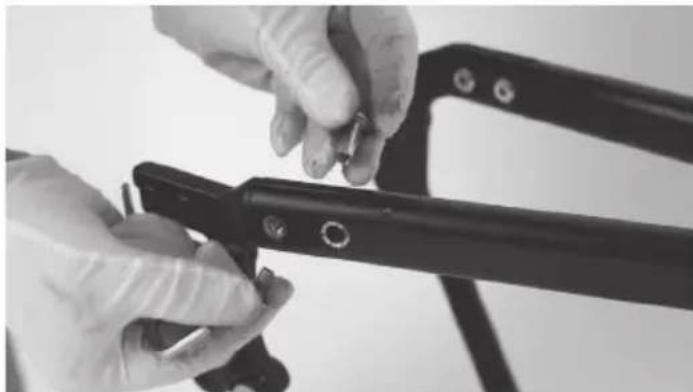
natural_image
Close-up of hands using a tool to adjust or install a black metal bracket (no visible text or symbols)
natural_image
Close-up of hands using a mechanical clamp or bracket to adjust a cable (no visible text or symbols)
natural_image
Close-up of a black bicycle frame structure with visible gears and brackets (no text or symbols)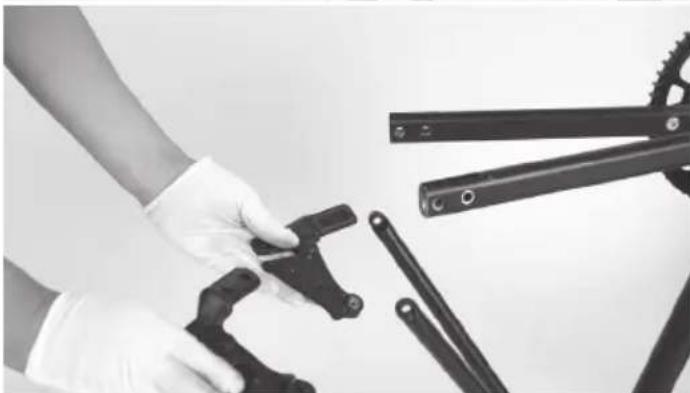
natural_image
Close-up of hands in gloves handling mechanical tools including crimping and bracketing (no visible text or symbols)Zatim uklonite pojas.
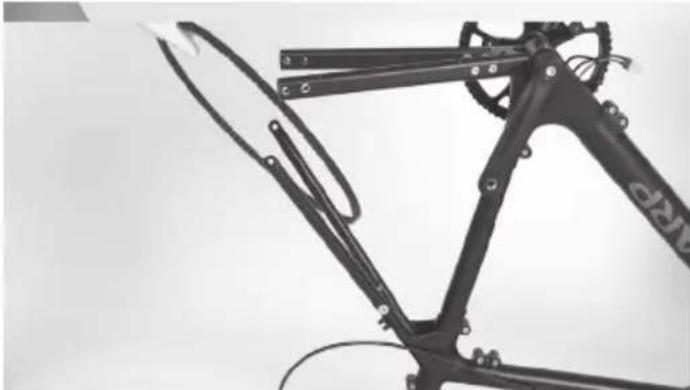
natural_image
Close-up of a bicycle frame structure with visible joints and brackets (no text or symbols)Korak 16: Uklonite lančanike i sjedala
Ponovite radnju. Zatim uklonite lančanike i sjedala.

natural_image
Three-panel black-and-white photo showing a person using a bicycle-mounted device, demonstrating step-by-step assembly (no text or symbols visible)Korak 17: Uklonite stup sjedala
natural_image
Person using a Sharp stationary bike on a white background (no text or symbols visible)
natural_image
Person using a Sharp bicycle on a stationary platform (no visible text or symbols)Korak 18: Rastavite okvir
Otpustite sve vijke na prednjem trokutu okvira pomoću imbus ključa od 5 mm.
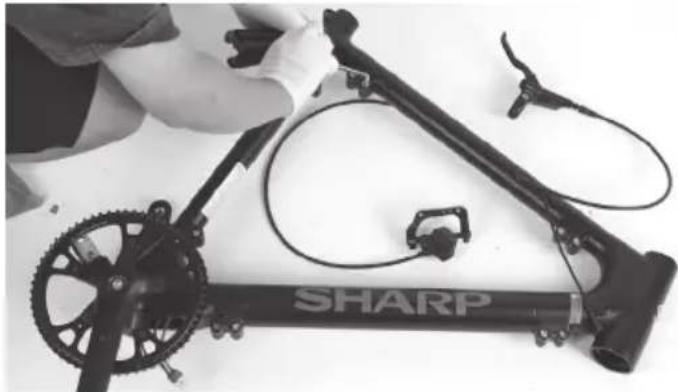
natural_image
Black-and-white photo of a bicycle brake system with a hand adjusting the wheel (no visible text or symbols)Zatim iskopčajte kabel baterije i kasnije ga lagano izvucite iz rupe.
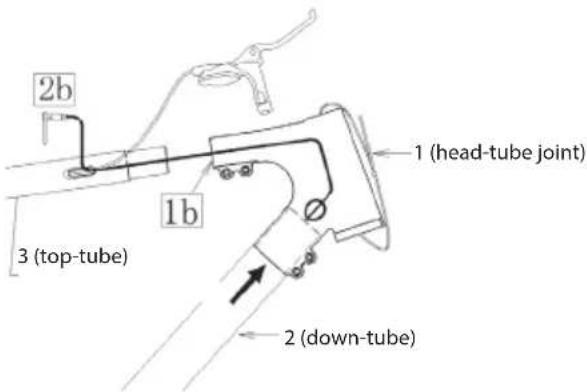
Rastavite okvir u sljedećem slijedu.
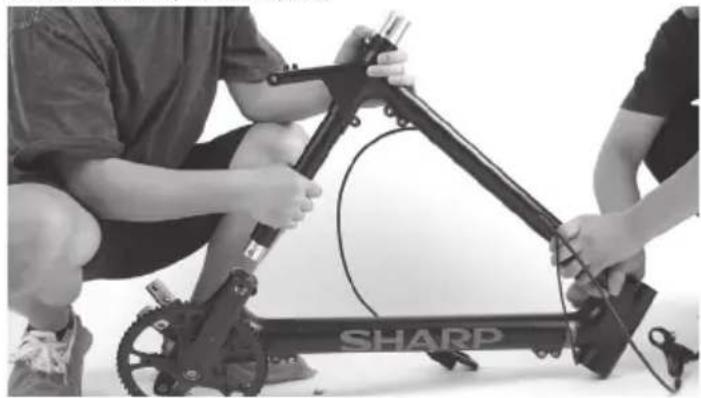
natural_image
Person assembling a Sharp bicycle frame with visible wiring and mechanical components (no text or symbols)
natural_image
Two people assembling a bicycle frame with visible gears and components (no text or symbols)
natural_image
Person using a handheld device with a mechanical scale nearby (no visible text or symbols)
natural_image
Person assembling a mechanical device with tools and cables on a white surface (no visible text or symbols)
natural_image
Person kneeling with a handheld device labeled 'SHARP' attached to a cylindrical device (no visible text or symbols on the device itself)
natural_image
Person kneeling on a bench with a mechanical device and two cylindrical components, no visible text or symbolsBaterija je skrivena unutar donje cijevi. Obje strane cijevi imaju vrući topivi ljepilo za pričvršćivanje baterije i kabela.
Zadatak završen!

natural_image
Assorted bicycle components including bicycles, shakers, and tools arranged on a white surface (no text or symbols visible)Stežeći momenti:
| Dio Okretni moment Nm | |
| Okvir u obliku trokuta 20 Nm | |
| Parna gornja / bočna strana 6 Nm/12 Nm | |
| Parni stezaljka 8 Nm | |
| Sjedalo ostaje 20 Nm | |
| Lanac ostaje 10 Nm | |
| Vijak pedale 40 Nm | |
| Podesite vijke R-brtve 6 Nm | |
| Zadnji poklopci kotača 45 Nm | |
| Servisna vrata 5 Nm | |
| Kočioni kaliper 8 Nm | |
| Poklopac drške 3 Nm | |
| Kočničke poluge 8 Nm | |
| L/R pedale 18 Nm | |
| Blatobrani 5 Nm |
Ponovni sastav:

Zaključajte vijke prema sekvenci A-B-C-D-a-b-c-d
Održavanje
www.sharpconsumer.com/RS08EB/#down
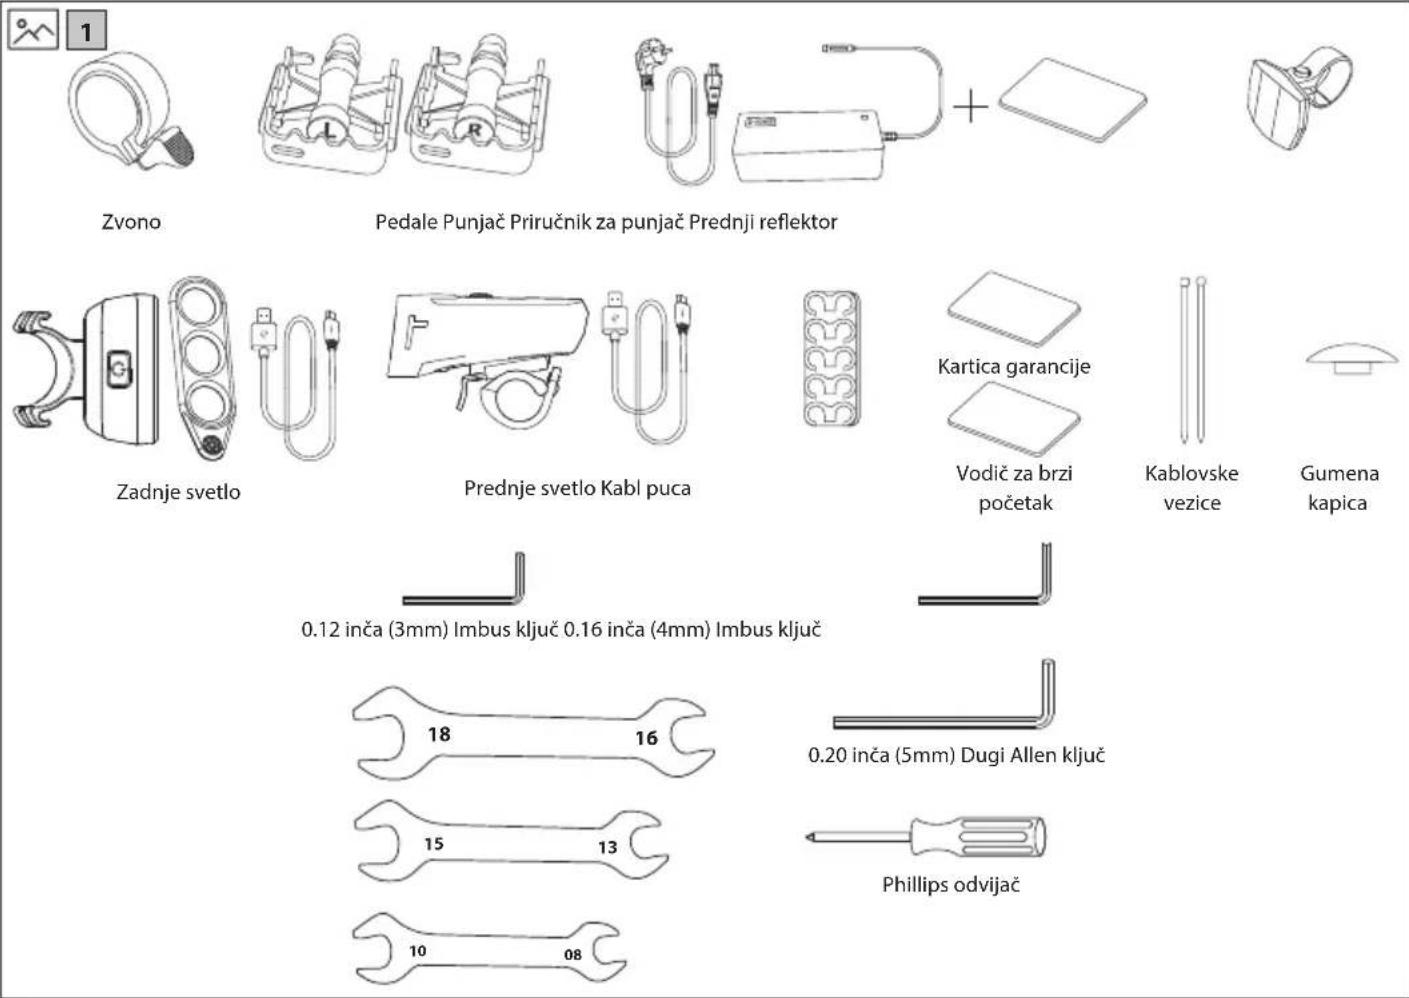


natural_image
Line drawing of a shared bicycle with a compact box and wheels (no text or symbols)natural_image
Two circular icons showing a sneaker and a helmet, no text or symbols present.
www.sharpconsumer.com/contact/

www.sharpconsumer.com/support/
Baterije
- Ne izlažite baterije visokim temperaturama i ne stavljajte ih na lokacije gde temperatura može brzo da se poveća, npr. blizu vatre ili na direktnoj sunčevoj svetlosti.
- Ne izlažite baterije preteranoj toploti, ne bacajte ih u vatru, ne demontirajte ih i ne pokušavajte da ponovo napunite baterije koje se ne pune; mogu da procure ili eksplodiraju.
- Uklanjanje baterije u vatru ili mehaničko zdrobnjavanje ili sečenje baterije može da dovede do eksplozije.
- Ako ostavite bateriju na ekstremno visokoj temperaturi u okolini to može da dovede do eksplozije ili curenja zapaljive tečnosti ili gasa.
- Baterija koja je izložena izuzetno niskom vazdušnom pritisku može da dovede do eksplozije ili curenja zapaljive tečnosti ili gasa.
- OPREZ: Rizik od eksplozije ili oštećenja opreme, ako se koriste baterije pogrešnog tipa.
- Nikada ne koristite različite baterije zajedno niti mešajte nove i stare.
- Ne koristite bilo koje baterije osim onih koje su navedene.
Uklanjanje ove opreme i baterija
- Ne uklanjajte ovaj proizvod ili njegove baterije kao nesortiran opštinski otpad. Vratite ga na obeleženu tačku prikupljanja za recikliranje WEEE u skladu sa lokalnim zakonom. Kada to uradite, to će pomoći da se očuvaju resursi i zaštiti okolina.
- Većina EU zemalja reguliše uklanjanje baterija zakonom. Simbol za recikliranje pojavljuje se na električnoj opremi, pakovanju i baterijama da bi podsetio korisnike da uklone pravilno ove stavke. Od korisnika se traži da koriste postojeće povratne objekte za korišćenu opremu i baterije. Kontaktirajte svog prodavca ili lokalnu vlast za više informacija.
Uklanjanje baterije radi odlaganja
- Baterija je sakrivena unutar donje cevi. Obe strane cevi imaju vrući topivi lepak za fiksiranje baterije i kabla. Da biste uklonili bateriju, molimo vas da uklonite sve šrafove na ramu bicikla i uklonite donju cev.
Izjava CE:
- Ovim Sharp Consumer Electronics Poland sp. z o.o. izjavljuje da je ovaj uređaj u skladu sa bitnim zahtevima i drugim važnim regulativima RED direktive 2014/53/EU.
- Ceo tekst EU deklaracije o poštovanju dostupan je prateći linkwww.sharpconsumer.com a zatim ulazeći u odeljak za preuzimanje vašeg modela i birajući "CE Izjave".

www.sharpconsumer.com/documents-of-conformity/


Šta se nalazi u kutiji:
Brzi vodič za pokretanje (ovaj dokument)
Delovi E-bicikla
• 1 × Ram i zadnji točak
- 1 × Prednji točak
- 1 × Osovina kroz
- 1 × Volan
• 1 × Sedlo i sedalna cev
- 2 × Fender
- 1 × Stalak za bicikl
Kutija sa dodacima
- 5 × Prekidi kabla
- 1 × punjač
- 1 × Ručna operacija
- 3 × Imbus ključ
• 3 × Ključ otvorenog kraja
• 1 × Phillips odvijač
Kutija sa dodacima
(Pogledajte 1na stranici 1)
Delovi bicikla
(Pogledajte 2na stranici 1)
Broj rama bicikla
Broj rama bicikla može se naći utisnut na donjem nosaču, kako je prikazano na [slici]. To je jedinstveni identifikator vašeg e-bicikla. Kada vam bicikl bude ukraden, upravo je serijski broj ono što vam daje najveću šansu da ga povratite. Bilo bi dobro da ga zapišete negde ili napravite fotografiju.
natural_image
Technical line drawing of a mechanical device with no visible text or symbolsSlika 1-1 Slika 1-2
NAPOMENA:
Proverite da je obrtni moment šrafa na vrhu oko 4-6 N·m.
Proverite da je obrtni moment onih sa strane otprilike 10-12 N·m.
a. Otpustite četiri šrafa na steznoj glavi volana u smeru suprotnom od smera kazaljke na satu koristeći Allen ključ od 5 mm, zatim uklonite šrafove i prednji poklopac, kako je prikazano na [Slici 1-3] i [1-4].
natural_image
Technical line drawing of a robotic arm with articulated joints and base mount (no text or symbols)Slika 1-3 Slika 1-4
b. Postavite upravljač u centar stezne spojnice kada je korisnik na sedištu i proverite da li je pravilno orijentisan. Kontrolne dugmiće na levoj strani. Ponovo postavite prednji poklopac i čvrsto zategnite šrafove, ali ne potpuno.
natural_image
Line drawing of a bicycle with visible wheel, spokes, and handle (no text or symbols)c. Pomerajte upravljač levo i desno da ga centrirate; rotirajte ga malo tako da su poluge kočnica nagnute nadole. Zatim, postepeno zatezite šrafove u sekvenci A-B-C-D, kako je prikazano na [Slici 1-5].

natural_image
Line drawing of a mechanical device with lever and base (no text or symbols)
Slika 1-5
NAPOMENA: Proverite da li je obrtni moment vijaka ABCD oko 6-8 N·m.
KORAK 2: Upravljanje kablom
a. Povežite kabl senzora za prikaz, kao što je prikazano na [Slici 2-1] i [Slici 2-2].
b. Dodajte stezaljke za kablove za upravljanje kablovima.

natural_image
Line drawing of two cylindrical electronic components with internal structure, shown from different angles (no text or symbols)Slika 2-1 Slika 2-2
KORAK 3: Instalirajte sedište
a. Otpustite šrafove [F] i [J] u suprotnom smeru od kazaljke na satu pomoću Allen ključa od 5 mm, ubacite sedište u okvir, kako je prikazano na [Slici 3-1].
b. Podesite visinu sedla prema svojoj odgovarajućoj visini. Ne prelazite maksimalnu visinu sedla, kako je prikazano na [Slici 3-2]. Zatim zategnite šrafove [F] i [J].
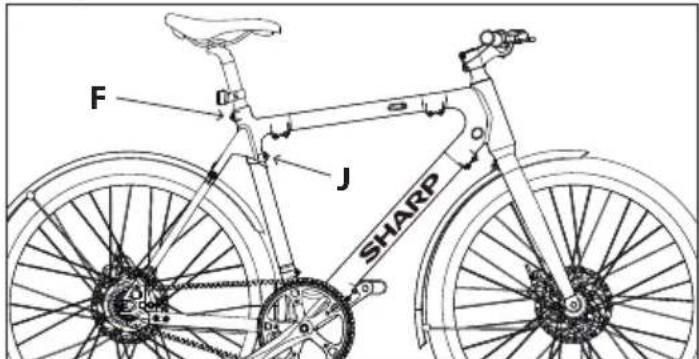
Slika 3-1
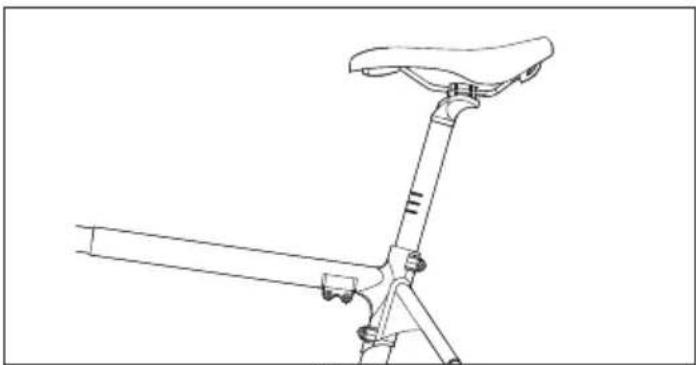
natural_image
Line drawing of a bicycle leg with seat and support bracket (no text or symbols)Slika 3-2
NAPOMENA: Proverite da li je obrtni moment šrafova [F] i [J] oko 20 N·m
KORAK 4: Instalirajte prednji točak
natural_image
Technical line drawing of two cylindrical mechanical components with a wrench and clamp (no text or symbols)Slika 4-1 Slika 4-2

Slika 4-3

natural_image
Technical line drawing of a mechanical assembly with intersecting rods and a fork, no text or symbols presentSlika 4-4 Slika 4-5
NAPOMENE:
Ako nema napetosti prilikom zaključavanja poluge za brzo otpuštanje, moraćete je dodatno zategnuti.
natural_image
Line drawing of a bicycle wheel assembly with no text or symbolsSlika 5-1

natural_image
Technical line drawing of a bicycle wheel with visible spokes and hub (no text or symbols)Slika 5-2

natural_image
Technical line drawing of a bicycle wheel and suspension bracket (no text or symbols)Slika 5-3
KORAK 6: Instalirajte zadnji blatobran
a. Koristite ključ otvorenog kraja od 10 mm da biste olabavili maticu šrafa blatobrana na spoju sedišne cevi, a zatim uklonite šraf i maticu.
b. Nakon što poravnate blatobran sa rupom za šraf, ponovo zategnite montažne šrafove da ga pričvrstite na spoj sedišne cevi, kako je prikazano na [Slici 6-1].
c. Nakon potvrde da je prednji branik poravnan sa rupom za šraf, koristite Allen ključ od 5 mm da biste gurnuli šraf i otvoreni ključ od 10 mm da biste ponovo zategnuli maticu na drugoj strani na obrtni moment od 4-6 N·m. Ne zaboravite razmake.
d. Nakon što ste pričvrstili gornji nosač, koristite Allen ključ od 4 mm da biste uklonili 2 šrafa na ispustu. Zatim, poravnajte noge blatobrana sa rupama za instalaciju, kao što je prikazano na [Slikama 6-2] i [6-3], a zatim ponovo zategnite šrafove.
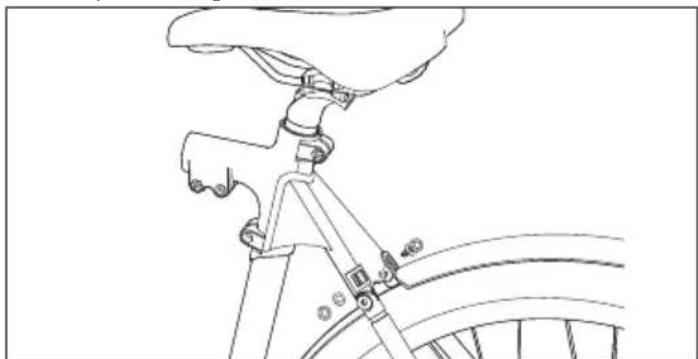
natural_image
Line drawing of a bicycle seat and wheel assembly (no text or symbols)Slika 6-1

natural_image
Mechanical diagram of a bicycle wheel assembly with gear and hub, showing internal components and a close-up inset (no text or labels)Slika 6-2

natural_image
Mechanical assembly diagram showing a wheel with gear and a close-up inset of a component detail (no text or symbols)Slika 6-3

natural_image
Technical line drawing of a bicycle wheel assembly with labeled components (no text or symbols present)Slika 8-1
KORAK 7: Povežite kabl
Okrenite svoj bicikl naopako.
a. Otpustite četiri šrafa na poklopcu pored donjeg nosača u suprotnom smeru od kazaljke na satu koristeći Allen ključ od 3 mm, zatim uklonite šrafove i poklopac, kako je prikazano na [Slika 7-1].
b. Povežite kabl između baterije i kontrolera, kako je prikazano na [Slici 7-2].
c. Vratite poklopac i ponovo zategnite šrafove.
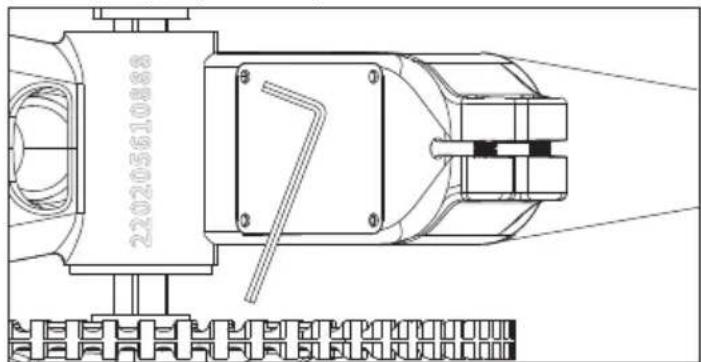
Slika 7-1

Slika 7-2
KORAK 8: Instalirajte pedale
natural_image
Technical line drawing of two mechanical components with no visible text or symbolsNAPOMENE:
natural_image
Technical line drawing of mechanical components including a crimping tool, a cylindrical component, and a clamp bracket (no text or symbols)Slika 9-1

natural_image
Line drawing of a bicycle seat assembly with a close-up inset showing a small device (no text or symbols)Slika 9-2

natural_image
Technical line drawing of a mechanical device with lever arms and handle (no text or symbols)Slika 9-3
KORAK 10: Instalirajte oslonac za bicikl
a. Otpustite šrafove i podloške, a zatim ih uklonite iz ispusta, kako je prikazano na [Slici 10-1].
b. Koristite Allen ključ od 5 mm za montiranje oslonca na ispust, a zatim ponovo zategnite šrafove na obrtni moment od 10-12 N·m.
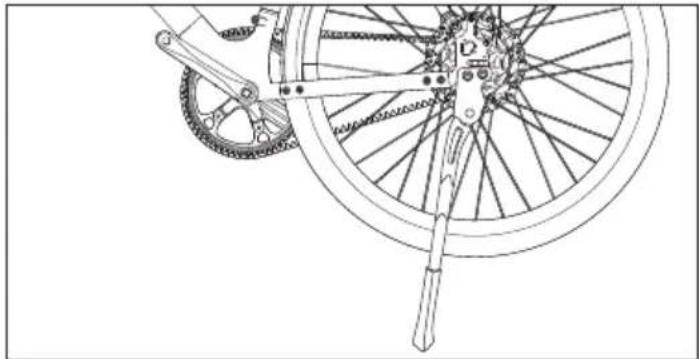
natural_image
Technical line drawing of a bicycle wheel assembly with visible gears and hub (no text or symbols)Slika 10-1
Pumpanje biciklističke gume
Da biste napumpali gume, potrebno vam je:
Biciklistička pumpa kompatibilna sa Presta ventilom ili
Adapter za Presta ventil (ako vaša pumpa nema ugrađenu Presta glavu ventila) nije uključen.
Kako napumpati gumu
a. Ako vaša pumpa ima dvostruku glavu (odgovara i Presta i Schrader ventilima), proverite da li je podešena za Presta ventile. Ako vaša pumpa nije kompatibilna sa Presta, biće vam potreban adapter za Presta ventil. Priključite adapter na glavu pumpe.
b. Na biciklu, odvrnite mali zavrtanj na vrhu Presta ventila okretanjem u suprotnom smeru od kazaljke na satu. To omogućava otvaranje ventila i protok vazduha u gumu.
c. Pritisnite Presta ventil da biste ispustili malu količinu vazduha. Ovo pomaže da se osigura da ventil nije zaglavljen i omogućava pumpi da se pravilno uključi.
d. Pritisnite pumpu na Presta ventil što je moguće dalje.
e. Ako vaša pumpa ima polugu, prebacite je nadole da biste osigurali glavu pumpe na Presta ventil. Ovo stvara hermetički zatvorenu vezu.
f. Počnite da pumpate vazduh u gumu.
g. Kada dostignete željeni pritisak u gumama, odvojite glavu pumpe otpuštanjem poluge ili je odvrćući.
h. Zavrnite malu maticu na vrhu Presta ventila u smeru kazaljke na satu da biste je zatvorili.
Kako koristiti E-bicikl
Potpuno napunite bateriju pre prve upotrebe.
Kako napuniti
a. Otvorite gumenu kapicu i priključite punjač u priključak za punjenje e-bicikla [Slika 11-1]. Proverite da li je priključak za punjač u datom smeru, kao što je prikazano na [Slici 11-2].
b. Utikač punjača uključite u zidnu utičnicu za naizmeničnu struju.
c. Kada je povezan na punjač baterije, baterija će početi da se puni i indikator punjenja na punjaču će postati crven.
d. Nakon što se punjenje završi, indikator punjenja će postati zelen. Uklonite punjač baterije kada je potpuno napunjena.
e. Zatvorite gumenu kapu nakon punjenja.
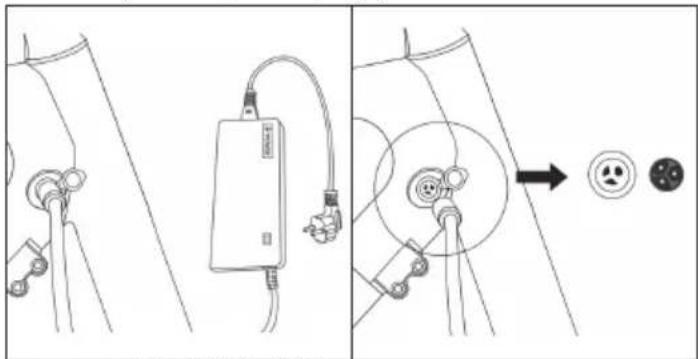
Slika 11-1 Slika 11-2
Bluetooth device connected
Battery Indicator
Real Time speed
Toggle Riding Info
PAS level
Interfejs displeja
Podrazumevano, na displeju se prikazuje stvarna brzina (km/h), pojedinačna kilometraža (km) i ukupna kilometraža (km). Kratko pritisnite dugme MODE da prebacite.
Kako podesiti
Pritisnite UP ili Down da prebacite i pritisnite dugme Mode da sačuvate. Kada završite, pritisnite dugme Mode da biste se vratili na glavni meni podešavanja. Ako nema akcije u roku od jednog minuta, automatski će izaći iz stranice za podešavanje.
Povežite se sa SHARP Life aplikacijom

natural_image
Technical line drawing of a bicycle seat assembly with two views (top and side), no text or symbols present.SHARP Life aplikacija

https://www.sharpconsumer.com/sharp-life-app
Uputstva za rastavljanje
KORAK 1: Uklonite upravljač
a. Odspojite kablove displeja i pomoćnog prekidača.
b. Uklonite četiri šrafa na prednjoj pokrivci u suprotnom smeru od kazaljke na satu koristeći Allen ključ od 5 mm.
c. Uklonite poklopac.
d. Zatim uklonite upravljač.
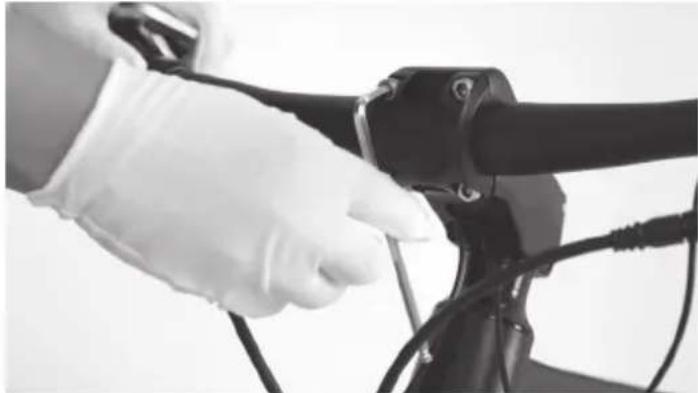
natural_image
Close-up of a gloved hand adjusting a bicycle brake lever (no text or symbols visible)
natural_image
Person in gloves adjusting a bicycle frame with cable (no visible text or symbols)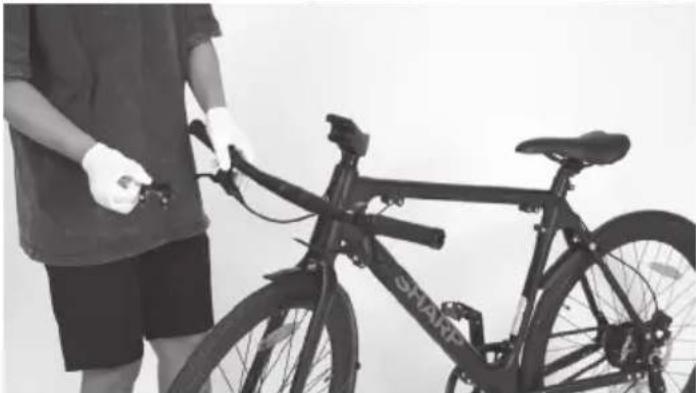
natural_image
Person holding a shared bicycle with visible 'SHAK' branding, standing beside it (no text or symbols on the bicycle itself)Korak 2: Uklonite stablo i prikaz
a. Uklonite gumenu kapu sa vrha stabla.
b. Otpustite dva šrafa sa strane stabla i dugi šraf na vrhu stabla pomoću Allen ključa od 5 mm.
c. Zatim uklonite stabiljiku i prikažite.
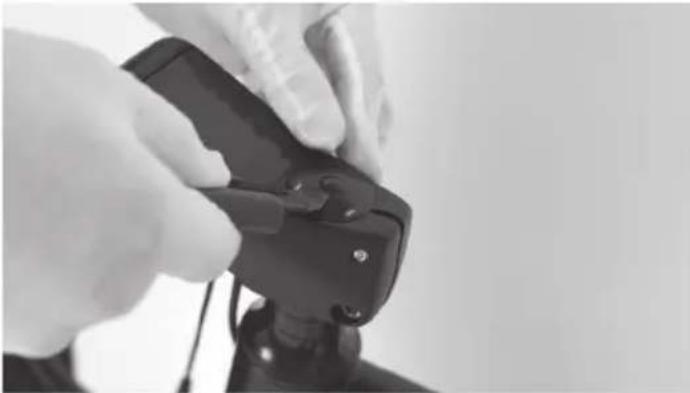
natural_image
Close-up of hands using a handheld device to adjust or install a black mechanical component (no visible text or symbols)
natural_image
Close-up of a hand holding a black mechanical component with a white clip, against a plain background (no text or symbols visible)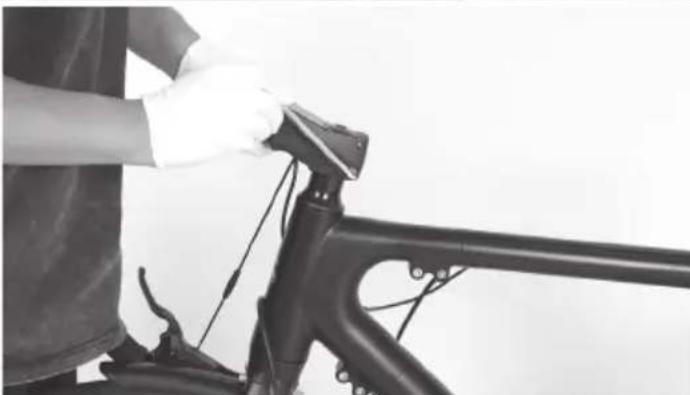
natural_image
Person wearing gloves handling a bicycle frame with cable (no visible text or symbols)
natural_image
Close-up of hands using a tool to adjust or install a black bicycle component (no visible text or symbols)Korak 3: Uklonite prednju viljušku i prednji točak Uklonite prednju viljušku i prednji točak.

natural_image
Person standing beside a bicycle with visible frame and wheels (no text or symbols)Korak 4: Uklonite dršku
a. Otpustite šrafove na dršci pomoću Allen ključa od 3 mm. b. Zatim uklonite dršku.

natural_image
Person repairing a shared bicycle with visible wheel rim and headrest (no text or symbols)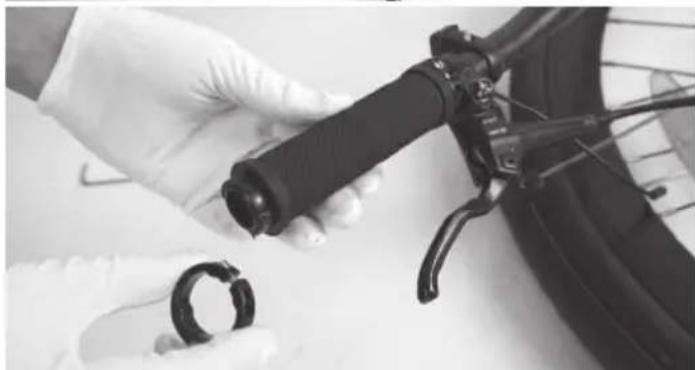
natural_image
Close-up of gloved hands holding a black mechanical component, with no visible text or symbols
natural_image
Close-up of a hand using a tool to adjust the bicycle wheel (no text or symbols visible)
natural_image
Close-up of hands holding a black bicycle brake lever with wires (no visible text or symbols)Korak 5: Uklonite polugu za kočnicu
a. Otpustite šrafove na ručici kočnice pomoću Allen ključa od 5 mm. b. Zatim uklonite polugu kočnice.

natural_image
Close-up of a bicycle tire being adjusted for a cable, with a hand partially visible (no text or symbols)
natural_image
Close-up of a bicycle tire being adjusted by a hand, showing the blade and wheel (no text or symbols visible)
natural_image
Person cleaning a bicycle tire with a hand using a tool (no visible text or symbols)Korak 6: Uklonite pomoćni prekidač
a. Otpustite šraf na kočionoj poluzi pomoću Allen ključa od 5 mm. b. Zatim uklonite pomoćni prekidač pomoću Allen ključa od 2,5 mm.

natural_image
Person in gloves handling a black cable or pipe component, no visible text or symbols
natural_image
Close-up of hands holding a black cable or hose next to a tire, with no visible text or symbols.Korak 7: Uklonite polugu kočnice sa druge strane
a. Ponovite korak 4 i 5 na drugoj strani volana. b. I zatim uklonite volan sa bicikla.
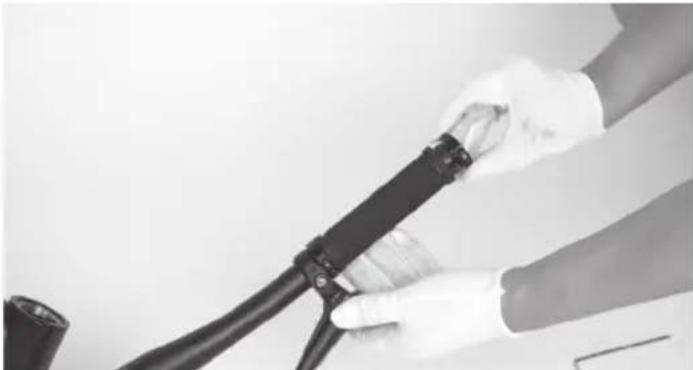
natural_image
Close-up of hands holding a black cable with a white plastic clip, no visible text or symbols
natural_image
Close-up of hands holding a black cable with small components nearby (no visible text or symbols)Korak 8: Uklonite poklopac pored donje nosača
a. Okrenite bicikl naopako.
b. Otpustite četiri šrafa na poklopcu pored donjeg nosača u smeru suprotnom od smera kazaljke na satu koristeći Allen ključ od 3 mm.
c. Zatim uklonite poklopac.

natural_image
Close-up of a person adjusting a bicycle wheel assembly (no visible text or symbols)
natural_image
Close-up of hands adjusting a bicycle wheel assembly (no visible text or symbols)Korak 9: Odspojite kablove
Odspojite kabl između baterije i motora.
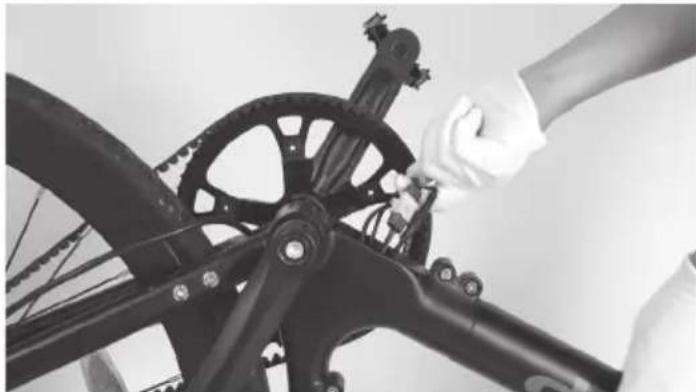
natural_image
Close-up of hands adjusting a bicycle wheel assembly (no visible text or symbols)
natural_image
Close-up of hands adjusting a bicycle wheel component (no visible text or symbols)
natural_image
Close-up of hands adjusting a bicycle wheel and gear mechanism (no visible text or symbols)Korak 10: Uklonite oslonac za nogu
a. Otpustite šrafove na osloncu koristeći Allen ključ od 5 mm. b. Zatim uklonite oslonac.

natural_image
Close-up of a person adjusting a bicycle wheel with visible gears and chains (no text or symbols)
natural_image
Close-up of hands assembling a bicycle wheel with visible gears and blades (no text or symbols)
natural_image
Close-up of a bicycle wheel with visible mechanical components and a hand adjusting the wheel (no text or symbols)Korak 11: Uklonite kaiš
natural_image
Two-panel black-and-white photo showing a bicycle wheel assembly and hand positioning, no text or symbols visible.Otpustite šrafove na R-gumicama pomoću Allen ključa od 3 mm. Zatim ih uklonite.

natural_image
Close-up of hands assembling a bicycle wheel assembly with metal rings and chains (no text or symbols visible)Otpustite šrafove na ispustu koristeći Allen ključ od 4 mm. Zatim ih uklonite.
natural_image
Four-panel black-and-white photo showing bicycle wheel assembly and maintenance, with no visible text or symbols.Korak 12: Uklonite zadnji blatobran
a. Otpustite šrafove na ispustu koristeći Allen ključ od 4 mm.
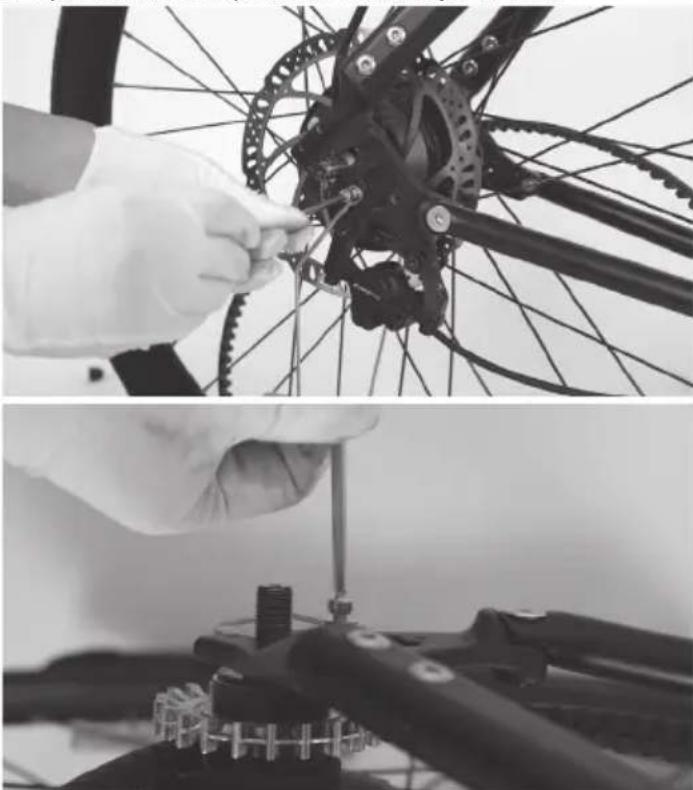
natural_image
Two black-and-white photos showing hands assembling a bicycle wheel and a mechanical component (no visible text or symbols)b. Koristite Allen ključ od 5 mm da biste gurnuli šraf. Otpustite maticu sa druge strane pomoću otvorenog ključa od 10 mm.
c. Zatim uklonite zadnji blatobran.
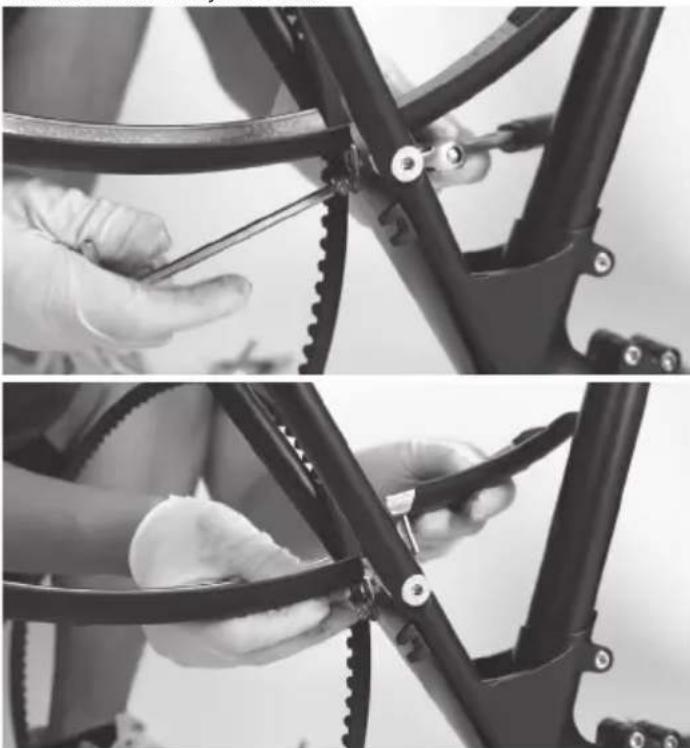
natural_image
Close-up of hands using a bicycle gear to trim a black frame, no text or symbols visibleKorak 13: Skinite poklopac kabla, zadnju kočnicu i zadnji točak
a. Otpustite 2x Philips šrafove, a zatim uklonite poklopac kabla.
b. Otpustite šrafove pomoću Allen ključa od 5 mm. Zatim uklonite zadnju kočnicu.
c. Zatim možete lako ukloniti čitav zadnji točak sa bicikla.
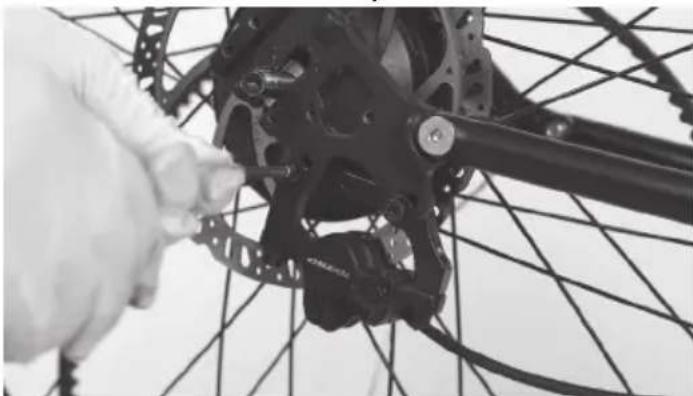
natural_image
Close-up of a bicycle wheel assembly with a hand adjusting the component (no visible text or symbols)
natural_image
Close-up of hands assembling a bicycle wheel frame with a mechanical component (no visible text or symbols)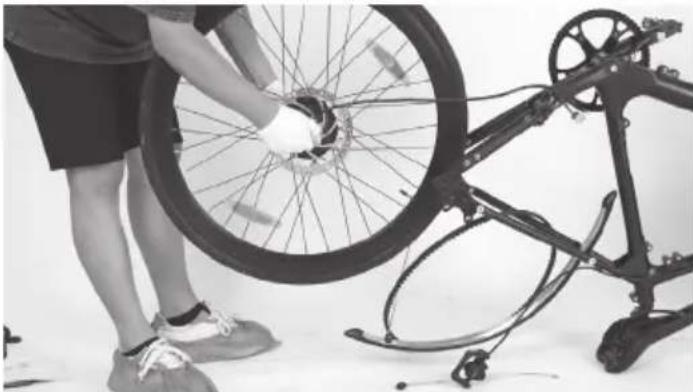
natural_image
Person adjusting a bicycle tire with hands, no visible text or symbolsKorak 14: Uklonite pedale
Otpustite pedale pomoću otvorenog ključa od 15 mm. Zatim ih uklonite.
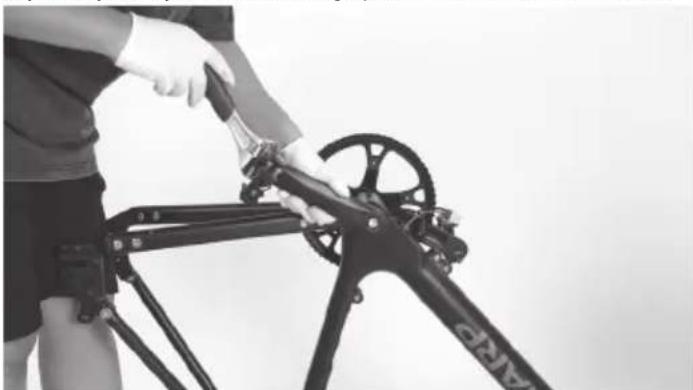
natural_image
Person assembling a bicycle frame with a tool, no visible text or symbols
natural_image
Person assembling a bicycle frame with visible gears and branding (no text or symbols)Korak 15: Uklonite dropout
a. Koristite Allen ključ od 4 mm da biste gurnuli šrafove na lančaniku.
Otpustite šrafove na drugoj strani sa drugim Allen ključem od 4 mm.
b. Otpustite šrafove na nosaču sedišta pomoću Allen ključa od 5 mm.
c. Zatim uklonite dropout.

natural_image
Person using a bicycle-mounted tool to adjust the frame (no visible text or symbols)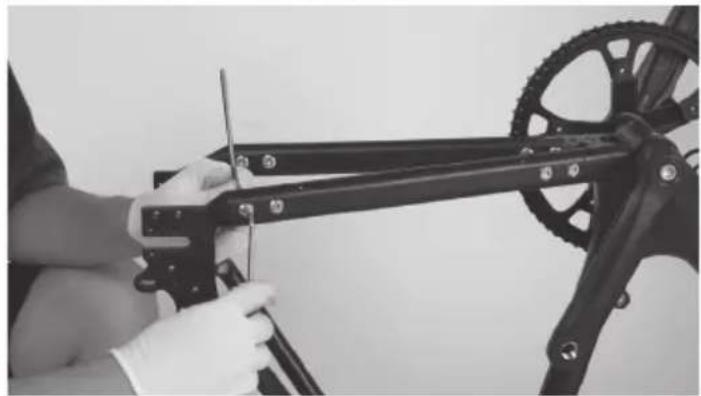
natural_image
Person assembling a black bicycle frame with a tool, no visible text or symbols
natural_image
Close-up of hands installing or adjusting a black metal bracket component (no visible text or symbols)
natural_image
Close-up of hands using crimping tools to adjust a mechanical bracket (no visible text or symbols)
natural_image
Close-up of a black bicycle frame structure with visible gears and mounting brackets (no text or symbols)
natural_image
Close-up of hands in gloves handling mechanical tools and crimping components (no visible text or symbols)Zatim uklonite kaiš.
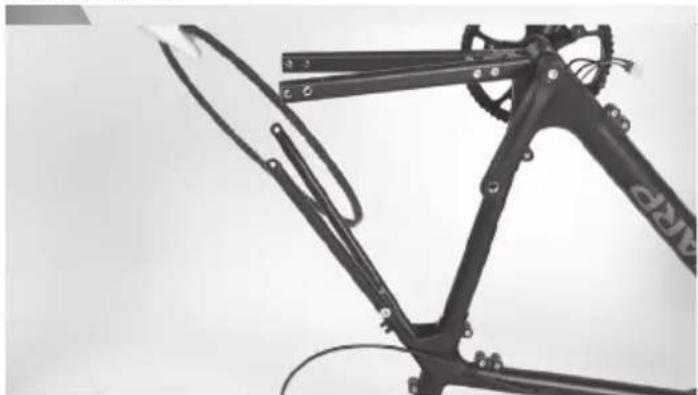
natural_image
Close-up of a bicycle frame structure with visible joints and brackets (no text or symbols)Korak 16: Uklonite lančanike i sedišne šipke
Ponovite radnju. A zatim uklonite lančanike i sedišne šipke.
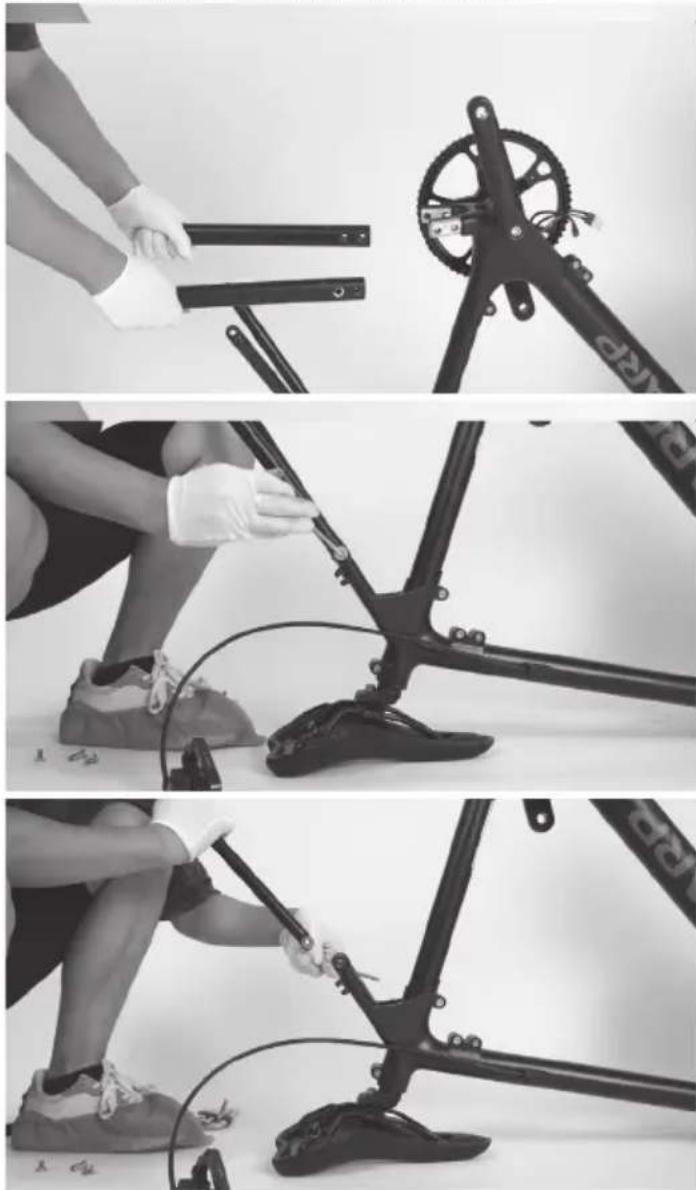
natural_image
Three-panel black-and-white photo sequence showing a person using a bicycle brake system, demonstrating step-by-step assembly (no text or symbols visible)Korak 17: Uklonite sedišni stub
Otpustite šraf na spoju sedišne cevi pomoću Allen ključa od 5 mm. Zatim uklonite šipku sedla.

natural_image
Person using a shared stationary bike with a headrest, no visible text or symbols on the bike or background
natural_image
Person using a Sharp bicycle on a stationary platform (no visible text or symbols)Korak 18: Rastavite ram
Otpustite sve šrafove na prednjem trouglu okvira pomoću Allen ključa od 5 mm.

natural_image
Black-and-white photo of a bicycle frame with a hand adjusting it, no visible text or symbols on the main subject.Uklonite gumenu stezaljku sa gornje cevi.

natural_image
Person assembling a Sharp bicycle frame with visible wiring and components (no text or symbols)
natural_image
Two people assembling a bicycle frame with visible gears and components (no text or symbols)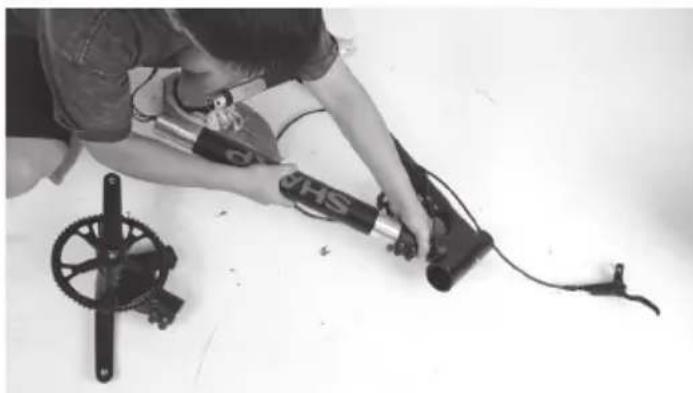
natural_image
Person assembling mechanical components including a wheel and sensor device (no visible text or symbols)
natural_image
Person assembling a mechanical device with tools and cables on a white surface (no visible text or symbols)
natural_image
Person kneeling with a handheld device labeled 'SHARP' on a flat surface (no other text or symbols visible)
natural_image
Person kneeling on a bench with a device and two cylindrical equipment (no visible text or symbols)Baterija je sakrivena unutar donje cevi. Obe strane cevi imaju topiv lepak za fiksiranje baterije i kabla.
Misija završena!

natural_image
Assorted bicycle components including bicycles, shakers, and tools arranged on a plain surface (no text or symbols visible)Obrtni momenti za zatezanje:
| Deo Obrtni moment Nm | |
| Trouglasti okvir 20 Nm | |
| Parna gornja / bočna strana 6 Nm/12 Nm | |
| Parna stezaljka 8 Nm | |
| Sedalni deo 20 Nm | |
| Lančanik ostaje 10 Nm | |
| Šraf za radilicu 40 Nm | |
| Podesite R-gasket belet šrafove 6 Nm | |
| Zadnje poklopce točka 45 Nm | |
| Servisna vrata 5 Nm | |
| Kočioni kliješta 8 Nm | |
| Krajnji poklopac drške 3 Nm | |
| Ručice kočnica 8 Nm | |
| L/D pedale 18 Nm | |
| Blatobrani 5 Nm |
Ponovni sklop:
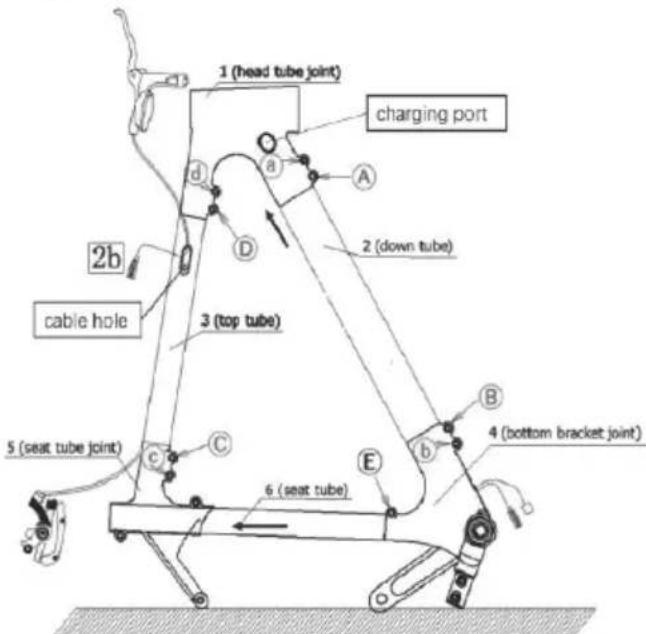
Zaključajte šrafove po sekvenci A-B-C-D-a-b-c-d
Održavanje
| Interval Pregledajte Servis Zamenite | |||
| Sedmično, 160-321km (100-200 mi) | Proverite hardver za pravilan obrtni moment. Proverite pogonski lanac da li je pravilno poravnan i funkcionalan (uključujući kaiš, slobodni točak, lančanik). Proverite ispravnost točka i tihi rad točka na (bez buke od žica) Proverite stanje rama za bilo kakva oštećenja. | Očistite ramu tako što ćete je obrisati vlažnom krpom. Koristite regulator(e) zatezanja za podešavanje kablova menjača/ kočnica ako je potrebno. | Zamenite sve komponente za koje naša podrška za proizvode ili sertifikovani pouzdani biciklistički mehaničar potvrdi da su oštećene do nepopravljivosti ili pokvarene. |
| Mesečno, 402-1207 km (250-750 km) | Proverite poravnanje kočionih pločica, nape- tost kočionog kabla. Proverite istezanje kaiša. Proverite kočione i menjačke kablove zbog korozije ili oštećenja. Proverite napetost žica. Proverite montažu dodataka (šrafovi za montažu nosača, hardver blatobrana i poravnanje). | Proverite obrtni moment pogona i pedale. Očistite kočione i menjačke kablove. Proverite i zategnite točkove ako otkrijete bilo kakve labave šipke. | Zamenite kočione i menjačke kablove ako je potrebno. Zamenite kočione pločice ako je potrebno. |
| Svakih 6 meseci, 1207-2011 km (750-1250 km) | Pregledajte pogonski sistem (remen, lančanik, slobodni točak). Pregledajte sve kablove i kućišta. | Preporučuje se standardni servis od strane sertifikovanog, ugled- nog mehaničara za bicikle. Podmažite donji nosač. | Zamenite kočione pločice. Zamenite gume ako je potrebno. Zamenite kablove i kućišta ako je potrebno. |
Ako koristite bicikl u izazovnim uslovima ili pređete više od 2.000 km/1.250 mi godišnje, skratite intervale inspekcije i obavite inspekciju u servisu za bicikle svakih 6 meseci.
Šrafovski spojevi
- Redovno proveravajte vozilo za labave veze sa šrafovima prema planu održavanja i zategnite labave šrafove sa dinamometričnim ključem.
- Ne vozite bicikl ako primetite da su se bilo koji vijci olabavili.
- Ako nemate potrebno znanje i neophodne alate, proverite labave spojeve šrafova kod profesionalca.
Okvir i viljuške
- Proverite ram i čvrstu viljušku za pukotine, deformacije ili promene boje.
- Ako je ram ili viljuška pukla, deformisana ili promenila boju, odmah kontaktirajte profesionalca.
- Ne koristite bicikl ako primetite bilo kakve pukotine, deformacije ili promene boje.
Sedlo
- Proverite da li možete da okrenete sedište.
- Ako možete da okrenete sedište, zategnite stezaljku za šipku sedišta. Poštujte primenljive obrtni momente.
- Proverite da li možete pomeriti sedište horizontalno u smeru kretanja ili suprotnom smeru.
- Ako možete pomeriti sedište, prilagodite stezaljku za sedište.
Točkovi
- Proverite da li prednji ili zadnji točak mogu da se pomeraju bočno i da li se matice točka pomeraju.
- Ako se točkovi matice pomeraju, angažujte profesionalca da proveri spojeve šrafova.
- Ako se brzo-oslobađajuća osovina pomera, podesite osovinu.
www.sharpconsumer.com/RS08EB/#down
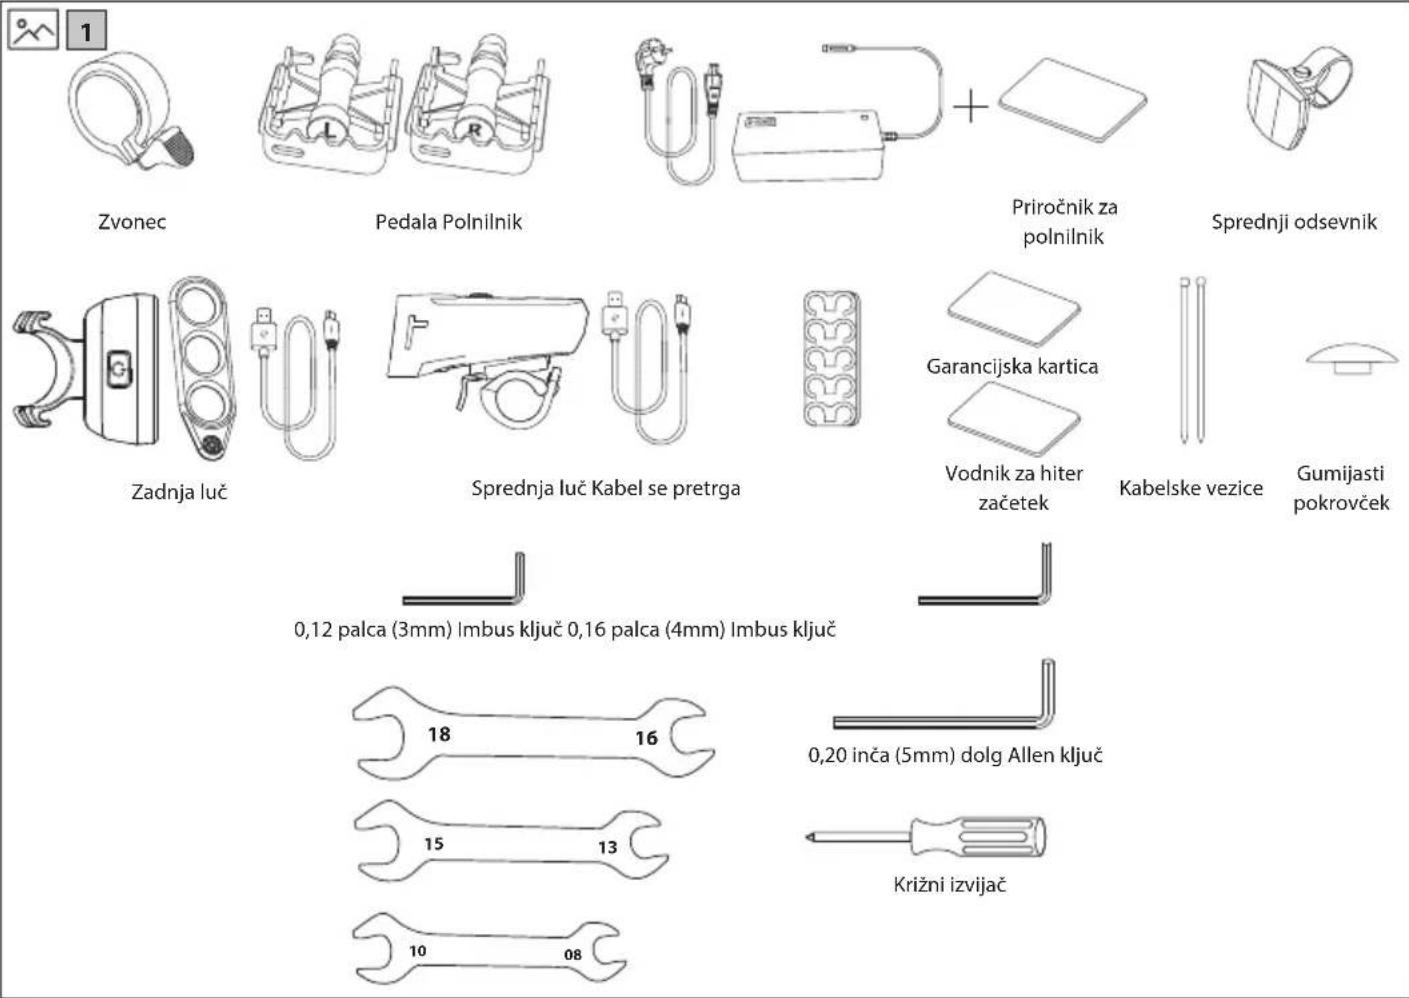
natural_image
Line drawing of a shared bicycle with a compact box and wheels (no text or symbols)
www.sharpconsumer.com/contact/

www.sharpconsumer.com/support/

www.sharpconsumer.com/documents-of-conformity/
Kaj je v škatli:
natural_image
Technical line drawing of a mechanical device with no visible text or symbolsSestavljanje E-kolesa
KORAK 1: Namestite in prilagodite krmilo
Slika 1-1 Slika 1-2
OPOMBA:
Prepričajte se, da je navor vijaka na vrhu približno 4-6 N·m. Prepričajte se, da je navor tistih na strani približno 10-12 N·m.
natural_image
Technical line drawing of a robotic arm with articulated joints and control knobs (no text or symbols)Slika 1-3 Slika 1-4
natural_image
Line drawing of a bicycle with visible wheel, spokes, and handle (no text or symbols)c. Pritisnite krmilo levo in desno, da ga centrirate; rahlo ga zavrtite, tako da so ročice zavor usmerjene navzdol. Nato postopoma zategnite vijake v zaporedju A-B-C-D, kot je prikazano na [Slika 1-5].
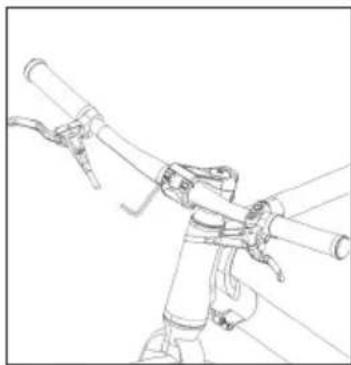
natural_image
Line drawing of a mechanical device with articulated arms and cylindrical body (no text or symbols)
Slika 1-5
OPOMBA: Poskrbite, da je navor vijakov ABCD približno 6-8 N·m.
KORAK 2: Upravljanje s kabli

natural_image
Technical line drawing of two cylindrical electronic components with internal connectors (no text or symbols)Slika 2-1 Slika 2-2
Slika 3-1

natural_image
Line drawing of a bicycle leg with seat and support bracket (no text or symbols)Slika 3-2
OPOMBA: Poskrbite, da je navor vijakov [F] in [J] približno 20 N·m
natural_image
Technical line drawing of two cylindrical mechanical components with a wrench and clamp (no text or symbols)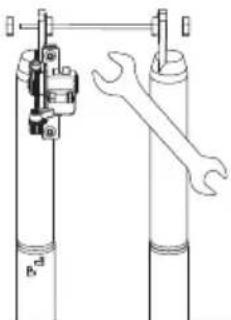
natural_image
Technical line drawing of two cylindrical mechanical components with a wrench, no text or symbols present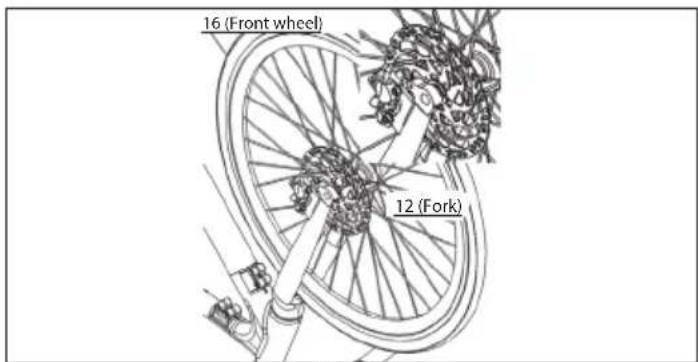
Slika 4-3

natural_image
Technical line drawing of a mechanical assembly with intersecting rods and a labeled fork (no text or symbols beyond label)Slika 4-4 Slika 4-5
OPOMBE:
natural_image
Line drawing of a bicycle wheel with visible frame and hub (no text or symbols)Slika 5-1

natural_image
Technical line drawing of a bicycle wheel with visible spokes and hub (no text or symbols)Slika 5-2

natural_image
Line drawing of a bicycle wheel and suspension bracket (no text or symbols)Slika 5-3
KORAK 6: Namestite zadnji blatnik
natural_image
Line drawing of a bicycle's front wheel and seat assembly (no text or symbols)Slika 6-1

natural_image
Mechanical diagram of a bicycle wheel with gear and mechanical components, showing no text or symbolsSlika 6-2

natural_image
Mechanical assembly diagram showing a wheel with levers and gear components, no text or symbols presentSlika 6-3
KORAK 7: Povežite kabel
natural_image
Technical line drawing of a mechanical device with no visible text or symbolsSlika 7-1

Slika 7-2
KORAK 8: Namestite pedala
natural_image
Technical line drawing of two mechanical components with no visible text or symbols
natural_image
Mechanical gear assembly diagram showing wheel, shaft, and gear components (no text or labels)Slika 8-1
OPOMBE:
Preverite končni pokrovček na obeh pedalih, da prepoznate levi in desni pedal. Upoštevajte, da se desni pedal zategne v smeri urinega kazalca, medtem ko se levi pedal zategne v nasprotni smeri urinega kazalca. Poskrbite, da je navor 18 N·m.
natural_image
Technical line drawing of mechanical components including a tool, clamping bracket, and cylindrical housing (no text or symbols)Slika 9-1
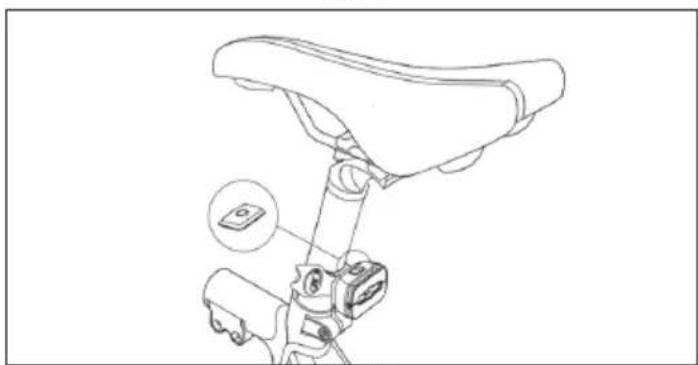
natural_image
Line drawing of a bicycle seat assembly with a close-up inset showing a small device (no text or symbols)Slika 9-2
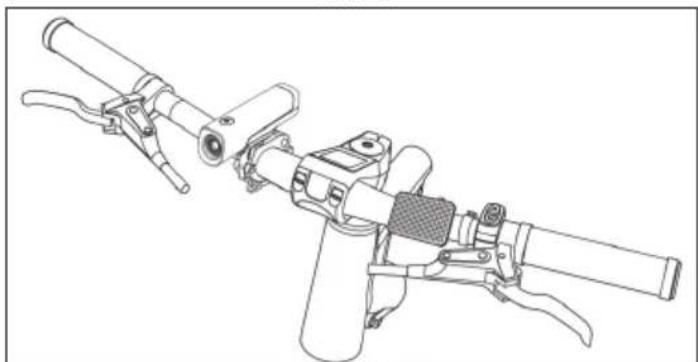
natural_image
Technical line drawing of a firearm assembly (no text or symbols)Slika 9-3
KORAK 10: Namestite oporo za kolo
natural_image
Technical line drawing of a bicycle wheel assembly with visible gears and levers (no text or symbols)Slika 10-1
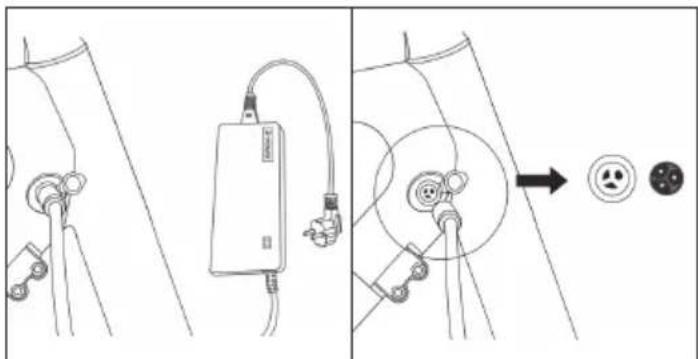
Slika 11-1 Slika 11-2
Vmesnik za zaslon
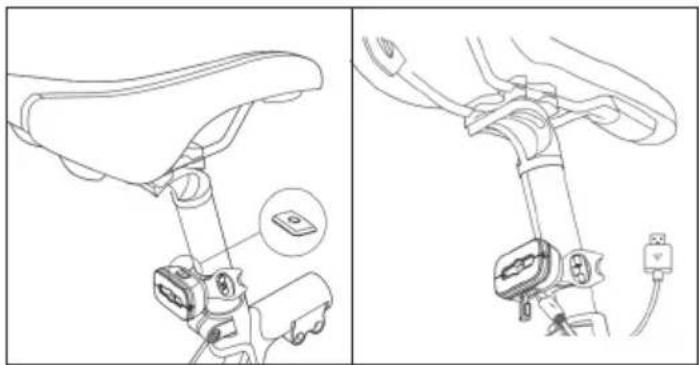
natural_image
Technical line drawing of a bicycle seatbelt mechanism, showing front and side views with no text or symbolsAplikacija SHARP Life

https://www.sharpconsumer.com/sharp-life-app
natural_image
Close-up of a gloved hand adjusting a bicycle brake lever (no text or symbols visible)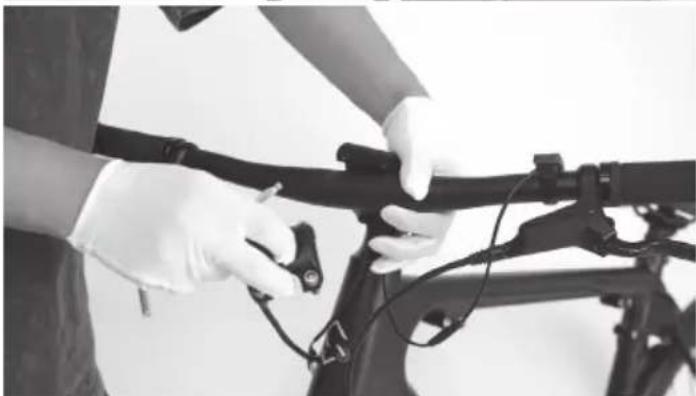
natural_image
Person in gloves adjusting a bicycle frame with cable (no visible text or symbols)
natural_image
Person holding a shared bicycle with visible 'SHARK' branding, standing beside it (no text or symbols on the bicycle itself)Korak 2: Odstranite steblo in prikaz
a. Odstranite gumijasti pokrovček na vrhu stebla.
b. Sprostite dva vijaka na strani stebla in dolg vijak na vrhu stebla z imbus ključem velikosti 5 mm.
c. Nato odstranite steblo in prikažite.
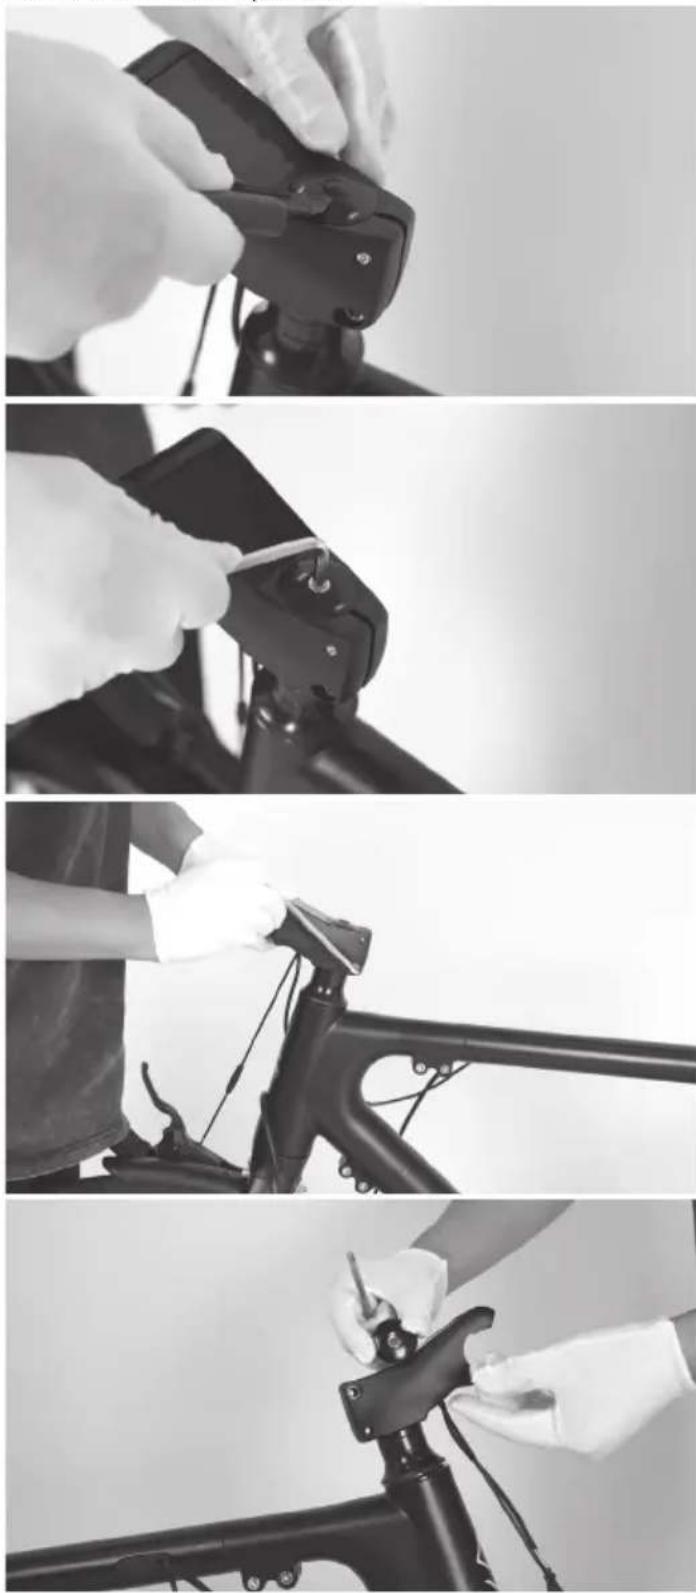
natural_image
Four-panel black-and-white photo showing a person using a bicycle to adjust the camera, with no visible text or symbols.Korak 3: Odstranite sprednjo vilico in sprednje kolo
Odstranite sprednjo vilico in sprednje kolo.

natural_image
Person standing beside a bicycle with visible frame and wheels (no text or symbols)Korak 4: Odstranite ročaj
natural_image
Person cleaning a bicycle frame with visible wheel rim and headrest (no text or symbols)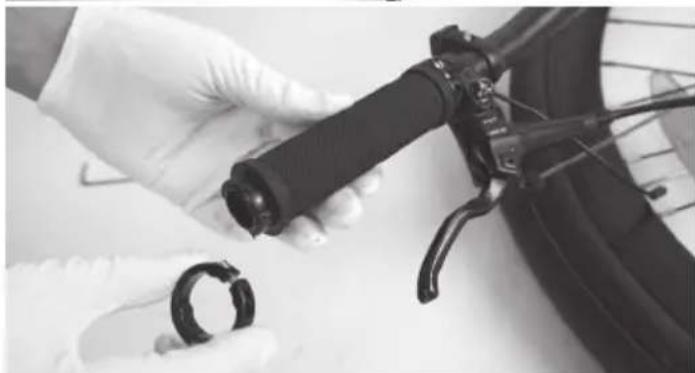
natural_image
Close-up of gloved hands holding a black plastic clip and a coiled black ring, next to a bicycle (no visible text or symbols)
natural_image
Close-up of hands using a tool to adjust the bicycle wheel (no text or symbols visible)
natural_image
Close-up of hands holding a black bicycle brake lever with wires (no visible text or symbols)Korak 5: Odstranite sprostilno ročico
natural_image
Close-up of a bicycle tire being adjusted by a tool, with no visible text or symbols
natural_image
Close-up of a bicycle tire being adjusted with a tool, no visible text or symbols
natural_image
Person cleaning a bicycle tire with a hand pump, no visible text or symbolsKorak 6: Odstranite pomožno stikalo
natural_image
Person in gloves handling a black cable or pipe with a clamp, no visible text or symbols
natural_image
Close-up of hands holding a black cable or hose next to a tire, with no visible text or symbols.Korak 7: Odstranite zavorno ročico na drugi strani
a. Ponovite korak 4 in 5 na drugi strani krmila. b. Nato odstranite krmilo s kolesa.
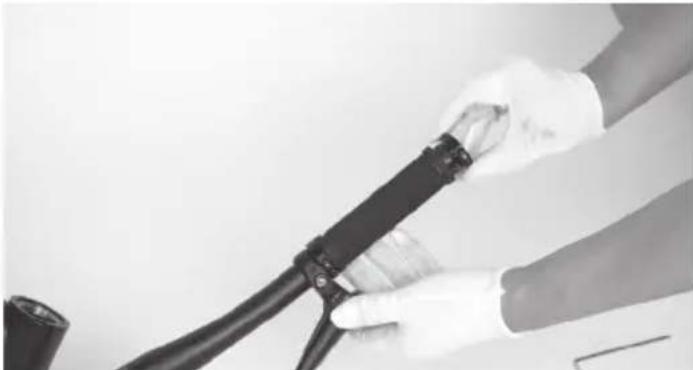
natural_image
Close-up of hands using a black cable or wire tool to handle a cable, no visible text or symbols
natural_image
Close-up of hands holding a black cable with a small inset image showing a connector (no text or symbols visible)Korak 8: Odstranite pokrov poleg spodnjega nosilca
natural_image
Close-up of a person adjusting a bicycle wheel, no visible text or symbols
natural_image
Close-up of hands assembling a bicycle wheel and chain (no visible text or symbols)Korak 9: Odklopite kable
Odklopite kabel med baterijo in motorjem.
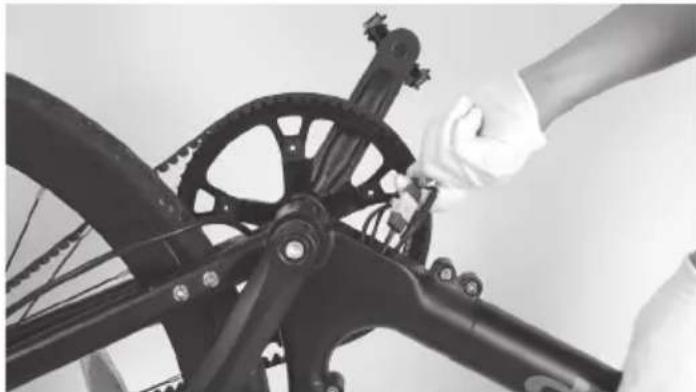
natural_image
Close-up of hands adjusting a bicycle wheel assembly (no visible text or symbols)
natural_image
Close-up of hands adjusting a bicycle wheel component (no visible text or symbols)
natural_image
Close-up of hands adjusting a bicycle wheel and gear mechanism (no visible text or symbols)Korak 10: Odstranite oporo za kolo
a. Sprostite vijake na oporniku s ključem Allen 5 mm.
b. Nato odstranite oporo.

natural_image
Close-up of a person adjusting bicycle wheel components (no visible text or symbols)
natural_image
Close-up of hands assembling a bicycle wheel with visible tracks and gear (no text or symbols)
natural_image
Close-up of a bicycle wheel with visible mechanical components and a hand adjusting the wheel (no text or symbols)Korak 11: Odstranite pas
natural_image
Two-panel black-and-white photo showing a bicycle wheel assembly and hand positioning on its wheel (no text or symbols visible)natural_image
Close-up of hands assembling a bicycle wheel assembly with visible gears and stator (no text or symbols)natural_image
Four-panel black-and-white photo showing bicycle wheel assembly and maintenance, including hand tooling and cleaning steps (no text or symbols visible)Korak 12: Odstranite zadnji blatnik
natural_image
Two black-and-white photos showing hands assembling a bicycle wheel and a mechanical component (no visible text or symbols)natural_image
Close-up of hands using a saw to cut the bicycle frame, showing mechanical components and tool path (no text or symbols visible)Korak 13: Odstranite pokrov kabla, zadnjo zavoro in zadnje kolo
natural_image
Three-panel black-and-white photo showing a bicycle wheel assembly: hand, close-up of gear, and close-up of hands working on the wheel (no text or symbols visible)Korak 14: Odstranite pedala
natural_image
Person assembling a bicycle frame with a tool, no visible text or symbols
natural_image
Person assembling a bicycle frame with visible wheels and structural components (no text or symbols)Korak 15: Odstranite dropout
natural_image
Person assembling a bicycle frame with a tool, no visible text or symbols
natural_image
Person using a mechanical bicycle frame to adjust the wheel (no visible text or symbols)
natural_image
Close-up of hands installing a black metal bracket component (no text or symbols visible)
natural_image
Close-up of hands adjusting a mechanical linkage component (no visible text or symbols)
natural_image
Close-up of a black bicycle frame structure with visible gears and brackets (no text or symbols)
natural_image
Close-up of hands in gloves handling mechanical tools and crimping gears (no text or symbols visible)natural_image
Close-up of a bicycle frame structure with visible joints and brackets (no text or symbols)Korak 16: Odstranite verižne in sedežne opore
Ponovite dejanje. Nato odstranite verižne in sedežne opore.

natural_image
Three-panel black-and-white photo showing a person using a bicycle-mounted device, demonstrating step-by-step assembly (no text or symbols visible)Korak 17: Odstranite sedežno oporo
natural_image
Person using a Sharp stationary bike on a white background (no text or symbols visible)
natural_image
Person using a Sharp bicycle on a stationary platform (no visible text or symbols)Korak 18: Razstavite okvir
natural_image
Black-and-white photo of a bicycle brake system with a hand adjusting it, no visible text or symbols on the main body.Odstranite gumijasto sponko z zgornje cevi.

natural_image
Person assembling a Sharp bicycle frame with visible wiring and components (no text or symbols)
natural_image
Two people assembling a bicycle frame with visible gears and wiring (no text or symbols)
natural_image
Person using a handheld device with a mechanical scale nearby (no visible text or symbols)
natural_image
Person assembling a mechanical device with tools and cables on a white surface (no visible text or symbols)
natural_image
Person kneeling on a floor using a sharp pressure tool, no visible text or symbols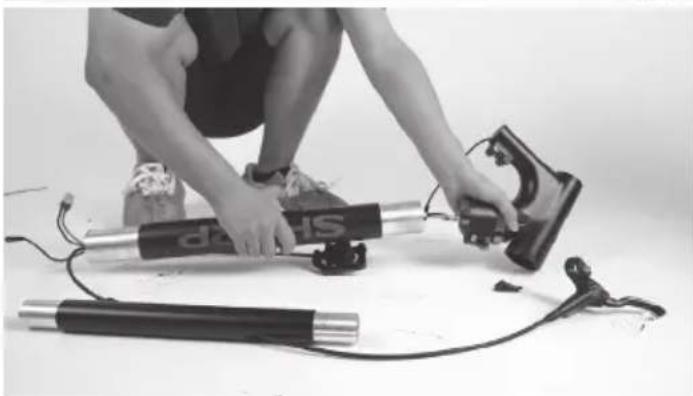
natural_image
Person kneeling on a bench with a mechanical device and two cylindrical components, no visible text or symbolsnatural_image
Assorted bicycle components including bicycles, shakers, and tools arranged on a white surface (no text or symbols visible)Navori za zategovanje:
| Del Navor Nm | |
| Triangularni okvir 20 Nm | |
| Parna zgornja / stranska 6 Nm/12 Nm | |
| Parna sponka 8 Nm | |
| Sedež ostane 20 Nm | |
| Verižnik 10 Nm | |
| Vijak za gonilko 40 Nm | |
| Prilagodite vijake za R-tesnilo 6 Nm | |
| Zadnji pokrovčki koles 45 Nm | |
| Servisna vrata 5 Nm | |
| Zavorni čeljust 8 Nm | |
| Končni pokrovček ročajev 3 Nm | |
| Zavorne ročice 8 Nm | |
| L/D pedala 18 Nm | |
| Odbijači 5 Nm |
Ponovna sestava:

Zaklenite vijake po vrstnem redu A-B-C-D-a-b-c-d
Vzdrževanje
www.sharpconsumer.com/RS08EB/#down
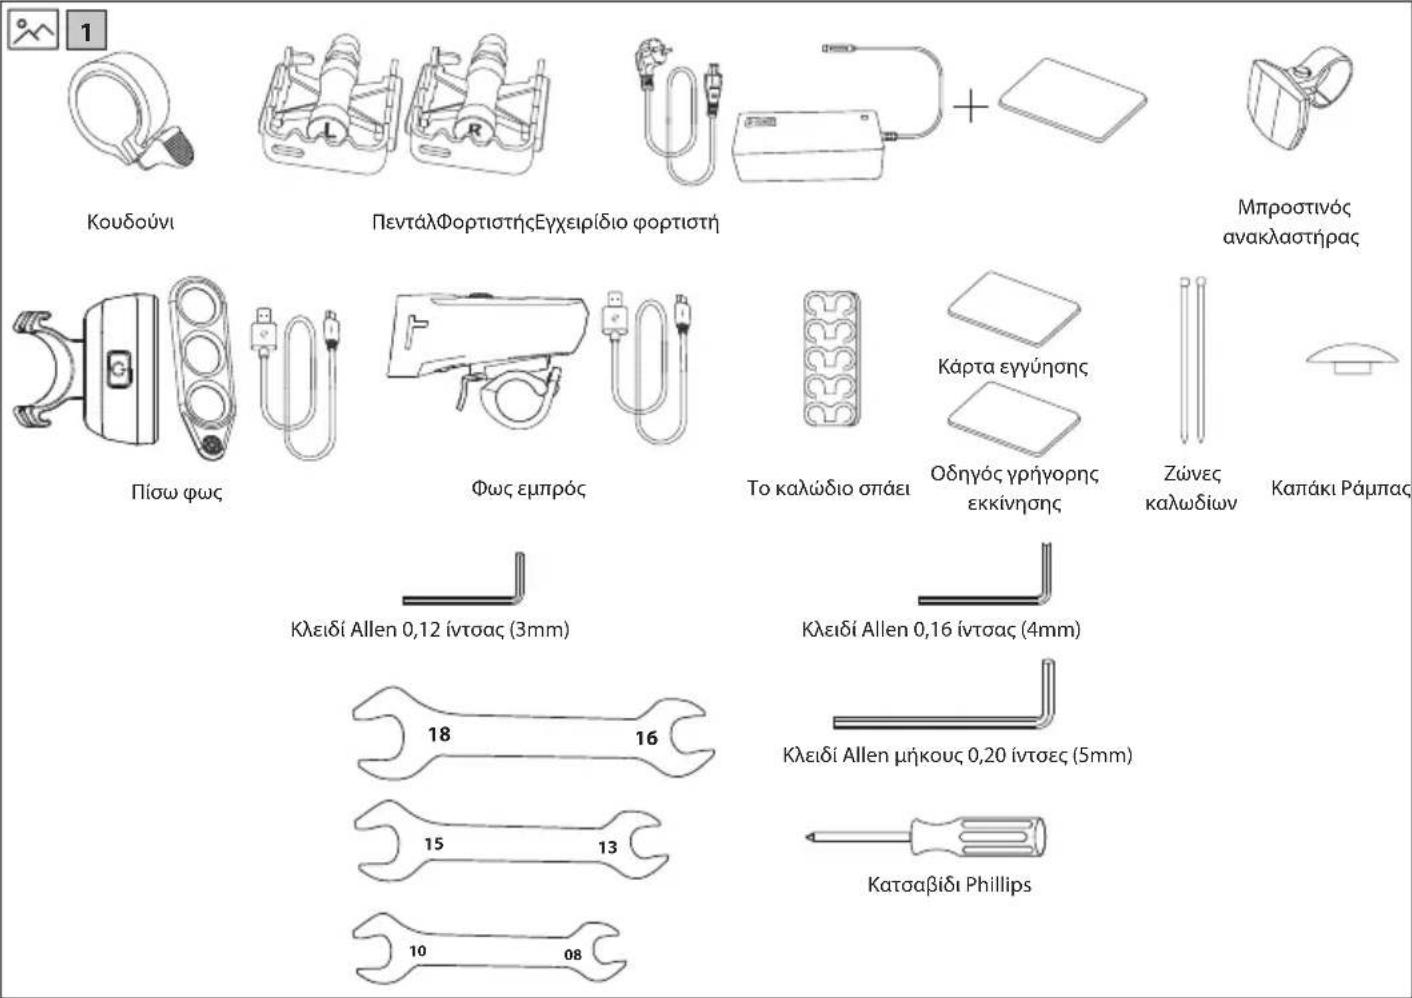
natural_image
Line drawing of a shared bicycle with a compact box and wheels (no text or symbols)
www.sharpconsumer.com/contact/

www.sharpconsumer.com/support/

www.sharpconsumer.com/documents-of-conformity/
natural_image
Technical line drawing of a mechanical device with no visible text or symbolsΣχήμα 1-1 Σχήμα 1-2
ΣΗΜΕΙΩΣΗ:
natural_image
Technical line drawing of a robotic arm with articulated joints and a handle (no text or symbols)Σχήμα 1-3 Σχήμα 1-4
natural_image
Line drawing of a bicycle with front wheel, rear wheel, and side-mounted lever (no text or symbols)natural_image
Line drawing of a mechanical device with lever and handle (no text or symbols)
Σχήμα 1-5

natural_image
Two cylindrical electronic components with internal wiring, shown from different angles (no text or symbols)Σχήμα 2-1 Σχήμα 2-2
Σχήμα 3-1
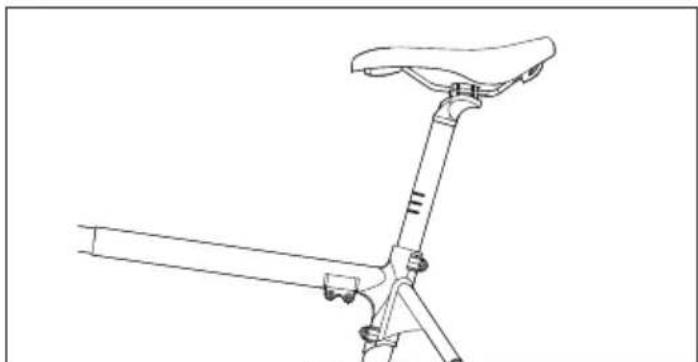
natural_image
Line drawing of a bicycle leg with seat and support bracket (no text or symbols)Σχήμα 3-2
Σχήμα 4-3

natural_image
Technical line drawing of a mechanical assembly with intersecting rods and a fork, no text or symbols presentΣχήμα 4-4 Σχήμα 4-5
ΣΗΜΕΙΩΣΕΙΣ:
natural_image
Line drawing of a bicycle wheel and suspension mechanism (no text or symbols)Σχήμα 5-1
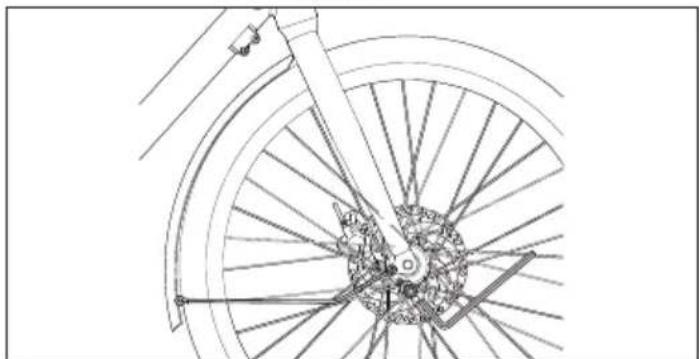
natural_image
Technical line drawing of a bicycle wheel and spokes assembly (no text or symbols)Σχήμα 5-2
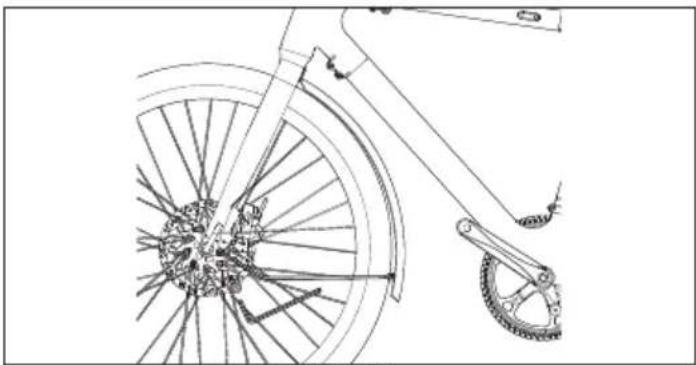
natural_image
Line drawing of a bicycle wheel and suspension bracket (no text or symbols)Σχήμα 5-3
natural_image
Line drawing of a bicycle's front wheel and seat assembly (no text or symbols)Σχήμα 6-1

natural_image
Technical diagram of a bicycle wheel assembly with mechanical components and a close-up inset showing a hand tool (no text or labels)Σχήμα 6-2

natural_image
Mechanical assembly diagram showing a wheel with gear and a close-up inset of a component detail (no text or symbols)Σχήμα 6-3

natural_image
Technical line drawing of two mechanical components with no visible text or symbolsnatural_image
Technical line drawing of a mechanical device with no visible text or symbolsΣχήμα 7-1
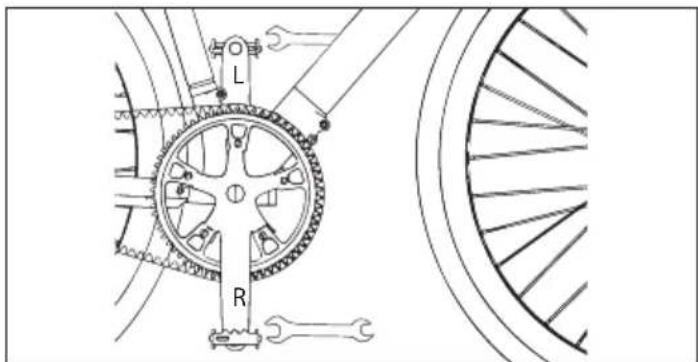
Σχήμα 8-1
ΣΗΜΕΙΩΣΕΙΣ:
natural_image
Technical line drawing of mechanical components including a tool, clamping bracket, and flashlight (no text or symbols)Σχήμα 9-1
natural_image
Line drawing of a bicycle seat assembly with a device inserted, showing no text or symbolsΣχήμα 9-2

natural_image
Technical line drawing of a firearm assembly (no text or symbols)Σχήμα 9-3
natural_image
Technical line drawing of a bicycle wheel assembly with visible gears and levers (no text or symbols)Σχήμα 10-1
Διεπαφή Οθόνης
https://www.sharpconsumer.com/sharp-life-app
natural_image
Person standing beside a bicycle with visible frame and wheels (no text or symbols)natural_image
Person assembling a shared bicycle with visible wheel rim and headrest (no text or symbols)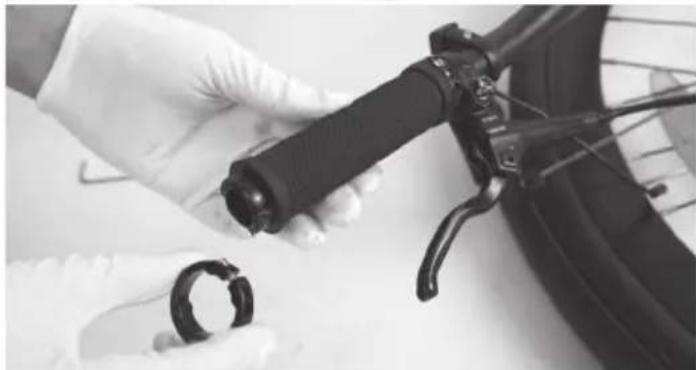
natural_image
Close-up of hands adjusting a bicycle brake lever and plastic ring component (no visible text or symbols)
natural_image
Close-up of hands using a tool to adjust or install a bicycle wheel (no visible text or symbols)
natural_image
Close-up of a hand holding a bicycle brake lever with wires (no visible text or symbols)natural_image
Close-up of a bicycle tire being adjusted by a tool, with no visible text or symbols
natural_image
Close-up of a bicycle tire being adjusted by a hand, no visible text or symbols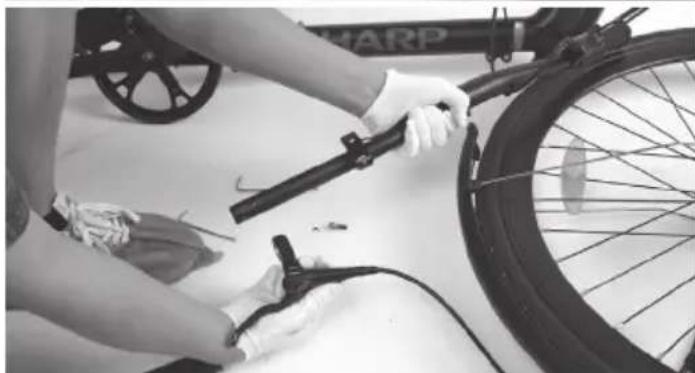
natural_image
Person cleaning a bicycle tire with a handbag and cable (no visible text or symbols)natural_image
Two black-and-white photos showing hands adjusting a bicycle wheel rim, no text or symbols visiblenatural_image
Two-panel black-and-white photo showing hands adjusting a cable or connector, with no visible text or symbols.natural_image
Two black-and-white photos showing hands adjusting a bicycle wheel frame and bracket assembly (no text or symbols visible)natural_image
Two-panel black bicycle wheel assembly photo showing hands adjusting components (no text or symbols visible)
natural_image
Close-up of hands assembling a bicycle wheel assembly (no visible text or symbols)natural_image
Close-up of a person adjusting a bicycle wheel with visible gears and spokes (no text or symbols)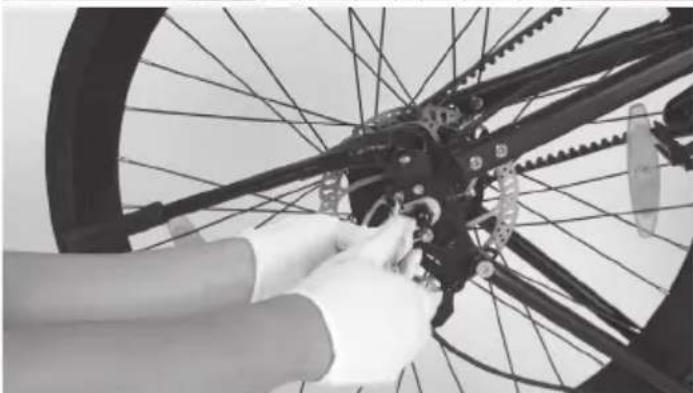
natural_image
Close-up of hands assembling a bicycle wheel with visible gears and spokes (no text or symbols)
natural_image
Close-up of hands cleaning a bicycle wheel with visible mechanical components (no text or symbols)natural_image
Close-up of a bicycle wheel with visible mechanical components and a hand adjusting the wheel (no text or symbols)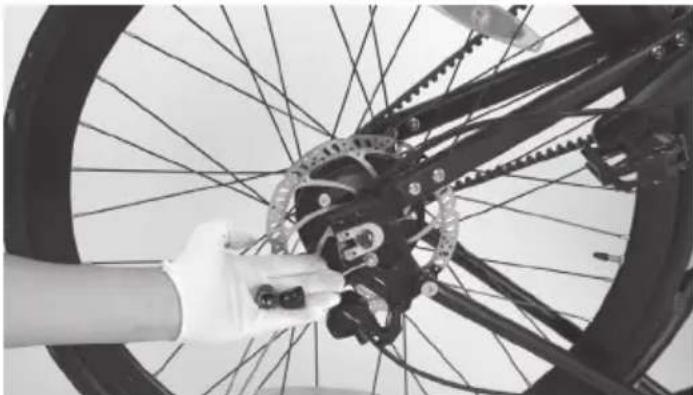
natural_image
Close-up of hands adjusting a bicycle wheel rim with a gear mechanism (no text or symbols visible)natural_image
Close-up of a bicycle wheel assembly with visible gears and hub (no text or symbols)
natural_image
Close-up of a hand adjusting a bicycle gear mechanism with chains and gears (no visible text or symbols)natural_image
Close-up of a bicycle's wheel assembly with a hand adjusting the gear (no visible text or symbols)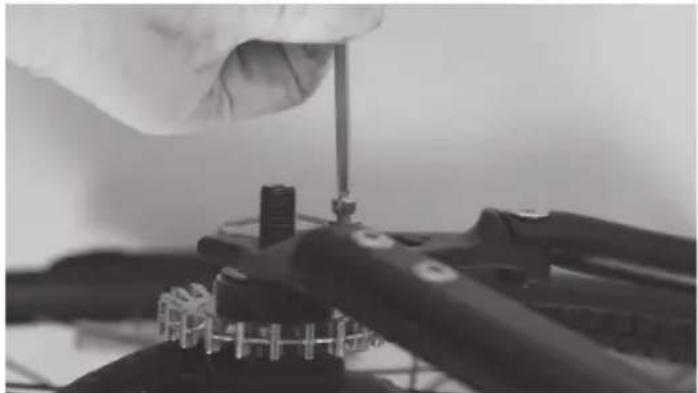
natural_image
Close-up of a hand using a screwdriver to adjust mechanical components (no visible text or symbols)natural_image
Close-up of hands using a saw to adjust bicycle frames (no text or symbols visible)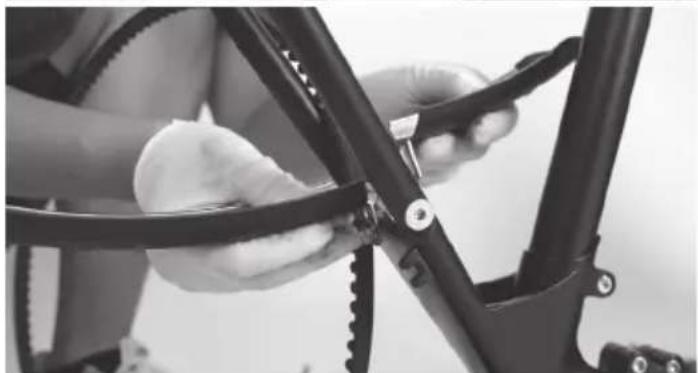
natural_image
Close-up of a person using a bicycle tire to adjust the wheel rim (no text or symbols visible)natural_image
Three-panel black bicycle frame installation procedure showing hand tool, gear mechanism, and final assembly (no text or symbols visible)natural_image
Close-up of a bicycle frame structure with visible joints and brackets (no text or symbols)natural_image
Three-panel black-and-white photo showing a person using a bicycle brake system to adjust the wheel and foot (no text or symbols visible)natural_image
Person using a Sharp exercise bike (no visible text or symbols)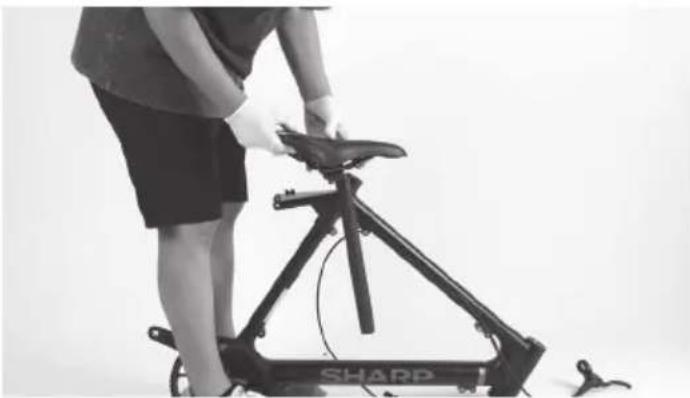
natural_image
Person using a Sharp stationary exercise bike (no visible text or symbols)natural_image
Black-and-white photo of a hand holding a Sharp bicycle brake lever with visible branding (no text or symbols on the device itself)natural_image
Person assembling a Sharp bicycle frame with visible wheels and cable (no text or symbols)
natural_image
Two people assembling a bicycle frame with a gear mechanism (no text or symbols visible)
natural_image
Person working on a mechanical device with gears and a tool, no visible text or symbols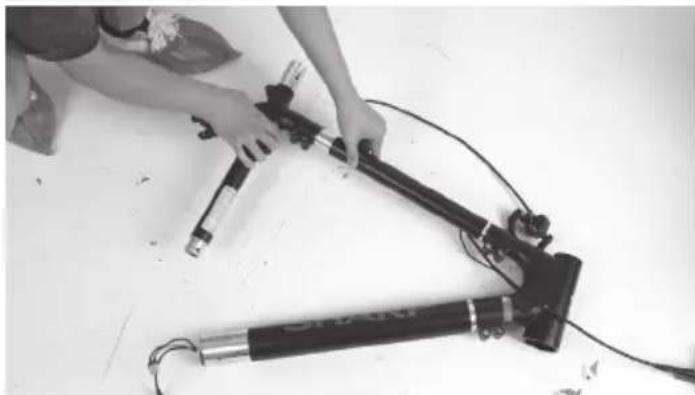
natural_image
Person assembling a mechanical device with a stand and cable (no visible text or symbols)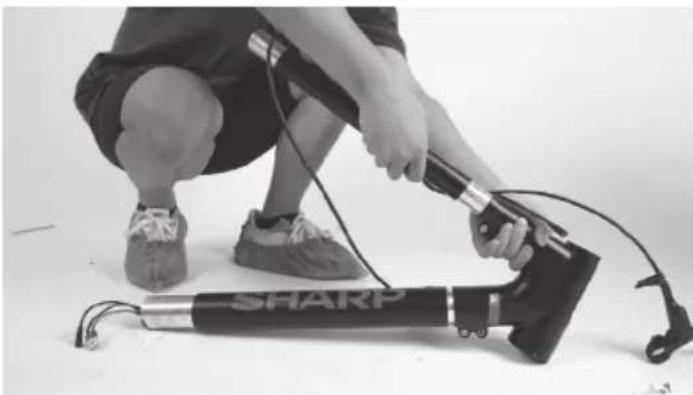
natural_image
Person kneeling with a handheld device connected to a black SHARP device (no visible text or symbols)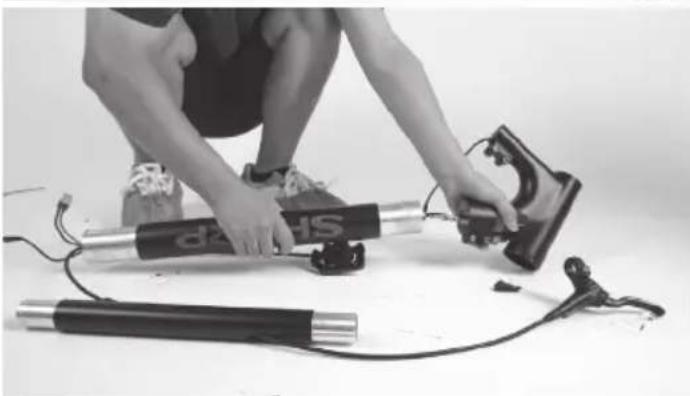
natural_image
Person kneeling on a bench with a mechanical device and two cylindrical components, no visible text or symbolsnatural_image
Assorted bicycle components including bicycles, levers, and a sharp wrench (no text or symbols visible)Ροπές Σφίξης:
www.sharpconsumer.com/RS08EB/#down
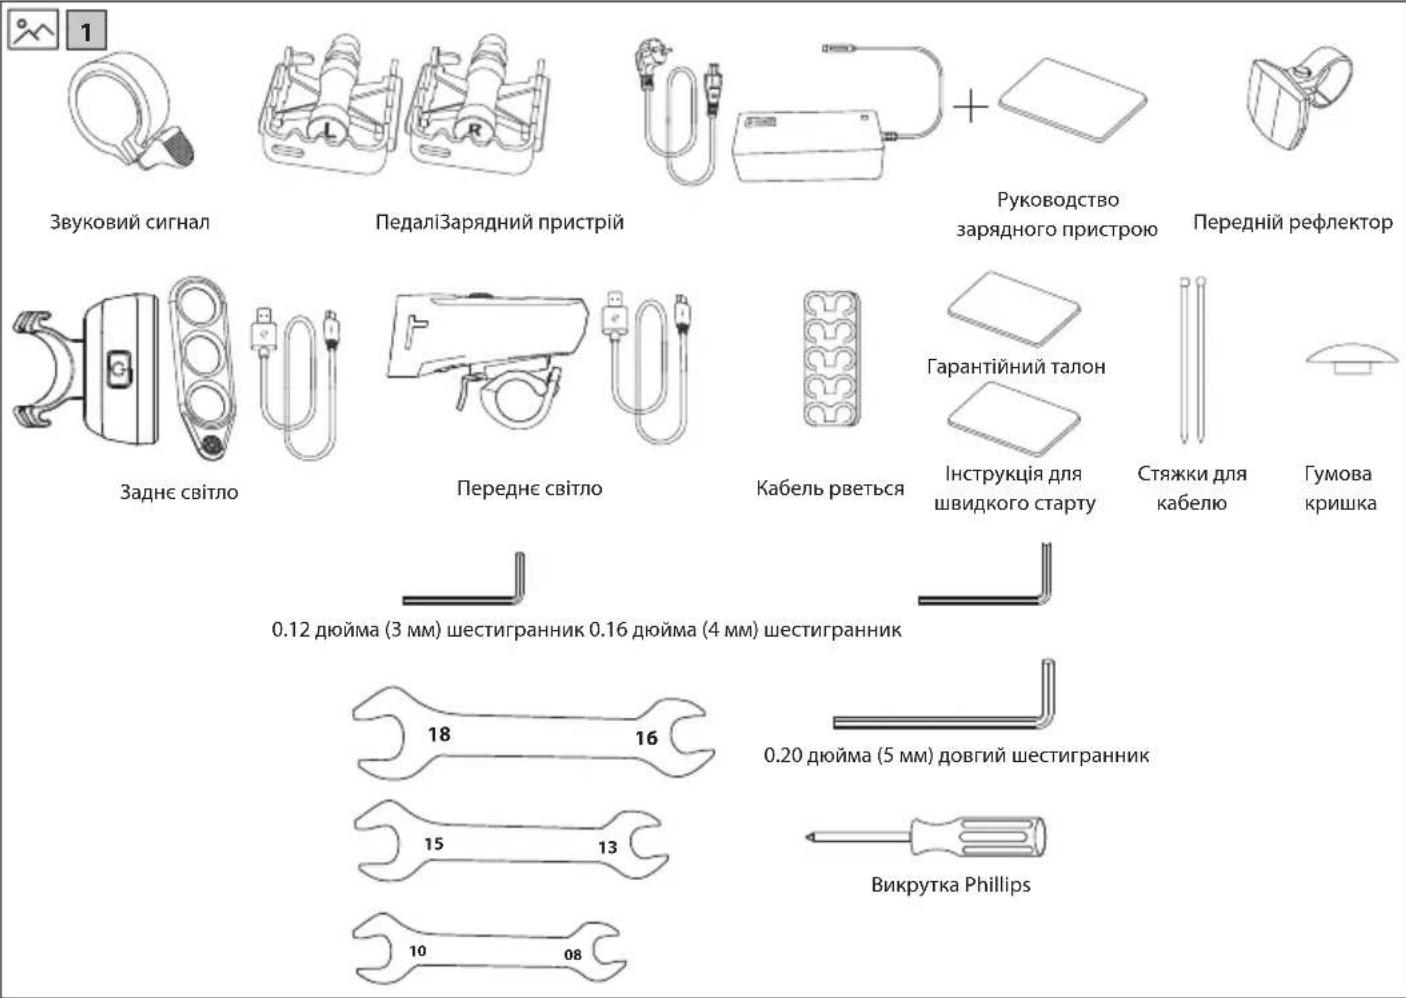
natural_image
Line drawing of a shared bicycle with a compact box and wheels (no text or symbols)
www.sharpconsumer.com/contact/

www.sharpconsumer.com/support/

www.sharpconsumer.com/documents-of-conformity/
Що в коробці:
natural_image
Line drawing of a mechanical device with lever and handle (no text or symbols)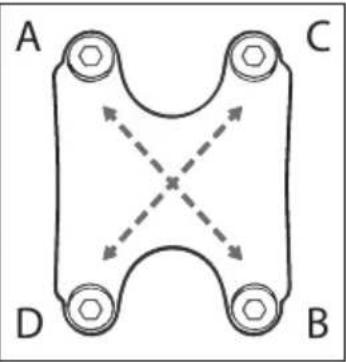
Рисунок 1-5

natural_image
Two cylindrical electronic components with internal wiring, shown from different angles (no text or symbols)Рисунок 3-1

natural_image
Line drawing of a bicycle leg with seat and support bracket (no text or symbols)Рисунок 3-2
Рисунок 4-3
natural_image
Mechanical assembly diagram showing a wheel with gear and a close-up inset of a component (no text or symbols)Рисунок 6-3

natural_image
Technical line drawing of two mechanical components with no visible text or symbolsРисунок 8-1
ПРИМІТКИ.
natural_image
Technical line drawing of mechanical components including a tool, clamping mechanism, and clamp (no text or symbols)Рисунок 9-1
natural_image
Line drawing of a bicycle seat assembly with a close-up inset showing a device (no text or symbols)Рисунок 9-2

natural_image
Technical line drawing of a firearm assembly (no text or symbols)Рисунок 9-3
natural_image
Technical line drawing of a bicycle wheel assembly with visible spokes and hub (no text or symbols)Рисунок 10-1
Bluetooth device connected
Battery Indicator
Real Time speed
Toggle Riding Info
PAS level
Як встановити

natural_image
Technical line drawing of a bicycle seatbelt mechanism, showing front and side views with no text or symbolsДодаток SHARP Life

https://www.sharpconsumer.com/sharp-life-app
natural_image
Three-panel black-and-white photo showing a person adjusting a bicycle frame, with no visible text or symbols.natural_image
Four-panel black-and-white photo sequence showing hands using a bicycle to adjust the frame, no text or symbols visiblenatural_image
Person standing beside a bicycle with visible frame and wheels (no text or symbols)natural_image
Person cleaning a bicycle wheel with a hand tool, no visible text or symbols
natural_image
Close-up of gloved hands holding a black brake lever and a small black ring component (no visible text or symbols)
natural_image
Close-up of a hand holding a bicycle steering wheel with visible blades and cable (no text or symbols)
natural_image
Close-up of a hand holding a bicycle brake lever with attached cable (no visible text or symbols)natural_image
Close-up of a bicycle tire being adjusted with a tool, no visible text or symbols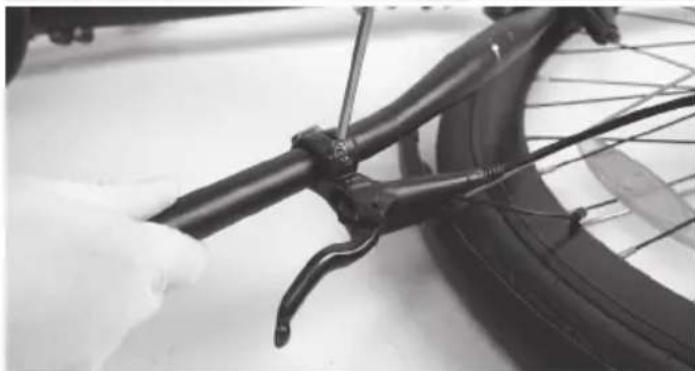
natural_image
Close-up of a bicycle wheel with a black cable and lever, being adjusted by hand (no text or symbols visible)
natural_image
Person cleaning a bicycle tire with a hand pump, no visible text or symbolsnatural_image
Two black-and-white photos showing hands adjusting a cable or cable connector, no text or symbols visible.natural_image
Two-panel black-and-white photo showing hands adjusting a cable or connector, with no visible text or symbols.natural_image
Two-panel black-and-white photo showing hands adjusting a bicycle wheel and chain, no visible text or symbolsnatural_image
Two-panel black bicycle wheel assembly photo showing hands adjusting components (no text or symbols visible)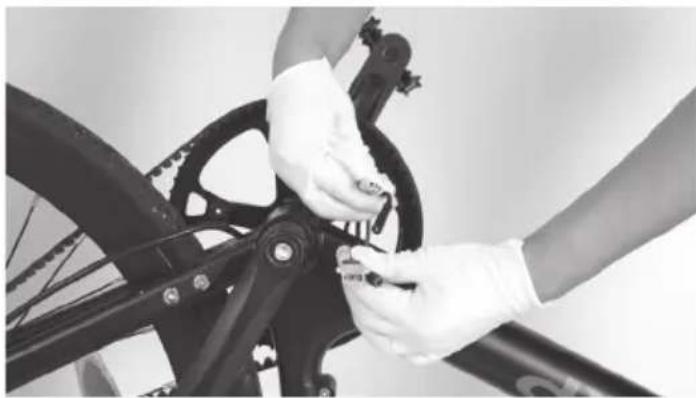
natural_image
Close-up of hands adjusting a bicycle wheel and gear assembly (no visible text or symbols)natural_image
Close-up of a person adjusting bicycle wheel components, no visible text or symbols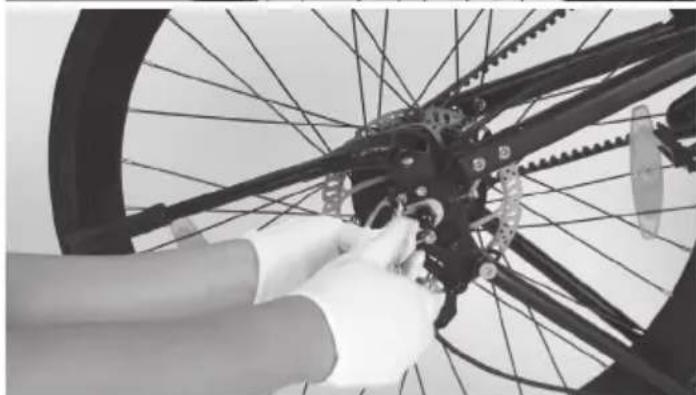
natural_image
Close-up of hands assembling a bicycle wheel with visible gears and chains (no text or symbols)
natural_image
Close-up of hands cleaning a bicycle wheel with visible tire and gear (no text or symbols)natural_image
Close-up of a bicycle's wheel and chain assembly, showing no text or symbols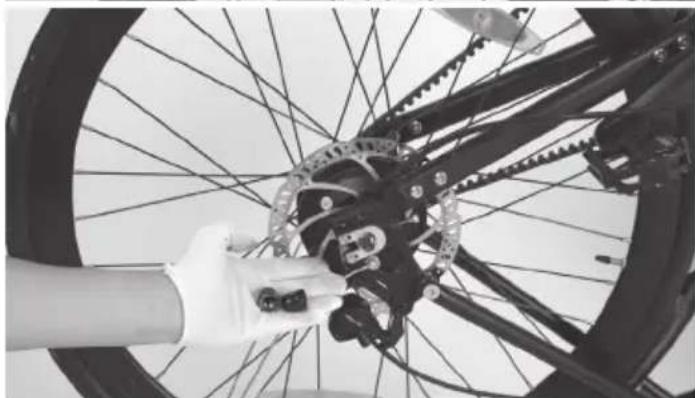
natural_image
Close-up of hands adjusting a bicycle wheel rim with a gear mechanism (no text or symbols visible)natural_image
Close-up of a bicycle wheel assembly with visible gears and chains (no text or symbols)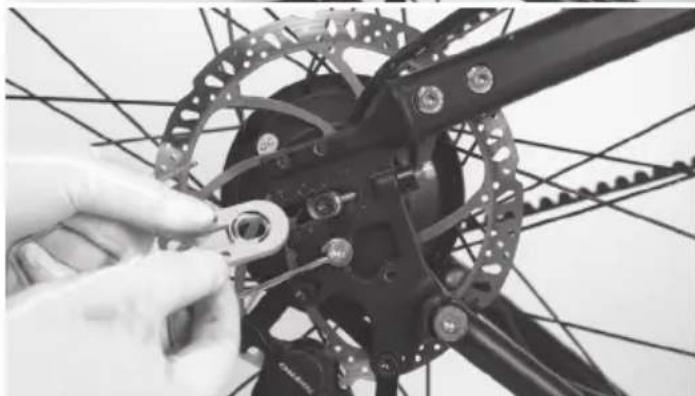
natural_image
Close-up of hands assembling a bicycle wheel assembly with visible gears and stad (no text or symbols)natural_image
Close-up of a bicycle's head assembly with a hand adjusting the wheel (no visible text or symbols)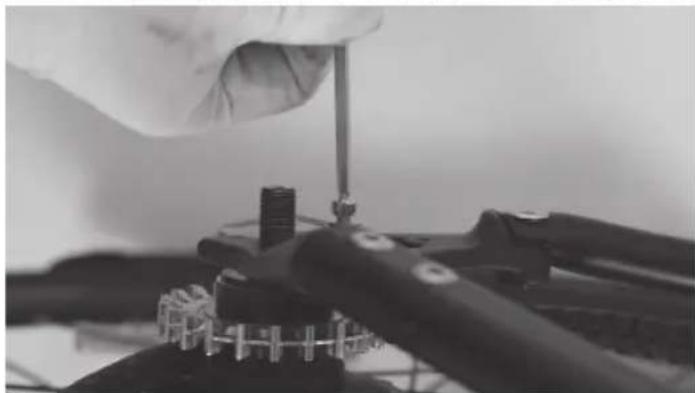
natural_image
Close-up of a hand using a screwdriver to adjust mechanical components (no visible text or symbols)natural_image
Close-up of hands using a saw to cut the bicycle frame (no text or symbols visible)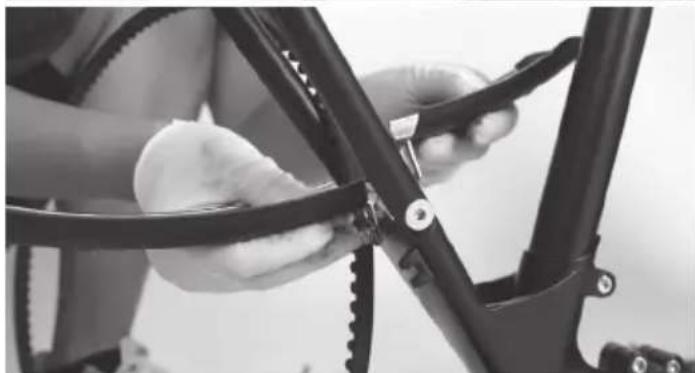
natural_image
Close-up of a person using a bicycle tire to trim a white object (no text or symbols visible)natural_image
Three-panel black-and-white photo showing bicycle wheel assembly: hand adjusting gear, close-up of mechanical components, and close-up of a person's wheel with visible tire.natural_image
Person assembling a bicycle frame with visible wheels and branding (no text or symbols)natural_image
Two-step black bicycle frame installation procedure showing hand positioning and tool path (no text or symbols visible)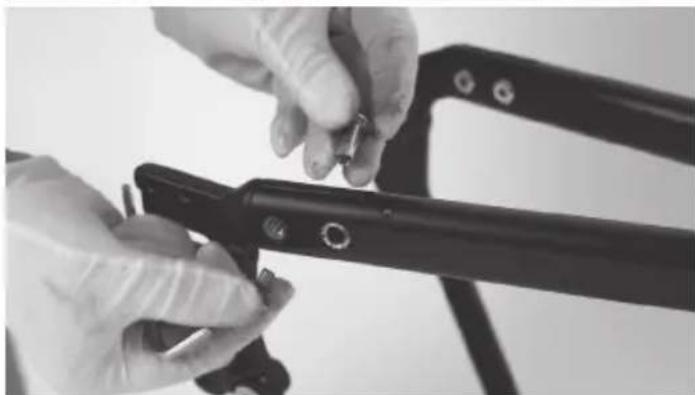
natural_image
Close-up of hands installing or adjusting a metal bracket component (no visible text or symbols)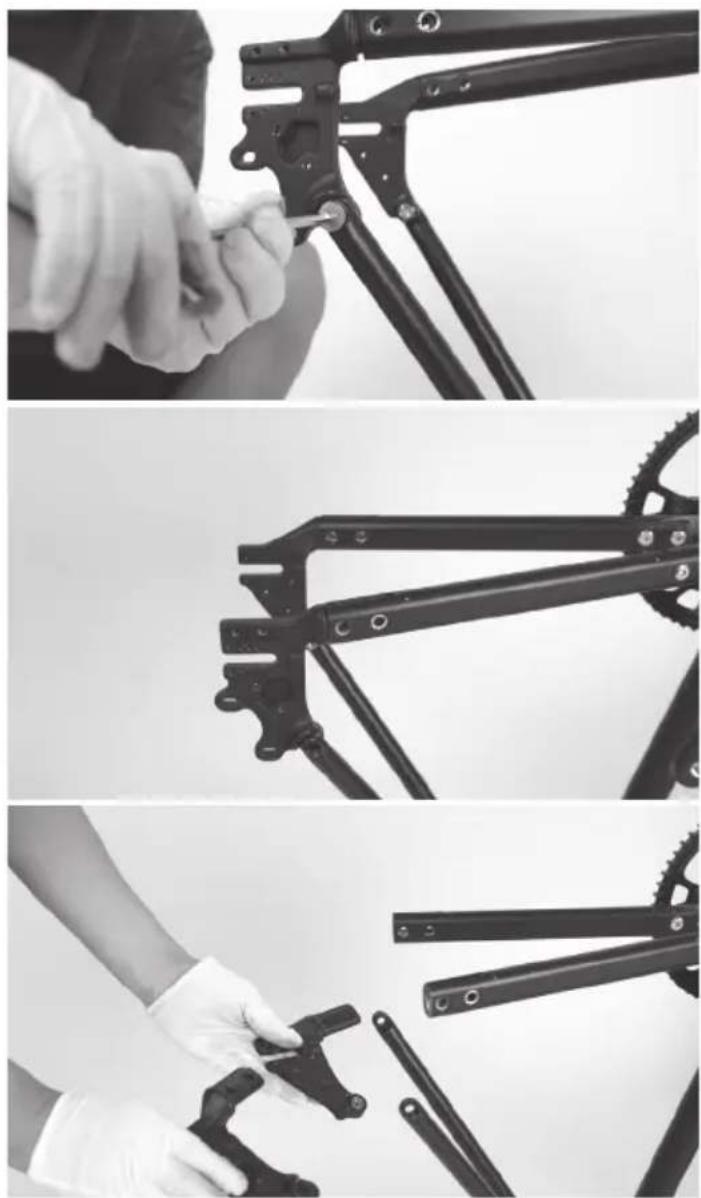
natural_image
Three-panel black bicycle frame assembly procedure showing hand tool, gear mechanism, and tool path (no text or symbols visible)natural_image
Close-up of a bicycle frame structure with visible joints and brackets (no text or symbols)natural_image
Three-panel black-and-white photo showing a person using a bicycle-mounted device, demonstrating step-by-step assembly (no text or symbols visible)natural_image
Person using a stationary exercise bike with a head-mounted sensor (no visible text or symbols)
natural_image
Person using a Sharp exercise bike (no visible text or symbols)natural_image
Black-and-white photo of a hand holding a Sharp bicycle brake lever with visible branding (no text or symbols on the device itself)natural_image
Person assembling a Sharp bicycle frame with visible wheels and cable (no text or symbols)
natural_image
Two people assembling a bicycle frame with a gear mechanism (no text or symbols visible)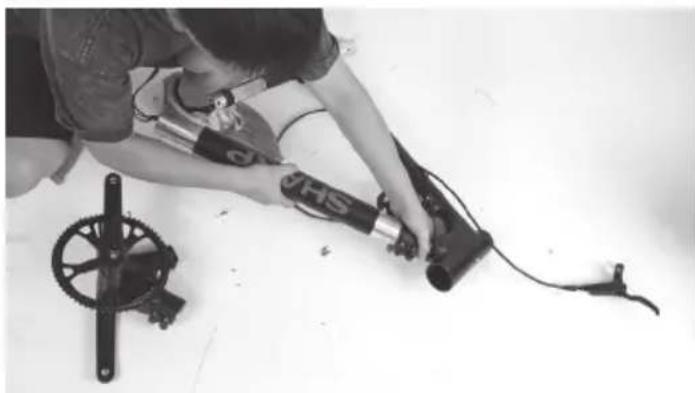
natural_image
Person working on a mechanical device with gears and a tool, no visible text or symbols
natural_image
Person assembling a mechanical device with a stand and cable (no visible text or symbols)
natural_image
Person kneeling with a handheld device connected to a black SHARP device (no visible text or symbols)
natural_image
Person kneeling on a fitness bar with attached mechanical device (no visible text or symbols)natural_image
Assorted bicycle components including bicycles, tools, and a sharp wrench (no text or symbols visible)Sharp Consumer Electronics Poland sp. z o.o.
Ostaszewo 57B, 87-148 Łysomice, Poland
SDA/MAN/0319
www.sharpconsumer.eu
SHARP