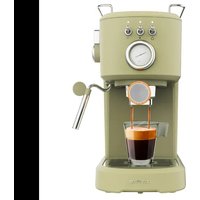
Power Espresso 20 Retro Green - Coffee machine CECOTEC - Free user manual and instructions
Find the device manual for free Power Espresso 20 Retro Green CECOTEC in PDF.


User questions about Power Espresso 20 Retro Green CECOTEC
0 question about this device. Answer the ones you know or ask your own.
Ask a new question about this device
Download the instructions for your Coffee machine in PDF format for free! Find your manual Power Espresso 20 Retro Green - CECOTEC and take your electronic device back in hand. On this page are published all the documents necessary for the use of your device. Power Espresso 20 Retro Green by CECOTEC.
USER MANUAL Power Espresso 20 Retro Green CECOTEC
natural_image
Exterior view of a modern beige espresso machine with a wooden handle and control panel (no visible text or symbols)Cumbia
-
Parts and components 41
-
Before use 41
-
Operation 42
-
Cleaning and maintenance 46
-
Troubleshooting 47
-
Technical specifications 48
-
Disposal of old electrical and electronic appliances 48
-
Technical support and warranty 48
-
Copyright 49
SOMMAIRE
- Safety instructions
- Read these instructions thoroughly before using the device. Keep this instruction manual for future reference or new users.
- All safety instructions must be closely followed when using the appliance.
- This symbol means “Caution, Hot Surface”. Accessible surfaces are likely to heat up during use. Be careful not to burn yourself.
- This device is designed for domestic use only and is not intended for bars, restaurants, farmhouses, hotels, motels, and offices.
- The appliance must not be used by children. Keep this appliance and its power cord out of their reach.
- This appliance can be used by persons with reduced physical, sensory, or mental capabilities or lack of experience and knowledge if they have been given supervision or instruction concerning the use of the appliance in a safe way and understand the hazards involved.
- Children must not play with the device. Cleaning and user maintenance should not be carried out by unsupervised children.
- WARNING: the filling opening or the water tank must not be opened during operation.
- WARNING: take precautions to avoid spillage of liquids on the cable.
- WARNING: incorrect or improper use can be dangerous for the user and damage the appliance. Use the
appliance only for the purposes described in this manual. The surface of the heating element is subject to residual heat after use.
- Ensure that the mains voltage matches the voltage specified on the appliance rating label and that the plug is earthed.
- Do not immerse the cable, plug, or any other non-removable part of the device in water or any other liquid or expose electrical connections to water. Make sure your hands are dry before handling the plug or switching on the device.
- Warning: if the device falls accidentally in water, unplug it immediately. Do not touch the water!
- Check the power cable regularly for visible damage. If the cable is damaged, it must be replaced by the official Technical Support Service of Cecotec
- in order to avoid any type of danger.
- WARNING: do not use the appliance if its cable, plug, or housing are damaged, nor after it malfunctions or has been dropped or damaged in any way.
- Do not twist, bend, pull, or damage the power cable. Protect it from sharp edges and heat sources. Do not allow the cable to touch hot surfaces. Do not let the cable hang over the edge of the working surface or worktop.
- This appliance is not intended to be operated by means of an external timer or separate remote-control system.
- Turn off and unplug the appliance from the mains supply when not in use and before cleaning it. Pull from the plug, not the cable, to disconnect it from the outlet.
- Supervise children to prevent them from playing with the appliance. Close supervision is necessary when the appliance is being used by or near children.
- Place the appliance on a dry, stable, flat, heat-resistant surface.
- Do not use the appliance under the following circumstances:
- On or near a gas or electric hob, in heated ovens, or near open flames.
- On soft surfaces (such as carpets) or where it may tip over during use.
- Outdoors or in areas with high humidity levels.
- Do not cover the appliance during operation.
- Never leave the device unattended during use. Unplug it from the mains supply when you finish using it or when you leave the room.
- Do not try to repair the device by yourself. Contact the official Cecotec Technical Support Service for advice.
- Cleaning and maintenance must be carried out according to this instruction manual to make sure the appliance functions properly. Turn off and unplug the appliance before moving and cleaning it.
- Do not wash the appliance in dishwashers.
- No liability is accepted for any eventual damage or personal injuries derived from misuse or non-compliance with this instruction manual.
INSTRUCTIONS DE SÉCURITÉ
- Steam indicator light
- Coffee indicator light
- Power indicator light
- Power switch
- Coffee switch
- Steam switch
- Stainless-steel mesh filter
- Pressing lever
- Portafilter
- Drip grid
- Drip tray
- Top cover
- Water tank cover
- Handle
- Water tank
- Steam knob
- Main body
- Base
- Measuring spoon with tamper
Note:
the graphics in this manual are schematic representations and may not exactly match the device.
2. BEFORE USE
- This appliance is packaged in a way as to protect it during transport. Take the device out of its box and remove all packaging materials. You can keep the original box and other packaging elements in a safe place. This will help you prevent damage to the device when transporting it in the future. In case the original packaging is disposed of, make sure all packaging materials are recycled accordingly.
- Make sure all parts and components are included and in good conditions. If there is any piece missing or in bad conditions, contact the Official Cecotec Technical Support Service immediately.
ENGLISH
- To ensure the first cup of coffee tastes excellent, you should rinse the coffee machine with hot water as follows:
- Pour water into the water tank, the water level should not exceed the "MAX" mark in the tank. Then, replace the water tank cover.
Please note
The appliance is fitted with a removable water tank for easy cleaning, so you can fill it with water and then reinstall it.
-
Insert the stainless-steel mesh filter into the portafilter (without ground coffee).
-
Place a glass or a cup on the drip tray. Make sure the steam knob is in the off position.
Please note
The coffee maker does not come with a container, so you have to use your own glass or cup.
-
Plug the coffee machine into the mains socket and turn the power switch to the on position. The power indicator light will start flashing blue. When it is steady then you can proceed with the next step.
-
Slide the coffee switch upwards; the machine will dispense hot water.
-
Once the coffee maker has stopped dispensing hot water after 60 seconds, pour the water out of the cup and clean it thoroughly. The coffee machine is now ready for use.
Attention
The coffee maker may make noises when dispensing water for the first time. That is completely normal, since the coffee maker is releasing the air that is inside the water pump. After 20 seconds, this noise will stop.
Box content
- Power Espresso 20 Retro Green espresso coffee maker
- Portafilter
- 1 and 2 coffee filters
- Measuring spoon with tamper
3. OPERATION
- Plug the coffee machine into a mains socket. On power-up, the machine itself will detect the position (on or off) of all switches. For that reason, make sure that all the switches are in the off position, otherwise, the indicator lights of those switches which are not, will flash fast and intermittently for 25 seconds, and then they will
switch off for another 25 seconds, and so on. In this mode, the machine cannot be put into operation.
- After all switches have been turned to the off position, switch on the coffee maker using the power switch. The power indicator light will slowly start flashing and the coffee machine will start to heat up. Once it has warmed up, the power indicator light will stop flashing and remain steady. Next, turn the coffee switch to the on position. The coffee indicator light will start flashing slowly (approximately every 2 seconds) and the machine will start brewing coffee.
Caution: turning on the coffee switch during the preheating process of the machine will cause the coffee indicator light to flash rapidly, indicating an error. Wait until the machine has finished heating up and the power indicator light is steady before selecting the coffee function.
-
Once the coffee machine has heated up, the power indicator light will remain on. Then, turn the steam switch to the on position so that the machine continues to heat up and starts to generate steam. The steam indicator light will start flashing slowly. When the steam indicator is steadily lit, the steam function is ready. Then, you can turn the knob to release the steam.
-
Press the steam switch twice within 2 seconds to activate the hot water function. The steam indicator light will start flashing slowly (approximately every 2 seconds), indicating that you can now turn the steam knob to dispense hot water.
Caution: if, after steaming, the coffee indicator light flashes rapidly for 25 seconds and then switches off for another 25 seconds, the machine temperature is too high. In this mode, the machine cannot be put into operation. It will therefore be necessary to dispense hot water to cool the coffee machine or let it cool down naturally before it can be used again.
Preheating
To make a good cup of coffee, it is advisable to preheat the coffee machine before brewing, including the funnel, filter, and cup, so that the taste of the coffee is not altered by any cold elements.
-
Remove the removable tank and open the cover to fill it with water, preferably natural or purified mineral water. The water level must not exceed the "MAX" mark on the tank. After filling the tank, put it back in place.
-
Insert the stainless-steel mesh filter into the portafilter. Ensure that the funnel tube is aligned with the slot in the machine. Then, install the portafilter into the coffee machine from the unlocked position by turning it counterclockwise until it locks into the locked position.
-
Place a cup in the drip tray.
-
Plug the coffee machine into a mains socket. Make sure the steam knob is in the off position.
ENGLISH
- Slide the power switch upwards; the power indicator light will start flashing. Once the preheating process is completed, the power indicator light will stop flashing and will remain steady. Turn the coffee switch to the on position and, once the machine has finished dispensing hot water, turn it off.
Preparing an espresso
-
Following the "Preheating" steps above, remove the portafilter by turning it to the left. Add the ground coffee into the filter with the measuring spoon. One tablespoon of ground coffee makes one cup. Then, use the other end of the measuring spoon to press the ground coffee.
-
Insert the stainless-steel mesh filter into the portafilter. Ensure that the funnel tube is aligned with the slot in the machine. Then, install the portafilter into the coffee machine from the unlocked position by turning it counterclockwise until it locks into the locked position.
-
Empty the dispensed water from the cup and place it back into the drip tray.
-
Turn the coffee switch to the ON position; the coffee indicator light will start flashing. Wait for a moment until the coffee starts to come out. When the desired amount is obtained, turn the coffee switch to the off position. The machine will stop brewing coffee. If the switch is not switched off, coffee will come out for 60 seconds and then the machine will stop brewing automatically. The coffee indicator light then flashes rapidly, reminding you to turn off the coffee switch.
Warning
- Do not leave the machine unattended during preparation, as it may be necessary to handle the machine manually.
- When you have finished brewing coffee, remove the portafilter from the machine by turning it clockwise and then remove the coffee residue from the filter by pressing the pressing lever.
- Rinse the metal funnel and the stainless-steel mesh filter with water.
- The recommended cup volume is approximately 30 ml for single coffee and 60 ml for double coffee.
Preparing hot water
Once the preheating process is completed, the power indicator light will stop flashing and will remain steady. Next, press the steam switch twice within 2 seconds. The steam indicator light will start flashing and the water pump will start dispensing water. Turn the steam knob to the steam/hot water position so that hot water comes out from the steamer. To stop dispensing hot water, turn the steam switch to the off position. If the steam switch is not switched off, hot water will come out for 60 seconds and then the machine will stop brewing automatically. Then, the steam indicator light flashes rapidly, reminding you to turn off the steam switch.
Preparing a cappuccino
To prepare a cappuccino, fill the espresso cup with frothed milk.
- To prepare a cappuccino, first prepare an espresso following the steps in the section "PREPARING AN ESPRESSO". Make sure the steam knob is in the off position.
- Turn the steam switch to the on position and wait until the corresponding indicator light lights up.
Please note
During the preheating process, the steam indicator light will turn on and off to maintain the desired temperature.
- Fill a jug with about 100 ml of cold whole milk for each cappuccino you wish to prepare.
Please note
When choosing the size of the jug, it is recommended that the diameter of the jug should not be less than 70 ± 5 mm. Also, bear in mind that milk increases in volume by a factor of two, so make sure that the jug is high enough.
- Slowly turn the steam knob counterclockwise so that steam comes out from the steamer.
Please note
Never turn the steam knob sharply, as the machine will emit a lot of steam in a short time, which may increase the risk of scalding.
-
Insert the steamer into the milk about two centimetres deep and froth the milk by moving the jug up and down.
-
When you have finished frothing the milk, turn the steam knob to the off position.
Please note
The steam outlet nozzle should be cleaned with a damp sponge immediately after steam stops coming out but be careful not to burn yourself. In addition, repeat the steaming process again but this time by placing the steam nozzle in a glass of water to clean it.
- Pour the frothed milk into the coffee cup; your cappuccino is now ready. Sweeten to taste and if desired, sprinkle the froth with a little cocoa powder. Turn off the power switch to switch off the machine. All indicator lights will turn off.
Warning
After you have finished using the steam function, turn the coffee switch to the on position. If the coffee and steam indicator lights flash rapidly, the machine temperature is too high. Let the machine cool down for at least 5 minutes or activate the hot water function to cool down the machine. The machine will automatically stop dispensing water when the temperature decreases.
ENGLISH
Automatic shut-off function
If no switch is operated and the knob is not turned for 2 minutes, the coffee machine will switch off automatically.
4. CLEANING AND MAINTENANCE
- Make sure to unplug the coffee machine and allow it to cool down completely before cleaning it.
- Regularly clean the main housing and water tank with a sponge. Thoroughly wash and dry the drip tray and grid.
Please note
Do not use alcohol or solvents to clean the machine. Never immerse the housing in water for cleaning.
- Remove the metal funnel from the filter by turning it clockwise and remove any coffee residue. Clean with water and detergent and dry thoroughly.
- Wash all accessories and dry them thoroughly.
Cleaning mineral deposits
- If the machine has been in use for the last 3 months, it is necessary to clean the mineral deposits (limescale).
- Fill the tank with water and descaler up to the MAX level (for the amount of descaler follow the instructions on the package or manufacturer's instructions).
- Heat the above solution following the steps in the "PREHEATING" section.
- Once the preheating process is completed, the power indicator light will stop flashing and will remain steady.
- Turn the coffee switch to the ON position to brew two cups of the solution.
- Turn the steam switch to the on position and wait until the corresponding indicator light lights up. Emit steam for 2 minutes by turning the steam knob to the steam/hot water position; then, turn the knob back to the off position to stop generating steam. Turn off the power switch to stop the machine completely, leaving the descaler or citric acid solution in the machine for at least 15 minutes.
- Repeat steps 5 and 6.
- Turn the coffee switch to the on position; the coffee indicator light will remain steady. In this way, the machine will start preparing the solution until there is no descaler left.
- Fill the tank with clean water up to the MAX level and then dispense water until there is no water left in the tank.
-
Repeat step 8 to ensure that the steamer is thoroughly cleaned.
-
TROUBLESHOOTING
| Problem Cause Solution | ||
| The metal parts of the water tank are rusted | The descaler used is not the right one. May corrode metal parts of the tank. | Use the descaler recommended for coffee machines. |
| The bottom of the machine leaks | There is too much water in the drip tray. | Empty the drip tray. |
| The coffee machine does not work properly. | Contact the official Cecotec Technical Support Service. | |
| The water flows out of the sides of the steel mesh filter | There are traces of ground coffee on the edges of the filter. | Wipe off any coffee residue. |
| Coffee tastes sour | The device has not been properly cleaned after descaling. | Clean the machine several times following the steps in the “Before use” section. |
| Ground coffee has been stored in a hot, wet place for a long time. The ground coffee has gone bad. | Use fresh ground coffee, or store it in a cool, dry place. After opening a package of ground coffee, reseal it tightly and store it in a refrigerator to maintain its freshness. | |
| The machine does not turn on | The power cable is not properly plugged in. | Plug the power cord correctly into a power outlet. If the machine still does not work, contact the official Cecotec’s Technical Support Service. |
| Steam does not froth the milk | The steam indicator light is not lit. | Only when the steam indicator light is lit can the steam function be used for frothing. |
| Container is too large, or shape does not fit. | Use a tall, narrow cup. | |
| You have used skimmed milk. Use | whole cold milk. |
ENGLISH
6. TECHNICAL SPECIFICATIONS
Product reference: 01723
Product: Power Espresso 20 Retro Green espresso coffee maker
Power: 1100 W
Voltage: 220 - 240 V\~
Frequency: 50 Hz
Technical specifications may change without prior notification to improve product quality. Made in China | Designed in Spain
7. DISPOSAL OF OLD ELECTRICAL AND ELECTRONIC APPLIANCES
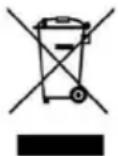
This symbol indicates that, according to the applicable regulations, the product and/or batteries must be disposed of separately from household waste. When this product reaches the end of its shelf life, you should dispose of the cells/batteries/accumulators and take them to a collection point designated by the local authorities.
Consumers must contact their local authorities or retailer for information concerning the correct disposal of old appliances and/or their batteries.
Compliance with the above guidelines will help protecting the environment.
8. TECHNICAL SUPPORT AND WARRANTY
Cecotec shall be liable to the end user or consumer for any lack of conformity that exists at the time of delivery of the product under the terms, conditions, and deadlines established by the applicable regulations.
It is recommended that repairs be carried out by qualified personnel.
If at any moment you detect any problem with your product or have any doubt, do not hesitate to contact the official Cecotec Technical Support Service at +34 963 210 728.
9. COPYRIGHT
The intellectual property rights over the texts in this manual belong to CECOTEC INNOVACIONES, S.L. All rights reserved. The contents of this publication may not, in whole or in part, be reproduced, stored in a retrieval system, transmitted, or distributed by any means (electronic, mechanical, photocopying, recording or similar) without the prior authorization of CECOTEC INNOVACIONES, S.L.
FRANÇAIS
1. PIÈCES ET COMPOSANTS
Img. 1
text_image
Labeled diagram of a microwave oven with numbered parts for identificationFig. / Img. / Rys. / Obr. 1
www.cecotec.es