
7 WCM Premium - Pressure washer Kärcher - Free user manual and instructions
Find the device manual for free 7 WCM Premium Kärcher in PDF.
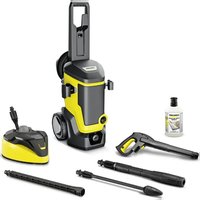


| Product type | High-pressure washer |
| Brand | Kärcher |
| Model | 7 WCM Premium |
| Usage | Domestic (household) |
| Service pressure | 15 MPa (150 bar) |
| Max. admissible pressure | 18 MPa (180 bar) |
| Water flow rate | 9.2 l/min |
| Max. flow rate | 10 l/min |
| Connected load | 3.0 kW |
| Power supply | 230 V, 50 Hz, 16 A |
| Protection type | IPX5 |
| Operating weight | 19.3 kg |
| Dimensions (L × W × H) | 394 × 369 × 946 mm |
| Max. feed temperature | 60 °C |
| Max. suction height | 0.5 m |
| Sound pressure level LpA | 75 dB(A) |
| Sound power level LWA | 91 dB(A) |
| Included accessories | Dirt blaster lance, Vario Power lance, high-pressure gun, high-pressure hose, hose reel, storage |
| Safety features | Main switch, gun lock, Auto-Stop function, motor thermal protection |
| Maintenance | Cleaning of water inlet strainer and detergent filter |
| Repairability | Original spare parts available from Kärcher |
Frequently Asked Questions - 7 WCM Premium Kärcher
User questions about 7 WCM Premium Kärcher
0 question about this device. Answer the ones you know or ask your own.
Ask a new question about this device
Download the instructions for your Pressure washer in PDF format for free! Find your manual 7 WCM Premium - Kärcher and take your electronic device back in hand. On this page are published all the documents necessary for the use of your device. 7 WCM Premium by Kärcher.
USER MANUAL 7 WCM Premium Kärcher
Chairman of the Board of Management
S. Reiser
Manager Regulatory Affairs & Certification
71364 Winnenden (Germany)
Tel.: +49 7195 14-0
Fax: +49 7195 14-2212
Winnenden, 2022/10/01
Contents
General notes. 12
Environmental protection. 12
Intended use 12
Accessories and spare parts 12
Scope of delivery. 12
Device description 12
Safety devices 13
Symbols on the device 13
Installation 13
Initial startup 13
Operation 14
Transport 15
Storage 15
Care and service 15
Troubleshooting guide 15
Warranty 16
Technical data 16
EU Declaration of Conformity 16
General notes


Read these original operating instructions and the enclosed safety instructions before using the device for the first time.
Proceed accordingly.
Keep both books for future reference or for future owners.
Environmental protection

The packing materials can be recycled. Please dispose of packaging in accordance with the environmental regulations.

Electrical and electronic devices contain valuable, recyclable materials and often components such as batteries, rechargeable batteries or oil, which - if handled or disposed of incorrectly - can
pose a potential danger to human health and the environment. However, these components are required for the correct operation of the device. Devices marked by this symbol are not allowed to be disposed of together with the household rubbish.
Cleaning work producing in oily waste water, e.g. washing engines, washing undercarriages etc., may only be performed at washing stations with an oil separator.

Working with detergents may only be performed on the watertight surfaces with connection to the waste or sewer sewage system. Do not allow detergent to enter overways or the soil.

Extraction of water from public waterways is not permitted in some countries.
Notes on the content materials (REACH)
Current information on content materials can be found at: www.kaercher.de/REACH
Intended use
Use the high-pressure cleaner in private households only.
The high-pressure cleaner is intended for cleaning machines, vehicles, buildings, tools, facades, terraces, garden machines etc. using a high-pressure water jet.
Accessories and spare parts
Only use original accessories and original spare parts. They ensure that the appliance will run fault-free and safely.
Information on accessories and spare parts can be found at www.kaercher.com.
Scope of delivery
The scope of delivery for the appliance is shown on the packaging. Check the contents for completeness when unpacking. If any accessories are missing or in the event of any shipping damage, please notify your dealer.
Device description
For the illustrations, refer to the graphics page Illustration A
Illustration B
①Transport wheel 2Water connection with integrated sieve 3 Detergent suction hose 4Mains connection cable with mains plug 5 Mains connection cable storage compartment 6Hose reel 7 Holder for high-pressure hose Spray lance dirt blaster for stubborn soiling 9 Vario Power spray lance for common cleaning tasks The working pressure can be continuously increased from "SOFT" to "HARD". To adjust the working pressure, release the trigger gun lever and turn the spray lance to the desired position. Detergent can be added to the water jet when the spray lance is turned all the way in the SOFT direction. 10High-pressure gun 11Button for separating the high-pressure hose from the high-pressure gun 12 High-pressure gun lever 13High-pressure gun lock 14High-pressure hose 15 Trigger "0/OFF" / "I/ON" Storage for spray lance Storage for high-pressure hose / mains connection cable 18Transport handle Storage for high-pressure gun
20Quick coupling for high-pressure connection 21Type plate 22Water connection coupling 23**Garden hose (fabric reinforced, diameter at least 1/2 inch (13mm) length at least 7.5m with commercially available quick coupling) 24**KARCHER suction hose for water supply from open containers (order no. 2.643-100) (25)Screws 26 High-pressure hose clip
** additionally required
Safety devices
CAUTION
Missing or modified safety devices!
Safety devices are provided for your own protection. Do not bypass, remove or render ineffective any safety devices.
Power switch
The power switch prevents unintentional operation of the device.
High-pressure gun lock
The lock secures the lever of the high-pressure gun and prevents the device from starting unintentionally.
Auto-stop function
If the lever of the high-pressure gun is released, the pressure switch turns off the pump and the high-pressure jet stops. The pump switches on again when the lever is pressed.
Motor circuit breaker
The motor circuit breaker shuts off the device if power consumption is too high.
Symbols on the device
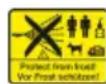
Do not aim the high-pressure jet at persons, animals, live electrical equipment, or the device itself.
Protect the device against frost.
The device may not be connected to the public drinking water network.

Installation
For the illustrations, refer to the graphics page.
Fit the supplied loose parts onto the device before starting up the device.
Place the screws provided and matching screwdriver at the ready.
Mounting the transport handle
- Attach the transport handle.
- Secure the transport handle with 3 screws. Illustration C
Mounting the storage option for the high-pressure hose / mains connection cable
- Insert the storage option for the high-pressure hose / mains connection cable into the holder at the centre of the transport handle. The storage option locks into place. Illustration D
Mounting the storage option for spray lances
- Push in the storage option for the spray lances into the holder on the device.
- Hold the storage option in the end position and secure it using a screw.
Illustration E
Mounting the storage option for the high-pressure gun
- Push in the storage option for the high-pressure gun into the holder on the device.
- Hold the storage option in the end position and secure it using a screw.
Illustration F
Mounting the storage option for the mains connection cable
Devices without a hose reel
- Push in the storage option for the mains connection cable into the holder on the transport handle.
- Hold the storage option in the end position and secure it using a screw.
Illustration G
Mounting the high-pressure hose reel
Devices with a hose reel
- Attach the holder for the hose reel.
- Secure the holder using 2 screws. Illustration H
- Attach the hose reel. The hose reel locks into place. Illustration I
Installing the water connection coupling
- Screw the water connection coupling onto the water connection on the device. Illustration J
Initial startup
Note
Take care not to exceed the maximum permissible mains impedance at the connection point (see chapter Technical data).
Contact your electricity supplier in the case of any uncertainties regarding the mains grid impedance at your electrical connection point.
- Place the device on a flat and level surface.
- Unwind the high-pressure hose and eliminate any loops and twists.
Note
Devices with a hose reel: During operation, the high-pressure hose must be completely unwound from the hose reel. 3. Insert the high-pressure hose into the high-pressure gun until it audibly latches into place. (Illustration K)
Note
Take care to ensure the correct alignment of the nipple. 4. Insert the high-pressure hose into the quick coupling until it audibly latches into place. (Illustration L) 5. Check for a secure connection by pulling on the high-pressure hose. 6. Plug the mains plug into a mains socket.
Water supply
For the connection values, see the type plate or chapter Technical data.
Observe the water distribution company regulations.
ATTENTION
Damage through contaminated water
Contamination in the water can damage the pump and the accessories.
KÄRCHER recommends using the KÄRCHER water filter for protection (special accessory, order number 4.730-059).
Connection to the water line
ATTENTION
Hose coupling with Aquastop on the water connection of the device
Damage to the pump
Never use a hose coupling with Aquastop on the water connection of the device.
You can use an Aquastop coupling on the tap.
- Plug the garden hose onto the water connection coupling.
- Connect the garden hose to the water line.
Illustration M
- Open the water tap fully.
Sucking water from open containers
When used with the KARCHER suction hose with check valve (special accessory, order number 2.643-100) this high-pressure cleaner is suitable for sucking up surface water, e.g. from rain barrels or ponds (for the maximum suction height see chapter Technical data).
The water connection coupling is not required for vacuuming operation.
- Fill the suction hose with water.
- Screw the suction hose onto the device water connection and hang it in a water source (e.g. water butt).
Vent the device
- Switch the device on "I/ON".
- Unlock the lever of the high-pressure gun.
- Press the lever of the high-pressure gun.
The device switches on.
- Allow the device to run for a maximum of 2 minutes until the water escaping from the high-pressure gun is free of air bubbles.
- Release the lever of the high-pressure gun.
- Lock the lever of the high-pressure gun.
Operation
ATTENTION
Pump running dry
Damage to the device
If pressure does not build up in the device after 2 minutes, then switch the device off and proceed according to the instructions in the chapter Troubleshooting guide.
High-pressure operation
ATTENTION
Damage to painted or sensitive surfaces
Surfaces can be damaged when the jet is too close to the surface or an unsuitable spray lance is used.
Maintain a minimum spray distance of 30 cm when cleaning painted surfaces.
Do not clean car tyres, paint or sensitive surfaces such as wood with the dirt grinder.
- Insert a spray lance into the high-pressure gun and lock it by turning it 90°.
- Switch the device on ("I/ON").
- Unlock the lever of the high-pressure gun.
- Press the lever of the high-pressure gun. The device switches on.
Operation with detergent
DANGER
Failure to adhere to the safety data sheet
Incorrect handling of the detergent can seriously damage your health
Observe the safety data sheet of the detergent manufacturer, in particular the instructions on personal protective equipment.
Note
KÄRCHER detergents ensure fault-free operation. Ask us for a consultation, request our catalogue or our detergent information sheets.
Note
Detergent can only be mixed into the jet at low pressure.
- Pull the desired length of the detergent suction hose out of the casing.
Illustration O
- Hang the detergent suction hose in a container with detergent solution.
- Use the Vario Power spray lance.
- Turn the spray lance all the way into the "SOFT" position.
The detergent solution is mixed with the water jet during operation.
Recommended cleaning method
- Spray the detergent sparingly on the dry surface and let it work for a while (do not let it dry).
- Rinse off the loosened dirt with the high-pressure jet.
After operation with detergent
- Flush the device with clear water for approx. 30 seconds.
Interrupting operation
- Release the lever of the high-pressure gun. The device switches off when the lever is released. The high pressure in the system is retained.
- Lock the lever of the high-pressure gun.
Illustration P
- Switch the device off "0/OFF" during work breaks longer than 5 minutes.
Ending operation
CAUTION
Pressure in the system
Injuries from high-pressure water escaping uncontrollably
Only disconnect the high-pressure hose from the high-pressure gun or the device when the system is fully depressurised.
- Release the lever of the high-pressure gun.
- Close the water tap.
- Press the lever of the high-pressure gun for 30 seconds.
The pressure remaining in the system is discharged.
- Release the lever of the high-pressure gun.
- Lock the lever of the high-pressure gun.
- Disconnect the device from the water supply.
- Switch off the device "0/OFF".
- Pull the mains plug out of the socket.
Transport
CAUTION
Failure to observe the weight
Risk of injury and damage
Be aware of the weight of the device during transportation.
Pulling the device
- Pull the device via the transport handle.
Transporting the device in a vehicle
- Secure the device against slipping and tipping over.
Storage
CAUTION
Risk of injury and damage!
The device may tip over on sloping surfaces.
Be aware of the weight of the device during storage.
Storing the device
- Place the device on a level surface.
- Disconnect the spray lance from the high-pressure gun.
- Press the separation button on the high-pressure gun and disconnect the high-pressure hose from the high-pressure gun.
- Press the casing of the high-pressure hose quick coupling in the direction of the arrow and pull out the high-pressure hose.
- Stowing the high-pressure hose.
Devices without a hose reel
Store the high-pressure hose on the device.
Devices with a hose reel
a Insert one end of the high-pressure hose into the opening at the front of the hose reel. b Turn the crank to wind up the high-pressure hose. c While doing so, guide the high-pressure hose with the second hand.
Illustration Q
d Fasten the coiled high-pressure hose to the hose reel with the high-pressure hose clip.
Illustration R
- Stow the mains connection cable on the device.
- Stow both spray lances and the high-pressure gun in the appropriate storage options.
Observe the additional instructions before storing the device for a longer period of time, see chapter Care and service.
Frost protection
ATTENTION
Danger of frost
Incompletely emptied devices can be destroyed by frost.
Completely empty the device and accessories. Protect the device from frost.
The following requirements must be satisfied:
The device is disconnected from the water supply. The high-pressure hose is removed. 1. Switch the device on "I/ON" 2. Wait for a maximum of 1 minute until no more water escapes from the high-pressure connection. 3. Switch off the device. 4. Store the device in a frost-protected room, together with all accessories.
Care and service
△DANGER
Danger of electric shock
Injuries due to touching live parts
Switch off the device.
Remove the mains plug.
The device is maintenance-free, i.e. you do not need to perform any maintenance work.
Clean the sieve in the water connection
ATTENTION
Damaged sieve in the water connection Damage to the device through contaminated water Check the sieve for damage before inserting it in the water connection. If necessary, clean the sieve in the water connection. 1. Remove the water connection coupling. 2. Pull the sieve out. 3. Clean the sieve under running water. Illustration S 4. Insert the sieve into the water connection.
Clean the detergent filter
Clean the detergent filter before longer periods of storage.
- Pull the filter off the detergent suction hose.
- Clean the filter under running water. Illustration T
Troubleshooting guide
Malfunctions often have simple causes that you can remedy yourself using the following overview. When in doubt, or in the case of malfunctions not mentioned here, please contact your authorised Customer Service.
△DANGER
Danger of electric shock
Injuries due to touching live parts
Switch off the device.
Remove the mains plug.
Device not running
- Press the lever of the high-pressure gun. The device switches on.
- Check that the voltage specified on the type plate corresponds to the voltage of the power source.
- Check the mains connection cable for damage.
- If the motor is overloaded and the motor circuit breaker has triggered:
a Switch off the device "0/OFF". b Allow the device to cool down for 1 hour. c Switch the device on "I/ON" and resume operation. Have the device checked by Customer Service if this fault occurs repeatedly.
The device does not start up, the motor buzzes
Voltage drop due to a weak mains grid or when using an extension cable
- When switching on, first press the lever on the high-pressure gun and then switch on the device "I/ON". Device does not reach required pressure The water supply is too low.
- Open the water tap fully.
- Check the water inlet for an adequate flow rate.
- Check the setting at the spray lance.
- Check that the maximum suction height is not exceeded. The sieve in the water connection is dirty.
- Pull the sieve in the water connection out using flat pliers.
- Clean the sieve under running water. Illustration S
Air is in the device.
- Vent the device:
a Switch on the device without a connected spray lance for a maximum of 2 minutes.
b Press the high-pressure gun and wait until the water escaping from the high-pressure gun is free of air bubbles.
c Connect the spray lance.
Strong pressure fluctuations
- Clean the high-pressure nozzle: a Use a needle to remove dirt from the nozzle drill. b Rinse the high-pressure nozzle from the front with water.
- Check the water supply volume.
Device leaking
- The device leaks a small amount for technical reasons. If the leak is severe, request authorised Customer Service.
Detergent is not sucked in
- Use the Vario Power spray lance and turn it all the way in the "SOFT" direction.
- Clean the filter on the detergent suction hose.
- Check the detergent suction hose for kinks.
Warranty
The warranty conditions issued by our relevant sales company apply in all countries. We shall remedy possible malfunctions on your appliance within the warranty period free of cost, provided that a material or manufacturing defect is the cause. In a warranty case, please contact your dealer (with the purchase receipt) or the next authorised customer service site.
(See overleaf for the address)
Technical data
| K 7 WCM | K 7 WCM Premium | ||
| Electrical connection | |||
| Voltage | V | 230 | |
| Phase ~ 1 1 | |||
| Frequency Hz 50 50 | |||
| Maximum permissible mains grid impedance | Ω | 0,0377+j0,0236 | 0,0377+j0,0236 |
| Power rating | kW | 3,0 | 3,0 |
| Degree of protection | IPX5 | IPX5 | |
| Protection class | I | I | |
| Power protection (slow- blowing) | A | 16 | 16 |
Water connection
| Feed pressure (max.) | MPa | 1,2 | 1,2 |
| Input temperature (max.) °C | 60 60 | ||
| Input amount (min.) | l/min | 12 12 | |
| Suction height (max.) | m | 0,5 | 0,5 |
Device performance data
| Operating pressure | MPa | 15 15 | |
| Max. permissible pressure | MPa | 18 | 18 |
| Water flow rate | l/min | 9,2 | 9,2 |
| Maximum flow rate l/min | 10 10 | ||
| Detergent flow rate | l/min | 0,3 | 0,3 |
| K 7 WCM | K 7 WCM Premium | ||
| High-pressure gun recoil force | N | 27 | 27 |
Dimensions and weights
| Typical operating weight | kg | 18,8 19,3 |
| Length | mm | 355 394 |
| Width | mm | 369 369 |
| Height | mm | 946 946 |
Determined values in acc. with EN 60335-2-79
| Hand-arm vibration value | m/s2 | 2,3 | 2,3 |
| Uncertainty K | m/s2 | 0,7 | 0,7 |
Sound pressure level LpA dB(A) 75 75
| Uncertainty KpA | dB(A) 3 3 |
| Sound power level LWA + | dB(A) 91 91 |
| K uncertaintyWA |
Exception according to Regulation (EU) 2019/1781 Annex I Section 2 (12): j)
Subject to technical changes without notice.
EU Declaration of Conformity
We hereby declare that the machine described below complies with the relevant basic safety and health requirements in the EU Directives, both in its basic design and construction as well as in the version placed in circulation by us. This declaration is invalidated by any changes made to the machine that are not approved by us.
Product: High-pressure cleaner
Type: 1.317-xxx
Currently applicable EU Directives
2006/42/EC (+2009/127/EC)
2014/30/EU
2011/65/EU
2000/14/E30
2009/125/EC
Commission Regulation(s)
(EU) 2019/1781
Harmonised standards used
EN 60335-1
EN 60335-2-79
EN 62233: 2008
EN 55014-1:2017 + A11:2020
EN 55014-2:1997 + A1:2001 + A2:2008
EN 61000-3-2:2014
EN 61000-3-11:2000
EN IEC 63000:2018
Applied conformity evaluation method
2000/14/EG: Annex V
Sound power level dB(A)
Measured: 88
Guaranteed: 91
The signatories act on behalf of and with the authority of the company management.
H.Jenner
Chairman of the Board of Management
S. Reiser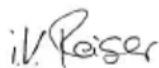
Manager Regulatory Affairs & Certification
Documentation supervisor:
S. Reiser
Content
General remarks. 17
2006/42/EC (+2009/127/EC)
2014/30/EU
2011/65/EU
2000/14/EC
2009/125/EC
Applicable directive(s)
(EU) 2019/1781
H.Jenner Chairman of the Board of Management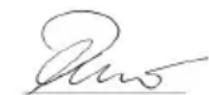
S. Reiser Manager Regulatory Affairs & Certification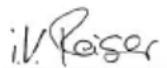
Responsible for documentation:
S. Reiser
Alfred Kärcher SE & Co. KG
Alfred-Karcher-Str. 28 - 40
71364 Winnenden (Germany)
Tel.: +49 7195 14-0
Fax: +49 7195 14-2212
Winnenden, 01/10/2022
Index
H. Jenner Chairman of the Board of Management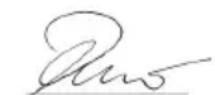
S. Reiser Manager Regulatory Affairs & Certification
71364 Winnenden (Germany)
Tel.: +49 7195 14-0
Fax: +49 7195 14-2212
Winnenden, 01/10/2022
Contents
H. Jenner Chairman of the Board of Management
S. Reiser Manager Regulatory Affairs & Certification
71364 Winnenden (Germany)
Tel.: +49 7195 14-0
Fax: +49 7195 14-2212
Winnenden, 2022/10/01
Table of Contents
General notes. 32
H. Jenner Chairman of the Board of Management
S. Reiser Manager Regulatory Affairs & Certification
Document responsible:
S. Reiser
Alfred Karcher SE & Co. KG
Alfred-Karcher-Str. 28 - 40
71364 Winnenden (Germany)
Tel.: +49 7195 14-0
Fax: +49 7195 14-2212
Winnenden, 01/10/2022
Indices
2006/42/CE (+2009/127/CE)
2014/30/UE
2011/65/UE
2000/14/CE
2009/125/CE
Applicable regulation(s)
(UE) 2019/1781
Chairman of the Board of Management
S. Reiser
Manager Regulatory Affairs & Certification
Winnenden, 01/10/2022
Content
General safety instructions 43
Environmental protection 43
Correct use 43
Accessories and spare parts 43
Scope of delivery 43
Mounting the transport handle
- Attach the transport handle.
- Secure the transport handle with 3 screws.
Figure C
Relevant EU directives
2006/42/EC (+2009/127/EC)
2014/30/EU
2011/65/EU
2000/14/EC
2009/125/EC
Chairman of the Board of Management
S. Reiser
Manager Regulatory Affairs & Certification
71364 Winnenden (Germany)
Tel.: +49 7195 14-0
Fax: +49 7195 14-2212
Winnenden, 2022/10/01
Contents
General notes 47
Environmental protection 47
- Open the water tap fully.
2006/42/EC (+2009/127/EC)
2014/30/EU
2011/65/EU
2000/14/EC
2009/125/EF
Applicable regulation(s)
(EU) 2019/1781
Applied harmonized standards
EN 60335-1
EN 60335-2-79
EN 62233: 2008
EN 55014-1:2017 + A11:2020
EN 55014-2: 1997 + A1: 2001 + A2: 2008
EN 61000-3-2: 2014
EN 61000-3-11:2000
EN IEC 63000:2018
H. Jenner Chairman of the Board of Management
S. Reiser Manager Regulatory Affairs & Certification
71364 Winnenden (Germany)
Tel.: +49 7195 14-0
Winnenden, 2022/10/01
Contents
General information. 52
Environmental protection. 52
H. Jenner Chairman of the Board of Management
S. Reiser Manager Regulatory Affairs & Certification
Authorized representative for documentation:
S. Reiser
Alfred Kärcher SE & Co. KG
Alfred-Karcher-Str. 28-40
D-71364 Winnenden (Germany)
Tel.: +49 7195 14-0
Fax: +49 7195 14-2212
Winnenden, 01.10.2022
Table of contents
General instructions 57
Chairman of the Board of Management
S. Reiser
Manager Regulatory Affairs & Certification
71364 Winnenden (Germany)
Phone: +49 7195 14-0
Winnenden, 1.10.2022
Introduction
Safety instructions 61
Environmental protection 61
Intended use 62
Scope of delivery and accessories 62
Technical data 62
Description of the device 62
H. Jenner, Chairman of the Board of Management
S. Reiser, Manager Regulatory Affairs & Certification
YIeUvOc TeVikou qakéLou:
S. Reiser
Alfred Kärcher SE & Co. KG
Alfred-Karcher-Str. 28-40
71364 Winnenden (Germany)
Tel: +49 7195 14-0
Fax: +49 7195 14-2212
Winnenden, 2022/10/01
Contents
General notes 67
Environmental protection 67
2006/42/EC (+2009/127/EC)
2014/30/AB
2011/65/AB 230
2000/14/AT
2009/125/EG
Chairman of the Board of Management
S. Reiser
Manager Regulatory Affairs & Certification
Winnenden, 2022/10/01
Contents
General safety instructions 72
Environmental protection 72
Intended use 72
Accessories and spare parts 72
Scope of delivery 72
Description of the device 72
Protective devices. 73
Symbols on the device 73
Installation 73
Input, operation. 74
74
Transportation 75
Storage 75
Maintenance and technical service. 76
Troubleshooting 76
Warranty 76
Technical specifications 77
Declaration of conformity with standards. 77
General instructions


Before first use of the device, familiarize yourself with this original instruction manual and the attached safety instructions. Follow them.
Operation and attached safety instructions. Follow them.
Keep this brochure for future
use by the next user.
Environmental protection

Packaging materials are recyclable. Please dispose of packaging in an environmentally responsible manner.

Electrical and electronic devices contain valuable recyclable materials and often components such as batteries,
rechargeable batteries or oil, which, if handled improperly or disposed of incorrectly, can pose a potential hazard to health and the environment. However, these components are necessary for the proper operation of the device.
Devices marked with this symbol are prohibited from being disposed of with household waste.
Cleaning work that results in wastewater containing oil, for example, engine washing, must only be carried out on wash bays with oil separators. Work with cleaning agents must only be carried out on water-permeable work surfaces connected to domestic sewage. Do not allow cleaning agents to enter bodies of water. Water intake from open bodies of water is not permitted in some countries.
Notes on ingredients (REACH)
For information on ingredients, see www.kaercher.de/REACH
Intended use
Use the high-pressure cleaner only indoors.
The high-pressure cleaner is intended for cleaning machines, vehicles, buildings, tools, facades, terraces, garden equipment, etc. using a high-pressure water jet.
Accessories and spare parts
Use only original accessories and spare parts. Only they guarantee safe and trouble-free operation of the device.
Install the device, connect it to the mains, and use the protective devices.
Switching off the device
Switching off the device prevents unintended operation of the device.
High-pressure hose lock
The lock blocks the trigger of the high-pressure gun and protects against unintended activation of the device.
Auto-stop function
When the trigger of the high-pressure gun is released, the pressure switch turns off the pump, and water supply under high pressure stops. When the lever is pressed, the pump switches on again.
Motor protection switch
In case of overvoltage in the network, the motor protection switch disconnects the device.
Symbols on the device
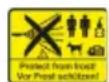
Do not direct the water jet at high pressure at people, animals, live electrical equipment, or at the device itself. Protect the device from frost.

The device must not be connected directly to the public drinking water supply.
Installation
See figures on the pages with figures.
Before commissioning, install the loose parts supplied with the device. Check the contents of the delivery and the corresponding opening.
Installing the handle for transport
- Attach the handle for transport.
- Secure the handle for transport with the screws. Figure C
Installing the high-pressure hose/network connection cable compartment
- Insert the compartment for storing the high-pressure hose/network connection cable into the bracket, centering it on the handle for transport. The compartment for storage snaps into place. Figure D
Installing the hose storage compartment
- Insert the compartment for storing hoses into the bracket on the device.
- Hold the storage compartment in the lowest position and secure it with the screw. Figure E
Installing the high-pressure pistol storage compartment
- Insert the compartment for storing the high-pressure pistol into the bracket on the device.
- Hold the storage compartment in the lowest position and secure it with the screw. Figure F
Installing the network connection cable compartment
Devices without a hose reel
- Insert the compartment for storing the network connection cable onto the handle for transport into the bracket.
- Hold the storage compartment in the lowest position and secure it with the screw. Figure G
Installing the high-pressure hose reel
Installing the hose reel
- Place the hose reel holder onto the shaft.
- Secure the holder with screws. Figure H
- Place the hose reel. The hose reel is secured in place. Figure I
Installing the water supply coupling
- Screw the water supply coupling onto the water supply pipe on the device.
Figure J
Commissioning
Note
Make sure that the resistance of the power supply network at the connection point (see Technical specifications) does not exceed the maximum permissible resistance.
If questions arise regarding the network resistance at the connection point, contact your power supply organization.
- Place the device on a flat surface.
- Unroll the high-pressure hose and untangle any possible twists.
Note
Connect the high-pressure hose to the spray gun: Before operating and during operation, the high-pressure hose must be completely unwound from the hose reel. 3. Insert the high-pressure hose into the high-pressure connector until it clicks into place. Figure K
Note
Ensure the hose is correctly routed. 4. Insert the high-pressure hose into the quick-release coupling until it clicks into place. Figure L 5. Check the security of the connection by pulling on the high-pressure hose. 6. Insert the spray lance into the trigger gun.
Water supply
The connection parameters are indicated on the factory rating plate in the chapter Technical specifications.
Follow the regulations of the water supply company.
CAUTION
Damage due to contaminated water
Contaminants contained in water can cause damage to the pump and accessories. To protect the KARCHER unit, we recommend using a KARCHER water filter (special accessory, order no. 4.730-059).
Connection to the water supply
CAUTION
Screw coupling with Aquastop system on the water connection of the device
Damage to the pump
Never use a screw coupling with Aquastop system on the water connection of the device.
You can use an Aquastop coupling on the water tap.
- Connect the suction hose to the water inlet. 2. Connect the suction hose to the water supply. Figure M
- Open the water tap.
Water intake from open reservoirs
The device is a high-pressure cleaner with a suction hose and a return valve (special accessory, order number 2.643-100) intended for drawing water from open reservoirs, for example from barrels for rainwater or ponds (maximum suction height see in the chapter Technical data).
In suction mode, the use of the water inlet coupling is not required.
- Fill the suction hose with water. 2. Connect the suction hose to the water inlet connection on the device and place it in the water source (for example, in a rainwater tank).
Removing air from the device
- Switch on the device "I/ON".
- Unlock the trigger of the high-pressure gun.
- Press the trigger of the high-pressure gun. The device switches on.
- Let the device run for a maximum of 2 minutes until water exits the high-pressure gun without bubbles.
- Release the trigger of the high-pressure gun.
- Lock the trigger of the high-pressure gun.
Operation
CAUTION
Troubleshooting: If the device does not create pressure within 2 minutes, turn off the device and follow the instructions in the Troubleshooting chapter.
High Pressure Operation
WARNING
Damage to painted or sensitive surfaces
Surfaces are damaged if the distance to the object is too small or if the wrong spray nozzle is selected.
When cleaning painted surfaces, maintain a distance of at least 30 cm.
Do not clean car tires, painted or sensitive surfaces with the dirt blaster.
- Insert the spray nozzle into the high-pressure gun and lock it by turning it 90° (Figure N).
- Turn on the device (I/ON).
- Unlock the trigger of the high-pressure gun.
- Press the trigger of the high-pressure gun. The device turns on.
Operation with Detergent
DANGER
Failure to observe safety instructions
Serious injuries due to improper use of the cleaning agent.
Follow the safety instructions of the cleaning agent manufacturer, in particular
the instructions regarding personal protective equipment.
Note
The use of KARCHER cleaning agents ensures trouble-free operation of the equipment. You can contact us for advice, request our catalog or information materials on cleaning agents.
Note
The cleaning agent can only be added at low pressure.
- Pull the suction hose for the cleaning agent out of the housing to the required length. Figure O
- Lower the suction hose for the cleaning agent into the container with the cleaning agent solution.
- Use the Vario Power spray lance. 4. Turn the spray lance to the "SOFT" position until it stops. During operation, the cleaning agent solution is added to the water jet.
Recommended cleaning method
- Spray the cleaning agent economically onto the dry surface and let it take effect (do not let it dry).
- Rinse off the dirt with high pressure.
After operation with cleaning agent
- Rinse the device with clean water for approx. 30 seconds.
Work setup
- Release the trigger of the high-pressure pistol. When released, the device switches off. High pressure remains in the system.
- Secure the trigger of the high-pressure pistol.
Figure P
3. During breaks in work longer than 5 minutes, the device should be switched off (0 / OFF).
End of work
CAUTION
System pressure
Injuries from uncontrolled release of water under high pressure
Disconnect the high-pressure hose from the high-pressure pistol or the device only when there is no pressure in the system.
- Release the trigger of the high-pressure pistol.
- Close the water supply tap.
- Press the trigger of the high-pressure pistol for 30 seconds. The remaining pressure in the system is released.
- Release the trigger of the high-pressure pistol.
- Secure the trigger of the high-pressure pistol.
- The device is designed for water supply.
- Turn the device off with the «0/OFF» switch.
- Remove the plug from the socket.
Transportation
CAUTION
Risk of injury
Danger of injury from improper handling.
During transportation, consider the weight of the device.
Lifting the device
- Hold the device by the transport handle.
Transporting the device in a vehicle
- Secure the device against shifting and tipping.
Storage
CAUTION
Danger of injury from tipping! The device can tip over on inclined surfaces.
The device must be stored in a dry place.
Storage of the device
- Place the device on a flat surface.
- Disconnect the hose from the high-pressure gun.
- Press the release button on the high-pressure gun and disconnect the high-pressure hose.
- Press on the body of the quick-release coupling for the high-pressure hose in the direction indicated by the arrow and pull out the hose.
- Store the high-pressure hose in the storage device without a drum. To do this, place the high-pressure hose on the storage device.
Storing the hose without a drum
a Insert one end of the high-pressure hose into the opening in the front part of the drum for the hose. b Turn the crank handle to wind the high-pressure hose. c With the other hand, guide the high-pressure hose.
Figure Q
d Secure the wound high-pressure hose on the hose drum with the hose clamp.
Figure R
- Place the spray lance and connecting cable on the storage device.
- Place the hoses and high-pressure gun in the corresponding storage compartments.
For additional instructions before extended storage, see the chapter Maintenance and Servicing.
Risk of freezing
WARNING
Danger of freezing
Devices that are not completely emptied may be damaged by frost.
Completely empty the device and accessories.
Protect the device from frost.
The following conditions must be met:
- The device is disconnected from the water supply system.
- The high-pressure hose is removed.
- Turn on the device I/ON
- Wait no more than 1 minute until water stops coming out of the high-pressure hose. 3. Turn off the device.
- Store the device and all accessories in a frost-protected room.
Maintenance and servicing
Danger of electric shock
Injuries resulting from touching live parts
Switch off the device.
Keep the device away from children.
The device does not require technical maintenance, that is, regular technical maintenance is not required.
Cleaning the mesh filter in the water supply pipe
ATTENTION
Check the mesh filter in the water supply pipe.
Device malfunction due to water blockage. Check the mesh filter for damage before inserting it into the water supply pipe.
Clean the mesh filter in the water supply pipe as needed.
- Close the water supply valve.
- Remove the mesh filter.
- Rinse the mesh filter under running water. Figure 5
- Insert the mesh filter into the water supply pipe.
Function of the device for the device operation
With proper storage of the device filter.
- Rinse the filter under running water. Figure T
- Rinse the filter under running water. Figure T
Troubleshooting
Many malfunctions have simple causes, so with the help of the following overview they can be eliminated independently. In case of doubt or if faults not described here occur, contact an authorized customer service.
DANGER
Danger of electric shock
Touching live parts
Switch off the device.
Pull out the mains plug.
The device does not work
- Press the high-pressure nozzle lever. The device switches on.
- Check that the voltage indicated on the rating plate matches the supply voltage.
- Check the cable for damage.
- If the overload protection device has tripped and the motor has stopped:
a Switch off the device with the «0/OFF» switch. b Let the device rest for 1 hour. c Switch the device on with the «I/ON» switch and resume work.
If the malfunction occurs repeatedly, have the device checked by a service center.
The device does not switch on, the motor hums
The voltage is too low due to a weak electrical network or the use of an extension cord.
The power cord is too weak.
- Open the water tap fully.
- Check the water supply for sufficient volume.
- Check the adjustment of the jet pipe.
- Check that the maximum suction height has not been exceeded.
The filter in the water inlet pipe is clogged.
- Remove the filter from the water inlet pipe and clean it.
- Rinse the filter under running water. Figure 5
Air is trapped in the device.
- Remove the air from the device:
Connect the device without the hose for no more than 2 minutes. Press the high-pressure pistol and hold it until water starts to come out of the pistol without air bubbles. Then connect the hose.
Strong pressure drops
- Clean the high-pressure nozzle:
a) Remove dirt from the nozzle opening. b) Rinse the high-pressure nozzle with water.
- Check the water supply volume.
Device is not sealed
- Minor leakage of the device is due to technical features. In case of strong leakage, contact an authorized service center.
Detergent is not being drawn in
- Use the Vario Power hose and turn it to the "SOFT" position until it stops.
- Clean the filter in the suction hose for detergent.
- Check the suction hose for detergent for kinks.
Warranty
In each country, the corresponding warranty conditions established by the authorized sales organization for our products apply. We will repair possible defects of the device free of charge during the warranty period, if they are due to material defects or manufacturing errors. In case of complaints during the warranty period, please contact the sales organization that sold the product or the authorized service center.
(Authorized dealer)
The date of manufacture is indicated on the factory plate.
The product is sealed.
The digits have the following meaning:
Example: 30190
3 = year of manufacture, 0 = decade of manufacture, 1 = year within decade, 9 = second digit of year, 0 = first digit of month, 9 = month of manufacture
Thus, in this example, code 30190 means the date of manufacture is 09/2013.
Technical specifications
The following declarations apply from the name and to the trust of the company.
H. Jenner Chairman of the Board of Management
S. Reiser Manager Regulatory Affairs & Certification
Person responsible for documentation: I. Pau3ep (S. Reiser)
Alfred Kärcher SE & Co. KG
Alfred-Karcher-Str. 28-40
71364 Winnenden (Germany)
Tel.: +49 7195 14-0
Fax: +49 7195 14-2212
r.BuHHHeHdEh, 01.10.2022
Table of Contents
Chairman of the Board of Management
S. Reiser
Manager Regulatory Affairs & Certification
Winnenden, 2022/10/01
Contents
General Instructions 83
Environmental Protection 83
Intended Use 83
Accessories and Spare Parts 83
Scope of Delivery 83
Description of the Device 83
Chairman of the Board of Management
S. Reiser
Manager Regulatory Affairs & Certification
Documentation authorized representative:
S. Reiser
Alfred Karcher SE & Co. KG
Alfred-Karcher-Str.28-40
Winnenden, 2022/10/01
Table of contents
General instructions 88
Environmental protection 88
Intended use 88
Accessories and spare parts. 88
Scope of delivery 88
Description of the device 88
Safety devices 89
Symbols on the device. 89
Montaza. 89
Zagon 89
Obratovanje 90
Transport 90
Skladišenje 90
2006/42/ES (+2009/127/ES)
2014/30/EU
2011/657U
2000/14/ES
2009/125/ES
Uporabljena(-e) uredba(-e)
(EU) 2019/1781
H.Jenner Chairman of the Board of Management
S. Reiser Manager Regulatory Affairs & Certification
Pooblascena oseba za dokumentaciono:
S. Reiser
Alfred Karcher SE & Co. KG
Alfred-Karcher-Str.28-40
Winnenden, 1. 10. 2022
Table of contents
General notes 93
2006/42/EC (+2009/127/EC)
2014/30/EU
2011/65/EU
2000/14/EC
2009/125/EC
Chairman of the Board of Management
S. Reiser
Manager Regulatory Affairs & Certification
Documentation administrator:
S. Reiser
Alfred Karcher SE & Co. KG
Alfred-Karcher-Str. 28 - 40
71364 Winnenden (Germany)
Tel.: +49 7195 14-0
Dispositivedesignaranta 99
Directive UE relevante
2006/42/UE (+2009 / 127 / UE)
2014/30/UE
2011/65/UE
2000/14/UE
2009/125/UE
Regulament(e)utilizate
(UE) 2019/1781
Norme armonizate aplicate
EN 60335-1
EN 60335-2-79
EN 62233: 2008
EN 55014-1:2017 + A11:2020
EN 55014-2: 1997 + A1: 2001 + A2: 2008
EN 61000-3-2: 2014
EN 61000-3-11: 2000
EN IEC 63000:2018
Conformity assessment procedure
2000/14/EC: Annex V
Sound power level dB(A)
Measured: 88
Guaranteed: 91
Signatories acting on behalf of and with the authorization of
H. Jenner Chairman of the Board of Management
S. Reiser Manager Regulatory Affairs & Certification
Responsible for the preparation of the documentation:
S. Reiser
Alfred Kärcher SE & Co. KG
Alfred-Karcher-Str. 28 - 40
71364 Winnenden (Germany)
Tel.: +49 7195 14-0
Fax: +49 7195 14-2212
Winnenden, 2022/10/01
Contents
2006/42/EC (+2009/127/EC)
2014/30/EU
2011/65/EU
2000/14/EC
2009/125/EC
2000/14/ES: Annex V
H.Jenner Chairman of the Board of Management
S. Reiser Manager Regulatory Affairs & Certification
71364 Winnenden (Germany)
Tel.: +49 7195 14-0
Fax: +49 7195 14-2212
Winnenden, 01.10.2022
Contents
General notes 108
Environmental protection 108
2006/42/EC (+2009/127/EC)
2014/30/EU
2011/65/EU
2000/14/EC
2009/125/EC
Applied regulations
(EU) 2019/1781
Applied harmonized standards
EN 60335-1
EN 60335-2-79
EN 62233: 2008
EN 55014-1:2017 + A11:2020
EN 55014-2: 1997 + A1: 2001 + A2: 2008
EN 61000-3-2: 2014
EN 61000-3-11:2000
ENIEC63000:2018
H.Jenner Chairman of the Board of Management
S. Reiser Manager Regulatory Affairs & Certification
2006/42/EZ (+2009/127/EZ)
2014/30/EU
2011/65/EU
2000/14/EC
2009/125/EC
Applied provision(s)
(EU) 2019/1781
Applied harmonised standards
EN 60335-1
EN 60335-2-79
EN 62233: 2008
EN 55014-1:2017 + A11:2020
EN 55014-2: 1997 + A1: 2001 + A2: 2008
EN 61000-3-2: 2014
EN 61000-3-11:2000
EN IEC 63000:2018
H. Jenner, Chairman of the Board of Management
S. Reiser Manager Regulatory Affairs & Certification
Person authorized to compile the documentation:
S. Reiser
Alfred Karcher SE & Co. KG
Alfred-Karcher-Str.28-40
71364 Winnenden (Germany)
Tel.: +49 7195 14-0
Winnenden, 2022/10/01
Table of contents
General information 118
Environmental protection 118
Intended use 118
Accessories and spare parts 118
Scope of delivery 118
Description of the device 119
Device overview. 119
Symbols on the device 119
Installation 119
Environmental protection

Packaging materials can be recycled. Please dispose of packaging in accordance with the environmental regulations.

Electrical and electronic devices contain materials, components and substances that may be hazardous to health and the environment if not handled or disposed of correctly, e.g. batteries, rechargeable batteries or oil.
These components are necessary for the correct functioning of the device. Devices marked with this symbol must not be disposed of together with household waste.
Work involving the suction of substances that produce oil-containing water, e.g. when changing the oil in the engine or gearbox, must only be carried out at locations approved for oil-water separation.
Work with cleaning agents must only be carried out on leak-proof work surfaces with a connection to the wastewater sewer. Do not allow cleaning agents to enter water bodies or the ground.
In some countries, drawing water from public water bodies is not permitted.
Information on ingredients (REACH)
Current information on ingredients is available at: www.kaercher.de/REACH
Intended use
Use the device for cleaning under high pressure in the household.
The high-pressure cleaning device is intended for cleaning machines, vehicles, buildings, tools, facades, terraces, garden equipment, etc. with a high-pressure water jet.
Accessories and spare parts
Use only original accessories and original spare parts. They ensure the safe and trouble-free operation of the device.
Information on accessories and spare parts can be found at: www.kaercher.com.
Scope of delivery
The scope of delivery of the device is shown on the packaging. When unpacking, check the contents for completeness. If accessories are missing or in case of transport damage, contact your dealer.
Description of the device
See illustrations on the page with graphics Figure A Figure B
1 Transport wheel ② Water connection with coupling ③ Suction hose for detergent (4) Mop holder for cable ⑤ Storage for cable ⑥ Drum for hose ⑦ Hose guide ⑧ Spray tube for stain remover ⑨ Vario Power spray tube for the most demanding cleaning tasks. Working pressure can be increased continuously from SOFT to HARD. To adjust the working pressure, turn the nozzle on the spray tube for high-pressure cleaning and close the tube for spraying the detergent position. If the tube for spraying is closed completely and the pressure is SOFT, the pressure can be increased by pressing the trigger. 10 High-pressure spray gun ① Button for releasing the high-pressure spray gun from the spray tube 12 Nozzle of the high-pressure spray gun 13 Cover of the high-pressure spray gun 14 High-pressure spray gun (15) Switch on the device "0/OFF" / "I/ON" 16 Storage for spray tube 17 Storage for high-pressure spray gun / hose connection to the device (18) Handle for transport 19 Storage for high-pressure spray gun 20 Quick-release coupling for switching on and high pressure (2) Type plate 22 Coupling for water outlet 23 **Filter (armature, minimum diameter 1/2" (13 mm), minimum length 7.5 m, with fitting in the trade network quick coupling) 24 **Suction hose KARCHER for water supply from open reservoirs (catalog no. 2.643-100) (25) Screws 26 Ⅲ Shaft for high-pressure spray gun
** Optional
Safety devices
△CAUTION
Never modify safety devices!
Safety devices are for your protection.
Do not neglect, remove, or deactivate safety devices.
Device description
The device is protected against unintentional starting when stored.
Store the device in a dry place.
The storage conditions may affect the accessories.
For protection, KARCHER recommends using KARCHER water filters (special accessory, order no. 4.730-059).
Connecting the water supply
WARNING
Protection against freezing
WARNING
Danger of freezing
Improperly stored devices can be damaged by freezing. Store the device and accessories properly. Protect the device from freezing. The following conditions must be met: - The device is drained of water. Marked for high-pressure operation is void. 1. Turn on the device "I/ON". 2. Wait a maximum of 1 minute until no more water comes out of the high-pressure nozzle. 3. Turn off the device. 4. Store the device with all accessories in a frost-protected room.
Maintenance
DANGER
Danger of electric shock
Damaged parts must be replaced by qualified personnel.
Turn off the device.
The device does not need adjustment, i.e., it is not necessary to remove the periodic work of adjustment.
Searching for a leak in the water outlet
WARNING
Damaged hose in the water outlet
Damaged hose before water intake. Before placing the hose in the water outlet, check for damage.
If necessary, replace the hose in the water outlet.
- Remove the coupling from the water outlet.
- Insert the hose.
- Place the hose under running water. Figure 5
- Place the hose in the water outlet.
Cleaning the filter for detergent
For longer storage, clean the filter for detergent.
- Remove the filter from the detergent drawer.
- Place the filter under running water. Figure
Many faults can be fixed by you yourself using the instructions given. If you are not confident or the faults are not described here, contact the authorized service.
DANGER
Danger of electric shock
Parallel operation of devices to the same part
Disconnect the device.
Choose the target.
The device does not work
- Press the button for operation at high voltage. The device turns on.
- Check whether the voltage of the power table matches the voltage of the power source.
- Check the power supply cable for damage.
- If the device is overloaded and the protection has been activated:
a Turn off the device "0/OFF". b Let the device cool down for 1 hour. c Turn on the device "I/ON" and try it again in operation.
If the fault occurs repeatedly, send the device for inspection to the service.
The device works, the motor hums
Weak electrical shock may occur when using the extension cable.
- When turning on, first press the trigger for high pressure operation, then switch on the "I/ON" switch.
The device does not build up pressure.
Water supply is too weak.
- Open the water tap fully.
- Check the water supply for sufficient flow.
- Adjust the nozzle to the high-pressure setting.
- Check if the maximum spray height has been exceeded.
The water inlet filter is clogged.
1. Remove the water inlet filter with flat pliers. 2. Clean the filter under running water. Figure 5
The device has air in it.
- Vent the device:
a Turn on the device without the spray gun connected for a maximum of 2 minutes. b Press the trigger for high pressure operation and wait until water flows out without air bubbles from the high pressure nozzle. c Connect the spray gun.
Pressure fluctuations
- Cleaning the high pressure nozzle: a Remove any blockages from the nozzle opening with a needle. b Rinse the high pressure nozzle from the front with water.
- Check the amount of water to be added.
The device is not hermetically sealed.
- Minor leakage is technically unavoidable. In case of significant leakage, contact the authorized service.
Do not use detergents.
1. Remove the Vario Power spray lance and turn the nozzle to "SOFT". 2. Follow the filter on the vacuum cleaner for the cleaning agent. 3. Turn the vacuum cleaner switch to the cleaning position.
Warranty
For each device, the distributor provides warranty conditions. Any damage to your device will be repaired free of charge within the warranty period if it is due to material or manufacturing defects. In case of warranty claim, contact your distributor or the nearest authorized service, presenting the cash receipt. (Address, see back page)
Technical data
Chairman of the Board of Management
S. Reiser
Manager Regulatory Affairs & Certification
Documentation assistant:
S. Reiser
Alfred Karcher SE & Co. KG
Alfred-Karcher-Str. 28 - 40
71364 Winnenden (Germany)
Tel.: +49 7195 14-0
Fax: +49 7195 14-2212
Issued: 2022/10/01
Table of contents
General instructions 124
Environmental protection 124
Intended use 124
Accessories and spare parts. 124
Scope of delivery 124
Product: High-pressure washer
Type: 1.317-xxx
Chairman of the Board of Management
S. Reiser
Manager Regulatory Affairs & Certification
Documentation officer:
S. Reiser
Alfred Kärcher SE & Co. KG
Alfred-Karcher-Str. 28 - 40
71364 Winnenden (Germany)
Tel: +49 7195 14-0
Winnenden, 2022/10/01
Signatures
General notes 128
Chairman of the Board of Management
S. Reiser Manager Regulatory Affairs & Certification
Authorized to prepare documentation:
S. Reiser
Alfred Kärcher SE & Co. KG
Alfred-Karcher-Str. 28 - 40
71364 Winnenden (Germany)
Tel.: +49 7195 14-0
Fax: +49 7195 14-2212
Winnenden, 01.10.2022.
Contents
Chairman of the Board of Management
S. Reiser
Manager Regulatory Affairs & Certification
Scope of delivery 139
Declaration of conformity 139
Accessories and spare parts 139
Delivery set 139
Device description 139
Safety instructions 139
Device symbols 140
Putting into operation 140
Operation 141
Transportation 141
Storage 142
Maintenance and technical service 142
Troubleshooting assistance 142
Warranty 143
Technical characteristics 143
Declaration of conformity with EU standards. 143
General instructions


Before first use, familiarize yourself with the original instructions for
operation and safety instructions. Follow them.
Keep this brochure for future reference
Use of the following equipment.

Recyclable materials are to be fed into the recycling process. Packaging must be disposed of without harm to the environment.

Electrical and electronic devices contain valuable materials that are suitable for recycling, as well as components such as batteries and oils that, if
handled incorrectly or
disposed of improperly, can pose a potential hazard to human health and the environment. However, these components are necessary for the proper operation of the device. Devices marked with this symbol must not be disposed of together with household waste.
Work involving cleaning, as a result of which
wastewater containing oil may be produced, for example, washing the underbody or the engine, must only be carried out at washing stations equipped with an oil separator.
Work with cleaning agents
must only be carried out on impermeable surfaces with a connection to the sewage system. Cleaning agents must not enter water bodies or soil.

Taking water from open bodies of water is prohibited in some countries.
Directives on components (REACH)
Current information on components can be found at: www.kaercher.de/REACH
Intended use
Use the high-pressure cleaner only for household use.
The high-pressure cleaner is intended for cleaning machines, vehicles, buildings, tools, facades, terraces, garden equipment, and similar items using a high-pressure water jet.
Ppuna Ta 3anachi Detani
Only use original accessories and original spare parts. They guarantee safe and trouble-free operation of the device.
Information about accessories and spare parts can be found at www.kaercher.com.
Scope of delivery
The accessories supplied with the device are listed on the packaging. When unpacking the device, check the contents. If accessories are missing or if damage occurred during transport, please notify the dealer who sold the device.
Device description
See figures on page with illustrations A
Illustrations
1 Transport wheel
2 Water inlet pipe with installed dirt filter
3 Suction hose with dirt filter
4 Power cable with plug
5 Storage compartment for power cable
6 Drum cleaning nozzle
7 High pressure hose
8. Jet nozzle with abrasive for removing hardened residue
9. Vario Power jet nozzle for basic cleaning tasks. The working pressure can be smoothly adjusted from SOFT (low) to HARD (high). To adjust the working pressure, release the trigger on the spray gun and turn the jet nozzle to the desired position. If the jet nozzle is turned towards SOFT, more cleaning agent can be added.
(10) High-pressure gun
Installing the transport handle
- Install the handle for transport
- Close the handle for transport with the screw. Figure C
Installing the storage device for the high-pressure hose/network cable
- Insert the storage device for the high-pressure hose/network cable into the recess in the middle of the transport handle. The storage device clicks into place. Figure D
Installing the storage device for the jet nozzles
- Insert the storage device for the jet nozzles into the recess on the device.
- Hold the storage device in the vertical position and close it with the screw. Figure E
Installing the storage device for the high-pressure gun
- Insert the storage device for the high-pressure gun into the recess on the device.
- Hold the storage device in the vertical position and close it with the screw. Figure F
Installing the storage device for the network cable
Remove the drum for the plan.
- Insert the device for storage into the appropriate position for transportation.
- Hold the device for storage in a horizontal position and close it with its cover.
Figure B
Installation of the high-pressure drum for the plan.
Disassemble the drum for the plan.
- Insert and hold the drum for the plan.
- Close the holder with 2 screws. Figure K
- Press the drum for the plan. The drum is adjustable. Figure I
Install the filter for the water supply.
- Screw the filter for the water supply onto the water supply pipe on the device. Figure J
Commissioning
Instruction
Check that the resistance between the mains plug and the device does not exceed the maximum permissible resistance (see section Technical Data). If there are any questions regarding the impedance of the mains plug, contact the organization that supplies the electricity.
- Place the device on a level surface.
- Unwind the high-pressure hose and straighten out any loops and kinks (if present).
Figure
Device with hose drum: Before operating the high-pressure cleaner, the high-pressure hose must be completely unwound from the hose drum. 3. Insert the high-pressure hose into the high-pressure gun until it clicks into place.
Figure K
Figure
Follow the instructions for correct connection.
- Insert the high-pressure hose into the quick-connect coupling until it clicks into place. Figure L
- Check the connection by pulling on the high-pressure hose.
- Insert the mains plug into the socket.
Water supply
Connection parameters are specified on the rating plate or in the Technical Data chapter. Follow the water supply company's regulations.
Attention
Damage caused by contaminated water. Contamination, such as sand in the water, can cause damage to the device. To protect the device, use KÄRCHER filter water (special accessory, order no. 4.730-059).
Install the Aquastop system to protect against water leakage on the connection pipe of the device for water supply.
Water supply hose
Do not use the Aquastop hose on the connection pipe of the device for water supply.
The Aquastop hose can be used on the water tap.
- 1. Screw the union nut onto the hose for water supply. 2. Connect the hose to the water supply. See figure 3. 3. Open the water tap.
Suctioning water from open reservoirs
This device is suitable for suctioning water from open reservoirs, for example, from a rain barrel or pond (maximum suction height see chapter Technical data).
The suction hose for water supply is not required.
- Fill the suction hose with water.
- Connect the suction hose to the connection pipe of the device and immerse it in the water source (for example, in a rain barrel).
Removing the device
- Switch off the device.
- Unscrew the high-pressure hose.
- High-pressure pistol handle. The device is switched on. 4. Allow the device to operate for a maximum of 2 minutes until water starts coming out of the high-pressure pistol without pulsation.
- Release the high-pressure pistol trigger.
- Lock the high-pressure pistol trigger.
Operation
WARNING
Dry running of the pump
If the device has been running dry for more than 2 minutes, switch it off and follow the instructions in the Troubleshooting section.
Operation at high pressure
WARNING
Rough or damaged surfaces
Surfaces can be damaged if the nozzle is held too close to the object or if the wrong spray tube is selected.
When cleaning rough surfaces, keep a distance of at least 30 cm. Do not clean tires, rough or damaged surfaces using the dirt blaster.
- Insert the spray tube into the high-pressure pistol and lock it in place, turning it 90° as shown in figure N.
- Switch on the device (I/ON).
- Unlock the high-pressure pistol trigger.
- Handle with care. The device is equipped with a safety device.
Operation with the device
DANGER
Non-compliance with safety regulations
Serious injury or damage due to improper use of the device.
Follow the safety instructions of the device manufacturer, especially the instructions for personal protective equipment.
Instructions
KARCHER devices guarantee trouble-free operation. We recommend obtaining advice or contacting us for information materials about our devices.
Instructions
The device may only be used at low risk.
- Pull the device's suction hose out of the housing to the required length. Figure O
- Insert the suction hose into the device in the container with the device's opening.
- Use the Vario Power spray tube. 4. Turn the spray tube to the 'SOFT' position. During operation, the device's opening is closed to the water supply.
Recommended cleaning method
- Spray the device onto a dry surface and let it act for some time (do not wipe).
- Late blisters with water jet and high pressure.
Work with the tool
- Rinse the device thoroughly for about 30 seconds.
Interrupting work
- Release the high-pressure nozzle trigger. When the trigger is released, the device stops. High pressure in the system is maintained.
- Lock the high-pressure nozzle trigger. Figure P 3. During the first operation, the device may switch to "0/OFF".
End of work
DANGER
System pressure
Risk of injury from uncontrolled high-pressure water outlet
Disconnect the high-pressure hose from the high-pressure nozzle or the device only when the system is depressurized.
- Release the high-pressure nozzle trigger.
- Close the water tap.
- Press the high-pressure nozzle trigger for 30 seconds. The pressure that has built up in the system is released.
- Turn off the high-voltage device.
- Record the high-voltage value.
- Disconnect the device from the water supply system.
- Switch the device to OFF.
- Pull the plug out of the socket.
Transportation
CAUTION
Improper handling
Risk of injury or damage during transportation. Secure the device.
Device weight
- Hold the device by the handle during transportation.
Transport the device in the transport vehicle.
- Secure the device against tipping over.
Storage
Danger! Risk of falling! The device may tip over on inclined surfaces. Store the device safely.
Storing the device
- Place the device on a level surface.
- Disconnect the spray hose from the high-pressure washer.
- Press the trigger on the high-pressure washer to release the high-pressure hose from the washer.
- Press the quick-release coupling on the housing to release the high-pressure hose in the direction of the arrow and pull out the hose.
- Remove the high-pressure hose. The pistol with the hose must be removed from the high-pressure washer for storage.
Pistol with hose
a Insert one end of the high-pressure hose into the opening on the front side of the hose reel. b Turn the crank to wind the high-pressure hose. c Guide the high-pressure hose with the other hand.
Figure
d Close the hook of the high-pressure hose on the reel with the help of the hose hook. Figure R
- Store the cable reel on the device.
- Place the spray hose and high-pressure washer on the corresponding device for storage.
Follow the additional instructions before storing the device. See the chapter on maintenance and care.
Frost protection
ATTENTION
Risk of freezing
If the device is not emptied, it may be damaged by frost.
Empty the device completely and additional equipment.
The device does not require technical maintenance, i.e., regular technical maintenance is not necessary.
Cleaning the filter in the water supply pipe
Install the filter element into the pipeline and connect the water.
Install the device through the water supply connection. Check the filter element for damage before installing it into the pipeline or connecting the water.
Open the filter taps on the pipeline and supply water as needed.
- Remove the plug from the pipeline for water supply.
- Open the filter taps. 3. Install the filter element. 4. Connect the water supply.
- Install the filter element into the pipeline and connect the water supply.
Cleaning the filter element of the device.
Replace the filter with a new one of the same type.
- This filter is designed for water purification.
- Rinse the filter under running water. Figure 7
To turn off the device, press the ON/OFF button and then turn it on again.
If the malfunction occurs many times, contact the service center for device inspection.
Do not start the device if the cord is damaged.
Early voltage drop may be due to weak power supply or use of an extension cord.
1. When replacing the filter, first turn off the device with the ON/OFF button.
High-capacity filter, then turn on the device with the ON/OFF button.
The device does not create noise.
The water supply is weak.
- Check the water supply to the faucet. 2. Check the water supply to the faucet.
- Check the water supply to the hose. 4. Check the maximum height of the device installation.
Insert the filter into the water supply pipe.
- Remove the filter from the water supply pipe using pliers.
- Connect the device to the water supply. Turn on the water.
The device is now ready for use.
- To turn off the device:
a) Do not remove the device without the spray hose for more than 2 minutes. b) Press the high-pressure trigger and wait until water flows out of the trigger without bubbles. c) Then remove the spray hose.
Large pressure drops
- Clean the high-pressure filter:
a) Remove any blockages from the nozzle opening. b) Rinse the high-pressure filter with water from the front.
- Check the fittings and connections.
Intermittent operation
- Slight intermittent operation of the device is due to technical features. In case of strong intermittent operation, contact an authorized service center.
Detergent not being drawn in
- Use the Vario Power spray hose and turn it to the "SOFT" position until it stops.
- Clean the filter in the detergent suction hose. 3. Check the detergent suction hose for kinks.
Warranty
All countries have their own warranty conditions, established by the authorized organization for the sale of products in each country. Possible malfunctions of the device during the warranty period are eliminated free of charge, provided that the malfunction is due to defects in materials or manufacturing defects. In case of claims during the warranty period, please contact, with the purchase receipt, the trade organization that sold the product, or the nearest authorized service center. (Addresses on the back)
Technical characteristics
Type: High pressure apparatus
Model: 1.317-xxx
Complies with directives
2006/42/EG (+2009/127/EG)
2014/30/EC
2011/65/EC
2000/14/EG
2009/125/EC
Applied regulation(s)
(EC) 2019/1781
Applied harmonized standards
EN 60335-1
EN 60335-2-79
EN 62233: 2008
EN 55014-1:2017 + A11:2020
EN 55014-2: 1997 + A1: 2001 + A2: 2008
EN 61000-3-2: 2014
EN 61000-3-11:2000
EN IEC 63000:2018
Conformity assessment method according to 2000/14/EC: Annex V
Sound power level, dB(A)
Measured: 88
Guaranteed: 91
Person authorized to compile the technical file on behalf of and with the authorization of the management.
H. Jenner Chairman of the Board of Management
S. Reiser Manager Regulatory Affairs & Certification
Person responsible for documentation: S. Reiser
Alfred Karcher SE & Co. KG
Alfred-Karcher-Str. 28-40
71364 Winnenden (Germany)
Tel.: +49 7195 14-0
Fax: +49 7195 14-2212
M. BiHHeHdEh, 01.10.2022
Ma3MyHbI
Kannbl Hucaynap. 144
Kopwafran opTaHbI KopFay 144
ByibIMbl MaKCaTbHa CcHKeC KOnJaHy. 144
KepeK-kaPak KHe KocanKbI 6eJWeKTeP 144
XeK3iIm XHaftb1 144
KypblfbiHbIH CnnaTamaCbI 144
Kopfahbic KypaJI-ka6IbIKTapbl 145
KypbIbIaIbI 6enriep. 145
Ophaty 145
Painanahyra eHri3y 146
PaiandaHny 146
TacbImaIay. 147
CaKray. 147
Kytim XeHe TexHnKaJIbIK KbI3MeT KepCety 148
Akaynap KeiHderi KEmek 148
Kenilik 148
TexHnKaIbIK CnIaTTamJaIapbl. 149
AkbipaTkblW KypblfblHbIH Ke3deiCOK KocblnybHaKeepri 6oanaBl.
KofapbI TereypinHnncToJIeTTiH qnkcaTopbI
Φικcatop xorapbī tereepiHdi nntctoneTTIH Tetirih 6yfaTtānblj KHe H KpybIfblHbIH Ke3deNcOK icke KocblnybiHa Keepri 6onaBbl.
Kofapbl KblcblMdbI NCTOJTe kapeHaJIFaH KOIMaHbI OPhaTbIHbI3
- KofapblkbicbIMdbI nuctoneTke apHaJIFaH KOImaHbIKypbJIfbldaftby YCTafblka CbIPfbltHiB3.
- CaTaydbi coHbI KyHHe HbIK yCTaHbI3 XHe 6ypaHdAmEH bekitih3. Cypert F
Kejire kocy ka6eni yuih caTaydbI opHaTbIHb3
UHaHr opamblKOK Kypblfblnap
- Remove the protective cap from the fitting before installation.
- After installation, check the connection for leaks. Figure B
Install the protective cap on the fitting.
If the fitting has a protective cap
- Install the protective cap securely.
- Install and secure it. Figure H
- Install the protective cap. Check the protective cap. Figure I
Install the coupling intended for the pipeline.
- Install the coupling intended for the pipeline onto the pipeline. Figure J
Commissioning
Operation
Before commissioning, ensure that the required accessories are installed (see technical specifications). If you are not sure about the accessories needed for commissioning, contact the energy supply company.
- Install the protective cap.
- KorapbI TereepiHki Ky6biipweKTI ToBik Weewin, imMeKTepeMeh 6ypblbCTapdbI 6ocatbHb3.
Hycay
UHaOpamb6ap KypbInfnnap:Kmbic Ke3iHde KorapbkbicimdbuHa,wnaH2,wnaH2 opambiHa monbirBIme HwirapblnykepK. 3. Korapbi tereepinii k6bipwekTI kofapbi tereepinii nictonetke on ectinetinHdenn bibcnen capT etin ka6blraHwa cana 6epiH3.
Cyper K
Hycay
BypaHdaIbI mymikmiH dypbic KaNbInma mypybIH 6aKablnHaHbI3. 4. KorapbI tereypinHki Ky6bIpweKti Te3 kAnfaraBiw Kocblbica on ectineTHei DblbicneH capTein Ka6blnatbHdaanCanbHb3. Cypet L 5. KorapbI TereepinDi Ky6bpweKTI TapTbIn, 6ekHicTiH ceHimdiJirirn TeKcepiH3. 6. Keni icikwecih, aawacbH po3ekara caibhB3.
Cy 6epy
KocbIaTbH KYkTeMeHi ΦnPmaJIbIK TaKtaWaaH Hemece 6eImHeH KapaBb3 TexHukaJIbIK cunammamanaPbl.
CymeH kAMtAmacbI3 ety KecinOpHbIHbIH HycKaynapbIH caKaTaHbI3.
HA3AP AYdAPbIhbl
JaacmaHrah cybIn KeJmipemin 3anaJIbI
CydaI naMaHynap copfblHbIH XHe OHbIH Xa6dbkmapbHbIH 3akBIMdaHybHa anbIn KeNedi. KARCHER Kopray yuiH KARCHER cy cy32icih naDaIahy ycblHbIaObl (apHaUbI Xa6dbk, mancbipbc 6epy Hempi 4.730-059).
Cy Ky6bIpbHa KocBiny
HA3AP AYdAPbIhbl
KypbIrfHbIH cy KocbIbIMbIHda wnaHeHH Aquastop-NeH 6aunahbcbl
Connect the hose to the Aquastop fitting on the water tap.
The Aquastop tap must be connected to the fitting.
- Screw the hose connector onto the thread of the water tap.
2. Connect the hose to the water tap. See figure M 3. Use only the hose with the union nut.
Check the water supply from the tap.
For this purpose, the appliance is equipped with a non-return valve (KARCHER copy) on the water connection (see figure, item 2.643-100) to protect against dirty water, soap, or other liquids being drawn back into the drinking water supply (maximum backflow protection according to EN 1717).
When using the copy, do not operate the water tap without the filter.
- Fill the copy with water.
- Remove the filter from the water connection and clean it under running water (soap, other liquids).
- Press the trigger of the high-pressure gun.
- Press the trigger of the high-pressure gun. The pump starts.
- Let the water run through the high-pressure gun without the nozzle for a maximum of 2 minutes.
- Place the device on a flat surface.
- Place the device on a flat surface.
Warnings
ATTENTION
Rules for using the dryer and closing the valve
If the device is not used for more than 2 minutes, turn it off to avoid unnecessary energy consumption.
Hot air drying mode
ATTENTION
Closing the valve after use
Close the valve after each use to prevent dust and moisture from entering.
When closing the valve, keep a distance of at least 30 cm from the device.
Do not touch the device with wet hands or while it is plugged in.
- Place the device on a flat surface and rotate it 90 degrees to lock it. See Figure N
- Close the valve (I/ON).
- Place the device on a flat surface and close the valve.
- The device is intended for outdoor use. The device is not suitable for use in the rain.
Starting the device
CAUTION
Technical safety
The device must not be operated in areas where there is a risk of explosion.
For the device's safety, observe the technical safety instructions, especially for devices with a protective class.
Operation
KARCHER devices are designed for professional use. If you have any questions, please contact our customer service or authorized dealers.
Operation
The device can be operated with a short interruption.
- Pull the trigger to release the water flow directed at the device.
Figure O.
- Release the trigger to stop the water flow from the device.
- Set the Vario Power trigger.
- Turn the trigger to the "SOFT" position. If the device is not in use, disconnect it from the water supply.
- Close the lid, open the valve, and drain the remaining water (if any).
- Rinse the hot water tank with clean water and drain it.
After using the device with the lid
- Rinse the device with water for 30 seconds and drain it.
Stopping the device
- Disconnect the hot water tank from the power supply. After disconnecting, the device will still be hot. Wait until the hot water has cooled down.
- Disconnect the hot water tank from the power supply. Then press
- After use, if you do not use the device for more than 5 minutes, turn it off (0/OFF).
Storing the device
CAUTION
Hot water
When the device is in operation, do not touch the hot water or the hot water outlet. Wait until the hot water has cooled down before touching it.
- Disconnect the hot water tank from the power supply.
- Empty the water tank and dry it.
- After the boiler has been heated for 30 seconds, the pipe base is hot. Do not touch the pipe base.
- After the boiler has been heated, it is hot.
- After the boiler has been heated, do not touch it.
- Turn off the water supply by closing the valve.
- Turn off the boiler (OFF).
- Stop the operation and turn it off.
Draining
Warning
Draining procedure
Before draining, close the gas valve and turn off the boiler. After draining, check that the boiler is off.
Draining the boiler
- Drain the boiler by opening the drain valve.
Draining with a car
- Remove the boiler from the wall and floor and store it.
Storage
Before closing any cover, make sure that no foreign objects remain inside.
During operation, periodically check the cover.
Installing the cover
- Place the cover in the correct position.
- Tighten the upper cover screws by hand.
- Do not use a screwdriver to tighten the upper cover screws; tighten them by hand only.
- For the upper cover screws, use a screwdriver to loosen them, then remove the upper cover screws.
- Remove the upper cover screws. Store the cover in a dry place. Store the cover in a high place.
a. Before removing the upper cover screws, disconnect the power cord. b. To remove the upper cover screws, use a screwdriver. c. Remove the upper cover screws with your hands.
Figure Q
d. Insert the upper cover screws into the holes and tighten them by hand.
Figure R
- Install the cover screws.
- After completing the installation, reconnect the power cord and turn on the power.
Store the device in a dry place, protected from dust and mechanical damage.
Storage conditions
ATTENTION!
Storage temperature
It is possible to store the device at temperatures below freezing.
Store the device and its accessories at temperatures below freezing.
Protect the device from moisture.
To do this:
The device is powered by a battery. Replace the battery as follows: 1. Turn off the device ("I/ON"). 2. Remove the battery from the compartment and wait at least 1 minute. 3. Insert a new battery. 4. Dispose of the old battery in accordance with all regulations.
Maintenance and technical service
CARE
Cleaning and maintenance
During operation, avoid contact with the device and its accessories.
Turn off the device.
Remove the batteries from the device.
Technical specifications for the corset. The corset is designed to be worn over the body, and it is intended to provide support and shaping.
Electrical safety when using the device
ATTENTION
Protection against electric shock when using the device
The device must be connected to a power outlet that is properly grounded. Do not use an adapter that bypasses the grounding.
Do not use the device if the power cord or plug is damaged.
- Do not touch the plug with wet hands.
- Unplug the device.
- Do not immerse the device in water. See Figure 5.
- Do not place the device near water.
Cleaning the water tank
Before cleaning, unplug the device and allow it to cool down.
- Remove the water tank from the device and empty it.
- Do not immerse the device in water. See Figure 7.
During operation, the device
If the device is used in a place where the air humidity is high, the device may be damaged. If it is used, please contact the service organization without permission.
KAYIN
Tokneh 3bIKbIMdany kayni
Kephey KyuiHde mypraH 6eIwueKmepMeH 6aJNaHbIC Ke3iHdezi 3aKbIMdap KypbInFbIbI eWipipiH3. Kenik umekepi posemkadaH uBirapbn anbHb3. Kpbnfnxmbic ictemei
- KorapbI Tereepin nnctonetTtH TetirHe 6acbl3. KypblFbKocblnabI.
- ΦιρMaJIbIΚΤΑΚΤΑΝΑΚερCετιΓηΗκερHEYΚοpeK ΚεδιHΚερHEYΙΜΕΝΑΚηκε Κημε, JOK Α, TEKCEpiH3.
- Kei 6aycbimbH 3aKbIMapFa TeKcepHj3.
- Ko3raTtKbIiTbIH apTbIK KxKTeNy i Ke3iHde OHbIH KopraHbIC ABTomAtbI ICTemEi Kanca: a KypblIbIbHbI eWipHiz («0/OFF»).
b KypbIfblHb1 cafataCyyfa KOblHb3. C KypblfbiHbKOcbHb3 «I/ON» XaHe OHb KaTadaH naJaHa ha 6actaHb3.
Erep Kni akaynap TybHdAn KaTca, OHda KpyblfBhl cepBnCTIK Kb3MeTTe Tekcepy KepeK.
Kypblfblicke KocbImaIdbI, Ko3rntKbiw rynen Typ
Onci3 xeninH acepiHemec 3apTybKa6JIbI naDanaHydbH acepiH KepHeydiKJaybl.
- KocatbH Ke3e aJdbImeH KofapbTeereypiHINCTOJIeTTI 6acblb3, aJ cOaH KeiH KpyblfblbKocblb3 («I/ON»).
KypbIINfbl KbcIbIM TydbIpMaIbI
Cy kTeKi3y kTeKlNiikci3.
- Turn the device off.
- Do not use the device if it is damaged, only if it is intact.
- Check the device's details.
- Do not use the device if the maximum duration has passed.
The device is intended for water treatment.
- Do not use the device for water treatment if it is damaged.
- Place the device under running water. See figure S
Installation.
- To install:
a) Insert the device into the holder for a maximum of 2 minutes. b) Do not use the device without water in the container. c) Insert the device.
Removing the device
- To remove the device from the container:
a) Remove the device from the container. b) Remove the device from the container with water.
- Check the water level.
The device's container
- The design of the counting device is simple. During the counting process, you can perform service work yourself.
Keep the device clean
- Vario Power is equipped with a switch that can be set to the «SOFT» mode.
- Drain the water from the container intended for the device.
- Empty the container intended for the device and its contents.
Warranty
The warranty terms provided by the distributor apply. In case of material or manufacturing defects, the warranty claims are accepted within the warranty period. If you have any questions regarding the warranty, please contact the seller or the authorized service center.
(Provided at the end of the manual)
Follow the instructions for the type of test.
The device's serial number should be:
Example: 30190
3rd digit from the end: 0, 2nd digit from the end: 1, 1st digit from the end: 0, 9th digit from the end: 0, 3rd digit from the end: 0, 1st digit from the end: 0
Therefore, this example has the code 30190, which corresponds to the date 09/(2)013.
Technical specifications
Applicable standards
(EU) 2019/1781
Implementing standard
EN 60335-1
EN 60335-2-79
EN 62233: 2008
EN 55014-1:2017 + A11:2020
EN 55014-2: 1997 + A1: 2001 + A2: 2008
EN 61000-3-2: 2014
EN 61000-3-11:2000
EN IEC 63000:2018
Chairman of the Board of Management
S. Reiser
Manager Regulatory Affairs & Certification
Signed for and on behalf of:
C. Reiser
Alfred Karcher SE & Co. KG
Alfred-Karcher-Str. 28 - 40
71364 Winnenden (Germany)
Tel.: +49 7195 14-0
Fax: +49 7195 14-2212
Winnenden, 2022/10/01

THANK YOU!
MERCI! DANKE! GRACIAS!

Register your product and benefit from many advantages.
www.kaercher.com/welcome ★★★★★

Rate your product and tell us your opinion.
www.kaercher.com/dealersearch
Alfred Kärcher SE & Co. KG
Alfred-Karcher-Str. 28-40
71364 Winnenden (Germany)
4-2-HC-A5-GS
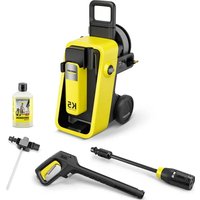

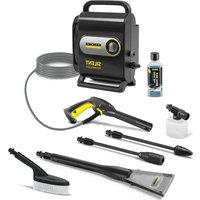
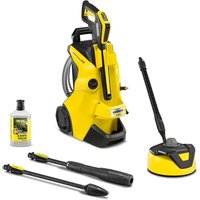
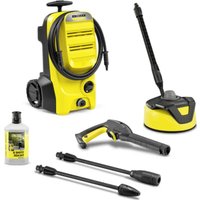
- CONTENTS
- GENERAL NOTES
- ENVIRONMENTAL PROTECTION
- NOTES ON THE CONTENT MATERIALS (REACH)
- INTENDED USE
- ACCESSORIES AND SPARE PARTS
- SCOPE OF DELIVERY
- DEVICE DESCRIPTION
- FOR THE ILLUSTRATIONS, REFER TO THE GRAPHICS PAGE ILLUSTRATION A
- ILLUSTRATION B
- SAFETY DEVICES
- CAUTION
- MISSING OR MODIFIED SAFETY DEVICES
- POWER SWITCH
- HIGH-PRESSURE GUN LOCK
- AUTO-STOP FUNCTION
- MOTOR CIRCUIT BREAKER
- SYMBOLS ON THE DEVICE
- INSTALLATION
- FOR THE ILLUSTRATIONS, REFER TO THE GRAPHICS PAGE
- MOUNTING THE TRANSPORT HANDLE
- MOUNTING THE STORAGE OPTION FOR THE HIGH-PRESSURE HOSE / MAINS CONNECTION CABLE
- MOUNTING THE STORAGE OPTION FOR SPRAY LANCES
- ILLUSTRATION E
- MOUNTING THE STORAGE OPTION FOR THE HIGH-PRESSURE GUN
- ILLUSTRATION F
- MOUNTING THE STORAGE OPTION FOR THE MAINS CONNECTION CABLE
- DEVICES WITHOUT A HOSE REEL
- ILLUSTRATION G
- MOUNTING THE HIGH-PRESSURE HOSE REEL
- DEVICES WITH A HOSE REEL
- INSTALLING THE WATER CONNECTION COUPLING
- INITIAL STARTUP
- NOTE
- WATER SUPPLY
- ATTENTION
- DAMAGE THROUGH CONTAMINATED WATER
- CONNECTION TO THE WATER LINE
- HOSE COUPLING WITH AQUASTOP ON THE WATER CONNECTION OF THE DEVICE
- ILLUSTRATION M
- SUCKING WATER FROM OPEN CONTAINERS
- VENT THE DEVICE
- OPERATION
- PUMP RUNNING DRY
- HIGH-PRESSURE OPERATION
- DAMAGE TO PAINTED OR SENSITIVE SURFACES
- OPERATION WITH DETERGENT
- DANGER
- FAILURE TO ADHERE TO THE SAFETY DATA SHEET
- ILLUSTRATION O
- RECOMMENDED CLEANING METHOD
- AFTER OPERATION WITH DETERGENT
- INTERRUPTING OPERATION
- ILLUSTRATION P
- ENDING OPERATION
- PRESSURE IN THE SYSTEM
- TRANSPORT
- PULLING THE DEVICE
- TRANSPORTING THE DEVICE IN A VEHICLE
- STORAGE
- STORING THE DEVICE
- ILLUSTRATION Q
- ILLUSTRATION R
- FROST PROTECTION
- CARE AND SERVICE
- △DANGER
- CLEAN THE SIEVE IN THE WATER CONNECTION
- CLEAN THE DETERGENT FILTER
- TROUBLESHOOTING GUIDE
- AIR IS IN THE DEVICE
- STRONG PRESSURE FLUCTUATIONS
- DEVICE LEAKING
- DETERGENT IS NOT SUCKED IN
- WARRANTY
- EU DECLARATION OF CONFORMITY
- CONTENT
- INDEX
- TABLE OF CONTENTS
- INDICES
- FIGURE C
- RELEVANT EU DIRECTIVES
- APPLICABLE REGULATION(S)
- APPLIED HARMONIZED STANDARDS
- INTRODUCTION
- REISER
- GENERAL INSTRUCTIONS
- NOTES ON INGREDIENTS (REACH)
- SWITCHING OFF THE DEVICE
- HIGH-PRESSURE HOSE LOCK
- MOTOR PROTECTION SWITCH
- INSTALLING THE HANDLE FOR TRANSPORT
- INSTALLING THE HIGH-PRESSURE HOSE/NETWORK CONNECTION CABLE COMPARTMENT
- INSTALLING THE HOSE STORAGE COMPARTMENT
- INSTALLING THE HIGH-PRESSURE PISTOL STORAGE COMPARTMENT
- INSTALLING THE NETWORK CONNECTION CABLE COMPARTMENT
- INSTALLING THE HIGH-PRESSURE HOSE REEL
- INSTALLING THE WATER SUPPLY COUPLING
- COMMISSIONING
- DAMAGE DUE TO CONTAMINATED WATER
- CONNECTION TO THE WATER SUPPLY
- SCREW COUPLING WITH AQUASTOP SYSTEM ON THE WATER CONNECTION OF THE DEVICE
- WATER INTAKE FROM OPEN RESERVOIRS
- REMOVING AIR FROM THE DEVICE
- HIGH PRESSURE OPERATION
- WARNING
- FAILURE TO OBSERVE SAFETY INSTRUCTIONS
- AFTER OPERATION WITH CLEANING AGENT
- WORK SETUP
- FIGURE P
- END OF WORK
- SYSTEM PRESSURE
- TRANSPORTATION
- RISK OF INJURY
- LIFTING THE DEVICE
- STORAGE OF THE DEVICE
- FIGURE Q
- FIGURE R
- RISK OF FREEZING
- DANGER OF FREEZING
- MAINTENANCE AND SERVICING
- CLEANING THE MESH FILTER IN THE WATER SUPPLY PIPE
- FUNCTION OF THE DEVICE FOR THE DEVICE OPERATION
- TROUBLESHOOTING
- DEVICE IS NOT SEALED
- DETERGENT IS NOT BEING DRAWN IN
- UPORABLJENA(-E) UREDBA(-E)
- DESCRIPTION OF THE DEVICE
- △CAUTION
- STORE THE DEVICE IN A DRY PLACE
- CONNECTING THE WATER SUPPLY
- PROTECTION AGAINST FREEZING
- MAINTENANCE
- DANGER OF ELECTRIC SHOCK
- SEARCHING FOR A LEAK IN THE WATER OUTLET
- DAMAGED HOSE IN THE WATER OUTLET
- CLEANING THE FILTER FOR DETERGENT
- THE DEVICE DOES NOT WORK
- THE DEVICE WORKS, THE MOTOR HUMS
- THE DEVICE DOES NOT BUILD UP PRESSURE
- THE WATER INLET FILTER IS CLOGGED
- THE DEVICE HAS AIR IN IT
- PRESSURE FLUCTUATIONS
- THE DEVICE IS NOT HERMETICALLY SEALED
- DO NOT USE DETERGENTS
- SIGNATURES
- DIRECTIVES ON COMPONENTS (REACH)
- PPUNA TA 3ANACHI DETANI
- ILLUSTRATIONS
- INSTALLING THE TRANSPORT HANDLE
- INSTALLING THE STORAGE DEVICE FOR THE HIGH-PRESSURE HOSE/NETWORK CABLE
- INSTALLING THE STORAGE DEVICE FOR THE JET NOZZLES
- INSTALLING THE STORAGE DEVICE FOR THE HIGH-PRESSURE GUN
- INSTALLING THE STORAGE DEVICE FOR THE NETWORK CABLE
- REMOVE THE DRUM FOR THE PLAN
- FIGURE B
- INSTALLATION OF THE HIGH-PRESSURE DRUM FOR THE PLAN
- DISASSEMBLE THE DRUM FOR THE PLAN
- INSTALL THE FILTER FOR THE WATER SUPPLY
- INSTRUCTION
- FIGURE
- FIGURE K
- INSTALL THE AQUASTOP SYSTEM TO PROTECT AGAINST WATER LEAKAGE ON THE CONNECTION PIPE OF THE DEVICE FOR WATER SUPPLY
- SUCTIONING WATER FROM OPEN RESERVOIRS
- REMOVING THE DEVICE
- DRY RUNNING OF THE PUMP
- OPERATION AT HIGH PRESSURE
- ROUGH OR DAMAGED SURFACES
- OPERATION WITH THE DEVICE
- NON-COMPLIANCE WITH SAFETY REGULATIONS
- INSTRUCTIONS
- WORK WITH THE TOOL
- INTERRUPTING WORK
- IMPROPER HANDLING
- DEVICE WEIGHT
- TRANSPORT THE DEVICE IN THE TRANSPORT VEHICLE
- CLEANING THE FILTER IN THE WATER SUPPLY PIPE
- INSTALL THE FILTER ELEMENT INTO THE PIPELINE AND CONNECT THE WATER
- CLEANING THE FILTER ELEMENT OF THE DEVICE
- DO NOT START THE DEVICE IF THE CORD IS DAMAGED
- THE DEVICE DOES NOT CREATE NOISE
- THE DEVICE IS NOW READY FOR USE
- LARGE PRESSURE DROPS
- INTERMITTENT OPERATION
- DETERGENT NOT BEING DRAWN IN
- TECHNICAL CHARACTERISTICS
- MA3MYHBI
- KOFAPBI TEREYPINHNNCTOJIETTIH QNKCATOPBI
- KOFAPBL KBLCBLMDBI NCTOJTE KAPEHAJIFAH KOIMAHBI OPHATBIHBI
- KEJIRE KOCY KA6ENI YUIH CATAYDBI OPHATBIHB
- UHAHR OPAMBLKOK KYPBLFBLNAP
- INSTALL THE PROTECTIVE CAP ON THE FITTING
- IF THE FITTING HAS A PROTECTIVE CAP
- INSTALL THE COUPLING INTENDED FOR THE PIPELINE
- HYCAY
- CYPER K
- CY 6EPY
- HA3AP AYDAPBIHBL
- CY KY6BIPBHA KOCBINY
- CHECK THE WATER SUPPLY FROM THE TAP
- WARNINGS
- HOT AIR DRYING MODE
- STARTING THE DEVICE
- FIGURE O
- AFTER USING THE DEVICE WITH THE LID
- STOPPING THE DEVICE
- HOT WATER
- DRAINING
- DRAINING PROCEDURE
- DRAINING THE BOILER
- DRAINING WITH A CAR
- INSTALLING THE COVER
- STORAGE CONDITIONS
- STORAGE TEMPERATURE
- MAINTENANCE AND TECHNICAL SERVICE
- CARE
- ELECTRICAL SAFETY WHEN USING THE DEVICE
- CLEANING THE WATER TANK
- DURING OPERATION, THE DEVICE
- KAYIN
- KYPBIINFBL KBCIBIM TYDBIPMAIBI
- THE DEVICE'S CONTAINER
- KEEP THE DEVICE CLEAN
- APPLICABLE STANDARDS
- IMPLEMENTING STANDARD
- THANK YOU
- MERCI! DANKE! GRACIAS
Brand : Kärcher
Model : 7 WCM Premium
Category : Pressure washer