
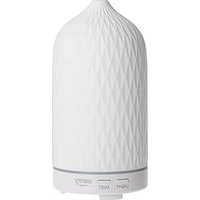
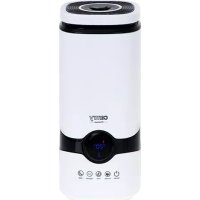
CR 7973 - Humidifier CAMRY - Free user manual and instructions
Find the device manual for free CR 7973 CAMRY in PDF.

| Product type | Ultrasonic humidifier |
| Brand | Camry |
| Model | CR 7973 |
| Power supply | 220-240 V ~ 50/60 Hz |
| Power | 23 W |
| Water tank capacity | 5 liters |
| Mist intensity levels | 5 levels (1 to 5) |
| Timer | 1 h, 2 h, 4 h, 8 h + 3 night modes (1/1, 5/5, 10/10 min) |
| Humidity setting | 40% to 90% RH in 5% steps |
| Display | Ambient temperature and humidity |
| Aromatherapy function | Yes, with dedicated cotton sponge (water-soluble essential oils) |
| Water shortage protection | Automatic shut-off + flashing red indicator |
| Descaling filter | Integrated (ref. CR7973.1), lifespan 1 year, replaceable |
| Cleaning and maintenance | Empty and clean the tank every 3 days; descale the transducer regularly with a citric acid solution |
| Cleaning brush included | Yes |
| Dimensions (approx.) | 25 x 25 x 30 cm |
| Weight (approx.) | 2 kg |
| Use | Household only |
Frequently Asked Questions - CR 7973 CAMRY
User questions about CR 7973 CAMRY
0 question about this device. Answer the ones you know or ask your own.
Ask a new question about this device
Download the instructions for your Humidifier in PDF format for free! Find your manual CR 7973 - CAMRY and take your electronic device back in hand. On this page are published all the documents necessary for the use of your device. CR 7973 by CAMRY.
USER MANUAL CR 7973 CAMRY
natural_image
Black and white photo of a modern kitchen air purifier with digital display and control buttons (no visible text or symbols)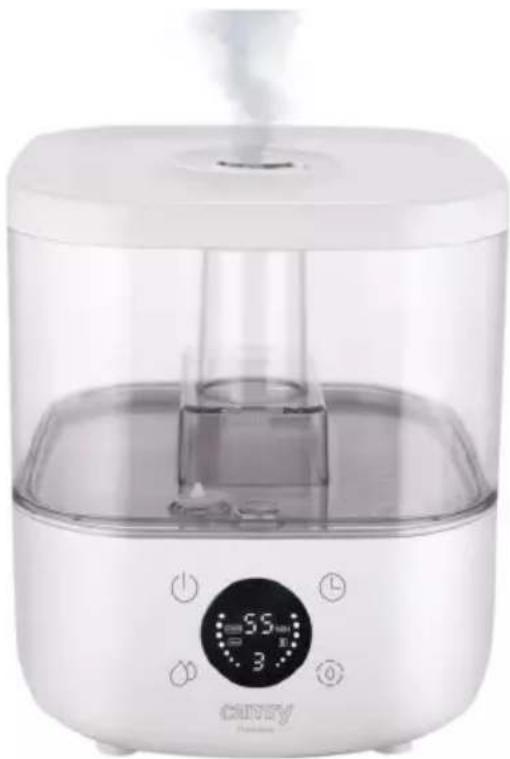
natural_image
White ceramic water purifier with digital display and digital temperature scale (no visible text or symbols)CR 7973
natural_image
Line drawing of a device interior with a curved arrow indicating motion or change (no text or symbols)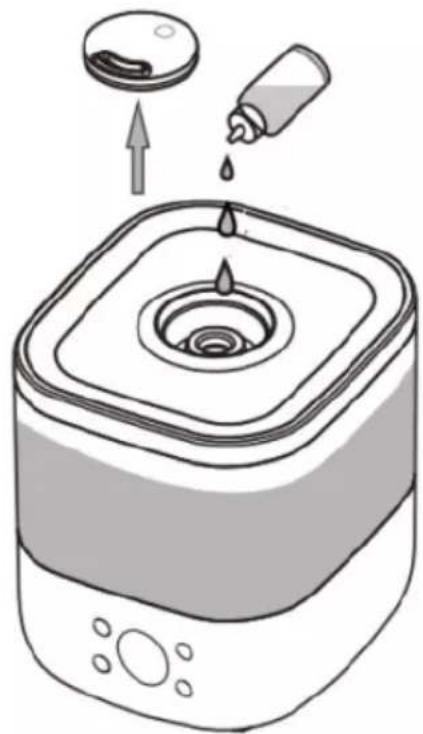
natural_image
Illustration of a square water heater with liquid droplets and a dropper, showing an upward arrow (no text or symbols)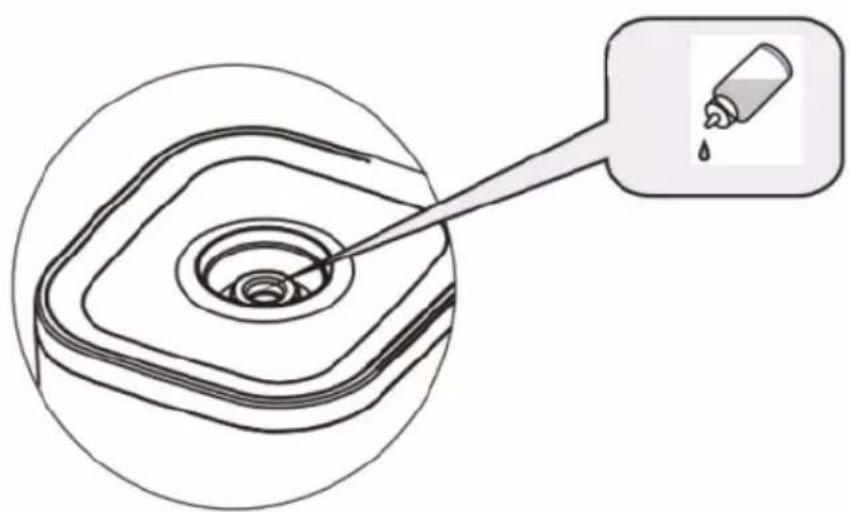
natural_image
Diagram showing a droplet being inserted into a square container with a pipette, no text or symbols presentFigure 3

flowchart
graph TD
    A["Default first gear at first"] --> B["Press one time"]
    B --> C["Second gear"]
    C --> D["Press two times"]
    D --> E["Third gear"]
    E --> F["Press three times"]
    F --> G["Cycle in turn"]
    G --> H["Fifth gear"]
    H --> I["Press four times"]
    I --> J["Fourth gear"]
flowchart
graph TD
    A["Default timer off"] --> B["1 hour setting"]
    B --> C["2 hours setting"]
    C --> D["4 hours setting"]
    D --> E["5 hours setting"]
    E --> F["6 hours setting"]
    F --> G["7 hours setting"]
    G --> H["8 hours setting"]
    H --> I["9 hours setting"]
    I --> J["Turn-off timer"]

    subgraph Time Settings
        K["Sleep mode 01"] --> L["Sleep mode 05"]
        L --> M["Sleep mode 10"]
    end

    N["Press one time"] --> O["Press multiple times"]
    O --> P["Turn off Press one time"]

    style A fill:#f9f,stroke:#333
    style B fill:#f9f,stroke:#333
    style C fill:#f9f,stroke:#333
    style D fill:#f9f,stroke:#333
    style E fill:#f9f,stroke:#333
    style F fill:#f9f,stroke:#333
    style G fill:#f9f,stroke:#333
    style H fill:#f9f,stroke:#333
    style I fill:#f9f,stroke:#333
    style J fill:#f9f,stroke:#333
Figure 6
natural_image
Two line drawings of a square kitchen appliance with hands using chopsticks to handle or adjust the interior (no text or symbols)Figure 7
ENGLISH
GENERAL SAFETY CONDITIONS
IMPORTANT SAFETY INSTRUCTIONS READ CAREFULLY AND SAVE FOR FUTURE The warranty conditions are different, if the device is used for commercial purpose.
- Before using the product please read carefully and always comply with the following instructions. The manufacturer is not liable for damages caused by using the device contrary to its intended purpose or improper operation.
- The device is for home use only. Do not use for other purposes that are not for its intended purpose.
- The device should only be connected to a 220-240 V \~ 50/60 Hz socket.
- Take special care when using the device when children are nearby. Do not allow children to play with the device, do not allow children or people unfamiliar with the device to use it.
- WARNING: This equipment may be used by children over 8 years of age and people with limited physical, sensory or mental ability, or people who have no experience or knowledge of the equipment, if this is done under the supervision of a person responsible for their safety or have been granted them information on the safe use of the device and are aware of the dangers of using it. Children should not play with the equipment. Cleaning and maintenance of the device should not be performed by children, unless they are over 8 years old and these activities are carried out under supervision.
- Always remove the plug from the power socket after use by holding the socket with your hand. DO NOT pull on the power cord.
- Do not immerse the cable, plug, base and the whole device in water or any other liquid. Do not expose the device to atmospheric conditions (rain, sun, etc.) or use in conditions of high humidity (bathrooms, damp mobile homes).
- Periodically check the condition of the power cord. If the power cord is damaged, it should be replaced by a specialist in repair center to avoid danger.
- Do not use the device with a damaged power cord or if it has been dropped or damaged in any other way or if it is not working properly. Do not repair the device yourself, as there is a risk of electric shock. Take the damaged device to an appropriate service center for checking or repair. All repairs may only be carried out by authorized service points. Incorrectly performed repairs can cause serious danger for the user.
- Place the device on a cool, stable surface, away from hot kitchen appliances such as an electric stove, gas burner, etc.
- Do not use the device near flammable materials.
- The power cord may not hang over the edge of a table or touch hot surfaces.
- Never leave the product connected to the power source without supervision. Even when use is interrupted for a short time, turn it off from the network, unplug the power.
- To provide additional protection, it is advisable to install a residual current device (RCD) in the electrical circuit with a rated residual current not exceeding 30 mA. Ask an electrician for this.
o not use the device near water, e.g. ... in the shower, bath tub or above the basin with water.

- When the appliance is used in a bathroom, remove the plug from the socket after use, as the proximity of water is a hazard even when the appliance is turned off.
- Do not allow the device to get wet. In the event that the device falls into water, immediately remove the plug from the wall socket. Do not put your hands in water when the machine is connected to the network. It must be checked by a qualified electrician before using it again.
- Do not hold the device with wet hands.
- Always turn off the device after every use. Please switch off power before unplugging.
- Never turn on the device without water in the water tank.
- Use only clean, cool water.
- Do not pour water into the tank above the maximum level.
- Do not immerse the humidifier base. If water spills on the device, immediately unplug it and allow it to dry.
- Do not add any chemicals to the water bowl, water tank or mist outlet. Do not add salt, descaling tablets, powders or cleaning agents to the water. The supplied descaling filter (13) should only be used inside the water tank.
- The mist inlet and water tank cover should always be tightly closed.
- Make sure the humidifier's mist outlet is not directed directly at walls, furniture, electrical outlets, electrical and electronic devices, or children. Too high humidity in a room can lead to moisture accumulation, causing bacteria and fungi to grow, and damage to walls, furniture, and wallpapers.
- Do not block the ventilation of the device. Keep a distance of at least 20 cm from the device. Do not block the humidifier water mist outlet.
- Do not use the device if there is a risk of condensation. Moisture can form on the inside and outside of the device when:
- the device is moved from a cold to a warm place,
- the heating system has just been switched on,
- the device is used in a room with high humidity,
- the device is cooled by the air conditioning cooling system.
When moisture condensation occurs in the device, it may not work properly or may be damaged in extreme cases. In this case, do not use the device and let it dry for a few hours. - Do not tilt, turn over or attempt to top up or pour water from the machine during operation.
- Do not remove the tank from the base of the device during operation of the humidifier.
- The filled water tank is heavy. When carrying it, keep it underneath as well.
- Do not use a humidifier if you find water leaks from under the device.
- Do not leave water in the humidifier when it is not being used.
- Follow the cleaning instructions in this manual.
- Never allow sedimentation, moisture or water to remain in the humidifier base tank (this may cause contamination or even damage to the ultrasonic atomizer).
-
During prolonged operation of the device, the water mist emitted by the humidifier may fall to the floor and cause moisture.
-
Do not lift the water tank by the water mist outlet.
- It is prohibited to insert metal chips, wire, needles and other foreign objects into the product or into the housing gaps, otherwise it may cause electric shock or malfunction.
- Be aware that high humidity levels may encourage the growth of biological organisms and fungi in the environment.
- Too much humidity in the room can lead to moisture accumulation causing the damage to walls, furniture, wallpaper and electric other appliances as TV. Do not direct the mist outlet close to such objects.
- Do not permit the area around the humidifier to become damp or wet. If dampness occurs, turn down the mist production. If the mist capacity cannot be turned down, use the humidifier intermittently. Do not allow absorbent materials, such as carpeting, curtains, drapes, or tablecloths, to become damp.
- Do not cover the device. Do not place any objects on the top of the device.
- Do not use the device in association with a programmer, timer or other device that automatically switches the humidifier on.
Warning: Microorganisms that may be present in the water tank will be blown into the air, causing a very serious health hazard. To prevent this, change the water regularly and clean the tank every three days.
Warning: The water tank should be emptied and refilled every three days. Before refilling, clean it with fresh water or using available detergents if required by the manufacturer. Remove scale, deposits or a film that has formed on the walls of the tank. After cleaning, wipe dry all accessible surfaces.
Ultrasonic humidifier uses ultrasonic high frequency oscillation principle, the water is atomized into 1-5 micron ultra fine particle, then the water mist is diffused into the air through the pneumatic device, so as to achieve the purpose of uniformly humidifying the air, refreshing air, moisturizing skin and improving health.
Before first use" When the device is turned on, please do not touch an atomizing transducer (17) with hand to avoid hurting.
Device description: Ultrasonic humidifier (Figure 1)
- Rotating mist cap 2. Water tank cover
- Spray nozzle 4. Place for an aromatherapy cotton sponge
- Mist air duct 6. Water tank
7A. On // off button 7B. time button
7C. Mist intensity adjustment button
-
Display 9. Air inlet (underneath - not visible)
-
Mist outlet 11. Cotton aromatherapy sponge
-
Cleaning brush 13. Water descaling filter
-
Float 15. Filter space (above the atomizing transducer)
-
Air outlet 17. Atomizing transducer (17)
7D. Continuous humidification / sleep mode button
WATER FILLING
- Place the device on a stable, flat surface. Remember to add water to the disconnected device.
- Open the lid (2) and fill up the water tank (6)
- When adding water, do not pour water into the spray nozzle (3) and do not pour water into the mist outlet (10).
- Be careful not to exceed the MAX water level marked on the mist air duct (5) - see Figure 2. Use clean tap water.
- Close the lid of the water tank (2), set the direction of the mist outlet by turning the cap (1). Connect the device to the mains socket.
-
When the device is not in use, pour out the water from the water tank (6).
-
To reduce the formation of scale in the water, the machine is equipped with a water descaling filter (13), a plastic disc that you will find inside the water tank. Do not throw away the filter (13) when changing water, the filter is active for 1 year, you can optionally purchase a filter for this device, number CR7973.1 from the seller of this device.
AROMATHERAPY FUNCTION
-
Remove the rotating cap (1).
-
Pour 2-3 drops of essential oil onto an aromatherapy cotton sponge (11) and place it in place (4). See picture 3. The nice fragrance will be distributed with the mist.
NOTE: ONLY water-soluble essential oils are suitable for this device.
- DO NOT drip essential oils directly into the water.
USAGE
-
After connecting, the device beeps and goes into standby mode.
-
To turn on the device, press the power button (7A) once. The default mist volume is set to the first level, the display (8) will show the number 1, to put the device into standby press the button (7A) again.
-
Press the button (7C) several times to set the mist intensity. The display (8) will show numbers from 1 to 5 in turn, where 1 means low fog intensity and 5 means the maximum low mist intensity. See figure 4.
PROTECTION AGAINST LACK OF WATER
When the device is running, the float (14) detects the lack of water. Then the device stops working, a flashing red symbol of crossed-out drop appears on the display (8) (see Figure 1), after 30 seconds the device goes into standby mode. After adding water, press the power button (7A), after which the device can work normally.
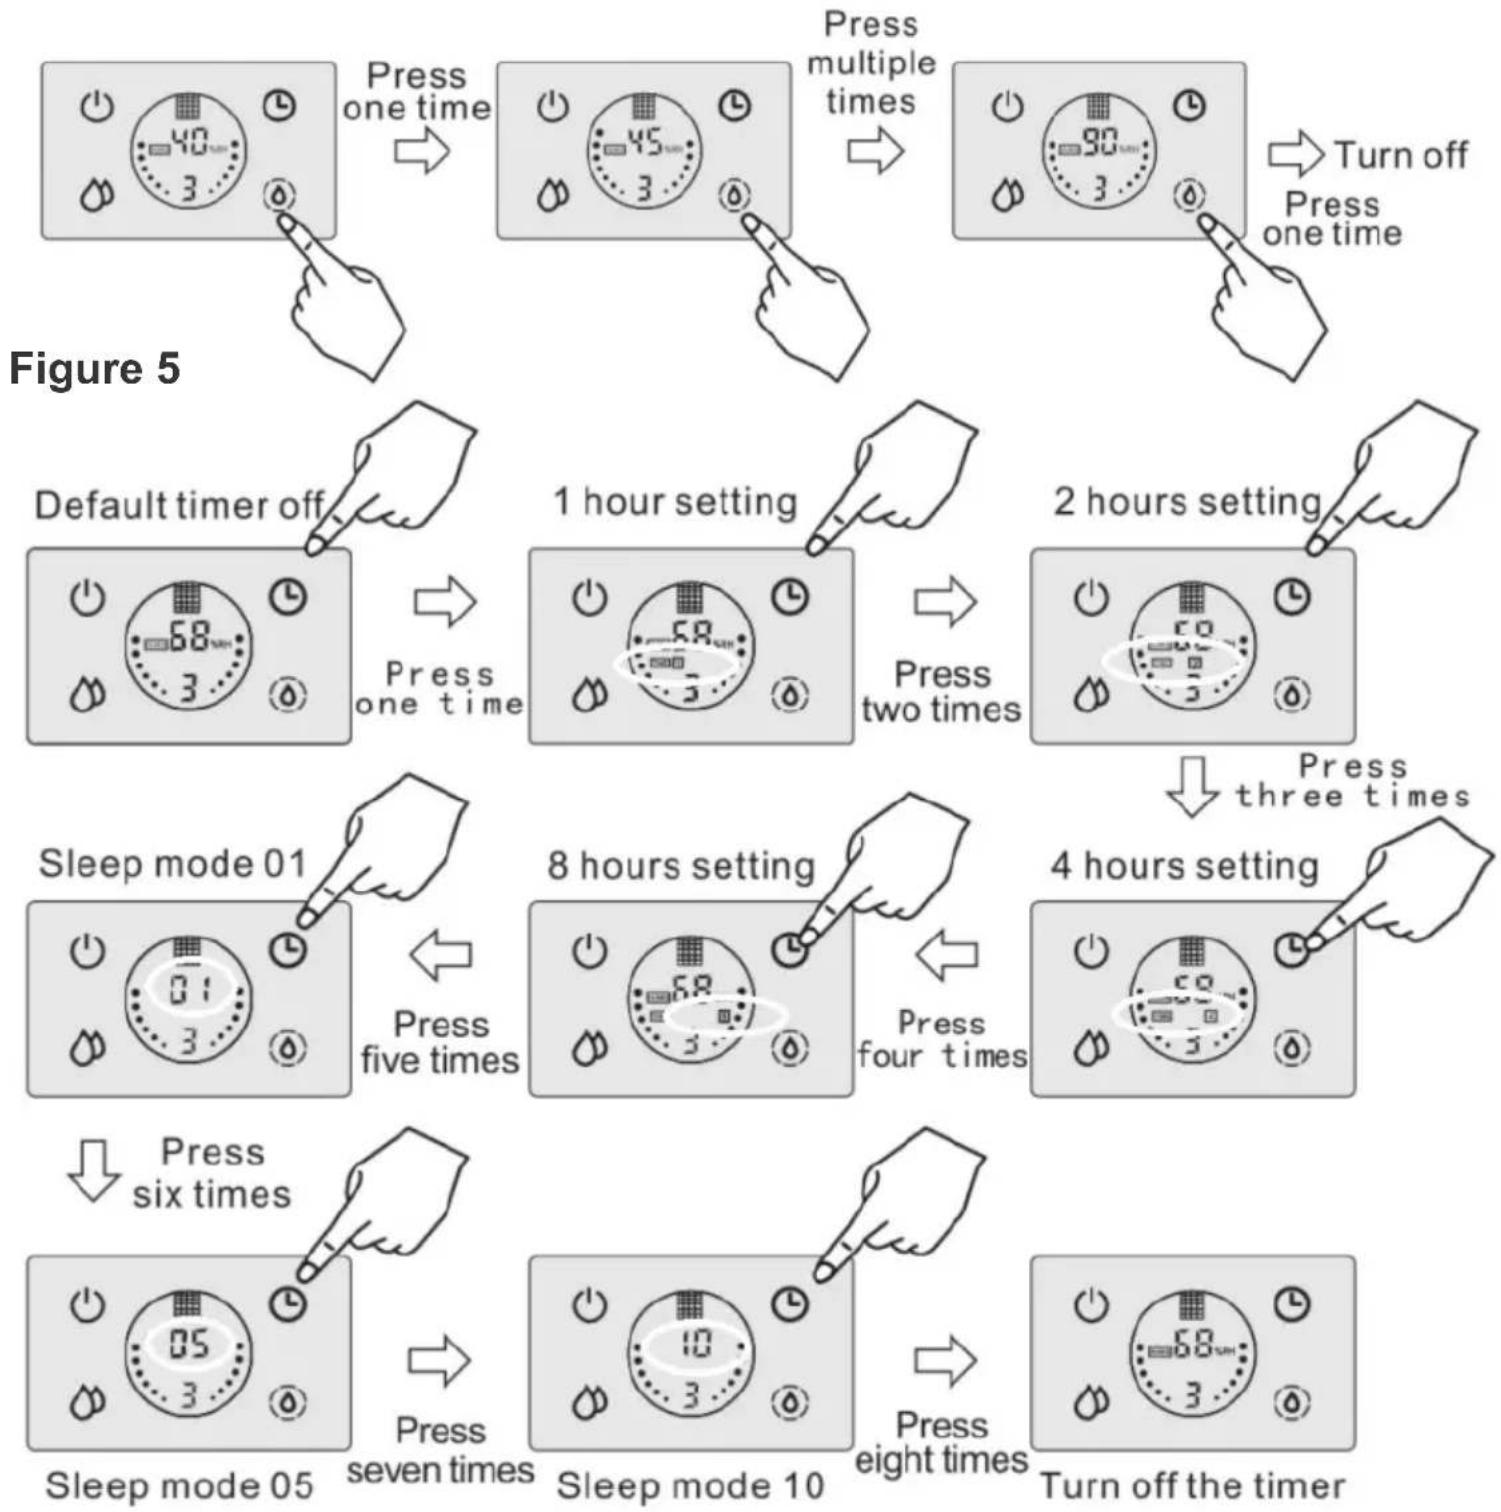
TIMER SETTING & SLEEP MODE SETTING
The default setting is zero hours. While the device is running, press the timer button (7B) repeatedly to select one of the timer periods: 1 hour or 2 hours or 4 hours or 8 hours or keep pressing the button (7B) further to select one of the three night mode settings:
01: when entering sleep mode, "01" flashes for 5 seconds, then turns off the display, sprays fog for 1 minute, and stops for 1 minute, it works in such cycles.
05: when entering sleep mode, "05" flashes for 5 seconds, then turns off the display, sprays fog for 5 minutes, and stops for 5 minutes, it works in such cycles.
10: when entering sleep mode, "10" flashes for 5 seconds, then blanks the display, sprays for 10 minutes and stops for 10 minutes, it works in such cycles.
See figure 6.
When the device is working, press the continuous humidification button (7D), you can set the humidity value in the range of 40-90% relative humidity, each subsequent press increases the value by 5%. Once the humidity level is set, the device continuously humidifies to the desired level. When the desired humidity level is reached, the device goes into standby mode and stops spraying the mist until the ambient humidity level drops to 5% below the desired humidity level. In this case, the device will start spraying the mist automatically again. Refer to figure 5. When you set the desired humidity value, this number flashes, when the selection is completed, the flashing will stop after 5 seconds. The display (8) shows the current room humidity and temperature alternately.
CLEANING AND MAINTENANCE
- Unplug the device before cleaning. If there is some water left in the water tank (6), pour it out by tilting the water tank (6). See figure 2. NOTE: It is important to position the water tank (6) correctly when pouring out the water. The correct position is obtained when the air outlet (16) remains dry and the water flow is guided by the opposite edge of the water tank (6). See figure 2.
- Clean the water tank every 3 days.
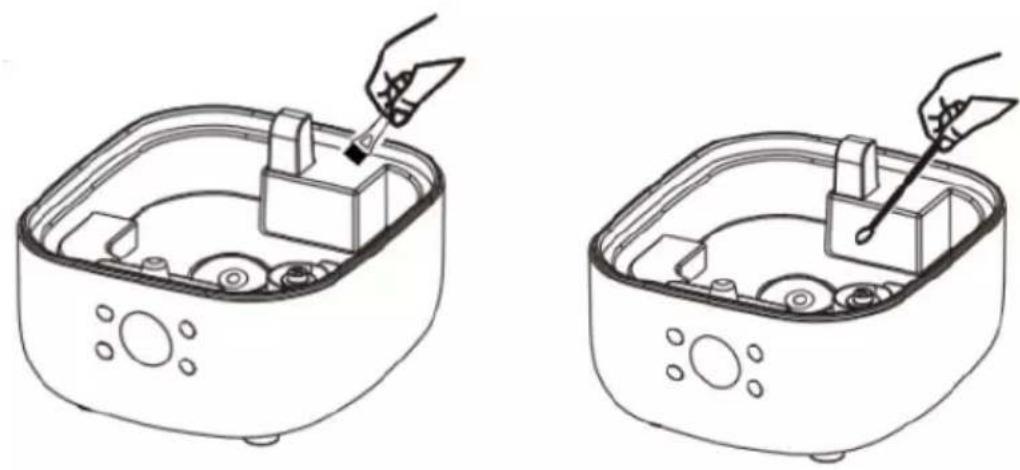
- After using the device for a while, scale is easily deposited and "white powder" phenomenon is formed, it is attached to the surface of the atomizing transducer (17), which affects the humidification performance. It is necessary to clean the main elements regularly. To clean the main components, see Figure 7.
* Open the water tank cover (2), remove the water tank (6).
* Add appropriate amount of water, clean the device with the cleaning brush (12).
* Wipe the atomizing transducer (17) with a cotton swab soaked in a solution of citric acid and do not touch it with sharp, hard objects.
* Wipe the inside of the water tank (6), mist air duct (5) and covers with a soft dry cloth. - Do not use detergent to clean, clan water is better.
- The outer surface of the device housing can be cleaned with a damp cloth and then wiped dry with a clean cloth. Do not use chemical solvents, gasoline, kerosene or polishing powder to wipe the surface.
- Do not allow water to enter the housing during cleaning to avoid malfunction of internal components.
- Clean the device before each use.
STORAGE
-
For seasonal storage, keep the device empty, clean and dry.
-
Store in a dust-proof bag in a dry place.
TROUBLESHOOTING
If the device is not working properly, please check the following possible causes before sending it for service to solve the problems yourself.
PROBLEM I.: the display (8) does not light up.
POSSIBLE CAUSE OF PROBLEM I: The power supply is not properly connected.
SOLUTION I: Connect the power cord and turn on the power.
PROBLEM II: there is water in the tank, but the device does not spray the mist or there is little mist
POSSIBLE CAUSE OF PROBLEM II: too much scale on the atomizing transducer (17)
SOLUTION II: clean the deposits from the atomizing transducer (17)
PROBLEM III: Not enough mist
POSSIBLE CAUSE OF PROBLEM III:
IIIa. There is too much white deposit on the spray transducer (17).
IIIb. The water is too dirty or has been stored for too long
lllc. The mist volume has been set to a low level
PROBLEM SOLUTION III:
IIIa. clean the white scale on the spray transducer (17)
IIIb. Change to clean water
lllc. Set the mist level higher
PROBLEM IV: Abnormal noise
POSSIBLE CAUSE OF PROBLEM IV:
IVa. There is not enough water in the tank
IVb . It knocks against the table surface, causing it to vibrate
PROBLEM SOLUTION IV:
IVa . add water
IVb. Place the device on a hard, smooth surface
PROBLEM V: Peculiar Mist Smell
POSSIBLE CAUSE OF PROBLEM V: The water in the tank is not clean or has been stored for a long time
SOLUTION V: Clean the water tank, dry it, then add clean water
TECHNICAL DATE:
Power: 23W
Power Supply: 220-240V \~50-60Hz
Water tank capacity: 5 liters
To protect your environment: please separate carton boxes and plastic bags and dispose them in corresponding waste bins. Used appliance should be delivered to the dedicated collecting points due to hazarsous components, which may effect the environment. Do not dispose this appliance in the common waste bin.
DEUTSCH
POSIBLE CAUSA DEL PROBLEMA IV:
BESCHERMING TEGEN WATERGEBREK
PROBLEEM OPLOSSING III:
IIIa. reinig de witte schaal op de spraytransducer (17)
IIIb. Schakel over op schoon water
PROBLEEM OPLOSSING IV:
IVa. Voeg water toe
natural_image
White and blue water heater with a small blue object inside, no visible text or symbols on the device itself.Electric Kettle AD 02
natural_image
Exterior view of a modern coffee machine with orange and black casing (no visible text or symbols)Espresso Machine AD 4404
Standing Fan
AD 7305
natural_image
Black and silver photo of a ADLER 3 watermelon grater with a red and green button (no visible text or symbols)Sandwitch maker AD 3015
natural_image
White portable electric heater with visible cooling fan and control panel (no text or symbols)
natural_image
White cylindrical solar oil heater with wheels and control panel (no visible text or symbols)Oil Heater AD 7808
Hair Clipper
AD 2823
Hair Clipper
AD 2825
natural_image
Exterior view of a modern glass coffee maker with a black handle (no visible text or symbols)Dripp Coffee Maker AD | 4407

natural_image
Glass water heater with blue liquid, no visible text or symbolsKettle AD 1286

natural_image
White hairdryer with 'ADLIR' logo, no visible text or symbols on bodyHair Dryer AD 2252

natural_image
Black handheld device with metallic buttons and a small white mark (no visible text or symbols)Hair Clipper AD 2832
natural_image
Black and red portable phone case with a strap (no visible text or symbols)Hair Shaver AD 2932
natural_image
Close-up of a stainless steel kitchen scale with digital display (no visible text or symbols)Kitchen Scale AD 8121
natural_image
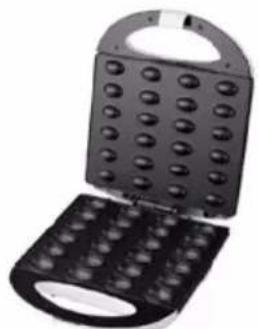
Black and white photo of a mobile phone keyboard with a grid of circular buttons (no visible text or symbols)Nut Cookie Maker AD 3039

natural_image
Exterior view of a modern kitchen blender with pink liquid and black handle (no text or symbols visible)Blender AD 4076

AFTER SALE SERVICE NOTICE
| GB | If you want to buy spare parts or make any complaints, please contact the seller who issued the receipt directly. |
| DE | Wenn Sie Ersatzteile kaufen oder reklamieren möchten, wenden Sie sich bitte direkt an den Verkäufer, der die Quittung ausgestellt hat. |
| FR | Si vous souhaitez acheter des pièces de rechange ou faire des réclamations, veuillez contacter directement le vendeur qui a èmis le reçu. |
| ES | Si desea comprar repuestos o presentar alguna queja, comuniquese directamente con el vendedor que emitió el recibo. |
| PT | Se você quiser comprar peças de reposição ou fazer alguma reclamação, entre em contato diretamente com o vendedor que emitiu o recibo. |
| LT | Jei norite jsigyti atsarginiu dalių ar pateikti nusiskundimų, susisiekite tiesiogiai su kvitą išdavusiu pardavėju. |
| LV | Ja vēlaties iegādāties rezerves daļas vai izteikt pretenzijas, lūdzu, sazinieties tieši ar pārdevēju, kurš izsniedza čeku. |
| EST | Kui soovite osta varuosi või esitada pretensioone, võtke otse ühendust kviitungi väljastanud mūūjaga. |
| HU | Ha pótalkatrészeket szeretne vásárolni, vagy panaszt szeretne tenni, forduljon közvetlenül a bizonylatot kiàllító eladóhoz. |
| BS | Ako želite kupiti rezervne dijelove ili napraviti reklamaciju, obratite se direktno prodavaču koji je izdao račun. |
| RO | Если вы хотите купить запчасти или предъявить какие-либо претензии, пожалуйста, свяжитесь напрямую с продавцом, выдавшим чек. |
| CZ | Chcete-li zakoupit náhradní dily nebo uplatnit jakoukoli reklamaci, kontaktujte přimo prodejce, který účtenku vystavil. |
| RU | Dacă doriți să cumpărati piese de schimb sau să faceți vreo reclamație, vă rugăm să contactați direct vânzătorul care a emis chitanța. |
| GR | Eăv BÉLÆTE va ayorășete antalλλακτικά ή va kăvete ottoiobîποτε παράπτονα, επικοινωνήστε απευθείας με τον πωλητή που εξόδωσε την απόδειξη. |
| MK | Ako сакате да kupите резервни делови или да поднесете какви било поплаки, контактирајте директно со продавачот koј ja издал сметката. |
| NL | Als u reserveonderdelen wilt kopen of een klacht wilt indienen, neem dan rechtstreeks contact op met de verkoper die de bon heeft afgegeven. |
| SL | Če želite kupiti nadomestne dele ali vložiti reklamacije, se obrnite neposredno na prodajalca, ki je izdal račun. |
| FI | Jos haluat ostaa varaosia tai tehdā valituksia, ota yhteyttä suoraan kuitin antaneeseen myyjään. |
| PL | W przypadku chęci zakupu części zamiennych lub zgłoszenia ewentualnych reklamaciji należy kontaktować się bezpośrednio ze sprzedawca, który wystawil paragon. |
| IT | Se desideri acquistare pezzi di ricambio o presentare reclami, contatta direttamente il venditore che ha emesso la ricevuta. |
| HR | Se desideri acquistare pezzi di ricambio o presentare reclami, contatta direttamente il venditore che ha emesso la ricevuta. |
| SV | Om du vill köpa reservdelar eller göra några reklamationer, vänligen kontakta säljaren som utfärdat kvittot direkt. |
| DK | Hvis du ønsker at købe reservedele eller reklamere, bedes du kontakte sælgeren, som har udstedt kvitteringen, direkte. |
| UA | Якщо ви хочете придбати запчастини або подати будь-які претензії, зверниться безпосередньо до продавця, який видав чек. |
| SR | Ako желите да kupите резервне делове или да уложите рекламацију, обратите се директно продавцу који је издао рачун. |
| SK | Ak ci chcete kúpit'náhradně diely alebo uplatnit' akúkol'vek reklamáciu, kontaktujte priamo predajcu, ktorý účtenku vystavil. |
| AR | إذا كنت درعب في شراء قطع عيار أو متتيم أي شكري، فيرجي الانصال بالبائع الذي أصدر الإ Corpus مبiatedرة. |
| BG | Ako искате да закупите резервни части или да направите оплаквания, моля, свържете се директно с продавача, който е издал касовата бележка. |
| AZ | Ehtiyat hissaləri almaq va ya hər hansı şikayat etmək istəyirsinizsə, qəbzi verən satici ilə birbaşa əlaqa saxlayın. |

Brand : CAMRY
Model : CR 7973
Category : Humidifier