
ScreenBar Pro - Lamp BENQ - Free user manual and instructions
Find the device manual for free ScreenBar Pro BENQ in PDF.
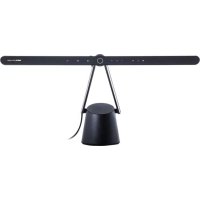
| Product Type | LED Monitor Lamp |
| Brand | BenQ |
| Model | ScreenBar Pro (CR21_C) |
| Dimensions (W x D x H) | 50 x 13.5 x 9.2 cm |
| Weight | Approximately 0.5 kg |
| Power Supply | AC adapter 100-240V, 50/60 Hz, or USB-C 5V 2A |
| Max Power Consumption | 8.5 W |
| Light Source | Integrated LED, energy efficiency class E |
| Luminous Flux | 900 lumens |
| Color Temperature | 2700K to 6500K (8 settings) |
| Brightness Adjustment | 16 levels (depending on power supply) |
| Lighting Angle | 24° |
| LED Lifespan | 50,000 hours (L70B50) |
| Main Features | Auto-dimming mode, presence detection, favorite mode, automatic dimming, manual adjustment |
| Sensors | Ambient light sensor, ultrasonic presence sensor |
| Installation | Monitor clip (frame thickness 0.43-6.5 cm), compatible with curved and convex |
| Included Accessories | AC adapter, quick start guide, warranty card, webcam accessory |
| Maintenance | Wipe with a soft cloth lightly dampened (mild detergent), do not use alcohol |
| Safety | Do not disassemble, use only indoors, avoid moisture |
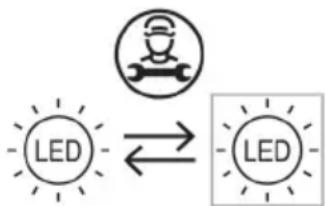
| Repairability | LED light source replaceable only by a professional |
| Warranty | See included warranty card |
| Country of Manufacture | Not specified (likely China) |
Frequently Asked Questions - ScreenBar Pro BENQ
User questions about ScreenBar Pro BENQ
0 question about this device. Answer the ones you know or ask your own.
Ask a new question about this device
Download the instructions for your Lamp in PDF format for free! Find your manual ScreenBar Pro - BENQ and take your electronic device back in hand. On this page are published all the documents necessary for the use of your device. ScreenBar Pro by BENQ.
USER MANUAL ScreenBar Pro BENQ
© 2025 BenQ Corporation.
All rights reserved. Rights of modification reserved.
Package Contents
The package should include the following items. If anything is missing or damaged, please contact the place of purchase immediately.
- 1 x ScreenBar Pro light (with USB-C power cord) • 1 x AC power adapter
- 1x Quick Start Guide
- 1x Warranty card
• 1x Webcam Accessory
The illustrations in this guide are for your reference only and may look different from the appearance of the actual product.
Safety Warnings
- Only use the provided AC power adapter and connect it to 100-240V AC, 50/60Hz power. Otherwise the light will not work properly and may even cause a fire. If you prefer to connect the light to a USB-C port directly without using the provided AC power adapter, ensure that the USB-C port provides enough power (5V DC, 2A) for optimized performance.
- Do not place or hang any objects on the light to avoid malfunction.
- Route the USB power cord to avoid it being pinched by items placed upon or against it.
- If the light will not be used for an extended time period, unplug the AC power adapter from the power outlet.

CAUTION
- If you encounter the following situations, unplug the power adapter or remove the USB power cord from the USB-C port immediately, and seek support from an authorized service agent or qualified technician:
- When the casing of this product is damaged
- When this product emits an abnormal smell
- When the LED light source flickers abnormally
- When the power cord is damaged or the wire inside is exposed
- Do not expose this product to humid environments (such as bathrooms/outdoors) to avoid short circuiting and accidents.
- This product is only suitable for indoor use, do not use it outdoors.
- It is strictly prohibited to disassemble any part or component of this product. Otherwise it may cause an accident and invalidate the product warranty.
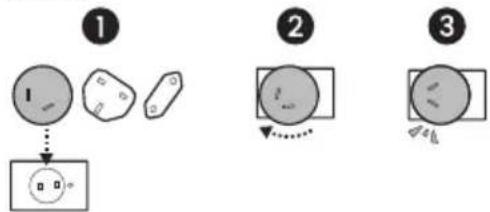
Installation
- Extend the clamp of the light as shown in [Figure A]
- Rest the light on the monitor bezel [Figure B 1] recommended that you fit the clamp closely against the monitor bezel so there is no visible gap in between.
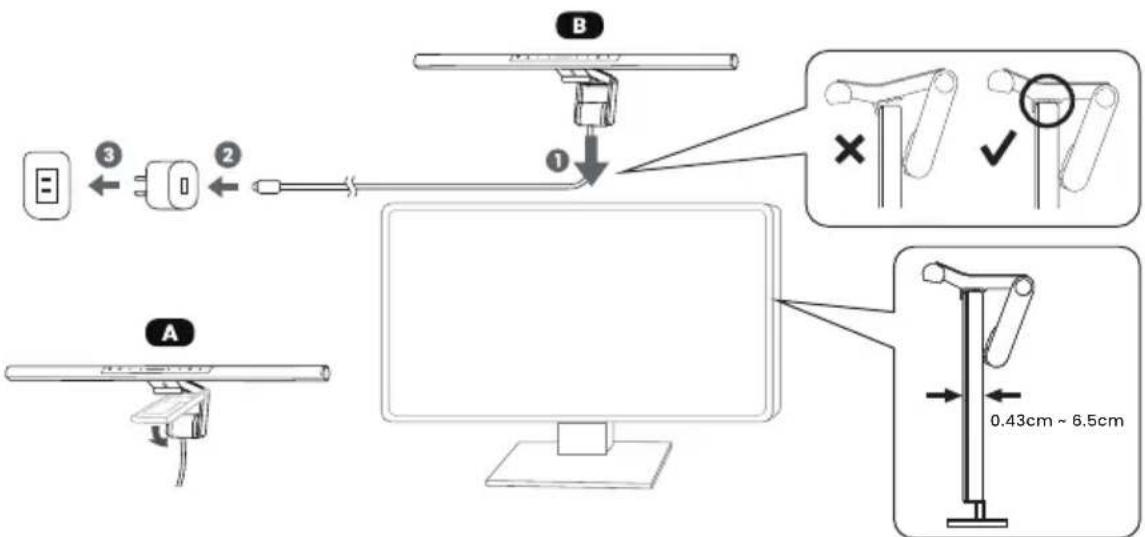

- The applicable range of the monitor bezel thickness is 0.43cm - 6.5cm.
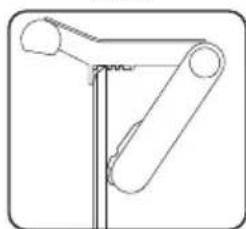
- Refer to the illustrations below for how to install the light on different types of monitors:
Monitor with beveled
bezel
Monitor with round bezel
Curved monitor Monitor with bulge on the back
natural_image
Simple line drawing of a mechanical lever or bracket (no text or symbols)
natural_image
Pure mechanical linkage diagram without any text, numbers, or symbols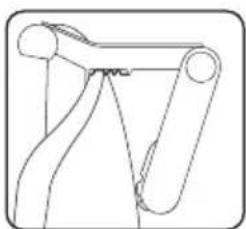
natural_image
Pure mechanical diagram showing a linkage or clamping mechanism without any text, numbers, or symbols
natural_image
Pure mechanical linkage diagram without any text, numbers, or symbols- Connect the USB-C power cord to the AC power adapter [Figure B 2d] then plug the AC power adapter into an AC power outlet [Figure B 3] light will turn ON automatically.

If your adapter includes multiple plugs, please refer to the installation instructions below.
flowchart
graph TD
    A["1: Initial State I"] --> B["2: Feedback Loop"]
    B --> C["3: Final State with State 1 and State 2"]
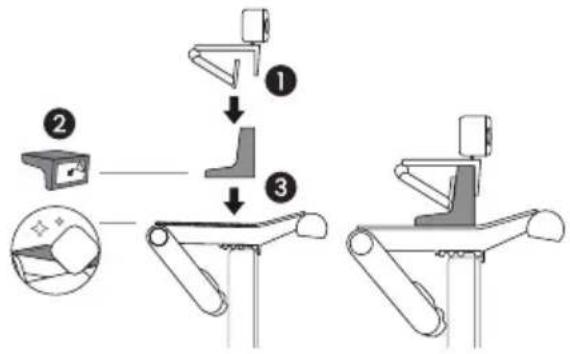
Installing the Webcam Accessory
- Place the webcam on top of the webcam accessory.
- Remove the release paper from the adhesive tape on the underside of the webcam accessory.
- Clean the top surface of the clip and attach the accessory to the flat area in the middle of the clip.

- To remove the webcam accessory, hold the upper part of the accessory and pull it towards the light tube.
- To replace the adhesive tape, remove the current tape and use the spare adhesive tape provided in the box.
Using the Light
Controls on the Light Head
You can use the touch keys and knob on the light head to perform various operations. Refer to the figure below for the names and position of these controls:


When the light is off and the ambient brightness is extremely low, all the indicator lights will go out so as not to disturb the user's sleep at night.
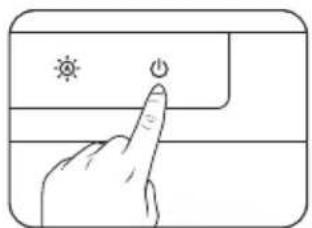
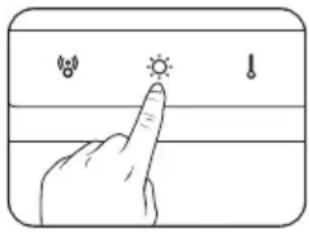
Turning On/Off the Light and Entering Auto-Dimming Mode Turning On/Off the Light
natural_image
Hand pressing a button with a sun icon and power button (no text or symbols)To turn on the light, tap the Power key. To turn off the light, tap the Power key again.
natural_image
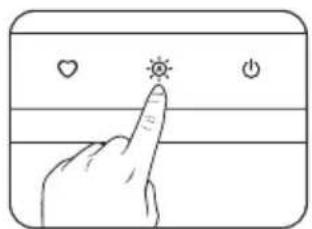
Hand pointing at a simple icon with a sun and heart symbols on a screen (no text or labels)Entering Auto-Dimming Mode
To enter Auto-Dimming Mode, tap the Auto-Dimming Mode key when the light is on. The Auto-Dimming Mode indicator will light up. The Auto-Dimming Mode automatically adjusts the light's brightness according to the ambient lighting condition and sets the color temperature setting to 4000K.

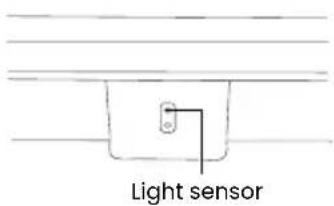
- Do not block the light sensor on the light. Otherwise the Auto-Dimming Mode will not function properly.
- If the Auto-Dimming Mode is turned on, the light will monitor the ambient lighting condition and dynamically adjust the brightness.
- The Auto-Dimming Mode will exit automatically and the Auto-Dimming Mode indicator will go off when you manually adjust brightness or color temperature.
Manually Adjusting Brightness and Color Temperature
Adjusting Brightness
-
Tap the Brightness Adjustment - key when the light is on. The Brightness Adjustment - indicator will light up.
-
Tap the ◀ key to decrease brightness, or tap the ▶ key to increase it. You can select from 16 brightness levels.

- If the power supply capacity is up to 5V 1.5A, only 14 brightness levels are available for adjustment.
- If the power supply capacity is up to 5V 0.9A, only 8 brightness levels are available for adjustment.
- If the power supply capacity is less than 5V 0.9A, the light will not operate properly. Use the provided AC power adapter or connect it to another power supply that meets 5V 2A to optimize the performance of the light.
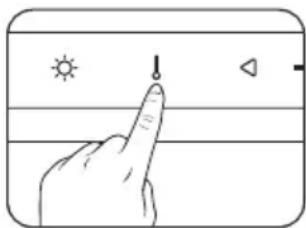
Adjusting Color Temperature
- Tap the Color Temperature Adjustment key when the light is on. The Color Temperature Adjustment indicator will light up.
- Tap the ▶key to select a higher color temperature setting, or tap the ▶key to select a lower one. You can select from 8 color temperature settings: 6500K (daylight), 5700K (cool white), 5000K, 4500K (neutral white), 4000K, 3500K (warm white), 3000K and 2700K (soft white).

If the power supply is suddenly interrupted, the light will automatically return to its settings before the power outage when the power is restored.
- If the light was on before the power outage, it will automatically turn on when power is restored, and restore the brightness and color temperature settings before the power outage.
- If the light was off before the power outage, it will remain off when power is restored.
Turning On/Off the Presence Detection Function
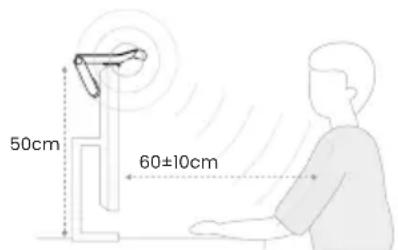
The Presence Detection function allows the light to turn on automatically when the user enters the detection area (as shown in the figure).

natural_image
Illustration of a hand pointing at a touchscreen device with icons for brightness and saturation (no text or symbols)- To turn on the Presence Detection function, tap the Presence Detection key. The Presence Detection indicator will light up.
- To turn the function off, tap the Presence Detection key again. The indicator will go out.


- With its ultrasonic sensor 50~cm above the desktop, it detects at 60 ± 10~cm in front of the screen and has a conical detection shape.
- When the Presence Detection function is on, if the user leaves the detection area for more than 5 minutes, the light will automatically turn off to save power.
- With the Presence Detection function on, if you manually turn off the light, the Presence Detection function will be disabled temporarily and the Presence Detection indicator will flash for about 30 seconds. When the indicator stops flashing, the
Presence Detection function will resume and the light will turn on if you are still in the detection area.
- Do not block the ultrasonic sensor on the light. Otherwise the Presence Detection function will not work properly.
- Do not insert any object into the ultrasonic sensor to avoid malfunction of it.
- The presence detection function operates based on motion tracking. If users maintain a fixed posture in front of the screen for more than 5 minutes, such as when watching videos, it may cause the sensor to detect no movement and subsequently turn off the light.

- The ScreenBar Pro light uses an ultrasonic sensor to detect presence and absence by emitting high-frequency sound waves and analyzing reflected signals to determine object distance and movement, enabling automatic light control. However, environmental factors such as temperature changes from heating or cooling devices or frequency vibrations from humidifiers may affect detection accuracy, potentially causing unexpected light activation.
My Favorite Mode

natural_image
Hand pointing at a finger with icons for TV, heart, and sun (no text or symbols)After you manually adjust the light's brightness and color temperature settings, you can use this function to save them as your favorite mode.
- Adjust the light's brightness and color temperature settings according to your preference.
- When done, tap and hold the My Favorite Mode ♥ key for approximately 3 seconds. The Brightness
Adjustment Color Temperature Adjustment, Auto-Dimming Mode and My Favorite Mode indicators will flash 3 times simultaneously to indicate that the settings are saved successfully.
To access My Favorite Mode, tap the My Favorite Mode heart key.
Maintenance and Troubleshooting
- First turn off the light and unplug the light from the AC power adapter or USB port. When cleaning the light, wipe off any smears or dusts using a soft, lint-free cloth lightly moistened with a mild detergent solvent. Do not use alcohol or any other chemical solvents like kerosene, naphtha and so on, as the light's casing may become damaged.
- Do not rinse the light or any of its components directly with water.
- If the light does not turn on, check to make sure that there are no loose connections between the USB power cord, power adapter, and USB-C port.
- If the problem persists, please contact the place of purchase for help.
| Light source Model Power (W) | Luminous flux (lm) | CCT (K) Dim | Efficiency Class | Weighted energy consumption (Ec) kWh/100 0h | L_70B_50 lifetime (h) | QR code | |
| Light source-Front 7900 2700/4000/6500 Yes E 7 50000 | |||||||
• This product contains a front light source of energy efficiency class E.
- Light source (LED only) is replaceable by a professional.
flowchart
graph LR
    A["LED"] <--> B["LED"]
Specifications
| Model CR21_C | |
| AC power input | 100-240V AC, 50/60Hz (US/JP)220-240V AC, 50/60Hz (EU/UK) |
| Max. power consumption Max. 8.5W | |
| Dimensions (Width x Depth x Height) 50 | x 13.5 x 9.2 cm |
| Power adapter model number | PS15J050K3000UC (US/JP)PS15K050K3000Z (EU/UK)*Only UK plug used for Singapore market. |

Inhalt des Pakets
natural_image
Simple line drawing of a mechanical lever or bracket (no text or symbols)natural_image
Simple line drawing of a mechanical or architectural component with no text or symbols
natural_image
Pure mechanical linkage diagram without any text, numbers, or symbolsVerwenden der Lampe
Bedienelemente am Lampenkopf
natural_image
Hand pressing a button with a sun icon and power symbol (no text or labels)natural_image
Hand pointing at a button with icons for heart, sun, and power (no text or symbols)natural_image
Hand pointing at a touchscreen interface with sun icons (no text or symbols)natural_image
Hand pointing at a finger with icons for TV, heart, and sun (no text or symbols)natural_image
Simple line drawing of a mechanical lever or bracket (no text or symbols)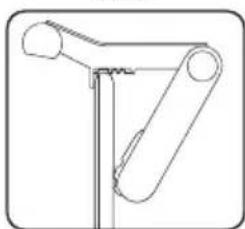
natural_image
Pure mechanical linkage diagram without any text, numbers, or symbols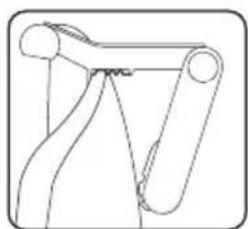
natural_image
Simple line drawing of a mechanical clamp or bracket (no text or symbols)
natural_image
Pure mechanical linkage diagram without any text, numbers, or symbolsnatural_image
Hand pressing a button with a sun icon and power button (no text or symbols)Allumer/éteindre la lampe
natural_image
Hand pointing at a simple icon with a sun, heart, and power button symbols (no text or labels)natural_image
Hand pointing at a screen with icons for sun, play button, and navigation (no text or symbols)natural_image
Illustration of a hand pointing at a device with icons for sun and moon (no text or symbols)natural_image
Hand pointing at a finger with icons for heart, triangle, and sun (no text or symbols)natural_image
Hand pressing a button with a sun icon and power button (no text or symbols)natural_image
Hand pointing at a button with icons for heart, sun, and power (no text or symbols)Ajuste del brillo
natural_image
Hand pointing at a button with sun icon and exclamation mark (no text or symbols)natural_image
Hand pointing at a touchscreen interface with icons for sun and moon (no text or symbols)natural_image
Hand pointing at a finger with icons for heart, triangle, and sun (no text or symbols)natural_image
Hand pressing a button with a sun icon and power button (no text or symbols)natural_image
Hand pointing at a simple icon with a sun, heart, and power button symbols (no text or labels)natural_image
Hand pointing at a screen with icons for sun, play button, and navigation (no text or symbols)natural_image
Hand pointing at a device with icons for sun and wind (no text or symbols)natural_image
Hand pointing at a finger with icons for heart, triangle, and sun (no text or symbols)natural_image
Simple line drawing of a mechanical linkage or bracket (no text or symbols)natural_image
Simple line drawing of a mechanical clamp or bracket (no text or symbols)
natural_image
Pure mechanical linkage diagram without any text, numbers, or symbolsnatural_image
Hand pressing a button with a sun icon and power button (no text or symbols)natural_image
Hand pointing at a button with icons for heart, power, and sun (no text or symbols)Auto Dimmer Modus activeren
natural_image
Hand pointing at a button with sun icon and exclamation mark (no text or symbols)natural_image
Illustration of a hand pointing at a button with icons for sun and moon (no text or symbols)natural_image
Hand pointing at a finger with icons for TV, play button, heart, and sun (no text or symbols)natural_image
Simple line drawing of a mechanical lever or bracket (no text or symbols)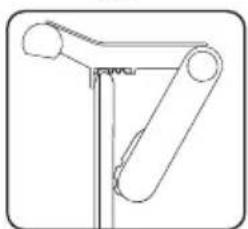
natural_image
Pure mechanical linkage diagram without any text, numbers, or symbols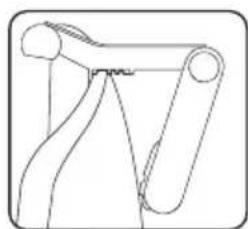
natural_image
Pure mechanical diagram of a lever mechanism without any text or symbols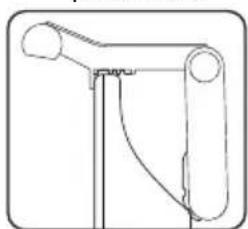
natural_image
Pure mechanical linkage diagram without any text, numbers, or symbolsnatural_image
Hand pointing at a control panel with sun and power button (no text or symbols)Tända/släcka lampan
natural_image
Hand pointing at a touchscreen interface with heart, power button, and sun icon (no text or symbols)Justera ljusstyrkan
natural_image
Hand pointing at a button with sun icon and exclamation mark (no text or symbols)natural_image
Hand pointing at a touchscreen interface with sun and flame icons (no text or symbols)natural_image
Hand pointing at a finger with icons for heart, triangle, and sun (no text or symbols)natural_image
Hand pressing a button with a sun icon and power button (no text or symbols)開燈 / 關燈
natural_image
Hand pointing at a simple icon with a sun symbol and heart/Power button (no text or labels)使用自動調光模式
調整亮度
natural_image
Hand pointing at a button with sun icon and play triangle (no text or symbols)調整色溫
natural_image
Hand pointing at a device interface with icons for sun and flame (no text or symbols)
natural_image
Hand pointing at a finger with icons for triangle, heart, and sun (no text or symbols)natural_image
Simple line drawing of a mechanical clamp or bracket (no text or symbols)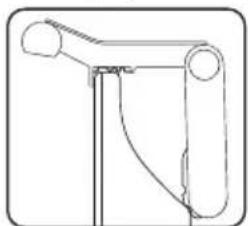
natural_image
Pure mechanical linkage diagram without any text, numbers, or symbolsnatural_image
Hand pressing a button with a sun icon and power button (no text or symbols)点灯 / 消灯
natural_image
Hand pointing at a button with icons for heart, sun, and power (no text or symbols)自動調光モード
明るさの調整
色温度調整
natural_image
Hand pointing at a device with icons for sun and wind (no text or symbols)natural_image
Hand pointing at a finger with icons for TV, heart, sun, and triangle (no text or symbols)조명사용방법
조명상단컨트롤러
natural_image
Hand pressing a button with a sun icon and power button (no text or symbols)전원켜고 끌는 법
natural_image
Hand pointing at a button with icons for heart, sun, and power (no text or symbols)자동 밝기 모드
밝 기 조 절
natural_image
Hand pointing at a button with sun icon and play button (no text or symbols)색 온 도 조 절
natural_image
Hand pointing at a touchscreen interface with sun and flame icons (no text or symbols)natural_image
Hand pointing at a finger with icons for heart, sun, and triangle (no text or symbols)Disposal of Waste Electrical and Electronic Equipment and/or Battery by users in private households in the European Union.
This symbol on the product or on the packaging indicates that this can not be disposed of as household waste. You must dispose of your waste equipment and/or battery by handling it over to the applicable take-back scheme for the recycling of electrical and electronic equipment and/or battery. For more information about recycling of this equipment and/or battery, please contact your city office, the shop where you purchased the equipment or your household waste disposal service. The recycling of materials will help to conserve natural resources and ensure that it is recycled in a manner that protects human health and environment.
Recycling Information: See https://www.beng.com/en-us/support/recycling/global-recycle.html for details.


https://www.beng.com/en-us/support/recycling/global-recycle.html.


DECLARATION OF CONFORMITY
The device complies with the requirements set out in the Council Directives on the Approximation of the Laws of the Member States relating Electromagnetic Compatibility (2004/108/EC) and Low Voltage Directive (2006/95/EC) and Radio and Telecommunications Terminal Equipment Directive (1999/5/EC), the Restriction of The Use of Certain Hazardous Substances in Electrical And Electronic Equipment Directive (2011/65/EU), Turkish EEE Directive; Turkish ErP (Decision 2010/643);the Commission Regulation (EC) No 1275/2008 implementing Directive 2005/32/EC of the European Parliament and of the Council with regard to eco-design requirements for standby and off mode electric power consumption of electrical and electronic household and office equipment, and the Commission Regulation (EC) No 1194/2012 implementing Directive 2009/125/EC of the European parliament and of the council establishing a framework for the setting of eco-design requirements for energy-related products.
Deutsch
DÉCLARATION DE CONFORMITÉ
Federal Communication Commission Interference Statement
This equipment has been tested and found to comply with the limits for a Class B digital device, pursuant to Part 15 of the FCC Rules. These limits are designed to provide reasonable protection against harmful interference in a residential installation. This equipment generates, uses and can radiate radio frequency energy and, if not installed and used in accordance with the instructions, may cause harmful interference to radio communications. However, there is no guarantee that interference will not occur in a particular installation. If this equipment does cause harmful interference to radio or television reception, which can be determined by turning the equipment off and on, the user is encouraged to try to correct the interference by one of the following measures:
• Reorient or relocate the receiving antenna.
- Increase the separation between the equipment and receiver.
- Connect the equipment into an outlet on a circuit different from that to which the receiver is connected.
- Consult the dealer or an experienced radio/TV technician for help.
FCC Caution: Any changes or modifications not expressly approved by the party responsible for compliance could void the user's authority to operate this equipment.
This device complies with Part 15 of the FCC Rules. Operation is subject to the following two conditions: (1) This device may not cause harmful interference, and (2) this device must accept any interference received, including interference that may cause undesired operation.
Industry Canada statement
This device contains licence-exempt transmitter(s)/receiver(s) that comply with Innovation, Science and Economic Development Canada's licence-exempt RSS(s). Operation is subject to the following two conditions:


- Package Contents
- Safety Warnings
- Installation
- Installing the Webcam Accessory
- Using the Light
- Controls on the Light Head
- Turning On/Off the Light and Entering Auto-Dimming Mode Turning On/Off the Light
- Entering Auto-Dimming Mode
- Manually Adjusting Brightness and Color Temperature
- Adjusting Brightness
- Adjusting Color Temperature
- Turning On/Off the Presence Detection Function
- My Favorite Mode
- Maintenance and Troubleshooting
- Specifications
- Inhalt des Pakets
- Verwenden der Lampe
- Bedienelemente am Lampenkopf
- Allumer/éteindre la lampe
- Ajuste del brillo
- Auto Dimmer Modus activeren
- Tända/släcka lampan
- Justera ljusstyrkan
- 開燈 / 關燈
- 使用自動調光模式
- 調整亮度
- 調整色溫
- 点灯 / 消灯
- 自動調光モード
- 明るさの調整
- 色温度調整
- 조명사용방법
- 조명상단컨트롤러
- 전원켜고 끌는 법
- 자동 밝기 모드
- 밝 기 조 절
- 색 온 도 조 절
- DECLARATION OF CONFORMITY
- Deutsch
- DÉCLARATION DE CONFORMITÉ
- Federal Communication Commission Interference Statement
- Industry Canada statement
Brand : BENQ
Model : ScreenBar Pro
Category : Lamp