MR 400 - Robot mower Grizzly - Free user manual and instructions
Find the device manual for free MR 400 Grizzly in PDF.

User questions about MR 400 Grizzly
0 question about this device. Answer the ones you know or ask your own.
Ask a new question about this device
Download the instructions for your Robot mower in PDF format for free! Find your manual MR 400 - Grizzly and take your electronic device back in hand. On this page are published all the documents necessary for the use of your device. MR 400 by Grizzly.
USER MANUAL MR 400 Grizzly
natural_image
Black robotic lawn mower with visible branding and mechanical components (no text or symbols on the device itself)MR 400

Translation of the original instructions for use
natural_image
Close-up of a person adjusting a mechanical component with a gear-like head (no visible text or symbols)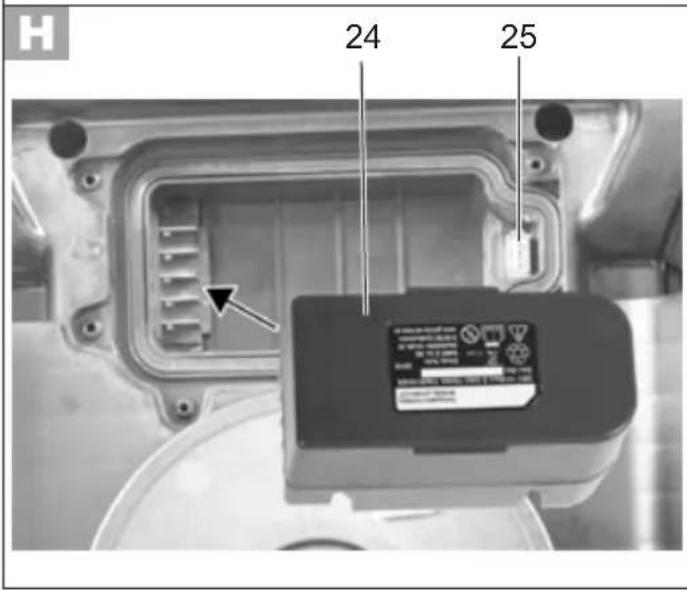
text_image
H 24 25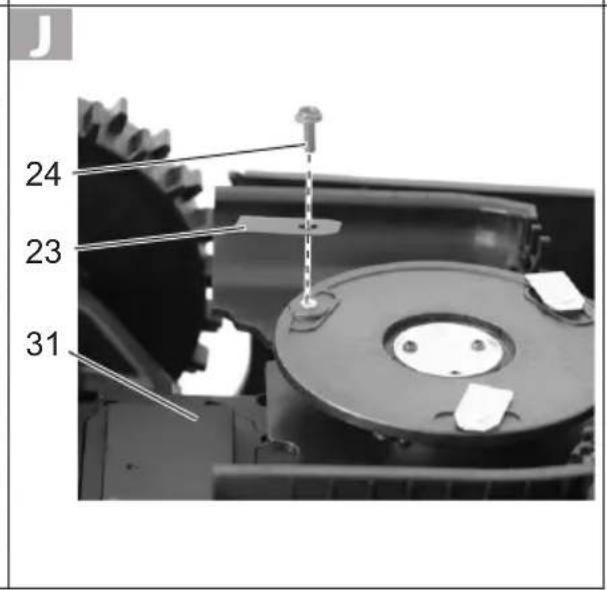
text_image
J 24 23 31
DE Originalbetriebsanleitung....7
FR Traduction de la notice d'utilisation originale .....27
IT Traduzione delle istruzioni per l'uso in originale .....46
NL Vertaling van de originele gebruiksaanwijzing......64
GB Translation of the original instructions for use......82
PL Tłumaczenie oryginalnej instrukcji obsługi....99
CZ Překlad originálního návodu k obsluze......119
LT Originalios eksploatavimo instrukcijos vertimas...136
ES Traducción del manual de instrucciones original..153
SK Preklad originálneho návodu na obsluhu....173
Inhalt
Einleitung 7
Grizzly Service-Center 203
Einleitung
Akku (Li-Ion)......DYMA118
Nennspannung ....28 V ---
Ladestation ....DYMA130
Eingangsspannung/
Input....28 V ÷ 1,8 A
Ausgangsspannung/
Output 28 V ÷ 4,7 A
Schutzart IPX4
Introduction......27
Grizzly Service-Center 203
Introduction
12 Station de charge
Station de charge ......DYMA130
Installer la station de charge
Grizzly Service-Center 203
Introduzione
Grizzly Service-Center 203
Inleiding
Laadstation ....DYMA130
Ingangsspanning /
Input....28 V ÷ 1,8 A
Uitgangsspanning /
Output 28 V ÷ 1,7 A
General Description 83
Scope of delivery.... 83
Description of functions....83
Overview 83
Technical Specifications....83
Safety Information....84
Symbols 84
General Safety Information 85
Initial start-up....89
Positioning the charging station ..... 89
Installing the boundary wire 89
Connecting the boundary wire to the charging station....91
Switching on and off....91
Setting the PIN 91
Forgotten PIN....91
Setting the daily operating time......92
Charging....92
Charging the battery.... 93
LED on the charging station....93
Checking the charge status of the battery 93
Practical tips 93
Setting the cutting height.... 93
Manually interrupting/starting the operating cycle....93
Cleaning/maintenance/storage ..... 94
General cleaning and maintenance work.... 94
Replacing the rechargeable battery .. 94
Turning/replacing the blades....94
Updating the firmware 95
Storage 95
Storage over winter....95
Transport....95
Disposal/environmental protection .. 95
Guarantee....96
Repair Service.... 96
Trouble Shooting....97
Replacement parts/Accessories ..... 98
Translation of the original EC declaration of conformity....195
Exploded Drawing....201
Grizzly Service-Center 203
Introduction
Congratulations on the purchase of your new device. With it, you have chosen a high quality product.
During production, this equipment has been checked for quality and subjected to a final inspection. The functionality of your equipment is therefore guaranteed.

The operating instructions constitute part of this product. They contain important information on safety, use and disposal. Before using the product, familiarise yourself with all of the operating and safety instructions. Use the product only as described and for the applications specified.
Keep this manual safely and in the event that the product is passed on, hand over all documents to the third party.
Intended use
This device is intended only for cutting lawns and grassed areas in residential applications.
This device is not suitable for commercial use. The warranty is void in the case of commercial use.
Any other use not expressly approved in the present instruction manual can damage the device and thus present a substantial risk for the user.
The device is intended for use by adults.
Children and people who are not familiar
with these instructions may not use the device. The use of the device in the rain or a damp environment is prohibited. The manufacturer is not liable for damage caused by improper use or incorrect operation.
General Description

The illustration how to handle the appliance can be found on page 2 - 5.
Scope of delivery
Carefully remove the device from the packaging and check whether all the parts listed below are present and complete:
- Automatic lawn mower
- 100 m Boundary wire
- Charging station
- Charger
- 5 fixing nails
- 125 hooks
- Charging station bumper
- 3 spare blades
- 3 Blade bolts
- Instruction manual
Description of functions
The automatic lawn mower has a rotating cutting tool parallel to the cutting plane. It is equipped with a high-performance electric motor, a robust plastic housing and a safety switch. In addition, the device has infinite height adjustment and smooth-running wheels.
Please refer to the descriptions below for information on how the operating elements work.
Overview

1 Stop button
2 Control panel
3 Cutting height adjustment wheel
4 Carrying handle
5 On/Off switch
6 Boundary wire 7 Hooks
8 Fixing nails
9 Charger connector 10 Charger
11 Power cord for the charger
12 Charging station
12a Working range indicator
12b Charging station bumper
13 Charging station connector

14 Running time setting LED
15 Running time setting key
16 Power key
17 Start key
18 Home key
19 Lock key
20 OK key

21 Rechargeable battery
22 USB port

23 Blade
24 Blade bolt

25 LED
26 Charging prongs

27 Contact jack „+“
28 Contact jack „S1“
29 Groove
Technical Specifications
Robotic mower......MR 400
Nominal voltage....28 V ---
Drive speed 1,2 km/h
GB
Protection class ....... III ◇
Protection type.....IPX4
Idling speed n_0 .....3100 min ^-1
Cutting diameter 180 mm
Cutting height 20 - 60 mm
Slope/pitch....35% (20°)
Gradient....17% (10°)
Number of blades 3
max. work area 400 m ^2
Weight 8,2 kg
Average operating time per charge .... 60 min*
Recommended operating
time (hrs) per day ....3 Std.
Sound pressure specification
(L_pA) 48,9 dB(A), K_pA = 3 dB
Noise level specification ( L_WA )
guaranteed 66 dB(A)
measured .....61,5 dB(A), K_WA = 1,93 dB
* The times actually required depend on the type of grass, the growing conditions, the humidity and the flatness of the lawn area.
Rechargeable battery (Li-Ion)... DYMA118
Nominal voltage....28 V =
Capacity.... 2,0 Ah
Energy 50,4 Wh
Charging time ...... ca. 1 - 2 h
Charger......DYMA129
Rated input .. 100-240 V\~, 50/60 Hz, 1,5 A
Rated output....28 V ===; 1,8 A
Protection class ....
Protection type.....IP65
max. outside temperature ( t_a ) ..... 50 °C
Charging Station......DYMA130
Rated input....28 V ≠4,8 A
Rated output....28 V==; 1,7 A
Protection type.....IPX4
Noise and vibration values were determined according to the standards and stipulations mentioned in the declaration of conformity.
Safety Information
This section covers the basic safety regulations when working with the electric lawnmower.
Symbols
Symbols on the device

Attention!
d the operating instruc- tions carefully.
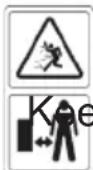
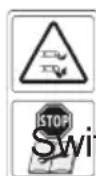
Risk of injury due to ejected parts.
p persons in the vicinity away from the mower.
Caution - sharp cutting blades! Keep away from feet and hands. Risk of injury!
ch off the motor before carrying out adjustments or cleaning work.
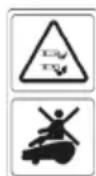
Caution - sharp cutting blades! Keep away from feet and hands. Risk of injury! Do not sit on the device.
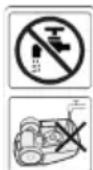
Do not wash the underside of the automatic lawn mower with flowing water.

Protection class III
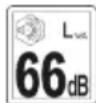
The sound power level L_WA is indicated in dB.
Electrical devices must not be disposed of with domestic waste.

Cutting diameter

Graphical symbol on the cutting height adjustment wheel
Symbols on the battery

Attention!

Carefully read through the instruction manual.

Take batteries to an old battery collection point where they will be recycled in an environmentally friendly manner.

Attention! Protect from rain and moisture.
Do not throw batteries into domestic waste,
Symbols on the charger

Attention!

Carefully read through the instruction manual.

Safety transformer – short-circuit proof
Switch-mode power supply

Miniature fuse

Protection class II
Electrical devices must not be disposed of with domestic waste.
Symbols on the Charging Station
Electrical devices must not be disposed of with domestic waste.
LED on the charging station
Illuminated red: Battery charging.
Flashing green: Boundary wire damaged or incorrectly connected.

Illuminated green: Battery fully charged.
Symbols in the manual

Warning symbols with information on damage and injury prevention.

Precaution symbol (explanation of precaution instead of exclamation mark) with information on prevention of harm / damage

Help symbols with information on improving tool handling.
General Safety Information

Important! Please read the operating instructions carefully and keep the manual for future reference.

This unit can cause serious injury if not used cor-
rectly. Before using the unit, carefully read through the instruction manual and familiarise yourself with all of its controls.
Preparation:
- This appliance is not intended for use by persons with reduced physical, sensory or mental capabilities, or lack of experience and knowledge, unless they have been given supervision or instruction concerning use of the appliance by a person responsible for their safety.
- Do not allow the use of this equipment by children or others who are unfamiliar with these operating instructions. Local regulations may specify the minimum age of the operator.
- The operator or user is responsible for accidents, injuries to other people or damage to the property of others.
- Check the terrain on which the equipment is to be used and remove stones, sticks, wires and other foreign objects that could become caught and thrown up.
- Before each use, carry out a visual inspection of the equipment. Do not use the equipment if protective devices (e.g. collision guard or grass bag), parts of the cutting device or bolts are missing, worn or damaged. To avoid imbalance, damaged tools and bolts are to be replaced only in sets.
• Take care with equipment that has several cutting tools, as the movement of one blade may result in the rotation of the other blades.
- Use only spare parts and accessories supplied and recommended by the manufacturer. The use of non-original parts will immediately invalidate the guarantee.
Working with the Equipment:

Do not place feet or hands near or under rotating parts when working. Risk of injury!

Observe the noise protection and local regulations.
- Switch on the motor according to the instructions and only when your feet are at a safe distance from the cutting tools.
- The equipment is not to be lifted or transported while the motor is running. Switch off the equipment if it has to be tilted in transit, when crossing surfaces other than grass, and when the equipment is being transported to and from the surfaces to be mowed.
- Do not work with equipment that is damaged, incomplete, or has been modified without the authorisation of the manufacturer.
- Do not overload the equipment. Work only within the specified power range and do not change the regulator settings
on the motor. Do not use low-powered machines for heavy work. Do not use your equipment for purposes other than those for which it is designed.
- Do not use the equipment near inflammable liquids or gases. Non-observance will result in a risk of fire or explosion.
- The equipment is not to be lifted or transported while the motor is running.
Maintenance and Storage
- When servicing the blades, remember that they can move even if the power source is off.
- Ensure that all nuts, bolts and screws are tightened firmly and the equipment is in safe working condition.
- Check the mower for any damages.
- Repair damaged parts as appropriate.
- Do not attempt to repair the equipment yourself unless you have been trained to do so. Any work not specified in these instructions is to be carried out only by customer service centres that we have authorised.
- Keep the equipment in a dry location and out of reach of children.
- Handle the equipment with care. Keep tools sharp and clean, in order to facilitate better and safer work. Follow the maintenance instructions.
-
Wear protective gloves when changing the cutting device.
-
Replace worn or damaged parts for safety reasons. When adjusting the blades, take particular care to avoid fingers being trapped between the rotating blades and fixed parts of the machine.
- Check that only replacement tools authorised by the manufacturer are used.
Electrical Safety:
- Ensure that the mains voltage matches the specifications on the rating plate.
- Avoid bodily contact with earthed parts (e.g. metal fences, metal posts). There is an increased risk of electric shock if your body is earthed.
- Keep the power cable away from the cutting tool when working. The cutting blades may damage the power cable and result in contact with live parts. Always run the power cable behind the operator. The extension cable can be accidentally severed. Risk of electric shock!
- Do not use the power cable to pull the plug from the socket. Protect the power cable from heat, oil and sharp edges.
- Switch off the equipment and disconnect the plug from the socket if the power cable is damaged. If the power cable is damaged, it must be replaced by the manufacturer, the customer services of the same, or a qualified person, in order to avoid hazards.
GB
- Do not connect a damaged power cable to the mains. Do not touch a damaged power cable when it is connected to the mains. A damaged power cable may result in contact with live parts.
Special safety directions for battery-operated tools
- Ensure that the device is switched off before inserting the battery. Inserting a battery into a power tool that is switched on may result in accidents.
- Recharge the batteries indoors only because the battery charger is designed for indoor use only. Risk of electric shock.
- To reduce the electric shock hazard, unplug the battery charger from the mains before cleaning the charger.
- Do not subject the battery to strong sunlight over long periods and do not leave it on a heater. Heat damages the battery and there is a risk of explosion.
- Allow a hot battery to cool before charging.
- Do not open up the battery and avoid mechanical damage to the battery. Risk of short circuit and fumes may be emitted that irritate the respiratory tract. Ensure fresh air and seek medical assistance in the event of discomfort.
- Do not use non-rechargeable batteries. This could damage the appliance.
Correct handling of the battery charger
- This appliance can be used by children aged from 8 years and above and persons with reduced physical, sensory or mental capabilities or lack of experience and knowledge if they have been given supervision or instruction concerning use of the appliance in a safe way and understand the hazards involved. Children shall not play with the appliance. Cleaning and user maintenance shall not be made by children without supervision.
- To charge the battery, use only the charger supplied. Risk of fire and explosion. This ensures that the safety of the device is maintained.
- Before each use, check the charger, cable and plug and have them repaired by qualified professionals and only with original parts. Do not use a defective charger and do not open it up yourself. This ensures that the safety of the device is maintained.
- Connect the charger only to a socket with an earth. Ensure that the mains voltage matches the specifications on the charger rating plate. Risk of electric shock.
- Disconnect the charger from the mains before closing or opening connection to the battery / power tool / device. This ensures that the battery and charger are not damaged.
- Keep the charger clean and away from wet and rain. Do not use the charger outdoors. Dirt and the entry of water increase the risk of electric shock.
- Operate the charger only with the appropriate original batteries. Charging other batteries may result in injuries and risk of fire
- Avoid mechanical damage to the charger. This can result in internal short circuits.
- Do not operate the charger on a combustible surface (e.g. paper, textiles). Risk of fire due to heating during charging.
- If the power cable for this equipment is damaged, it must be replaced by the manufacturer, a customer service agent of the same or a similarly qualified person in order to prevent hazards.
- Do not attempt to charge non-rechargeable batteries in the charger. The device could get damaged.
Initial start-up

Regularly check the lawn area for rocks, branches, wires and other objects that may damage the device and the blades.

Make sure that the mowing zones for two or more automatic lawn mowers are placed at a sufficient distance (at least 2.5 - 3 m) from each other.
If mowing zones are too close to each other, this can cause the devices to malfunction.
B Positioning the charging station
- Select a flat position near a socket for the charging station (12) with at least 2 m of space in front and 1 m behind.
- Secure the charging station and the charging station bumper (12b) with the fixing nails (8).
The charging station bumper (12b) is fastened to the side of the charging station outside the restricted lawn area.
The working range indicator (12a) on the charging station must be located within the restricted lawn area. - Connect the charging station to the charger (10) using the connectors (9+13). Ensure that the connector contacts marked with "1" and "2" are engaged correctly.

Make sure that the charging station (12) is positioned an adequate distance away from ponds, pools and steps.

We recommend installing a roof for the charging station (12) to protect it from weather damage.
C Installing the boundary wire
Before starting up the automatic lawn mower, the boundary wire (6) must be placed around the lawn area to be covered by the automatic lawn mower.
You can do this as follows:
- Mark out the lawn area with the hooks (7).
- Bury the boundary wire (6) in the ground (max. depth of 5 cm).
GB

The automatic lawn mower crosses over the boundary wire by about 20 - 30 cm before it turns around and searches for a new path. Install the boundary wire accordingly to prevent damage.

For the initial installation, we recommend marking out the boundary wire (6) with the hooks (7) in case corrections need to be made at a later date.
- The lawn area must be bordered as a single enclosed area (see figure ①).
- Any parallel boundary wires installed at a distance of at least 10 cm are identified as an obstacle by the automatic lawn mower and are evaded (see figure ②).
- Any parallel boundary wires at a distance of 5 mm or less are not detected by the automatic lawn mower and are passed over.
- Avoid creating corners with a 90° angle. Instead, split these into two 45° angles (see figure ③).
- The automatic lawn mower's sensors are able to detect and evade stationary and solid obstacles (walls, garden furniture, etc.) larger than 100 mm. Protect sensitive obstacles (e.g. flowerbeds) on the lawn area with the boundary wire (6).
- Keep a distance of at least 1 m between bordered obstacles. Border obstacles that do not meet this minimum distance as a single obstacle (see figure ②).

Make sure that the boundary wire (6) does not intersect at any point. This can lead to faults and failures in the automatic lawn mower's operation.
Trees
The automatic lawn mower detects trees as a normal obstacle. However, protruding roots may damage the underside/blades (23).
We recommend using the boundary wire (6) to also border trees.
Rocks
- Remove small rocks (lower than 100 mm) from the lawn area. These may damage the device and the blades (23).
- The automatic lawn mower detects rocks (taller than 100 mm) as normal obstacles.
We recommend using the boundary wire (6) to also border rocks.
Gradients
The automatic lawn mower is able to traverse uphill gradients up to max. 20° (35%).
The boundary wire should not be installed across uphill gradients greater than 20^ and downhill gradients greater than 10^ (17%).

Make sure that a distance of at least 30 cm is maintained between the boundary wire (6) and an obstacle on an uphill gradient and at least 40 cm on a downhill gradient.
Ponds/pools
Ponds and pools should be bordered by the boundary wire (6) where possible or designed so that the automatic lawn mower cannot enter the water. This may seriously damage the device's electronics.
Paths/roads
The automatic lawn mower can easily cross paths and roads at ground level. If height differences exist between the lawn area and path/road, border off the path/road with a safety margin of approx. 40 cm.
Narrow passages
Narrow passages on the bordered lawn area should be at least 1.2 m wide and no more than 8 m long (see figure ④).

Connecting the boundary wire to the charging station
- Strip approx. 10-15 mm of both ends of the boundary wire (6) using cable strippers.
- Connect the rear end of the boundary wire (6) to the contact jack (28) marked with "S1".
- Pass the other end of the boundary wire (6) through the groove (29) under the charging station (12).
- Connect this end of the wire to the contact jack (27) marked with “+”.
- Check the LED (25) on the charging station. If the LED (25) lights up green, the boundary wire (6) is connected to the charging station (12) correctly.

Allow a metre of additional space for corrections when installing the boundary wire (6).

Do not place the “protruding” remains of the boundary wire together. This can lead to faults and failures in the automatic lawn mower’s operation.

Switching on and off
Switching the automatic lawn mower on
- Press the on/off switch (5) on the underside of the automatic lawn mower (position "1").
- Press the power key (16) on the control panel.
Switching the automatic lawn mower off
- Press the on/off switch (5) on the underside of the automatic lawn mower (position "0").

Setting the PIN
- Unlock the control panel (2) with the PIN (factory setting: press keys marked "1-2-3-4" in numerical order).
- Simultaneously press the OK key (19) and the lock key (20). The lock LED (30) flashes red/green.
- Enter a new 4-digit PIN using the keys marked "1-2-3-4".
- Confirm the new PIN with the OK key (19). The automatic lawn mower beeps to confirm.
Forgotten PIN
- Open the battery compartment (31) on the underside of the device.
GB
- Remove the battery (21) from the charger.
- Connect an empty USB memory device (USB stick; not supplied) to the automatic lawn mower via the USB port (22).
- Reposition the battery (21).
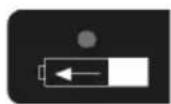
- Press the on/off switch ( 5) on the underside of the automatic lawn mower (position "1"; see image ):
- Simultaneously press the power key (16) and the OK key (19) on the control panel (2) Every display on the control panel (2) lights up.
- Press the running time setting key (15).
- Remove the USB memory device from the automatic lawn mower.
- Connect the USB memory device to the computer.
- Retrieve the unlock code located in the .txt file on the USB memory device.
- Give the unlock code to our service centre (see "Grizzly Service Centre") to obtain your new PIN.
G Setting the daily operating time
- If necessary, stop the automatic lawn mower (see "Manually interrupting/ starting the operating cycle").
- Unlock the control panel (2) by pressing keys "1-2-3-4" in numerical order.
- Confirming with the OK key (19).
-
Press the operating time setting key (15) to set the desired daily operating time for the automatic lawn mower. The selected operating time is signalled by the operating time LEDs (14).
-
Confirm the selection with the OK key (19).
The automatic lawn mower beeps twice to confirm.
- Press the lock key (20) to re-lock the control panel (2).
The automatic lawn mower always starts its daily operating cycle at the time at which it first started operating.

Please note that the automatic lawn mower's required operating time is influenced by charging breaks and the condition of the lawn area.
The locked status of the control panel (2) can be identified by the lock LED (30).
LED illuminated green: The control panel is unlocked.
LED illuminated red: The control panel is locked.
Charging

Do not expose the battery to extreme conditions such as heat and shocks. There is a risk of injury from leaking battery fluid! In case of contact with eyes or skin, rinse the affected sites with water or a neutralising agent and seek medical attention.

Only charge the battery with the enclosed charger.
- Charge the battery before using it for the first time.
- If the operating time is considerably shortened despite charging, this
shows that the rechargeable battery is depleted and must be replaced. Only use an original battery purchased from customer service.
- Always comply with the latest safety instructions, as well as the regulations and information relating to environmental protection.
- Defects resulting from improper handling are not covered by the guarantee.
Charging the battery
The automatic lawn mower automatically returns to the charging station when it has a low charge status.
To do so, the automatic lawn mower locates the nearest boundary wire and follows this in a clockwise direction.
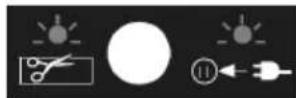
LED on the charging station
No display: Charging station is not connected to the mains

Illuminated red: Battery charging
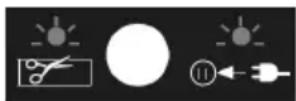
Flashing green: Boundary wire dam- aged or incorrectly connected

Illuminated green: Battery fully charged
Checking the charge status of the battery
You can check the charge status of the automatic lawn mower on the control panel at any time.
Practical tips
Regular mowing stimulates the grass to an increased leaf formation, while at the same time killing weeds. Therefore, the lawn becomes denser after each mowing process, resulting in an evenly loadable lawn.
The first cut takes place roughly in April when the grass is about 7 - 8 cm high. During the main growing season, the lawn is mowed at least once a week.
E Setting the cutting height

Switch off the device and wait for the blade to come to a stop. There is a risk of personal injury.
Set the cutting height adjustment wheel (3) to the desired cutting height.
The device can be infinitely adjusted to a cutting height between 20 and 60 mm.
The correct cutting height is between 30 and 45 mm for an ornamental lawn and about 30 to 65 mm for a utility lawn.

A high cutting height should be selected for the first cuts in the season.
G Manually interrupting/ starting the operating cycle
Interrupting the operation
Press the stop button (1) to stop the mower during operation.
Press the home key (18) to manually send the automatic lawn mower to the charging station (12).
GB
Starting/resuming operation
Press the start key (17). The automatic lawn mower starts the set operating cycle or resumes its previous activity without interruption.
Cleaning/maintenance/storage

Have any work that is not described in these instructions performed by an authorised customer service centre. Only use original parts.

Before any maintenance or cleaning work, switch off the device and wait for the blade to come to a standstill.

Wear gloves when handling the blades.
General cleaning and maintenance work

Never spray down the lawn mower with water. There is a risk of electric shock.
- Keep the device clean. Use a brush or cloth for cleaning, but do not use any aggressive cleaning agents or solvents.
- Grease the wheels from time to time.
- Check the covers and protective devices for damage and correct fit. Replace these if necessary.

Replacing the rechargeable battery

Switch off the device and wait for the blades to come to a stop. There is a risk of personal injury.

There is a risk of injury from leaking battery fluid! In case of contact with eyes or skin, rinse the affected sites with water or a neutralising agent and seek medical attention.
- Turn over the automatic lawn mower.
- Open the battery compartment
(31) by removing the 6 screws on the underside of the device. - Remove the battery (21).
- Insert the new rechargeable battery.
- Re-connect the battery compartment.

Turning/replacing the blades
The automatic lawn mower is equipped with reversible blades. If the blades are blunt on one side, they can be turned over. If the blades are damaged or show signs of imbalance, they need to be replaced (see “Spare parts/accessories”).
- Turn the device over.
- Remove the blade bolts (24) on the underside of the device
Turning the blade
- Turn the blade (23) over.
- Refasten the blades with the blade bolts (23).
Replacing the blades
- Remove the old blades (23).
- Refasten the new blades (23) with the blade bolts (24).
Updating the firmware
Firmware updates can be performed by one of our service partners (see “Service Centre”).
Storage
- Store the device in a dry place, out of reach of children.
- Do not enclose the device in nylon sacks as this may cause moisture to form.
We are not liable for damage cause by our devices if this is caused by improper repair, the use of non-original parts or incorrect use.
Storage over winter
- Clean the device prior to storage (see "Cleaning and maintenance").
- Make sure that the on/off switch (5) on the device is set to "Off".
- Only store the batteries in the partially-charged state. The charge status should amount to 40-60% during a lengthy storage period.
- Check the battery charge status approximately every 3 months during a lengthy storage period and recharge if necessary.
- Disconnect the charging station from the boundary wire
• Insulate the contacts of the boundary wire with adhesive tape

If you are starting the device after an extended storage period, clean the battery contacts on the device and the charging prongs (26) on the charging station with a brass brush to prevent charging problems.

Transport
A carrying handle (4) for transporting the device is located on the rear of the automatic lawn mower.

Always carry the automatic lawn mower with the blades (23) pointing away from your body. Risk of injury!
Disposal/environmental protection
Remove the battery from the device and recycle the device, battery, accessories and packaging in an environmentally-friendly manner.

Electrical devices do not belong in domestic waste.
Do not throw batteries into domestic waste, fire (risk of explosion) or water. Damaged batteries can harm the environment and your health if poisonous fumes or liquids escape.
- Hand the device and the charger to a recycling point. The plastic and metal parts used on your device can be properly sorted according to materials and grades and efficiently recycled. Please contact our service centre for more information.
GB
- Dispose of batteries in a discharged state. We recommend covering the contacts with an adhesive strip to protect against short circuits. Do not open the battery.
- Dispose of the batteries in accordance with local regulations. Hand in the batteries at a used battery collection point where they are recycled in an environmentally friendly manner. For more information, please contact your local waste management provider or our service centre.
- Disposal of your sent in defective devices is carried out free of charge.
Guarantee
- This appliance has a 24-month guarantee.Commercial use will invalidate the guarantee.
- Damages, which can be attributed to natural wear, overloading or inappropriate use, are excluded from the guarantee. Certain component parts are subject to a normal wear and are excluded from the guarantee. In particular, these include: Blades, boundary wire, rechargeable battery.
• Furthermore, the prerequisite for guarantee services is that the references indicated in the operating instructions regarding cleaning and maintenance have been adhered to. - Damage, which has been caused from material or manufacturing faults, will be made good free of charge, by replacement delivery or repair.
This requires that the appliance is returned to the merchant undismantled and with proof of purchase and guarantee.
Repair Service
- Repairs, which are not covered by the guarantee, can be carried out for charge by our service center. Our service center will be glad to provide you with a cost estimate. We can only process devices which have been packaged sufficiently and which have been dispatched with correct stamping.
- Note: In case of complaint or service, please deliver your device cleaned, and with an indication of the defect, to our service address.
Devices sent in freight collect - by bulk freight, express or with other special freight - are not accepted.
- Defective units returned to us will be disposed of for free.
Trouble Shooting
| Problem Possible cause Troubleshooting | ||
| Device does not start | On/Off switch (5) set to “Off” (“0” position) | Set the on/off switch (5) to “On” (position “1”) (see “Switching on and off”) |
| Rechargeable battery not inserted | Insert rechargeable battery (see “Replacing the rechargeable battery”) | |
| Defective motor | Send the device in to the Service Centre for repair | |
| Grass too long | Pre-mow the lawn area if necessary. Set higher cutting height. | |
| Warning LED on the control panel lights up red | Mower lifted up during operation | Start mower again (press OK key) Delete errors (press Stop key) |
| Warning LED on the control panel flashes red Device rotates incessantly on the lawn area | Boundary wire (6) connected incorrectly, cut or damaged | Check the connections on the charging station Check the boundary wire (6) for possible damage |
| Warning LED on the control panel lights up blue | Battery (21) temperature too hot Defective battery (21) | Allow the automatic lawn mower to cool down for approx. 15 mins Replace the battery (21) when necessary |
| Warning LED on the control panel flashes blue | Automatic lawn mower tipped over/overworked | Turn mower over again Check the height of the grass (max 60 mm), pre-mow the lawn area if necessary |
| Automatic lawn mower moves, but does not cut | Defective battery | Replace the rechargeable battery (see “Replacement parts/accessories) |
| Engine switches off | Blockage by foreign body Remove foreign body | |
| Output not satisfactory or engine is difficult to operate | Cutting height too low Set higher cutting height | |
| Blades (23) blunt | Sharpen or replace blades | |
| Blade area blocked Clean device | ||
| Blades (23) incorrectly assembled | Install blades correctly | |
| Abnormal sounds, clattering or vibrations | Blade bolts (24) loose | Tighten blade bolts |
| Blades damaged (23) | Replace blades | |
| Automatic lawn mower moves out of the boundary | Routing error: 90° corners can lead to signal loss | Take corners widely or at a 45° angle |
Replacement parts/Accessories
Spare parts and accessories can be obtained at www.grizzly-service.eu
If you have any other questions, contact the service centre (see "Grizzly Service Centre").
Pos. Name Art. no.
A 6 Boundary wire....91105150
A 7 Hooks....91105152
A 8 Ground anchors 91105255
A 10 Charger 91105257
A 12b Charging station bumper....91105254
A 13 Charging station connector....91105256
A 14 Cutting height adjustment wheel....91105259
H 24 Rechargeable battery....80001181
J 26+27 Blade + blade bolt 91105153
Rear wheel set....91105253
Front wheel set....91105251
Spis treści
Wstęp....99
Grizzly Service-Center 203
Wstep
21 Akumulator 22 Port USB
Akumulator (Li-Ion) ......DYMA118
H 24 Akumulator....80001181
Grizzly Service-Center 203
Úvod
Grizzly Service-Center 203
Ivadas
Grizzly Service-Center 203
Introducción
Grizzly Service-Center 203
Úvod
| GB | Translation of the original CE declaration of conformity |
| We confirm, that the Robotic mower Design Series MR 400 Batch number B-45819 conforms with the following applicable relevant version of the EU guidelines: | |
| 2006/42/EC • 2014/53/EU • 2014/30/EU • 2014/35/EU • 2011/65/EU* | |
| In order to guarantee consistency, the following harmonised standards as well as national standards and stipulations have been applied: | |
| EN 60335-1:2012/A13:2017 • EN 62233:2008 • EN 62133-2:2017 • EN 62311:2008 EN 55014-1:2017 • EN 55014-2:2015 • EN 61558-1:2005+A1:2009 EN 61558-2-16:2009+A1:2013 • EN 301 489-1 v2.2.0:2017 EN 301 489-3 v2.1.1:2017 • EN 301 489-17 v3.2.0:2017 • EN 300 328 v2.1.1:2016 EN 303 447 v1.1.1:2017 • EN 62479:2010 • EN 50636-2-107:2015/A1:2018 EN 61000-3-2:2014 • EN 61000-3-3:2013 • EN 62321-1:2013 | |
| This declaration of conformity (20)** is issued under the sole responsibility of the manufacturer: | |
| CE Grizzly Tools, GmbH & Co. KG Stockstädter Straße 20 63762 Großostheim Germany 10.01.2020 | Christian Frank Documentation Representative |
Grizzly Service-Center

Unit 3, Beldray Park
Beldray Road, Mount Pleasant
Bilston, West Midlands WV14 7NH
Tel.: 0845 683 2672
e-mail: care@novoserv.co.uk