HomeRun 3000 Series Aqua XU3100 - Robot vacuum PHILIPS - Free user manual and instructions
Find the device manual for free HomeRun 3000 Series Aqua XU3100 PHILIPS in PDF.


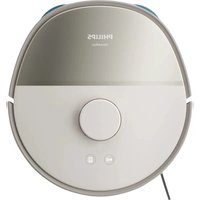
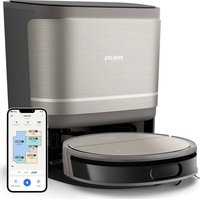
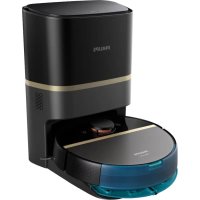
| Product type | Robot vacuum and mop |
| Brand | Philips |
| Model | HomeRun 3000 Series Aqua XU3100 |
| Power supply | Rechargeable battery, automatic emptying station with built-in charging |
| Runtime | Up to 120 minutes (estimated) |
| Water tank capacity | Approximately 200 ml |
| Dustbin capacity | Approximately 400 ml |
| Navigation | 360° laser (LiDAR) for mapping and navigation |
| Key features | Simultaneous vacuuming and mopping, multi-floor mapping, no-go zones and dry zones, auto, custom, quiet, and intensive modes, auto-resume, auto-empty |
| Connectivity | Wi-Fi, Philips HomeRun app (iOS and Android) |
| Voice control | Compatible with voice assistants (via app) |
| Maintenance | Regular cleaning of brushes, filters, sensors; washable wipes |
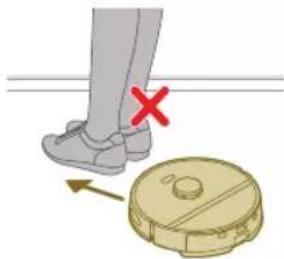
| Safety | Anti-fall sensors, staircase detection, automatic stop when lifted |
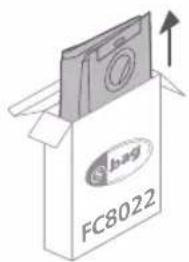
| Replacement parts | Washable wipes XV1430, dust bags FC8022, maintenance kit XV1433 |
| Repairability | Replaceable battery, parts available at philips.com/myrobot3000 |
| Noise level | Approximately 65 dB (estimated) |
| Dimensions (diameter x height) | Approximately 35 cm x 10 cm |
| Weight | Approximately 4 kg |
| Warranty | International warranty, support at philips.com/support |
| Available languages | Multi-language, including French |
Frequently Asked Questions - HomeRun 3000 Series Aqua XU3100 PHILIPS
User questions about HomeRun 3000 Series Aqua XU3100 PHILIPS
0 question about this device. Answer the ones you know or ask your own.
Ask a new question about this device
Download the instructions for your Robot vacuum in PDF format for free! Find your manual HomeRun 3000 Series Aqua XU3100 - PHILIPS and take your electronic device back in hand. On this page are published all the documents necessary for the use of your device. HomeRun 3000 Series Aqua XU3100 by PHILIPS.
USER MANUAL HomeRun 3000 Series Aqua XU3100 PHILIPS
Introduction 6
Product overview 7
Before first use 8
Preparing for use 8
Audible signals 12
How your robot works 13
Using your robot 17
Cleaning and maintenance 19
User interface signals and their meaning 27
Reset/restore the robot 28
Replacement 29
Warranty and support 31
Disposal and recycling 31
Troubleshooting 31
Introduction
Congratulations on your purchase of a Philips HomeRun Vacuum and Mop robot 3000 Series Aqua! To get the most out of your robot and access all the advanced functions you can download and install the Philips HomeRun robot app. You can also find support videos and frequently asked questions in the app or visit www.philips.com/myrobot3000.
Read the separate safety booklet carefully before you use the robot for the first time and save it for future reference.
Product overview
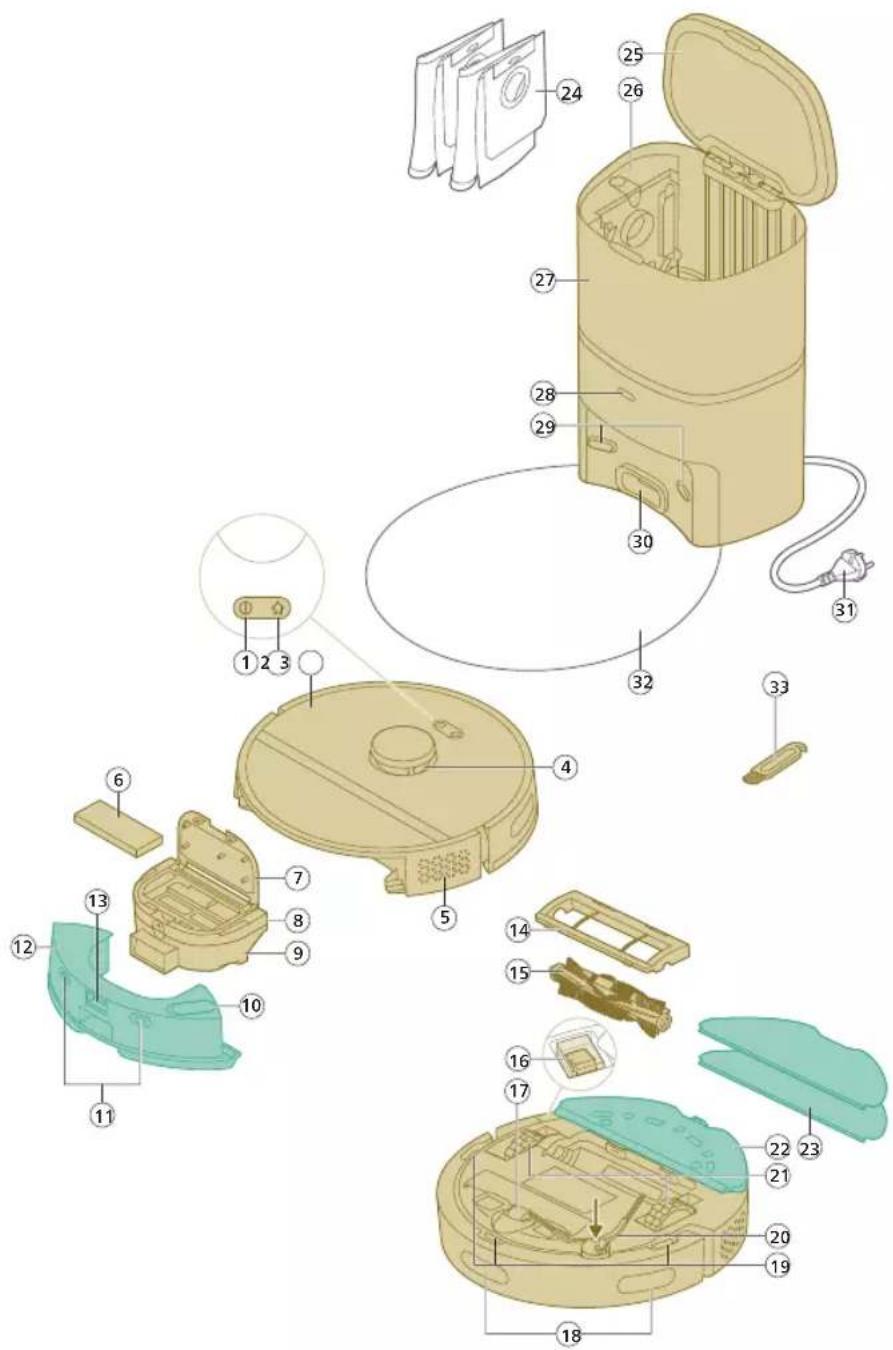
1 On/off button
2 Home button
3 Top cover
4 360° laser navigation (LiDAR)
5 Air outlet
6 Washable filter
7 Lid of the washable filter
8 Dust bin empty lid
9 Dust bin
10 Water inlet
8 English
11 Charging contact points (robot)
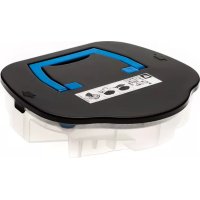
12 Water tank
13 Release button of the water tank
14 Brush cover
15 Main brush
16 Power on/off switch
17 Front caster wheel
18 Sensor to guide the robot back to the station (3x)
19 Anti-drop sensor (3x)
20 Side brush
21 Main wheels
22 Mop pad holder
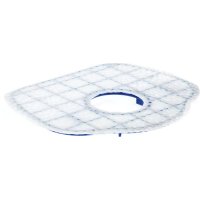
23 Washable mop pad (2x)
24 Dust bag (2x)
25 Canister lid
26 Dust bag compartment
27 Auto-Empty station
28 Indicator light
29 Charging contact points (station)
30 Auto-Empty inlet
31 Power cord socket
32 Placemat
33 Brush cleaning tool
Before first use
1 Take the appliance out of the box and remove all packaging.
2 Remove the protection covers.
3 If you see any sign of visible damage, go to www.philips.com/support or contact the Consumer Care Center in your country.
Preparing for use
Tips for choosing the best location for installing the station:
- Do not place the station in bright sunlight or under furniture. This will block the infrared signal that helps the robot find its way back to the station.
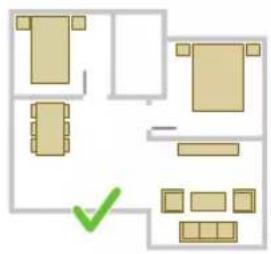
- Install the station on a level surface against a wall.
- Install the station on a hard floor.
- Do not place the station near stairs or a heating source (radiator).
- Install in a location with good WiFi coverage.
Install the station
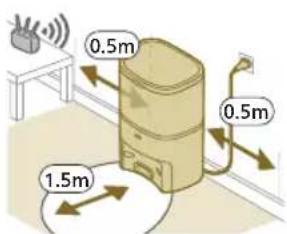
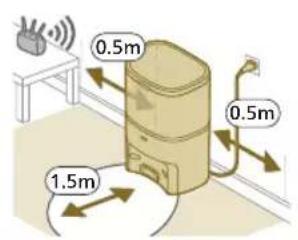
1 Install the station within the correct dimensions for placement.
i Note: Keep 0.5 meters of space on the sides of the station and 1.5 meters in front of the station.
2 Connect the station to the power supply.
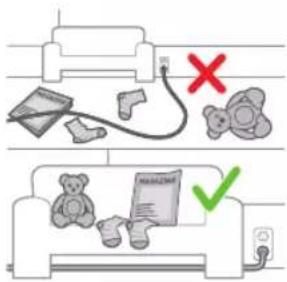
3 Make sure that the remaining part of the power cable is well concealed behind the station so that the robot cannot drive over it.
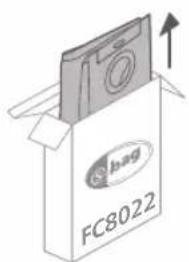
4 Place the dust bag in the dust bag compartment of the station.
Install the mop pad holder, washable mop pad, and the side brush
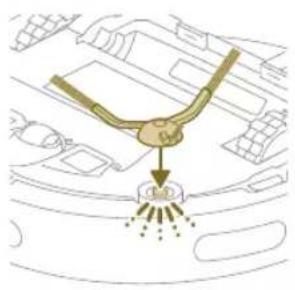
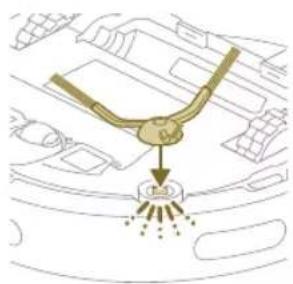
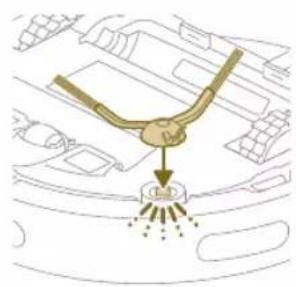
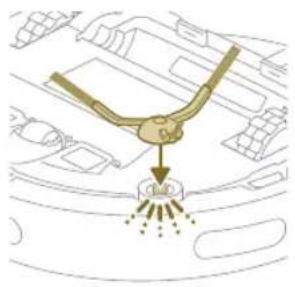
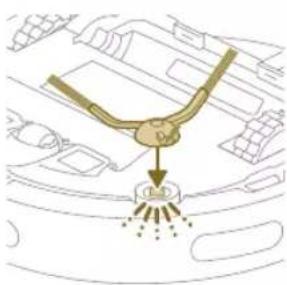
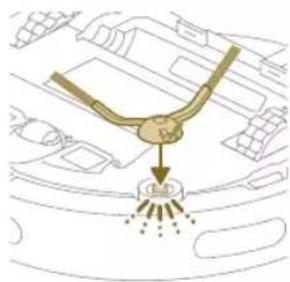
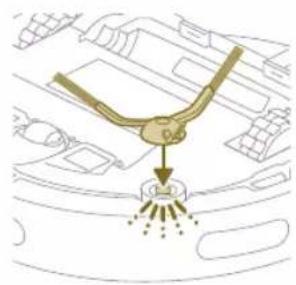
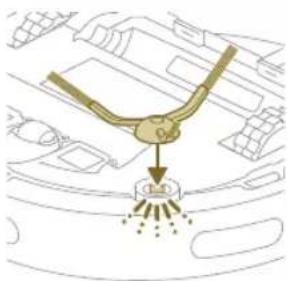
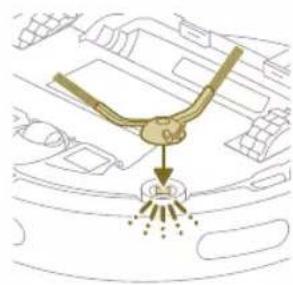
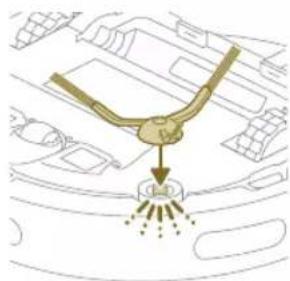
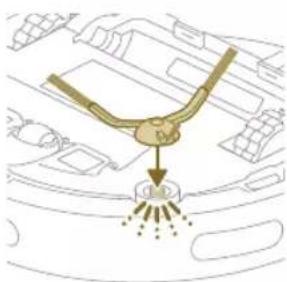
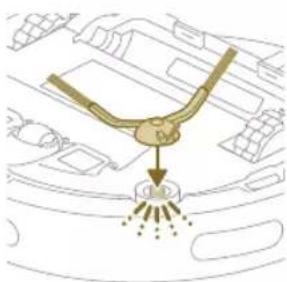
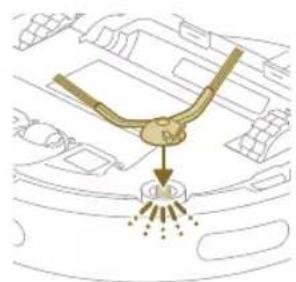
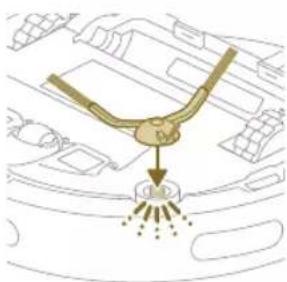
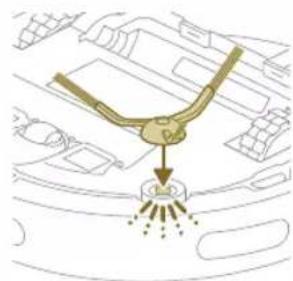
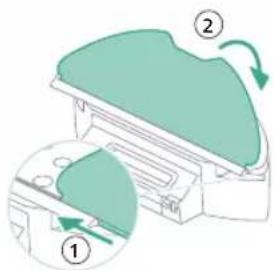
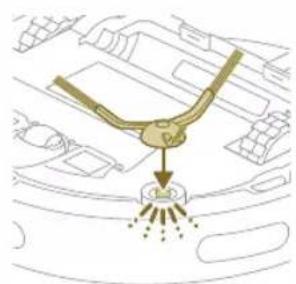
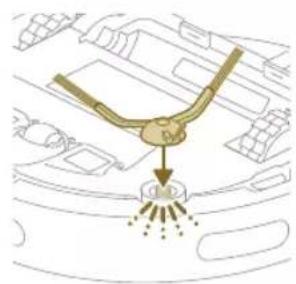
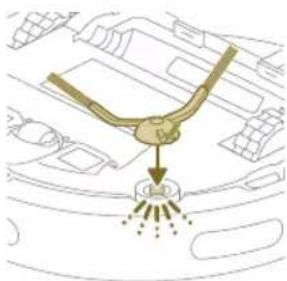
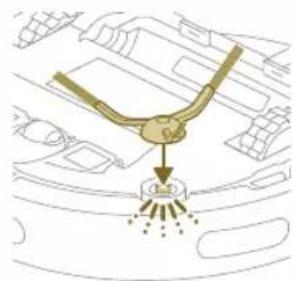
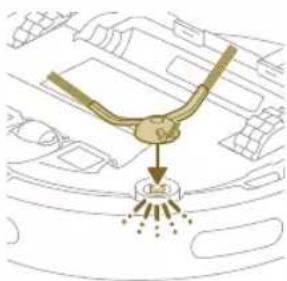
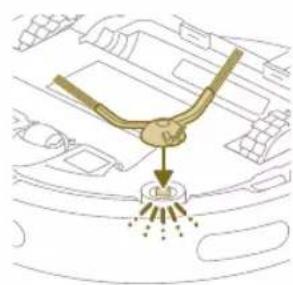
1 Attach the side brush by clicking it into the correct position on the bottom of the robot.
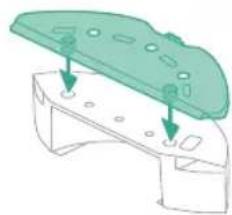
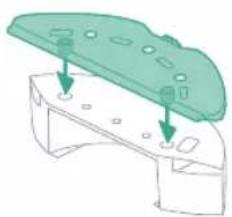
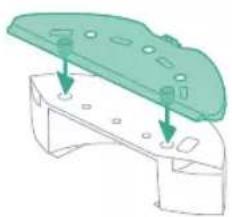
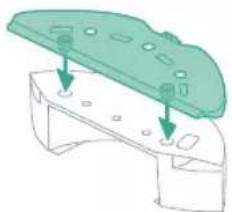
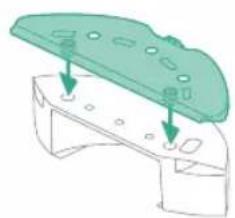
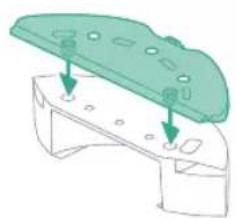
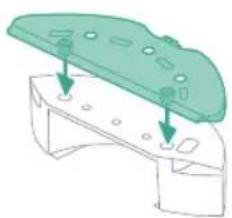
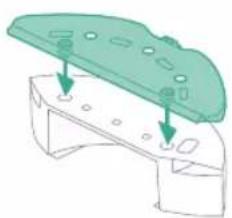
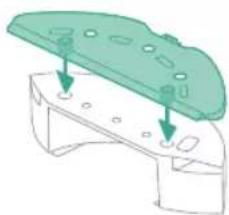
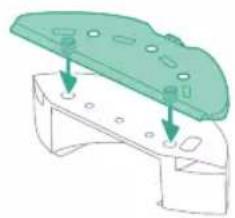
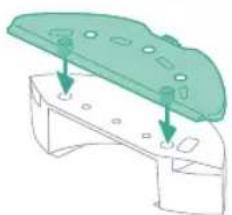
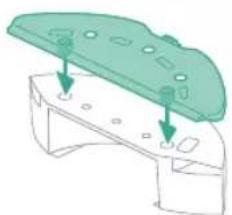
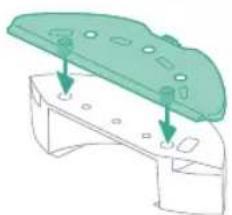
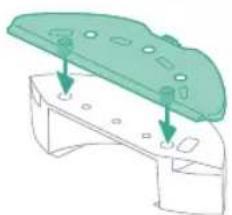
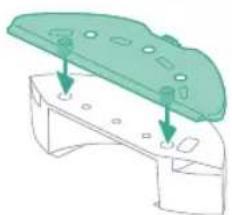
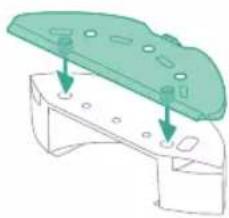
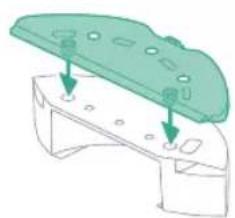
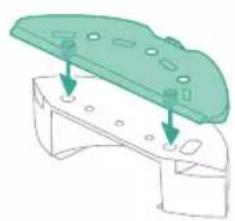
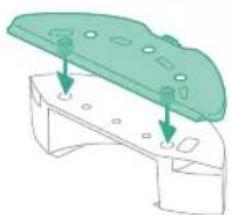
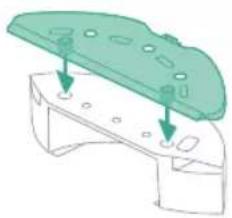
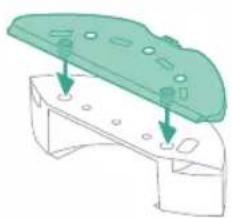
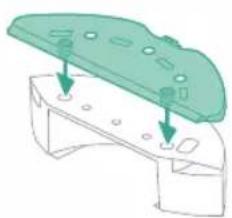
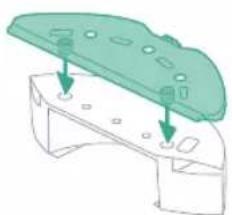
2 Attach the mop pad holder to the bottom of the water tank of the robot.
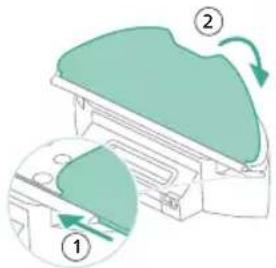
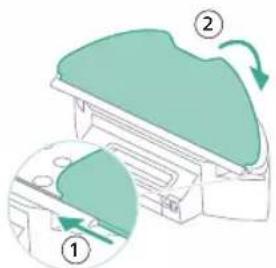
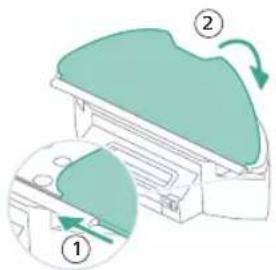
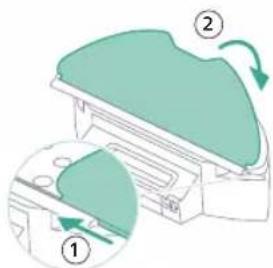
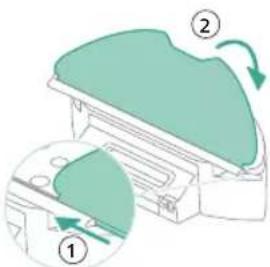
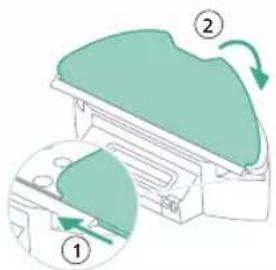
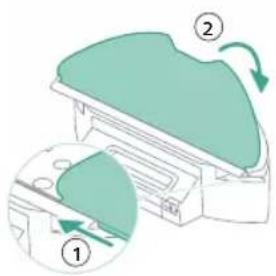
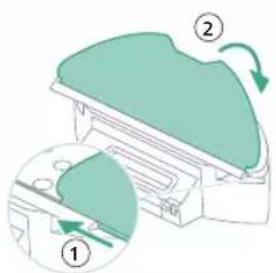
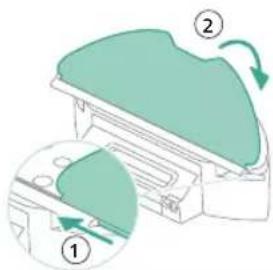
3 Slide the straight side of the washable mop pad in the correct slot of the mop pad holder and attach the washable mop pad to the velcro material of the mop pad holder.
Charging the robot
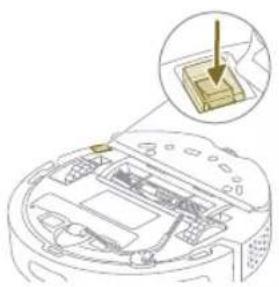
i Attention: Even if you charge the robot for the first time, the station will start vacuuming the robot empty. This is not an error, but is part of the normal charging procedure.
1 Press the on/off switch on the bottom of the robot to switch on the robot.
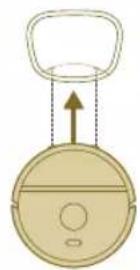
2 Turn the robot to its correct position and put the robot on the floor in front of the station.
3 Make sure that the station is connected to the wall socket.
English
![graph TD A["Step 1"] --> B["Device"] B --> C["Step 2"] C --> D["End"]](/content/2026/04/664990/images/f563534afd324f8d97e15967ae258937851a9ca0c0fbdfd1e8d667c1005af8ad.jpg)
4 Press the home button. The robot drives to the correct position in the station.
5 Wait until the robot is fully charged.
If the battery is empty, the robot will not drive itself to the correct position. In this case, follow the next steps:
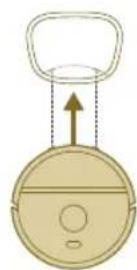
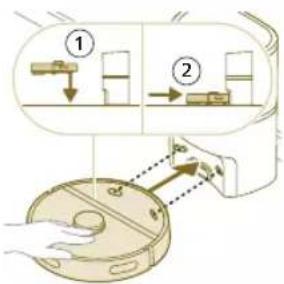
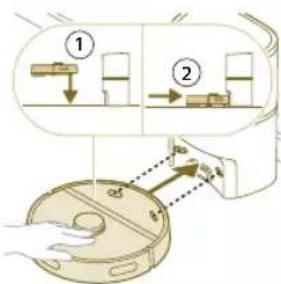
1 Turn the robot to its correct position and put the robot on the floor in front of the station. The water tank should be facing the station.
2 Align the charging contact points on the water tank of the robot with the charging contact points on the station.
3 Push the robot against the station so that the charging contacts of the robot make contact with the charging contacts of the station.
i Note: Make sure that the robot is in its correct position and starts to charge. The lights in the two buttons on top of the robot flash slowly. If the battery is empty, it may take a while before the robot indicates that it is charging.
i Attention: Even if you charge the robot for the first time, the station will start vacuuming the robot empty. This is not an error, but is part of the normal charging procedure.
4 Wait until the robot is fully charged.
i Note: Make sure the robot is fully charged before you use it for the first time.
i Note: The white LED on the station also lights up to indicate that the robot is charging.
Download the app, register, and connect to Wi-Fi
App content
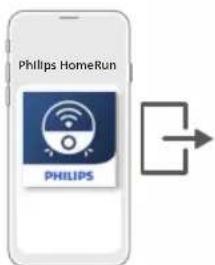
You can operate the robot with the Philips HomeRun robot app. The app allows you to manage your robot and offers help and support:
1 How-to-use videos.
2 Full user manual.
3 FAQs.
4 Contact Consumer Care.
5 Create a map of your home.
6 Select which rooms to clean.
7 Choose between different cleaning modes and settings for each room.
8 View the status of the cleaning run in real time and see the battery level.
9 Receive notifications and alerts.
10 Schedule a cleaning run.
11 See the maintenance status and find replacement parts.
Downloading the app
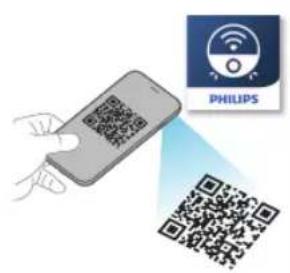
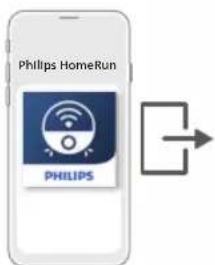
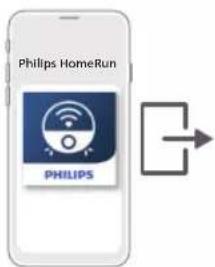
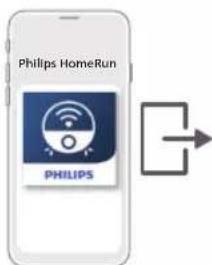
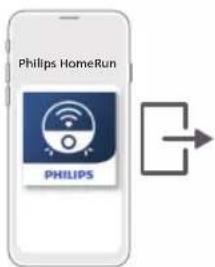
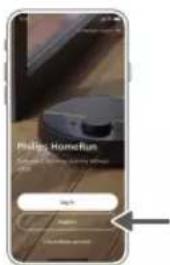
1 Scan the QR code on the cover of this user manual or on the package of the robot.
Or:
Search for 'Philips HomeRun robot app' in the Apple App Store or one of the Android App Stores.
2 Download and install the app.
3 Follow the instructions in the app.
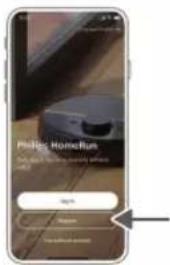
Registering a personal account
You can register a personal account and benefit from the following advantages:
- Control the robot from more than one device, e.g. a smart phone and tablet, or add multiple users in the household.
- Save back-up of important data like customized cleaning plans for your home.
i Note: If you change your phone and you don't have an account, then you'll lose all customized cleaning plans.
i Important: Philips values and respects your privacy. A link to our privacy notice can be found in the app before registering.
Setting up the Wi-Fi connection
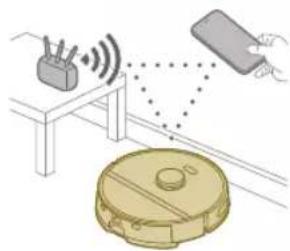
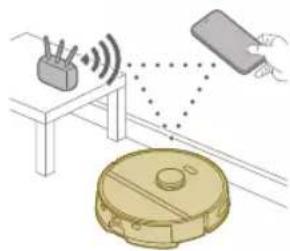
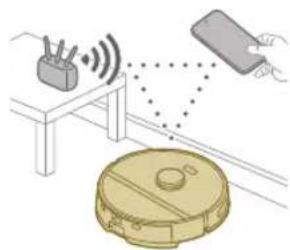
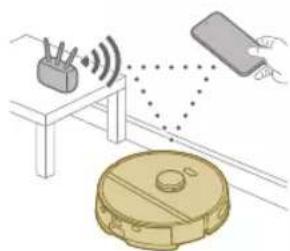
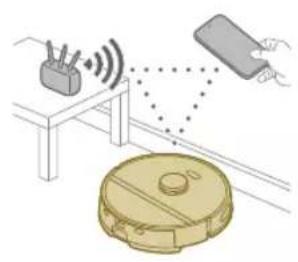
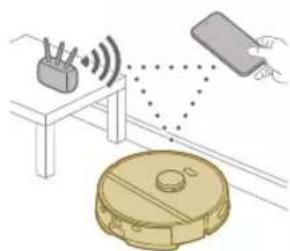
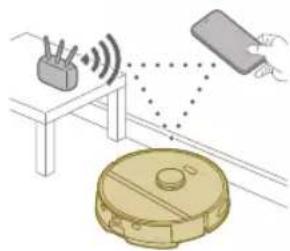
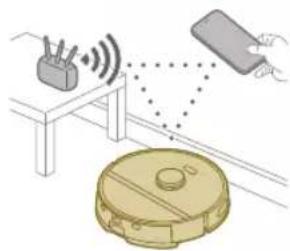
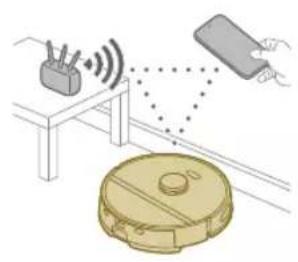
Before you begin: make sure that the robot and your mobile device have good Wi-Fi coverage.
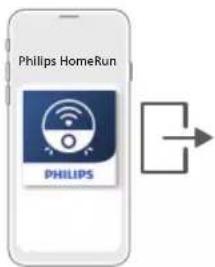
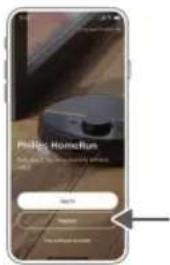
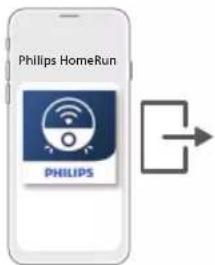
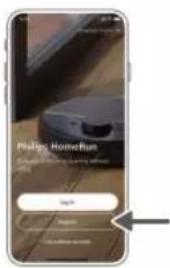
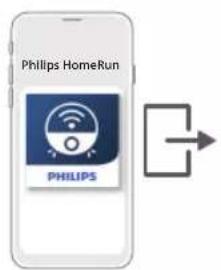
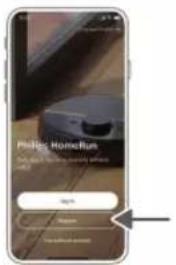
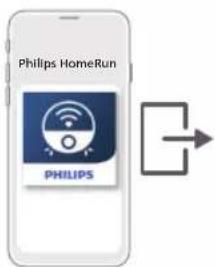
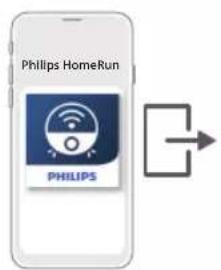
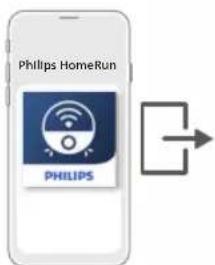
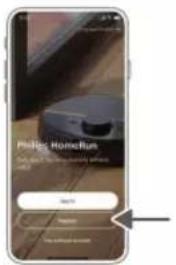
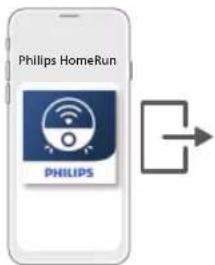
1 Press the 'Add robot' button in the app and follow the instructions.
2 Pair the robot with the WiFi in the app.
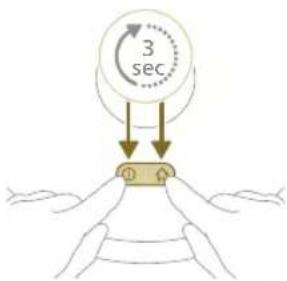
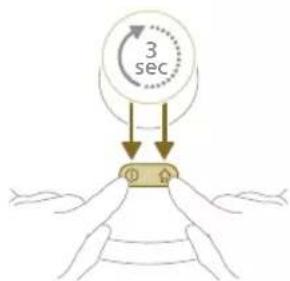
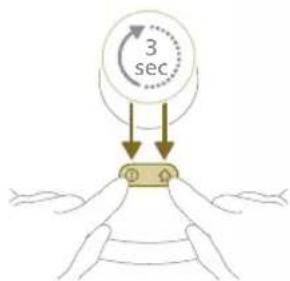
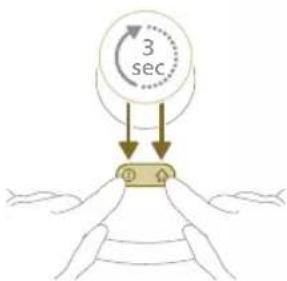
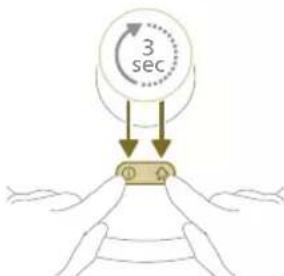
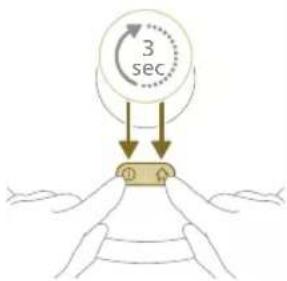
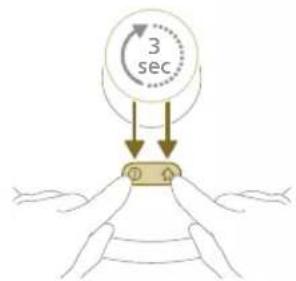
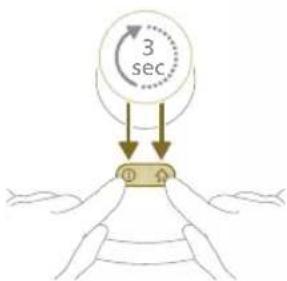
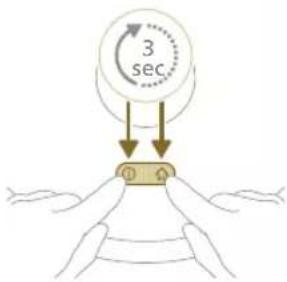
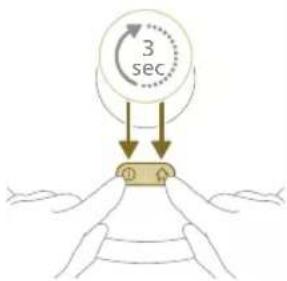
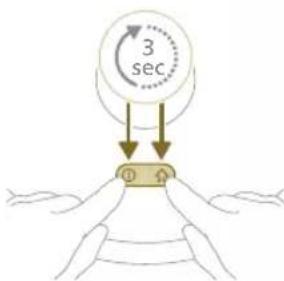
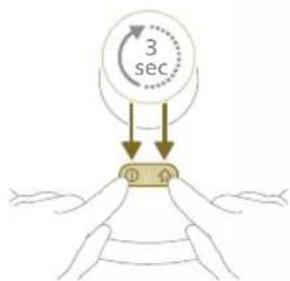
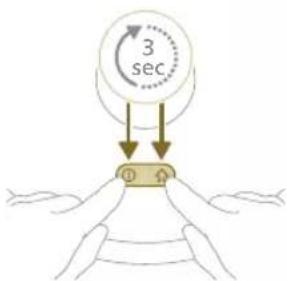
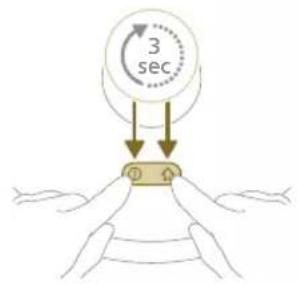
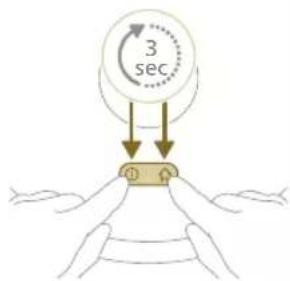
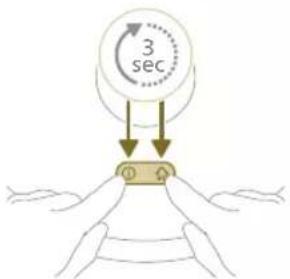
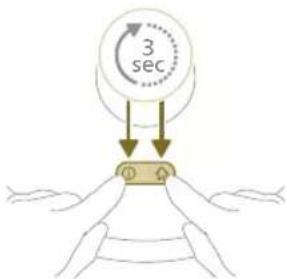
3 Press and hold the on/off button and home button at the same time for three seconds. The lights in the buttons will flash orange to indicate that the robot is in Wi-Fi set-up mode.
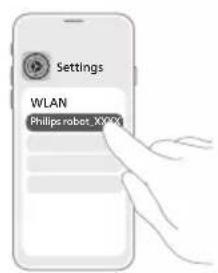
4 Click the join button if it's visible in the app to connect with the 'Philips robot' network.
12 English
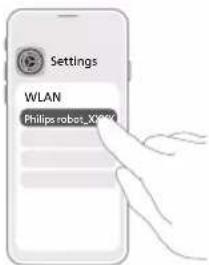
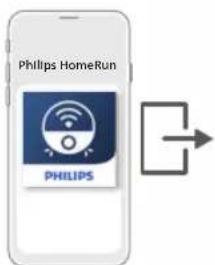
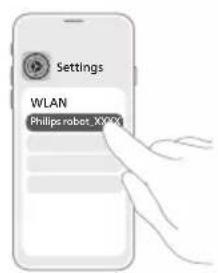
i Note: If the join button is not visible in the app, leave the app and go to WiFi under 'Settings' on your mobile device. There you can select the 'Philips robot' network and connect to it).
If the Wi-Fi pairing fails:
- Check your Wi-Fi connection.
- Check if you selected the correct model.
- Check if you entered the correct Wi-Fi password.
- Check if the robot is still in Wi-Fi set-up mode.
i Note: You can recognize this if the lights in the two buttons on the robot are still flashing orange.
i Note: If you are unable to solve the problem, visit www.philips.com/myrobot3000 for support information and the contact details of Consumer Care.
Audible signals
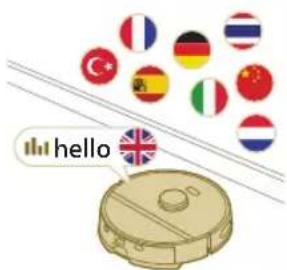
- The voice alert language of the robot can be changed from English to your local language. To change the language, download the app and connect the robot with the Wi-Fi, so that it can download the new language.
- The app will give alerts and reminders if the robot needs attention. This way you'll be fully informed on the real-time status even if the robot cleans while you're away.
Set the language of the voice alerts
i You can set the language of the voice alerts immediately after you have connected the robot to Wi-Fi
1 Make sure that the robot is connected with the app.
2 In two places in the app you can find the option to change the language of the voice alert.
- On the same app screen where you are asked to name the robot
- Or by pressing the three lines at the top left and then choosing the Robot settings tab.
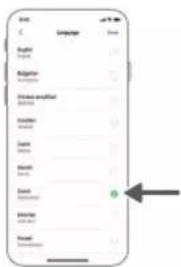
3 Then choose the language of the voice alert there.
How your robot works
Create a map
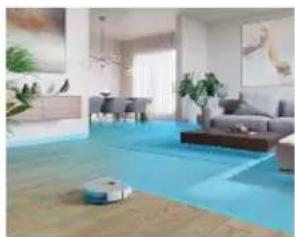
How mapping works
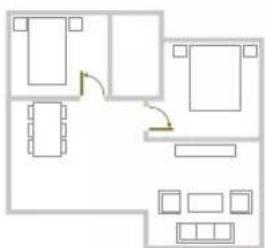
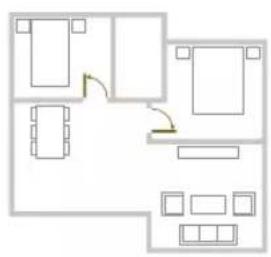
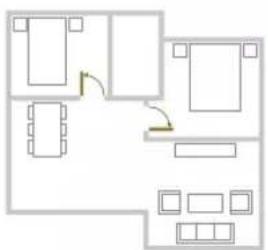
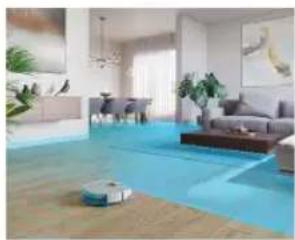
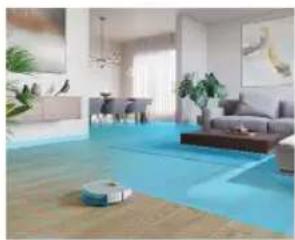
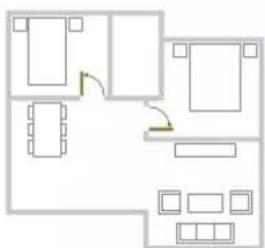
The robot drives through the rooms and the laser navigation quickly scans the rooms to build a map of the floor.
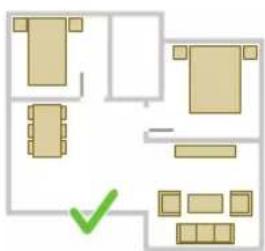
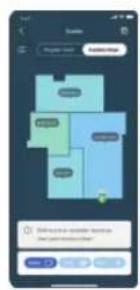
Map Edit
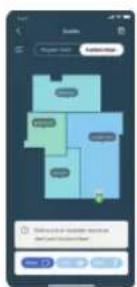
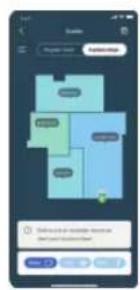
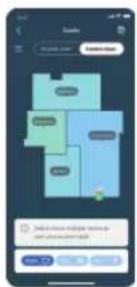
In the app, you can use Map Edit to:
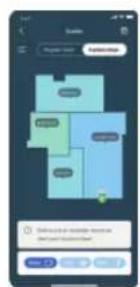
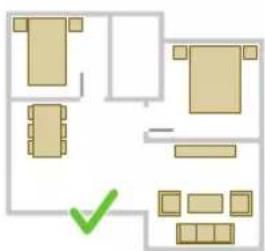
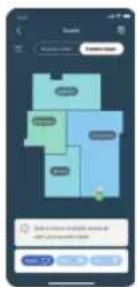
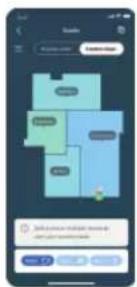
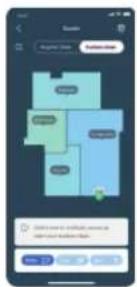
- Edit rooms (merge/divide rooms, name rooms) so you can customize the cleaning routine of the robot per room.
- Set up restricted areas to specify where the robot is allowed to clean and where it is not.
- Create a map for each floor of your home and store up to 5 maps. When you use the appliance, it generates a new map in a new environment. If you have maps that you use frequently and do not want to accidentally overwrite, you can lock up to 3 maps.
Preparing the room for mapping
Before you start mapping, make sure to:
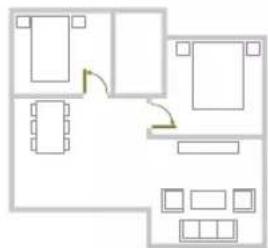
- Tidy up the area.
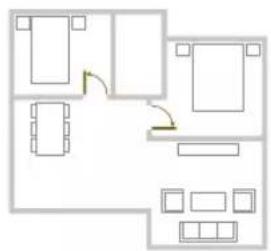
- Put furniture in the proper place.
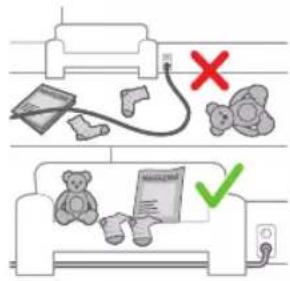
- Put away loose and small obstacles.
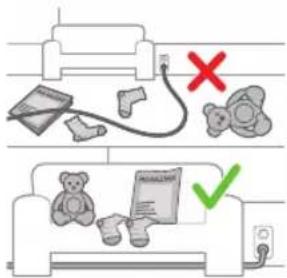
i Note: This is important to avoid permanently storing the obstacles on the map.
English
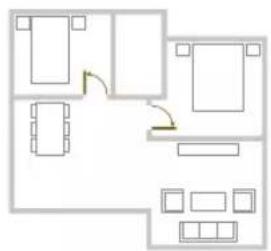
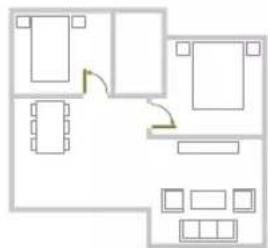
- Open all in-house doors and close doors to the outside.
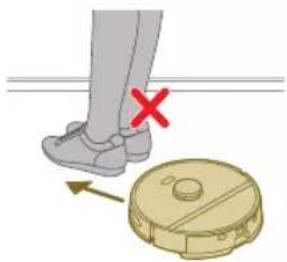
i Important: Make sure the robot cannot get blocked during use.
Creating a map
i Important: During mapping your robot will not clean.
i Important: To create a map of a floor, it is very important to place the station on the floor that you want to map because the robot must be in the station when starting and ending the mapping. If you want to create a map of the 2nd floor, the station must be placed there during the mapping process. Thereafter the map of this floor can be used even if the station is on another floor.
Tell your robot where not to clean with restricted cleaning zones
In the app you can set up restricted areas to indicate where the robot is allowed to clean and where it is not.
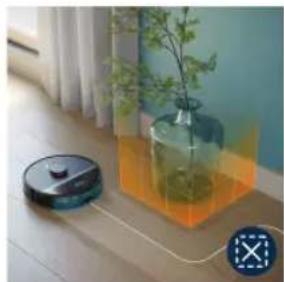
Virtual wall and No-Go zone
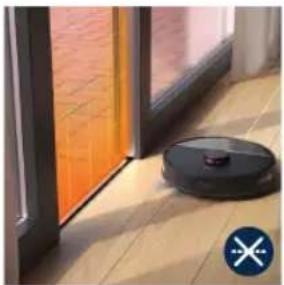
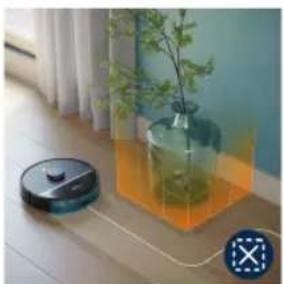
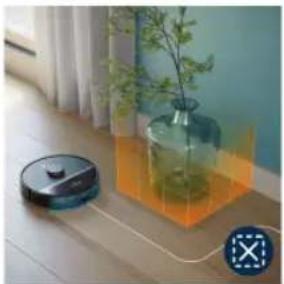
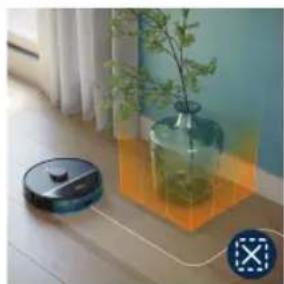
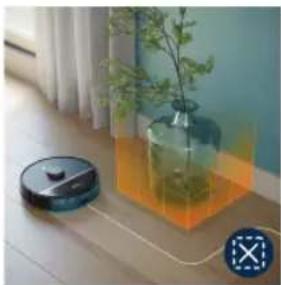
Create virtual walls and No-Go zones areas you do not want the robot to go. You can for example create virtual walls or No-Go zones to:
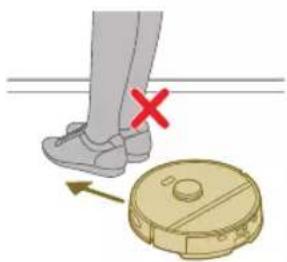
- Protect fragile objects. The robot cannot detect small obstacles like shoes, toys or cables, nor can it detect shiny, transparent (e.g. glass) or dark obstacles or surfaces.
- Prevent the robot from getting stuck while cleaning.
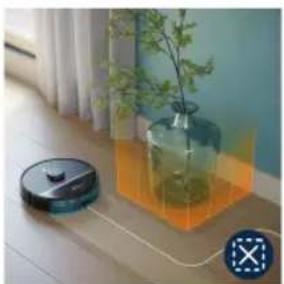
i Note: The robot can get stuck on high pile carpets, carpets with fringes or or very light rugs like in the bathroom. Also the robot cannot detect cables on the floor.
- Protect the robot.
i Note: The robot should be kept away from liquids and wet areas such as pet bowls and plant trays.
i Important: virtual walls and No-Go zones should not be used to protect against hazards.
i Important: virtual walls and No-Go zones should not prevent the robot from returning to the station.
No-Mop zone
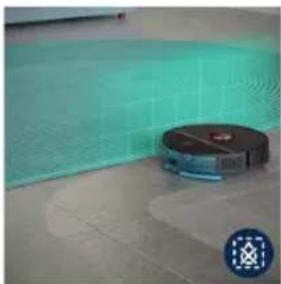
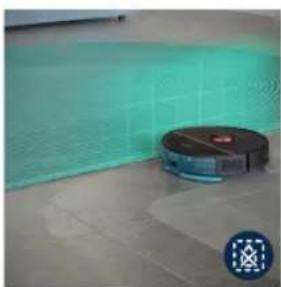
Create No-Mop zones 📋 to prevent the robot from mopping carpets or rugs.
i Note: The robot will avoid the No-Mop zones when the mop pad holder is attached. When the mop pad holder is not attached to the robot, the robot will vacuum the No-Mop zone.
How your robot cleans
In the app, the following cleaning routines can be selected:
Routine Description
| Regular cleaning | Regular cleaning is intended for your normal daily cleaning routines. The robot cleans each room according to the settings you specified and saved in the cleaning plan. If the environment is not recognized, the robot maps the environment and simultaneously vacuums it (the robot does not mop in this case). After completion, it returns to the station. |
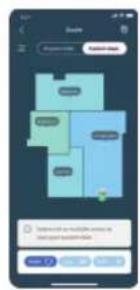
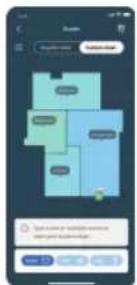
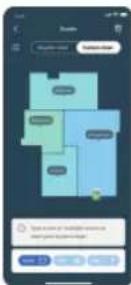
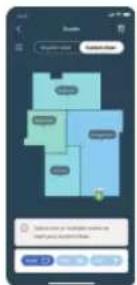
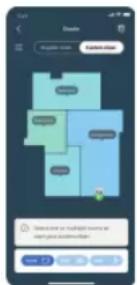
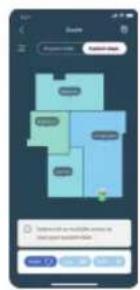
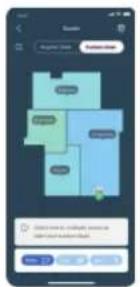
| Custom cleaning | Custom cleaning can be used to have the robot perform cleaning actions at unique occasions. You can customize the cleaning routine of your robot to your wishes. You can set the following three options.- Room: the robot cleans one or more rooms in an order you specify.- Zone: the robot cleans a zone in a room you specify.- Spot: the robot cleans in a square of 1.5 by 1.5 meter in a specific spot in your house that you want to have cleaned.Note: with spot cleaning, place the robot in the middle of the square you want the robot to clean.After selecting one of the above options, you can select a cleaning mode and fine-tune your cleaning preferences and advanced settings. |
Set cleaning preferences, advanced settings and cleaning order
In the app, you can select five different cleaning modes for each room. These are standard modes that can be used in most situations. You can customize your cleaning mode by fine-tuning cleaning preferences and advanced settings.
Cleaning modes
Mode Description
| Wet & dry The robot vacuums and mops the floor at the same time. This mode is intended for regular cleaning of hard floors. |
| IMPORTANT: For mopping sensitive hard floors, such as parquet floors, set the water level in the app to the lowest level. |
| Dry The robot only vacuums the floor. This mode can be used for areas that shouldn't be mopped. |
Mode Description
| Quiet The robot cleans with minimal noise. The suction power is lowered and the voice alerts are muted. |
| Intensive The robot vacuums and mops the floor at the same time and at full power. This mode is intended for thorough cleaning of small areas.Note that it is not recommended to clean large areas in this mode. The robot passes the area 5 times, so the cleaning time and battery usage will increase significantly. |
| Individual For this mode you can select all settings from scratch. |
Cleaning preferences
For each cleaning mode, you can fine-tune the following cleaning preferences:
Setting Description
| Suction power change the suction power: |
| - Eco: for efficient cleaning with low energy consumption and low noise level. |
| - Normal: for regular cleaning and effective removal of fine dust on hard floors with optimal balance between power and efficiency. |
| - High: for a thorough cleaning of large floors. Can clean more on a single charge than max mode. |
| - Max: ideal for removing large dirt like crumbs. The strong suction power removes fine dust particles hidden deep inside carpets and crevices. |
Mopping wetness determine the flow rate that is pumped from the electric water tank onto the mop:
A IMPORTANT: Do not add hot water or cleaning detergents to the water tank.
- None: Switch off the mopping wetness for uncoated wooden floors and carpets.
- Low: to mop a sensitive floor e.g. parquet. The combination of vacuuming and mopping removes more fine dust than vacuuming alone.
- Medium: optimal for a regular wet & dry cleaning. The mop removes superficial dirt and bacteria to keep your home sanitized and healthy.
- High: for a spotlessly clean home. It is recommended to combine this setting with 2 or 5 cleaning path repetitions for an intensive cleaning.
| Cleaning path repetition | Specify the number of cleaning passes. One pass is sufficient for normal cleaning. It is possible to program the robot to make 2 or 5 passes for intensive cleaning. It is recommended to select this option only for specific cleaning areas as it impacts cleaning duration. |
Advanced settings
For each cleaning mode, you can fine-tune the following advanced setting:
Setting Description
| Carpet boost 📂 Turn the carpet boost on or off. The robot automatically increases the suction power when it has driven onto a carpet or rug. It is recommended to enable this setting. |
Using your robot
Preparing for a cleaning run
Before you start the robot on its cleaning run:
- Attach the side brush by clicking it into the correct position on the bottom of the robot.
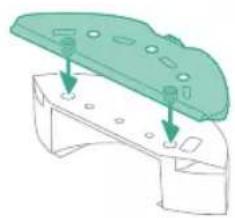
- Attach the mop pad holder to the bottom of the water tank.
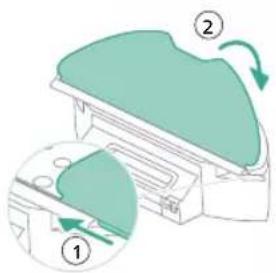
- Attach the washable mop pad to the mop pad holder.
A IMPORTANT: The mop pad holder can be removed. But when using the robot with mop pad holder, the washable mop pad must always be attached to the mop pad holder, even if you use the robot without mopping. This is to prevent damage to the floor and the mop holder during use.
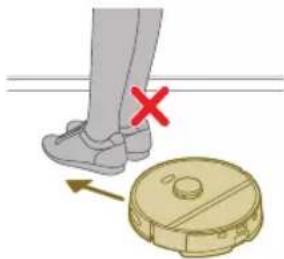
- Remove all cables, wires, cords and small objects such as shoes and toys from the floor to prevent the robot from getting entangled in them.
- Open all in-house doors.
- Pre-wet the mop for optimal results.
Start your first cleaning program via the app
Start
1 Open the app.
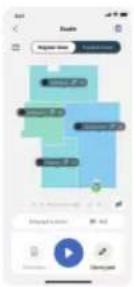
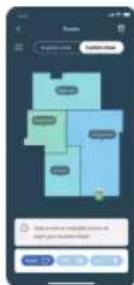
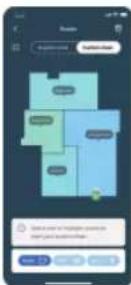
2 Select the cleaning program: Regular cleaning or Custom cleaning.
3 Press the 'start' icon.
i Note: If the battery level is too low, cleaning cannot start. Wait until the robot is sufficiently charged before you start a cleaning run.
Stop
1 Press the Pause icon in the app. The robot stops.
2 Press the Start icon again. The robot continues.
3 Press the Home & charge icon. The robot goes back to the station.
Using the robot without the app
i Note: For an optimal experience, we recommend using the app.
Without the app, you can use the two buttons on the robot to operate it:
- On/off button
- Long press (3s) to turn the robot on and off.
- Short press to start cleaning or to pause cleaning. Press again to resume cleaning.
- Home button
- Short press (when the robot is not cleaning): the robot will find the station and charge.
- Short press while cleaning: the robot will stop cleaning. Short press again: the robot returns to the station to charge.
- Short press when the robot is driving back to the station: the robot will pause returning to the station. Press again to let it drive back to the station.
When operating the robot manually, it will vacuum and mop. However, if the water tank is empty it won't mop.
Your robot's cleaning pattern
![graph TD A["①"] --> B["②"] B --> C["③"] C --> D["④"] D --> A style A fill:#f9f,stroke:#333 style B fill:#bbf,stroke:#333 style C fill:#bfb,stroke:#333 style D fill:#ffb,stroke:#333](/content/2026/04/664990/images/5d9923f49d865e0a54edf8635626c5c011626c10b201470fea1a30a687145599.jpg)
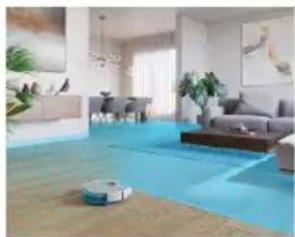
The robot cleans the home in a structured way. The robot cleans room by room and always starts by cleaning the edges of the room first before covering the remaining surface.
Returning to the station
![graph TD A["3"] -->|5| Node B["2"] -->|1| Node C["1"] -->|E| Node D["2"] -->|D| Node E["1"] -->|√| Node F["4"] -->|F| Node G["4"] -->|C| Node](/content/2026/04/664990/images/6a373b0bfef915de180908044ca5aaab6ae76223501ec22aa33771f88dc36333.jpg)
After the robot has completed its cleaning run, the robot will automatically drive back to the station to recharge.
Auto recharge and resume
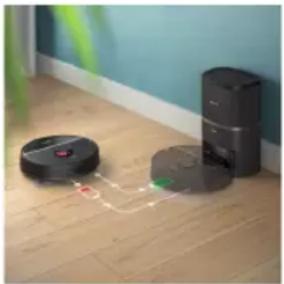
When the battery runs low (<20%) while cleaning, the robot automatically returns to the station to recharge. After the battery has been charged, the robot continues where it has left off.
Cleaning and maintenance
When to do maintenance
Item Cleaning Replacement
| Washable mop pad After every use 3-6 months | |
| Main brush Monthly 6-12 months | |
| Washable filter Monthly 3-6 months | |
| Side brush Monthly 6-12 months | |
| Main wheels & universal wheel | Monthly - |
| 360° laser navigation (LiDAR) sensor | Monthly - |
| Sensors: - Infrared signal receiver to find the station - Infrared signal emitter to communicate with the station - Anti-drop sensor (3x) | Monthly - |
20
English
| Charging contacts robot and station | Monthly - |
| Sensors to detect placement of dust bin and water tank | 6 months - |
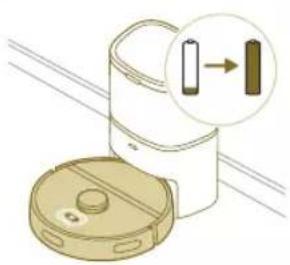
| Dust bag in Auto-Empty station | - When the orange LED on the Auto-Empty station flashes indicating that the dust bag is full. |
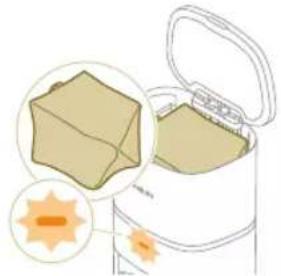
How to clean the mop pad and the dust bin
Clean the washable mop pad
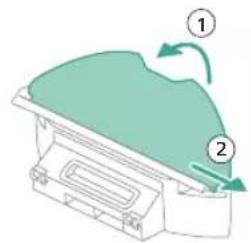
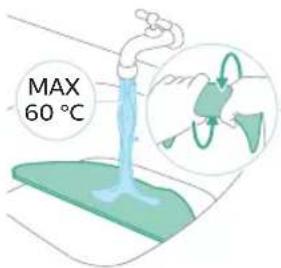
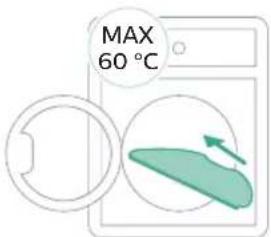
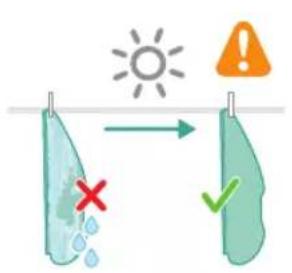
1 Pull the washable mop pad off the velcro material and slide the straight side of the washable mop pad out of the slot.
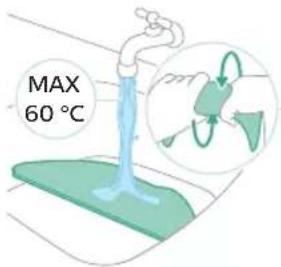
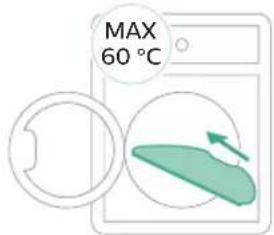
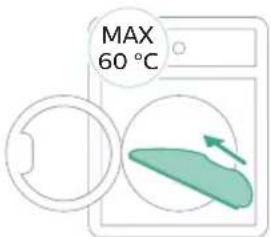
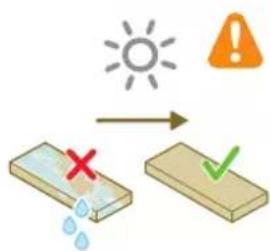
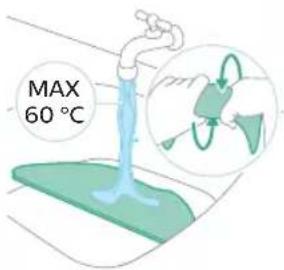
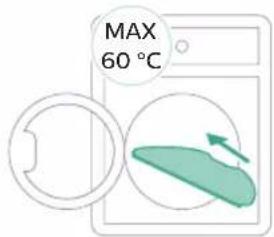
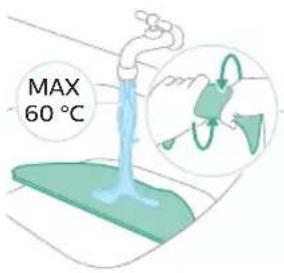
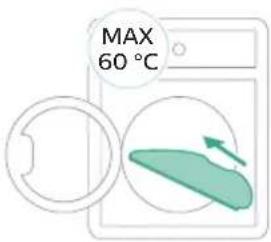
2 Rinse and clean the washable mop pad with water or wash it in the washing machine.
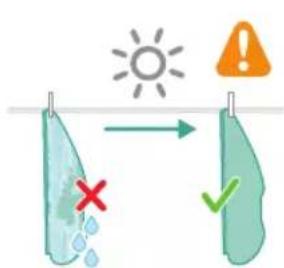
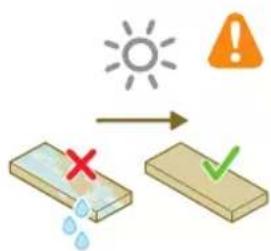
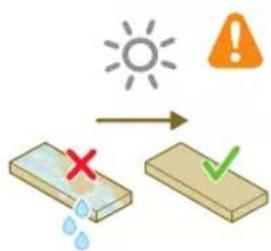
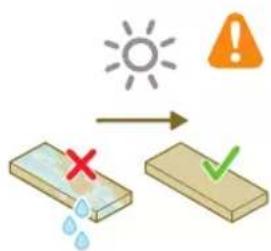
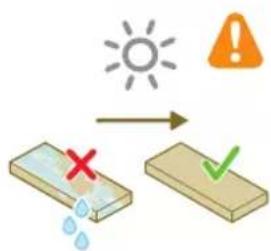
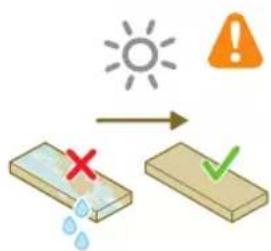
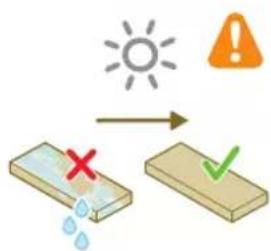
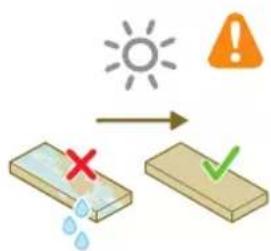
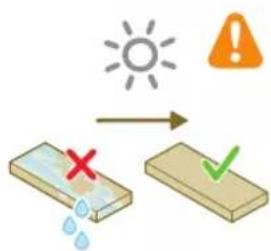
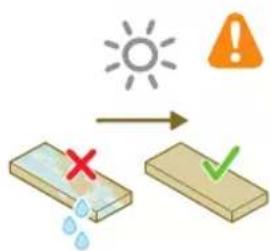
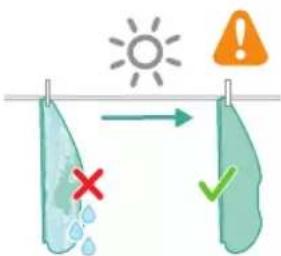
3 Air dry the washable mop pad.
i Note: Do not use other ways to dry the washable mop pad.
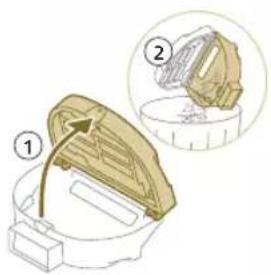
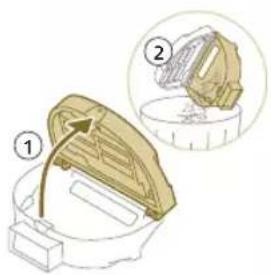
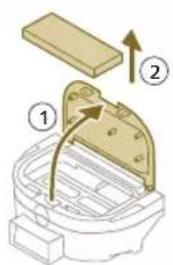
Clean the dust bin
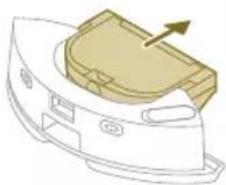
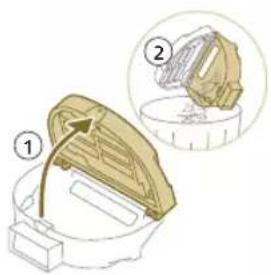
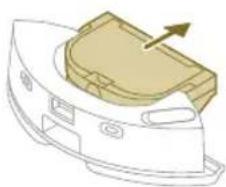
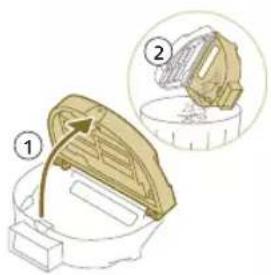
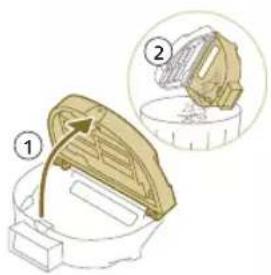
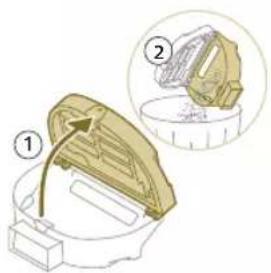
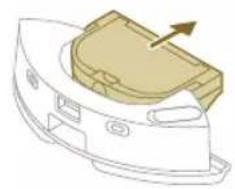
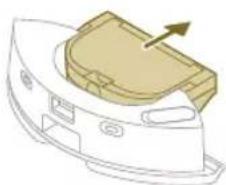
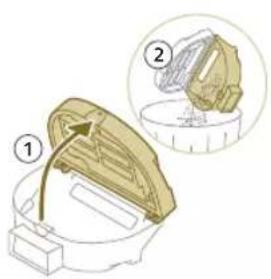
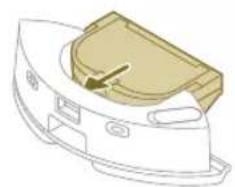
1 Pull the dust bin out of the water tank.
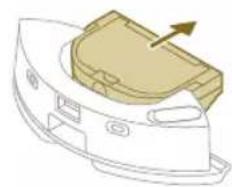
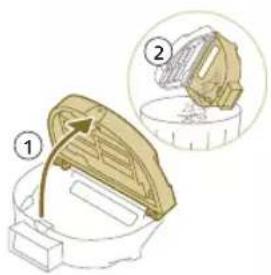
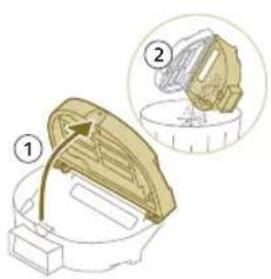
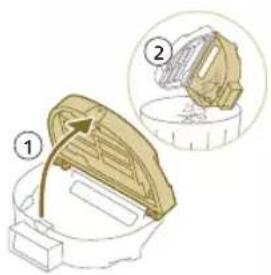
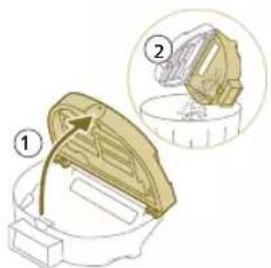
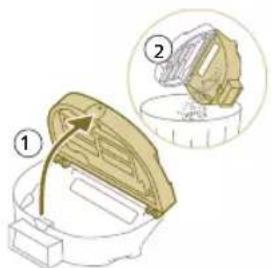
2 Open the lid of the dust bin and and let the dirt out of the dust bin.
i Note: Do not confuse the lid of the dust bin with the lid of the washable filter.
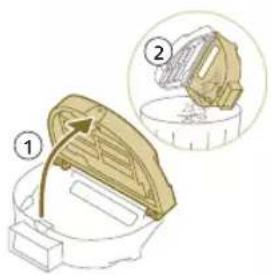
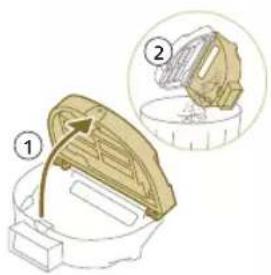
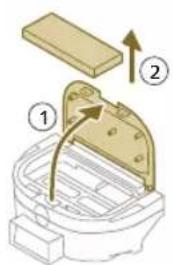
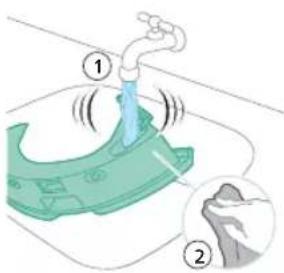
3 Open the lid of the washable filter and pull the washable air filter out.
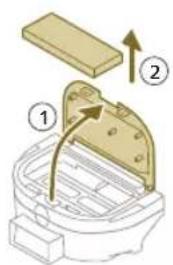
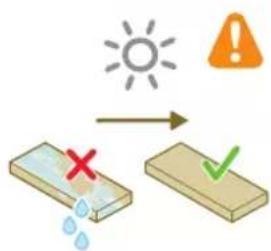
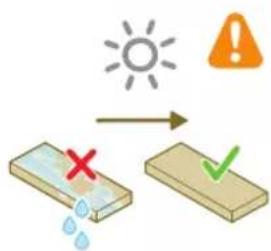
4 Rinse the washable filter with water and air dry the washable filter.
i Note: Do not use cleaning detergents.
i Note: Do not use other ways to dry washable filter.
5 Put the washable filter against the filter lock of the dust bin and push it in.
6 Push the washable filter down.
7 Close the lid of the washable filter.
22 English
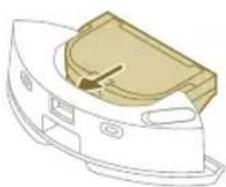
8 Slide the dust bin back into the water tank.
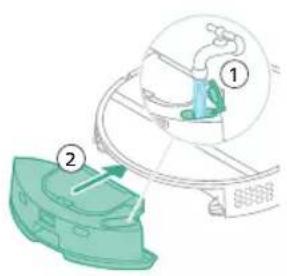
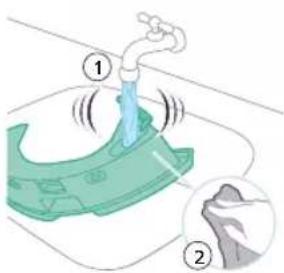
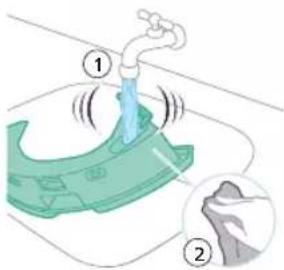
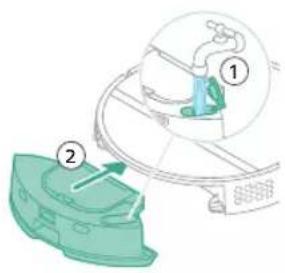
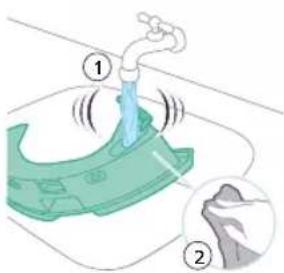
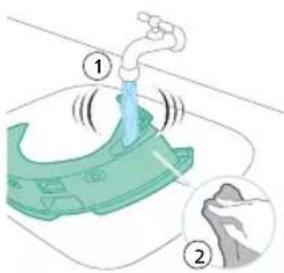
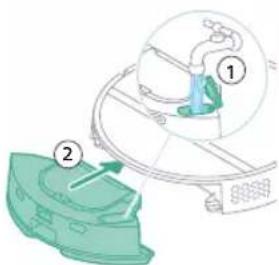
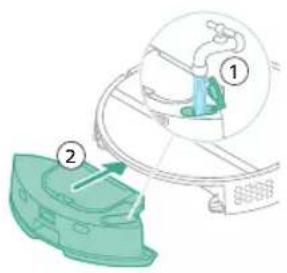
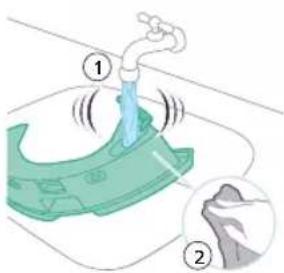
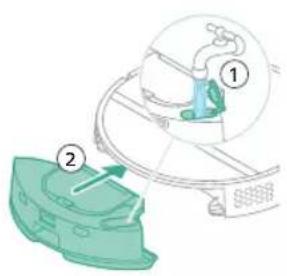
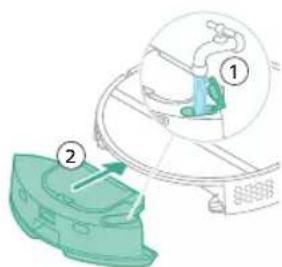
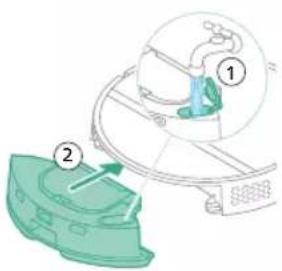
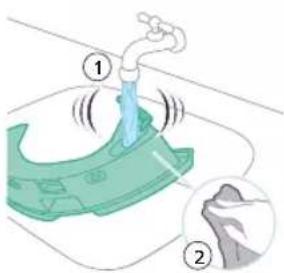
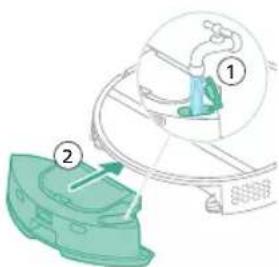
Cleaning the water tank
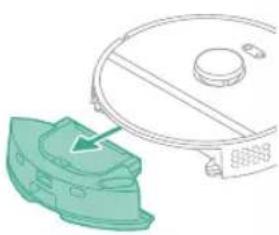
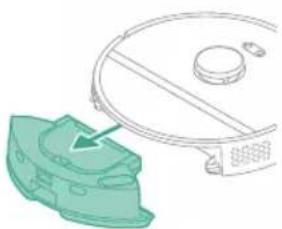
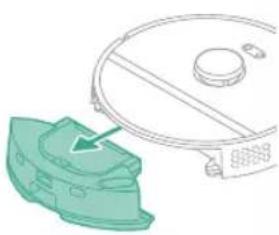
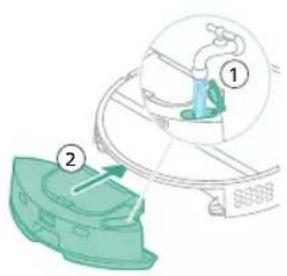
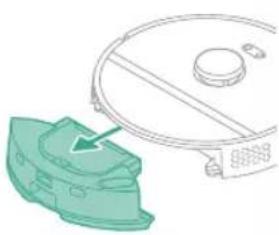
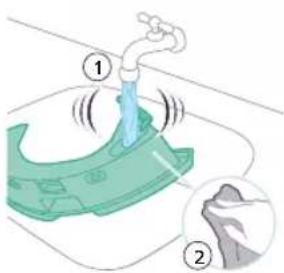
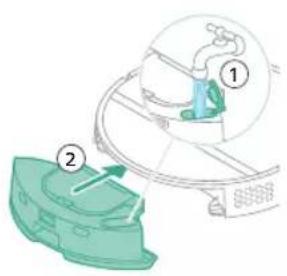
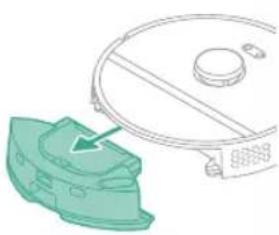
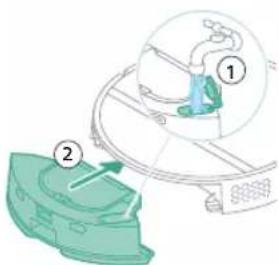
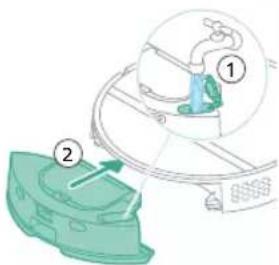
1 Push the water tank release button.
2 Pull the water tank out of the robot.
3 Remove the dustbin from the water tank.
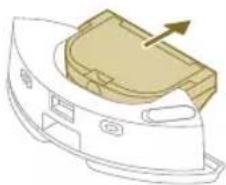
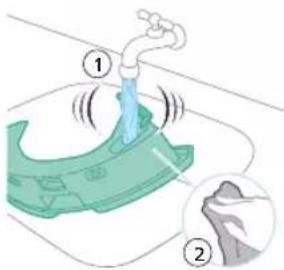
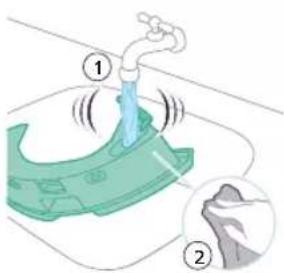
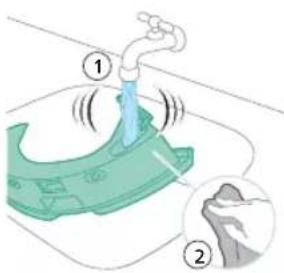
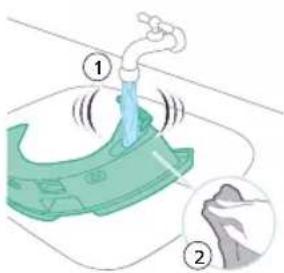
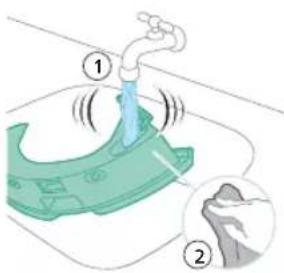
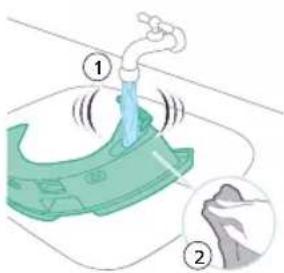
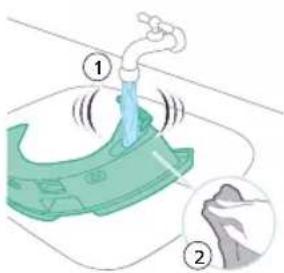
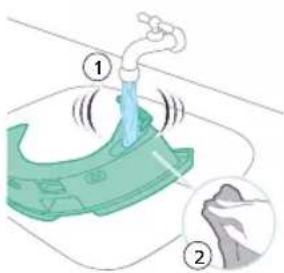
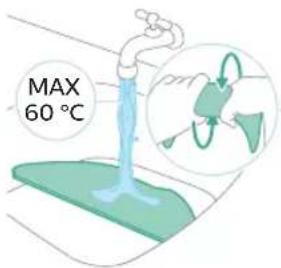
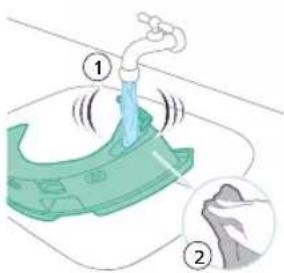
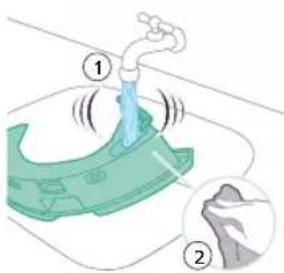
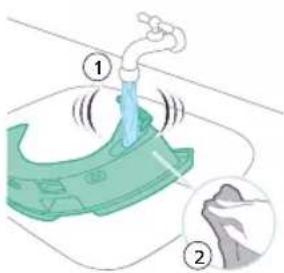
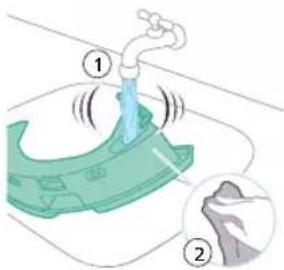
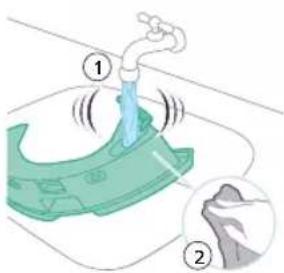
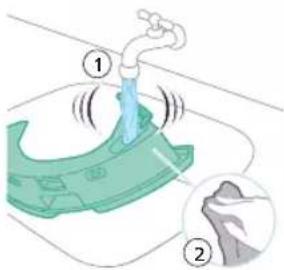
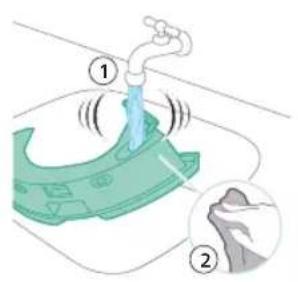
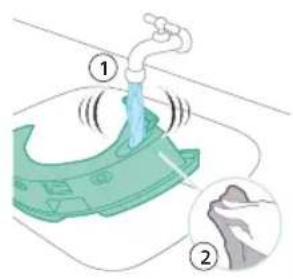
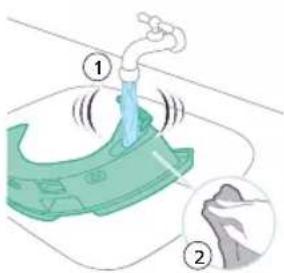
4 Rinse the water tank with tap water
5 Dry the outside of the water tank with a cloth.
i Note: Do not use cleaning detergents.
IMPORTANT: Do not wash water tank in the dishwasher.
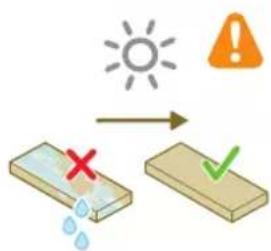
6 Keep the sealing cap of the water tank open and allow the inside of the water tank to air dry.
i Note: Do not use other ways to dry the water tank.
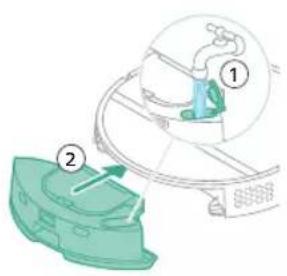
7 Put the dust bin back to the water tank.

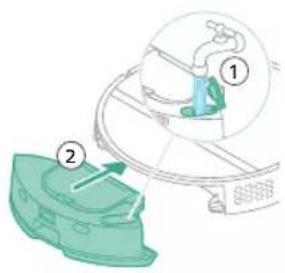
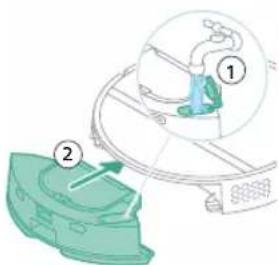
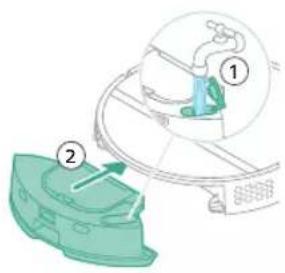
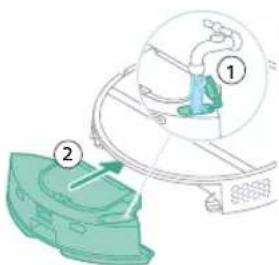
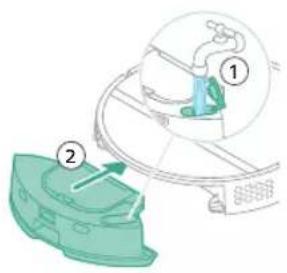
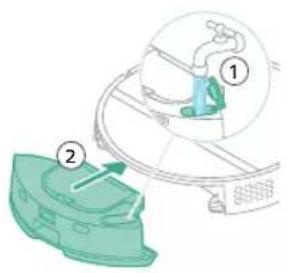
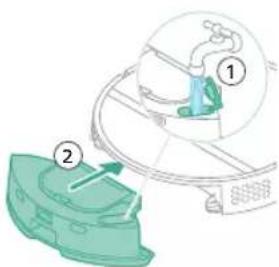
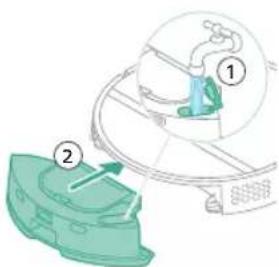
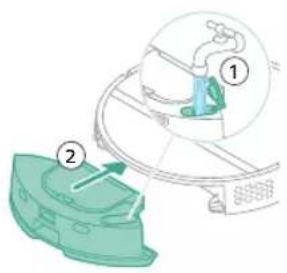
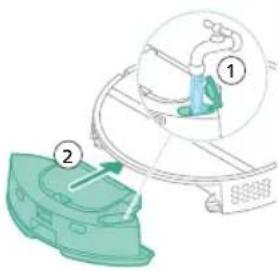
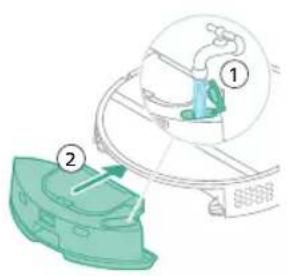
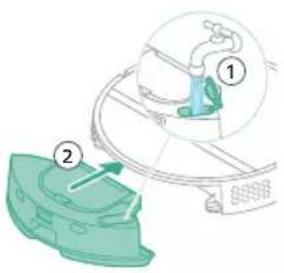
8 Fill the water tank from the water inlet. Insert the water tank in the correct location.
i Note: Make sure that the outside of the water tank is dry.
i Note: Do not use cleaning detergents.
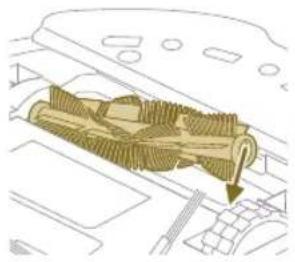
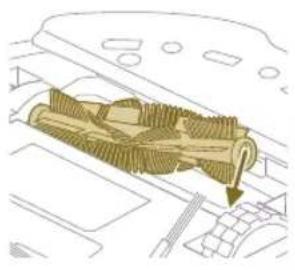
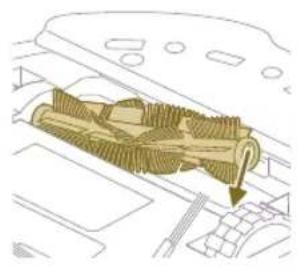
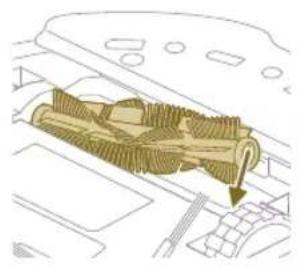
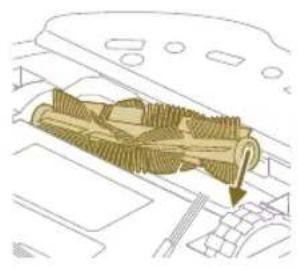
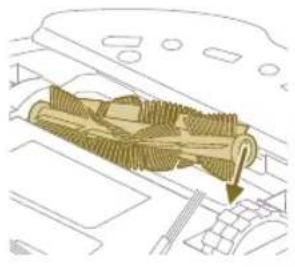
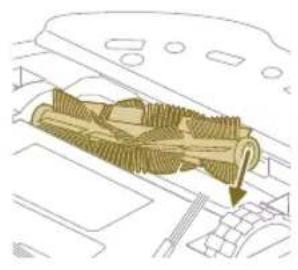
Cleaning the main brush
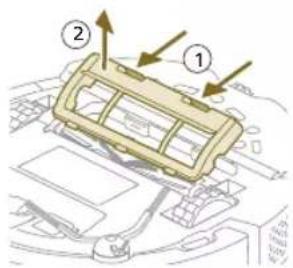
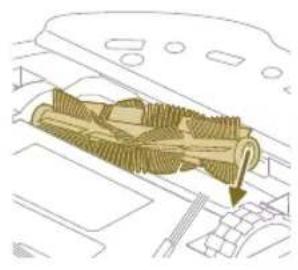
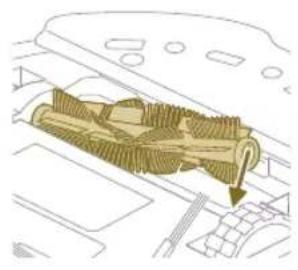
1 Put the robot upside down on a surface that is flat and stable.
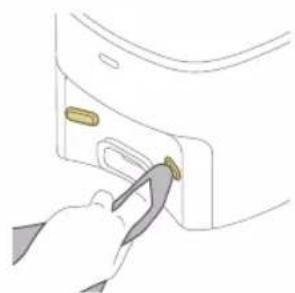
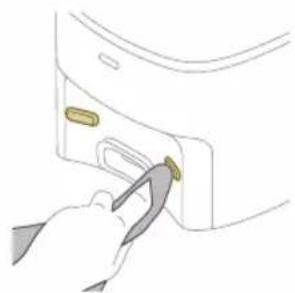
2 Push the release buttons of the brush cover at the same time.
3 Lift and remove the brush cover.
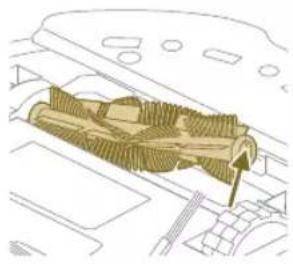
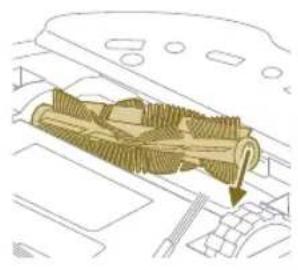
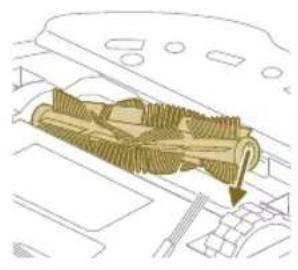
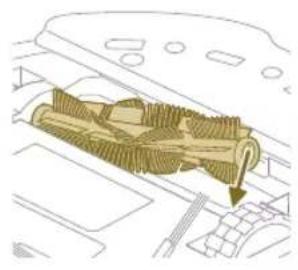
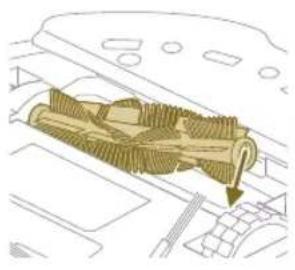
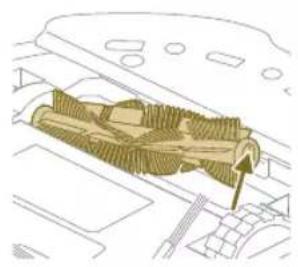
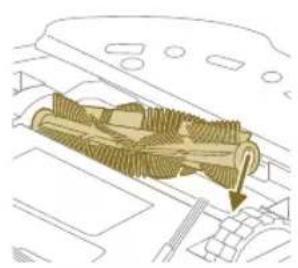
4 Pull the main brush out.
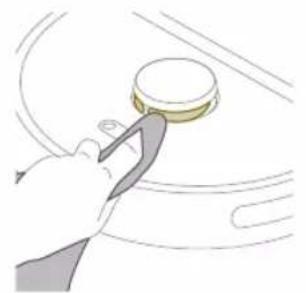
5 Use the cleaning tool to cut through the hairs.
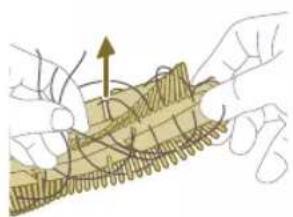
6 Remove the hairs and dirt from the main brush.
Tip: Use the brush end of the cleaning tool to remove the dirt on the main brush.
7 If you have removed the cap on the end of the main brush, place it back.
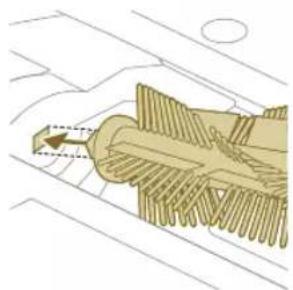
24 English
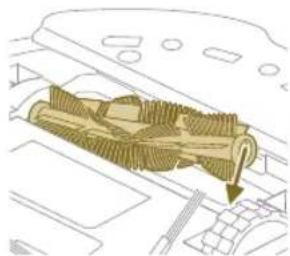
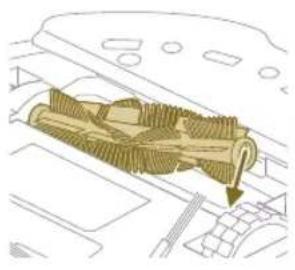
8 Install the main brush in the correct location. Match the square shaped peg with the square shape hole and insert the brush into position.

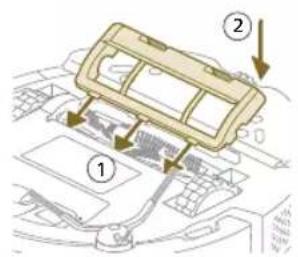
9 Put the lips of the brush cover in the correct cutouts.
10 Push the brush cover in.
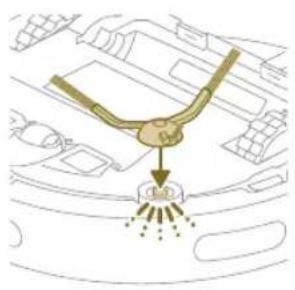
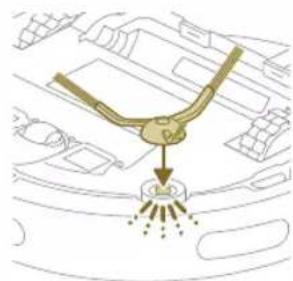
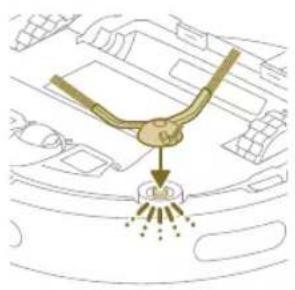
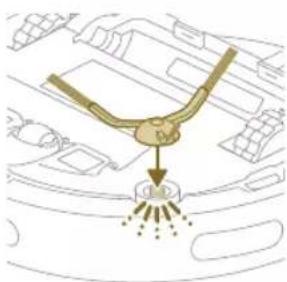
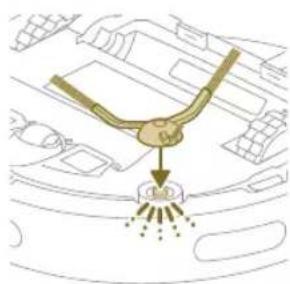
Cleaning the side brush
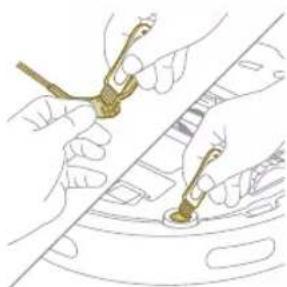
1 Put the robot upside down on a surface that is flat and stable.
2 Remove the side brush.
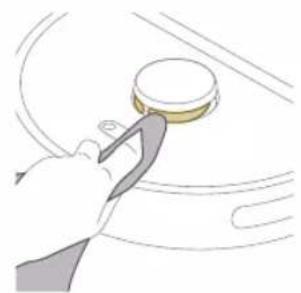
3 Use a brush with soft bristles (e.g. a toothbrush) to remove dust or fluff from the side brush and the robot.
Tip: You can use the brush end of the cleaning tool to remove dust or fluff from the side brush and the robot.
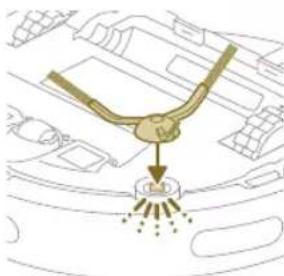
4 Attach the side brush by clicking it into the correct position on the bottom of the robot.
Cleaning the main wheels and the front caster wheel
1 Put the robot upside down on a surface that is flat and stable.
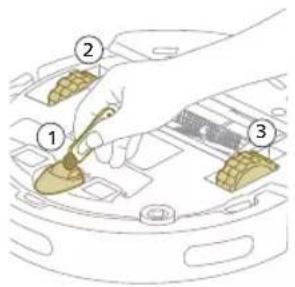
2 Use a brush with soft bristles (e.g. a toothbrush) to remove dust or fluff from the front caster wheel and main wheels.
You can use the brush end of the cleaning tool to remove dust or fluff from the wheels.
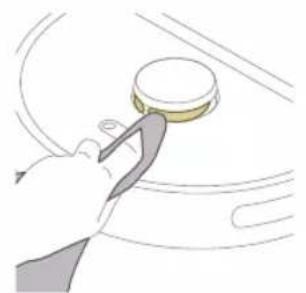
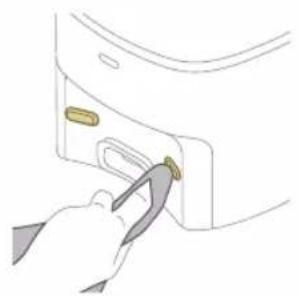
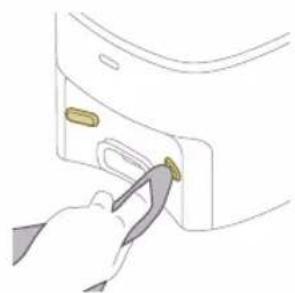
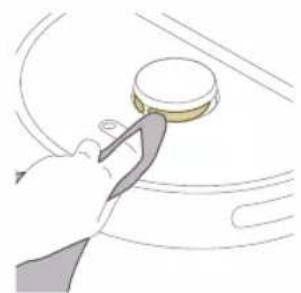
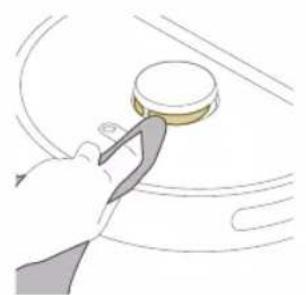
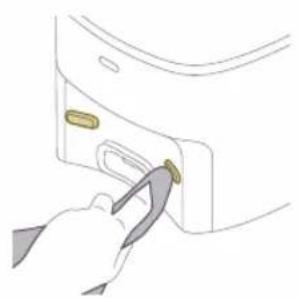
Cleaning the sensors, contact points and IR signal window
To maintain good cleaning performance, you have to clean sensor, contact points and IR signal window from time to time.
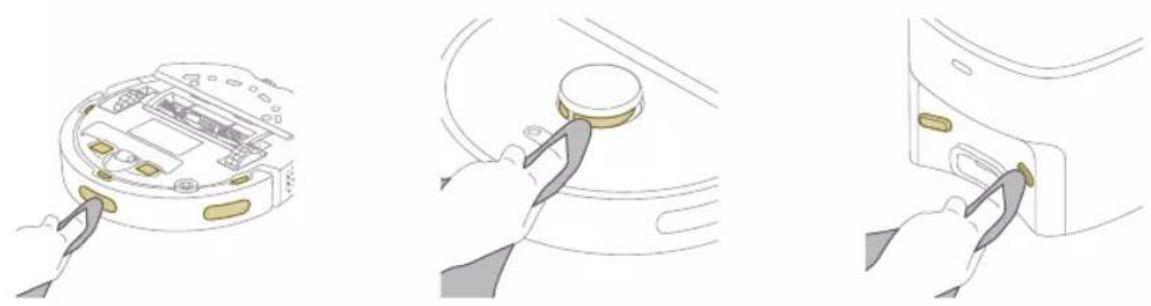
1 Unplug the station from the wall socket
2 Use a soft non-abrasive dry cloth. If necessary, lightly moisten the cloth.
3 Clean the components.
i Note: Do not use cleaning detergents.
4 Dry the components and surfaces with a dry cloth.
i Note: Do not use other ways to dry the components.
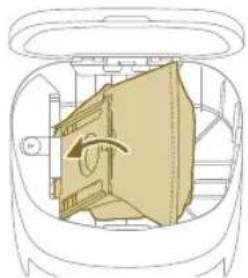
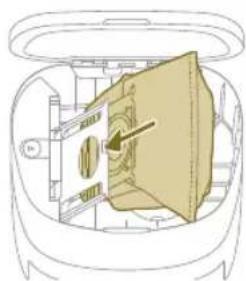
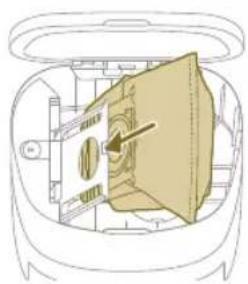
Replacing the dust bag
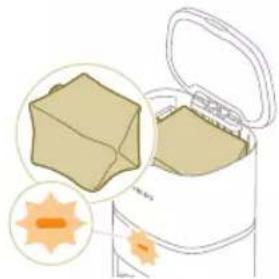
When the orange LED on the auto-empty station flashes indicating that de dust bag is full.
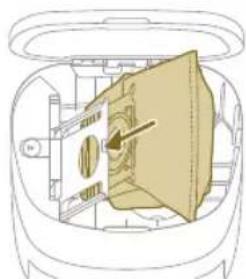
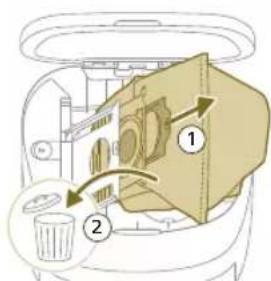
1 Open the lid of the Auto-Empty station.
English
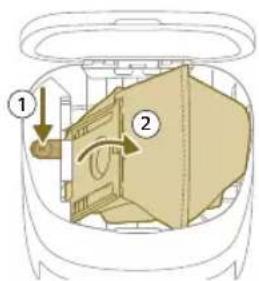
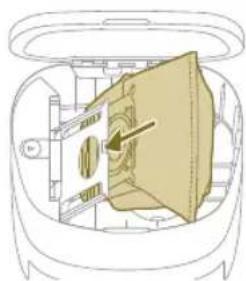
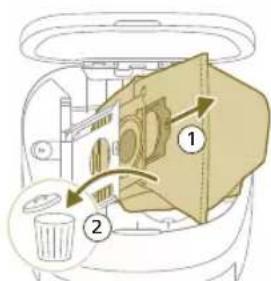
2 Press the release button and push the bag holder to the side.
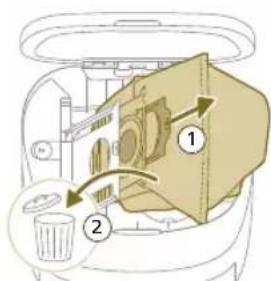
3 Remove and dispose the dust bag.
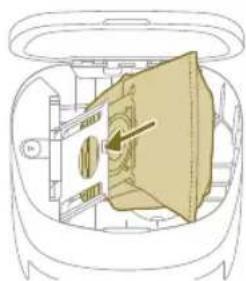
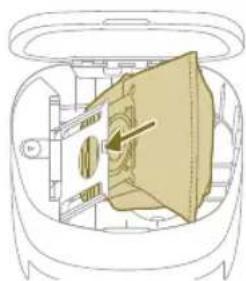
4 Slide the cardboard piece of the dust bag onto the bag holder.
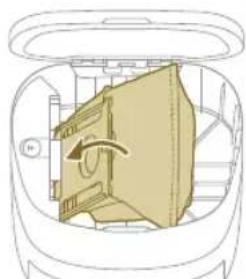
5 Push the bag holder back to its standing position until you hear a clicking sound.
6 Close the lid of the Auto-Empty station.
For information on where and how to order new dust bags, see the 'Replacement' section in the manual.
Long term storage
1 Charge the battery until it is full.
2 Store the robot within a temperature range of below +35 °C and above 8 °C.
User interface signals and their meaning
Signal Description of signal Meaning of signal
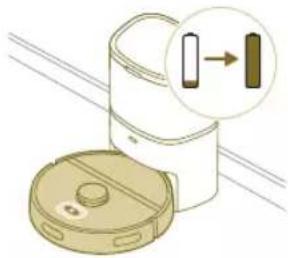 | The lights in the two buttons on the robot flash slowly. | The robot is charging. |
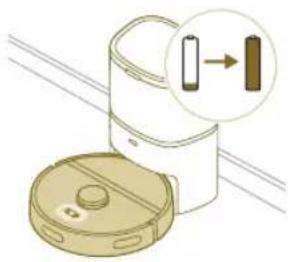 | The lights in the two buttons on the robot are on continuously. | The robot is fully charged. |
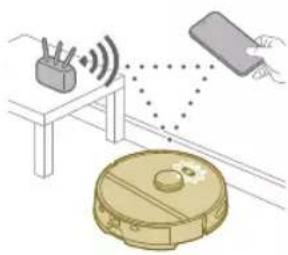 | The lights in the two buttons on the robot flash orange. | The robot is in Wi-Fi set-up mode. |
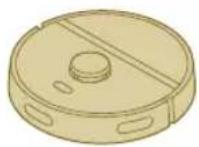 | The robot's lights go out. The robot has gone into sleep mode.The robot will go into sleep mode if it has not returned to the station. Press the on/off button for 3 seconds or longer to awake the robot.Then send it to the station via the app or by pressing the home button. | |
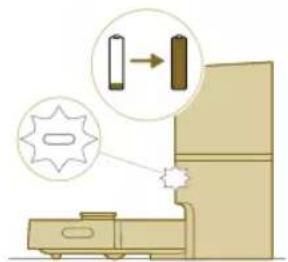 | The white LED on the Auto-Empty station flashes when the robot is charging.Note: When the robot is fully charged, the white LED will be on continuously, after 10 minutes, the white LED will dim and shine at only 30%. | The robot is charging when the white LED is flashing and the robot is fully charged when the white LED is on continuously. |
Signal Description of signal Meaning of signal
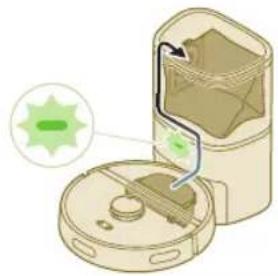 | The green LED on the Auto-Empty station flashes. | The Auto-Empty station is vacuuming the dust bin of the robot empty. The dust and dirt are collected in the dust bag of the station. |
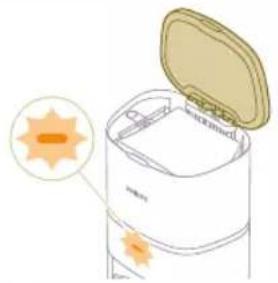 | The orange LED on the Auto-Empty station flashes. | The canister lid is open. |
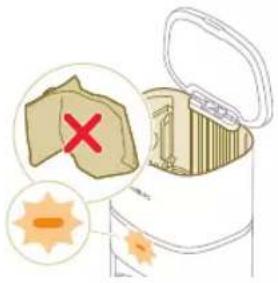 | The orange LED on the Auto-Empty station flashes. | There is no dust bag installed. |
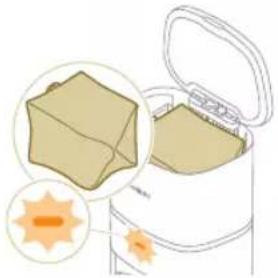 | The orange LED on the Auto-Empty station flashes. | The dust bag is full. |
Reset/restore the robot
You can reset/restore the robot by pressing and holding both the home and on/off buttons on top of the robot for 15 seconds.
i Note: After resetting/restoring the robot, the robot needs to reconnect the app, and the relevant settings in the app are removed.
Replacement
Ordering accessories
To buy accessories or spare parts, visit www.philips.com/myrobot3000 or go to your Philips dealer. You can also contact the Philips Consumer Care Center in your country (see the international warranty leaflet for contact details).
Replacement parts:
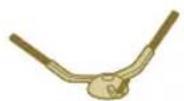
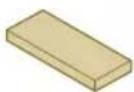
XV1430 Replacement washable mops
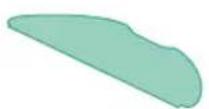
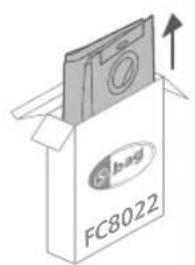
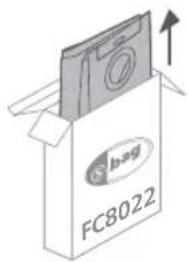
FC8022 Dust bags (anti-allergy s-bags)
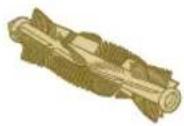
XV1433 Maintenance kit with 2
filters, 1 main brush and 1 side brush.
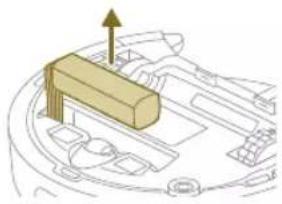
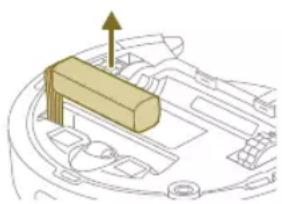
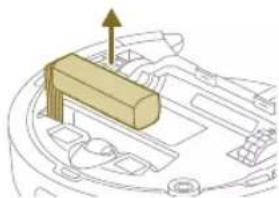
Removing the rechargeable battery
To remove the rechargeable battery, follow the instructions below. You can also take the robot to a Philips service center to have the rechargeable battery removed. Contact the Philips Consumer Care Center in your country for the address of a service center near you.
Take any necessary safety precautions when you handle tools to open the product and when you dispose of the rechargeable battery.
Warning: Before you remove the battery, make sure that the product is disconnected from the station and that the battery is completely empty.
1 Start the robot from a place somewhere in the room and not from the station station.
2 Let the robot run until the rechargeable battery is empty to make sure that the rechargeable battery is completely discharged before you remove it and dispose of it.
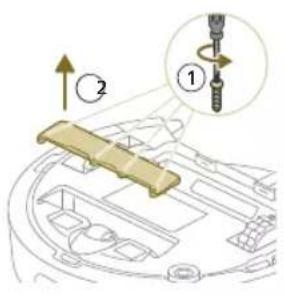
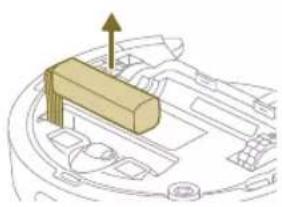
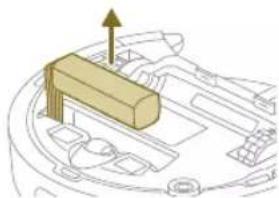
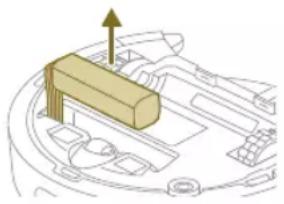
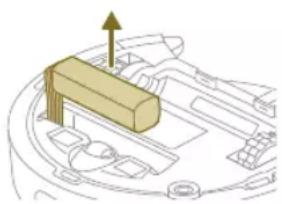
3 Undo the screws of the battery compartment lid and remove the lid.
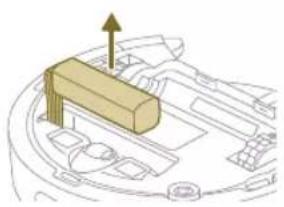
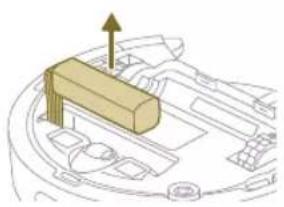
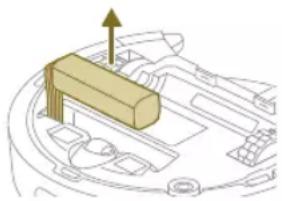
4 Lift out the rechargeable battery and disconnect it by pressing the little clip on the battery connector to release the battery connector.
5 Take the robot and the rechargeable battery to a collection point for electrical and electronic waste.
Warranty and support
If you need information or support, please visit www.philips.com/support or read the international warranty leaflet.
Your robot vacuum cleaner has been designed and developed with the greatest possible care. In the unfortunate case that your robot needs repair, the Consumer Care Centre in your country will help you by arranging any necessary repairs in the shortest possible time and with maximum convenience. If there is no Consumer Care Centre in your country, go to your local Philips dealer.
Disposal and recycling
Do not dispose the robot in the regular trash. Make sure to bring it to your the recycling facility for electrical equipment.
Troubleshooting
This chapter summarizes the most common problems you could encounter with the appliance. If you are unable to solve the problem with the information below, go to the Philips HomeRun robot app or visit
www.philips.com/myrobot3000, where can also find support videos and
32 English
frequently asked questions. You can also contact the Consumer Care Center in your country.
Problem Possible cause Solution
| The robot doesn't switch on. The battery is low. Charge the robot on the station before use. | ||
| The ambient temperature is too low or too high. | Use the robot at a temperature between 8 °C and 35 °C. | |
| The robot is unable to pair with the app. | The robot is no longer in pairing mode. | Put the robot back in pairing mode by holding the home and on/off button at same time (lights will flash orange). |
| The Wi-Fi connection (signal) is not good. | Place the robot in an area with a good Wi-Fi signal. | |
| A wrong Wi-Fi network selected. | Make sure you select the correct Wi-Fi network. | |
| A wrong password used. Make sure you use the correct Wi-Fi password. | ||
| A wrong robot model is selected in the app. | Make sure you select the correct robot model. | |
| A wrong app is downloaded Always use the app that you have downloaded via the QR-code from the quick start guide. | ||
| The app and the robot lose connection. | The robot has gone out of reach of the Wi-Fi signal. | Wait for robot to drive back into area with a good Wi-Fi signal. |
| The robot has gone into sleep mode. | The robot will go into sleep mode if if it has not returned to the station. Press the on/off button for 3 seconds or longer to awake the robot.Then send it to the station via the app or by pressing the home button. | |
| The Wi-Fi password has been changed. | When Wi-Fi details have changed: add the robot to the app again. | |
| The Wi-Fi network name has been changed. | When Wi-Fi details have changed: add the robot to the app again. | |
| The app account was changed. When account details were changed, add robot to the app again. | ||
| The email with the verification code has not been received. | The verification code email may take up to a minute to arrive. | Wait more than a minute for the email. |
| The email has not been sent. Click the "resend" button. | ||
| The email may have landed in 'spam' or 'junk' folder. | Check the 'spam' or 'junk' folders. (The sender e-mail address starts with: HomeRun_noreply@). | |
Problem Possible cause Solution
| A wrong email address is used. Check if you have used the correct email address. | ||
| The phone or computer doesn't have good internet connection to receive the email. | Make sure the phone or computer has a good internet connection. | |
| The robot can't find station. The station has been moved during a cleaning run. | Place the station back in the same place it was before the cleaning run started. | |
| The station is not connected to the power supply. | Connect the station to the power supply. | |
| The sensors on robot and/or station are dirty. | Clean all the sensors of the robot and the station. | |
| A No-Go zone was placed too close to the station | Don't save No-Go zones too close to the station. | |
| The station has been placed on a spot with very bright light. | Don't put the station in a place with very bright light (like direct sun light) this may interfere with the infra red signal. | |
| The robot pushes the station away. | The station is not standing close to a wall. | Place station with the back towards a wall. |
| The sensors on robot and/or station are dirty. | Clean all the sensors of the robot and the station. | |
| The station doesn't have enough space around it (0,5 meter to each side and 1,5 m to the front). | Make sure the station has enough space around it. | |
| The robot doesn't clean properly. | The dust bin of the robot is full. Empty the dust bin of the robot. | |
| The water tank is empty. Refill the water tank in time. | ||
| Obstacles are stuck in the brushes. | Remove all obstacles from the brushes. | |
| The filter has not been cleaned. Clean the filter regularly. | ||
| The filter has not been placed back or has not been placed back correctly. | Place the filter back correctly. | |
| The washable mop needs to be replaced. | Replace the XV1430 washable mop. Purchase a new XV1430 washable mop via de app or on www.philips.com/myrobot3000 | |
| The robot uses no or little water during mopping. | The water level is set too low. Set the water level higher in the app. | |
Problem Possible cause Solution
| Too much water comes out of the mop / the robot makes the floor too wet. | The water level is set too high. Set the water level lower in the app. | |
| ▲ IMPORTANT: For mopping sensitive hard floors, such as parquet floors, set the water level in the app to the lowest level. | ||
| Robot misses areas for cleaning/ robot does not clean the whole area/ robot has began to miss certain spots | The sensors of the robot are no longer clean. | Clean the robot's sensors with a dry cloth. |
| The robot is working on slippery polished floors. | Make sure the floor is dried before the robot starts cleaning. | |
| The robot is unable to reach certain areas blocked by furniture or barriers. | Tidy up the area to be cleaned by putting furniture and small objects in their proper place. | |
| The cleaning area is not tidy. Remove small objects from the floor and tidy up the cleaning area before the robot starts cleaning. | ||
| The robot keeps a safety margin in the distance close to No-Go zones and No-Mop zones, and this can cause that the robot won't pass a certain area. | Make the No-Go zone or No-Mop zone in the app a bit smaller. | |
| The robot has blocked itself by eating a cable. | There are cables on the floor which the robot is unable to detect. | Stop the robot and remove the brush cover. Take away main brush and check if something is stuck in the side brush: remove side brush, take away the cable, reattach the side brush. Remove all cables from the floor before you start a cleaning run. |
| The robot falls from stairs. The anti-drop sensors on the bottom of the robot are dirty. | Clean the anti-drop sensors on the bottom of the robot. | |
| Objects have been placed on the top step of the stairs that the robot detects and therefore thinks it is safe to drive. | Remove the any objects that are placed on the top step of the stars. | |
| The robot doesn't charge or discharges very quickly. | The robot is stored in a space that is too hot or too cold. | Charge and store the robot at a temperature between 8 °C and 35 °C. |
| The Auto-Empty station doesn't collect dust from the robot. | The dust bag has not been placed back or placed back correctly. | Place a dust bag correctly in the Auto-Empty station. |
| The dust bag is full. Place an empty dust bag in the Auto-Empty station. | ||
Problem Possible cause Solution
| The quiet mode or do not disturb setting has been activated in the app. | De-select the quiet mode or do not disturb in the app. | |
| The Auto-Empty station inlet is blocked. | Clean the Auto-Empty station inlet. | |
| There is foam buildup in the water tank and the robot moves strangely. | Detergent has been added to the water tank, causing the robot to be slippery. | Never add detergent to the water tank again. Clean the robot and its wheels, including a thorough rinse of the water tank. |
| The robot is making an abnormal noise. | The filter has not been placed back or has not been placed back correctly. | Check if filter is placed back correctly. |
| The brushes are no longer turning. | Hairs are stuck in the main brush. | Remove hairs with the brush cleaning tool provided with the robot. |
| Other obstacles are stuck in the brushes. | Remove other obstacles from the brushes. | |
| The main brush was not placed back correctly. | Remove the main brush and reassemble it. | |
| When main brush is not placed back correctly: reassemble correctly the square shaft into the square hole. | ||
| The side brush gets deformed. | Something may have gotten stuck in the side brush. | Put brush in hot water for a while and let it dry. |
| Purchase a new side brush via the app or on www.philips.com/myrobot3000 | ||
| The robot won't drive on to a black floor. | The robot thinks a pitch black floor is a falling hazard - the cliff detection is activated. | Make sure lights are switched on in the room with pitch black flooring. |
| Clean the anti-drop sensor on the bottom of the robot. | ||
| A schedule is set, but the robot doesn't start cleaning according to the schedule. | The 'do not disturb' function may be activated. | Check in the app if the 'do not disturb' function is switched on at the same time as the schedule. |
| The robot is in sleep mode. Make sure that the robot is charging in the station.The robot will go into sleep mode if if it has not returned to the station. Press the on/off button for 3 seconds or longer to awake the robot.Then send it to the station via the app or by pressing the home button. | ||
Problem Possible cause Solution
| The wrong time zone has been selected in the app. | You can change the time zone in in the app in 'My Account' under 'Profile'. | |
| The robot has lost connection with the Wi-Fi network. | Make sure the Wi-Fi network is working. | |
| The battery of the robot is empty. | Make sure that the station is connected to the power supply. | |
| It is not possible to log in to the robot app account. | The email address has been changed. | Create a new app account in case the email address has been changed. |
| The password is wrong. Enter the correct password. | ||
| In case the password is forgotten, click 'forgot password' and follow the steps. | ||
| The wrong country region is selected. | Select the correct country region in the app. | |
| Pop-up messages about app or firmware updates continue to be received. | App updates or firmware updates are not installed. | For continuous improvement of the robot we recommend installing all updates. |
| The Philips HomeRun robot app is not available in my country. | VPN may be blocking access to the right country information. | Disable any VPN service you are using. |
| Google or Apple account may be set to a different country. | Change the Google or Apple account information to match the country you bought the robot in. | |
| The firmware update fails. The battery level is too low The battery level of the robot needs to be more than 20% in order to install an update. | ||
| The robot is not at the station Make sure the robot is charging in the station when you install the update. | ||
| The Wi-Fi signal is not good enough. | Ensure the robot is in a spot with strong wifi | |
| The robot finished mapping, but I do not see a map in the app. | The robot did not start and finish at the station. | To create a map, make sure that the robot starts and finishes at the station. Once the map has been saved in the app, you can use the robot without station. |
| My map is lost from the app. The maximum amount of maps had been reached. | The robot will create a new map when it recognizes a new environment. If you already have 5 maps, the robot will override an old one. If you want to make sure the robot does not override a map, lock it in the app. You can lock 3 maps at the same time. | |
Obsah
Úvod 37
Přehled výrobku 38
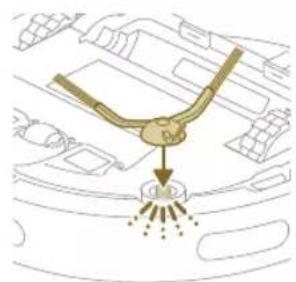

3 Zatlačte robota ke stanici, aby se nabíjecí kontakty robota setkaly s nabíjecími kontakty stanice.
Úpravy mapy
Oblast bez vytírání
72 Dansk
Kort Rediger
I appen kan du bruge kortredigering til at:
Zone uden mopning
Opret zoner uden mopning for at forhindre robotten i at vaske tæpper.
6 Skub det vaskbare filter ned.
7 Luk låget til det vaskbare filter.
1 Anbring robotten med bunden opad på et fladt og stabilt underlag.
Den automatiske tømningsstations orange LED blinker.
Støvposen er fuld.
Nulstil/gendan robotten
Du kan nulstille/gendanne robotten ved at trykke og holde både home- og afbryderknappen oven på robotten nede i 15 sekunder.
FC8022 Støvposer (anti-allergi-s- poser)
3 Løsn skruerne i batterirummets låg, og fjern låget.
Karte bearbeiten
Entfernen des Akkus
Kaardi muutmine

Veepaagi puhastamine
4 Loputage veepaak kraaniveega.
3 Eemaldage tolmukott ja visake minema.
Aku eemaldamine
Editar mapa
Zona sin mopa
Zone sèche
1 Gumb za uključivanje/isključivanje
2 Tipka za početni zaslon
3 Gornji poklopac
4 360° laserska navigacija (LiDAR)
5 Izlaz zraka
6 Perivi filtar
7 Poklopac perivog filtra
8 Poklopac za pražnjenje spremnika za prašinu
9 Spremnik za prašinu
10 Otvor za vodu
11 Kontakti za punjenje (robot)
12 Spremnik za vodu
13 Gumb za oslobađanje spremnika za vodu
14 Poklopac četke
15 Glavna četka
16 Prekidač za uključivanje/isključivanje
17 Prednji kotačić
18 Senzor za navođenje robota natrag na stanicu (3x)
19 Senzor ispadanja (3x)
20 Bočna četka
21 Glavni kotačići
22 Držač krpe
23 Periva krpa (2x)
24 Vrećica usisavača (2x)
25 Poklopac spremnika
26 Odjeljak za vrećice usisavača
27 Stanica za automatsko pražnjenje
28 Svjetlosni indikator
29 Kontakti za punjenje (stanica)
30 Ulaz za automatsko pražnjenje
31 Utičnica kabela za napajanje
32 Podložak
33 Alat za čišćenje četke
Prije prve uporabe
1 Izvadite uređaj iz kutije i uklonite svu ambalažu.
2 Skinite zaštitne pokrove.
3 Ako uočite bilo koji znak vidljivog oštećenja, posjetite web-mjesto www.philips.com/support ili se obratite centru korisničke službe u svojoj državi.
Priprema za uporabu
i Oprez: čak i ako prvi put punite robot, stanica će početi prazniti robota usisavanjem. To nije pogreška, već je dio standardnog postupka punjenja.
i Napomena: ako gumb za pridruživanje nije vidljiv u aplikaciji, napustite aplikaciju i idite na Wi-Fi u dijelu „Postavke” na svom mobilnom uređaju. Ondje možete odabrati mrežu „Philips robot” i povezati se s njom.
Način na koji robotski usisavač radi
Izradite kartu
Na koji način radi mapiranje
Robot vozi kroz sobe, a laserska navigacija brzo skenira sobe kako bi izradila kartu 📂ata.
Uređivanje karte
Virtualni zid i zabranjena zona
Zona bez brisanja
Izradite zone bez brisanja 📄ako biste spriječili robot da briše tepihe ili tepisone.
- Pričvrstite bočnu četku tako da je utisnete u točan položaj (dok ne čujete škljocaj) na donjem dijelu robota.
- Pričvrstite držač krpe na donji dio spremnika za vodu.
- Pričvrstite perivu podlogu krpe na držač krpe.
2 Odaberite program za čišćenje: Redovito čišćenje ili Prilagođeno čišćenje.
1 Povlačenjem odvojite perivu krpu od čičak-materijala i kliznim potezom izvucite ravnu stranu perive krpe iz utora.
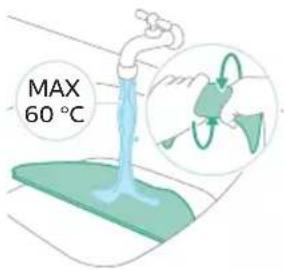
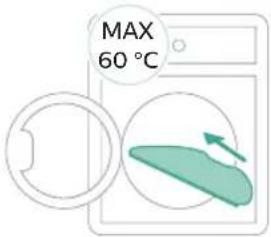
2 Isperite i očistite perivu krpu vodom ili je operite u perilici rublja.

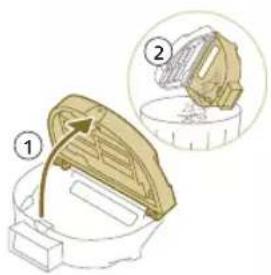
2 Otvorite poklopac spremnika za prašinu i istresite prašinu.
i Napomena: nemojte pobrkati poklopac spremnika za prašinu s poklopcem perivog filtra.
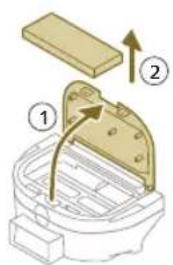
3 Otvorite poklopac perivog filtra i izvucite perivi filter.
4 Isperite perivi filtar vodom i osušite ga na zraku.
Čišćenje spremnika za vodu
1 Pritisnite gumb za oslobadanje spremnika za vodu.
2 Izvucite spremnik za vodu iz robota.
3 Izvadite spremnik za prašinu iz spremnika za vodu.
4 Isperite spremnik za vodu vodom iz slavine
5 Obrišite vanjski dio spremnika za vodu krpom.
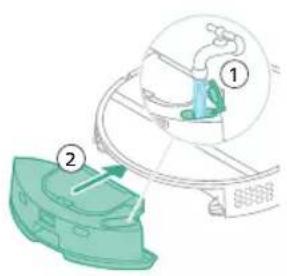
8 Napunite spremnik za vodu vodom iz slavine. Umetnite spremnik za vodu na pravilnu lokaciju.
i Napomena: provjerite je li vanjski dio spremnika za vodu suh.
i Napomena: nemojte koristiti deterdžente za čišćenje.
1 Okrenite robot naopako na površinu koja je ravna i stabilna.
2 Istovremeno pritisnite gumbe za oslobadanje poklopca četke.
3 Podignite i uklonite poklopac četke.
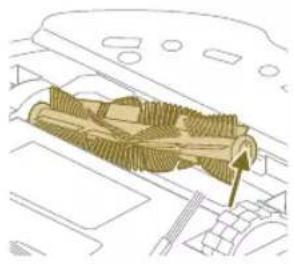
252 Hrvatski
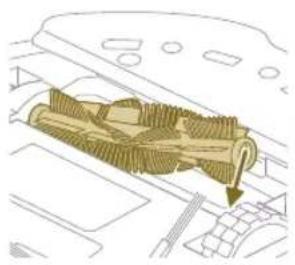
9 Postavite jezičce poklopca četke u odgovarajuće ureze.
10 Gurnite poklopac četke.
1 Okrenite robot naopako na površinu koja je ravna i stabilna.
2 Uklonite bočnu četku.
3 Pomoću četke s mekim vlaknima (npr. četkice za zube) uklonite prašinu i nakupine s bočne četke i robota.
4 Pričvrstite bočnu četku tako da je utisnete u točan položaj (dok ne čujete škljocaj) na donjem dijelu robota.
2 Pomoću četke s mekim vlaknima (npr. četkice za zube) uklonite prašinu i nakupine prašine s prednjeg kotačića i glavnih kotačića.
1 Iskopčajte stanicu iz zidne utičnice
2 Koristite meku suhu krpu. Ako je potrebno, lagano namočite krpu.
3 Očistite dijelove.
2 Pritisnite gumb za otpuštanje i pogurnite držač vrećice u stranu.
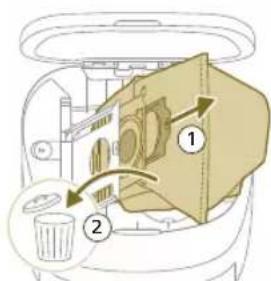
3 Uklonite i bacite vrećicu usisavača.
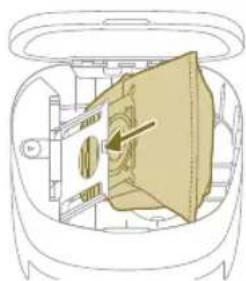
4 Kliznim potezom umetnite kartonski dio vrećice usisavača u držač vrećice.
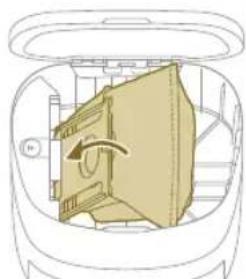
Uklanjanje punjive baterije
Kako biste izvadili punjivu bateriju, slijedite upute u nastavku. Takoder možete odnijeti robotski usisivač u servisni centar tvrtke Philips kako bi vam uklonili punjivu bateriju. Obratite se centru za korisničku službu tvrtke Philips u svojoj državi radi adrese servisnog centru u vašoj blizini.
Poduzmite sve mjere opreza kada rukujete alatima da otvorite proizvod i kad odlažete punjivu bateriju.
Upozorenje: prije uklanjanja baterije pazite da je proizvod iskopčan iz stanice i da je baterija potpuno prazna.
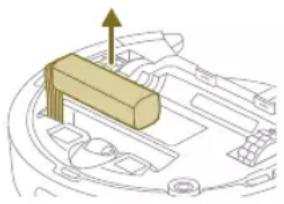
4 Podignite punjivu bateriju i odspojite je pritiskom na malu kopču na konektoru baterije kako biste oslobodili konektor baterije.
5 Odnesite robotski usisivač i punjivu bateriju na mjesto za prikupljanje električnog i elektroničkog otpada.
Jamstvo i podrška
Ako su Vam potrebne informacije ili podrška, molimo posjetite www.philips.com/support ili pročitajte brošuru o međunarodnom jamstvu. Vaš je robotski usisavač osmišljen i izrađen s najvećom mogućom pažnjom. U malo vjerojatnom slučaju da mu zatreba popravak, centar za potrošače u vašoj državi pomoći će vam izvođenjem svih potrebnih popravaka u najkraćem mogućem roku i uz maksimalnu susretljivost. Ako u vašoj zemlji ne postoji centar za potrošače, obratite se lokalnom distributeru tvrtke Philips.
Zbrinjavanje i recikliranje
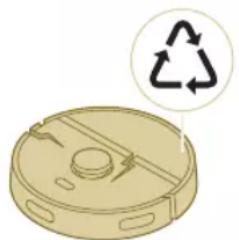
284 Italiano
![graph TD A["①"] --> B["②"] B --> C["③"] C --> D["④"]](/content/2026/04/664990/images/98a393d2d7bdd11e16a115ede095d00ac4d240c652b7626dff51f41ba5645b8a.jpg)
Kartes rediğešana
Lietotnē varat izmantot kartes rediğešanu, lai:
Kā robots tīra
312 Latviešu
1 Pavelkot nonemiet mazgajamo sukas paliktni no "Velcro" materiāla sloksnes un bīdot iznemiet mazgajamā sukas paliktna taisno malu no slota.
4 Izskalojiet üdens tvertni ar krāna üdeni.
5 Nosusiniet üdens tvertnes arpusi ar drāniņu.
3 Iznemiet puteklu maisinu un izmetiet to.
5 Bidiet maisina turetaju atpakal ta stavoša pozicija, lidz atskan klikškis.
Neplaunama zona
2 Pasirinkite valymo programa: reguliarus valymas arba individualiai pritaikytas valymas.
Vandens bako valymas
350 Lietuviškai
4 Prijunkite šonini šepetj, prisegdami jj tinkamoje padetyje antRoboto dugno.

Térkép szerkesztése
Felmosásmentes zóna
382 Magyar
FC8022 Porzsákok (antiallergén s- bags)
De stofbak reinigen
Installer holderen for mikrofiberkluten, den vaskbare mikrofiberkluten og sidebørsten
i Viktig: Selv om du lader roboten for første gang, vil stasjonen begynne å støvsuge roboten tom. Dette er ikke en feil men en del av den normale ladeprosedyren.
Nedlasting av appen
i Merk: Hvis Bli med-knappen ikke er synlig i appen, går du ut av appen og går til Wi-Fi under «Innstillinger» på mobilenheten din. Der kan du velge og koble til «Philips robot»-nettverket.)
Kartredigering
I appen kan du bruke kartredigering for å:
Moppefri sone
446 Norsk
4 Skyll det vaskbare filteret med vann og la det lufttørke.
448 Norsk
4 Skyv kartongstykket på støvsugerposen inn i poseholderen.
452 Norsk
Lysene i de to knappene på roboten blinker sakte.
Roboten lader.
Lysene i de to knappene på roboten lyser kontinuerlig.
Roboten er fulladet.

Lysene i de to knappene på roboten blinker oransje.
Robotener i Wi-Fi-oppsettmodus.
FC8022 Støvposer (anti-allergiposer)
Fjerne det oppladbare batteriet
468 Polski
Edycja mapy
Strefa bez mycia na mokro
482 Polski
Funcionamento do mapeamento
Edição do mapa
3 Remova e descarte o saco para o pó.
Repor/restaurar o robot
Encomendar acessórios
Editarea hârtilor
1 Deconectați statia de la priza de perete
Modifikimi i hartës
2 Zgjidhni programin e pastrimit: Pastrim i rregullt ose pastrim i personalizuar.
3 Shtypni ikonën "Fillo".
Pastroni koshin e pluhurit
10 Shtyjeni kapakun e furçës brenda.
1 Hiqeni stacionin nga priza.
3 Hiqni dhe hidhni qesen e pluhurit.
2 Držalo krpe za brisanje pritrdite na spodnji del posode za vodo na robotu.
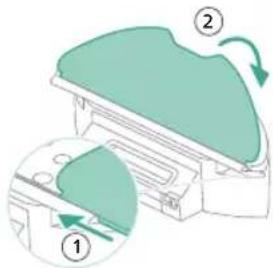
3 Ravno stran pralne krpe za mokro brisanje potisnite v pravo režo na držalu krpe za brisanje in pritrdite pralno krpo za mokro brisanje na ježka držala krpe za brisanje.
Polnjenje robota
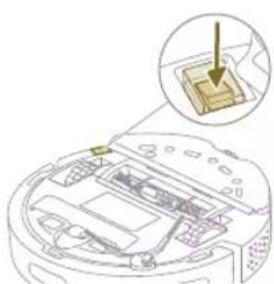
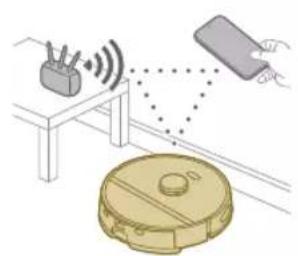
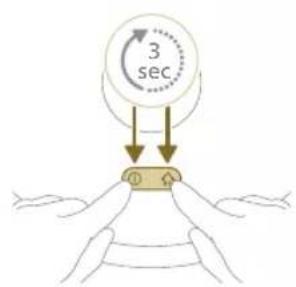
Prenos aplikacije
Robot se pomika skozi prostore in laserska navigacija na hitro preleti prostore, da si sestavi zemljevid al.
Urejanje zemljevida
i Opomba: To je pomembno, da se ovire ne bi za stalno shranile na zemljevid.
604 Slovenščina
i Pomembno: Zagotovite, da pot robota med uporabo ne bo blokirana.
- Držalo krpe za brisanje pritrdite na spodnji del posode za vodo.
- Pralno krpo za mokro brisanje pritrdite na držalo krpe za brisanje.
3 Pralno krpo za mokro brisanje posušite na zraku.
i Opomba: Ne uporabljajte drugih načinov za sušenje pralne krpe za mokro brisanje.
2 Odprite pokrov posode za prah in stresite umazanijo iz nje.
i Opomba: Ne zamenjajte pokrova posode za prah s pokrovom pralnega filtra.
3 Odprite pokrov pralnega filtra in izvlecite pralni zračni filter.
4 Pralni filter operite z vodo in ga posušite na zraku.
4 Posodo za vodo izperite z vodo iz pipe.
5 Zunanjost posode za vodo osušite s krpo.
8 Posodo za vodo napolnite skozi dovod za vodo. Posodo za vodo vstavite na pravo mesto.
614 Slovenščina
9 Robove pokrova ščetke vstavite v prave zareze.
10 Potisnite pokrov ščetke noter.
1 Izključite postajo iz električne vtičnice.
2 Uporabite mehko in suho krpo. Po potrebi krpo rahlo navlažite.
3 Očistite sestavne dele.
2 Pritisnite gumb za sprostitev in potisnite nosilec vrečke na stran.
3 Odstranite vrečko za prah in jo zavrzite.
5 Nosilec za vrečko potiskajte nazaj na položaj, dokler ne zaslišite klika.
3 Odvijte vijake pokrova prostora za baterije in odstranite pokrov.
4 Akumulatorsko baterijo dvignite in jo izključite tako, da pritisnete malo sponko na priključku baterije, da se ta sprosti.
3 Zatlačte robota k stanici tak, aby nabíjacie kontakty robota boli v kontakte s nabíjacími kontaktmi na stanici.
Ako robot funguje
Vytvorenie mapy
Úprava mapy
- Pripevnite utierku mopu k držiaku na utierku mopu.
Ked'sa počas upratovania vybije batéria (< 20 %), robot sa automaticky vráti do stanice, aby sa dobil. Po dobití batérie robot pokračuje tam, kde skončil.
Čistenie a údržba
3 Vysušte pratelnú utierku mopu na vzduchu.
Čistenie nádoby na vodu
646 Slovensky
2 Stlačte uvolňovacie tlačidlo a zatlačte nosič vrecka do strany.
1 Dugme za uključivanje/isključivanje
2 Dugme za početak
3 Gornji poklopac
4 Laserska navigacija od 360° (LiDAR)
5 Izlaz za vazduh
6 Perivi filter
7 Poklopac perivog filtera
8 Poklopac za pražnjenje posude za prašinu
9 Posuda za prašinu
10 Ulaz za vodu
11 Kontakti za punjenje (robot)
12 Rezervoar za vodu
13 Dugme za otpuštanje rezervoara za vodu
14 Poklopac četke
15 Glavna četka
16 Prekidač za uključivanje/isključivanje
17 Prednji upravljački točkić
18 Senzor za navođenje robota do stanice (3x)
19 Senzor ispadanja (3x)
20 Bočna četka
21 Glavni točkići
22 Držač umetka za brisanje
23 Perivi umetak za brisanje (2x)
24 Kesa za prašinu (2x)
25 Poklopac spremnika
26 Odeljak za kesu za prašinu
27 Stanica za automatsko pražnjenje
28 Indikatorska lampica
29 Kontakti za punjenje (stanica)
30 Ulaz za automatsko pražnjenje
31 Utičnica kabla za napajanje
32 Podmetač
33 Alatka za čišćenje četke
Saveti za izbor najbolje lokacije za postavljanje stanice:
- Nemojte postavljati stanicu na jaku sunčevu svetlost ili ispod nameštaja. To će blokirati infracrveni signal koji pomaže robotu da se vrati do stanice.
- Postavite stanicu na ravnu površinu pored zida.
- Postavite stanicu na tvrdi pod.
- Nemojte postavljati stanicu pored stepenica ili izvora toplote (radijator).
- Postavite je na lokaciju sa dobrom pokrivenošću Wi-Fi mreže.
Postavljanje stanice
i Pažnja: Čak i ako punite robot prvi put, stanica će početi da usisava tako da prazni robot. To nije greška, već je deo normalne procedure punjenja.
1 Pritisnite prekidač za uključivanje/isključivanje na donjem delu robota da biste uključili robot.
2 Okrenite robot u pravilan položaj i postavite ga na pod ispred stanice.
3 Proverite da li je stanica uključena u zidnu utičnicu.
![graph TD A["Step 1"] --> B["Step 2"] B --> C["End"]](/content/2026/04/664990/images/c2d17c251a332530399dd0b5e13b8cb87467bd20f42476e10149eb63b9b75c53.jpg)
4 Pritisnite dugme za početak. Robot dolazi do pravilnog položaja na stanici.
5 Sačekajte dok se robot potpuno ne napuni.
i Napomena: Ako promenite telefon, a nemate nalog, izgubićete sve prilagodene planove čišćenja.
i Važno: Philips ceni i poštuje vašu privatnost. Pre registracije, u aplikaciji možete pronaći vezu za naše obaveštenje o privatnosti.
Kako robot radi
Kreirajte mapu
Uređivanje mape
Uređivanje mape u aplikaciji možete da koristite za:
- Izmenu prostorija (spajanje/deljenje soba, davanje naziva sobama) što omogućava prilagođavanje rutine čišćenja u zavisnosti od prostorije.
- Postavljanje zabranjenih područja kojim se određuje gde robot sme da čisti, a gde ne.
- Možete da kreirate mapu za svaki sprat svog doma i da sačuvate do 5 mapa. Kada koristite ovaj aparat, on pravi novu mapu u novom okruženju. Ako imate mape koje često koristite i ne želite da ih slučajno izbrišete, možete da zaključate do 3 mape.
Priprema prostorije za mapiranje
- Otvorite sva unutrašnja vrata i zatvorite vrata spolja.
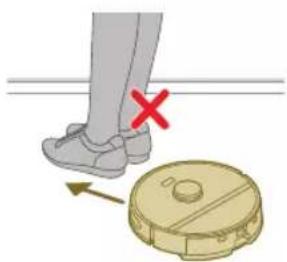
Virtuelni zid i zabranjena zona
Napravite virtuelne zidove ✘zabranjene zone 27 područja na koja ne želite da robot ide. Na primer, možete da napravite virtuelne zidove ili zabranjene zone:
i Napomena: Robot može da se zaglavi na debelim tepisima, tepisima sa resama ili veoma laganim prostirkama, kao što su one u kupatilu. Takođe, robot ne može da otkrije kablove na podu.
- Zaštitite robota.
i Napomena: Robota treba držati dalje od tečnosti i vlažnih područja kao što su posude za kućne ljubimce i tacne za saksije.
i Važno: virtuelni zidovi i zabranjene zone se ne smeju koristiti za zaštitu od opasnosti.
i Važno: virtuelni zidovi i zabranjene zone ne smeju da spreče robota da se vrati u stanicu.
Zona bez brisanja
Napravite zone bez brisanja 📄a robot ne bi brisao tepihe ili prostirke.
- Spojite bočnu četku tako što će kliknuti u pravi položaj pri dnu robota.
672 Srpski
2 Izaberite program za čišćenje: redovno čišćenje ili prilagođeno čišćenje.
3 Pritisnite ikonu za pokretanje.
1 Povucite perivi umetak za brisanje sa čičak-trake i izvucite ravnu stranu perivog umetka iz proreza.
2 Isperite i očistite perivi umetak za brisanje vodom ili ga operite u mašini za pranje veša.
2 Otvorite poklopac i ispustite prljavštinu iz posude za prašinu.
i Napomena: Nemojte da pomešate poklopac posude za prašinu sa poklopcem perivog filtera.
3 Otvorite poklopac perivog filtera i izvucite perivi filter.
4 Isperite perivi filter vodom i osušite ga na vazduhu.
Čišćenje rezervoara za vodu
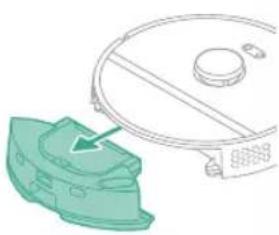
1 Pritisnite dugme za oslobadanje rezervoara za vodu.
2 Izvucite rezervoar za vodu iz robota.
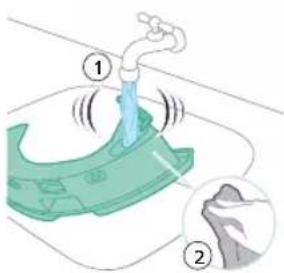
4 Isperite rezervoar za vodu vodom sa česme
5 Osušite spoljašnjost rezervoara za vodu krpom.
i Napomena: Nemojte koristiti deterdžente za čišćenje.
VAŽNO: Nemojte prati rezervoar za vodu u mašini za pranje sudova.
6 Ostavite otvoren zaptivni poklopac na rezervoaru za vodu i ostavite da se unutrašnjost rezervoara osuši na vazduhu.
i Napomena: Nemojte koristiti druge načine za sušenje rezervoara za vodu.
7 Stavite posudu za prašinu nazad u rezervoar za vodu.
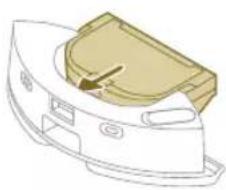
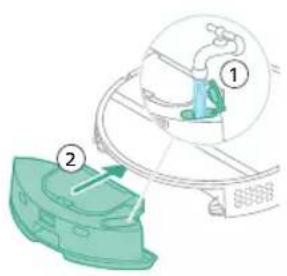
8 Napunite rezervoara za vodu kroz otvor za vodu. Postavite rezervoar za vodu na pravo mesto.
i Napomena: Proverite da li je spoljašnjost rezervoara za vodu suva.
1 Okrenite robot naopako na površini koja je ravna i stabilna.
2 Istovremeno pritisnite dugmad za oslobađanje poklopca četke.
3 Podignite i skinite poklopac četke.
678 Srpski
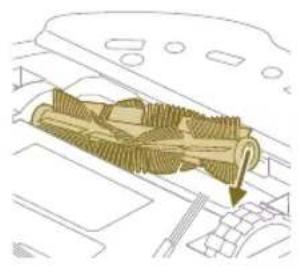
9 Postavite jezičke na poklopcu četke u odgovarajuće ureze.
10 Gurnite poklopac četke.
4 Spojite bočnu četku tako što će kliknuti u pravi položaj pri dnu robota.
1 Isključite stanicu iz zidne utičnice
2 Koristite meku, neabrazivnu, suvu krpu. Ako je potrebno, blago je navlažite.
3 Prebrišite komponente.
Kada narandžasta LED lampica na stanici za automatsko pražnjenje treperi, to znači da je kesa za prašinu puna.
1 Otvorite poklopac stanice za automatsko pražnjenje.
680 Srpski
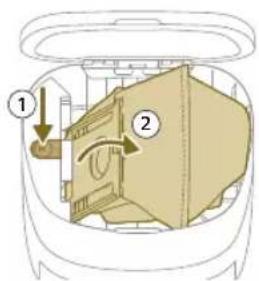
2 Pritisnite dugme za otpuštanje i gurnite držač kese u stranu.
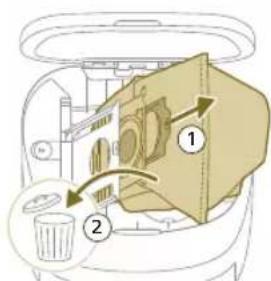
3 Uklonite i bacite kesu za prašinu.
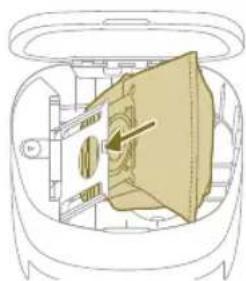
4 Uvucite kartonski deo kese za prašinu u držač kese.
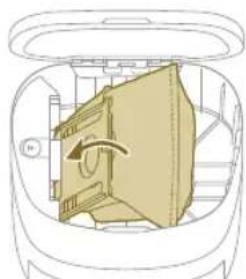
5 Gurnite držač kese nazad u uspravan položaj dok ne začujete „klik“. 6 Zatvorite poklopac stanice za automatsko pražnjenje.
Uklanjanje punjive baterije
Da biste izvadili punjivu bateriju, pratite uputstva u nastavku. Možete i da odnesete robota u ovlašćeni servisni centar kompanije Philips da biste izvadili punjivu bateriju. Obratite se centru za korisničku podršku kompanije Philips u svojoj zemlji kako biste dobili adresu servisnog centra koji se nalazi blizu vas.
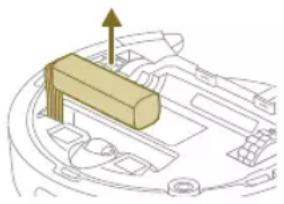
4 Podignite punjivu bateriju i odvojite je tako što ćete pritisnuti malu kopču na priključku baterije da biste oslobodili priključak baterije.
5 Odnesite robota i punjivu bateriju na mesto za prikupljanje električnog i elektronskog otpada.
Garancija i podrška
Robotin toiminta
Kartan luominen
Kartan muokkaus
Ei moppausta -alue
704 Suomi
Akun irrottaminen
Redigera karta
Moppfri zon
Innan du startar roboten på rengöringskörningen:
2 Välj rengöringsprogram: Rutinmässig rengöring eller anpassad rengöring.
3 Tryck på ikonen "start".
- Anti-droppsensor (3x)
Rengöra sidoborsten
Harita Düzenleme
770 Türkçe
806 Български
Светлинните индикатори в двата бутона на робота мигат в оранжево.
Редагування мапи
Суха зона
874 Українська
- INTRODUCTION
- PRODUCT OVERVIEW
- 8 ENGLISH
- BEFORE FIRST USE
- PREPARING FOR USE
- INSTALL THE STATION
- INSTALL THE MOP PAD HOLDER, WASHABLE MOP PAD, AND THE SIDE BRUSH
- CHARGING THE ROBOT
- ENGLISH
- DOWNLOAD THE APP, REGISTER, AND CONNECT TO WI-FI
- APP CONTENT
- DOWNLOADING THE APP
- REGISTERING A PERSONAL ACCOUNT
- SETTING UP THE WI-FI CONNECTION
- 12 ENGLISH
- AUDIBLE SIGNALS
- SET THE LANGUAGE OF THE VOICE ALERTS
- HOW YOUR ROBOT WORKS
- CREATE A MAP
- HOW MAPPING WORKS
- MAP EDIT
- PREPARING THE ROOM FOR MAPPING
- CREATING A MAP
- TELL YOUR ROBOT WHERE NOT TO CLEAN WITH RESTRICTED CLEANING ZONES
- VIRTUAL WALL AND NO-GO ZONE
- NO-MOP ZONE
- HOW YOUR ROBOT CLEANS
- SET CLEANING PREFERENCES, ADVANCED SETTINGS AND CLEANING ORDER
- CLEANING MODES
- CLEANING PREFERENCES
- A IMPORTANT: DO NOT ADD HOT WATER OR CLEANING DETERGENTS TO THE WATER TANK
- ADVANCED SETTINGS
- USING YOUR ROBOT
- PREPARING FOR A CLEANING RUN
- START YOUR FIRST CLEANING PROGRAM VIA THE APP
- START
- STOP
- USING THE ROBOT WITHOUT THE APP
- I NOTE: FOR AN OPTIMAL EXPERIENCE, WE RECOMMEND USING THE APP
- YOUR ROBOT'S CLEANING PATTERN
- RETURNING TO THE STATION
- AUTO RECHARGE AND RESUME
- CLEANING AND MAINTENANCE
- WHEN TO DO MAINTENANCE
- HOW TO CLEAN THE MOP PAD AND THE DUST BIN
- CLEAN THE WASHABLE MOP PAD
- CLEAN THE DUST BIN
- 22 ENGLISH
- CLEANING THE WATER TANK
- CLEANING THE MAIN BRUSH
- 24 ENGLISH
- CLEANING THE SIDE BRUSH
- CLEANING THE MAIN WHEELS AND THE FRONT CASTER WHEEL
- CLEANING THE SENSORS, CONTACT POINTS AND IR SIGNAL WINDOW
- REPLACING THE DUST BAG
- LONG TERM STORAGE
- USER INTERFACE SIGNALS AND THEIR MEANING
- SIGNAL DESCRIPTION OF SIGNAL MEANING OF SIGNAL
- RESET/RESTORE THE ROBOT
- REPLACEMENT
- ORDERING ACCESSORIES
- REMOVING THE RECHARGEABLE BATTERY
- WARRANTY AND SUPPORT
- DISPOSAL AND RECYCLING
- TROUBLESHOOTING
- 32 ENGLISH
- OBSAH
- ÚPRAVY MAPY
- OBLAST BEZ VYTÍRÁNÍ
- 72 DANSK
- KORT REDIGER
- ZONE UDEN MOPNING
- NULSTIL/GENDAN ROBOTTEN
- KARTE BEARBEITEN
- ENTFERNEN DES AKKUS
- KAARDI MUUTMINE
- VEEPAAGI PUHASTAMINE
- AKU EEMALDAMINE
- EDITAR MAPA
- ZONA SIN MOPA
- ZONE SÈCHE
- PRIJE PRVE UPORABE
- PRIPREMA ZA UPORABU
- NAČIN NA KOJI ROBOTSKI USISAVAČ RADI
- IZRADITE KARTU
- NA KOJI NAČIN RADI MAPIRANJE
- UREĐIVANJE KARTE
- VIRTUALNI ZID I ZABRANJENA ZONA
- ZONA BEZ BRISANJA
- ČIŠĆENJE SPREMNIKA ZA VODU
- 252 HRVATSKI
- UKLANJANJE PUNJIVE BATERIJE
- JAMSTVO I PODRŠKA
- ZBRINJAVANJE I RECIKLIRANJE
- 284 ITALIANO
- KARTES REDIĞEŠANA
- KĀ ROBOTS TĪRA
- 312 LATVIEŠU
- NEPLAUNAMA ZONA
- VANDENS BAKO VALYMAS
- 350 LIETUVIŠKAI
- TÉRKÉP SZERKESZTÉSE
- FELMOSÁSMENTES ZÓNA
- 382 MAGYAR
- DE STOFBAK REINIGEN
- INSTALLER HOLDEREN FOR MIKROFIBERKLUTEN, DEN VASKBARE MIKROFIBERKLUTEN OG SIDEBØRSTEN
- NEDLASTING AV APPEN
- KARTREDIGERING
- MOPPEFRI SONE
- 446 NORSK
- 448 NORSK
- 452 NORSK
- FJERNE DET OPPLADBARE BATTERIET
- 468 POLSKI
- EDYCJA MAPY
- STREFA BEZ MYCIA NA MOKRO
- 482 POLSKI
- FUNCIONAMENTO DO MAPEAMENTO
- EDIÇÃO DO MAPA
- REPOR/RESTAURAR O ROBOT
- ENCOMENDAR ACESSÓRIOS
- EDITAREA HÂRTILOR
- MODIFIKIMI I HARTËS
- PASTRONI KOSHIN E PLUHURIT
- POLNJENJE ROBOTA
- PRENOS APLIKACIJE
- UREJANJE ZEMLJEVIDA
- 604 SLOVENŠČINA
- 614 SLOVENŠČINA
- AKO ROBOT FUNGUJE
- VYTVORENIE MAPY
- ÚPRAVA MAPY
- ČISTENIE A ÚDRŽBA
- ČISTENIE NÁDOBY NA VODU
- 646 SLOVENSKY
- SAVETI ZA IZBOR NAJBOLJE LOKACIJE ZA POSTAVLJANJE STANICE
- POSTAVLJANJE STANICE
- KAKO ROBOT RADI
- KREIRAJTE MAPU
- UREĐIVANJE MAPE
- PRIPREMA PROSTORIJE ZA MAPIRANJE
- VIRTUELNI ZID I ZABRANJENA ZONA
- 672 SRPSKI
- ČIŠĆENJE REZERVOARA ZA VODU
- 678 SRPSKI
- 680 SRPSKI
- GARANCIJA I PODRŠKA
- ROBOTIN TOIMINTA
- KARTAN LUOMINEN
- KARTAN MUOKKAUS
- EI MOPPAUSTA -ALUE
- 704 SUOMI
- AKUN IRROTTAMINEN
- REDIGERA KARTA
- MOPPFRI ZON
- RENGÖRA SIDOBORSTEN
- HARITA DÜZENLEME
- 770 TÜRKÇE
- 806 БЪЛГАРСКИ
- РЕДАГУВАННЯ МАПИ
- СУХА ЗОНА
- 874 УКРАЇНСЬКА
Brand : PHILIPS
Model : HomeRun 3000 Series Aqua XU3100
Category : Robot vacuum