TD115 SPS - Turntable BIGBEN INTERACTIVE - Free user manual and instructions
Find the device manual for free TD115 SPS BIGBEN INTERACTIVE in PDF.


User questions about TD115 SPS BIGBEN INTERACTIVE
0 question about this device. Answer the ones you know or ask your own.
Ask a new question about this device
Download the instructions for your Turntable in PDF format for free! Find your manual TD115 SPS - BIGBEN INTERACTIVE and take your electronic device back in hand. On this page are published all the documents necessary for the use of your device. TD115 SPS by BIGBEN INTERACTIVE.
USER MANUAL TD115 SPS BIGBEN INTERACTIVE
Sortie line out (Droite (R), Gauche (L)):
customerservice@bigben-interactive.be
ESPANA, sat@bigbeninteractive.es
ITALIA, support@bigbeninteractive.it
www/bigben.eu
TD115 SPS
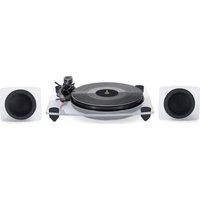
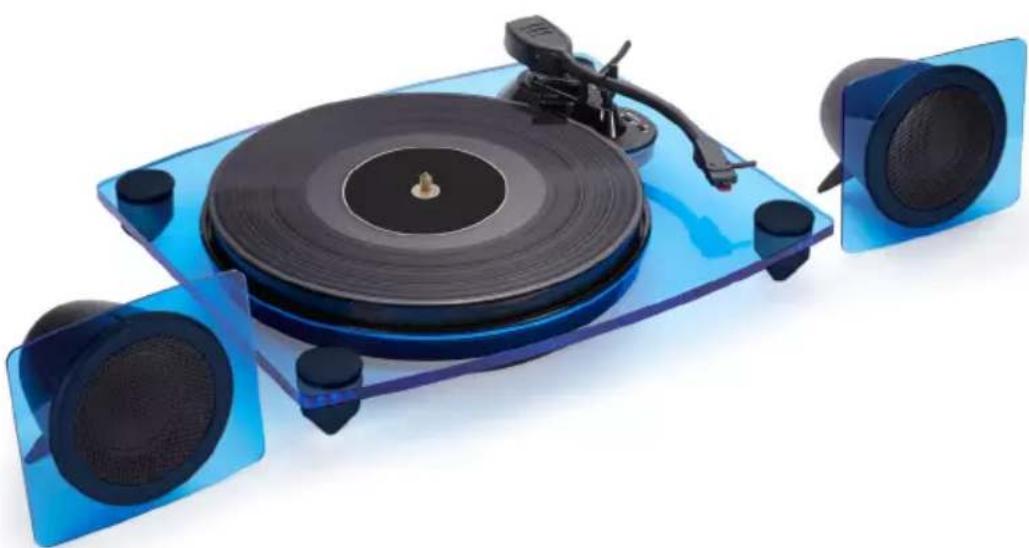
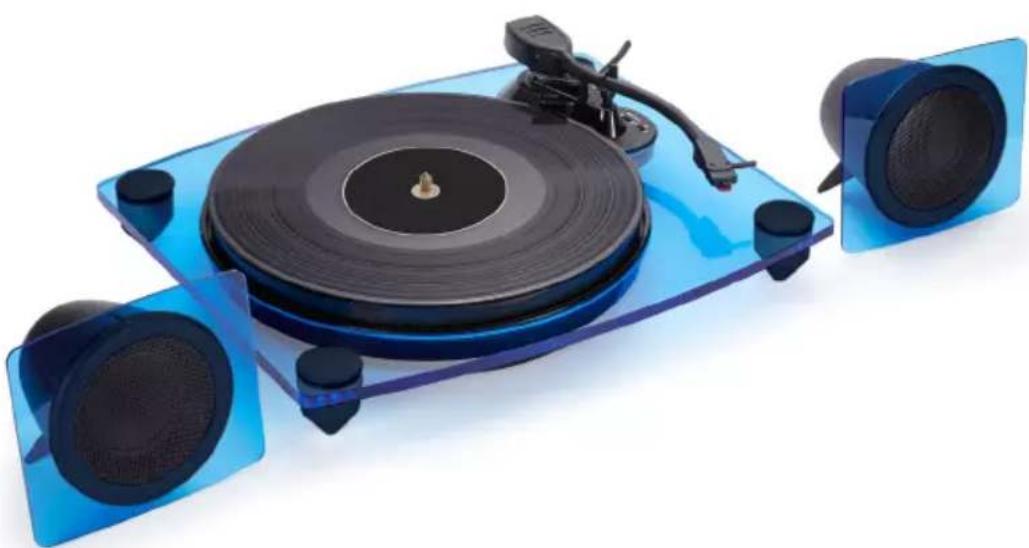
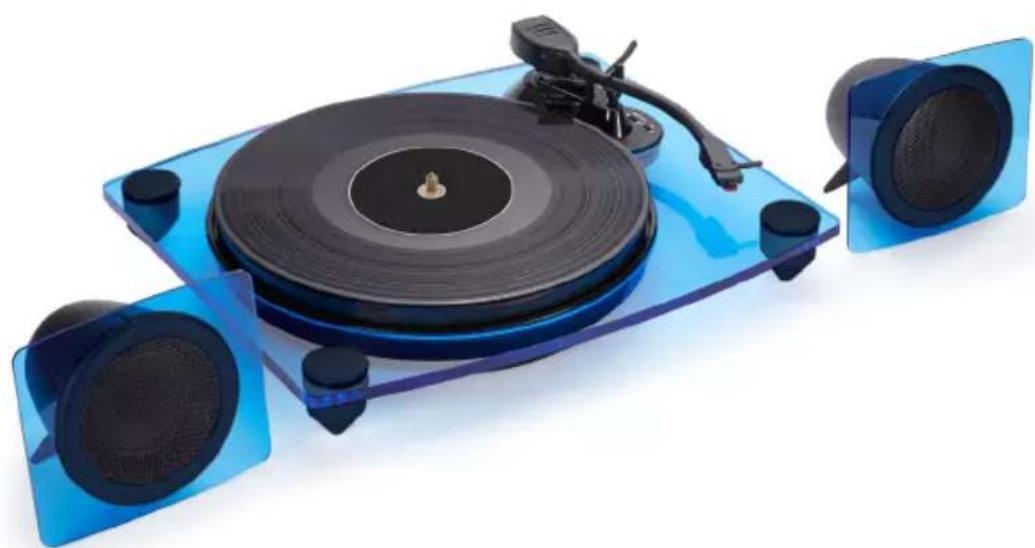
TURNTABLE WITH WIRELESS BLUETOOTH SPEAKERS PC ENCODING & LINE OUT
OPERATING INSTRUCTIONS
PLEASE READ THIS USER MANUAL CAREFULLY BEFORE
OPERATING THIS UNIT AND RETAIN FOR
FUTURE REFERENCE
Contents
Setting Started 1
Safety and Notice
Care for your product 2
Care of the environment
What's in the box 3
Power
Description of Parts 4
Charging the Bluetooth Speaker (Left or Right) 5
Bluetooth Pairing with Turntable
Bluetooth Pairing Operation
Bluetooth speakers connected to other devices
Bluetooth Transmission from the Turntable to other Bluetooth Speakers
Operating the turntable 6
Recording and storing music from turntable to computer
Line Out (R, L): Connection to Amplifier only 9
External Speaker Connection Jacks
Remarks 10
Setting Started
- Remove the appliance from the box.
- Remove any packaging from the product.
- Place the packaging inside the box and either or dispose of safely.
Safety and Notice
Read and understand all instructions before you use this product. If damage is caused by failure to follow the instructions, the warranty does not apply.
Safety
Warning
- Never remove the casing of this apparatus.
- Never lubricate any part of this apparatus.
- Never place this apparatus on other electrical equipment.
- Keep this apparatus away from direct sunlight, naked Fames or heat.
- Never look into the laser beam inside this apparatus.
- Ensure that you always have easy access to the power cord, plug or adaptor to disconnect this apparatus from the power.

- Read these instructions.
- Keep these instructions.
- Heed all warnings.
- Follow all instructions.
- Do not use this apparatus near water.
- Clean only with dry cloth.
- Do not block any ventilation openings. Install in accordance with the manufacturer's instructions.
- Do not install near any heat sources such as radiators, heat registers, stoves, or other apparatus (including amplifiers) that produce heat.
- Protect the power cord from being walked on or pinched, particularly at plugs, convenience receptacles, and the Point where they exit from the apparatus.
- Only use attachments/accessories specified by the manufacturer.
- Use only with the cart, stand, tripod, bracket, or table specified by the manufacturer or sold with the apparatus. When a cart is used, use caution when moving the cart/apparatus combination to avoid injury from tip-over.
- Unplug this apparatus during lightning storms or when unused for long periods of time.
-
Refer all servicing to qualified service personnel. Servicing is required when the apparatus has been damaged in anyway, such as power-supply cord or plug is damaged, liquid has been spilled or objects have fallen into the apparatus, apparatus has been exposed to rain or moisture, does not operate normally, or has been dropped.
-
Apparatus shall not be exposed to dripping or splashing.
- Do not place any sources of danger on the apparatus (e.g. liquid filled objects, lighted candles).
- Where the MAINS plug or an appliance coupler is used as the disconnect device, the disconnect device shall remain readily operable.
- Make sure there is enough free space around the product for ventilation.
- Batteries (battery pack or batteries installed) shall not be exposed to excessive heat such as sunshine, fire or the like.
Care for your product
- Always unplug the appliance when not in use and before cleaning.
- Do not play music at excessive volume levels as damage to hearing and or the equipment may occur.
- Do not use this unit in wet or damp conditions.
- Always disconnect the unit from the mains power supply before cleaning. Clean the appliance with a soft, damp, lint free cloth. Do not use abrasives or harsh cleaners.
Care of the environment

Your product is designed and manufactured with high quality materials and components, which can be recycled and reused.
Your product contains batteries covered by the European Directive 2006/66/EC, which cannot be disposed with normal household waste. Please inform yourself about the local rules on separate collection of batteries because correct disposal helps to prevent negative consequences for the environmental and human health.
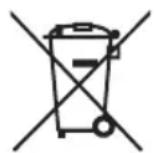
When this crossed-out wheeled bin symbol is attached to a product it means that the product is covered by the European Directive 2002/96/EC. Please inform yourself about the local separate collection system for electrical and electronic products. Please act according to your local rules and do not dispose of your old products with your normal household waste. Correct disposal of your old product helps to prevent potential negative consequences for the environment and human health.
What's in the box
Check and identify the contents of your package:
- Main unit
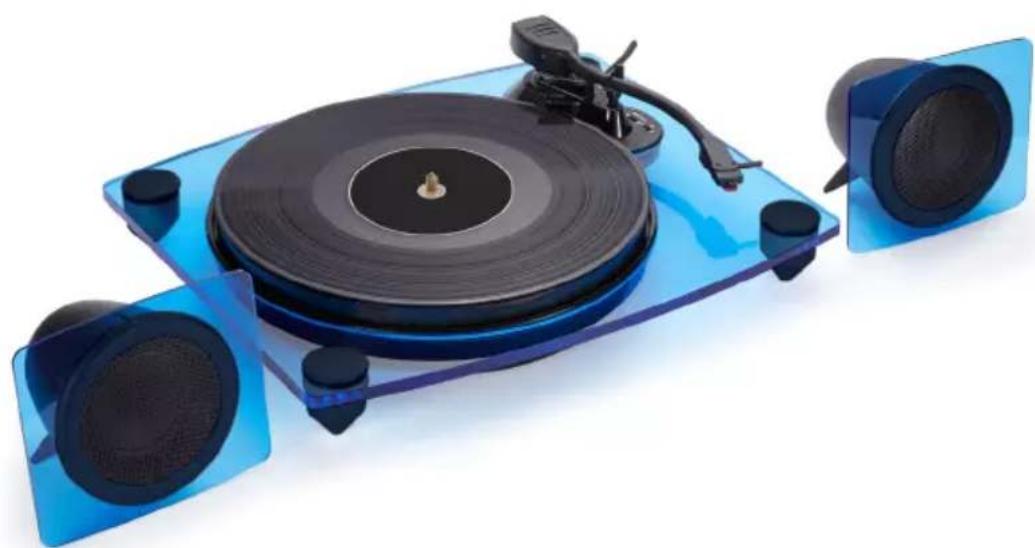
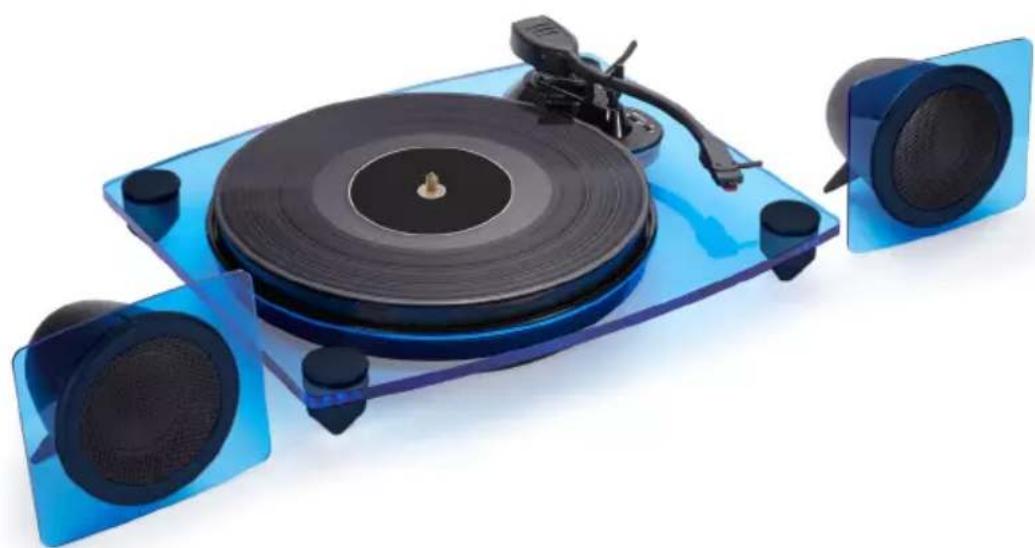
A pair of independent speakers - User manual
45 RPM adaptor - AC adaptor for turntable
- AC adaptor for speaker
USB cable for PC encoding
RCA line out cable
Power

CAUTION
- Risk of product damager! Make sure that the power voltage corresponds to the voltage printed on the back label.
- Risk of electric shock! When you unplug the AC/DC adaptor always pull the plug from the socket. Never pull the cord
- Before connecting the AC/DC adaptor, ensure you have completed all other connections
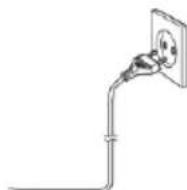
Place the unit in the desired position and unravel the mains cable. Insert the cable into the supply socket and switch on if applicable.
Power Source
This unit is designed to operate on a normal AC 100V 240V 50 / 60Hz household power supply. Do not attempt to operate the system using other power sources. This may result in damage to the unit and void your warranty.
Description of Parts
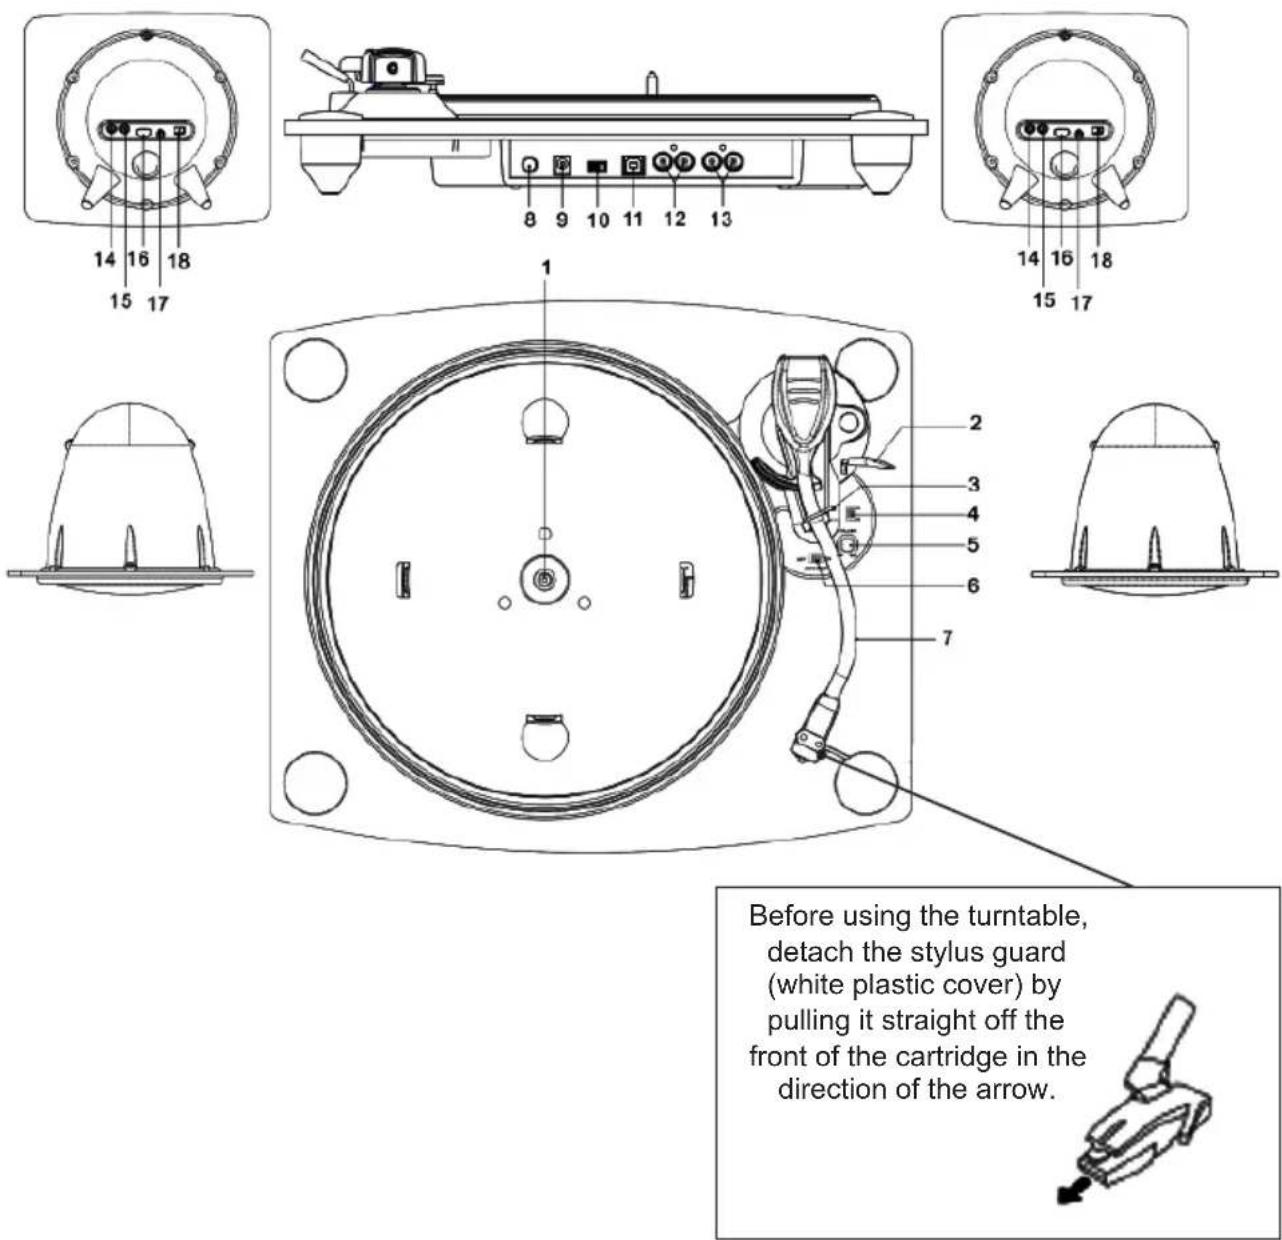
Turntable
- Platter
- Cue lever
- Tonearm holder
- Speed selector (33/45)
- Volume (Max ....Min)
- Auto Stop (On/Off)
- Tonearm
- Power on / Standby
- DC 12V in for AC cord
- BT / Phono switch
- USB jack (to connect to computer)
- Line out R & L for amplifier
- External speaker connection jacks
- 45 RPM adaptor (packed with Instruction Manual in separate polybag)
- Place the 45 RPM adaptor over the central spindle when playing 45 RPM records)
Charging the Bluetooth Speaker (Left or Right)
- Insert the AC adaptor plug in the DC in port behind the speaker & power supply socket
- The light indicator will flash red while speaker is charging.
- This unit has a built-in rechargeable lithium-ion battery. It will last for the unit's service life. When the battery level drops substantially, please recharge the speaker.
- The user should not disassemble or remove the battery inside the speaker. Doing so could cause leakage of an electrolytic substance and cancel warranty.
Bluetooth Pairing with Turntable
- Turn on the Bluetooth speaker and establish a successful connection with the left & right speakers (i.e. pairing the speakers)
-
Next, turn on the turntable and establish Bluetooth connection (i.e. pairing main unit to speaker)
-
Remark: If the above steps are reversed, the user will fail to establish the Bluetooth connection.
Bluetooth Pairing Operation
- Turn on (18) both left & right Bluetooth speakers.
- Press (14) "Connect speaker" to establish a successful connection with both left & right speakers.
- Once the connection is established, the light indicator on the speaker will flash.
- On the rear panel of the turntable, press (8) to turn on the turntable & (10) to activate the BT Phono transmitter.
- Bluetooth will be automatically paired between the turntable & the supplied pair of speaker or your own sound Bluetooth system.
- Upon successful connection, the light indicator on speaker will flash blue light.
- Should Bluetooth pairing fail, to refresh pairing function, press (15) Bluetooth pair on speaker & turn on (10) BT phono on turntable.
- When the Bluetooth transmitter is switched on, it will automatically connect to last connected device.
Bluetooth speakers connected to other devices:
- Turn off the Bluetooth, switch (10) from the turntable
- Turn on (15) both left & right Bluetooth speakers.
- Press (14) "Connect speaker" to get successful connection with both left & right speaker. You can also use the speakers independently.
- Once connection is done, the light indicator on the speaker will flash.
- Using the native controls, turn on the Bluetooth pairing function on mobile / other Bluetooth devices.
- Select the pairing name TD115. Bluetooth will be automatically paired.
- Upon successful connection, the light indicator on the speaker will flash blue.
- To listen to audio, operate mobile / other Bluetooth devices as instructed by their manufacturers.
Bluetooth Transmission from the Turntable to other Bluetooth Speakers
- Power off the speaker (18) or turn off the Connect speaker (14) to disconnect the TD115's speaker
- Using native controls, turn on the other Bluetooth speakers as instructed by the manufacturers.
- On the turntable's rear panel, press (8) to turn on the turntable & (10) to activate the BT transmitter.
- Select pairing name TD115. The Bluetooth connection will be automatically paired between the turntable & the speakers.
-
To operate the turntable as described below:
-
The Bluetooth speakers (ver. 2.1 EDR) may be connected to smartphones or other Bluetooth devices/equipment, in addition to the record player. It may be used on its own.
Devices running out-of-date Bluetooth versions may fail to connect.
Operating the turntable
Prior to use, please make sure to release the tonearm.
- Press the Power on / Standby mode (7) on the turntable's rear panel.
- Establish a successful connection with the Bluetooth speakers as per the above steps
- Place a record on the turntable over the central spindle (Place the 45 RPM adaptor over the central spindle when playing 45 RPM records)
- Set the Speed Selector to 33 or 45 RPM according to the record's speed.
- Turn the Auto Stop (10) to the ON position. The turntable plate will move & swivel over the record automatically.
- Release the tonearm holder & remove the protective cap from the stylus
- Lift the tonearm using the tonearm cue lever (2).
- Move the tonearm to the beginning of the record, or to the start of a track.
- Gently lower the tonearm onto the record using the tonearm cue lever (2) to start playing.
- Turn the volume (5) up or down to enjoy the music.
- Once the record is done playing, the tonearm will automatically lift from the record and return to the tonearm holder. To stop manually, lift the tonearm using the tonearm cue lever (6) and return it to the tonearm holder. Lock the holder.
- Press the Power button (standby mode [7]) on the turntable's rear panel to turn the unit off when playback is finished
- Replace the protective cap on the stylus when not in use.
In the ON position, 33 RPM records will automatically stop when the end of the record is reached.
To play entire 45 RPM records, turn the Auto Stop function OFF.
Note: Do not stop or turn the platter manually.
Moving or jarring the turntable without securing the tonearm clamp could result in damage to the tonearm.
Replace the protective cap on the stylus when not in use.
RECORDING AND STORING MUSIC FROM TURNTABLE TO COMPUTER
You can record your favourite songs on vinyl in MP3 format and store them on a computer.
Installing the Audacity Software
Go to the website http://www.audacityteam.org/download/ to install the Audacity software on your computer.
- Click on "My Computer" on the desktop.
- Double-click "Audacity Set Up" to install the Audacity software. Follow the on-screen instructions.
Connecting the USB Cable (Included) to the Computer
- Connect the provided USB cable to the PC port (12) on the rear panel and to your computer.
- Follow the on-screen instructions to install the USB driver.
Recording Using Audacity
- Connect the device to your computer using the USB cable (included)
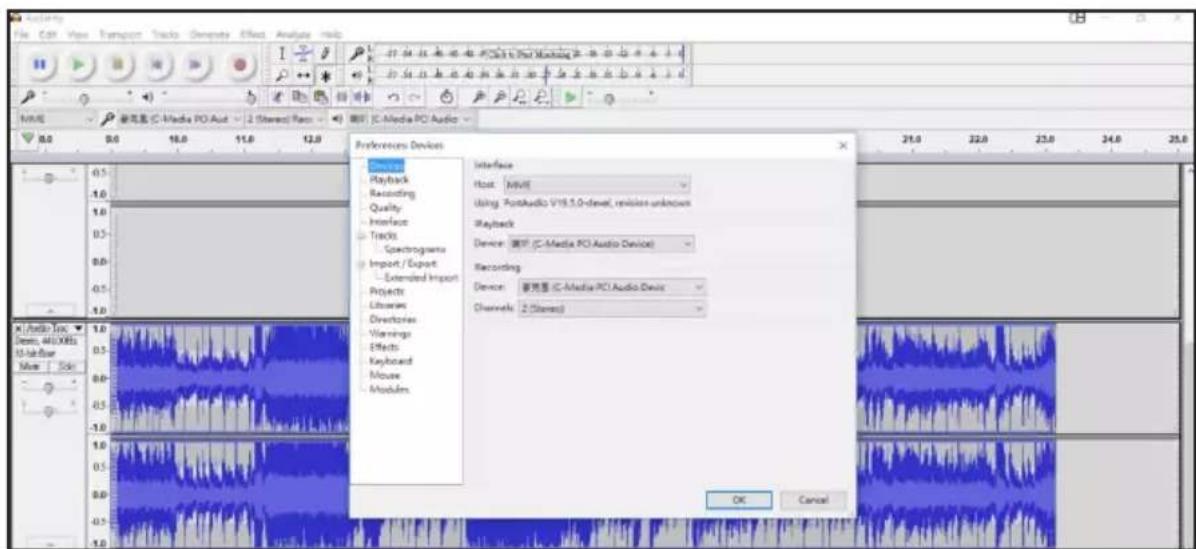
- Open the software. It will display the following screen:
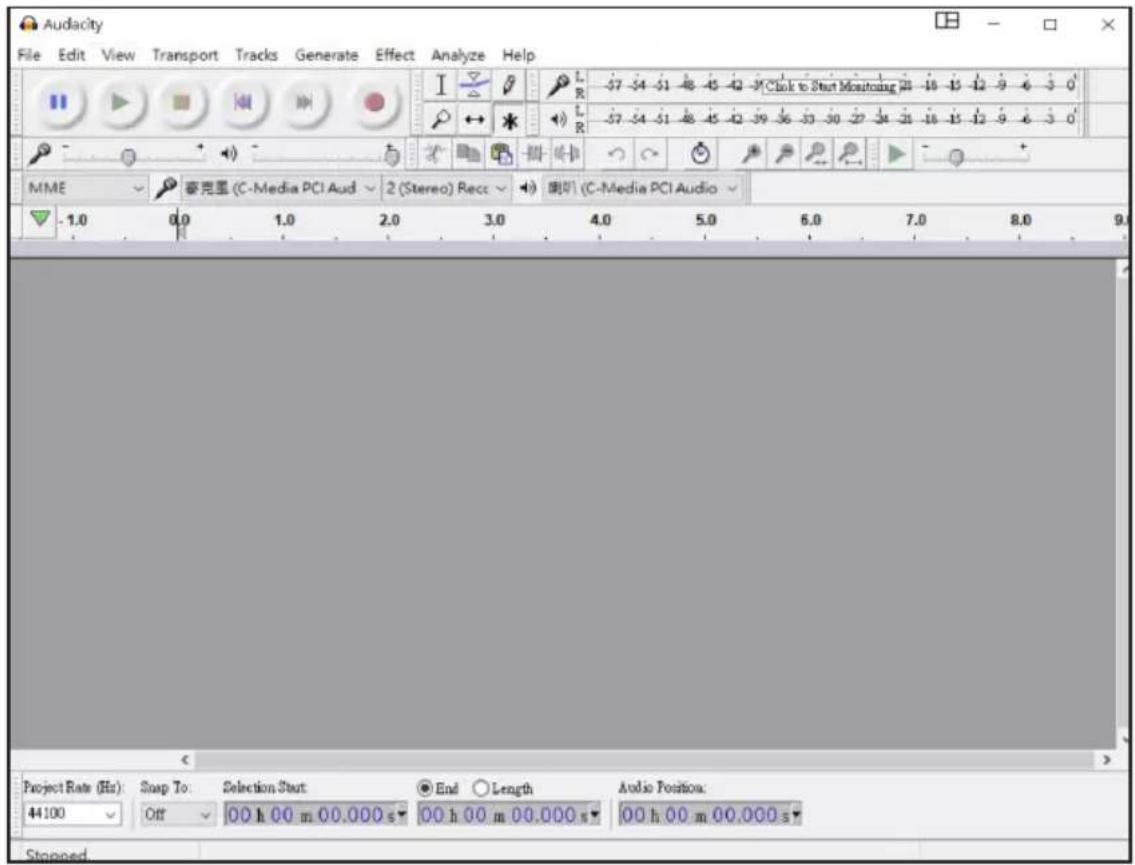
Go to the beginning toolbar at the top of the screen.
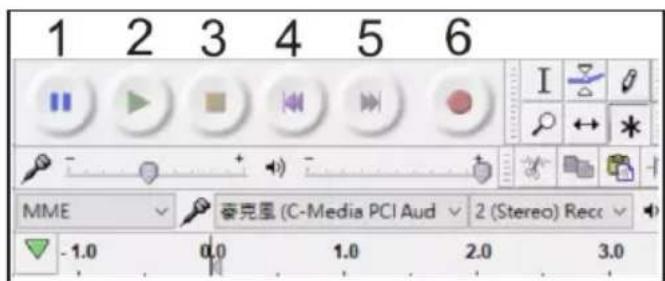
- Pause
- Play
- Stop recording
- Skip to start
- Skip to end
- Record (red colour)
- Adjust the output volume
- Adjust the input volume
On the top of the menu toolbar; Use File, Edit, View, Transport, Tracks, Generate, Effect, Analyze, Help to save, export and edit the music

How to operate Audacity
- Launch Audacity

-
Turn on the turntable and put on a record.
-
Start record playback & press (6) the red record button. The screen displays the recording bar in blue.
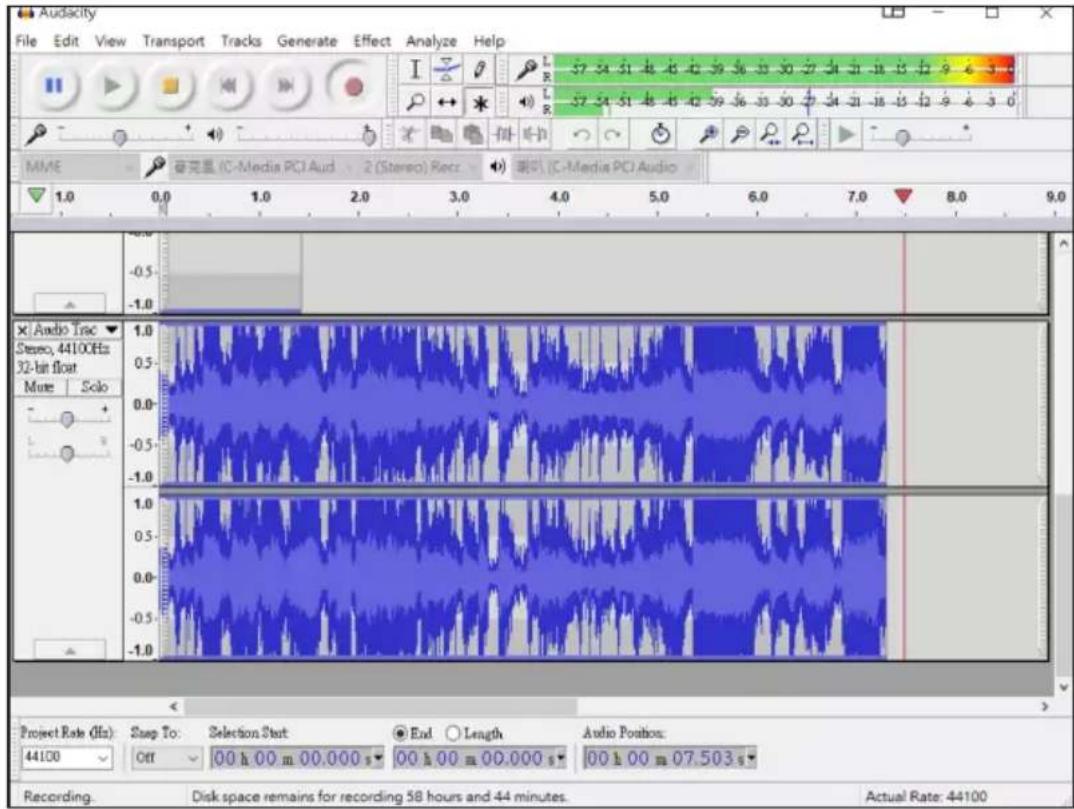
- Press (3) Stop to stop the recording
If the bar does not move, please check again to confirm that the device is properly connected to the computer & set the default recording device again
- Press Play in Audacity to listen to the track recorded by the user.
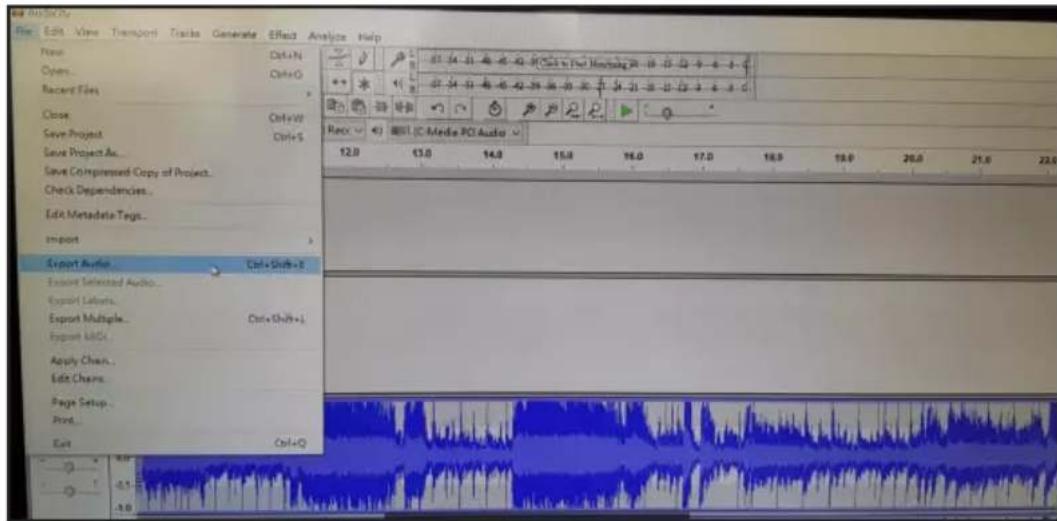
- To save the file, go to "File" and click on "Export as MP3"
For example, the user can save the file in the Music folder. Click on "Record". The music played via the record player is converted to an MP3 file by the PC program. After conversion, the MP3 file can be saved on the PC. The MP3 music file will be stored in the program's menu.
7. The user can also change the settings
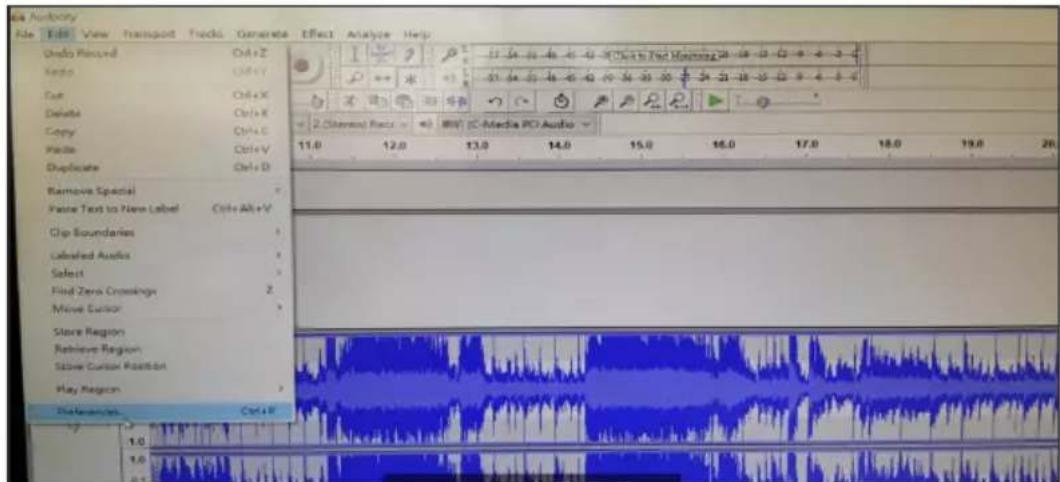
8. The option menu opens, enabling the user to set the preferences.
Important: Do not disconnect the cable while transferring music from the turntable to the computer. This could result in data loss or corrupted files.
REMARK: Audacity is a free open-source program. Bigben has no affiliation with the creators of Audacity and cannot offer any support regarding the software nor be responsible for any effects that it may have on the user's computers. For software-related enquiries, please go to the Audacity website for assistance.
Line Out (R, L): Connection to Amplifier only
The user can connect the unit to an external audio amplifier (cable provided).
Connect the "L" & "R" line out jacks to the Aux In jack of the external audio amplifier.
Turn on the turntable & the external amplifier. Sound will be produced by the external amplifier.
External Speaker Connection Jacks
The user can connect the unit to external speakers (4 ohms) via the speaker output L, R sockets (next to the original TD115 speakers).
REMARK: In order to save energy when the unit has no sound output for 30 minutes, the unit will be switched to stand-by automatically. It can be switched ON by using the function selector again.
SPECIFICATIONS:
Power supply: AC 230V ~ 50Hz
Power consumption: 13W
Remarks:
Don't discard the electrical and electronic appliances in the regular waste disposal.
- Take them to a collection point.
-
Some components in these appliances may be hazardous to health and the environment.
-
If there is an incoming call while TD115 SPS is connected to your cell phone for music playback, it will pause at once when you answer the call and resume after the call ended. (Sometimes it will pause after end the call, it depend on your cell phone.)
- The Bluetooth® word, mark and logo are registered trademarks owned by Bluetooth SIG, Inc. and any use of such marks by Bigben Interactive is under license. Other trademarks and trade names are those of their respective owners.
- Hereby, Bigben Interactive SA, declares that the TD115 SPS device complies with the essential requirements of the directive 1995/5/EC of the European Parliament and of the Council of 9 March 1999 on radio equipment and telecommunications terminal equipment and the mutual recognition of their conformity.
- You can find the information on the plate located at the back of the unit.
To download the full statement, please visit our website: http://www/bigben-interactive.co.uk/support and the section <>.

- Minimum distances around the apparatus for sufficient ventilation at less 1 cm
- The ventilation should not be impeded by covering the ventilation openings with items, such as newspaper, table-cloths, curtains, etc.:
- No naked flame sources, such as lighted candles, should be placed on this apparatus.
- Attention should be drawn to the environmental aspects of battery disposal.
- The use of apparatus in tropical and / or moderate climates.
Manufactured by BIGBEN INTERACTIVE SA
396, Rue de la Voyette
CRT2-FRETIN
CS 90414
59814 LESQUIN Cedex - France
www/bigben.eu
Made in China






REACH


Fabricant:BigbenInteractive FRANCE
396, Rue de la Voyette, C.R.T. 2 Fretin,
CS 90414 - 59814 LESQUIN Cedex
customerservice@bigben-interactive.be
ESPANA, sat@bigbeninteractive.es
ITALIA, support@bigbeninteractive.it
www/bigben.eu
TD115 SPS
TOCADISCOS CON ALTAVOCES INALÁMBRICOS BLUETOOTH CODIFICACION DE PC Y SALIDA DE LÍNEA
customerservice@bigben-interactive.be
ESPANA, sat@bigbeninteractive.es
ITALIA, support@bigbeninteractive.it
www/bigben.eu
TD115 SPS
GIRADISCHI CON ALTOPARLANTI WIRELESS BLUETOOTH CODIFICA PC E LINE OUT
ISTRUZIONI D'USO
PRIMA DI UTILIZZARE L'APPARECCHIO, LEGGERE PER INTERO IL PRESENTE MANUALE E CONSERVARLO PER CONSULTAZIONI FUTURE.
Index
Per iniziare 1
customerservice@bigben-interactive.be
ESPANA, sat@bigbeninteractive.es
ITALIA, support@bigbeninteractive.it
www/bigben.eu
TD115 SPS
GIRA-DISCOS COM
ALTIFALANTES SEM FIOS BLUETOOTH CODIFICAZAO PARA PC E LINE OUT
Instalaro software Audacity
Aceda ao website http://www.audacityteam.org/download/ para instalar o software Audacity no seu computador.
customerservice@bigben-interactive.be
ESPANAsat@bigbeninteractive.es
ITALIA, support@bigbeninteractive.it
www/bigben.eu
TD115 SPS
customerservice@bigben-interactive.be
ESPANA, sat@bigbeninteractive.es
ITALIA, support@bigbeninteractive.it
www/bigben.eu
TD115 SPS
PLATENSPELER MET DRAADLOZE BLUETOOTH-LUIDSPREKERS PC CODERING & LINE OUT
VEILIGHEIDSINSTRUCTIES
LEES DEZE GEBRUKSAANWIJZING VOLLEDIG DOOR ALVORENS DEZE EENHEID TE BEDIENEN, EN BEWAAR DIT BOEKJE VOOR UW ADMINISTRATIE.
Inhoud
Aandeslag1
customerservice@bigben-interactive.be
ESPANA, sat@bigbeninteractive.es
ITALIA, support@bigbeninteractive.it
www/bigben.eu