iGrade - Car seat JANE - Free user manual and instructions
Find the device manual for free iGrade JANE in PDF.

| Product Type | i-Size Convertible Car Seat |
| Brand | Jane |
| Model | iGrade |
| Certification | i-Size (ECE R129/03) |
| Child Height | 40 to 150 cm (from birth to approx. 12 years) |
| Maximum Weight (harness mode) | 18 kg (up to 105 cm) |
| Maximum Weight (booster mode) | Up to 150 cm with vehicle seat belt |
| Installation Method | ISOFIX + support leg (up to 105 cm); ISOFIX or seat belt (booster) |
| Rotation | 360° with 4 lockable positions |
| Recline | 5 positions |
| Travel Positions | Rear-facing (40-105 cm), Forward-facing (76-105 cm), Booster (100-150 cm) |
| Restraint System | 5-point harness, stowable |
| Reducers / Inserts | Reducing cushion (40-75 cm), backrest wedge and head cushion |
| Side Protection | Yes (headrest and shell) |
| Adjustable Headrest | Yes, height adjustable |
| Support Leg | Stowable for booster mode |
| Storage Compartment | For manual and harness buckle |
| Maintenance | Clean with soft cloth and soapy water; do not use solvents |
| Warranty | Against manufacturing defects (see manual) |
| Package Contents | Car seat, ISOFIX guides, manual |
Frequently Asked Questions - iGrade JANE
User questions about iGrade JANE
0 question about this device. Answer the ones you know or ask your own.
Ask a new question about this device
Download the instructions for your Car seat in PDF format for free! Find your manual iGrade - JANE and take your electronic device back in hand. On this page are published all the documents necessary for the use of your device. iGrade by JANE.
USER MANUAL iGrade JANE
iGRADE
图 1-30
注:
A1-476×240=0.51
- 用可转换为USB或USB的输入框
11
√WEDD FOR THE YEAR
10.
2.000-5.000
Architectural Design and Design
5
Note: The following data for the year 2018 was reported in the Table 3.
iGRADE

flowchart
graph TD
    A["Manual Mode 1"] --> B["Car Control"]
    C["Manual Mode 2"] --> D["Battery"]
    E["Manual Mode 3"] --> F["Switch"]
    G["Manual Mode 4"] --> H["Motor"]
    I["Manual Mode 5"] --> J["Control Unit"]
    K["Manual Mode 6"] --> L["Reactor"]
    M["Manual Mode 7"] --> N["Control Unit"]
    O["Manual Mode 8"] --> P["Reactor"]
    Q["Manual Mode 9"] --> R["Control Unit"]
    S["Manual Mode 10"] --> T["Reactor"]
    U["Manual Mode 11"] --> V["Control Unit"]
    W["Manual Mode 12"] --> X["Reactor"]
    Y["Manual Mode 13"] --> Z["Control Unit"]
    AA["Manual Mode 14"] --> AB["Reactor"]
    AC["Manual Mode 15"] --> AD["Control Unit"]
    AE["Manual Mode 16"] --> AF["Reactor"]
    AG["Manual Mode 17"] --> AH["Control Unit"]
    AI["Manual Mode 18"] --> AJ["Reactor"]
    AK["Manual Mode 19"] --> AL["Control Unit"]
ESPAÑOL
03
ENGLISH
21
FRANÇAIS
39
DEUTSCH
57
ITALIANO
75
PORTUGUÊS
93
POLSKI
111
SLOVENČINA
129
ES 2
\_ ESPAÑOL
\_PARTES DE LA SILLA iGRADE
natural_image
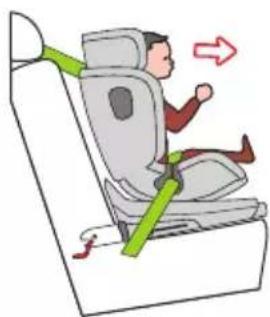
Illustration of a person sitting inside a car seat, with a red arrow indicating leftward motion (no text or symbols)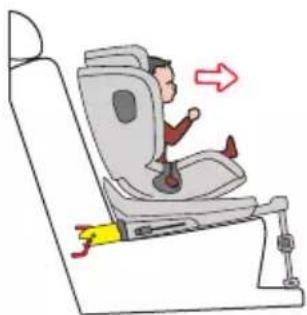
natural_image
Illustration of a person sitting in a car seat with a red arrow indicating motion (no text or symbols)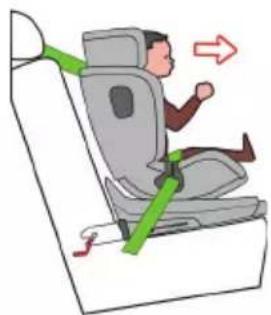
natural_image
Illustration of a person sitting in a car seat with green safety belt, showing no text or symbolsde 40 a 105 cm
22 GENERAL INSTRUCTIONS
25_ iGRADE SAFETY SEAT PARTS
26 MAIN CONFIGURATIONS FOR USE:
28 FEATURES OF YOUR iGRADE SAFETY SEAT
29_ 1- Use for children from 40 to 105 cm
Setting up the iGRADE for use from 40 to 105 cm
Installing the safety seat in the car
Changing the direction of the seat
Using the cushion inserts de (40 a 75 cm)
Fastening the child securely in the safety seat
Adjusting the height of the integral straps
32_ 2- Use for children from 100 to 150 cm using the car seat belt
Changing the safety seat into a booster seat with backrest
Concealing the integral straps
Installing the booster seat with backrest without the ISOFIX anchors
Installing the booster seat with backrest with the ISOFIX anchors
35_ 3- Reclining the seat
37_ GUARANTEE INFORMATION
GENERAL INSTRUCTIONS
iGRADE from JANÉ is a safety seat designed to protect the child in the car from birth up to 150 cm in height (approximately 12 years old). The seat has passed the rigorous safety tests of European directive ECE R129/03 also known as “i-size”.
The iGRADE safety seat has been approved as “i-size”. Therefore, it is completely compatible with the seats in the car that the vehicle manufacturer defines as “i-size”. Consult your vehicle manual.
For vehicles that do not have i-size seats, it is very likely that the iGRADE safety seat can be installed on some of the seats, you will find a compatibility list for the iGRADE seat in the “car fitting” of the following website: www.janeworld.com
A high percentage of safety seat users do not install them correctly. Understanding the instruction manuals and following them correctly, is as important for safety as the actual seat. Therefore:
- Read these instructions carefully before using the iGRADE safety seat for the first time.
- Make sure that everyone who is going to use the seat at any time is also familiar with the correct procedure for installation and use.
- Keep the instructions in the compartment found on the back of the seat, and consult them if you have any questions. You can also find the instructions on our website: www.janeworld.com or you can check them from a Smartphone by scanning the QR code found on the seat itself.
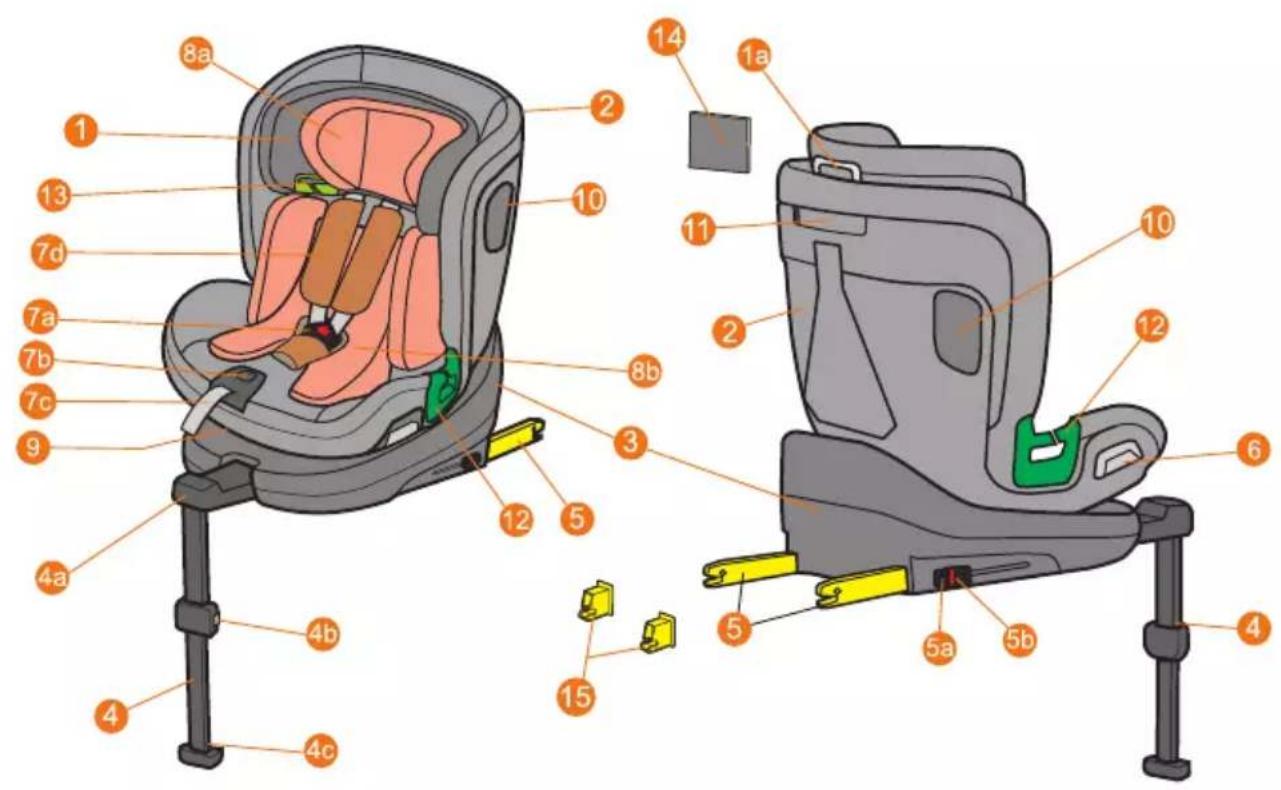
\_ iGRADE SAFETY SEAT PARTS
1 Headrest
1a Headrest adjustment ring
2 Seat
3 Base
4 Paw
4a Sliding leg support
4b Leg height adjustment
4c Foot with leg status indicator
5 ISOfix anchor
5a ISOfix button
5b ISOfix status indicator
6 Seat swivel release (40 to 105 cm)
7 Harness
7a Buckle
7b Central adjusting device
7c Tightener strap
7d Shoulder padding
8 Reducer cushion
8a Reducer head cushion (up to 75cm)
8b Backrest wedge (up to 75cm)
9 Recline lever
10 Side impact protection
11 Instruction compartment
12 Car lap belt guide (100 to 150 cm)
13 Shoulder belt guide (100 to 150 cm)
14 Instruction manual
15 ISOfix guides
\_ MAIN CONFIGURATIONS FOR USE:
| iGRADE safety seatRear facing | iGRADE safety seatForward facing | iGRADE booster seatwith backrest |
 |  |  |
| from 40 to 105 cmand maximum weight of 18 Kg | from 76 to 105 cmand maximum weight of 18 Kg | from 100 to 150 cm |
| Installation of theiGRADE seat withISOFIX anchors andanti-rotation leg | Installation of theiGRADE seat withISOFIX anchors andanti-rotation leg | Secured with the vehicle seat beltor can be fastened withthe ISOFIX anchorsWithout anti-rotation leg |
| The child is held secure withthe 5-point harness fittedin the safety seat | The child is held secure withthe 5-point harness fittedin the safety seat | The child is held securewith the vehicle3-point seat belt |
\_PARTS OF YOUR CAR
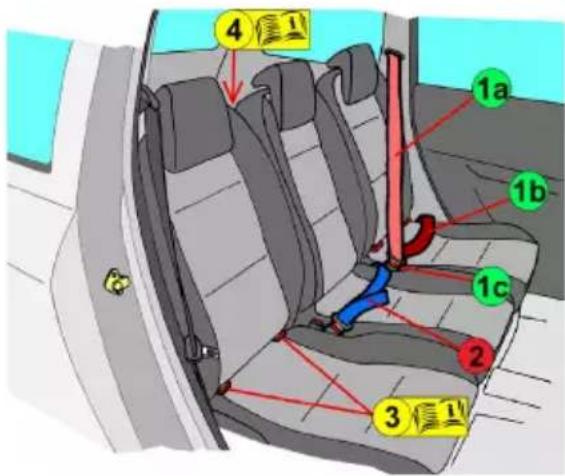
1 Three-point seat belt. It consists of two different parts:
1a Shoulder part, which goes from the buckle across the chest and the shoulder.
1b Lap part, which goes over the legs.
1c Buckle.
2 Two-point seat belt.
3 ISOFIX anchors. The anchors are located at the intersection between the seat area and the backrest. Not all vehicle are fitted with these anchor points, check your car manual for more information.
4 Rings for the anti-rotation or top tether strap, not used on the iGRADE safety seat.
\_ FEATURES OF YOUR iGRADE SAFETY SEAT
The iGRADE safety seat has been designed using the latest advances in safety and comfort:
- IGRADE must be installed with ISOFIX anchors up to 105cm high. It has a leg as an anti-rotation system.
- The height of the shoulder straps is adjusted without having to remove the straps. This action is linked to the headrest that protects the child better in the event of a side impact while supporting the head.
- The seat can be rotated 360^ degrees to install it in the rear or forward facing position and to turn it round to the car door to get the child in and out of the seat more easily.
- When changing the safety seat to a booster seat with backrest (100 to 150 cm), it is not necessary to remove the integral seat belts, they can simply be concealed. This prevents any fitting errors that could affect safety. At this stage, the leg is completely concealed in the base.
- The inside of the seat is covered with shock absorbing material.
- It is fitted with adjustable cushion inserts for smaller babies (from 40 to 75 cm).
- The seat has ventilation windows.
- The seat can be reclined in 5 different positions.
\_ 1 Use for children from 40 to 105 cm
Setting up the iGRADE for use from 40 to 105 cm
- To save space, in its original packaging, the iGRADE safety seat comes set up in the rearward facing position and with the anti-rotation leg folded.
- Unfold the anti-rotation leg and pull it forward. (1a) will now be ready for use.
\_ Installing the safety seat in the car
- Pull the two ISOFIX anchors (5) fully out by pressing the buttons on each anchor (5a) and sliding them out. (1b)
- In some cars, the ISOFIX anchors are difficult to access or are hidden between the vehicle seat foam. With the chair we provide you with some guides (15) to facilitate its location, insert them before the next step.
- Guide the anchors towards the axles in your car and press until both sides both sides are locked, two green signals displayed on both buttons (5b) or two green lights on the control panel will indicate that they are locked. If one or both the signals are red, try again. (1c)
- Press the base (3) against the backrest of the vehicle seat until it is held firmly in place. (1d)
- Release the leg height lock by pressing the buttons (4a). Extend the leg until it touches the floor of the vehicle. Lift the safety seat until the buttons (4a) lock again, the green signal will be displayed on the base of the leg (4c) or on the control panel (4b). (1e)
\_ Changing the direction of the safety seat
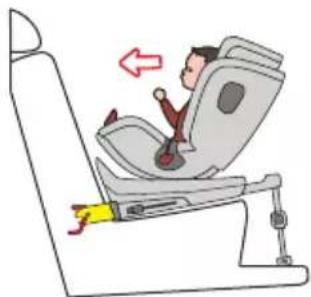
The iGRADE safety seat can be used in the rear facing position from birth to 105 cm in height, or in the forward facing position from 15 months up to 150 cm. the safety seat can rotate 360° degrees.
It can be locked into 4 different positions:
Forward facing and rearward facing (the only positions suitable for travelling in) and 2 loading positions
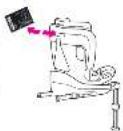
To release the swivel feature, pull the lever on the base (6) and turn the seat to the required locking position. (2a)
NOTE: In vehicle without rear seat doors, the swivel is limited for reasons of space between the seat and the sides.
Using the cushion insert.
The iGRADE chair comes equipped with cushions to reduce the cabin when the baby It is small (40 to 75cm)
\_ Fastening the child securely in the safety seat (from 40 to 105 cm)
- Fit the cushion insert (8) in place if necessary (from 40 to 75 cm).
- Loosen the integral belts by pulling the straps (7) above the buckle while pressing the tightener button (7b). (3a)
-
Undo the buckle (7a). (3b)
-
Place the child in the seat making sure that they are sitting with their back straight against the backrest of the seat. Bring the upper ends of the buckle together. Insert them into the lock and press until you hear them click into place. (3c)
- Pull the tightener strap (7b). Correct belt tension is very important for the child's safety, do not leave the belts slack. (3d)
\_ Adjusting the height of the integral straps
The height of the shoulder strap should be adjusted as the child grows.
Check the correct position of the shoulder straps with the child correctly positioned in the seat. The straps should be slightly above the child's shoulders. (4e)
To change the height of the straps, follow the steps below:
- Pull the ring on the top part of the headrest (1a), this will unlock the headrest position. Move the headrest (1) to the right position for the child and release the lever. Move the headrest until you hear the locking click. Pull the headrest to make sure that it is locked in place. (4b)
NOTE: Adjust this height as the child grows
Removing the seat when installed using ISOFIX:
- Release the ISOFIX anchors by pressing both ISOFIX buttons (5a). The signals on the ISOFIX buttons (5b) will turn red.
- Remove the seat. Press the ISOFIX anchors (5) to store them inside the base.
\_ 2 Use for children from 100 to 150 cm using the car seat belt
\_Changing the safety seat into a booster seat with backrest
To switch the iGRADE safety seat into a booster seat with backrest, the seat must be in the forward facing position. To complete the following steps the seat must be uninstalled from the car.
- Rotate the leg by about 45 degrees. (5a)
- Press the leg support towards the base until it is fully inserted. (5b)
- Adjust the length of the leg to the shortest position by releasing the leg lock using the buttons (4b).
- Rotate the leg towards the base until it fits into the slot. There is a lock that prevents it from coming out. (5c)
- Fully loosen the belts by pressing the lock. (7b) (5d)
-
Remove the fabric protector cover from the buckle. Lift up the backrest skirt and remove the buckle from its slot. Refasten the belts to the buckle.
-
There is a storage compartment for the buckle in the base of the seat. Open it and put the fully fastened buckle inside. (5e)
- The buckle tabs can be hidden inside some bags that you will find in the upholstery (5f)
- Close the compartment and put the backrest skirt back in place.
Installing the booster seat with backrest without the ISOFIX anchors
If you decide to install the iGRADE booster seat with backrest without the ISOFIX anchors, simply place the booster seat on the vehicle seat and pass the seat belt through the bet guides on the sides of the seat (12) and the one on the side of the headrest (13). These guides are marked green.
WARNING: When the booster seat with backrest is not in use, it still needs to be fastened with the vehicle 3-point seat belt. In the event of sudden braking or an accident, an unrestrained booster seat can get flung about and cause injury to other passengers.
Installing the booster seat with backrest with the ISOFIX anchors
The booster seat with backrest can be fastened with the ISOFIX anchors, which gives the seat more lateral stability.
To install the booster seat follow the steps below:
- Pull the two ISOFIX anchors (5) out fully by pressing the buttons on each anchor (5a) and sliding then out. (6a)
- In some vehicles, the ISOFIX anchors are difficult to access or they are hidden between the foam sections of the vehicle seat. With the seat we have provided some guides (15) making it easier to locate them, insert them before the following step.
- Guide the anchors towards the axles in your vehicle and press until both sides are locked into place, two green signals on both buttons (5b) or two green lights on the control panel will show that they are securely anchored. If one or both of the signals are red, try again. (6b)
- Press the base (3) against the backrest of the vehicle until it is firmly in place.
\_ Adjusting the height of the headrest
The height of the headrest is adjusted using the handle found on the top of the headrest. To release the lock pull the ring upwards, when you release it, the headrest will lock into the nearest position
- Pass the lower lap part or the shoulder part of the vehicle seat belt through the belt guide on the side of the headrest (13).
- Position the child in the booster seat, and adjust the height of the headrest using the handle (1a). The seat belt should be slightly above the child's shoulder. (7a)
IMPORTANT: Adjust this height as the child grows
Placing the child in the seat
- Position the child in the booster seat and pass the vehicle shoulder belt through the guide on the side of the headrest (13). Pass the seat belt over the child and fasten the buckle. (7b)
- Lastly, pass the seat belts through the slots under both armrests. (13). (7c)
When you get the child out of the booster seat it is not necessary to take the seat belt out of the guide at the side of the headrest (13), this makes it easier to fasten the child in the next time the booster seat is used.
IMPORTANT : Even when the booster seat is not in use it should be secured with the seat belt; in the event of sudden braking or an accident it could get flung about and injure the other occupants of the vehicle.
Removing the seat when it has been installed with ISOFIX:
- Release the ISOFIX anchors by pulling both ISOFIX buttons (5). The signals on the ISOFIX buttons (5b) will turn red.
- Remove the seat. Press the ISOFIX anchors (5) to store them inside the base.
\_ 3 Reclining the seat
The iGRADE seat is reclined using a lever found underneath the feet (9). It has 5 positions. This action, when the seat is used as a booster seat with backrest, requires the vehicle 3-point seat belt to be adjusted, in this case it should be carried out while the vehicle is stationary.
- To recline the seat, pull the lever forwards and slide the seat to the required position. (8a)
Removing the seat when it has been installed with ISOFIX:
- Release the ISOFIX anchors by pulling both ISOFIX buttons (5). The signals on the ISOFIX buttons (5b) will turn red.
- Remove the seat. Press the ISOFIX anchors (5) to store them inside the base.
\_ INFORMATION ABOUT THE GUARANTEE
- This item is guaranteed against manufacturing defects as stipulated in the legal Directives and/or regulations in force on guarantees for consumer goods applicable to the European Union and those of the country in which it is marketed.
- It is essential to present the purchase invoice or receipt in order to process the guarantee through the seller of the item or, failing that, through the manufacturer.
- The guarantee excludes anomalies or faults caused by misuse, non-compliance with the safety regulations and instructions for use and maintenance provided, or due to wear and tear caused by normal use and regular handling of the item.
- The label containing the serial number of your model must not be torn off under any circumstances as it contains information relevant to the guarantee.
\_ FRANÇAIS
\_PARTIES DU SIÈGE AUTO iGRADE
INFORMATIONS RELATIVES À LA GARANTIE
\_ TEILE DES KINDERSITZES iGRADE
\_ INFORMATIONEN ZUR GARANTIE
\_PARTI DEL SEGGIOLINO IGRADE
natural_image
Illustration of a person sitting in a car seat, showing seatbelt and seatbelt mechanism (no text or symbols)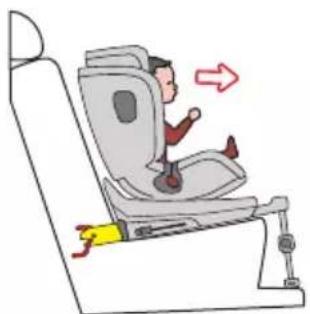
natural_image
Illustration of a person sitting in a car seat with a red arrow indicating motion (no text or symbols)
natural_image
Illustration of a child sitting in a car seat with a green belt, showing a red arrow indicating motion (no text or symbols)da 40 a 105 cm
PARTES DA CADEIRA IGRADE
natural_image
Illustration of a person sitting in a car seat with a red arrow indicating left motion (no text or symbols)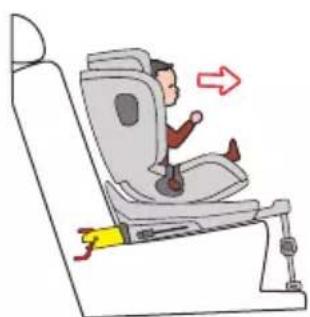
natural_image
Illustration of a person sitting in a car seat with a red arrow indicating motion (no text or symbols)