
Oslo 600 DAB - Car radio BLAUPUNKT - Free user manual and instructions
Find the device manual for free Oslo 600 DAB BLAUPUNKT in PDF.
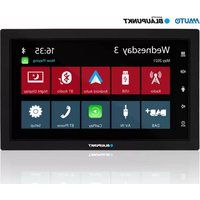


| Product type | Car radio with DAB+ receiver |
| Brand | Blaupunkt |
| Model | Oslo 600 DAB |
| Power supply | 12 V DC (vehicle) |
| Main functions | FM/AM radio, DAB/DAB+, Bluetooth, USB, Apple CarPlay, Android Auto, touch screen, remote control |
| Screen | Capacitive touch |
| Supported audio formats | MP3, OGG, FLAC, WMA, WAV |
| Supported video formats | MKV, AVI |
| Inputs | USB (rear), AV-IN, external microphone |
| Outputs | Subwoofer (SUB-OUT), external amplifier (P.CONT), antenna |
| Bluetooth | Compatible HFP, A2DP, AVRCP |
| Smartphone connectivity | Wired Apple CarPlay, Wired Android Auto |
| Safety | Video cut-off while driving (parking brake required), volume limited for road safety |
| Maintenance and cleaning | Dry or slightly damp cloth; avoid solvents and abrasive products |
| Installation | Complies with DIN standard, ACC and battery connections required |
| Box contents | Car radio, remote control, external Bluetooth microphone, mounting frame, cables, manual |
Frequently Asked Questions - Oslo 600 DAB BLAUPUNKT
User questions about Oslo 600 DAB BLAUPUNKT
0 question about this device. Answer the ones you know or ask your own.
Ask a new question about this device
Download the instructions for your Car radio in PDF format for free! Find your manual Oslo 600 DAB - BLAUPUNKT and take your electronic device back in hand. On this page are published all the documents necessary for the use of your device. Oslo 600 DAB by BLAUPUNKT.
USER MANUAL Oslo 600 DAB BLAUPUNKT

powered by
BLAUPUNKT
Enjoy it.
Controls
Attention:
Phone configuration
Before starting:
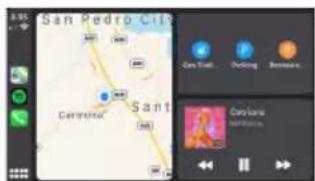
Apple Maps
M5.0 x 6.0mm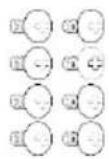
M5.0 x 5.0mm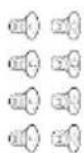
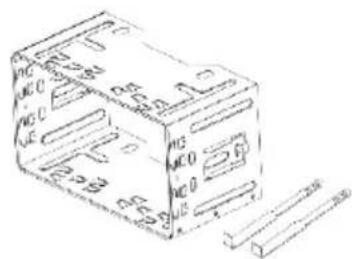
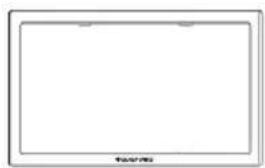
Mounting instructions
Connection diagram
Connections:
Controls Remote Control
Safety notes
Symbols used
Road safety
General safety notes
Use as directed
Cleaning notes
Disposal notes
Scope of delivery
Placing the device in operation
Switching on/off
Volume
Operation
Touchscreen
Settings in menus
Main menu
Opening main menu
The main menu display
Sound settings
The equalizer display 1
The equalizer display 2
System settings
Opening system settings
The Settings display
External devices and data carriers
Basic information
USB data carrier
Bluetooth sources
Analogue Radio (FM, AM)
Starting radio playback
Radio display
Digital Radio (DAB/DAB+)
Starting DAB playback
DAB display
Media playback (USB, AV-IN, BT Audio)
Starting media playback
Media display
Media browser for media type and folder
Calling
Opening the phone
The keyboard display
The list of calls
Phone book
Incoming/outgoing call
SWC Input Operation
How to use CarPlay®
Requirements
Phone Setup
Device Setup
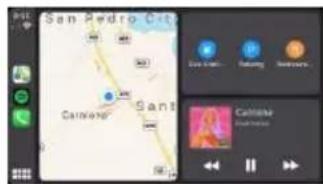
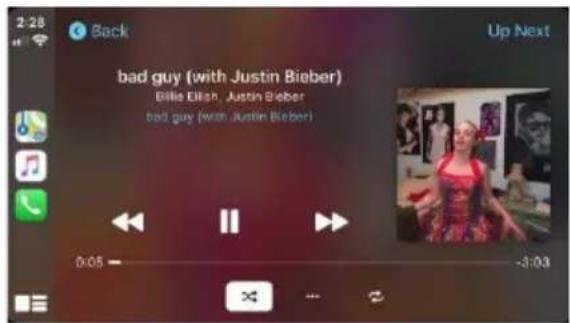
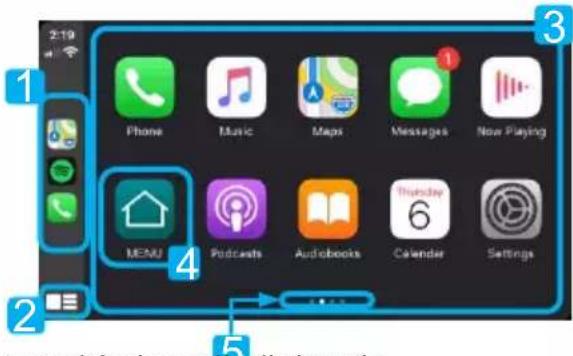
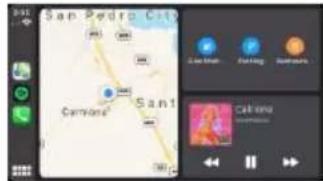
Familiar home screen
Using Siri®
40 Apple Music
40 Apple Maps
41 How to use Android Auto®
41 Basic Requirements
41 Phone Setup
41 Device Setup
41 Overview
41 Google Assistant
42 Music
43 Accessing Map
44 Installation guide
45 Connection diagram
46 Troubleshooting
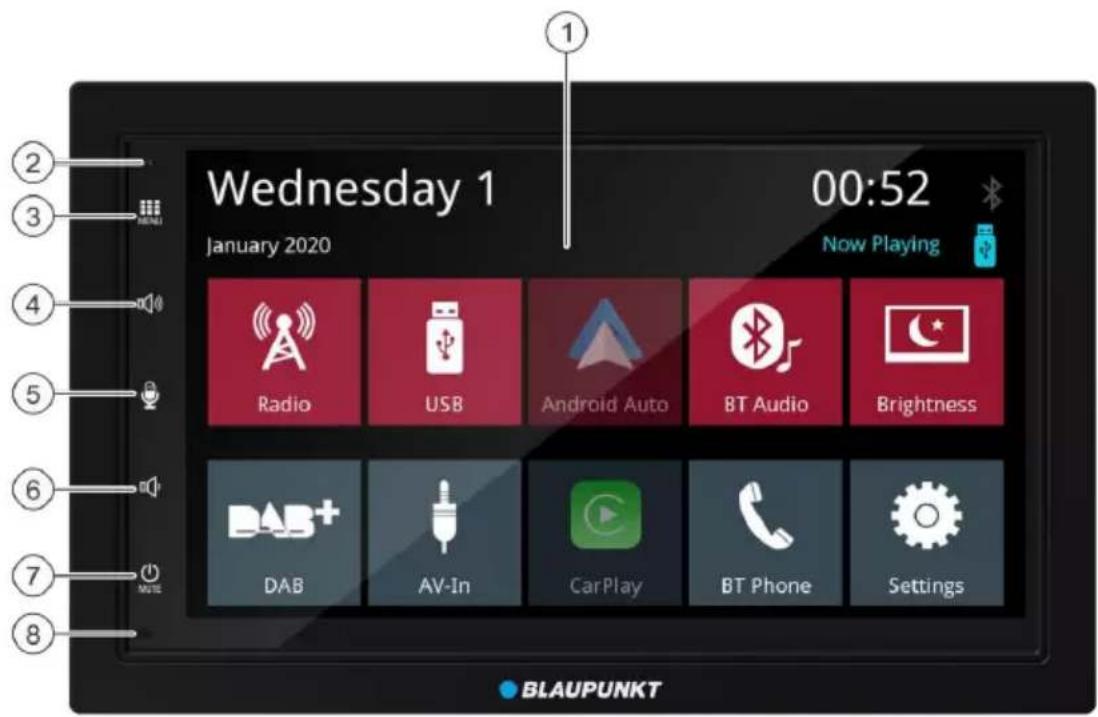
- Touchscreen user interface
- Reset button
Restoring factory settings
Note: All personal settings will be deleted!
- Button (MENU)
- Volume Up button
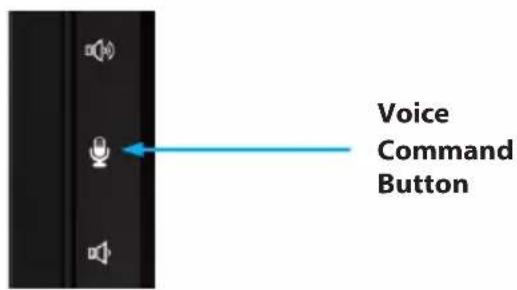
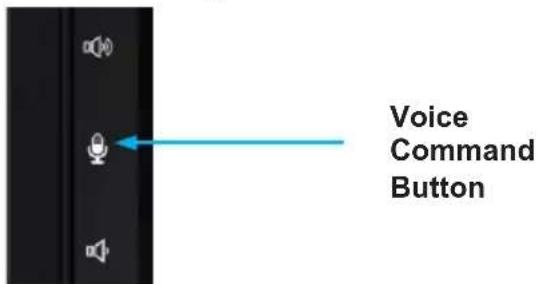
- Voice command button (for phone)
- Volume Down button
- Power button/Mute:
Short press: Mutes audio source
Long press: Switches off device
- Internal microphone
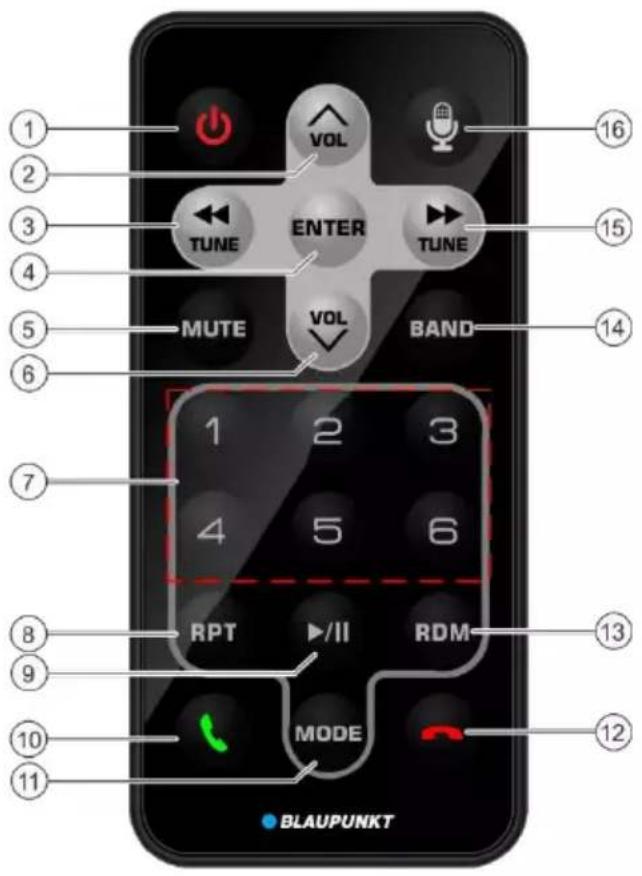
- POWER button Switching the device on/off
- Volume Up
- Tune/Track Down
- Enter
- Mute
- Volume Down
- Preset 1-6
- Repeat
- Play/Pause
- Talk
- MODE
- End Call
- Random
- BAND
- Tune/Track Up
- Voice Activation Button (for Phone)
Safety notes
The car sound system was manufactured according to the state of the art and established safety guidelines.
Even so, dangers may occur if you do not observe the safety notes in these instructions.
- Read these instructions carefully and completely before using the car sound system.
- Keep the instructions in a location where they are always accessible to all users. Always pass on the car sound system to third parties together with these instructions.
In addition, observe the instructions of the devices used in conjunction with this car sound system.
Symbols used
These instructions employ the following symbols:

DANGER!
Warns about injuries

DANGER!
Warns about high volume

The CE mark confirms compliance with EU directives.
Identifies a sequencing step
• Identifies a listing
Road safety
Observe the following notes about road safety:

DANGER!
Risk of road safety by using the device while driving.
The use of device functions while driving may divert your attention from the traffic situation and lead to serious accidents!
Particularly the use of the following functions significantly impacts your attention as the operator of the vehicle:
- Video playback • Use of a connected smartphone. Refrain from these functions and all additional functions that will divert your attention from the traffic situation and from operating the vehicle while driving.
To use these functions, stop at a suitable location and operate your device while the vehicle is standing.
- Use your device in such a way that you can always safely control your vehicle. In case of doubt, stop at a suitable location and operate your device while the vehicle is standing. As the driver, you may not use the applications that will distract you from traffic (depending on the scope of functions of the device, e.g., viewing videos, entering a destination).
- Follow the driving recommendations during the route guidance only if you are not violating any traffic regulations! Traffic signs and traffic regulations have always priority over driving recommendations.
- Always listen at a moderate volume to protect your hearing and to be able to hear acoustic warning signals (e.g., police sirens). During mute phases (e.g., when changing the audio source), changing the volume is not audible. Do not increase the volume during this mute phase.
General safety notes
Observe the following note to protect yourself against injuries:
Do not modify or open the device. The device contains a Class 1 laser that can cause injuries to your eyes.
Use as directed
This car sound system is intended for installation and operation in a vehicle with 12 V vehicle system voltage and must be installed in a DIN slot. Observe the output limits of the device. Repairs and installation, if necessary, should be performed by a specialist.
Installation instructions
You may only install the car sound system yourself if you are experienced in installing car sound systems and are very familiar with the electrical system of the vehicle. For this purpose, observe the connection diagram at the end of these instructions. Installing the device must not obstruct or block the function of any airbags, other safety devices or controls.
Declaration of conformity
The Blaupunkt Competence Center Car Multimedia - Evo Sales GmbH declares that the device complies with the basic requirements and the other relevant regulations of the directive 2014/53/EU.
The declaration of conformity can be found on the Internet under www.blaupunkt.com.
Cleaning notes
Solvents, cleaning and scouring agents as well as dashboard spray and plastics care product may contain ingredients that will damage the surface of the car sound system.
Use only a dry or slightly moistened cloth for cleaning the car sound system.
Disposal notes

Do not dispose of your old unit in the household trash!
Use the return and collection systems available to dispose of the old device, the remote control and exhausted batteries.
Scope of delivery
The scope of delivery includes:
- Car sound system
- Remote control • External Bluetooth microphone
- Operating manual
- Support frame
- Small parts set • Installation material
- Connecting cable(s)
Operation
Touchscreen
Important note:
Do not use any pointed or hard objects, such as ball point pens or fountain pens, to operate the touch-screen.
The device features a capacitive touchscreen that provides a remote control (see the section "Controls" at the beginning of these instructions) and allows operating the device.
Tapping
To activate a control, e.g. a button, a slight touching of the display surface is sufficient. You do not have to exert any pressure on the display surface.
- Short tap: A short tap on the display surface is sufficient for activating most of the controls.
- Long tap: Some functions require a long tap. Rest your fingertip on the display surface for approximately 1 second.
Swiping/scrolling
Some functions require swiping across the display surface, e.g.
- scrolling in lists
- adjusting sliders
Tap on the display surface and rest your finger on the surface. Next, move your finger over the surface.
Main menu
Opening main menu
Press the [MEM] button
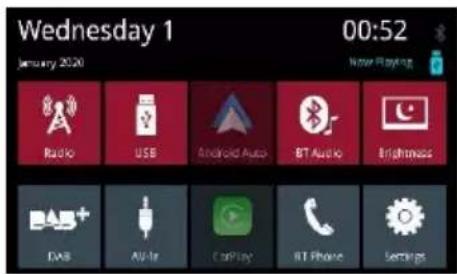
The main menu display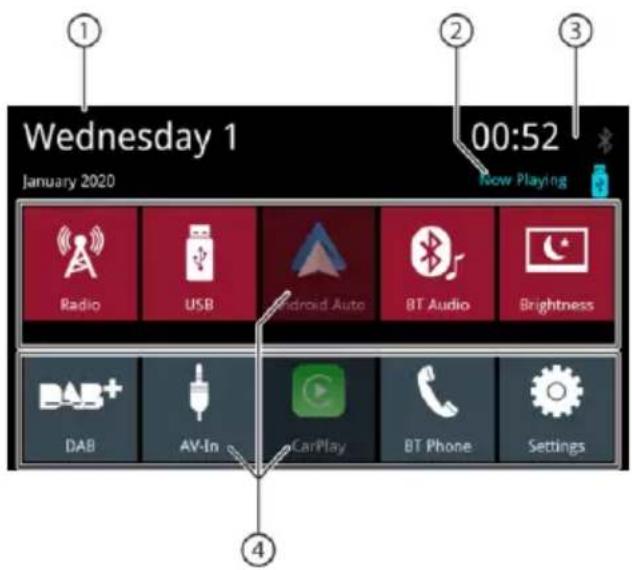
The main menu features the following areas and displays:
- Date
- Playing audio/video source
- Time/Bluetooth™ status
- Buttons for audio sources, tap on a button to start the audio source.
In main menu you can do following actions:
- Select audio sources Radio, DAB, USB, BT Audio, AV-In (see corresponding chapters in manual)
- Select Phone to make a call (see corresponding chapters in manual)
- Select Apple Car Play® or Android Auto® (this needs compatible phone connected to USB, see corresponding chapters in manual)
- Change display brightness (tab button briefly) or switch display off (tab button > 1 second), touch again to enable display
- Open settings (see corresponding chapters in manual)
- Select "now playing" to open playing audio source
Changing to the previous screen or the higher-level menu
Touch the [←] button. or: Touch the [<] button.
Settings in menus
Activating/deactivating options
To activate or deactivate options, tap on the corresponding menu entry or symbol.
Activated: Deactivated:
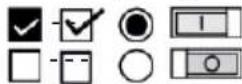
Control
Certain settings can be made using a slider.
Tap on the desired point of the slider or swipe along the slider.
Additional settings
Some options offer additional settings.
Touch the [⚙️] button to open the settings menu.
Sound settings
The equalizer display 1
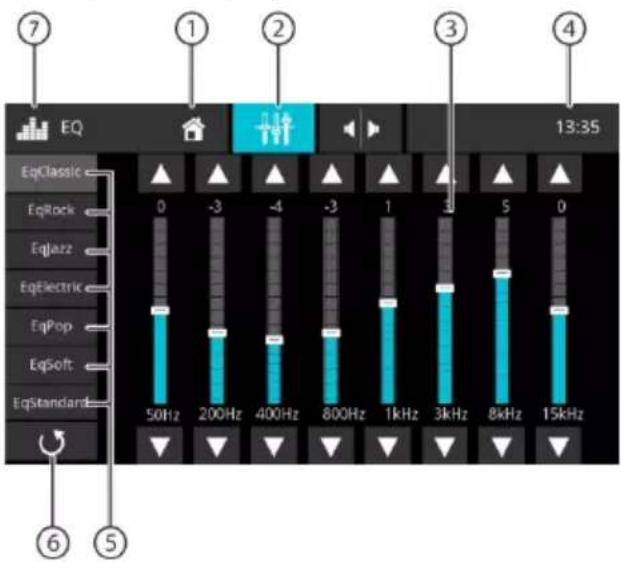
The equalizer display 1 features the following functions:
- Home button, return to main menu
- Change to the equalizer display 2 (see the following section)
- Frequency band display, tab to change
- Time/ Bluetooth TM status
- Equalizer presets: Tap on a preset to select it.
- Not available
- EQ Button, return to main menu
Note:
If you select and change an equalizer preset, it will automatically become "custom" setting. Previous custom setting will be overwritten.
The original equalizer preset remains unchanged.
The equalizer display 2
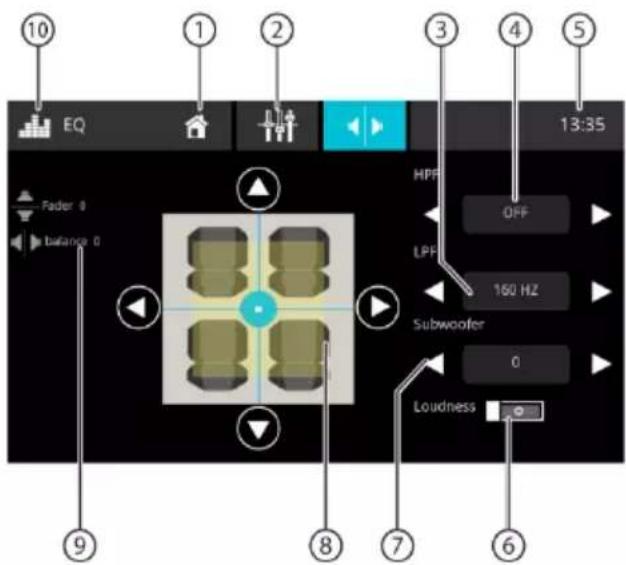
The equalizer display 2 features the following functions:
- Home button, return to main menu
- Change to the equalizer display 1 (see previous section)
- Set the LPF level with the buttons [ ] and [ ]
- Set the HPF level with the buttons [ ] and [ ]
- Time/ Bluetooth TM status
- Set the Loudness function on and off
- Set the Subwoofer level with the buttons [◀] and [▶]
Note: Subwoofer must be enabled in audio settings to change subwoofer level
- Adjusting balance and fader:
Shift the volume distribution with the buttons [◀] and [▶] or [▲] and [▼] (fader) or:
Tap on a point in the displayed passenger compartment to directly adjust the corresponding volume distribution.
- Current balance and fader value
- EQ button, return to main menu
System settings
Opening system settings
In the main menu, select the Settings button (see the chapter "Main Menu")
The Settings display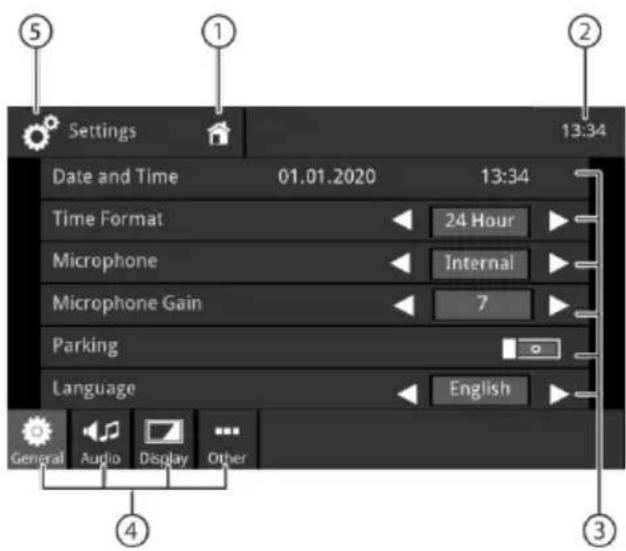
Note:
Scroll through the list, if necessary, to access the desired setting.
The settings display features the following functions and displays:
- Home button, return to main menu
- Time/Bluetooth™ status
- Submenu items
- Menu items
- Settings Button, Return to main menu
The Settings menu features the following menu and submenu items:
• General: Performing general device settings: - Setting the Date and Time - Setting the Time Format - Setting the Microphone - Setting the Microphone Gain - Setting the Parking - Setting the Language - Setting key sound - Setting SWC (steering wheel control)
• Audio: Performing audio settings:
Setting the Equalizer - Setting the Subwoofer/Subwoofer Gain - Setting source volumes
• Display: Making display settings:
- Adjusting Brightness
- Setting Dimmer Mode (note: mode "auto" needs car lights input connected)
• Other: Making Other settings: - Displaying information about the current software of the device - Setting the Factory Default
External devices and data carriers Basic information
- USB data carriers • MP3 files, movies and images • Format/file system: FAT/FAT32
- Recognizable formats: .mp3, .ogg, .flac, .wma, .wav, .mkv, .avi
Note:
Playability of files may depend on used encoder software and/or embedded audio/video codecs in container formats. Blaupunkt cannot guarantee compatibility with every available file.
USB data carrier
This device features one USB port:
• USB port at the rear of the device
Connecting a USB data carrier
Insert the USB data carrier in the USB socket. The device automatically switches to USB mode. The data are read, the playback starts with the first media file recognized by the device.
Removing a USB data carrier
Turn off the car sound system. Disconnect the USB data carrier.
Bluetooth® sources
The Bluetooth® function allows registering cell phones and media playback devices with the car sound system.
When you register a cell phone with the car sound system, you can make phone calls with the built-in hands free function. You can access the lists of dialed numbers and the phone book of the registered cell phone.
If the connected Bluetooth® device supports the functions A2DP and AVRCP, you can play the music via the car sound system and control the playback.
Connecting a Bluetooth® device for the first time
Note:
If necessary, switch on Bluetooth® on your external Bluetooth® device first and ensure that it is visible.
In the main menu, select the Settings button (see the chapter "Main menu").
Select the Bluetooth option.
Note:
If necessary, switch on Bluetooth® first.
Select the Devices Management entry.
Tap on Add device.
Your device is being recognized and appears in the device list under its Bluetooth® name.
Note:
If your Bluetooth® device does not appear in the device list, you have to establish the connection from your Bluetooth® device:
- The device is recognized as "BLAUPUNKT" by your Bluetooth® device.
- When establishing the connection, use the Bluetooth® PIN of the device. If necessary, first define the Bluetooth® PIN in the Bluetooth menu under the Pairing Code option.
Tap on the entry of the device in the device list.
If necessary, enter the Bluetooth PIN on your external Bluetooth® device.
The external Bluetooth® device is being connected and is available.
Note:
You can change the Bluetooth® PIN in the Bluetooth menu under the Pairing Code option.
Managing Bluetooth® devices
In the main menu, select the Settings button (see the chapter "Main menu").
Select the Bluetooth option.
Note:
If necessary, switch on Bluetooth® first. Select the Devices Management
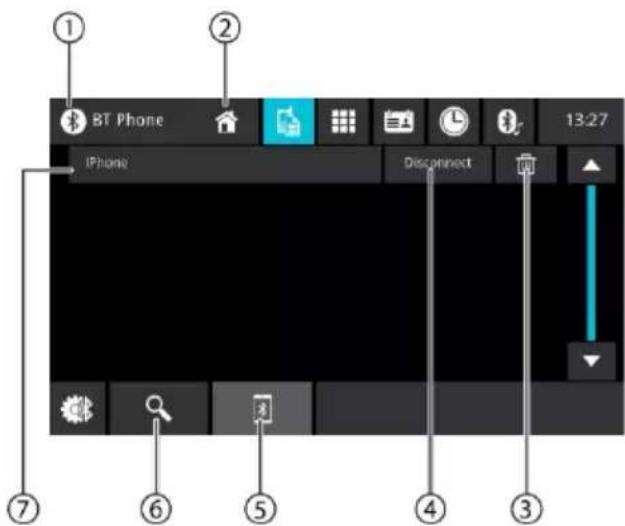
- Bluetooth Button, Return to main menu
- Home button, return to main menu
- Delete device button
- Disconnect button
- Pairing list button
- Search device button
- List of registered devices. To unregister a device, tap on its entry and then on the cross for deletion. After your confirmation, the device is being unregistered.
Analogue Radio
Starting radio playback
In the main menu, select the radio button (see the chapter "Main menu").
The radio display opens (see the next section) and playback starts.
Radio display
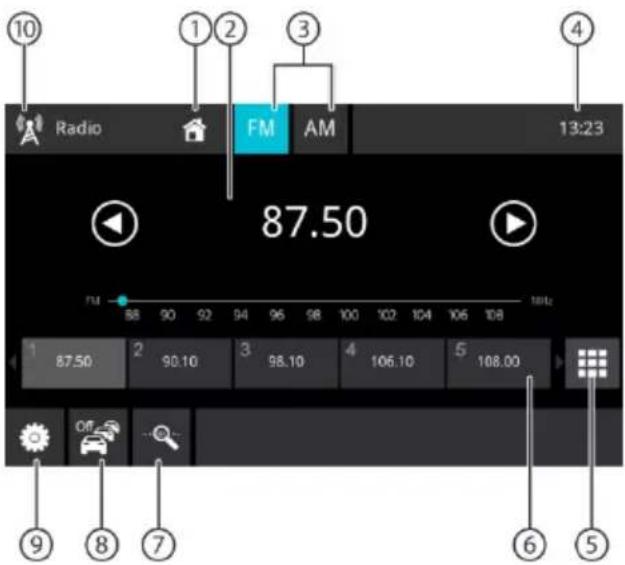
The radio display features the following functions and displays:
- Home button, return to main menu
- Station info area:
• Current frequency/ station name/radio text • Current memory bank - Frequency scale
Note:
Tap on the frequency scale or swipe across the frequency scale to change the frequency.

Short press: ascending seek tuning Long press: Increases the frequency in increments

Short press: descending seek tuning
Long press: Decreases the frequency in increments
- Selecting the waveband
- Time/ Bluetooth TM status
- Direct frequency input keypad
- Memory locations of the current memory bank Short press: Calls up the stored station
Long press: Saves the set station
Note:
Swipe across the list of memory locations to scroll to additional memory locations
- Intro scan of presets of the current waveband
- TRAFFIC function ON/OFF
- Tuner settings
- Radio Button, Return to main menu
Settings menu
The options menu features the following functions and settings:
• RDS Alternative Frequency/ RDS AF:
If RDS AF is activated, the device automatically changes to the strongest frequency of the set station.
• RDS Regional:
Switches RDS regional mode on/off. If regional mode is activated, the device changes only to the alternative frequencies of the set station that broadcast the same regional program.
• RDS Time/ RDS CT:
Switches RDS time on/off
With RDS CT activated, the time of the device is automatically set via the received RDS signal.
Digital Radio DAB/ DAB+
Starting DAB playback
In the main menu, select the DAB button (see the chapter "Main menu"). The DAB display opens (see the next section) and playback starts.
DAB display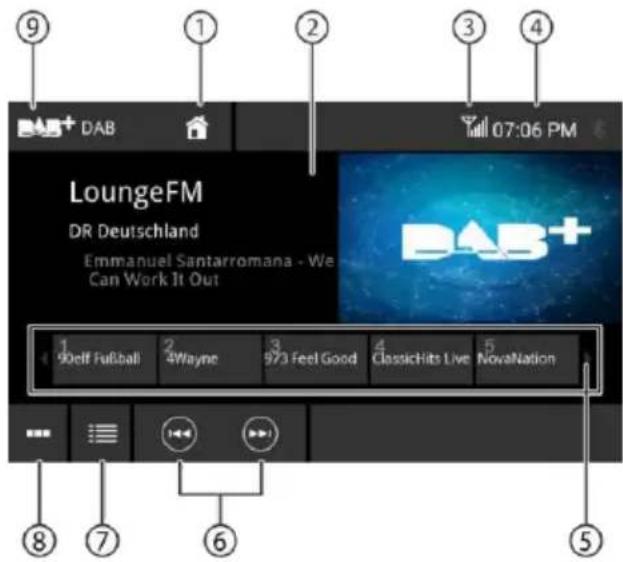
The DAB display features the following functions and displays:
- Home button, return to main menu
- Service info area (current service name/additional DAB info)
- DAB reception status
- Time/ Bluetooth TM status
- Selecting a service: Sliding interface Short press: Calls up the stored service Long press: Saves the current service Slide: Show further presets
- [▶]Changes to the next preset [◀]Changes to the previous preset
- Opens the service list
- Scanning all receivable services
- DAB Button, Return to main menu
After first start of DAB/DAB+, the band scan will be performed automatically to find available services (radio stations). Available services will be added to the service list.
Available services are shown in the service list and you can select them for listening.
Media playback
This chapter describes the playback of media on connected devices and data carriers (USB, CarPlay, Android Music Player, Bluetooth™ Streaming, A/V).

DANGER! Risk of road safety due to video playback.
The use of the video playback can divert your attention from the traffic situation and lead to serious accidents!
Do not use video playback while driving. To use it, stop at a suitable location and operate your device while the vehicle is standing.
Notes:
- For connecting or inserting devices and data carriers, please read the chapter "External devices and data carriers".
- Not all media, devices or connection types support all options.
Starting media playback
In the main menu, select the desired data carrier or the device (see the chapter "Main menu"). The media display opens (see the next section) and playback starts or the media browser opens (see the section "Media browser").
Media display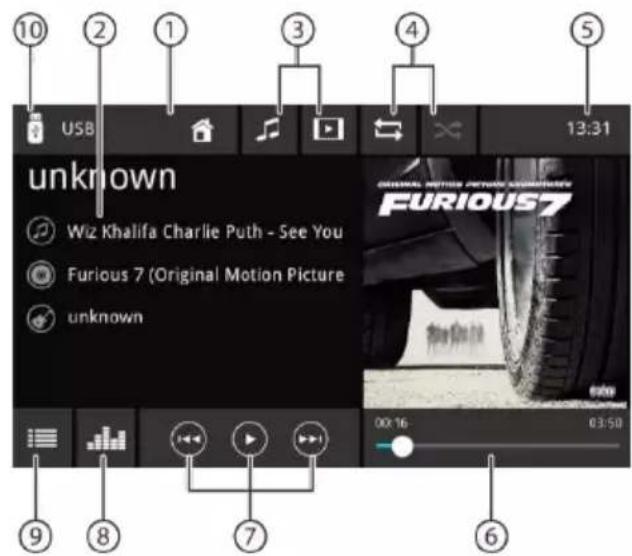
The Media display features the following functions and displays:
- Home button, return to main menu
Note:
If the scan has finished without finding any stations, please check the DAB antenna or try a new scan at a different location.
2. Track info area:
For audio playback: Track information such as track name, artist, and cover art (not for A/V). For video/image playback:
Notes:
- Track information (ID3 tags) must be provided by the connected data carrier or device.
- For image playback, the menu bars are automatically hidden after approximately 3 seconds. To show the menu bars again, tap on the display.
3. Changing the media type
[ ] Audio track
[▶] Video title
When changing the media type, the media browser is automatically opened (see the next section).
4. Setting repeat title/random track playback
[←] Repeat title off
[ ] Repeat all tracks of the folder
[ ] Repeat current track
[ ] Repeat track playback on (all files)
[×] Random track playback off
[✗] Random track playback on (current folder)
[×] Random track playback on (all files)
5. Time/Bluetooth™ status
6. Playback process (not for image playback):
• Current track number/number of tracks - Current time - Total time - Progress bar
Note:
Tap on the progress bar or swipe across progress bar to go to a different position in the current playback.
7. Controlling playback:
[▶] Short press: Changes to the next track/DVD chapter Press and hold: Fast searching forward
[⑪] Interrupting/continuing playback
[◀] Short press: Changes to the previous track/DVD chapter Press and hold: Fast searching reverse
- Tap the button to adjust equalizer setting
- Tap the button to show the track list
- USB Button, Return to main menu
Media browser for media type and folder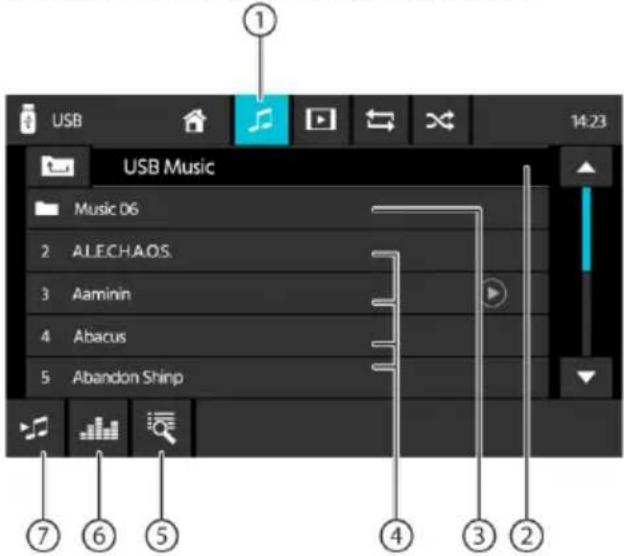
The media browser for media type and folder features the following functions and displays:
- Current media type
- Name of current folder
- Opening subfolder
- Starting a track
- Open the list and search
- Equalizer button: Makes equalizer settings and sets volume distribution
Note:
For further details, read the chapter "Sound settings".
- Top to go back to previous page
Calling
Opening the phone
In the main menu, select the Phone button (see the chapter "Main menu").
The keyboard display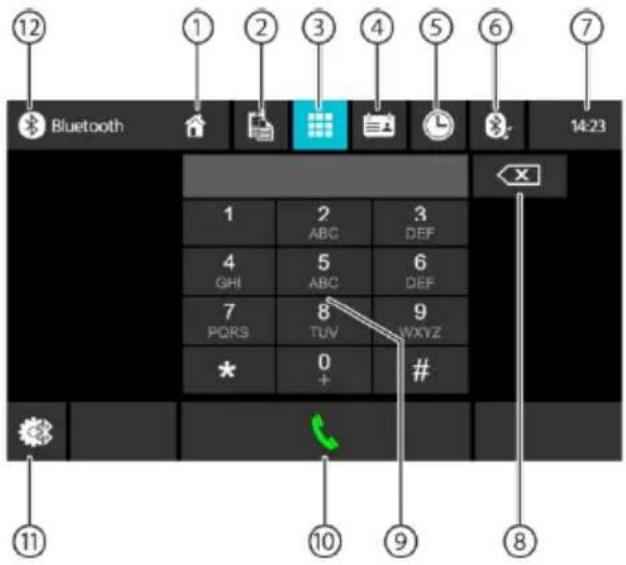
The keyboard display features the following functions and displays:
General functions of the phone displays:
- Home button, return to main menu
- Changing to the devices display
- Changing to the keyboard display
- Changing to the phone book
- Changing to the list of calls
- Changing to the list of A2DP
- Time/Bluetooth™ status
- Correction key for deleting the entry
- Keyboard for number input
- Dial key for dialing the number entered
- Bluetooth setting: Opens Bluetooth™ settings
- Bluetooth button, return to main menu
The list of calls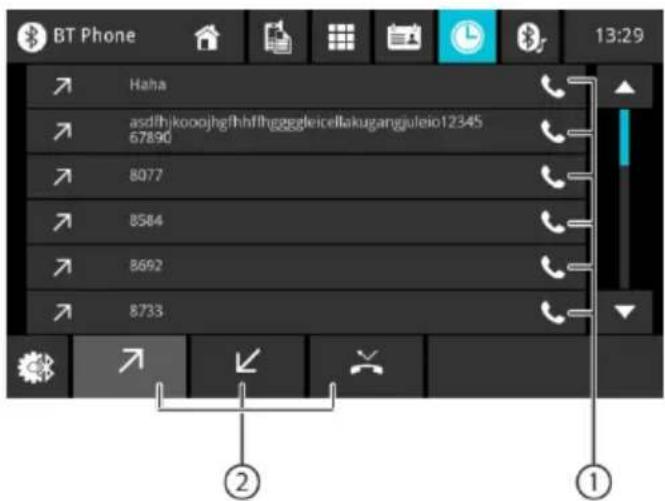
The list of calls features the following functions and displays:
- List of the most recently called numbers/contacts with date and time of the call. Tap on an entry to call the number/contact.
- Dialed/Received/Missed View
Phone book
Note:
The phone book contains all the contacts from the phone book of your cell phone.
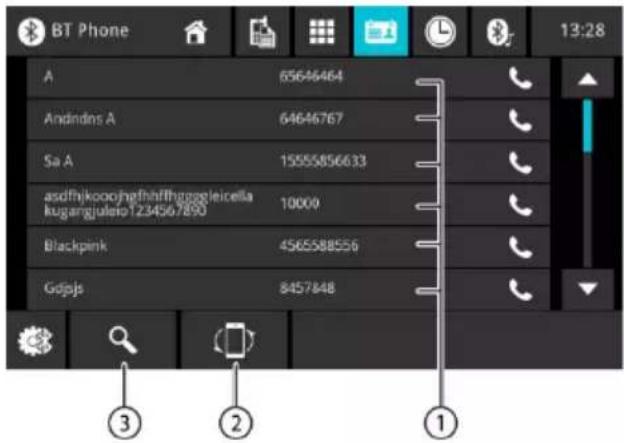
The phone book or list of favorites features the following functions and displays:
- Entries of the list of contacts Short press: Calls number/contact or displays numbers (if several numbers are available)
- Phone Book Sync: Copies contacts from the phone book of the cell phone to the device/updates contacts on the device
Note:
You can automatically synchronise the device phone book with the phone book of the cell phone (see the chapter "System settings", Bluetooth /Auto Phone Book Sync option).
- Letter menu: Jumping to the selected starting letter in the list of contacts Opening a keyboard for name search in the list of contacts
Incoming/outgoing call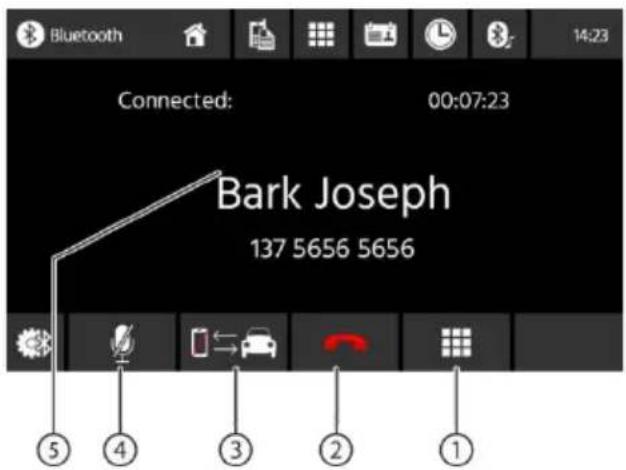
An incoming call provides the following functions and displays:
- DTMF keyboard
- Call/phone call handling:
[ ]Rejecting a call (for incoming call)
Cancelling a call (for outgoing call)
Ending a phone call (for ongoing call)
[ ]Answering a call (for incoming call)
- Switching a phone call between device and cell phone
- Turn the microphone on or off
- Caller info
- Contact name/caller number (if available)
- Call duration
SWC Input Operation
The following controls are available for most vehicles.
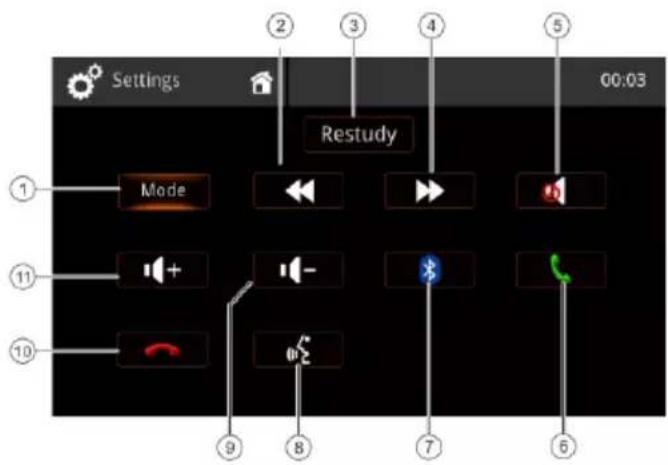
- Mode (select source)
- Seek/Track Up/Preset Up (+)
- Restudy - delete all settings
- Seek/Track Down/Preset Down (-)
- Mute
- BT call/accept call
- Bluetooth
- Voice command (phone)
- Volume Down (-) 10. BT end/reject call 11. Volume Up (+)
To learn SWC commands from your car steering wheel control, please press briefly the desired button on your steering wheel control which you want to associate with the highlighted button on display. The display will show you measured values for this button and wait for next key. You can learn all keys step by step or you can select one special button on display to skip other buttons.
Note:
For using SWC function, an additional connection to your car steering wheel control is necessary, this may require additional adaptors. Therefore please ask your local dealer for compatible accessories. Blaupunkt cannot guarantee compatibility with all available steering wheel controls on market.
Requirements
- Apple Lightning® to USB cable or a high-quality, certified USB cable
- iPhone® 5s or above
- Siri® must be enabled to use Apple CarPlay
Phone Setup
Before you begin:
- Apple CarPlay® features may operate differently than on your Apple iPhone®.
- Message and data charges may apply when using Apple CarPlay®. Please check with your carrier.
- Apple CarPlay® relies on the performance of your phone. If you experience performance issues:
- Close all apps and then restart them again or
- Disconnect and then reconnect your phone using the Apple Lightning cable that was provided with your phone is recommended.
- Siri® must be enabled to use voice recognition system with Apple CarPlay.
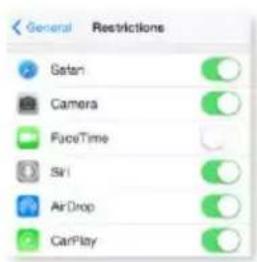
- On your phone, go to Settings > General > Restrictions > CarPlay to allow CarPlay access.
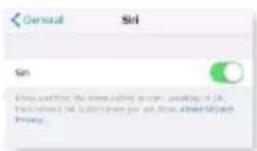
- On your phone, go to Settings > General > Siri and ensure Siri is turned ON.
Device Setup
Connect your iPhone to the USB port of the radio device.
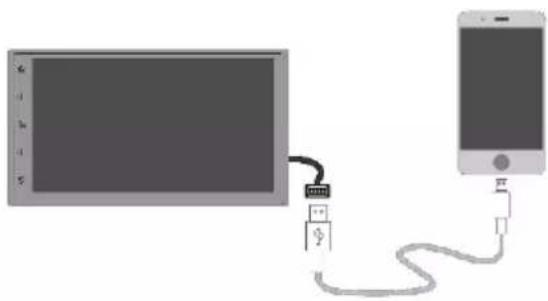

- Your iPhone will receive a prompt message, then tap "Allow".
- The Apple CarPlay® icon is now enabled on the main menu.
- Press the CarPlay® icon on the radio screen.
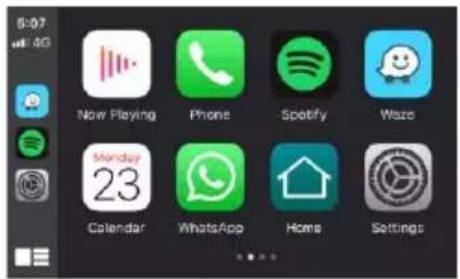
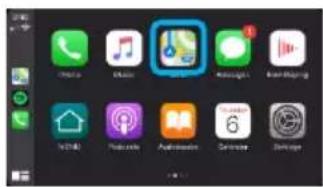
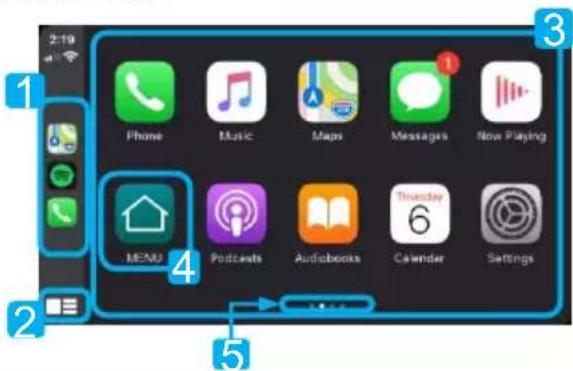
Familiar home screen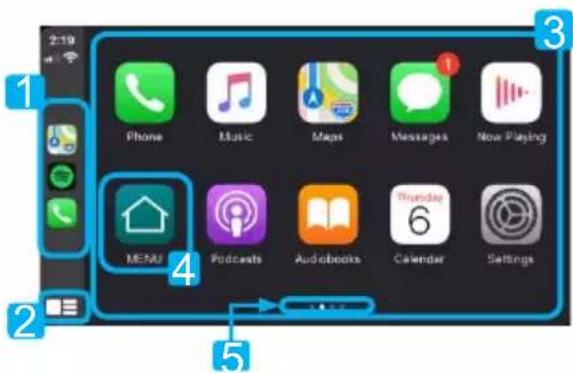
- Recently Used App
- Home button / Activate Siri
- Apps
- Return to Main Menu
- Page Indicator
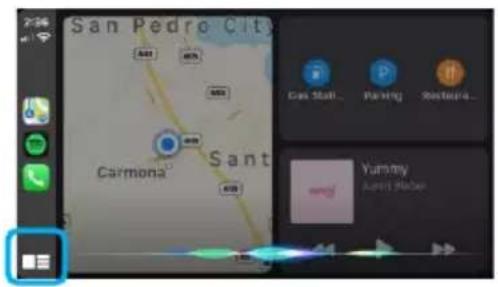
Apple CarPlay uses Siri to perform many actions like sending messages, placing calls, and looking up/setting POI/Destinations. A Siri session can be initiated on any screen by:
- Pressing and holding the Home icon on the CarPlay screen, pressing the Voice Command button, or
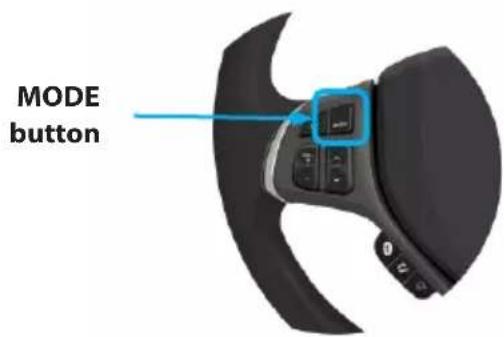
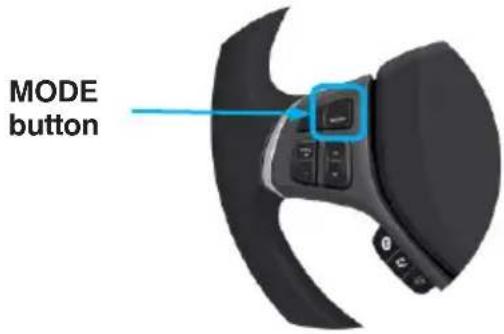
- Pressing and holding the steering wheel MODE button, then say any of the following commands:
- "Text you'll to send text message.
- "Read text to email available text message."
- "Call " to make a phone call.
- "Find " to locate a POI/Destination.
NOTE:
Ensure Siri feature is set to ON in your phone (Go to Settings > General > Siri).
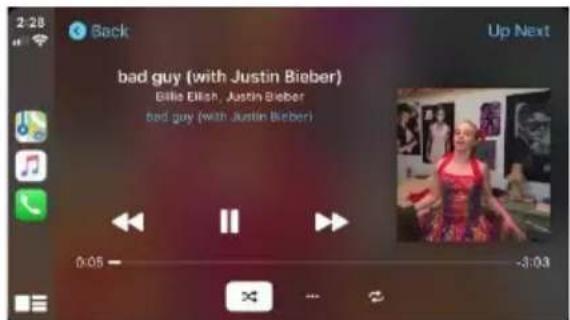
Apple Music
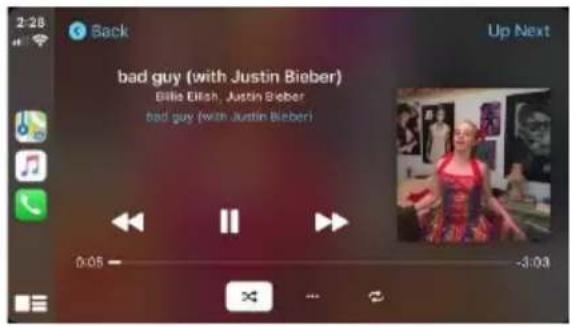
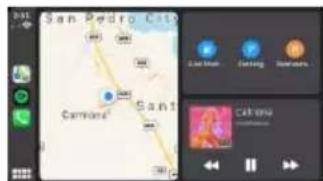
Apple Maps
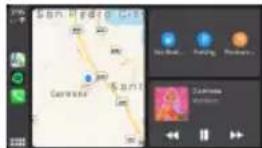
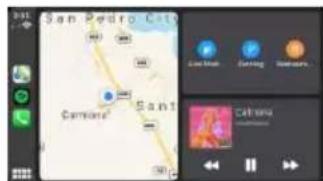
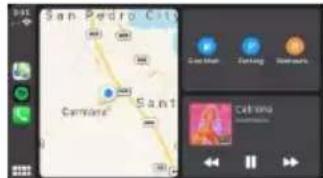
- Navigate your way by using Apple Maps or any other third party navigation app (e.g., Waze).
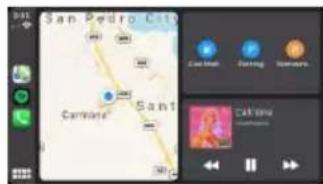
- Navigation app will display your destination and route options.

A list of the supported CarPlay supported apps can be found at http://www.apple.com/ios/carplay/.
Ensure phone has latest version of the third party apps.

Connect your phone using the Apple Lightning cable that was provided with your phone is recommended.
i INFORMATION
Depending on use, Apple CarPlay can share certain vehicle information (e.g., vehicle location, speed, and other operating conditions) with the connected iPhone. See Apple's privacy policy for details regarding Apple's use and handling of data uploaded by CarPlay. Use of CarPlay is at user's own risk, and is subject to agreement to the CarPlay terms of use, which are included as part of the Apple iOS terms of use. CarPlay vehicle integration is provided "as is," and cannot guarantee CarPlay operability or functionality now or in the future due to, among other conditions, changes in CarPlay software/Apple iOS, service interruptions, or incompatibility or obsolesce of vehicle-integrated hardware or software. Due to updates from third party the functionality can change without further notice. Only use CarPlay when conditions allow you to do so safely.
Basic Requirements
- To use Android Auto, you'll need an Android phone running 5.0 (Lollipop) or higher.
- For best performance, Android 6.0 (Marshmallow) or higher is recommended.
You'll need a high-quality, certified USB cable for the in-vehicle connection.
Phone Setup
Before you begin:
- Android Auto® features may operate differently than on your Android® phone.
- Message and data charges may apply when using Android Auto. Please check with your carrier. • Android Auto relies on the performance of your phone. If you experience performance issues:
- Close all apps and then restart them again or disconnect and then reconnect your phone.
- Using the USB cable that was provided with your phone is recommended.
- When Android Auto is active, your in-vehicle voice recognition system is disabled and you will be using Google® voice actions to make your requests.
Device Setup
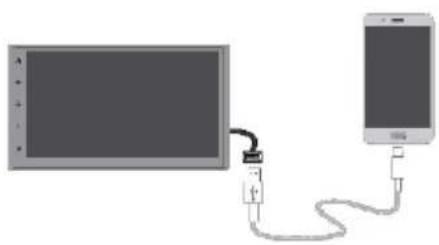
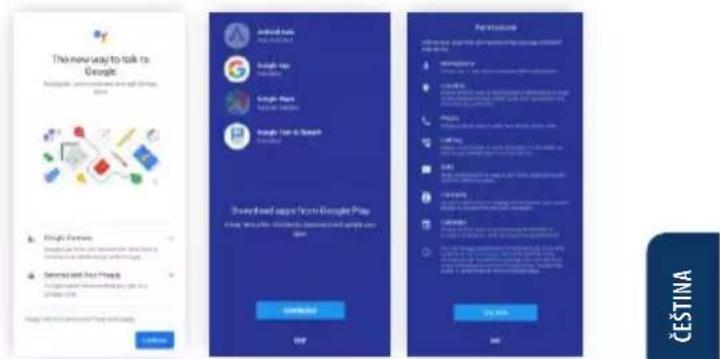
- Turn on Bluetooth on your Android Phone and connect it to the USB port.
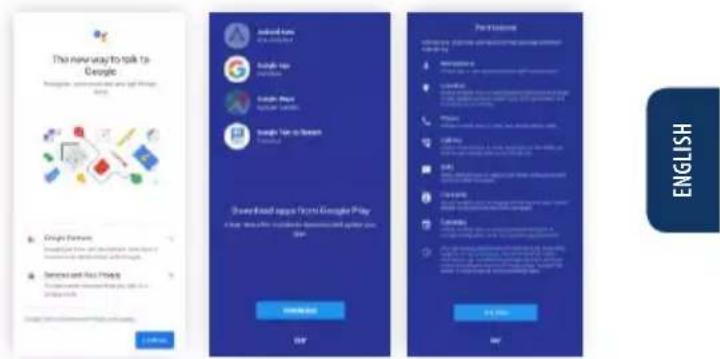
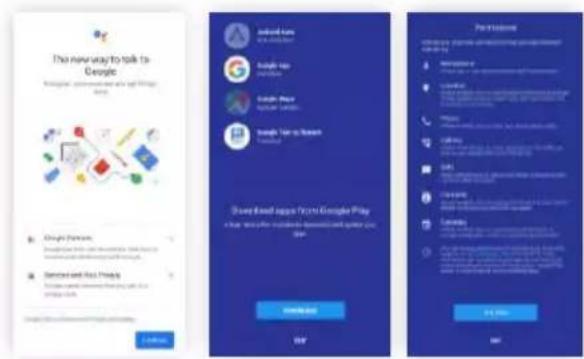
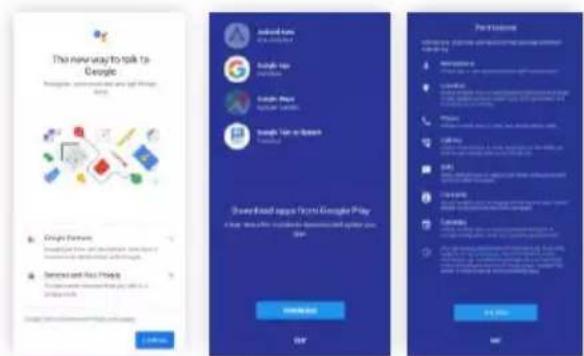
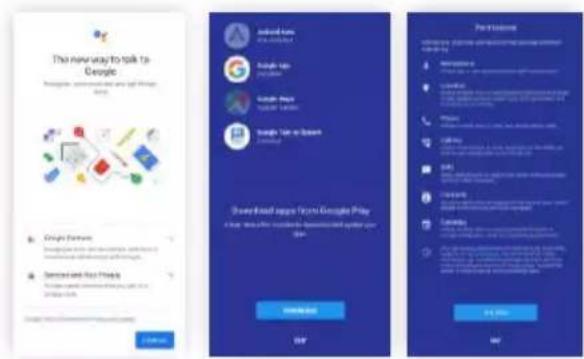
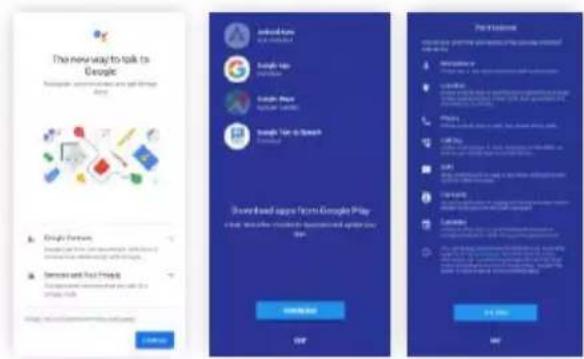
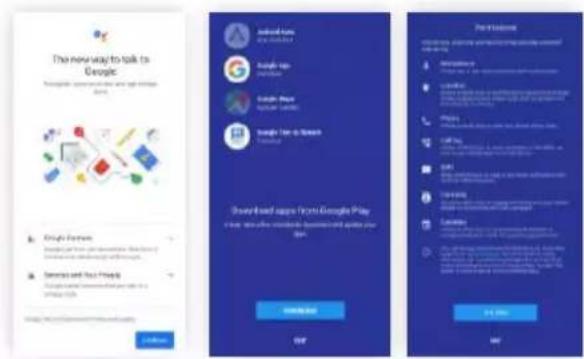
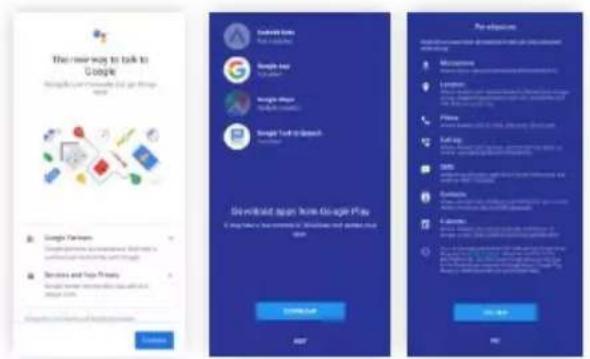
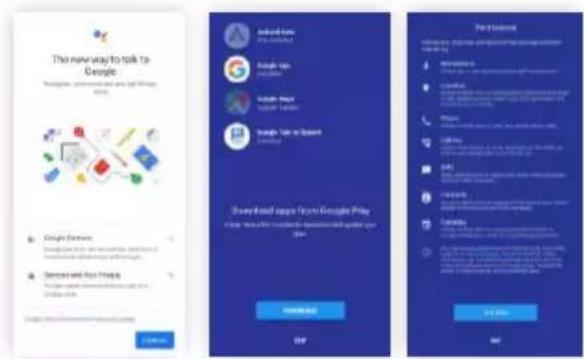
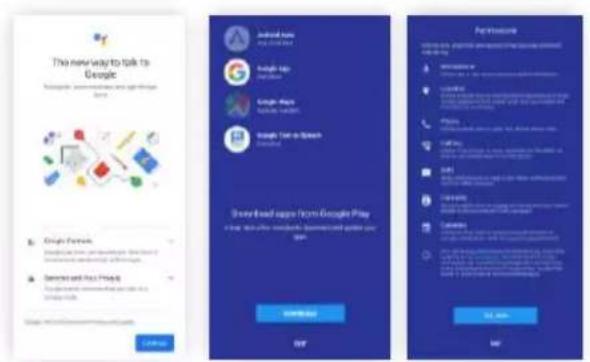
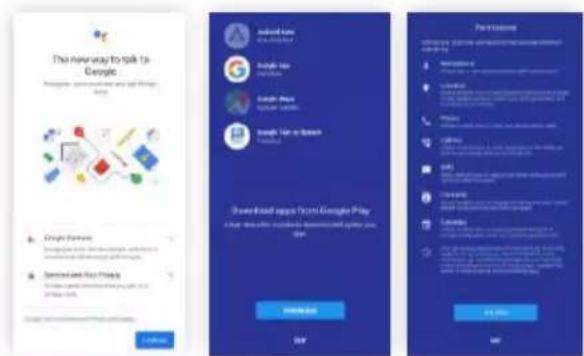
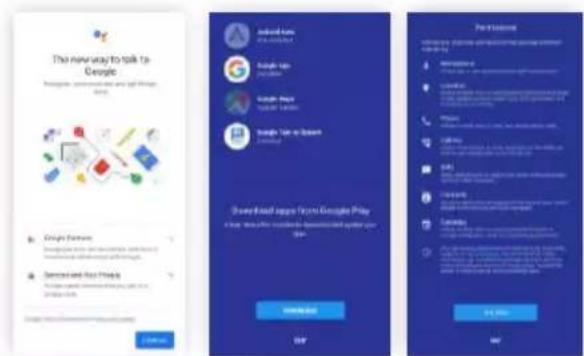
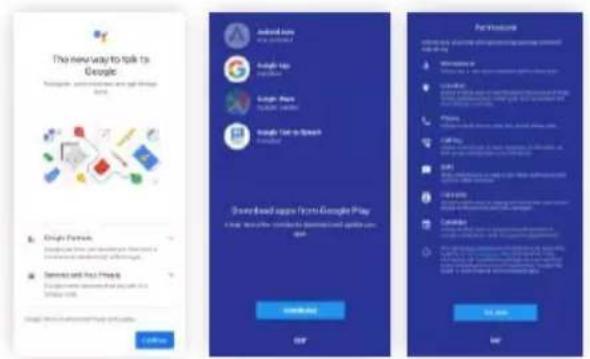
- First time connection will prompt the phone to download Android Auto app and other needed apps. • Phone will ask you to allow all permission to be activated.
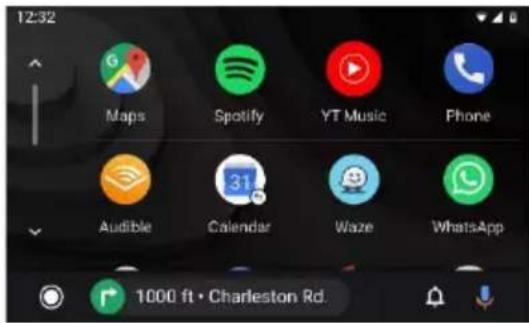
Overview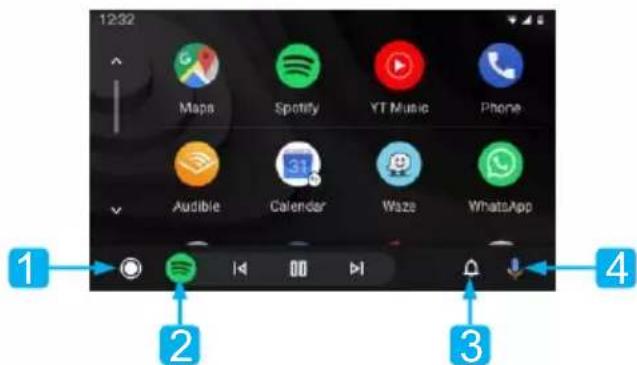
- Android Auto Home Button
- Recent Apps
- Notification Button
- Activate Google Assistant™
Google Assistant®
Android Auto uses Google Assistant® for many functions. A Google Assistant® can be initiated on radio screen by:
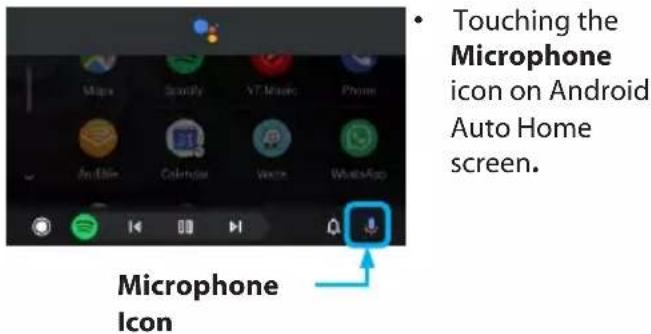
- Pressing the Voice Command Button located on right side of the Head unit or,
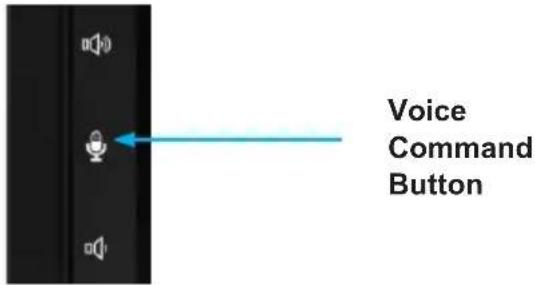
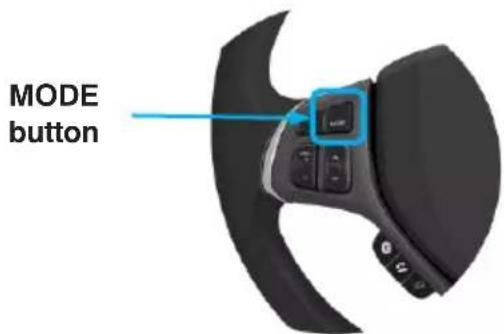
- long press the Mode button on your steering wheel, and state your request by saying first "Hey Google" or then Google request, (e.g. "Ok Google, on my agenda for today?.)
Phone
Make a call
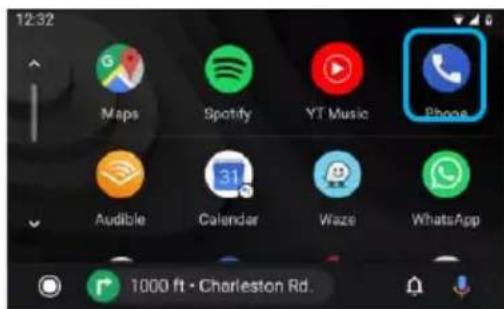
- Touch the Phone icon on Android Auto Main Menu to access recent calls and contact list. You can initiate a voice action and then say "Ok Google, Call " or "Dial " make phone calls.
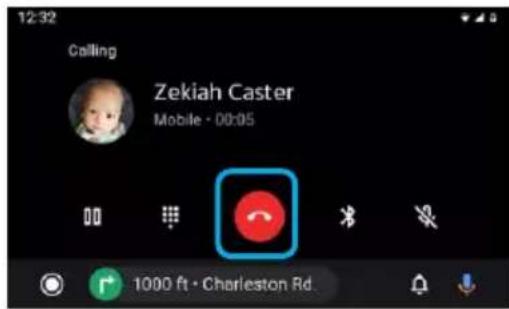
- To hang up call just press the red telephone handset icon.
Music
Playing Music
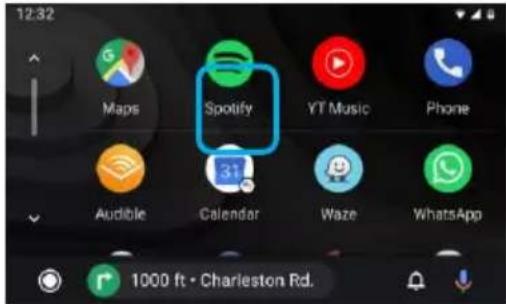
Touch Google Play Music or any other third party Music Apps (e.g., Spotify).
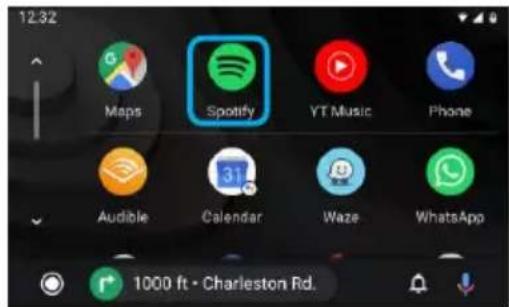
NOTE:
A list of supported third party apps can be found on the Android Auto website at http://www.android.com/auto
Finding Playlists and Songs
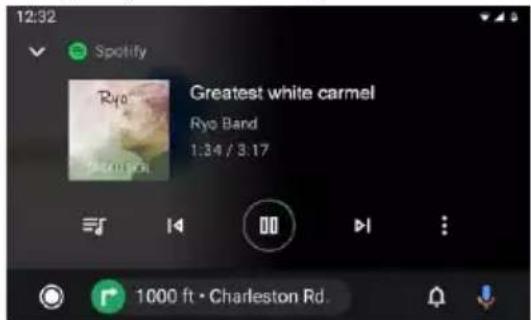
Touch the Queue icon on your Music app to access recent playlists, mixes, and queue songs.
Accessing Settings
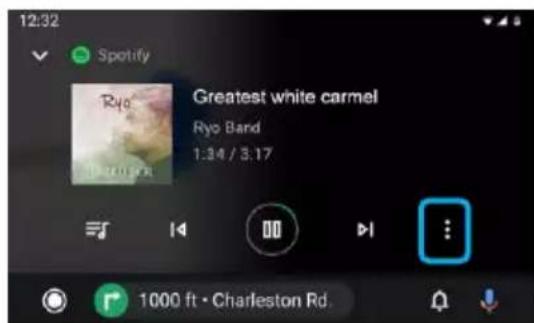
Touch the Options icon to view additional settings (thumbs/down, etc). Settings may vary by app.
Navigation
Accessing Maps
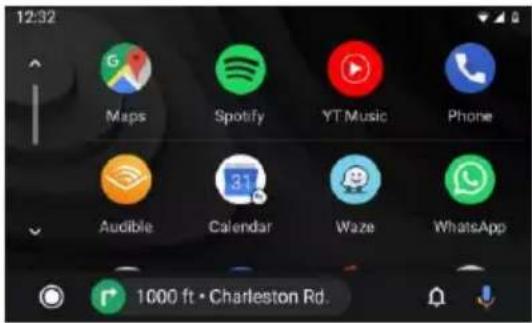
While in the Android Auto Main Menu, touch the
Maps icon to access Google Maps or any other third party navigation apps (e.g., Waze).
Getting Directions
Press the Voice Command button then state your destination (e.g., Ok Google, navigate home.) or POI to activate a Google Search.
Press and Hold the Mode button to Activate Voice Recognition: Search places, ask for traffic information along route, and re-routing.
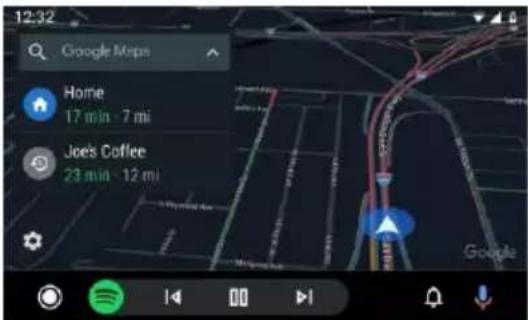
Viewing Directions
Google Maps will display your destination and route options.
i INFORMATION
Android Auto requires the Android Auto app from Google Play installed on an Android smartphone running Android Lollipop 5.0 or higher.
Warning:
Certain uses of the smartphone may not be legal while driving in your jurisdiction, so you must be aware of and obey any such restrictions. If in doubt as to a particular function, only perform it while the car is parked. No feature should be used unless it is safe to do so under the driving conditions you are experiencing.
Starting Android Auto
Connect an Android Auto compatible device to the unit via USB cable. Android Auto will launch automatically, or it can be accessed at any time from the main menu.
Note: When the device for Android Auto is connected to this unit, the device is also connected via Bluetooth at the same time. If five devices are already paired, the message confirming whether to delete the registered device is displayed. If you want to delete the device, touch [Agree]. If you want to delete other device, touch [BT Settings] and delete the devices manually.
Note: If Android Auto is turned on during a call on a cellular phone other than the Android Auto compatible device, the Bluetooth connection will switch to the Android Auto compatible device after the call.
Android Auto vehicle integration is provided "as is," and cannot guarantee Android Auto operability or functionality now or in the future due to, among other conditions, changes in Android Auto software/ Android OS, service interruptions, or incompatibility or obsolescence of vehicle-integrated hardware or software. Due to updates from third parties, the functionality can change without further notice.

M5.0 x 6.0mm
M5.0 x 5.0mm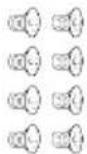
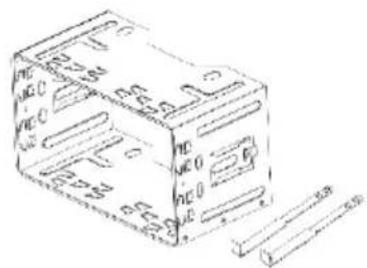
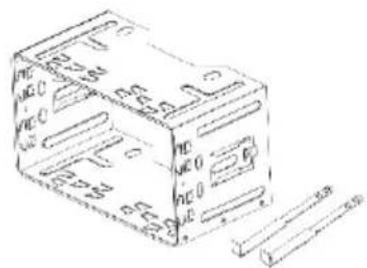
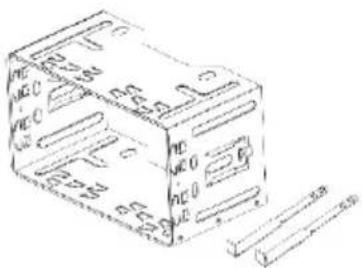
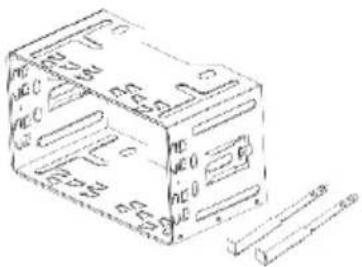
MOUNTING SLEEVE MOUNTING RELEASE KEY
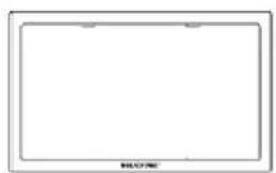
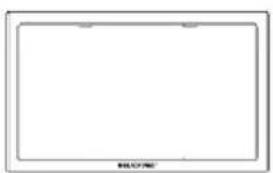
TRIM RINGMOUNTING SCREWS
Installation:
- Please contact your local car-hifi specialist for installation support if you are unsure.
- Depending on your car there may be additional accessories, adaptors and frames necessary. Your local car-hifi specialist will be able to support you. Installation errors can destroy the vehicle electrical system or the device.
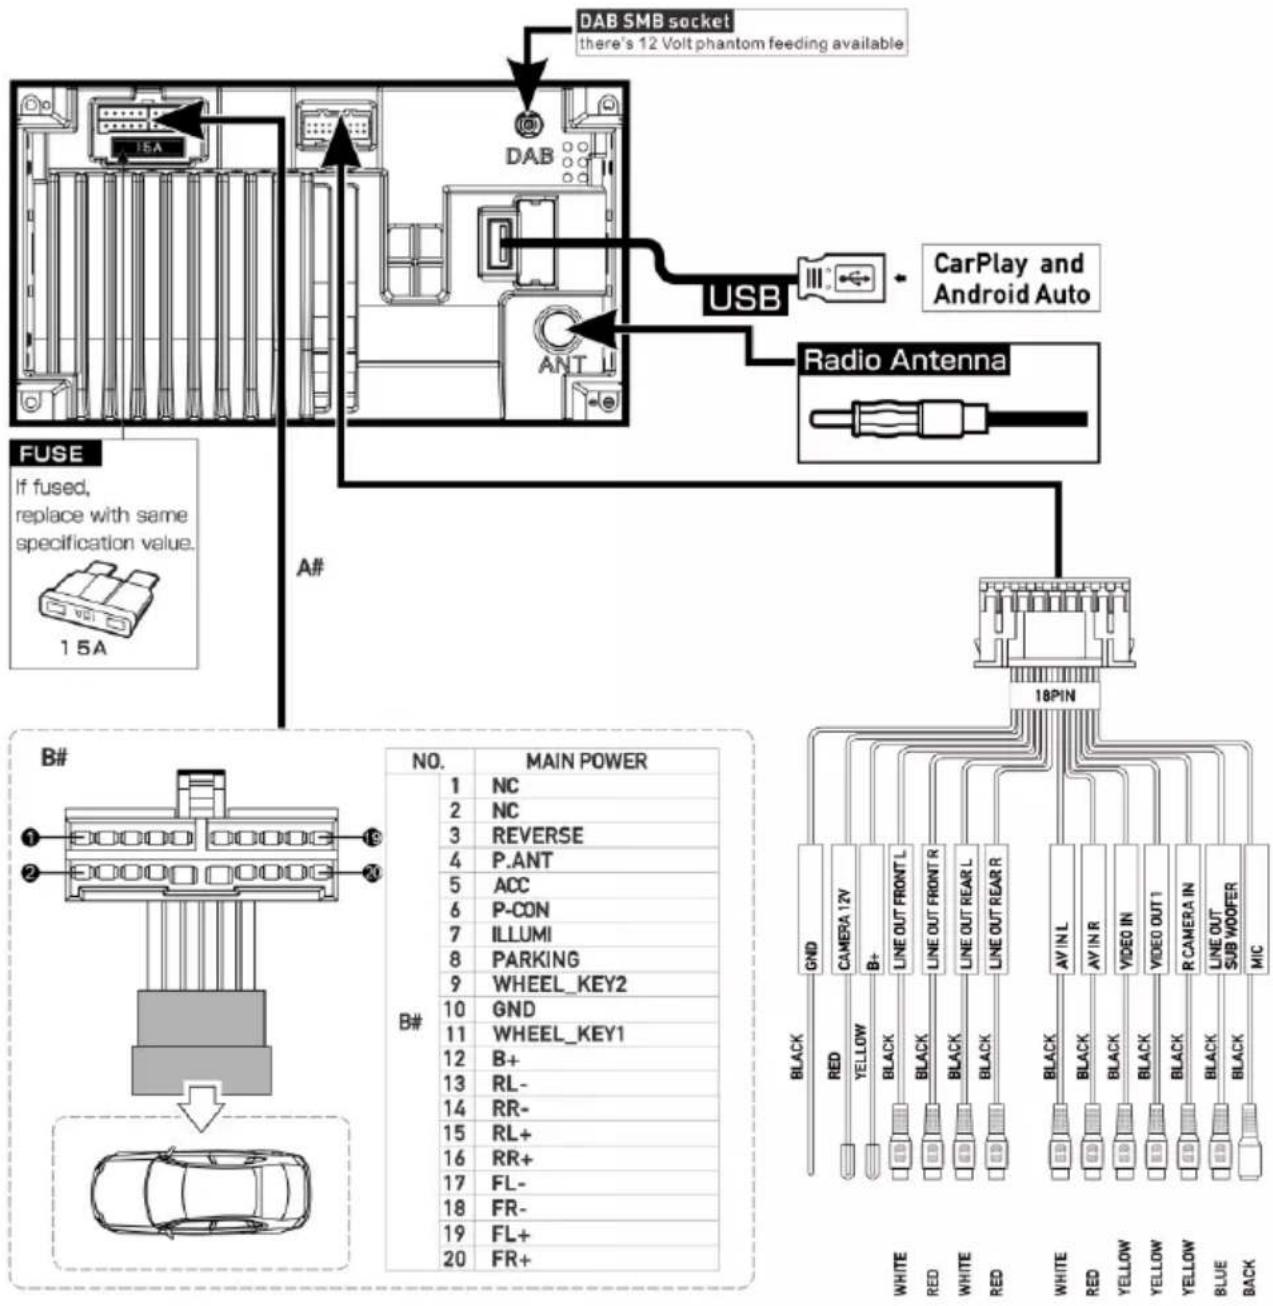
Connections:
• REVERSE: reverse signal from car, needed to enable reverse camera • P.ANT: Switched power supply for active antenna (12V/ max. 200mA) - ACC: Ignition signal • P.CONT: Switched power supply for external amplifier (12V/ max. 200mA) - ILLUMI: car lights input, needed for dimmer mode "auto", only DC 12 V, PWM signal may cause flickering display! • PARKING: Connect to handbrake signal • WHEEL KEY: SWC input (steering wheel control)
Connections:
- B+: Power output (enabled if ACC is ON) (12V/ max. 500 mA) • CAMERA 12V: Power supply for camera (enabled if source camera active) (12V/ max. 200mA) • DAB phantom feeding (12V/ max. 100mA)
Note:
For operation, ACC must be connected and switched on. Device is not operable without ACC.
Don't connect ACC to BATTERY directly, this will cause high battery drain.
To keep all settings and memory, BATTERY must be connected permanently.
Below you will find some error patterns and their possible solutions. If you continue to have problems with the device, contact your specialist dealer or Blaupunkt Service. If you have any problems, please have the installation checked or carried out by a specialist. Most of the problems that may arise can be traced back to connection and operating errors.
- After installation, the control lights for the airbag from car dashboard light up/ the speedometer does not work etc.:
The device was obviously connected incorrectly. Immediately disconnect the vehicle battery and remove the radio. The installation must carried out / checked by a specialist.
- At higher volumes, the device switches off completely or display flickers:
Please check the cable diameter of the power supply. The installation must carried out / checked by a specialist.
• The remote control does not work:
Please check that the battery is correctly inserted. Please check the battery.
• Device does not switch on / device does not react to ACC:
ACC / battery connected correctly? Please check the correct connection of the device. The installation must be carried out / checked by a specialist. Please note: This device is only operable if ACC is connected properly.
• The device has no or poor radio reception: Please check the antenna for the respective reception area. Please check whether you may need a phantom feeding adapter.
- USB, CD, SD or other data carriers no function:
Please check the function with another data carrier, reformat the data carrier, use other media files. Please check user manual for compatible data carriers.
- Camera no picture / no sound:
Please check the connection of the camera, check the system settings of the device. As a test, you can connect the camera to an AV-IN connection and check whether it works with this.
• Video playback not possible:
Please check the correct connection of the brake signal. Apply the handbrake to activate the video playback.
- Bluetooth problems such as the phone book are not displayed, the phone does not connect, the caller cannot be heard:
Please check whether there are software updates for the phone and / or radio available. Please delete the phone from the radio and delete the phone from the list on the radio, then re-establish the connection. Confirm all authorization requests on the phone with YES. Try a different phone.
- Caller cannot hear me:
Please check the connection of the external microphone. Check the microphone setting in the Bluetooth settings. Try a different phone.
• The screen has small, incorrectly lit, or non-lit pixels:
Despite the most careful and most modern production processes, it is unfortunately inevitable, due to technology, to have so-called pixel errors on LCD screens. These can be present from the start or occur over time. If there are a small number of such errors, this is not a reason for complaint.
- SUB-OUT or its setting options in the device have no function: Please check the correct connection of the subwoofer to the SUB-Out output of the device, otherwise the options in the sound settings have no effect. Please make sure to enable the SUB-OUT in the settings.
- Malfunction / problem not listed here. A function of the device does not work as expected / device does not behave as expected:
Please reset the device to factory settings. Please check that the software is up-to-date, current software updates can be found on our homepage.
Note:
• RDS Alternative Frequency/ RDS AF:
[ ♪] Audio track [ ]Film
Phone configuration
Before starting:
Apple Maps
Music
Music playback
M5.0 x 6.0mm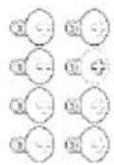
M5.0 x 5.0mm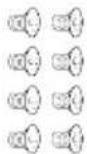
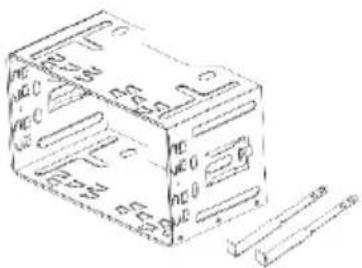
MOUNTING SCREWS MOUNTING SOCKET RELEASE KEY FOR MOUNTING FRAME
Mounting:
Analog radio (FM, AM)
Android Auto support®
Note:
• RDS Alternative Frequency/ RDS AF:
Phone configuration
Before starting:
Known home screen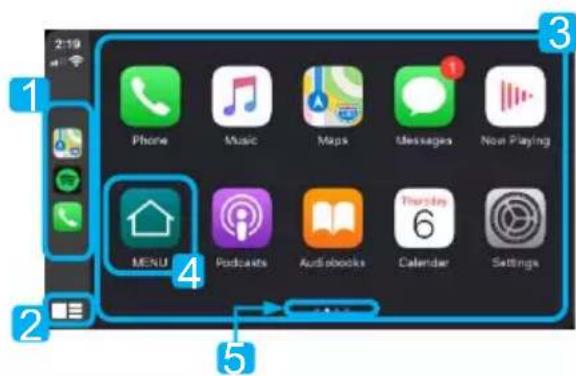
Apple Music
Apple Maps
- The navigation app shows destination and route settings.

List of supported CarPlay applications http://www.apple.com/ios/carplay. Make sure your phone has the latest version of third-party applications.

Phone
Make calls
Music
Music playback
Press the Google Play Music icon or other third-party music applications (such as Spotify).
NOTE:
M5.0 x 6.0mm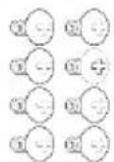
M5.0 x 5.0mm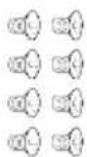
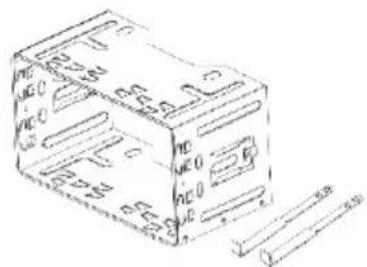
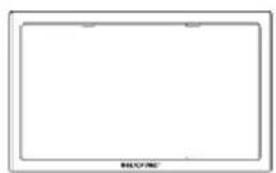
MOUNTING POCKETS KEY FOR MOUNTING RELEASE FRAME MOUNTING SCREWS
Mounting:
Note:
• Hora RDS / RDS CT:
Apple Maps
Music
Play music
M5.0 x 6.0mm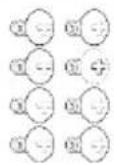
M5.0 x 5.0mm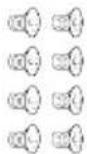
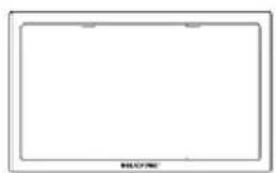
ADJUSTMENT RING MOUNTING SCREWS
Installation:
Connections:
Note:
• RDS Alternative Frequency/ RDS AF:
Known main display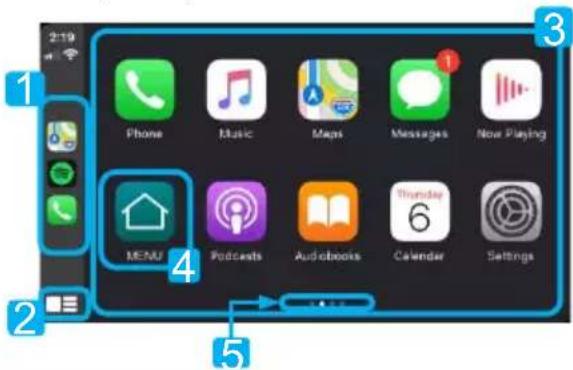
Apple Music
Apple Maps
Phone
Making a call
Music
Music playback
Route overview
M5.0 x 6.0mm
M5.0 x 5.0mm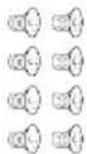
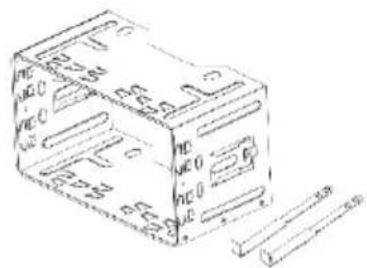
INSTALLATION POCKET INSTALLATION RELEASE KEY
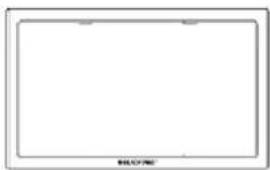
FRAME INSTALLATION SCREWS
Installation:
151 Google Assistant
152 Music
Note:
] Short press: swipe down
Home screen
Apple Maps
Music
M5.0 x 6.0mm
M5.0 x 5.0mm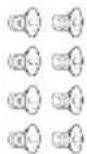
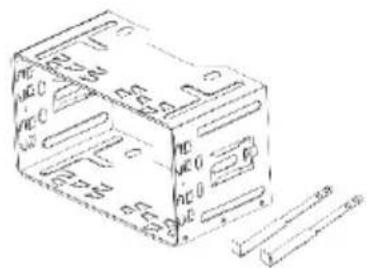
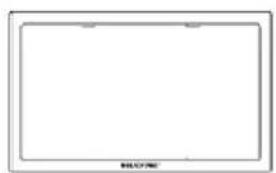
MOUNTING SCREW FIXING SOCKET KEY TO OPEN THE HOUSING TRIM RING
Mounting:
Attention:
• RDS Alternative Frequency/ RDS AF:
Known home screen
Apple Maps
Zene
Zene lejátszása
M5.0 x 6.0mm
M5.0 x 5.0mm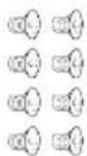

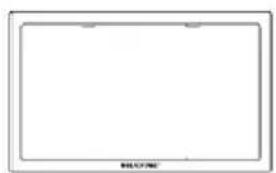
MOUNTING SCREWS INSTALLATION SLEEVE RELEASE KEY FOR INSTALLATION FRAME
Installation:
Note:
Home screen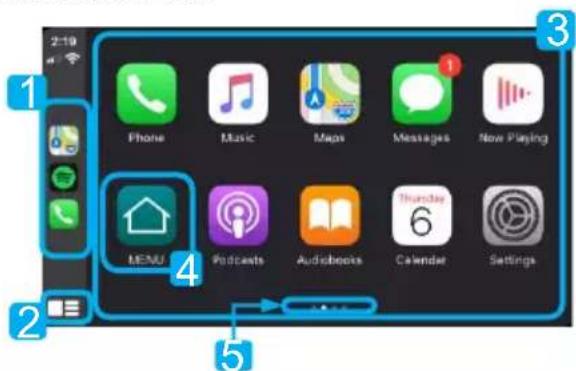
Apple Maps
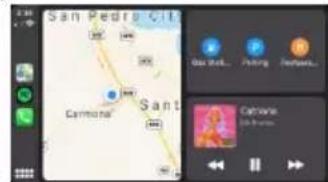
http://www.apple.com/ios/carplay/.
Music
M5.0 x 6.0mm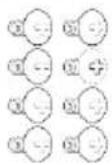
M5.0 x 5.0mm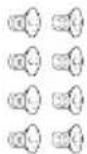
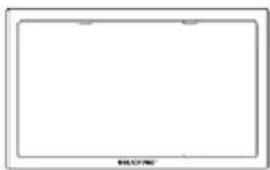
MOUNTING SCREWS MOUNTING SLEEVE RELEASE KEY FOR INSTALLATION SUPPORT MASK
Installation:
210 Analog radio (FM, AM)
211 Digital radio (DAB/DAB+)
211 Multimedia playback (USB, AV-IN, BT Audio)
213 Phone calls
Note:
• RDS Alternative Frequency/ RDS AF:
Apple Maps
Music
Play music
M5.0 x 6.0mm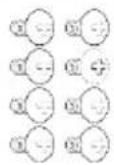
M5.0 x 5.0mm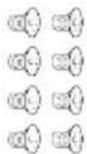
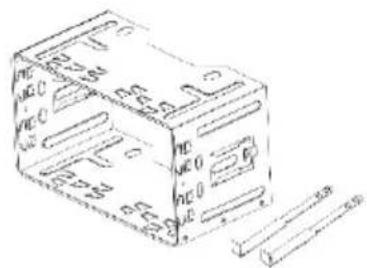
MOUNTING SLOT MOUNTING RELEASE KEY
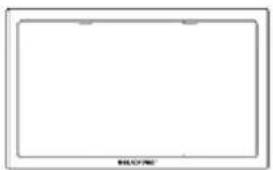
FRAME MOUNTING SCREWS
Installation:
Note:
Known main screen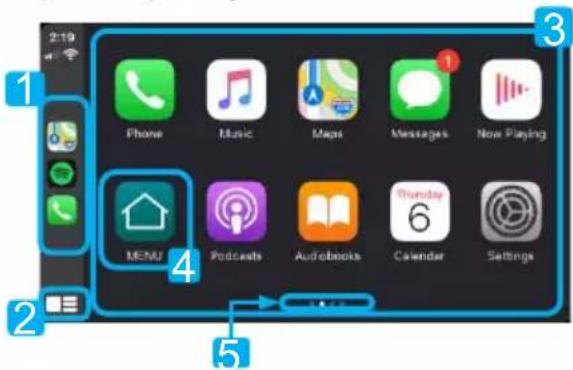
Apple Maps
Music
Music playback
M5.0 x 6.0mm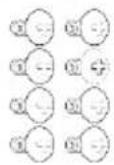
M5.0 x 5.0mm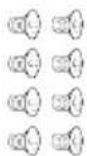
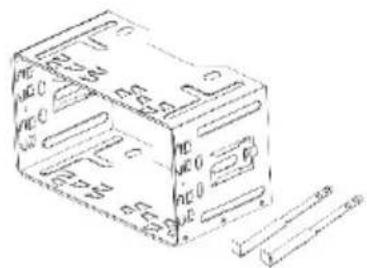
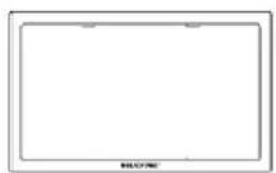
MOUNTING SCREWS MOUNTING POCKETS RELEASE KEY MOUNTING FRAME
Mounting:
Note:
• RDS Alternative Frequency/ RDS AF:
Apple Maps
Music
M5.0 x 6.0mm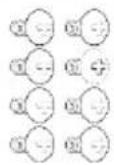
M5.0 x 5.0mm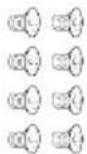
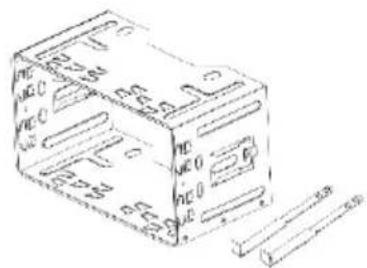
Installation:
Analog radio (FM, AM)
Note:
• RDS Alternative Frequency/ RDS AF:
Known main screen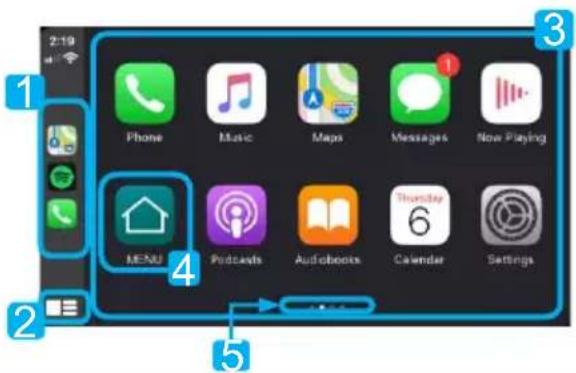
Apple Maps
- The navigation app's route options.
shows
a
destination
and

Music
M5.0 x 6.0mm
M5.0 x 5.0mm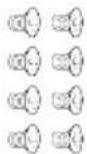
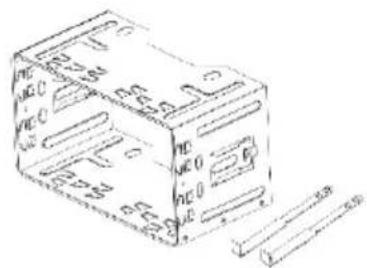
Mounting bracket Mounting key
Frame mounting screws
Mounting:
Connections:
• RDS Alternative Frequency/ RDS AF:
Home screen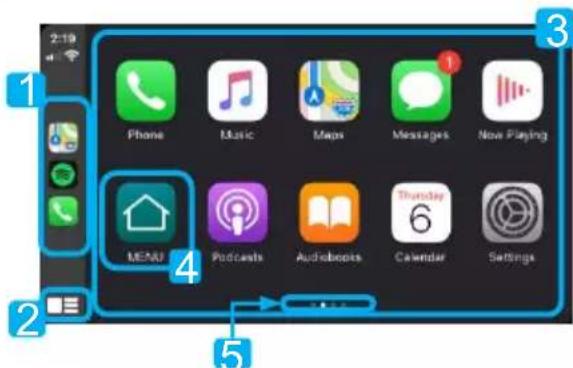
Apple Maps
Music
M5.0 x 6.0mm
M5.0 x 5.0mm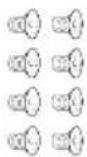
DE, EN, CS, DA, ES, FI, FR, HU, IT, NL, PL, PT, SV, EL
CE

BLAUPUNKT
EN
Product Specifications:
• Voltage: 5V - Current: 210mA • Supported temperature: -20° to 75°
Contains:
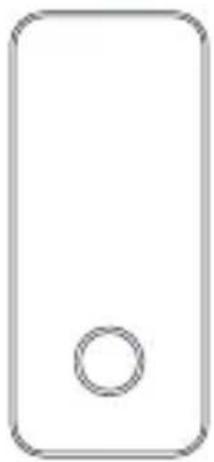
Product*1
USB-A to USB-C Cable *1
USER MANUAL*1
Function:
Convert the original wired Android Auto to wireless Android Auto, and convert the original wired CarPlay to wireless CarPlay.
Features:
This adapter supports up to 60 frames per second.
Bluetooth & WiFi name: SmartControl-xxxx
Note: This adapter defaults to CarPlay mode.
Button Switch:
Long press the button for 6-8 seconds. The indicator light goes out and stays on again. Switch to wired Android Auto to wireless Android Auto or convert the original wired CarPlay to wireless CarPlay mode.
Indicator status:
Indicator light: The adapter starts normally: the light flashes after 6S.
CarPlay Mode: The green light flashes once every second. Android Auto Mode: The blue light flashes once every second.
NOTE:
1: iPhone only supports CarPlay, with the indicator light in green status;
2: Android phones only support Android Auto, with the indicator light in blue status.
Indicator light:
1: After the adapter is powered on, it flashes after 6 seconds, which means that the adapter is normal.
2: If the indicator light is steady on or off after 6 seconds, which means the adapter is faulty. Please contact the seller.
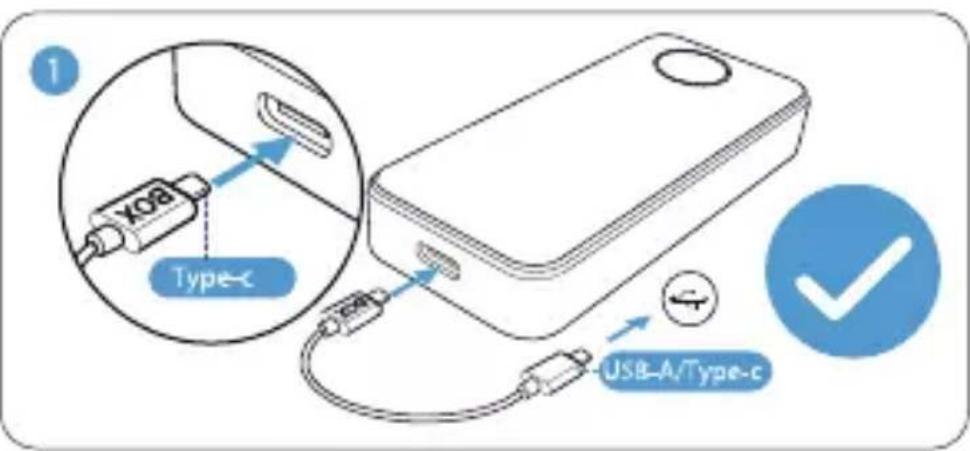
EN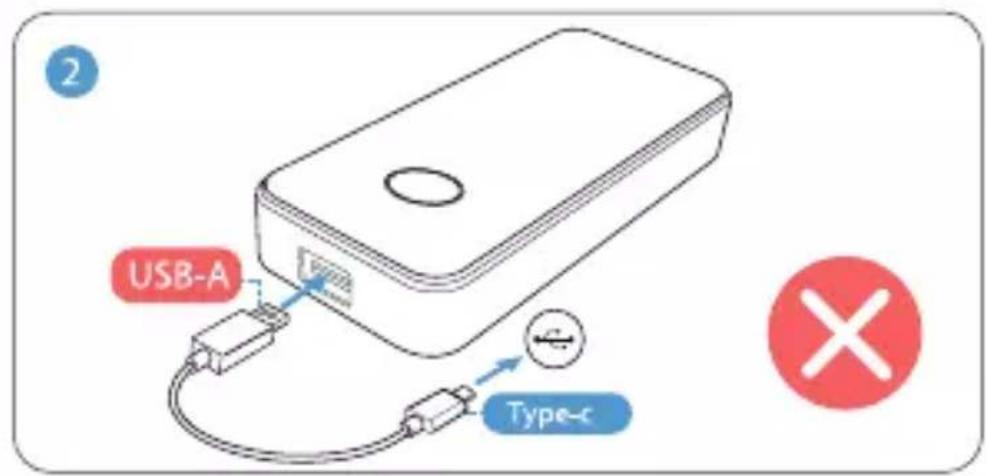
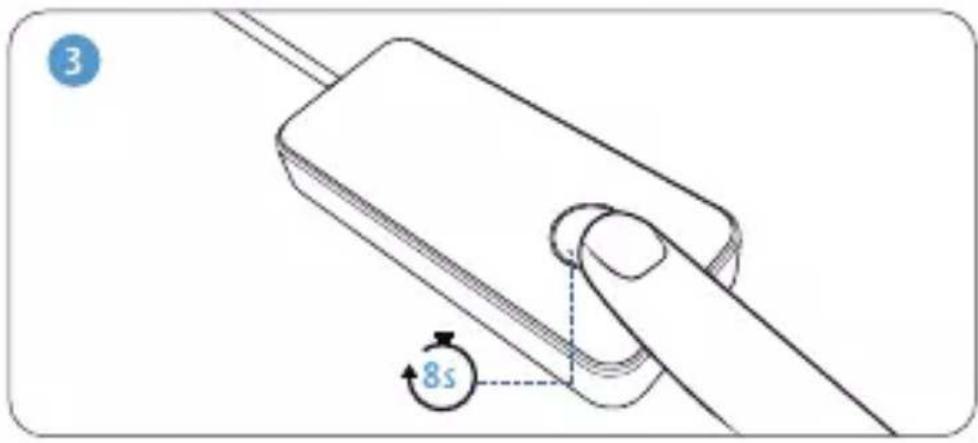
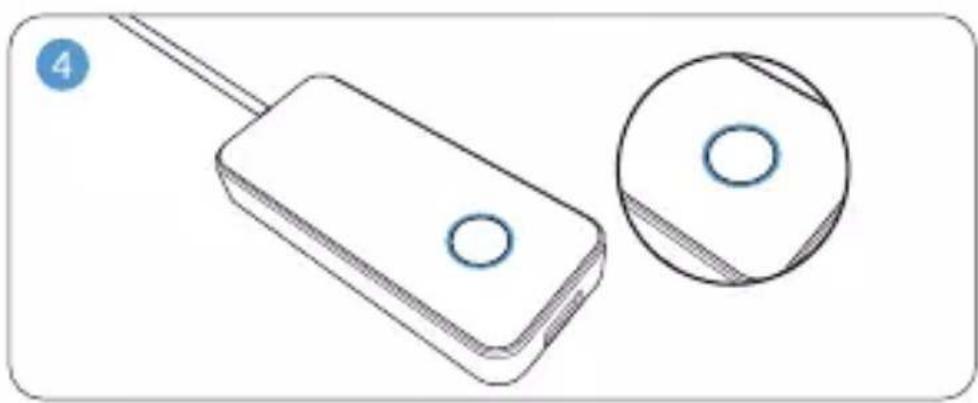
1 Type-C port: Insert the Type-C end of the data cable into the Type-C port of the adapter. 2 USB port: USB upgrade port, for USB disk upgrade; do not insert the phone data cable. 3 Button: Long press the indicator light for 6-8 seconds, the indicator light goes out, the adapter restarts, wait for 6 seconds after the switch between CarPlay or Android Auto mode is completed. Please pay attention to the color of the indicator light. When reconnecting CarPlay or Android Auto, please reconnect the adapter Bluetooth.
4 Indicator light: Determine whether the device is working properly.
Connection method:
CarPlay Connection:
1: Insert the adapter into the USB/Type-C port of the original vehicle and wait for the original head unit UI interface to display. After the adapter UI interface comes out, please use the iPhone to connect to the Bluetooth name on the UI interface, and at the same time realize the function under the prompt and guidance of the iPhone. 2: Insert the adapter into the original USB/Type-C port and wait for the original vehicle "Apple CarPlay" icon to turn green (the adapter UI not displayed), or click on the original car screen prompt to use "Apple CarPlay". At this time, please use the iPhone to connect to the Bluetooth name of the adapter.
Wireless CarPlay NOTE:
1: Before connecting, make sure that Bluetooth and Wi-Fi on the iPhone are not connected to other devices. If connected, please disconnect. Before changing the iPhone connection, please turn off the Bluetooth and Wi-Fi on the iPhone connected to the adapter. 2: iPhone or vehicle restart. 3: If the connection fails, please unplug the adapter and try again. 4: The source of network data generated by Wireless CarPlay (such as audio and video data, map data, currency data, etc.) is irrelevant to this adapter. 5: To turn off the Wireless CarPlay feature, you must remove Bluetooth and Wi-Fi from the phone, or remove the adapter. 6: When restarting the car, the wireless
CarPlay function may not start automatically. You can reconnect Bluetooth through your iPhone or by reinserting your adapter.
Android Auto Connection: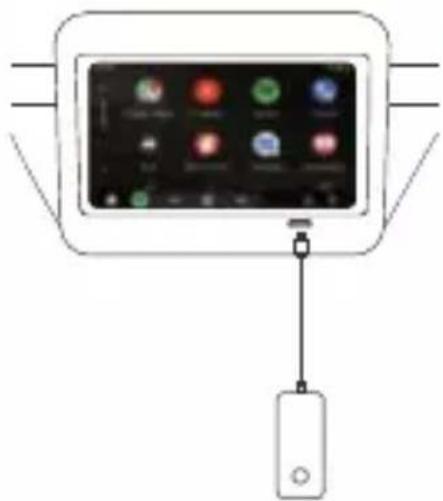
Setting up your device
Before connecting the adapter, use a phone that supports Android Auto to connect the wired Android Auto function of the auto to ensure that the wired Android Auto function can work properly. If the wired Android Auto cannot be used normally, please set it first. The product is inapplicable if the auto does not have the wired Android Auto function.
properly. If the wired Android Auto cannot be used normally, please set it first. The product is inapplicable if the auto does not have the wired Android Auto function.
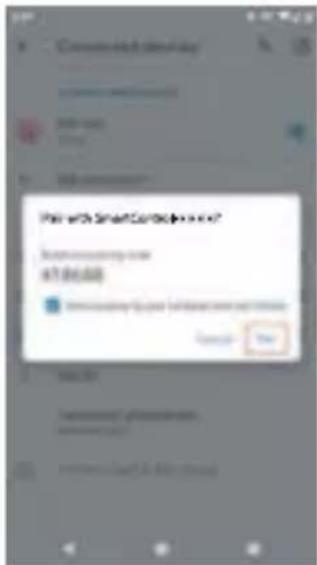
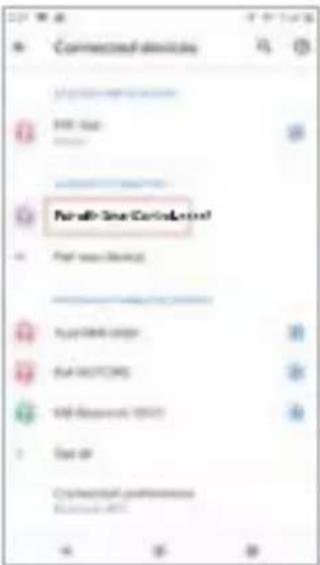
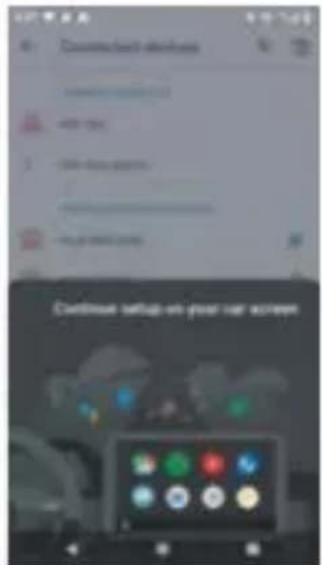
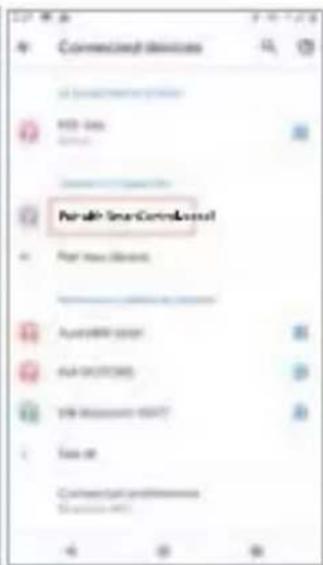
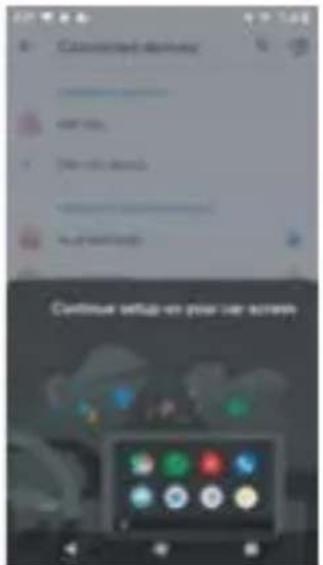
Insert the adapter into the auto USB port, wait for 6-20 seconds, scanning, search and pair the adapter Bluetooth in the Bluetooth list of the phone, Bluetooth name: SmartControl-xxxx, the Android Auto continue page will appear on the phone after the pairing, then click the Android Auto icon to access the wireless Android Auto function.
Insert the adapter into the car's USB port, wait 6-20 seconds for scanning, then search for and pair the adapter's Bluetooth in the phone's Bluetooth list. The Bluetooth name is SmartControl-xxxx. After pairing, the Android Auto continue page will appear on the phone. Then tap the Android Auto icon to access the wireless Android Auto function.
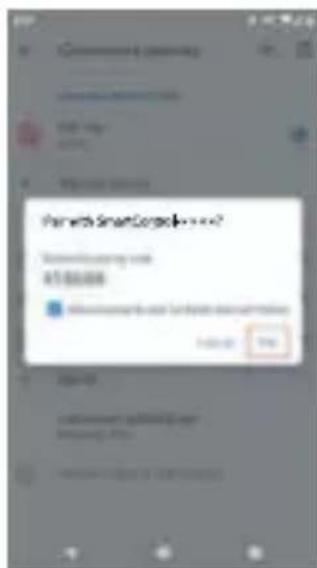
Bluetooth connected
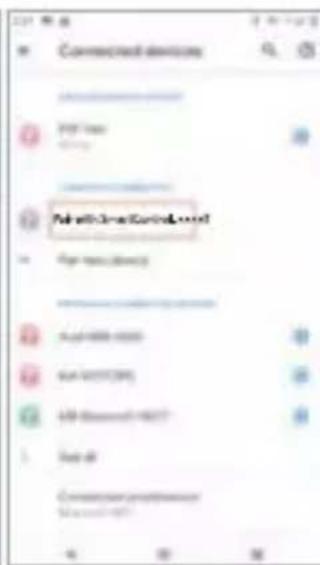
Connection is successful
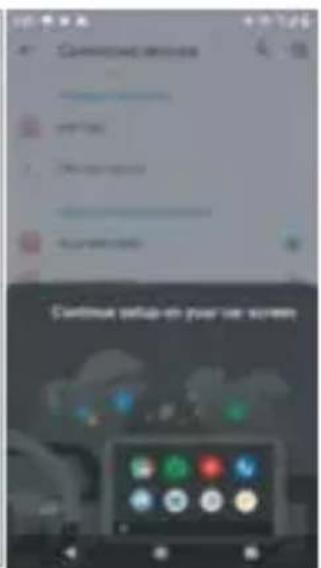
Note: Due to the differences in region, model, phone brand and function, it may not be automatically re-connected for next use. In this case, please delete the Bluetooth pairing information or re-plug the adapter, or refer to "If you can't connect again, please try the following" to resolve the connection problem.
Note: Due to differences in region, model, phone brand, and function, it may not automatically reconnect for the next use. In this case, please delete the Bluetooth pairing information or re-plug the adapter, or refer to "If you can't connect again, please try the following" to resolve the connection problem.
Check for any updates of Android Auto for your phone via the Google Play app store.
- Check for any updates of Android Auto for your phone via the Google Play app store.
- Check and make sure the Wireless Android Auto feature is enabled in the Android Auto Settings on your phone. Please check whether the wireless Android Auto function is enabled in the "Android Auto App" on the mobile phone. If you do not find the "Enable wireless Android Auto" option, please find the "Version Information" in "Android Auto App", and click 10 times in a row, and then select the "Android Auto developer" option in the upper right corner of "Android Auto App", and enable the wireless Android Auto feature.
- Connect your Bluetooth with the auto to confirm that the phone is connected for hands-free calls. (Bluetooth HFP)
Make or receive a call to confirm that your phone is connected for hands-free calling (Bluetooth HFP). A properly handled Bluetooth HFP phone call will be applicable for the auto speakers and microphone.
- Before changing the phone connection, please disconnect the Bluetooth and WiFi of the phone that has been connected to the adapter, or turn on the airplane mode.
- To disable the wireless Android Auto function, please disconnect the Bluetooth and WiFi of the adapter on your phone, or unplug the adapter.
- After the wireless Android Auto is connected successfully, the Bluetooth of the Android phone will be disconnected from our adapter.
- If you have inserted the adapter and successfully connected to the Bluetooth of the adapter, but the Android Auto continue interface has not appeared on the auto or your phone, please refer to "If you can't connect again, please try the following" for help in troubleshooting. If the connection fails, it proves that this device does not support your auto.
- The content generated by the wireless Android Auto function (including fonts, music, audio, maps, lyrics, touches, calls, etc.) has nothing to do with this Adapter.
- Due to differences in region, phone model, phone brand, and ambient temperature, wireless Android Auto may cause excessive power consumption or obvious heating of the phone, resulting in disconnection or decreased experience.
- If the connection fails, please restart or restore the factory settings of the auto.
- The wireless Android Auto function may not be automatically enabled when the car is restarted. You can re-establish the connection
EN
by re-pairing the Bluetooth or unplugging the adapter.
- During the use of the Adapter, the normal operating temperature is about 28-34 degrees Celsius. If you do not use the device in summer, please avoid exposing the device to an ambient temperature higher than 60 degrees Celsius. If you need to use the device at this moment, please cool down the device immediately. In summer, the normal operating temperature of the device may rise to about 34 degrees Celsius. The Adapter has been thermally protected which can carry out normal work within -20-75 degrees Celsius. Please use it with confidence.
- This adapter is applicable for most phone brands and models with Android
- You can refer to the Google support page for wireless Android Auto at: https://android.com/auto
15: Please disconnect VPN before using
16: German cars use this Adapter. After Bluetooth is connected, when the "USB identification" appears on the interface of vehicle, please click the Android auto icon
Attention: For vehicles with MirrorLink such as Volkswagen, Peugeot, Citroën, etc., do not click on the MirrorLink function during the connection process. Only click on the Android Auto application during the connection process.
If you can't connect again, please try the following:
1: Make sure the Android Auto app on your phone is updated to the latest version in the Google Play store.
2: Make or receive a call to make sure that your phone is connected to the auto for hands-free calling (Bluetooth HFP). A properly handled Bluetooth HFP phone call will be applicable for the auto speakers and microphone. 3: Please restart your phone, unplug/replug the adapter, then restart your auto infotainment system. 4: In the Bluetooth list of the car machine, delete the Bluetooth information of the mobile phone that has been paired with the car machine. 5: On your phone, find the Bluetooth system settings, then "forget" or "delete" both the paired auto and the paired SmartControl-xxxx. 6: On your phone, find the Apps system settings; select Android Auto; under "Storage," tap "Clear Data" (this may vary slightly by diverse phone brands). 7: Insert the data cable again and use wired Android Auto to ensure that the wired Android Auto can be connected properly. 8: If the wired Android Auto can connect properly, please reinsert the adapter and reconnect the Bluetooth. 9: If the wired Android system cannot be connected properly, please reactivate the original auto wired Android through the above methods (1), (2), (3), (4)
Exemption Notice:
Device interference exemption: This product has passed CE-RED-EMC wireless electromagnetic compatibility testing.
netic interference certification, but major functions may be affected by some vehicle electromagnetic interference, resulting in partial data loss or small electromagnetic sound.
Risk infringement exemption: This product is not an APPLE or GOOGLE product. The risk of traffic safety and infringement (including brand, technology, network content sources, etc.) caused by users has nothing to do with our company.
Function loss exemption: Due to defects of Android itself or improper upgrade of the phone (including but not limited to jailbreak), or differences in phone devices of various models or regional differences, upgrade or improper operation on the auto system, or improper upgrade of the Adapter, it may degrade the experience or cause function (partial or all) missing issues.
Device disconnection exemption: This adapter may cause disconnections during use, including long connection times or disconnections inherent to CarPlay and Android Auto.
problem, which is affected by external conditions or environment. The Adapter has been optimized to enable the device to reconnect with the adapter immediately or manually when detecting disconnection.
Evo-Sales GmbH
Hastenbecker Weg 33
31785 Hameln/Germany
www.blaupunkt.com
Scope of delivery:
ACP/AA Wireless Dongle USB cable Manual
Function:
31785 Hameln/Germany
www.blaupunkt.com
device*1
manual*1
Function:
Convert the original wired Android Auto to wireless Android Auto and convert the original wired CarPlay to wireless CarPlay.
Features:
Insert the adapter into the auto USB port, wait for 6-20 seconds, scanning, search and pair the adapter Bluetooth in the Bluetooth list of the phone, Bluetooth name: SmartControl-xxxx, the Android Auto continue page will appear on the phone after the pairing, then click the Android Auto icon to access the wireless Android Auto function.
Connector and Bluetooth coupler
Bluetooth connected
Connection successful
31785 Hameln/Germany
www.blaupunkt.com
IT
device *1
USB-A to USB-C cable *1
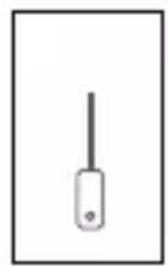
manual *1
Function:
Convert original Android Auto via cable to Android Auto wireless and Convert original CarPlay Auto via cable to CarPlay Auto wireless
Features:
31785 Hameln/Germany
www.blaupunkt.com
ES
device *1
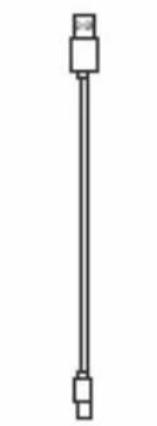
USB-A to USB-C Cable *1
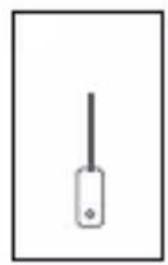
manual *1
Function:
Bluetooth connected
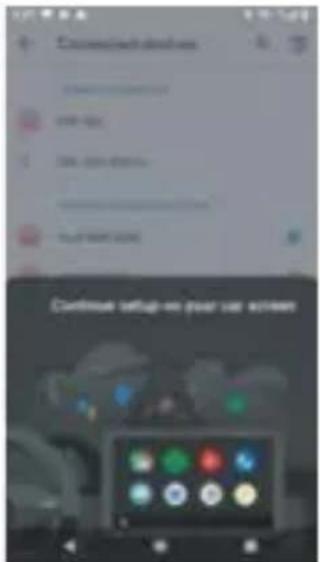
31785 Hameln/Germany
www.blaupunkt.com
device *1
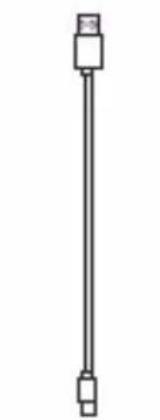
manual *1
Function:
Convert original wired Android Auto to wireless Android Auto and convert original wired CarPlay Auto to wireless CarPlay Auto
Features:
Android Auto Connect:
Connect and pair Bluetooth
Bluetooth connected
31785 Hameln/Germany
www.blaupunkt.com


- CONTROLS
- ATTENTION
- PHONE CONFIGURATION
- BEFORE STARTING
- APPLE MAPS
- MOUNTING INSTRUCTIONS
- CONNECTION DIAGRAM
- CONNECTIONS
- CONTROLS REMOTE CONTROL
- SAFETY NOTES
- CLEANING NOTES
- DISPOSAL NOTES
- SCOPE OF DELIVERY
- PLACING THE DEVICE IN OPERATION
- OPERATION
- MAIN MENU
- SOUND SETTINGS
- SYSTEM SETTINGS
- EXTERNAL DEVICES AND DATA CARRIERS
- ANALOGUE RADIO (FM, AM)
- DIGITAL RADIO (DAB/DAB+)
- MEDIA PLAYBACK (USB, AV-IN, BT AUDIO)
- CALLING
- SWC INPUT OPERATION
- HOW TO USE CARPLAY®
- HOW TO USE ANDROID AUTO®
- INSTALLATION GUIDE
- TROUBLESHOOTING
- SYMBOLS USED
- DANGER
- ROAD SAFETY
- GENERAL SAFETY NOTES
- USE AS DIRECTED
- INSTALLATION INSTRUCTIONS
- DECLARATION OF CONFORMITY
- TOUCHSCREEN
- IMPORTANT NOTE
- TAPPING
- SWIPING/SCROLLING
- OPENING MAIN MENU
- IN MAIN MENU YOU CAN DO FOLLOWING ACTIONS
- CHANGING TO THE PREVIOUS SCREEN OR THE HIGHER-LEVEL MENU
- SETTINGS IN MENUS
- ACTIVATING/DEACTIVATING OPTIONS
- CONTROL
- ADDITIONAL SETTINGS
- THE EQUALIZER DISPLAY
- NOTE
- OPENING SYSTEM SETTINGS
- EXTERNAL DEVICES AND DATA CARRIERS BASIC INFORMATION
- USB DATA CARRIER
- CONNECTING A USB DATA CARRIER
- REMOVING A USB DATA CARRIER
- BLUETOOTH® SOURCES
- CONNECTING A BLUETOOTH® DEVICE FOR THE FIRST TIME
- MANAGING BLUETOOTH® DEVICES
- ANALOGUE RADIO
- STARTING RADIO PLAYBACK
- RADIO DISPLAY
- SETTINGS MENU
- DIGITAL RADIO DAB/ DAB
- STARTING DAB PLAYBACK
- MEDIA PLAYBACK
- DANGER! RISK OF ROAD SAFETY DUE TO VIDEO PLAYBACK
- NOTES
- STARTING MEDIA PLAYBACK
- TRACK INFO AREA
- CHANGING THE MEDIA TYPE
- SETTING REPEAT TITLE/RANDOM TRACK PLAYBACK
- TIME/BLUETOOTH™ STATUS
- PLAYBACK PROCESS (NOT FOR IMAGE PLAYBACK)
- CONTROLLING PLAYBACK
- OPENING THE PHONE
- GENERAL FUNCTIONS OF THE PHONE DISPLAYS
- PHONE BOOK
- REQUIREMENTS
- PHONE SETUP
- BEFORE YOU BEGIN
- DEVICE SETUP
- APPLE MUSIC
- I INFORMATION
- BASIC REQUIREMENTS
- GOOGLE ASSISTANT®
- PHONE
- MAKE A CALL
- MUSIC
- PLAYING MUSIC
- FINDING PLAYLISTS AND SONGS
- ACCESSING SETTINGS
- NAVIGATION
- ACCESSING MAPS
- GETTING DIRECTIONS
- VIEWING DIRECTIONS
- WARNING
- STARTING ANDROID AUTO
- INSTALLATION
- MUSIC PLAYBACK
- MOUNTING
- MAKE CALLS
- PLAY MUSIC
- MAKING A CALL
- ROUTE OVERVIEW
- HOME SCREEN
- ZENE
- ZENE LEJÁTSZÁSA
- ANALOG RADIO (FM, AM)
- MULTIMEDIA PLAYBACK (USB, AV-IN, BT AUDIO)
- PHONE CALLS
- EN
- PRODUCT SPECIFICATIONS
- CONTAINS
- FUNCTION
- FEATURES
- BUTTON SWITCH
- INDICATOR STATUS
- INDICATOR LIGHT
- CONNECTION METHOD
- CARPLAY CONNECTION
- WIRELESS CARPLAY NOTE
- SETTING UP YOUR DEVICE
- INSERT THE ADAPTER INTO THE AUTO USB PORT, WAIT FOR 6-20 SECONDS, SCANNING, SEARCH AND PAIR THE ADAPTER BLUETOOTH IN THE BLUETOOTH LIST OF THE PHONE, BLUETOOTH NAME: SMARTCONTROL-XXXX, THE ANDROID AUTO CONTINUE PAGE WILL APPEAR ON THE PHONE AFTER THE PAIRING, THEN CLICK THE ANDROID AUTO ICON TO ACCESS THE WIRELESS ANDROID AUTO FUNCTION
- NOTE: DUE TO THE DIFFERENCES IN REGION, MODEL, PHONE BRAND AND FUNCTION, IT MAY NOT BE AUTOMATICALLY RE-CONNECTED FOR NEXT USE. IN THIS CASE, PLEASE DELETE THE BLUETOOTH PAIRING INFORMATION OR RE-PLUG THE ADAPTER, OR REFER TO "IF YOU CAN'T CONNECT AGAIN, PLEASE TRY THE FOLLOWING" TO RESOLVE THE CONNECTION PROBLEM
- CHECK FOR ANY UPDATES OF ANDROID AUTO FOR YOUR PHONE VIA THE GOOGLE PLAY APP STORE
- EXEMPTION NOTICE
- IT
- ES
- ANDROID AUTO CONNECT
Brand : BLAUPUNKT
Model : Oslo 600 DAB
Category : Car radio