
HAF5TW 011 - Deep fryer HAIER - Free user manual and instructions
Find the device manual for free HAF5TW 011 HAIER in PDF.

| Brand | Haier |
| Model | HAF5TW 011 |
| Product type | Air fryer |
| Power supply | 220-240 V ~ 50/60 Hz |
| Power | 2000 W |
| Cooking programs | Manual, Air fry, Grill, Roast, Bake, Dehydrate, Reheat, Defrost, Yogurt, Slow cook |
| Display | Control panel with digital screen and rotary dial |
| Transparent window | Yes, to monitor cooking |
| Internal light | Yes, with dedicated button |
| Shake function | Automatic alert at half-cooking, pause and resume |
| Memory function | Resumes cooking after basket is replaced or power returns (up to 1 hour) |
| Special modes | Standby mode, automatic shut-off, mute mode (long press on light) |
| Main material | Non-stick coating on basket and container |
| Cleaning | Basket and container dishwasher safe; exterior cleanable with damp cloth |
| Safety | Overheat protection, automatic shut-off, power cord replaceable only by authorized repairer |
| Spare parts | Original parts available from Haier dealer |
| Repairability | Maintenance and repairs by an authorized Haier repairer |
| Warranty | According to conditions in force in the country of purchase |
| Standards | Compliant with European directives 2014/35/EU, 2014/30/EU, 2011/65/EU |
| Country of manufacture | Italy (CANDY HOOVER GROUP S.r.l.) |
Frequently Asked Questions - HAF5TW 011 HAIER
User questions about HAF5TW 011 HAIER
0 question about this device. Answer the ones you know or ask your own.
Ask a new question about this device
Download the instructions for your Deep fryer in PDF format for free! Find your manual HAF5TW 011 - HAIER and take your electronic device back in hand. On this page are published all the documents necessary for the use of your device. HAF5TW 011 by HAIER.
USER MANUAL HAF5TW 011 HAIER
natural_image
Line drawing of a Haier air fryer with no text or symbols on the device itselfUser manual (GB) ......P8
* GB - Content may vary according to your model. FR - Le contenu peut varier en fonction de votre modèle. IT - I contenuti possono variare secondo il modello. DE - der inhalt kann je nach modell variieren. ES - el contenido puede variar en base a su modelo. NL - inhoud kan varieren volgens uw model. CZ - obsah semüže lišit v závislosti na vašem modelu. DK - indholdet kanvariere i henhold til modellen. NO - innholdet kan variere avhengig av modellen. PT - o conteúdo pode variar de acordo com o modelo. SE - innehåll kan variera beroende på modell. FI - sisältö saattaa vaihdella mallista riippuen. NL - De inhoud kan per model verschillen. NO - Innhold kan variere etter modell. PL - zawartość może być inna w zależności od modelu. GR - τοπεριεχομενο ενδεχεται να διαφερει αναλογα με το μοντελο. RU - содержимое может меняться в зависимости от модели. SK - Obsah sa môže lišit' v závislosti od vášho modelu. SE - Innehållet kan variera beroende på din modell. TR - içerik modelinize göre farklılik gösterebilir. AR - قد يختلاف المحتوى وفقçaً لطرازك
natural_image
Line drawing of an air fryer with a lid open, showing internal components (no text or symbols)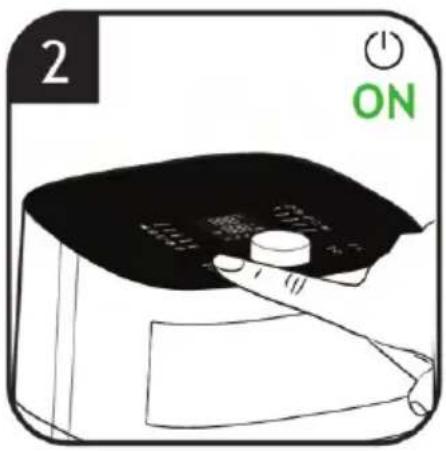


natural_image
Line drawing of a Holfer air fryer with a clock icon (no text or symbols on the device itself)
natural_image
Simple diagram showing a speaker icon with sound waves and a magnifying glass, no text or symbols present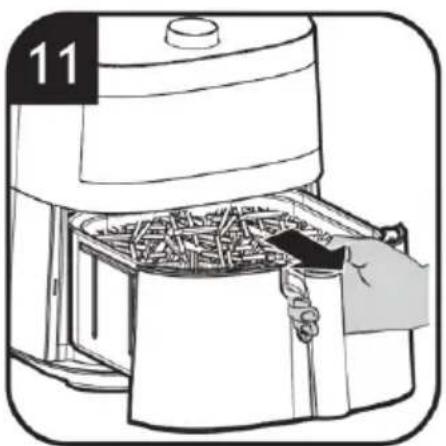
natural_image
Illustration of an air fryer being placed into a container with food inside (no text or symbols)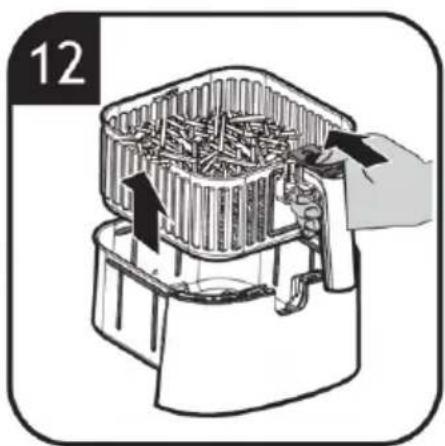


natural_image
Illustration of a device with a speaker emitting sound waves, featuring an eye and a speaker icon (no text or symbols)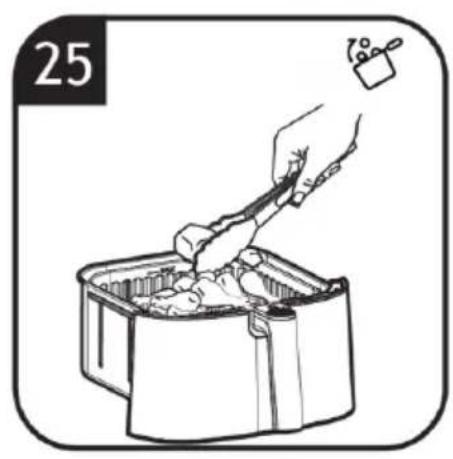
natural_image
Illustration of a hand using a tool to cut or wash food into a container (no text or symbols)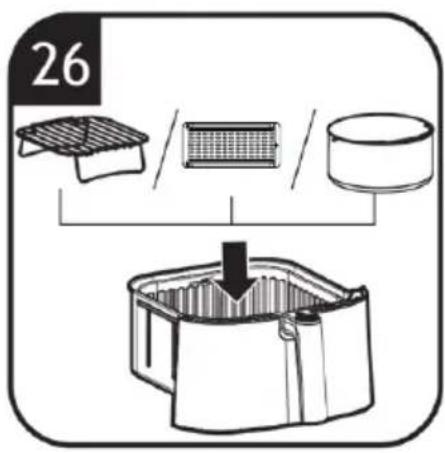
natural_image
Illustration of a kitchen appliance with a handle and control panel (no text or symbols)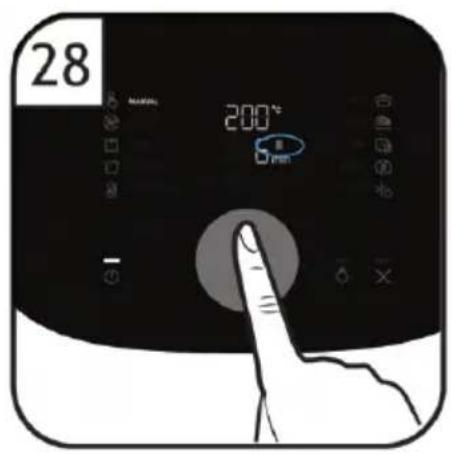

natural_image
Simple line drawing of a hand holding a cup, with no text or symbols present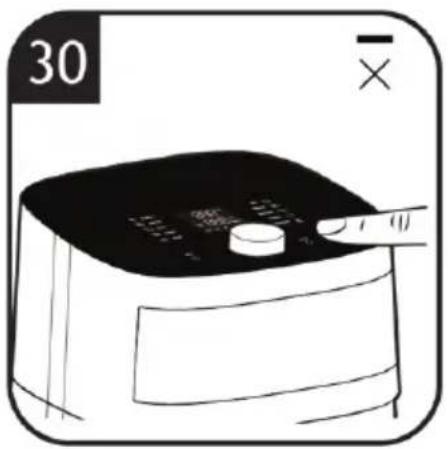
natural_image
Illustration of a hand using a portable air fryer (no text or symbols visible)
Table 1
 |  |  |  |  | ||
 MANUAL MANUAL | / | 40-50 °C | 1 min-8 H | √ | ||
| / | 55-80 °C | 1 min-4 H | √ | |||
| / | 85-200 °C | 1-60 min | √ | |||
| AIR FRY |  MEAT MEAT | 200 °C | 12 min | 300-600 g (1 inch) | √ | |
 CHICKEN CHICKEN | 200 °C | 15 min | 300-600 g (1 inch cubes/wings) | √ | ||
 FISH (FISH-fillets) FISH (FISH-fillets) | 180 °C | 8 min | 300-600 g (1 / 2 inch thickness) | √ | ||
 FISH (FISH-whole) FISH (FISH-whole) | 180 °C | 15 min | 400-800 g (1 or 2 fishes) | √ | ||
 FRUIT/VEG FRUIT/VEG | 200 °C | 18 min | 300-600 g (1 / 2 inch) | √ | ||
 CAKE CAKE | 170 °C | 20 min | 600 g max (single portion mould) | |||
| GRILL |  MEAT MEAT | 200 °C | 15 min | 300-600 g (1 inch) | √ | |
| [wSZ6] CHICKEN | 200 °C | 20 min | 300-600 g (1 inch pieces/wings) | √ | ||
 FISH FISH | 200 °C | 7 min | 300-600 g (1 inch cubes/fillets) | √ | ||
 FRUIT/VEG FRUIT/VEG | 180 °C | 15 min | 300-600 g (1 inch slices/cubes) | √ | ||
| ROAST |  MEAT MEAT | 200 °C | 24 min | 800 g (whole) | √ | |
 CHICKEN CHICKEN | 200 °C | 25 min | 800 g (pieces) | √ | ||
 FISH FISH | 200 °C | 15 min | 800 g (whole piece) | √ | ||
 FRUIT/VEG FRUIT/VEG | 200 °C | 22 min | 800 g (1 inch cubes) | √ | ||
[ |  |  |  |  | ||
 BAKE BAKE |  CAKE CAKE | 30 min | 600 g max (20 cm mould) | |||
| DRY |  FRUIT/VEG FRUIT/VEG | 4 H | 300 g (2-3 mm slices) | √ | ||
| REHEAT | MEAT | 200 °C | 5 min | 300-600 g (1/2 inch slices/cubes) | √ | |
| CHICKEN | 180 °C | 5 min | 300-600 g (1/2 inch slices/cubes) | √ | ||
| FISH | 160 °C | 5 min | 300-600 g (1/2 inch slices/cubes) | √ | ||
| FRUIT/VEG | 180 °C | 5 min | 300-600 g (1/2 inch slices/cubes) | √ | ||
| CAKE | 160 °C | 5 min | 300-600 g (1/2 inch slices/cubes) | |||
| DEFROST | MEAT | 80 °C | 15 min | 300-600 g (1/2 inch slices/cubes) | √ | |
| CHICKEN | 70 °C | 15 min | 300-600 g (1/2 inch slices/cubes) | √ | ||
| FISH | 70 °C | 15 min | 300-600 g (1/2 inch slices/cubes) | √ | ||
| FRUIT/VEG | 70 °C | 15 min | 300-600 g (1/2 inch slices/cubes) | √ | ||
| CAKE | 70 °C | 10 min | 300-600 g (whole/single portion) | |||
| YOGURT | / | 45 °C | 4 H | 500 ml | ||
 SLOW COOKING SLOW COOKING | / | 90 °C, 90 min + 200 °C, 5 min | 800 g | |||
This appliance is intended for domestic and indoor use only as described in this user guide. Please ensure that this guide is fully understood before operating the appliance.
WARNING: To eliminate suffocation hazard for young children, discard all packaging materials immediately after removing the product. Paper package for accessories may be present inside the appliance depend on the models you purchased, remove all package before using the appliance to avoid a fire hazard.
This appliance can be used by children aged from 8 years and above and persons with reduced physical, sensory or mental capabilities or lack of experience and knowledge if they have been given supervision or instruction concerning use of the appliance in a safe way and understand the hazards involved. Children shall not play with the appliance.
Cleaning and user maintenance shall not be made by children unless they are older than 8 years and supervised. Keep the appliance and its cord out of reach of children less than 8 years. If the power cord is damaged stop using the appliance immediately. To avoid a safety hazard, an authorised Haier service engineer must replace the power cord.
Use only attachments, consumables or spares recommended or supplied by Haier. The use of accessories or attachments not recommended by Haier may cause injuries.
Only use the appliance in accordance with the power specification on the rating plate.
WARNING: Risk of scalding! Never touch the inside of the appliance while in use and after operation. The heating element is subject to residual heat after use. Please always use the handle to carry the basket.
Only press the basket release button with the baskets resting flat on a counter (or any level, heat-resistant surface).
Do not block any ventilation openings. Hot steam is released through air outlets. Keep your hands and face away from the hot steam and openings. Also be careful of hot steam and air when you remove the basket from the appliance.
Do not operate the appliance
by means of an external timer or separate remote-control system.
Do not let any water or other liquid enter the appliance to prevent electric shock.
Do not pull or carry the appliance by the power cord.
Always unplug the appliance from the socket by pulling the plug instead of the cord.
Do not place the power cord over sharp edges or near hot surfaces. Do not use an extension cord.
Do not plug in the appliance or operate it with wet hands.
Never immerse the appliance, cord, plug or main unit in water or other liquid.
WARNING: Risk of fire! The food may burn, therefore do not use the appliance near or below combustible material, such as curtains.
Do not place the appliance against the wall or other appliances. Keep a free space of at least 10cm on the back and sides for the appliance.
Do not place anything on top of the appliance while in use.
WARNING: Risk of injury! A misuse of the appliance can potentially lead to injury.
Pay attention to clean surfaces which are intended to come into contact with food! Please note the information on cleaning in the instructions.
Do not use the appliance
for any other purpose than described in this User Guide.
The pan, the basket and accessories inside the appliance become hot during use. Be careful when you handle them.
Do not overfill above the maximum line indicated in the basket. Prevent food from touching with heating elements. Excessive or oversized food, paper, carboard, plastic or metal foil packages must not be cooked which may cause risk of fire.
Use the recommended cooking time for food, excessive cooking time could lead the food to burn.
Only connect the appliance to an earthed wall socket. Always make sure that the plug is inserted into the wall socket properly.
Use on worktop only. Do not place the appliance near the edge of a worktop.
Do not operate the appliance on an inclined surface and move it when working.
Do not operate the appliance without basket installed.
Do not leave the appliance unattended while in use.
Exercise extreme caution when use an appliance which contains hot oil or other hot liquid.
Allow the appliance to cool down before cleaning or any
maintenance.
Regularly clean the basket, otherwise any residue stuck to it may smoke or burn.
Unplug from the socket after use and before cleaning the appliance or any maintenance task.
Do not continue to use your appliance if it appears faulty.
Haier service: To ensure the continued safe and efficient operation of this appliance we recommend that any servicing or repairs are only carried out by an authorised Haier service engineer.
The surfaces are liable to get hot during use. Do not touch.
The Environment
The symbol on this appliance indicates that this appliance may not be treated as household waste. Instead it must be handed over to the applicable

collection point for the recycling of electrical and electronic equipment. Disposal must be carried out in accordance with local environmental regulations for waste disposal. For more detailed information about treatment, recovery and recycling of this appliance, please contact your local city office, your household and waste disposal service or the shop where you purchased the appliance.

This appliance complies with the European Directives 2014/35/EU, 2014/30/EU and 2011/65/EU.
CANDY HOOVER GROUP S.r.l. Via Comolli,16, 20861 Brugherio (MB) Italy
2. Getting to know your Air Fryer
COMPONENTS & FEATURES:
A. Control and display panel
a. MANUAL cooking program
b. AIR FRY cooking program
c. GRILL cooking program
d. ROAST cooking program
e. BAKE cooking program
f. DRY cooking program
g. REHEAT cooking program
h. DEFROST cooking program
i. YOGURT cooking program
j. SLOW COOKING program
k. ON/OFF Button
l. DIAL with click button
m. INTERNAL LIGHT button
n. CANCEL Button
B. Transparent window
C. Frying bucket
D. Handle
E. Frying basket release button
F. Frying basket release button cover
G. Frying basket
H. Extra Layer
I. Divider
J. Baking Kit
3. Before first use
- Remove all packing materials and any stickers or labels (if available) from the appliance.
- Thoroughly clean the basket and bucket with warm water. Clean the inside and outside of the air fryer with a moist cloth. Dry with a towel.
- Place the appliance on a stable, horizontal, level and heat-resistant Surface.
NOTE:
-
During the first times of using your new Air Fryer, there may be a “hot plastic” smell. It’s quite normal for the new Air Fryer, because the material is heated first time. It will go away after several uses.
-
This is an Air Fryer that works on hot air. Do not fill the frying bucket with oil, frying fat or any other liquid.
- This appliance may produce some smoke when you use it for the first time. This is normal.
- Preheating of the appliance is not necessary.
4. Using your Air Fryer
- Plug into the wall outlet. (All lights blinking once with a sound then all lights off).
- Hold the handle to remove the tray from the main body. You can find it inside the frying bucket. Place on a dry level surface such as a table or work top and plug in.
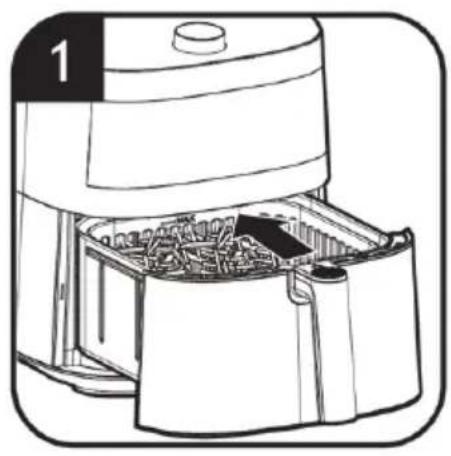
- Put ingredients into the frying basket [Fig. 1].
NOTE:
Do not put too many ingredients. Otherwise, the result will not be good enough. If you want to cook different ingredients at the same time, check the suggestion cooking time for every ingredient before cooking.
- Put the frying bucket back into the main body [Fig. 1].
- Press ON/OFF Button to switch the product on [Fig. 2].
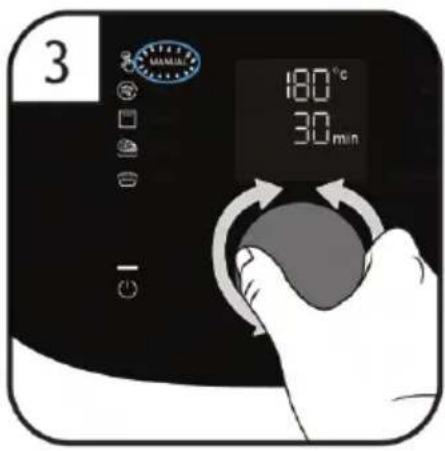
- Rotate the Dial to select your function [Fig. 3]. Both clockwise and anticlockwise will work. Press the Dial to confirm the function.
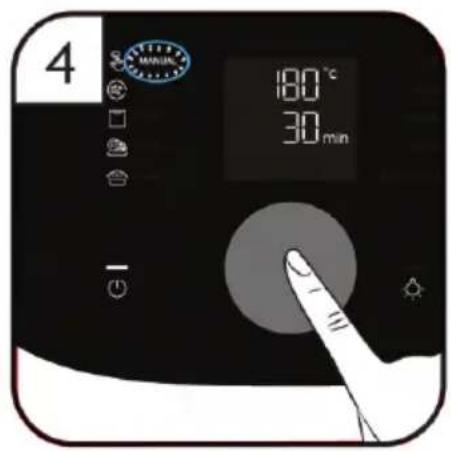
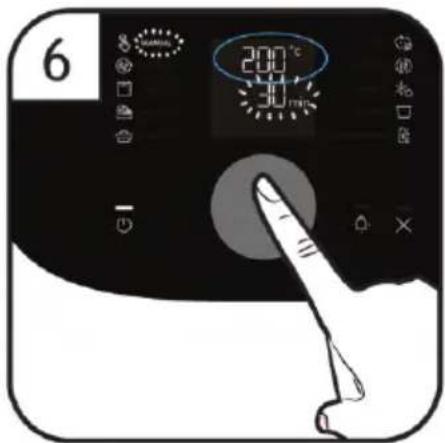
- Under MANUAL function, press Dial one time [Fig. 4], the Temperature blinks, you can rotate the Dial to adjust the temperature and press Dial to confirm the temperature [Fig. 5,6], at the same time the time blinks, you can rotate the Dial to adjust the time and press Dial to confirm time, the air fryer starts cooking [Fig. 7,8].
NOTE:
The temperature is adjusted in 5^ C steps by rotating the dial. The time is adjusted in 1 minute steps by rotating the dial.
If you do not operate within 2 minutes after the temperature blinks, the appliance will enter into standby, and within another 5 minutes of no operation, the appliance switches off automatically.
8. During cooking, you can not change the
temperature and time, you could press Dial to pause the cooking process. “| |” will show in Display. Time and min will blink, you can change the time by rotate the Dial or click again to resume.
NOTE:
In the working state, only the time can be adjusted, and the temperature cannot be adjusted. The temperature can only be adjusted in manual mode and before manual mode starts.
- During cooking, you could press CANCEL Button to cancel the cooking process or return to the previous navigation mode.
- You could check the cooking level of the ingredients by checking from the Transparent window or by taking out the bucket.
NOTE:
During the cooking process, if you take out and then put back the Air frying bucket, the program resumes automatically.
Caution: After cooking process, the Air frying bucket and basket, internal housing and the food is all hot, please be careful.
- During cooking, you could also check the cooking level by pulling out the tray any time, and put it back to resume work.
NOTE:
After pulling out the drawer, the heating tube and fan stop working, all the keys cannot be operated, put back in the drawer, the internal light will automatically light up for 30 seconds, and then automatically shut down.
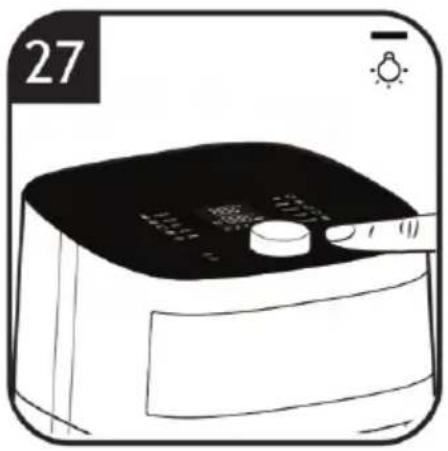
- During cooking, you could press INTERNAL LIGHT Button to turn on and off the light inside the chamber.
NOTE:
The internal light automatically turns on when the Air fryer start cooking.
The internal light automatically turns off after 30 seconds without any action.
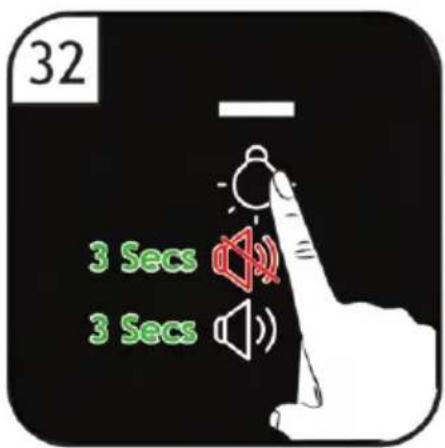
Activate and disable mute mode: press Light button for 3 seconds.
- When the cooking process is complete, the buzzer sounded three times, display shows the current temperature and timer shows there's no time remaining. At this time, the fan still runs and enters the standby state 15 seconds later.
NOTE:
- In standby mode: only the on/off button Led lights up.
- If there is no operation for 5 minutes after cooking, the machine will turn off automatically.
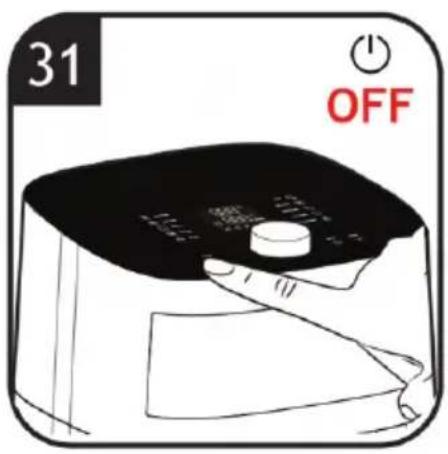
- It can also be turned off by keep pressing
the on/off button for 2 seconds during menu selection, during working or when cooking is finished.
- For some ingredients which need to shake during the cooking, when it reaches 2/3 cooking time the program pauses and the shake icon lights up [Fig. 10]. You can open the tray to turn the food and put the tray back to resume work. You can also ignore it, and after 10 seconds, the machine will continue to work automatically.
To shake:
[Fig. 11]: Hold the handle to remove the tray from the main body.
[Fig. 12]: Press the Frying basket release button and lift upwards to remove the frying basket from the bucket.
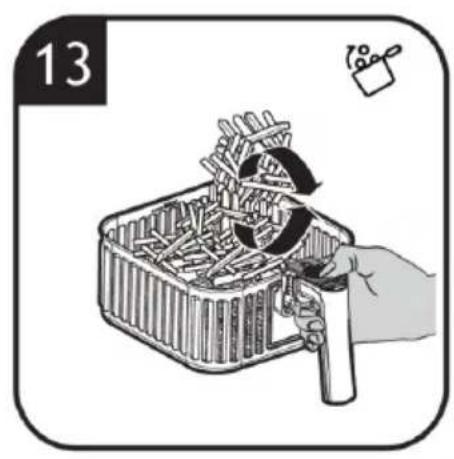
[Fig. 13]: Shake the frying basket.
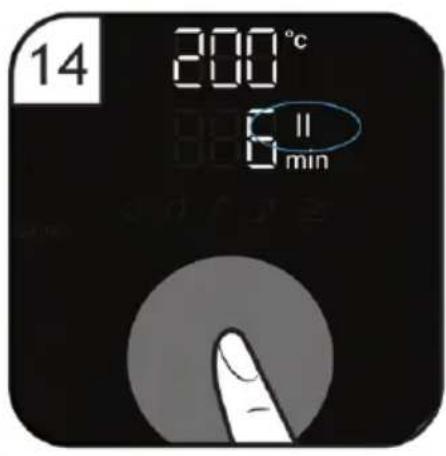
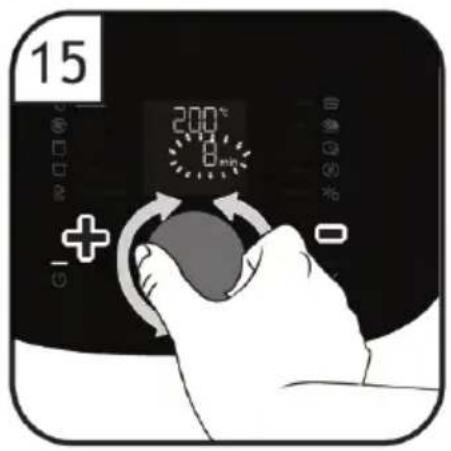
-
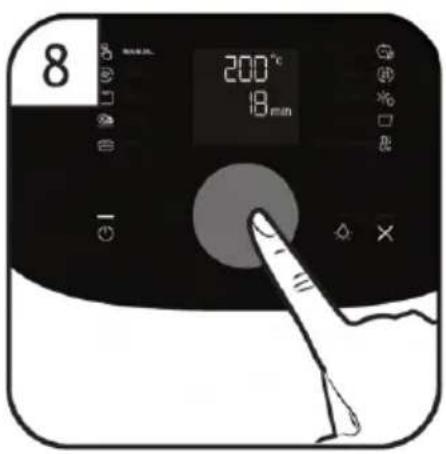
During cooking, if you want to change time, you could press Dial to pause the cooking process, “| |” will show in Display and Time and min will blink [Fig. 14], you can change the time by rotate the Dial [Fig. 15] and press again to resume [Fig. 16].
-
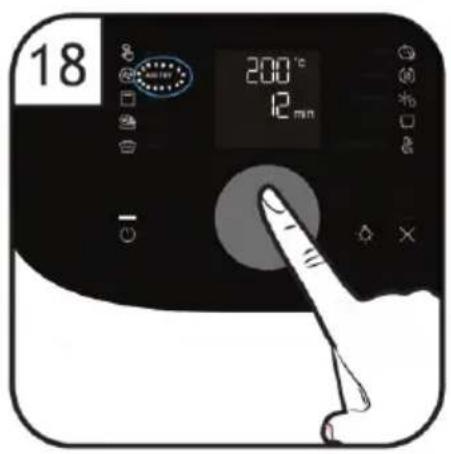
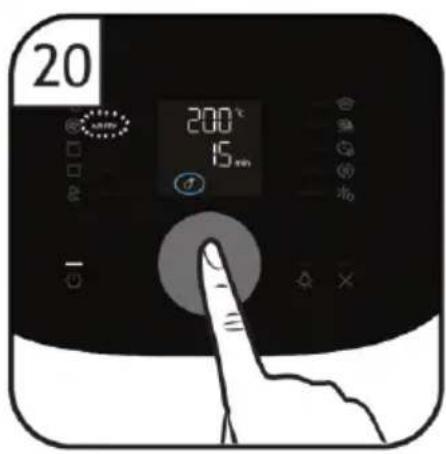
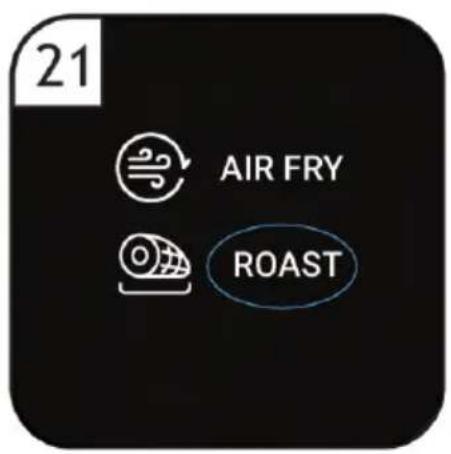
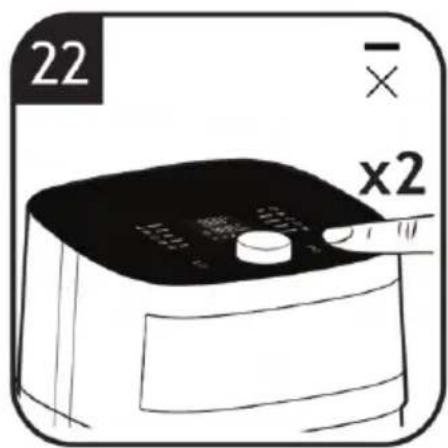
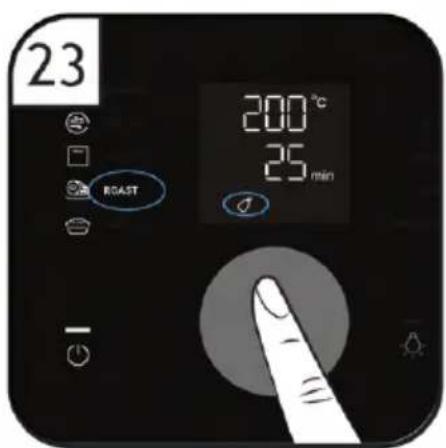
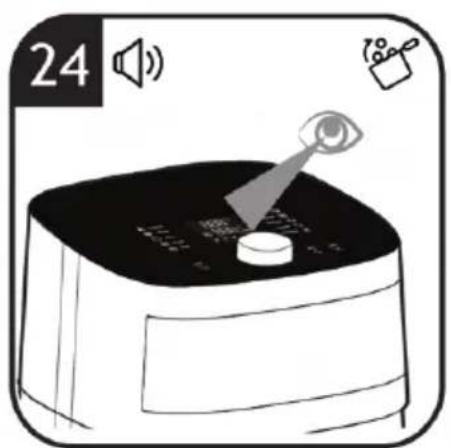
Under the other Preset functions, you can rotate the Dial to select other function [Fig. 17] and press the dial to confirm your function [Fig. 18], you will enter a secondary menu to select ingredients, rotate the dial to select ingredient [Fig. 19] and press the dial to confirm the selected ingredient [Fig. 20]. If you want change to another function [Fig. 21], you could press Cancel button 2 times [Fig. 22] and repeat operate [Fig. 19] and press the Dial to confirm your function [Fig. 23], the air fryer starts cooking. When it reaches 2/3 cooking time the program pauses and the shake icon lights up, you will hear the buzzer sound 5 times, and the fryer will enter the pause state [Fig. 24]. You can pull out the frying bucket and turn the ingredients [Fig. 25].
NOTE:
- After cooking process, the Air frying bucket and basket, internal housing and the food is all hot, please be careful.
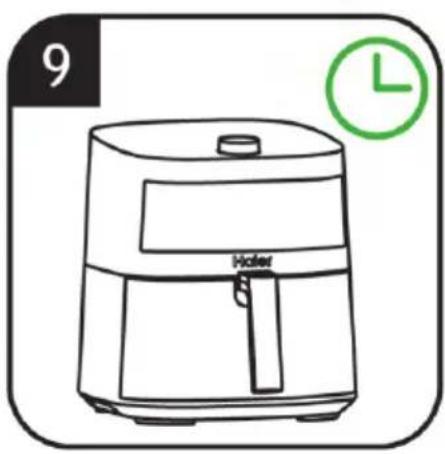
- Memory function:
a) If the basket is drawn out of the body, the air fryer will resume cooking once the basket is inserted back.
b) If the air fryer loses power during the cooking, it will return to its last status once connected to the power again (Valid for 1 hour).
- If you buy a model with accessories, you
can only use one of these accessories in the frying basket at a time [Fig. 26].
NOTE:
In the table 1 you can find more information about the presets.
5. Cleaning & Maintenance
WARNING
Always unplug the appliance from the power source and keep it cool down before cleaning. The basket, bucket and the inside of the appliance have a non-stick coating. Do not use metal kitchen utensils or abrasive cleaning materials as this may damage the non-stick coating.
- Pull out the basket and bucket from the appliance, slide the release button cover forward and press the basket release button to remove the frying basket from the frying bucket.
NOTE:
Remove the basket and the bucket to let the Air fryer cool down more quickly.
- Clean the basket and bucket or accessories in a dishwasher. You can also clean them with hot water, dishwasher liquid soap and a non-abrasive sponge [Fig. 34]. To avoid water marking, ensure all parts are completely dry after washing using a soft cloth.
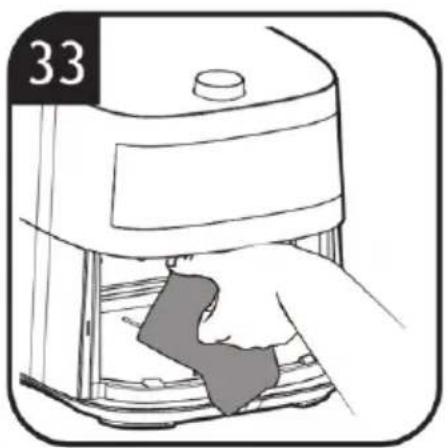
- Clean the heating element with a cleaning brush to remove any food residues [Fig. 33].
- Clean the inside of the appliance with hot water and a non-abrasive sponge [Fig. 33].
NOTE: Make sure no moisture remains on the control panel. Dry the control panel with a cloth after you have cleaned it.
-
Wipe the outside of the appliance with a moist cloth, if necessary.
-
Dry before next use.
NOTE: Clean the appliance after every time.
6. Troubleshooting
This chapter summarizes the most common problems you could encounter with the appliance. If you are unable to solve the problem with the information below, you could contact the Haier's Customer Support.
| Problem Possible | cause Solution | |
| The Air fryer does not work | The appliance is not plugged in. | Check if the plug is inserted in the wall socket. |
| The frying bucket and basket are not put into the appliance properly. | Push the basket securely into the appliance's body. | |
| White smoke comes out of the appliance | You are cooking fatty Ingredients. | Carefully pour off any excess oil or fat from the pan and then continue cooking. |
| The basket still contains greasy residues from previous use. | Always clean the bucket and the basket thoroughly after every use. | |
| Food are not completely cooked | The set temperature is too low or cooking time is too short. | Increase the cooking temperature and cooking time. |
| Too much ingredients in the basket. | Decrease or place less batches of ingredients into the basket for complete frying. | |
| The display show error code “E-1” | There is an open circuit in the temperature sensor. | Unplug it from the power source and contact the customer support. |
| The display show error code “E-2” | There is an short circuit in the temperature sensor. | Unplug it from the power source and contact the customer support. |
| The display show error code “E-3” | Overheat protection has been triggered. | Please let the appliance cool down before turning it on again. |
7. Technical data
| Electrical connection 220-240V~50/60Hz | |
| Power 2000W | |
8. Important information
Spares and Consumables
Always replace parts with genuine spares. These are available from your local dealer. When ordering parts always quote your model number.
Quality
Factories have been independently assessed for quality. Our products are made using a quality system which meets the requirements of ISO 9001.
Your Guarantee
The guarantee conditions for this appliance are as defined by our representative in the country in which it is sold. Details regarding these conditions can be obtained from the dealer from whom the appliance was purchased. The bill of sale or receipt must be produced when making any claim under the terms of this guarantee.
| EU 2023/826 | |
| Power Consumption Off Mode N.A. | |
| Power Consumption StandBy Mode 0.3W | |
| Power Consumption StandBy Mode with info display | N.A. |
| Power Consumption Networked StandBy | N.A. |
| Time to reach Off Mode/ StandBy/StandBy with display/ Networked StandBy | 7min |
WAARSCHUWING: Brandgevaar!
Brand : HAIER
Model : HAF5TW 011
Category : Deep fryer