PPIC90600 - Surveillance Camera ABUS - Free user manual and instructions
Find the device manual for free PPIC90600 ABUS in PDF.
Download the instructions for your Surveillance Camera in PDF format for free! Find your manual PPIC90600 - ABUS and take your electronic device back in hand. On this page are published all the documents necessary for the use of your device. PPIC90600 by ABUS.
USER MANUAL PPIC90600 ABUS
ABUS Solar Panel for Wi-Fi Battery Cam (PPIC90600) Installation material Safety information Drilling template Wall bracket Quick-start guide New cover for the back of the Wi-Fi battery cam English Cable clamps Cap for new cover Solar panel incl. 3 meter cable
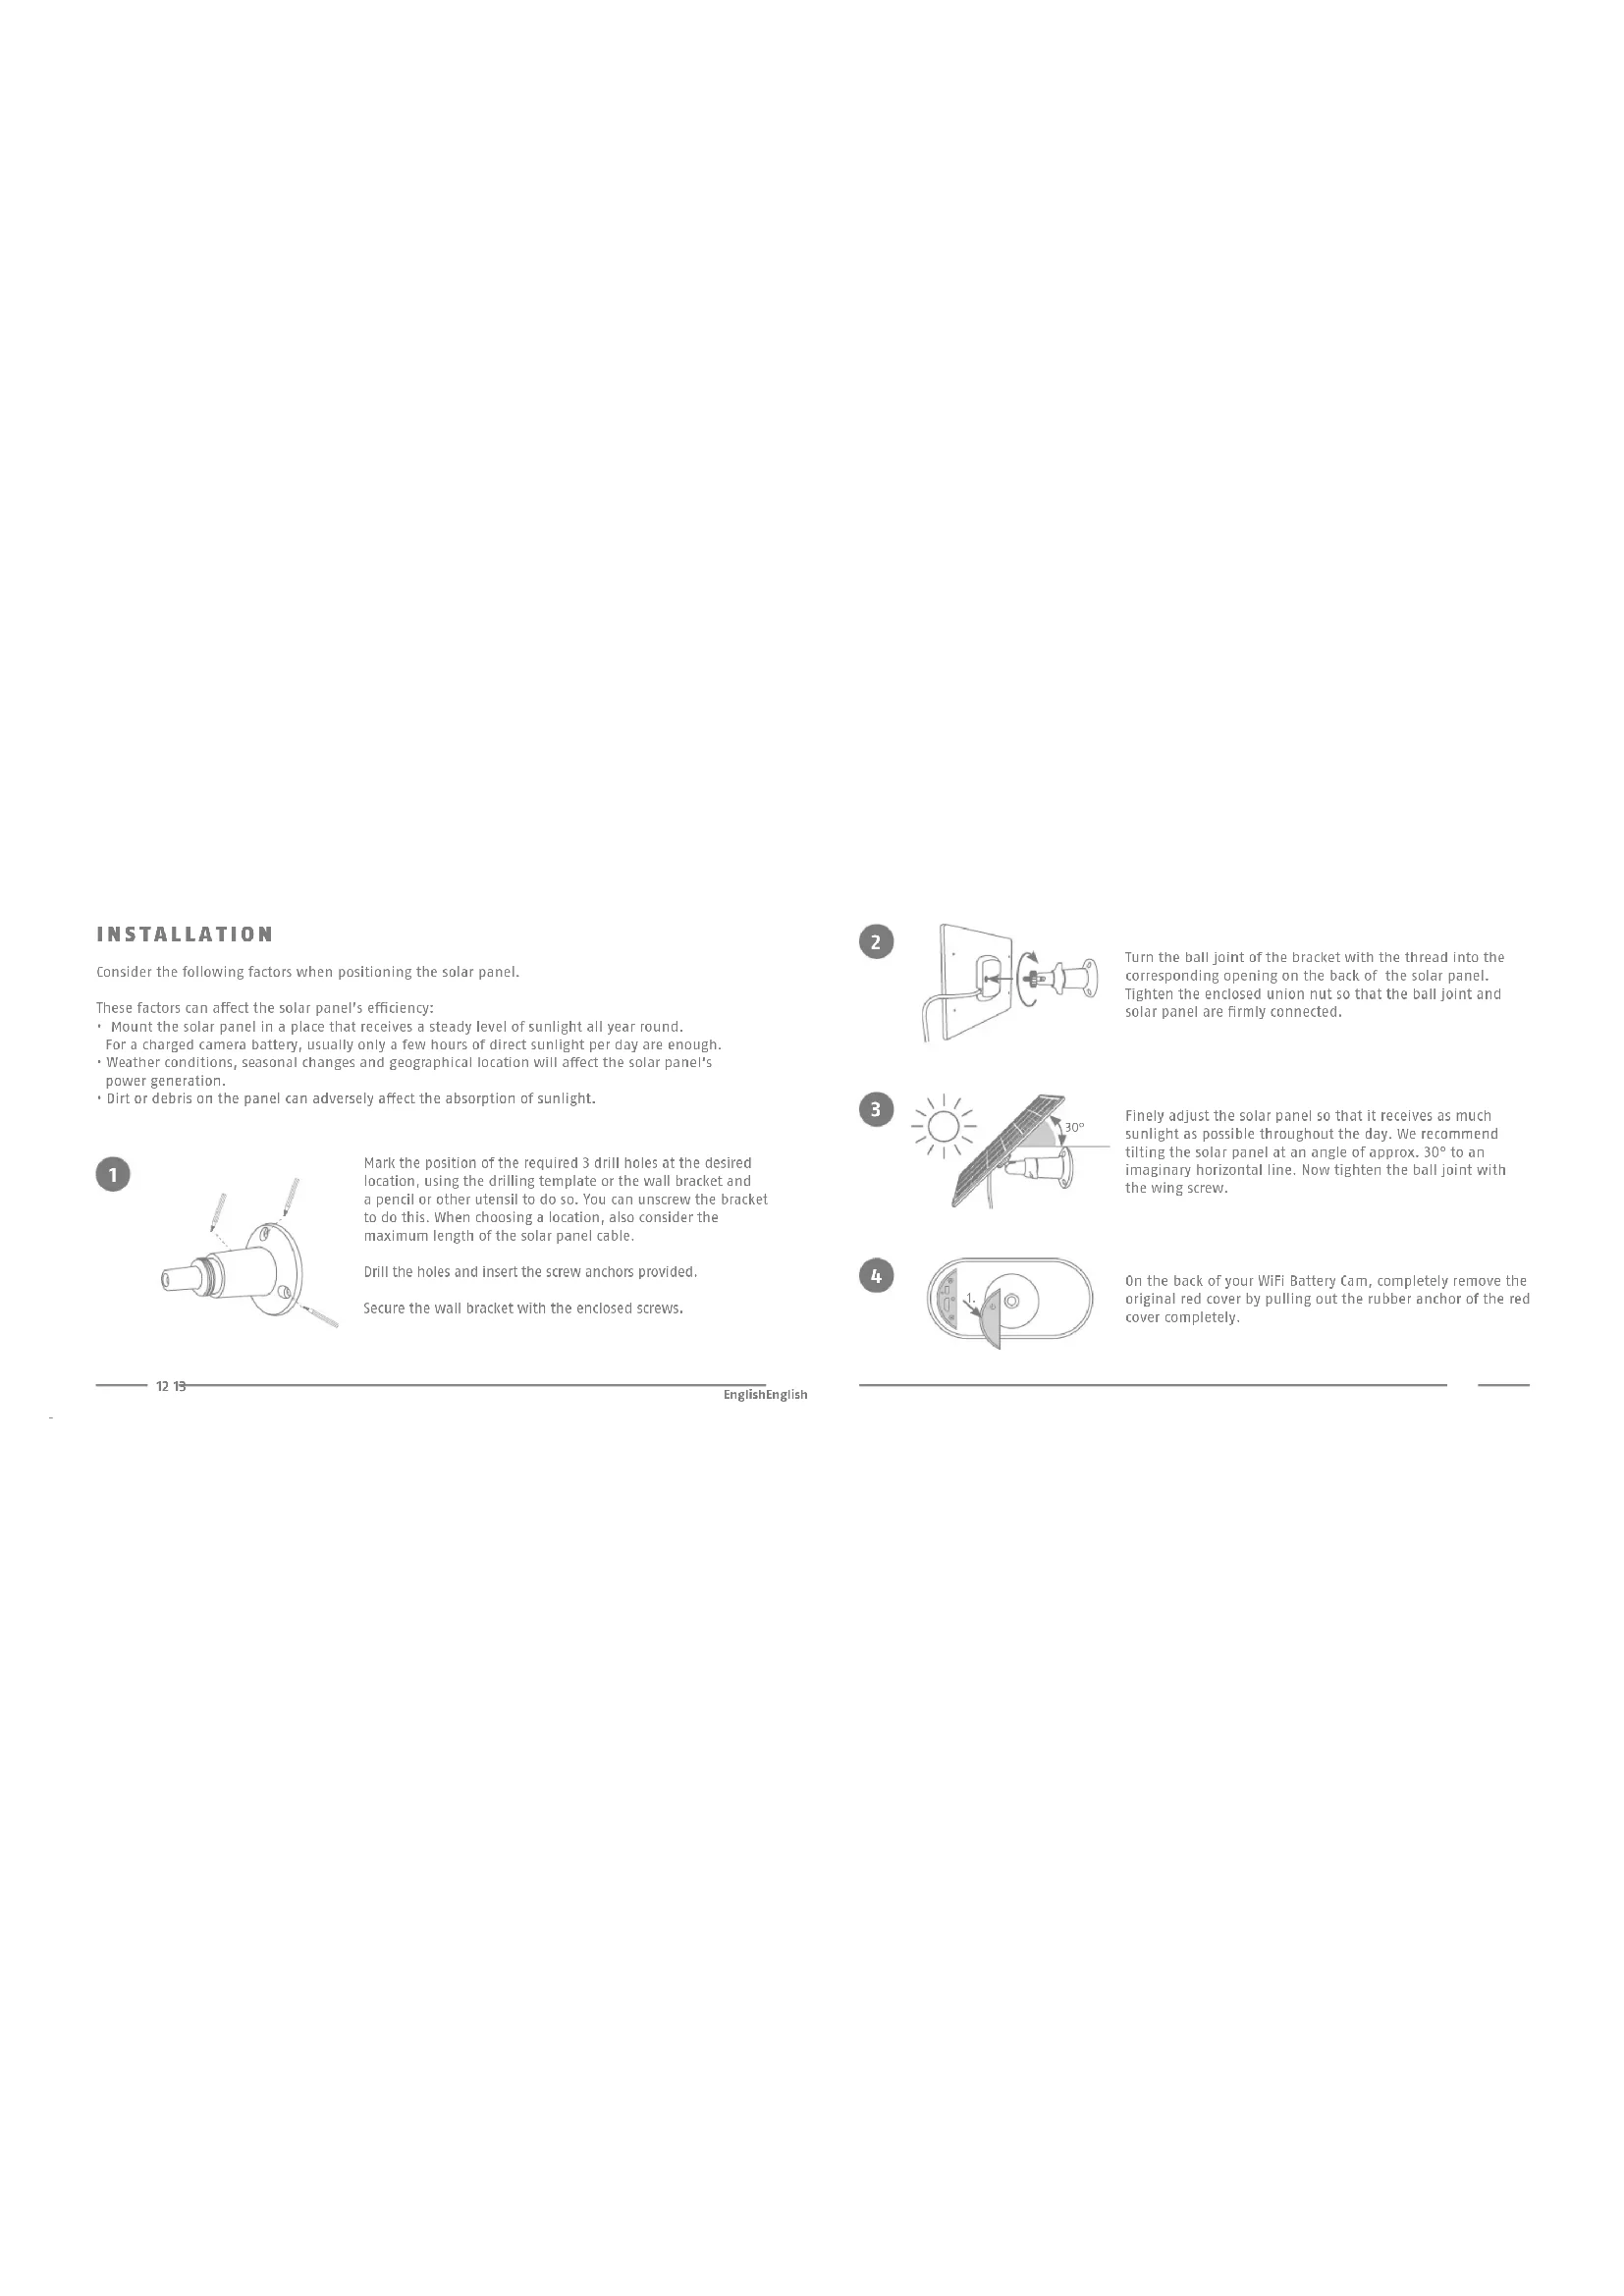
English English INSTALLATION Consider the following factors when positioning the solar panel. These factors can aect the solar panel’s eciency:
- Mount the solar panel in a place that receives a steady level of sunlight all year round. For a charged camera battery, usually only a few hours of direct sunlight per day are enough.
- Weather conditions, seasonal changes and geographical location will aect the solar panel‘s power generation.
- Dirt or debris on the panel can adversely aect the absorption of sunlight. Mark the position of the required 3 drill holes at the desired location, using the drilling template or the wall bracket and a pencil or other utensil to do so. You can unscrew the bracket to do this. When choosing a location, also consider the maximum length of the solar panel cable. Drill the holes and insert the screw anchors provided. Secure the wall bracket with the enclosed screws.
Turn the ball joint of the bracket with the thread into the corresponding opening on the back of the solar panel. Tighten the enclosed union nut so that the ball joint and solar panel are rmly connected.
Finely adjust the solar panel so that it receives as much sunlight as possible throughout the day. We recommend tilting the solar panel at an angle of approx. 30° to an imaginary horizontal line. Now tighten the ball joint with the wing screw. 30°
On the back of your WiFi Battery Cam, completely remove the original red cover by pulling out the rubber anchor of the red cover completely.
English English INSTALLATION Insert the new red cover that came with the solar panel so that the new cover sits completely plane to the back of the WLAN Battery Cam and ensures waterproong.
Tip: To position the small rubber anchor on the inside of the new cover, you can use a narrow object, such as a very small screwdriver. Make sure that the anchor holds the new red cover securely.
Important: To ensure the required watertightness, the new cover must sit at and centered all around with no bulging.
Connect the micro USB plug of the solar panel cable to the micro USB port of the Wi-Fi battery cam. Make sure that the connector is properly and rmly seated. Also make sure that the rubber seals are seated correctly to ensure waterproofness. Tip: In the live view of the app, you can see via the battery symbol - similar to the charging of a smartphone - as soon as the solar panel charges the camera battery in sunshine. Once all the components have been assembled, check again that the new cover on the back of the camera and the micro-USB connector are tted tightly so that the connection is waterproof. Depending on the mounting situation on site: You can use the cable clamps to x the cable between the solar panel and the camera to provide strain relief or as desired.16 17 English English IMPORTANT NOTES The best location for your solar panel is where... it is installed so that it receives as much sunlight as possible throughout the day: usually facing the south if in the northern hemisphere (e.g. in Europe, North America, Asia), or facing the north if in the southern hemisphere (e.g. in South America, Australia). it is aligned at an angle of approx. 30° (in relation to an imaginary horizontal line) Also note the following:
- Regularly remove dust and dirt from the solar panel.
- When the temperature drops below 0° C, the camera is no longer charged via the solar panel so as to protect the battery
- Make sure the micro USB plug is properly inserted into the micro USB port of the camera for proper waterproong.
- If the micro USB plug is not connected to the micro USB port, you must correctly place the rubber cap on the red cover of the camera for the required waterproofness.
- For information on the ABUS WiFi Battery Cam with base station, please refer to the camera‘s operating instructions. For operation with solar panel please ensure:
- The latest rmware version must be installed on your WLAN base station and WLAN battery cam. Check version? In the app, follow the path: Overview -> Menu -> Settings -> Advanced settings -> Device settings -> Check for rmware update. The points you must pay attention to when updating the rmware via the app are described in the operating instructions for the WLAN battery cam.
- In the settings of the WLAN battery cam that is connected to the solar panel, the operating mode must be set to „Solar“. To do this, follow the path in the app: Overview -> Menu -> Settings -> Advanced Settings -> Camera 1 or 2 Settings -> Operating Mode App - App2Cam Plus - COMMISSIONING18 English TECHNICAL DATA Dimensions 173.5 x 120.5 x 12.5 mm (without bracket) Weight 170 g (without bracket) Cable length 3 m Operating temperature -20°C to 60°C Wi-Fi Battery Cam charging temperature 0°C to 45°C Protection class IP65 Operating humidity 10 - 90% Operating voltage 4.5 V Operating current 570 mA19 Français