HR 4000 Fili - Beard trimmer BEURER - Free user manual and instructions
Find the device manual for free HR 4000 Fili BEURER in PDF.
| Product type | Beard trimmer |
| Brand | Beurer |
| Model | HR 4000 Fili |
| Dimensions (L x W x H) | 16.8 x 4.3 x 4.4 cm |
| Weight | 129 g |
| Power supply | Li-ion battery 3.2 V / 600 mAh, power adapter 5 V / 1 A |
| Runtime | Up to 60 minutes |
| Charging time | 60 minutes (fast charge: 5 minutes for a shave) |
| Blade type | Stainless steel with titanium coating, removable and washable under water |
| Included combs | Long comb (15-27 mm), short comb (1-12 mm), comb for narrow contour blade (1/3/5 mm) |
| Narrow contour blade | Yes, for precise contours |
| LED display | Displays battery charge, travel lock status, and oiling reminder |
| Travel lock | Electronic lock by long press 3 seconds |
| Direct Drive function | Can be used while plugged in even if battery is empty |
| Cleaning | Blade washable under running water, combs washable, cleaning brush included |
| Cutting oil | Supplied, apply regularly to the blade |
| Protection rating | Device: IPX4 (splash-proof), adapter: IP20 |
| Package contents | 1 trimmer, 2 attachments (trimmer + contour), 3 combs, 1 contour blade, 1 oil, 1 adapter, 1 brush, 1 pouch |
| Warranty | 3 years |
Frequently Asked Questions - HR 4000 Fili BEURER
User questions about HR 4000 Fili BEURER
0 question about this device. Answer the ones you know or ask your own.
Ask a new question about this device
Download the instructions for your Beard trimmer in PDF format for free! Find your manual HR 4000 Fili - BEURER and take your electronic device back in hand. On this page are published all the documents necessary for the use of your device. HR 4000 Fili by BEURER.
USER MANUAL HR 4000 Fili BEURER
natural_image
Black hairbrush with attached brand logo and multiple side-view cutouts showing different designs (no text or symbols on main body)DE Bartstyler
Instructions for use 15
FR Tondeuse à barbe
Mode d'emploi....27
natural_image
Line drawing of a mechanical device with a tool and connector (no text or symbols)natural_image
Line drawing of a hand holding a tool with a curved arrow indicating motion (no text or symbols)
natural_image
Line drawing of a hand gripping a piece of cable or wire (no text or symbols)natural_image
Illustration of a hand holding a spring-loaded device with an arrow indicating rotation (no text or symbols)Bart schneiden / stylen

Hinweis
natural_image
Line drawing of a person standing on grass, holding a tool (no text or symbols)
Hinweis
natural_image
Line drawing of a hand holding a textured object with a small circular mark (no text or symbols)natural_image
Line drawing of a hand holding a tool near a vertical surface with textured lines (no text or symbols)natural_image
Line drawing of hands holding a rectangular object with an arrow indicating direction (no text or symbols)
natural_image
Diagram of a cleaning or cleaning device with visible components and spray bubbles (no text or symbols)
WARNUNG
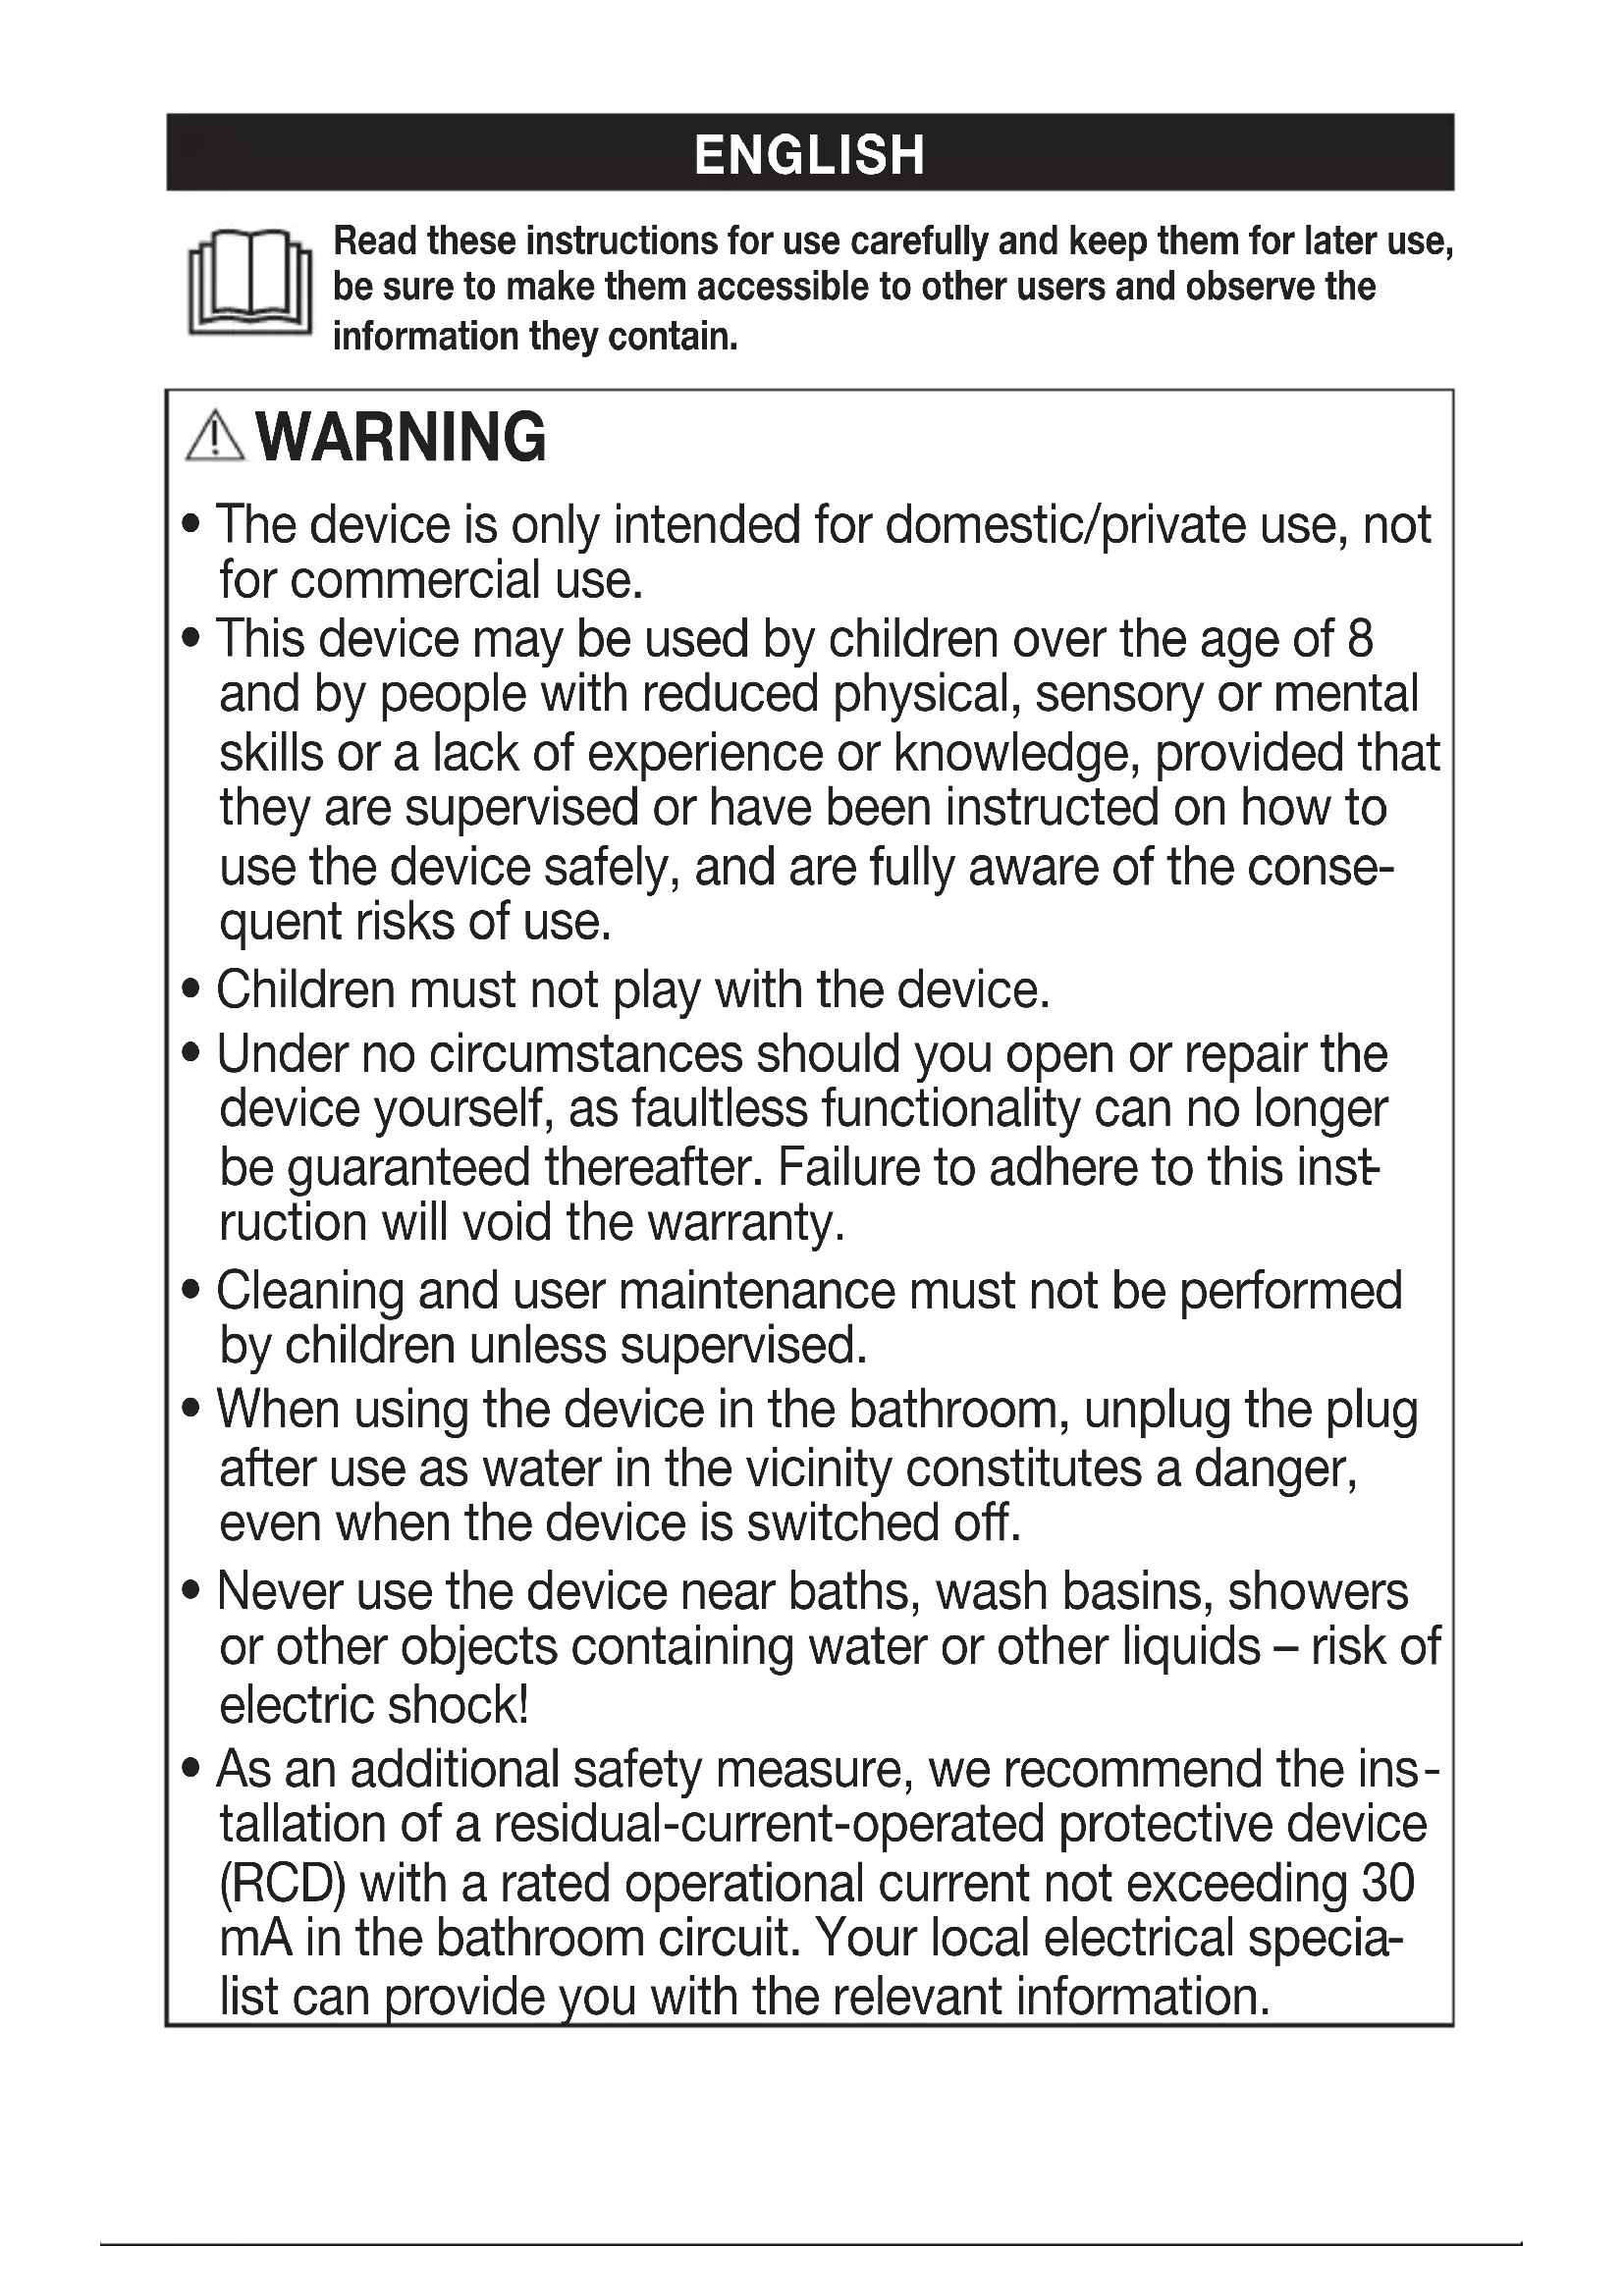
Read these instructions for use carefully and keep them for later use, be sure to make them accessible to other users and observe the information they contain.

WARNING
- The device is only intended for domestic/private use, not for commercial use.
- This device may be used by children over the age of 8 and by people with reduced physical, sensory or mental skills or a lack of experience or knowledge, provided that they are supervised or have been instructed on how to use the device safely, and are fully aware of the consequent risks of use.
• Children must not play with the device. - Under no circumstances should you open or repair the device yourself, as faultless functionality can no longer be guaranteed thereafter. Failure to adhere to this instruction will void the warranty.
- Cleaning and user maintenance must not be performed by children unless supervised.
- When using the device in the bathroom, unplug the plug after use as water in the vicinity constitutes a danger, even when the device is switched off.
- Never use the device near baths, wash basins, showers or other objects containing water or other liquids – risk of electric shock!
-
As an additional safety measure, we recommend the installation of a residual-current-operated protective device (RCD) with a rated operational current not exceeding 30 mA in the bathroom circuit. Your local electrical specialist can provide you with the relevant information.
-
If the mains connection cable of this device is damaged, it must be replaced by the manufacturer, its customer service department or a similarly qualified person to avoid any risk.
- The device may only be operated with the supplied mains adapter.
Dear customer,
Thank you for choosing a product from our range. Our name stands for high-quality, thoroughly tested products for applications in the areas of heat, weight, blood pressure, body temperature, pulse, gentle therapy, massage, beauty, baby and air. Please read these instructions for use carefully and keep them for later use. Be sure to make them accessible to other users and observe the information they contain.
With kind regards,
Your Beurer team
Table of contents
- Included in delivery 16
- Signs and symbols.... 17
- Getting to know your device 18
- Intended use.... 18
- Warnings and safety notes .... 18
- Device description....20
- Initial use 21
- Usage 22
- Cleaning and maintenance....24
- Disposal....25
- Technical specifications .... 25
- Warranty/service.... 26
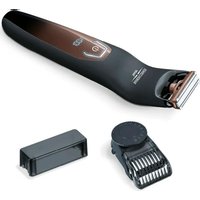
1. Included in delivery
Check that the exterior of the delivery cardboard packaging is intact and make sure that all contents are present. Before use, ensure that there is no visible damage to the device or accessories and that all packaging material has been removed. If you have any doubts, do not use the device and contact your retailer or the specified Customer Service address.
1 x HR 4000 beard styler
1 x trimmer attachment with stainless steel blade
1 x slim contour blade attachment
1 x comb attachment for slim contour blade
1 x long comb attachment
1 x short comb attachment
1 x cutting oil
1 x mains adapter
1 x cleaning brush
1 x storage bag
2. Signs and symbols
The following symbols are used in these instructions for use, on the packaging and on the type plate for the device:
 DANGER DANGER | This device must not be used near to water or in water (e.g. in a wash basin, or in the shower or bath) - risk of electric shock! |
 WARNING WARNING | Warning notice indicating a risk of injury or damage to health |
 CAUTION CAUTION | Safety note indicating possible damage to the device/accessory |
 Note Note | Note on important information |
 | The stainless steel blade is suitable for cleaning under running water. |
 | Observe the instructions for use |
 | Disposal in accordance with the Waste Electrical and Electronic Equipment EC Directive - WEEE. |
 | Manufacturer |
 | CE labellingThis product satisfies the requirements of the applicable European and national directives. |
 PAP PAP | Dispose of packaging in an environmentally friendly manner. |
 | Protection against splashes |
 | Only use the mains adapter indoors. |
 | Energy efficiency class 6 |
 | The adapter corresponds to device protection class II |
 | Short-circuit-proof safety isolating transformer |
| [C5ST] | SMPS (switch mode power supply unit) switching mains part |
 | Polarity of the output terminal |
3. Getting to know your device
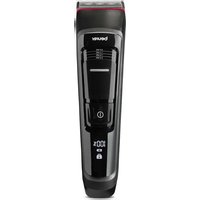
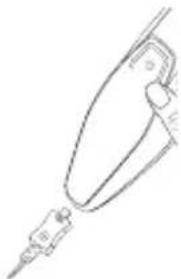
With the HR 4000 beard trimmer, you can shave and style your beard with ease and precision. Its high-quality stainless steel blade has a titanium coating, which ensures optimum skin compatibility.
Thanks to the three length-adjustable comb attachments and the extra attachment with slim contour blade, you can achieve various cutting lengths and clean contours effortlessly.
The beard trimmer features an LED display with battery, travel lock and charge indicator. There is also a symbol in the LED display which informs you when you need to re-oil the stainless steel blade.
The beard trimmer can be powered by the battery as well as the supplied mains adapter. A high-performance lithium battery ensures that you can use the beard trimmer for up to 60 minutes after just one battery charge.
The stainless steel blade can be removed and rinsed under running water for hygienic cleaning.
4. Intended use
The beard styler is exclusively intended to cut human facial hair. Do not use the beard styler on other body parts, animals or objects! Do not use the beard styler outside.
The beard styler is intended for private use only. The beard styler is not intended for commercial use. The beard styler may only be used for the purpose for which it was designed and in the manner specified in the instructions for use. Any form of improper use can be dangerous. The manufacturer is not liable for damage resulting from improper or incorrect use.
5. Warnings and safety notes

DANGER
To avoid damage to health, we strongly advise against using the device in the following situations:
- Danger of suffocation by packaging material. Keep packaging material away from children.
- Before use, inspect the device and accessories for visible damage. If you have any doubts, do not use the device and contact your retailer or the specified Customer Service address.
- Keep the mains adapter away from water.
- Never submerge the device in water or other liquids! Risk of electric shock!
- If the device should fall into water despite following all safety precautions, immediately pull the mains plug from the socket! Do not reach into the water! Risk of electric shock!
- Have the device checked by an authorised specialist workshop before using it again. Danger to life due to electric shock!
- If the device has been dropped or has suffered any other damage, it must no longer be used. Risk of electric shock and injury!
- If there is visible damage to the device, accessories or mains cable/plug, do not use the device if you have any doubts and contact your retailer or the specified Customer Services address. Risk of electric shock!
- Do not use the device if the stainless steel blade is damaged as it may have sharp edges – risk of injury!
- The edges of the stainless steel blade and the attachments are sharp. Take care when using the device.
- Keep packaging material away from children – risk of suffocation!
-
Store the device out of the reach of children.
-
Do not use extension cables in the bathroom to ensure the mains adapter can be accessed quickly in an emergency.
- Never use the device with wet or moist hands when it is connected to the power supply.
- Only use the original comb attachments.

WARNING
To avoid damage to health, please note the following:
- Do not use the device if you have sunburn, open wounds, eczema or cuts on your face.
- Switch off the device before attaching or switching the comb attachments.
- Ensure that no highly flammable liquids are located near the device. Risk of fire!
- Remove all packaging material before using the device.
- Ensure that the mains cable does not pose a trip hazard.
- Only connect the device to a socket that has the voltage shown on the type plate.
- Only operate the device according to the specifications on the type plate.
- Only pull the mains cable from the socket by the mains adapter.
- Under no circumstances should you open or repair the device yourself, as faultless functionality can no longer be guaranteed thereafter. Failure to comply with this instruction will void the warranty.
- In the event of a fault or damage, have the device repaired by a certified specialist workshop.
- Never leave the device unattended while in use.
- If you pass on the device to someone else, make sure to also pass on these instructions for use.
- Switch off the device after every use.
- Pull the mains adapter out of the socket after each completed charging process.

CAUTION
- Protect the device and its accessories from impacts, humidity, dirt, marked temperature fluctuations and direct sunlight.
- Only operate, charge or store the device at temperatures from -10^ to 40^ .

WARNING
Notes on handling batteries:
- If your skin or eyes come into contact with fluid from the battery cells, flush out the affected areas with plenty of water and seek medical assistance.
- Risk of explosion! Never throw batteries into a fire.
- Do not disassemble, split or crush batteries.
- Only use chargers specified in the instructions for use.
- Batteries must be charged correctly prior to use. The instructions from the manufacturer and the specifications in these instructions for use regarding correct charging must be observed at all times.
- Fully charge the battery prior to initial use (see Chapter 6).
- In order to achieve as long a battery service life as possible, fully charge the battery at least twice per year.
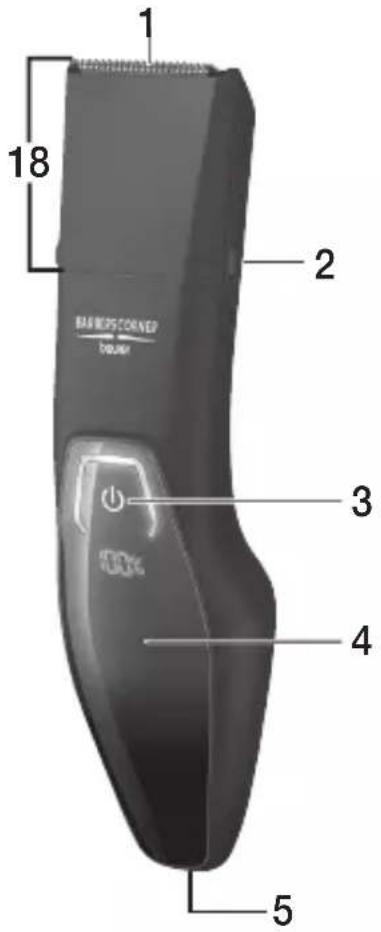
6. Device description
text_image
1 18 2 BARBEG CORNER barber 3 4 5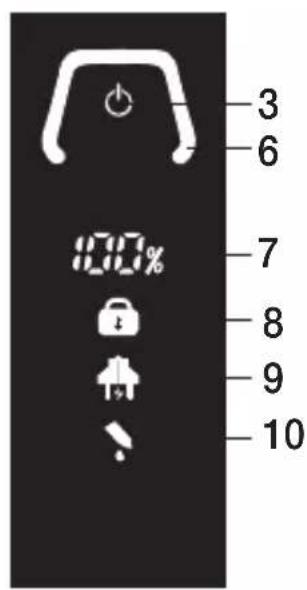
text_image
3 6 7 8 9 10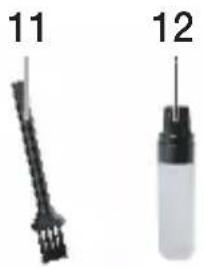
natural_image
Two labeled mechanical components: a black tool with three rods and a white bottle with a cylindrical part (no text or symbols visible)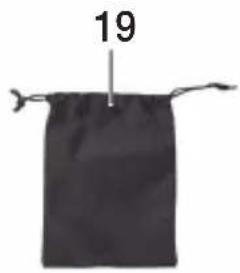
text_image
19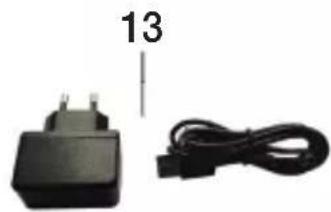
natural_image
Black electrical plug and cable with number 13 label (no text or symbols on components)
natural_image
Black electronic device with ventilation slots and a numbered label pointing to the edge (no readable text or symbols beyond the number)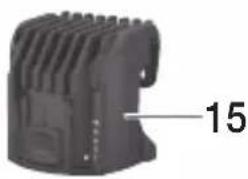
natural_image
Close-up of a black mechanical component with a label pointing to the number 15 (no other text or symbols visible)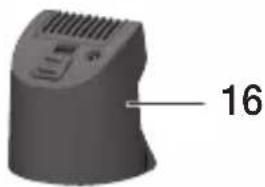
natural_image
3D rendered object with a curved surface and ventilation slots, labeled with the number 16 (no other text or symbols)
natural_image
3D rendered object with a tapered top and textured surface, labeled with the number 17 (no other text or symbols)| 1. Stainless steel blade 11. Cleaning brush | |
| 2. Clip for comb attachment 12. Cutting oil | |
| 3. ON/OFF button | 13. Mains adapter |
| 4. Display 14. Long comb attachment | |
| 5. Connection socket (micro USB) 15. Short comb attachment | |
| 6. Operating display 16. Comb attachment for slim contour blade | |
| 7. Battery indicator 17. Slim contour blade attachment | |
| 8. Travel lock indicator 18. Trimmer attachment | |
| 9. Charge indicator 19. Storage bag | |
| 10. Oil indicator |
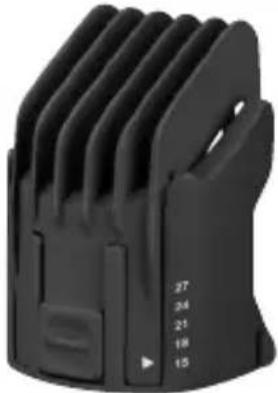 | Long comb attachmentSuitable for cutting lengths of 15-27 mm (3-mm increments). | 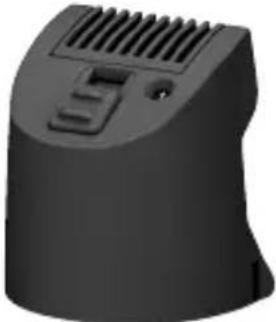 | Comb attachment for slim contour bladeSuitable for cutting lengths of 1 mm, 3 mm and 5 mm.The comb attachment for the slim contour blade can only be used with the slim contour blade attach-ment. |
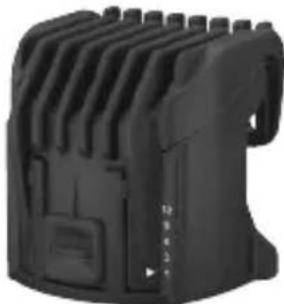 | Short comb attachmentSuitable for cutting lengths of 1-12 mm (3-mm increments). | 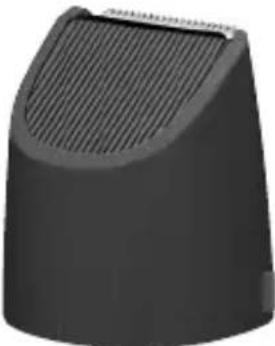 | Slim contour blade attachmentSuitable for precise contour styling. |
7. Initial use
You can operate the device with the battery as well as the supplied mains adapter.
Battery operation
In order to be able to operate the device with the battery, fully charge the battery for 60 minutes prior to initial use. The operating life of the device is approx. 60 minutes when it is fully charged.
To charge the battery, proceed as follows:
- Ensure that the device is switched off.
- Connect the mains adapter to a suitable socket.
-
Plug the other end of the mains adapter into the connection socket on the under - side of the device. The charge indicator now begins to flash. The battery indicator shows you the current battery state in percent.
-
Once the charging process is complete, pull the mains adapter out of the socket and the device. The device is now ready for use.
natural_image
Line drawing of a medical or laboratory device with a pointed tip and connector (no text or symbols)Quick charging
If you have forgotten to charge the shaver before use, the quick-charge function helps. Connect the device to the power supply for this purpose. The device will be ready for a complete shave using battery operation within 5 minutes.
Mains operation
To operate the device with the supplied mains adapter, proceed as follows:
- Connect the mains adapter to a suitable socket.
-
Plug the other end of the mains adapter into the connection socket on the underside of the device. The battery indicator shows you the current battery state in percent and the charge indicator begins to flash. The mains adapter supplies enough energy to charge the battery and operate the device at the same time.
-
After use, pull the mains adapter out of the socket and the device.

WARNING
Never use the device in the shower when it is being operated via the mains.
The hand-held part of the device must be disconnected from the connection cable before use in a damp environment.
8. Usage
Travel lock
The device has a travel lock. If the travel lock is activated, it is not possible to switch on the device. The travel lock prevents the device from switching on by accident (e.g. when transporting it in a suitcase).
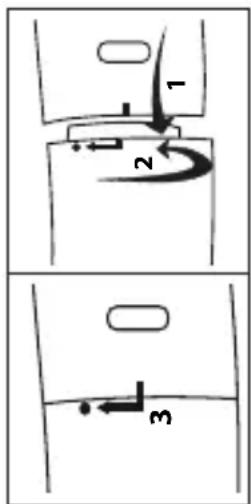
To activate the travel lock, press and hold the ON/OFF button ⏻ for 3 seconds. The travel lock indicator begins to flash. The device is now locked. If the ON/OFF button is briefly pressed when the device is locked, the travel lock indicator will light up in the display to indicate that the device is locked.
To deactivate the travel lock, press and hold the ON/OFF button again for 3 seconds.
Direct drive function
If the battery is completely flat, you can continue using the device immediately via mains operation.
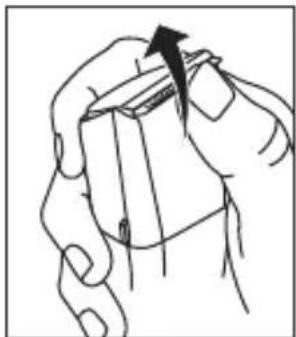
Changing the trimmer attachment and slim contour blade attachment
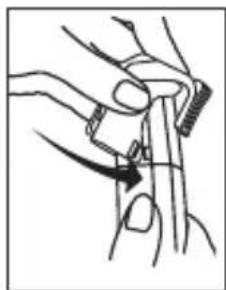
The device has two attachments. The trimmer attachment and the slim contour blade attachment. To switch the trimmer attachment, for example, proceed as follows:
- Switch off the device.
- Hold the device with the rear turned towards you. Twist the trimmer attachment to the right.
- Pull the trimmer attachment up and off. Place the slim contour blade attachment onto the device from above, so that it sits completely on the device.
- Twist the slim contour blade attachment to the left until it clicks into place.
text_image
Diagram showing three labeled mechanical or fluid dynamics states with directional arrows and numbered componentsAttaching/removing comb attachments
The device has three comb attachments. A long comb attachment, a short comb attachment and a comb attachment for the slim contour blade.

Note
The long and short comb attachments are only suitable for use with the trimmer attachment.
The comb attachment for the slim contour blade can also only be used with the slim contour blade attachment.
Switch the device off before attaching/removing a comb attachment.
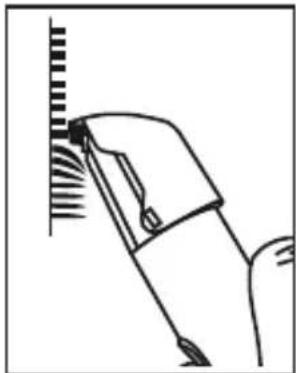
- To attach a comb attachment, place it on the trimmer attachment or the slim contour blade attachment from above as shown. Ensure that the comb attachment clicks securely onto the clips for the comb attachment on the sides.
- To remove a comb attachment, carefully release the attachment from the clips for the comb attachment with your fingers and pull the comb attachment up and off the trimmer attachment or the slim contour blade attachment.
natural_image
Illustration of a hand holding a tool with a curved arrow indicating motion (no text or symbols)
natural_image
Line drawing of a hand gripping a small object (no text or symbols)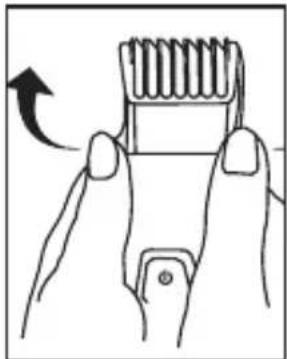
natural_image
Illustration of a hand holding a spring-loaded tool with an arrow indicating rotation (no text or symbols)Cutting/styling the beard

Note
Before starting the application, comb your beard in the direction of growth.
- Select the comb attachment depending on desired beard length.
- Place the selected comb attachment on the trimmer attachment or the slim contour blade attachment.
-
Select your desired cutting length using the slider on the relevant comb attachment.
-
Press the ON/OFF button ⏻ to switch on the device.
-
To style your beard, start from the ear. Work from there down to your chin. Style one side first, then the other.
-
When you are finished, press the ON/OFF button ⏻ to switch off the device.
text_image
12 20 31 D
natural_image
Line drawing of a person using a tool on grass (no text or symbols)
Note
If you wish to cut your beard very short (less than 2.5 mm), you can use the device without a comb attachment.
Shaving/trimming precise contours
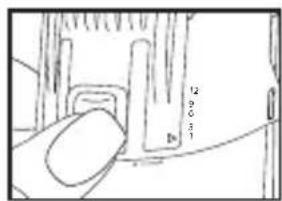
With the comb attachment for the slim contour blade you can shave/trim particularly precise contours (for example for the sideburns).
-
The comb attachment for the slim contour blade can only be used with the slim contour blade attachment. To do this, attach the slim contour blade to the device.
-
Now place the comb attachment for the slim contour blade on the slim contour blade attachment.
-
Select your desired length (1, 3, 5 mm) using the slider on the comb attachment for the slim contour blade.

natural_image
Line drawing of a hand using a tool to press or adjust a textured object (no text or symbols visible)- Press the ON/OFF button to switch on the device.
- Position the edge of the comb attachment for the slim contour blade against the desired area and move the device downwards as shown in the adjacent image.
- When you are finished, press the ON/OFF button ⏻ to switch off the device.
natural_image
Line drawing of a hand holding a tool near a vertical surface with textured lines (no text or symbols)9. Cleaning and maintenance
Clean the device

WARNING
- Always pull the mains adapter out of the socket before cleaning the device. Risk of electric shock! Before cleaning, always ensure that the device is switched off.
- Remove the comb attachments before cleaning.
- Only clean the housing of the device with a soft cloth dampened with warm water or the cleaning brush supplied.
- Do not clean the device with highly flammable liquids. Risk of fire!
- Do not clean the device in the dishwasher.
- Clean the comb attachments as well as the shaver unit and the slim contour blade after each use to prevent lots of hair getting jammed inside, which could otherwise impede flawless operation.
- Do not use any aggressive, caustic, abrasive or corrosive cleaning products or hard brushes.
Cleaning comb attachments
Blow on the comb attachments after the application in order to clean them of hair. You can also carefully remove wet hair with your fingers.
To clean the comb attachments particularly thoroughly, you can rinse them under running water.
Proceed as follows:
- Pull the relevant comb attachment off the device.
- Hold the comb attachment under running water.
- Leave the comb attachment to dry completely before you reattach it to the device.
Cleaning the trimmer attachment and slim contour blade attachment
Blow on the trimmer attachment and the slim contour blade attachment after use in order to clean them of hair. You can also remove wet hair with your fingers.

WARNING
When cleaning with your fingers, make sure that you do not injure yourself on the sharp edges of the stainless steel blade.
natural_image
Illustration of hands holding a rectangular object with an arrow indicating direction (no text or symbols)
natural_image
Line drawing of a cleaning or cleaning device with visible components and spray (no text or symbols)To clean the stainless steel blade or the slim contour blade particularly thoroughly, you can also rinse them under running water. Proceed as follows:
- Pull the stainless steel blade or the slim contour blade up and off the device.
-
Hold the stainless steel blade or the slim contour blade under running water, so that the stream of water runs through the stainless steel blade or the slim contour blade from the inside out.
-
Allow the stainless steel blade or the slim contour blade to dry completely before you reattach them to the device. Ensure that no water gets inside the device! Risk of electric shock!
Applying oil to the stainless steel blade or the slim contour blade
In order to achieve consistently optimum cutting results, you occasionally need to oil the stainless steel blade. Apply a drop of cutting oil to the stainless steel blade or the slim contour blade, at the latest as soon as the oil indicator symbol lights up in the display.
10. Disposal
For environmental reasons, do not dispose of the device in the household waste at the end of its useful life. Dispose of the device at a suitable local collection or recycling point in your country.
Dispose of the device in accordance with EC Directive – WEEE (Waste Electrical and Electronic Equipment). If you have any questions, please contact the local authorities responsible for waste disposal.
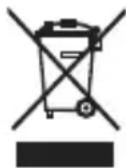

WARNING
The integrated battery cannot be removed for disposal. Risk of explosion and injury. The lithium-ion battery used in this device must not be disposed of in household waste, but must be disposed of correctly. For information on disposal, please contact the authorised seller or a municipal collection point. During disposal, it must be pointed out that the device contains a battery.
Discharge the battery before disposal. Take the device and switch the beard stylister on until the battery is flat.

Note
If it is not possible to discharge the battery due to a fault or damage, please consult your waste collection point.
- Technical specifications
| Model HR 4000 | |
| Weight 129 g | |
| Device dimensions 16.8 x 4.3 x 4.4 cm | |
| Device protection class IPX4 | |
| Device input 5 V | --- 1 A |
| Adapter protection type IP20 | |
| Adapter protection class II | |
| Voltage supply(TPA-97050100BU) | Input: 100-240 V~; 50/60 Hz; 0.15 AOutput: 5.0 V = 1.0 A; 5.0 W |
| Average active efficiency ≥ 73.98 % | |
| No-load power consumption ≤ 0,07 % |
| Battery:CapacityNominal voltageType designation | 600 mAh3.2 VLithium-ion |
Subject to technical changes
12. Warranty/service
Beurer GmbH, Söflinger Straße 218, 89077 Ulm, Germany (hereinafter referred to as "Beurer") provides a warranty for this product, subject to the requirements below and to the extent described as follows.
The warranty conditions below shall not affect the seller's statutory warranty obligations which ensue from the sales agreement with the buyer.
The warranty shall apply without prejudice to any mandatory statutory provisions on liability.
Beurer guarantees the perfect functionality and completeness of this product.
The worldwide warranty period is 3 years, commencing from the purchase of the new, unused product from the seller.
The warranty only applies to products purchased by the buyer as a consumer and used exclusively for personal purposes in the context of domestic use.
German law shall apply.
During the warranty period, should this product prove to be incomplete or defective in functionality in accordance with the following provisions, Beurer shall carry out a repair or a replacement delivery free of charge, in accordance with these warranty conditions.
If the buyer wishes to make a warranty claim, they should approach their local retailer in the first instance: see the attached “International Service” list of service addresses.
The buyer will then receive further information about the processing of the warranty claim, e.g. where they can send the product and what documentation is required.
A warranty claim shall only be considered if the buyer can provide Beurer, or an authorised Beurer partner, with
– a copy of the invoice/purchase receipt, and
– the original product.
The following are explicitly excluded from this warranty:
– deterioration due to normal use or consumption of the product;
- accessories supplied with this product which are worn out or used up through proper use (e.g. batteries, rechargeable batteries, cuffs, seals, electrodes, light sources, attachments and nebuliser accessories);
– products that are used, cleaned, stored or maintained improperly and/or contrary to the provisions of the instructions for use, as well as products that have been opened, repaired or modified by the buyer or by a service centre not authorised by Beurer;
– damage that arises during transport between manufacturer and customer, or between service centre and customer;
– products purchased as seconds or as used goods;
– consequential damage arising from a fault in this product (however, in this case, claims may exist arising from product liability or other compulsory statutory liability provisions).
Repairs or an exchange in full do not extend the warranty period under any circumstances.
FRANÇAIS

Remarques relatives aux batteries:
natural_image
Two labeled mechanical components: a black tool with threaded end and a white bottle with a pointed tip (no text or symbols visible)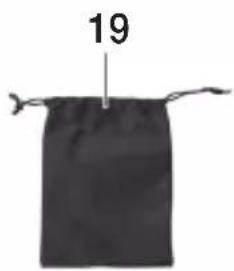
text_image
19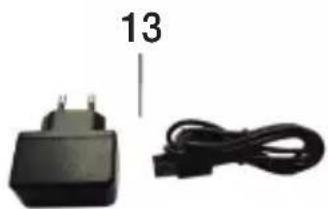
natural_image
Black plastic charger with two cables, one labeled '13' (no text or symbols on device)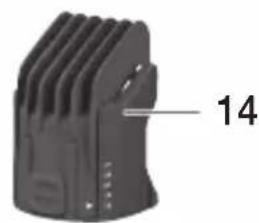
natural_image
Close-up of a black mechanical component with ribbed texture and a numbered label '14' pointing to its side (no other text or symbols visible)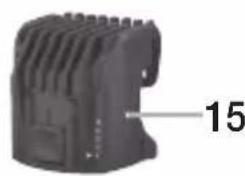
natural_image
Close-up of a black plastic electronic component with no visible text or symbols
natural_image
3D rendered object with a curved surface and ventilation grille, labeled with the number 16 (no other text or symbols)
natural_image
3D rendered object with a tapered top and label '17' pointing to a small feature (no other text or symbols)natural_image
Pure technical line drawing of a mechanical component without any text, numbers, or symbolsCharge rapide
natural_image
Line drawing of a hand holding a tool with a curved arrow indicating motion (no text or symbols)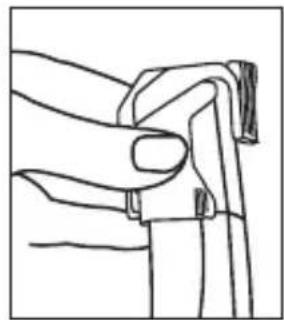
natural_image
Line drawing of a hand gripping a piece of paper or cable (no text or symbols)natural_image
Illustration of a hand holding a spring-loaded tool, showing motion with an arrow (no text or symbols)text_image
Diagram showing a hand holding a tool with labeled parts and numerical annotations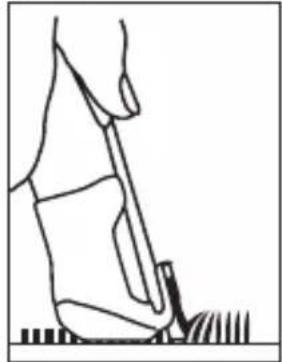
natural_image
Line drawing of a person standing on grass, viewed from above (no text or symbols)
Remarque
natural_image
Line drawing of a hand using a tool to adjust or install a textured object (no text or symbols visible)natural_image
Line drawing of a hand using a tool to clean or mark a surface with a grid pattern (no text or symbols)natural_image
Illustration of hands holding a rectangular object with an arrow indicating direction (no text or symbols)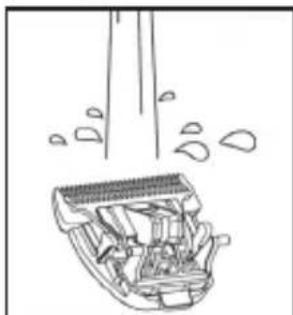
natural_image
Line drawing of a mechanical component with internal parts and motion indicators (no text or symbols)
AVERTISSEMENT
natural_image
Two laboratory test tubes labeled 11 and 12, one with a pointed tip and the other a clear liquid (no text or symbols on the tubes themselves)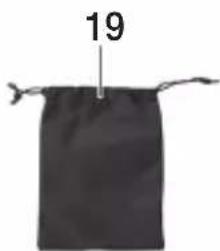
text_image
19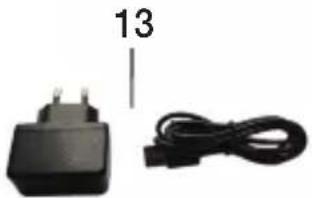
natural_image
Black electrical plug and cable with number 13 label (no text or symbols on the components)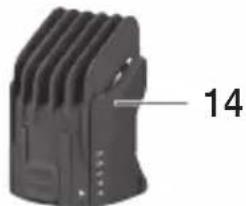
natural_image
Close-up of a black mechanical component with ribbed texture and a numbered label '14' pointing to its side (no other text or symbols visible)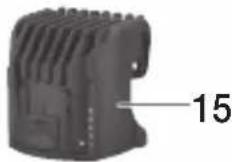

natural_image
3D rendered object with a curved surface and ventilation grille, labeled with the number 16 (no other text or symbols)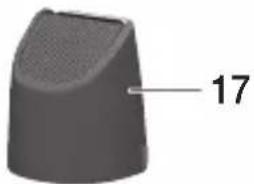
natural_image
3D rendered object with a tapered top and label '17' pointing to a small feature (no other text or symbols)natural_image
Line drawing of a mechanical clamp or connector (no text or symbols)Carga rápida
natural_image
Illustration of a hand holding a tool with a black arrow indicating a specific point (no text or symbols present)
natural_image
Line drawing of a hand gripping a piece of paper or cable (no text or symbols)natural_image
Illustration of a hand holding a spring-loaded tool with an arrow indicating rotation (no text or symbols)Cortar/perfilar la barba

Nota
natural_image
Line drawing of a person using a tool to clean or brush (no text or symbols)
Nota
natural_image
Line drawing of a hand using a tool to press or adjust a textured object (no text or symbols visible)
natural_image
Line drawing of a hand holding a tool near a vertical striped object (no text or symbols)natural_image
Line drawing of hands holding a rectangular object with an arrow indicating direction (no text or symbols)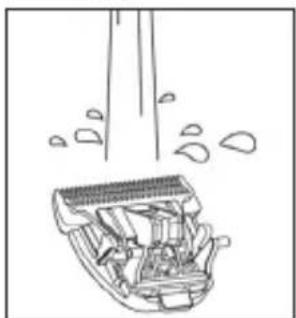
natural_image
Line drawing of a cleaning or cleaning device with visible components and spray (no text or symbols)natural_image
Two labeled medical or laboratory devices: a needle-like device and a clear bottle, both with metal tips (no visible text or symbols)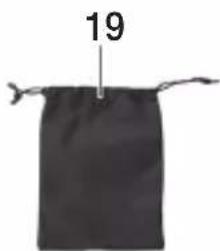
text_image
19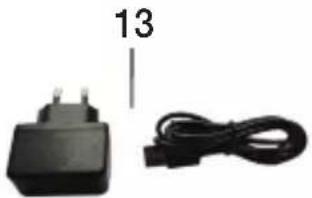
natural_image
Black electrical plug and cable with number 13 label (no text or symbols on components)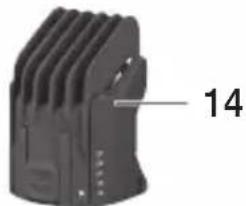
natural_image
Close-up of a black mechanical component with ribbed texture and a numbered label '14' pointing to a feature (no readable text or symbols beyond the number)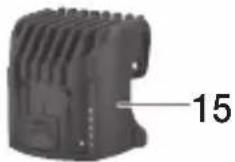

natural_image
3D rendered object with a curved surface and ventilation grille, labeled with the number 16 (no other text or symbols)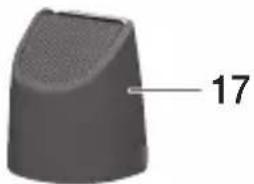
natural_image
3D rendered object with a tapered top and label '17' pointing to a small feature (no other text or symbols)natural_image
Line drawing of a mechanical clamp or tool with a base and handle (no text or symbols)natural_image
Line drawing of a hand holding a tool with a curved arrow indicating motion (no text or symbols)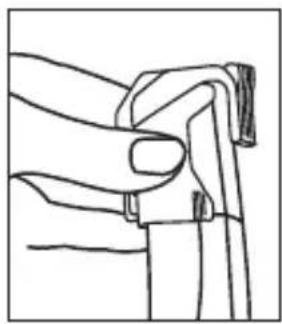
natural_image
Line drawing of a hand gripping a piece of paper or cable (no text or symbols)natural_image
Illustration of a hand holding a spring-loaded tool, showing motion with an arrow (no text or symbols)natural_image
Line drawing of a person standing on grass, viewed from above (no text or symbols)
Nota
natural_image
Line drawing of a hand using a tool to adjust or install a component (no text or symbols visible)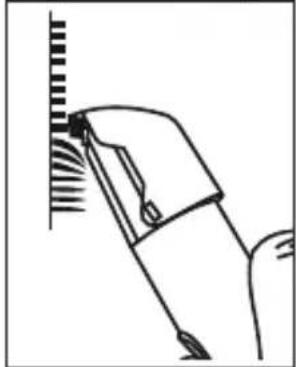
natural_image
Line drawing of a hand holding a tool near a vertical surface (no text or symbols)9. Pulizia e cura
natural_image
Illustration of hands holding a small object with an arrow indicating direction (no text or symbols)
natural_image
Line drawing of a cleaning or cleaning device with visible components and spray (no text or symbols)
AVVERTENZA
natural_image
Line drawing of a mechanical tool or probe with a pointed tip and base, no text or symbols presentHızlı şarj
text_image
Diagram showing three labeled mechanical or fluid flow paths with arrows and numbered components, likely illustrating fluid dynamics or movement.
Not
natural_image
Line drawing of a hand holding a tool with a curved arrow indicating motion (no text or symbols)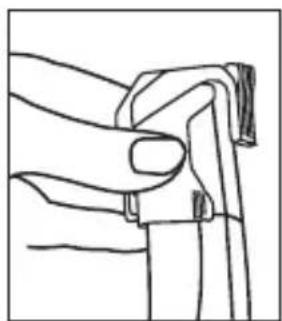
natural_image
Line drawing of a hand gripping a piece of paper or cable (no text or symbols)natural_image
Illustration of a hand holding a spring-loaded tool with an arrow indicating rotation (no text or symbols)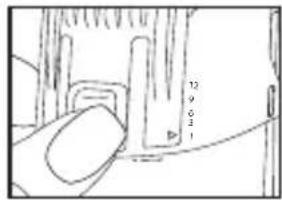
text_image
12 9 6 2 1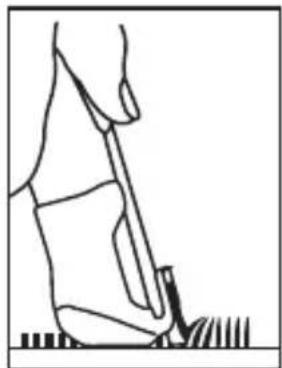
natural_image
Line drawing of a person standing on grass, viewed from above (no text or symbols)
Not
natural_image
Line drawing of a hand holding a textured object with a circular mark (no text or symbols)
natural_image
Line drawing of a hand holding a tool near a vertical line (no text or symbols)natural_image
Illustration of hands holding a small object with an arrow indicating direction (no text or symbols)
natural_image
Line drawing of a car interior with exhaust pipes and spray bubbles (no text or symbols)natural_image
Simple line drawing of a medical or laboratory device with a connector (no text or symbols)Быстрая зарядка
natural_image
Illustration of a hand holding a tool with a curved arrow indicating motion (no text or symbols)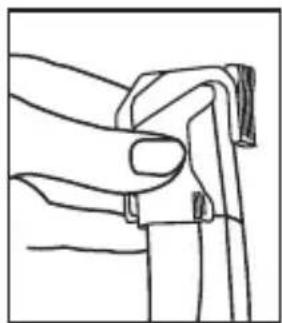
natural_image
Line drawing of a hand gripping a piece of paper or cable (no text or symbols)natural_image
Illustration of a hand holding a spring-loaded tool, showing motion with an arrow (no text or symbols)natural_image
Line drawing of a person using a tool to clean or dig the ground (no text or symbols)
Указание
natural_image
Line drawing of a hand holding a small electronic component with a grid-like top (no text or symbols)
natural_image
Line drawing of a hand holding a tool near a vertical surface with radial lines (no text or symbols)9. Очистка и уход
Очистка прибора

ПРЕДУПРЕЖДЕНИЕ
natural_image
Illustration showing hand holding a tool and cleaning a mechanical component (no text or symbols)natural_image
Two labeled laboratory test tubes, one with a pointed tip and the other with a black cap (no text or symbols visible)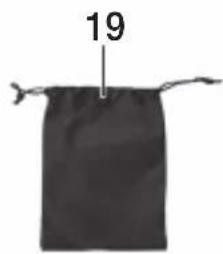
text_image
19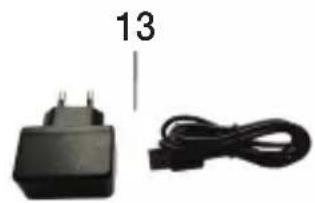
natural_image
Two electronic devices: a black power adapter and a black cable, with no visible text or symbols on the devices themselves.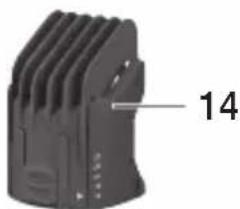
natural_image
Close-up of a black mechanical component with ribbed texture and a numbered label '14' pointing to its side (no other text or symbols visible)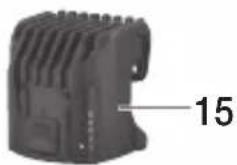
natural_image
Close-up of a black plastic electronic component with ventilation slots and a labeled part (15), no readable text or symbols beyond the number.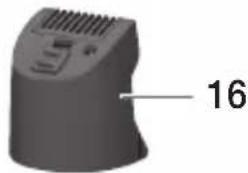
natural_image
Close-up of a black plastic electronic component with ventilation grille and labeled part '16' (no other text or symbols)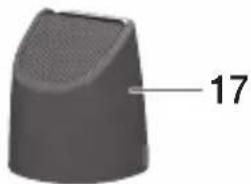
natural_image
3D rendered object with a tapered top and textured surface, labeled with the number 17 (no other text or symbols)natural_image
Line drawing of a soldering iron with a tip and base (no text or symbols)Szybkie ładowanie
text_image
Diagram showing two labeled arrows (1 and 2) indicating directional movement or force vectors in a mechanical or electrical component.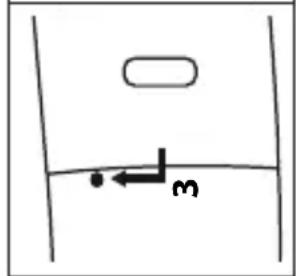
text_image
Diagram showing a horizontal arrow labeled '3' pointing left from a curved line, with an oval shape above it.natural_image
Illustration of a hand holding a tool with a curved arrow indicating motion (no text or symbols)
natural_image
Line drawing of a hand gripping a piece of paper or cable (no text or symbols)natural_image
Illustration of a hand holding a spring-loaded tool, showing motion with an arrow (no text or symbols)text_image
12 0.6 3 1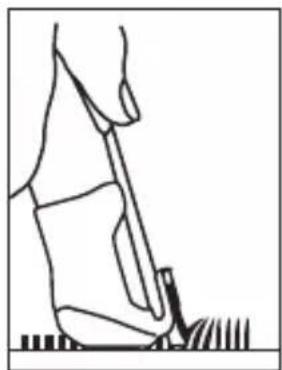
natural_image
Line drawing of a person using a tool on grass (no text or symbols)
Wskazówka
natural_image
Line drawing of a hand using a tool to press or adjust a textured object (no text or symbols visible)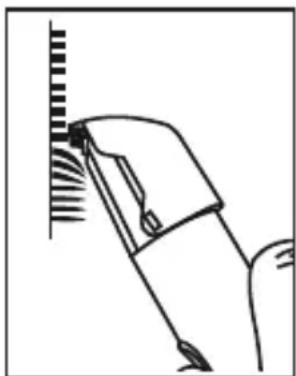
natural_image
Simple line drawing of a tool interacting with a vertical surface (no text or symbols)natural_image
Line drawing of a hand holding a small electronic device with a black arrow indicating the handle (no text or symbols present)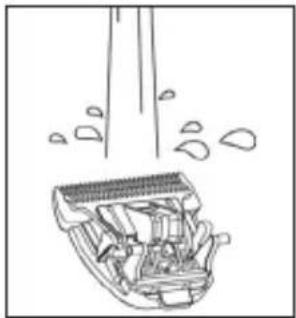
natural_image
Line drawing of a cleaning or dust removal device with visible spray and components (no text or symbols)