
AD 4130 - Juicer ADLER - Free user manual and instructions
Find the device manual for free AD 4130 ADLER in PDF.
| Product type | Slow masticating juicer (slow mastication) |
| Brand | Adler |
| Model | AD 4130 |
| Power supply | 220-240 V, 50/60 Hz |
| Power | 150 W (estimated) |
| Dimensions (L x W x H) | Not specified in the manual (approx. 25 x 20 x 30 cm) |
| Weight | Not specified in the manual (approx. 3 kg) |
| Color | White (typical) |
| Body material | ABS plastic |
| Auger material | Stainless steel |
| Main function | Juice extraction from fruits and vegetables via auger |
| Secondary functions | Reverse function (R) to clear jams |
| Juice container capacity | Approx. 600 ml |
| Pulp container capacity | Approx. 800 ml |
| Included accessories | Pusher, juice bowl, pulp bowl, filter, extraction cover |
| Maintenance | Clean with warm soapy water; do not immerse motor unit |
| Safety | Three-position switch (I/O/R); unplug before cleaning; children 8+ with supervision |
| Warranty | 2 years (according to legislation) |
| Repairability | Spare parts available on request through authorized service |
| Usage | Household use only |
Frequently Asked Questions - AD 4130 ADLER
User questions about AD 4130 ADLER
0 question about this device. Answer the ones you know or ask your own.
Ask a new question about this device
Download the instructions for your Juicer in PDF format for free! Find your manual AD 4130 - ADLER and take your electronic device back in hand. On this page are published all the documents necessary for the use of your device. AD 4130 by ADLER.
USER MANUAL AD 4130 ADLER
natural_image
Modern stainless steel juice brush maker with clear glass base and black handle (no visible text or symbols)AD 4130 / AD 4131
(GB) user manual
(FR) mode d'emploi
B
C
D
E

natural_image
Diagram of a curved pipe assembly with directional arrows indicating flow or movement (no text or symbols)F

natural_image
Technical line drawing of a mechanical device with a threaded end and cable, showing internal components and an arrow indicating direction (no text or symbols)
natural_image
Technical line drawing of a mechanical device with a curved cable and cylindrical component, showing an arrow indicating direction (no text or symbols present)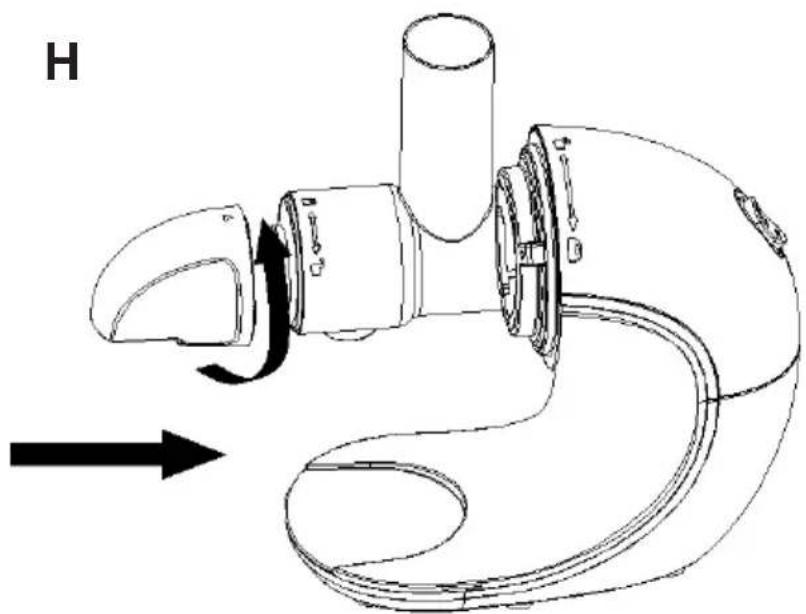
natural_image
Diagram of a medical device with a curved tube and tubing, showing internal components and directional arrows (no text or symbols)H1

natural_image
Line drawing of a hand mixer device with handle, spout, and control panel (no text or labels)H2
natural_image
Line drawing of a portable air purifier with cylindrical tank and connecting tubing (no text or symbols)
natural_image
Diagram of a pipe valve assembly with directional arrows indicating flow or movement (no text or labels)K

L

natural_image
Diagram of a hair dryer with attached cable and connector, showing internal components and wiring (no text or labels)
natural_image
Line drawing of a hair dryer with attached cable and connector, showing internal components and a circular component (no text or symbols)M.
natural_image
Simple line drawing of a conical mechanical part with flanged ends (no text or symbols)
natural_image
Line drawing of a curved pipe assembly with attached components (no text or symbols)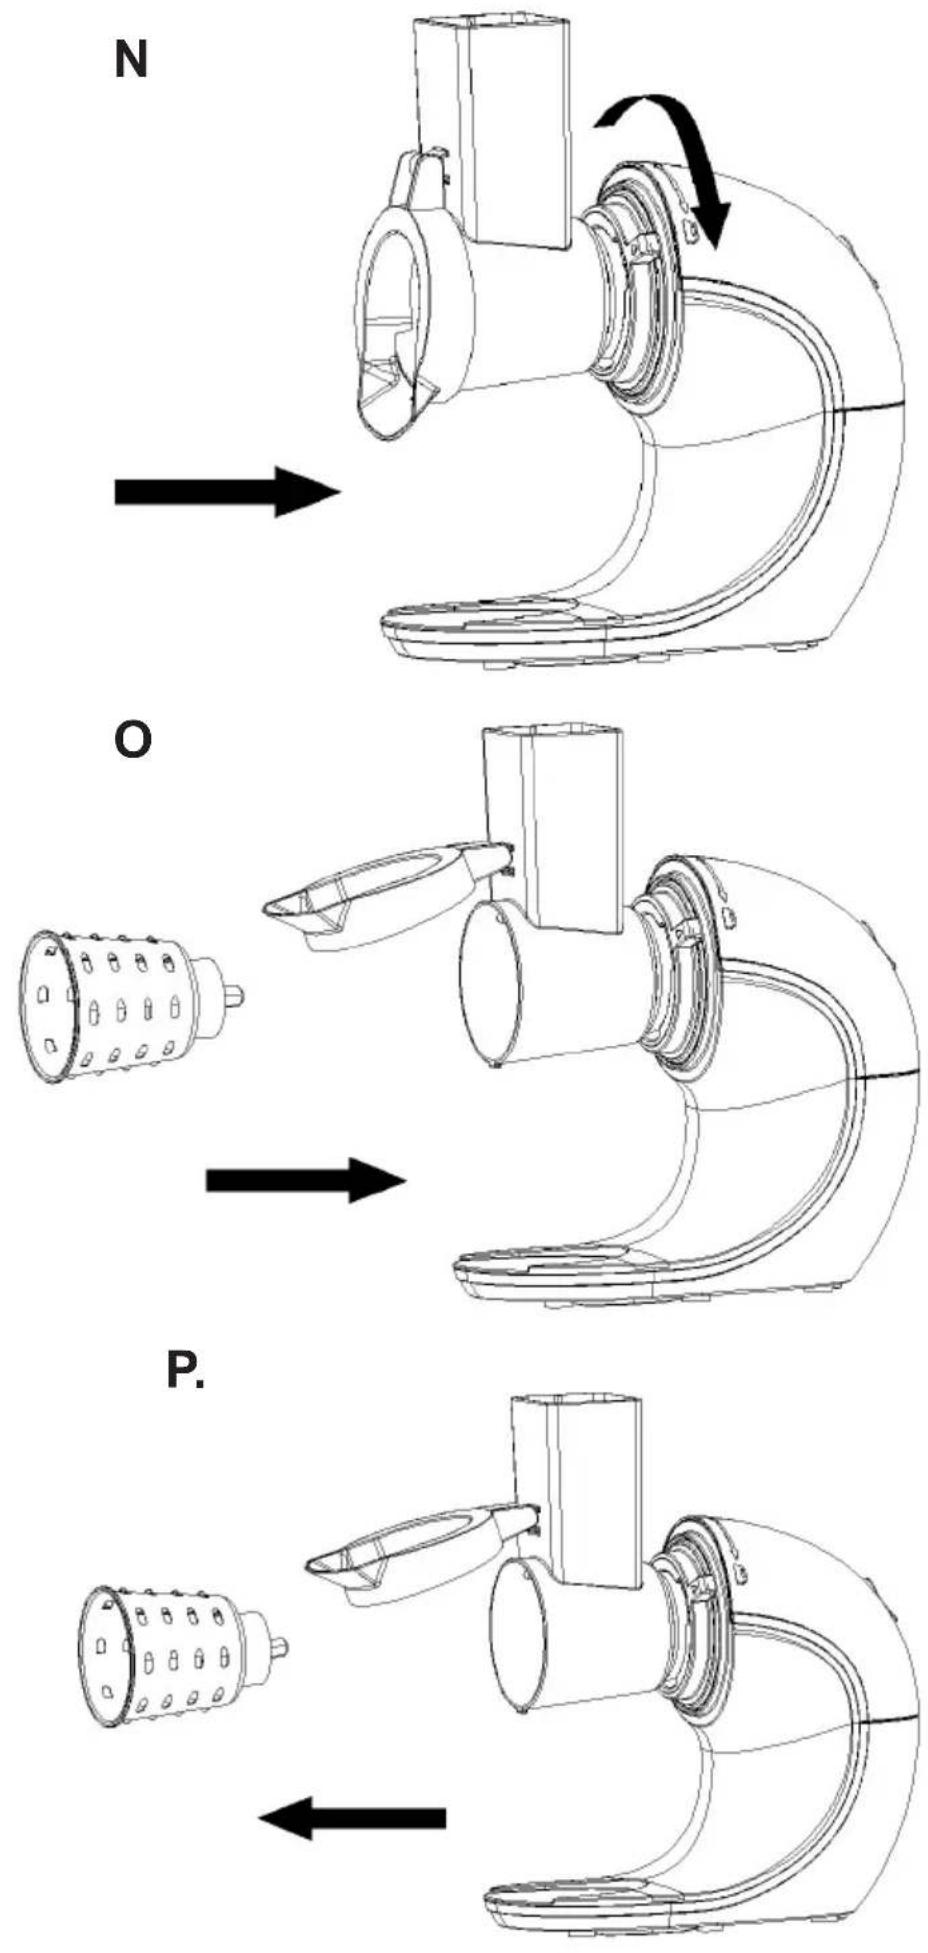
GENERAL SAFETY TERMS IMPORTANT SAFETY INSTRUCTIONS READ CAREFULLY AND KEEP FOR FUTURE REFERENCE
- Before using the device, read the user manual and follow the instructions contained therein. The manufacturer is not liable for damage caused by using the device contrary to its intended use or improper operation.
- The device is for home use only. Do not use it for other purposes that are inconsistent with its intended use.
- The device should only be connected to a 220-240V, \~50/60Hz socket. In order to increase the safety of use, many electrical devices should not be connected to one power circuit at the same time.
- Be especially careful when using the device when children are around. Do not allow children to play with the device and do not allow children or people unfamiliar with the device to use it
- WARNING: This equipment can be used by children over 8 years of age and persons with reduced physical, sensory or mental abilities, or persons without experience or knowledge of the equipment, if it is carried out under the supervision of a person responsible for their safety or they have been given instructions on the safe use of the device and are aware of the dangers associated with its use. Children should not play with the equipment. Cleaning and user maintenance should not be performed by children, unless they are over 8 years of age and are supervised.
- Always remove the plug from the socket after use by holding the socket with your hand. DO NOT pull on the net cord.
- Do not immerse the cord, plug or the entire appliance in water or any other liquid. Do not expose the device to weather conditions (rain, sun, etc.) or use it in high humidity conditions (bathrooms, damp mobile homes).
- Periodically check the condition of the power cord. If the power cord is damaged, it should be replaced by a specialist repair facility in order to avoid a hazard.
- Do not use the appliance with a damaged power cord or if it has been dropped or damaged in any other way or is not working properly. Do not repair the device yourself, as it may cause electric shock. Return the damaged device to the appropriate service center for inspection or repair. Any repairs may only be made by authorized service points. Improperly performed repair may result in serious danger to the user.
- Place the device on a cool, stable, level surface, away from hot kitchen appliances such as: electric cooker, gas burner, etc...
- Do not use the device near flammable materials.
- The power cord must not hang over the edge of the table or touch hot surfaces.
- Before cleaning or after use, remove the plug from the mains socket by holding the socket with your hand. DO NOT pull on the net cord.
- Do not use the device near water, e.g. in the shower, bathtub or over a wash basin with water.
- Never wash the appliance under running water or in such a way that water drips into it
- Do not allow the device to get wet. If the device falls into water, pull the plug out of the socket immediately. Do not put your hands into the water when the device is connected to the mains. It must be checked by a qualified electrician before being used again.
- Do not handle or use the device with wet hands.
- The device should be turned off each time after finishing work.
- Do not leave the device connected to the socket unattended.
- For additional protection, it is advisable to install a residual current device (RCD) in the electrical circuit with a rated residual current not exceeding 30 mA. Please consult an electrician for this.
-
Before you turn on the device, make sure that all parts are installed correctly.
-
WARNING: Be careful when handling the blades
cutting blades, when emptying and cleaning the machine. - WARNING: Always unplug the appliance when left unattended and before assembling or disassembling or cleaning.
- WARNING: Do not use the equipment if the rotating blades are damaged.
- WARNING: Before replacing equipment or approaching parts that move during use, switch off and disconnect equipment.
- Only use accessories provided by the manufacturer.
- When the device is operating, do not put your hand or any objects into the feeder opening. Only use the pusher for this purpose.
- Meat should be inserted into the feeder opening while the device is operating, it is not allowed to fill the feeder opening with fruit or vegetables when the device is stopped.
- Be careful not to overload the machine, do not use too much force to push the products through the feeder.
- Always disconnect the device from the mains when it is not in use or you want to clean it.
- Do not disassemble the clipper while it is plugged into a power outlet.
- Do not use harsh scourers or abrasive cleaners for cleaning.
- Do not immerse the motor unit in water or any other liquid.
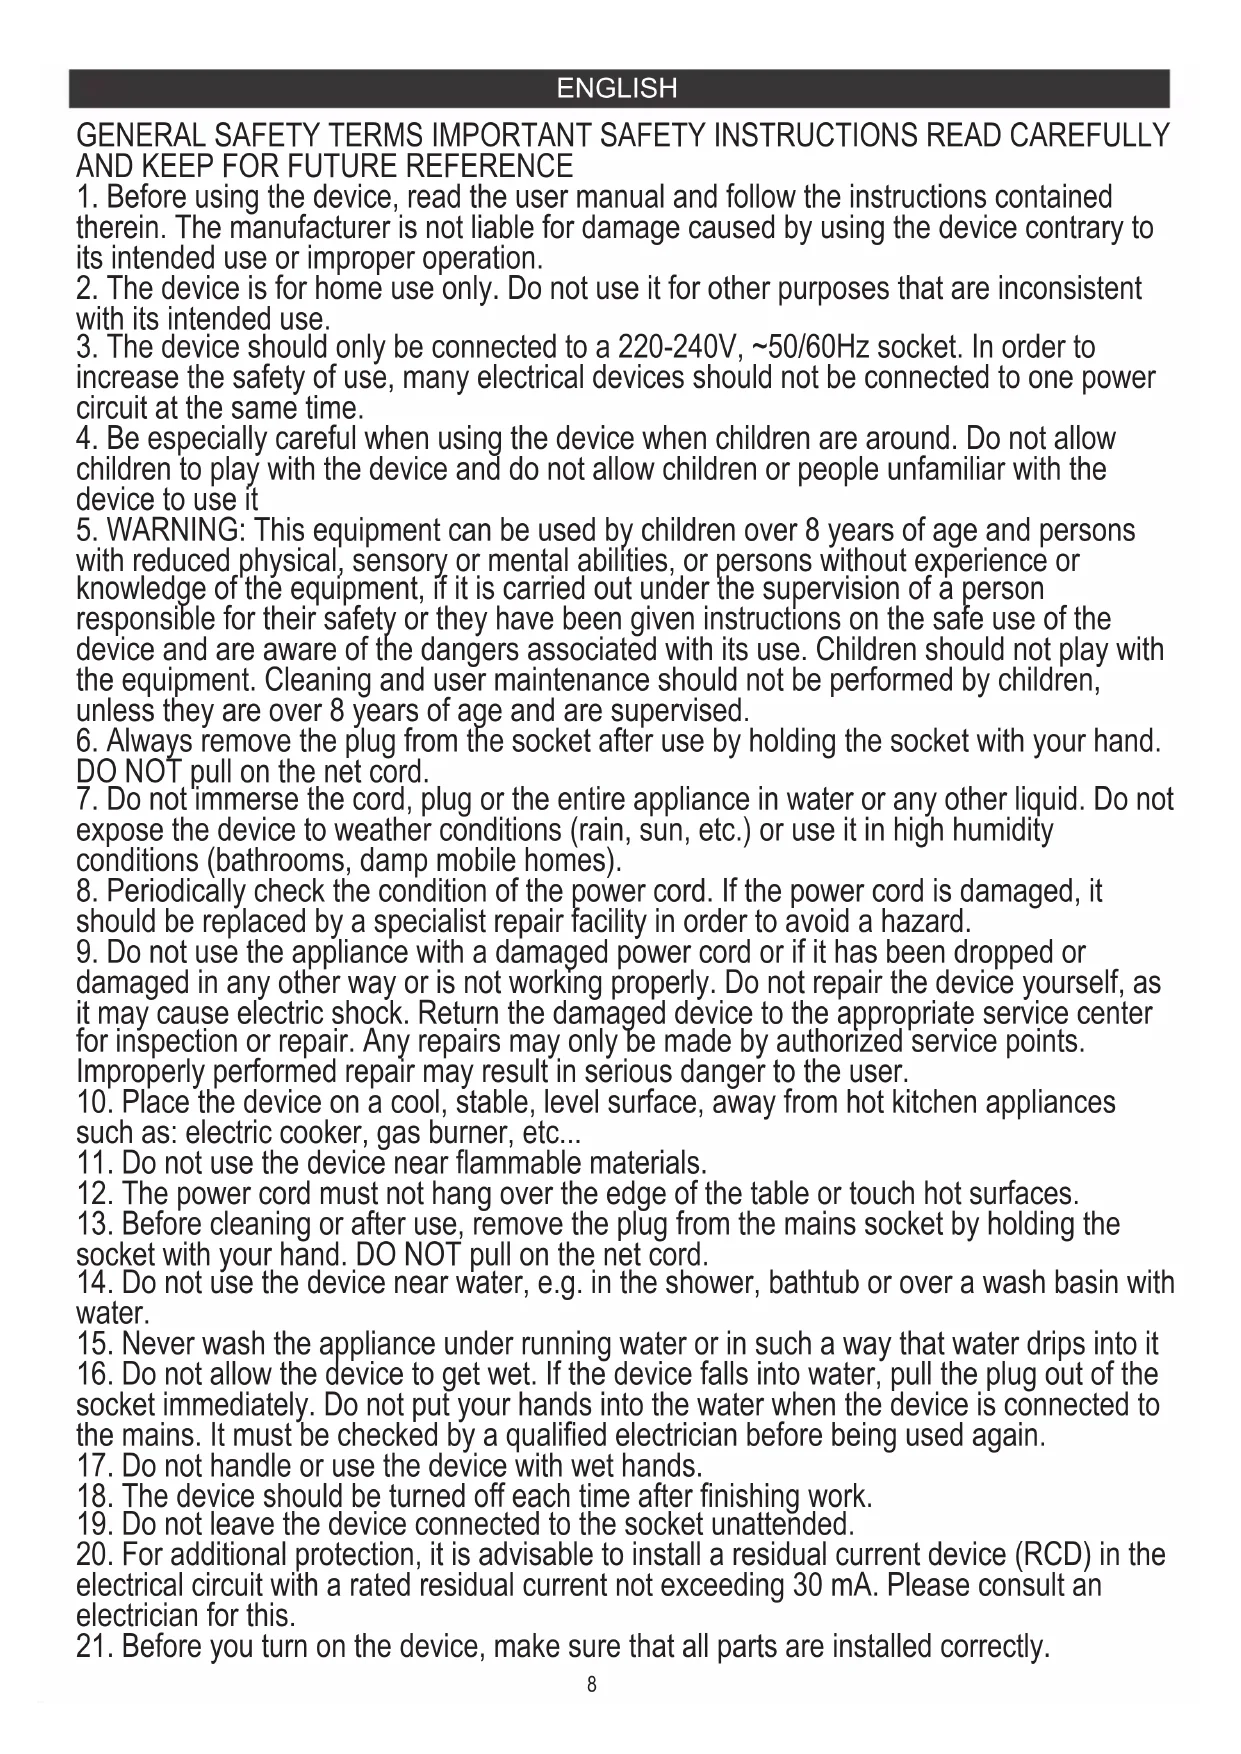
Slow Juicer AD 4130 / AD4131
Main Product Unit
-
Power cord with plug 2. Engine unit
-
Swing Switch 4. Locking ring
Extraction function
-
Juice cup 6. Foam filter plate 7. Pulp cup
-
Extraction pusher 9. Juice tray 10. Squeezing tube
-
Extraction screw 12. Filter net 13. Extraction cover
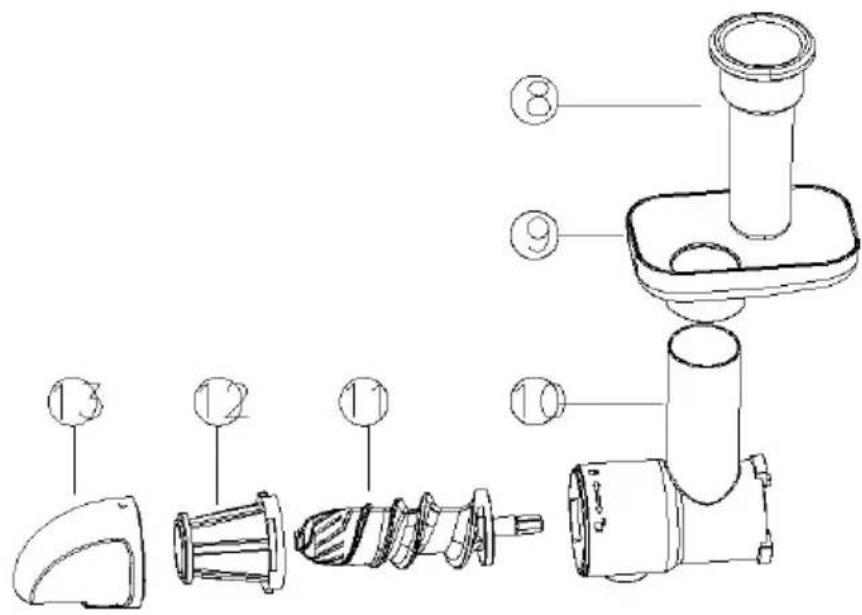
Meat grinder Function (Only in AD4131)
-
Pusher for meat grinder 15. Food tray 16. Feeding tube
-
Feeding screw 18. Cross knife 19. Cutting disc 3mm
-
Cutting disc 5mm 21. Cutting disc 8mm 22. Fixing ring
-
Sausage attachment
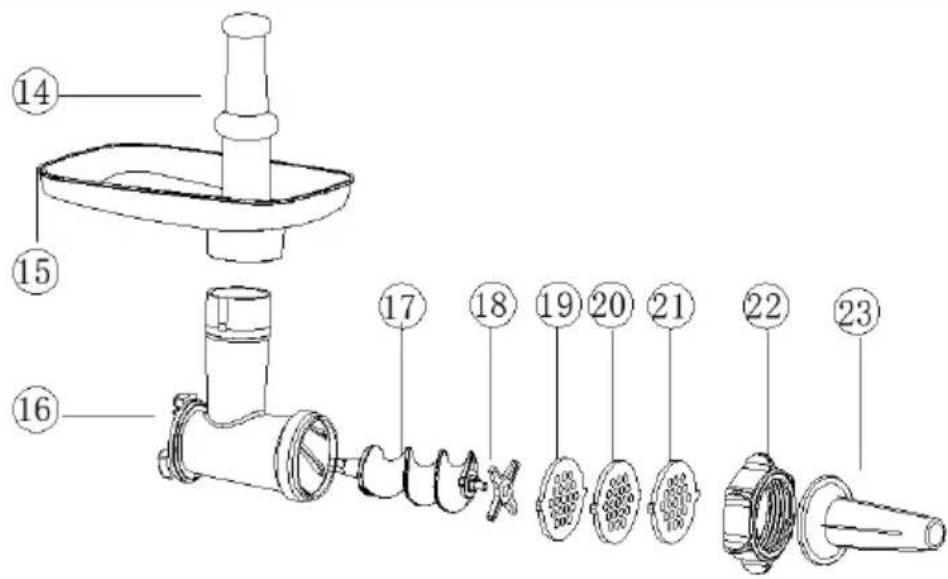
Salad maker (Only in AD4131)
-
Salad maker pusher 25. Salad maker tube
-
Salad maker tube cover 27. Slicer
-
Shredder 29. Masher
Before first use:
-
Before first use remove all packaging material.
-
Clean the device and all attachments with warm water mixed with dish washing soap.
-
Dry with a dry and soft towel or paper towel.
Button description:
The device has 1 rocking switch to operate.
The 3 functions of the switch are as follows:
I: This turns on the device. After pressing it will continue working until turned off.
O : Off position. The device will be turned off when the switch is in this position.
R : Reverse. When pressed the engine will turn into reverse. The Auger/slicer will turn in the opposite direction compared to normal operation. When released the device will switch to Off position.
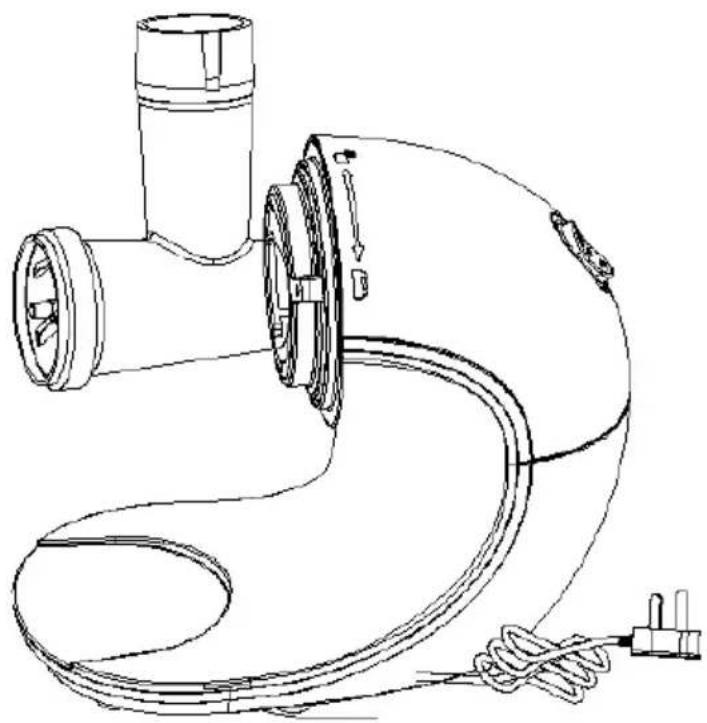
Juice Extractor Models AD4130 and AD4131 :
Couple Extractor to Frame. (Picture E. Page 3)
Embed the extractor into the frame by aligning the center on the inlet with the triangle mark (to point at the three fasteners on the extractor). (Picture E. Page 3)
Then rotate the extractor counterclockwise till it clicks. (Picture E. Page 3)
Align the hexagonal shaft of spiral propeller with the hole in the frame and push it in to the end. (slightly rotate the spiral propeller to make good alignment) (Picture F, G. Page 4)
Insert the coarse-hole end of juice filter into tail of spiral propeller and lock the three fasteners into the three slots in the extractor. Mis-align the three fasteners on extractor cover with the three ones on extractor and horizontally push them in, and then attach the cover to the extractor by rotating it counterclockwise. (Picture H. Page 4)
Place juice container beside machine frame with its opening right below the frame outlet. (Container baffle should be mounted in the
container in advance to block foam in the juice) (Picture H1. Page 5)
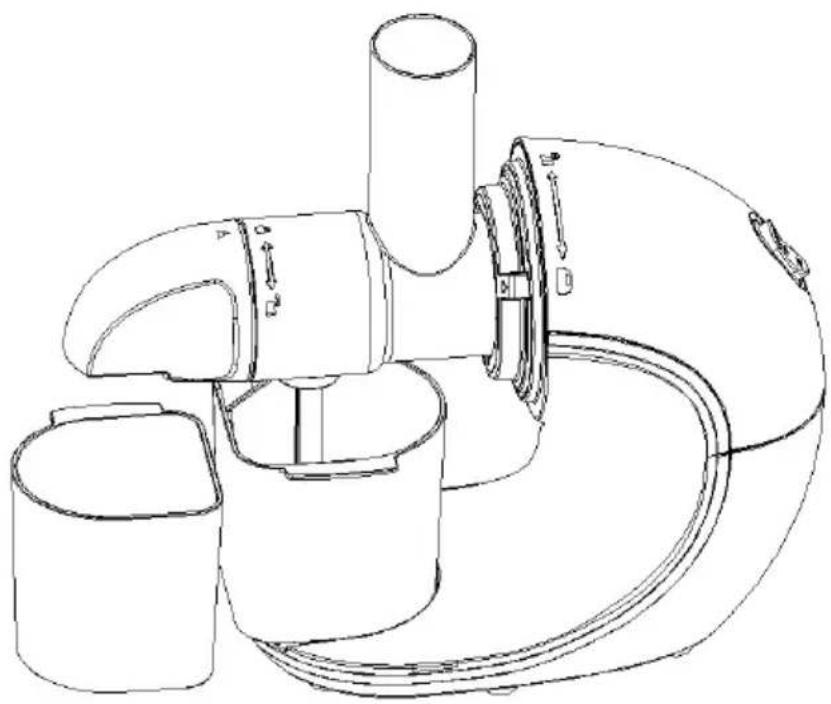
Place residue container below the frame residue outlet, near the juice container. (Picture H2. Page 5)
Mount tray onto the upper end of inlet cylinder.
The tray facilities loading of food material, such grape or strawberry.
Connect to power supply and get ready for startup. (Before connecting the device into mains power, make sure the switch is in Off position.)
Clean the material and cut it into pieces small enough to pass through the inlet, and place them onto the tray.
WARNING:
Any hard core, seed, skin or shell should be removed in advance. As it might get stuck in the device or block the juice extraction holes.
Press down the ON button to start then press R button to reverse. Then Press the On button again to start and keep the machine operating for less than 10 minutes.
Do not to touch the power switch with wet hand to avoid electric shock, leakage or fire.
Load the food material in through the inlet and push them in with the attached food pusher. DO NOT USE ANY METAL UTENSILS OR OTHER OBJECTS INSTEAD OF THE ATTACHED PUSHER.
Proper amount of force shall be used to push the food material in, not excessive but sufficient to have it cut off exactly.
(Do not put your finger or any other object into the inlet! If the residue/juice container is full, disconnect the power supply and empty and then clean before restart.)
Upon completion, shut down the device by pressing the ON/OFF switch and when no juice flows out of the outlet, disconnect the power supply.
The extracted juice should be drunk as soon as possible. The longer the juice is exposed to air and sun the less nutritious it will be.
The remaining pulp should be disposed as fast as possible. Either by throwing it away or it can be dried and used as an fiber supplement. For example apple pulp can be used in baking or making pastries as it has the intense flavor of apples and will not release water and juices into the dough.
Do not to touch the power switch with wet hands to avoid electric shock, leakage or fire.
MEAT GRINDER (Only AD4131)
Assemble the feeding tube
Embed the feeding tube into the frame by aligning the center on the inlet with the triangle mark (to point at the three fasteners on the extractor).
Then rotate the feeding tube counterclockwise till it clicks. (Picture I. Page 6)
Align the hexagonal shaft of feeding screw with the hole in the frame and push it in to the end. (slightly rotate the spiral propeller to make good alignment) (Picture J. Page 6)
Put the cross knife onto the feeding screw (there is a 4 angles shape on the front point of feeding screw to place the cross knife. (Picture K. Page 6)
Put the cutting disc on the feeding screw after placing the cross knife. (Picture L. Page 6)
Screw the fixing ring on the feeding tube to fix the parts of feeding tube accessory.
Put the food tray onto the top of feeding tube
Put the pusher onto food tray, finish the meat grinder function preparation.
Plugged in, prepare for working. Make sure product is on switch-off mode.
Press down ON button to to work.press R 'button to reverse. start and keep the machine operating for less than 10 minutes.
Do not to touch the power switch with wet hand to avoid electric shock, leakage or fire.
Making sausage (Use minced meat to make sausage)
(Please use picture M. Page 6 as an example of correct assembly order):
-
Prepare the minced meat
-
Remove the fixing ring and put the kebbe attachment & sausage tube, then screw the fixing ring to fix the parts again.
-
Connect the sausage wrapper on the sausage tube. Put the minced meat onto feeding tube, then the minced meat will be filled into sausage wrapper. Sausage ready.
Vegetable Slicer (Only model 4131)
Put the salad maker into the machine, and rotate the locking ring clockwise to lock the salad maker device onto the machine. (Picture N. Page 7)
Lift up the cover of the salad maker, then select the drum that needs to be used and place it inside the salad maker. (Sometimes it will be advised to move the drum left and right to make the hexagonal screw to fall into proper position before moving to the next step) (Picture O. Page 7).
Press the lid downwards and apply slight force to ensure that the lid of the salad maker drum is tightly fastened.
Make sure the On / Off switch is in Off position.
Plug the device into mains power.
Press down ON button to turn on the device then press press R button to reverse to make sure the parts are correctly assembled.
Start and keep the machine operating for less than 10 minutes.
Do not to touch the power switch with wet hand to avoid electric shock, leakage or fire.
Place the food into the salad maker tube, and use the pusher to push the food into the salad maker tube.
Pull out the power plug and put the machine in a power off state.
Lift up the cover of the salad maker tube.
Take out the drum. (Picture P. Page 7)
Technical data:
Maximum working duration: 10 minutes
Rest time: 30 minutes
Power: 150 W
Voltage: 220-240V \~ 50Hz
To protect your environment: please separate carton boxes and plastic bags and dispose them in corresponding waste bins. Used appliance should be delivered to the dedicated collecting points due to hazarsous components, which may effect the environment. Electrical appliance must be returned in order to reduce its reuse and utilization. If the device contains batteries they should be delivered to dedicated points separately.
DEUTSCH
Slow Juicer AD 4130 / AD4131
Hauptprodukteinheit
Storcator lent AD 4130 / AD4131
Par Extractor to Frame. (Slika E. Strana 3)
Ugradite ekstraktor u okvir tako što ćete poravnati centar na ulazu sa oznakom trouqla (da pokazuje na tri pričvršćivača na ekstraktoru).
(Slika E. Strana 3)
Slow Juicer AD 4130 / AD4131
Fő termékegység
Slow Juicer AD 4130 / AD4131
Modela sokovnika AD4130 in AD4131:
Par Extractor to Frame. (Slika E. stran 3)
Vstavite izvleček v okvir tako, da poravnate sredino na dovodu s trikotno oznako (da kaže na tri pritrdilne elemente na izvleku). (Slika E. stran 3)
Nato závrtite ekstraktor v nasprotni smeri urinega kazalca, dokler ne zaskoči. (Slika E. stran 3)
Poravnajte šesterokotno gred spiralnega propelerja z luknjo v okvirju in jo potisnite do konca. (rahlo zavrtite spiralni propeler, da ga dobro poravnate) (Slika F, G. Štran 4)
Slow Juicer AD 4130 / AD4131
Huvudproduktenhet
natural_image
Exterior view of a modern silver kettle with blue liquid, no visible text or symbolsElectric Kettle AD 1282

natural_image
Close-up of a black and white coffee griller with powder spilling out (no text or symbols visible)Burr Coffee Grinder AD 4450

Milk Frother
AD 4491
natural_image
Black rectangular electronic device with a flat lid and ventilation slots (no visible text or symbols)Sandwich Maker AD 3055

natural_image
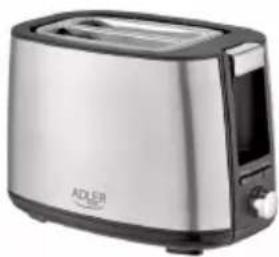
Exterior view of a modern stainless steel toaster with two handles and a front-mounted grille (no visible text or symbols)TOASTER 2 SLICE AD 3222

natural_image
Exterior view of a modern kitchen grater with a black and silver plate (no visible text or symbols)ELECTRIC GRILL AD 3052

natural_image
White ADLER juice shaver with orange liquid and a white comb (no text or symbols visible)CITRUS JUICER AD 4009

natural_image
Product photo of a blender with orange juice and fruit in foreground (no text or symbols visible)PERSONAL BLENDER AD 4081

natural_image
Assorted kitchen appliances including a blender, keyboard, and cleaning tools (no visible text or labels)FOOD PROCESSOR AD 4224

natural_image
Electric hand mixer with two coiled wire handles (no text or symbols visible)MIXER AD 4225
natural_image
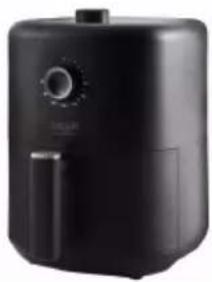
Black air fryer with control knob and side handle (no visible text or symbols)AIR FRYER AD 6310

natural_image
Exterior view of a modern silver coffee maker with black lid and control buttons (no visible text or symbols)PASTEURIZATION POT AD 4496

natural_image
White portable air conditioner unit with control panel and wheels (no visible text or symbols)AIR CONDITIONER AD 7916

natural_image
White cylindrical device with black body and lid, labeled '54" (no visible text or symbols beyond branding)AIR HUMIDIFIER AD 7966

natural_image
White portable heating fan with heat sink and vent slots (no visible text or symbols)FAN HEATER AD 7725

natural_image
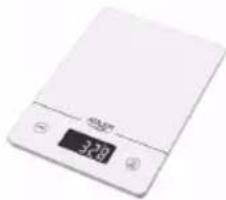
Close-up of a stainless steel kitchen scale with digital display (no visible text or symbols)KITCHEN SCALE AD 3166
ADLER
EUROPE

natural_image
Black cylindrical container with a circular logo and the brand name 'PACER' on its side (no additional text or symbols visible)COFFEE GRINDER AD 4446
natural_image
Exterior view of a modern stainless steel toaster with a digital display (no visible text or symbols)TOASTER 2 SLICE AD 3214

HAND BLENDER
Ad4625

natural_image
Modern stainless steel kitchen appliance with a digital kitchen scale and control knob (no visible text or symbols)MIXER WITH BOWL AD 4222

natural_image
Exterior view of a modern kitchen appliance with digital display (no visible text or symbols)AIR FRYER OVEN AD 6309

natural_image
Front view of a white microwave oven with control knobs and a blank screen (no visible text or symbols)MICROWAVE OVEN AD 6205

natural_image
Black rectangular electronic device with ports and lid (no visible text or symbols)WAFFLE MAKER AD 3049
natural_image
White digital kitchen scale with LCD display and control buttons (no visible text or symbols)KITCHEN SCALE AD 3170

natural_image
Glass water heater with blue liquid splashing, no visible text or symbolsELECTRIC KETTLE AD 1286

natural_image
Black rectangular flatset or griddle device with a red button, no visible text or symbolsSANDWICH MAKER
AD 3043

natural_image
Exterior view of a modern industrial air purifier unit (no visible text or symbols)PORTABLE FRIDGE AD 8077
natural_image
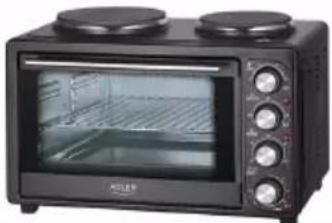
Black four-tier kitchen oven with two top ovens and a front-mounted dish inside (no visible text or labels)Electric Oven With HOB AD 6020

natural_image
White electric heating fan with visible blades and control knobs (no text or symbols)FAN HEATER AD 7728
natural_image
Black electronic device with a mesh grille and LED indicator, no visible text or symbols on the device itself.MOSQUITO LAMP AD 7938

natural_image
Black mesh medical device with a white cable attached (no visible text or symbols)HEATED PAD AD 7433
ORAL IRRIGATOR
AD 2176

AFTER SALE SERVICE NOTICE
| GB | If you want to buy spare parts or make any complaints, please contact the seller who issued the receipt directly. |
| DE | Wenn Sie Ersatzteile kaufen oder reklamieren möchten, wenden Sie sich bitte direkt an den Verkäufer, der die Quittung ausgestellt hat. |
| FR | Si vous souhaitez acheter des pièces de rechange ou faire des réclamations, veuillez contacter directement le vendeur qui a émis le reçu. |
| ES | Si desea comprar repuestos o presentar alguna queja, comuníquese directamente con el vendedor que emitió el recibo. |
| PT | Se você quiser comprar peças de reposição ou fazer alguma reclamação, entre em contato diretamente com o vendedor que emitiu o recibo. |
| LT | Jei norite jsigyti atsarginių dalių ar pateikti nusiskundimų, susisiekite tiesiogiai su kvitą išdavusiu pardavėju. |
| LV | Ja vēlaties legādāties rezerves daļas vai izteikt pretenzijas, lūdzu, sazinieties tieši ar pārdevēju, kurš izsniedza čeku. |
| EST | Kui soovite osta varuosi või esitada pretensioone, võtke otse ühendust kviitungi väljastanud müūjaga. |
| HU | Ha pótalkatrészeket szeretne vásárolni, vagy panaszt szeretne tenni, forduljon közvetlenül a bizonylatot kiállító eladóhoz. |
| BS | Ako želite kupiti rezervne dijelove ili napraviti reklamaciju, obratite se direktno prodavaču koji je izdao račun. |
| RO | Если вы хотите купить запчасти или предъявить какие-либо претензии, пожалуйста, свяжитесь напрямую с продавцом, выдавшим чек. |
| CZ | Chcete-li zakoupit náhradní díly nebo uplatnit jakoukoli reklamacı, kontaktujte přímo prodejce, který účtenku vystavil. |
| RU | Dacă doriți să cumpărați piese de schimb sau să faceți vreo reclamație, vă rugăm să contactați direct vânzătorul care a emis chitanța. |
| GR | Ećv θέλετε να αγοράσετε ανταλλακτικά ή να κάνετε οποιαδήποτε παράπονα, επικοινωνήστε απευθείας με τον πωλητή που εξέδωσε την απόδειξη. |
| MK | Ако сакате да купите резервни делови или да поднесете какви било поплаки, контакTRAJTE директно со продавачот кој ja издал сметката. |
| NL | Als u reserveonderdelen wilt kopen of een klacht wilt indienen, neem dan rechtstreeks contact op met de verkoper die de bon heeft afgegeven. |
| SL | Če želite kupiti nadomestne dele ali vložiti reklamacije, se obrnite neposredno na prodajalca, ki je izdal račun. |
| FI | Jos haluat ostaa varaosia tai tehdä valituksia, ota yhteyttä suoraan kuitin antaneeseen myyjään. |
| PL | W przypadku chęci zakupu części zamiennych lub zgłoszenia ewentualnych reklamacji należy kontaktować się bezpośrednio ze sprzedawcą, który wystawił paragon. |
| IT | Se desideri acquistare pezzi di ricambio o presentare reclami, contatta direttamente il venditore che ha emesso la ricevuta. |
| HR | Se desideri acquistare pezzi di ricambio o presentare reclami, contatta direttamente il venditore che ha emesso la ricevuta. |
| SV | Om du vill köpa reservdelar eller göra några reklamationer, vänligen kontakta säljaren som utfärdat kvittot direkt. |
| DK | Hvis du ønsker at købe reservedele eller reklamere, bedes du kontakte sælgeren, som har udstedt kvitteringen, direkte. |
| UA | Якщо ви хочете придбати запчастини або подати будь-які претензії, зверніться безпосередньо до продавця, який видав чек. |
| SR | Ако желите да купите резервне делове или да уложите рекламацију, обратите се директно продавцу који је издао рачун. |
| SK | Ak si chcete küpit'náhradné diely alebo uplatnit' akúkol'vek reklamáciu, kontaktujte priamo predajcu, ktorý účtenku vystavil. |
| AR | أو غيارقطعع earners في ترゴب كنتScientا شكوي أي تقدم، لاصтала فيرжи مباشرلاصibia رдумা يذلا بالباłęم |
| BG | Ако искате да закупите резервни части или да направите оплаквания, моля, свържете се директно с продавача, който е издал касовата бележка. |
| AZ | Ehtiyat hissələri almaq və ya hər hansı śikayət etmək istəyirsinizsə, qəbzi verən satici ilə birbaşa əlaqə saxlayın. |


Brand : ADLER
Model : AD 4130
Category : Juicer