ITW-802 - Smart Home Intertechno - Free user manual and instructions
Find the device manual for free ITW-802 Intertechno in PDF.
| Product type | 2-channel wall radio transmitter |
| Model | ITW-802 |
| Brand | Intertechno |
| Power supply | 3V CR2032 coin cell battery |
| Battery life | Approximately 20,000 switchings (3 years) |
| Low battery indicator | Red LED flashing every 4 seconds |
| Number of channels | 2 |
| Main functions | On/off switching, dimming, automatic shut-off delay |
| Compatibility | Intertechno self-learning radio receivers (adapters, flush-mounted switches) |
| Estimated range | Not specified, avoid metallic shielding |
| Mounting | Simple attachment with mounting plate, double-sided adhesive tape or screws |
| Material | Plastic |
| Maintenance and cleaning | Clean with a dry, soft cloth. Do not use liquids. |
| Safety | Do not ingest batteries. Risk of burns and death. Keep out of reach of children. |
| Spare parts | CR2032 battery, mounting plate |
| Repairability | Not repairable (parts not available, battery replacement only) |
| General information | Declaration of conformity at www.intertechno.at/CE |
Frequently Asked Questions - ITW-802 Intertechno
User questions about ITW-802 Intertechno
0 question about this device. Answer the ones you know or ask your own.
Ask a new question about this device
Download the instructions for your Smart Home in PDF format for free! Find your manual ITW-802 - Intertechno and take your electronic device back in hand. On this page are published all the documents necessary for the use of your device. ITW-802 by Intertechno.
USER MANUAL ITW-802 Intertechno
GB Operating instructions
GR Οδηγίες χρήσης
H Kezelési utasítás
HR Uputa za rukovanje
I Istruzioni d'uso
ISL Notkunarleiðbeiningar
N Bruksanvisning
natural_image
Illustration of a screwdriver holding a square panel with four slots, showing an arrow indicating rotation (no text or symbols present)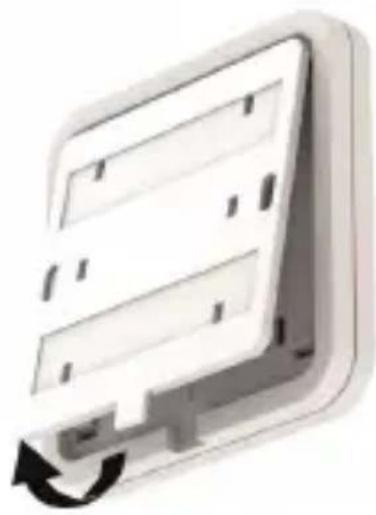
natural_image
Illustration of a computer monitor with an open button and scroll, showing no text or symbols.
2
natural_image
Two views of a wall-mounted electronic device with labeled components and a central circular component (no text or symbols visible)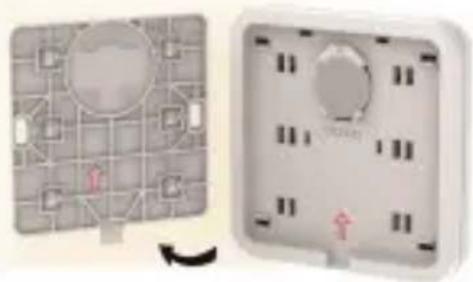
natural_image
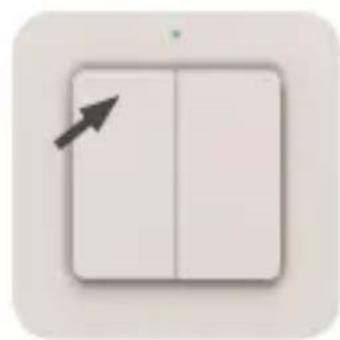
Two views of a wall-mounted electrical switch with grid layout and control buttons (no text or symbols visible)3
text_image
1.)2.)
natural_image
Simple icon of a door with a black arrow pointing to the left side (no text or symbols)D
Bedienungsanleitung
ITW-801
ITW-802
Den grønne LED viser:
0 - LED'en lyser 1x
5 s - 2x
1 min. - 3x
10 min. - 4x
30 min. - 5x
60 min. - 6x
Operating instructions
ITW-801
ITW-802
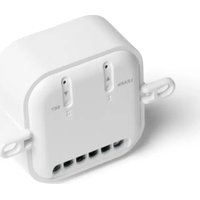
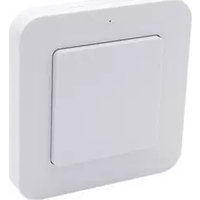
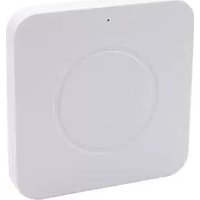
The wireless wall transmitter ITW-801 and wireless 2-gang wall transmitter ITW-802 (Fig.1) are compatible with all intertechno self-learning wireless receivers for switching.
Wireless adapters and flush-mounted switches for all light sources (such as LEDs) are available.
The automatic turn-off time is ideal for many applications and to save energy.
Removing battery strips/changing batteries (Fig.2)
The battery fuse must be removed first.
To do this, use a screwdriver to take off the mounting plate.
The + symbol must face upwards when you insert the battery.
The CR2032 3V battery will last for approx. 20,000 operations (lifetime of around 3 years)
The LED will light up red every 4 seconds when the battery is running out.
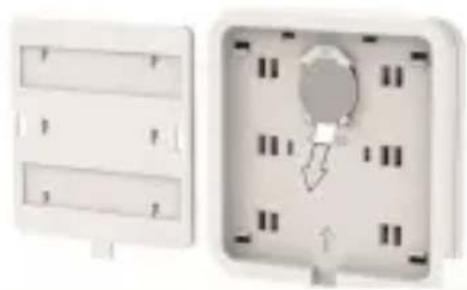
When closing the wireless wall transmitter with the mounting plate, ensure that the arrow of the mounting plate and the arrow on the back of the wall transmitter are both pointing upwards.
All 6 clips must properly click into place. If done correctly you should hear a distinct click.
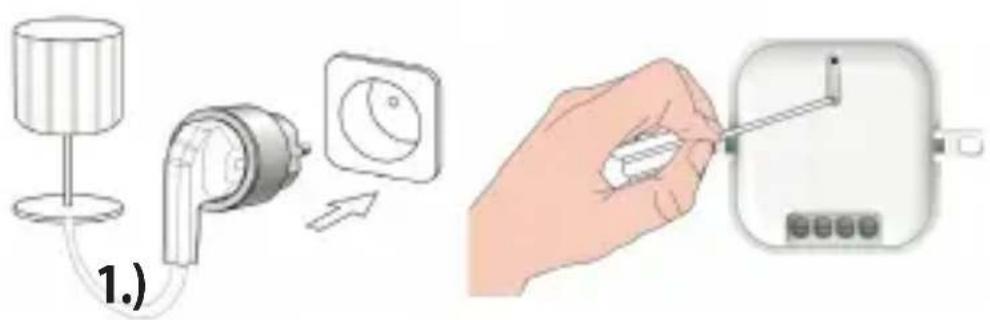
ENCODING - Teaching in a wireless receiver (Fig. 3)
To adjust the encoding, please also read the operating instructions of your self-learning wireless receiver.
Place the wireless wall transmitter near the wireless receiver.
1.) Put the wireless receiver in learn mode.
2.) Transmitting the on signal to the wall transmitter causes the LED to light up green and the wireless receiver applies the encoding.
Erasing encoding
To erase the encoding, repeat steps 1.) to 2.) as above, but now the off signal is sent instead.
The LED will light up red two times.
Setting the automatic turn-off time
No matter which time is set, it is always possible to prematurely switch off the device.
Press the on and off button at once for 3 s to adjust the setting.
The LED flashes green.


GB
Operating instructions
ITW-801
ITW-802
The on button extends the turn-off time;
the off button reduces it.
The green LED displays:
0 - 1x lighting up of the LED
5 s - 2x
1 min. - 3x
10 min. - 4x
30 min. - 5x
60 min. - 6x
Pressing the on and off button at the same time again for 3 s saves the turn-off time. The LED briefly flashes to confirm this.
ITW-802: Each channel can be assigned its own turn-off time.
This means that two receivers can turn off at different times.
However, it is also possible for a receiver that has learned both codes to be assigned a short or long turn-off time (for example, button 1 = 10 min., button 2 = 60 min.).
Mounting
Easy to install mounting plate.
The mounting plate is easy to affix on glass, wood, wallpaper or tiles, etc.
Double-sided adhesive tape and screws are included.
Caution: Avoid shielding through metal objects.
Operation
To turn on: Press on (top) once. The LED will briefly light up green.
To turn off: Press off (bottom) once. The LED will briefly light up red two times.
Dimming:
1.) Start the dimming cycle by pressing the on signal again and stop the dimming or brightening at the desired brightness with the on signal.
Or
2.) Keep the on (brighter) or off (dimmer) button pressed to dim or brighten the device until the desired brightness is reached, then release it to stop.


GB
Operating instructions
ITW-801
ITW-802
3.) In turned on and turned off state, the maximum brightness is set by transmitting the on signal two times in quick succession.
Transmitting the off signal two times sets the brightness to the minimum (night light, for example).
The last used brightness remains saved until the device is turned on again.
Please note that older and newer wireless dimmer receiver models may differ slightly.
The dimming cycle is continuous on older dimmer models.
On newer models the brightness is stopped at the brightest and dim-mest points respectively.
A synchronous dimming cycle with multiple dimmer receivers is not guaranteed.
Safety instruction
Do not ingest batteries, risk of burning due to dangerous substances. This product contains a button cell battery. If the button cell battery is swallowed, severe internal burns can occur within just 2 hours and cause death. Keep new and used batteries out of the reach of children. If the battery compartment does not close securely, do not use the product and keep it away from children. If you think that batteries have been swallowed or are in any part of the body, seek medical attention immediately.
To view the Declaration of Conformity, please visit www.intertechno.at/CE