L 42 SC - Lighting STEINEL - Free user manual and instructions
Find the device manual for free L 42 SC STEINEL in PDF.
| Product type | LED motion detection wall light |
| Brand | Steinel |
| Model | L 42 SC |
| Dimensions (L x H x D) | 306 x 131 x 105 mm |
| Power supply | 220–240 V, 50/60 Hz, 13.00 W |
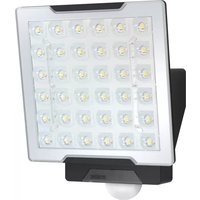
| Light source type | Non-replaceable integrated LED |
| Luminous flux | 1,010 lm |
| Color temperature | 3,000 K (warm white) |
| Color rendering index (CRI) | 82 |
| Detection angle | 180° |
| Maximum range | 10 m |
| Adjustable time delay | 10 s to 60 min |
| Trigger threshold | 2 to 2,000 lx |
| Functions | Motion detection, Bluetooth adjustment (STEINEL Connect app), marking light, grouping, neighbor function |
| Protection rating | IP54 |
| Protection class | II |
| Ambient temperature | -20 °C to +40 °C |
| Maintenance | Dry cleaning, without detergent |
| Manufacturer warranty | 3 years |
| Repairability | Non-replaceable LED source, repair by authorized professional |
Frequently Asked Questions - L 42 SC STEINEL
User questions about L 42 SC STEINEL
0 question about this device. Answer the ones you know or ask your own.
Ask a new question about this device
Download the instructions for your Lighting in PDF format for free! Find your manual L 42 SC - STEINEL and take your electronic device back in hand. On this page are published all the documents necessary for the use of your device. L 42 SC by STEINEL.
USER MANUAL L 42 SC STEINEL
natural_image
Exterior view of a modern office building (no signage)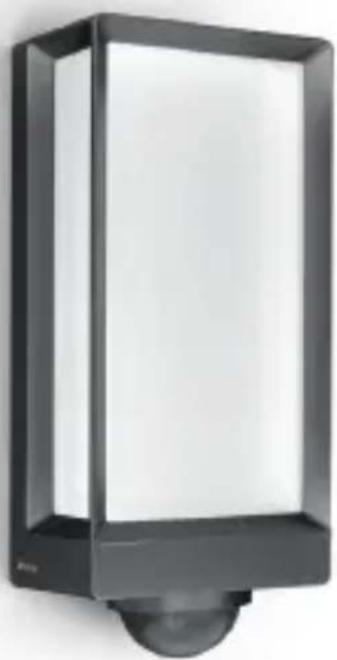
natural_image
Exterior view of a modern black-and-white outdoor lamp or stand (no text or symbols visible)L 40 C
L 40 SC
L 42 C
L 42 SC
DE
Inhalt
natural_image
Isometric line drawing of a rectangular box with a 1x multiplier label (no text or symbols on the diagram itself)
3×

3×
3×

1×
1×
natural_image
Isometric line drawing of a rectangular box with a 1x angular measurement indicator (no text or symbols on the diagram itself)
3×

3×

3×

3×
1×

1×
natural_image
Technical line drawing of a rectangular frame with a 105 mm dimension label (no other text or symbols)3.4 L 40 SC

text_image
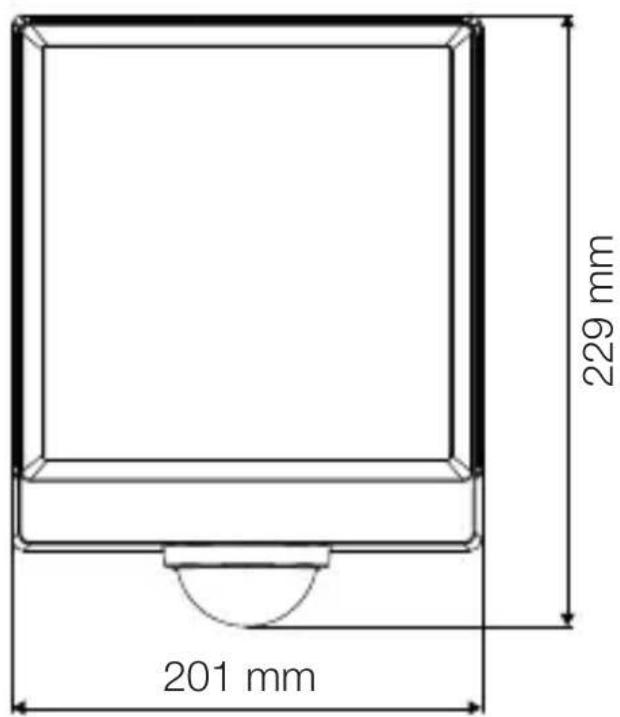
201 mm 229 mm
text_image
105 mm3.5 L 42 C

text_image
131 mm 274 mm
text_image
105 mm3.6 L 42 SC

text_image
306 mm 131 mm
text_image
105 mmGeräteübersicht
3.7 L 40 C, L 42 C

text_image
A Btext_image
Safety warning symbol and electrical circuit diagram showing lightning bolt and switch mechanism
text_image
L N L N PE
text_image
L N L N PE⊕text_image
≤ 10 m 2 mtext_image
Safety warning symbol and electrical switch diagram showing lightning bolt and switch mechanism
text_image
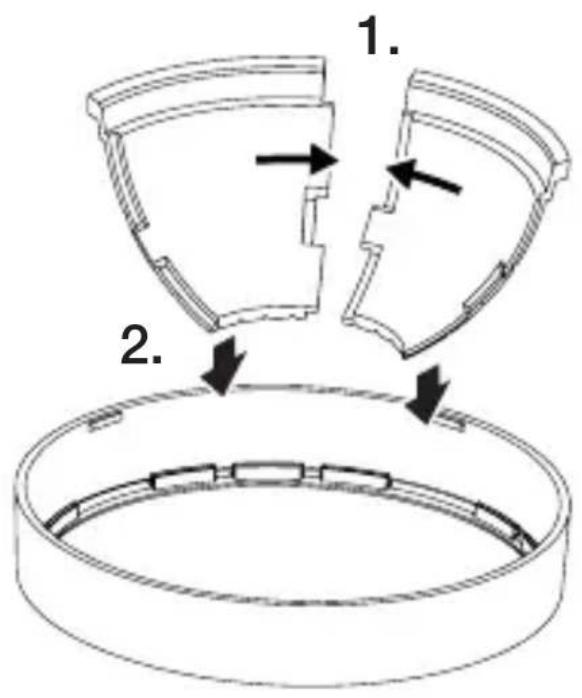
1. 2.text_image
Technical diagram of an electrical enclosure with labeled components and directional arrows indicating movement or forcetext_image
Technical diagram showing wiring connection to an electrical panel with labeled components and a magnified inset of the circuit.natural_image
Technical diagram showing a mechanical component with a rotating shaft and a circular feature, no text or symbols present.natural_image
Line drawing of a rectangular device with sound waves and a human figure, no text or symbols presentnatural_image
Simple line drawing of a basket with no text or symbols
natural_image
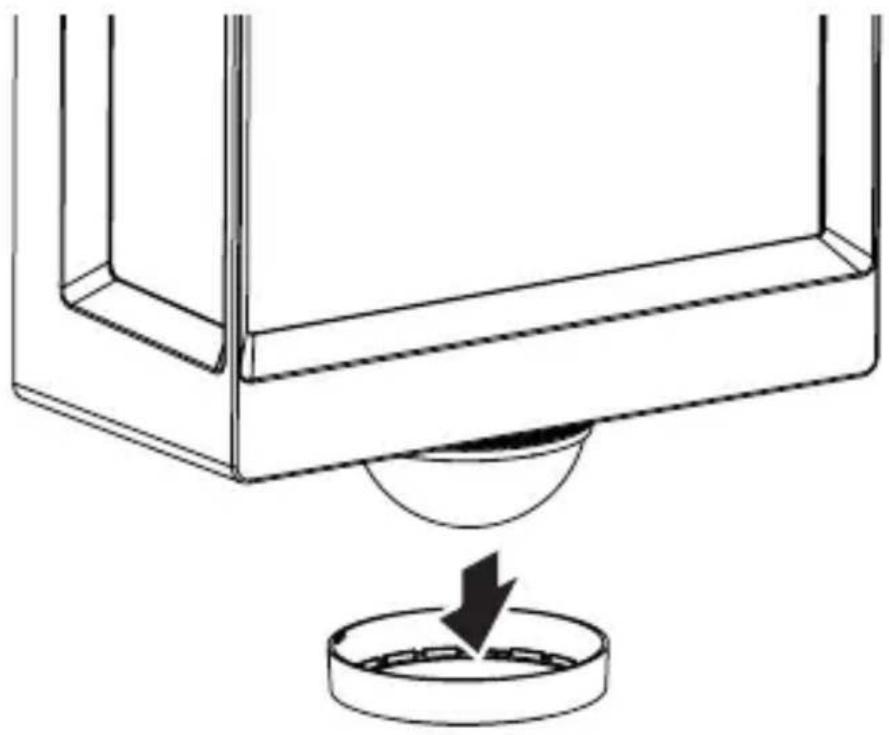
Line drawing of a rectangular box with a curved base and top edge (no text or symbols)5.14 L 40 SC, L 42 SC

natural_image
Technical line drawing of a mechanical component with a circular base and a downward arrow indicating force or motion (no text or symbols)5.15 L 40 SC, L 42 SC

text_image
1. 2.
natural_image
Technical line drawing of a mechanical assembly with an arrow indicating direction (no text or symbols)5.16 L 40 SC, L 42 SC

natural_image
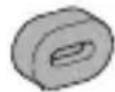
Diagram showing a container with a sphere above it, indicating a fluid or material flow (no text or symbols present)5.17 L 40 SC, L 42 SC

natural_image
Simple line drawing of a basket with no text or symbols
natural_image
Line drawing of a rectangular box with a flat top and bottom, no text or symbols present
natural_image
Simple line drawing of a rectangular box with a curved arrow indicating rotation or movement (no text or symbols)6. Funktion
text_image
QR code image containing encoded data, no visible human-readable text
text_image
QR code image containing encoded data, no visible human-readable text- About this document 35
- General safety precautions 35
- System description 36
- Electrical connection 43
- Installation 44
- Function 56
- Maintenance and care 59
- Disposal 60
- Declaration of Conformity 60
- Manufacturer's warranty 61
- Technical specifications 63
- Troubleshooting 64
1. About this document
- Under copyright. Reproduction either in whole or in part only with our consent.
– Subject to change in the interest of technical progress.
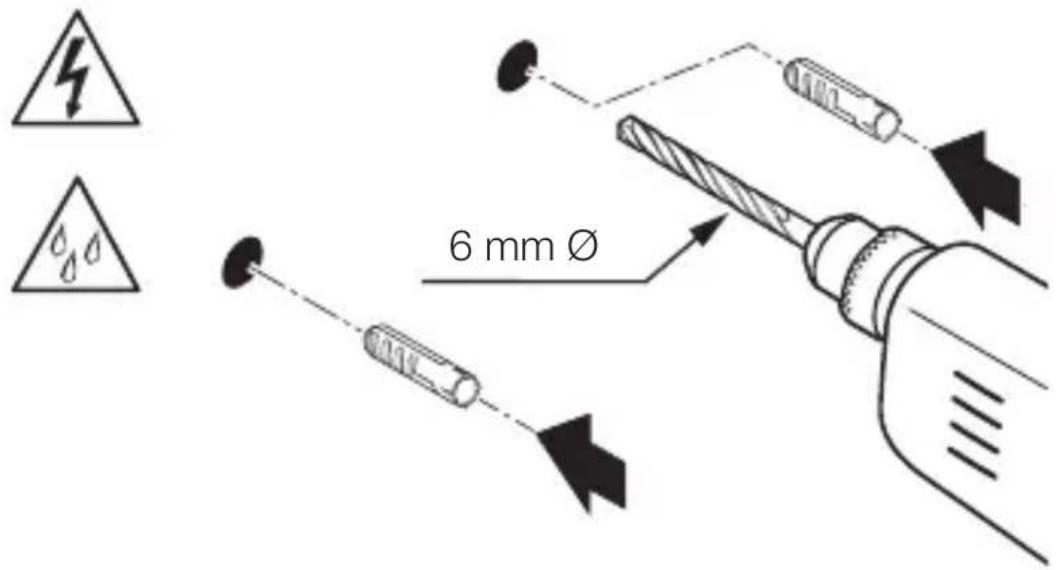
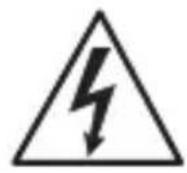
Hazard warning!
Warning of hazards from electricity!
Warning of hazards from water!
2. General safety precautions
Failure to observe these operating instructions presents hazards!
These instructions contain important information on the safe use of this product. Particular attention is drawn to potential hazards. Failure to observe this information may lead to death or serious injuries.
- Read instructions carefully.
- Follow safety advice.
-
Keep instructions within easy reach.
-
Working with electrical current may produce hazardous situations. Touching live parts can result in electrical shock, burns or death.
- Work on mains voltage must only be performed by qualified, skilled personnel.
- National wiring regulations and electrical operating conditions must be observed (e.g. DE: VDE 0100, AT: ÖVE-ÖNORM E8001-1, CH: SEV 1000).
- Only use genuine replacement parts.
3. System description
Proper use – L 40 SC, L 42 SC
– Sensor-switched LED light with motion detector.
- Wall mounting.
- Indoors and outdoors.
Proper use – L 40 C, L 42 C
- LED light.
- Wall mounting.
- Indoors and outdoors.
Operating principle – L 40 SC, L 42 SC
- The sensor-switched LED light contains an infrared motion detector and can only be adjusted via Bluetooth.
Operating principle – L 40 C, L 42 C
The C versions can be interconnected with other sensors via Bluetooth to extend the detection zone. They pass on the detected signals (presence and light level) via Bluetooth. This is controlled in the sensor interconnected with other interface.
Package contents
GB
3.1 L 40 C, L 42 C

natural_image
Isometric line drawing of a rectangular box with a 1x multiplier label (no text or symbols on the diagram itself)
3×

3×
3×
1×
1×
- 1 LED light
- 3 spacers
- 3 wall plugs
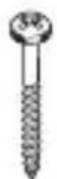
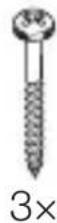
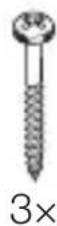
- 3 screws
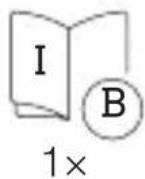
- 1 safety data sheet (A)
- 1 Quick start guide (B)
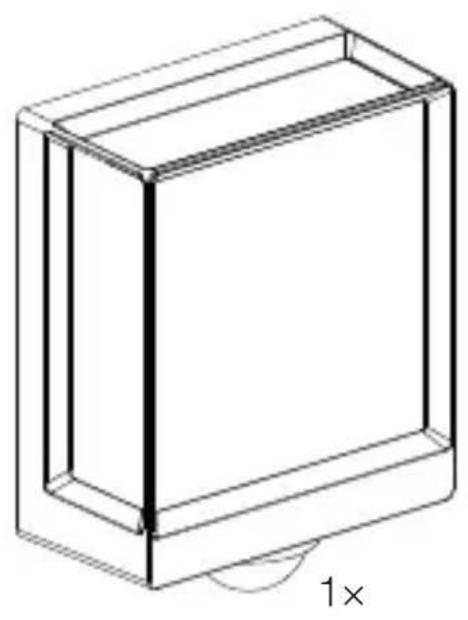
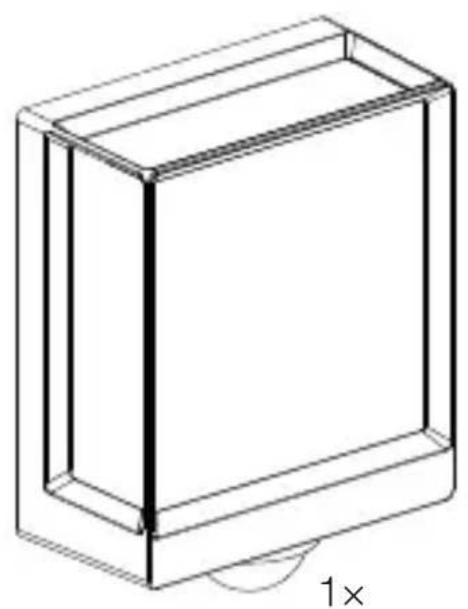
3.2 L 40 SC, L 42 SC

natural_image
Isometric line drawing of a rectangular box with a 1x angular measurement indicator (no text or symbols on the diagram itself)
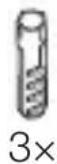
3×

3×

3×

3×

1×

1×
- 1 LED light
- 3 cover clips
- 3 spacers
- 3 wall plugs
- 3 screws
- 1 safety data sheet (A)
- 1 Quick start guide (B)
Product dimensions
GB
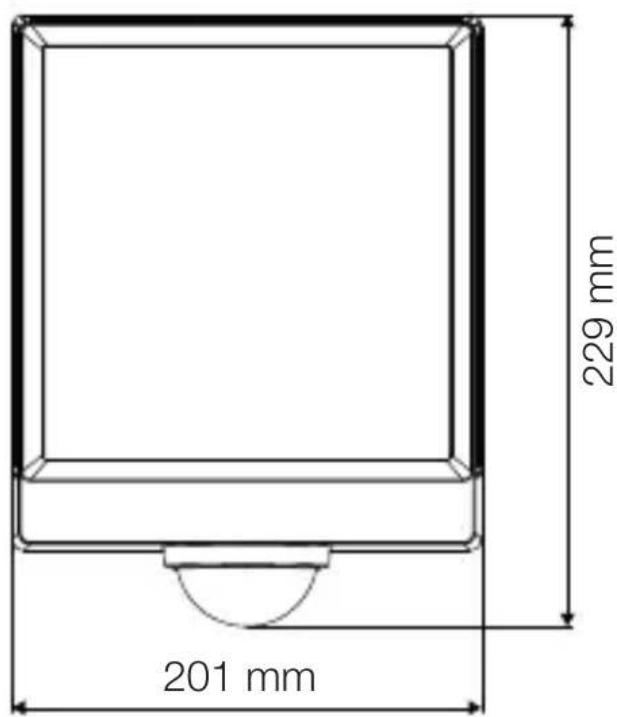
3.3 L 40 C

text_image
201 mm 229 mm
natural_image
Technical line drawing of a rectangular frame with a 105 mm dimension label (no other text or symbols)3.4 L 40 SC

text_image
201 mm 229 mm
text_image
105 mm3.5 L 42 C

text_image
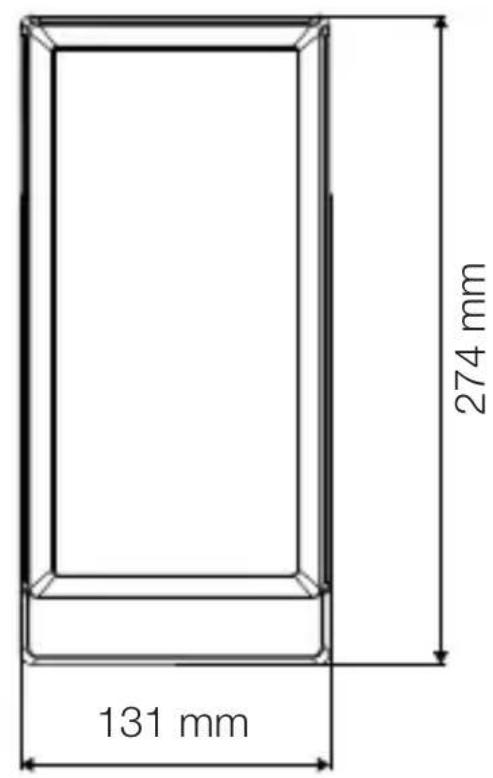
131 mm 274 mm
text_image
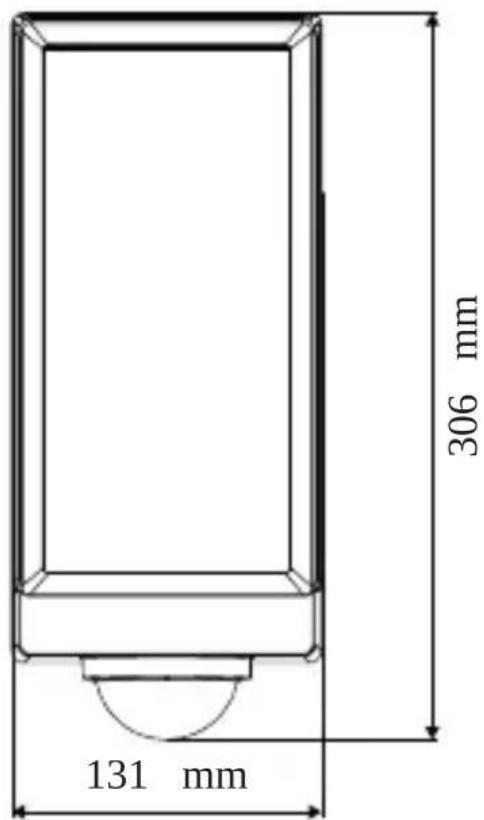
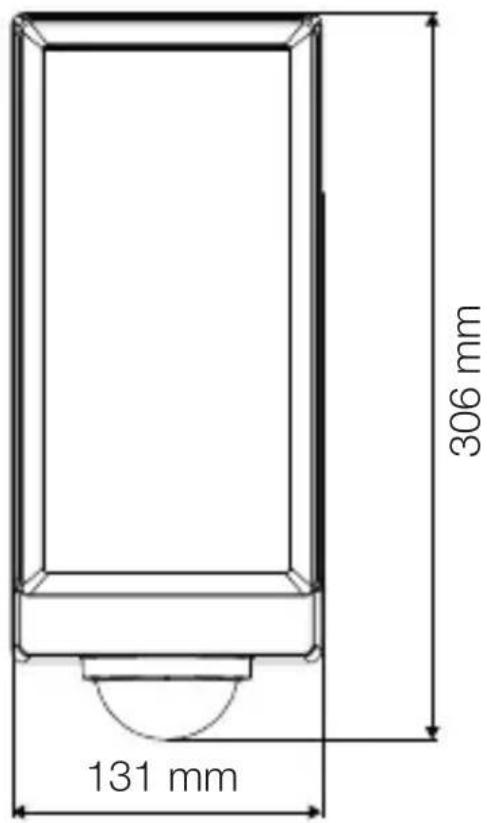
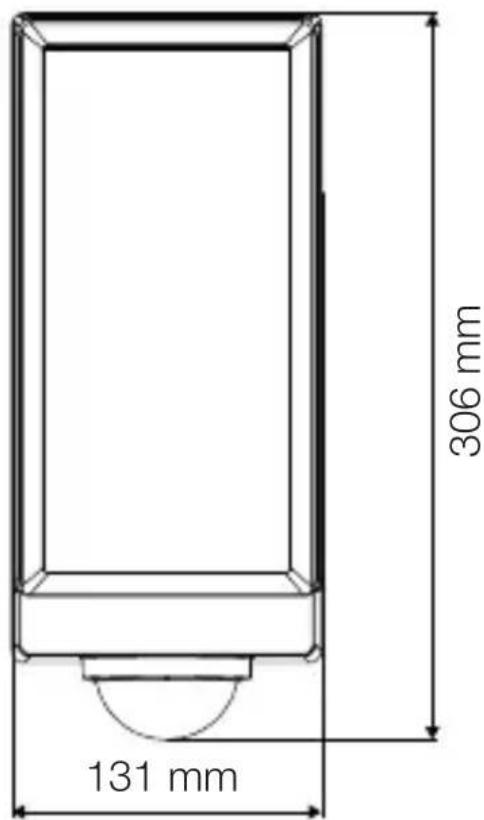
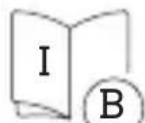
105 mm3.6 L 42 SC

text_image
306 mm 131 mm
text_image
105 mmProduct components
GB
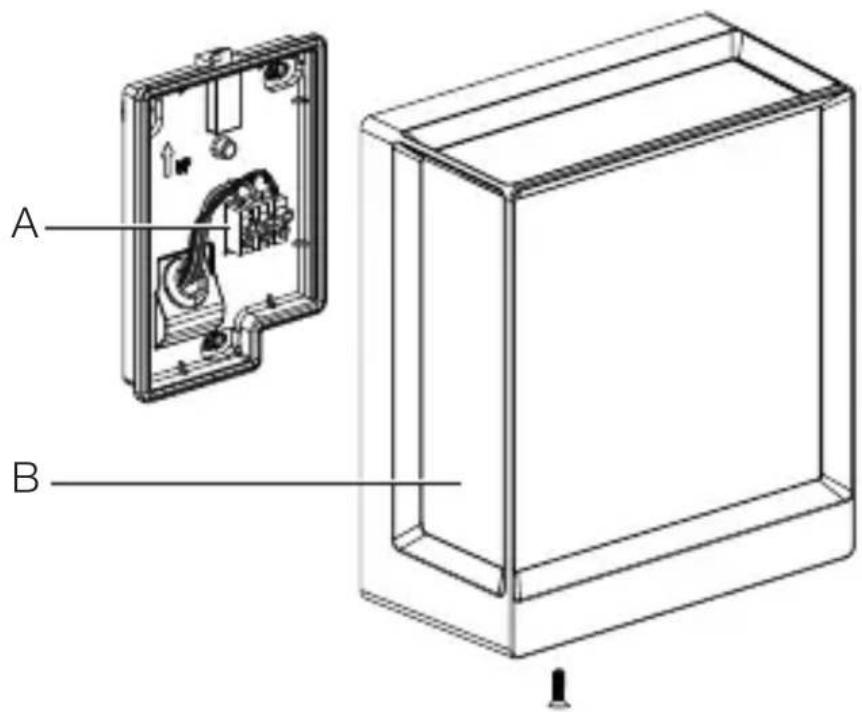
3.7 L 40 C, L 42 C
text_image
A BA Connecting terminal
B Luminaire
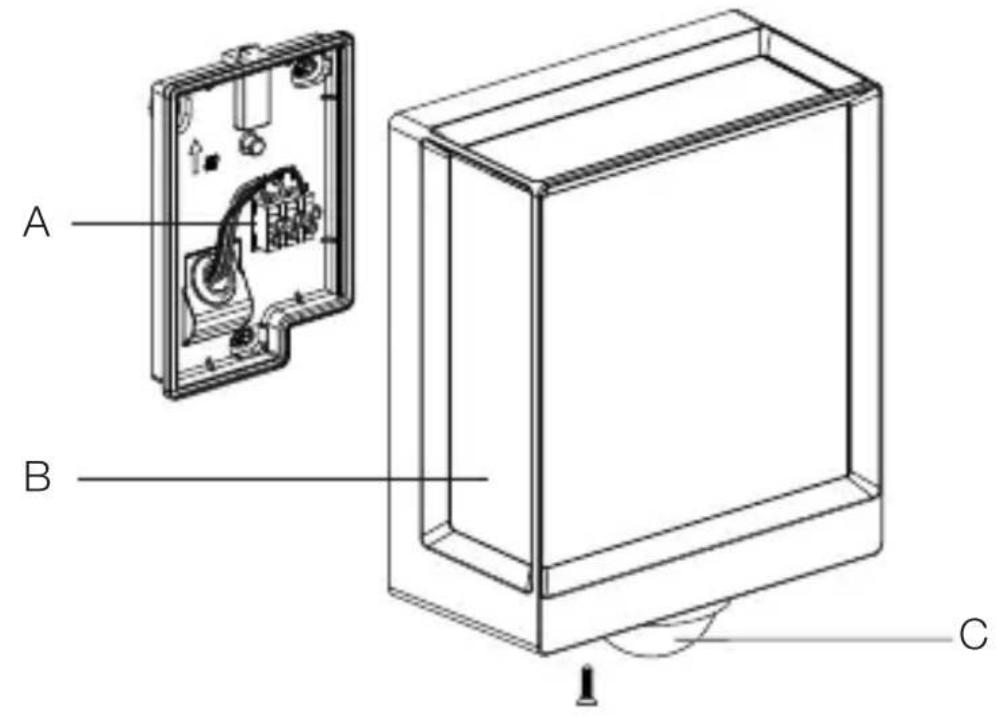
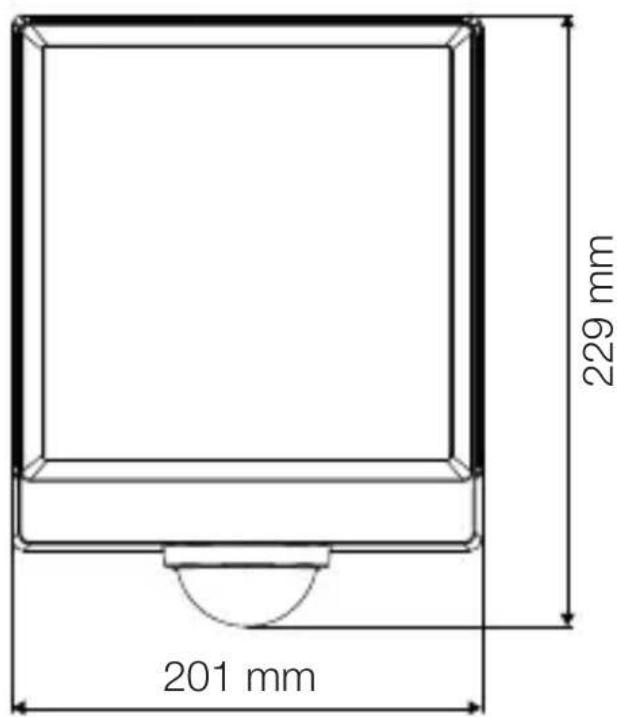
3.8 L 40 SC, L 42 SC
text_image
A B CA Connecting terminal
B Luminaire
C Sensor unit
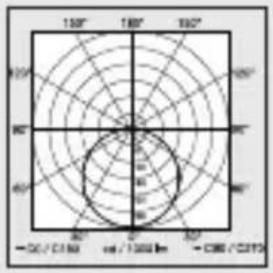
Light distribution curve
3.9
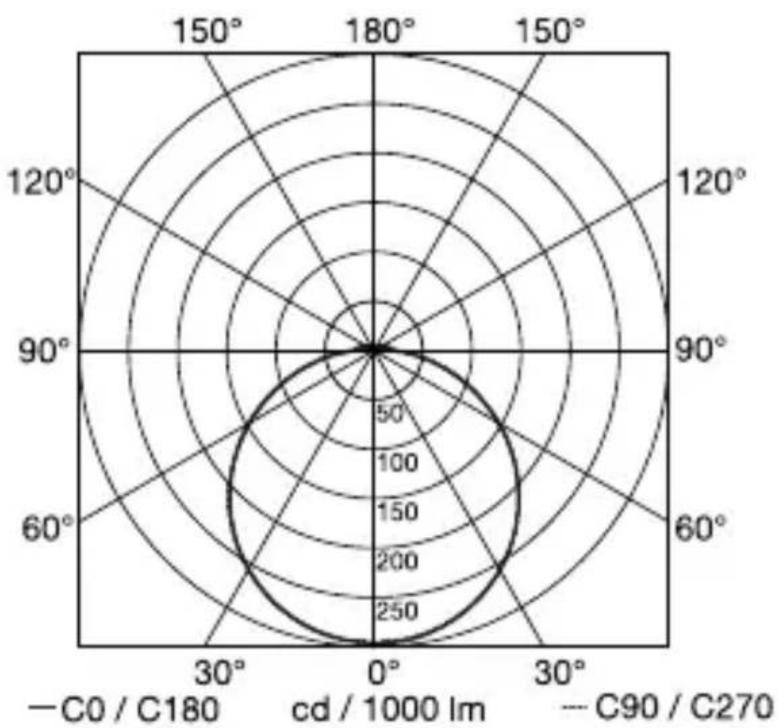
radar
| Angle | Value | |-------|-------| | 0° | 250 | | 30° | 200 | | 60° | 150 | | 90° | 100 | | 120° | 50 | | 150° | 0 | | 180° | 0 |4. Electrical connection
GB
Circuit diagram
4.1
text_image
Safety warning symbol and electrical circuit diagram showing lightning bolt and switch mechanism
text_image
L N L N PE
text_image
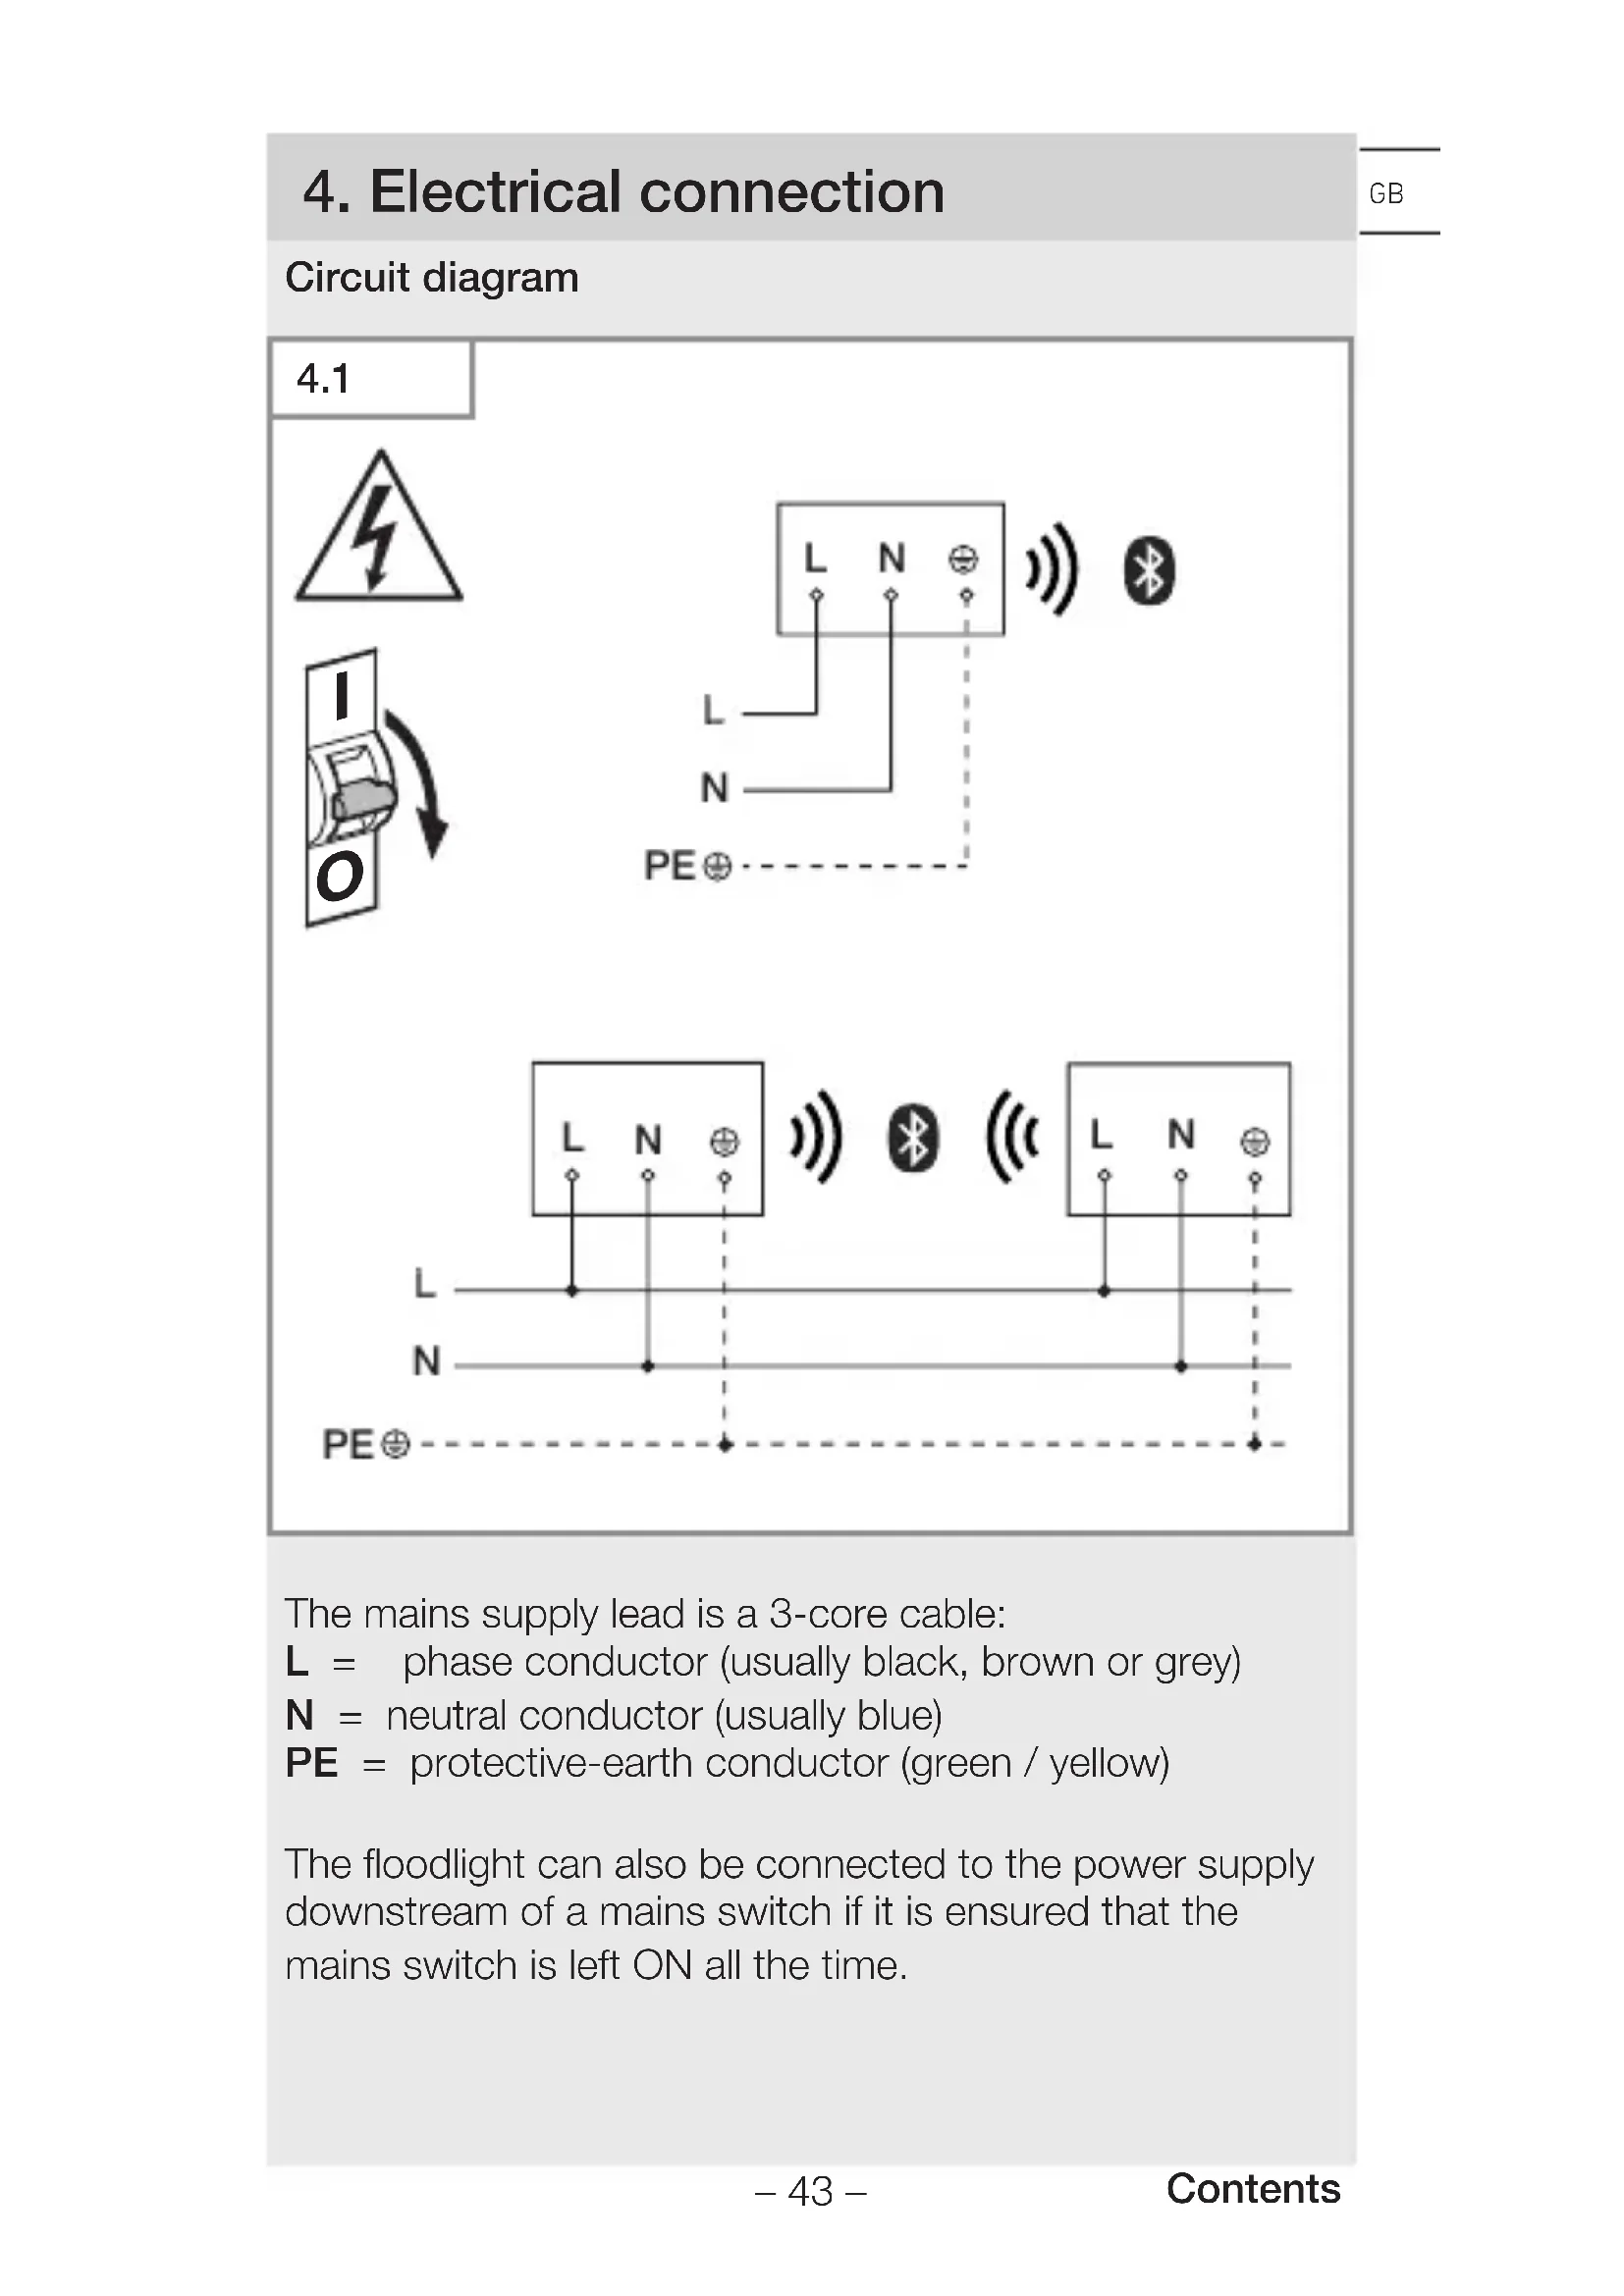
L N L N PE⊕The mains supply lead is a 3-core cable:
L = phase conductor (usually black, brown or grey)
N = neutral conductor (usually blue)
PE = protective-earth conductor (green / yellow)
The floodlight can also be connected to the power supply downstream of a mains switch if it is ensured that the mains switch is left ON all the time.
The light source of this light cannot be replaced. If the light source needs to be replaced (e.g. at the end of its service life), the complete light must be replaced.
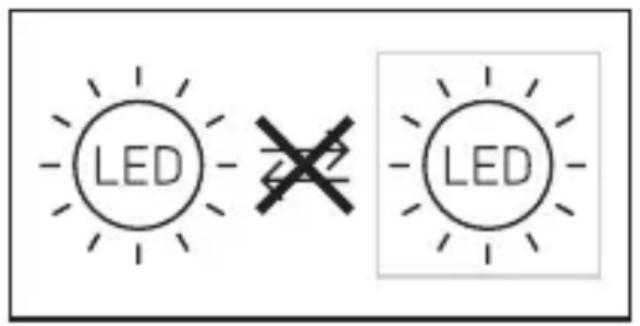
text_image
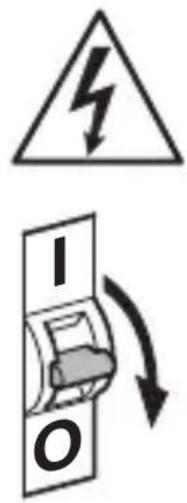
LED LED5. Installation
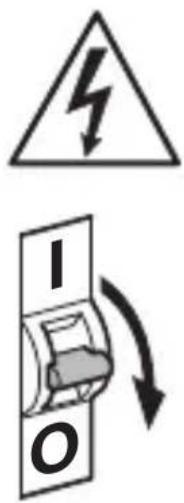
Hazard from electrical power!
Touching live parts can result in electrical shock, burns or death.
- Switch OFF power and interrupt power supply.
- Using a voltage tester, check to make sure that the power supply is disconnected.
- Make sure power supply remains interrupted.
Risk of damage to property!
Mixing up connection leads may produce a short circuit.
- Identify connection leads.
- Connect the leads correctly.
Preparing for installation
- Check all components for damage. Do not use the product if it is damaged.
- Select an appropriate site to install the product.
-Take reach into consideration.
-Take reach and motion detection into consideration.
-Vibration-free.
-No obstacles in detection zone.
-Not in explosive atmospheres.
-Not on normally flammable surfaces.
-Do not look into the light source from a short distance (< 30 cm).
- Spaced at a distance of at least 50 cm from other LED lights.
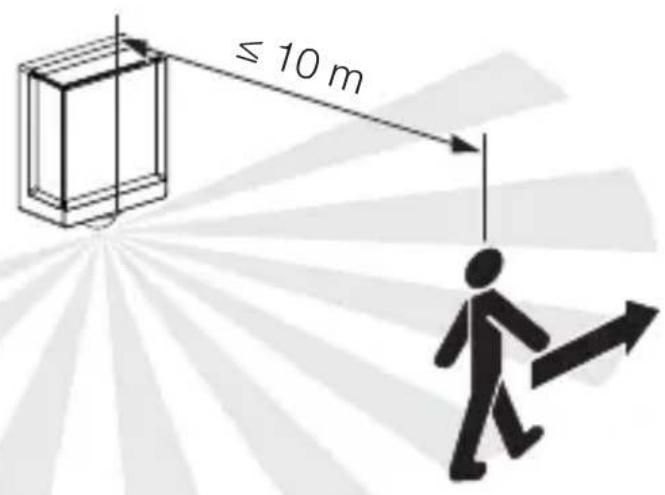
Reach
5.1
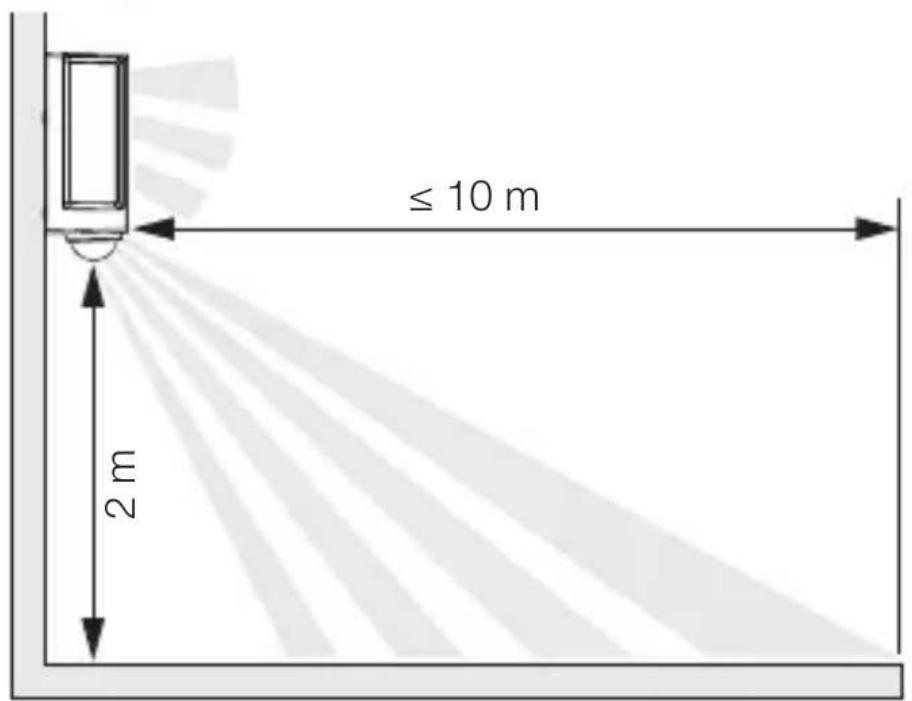
text_image
≤ 10 m 2 mDetecting motion across the direction in which a person walks
5.2

text_image
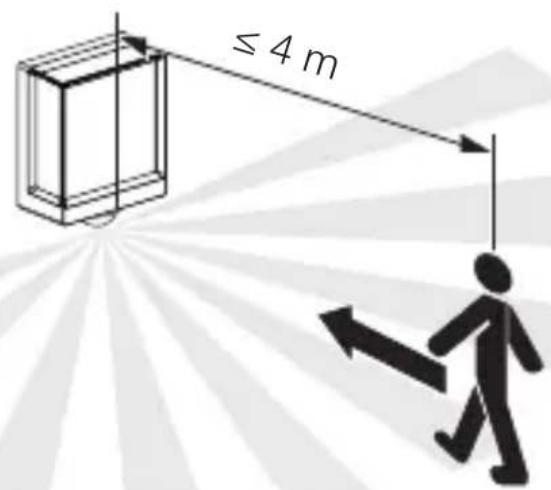
≤ 10 mDetecting motion in the direction in which a person walks
5.3
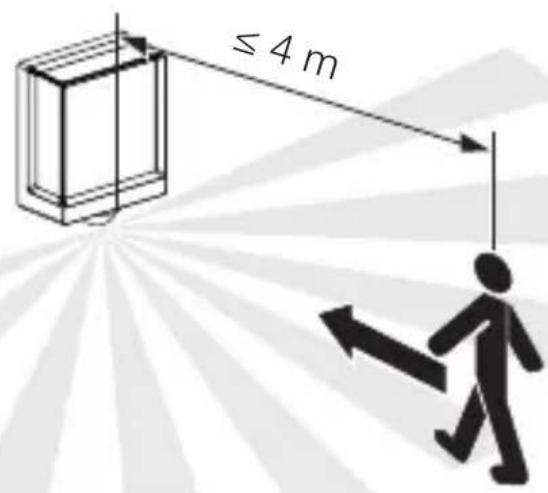
text_image
≤ 4 mMounting procedure
GB
5.4
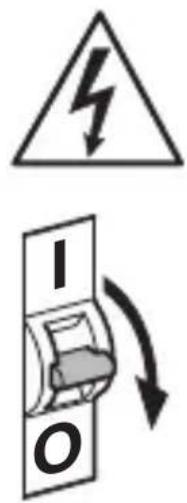
text_image
Safety warning symbol and electrical switch diagram with lightning bolt and 'I' label
text_image
1. 2.- Check to make sure the power supply is switched OFF.
- Unscrew retaining screw.
- Unscrew cover.
5.5

text_image
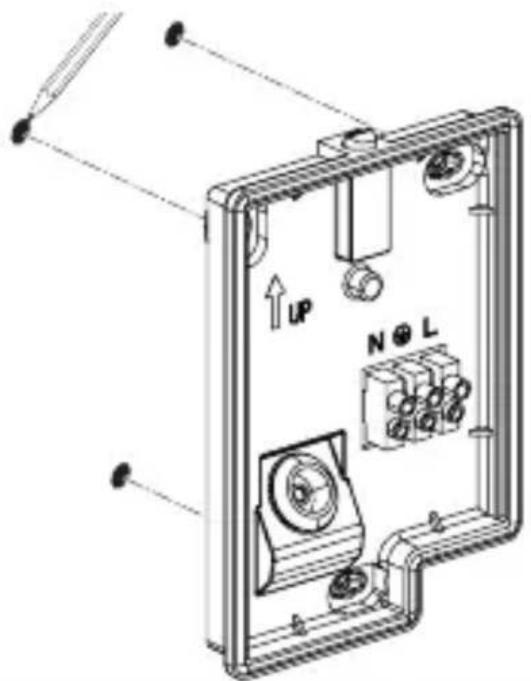
Technical diagram of an electrical enclosure with labeled components and directional arrows indicating movement or force- Mark drill holes.
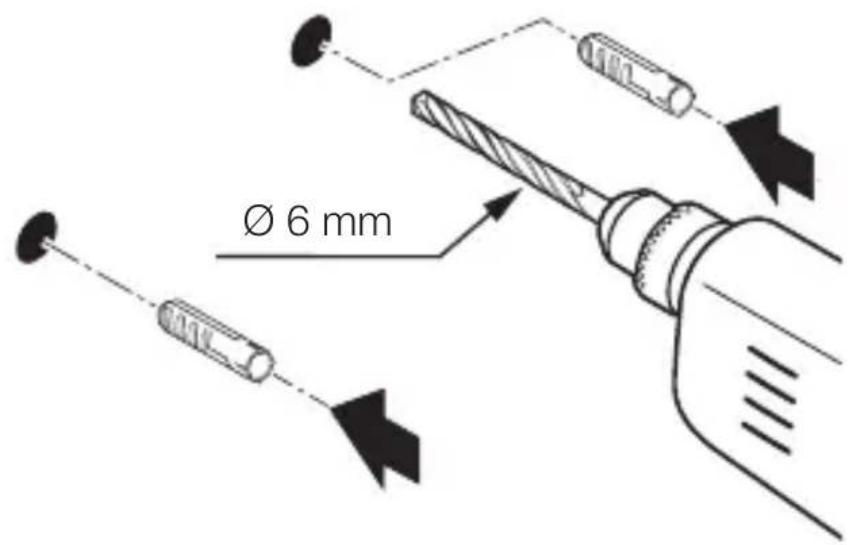
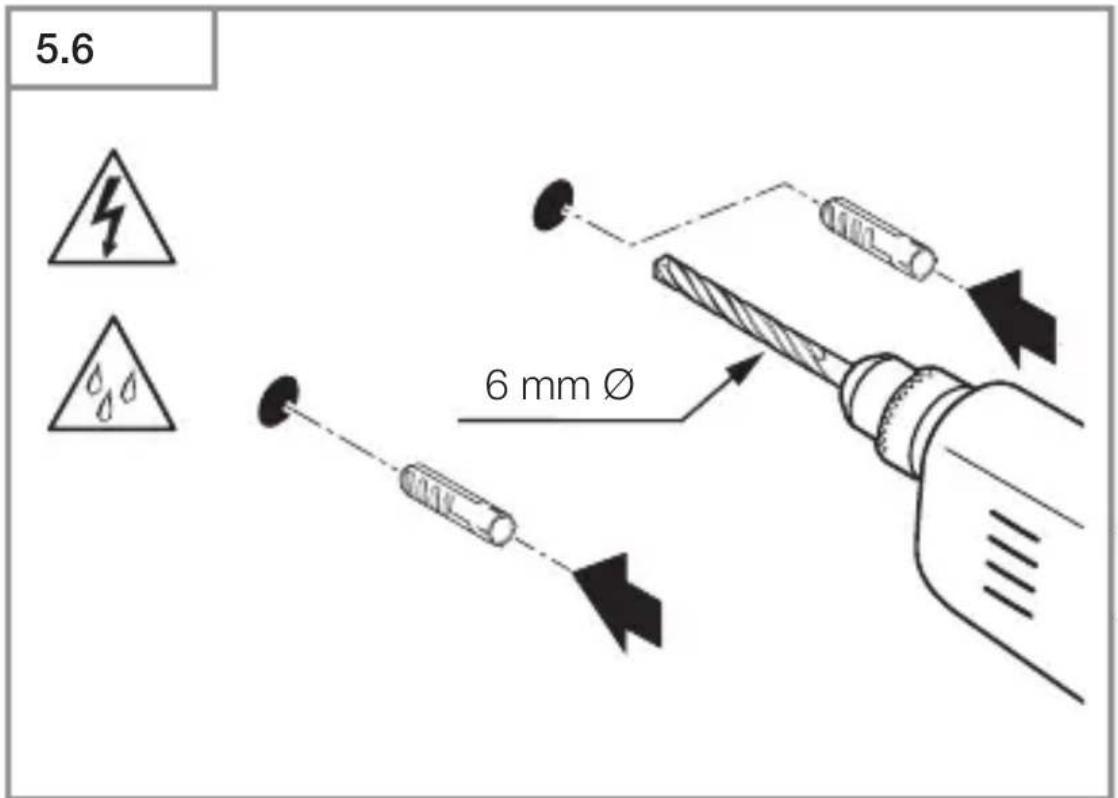
5.6

text_image
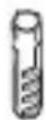
6 mm Ø- Drill holes (∅ 6 mm) and fit wall plugs.

text_image
5.7 UP NGB
- Screwing on LED light with concealed power supply lead.
text_image
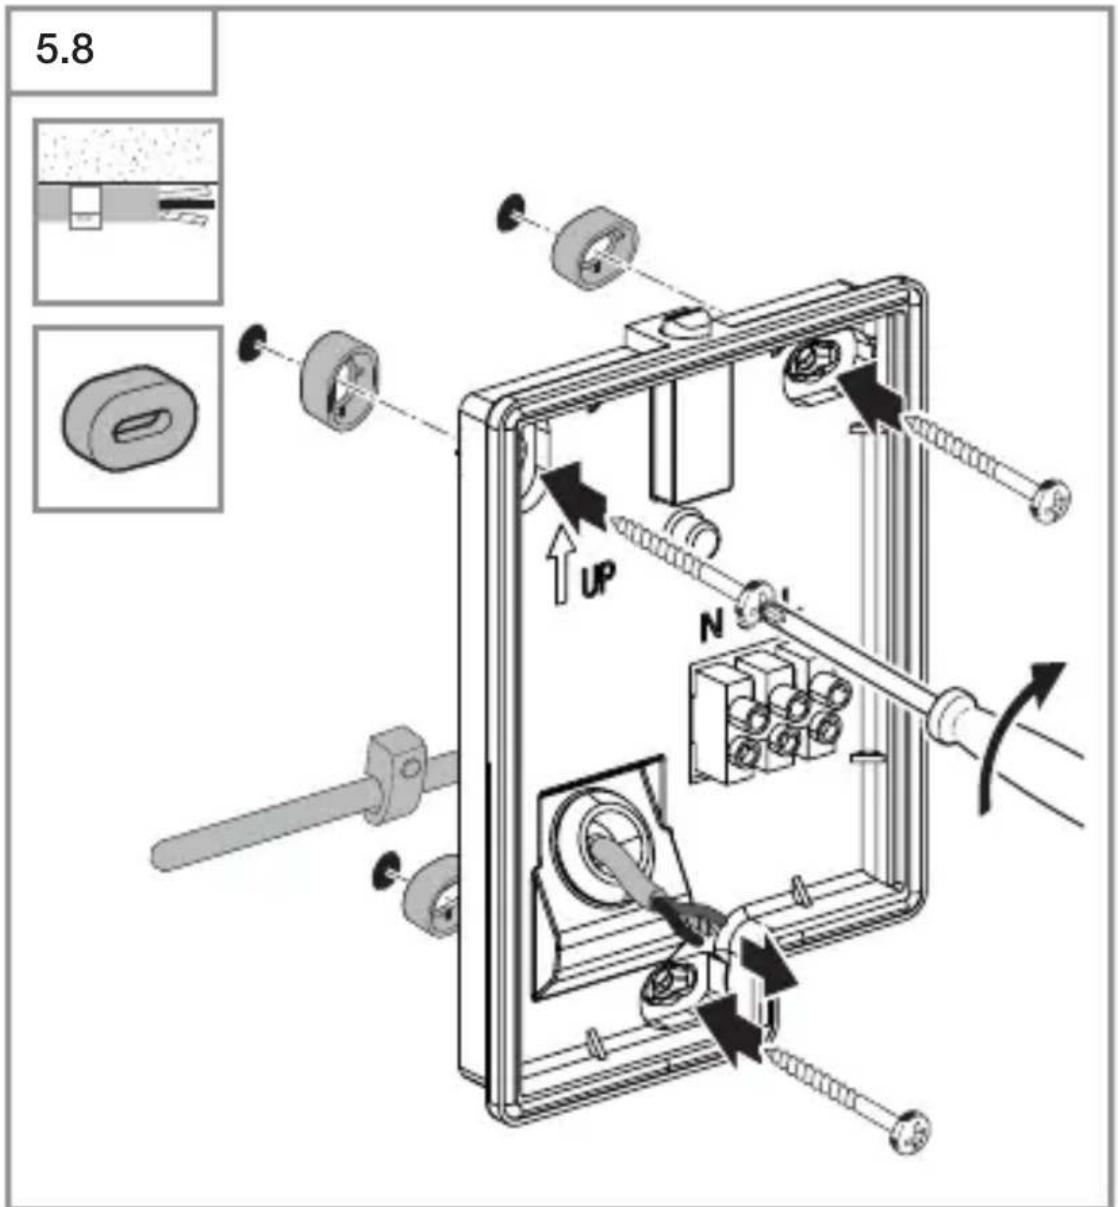
5.8 UP N- Screwing on LED light with surface-mounted power supply lead.
5.9
GB
text_image
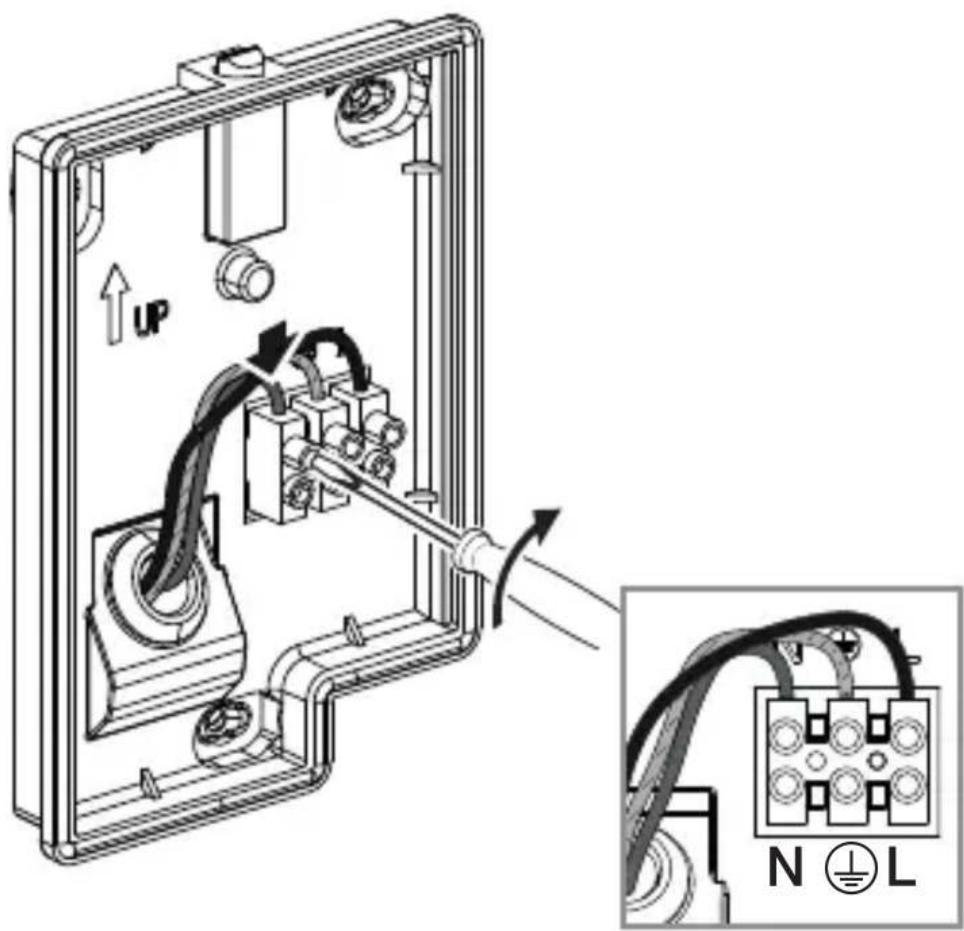
Technical diagram showing wiring connection to an electrical panel with labeled components and a magnified inset of the circuit.- Connect mains power supply lead as shown in the wiring diagram.
→“4. Electrical connection”
5.10
text_image
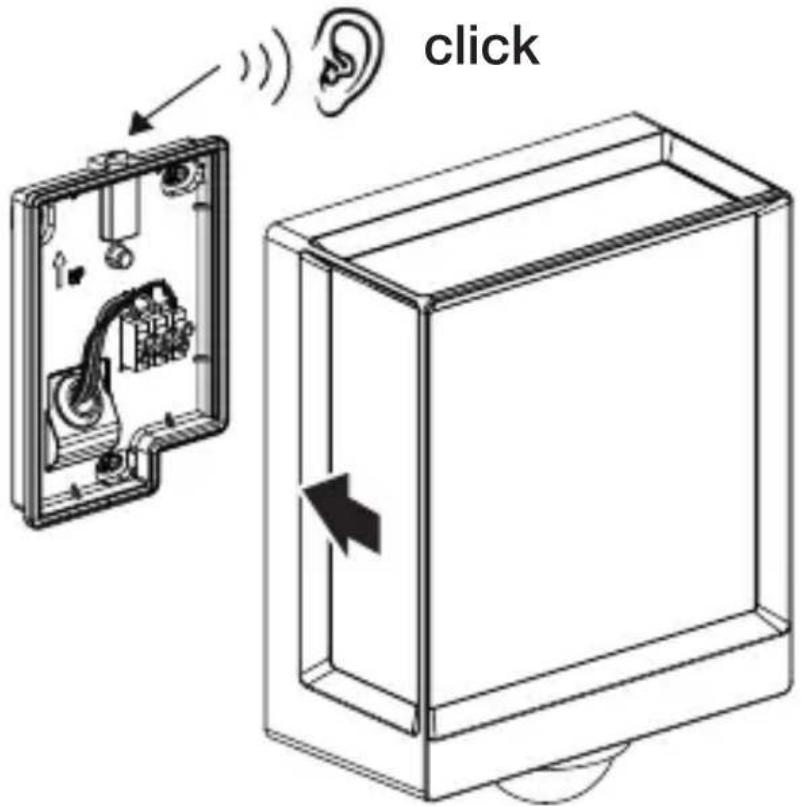
click- Connect the luminaire to the wallholder.
- Push until you hear a click sound.
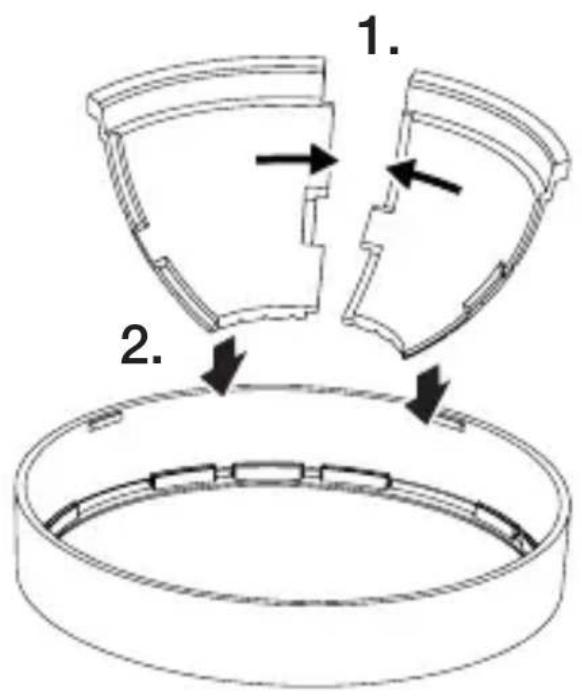
5.11
natural_image
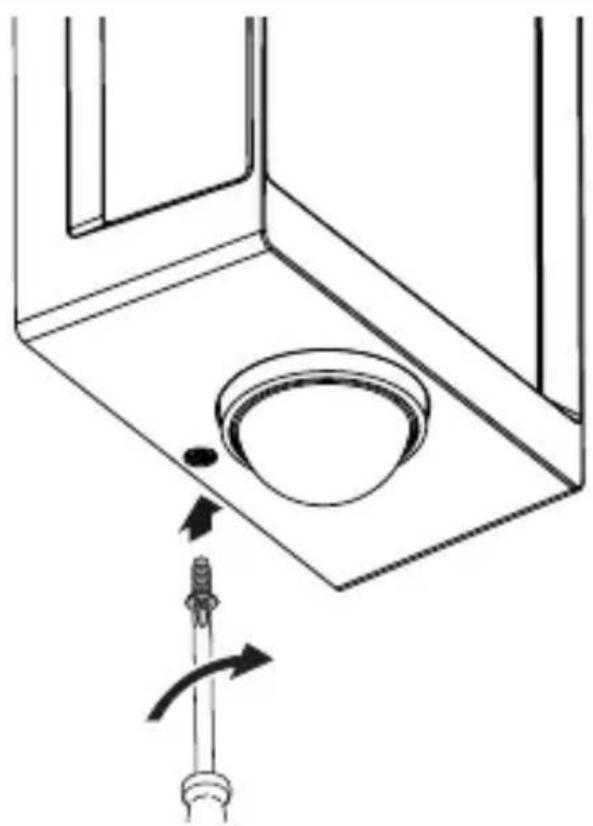
Technical diagram showing a mechanical component with a rotating shaft and a circular feature, no text or symbols present.- Tight the safety bolt.
5.12

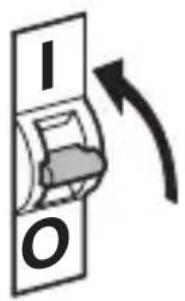
text_image
I O
natural_image
Line drawing of a rectangular device emitting sound waves with a human figure nearby (no text or symbols)- Switch ON power supply.
- Make settings via app (SC version only).
→“6. Function”
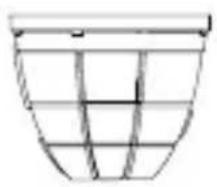
5.13 L 40 SC, L 42 SC
natural_image
Simple line drawing of a basket with grid pattern (no text or symbols)
natural_image
Line drawing of a rectangular box with a curved base and top edge (no text or symbols)GB
5.14 L 40 SC, L 42 SC

natural_image
Technical line drawing of a mechanical component with a circular base and a downward arrow indicating force or motion (no text or symbols)5.15 L 40 SC, L 42 SC

text_image
1. 2.
natural_image
Technical line drawing of a mechanical assembly with an arrow indicating direction (no text or symbols)5.16 L 40 SC, L 42 SC
GB

natural_image
Diagram showing a container with a sphere above it, indicating a fluid or material flow (no text or symbols present)5.17 L 40 SC, L 42 SC

natural_image
Simple line drawing of a basket with no text or symbols
natural_image
Line drawing of a rectangular box with a flat top and bottom, no text or symbols present
natural_image
Simple line drawing of a rectangular box with a curved arrow indicating rotation or movement (no text or symbols)6. Function
The functions can be set for the SC types.
C version functions only work in combination with a
Bluetooth sensor-switched product.
Functions are set via the Steinel Connect app.
Steinel Connect app
To configure the light via smartphone or tablet, you must download the STEINEL Connect app from your app store.
You will need a Bluetooth-capable smartphone or tablet.
Android iOS

text_image
QR code image containing encoded data, no visible human-readable text
text_image
QR code image containing encoded data, no visible human-readable textFunctions that can be set via the Steinel Connect app:
- Time setting.
- Reach setting.
– Twilight setting.
– Basic light level function. - Main light / basic light level adjustable.
- Extended reach adjustment.
- Group interconnection.
– Twilight setting by teach-in.
Note:
To rule out malfunctioning, a minimum distance of 3 m must be allowed from the Wi-Fi router and the access points.
Factory settings (state on leaving the factory)
Reach:
max.
Main light time setting: 10 sec.
Basic light time setting: 1 min.
Twilight level: 2,000 lux
Basic light dimming level: 50 %
Commissioning / power interruption
The settings and current operating status of the LED light are saved automatically in the event of power failure or disconnection from the power supply. Settings are reactivated as soon as the mains power supply is restored.
Reach setting (sensitivity)
Reach is the term used to describe the diameter of the more or less circular detection zone produced on the ground after mounting the SensorLight at a height of 2 m.
- Set to maximum = max. reach (10 m)
- Set to minimum = min. reach (1 m)
Time setting
The time (stay-ON time) can be set to any period from approx. 10 seconds to a maximum of 60 minutes. Every movement detected re-activates the light.
Note:
After the unit switches OFF, it takes approx. 1 second before it is able to start detecting movement again. The unit can then switch ON again in response to movement.
The shortest time setting is recommended when adjusting the detection zone and performing the functional test.
Twilight setting
The response threshold (twilight) can be infinitely varied from approx. 2 to 2,000 lux.

= daylight mode (depending on ambient light level)

= night-time operation (approx. 2 lux)
The control dial must be turned to *when adjusting the detection zone and performing the functional test in daylight.
Basic light level
The brightness of the basic light level setting can be varied between 10 % and 100 %.
The period for which the basic light level stays ON for can be infinitely varied between 10 seconds and 60 minutes, or set to remain ON all night.
Main light level
The brightness of the main light level setting can be varied between 10 % and 100 %.
Grouping
The unit can be operated as a separate light or several lights can be interconnected in groups via wireless communication. All lights belonging to a group operate in line with the group parameters set in the Steinel Connect app. Reach can be set individually for all lights in the lighting group.
Fade time
On switching ON, light level constantly builds up to 100 % (fade in). On switching OFF, light level is constantly reduced to 0 % (fade out). Fade-in and fade-out times are selectable.
Neighbouring-light function
The neighbouring-light function can be activated and deactivated via the Steinel Connect app.
This function assigns the neighbouring groups to the active lighting group. The active group responds to activation signals from the neighbouring group assigned to it and switches to main light or basic light as defined in the settings.
7. Maintenance and care
The tool requires no maintenance.

Hazard from electrical power!
Contact between water and live parts can result in electric shock, burns or death.
- Only clean tool in a dry state.
Risk of damage to property!
Using the wrong cleaning product can damage the light.
- Clean tool with a moist cloth without detergent.
Important note: the control gear cannot be replaced.
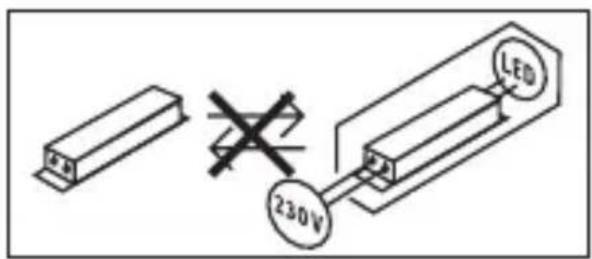
text_image
230V LED8. Disposal
Electrical and electronic equipment, accessories and packaging must be recycled in an environmentally compatible manner.
Do not dispose of electrical and electronic equipment as domestic waste!
EU countries only:
Under the current European Directive on Waste Electrical and Electronic Equipment and its implementation in national law, electrical and electronic equipment no longer suitable for use must be collected separately and recycled in an environmentally compatible manner.
9. Declaration of Conformity
STEINEL GmbH hereby declares that the L 40 SC/C and L 42 SC/C radio equipment type conforms to Directive 2014/53/EU.
The full wording of the EU Declaration of Conformity is available for downloading from the following Internet address: www.steinel.de
10. Manufacturer's warranty
Manufacturer's warranty of STEINEL GmbH, Dieselstrasse 80-84, DE-33442 Herzebrock-Clarholz, Germany
All STEINEL products meet the highest quality standards.
For this reason, we, the manufacturer, are pleased to provide you, the consumer, with a warranty under the following terms and conditions:
The warranty covers the absence of deficiencies which are proven to be the result of a material defect or fault in manufacturing and which are reported to us immediately after detection and within the warranty period. The warranty shall apply to all STEINEL products sold and used in Germany - excluding STEINEL Professional products.
You can opt for warranty cover in the form of repair or replacement which will be provided free of charge (if applicable, in the form of a successor model of the same or higher quality) or in the form of a credit note.
The warranty period for the STEINEL product you have purchased is 3 years (5 years for products from the XLED home range) in each case from the date on which the product was purchased.
We shall bear the shipping costs but not the transport risks involved in return shipment.
Statutory rights accruing from defects, gratuitousness
The warranty cover described here shall be applicable in addition to the statutory rights of warranty – including special consumer protection provisions – and shall not restrict or replace them. Exercising your statutory rights in the event of defects is gratuitous.
Exemptions from the warranty
All replaceable lamps are expressly excluded from this warranty. In addition to this, the warranty shall not cover:
– any wear resulting from use or any other natural wear of product parts or any deficiencies in the STEINEL product that are attributable to wear caused by use or other natural wear,
– any improper or non-intended use of the product or any failure to observe the operating instructions,
– any unauthorised additions, alterations or other modifications to the product or any deficiencies attributable to the use of accessory,
– supplementary or replacement parts which are not genuine STEINEL parts,
– any maintenance or care of products that is not carried out in accordance with the operating instructions,
– any attachment or installation that is not in accordance with STEINEL’s installation instructions,
– any damage or loss occurring in transit.
Application of German law
The warranty shall be governed by German law excluding the United Nations Convention concerning the International Sale of Goods (CISG).
Making claims
If you wish to make a warranty claim, please send your product complete and carriage paid with the original receipt of purchase, which must show the date of purchase and product designation, either to your retailer or directly to us at STEINEL (UK) Ltd. – 25 Manasty Road, Axis Park, Orton Southgate, GB- Peterborough Cambs PE2 6UP United Kingdom. For this reason, we recommend that you keep your receipt of purchase in a safe place until the warranty period expires.
11. Technical specifications
- Dimensions (H x W x D)
L 40 C: 229 x 201 x 105 mm
L 40 SC: 261 x 201 x 105 mm
L 42 C: 274 x 131 x 105 mm
L 42 SC: 306 x 131 x 105 mm
- Supply voltage: 220-240 V, 50/60 Hz
- Power consumption ( P_on )
L 40 C: 12.90 W
L 40 SC: 12.90 W
L 42 C: 12.60 W
L 42 SC: 13.00 W
- Standby (network) (P_net)
L 40 C: 0.44 W
L 40 SC: 0.42 W
L 42 C: 0.44 W
L 42 SC: 0.43 W
- Standby sensor ( P_sb )
L 40 SC: 0.42 W
L 42 SC: 0.43 W
- Luminous flux (360°)
L 40 C: 987 lm
L 40 SC: 1,057 lm
L 42 C: 990 lm
L 42 SC: 1,010 lm
- Efficiency
L 40 C: 76.5 lm/W
L 40 SC: 81.9 lm
L 42 C: 78.6 lm
L 42 SC: 77.7 lm
- Colour temperature: 3,000 K (warm white)
- Colour rendering index: R_a=82
– Average rated life expectancy:
L70B50 at 25 °C: > 60,000 hours
- Colour consistency SDCM: initial value: 6
– Luminous intensity distribution:
text_image
150° 180° 190° 90° 100° 90° 40° 30° 20° 10° 0° - 0.0 / 0.1 mm mm / 1000 lm - 0.06 / 0.17- Angle of coverage L 40, L 42 SC: 180^
- Transmission power: approx. 1 mW
- Reach L 40, L 42 SC: max. 10 m
- Time setting L 40, L 42 SC: 10 s - 60 min
– Twilight setting L 40, L 42 SC: 2–2,000 lux - IP rating: IP54
- Protection class: /
- Ambient temperature: -20 to +40 °C
This product contains a light source of energy efficiency class:
- L 40 C: “F”
- L 40 SC: "E"
- L 42 C: "E"
- L 42 SC: "F"
12. Troubleshooting
Unit without power.
- Fuse not switched ON or faulty.
- Switch ON fuse.
- Change faulty fuse.
- Break in wiring.
- Check wiring with voltage tester.
- Short circuit in mains power supply lead.
- Check connections.
- Any mains switch OFF
- Switch ON mains switch.
Unit does not switch ON.
– Wrong twilight setting selected.
- Reset twilight setting.
- Mains switch OFF.
- Turn on mains switch.
- Fuse not switched ON or faulty.
- Switch ON fuse.
- Change faulty fuse.
– Rapid movements being suppressed to minimise malfunctioning, or detection zone too small or incorrectly defined.
- Check and adjust detection zone.
– Light source faulty.
- The light source cannot be changed. Completely replace unit.
Unit does not switch OFF.
- Continued movement within the detection zone.
- Check detection zone.
- If necessary, limit or change detection zone.
Unit switches ON when it should not.
– Floodlight not mounted for detecting movement reliably.
- Securely mount floodlight.
- Movement occurred but not identified by the observer (movement behind wall, small object moving in immediate proximity of lamp etc.).
- Check detection zone.
- If necessary, limit or change detection zone.
FR
Sommaire
natural_image
Isometric line drawing of a rectangular box with a 1x multiplier label (no text or symbols on the diagram itself)


natural_image
Isometric line drawing of a rectangular box with a 1x angular measurement indicator (no text or symbols on the diagram itself)
3×

3×

3×

3×

1×

1×
natural_image
Technical line drawing of a rectangular frame with a 105 mm dimension label (no other text or symbols)3.4 L 40 SC

text_image
201 mm 229 mm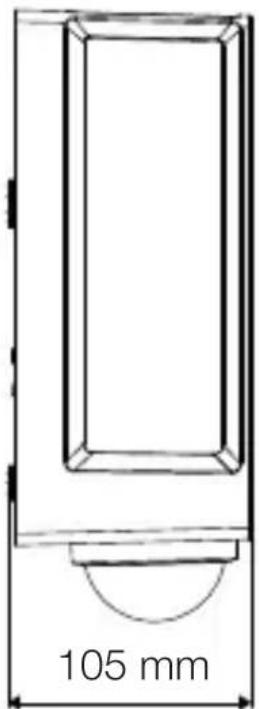
text_image
105 mmFR
3.5 L 42 C

text_image
131 mm 274 mm
text_image
105 mm3.6 L 42 SC

text_image
306 mm 131 mm
text_image
105 mmtext_image
Safety warning symbol and electrical circuit diagram showing lightning bolt and switch mechanism
text_image
L N L N PE
text_image
L N L N PE⊕text_image
≤ 10 m 2 mtext_image
Safety warning symbol and electrical switch diagram showing lightning bolt and switch mechanism
text_image
1. 2.FR
text_image
Technical diagram of an electrical enclosure with labeled components and directional arrows indicating movement or forcetext_image
Technical diagram showing wiring connection to an electrical panel with labeled components and a magnified inset of the circuit.FR
natural_image
Technical diagram showing a mechanical component with a rotating shaft and a circular feature, no text or symbols present.natural_image
Line drawing of a rectangular device emitting sound waves with a human figure nearby (no text or symbols)natural_image
Simple line drawing of a basket with grid lines (no text or symbols)
natural_image
Line drawing of a rectangular box with a curved base and top edge (no text or symbols)FR
5.14 L 40 SC, L 42 SC

natural_image
Technical line drawing of a mechanical component with a circular base and a downward arrow indicating force or motion (no text or symbols)5.15 L 40 SC, L 42 SC

text_image
1. 2.
natural_image
Technical line drawing of a mechanical assembly with an arrow indicating direction (no text or symbols)5.16 L 40 SC, L 42 SC

natural_image
Diagram showing a container with a sphere above it, indicating a fluid or material flow (no text or symbols present)FR
5.17 L 40 SC, L 42 SC

natural_image
Simple line drawing of a basket with no text or symbols
natural_image
Simple line drawing of a rectangular box with a handle and base, no text or symbols present.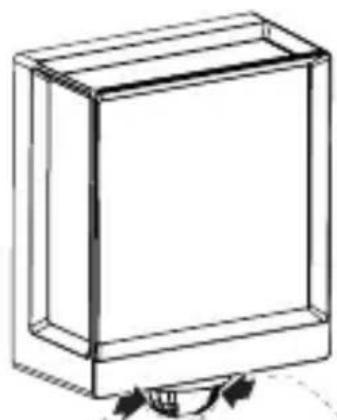
natural_image
Simple line drawing of a rectangular box with a curved arrow at the bottom (no text or symbols)6. Fonctions
text_image
QR code image containing encoded data, no visible human-readable text
text_image
QR code image containing encoded data, no visible human-readable text- Dimensions (H x I x P)
L 40 C : 229 x 201 x 105 mm
natural_image
Isometric line drawing of a rectangular box with a 1x multiplier label (no text or symbols on the diagram itself)


natural_image
Isometric line drawing of a rectangular box with a 1x angular measurement indicator (no text or symbols on the diagram itself)
3×
3×

3×

3×

1×

1×
natural_image
Technical line drawing of a rectangular frame with a 105 mm dimension label (no other text or symbols)3.4 L 40 SC

text_image
201 mm 229 mm
text_image
105 mm3.5 L 42 C

text_image
131 mm 274 mm
text_image
105 mm3.6 L 42 SC

text_image
306 mm 131 mm
text_image
105 mmOverzicht apparaat
3.7 L 40 C, L 42 C

text_image
A Btext_image
Safety warning symbol and electrical circuit diagram showing lightning bolt and switch mechanism
text_image
L N L N PE
text_image
L N L N PE⊕text_image
LED 22 LED5. Montage

text_image
≤ 10 m 2 mtext_image
Safety warning symbol and electrical switch diagram showing lightning bolt and switch mechanism
text_image
1. 2.NL
text_image
Technical diagram of an electrical enclosure with labeled components and directional arrows indicating movement or force• Boorgaten aftekenen.
5.6


text_image
6 mm Ø- Gaten boren (∅ 6 mm) en pluggen inbrengen.

text_image
5.7 UP NNL
text_image
Technical diagram showing wiring connection to an electrical panel with labeled components and a magnified inset of the circuit.natural_image
Technical diagram showing a mechanical component with a rotating shaft and a circular feature, no text or symbols present.natural_image
Line drawing of a rectangular device emitting sound waves with a human figure nearby (no text or symbols)natural_image
Simple line drawing of a basket with no text or symbols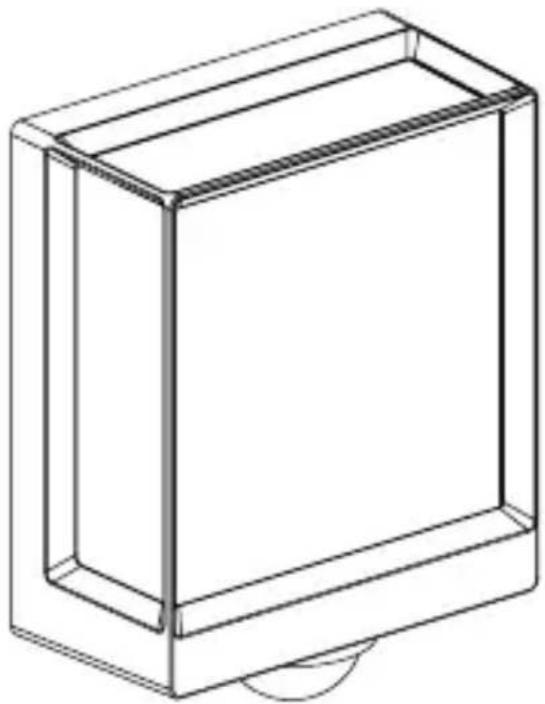
natural_image
Line drawing of a rectangular box with a curved base and top edge (no text or symbols)NL
5.14 L 40 SC, L 42 SC

natural_image
Technical line drawing of a mechanical component with a circular base and a downward arrow indicating force or motion (no text or symbols)5.15 L 40 SC, L 42 SC

text_image
1. 2.
natural_image
Technical line drawing of a mechanical assembly with an arrow indicating direction (no text or symbols)5.16 L 40 SC, L 42 SC

natural_image
Diagram showing a container with a sphere above it, indicating fluid or material flow (no text or symbols present)NL
5.17 L 40 SC, L 42 SC

natural_image
Simple line drawing of a basket with no text or symbols
natural_image
Simple line drawing of a rectangular box with a handle and base, no text or symbols present.
natural_image
Simple line drawing of a rectangular box with a curved arrow indicating rotation (no text or symbols)6. Werking
text_image
QR code image containing encoded data, no visible human-readable text
text_image
QR code image containing encoded data, no visible human-readable text- L 40 C: "F"
- L 40 SC: "E"
- L 42 C: "E"
- L 42 SC: "F"
natural_image
Isometric line drawing of a rectangular box with a 1x multiplier label (no text or symbols on the diagram itself)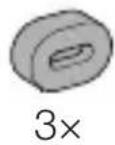


natural_image
Isometric line drawing of a rectangular box with a 1x angular measurement indicator (no text or symbols on the diagram itself)
3×

3×

3×

3×

1×

1×
natural_image
Technical line drawing of a rectangular frame with a 105 mm dimension label (no other text or symbols)3.4 L 40 SC

text_image
201 mm 229 mm
text_image
105 mm3.5 L 42 C

text_image
131 mm 274 mm
text_image
105 mm3.6 L 42 SC

text_image
306 mm 131 mm
text_image
105 mmtext_image
Safety warning symbol and electrical circuit diagram showing lightning bolt and switch mechanism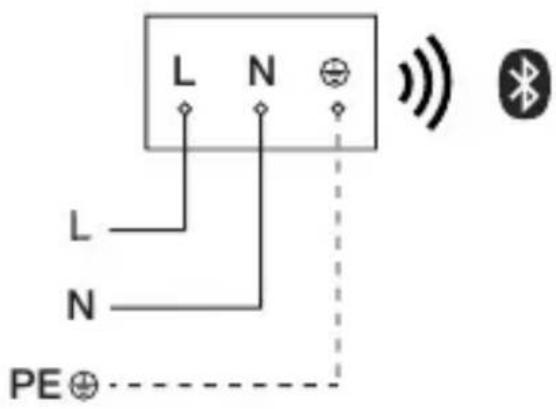
text_image
L N L N PE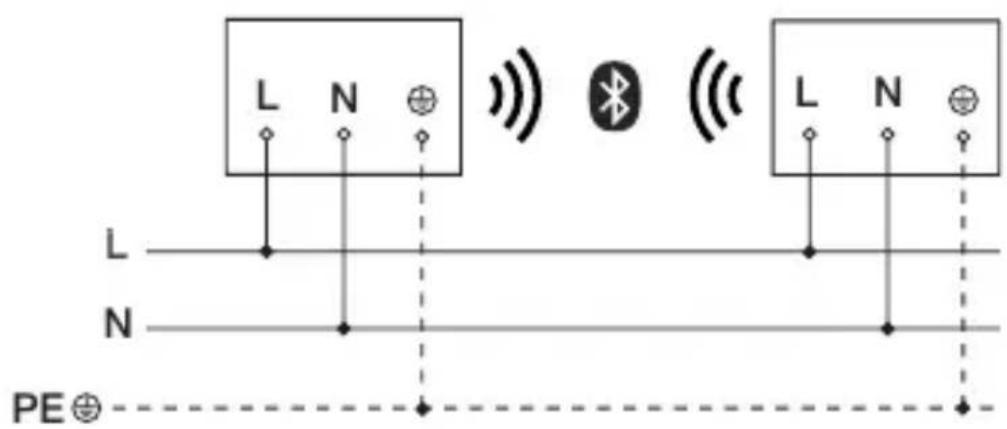
text_image
L N L N PE⊕text_image
≤ 10 m 2 mtext_image
Safety warning symbol and electrical switch diagram showing lightning bolt and switch mechanism
text_image
1. 2.text_image
Technical diagram of an electrical enclosure with labeled components and directional arrows indicating movement or force- Segnare i fori.

text_image
5.6 6 mm Øtext_image
Technical diagram showing wiring connection to an electrical panel with labeled components and a magnified inset of the circuit.natural_image
Technical diagram of a ceiling fixture with a circular component and directional arrows indicating motion (no text or symbols)natural_image
Line drawing of a rectangular device emitting sound waves with a human figure nearby (no text or symbols)natural_image
Simple line drawing of a basket with no text or symbols
natural_image
Line drawing of a rectangular box with a curved base and top edge (no text or symbols)5.14 L 40 SC, L 42 SC

natural_image
Technical line drawing of a mechanical component with a circular base and a downward arrow indicating force or motion (no text or symbols)5.15 L 40 SC, L 42 SC

text_image
1. 2.
natural_image
Technical line drawing of a mechanical assembly with a black arrow indicating direction (no text or symbols)5.16 L 40 SC, L 42 SC

natural_image
Diagram showing a container with a sphere above it, indicating a fluid or material flow (no text or symbols present)IT
5.17 L 40 SC, L 42 SC

natural_image
Simple line drawing of a basket with no text or symbols
natural_image
Simple line drawing of a rectangular box with a handle and base, no text or symbols present.
natural_image
Simple line drawing of a rectangular box with a curved arrow indicating rotation (no text or symbols)6. Funzionamento
text_image
QR code image containing encoded data, no visible human-readable text
text_image
QR code image containing encoded data, no visible human-readable text- Dimensioni (A x L x P)
L 40 C: 229 x 201 x 105 mm
L 40 SC: 261 x 201 x 105 mm
L 42 C: 274 x 131 x 105 mm
L 42 SC: 306 x 131 x 105 mm
- L 40 C: "F"
- L 40 SC: "E"
- L 42 C: "E"
- L 42 SC: "F"
natural_image
Isometric line drawing of a rectangular box with a 1x multiplier label (no text or symbols on the diagram itself)


natural_image
Isometric line drawing of a rectangular box with a 1x angular measurement indicator (no text or symbols on the diagram itself)
3×

3×

3×

3×

1×
1×
natural_image
Technical line drawing of a rectangular frame with a 105 mm dimension label (no other text or symbols)3.4 L 40 SC

text_image
201 mm 229 mm
text_image
105 mm3.5 L 42 C
text_image
131 mm 274 mm
text_image
105 mmES
3.6 L 42 SC

text_image
306 mm 131 mm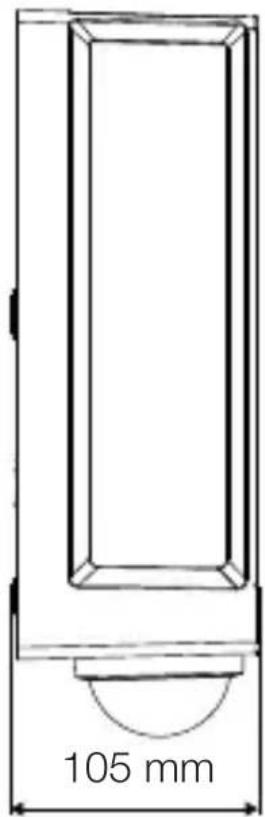
text_image
105 mmtext_image
Safety warning symbol and electrical circuit diagram showing lightning bolt and switch mechanism
text_image
L N L N PE
text_image
L N L N PE⊕text_image
≤ 10 m 2 mtext_image
5.3 ≤ 4 mtext_image
Safety warning symbol and electrical switch diagram showing lightning bolt and switch mechanism
text_image
1. 2.text_image
Technical diagram of an electrical enclosure with labeled components and directional arrows indicating movement or forcetext_image
5.6 6 mm ØES
text_image
Technical diagram showing electrical wiring connections inside a device with an inset close-up of the component labeled N ⊕ I.natural_image
Technical diagram of a mechanical component with a curved arrow indicating rotation or force direction (no text or symbols)natural_image
Line drawing of a rectangular device emitting sound waves with a human figure nearby (no text or symbols)natural_image
Simple line drawing of a basket with no text or symbols
natural_image
Line drawing of a rectangular box with a curved base and top edge (no text or symbols)5.14 L 40 SC, L 42 SC

natural_image
Diagram of a mechanical component with a circular base and a downward arrow indicating force or motion (no text or symbols)ES
5.15 L 40 SC, L 42 SC

text_image
1. 2.
natural_image
Technical line drawing of a mechanical assembly with an arrow indicating direction (no text or symbols)5.16 L 40 SC, L 42 SC

natural_image
Diagram showing a container with a sphere above it, indicating a fluid or material flow (no text or symbols present)5.17 L 40 SC, L 42 SC

natural_image
Simple line drawing of a basket with no text or symbols
natural_image
Simple line drawing of a rectangular box with a handle and base, no text or symbols present.
natural_image
Simple line drawing of a rectangular box with a curved arrow indicating rotation (no text or symbols)6. Funciones
text_image
QR code image containing encoded data, no visible human-readable text
text_image
QR code image containing encoded data, no visible human-readable text- L 40 C: "F"
- L 40 SC: "E"
- L 42 C: "E"
- L 42 SC: "F"
natural_image
Isometric line drawing of a rectangular box with a 1x multiplier label (no text or symbols on the diagram itself)


natural_image
Isometric line drawing of a rectangular box with a 1x angular measurement indicator (no text or symbols on the diagram itself)
3×

3×

3×

3×

1×

1×
natural_image
Technical line drawing of a rectangular frame with a 105 mm dimension label (no other text or symbols)PT
3.4 L 40 SC

text_image
201 mm 229 mm
text_image
105 mm3.5 L 42 C

text_image
131 mm 274 mm
text_image
105 mm3.6 L 42 SC

text_image
306 mm 131 mm
text_image
105 mmtext_image
Safety warning symbol and electrical circuit diagram showing lightning bolt and switch mechanism
text_image
L N L N PE
text_image
L N L N PE⊕text_image
≤ 10 m 2 mtext_image
Technical diagram of an electrical enclosure with labeled components and directional arrows indicating movement or force- Marque os furos.
5.6


text_image
Ø 6 mmtext_image
Technical diagram showing electrical wiring connections inside a device with an inset close-up of a component labeled N ⊕ I.natural_image
Technical diagram showing a mechanical component with a rotating shaft and a circular feature, no text or symbols present.natural_image
Line drawing of a rectangular device emitting sound waves with a human figure nearby (no text or symbols)natural_image
Simple line drawing of a basket with no text or symbols
natural_image
Line drawing of a rectangular box with a curved base and top edge (no text or symbols)5.14 L 40 SC, L 42 SC

natural_image
Technical line drawing of a mechanical component with a circular base and a downward arrow indicating force or motion (no text or symbols)5.15 L 40 SC, L 42 SC
text_image
1. 2.
natural_image
Technical line drawing of a mechanical assembly with an arrow indicating direction (no text or symbols)5.16 L 40 SC, L 42 SC

natural_image
Diagram showing a container with a sphere above it, indicating fluid or material flow (no text or symbols present)PT
5.17 L 40 SC, L 42 SC

natural_image
Simple line drawing of a basket with no text or symbols
natural_image
Simple line drawing of a rectangular box with a handle and base, no text or symbols present.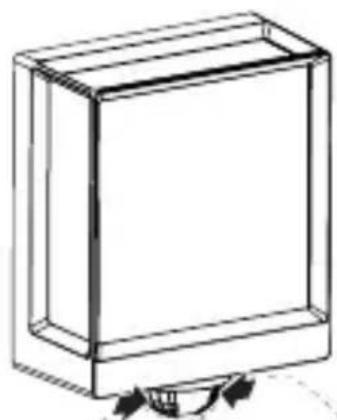
natural_image
Simple line drawing of a rectangular box with a curved arrow indicating rotation (no text or symbols)6. Funcionamento
text_image
QR code image containing encoded data, no visible human-readable text
text_image
QR code image containing encoded data, no visible human-readable text- L 40 C: "F"
- L 40 SC: "E"
- L 42 C: "E"
- L 42 SC: "F"
natural_image
Isometric line drawing of a rectangular box with a 1x multiplier label (no text or symbols on the diagram itself)


natural_image
Isometric line drawing of a rectangular box with a 1x angular measurement indicator (no text or symbols on the diagram itself)
3×

3×

3×

3×

1×
1×
natural_image
Technical line drawing of a rectangular frame with a 105 mm dimension label (no other text or symbols)3.4 L 40 SC

text_image
201 mm 229 mm
text_image
105 mm3.5 L 42 C

text_image
131 mm 274 mm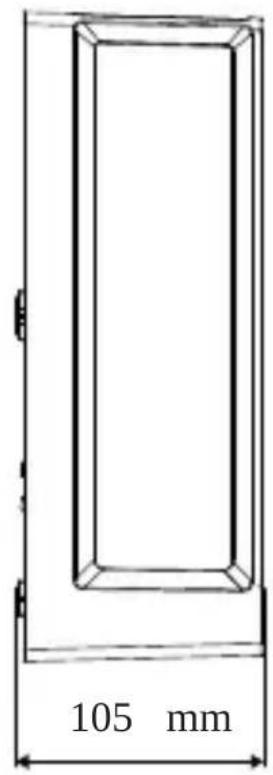
text_image
105 mmSE
3.6 L 42 SC
text_image
306 mm 131 mm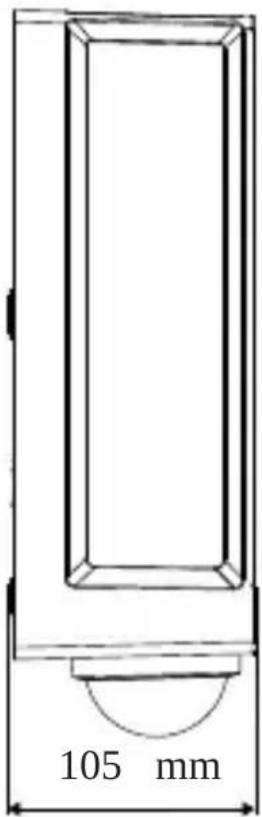
text_image
105 mmtext_image
Safety warning symbol and electrical circuit diagram showing lightning bolt and switch mechanism
text_image
L N L N PE⊕
text_image
L N L N PE⊕text_image
≤ 10 m 2 mtext_image
Safety warning symbol and electrical switch diagram showing lightning bolt and switch mechanism
text_image
1. 2.text_image
Technical diagram of an electrical enclosure with labeled components and directional arrows indicating movement or force- Markera borrhålen.
text_image
5.6 6 mm ØSE
text_image
Technical diagram showing wiring connection to an electrical panel with labeled components and a magnified inset of the circuit.- Anslut nätkabeln enligt kopplingsschemat. →"4. Elektrisk anslutning"
5.10

text_image
klicknatural_image
Technical diagram showing a mechanical component with a rotating shaft and a circular feature, no text or symbols present.- Skruva fast säkringsskruven.
5.12

text_image
I O
natural_image
Line drawing of a rectangular device with sound waves and a human figure, no text or symbols presentnatural_image
Simple line drawing of a basket with no text or symbols
natural_image
Line drawing of a rectangular box with a curved base and top edge (no text or symbols)5.14 L 40 SC, L 42 SC

natural_image
Diagram of a mechanical component with a circular base and a downward arrow indicating force or motion (no text or symbols)SE
5.15 L 40 SC, L 42 SC

text_image
1. 2.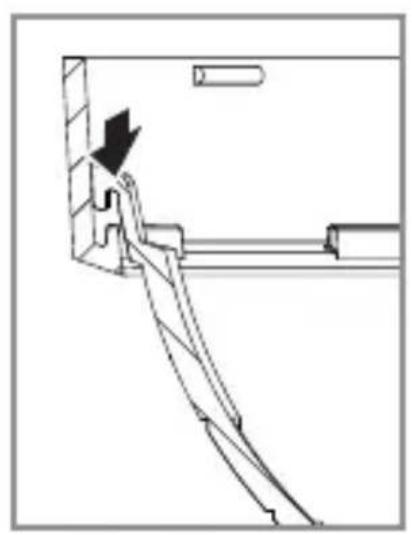
natural_image
Technical line drawing of a mechanical assembly with a black arrow indicating direction (no text or symbols)5.16 L 40 SC, L 42 SC

natural_image
Diagram showing a container with a sphere above it, indicating a fluid or material flow (no text or symbols present)5.17 L 40 SC, L 42 SC

natural_image
Simple line drawing of a basket with no text or symbols
natural_image
Simple line drawing of a rectangular box with a handle and base, no text or symbols present.
natural_image
Simple line drawing of a rectangular box with a curved arrow indicating rotation or movement (no text or symbols)6. Funktion
text_image
QR code image containing encoded data, no visible human-readable text
text_image
QR code image containing encoded data, no visible human-readable text- L 40 C: "F"
- L 40 SC: "E"
- L 42 C: "E"
- L 42 SC: "F"
natural_image
Isometric line drawing of a rectangular box with a 1x multiplier label (no text or symbols on the diagram itself)


- 1 LED-lampe
- 3 afstandsholdere
- 3 rawlplugs
- 3 skruer
- 1 sikkerhedsdatablad (A)
- 1 Quick-Start-guide (B)
3.2 L 40 SC, L 42 SC

natural_image
Isometric line drawing of a rectangular box with a 1x angular measurement indicator (no text or symbols on the diagram itself)
3×

3×

3×

3×

1×

1×
natural_image
Technical line drawing of a rectangular frame with a 105 mm dimension label (no other text or symbols)3.4 L 40 SC
text_image
201 mm 229 mm
text_image
105 mm3.5 L 42 C

text_image
131 mm 274 mm
text_image
105 mmDK
3.6 L 42 SC

text_image
306 mm 131 mm
text_image
105 mmtext_image
Safety warning symbol and electrical circuit diagram showing lightning bolt and switch mechanism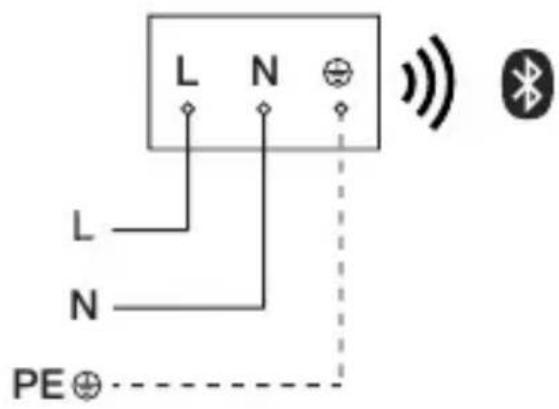
text_image
L N L N PE⊕
text_image
L N L N PE⊕text_image
≤ 10 m 2 mtext_image
Safety warning symbol and electrical switch diagram showing lightning bolt and switch mechanism
text_image
1. 2.text_image
Technical diagram of an electrical enclosure with labeled components and directional arrows indicating movement or forcetext_image
5.6 6 mm ØDK
text_image
Technical diagram showing wiring connection to an electrical panel with labeled components and a magnified inset of the circuit.natural_image
Technical diagram of a mechanical component with a rotating shaft and circular feature, showing directional arrows (no text or symbols)- Skru sikringsskruen fast.
5.12


text_image
I O
natural_image
Line drawing of a rectangular device with sound waves and a human figure, no text or symbols presentnatural_image
Simple line drawing of a basket with no text or symbols
natural_image
Line drawing of a rectangular box with a curved base and top edge (no text or symbols)5.14 L 40 SC, L 42 SC

natural_image
Technical line drawing of a mechanical component with a circular base and a downward arrow indicating force or motion (no text or symbols)DK
5.15 L 40 SC, L 42 SC

text_image
1. 2.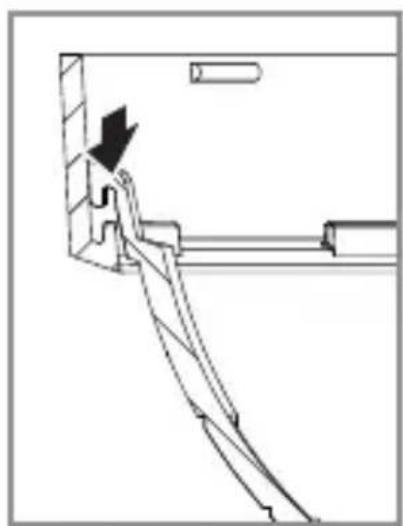
natural_image
Technical line drawing of a mechanical assembly with an arrow indicating direction (no text or symbols)5.16 L 40 SC, L 42 SC

natural_image
Diagram showing a container with a sphere above it, indicating a fluid or material flow (no text or symbols present)5.17 L 40 SC, L 42 SC

natural_image
Simple line drawing of a basket with no text or symbols
natural_image
Simple line drawing of a rectangular box with a handle and base, no text or symbols present.
natural_image
Simple line drawing of a rectangular box with a curved arrow indicating rotation or movement (no text or symbols)6. Funktion
text_image
QR code image containing encoded data, no visible human-readable text
text_image
QR code image containing encoded data, no visible human-readable text- L 40 C: "F"
- L 40 SC: "E"
- L 42 C: "E"
- L 42 SC: "F"
natural_image
Isometric line drawing of a rectangular box with a 1x multiplier label (no text or symbols on the diagram itself)


natural_image
Isometric line drawing of a rectangular box with a 1x angular measurement indicator (no text or symbols on the diagram itself)
3×

3×

3×

3×

1×
1×
natural_image
Technical line drawing of a rectangular frame with a 105 mm dimension label (no other text or symbols)FI
3.4 L 40 SC

text_image
201 mm 229 mm
text_image
105 mm3.5 L 42 C

text_image
131 mm 274 mm
text_image
105 mm3.6 L 42 SC

text_image
306 mm 131 mm
text_image
105 mmLaitteen yleiskuva
3.7 L 40 C, L 42 C

text_image
A Btext_image
Safety warning symbol and electrical circuit diagram showing lightning bolt and switch mechanism
text_image
L N L N PE
text_image
L N L N PE⊕text_image
≤ 10 m 2 mtext_image
Safety warning symbol and electrical switch diagram showing lightning bolt and switch mechanism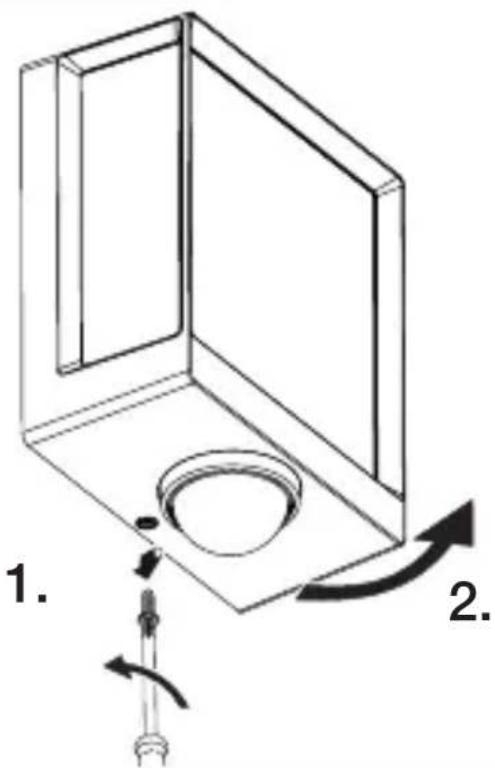
text_image
1. 2.text_image
Technical diagram of an electrical enclosure with labeled components and directional arrows indicating movement or force- Merkitse reiät.
5.6

text_image
6 mm Øtext_image
Technical diagram showing wiring connection to an electrical panel with labeled components and a magnified inset of the circuit.natural_image
Technical diagram showing a mechanical component with a rotating shaft and a circular feature, no text or symbols present.natural_image
Line drawing of a rectangular device emitting sound waves with a human figure nearby (no text or symbols)natural_image
Simple line drawing of a basket with no text or symbols
natural_image
Line drawing of a rectangular box with a curved base and top edge (no text or symbols)5.14 L 40 SC, L 42 SC

natural_image
Technical line drawing of a mechanical component with a circular base and a downward arrow indicating force or motion (no text or symbols)5.15 L 40 SC, L 42 SC

text_image
1. 2.
natural_image
Technical line drawing of a mechanical assembly with an arrow indicating direction (no text or symbols)5.16 L 40 SC, L 42 SC

natural_image
Diagram showing a container with a sphere above it, indicating a fluid or material flow (no text or symbols present)FI
5.17 L 40 SC, L 42 SC
natural_image
Simple line drawing of a basket structure (no text or symbols)
natural_image
Line drawing of a rectangular box with a flat top and bottom, no text or symbols present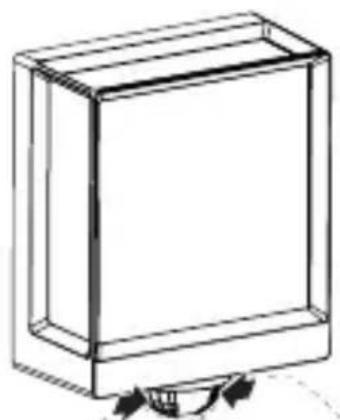
natural_image
Simple line drawing of a rectangular box with a curved base and arrow indicators at the bottom (no text or symbols)6. Toiminta
text_image
QR code image containing encoded data, no visible human-readable text
text_image
QR code image containing encoded data, no visible human-readable text- L 40 C: "F"
- L 40 SC: "E"
- L 42 C: "E"
- L 42 SC: "F"
12. Viankorjaus
natural_image
Isometric line drawing of a rectangular box with a 1x multiplier label (no text or symbols on the diagram itself)
3×

3×
3×

1×

1×
- 1 LED-lampe
- 3 avstandsstykker
- 3 veggplugger
- 3 skruer
- 1 sikkerhetsdatablad (A)
- 1 hurtigstart-guide (B)
3.2 L 40 SC, L 42 SC
natural_image
Isometric line drawing of a rectangular box with a 1x angular measurement indicator (no text or symbols on the diagram itself)
3×

3×

3×
3×

1×

1×
- 1 LED-lampe
- 3 dekklips
- 3 avstandsstykker
- 3 veggplugger
- 3 skruer
- 1 sikkerhetsdatablad (A)
- 1 hurtigstart-guide (B)
Produktmål
3.3 L 40 C

text_image
201 mm 229 mm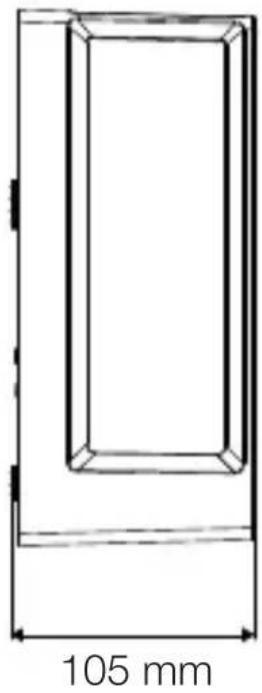
natural_image
Technical line drawing of a rectangular frame with a 105 mm dimension label (no other text or symbols)3.4 L 40 SC

text_image
201 mm 229 mm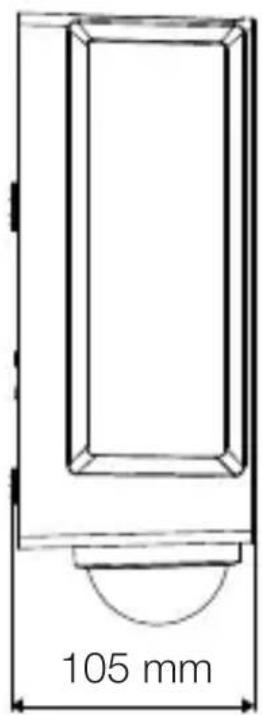
text_image
105 mm3.5 L 42 C

text_image
131 mm 274 mm
text_image
105 mmNO
3.6 L 42 SC

text_image
306 mm 131 mm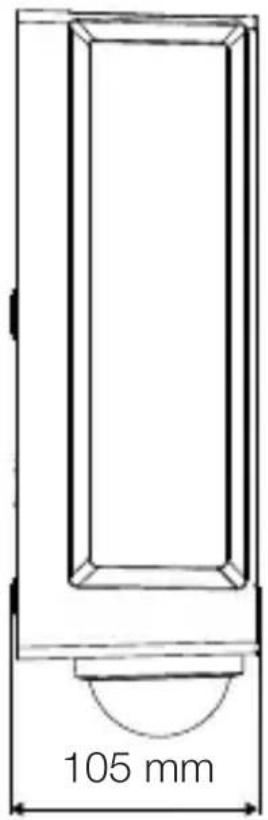
text_image
105 mmtext_image
Safety warning symbol and electrical circuit diagram showing lightning bolt and switch mechanism
text_image
L N L N PE⊕
text_image
L N L N PE⊕text_image
≤ 10 m 2 mtext_image
Safety warning symbol and electrical switch diagram showing lightning bolt and switch mechanism
text_image
1. 2.text_image
Technical diagram of an electrical enclosure with labeled components and directional arrows indicating movement or force- Tegn borehull
5.6
text_image
6 mm Øtext_image
Technical diagram showing wiring connection to an electrical panel with labeled components and a magnified inset of the circuit.natural_image
Technical diagram of a mechanical component with a rotating shaft and circular feature, showing directional arrows (no text or symbols)- Skru fast sikringsskruen.
5.12


text_image
I O
natural_image
Line drawing of a rectangular device emitting sound waves with a human figure nearby (no text or symbols)natural_image
Simple line drawing of a basket with grid lines (no text or symbols)
natural_image
Line drawing of a rectangular box with a curved base and top edge (no text or symbols)5.14 L 40 SC, L 42 SC
natural_image
Technical line drawing of a mechanical component with a circular base and a downward arrow indicating force or motion (no text or symbols)NO
5.15 L 40 SC, L 42 SC

text_image
1. 2.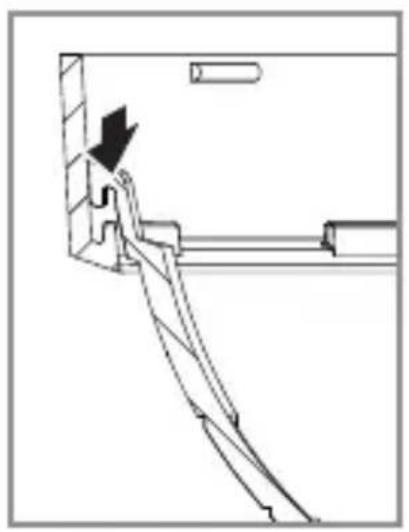
natural_image
Technical line drawing of a mechanical assembly with a downward arrow indicating motion (no text or symbols)5.16 L 40 SC, L 42 SC

natural_image
Diagram showing a container with a sphere above it, indicating a fluid or material flow (no text or symbols present)5.17 L 40 SC, L 42 SC

natural_image
Simple line drawing of a basket with no text or symbols
natural_image
Simple line drawing of a rectangular box with a handle and base, no text or symbols present.
natural_image
Simple line drawing of a rectangular box with a curved arrow indicating rotation (no text or symbols)6. Funksjon
text_image
QR code image containing encoded data, no visible human-readable text
text_image
QR code image containing encoded data, no visible human-readable textnatural_image
Isometric line drawing of a rectangular box with a 1x multiplier label (no text or symbols on the diagram itself)
3×
3×

3×

1×

1×
natural_image
Isometric line drawing of a rectangular box with a 1x angular measurement indicator (no text or symbols on the diagram itself)
3×

3×

3×

3×
1×

1×
natural_image
Technical line drawing of a rectangular frame with a 105 mm dimension label (no other text or symbols)GR
3.4 L 40 SC
text_image
201 mm 229 mm
text_image
105 mm3.5 L 42 C

text_image
131 mm 274 mm
text_image
105 mm3.6 L 42 SC

text_image
306 mm 131 mm
text_image
105 mmΕπισκόπηση συσκευής
3.7 L 40 C, L 42 C

text_image
A Btext_image
Safety warning symbol and electrical circuit diagram showing lightning bolt and switch mechanism
text_image
L N L N PE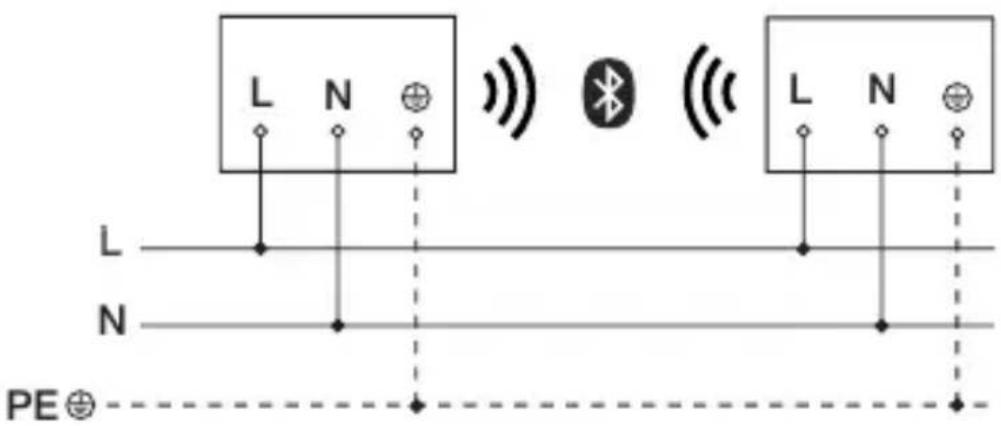
text_image
L N L N PE⊕text_image
LED 22 LED5. Συναρμολόγηση

text_image
≤ 10 m 2 mGR
text_image
Safety warning symbol and electrical switch diagram showing lightning bolt and switch mechanism
text_image
1. 2.text_image
Technical diagram showing wiring connection to an electrical panel with labeled components and a magnified inset of the circuit.natural_image
Technical diagram showing a mechanical component with a rotating shaft and a circular feature, no text or symbols present.natural_image
Line drawing of a rectangular device emitting sound waves with a human figure nearby (no text or symbols)natural_image
Simple line drawing of a basket with no text or symbols
natural_image
Line drawing of a rectangular box with a curved base and top edge (no text or symbols)5.14 L 40 SC, L 42 SC

natural_image
Technical line drawing of a mechanical component with a circular base and a downward arrow indicating force or motion (no text or symbols)5.15 L 40 SC, L 42 SC

text_image
1. 2.
natural_image
Technical line drawing of a mechanical assembly with an arrow indicating direction (no text or symbols)5.16 L 40 SC, L 42 SC

natural_image
Diagram showing a container with a sphere above it, indicating fluid or material flow (no text or symbols present)GR
5.17 L 40 SC, L 42 SC

natural_image
Simple line drawing of a basket with no text or symbols
natural_image
Simple line drawing of a rectangular box with a handle and base, no text or symbols present.
natural_image
Simple line drawing of a rectangular box with a curved arrow indicating rotation or movement (no text or symbols)6. Λειτουργία
text_image
QR code image containing encoded data, no visible human-readable text
text_image
QR code image containing encoded data, no visible human-readable textnatural_image
Isometric line drawing of a rectangular box with a 1x multiplier label (no text or symbols on the diagram itself)


natural_image
Isometric line drawing of a rectangular box with a 1× side label (no text or symbols on the diagram itself)
3×

3×

3×

3×

1×

1×
natural_image
Technical line drawing of a rectangular frame with a 105 mm dimension label (no other text or symbols)3.4 L 40 SC

text_image
201 mm 229 mm
text_image
105 mm3.5 L 42 C

text_image
131 mm 274 mm
text_image
105 mm3.6 L 42 SC
text_image
306 mm 131 mm
text_image
105 mmtext_image
Safety warning symbol and electrical circuit diagram showing lightning bolt and switch mechanism
text_image
L N L N PE⊕
text_image
L N L N PE⊕text_image
≤ 10 m 2 mtext_image
Safety warning symbol and electrical switch diagram showing lightning bolt and switch mechanism
text_image
1. 2.text_image
Technical diagram of an electrical enclosure with labeled components and directional arrows indicating movement or forcetext_image
Technical diagram showing wiring connection to an electrical panel with labeled components and a magnified inset of the circuit.natural_image
Technical diagram showing a mechanical component with a rotating shaft and a circular feature, no text or symbols present.natural_image
Line drawing of a rectangular device emitting sound waves with a human figure nearby (no text or symbols)natural_image
Simple line drawing of a basket with no text or symbols
natural_image
Line drawing of a rectangular box with a curved base and top edge (no text or symbols)5.14 L 40 SC, L 42 SC

natural_image
Technical line drawing of a mechanical component with a circular base and a downward arrow indicating force or motion (no text or symbols)5.15 L 40 SC, L 42 SC

text_image
1. 2.
natural_image
Technical line drawing of a mechanical assembly with an arrow indicating direction (no text or symbols)TR
5.16 L 40 SC, L 42 SC

natural_image
Diagram showing a container with a sphere above it, indicating a fluid or material flow (no text or symbols present)5.17 L 40 SC, L 42 SC

natural_image
Simple line drawing of a basket with no text or symbols
natural_image
Simple line drawing of a rectangular box with a handle and base, no text or symbols present.
natural_image
Simple line drawing of a rectangular box with a curved arrow indicating rotation (no text or symbols)6. Fonksiyon
text_image
QR code image containing encoded data, no visible human-readable text
text_image
QR code image containing encoded data, no visible human-readable textnatural_image
Isometric line drawing of a rectangular box with a 1x multiplier label (no text or symbols on the diagram itself)


natural_image
Isometric line drawing of a rectangular box with a 1x angular measurement indicator (no text or symbols on the diagram itself)
3×

3×

3×

3×

1×

1×
natural_image
Technical line drawing of a rectangular frame with a 105 mm dimension label (no other text or symbols)3.4 L 40 SC

text_image
201 mm 229 mm
text_image
105 mm3.5 L 42 C

text_image
131 mm 274 mm
text_image
105 mm3.6 L 42 SC

text_image
306 mm 131 mm
text_image
105 mmtext_image
Safety warning symbol and electrical circuit diagram showing lightning bolt and switch mechanism
text_image
L N L N PE⊕
text_image
L N L N PE⊕text_image
≤ 10 m 2 mHU
text_image
Safety warning symbol and electrical switch diagram showing lightning bolt and switch mechanism
text_image
1. 2.text_image
Technical diagram of an electrical enclosure with labeled components and directional arrows indicating movement or forcetext_image
Technical diagram showing wiring connection to an electrical panel with labeled components and a magnified inset of the circuit.natural_image
Technical diagram showing a mechanical component with a rotating shaft and a circular feature, no text or symbols present.natural_image
Line drawing of a rectangular device emitting sound waves with a human figure nearby (no text or symbols)natural_image
Simple line drawing of a basket with no text or symbols
natural_image
Line drawing of a rectangular box with a curved base and top edge (no text or symbols)5.14 L 40 SC, L 42 SC

natural_image
Technical line drawing of a mechanical component with a circular base and a downward arrow indicating force or motion (no text or symbols)5.15 L 40 SC, L 42 SC

text_image
1. 2.
natural_image
Technical line drawing of a mechanical assembly with an arrow indicating direction (no text or symbols)5.16 L 40 SC, L 42 SC

natural_image
Diagram showing a container with a sphere above it, indicating a fluid or material flow (no text or symbols present)5.17 L 40 SC, L 42 SC

natural_image
Simple line drawing of a basket with no text or symbols
natural_image
Simple line drawing of a rectangular box with a handle and base, no text or symbols present.
natural_image
Simple line drawing of a rectangular box with a curved arrow indicating rotation (no text or symbols)HU
6. Működés
text_image
QR code image containing encoded data, no visible human-readable text
text_image
QR code image containing encoded data, no visible human-readable text- Méretek (Ma x Sz x Mé)
L 40 C: 229 x 201 x 105 mm
L 40 SC: 261 x 201 x 105 mm
L 42 C: 274 x 131 x 105 mm
L 42 SC: 306 x 131 x 105 mm
natural_image
Isometric line drawing of a rectangular box with a 1x multiplier label (no text or symbols on the diagram itself)


natural_image
Isometric line drawing of a rectangular box with a 1x angular measurement indicator (no text or symbols on the diagram itself)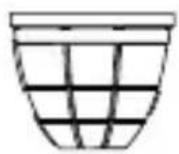
3×

3×

3×

3×

1×

1×
natural_image
Technical line drawing of a rectangular frame with a 105 mm dimension label (no other text or symbols)3.4 L 40 SC

text_image
201 mm 229 mm
text_image
105 mm3.5 L 42 C

text_image
131 mm 274 mm
text_image
105 mm3.6 L 42 SC

text_image
306 mm 131 mm
text_image
105 mmPřehled zařízení
3.7 L 40 C, L 42 C

text_image
A Btext_image
Safety warning symbol and electrical circuit diagram showing lightning bolt and switch mechanism
text_image
L N L N PE⊕
text_image
L N L N PE⊕text_image
≤10 m 2 mtext_image
Safety warning symbol and electrical switch diagram showing lightning bolt and switch mechanism
text_image
1. 2.text_image
Technical diagram of an electrical enclosure with labeled components and directional arrows indicating movement or forcetext_image
5.6 6 mm Ø- Vyvrtat otvory (∅ 6 mm) a vložit hmoždinky.

text_image
5.7 UP Ntext_image
Technical diagram showing wiring connection to an electrical panel with labeled components and a magnified inset of the circuit.natural_image
Technical diagram of a mechanical component with a rotating shaft and circular feature, showing directional arrows (no text or symbols)natural_image
Line drawing of a rectangular device with sound waves and a human figure, no text or symbols presentnatural_image
Simple line drawing of a basket with no text or symbols
natural_image
Line drawing of a rectangular box with a curved base and top edge (no text or symbols)5.14 L 40 SC, L 42 SC

natural_image
Technical line drawing of a mechanical component with a circular base and a downward arrow indicating force or motion (no text or symbols)5.15 L 40 SC, L 42 SC

text_image
1. 2.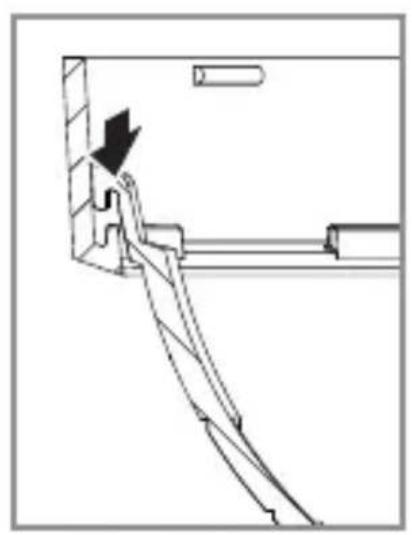
natural_image
Technical line drawing of a mechanical assembly with an arrow indicating direction (no text or symbols)5.16 L 40 SC, L 42 SC

natural_image
Diagram showing a container with a sphere above it, indicating a fluid or material flow (no text or symbols present)5.17 L 40 SC, L 42 SC

natural_image
Simple line drawing of a basket with no text or symbols
natural_image
Simple line drawing of a rectangular box with a handle and base, no text or symbols present.
natural_image
Simple line drawing of a rectangular box with a curved arrow indicating rotation or movement (no text or symbols)6. Funkce
text_image
QR code image containing encoded data, no visible human-readable text
text_image
QR code image containing encoded data, no visible human-readable textnatural_image
Isometric line drawing of a rectangular box with a 1x multiplier label (no text or symbols on the diagram itself)


natural_image
Isometric line drawing of a rectangular box with a 1x angular measurement indicator (no text or symbols on the diagram itself)
3×

3×

3×

3×

1×

1×
natural_image
Technical line drawing of a rectangular frame with a 105 mm dimension label (no other text or symbols)3.4 L 40 SC

text_image
201 mm 229 mm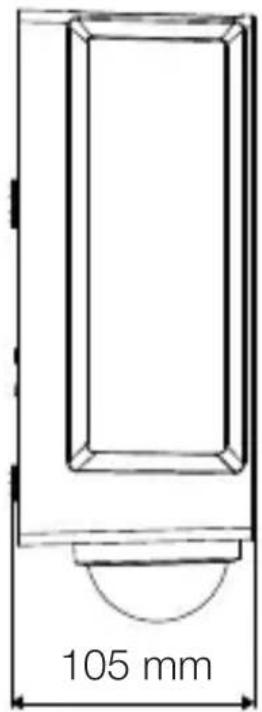
text_image
105 mmSK
3.5 L 42 C

text_image
131 mm 274 mm
text_image
105 mm3.6 L 42 SC

text_image
306 mm 131 mm
text_image
105 mmPrehlád výrobku
3.7 L 40 C, L 42 C

text_image
A Btext_image
Safety warning symbol and electrical circuit diagram showing lightning bolt and switch mechanism
text_image
L N L N PE⊕
text_image
L N L N PE⊕text_image
≤ 10 m 2 mSK
Snímanie pohybu bočne k smeru chôdze
5.2
text_image
≤ 10 mSnímanie pohybu v smere chôdze
5.3
text_image
≤ 4 mMontážny postup
5.4
text_image
Safety warning symbol and electrical switch diagram showing lightning bolt and switch mechanism
text_image
1. 2.text_image
Technical diagram of an electrical enclosure with labeled components and directional arrows indicating movement or force- Naznačte diery na vrtanie.
SK

text_image
5.6 6 mm Ø- Vyvrtajte diery (∅ 6 mm) a vložte hmoždinky.

text_image
5.7 UP Ntext_image
Technical diagram showing wiring connection to an electrical panel with labeled components and a magnified inset of the circuit.natural_image
Technical diagram showing a mechanical component with a rotating shaft and a circular feature, no text or symbols present.- Poistnú skrutku pevne priskrutkujte.
5.12

text_image
I O
natural_image
Line drawing of a rectangular device with sound waves and a human figure, no text or symbols presentnatural_image
Simple line drawing of a basket with no text or symbols
natural_image
Line drawing of a rectangular box with a curved base and top edge (no text or symbols)SK
5.14 L 40 SC, L 42 SC

natural_image
Technical line drawing of a mechanical component with a circular base and a downward arrow indicating force or motion (no text or symbols)5.15 L 40 SC, L 42 SC

text_image
1. 2.
natural_image
Technical line drawing of a mechanical assembly with an arrow indicating direction (no text or symbols)5.16 L 40 SC, L 42 SC

natural_image
Diagram showing a container with a sphere above it, indicating a fluid or material flow (no text or symbols present)5.17 L 40 SC, L 42 SC

natural_image
Simple line drawing of a basket with no text or symbols
natural_image
Simple line drawing of a rectangular box with a handle and base, no text or symbols present.
natural_image
Simple line drawing of a rectangular box with a curved arrow indicating rotation (no text or symbols)SK
6. Funkcia
text_image
QR code image containing encoded data, no visible human-readable text
text_image
QR code image containing encoded data, no visible human-readable textnatural_image
Isometric line drawing of a rectangular box with a 1x multiplier label (no text or symbols on the diagram itself)


natural_image
Isometric line drawing of a rectangular box with a 1× side label (no text or symbols on the diagram itself)
3×
3×

3×

3×

1×

1×
natural_image
Technical line drawing of a rectangular frame with dimension label (105 mm) at the base, no other text or symbols present.3.4 L 40 SC

text_image
201 mm 229 mm
text_image
105 mm3.5 L 42 C

text_image
131 mm 274 mm
text_image
105 mm3.6 L 42 SC

text_image
306 mm 131 mm
text_image
105 mmPL
Przegład urządzenia
3.7 L 40 C, L 42 C

text_image
A Btext_image
Safety warning symbol and electrical circuit diagram showing lightning bolt and switch mechanism
text_image
L N L N PE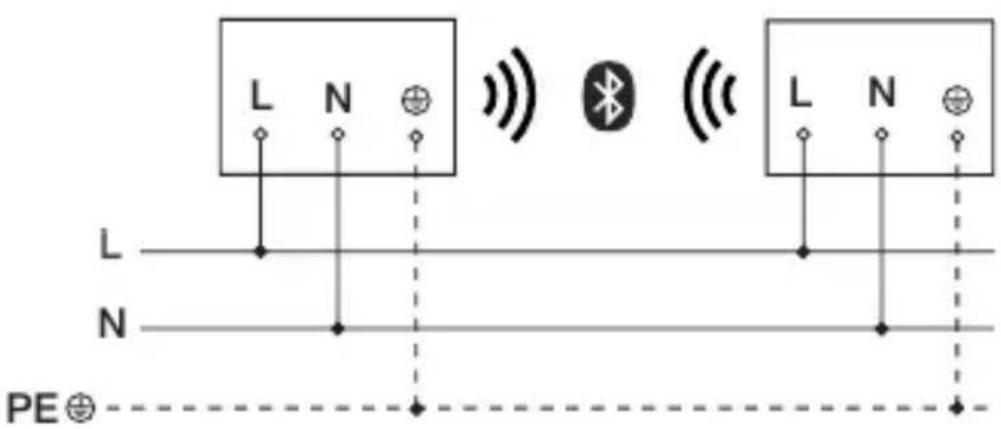
text_image
L N L N PE⊕text_image
≤ 10 m 2 mtext_image
Safety warning symbol and electrical switch diagram showing lightning bolt and switch mechanism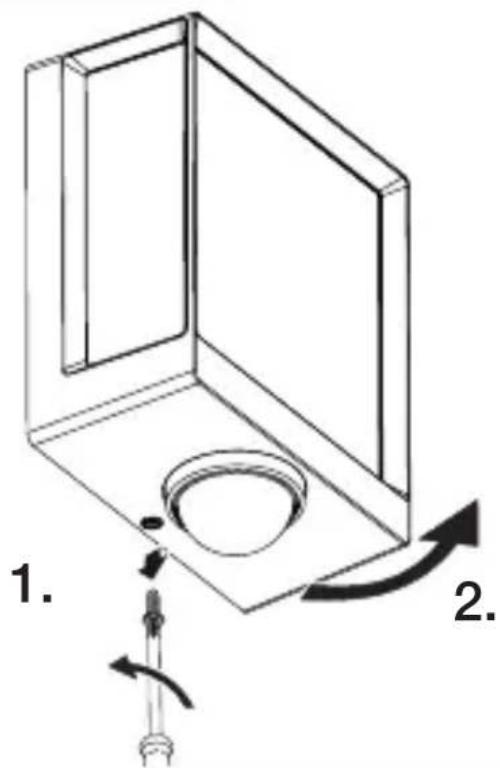
text_image
1. 2.text_image
Technical diagram of an electrical enclosure with labeled components and directional arrows indicating movement or forcetext_image
Technical diagram showing wiring connection to an electrical panel with labeled components and a magnified inset of the circuit.natural_image
Technical diagram of a mechanical component with a rotating shaft and circular feature, showing directional arrows (no text or symbols)natural_image
Line drawing of a rectangular device with sound waves and a human figure, no text or symbols presentnatural_image
Simple line drawing of a basket with no text or symbols
natural_image
Line drawing of a rectangular box with a curved base and top edge (no text or symbols)5.14 L 40 SC, L 42 SC

natural_image
Technical line drawing of a mechanical component with a circular base and a downward arrow indicating force or motion (no text or symbols)5.15 L 40 SC, L 42 SC

text_image
1. 2.
natural_image
Technical line drawing of a mechanical assembly with an arrow indicating direction (no text or symbols)PL
5.16 L 40 SC, L 42 SC

natural_image
Diagram showing a container with a sphere above it, indicating a fluid or material flow (no text or symbols present)5.17 L 40 SC, L 42 SC

natural_image
Simple line drawing of a basket with no text or symbols
natural_image
Simple line drawing of a rectangular box with a handle and base, no text or symbols present.
natural_image
Simple line drawing of a rectangular box with a curved arrow indicating rotation or movement (no text or symbols)6. Działanie
text_image
QR code image containing encoded data, no visible human-readable text
text_image
QR code image containing encoded data, no visible human-readable textnatural_image
Isometric line drawing of a rectangular box with a 1x multiplier label (no text or symbols on the diagram itself)


natural_image
Isometric line drawing of a rectangular box with a 1x angular measurement indicator (no text or symbols on the diagram itself)
3×

3×

3×

3×

1×

1×
natural_image
Technical line drawing of a rectangular frame with a 105 mm dimension label (no other text or symbols)3.4 L 40 SC

text_image
201 mm 229 mm
text_image
105 mm3.5 L 42 C

text_image
131 mm 274 mm
text_image
105 mm3.6 L 42 SC
text_image
306 mm 131 mm
text_image
105 mmRO
text_image
Safety warning symbol and electrical circuit diagram showing lightning bolt and switch mechanism
text_image
L N L N PE
text_image
L N L N PE⊕text_image
≤ 10 m 2 mtext_image
Safety warning symbol and electrical switch diagram showing lightning bolt and switch mechanism
text_image
1. 2.text_image
Technical diagram of an electrical enclosure with labeled components and directional arrows indicating movement or forcetext_image
Technical diagram showing wiring connection to an electrical panel with labeled components and a magnified inset of the circuit.natural_image
Technical diagram of a mechanical component with a rotating shaft and circular feature, showing directional arrows (no text or symbols)natural_image
Line drawing of a rectangular device emitting sound waves with a human figure nearby (no text or symbols)natural_image
Simple line drawing of a basket with no text or symbols
natural_image
Line drawing of a rectangular box with a curved base and top edge (no text or symbols)5.14 L 40 SC, L 42 SC

natural_image
Technical line drawing of a mechanical component with a circular base and a downward arrow indicating force or motion (no text or symbols)5.15 L 40 SC, L 42 SC
text_image
1. 2.
natural_image
Technical line drawing of a mechanical assembly with an arrow indicating direction (no text or symbols)RO
5.16 L 40 SC, L 42 SC

natural_image
Diagram showing a container with a sphere above it, indicating a fluid or material flow (no text or symbols present)5.17 L 40 SC, L 42 SC

natural_image
Simple line drawing of a basket with no text or symbols
natural_image
Simple line drawing of a rectangular box with a handle and base, no text or symbols present.
natural_image
Simple line drawing of a rectangular box with a curved arrow indicating rotation or movement (no text or symbols)6. Functionarea
text_image
QR code image containing encoded data, no visible human-readable text
text_image
QR code image containing encoded data, no visible human-readable textnatural_image
Isometric line drawing of a rectangular box with a 1x multiplier label (no text or symbols on the diagram itself)


natural_image
Isometric line drawing of a rectangular box with a 1x angular measurement indicator (no text or symbols on the diagram itself)
3×

3×
3×

3×

1×

1×
natural_image
Technical line drawing of a rectangular frame with a 105 mm dimension label (no other text or symbols)3.4 L 40 SC

text_image
201 mm 229 mm
text_image
105 mm3.5 L 42 C

text_image
131 mm 274 mm
text_image
105 mm3.6 L 42 SC

text_image
306 mm 131 mm
text_image
105 mmPregled naprav
3.7 L 40 C, L 42 C

text_image
A BA Priključna sponka
B Svetilka
3.8 L 40 SC, L 42 SC

text_image
A B CA Priključna sponka
B Svetilka
C Senzor
text_image
Safety warning symbol and electrical circuit diagram showing lightning bolt and switch mechanism
text_image
L N L N PE
text_image
L N L N PE⊕text_image
≤ 10 m 2 mtext_image
Safety warning symbol and electrical switch diagram with lightning bolt and 'I' label
text_image
1. 2.- Preverite, ali je dovod napetosti izklopljen.
- Odvijte varnostni vijak.
- Pokrov odvijačite.
5.5
text_image
Technical diagram of an electrical enclosure with labeled components and directional arrows indicating movement or forcetext_image
5.6 6 mm Øtext_image
Technical diagram showing wiring connection to an electrical panel with labeled components and a magnified inset of the circuit.natural_image
Technical diagram of a mechanical component with a curved arrow indicating rotation or force direction (no text or symbols)natural_image
Line drawing of a rectangular device emitting sound waves with a human figure nearby (no text or symbols)natural_image
Simple line drawing of a basket with grid pattern (no text or symbols)
natural_image
Line drawing of a rectangular box with a curved base and top edge (no text or symbols)SI
5.14 L 40 SC, L 42 SC

natural_image
Technical line drawing of a mechanical component with a circular base and a downward arrow indicating force or motion (no text or symbols)5.15 L 40 SC, L 42 SC

text_image
1. 2.
natural_image
Technical line drawing of a mechanical assembly with an arrow indicating direction (no text or symbols)5.16 L 40 SC, L 42 SC

natural_image
Diagram showing a container with a sphere above it, indicating a fluid or material flow (no text or symbols present)5.17 L 40 SC, L 42 SC

natural_image
Simple line drawing of a basket with no text or symbols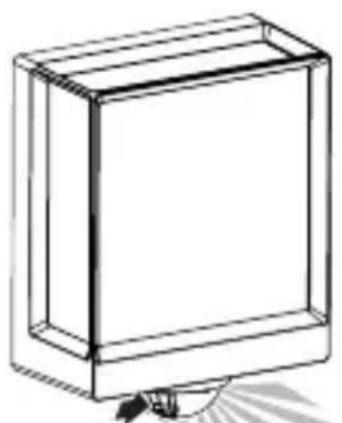
natural_image
Line drawing of a rectangular box with a flat top and bottom, no text or symbols present
natural_image
Simple line drawing of a rectangular box with a curved arrow indicating rotation or movement (no text or symbols)SI
6. Delovanje
text_image
QR code image containing encoded data, no visible human-readable text
text_image
QR code image containing encoded data, no visible human-readable textFunkcije, nastavljive v aplikaciji Steinel Connect:
natural_image
Isometric line drawing of a rectangular box with a 1x multiplier label (no text or symbols on the diagram itself)


- 1 LED svjetiljka
- 3 držača razmaka
- 3 tiple za zid
- 3 vijka
- 1 sigurnosno tehnički list (A)
- 1 uputa za brzo pokretanje (B)
3.2 L 40 SC, L 42 SC
natural_image
Isometric line drawing of a rectangular box with a 1x angular measurement indicator (no text or symbols on the diagram itself)
3×

3×

3×

3×

1×
1×
- 1 LED svjetiljka
- 3 kopče za poklopac
- 3 držača razmaka
- 3 tiple za zid
- 3 vijka
- 1 sigurnosno tehnički list (A)
- 1 uputa za brzo pokretanje (B)
Dimenzije proizvoda
3.3 L 40 C

text_image
201 mm 229 mm
natural_image
Technical line drawing of a rectangular frame with a 105 mm dimension label (no other text or symbols)3.4 L 40 SC
text_image
201 mm 229 mm
text_image
105 mm3.5 L 42 C

text_image
131 mm 274 mm
text_image
105 mm3.6 L 42 SC

text_image
306 mm 131 mm
text_image
105 mmHR
Pregled uređaja
3.7 L 40 C, L 42 C

text_image
A BA Priključna stezaljka
B Svjetiljka
3.8 L 40 SC, L 42 SC
text_image
A B Ctext_image
Safety warning symbol and electrical circuit diagram showing lightning bolt and switch mechanism
text_image
L N L N PE
text_image
L N L N PE⊕text_image
≤ 10 m 2 mtext_image
Safety warning symbol and electrical switch diagram showing lightning bolt and switch mechanism
text_image
1. 2.text_image
Technical diagram of an electrical enclosure with labeled components and directional arrows indicating movement or force- Označite rupe.
5.6


text_image
6 mm Ø- Izbušite rupe (∅ 6 mm) i umetnite učvrsnice.
HR
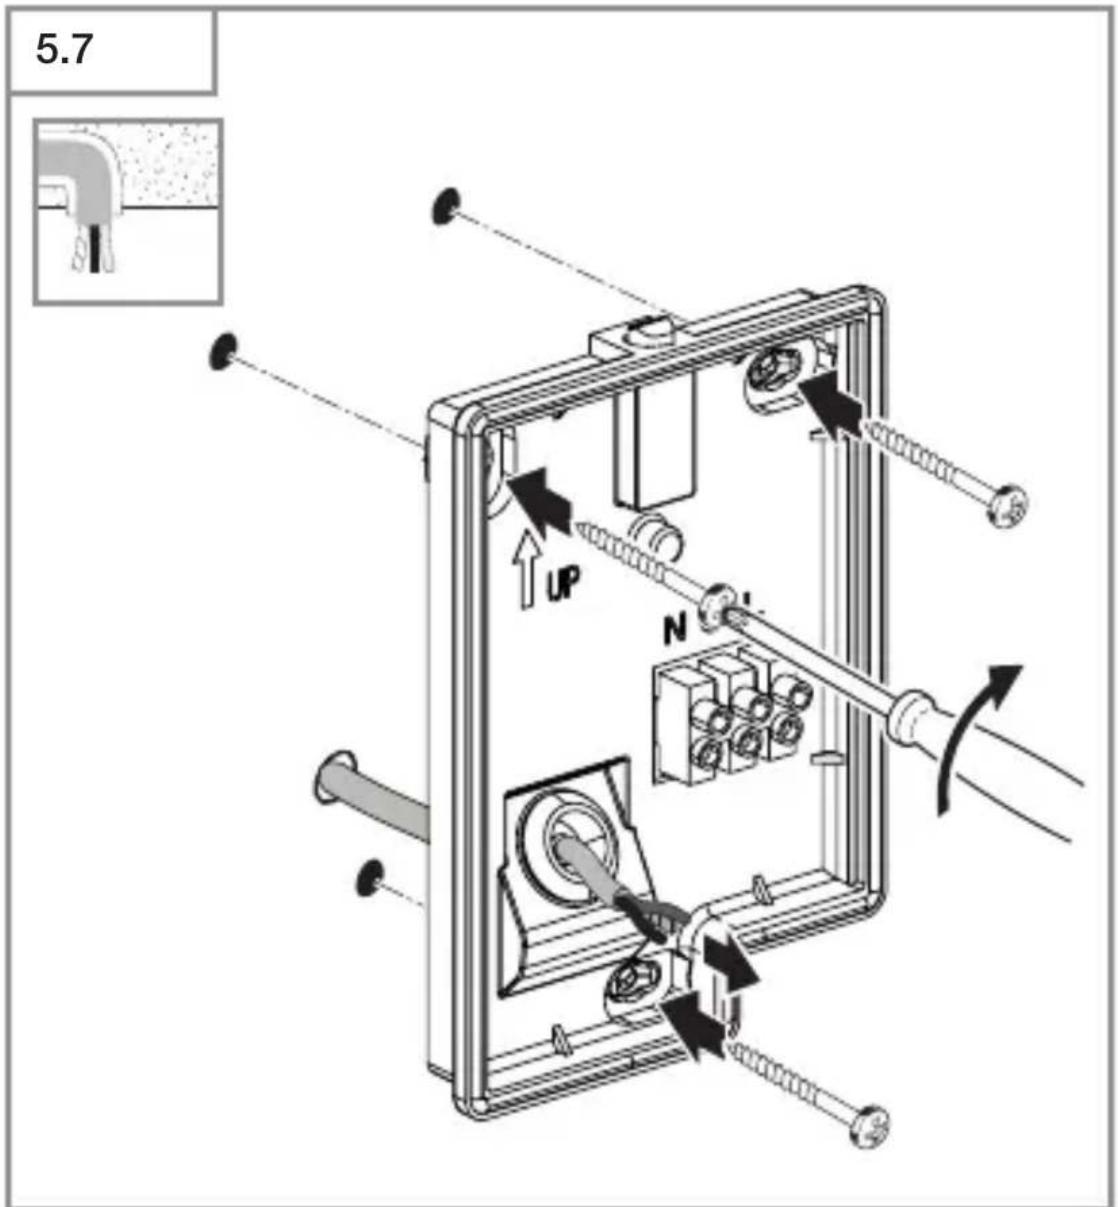
text_image
5.7 UP N- Navrnite LED svjetiljku kod podžbuknog voda.

text_image
5.8 UP Ntext_image
Technical diagram showing wiring connection to an electrical panel with labeled components and a magnified inset of the circuit.natural_image
Technical diagram of a mechanical component with a curved arrow indicating rotation or force direction (no text or symbols)- Pritegnite sigurnosni vijak.
HR
5.12

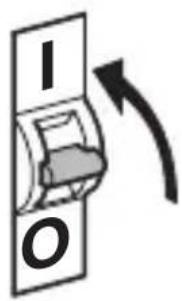
text_image
I O
natural_image
Line drawing of a rectangular device with sound waves and a human figure, no text or symbols present- Uključite strujno napajanje.
- Izvršite podešavanje putem aplikacije (samo SC varijanta).
→„6. Funkcija“
5.13 L 40 SC, L 42 SC
natural_image
Simple line drawing of a basket with no text or symbols
natural_image
Line drawing of a rectangular box with a curved base and top edge (no text or symbols)5.14 L 40 SC, L 42 SC

natural_image
Technical line drawing of a mechanical component with a circular base and a downward arrow indicating force or motion (no text or symbols)5.15 L 40 SC, L 42 SC

text_image
1. 2.
natural_image
Pure mechanical assembly diagram without any text, numbers, or symbolsHR
5.16 L 40 SC, L 42 SC

natural_image
Diagram showing a container with a sphere above it, indicating a fluid or material flow (no text or symbols present)5.17 L 40 SC, L 42 SC

natural_image
Simple line drawing of a basket with no text or symbols
natural_image
Simple line drawing of a rectangular box with a handle and base, no text or symbols present.
natural_image
Simple line drawing of a rectangular box with a curved arrow indicating rotation (no text or symbols)6. Funkcija
Funkcije se mogu podesiti za varijante SC.
Za varijante C vrijede funkcije samo u kombinaciji s proizvodom s Bluetooth senzorom.
Podešavanje funkcija obavlja se pomoću aplikacije Steinel Connect.
Aplikacija Steinel Connect
text_image
QR code image containing encoded data, no visible human-readable text
text_image
QR code image containing encoded data, no visible human-readable textFunkcije koje se mogu podesiti pomoću aplikacije Steinel Connect su:
- podešavanje vremena
- podešavanje dometa
– podešavanje svjetlosnog praga
– funkcija osnovnog svjetla
– podesiva razina glavnog / osnovnog svjetla
– prošireno podešavanje dometa - grupno umreženje
- podešavanje svjetlosnog praga pomoću funkcije Teach-In
Napomena:
Da bi se isključila mogućnost pogrešnog funkcioniranja, mora se održavati minimalni razmak od 3 m od WLAN usmjerivača i pristupnih točaka.
natural_image
Isometric line drawing of a rectangular box with a 1x multiplier label (no text or symbols on the diagram itself)


natural_image
Isometric line drawing of a rectangular box with a 1× side label (no text or symbols on the diagram itself)
3×

3×

3×

3×

1×

1×
natural_image
Technical line drawing of a rectangular frame with a 105 mm dimension label (no other text or symbols)3.4 L 40 SC

text_image
201 mm 229 mm
text_image
105 mmEE
3.5 L 42 C

text_image
131 mm 274 mm
text_image
105 mm3.6 L 42 SC

text_image
306 mm 131 mm
text_image
105 mmSeadme ülevaade
3.7 L 40 C, L 42 C

text_image
A Btext_image
Safety warning symbol and electrical circuit diagram showing lightning bolt and switch mechanism
text_image
L N L N PE
text_image
L N L N PE⊕text_image
≤ 10 m 2 mEE
text_image
Safety warning symbol and electrical switch diagram showing lightning bolt and switch mechanism
text_image
1. 2.text_image
Technical diagram of an electrical enclosure with labeled components and directional arrows indicating movement or forcetext_image
Two triangular warning symbols: a lightning bolt symbol and a water drop symbol, commonly used in safety or hazard prevention.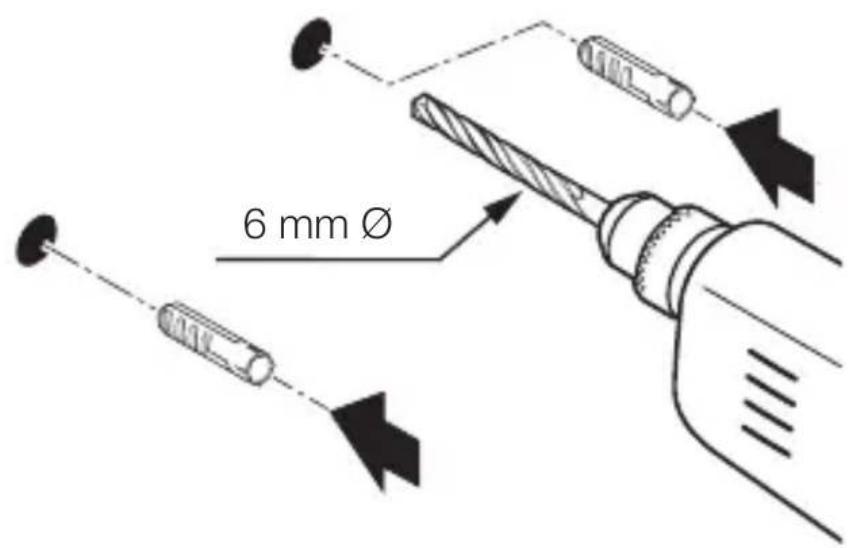
text_image
6 mm Øtext_image
Technical diagram showing wiring connection to an electrical panel with labeled components and a magnified inset of the circuit.natural_image
Technical diagram of a mechanical component with a curved arrow indicating rotation or force direction (no text or symbols)natural_image
Line drawing of a rectangular device emitting sound waves with a human figure nearby (no text or symbols)natural_image
Simple line drawing of a basket with no text or symbols
natural_image
Line drawing of a rectangular box with a curved base and top edge (no text or symbols)EE
5.14 L 40 SC, L 42 SC

natural_image
Technical line drawing of a mechanical component with a circular base and a downward arrow indicating force or motion (no text or symbols)5.15 L 40 SC, L 42 SC

text_image
1. 2.
natural_image
Technical line drawing of a mechanical assembly with an arrow indicating direction (no text or symbols)5.16 L 40 SC, L 42 SC

natural_image
Diagram showing a container with a sphere above it, indicating a fluid or material flow (no text or symbols present)5.17 L 40 SC, L 42 SC

natural_image
Simple line drawing of a basket with no text or symbols
natural_image
Simple line drawing of a rectangular box with a handle and base, no text or symbols present.
natural_image
Simple line drawing of a rectangular box with a curved arrow indicating rotation (no text or symbols)EE
6. Talitlus
text_image
QR code image containing encoded data, no visible human-readable text
text_image
QR code image containing encoded data, no visible human-readable text- L 40 C: "F"
- L 40 SC: "E"
- L 42 C: "E"
- L 42 SC: "F"
12. Törgete körvaldamine
Pingeta seade.
natural_image
Isometric line drawing of a rectangular box with a 1x multiplier label (no text or symbols on the diagram itself)


natural_image
Isometric line drawing of a rectangular box with a 1x angular measurement indicator (no text or symbols on the diagram itself)
3×

3×

3×

3×
1×

1×
natural_image
Technical line drawing of a rectangular frame with dimension label (105 mm) at the base, no other text or symbols present.3.4 L 40 SC

text_image
201 mm 229 mm
text_image
105 mm3.5 L 42 C

text_image
131 mm 274 mm
text_image
105 mm3.6 L 42 SC

text_image
306 mm 131 mm
text_image
105 mmLT
Prietaiso apžvalga
3.7 L 40 C, L 42 C

text_image
A Btext_image
Safety warning symbol and electrical circuit diagram showing lightning bolt and switch mechanism
text_image
L N L N PE
text_image
L N L N PE⊕text_image
≤ 10 m 2 mtext_image
Safety warning symbol and electrical switch diagram showing lightning bolt and switch mechanism
text_image
1. 2.text_image
Technical diagram of an electrical enclosure with labeled components and directional arrows indicating movement or forcetext_image
Technical diagram showing wiring connection to an electrical panel with labeled components and a magnified inset of the circuit.- Prijunkite maitinimo linija pagal elektros schema. →„4. Elektros jungtis“
5.10
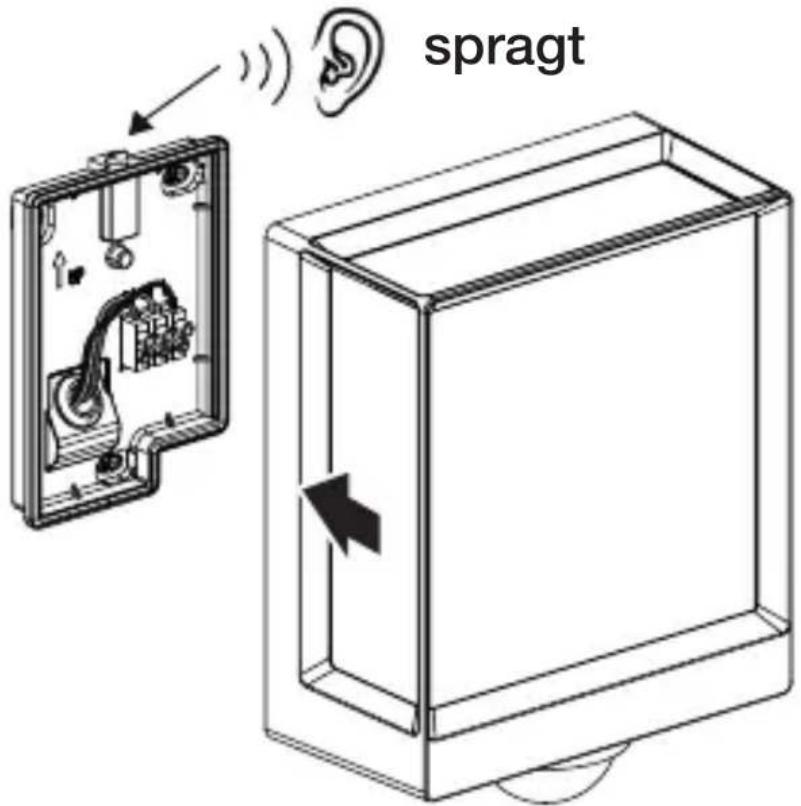
text_image
spragtnatural_image
Technical diagram showing a mechanical component with a rotating shaft and a circular feature, no text or symbols present.natural_image
Line drawing of a rectangular device with sound waves and a human figure, no text or symbols presentnatural_image
Simple line drawing of a basket with no text or symbols
natural_image
Line drawing of a rectangular box with a curved base and top edge (no text or symbols)5.14 L 40 SC, L 42 SC

natural_image
Technical line drawing of a mechanical component with a circular base and a downward arrow indicating force or motion (no text or symbols)5.15 L 40 SC, L 42 SC

text_image
1. 2.
natural_image
Technical line drawing of a mechanical assembly with an arrow indicating direction (no text or symbols)LT
5.16 L 40 SC, L 42 SC

natural_image
Diagram showing a container with a sphere above it, indicating a fluid or material flow (no text or symbols present)5.17 L 40 SC, L 42 SC

natural_image
Simple line drawing of a basket with no text or symbols
natural_image
Simple line drawing of a rectangular box with a handle and base, no text or symbols present.
natural_image
Simple line drawing of a rectangular box with a curved arrow indicating rotation (no text or symbols)6. Veikimas
text_image
QR code image containing encoded data, no visible human-readable text
text_image
QR code image containing encoded data, no visible human-readable textnatural_image
Isometric line drawing of a rectangular box with a 1x multiplier label (no text or symbols on the diagram itself)


- 1 LED gaismeklis.
- 3 starplikas
- 3 dienas dībeli
- 3 skrūves
- 1 Drošības datu lapa (A)
- 1 Ātrais starts (B)
3.2 L 40 SC, L42 SC
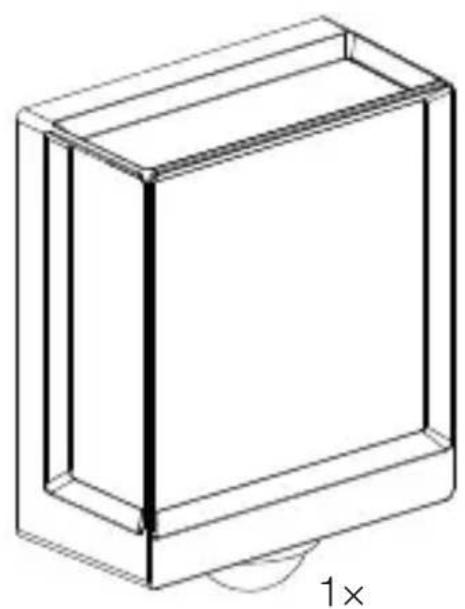
natural_image
Isometric line drawing of a rectangular box with a 1× side label (no text or symbols on the diagram itself)
3×
3×

3×

3×

1×

1×
- 1 LED gaismeklis.
- 3 nosegklipši
- 3 starplikas
- 3 dienas dībeli
- 3 skrūves
- 1 Drošības datu lapa (A)
- 1 Ātrais starts (B)
Izstrādājuma izmēri
3.3 L 40 C
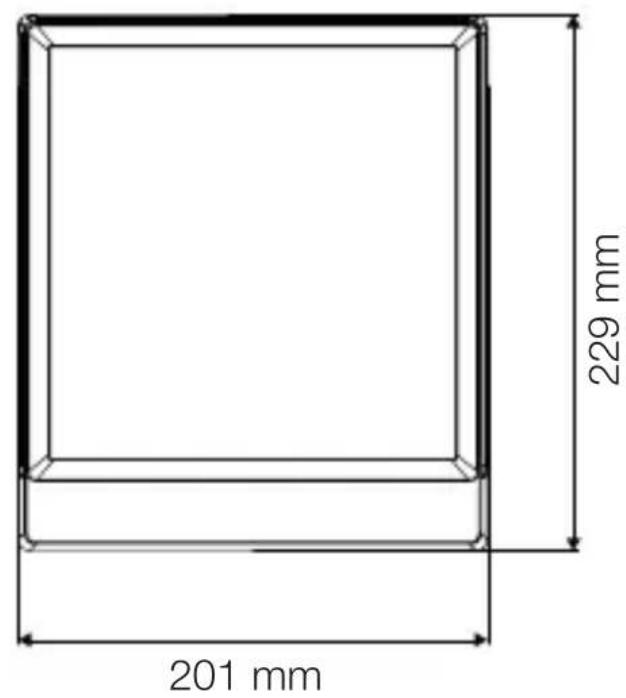
text_image
201 mm 229 mm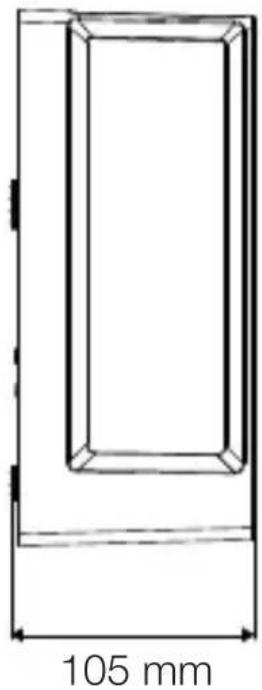
natural_image
Technical line drawing of a rectangular frame with a 105 mm dimension label (no other text or symbols)3.4 L 40 SC

text_image
201 mm 229 mm
text_image
105 mmLV
3.5 L 42 C

text_image
131 mm 274 mm
text_image
105 mm3.6 L 42 SC

text_image
306 mm 131 mm
text_image
105 mmtext_image
Safety warning symbol and electrical circuit diagram showing lightning bolt and switch mechanism
text_image
L N L N PE
text_image
L N L N PE⊕text_image
≤ 10 m 2 mLV
text_image
Safety warning symbol and electrical switch diagram showing lightning bolt and switch mechanism
text_image
1. 2.text_image
Technical diagram of an electrical enclosure with labeled components and directional arrows indicating movement or forcetext_image
Technical diagram showing wiring connection to an electrical panel with labeled components and a magnified inset of the circuit.natural_image
Technical diagram showing a mechanical component with a rotating shaft and a circular feature, no text or symbols present.natural_image
Line drawing of a rectangular device emitting sound waves with a human figure nearby (no text or symbols)natural_image
Simple line drawing of a basket with no text or symbols
natural_image
Line drawing of a rectangular box with a curved base and top edge (no text or symbols)LV
5.14 L 40 SC, L42 SC

natural_image
Technical line drawing of a mechanical component with a circular base and a downward arrow indicating force or motion (no text or symbols)5.15 L 40 SC, L42 SC

text_image
1. 2.
natural_image
Technical line drawing of a mechanical assembly with an arrow indicating direction (no text or symbols)5.16 L 40 SC, L42 SC
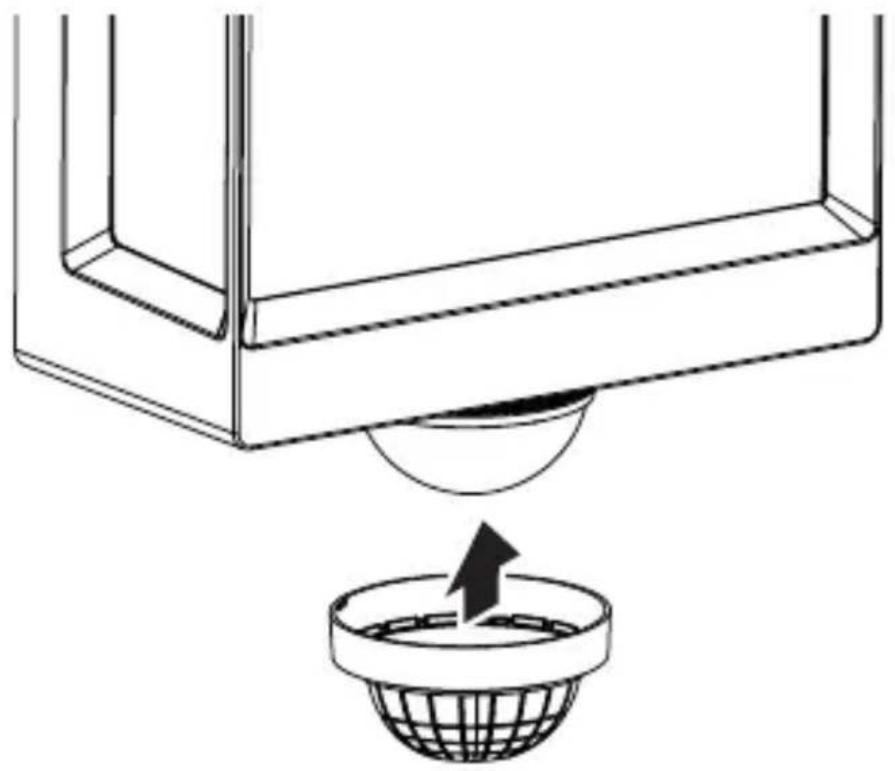
natural_image
Diagram showing a container with a sphere above it, indicating fluid or material flow (no text or symbols present)5.17 L 40 SC, L42 SC

natural_image
Simple line drawing of a basket with no text or symbols
natural_image
Simple line drawing of a rectangular box with a handle and base, no text or symbols present.
natural_image
Simple line drawing of a rectangular box with a curved arrow indicating rotation or movement (no text or symbols)LV
6. Funkcijas
text_image
QR code image containing encoded data, no visible human-readable text
text_image
QR code image containing encoded data, no visible human-readable textnatural_image
Isometric line drawing of a rectangular box with a 1x multiplier label (no text or symbols on the diagram itself)


natural_image
Isometric line drawing of a rectangular box with a 1x angular measurement indicator (no text or symbols on the diagram itself)
3×

3×
3×

3×

1×

1×
natural_image
Technical line drawing of a rectangular frame with dimension label (105 mm) at the bottom, no other text or symbols present.3.4 L 40 SC
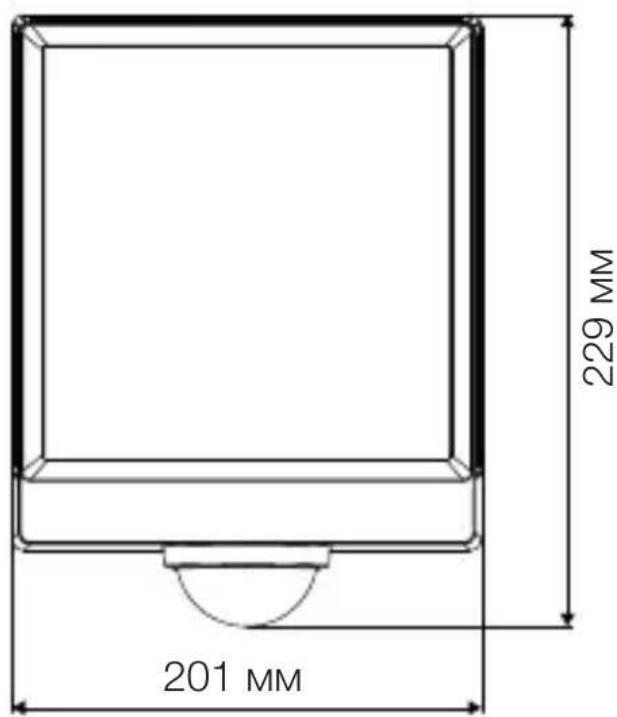
text_image
201 MM 229 MM
text_image
105 MM3.5 L 42 C

text_image
131 MM 274 MM
text_image
105 MM3.6 L 42 SC

text_image
306 MM 131 MM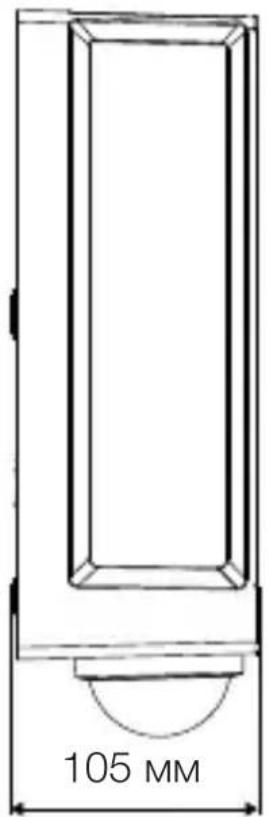
text_image
105 MMПреглед на уреда
3.7 L 40 C, L 42 C

text_image
A Btext_image
L N L N PE
text_image
L N L N PE⊕text_image
≤ 10 M 2 Mtext_image
Technical diagram of an electrical enclosure with labeled components and directional arrows indicating movement or forcetext_image
Technical diagram showing wiring connection to an electrical panel with labeled components and a magnified inset of the circuit.natural_image
Technical diagram showing a mechanical component with a rotating shaft and a circular feature, no text or symbols present.natural_image
Line drawing of a rectangular device with sound waves and a human figure, no text or symbols presentnatural_image
Simple line drawing of a basket with grid pattern (no text or symbols)
natural_image
Line drawing of a rectangular box with a curved base and top edge (no text or symbols)5.14 L 40 SC, L 42 SC

natural_image
Technical line drawing of a mechanical component with a circular base and a downward arrow indicating force or motion (no text or symbols)5.15 L 40 SC, L 42 SC

text_image
1. 2.
natural_image
Technical line drawing of a mechanical assembly with an arrow indicating direction (no text or symbols)5.16 L 40 SC, L 42 SC

natural_image
Diagram showing a container with a sphere above it, indicating a fluid or material flow (no text or symbols present)5.17 L 40 SC, L 42 SC
natural_image
Simple line drawing of a basket with no text or symbols
natural_image
Simple line drawing of a rectangular box with a handle and base, no text or symbols present.
natural_image
Simple line drawing of a rectangular box with a curved arrow indicating rotation or movement (no text or symbols)6. Функция
text_image
QR code image containing encoded data, no visible human-readable text
text_image
QR code image containing encoded data, no visible human-readable textnatural_image
Isometric line drawing of a rectangular box with a 1× label below (no text or symbols on the diagram itself)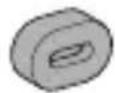
3×
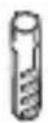
3×
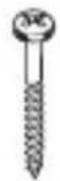
3×
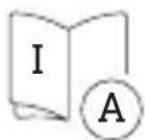
1×
1×
natural_image
Isometric line drawing of a rectangular box with a 1× side label (no text or symbols on the diagram itself)
3×

3×

3×

3×

1×

1×
natural_image
Technical line drawing of a rectangular frame with a 105 mm dimension label (no other text or symbols)3.4
L 40 SC
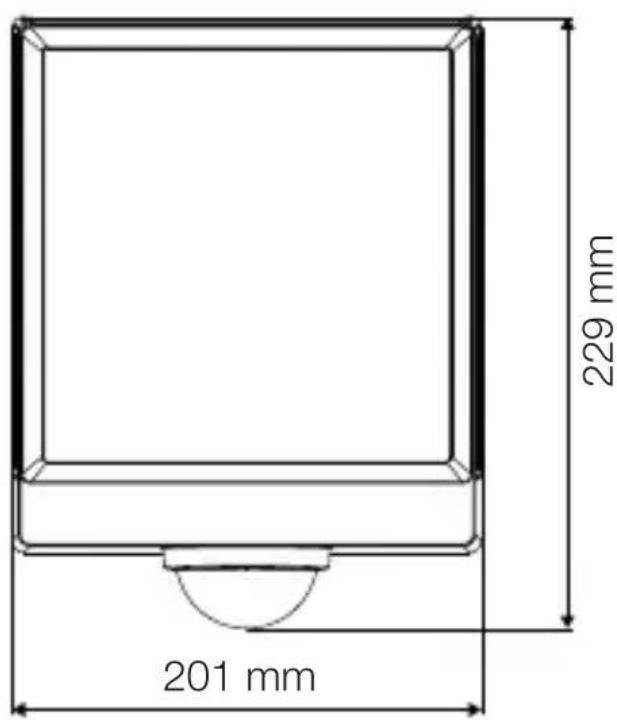
text_image
201 mm 229 mm
text_image
105 mm3.5
L 42 C
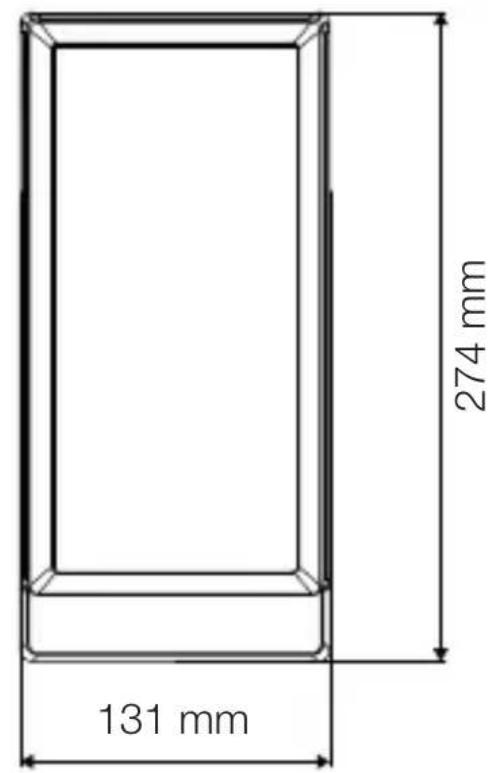
text_image
131 mm 274 mm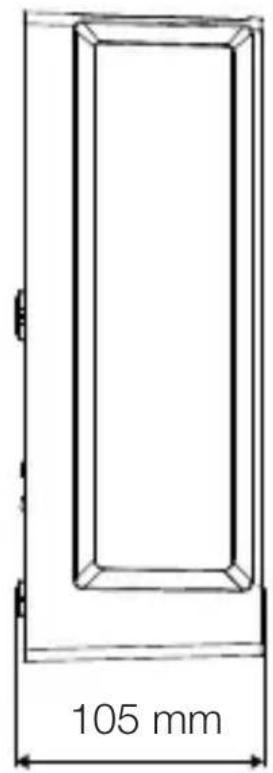
text_image
105 mm3.6
L 42 SC

text_image
306 mm 131 mm
text_image
105 mm设备概览
3.7
L 40 C、L 42 C

text_image
A BA 连接端子
B 灯
3.8
L 40 SC、L 42 SC
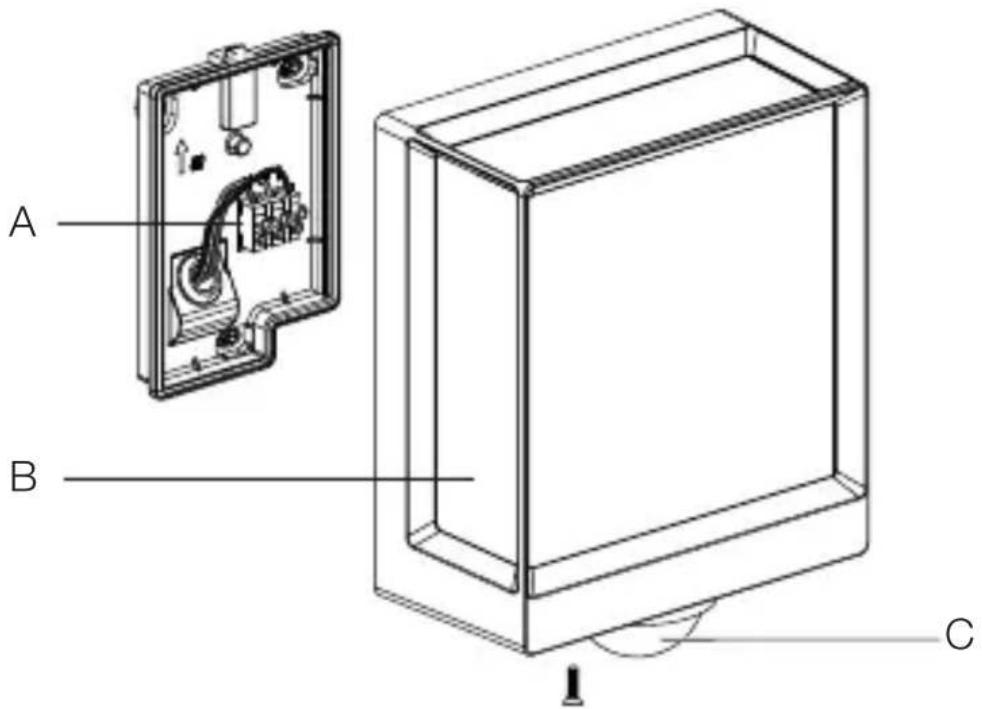
text_image
A B CA 连接端子
B 灯
C 感应器
光分配曲线
3.9
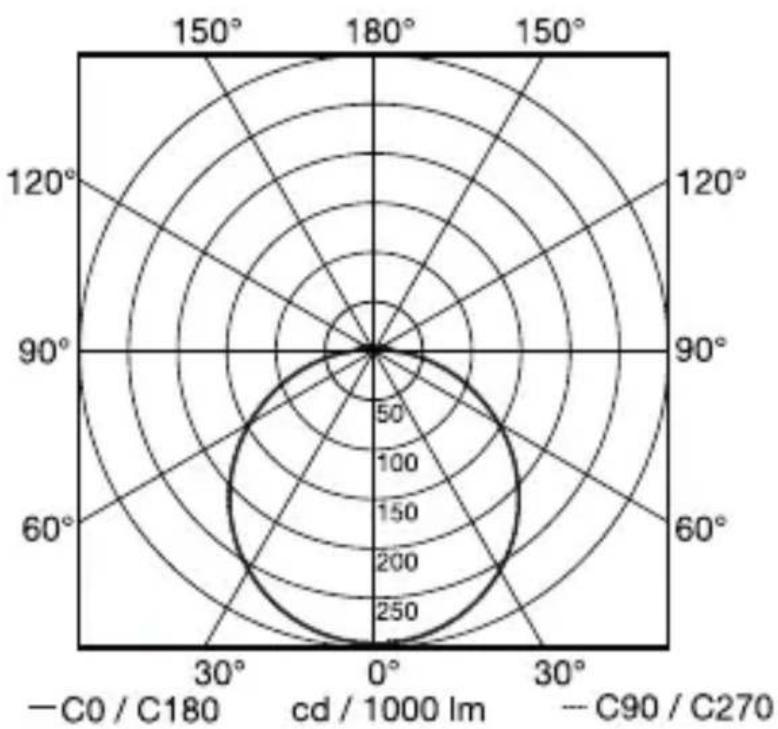
radar
| Angle | Value | |-------|-------| | 0° | 250 | | 30° | 200 | | 60° | 150 | | 90° | 100 | | 120° | 50 | | 150° | 0 |4. 电气连接
电路图
4.1
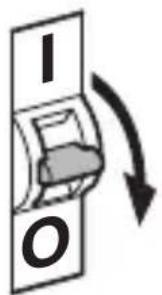
text_image
I O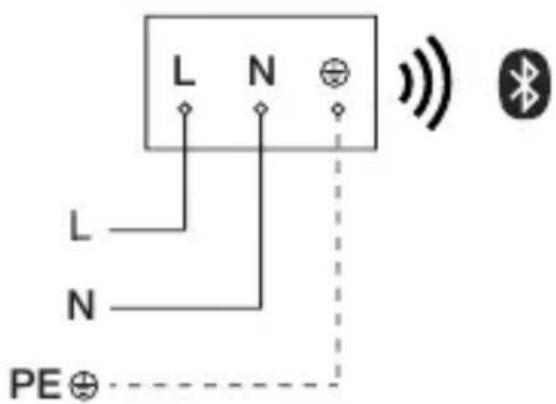
text_image
L N L N PE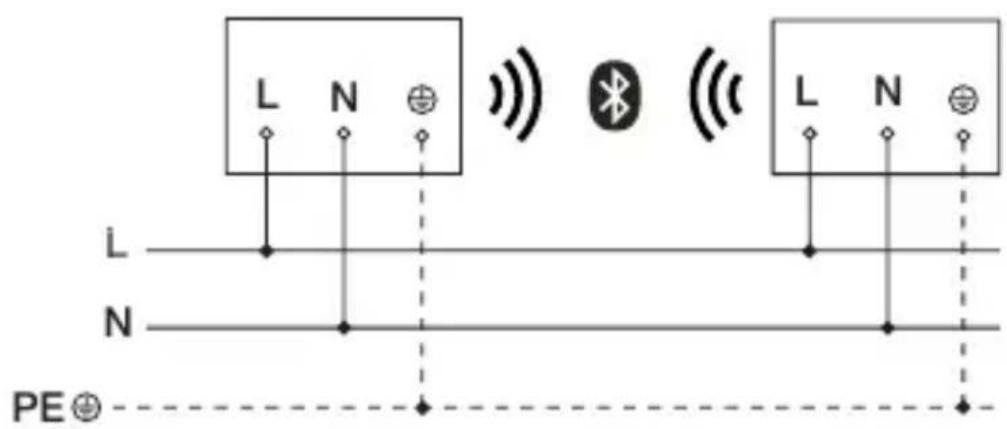
text_image
L N L N PE电源连接线为一根 3 芯电缆
text_image
LED 22 LED5. 安装
触电危险!
接触导电部件可能造成电击、灼伤或死亡。
text_image
≤ 10 m 2 m平行于行走方向的动作检测
5.2
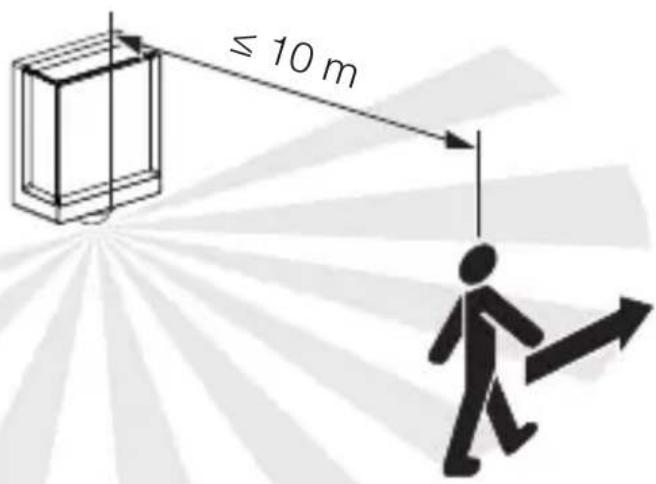
text_image
≤ 10 m正对行走方向的动作检测
5.3
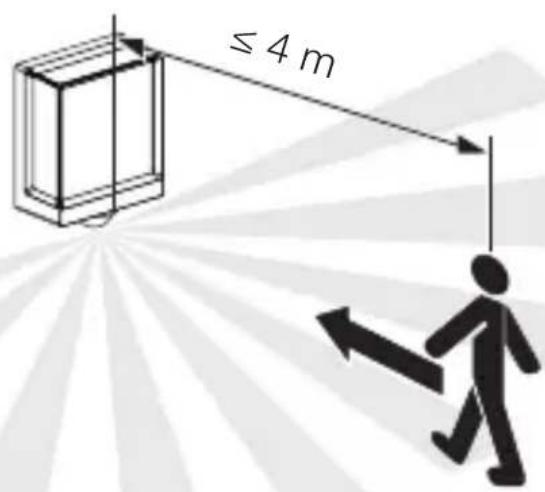
text_image
≤ 4 m安装步骤
5.4
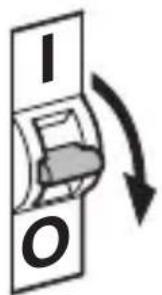
text_image
I O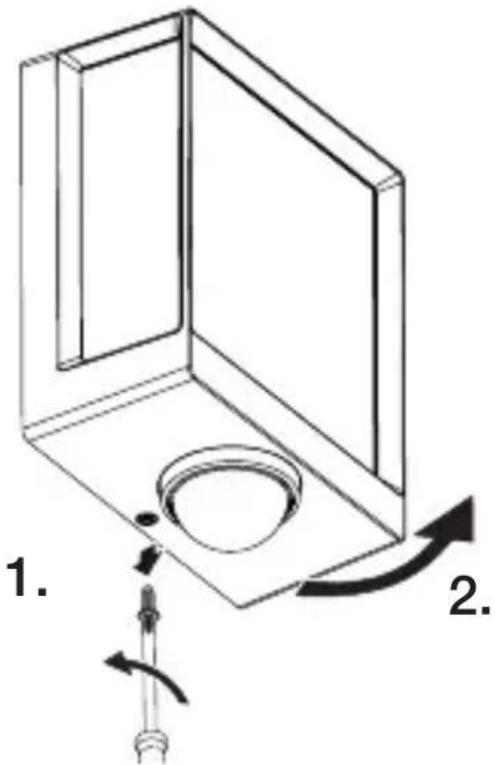
text_image
1. 2.text_image
Technical diagram of an electrical enclosure with labeled components and directional arrows indicating movement or force- 标记钻孔。
CN
5.6

text_image
6 mm Øtext_image
Technical diagram showing wiring connection to an electrical panel with labeled components and a magnified inset of the circuit.- 按照电路图连接电源引线。
→ “4. 电气连接”
5.10
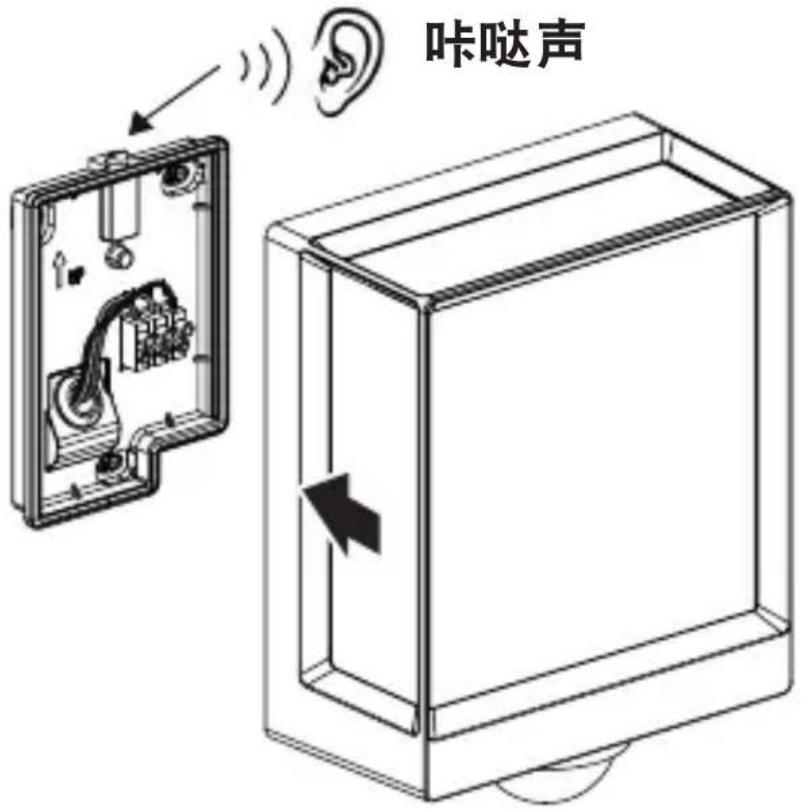
text_image
咔哒声natural_image
Technical diagram showing a mechanical component with a rotating shaft and a circular feature, no text or symbols present.- 拧紧止动螺栓。
5.12
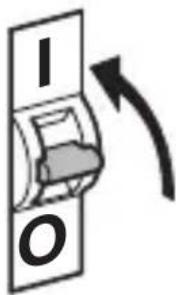
text_image
I O
natural_image
Line drawing of a rectangular device emitting sound waves with a human figure nearby (no text or symbols)natural_image
Simple line drawing of a basket with grid lines (no text or symbols)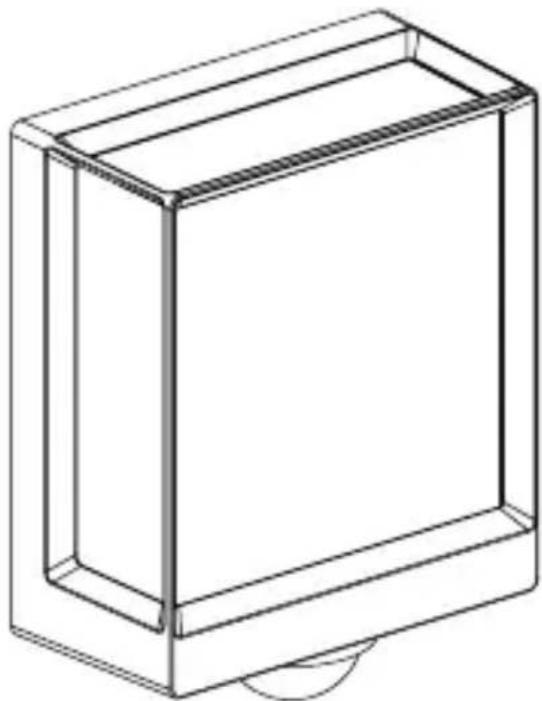
natural_image
Line drawing of a rectangular box with a curved base and top edge (no text or symbols)CN
5.14
L 40 SC、L 42 SC

natural_image
Diagram of a mechanical component with a circular base and a downward arrow indicating force or motion (no text or symbols)5.15
L 40 SC、L 42 SC
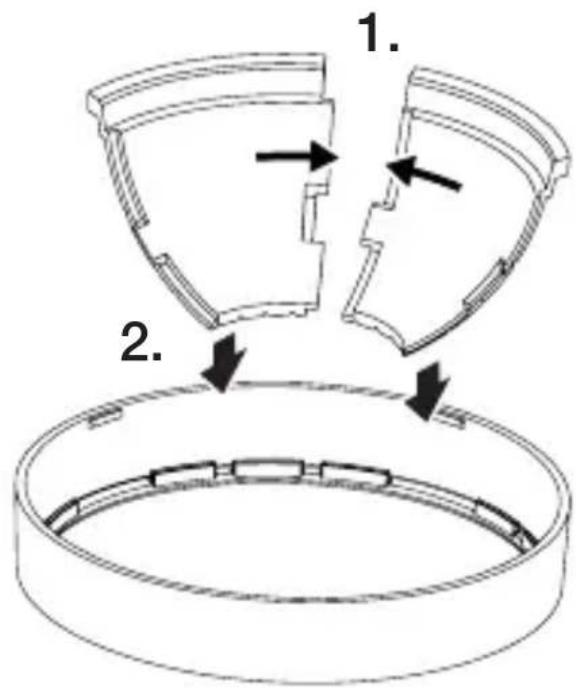
text_image
1. 2.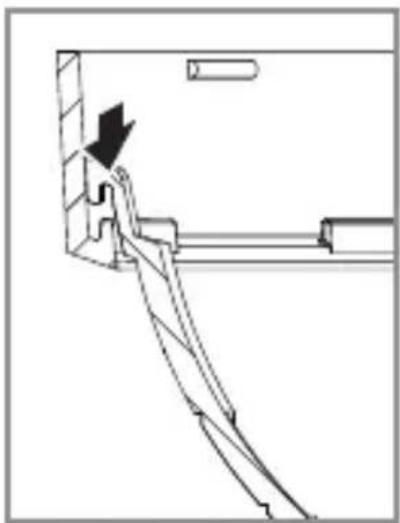
natural_image
Technical line drawing of a mechanical assembly with no visible text or symbols5.16
L 40 SC、L 42 SC
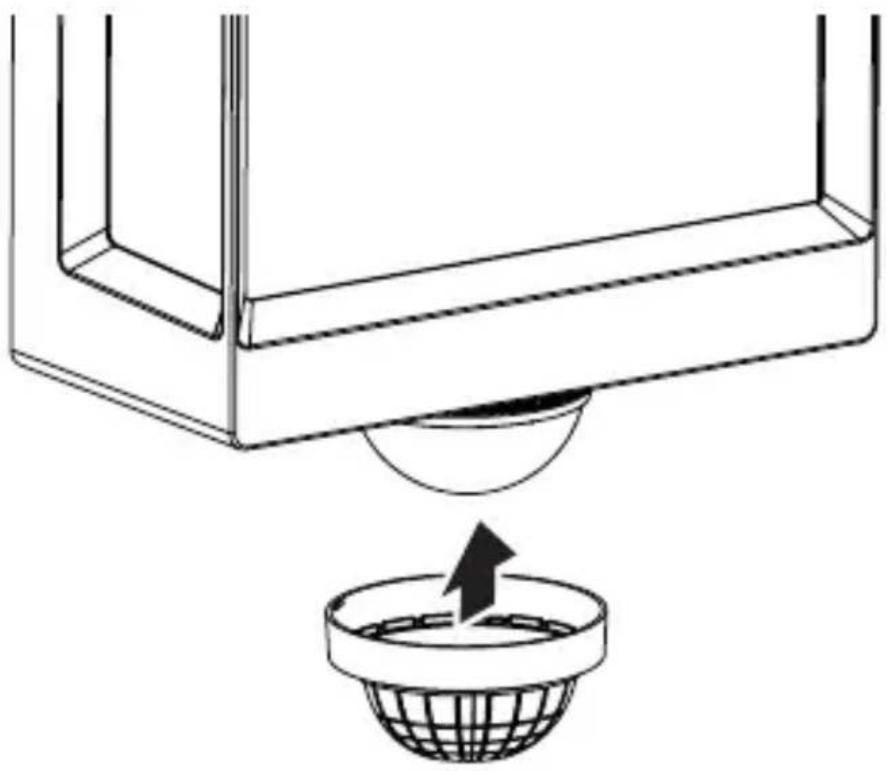
natural_image
Diagram of a container with a sphere submerged in liquid, showing fluid flow direction (no text or symbols)5.17
L 40 SC、L 42 SC
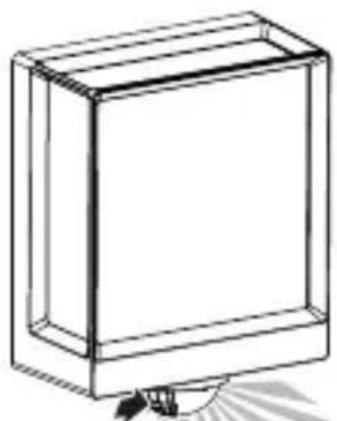
natural_image
Line drawing of a rectangular box with a flat top and bottom, no text or symbols present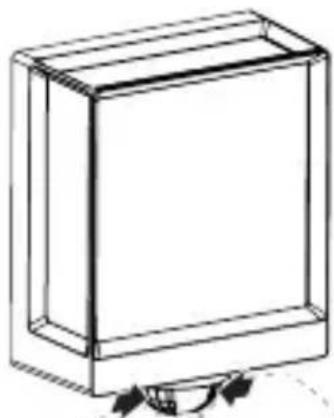
natural_image
Simple line drawing of a rectangular box with a curved arrow at the bottom (no text or symbols)
natural_image
Abstract geometric pattern with radial gray lines and a dashed outline (no text or symbols)
natural_image
Abstract geometric pattern with a dashed oval and three parallel gray shaded segments (no text or symbols)CN
6. 功能
仅可对 SC 型号设置这些功能。
text_image
QR code image containing encoded data, no visible human-readable textiOS

text_image
QR code image containing encoded data, no visible human-readable textL 40 C: 12.90 W
L 40 SC: 12.90 W
L 42 C: 12.60 W
L 42 SC: 13.00 W
L 40 C: 0.44 W
L 40 SC: 0.42 W
L 42 C: 0.44 W
L 42 SC: 0.43 W
L 40 SC: 0.42 W
L 42 SC: 0.43 W
- 光通量 (360°)
L 40 C: 987 lm
L 40 SC: 1,057 lm
L 42 C: 990 lm
L 42 SC: 1,010 lm
- 效率
L 40 C: 76.5 lm/W
L 40 SC: 81.9 lm
L 42 C: 78.6 lm
L 42 SC: 77.7 lm
- 色温:3,000K(暖白)
- 显色指数:R _a=82
- 平均额定使用寿命
natural_image
Isometric line drawing of a rectangular box with a 1x multiplier label (no text or symbols on the diagram itself)


natural_image
Isometric line drawing of a rectangular box with a 1x angular measurement indicator (no text or symbols on the diagram itself)
3×

3×

3×

3×

1×
1×
text_image
L N L N PE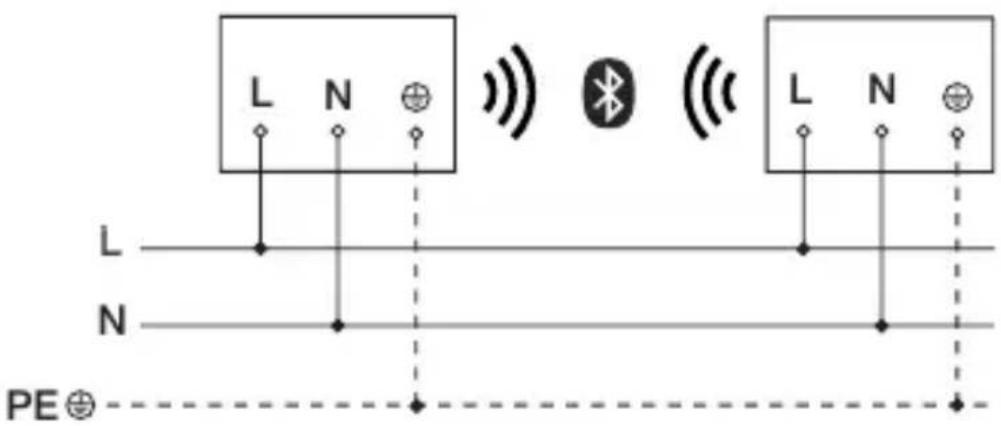
text_image
L N L N PE⊕text_image
LED 22 LED5. Монтаж

text_image
≤ 10 M 2 Mtext_image
Technical diagram of an electrical enclosure with labeled components and directional arrows indicating movement or forcetext_image
Two triangular warning symbols: a lightning bolt symbol and a water drop symbol, commonly used in safety or hazard prevention.
text_image
6 MM Øtext_image
Technical diagram showing wiring connection to an electrical panel with labeled components and a magnified inset of the circuit.natural_image
Technical diagram showing a mechanical component with a rotating shaft and a circular feature, no text or symbols present.natural_image
Line drawing of a rectangular device emitting sound waves with a human figure nearby (no text or symbols)natural_image
Simple line drawing of a basket with no text or symbols
natural_image
Line drawing of a rectangular box with a curved base and top edge (no text or symbols)5.14 L 40 SC, L 42 SC

natural_image
Technical line drawing of a mechanical component with a circular base and a downward arrow indicating force or motion (no text or symbols)5.15 L 40 SC, L 42 SC

text_image
1. 2.
natural_image
Pure mechanical assembly diagram without any text, numbers, or symbols5.16 L 40 SC, L 42 SC

natural_image
Diagram showing a container with a sphere above it, indicating a fluid or material flow (no text or symbols present)5.17 L 40 SC, L 42 SC

natural_image
Simple line drawing of a basket with no text or symbols
natural_image
Line drawing of a rectangular box with a flat top and bottom, no text or symbols present
natural_image
Simple line drawing of a rectangular box with a curved arrow indicating rotation (no text or symbols)6. Эксплуатация
text_image
QR code image containing encoded data, no visible human-readable text