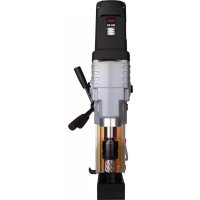
RU25 - Drill RUKO - Free user manual and instructions
Find the device manual for free RU25 RUKO in PDF.

| Product Type | Column Electro-Magnetic Drill |
| Brand | RUKO |
| Model | RU25 |
| Power Supply | Mains 230 V ~ 50 Hz |
| Magnetic Attraction Force | 16,000 N |
| Protection Class | I (with earthing) |
| Main Functions | Drilling, reaming, threading (on equipped models) |
| Safety | Magnet with automatic shut-off on power failure, emergency stop |
| Recommended Protective Equipment | Safety goggles, hearing protection, sturdy shoes, hair net for long hair |
| Maintenance | Regular cleaning, greasing of guides, cable inspection |
| Spare Parts | Original RUKO parts |
| Compliance | CE, directives 2006/42/EC, 2014/30/EU, 2011/65/EU |
| Noise Level | May exceed 85 dB(A) |
| Drilling Materials | Magnetizable ferrous metals (steel, etc.) |
| Operating Positions | Vertical, horizontal, ceiling |
| Tool Holder | EasyLock tool-free |
| Cooling | Integrated cooling device |
| Safety Strap | Provided for overhead use |
| Warranty | 12 months |
Frequently Asked Questions - RU25 RUKO
User questions about RU25 RUKO
0 question about this device. Answer the ones you know or ask your own.
Ask a new question about this device
Download the instructions for your Drill in PDF format for free! Find your manual RU25 - RUKO and take your electronic device back in hand. On this page are published all the documents necessary for the use of your device. RU25 by RUKO.
USER MANUAL RU25 RUKO
FASCINATION: PRECISION®
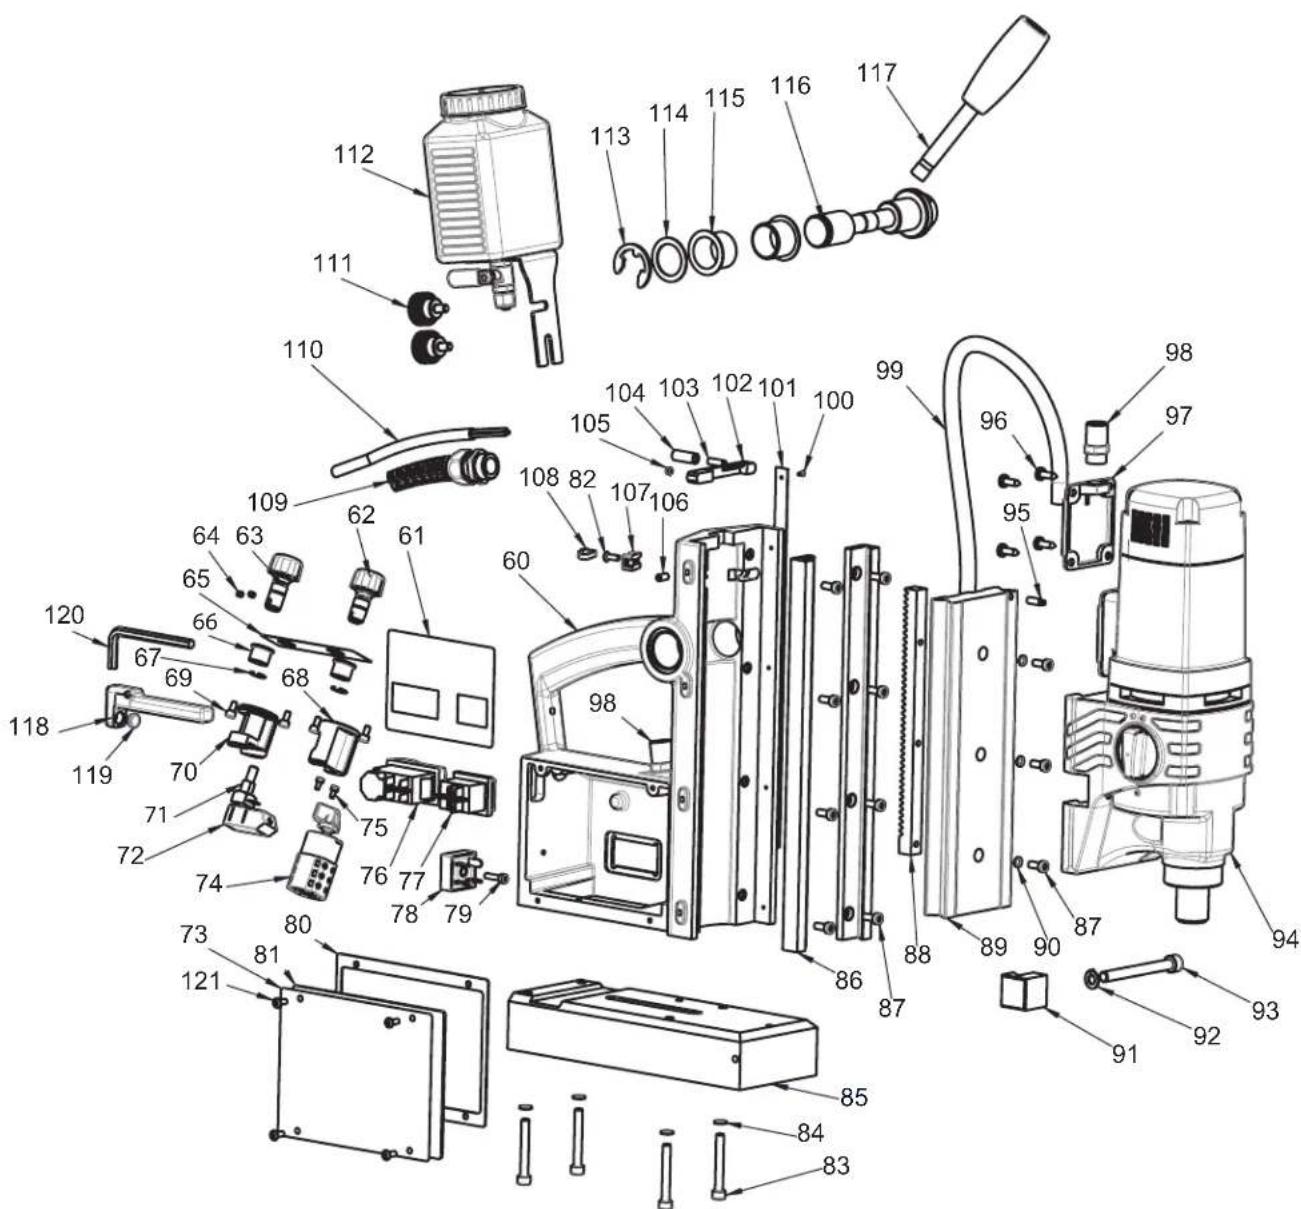
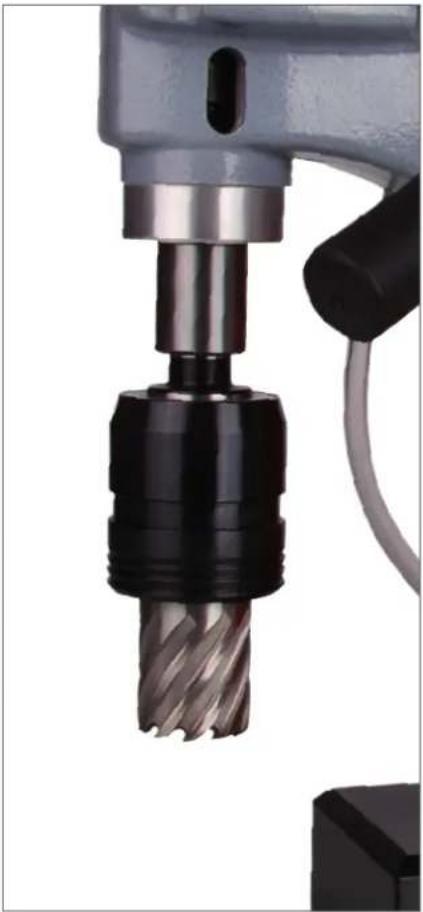
1 Drill chuck / Bohrfutter 1,0 - 16,0 mm
J Sicherheitsgutführung Buckle slot of safety belt
Symbol Term, meaning Explanation

Read documentation
Be absolutely sure to read and understand the enclosed documentation such as Instruction Manual and the General Safety Instructions.

Wear ear protection Use ear protection during operation.

Wear eye protection Use eye-protection(safety goggle) during operation.

Danger/warning/caution Observe the information in the adjacent text!

European conformity symbol
Confirms the conformity of the power tool with the directives of the European Community.
Class of protection I
Product with basic insulation and exposed (touchable), conductive parts additionally connected to the protective earth conductor.
Safety instructions

During work with this machine, improper handling and/or poor maintenance result in significant hazards which can lead to destruction of the machine and serious accidents with considerable injuries. Observe all safety instructions of this operation manual and contact the manufacturer if you have any questions.
During drilling operations on walls and ceilings, the Metal Core Drilling Machine must be safeguarded with the included safety belt. The magnetic adhesion is not maintained in case of a failure of circuit.
The cut core will be ejected automatically by the ejector pin. The ejector pin could possibly break in case of improper use
Only use undamaged power cord and extension cords and regularly check on damages. Danger of an electric shock!
Power supply and voltage details at the device must correspond.
When working with this device, wear the following protection equipment: Safety goggles, appropriate footwear, ear protection, hair net (for long hair), gloves, possibly also apron and safety helmet.
The place of installation for the magnet foot must be clean and rustfree. Remove lacquer and filler.
Do not execute any electric welding on the workpiece on which the Metal Core Drilling Machine is used. Prior to all operations mount coolant unit.

People with cardiac pacemakers or other medical appliances may only use this machine following approval by their physician.

Never touch rotating parts! Keep hands and fingers away from the work area while the motor is running! Failure to do so can result in severe injuries!
The RUKO magnetic-stand drilling machines RU25
natural_image
Close-up of a red and black mechanical device with visible blades and mounting holes (no text or symbols)Ergonomic handles for easy portability.
natural_image
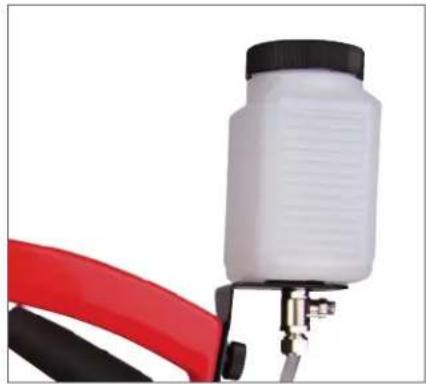
Close-up of a spray gun with white spray bottle and black cap, attached to red and black tool (no text or symbols visible)Integrated coolant bottle with intelligent coolant supply.
natural_image
Close-up of a drill bit with a black and black drill bit inserted into a cylindrical workpiece (no text or symbols visible)With the EasyLock arbor, the core drill gets automatically locked.

natural_image
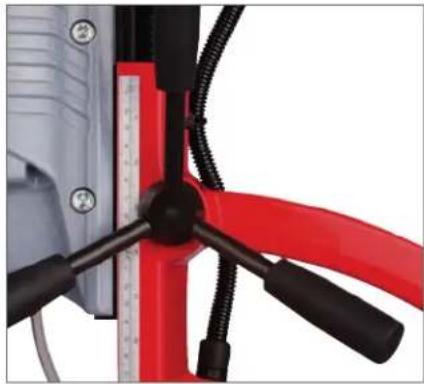
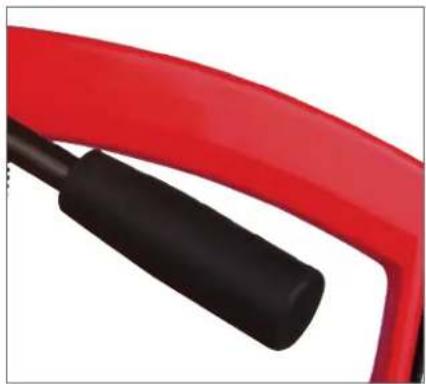
Close-up of a red and black object with a curved handle, possibly a tool or device (no visible text or symbols)Better handling due to ergonomic carrying handle.
natural_image
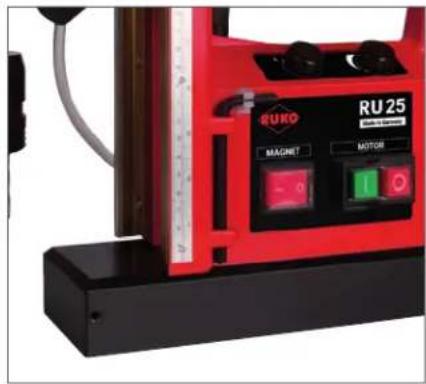
Red and black industrial machine labeled RU25 with control buttons (MAGNET, MOTOR) and a scale bar (no readable text beyond branding)Magnet with 16.000 N clamping force and larger contact.
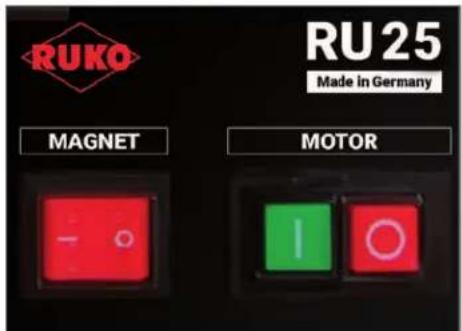
Turning machine ON and OFF
The control panel on your magnetic drilling machine is designed for maximum operating facility and safety.
1 - The ON Switch (GREEN):
This (upper) switch is used to switch the motor unit On ("I");
2 - The OFF Switch (RED)
This (lower) switch is used to switch the motor unit Off ("O");
3 - The Magnet Switch (RED):
This switch is used to turn on the main power and also to switch the magnet On and Off.
Assembling
The magnetic drilling units are supplied with a high powered electromagnet as well as a reclosure preventing device for the drilling mechanism. The magnetic drilling units correspond to protection class I with conductor according to IEC 745. The drilling mechanisms that have been developed according to DIN VDE 0740 and IEC 745-1 are radio screened according to EN 55014 and EN 61000 and are designed for continuous operation: It is possible that the sound level exceeds 85 dB (A). In this case special sound protection is necessary for the user. Indications concerning the sound level of the drilling units are based on DIN 45 649 part 2, DIN 45 635 part 21 and DIN EN 27 574 (ISO 7574).
The precise adjustment allows an exact adjustment of the drilling tool within the movable field. The adjustable dovetail guidance with wear resisting brass guide beads allows a precise guidance of the drilling mechanism. This ensures light and regular feed. The drill feed is made manually with the handle.
Application of the drilling unit RU25 + RU40
The magnetic drilling units are designed for drilling and thread cutting (with reversing adapter) on workpieces with magnetic properties for horizontal, vertical or overhead work. These drilling units with their rectangular footing are especially adapted for drilling in structural steel. The drilling unit should be placed on an even spot on the workpiece. This spot may be unworked. Loose rust and cinder as well as varnish and flat coats have to be removed. If material thinner than 1/2" (12.0 mm) is drilled, a steel plate should be put under the workpiece to reinforce the magnetic power.
Never put the running magnetic drilling unit on insulating material (e.g. wood, concrete, etc.). The insufficient heat dissipation may cause overheating and destruction of the electromagnet. Be aware that the magnetic clamping force is not retained after an interruption of the electricity supply (power failure, pulling of the plug). The magnetic drilling units may not be used while arc welding is carried out on the workpiece. The welding current could damage the magnetic drilling unit. The magnetic drilling units have a locking device that prevents the machine from starting automatically. This locking device ensures that after pressing the red switch only the electromagnet is supplied with electricity.
The drilling mechanism is only supplied with electricity after pressing the green switch. It is only now that the drilling mechanism can work.
If the electricity supply is interrupted (caused for example by a damaged supply line or by pressing the red switch) the drilling mechanism remains without electricity even after the interruption is over or the red switch has been pressed again. To supply the drilling mechanism with electricity again you have to press the green switch once more. The drilling mechanism starts working.
Maintenance
Damaged parts have to be replaced by original spare parts. All gliding surfaces have to be oiled quarterly after cleaning. Lateral play can be balanced by adjusting the set screws. For optimal cooling the ventilating valves of the drilling mechanism have to be kept free from dirt and dust. Please note that electric devices may only be repaired, maintained and checked by electric experts, as improper repairs can endanger the user!
For ordering spare parts it is necessary to indicate our order number or to send us a sample and indicating the serial number, machine type and voltage.
Before putting into operation
Plug the cable into a suitable supply. Check the correct voltage!
If you are using an extension cable please check if it is suitable for the machine's rated input power!
Attention: For vertical and overhead drilling work it is absolutely necessary to wear the enclosed safety belt.
Putting into operation
Position the drill bit over the drilling point. Switch the magnetic drilling unit on by pressing the red switch. The magnetic field that is created keeps the drilling unit clamped to the workpiece. Before drilling check if the magnetic drilling unit clamps safely to the workpiece.
Magnetic drilling units with the possibility of precise adjustment (see technical data) allow an exact positioning of the drill bit even after the electromagnet has been switched on. For this it is necessary to loosen the lever of the precise adjustment device. The drilling mechanism can now be moved and adjusted on the electromagnet. After the drill bit has been adjusted the lever is fastened and the adjusted position is fixed. With machines with more than one gear adjust the rotation speed of the engine according to the tool to be used.
Attention: Change rotation speeds only when the drilling mechanism is not working! The speeds are indicated by a single or double symbols on the changeover switch. The changeover can be helped by gently turning the work spindle by hand. For drill drive units which also have electronic speed controllers, the speed and power (torque) can be continuously adjusted at the corresponding controller on the drill drive unit.
Note: also read and follow the additional information provided under Drill drive type RS 40e.
For drill drive units with electronic speed controllers, the speed is adjusted at the corresponding set wheel on the control panel of the drill stand. For drill drives with the forward and reverse feature (types RS 40e only) the direction is changed via the black switch on the control panel of the drill stand. Position „R“ is for clockwise and Position „L“ is for the anticlockwise rotation. Note: The direction of rotation must only be changed when the drill drive is switched off. The switch is for turning on the drilling mechanism (green light up ON).
Please note: The drilling mechanism can only be started after the electromagnet has been switched on. Drill feed is made manually by moving the handles. To avoid overloading of the magnetic drilling unit or to avoid premature wear of the tool it is necessary to adjust the drilling pressure. After each cut chips and/or drilling cores have to be removed. Cooling/lubrication has to be made according to the tool used. Please take care to use not more cooling/lubrication paste than necessary and that it does not get into the drilling mechanism.
After usage the magnetic drilling units should be stored in a vertical position so that the gear oil may spread evenly.
Attention: Please read this manual carefully before using the drilling unit
The drilling units may only be used according to their determination. The use of the drilling unit as a lifting magnet is dangerous and absolutely inadmissible. The use for another purpose than what is determined endagers people and the machine.
Please note also the following safety instructions for electric tools.
Attention: Before the use of electric tools please note the following basic safety instructions to avoid electric shock, injuries and fire. Read and follow these instructions before using the electric tool.
- Keep your working area tidy.
A working area that is not cleared up causes danger of accidents.
- Consider external influences.
Do not expose electric tools to rain. Do not use electric tools in damp or wet surroundings. Good lighting is important.
Do not use electric tools near inflammable fluids or gases.
- Protect yourself from electric shock.
Avoid body contact to earthed parts like pipes, radiators, ovens, fridges.
- Keep away from children.
Do not let other people touch the tool or the cable - keep them from your working area.
- Keep your electric tools in a safe place.
Unused tools should be kept in a dry, closed space out of the reach of children.
- Do not overload your electric tools.
You will work better and safer within the indicated power range.
- Use the right tool.
Do not use tools week in power for heavy strains. Do not use tools for purposes other than determined, e.g. do not use a circular saw for felling
a tree or cutting branches.
- Use suitable working clothes.
Do not wear loose clothing or jewelry. They could be caught by moving parts of the tool.
If you are working outdoors it is recommendable to wear rubber gloves and non-slipping shoes. If you have long hair wear a hair-net.
- Use protective goggles.
Also use a breathing mask when carrying out work that produces dust.
- Do not use the cable for other purposes.
Do not use the cable for carrying the tool and do not use it to pull the plug out of the socket.
Protect the cable from heat, oil and cutting edges.
- Secure your workpiece.
Use a fastening device or a vise to fix the workpiece.
The workpiece is better fixed than by hand and it makes it possible to use the tool with both hands.
- Do not lean too far over the machine.
Take care to keep a normal position. You should have a secure standing position and you should keep your balance.
- Maintain your tools carefully.
Keep your tools sharp and clean - working with them will be better and safer. Follow the maintenance instructions and indications concerning
the replacement of tools. Check the cable regularly and in case of damage let it replace by an expert. Also check extension cables regularly
and replace them if they are damaged. Keep handles dry and free from oil and grease.
- Pull the plug out of the socket.
If you do not use the machine, before maintenance, while changing tools like saw blades, drills or any kind of machine tools.
- Remove tool keys.
Before turning the machine on, make sure that all keys and adjustment tools are removed.
- Avoid turning on the machine inadvertently.
Do not carry tools that are plugged in with your finger on the switch. Make sure the switch is on "off" position while plugging in the tool.
- Extension cables outdoors.
Only use extension cables that are authorized to be used outdoors and that are accordingly marked.
- Always take care.
Control your work. Be sensible and do not use the tools when you have difficulties in concentrating.
- Check if your appliance shows damages.
Before further use of the tool please check if safety appliances or damaged parts are working correctly. Check if the moving parts function correctly, if they move without problems, if no parts are broken, if all other parts are fixed correctly and if all other conditions that influence the working of the machine are fulfilled. If the use instruction does not say otherwise the damaged safety appliances and parts should be either repaired or replaced correctly. Damaged switches have to be replaced. Do not use tools where the switches cannot be set to "on" or "off".
- Attention!
For your own safety only use accessories and attachments that are indicated in the use instruction or are offered in the according catalogue.
The use of tools or accessories other than recommended by the use instruction may be dangerous.
- Repairs should be carried out only by experts
Electric tools are subject to the according safety regulations.
Repairs may only be carried out by an expert, otherwise the user runs the risk of accidents.
Please keep these instructions carefully.
Guarantee:
The Manufacturer default warranty period is 12 months after date of delivery. Proof is the invoice.
Condition is that the machine has been used, maintained and cleaned correctly and that no repairs by others have been made.
The guarantee is limited to repairs free of charge or replacements of the damaged parts that are caused by material defects or production faults.
Parts that have been damaged by normal wear or repairs made by oneself or others are not subject to this guarantee.
This guarantee is only valid if the correct tools, original accessories and spare parts have been used.
All other claims are excluded, i.e. RUKO is not liable for direct or indirect defects, damages caused by defects, losses or costs that may arise from the use or the impossibility to use the machine for a certain purpose.
Tacit assurances concerning the use or aptability for a certain purpose are not possible. If a defect is noted the machine has to be sent to
RUKO GmbH as quickly as possible for repair. All earlier verbal or written guarantee declarations are replaced by the above mentioned guarantee.
Declaration of conformity:
We declare in sole responsibility that the product sold by us is in accordance with the following technical norms or normative documents:
Machinery Directive: 2006/42/EC
Low Voltage Directive: 2006/95/EC
Electro-magnetic compatibility (EMC): 2014/30/EU
RoHs Directive: 2011/65/EU
Following directives or normative documents were applied:
EMC Directive:
EN 55014-1:2006+A1:2009+A2:2011
EN 55014-2:1997+A1:2001+A2:2008
EN 61000-3-2:2014
EN 61000-3-3:2013
RoHs Directive:
EN 50581:2012
Authorized for the compilation of the documents:
The description of operation is described in the operation instructions.
natural_image
Abstract blue line drawing with overlapping ovals and a small mark (no text or symbols)Ali Dagic Management
natural_image
Close-up of a red and black mechanical device with visible blades and mounting holes (no text or symbols)natural_image
Close-up of a spray gun with white spray bottle and black cap, attached to red and black tool (no text or symbols visible)natural_image
Close-up of a drill bit with a black and black drill bit inserted into a cylindrical workpiece (no text or symbols visible)natural_image
Close-up of a red and black object with a curved handle, possibly a tool or device (no visible text or symbols)natural_image
Red and black industrial machine labeled RU25 with control buttons (MAGNET, MOTOR) and a scale bar (no readable text beyond branding)Aufbau
natural_image
Abstract blue line drawing with overlapping ovals and a small mark (no text or symbols)natural_image
Close-up of a red and black mechanical device with visible blades and mounting holes (no text or symbols)natural_image
Close-up of a spray gun with white spray bottle and black cap, attached to red and black tool (no text or symbols visible)natural_image
Close-up of a drill bit with a black and black drill bit inserted into a cylindrical workpiece (no text or symbols visible)natural_image
Close-up of a red and black object with a curved handle, possibly a tool or device (no visible text or symbols)natural_image
Red and black industrial machine labeled RU25 with control buttons (MAGNET, MOTOR) and a scale bar (no readable text beyond branding)Conception
natural_image
Abstract blue line drawing with overlapping ovals and a small arrow (no text or symbols)Ali Dagic
Direction
natural_image
Close-up of a red and black mechanical device with visible blades and mounting holes (no text or symbols)natural_image
Close-up of a spray gun with white spray bottle and black cap, attached to red and black tool (no text or symbols visible)natural_image
Close-up of a drill bit with a black and black drill bit inserted into a cylindrical workpiece (no text or symbols visible)natural_image
Close-up of a red and black object with a curved handle, possibly a tool or device (no visible text or symbols)natural_image
Red and black industrial machine labeled RU25 with control buttons (MAGNET, MOTOR) and a scale bar (no readable text beyond branding)Opbouw:
natural_image
Abstract blue line drawing with overlapping ovals and a small mark (no text or symbols)natural_image
Close-up of a red and black mechanical device with visible blades and mounting holes (no text or symbols)natural_image
Close-up of a spray gun with white spray bottle and black cap, attached to red and black tool (no text or symbols visible)natural_image
Close-up of a drill bit with a black and black drill bit inserted into a cylindrical workpiece (no text or symbols visible)natural_image
Close-up of a red and black object with a curved handle, possibly a tool or device (no visible text or symbols)natural_image
Red and black industrial machine labeled RU25 with control buttons (MAGNET, MOTOR) and a scale bar (no readable text beyond branding)Opbygning
natural_image
Abstract blue line drawing with overlapping ovals and a small mark (no text or symbols)natural_image
Close-up of a red and black mechanical device with visible blades and mounting holes (no text or symbols)natural_image
Close-up of a spray gun with white spray bottle and black cap, attached to red and black tool (no text or symbols visible)natural_image
Close-up of a drill bit with a black and black drill bit inserted into a cylindrical workpiece (no text or symbols visible)El porta asiento rápido Easylock retiene automáticamente la broca hueca.

natural_image
Close-up of a red and black object with a curved handle, possibly a tool or device (no visible text or symbols)natural_image
Red and black industrial machine labeled RU25 with control buttons (MAGNET, MOTOR) and a scale bar (no readable text beyond branding)Montaje
natural_image
Abstract blue line drawing with overlapping ovals and a small mark (no text or symbols)natural_image
Close-up of a red and black mechanical device with visible blades and mounting holes (no text or symbols)natural_image
Close-up of a spray gun with white spray bottle and black cap, attached to red and black tool (no text or symbols visible)natural_image
Close-up of a drill bit with a black and black drill bit inserted into a cylindrical workpiece (no text or symbols visible)natural_image
Close-up of a red and black object with a curved handle, possibly a tool or device (no visible text or symbols)natural_image
Red and black industrial machine labeled RU25 with control buttons (MAGNET, MOTOR) and a scale bar (no readable text beyond branding)Installazione
natural_image
Abstract blue line drawing with overlapping ovals and a small mark (no text or symbols)natural_image
Close-up of a red and black mechanical device with visible blades and mounting holes (no text or symbols)natural_image
Close-up of a spray gun with white spray bottle and black cap, attached to red and black tool (no text or symbols visible)natural_image
Close-up of a drill bit with a black and black drill bit inserted into a cylindrical workpiece (no text or symbols visible)natural_image
Close-up of a red and black object with a curved handle, possibly a tool or device (no visible text or symbols)natural_image
Red and black industrial machine labeled RU25 with control buttons (MAGNET, MOTOR) and a scale bar (no readable text beyond branding)Montagem
natural_image
Abstract blue line drawing with overlapping ovals and a small mark (no text or symbols)natural_image
Close-up of a red and black mechanical device with visible blades and mounting holes (no text or symbols)natural_image
Close-up of a spray gun with white spray bottle and black cap, attached to red and black tool (no text or symbols visible)natural_image
Close-up of a drill bit with a black and black drill bit inserted into a cylindrical workpiece (no text or symbols visible)natural_image
Close-up of a red and black object with a curved handle, possibly a tool or device (no visible text or symbols)natural_image
Red and black industrial machine labeled RU25 with control buttons (MAGNET, MOTOR) and a scale bar (no readable text beyond branding)Konstrukce
natural_image
Abstract blue line drawing with overlapping ovals and a small mark (no text or symbols)natural_image
Close-up of a red and black mechanical device with visible blades and mounting holes (no text or symbols)natural_image
Close-up of a spray gun with white spray bottle and black cap, attached to red and black tool (no text or symbols visible)natural_image
Close-up of a drill bit with a black and black drill bit inserted into a cylindrical workpiece (no text or symbols visible)natural_image
Close-up of a red and black object with a curved handle, possibly a tool or device (no visible text or symbols)natural_image
Red and black industrial machine labeled RU25 with control buttons (MAGNET, MOTOR) and a scale bar (no readable text beyond branding)Budowa
natural_image
Abstract blue line drawing with overlapping ovals and a small curved mark (no text or symbols)natural_image
Close-up of a red and black industrial machine component with visible blades and wiring (no text or symbols)natural_image
Close-up of a spray gun with white plastic bottle and black cap, attached to red and black cable (no text or symbols visible)natural_image
Close-up of a drill bit with a metallic drill bit inserted into a black cylindrical block (no text or symbols visible)natural_image
Close-up of a red and black object with a curved handle, possibly a tool or device (no text or symbols visible)natural_image
Red industrial machine labeled RU25 with control buttons (MAGNET, MOTOR) and a ruler on top (no visible text beyond branding)Конструкция
natural_image
Abstract blue line drawing with overlapping ovals and a small curved mark (no text or symbols)natural_image
Close-up of a red and black mechanical device with visible blades and mounting holes (no text or symbols)natural_image
Close-up of a spray gun with white plastic bottle and black cap, attached to red and black tool (no text or symbols visible)natural_image
Close-up of a drill bit with a black and black drill bit inserted into a cylindrical workpiece (no text or symbols visible)Kolay kilitlenen (EasyLock) mandren sayesinde manyetik matkap ucu otomatik olarak kilitlenir.
natural_image
Close-up of a red and black object with a curved handle, possibly a tool or device (no visible text or symbols)natural_image
Red and black industrial machine labeled RU25 with control buttons (MAGNET, MOTOR) and a scale bar (no readable text beyond branding)Montaj
natural_image
Abstract blue line drawing with overlapping ovals and a small mark (no text or symbols)natural_image
Close-up of a red and black mechanical device with visible blades and mounting holes (no text or symbols)natural_image
Close-up of a spray gun with white plastic bottle and black cap, attached to red and black tool (no text or symbols visible)Integrirana boca za rashladno sredstvo sa intelligentnim prinošenjem rashladnog sredstva.

natural_image
Close-up of a drill bit with a black and black drill bit inserted into a cylindrical workpiece (no text or symbols visible)natural_image
Close-up of a red and black object with a curved handle, possibly a tool or device (no visible text or symbols)natural_image
Red and black industrial machine labeled RU25 with control buttons (MAGNET, MOTOR) and a scale bar (no readable text beyond branding)Magnet s adhezijskom silom od 16 000 N i većom dodirnom površinom.
Standardi
Magnetni strojevi za bušenje imaju snažne elektromagnete sa sigurnostnim sasatavom u vezi sa strojem za bušenje.
Magnetni strojevi za bušenje odgovaraju zaštitnom razredu I i ispunjavaju zahtjeve po IEC 745. Stroj za bušenje odgovara zahtjevima po DIN VDE 0740 i IEC 745-1 te zahtjevima po EN 55014 i EN 6100 i su izrađeni za serijsku proizvodnju.
Moguč je porast zvuka preko 85 dB (A). U tom slučaju, obavezna je upotreba zaštite za sluh. Navedbe o jakosti zvuka bazirane su na osnovi DIN 45649 dio 2, DIN 45635 dio 21 i DIN EN 27574 (ISO 7574).
Precizna izrada i tehnologija dozvoljava upotrebu aparata kao mobilni aparat za bušenje. Visoka tehnologija i precizna izrada aparata omogučuje vrlo visoke i kvalitetne rezulate. Rukovanje je jednostavno a pomak kod bušenja je ručni.
Upotreba magnetnih strojeva za bušenje RU25 + RU40
Magnetni strojevi za bušenje izrađeni su za bušenje rupa i za urezivanje navoja (sa dodatnim adapterom) na materijalima na kojima se može pričvrstiti magnet. Bušenje je moguče horizontalno, vertikalno i iznad glave. Kod upotrebe aparata za bušenje iznad glave, obavezna je upotreba sigurnostnog pojasa. Magnetni strojevi za bušenje namijenjeni su bušenju čelika. Strojevi za bušenje mogu se upotrebljavati jedino sa stalkom. Svi dijelovi koje je napala rda ili su oštečeni na kakav drugčiji način, moraju se promijeniti. U slučaju bušenja materijala tanjeg od 12 mm potrebno je ispod materijala staviti dodatan komad čelika zbog pojačanja snage magneta. Nikad ne stavljajte aparat koji radi na materiajle kao što je drvo, cigla, kamen i slično. Ovi materijali ne oduzimaju dovoljno toplote tako da može doči do pregrijavanja magneta i njegovog kvara.
natural_image
Abstract blue line drawing with overlapping ovals and a small curved mark (no text or symbols)Ali Dagic Management
natural_image
Blank white grid paper with no text, numbers, or symbols

- Edition September 2019