
DFP8363BB - Cooker DE DIETRICH - Free user manual and instructions
Find the device manual for free DFP8363BB DE DIETRICH in PDF.
| Product type | Built-in oven |
| Brand | De Dietrich |
| Model | DFP8363BB |
| Dimensions (W x H x D) | 596 x 592 x 560 mm (approximate) |
| Weight | Approximately 40 kg |
| Power supply | 220-240 V ~ 50/60 Hz, 16 A, 3-conductor cable 1.5 mm² |
| Maximum power | Approximately 3.5 kW |
| Oven capacity | Approximately 70 liters (estimate) |
| Cooking modes | Expert (Convection, Combination, Traditional, ECO, Fan Grill, Fan Bottom, Variable Grill, Keep Warm, Defrost, Bread, Drying), Low temperature (10 programs), Recipes (35 or 15 depending on model), Chef (6 automatic dishes) |
| Special functions | Smart Assist (duration suggestion), delayed start, 3-cooking memory, timer, child lock |
| Cleaning | Pyrolysis (3 cycles: PyroExpress 59 min, ECO 1h30, 2h00) with automatic door locking |
| Lighting | Bulb 25 W, 220-240 V~, 300°C, G9 (energy class G) |
| Supplied accessories | Anti-tip safety grid, drip tray 45 mm, multi-purpose dish, baking tray 8 mm, 2 half-grids 'flavor', 2 sliding rails, plastic wedges for window disassembly |
| Safety | Control lock (child safety), automatic shut-off (AS), door locked during pyrolysis, anti-tip system for grids |
| Origin | Made in France (factories in Orléans and Vendôme, Origine France Garantie label) |
| After-sales service | 0 892 02 88 04 (€0.50/min + call charges) or 09 69 39 34 34 (free service + call charges) |
Frequently Asked Questions - DFP8363BB DE DIETRICH
User questions about DFP8363BB DE DIETRICH
0 question about this device. Answer the ones you know or ask your own.
Ask a new question about this device
Download the instructions for your Cooker in PDF format for free! Find your manual DFP8363BB - DE DIETRICH and take your electronic device back in hand. On this page are published all the documents necessary for the use of your device. DFP8363BB by DE DIETRICH.
USER MANUAL DFP8363BB DE DIETRICH
text_image
QR code image containing encoded data, no visible human-readable textDe Dietrich

TABLE DES MATIERES
FR
1/ Installation....6
Interventions France....30
natural_image
Line drawing of a kitchen appliance with a mesh grille and a black arrow pointing to the side (no text or symbols)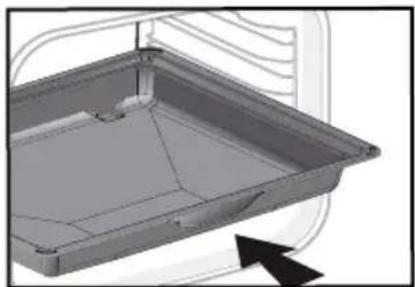
natural_image
3D CAD model of a rectangular tray or enclosure with internal channels and a black arrow pointing to the bottom section (no text or symbols)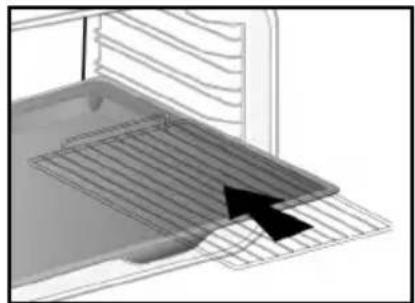
natural_image
3D diagram of a kitchen appliance with a grater and ventilation grille (no text or symbols)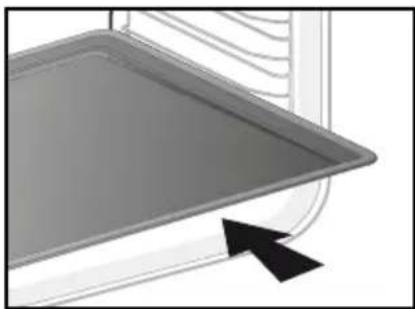
natural_image
Close-up of a gray baking tray with a black arrow pointing to it, no text or symbols visible.• 3 PRESENTATION DU FOUR
natural_image
Diagram of an oven with internal airflow arrows indicating flow or movement (no text or symbols)
natural_image
Mechanical assembly diagram showing a lever mechanism with labeled component A (no text or symbols present)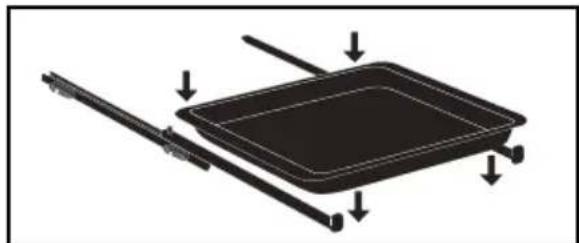
natural_image
Diagram of a rectangular tray with arrows indicating movement or force, no text or symbols present
natural_image
Mechanical assembly diagram showing a lever mechanism with directional arrows and a magnified inset view (no text or symbols)Conseil
natural_image
Two-panel illustration showing a hand holding a grid device, with arrows indicating rotation or movement (no text or symbols)NETTOYAGE DES VITRES DE LA PORTE
natural_image
Illustration of a hand using a tool to adjust or install a component, with no visible text or symbols.text_image
Diagram showing a hand holding a laptop with labeled 'A' and a magnified inset of the device's screen area.Retirez la vitre.
natural_image
Illustration of a hand opening a refrigerator drawer with arrows indicating direction (no text or symbols)text_image
Diagram illustrating a 3D printer with an open lid and a magnified view of the cover, showing directional arrows and a house icon.natural_image
Diagram showing a mechanical component with arrows indicating motion or force, and an inset magnified view of a stepped mechanism (no text or symbols present)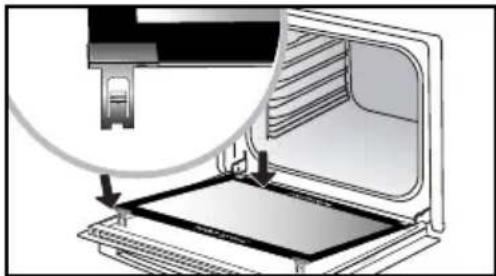
natural_image
Diagram of a 3D printer or printer with an open base and a magnified view showing the printer's internal structure (no text or symbols present)REPLACEMENT DE LA LAMPE
natural_image
Mechanical component diagram showing a rotating shaft and housing (no text or symbols)RELATIONS CONSOMMATEURS FRANCE
text_image
Technical diagram showing a door panel with a magnified inset highlighting a component detail, alongside a vertical label with Chinese text and symbols.| A | B | G | |
| SERVICE: | C | TYPE: D | I CE |
| E | F | ||
| Nr | H | Made in France |
natural_image
Simple illustration of a bowl with a lid and lid, no text or symbols present
natural_image
Illustration of a kitchen appliance inside a container with a clock icon and time label (no text or symbols on the appliance itself)NÁVOD PRO UŽIVATELE
TROUBY

VÁŽENÁ ZÁKAZNICE, VÁŽENÝ ZÁKAZNÍKU
natural_image
Diagram of a kitchen appliance with a grater and a black arrow indicating direction (no text or symbols)natural_image
3D rendering of a rectangular tray with internal compartments and a black arrow pointing to the bottom section (no text or symbols)- Rošty pro št'avnatost
natural_image
Diagram of a kitchen appliance with a black arrow pointing to a grater rack (no text or symbols)natural_image
Close-up of a gray rectangular tray with a black arrow pointing to it, no visible text or symbols.• 3 POPIS TROUBY
text_image
Technical diagram showing a mechanical assembly with labeled components and directional arrows indicating motion or force.Rada Pro
NĚKTERÉ RECEPTY V REŽIMU "ŠÉFKUCHAŘ"
Pizza nízká:
1 těsto na pizzu
natural_image
Illustration of a hand inserting a rack into a device (no text or symbols visible)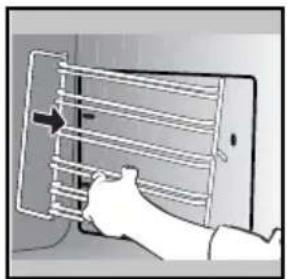
natural_image
Illustration of a hand holding a device with a grid-like structure and an arrow pointing to it (no text or symbols present)VNITŘNÍ PLOCHY SKEL
natural_image
Illustration of a hand using a tool to adjust or install a component, with a magnified view of a device (no text or symbols present)text_image
Diagram illustrating a mechanical or electrical component with labeled parts A, showing hand positioning and magnified detail.Vyjměte sklo.
natural_image
Illustration of a hand opening a refrigerator with a tray and drawer, showing internal compartments (no text or symbols)text_image
Diagram illustrating a device with an open lid and directional arrows indicating movement or process, including a magnified view of the component.natural_image
Diagram showing a mechanical assembly with arrows indicating motion or force direction, no text or symbols present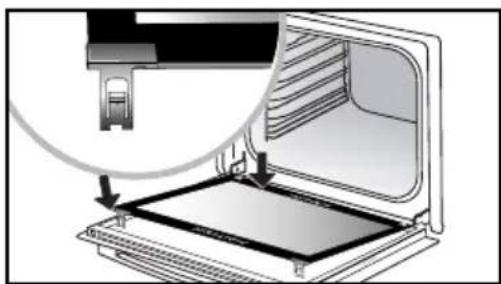
natural_image
Diagram of a laptop with an open screen and cable inserted, showing internal components (no text or symbols)text_image
A A SENSORnatural_image
Mechanical component diagram showing a rotating knob with a handle and base (no text or symbols)text_image
Technical diagram showing a door with a magnified detail and a control panel labeled 'OPEN ACCESS' in Chinese.| A | B | G | |
| SERVICE: | C | TYPE: D | I CE |
| E | F | ||
| Nr | H | Made in France |
ORIGINÁLNÍ NÁHRADNÍ DÍLY
natural_image
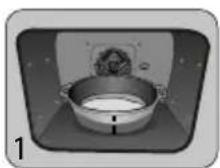
Illustration of a stainless steel pot with a lid and handle, placed on a pedestal (no text or symbols)
natural_image
Illustration of a pot with a lid and a small object above it, no text or symbols present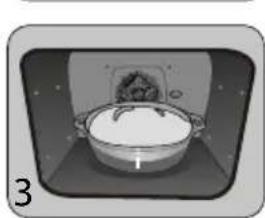
natural_image
Illustration of a cooking pot with a lid and lid placed inside a rectangular frame (no text or symbols)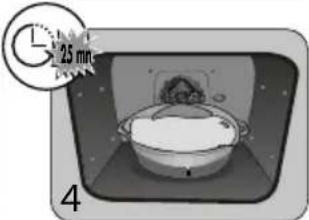
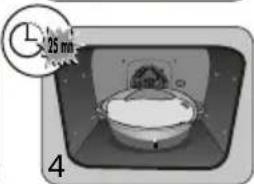
text_image
25 min 4BRUGSANVISNING
OVN
DA
KÆRE KUNDE,
natural_image
Diagram of a kitchen appliance with a grid-patterned tray and an arrow indicating direction (no text or symbols)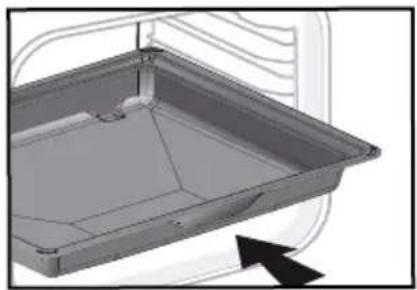
natural_image
3D rendering of a rectangular tray or container with internal structure and an arrow pointing to it (no text or symbols)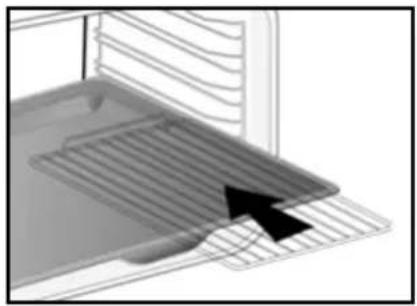
natural_image
Diagram of a kitchen appliance with a black arrow pointing to a slatted tray (no text or symbols)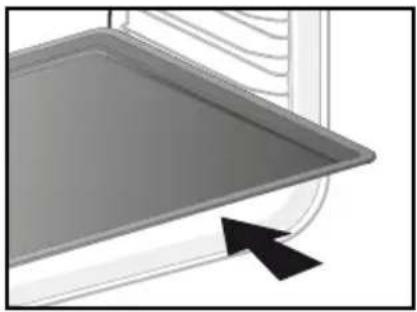
natural_image
Close-up of a gray tray with a black arrow pointing to it, no visible text or symbols• 3 PRÆSENTATION AF OVNEN
natural_image
Diagram of an oven with airflow arrows indicating material or movement (no text or symbols)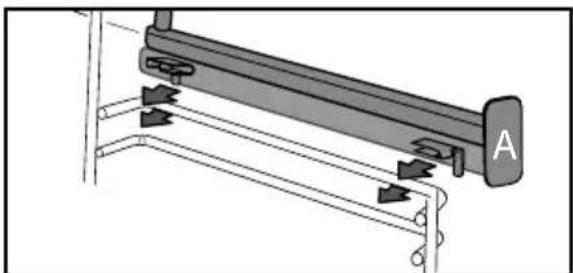
natural_image
Mechanical assembly diagram showing a lever mechanism with labeled component A (no text or symbols beyond label)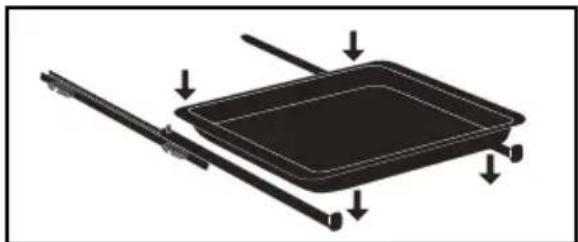
natural_image
Diagram of a rectangular tray with arrows indicating force or movement, no text or symbols present
natural_image
Mechanical assembly diagram showing a lever mechanism with directional arrows and a magnified inset view (no text or symbols)Gode råd
GENNEMF∅RE EN TILBEREDNING
TILBEREDNING MED UDSKUDT START
TILBEREDNING MED UDSKUDT START
TILBEREDNING MED UDSKUDT START
TILBEREDNING MED UDSKUDT START
natural_image
Illustration of a hand pressing down on a device panel with arrows indicating motion (no text or symbols)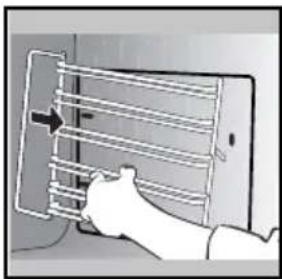
natural_image
Illustration of a hand holding a tablet with a grid and arrow indicating direction (no text or symbols)GLASRUDERNE INDVENDIGT

Advarsel
natural_image
Illustration of a hand using a tool to adjust or install a device, with no visible text or symbols.text_image
Diagram showing a hand holding a device with labeled components 'A', including a magnified inset of the device's handle.Tag glasset ud.
natural_image
Illustration of a hand opening a refrigerator with a tray and door, showing internal compartments (no text or symbols)text_image
Diagram illustrating a 3D printer or scanner with directional arrows and a magnified view of the device's internal structure.natural_image
Diagram showing a mechanical assembly with an inset magnified view of a component (no text or symbols present)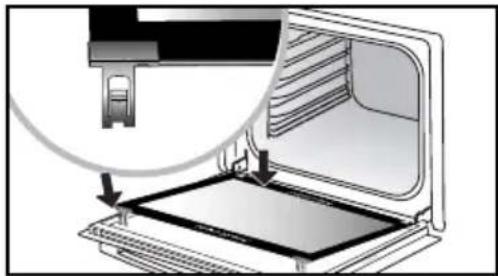
natural_image
Diagram of a laptop with an open screen and a cable inserted, showing internal components (no text or symbols)Tag plastkilen ud.
natural_image
Mechanical component diagram showing a lever and rotating knob (no text or symbols)text_image
Technical diagram showing a door panel with a magnified inset highlighting a component, alongside a vertical label indicating material specifications and dimensions.OPRINDELIGE RESERVEDELE
| A | B | G | |
| SERVICE: | C | TYPE: D | I CE |
| E | F | ||
| Nr | H | Made in France |
B: Forhandlingsreference
C: Servicereference
H: Serienummer
| RETTER | * | * | * | * | * | * | * | STEGE / BAGE TIDER | ||||||||
| TRIN | TRIN | TRIN | TRIN | TRIN | TRIN | TRIN | ||||||||||
| K∅D | Svinesteg (1 kg) 200 2 190 2 60 | |||||||||||||||
| Kalvesteg (1 kg) 200 2 190 2 60-70 | ||||||||||||||||
| Oksesteg 240 2 200 2 30-40 | ||||||||||||||||
| Lam (lammekølle, lammebov 2,5 kg) 220 2 220 2 200 2 210 2 60 | ||||||||||||||||
| Kyllingelår 200 3 220 3 210 3 185 3 60 | ||||||||||||||||
| Stort fjerkræ 220 3 210 3 20-30 | ||||||||||||||||
| Svine- kalvekoteletter 210 3 20-30 | ||||||||||||||||
| Højreb (1 kg) | 210 3 | 210 3 | 20-30 | |||||||||||||
| Fårekoteletter | 210 3 | 20-30 | ||||||||||||||
| FISK | Grillet fisk | 275 | 4 15-20 | |||||||||||||
| Fisk I fad (guldbrasen) | 200 3 | 190 3 | 30-35 | |||||||||||||
| Fisk I papillote | 220 3 | 200 3 | 15-20 | |||||||||||||
| GR∅NTSAGER | Gratin (kogte Ingredienser) | 275 | 2 | 30 | ||||||||||||
| Kartoffelgratin | 200 3 | 180 3 | 45 | |||||||||||||
| Lasagnes | 200 3 | 180 3 | 45 | |||||||||||||
| Farserede tomater | 170 | 3 | 170 | 3 | 30 | |||||||||||
| BAGNING | Sukkerbrødsrand | 180 3 | 180 4 35 | |||||||||||||
| Roulade | 220 | 3 | 180 | 2 | 190 | 3 | 5-10 | |||||||||
| Brioche | 180 | 3 | 200 | 3 | 180 | 3 | 180 | 3 | 35-45 | |||||||
| Brownies 180 2 180 2 20-25 | ||||||||||||||||
| Cake - Sandkage | 180 | 3 | 180 | 3 | 180 | 3 | 45-50 | |||||||||
| Clafoutis | 200 3 | 190 3 | 30-35 | |||||||||||||
| Cookies - Småkager | 175 | 3 | 170 | 3 | 15-20 | |||||||||||
| Kugelhopf | 180 | 2 | 40-45 | |||||||||||||
| Marengs | 100 | 4 | 100 | 4 | 100 | 4 | 60-70 | |||||||||
| Madeleinekage | 220 | 3 | 210 | 3 | 5-10 | |||||||||||
| Vandbakkelsesdej | 200 | 3 | 180 | 3 | 200 | 3 | 30-40 | |||||||||
| Små butterdejskager | 220 | 3 | 200 | 3 | 5-10 | |||||||||||
| Savarin | 180 | 3 | 175 | 3 | 180 | 3 | 30-35 | |||||||||
| Tærte i mørdej | 200 1 | 200 1 | 30-40 | |||||||||||||
| Tærte i butterdej | 215 1 | 200 1 | 20-25 | |||||||||||||
| DIVERSE | Dej i postejform | 200 | 2 | 190 | 2 | 80-100 | ||||||||||
| Pizza | 240 | 1 | 15-18 | |||||||||||||
| Æggekage | 190 | 1 | 180 | 1 | 190 | 1 | 35-40 | |||||||||
| Soufflé | 180 | 2 50 | ||||||||||||||
| Pie | 200 2 | 190 2 | 40-45 | |||||||||||||
| Brød | 220 2 | 220 2 | 30-40 | |||||||||||||
| Ristet brød | 275 | 4-5 | 2-3 | |||||||||||||
natural_image
Illustration of a cooking pot with a clock icon and 25 mm scale indicator (no text or symbols on the pot itself)GEBRAUCHSANLEITUNG
BACKOFEN

natural_image
Diagram of a kitchen appliance with a grater rack and an arrow indicating direction (no text or symbols)
natural_image
3D rendering of a rectangular tray with internal compartments and mounting holes, shown without any text or symbols.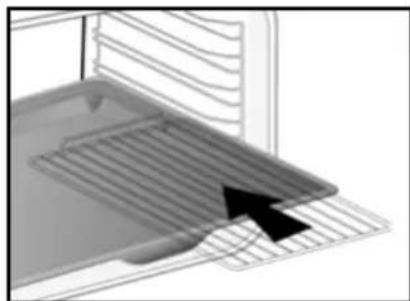
natural_image
3D diagram of a kitchen appliance with a black arrow pointing to a ventilation grille (no text or symbols)
natural_image
Close-up of a gray rectangular baking tray with a black arrow pointing to it, against a white background (no text or symbols)natural_image
Diagram of a microwave oven with airflow arrows indicating internal flow (no text or symbols)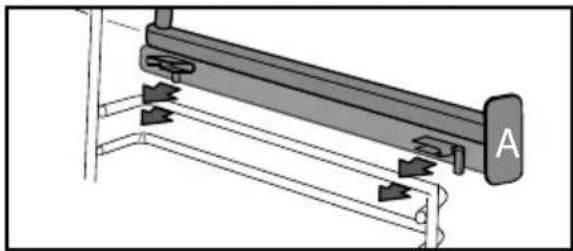
natural_image
Mechanical assembly diagram showing a lever mechanism with labeled component A and directional arrows (no text or symbols beyond label)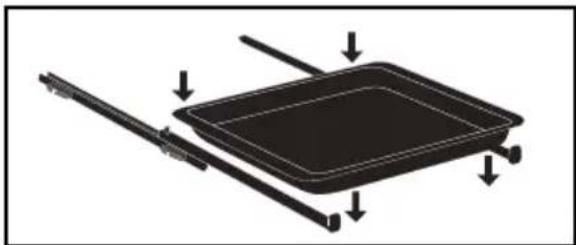
natural_image
Diagram of a rectangular tray with directional arrows indicating movement or force (no text or symbols)
natural_image
Mechanical assembly diagram showing a lever mechanism with directional arrows and a magnified inset view (no text or symbols)Empfehlung
natural_image
Illustration of a hand inserting a device into a grid notebook (no text or symbols visible)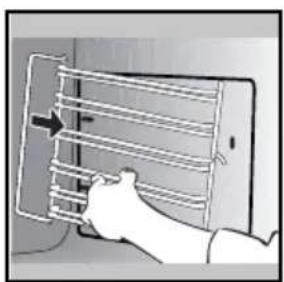
natural_image
Illustration of a hand holding a tablet with a grid and arrow indicator (no text or symbols)natural_image
Illustration of a hand inserting a small electronic component into a device, with no visible text or symbols.text_image
Diagram showing a hand holding a device with labeled components 'A', illustrating a mechanical or electrical assembly process.natural_image
Illustration of a hand opening a refrigerator with a tray and ventilation slots (no text or symbols)text_image
Diagram illustrating a device's internal structure with directional arrows and a magnified view of the component.natural_image
Diagram showing a mechanical assembly with an inset close-up of a component (no text or symbols visible)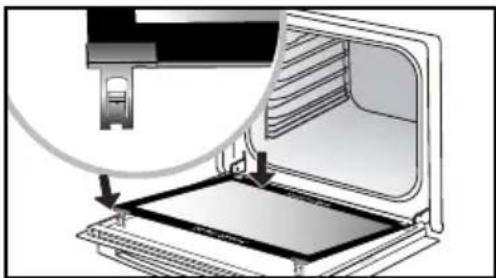
natural_image
Diagram of a laptop with an open screen and a magnified inset showing the cable being inserted (no text or symbols present)text_image
A B A C S ORDemontage:
natural_image
Mechanical component diagram showing a pin and rotating knob (no text or symbols)text_image
Technical diagram showing a door panel with a magnified inset detail and a vertical label indicating 'SOS 2013' and 'SOS 2014'.| A | B | G | |
| SERVICE: | C | TYPE: D | I CE |
| E | F | ||
| Nr | H | Made in France |
B: Handelsreferenznummer
C: Service-Referenznummer
H: Seriennummer
| GERICHTE | * | * | * | * | * | * | * | Gardauer | ||||||||
| Einschub- | Einschub- | Einschub- | Einschub- | Einschub- | Einschub- | Einschub- | ||||||||||
| °C | abene | |||||||||||||||
| FLEISCH | Schweinebraten (1 kg) 200 2 190 2 60 | |||||||||||||||
| Kalbsbraten (1 kg) 200 2 190 2 60-70 | ||||||||||||||||
| Rinderbraten 240 2 200 2 30-40 | ||||||||||||||||
| Lamm (Lammkeule,Schulter 2,5 kg) | 220 2 220 2 200 2 210 2 60 | |||||||||||||||
| Geflügel (1 kg) | 200 | 3 | 220 | 3 | 210 | 3 | 185 | 3 | 60 | |||||||
| Hühnchenschenkel 220 3 210 3 20-30 | ||||||||||||||||
| Schweinekotelett / Kalb 210 3 | 20-30 | |||||||||||||||
| Rindersteak (1 kg) 210 3 210 3 20-30 | ||||||||||||||||
| Lammbraten | 210 | 3 | 20-30 | |||||||||||||
| FISCH | Gegrillter Fisch | 275 | 4 | 15-20 | ||||||||||||
| Zubereiteter Fisch (Seebrasse) | 200 | 3 | 190 | 3 | 30-35 | |||||||||||
| Fischkoteletts | 220 | 3 | 200 | 3 | 15-20 | |||||||||||
| GEMÜSE | Überbackenes (gegarte Nahrungsmittel) | 275 | 2 | 30 | ||||||||||||
| Kartoffelgratin | 200 | 3 | 180 | 3 | 45 | |||||||||||
| Lasagne | 200 | 3 | 180 | 3 | 45 | |||||||||||
| Gefüllte Tomaten | 170 3 | 170 3 | 30 | |||||||||||||
| GEBÄCK | Biskults | 180 | 3 | 180 | 4 | 35 | ||||||||||
| Gerollte Biskults | 220 | 3 | 180 | 2 | 190 | 3 | 5-10 | |||||||||
| Napfkuchen | 180 | 3 | 200 | 3 | 180 | 3 | 180 | 3 | 35-45 | |||||||
| Brownies | 180 2 | 180 2 | 20-25 | |||||||||||||
| Cake | 180 | 3 | 180 | 3 | 180 | 3 | 45-50 | |||||||||
| Obstauflauf | 200 | 3 | 190 | 3 | 30-35 | |||||||||||
| Cookies | 175 3 | 170 3 | 15-20 | |||||||||||||
| Gugelhupf | 180 | 2 | 40-45 | |||||||||||||
| Eiweißgebäck | 100 | 4 | 100 | 4 | 100 | 4 | 60-70 | |||||||||
| Madeleines | 220 | 3 | 210 | 3 | 5-10 | |||||||||||
| Teig | 200 | 3 | 180 | 3 | 200 | 3 | 30-40 | |||||||||
| Kleines Blätterteiggebäck | 220 | 3 | 200 | 3 | 5-10 | |||||||||||
| Topfkuchen | 180 | 3 | 175 | 3 | 180 | 3 | 30-35 | |||||||||
| Mürbeteigboden | 200 1 | 200 1 | 30-40 | |||||||||||||
| Blätterteigboden, dünn | 215 1 | 200 1 | 20-25 | |||||||||||||
| DIVERSES | Pastete in der Schale | 200 2 | 190 2 | 80-100 | ||||||||||||
| Pizza | 240 1 | 15-18 | ||||||||||||||
| Quiches | 190 | 1 | 180 | 1 | 190 | 1 | 35-40 | |||||||||
| Auflauf-Soufflé | 180 | 2 | 50 | |||||||||||||
| Pastete | 200 2 | 190 2 | 40-45 | |||||||||||||
| Brot | 220 2 | 220 2 | 30-40 | |||||||||||||
| Toast Brot | 275 | 4-5 | 2-3 | |||||||||||||
natural_image
Illustration of a kitchen appliance with a clock icon and measurement label (no readable text or symbols)ΟΔΗΓΙΕΣ ΧΡΗΣΗΣ
ΦΟΥΡΝΟΣ
EL
ΑΓΑΠΗΤΟΙ ΠΕΛΑΤΕΣ,
natural_image
Diagram of a kitchen appliance with a grid-patterned tray and an arrow indicating direction (no text or symbols)natural_image
3D CAD model of a rectangular tray or enclosure with internal structure, shown without any text or symbols.natural_image
Diagram of a kitchen appliance with a black arrow pointing to a lid (no text or symbols)natural_image
Close-up of a gray tray with a black arrow pointing to it, no visible text or symbolsnatural_image
Mechanical assembly diagram showing a lever mechanism with labeled component A (no text or symbols beyond label)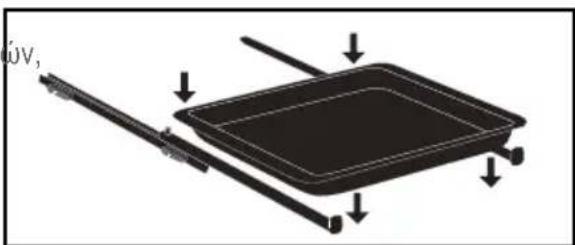
text_image
δv,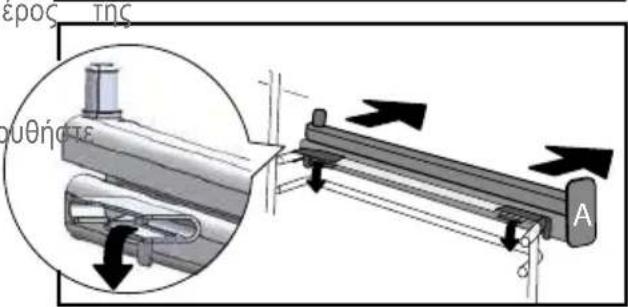
natural_image
Illustration of a hand inserting a spring into a rack with arrows indicating motion (no text or symbols)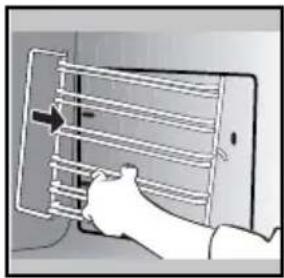
natural_image
Illustration of a hand holding a smartphone with a grid-like panel and an arrow pointing to it (no text or symbols present)natural_image
Illustration of a hand inserting a small electronic component into a device, with a black arrow indicating the component's direction (no text or symbols present)text_image
Diagram illustrating a mechanical or electrical component with labeled parts A, showing hand positioning and magnified detail.natural_image
Illustration of a hand pressing down on a tray with arrows indicating direction (no text or symbols)•6 ΣΥΝΤΗΡΗΣΗ
text_image
Diagram showing a device with an open lid and directional arrows indicating movement or process, including a magnified inset of the device's top view.natural_image
Diagram showing a mechanical assembly with an inset magnified view of a component (no text or symbols present)natural_image
Diagram of a printer's internal structure showing paper feeding into a tray (no text or symbols visible)natural_image
Mechanical component diagram showing a rotating knob with a handle and shaft (no text or symbols)text_image
Diagram showing a door with a magnified inset highlighting a component, alongside a control panel with Chinese text and icons.| A | B | G | |
| SERVICE: | C | TYPE: | D |
| E | F | I CEMade in France | |
| Nr | H |
natural_image
Illustration of a bowl with a lid and lid placed inside a rectangular frame (no text or symbols)
natural_image
Interior view of a kitchen appliance with a bowl and lid (no visible text or symbols)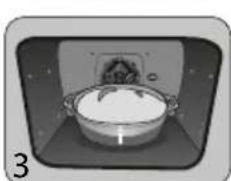
natural_image
Illustration of a pot with a lid and lid placed inside a rectangular frame (no text or symbols)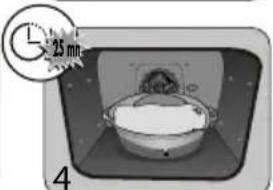
text_image
25 min 4USER GUIDE
OVEN
EN
DEAR CUSTOMER,
Discovering a De Dietrich product means experiencing the range of unique emotions.
The attraction is immediate, from the moment you set eyes on the product. The sheer quality of the design shines through, thanks to the timeless style and outstanding finishes which make each component an elegant and refined masterpiece in its own right, each one in perfect harmony with the others. Next, comes the irresistible urge to touch it.
De Dietrich design makes extensive use of robust and prestigious materials, where the accent is place firmly upon authenticity. By combining state-of-the-art technology with top quality materials, De Dietrich produces beautifully crafted products to help you get the most from the culinary arts, a passion shared by all lovers of cooking and fine food. We hope that you enjoy using this new appliance.
Thank you for choosing a De Dietrich product.

text_image
ORIGINE FRANCE® GRANTIEBVCert.6011825
The label "Origine France Garantie" assures the consumer the traceability of a product by giving a clear and objective indication of the source. The DE DIETRICH brand is proud to affix this label on products from our French factories based in Orléans and Vendôme.
www.dedietrich-electromenager.com

text_image
QR code image containing encoded data, no visible human-readable textCONTENTS
EN
Safety and Important Precautions .... 4
1 / Installation 6
2 / Environment 7
3 / Presentation of the oven 8
The controls and display 9
Accessories 10
4 / Settings 12
Time setting 12
Changing the time 12
Timer 12
Control lock 12
Settings menu 12
5 / Cook 13
"EXPERT" mode 13
- Immediate cooking .... 13
- Program the temperature, duration 13
- Delayed start cooking 14
- Save a cooking 14
- Cooking functions in "Expert" mode 15
"LOW TEMPERATURE" mode 18
"RECIPES" mode 19
"CHEF" mode 21
6 / Maintenance 25
External surface 25
Dismantling the steps 25
Cleaning the door windows 25
Disassembly and reassembly of the "Sensor" plate 26
Self-cleaning by pyrolysis 27
Lamp replacement 28
7 / Anomalies and solutions.... 29
8 / After-sales service 30
9 / Cooking aid 31
Cooking charts 31
Functional aptitude tests 32
Recipes with yeast 32
IMPORTANT SAFETY INSTRUCTIONS
IMPORTANT SAFETY INSTRUCTIONS - READ CAREFULLY AND RETAIN FOR FUTURE USE.
This user guide is available for download on the brand's website.
When you receive the appliance, unpack it or have it unpacked immediately. Check its general appearance. Make a note of any reservations on the delivery slip and keep a copy.

Important:
This appliance may be used by children aged 8 years and older, and by persons with impaired physical sensorial or mental capacities, or without experience or knowledge, if they are supervised or have received prior instructions on how to use the appliance safely and have understood the risks involved. Children must not be allowed to play with the appliance. Cleaning and maintenance operations must not be carried out by children without supervision.
— Children must be supervised to prevent them from playing with the appliance.
WARNING:
— The appliance and its accessible parts become hot during use. Be careful not to touch the heating elements inside the oven. Children under 8 years old must not be allowed near it unless they are supervised at all times.
— This appliance is designed to
cook with the door closed.
— Before pyrolytic cleaning of your oven, remove all accessories and any thick deposits.
— During cleaning, the surfaces may become warmer than under normal conditions of use. It is advisable to keep children away from the appliance.
— Do not use a steam cleaner.
— Do not use abrasive cleaning products or hard metal scrapers for cleaning the oven's glass door, as they could scratch the surface and cause the glass to shatter.
WARNING :
Make sure the appliance is disconnected from the power before replacing the lamp in order to avoid the risk of electric shock. Change the lamp only when the appliance has cooled down. To unscrew the view port and the light, use a rubber glove, which will make disassembly easier.
IMPORTANT SAFETY INSTRUCTIONS

The electrical plug must remain accessible after ation.
— It must be possible to disconnect the appliance from the power supply, either using a plug or by fitting a switch on the fixed wiring system in accordance with installation rules.
— If the power cable is damaged, it should be replaced by the manufacturer, its after-sales service department or by a similarly qualified person in order to avoid danger.
— This appliance may be installed either under a worktop or in a cabinet column, as indicated on the installation diagram.
— Centre the oven in the unit so as to ensure a minimum distance of 10 mm between the appliance and the surrounding unit. The material of the unit supporting the appliance must be heat-resistant (or covered with a heat-resistant material). For greater stability, attach the oven to the unit with 2 screws through the holes provided on the side panels.
— In order to avoid overheating, the appliance must not be installed behind a decorative door.
— This appliance is designed to be used for domestic and similar applications such as :
Kitchen areas for the staff of shops, offices and other professional premises.
Farms. Use by clients of hotels, motels and other residential type establishments; guest house type environments.
— The oven must be turned off when cleaning inside the oven.
Do not modify the characteristics of this appliance; doing so could be dangerous.
Do not use your oven as a larder or to store any items after use.
• 1 INSTALLATION
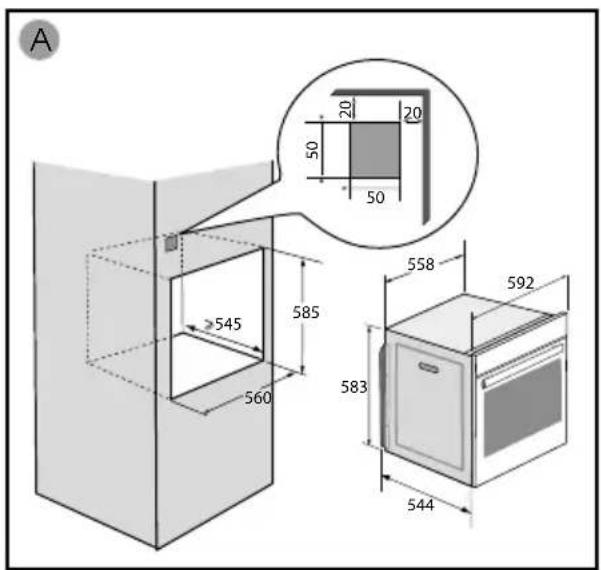
CHOICE OF LOCATION AND FITTING
The diagrams show the dimensions of a cabinet that will be able to hold your oven. This appliance may be installed either under a column (A) or in a worktop (B). If the cabinet is open, its opening at the back must be 70 mm maximum (C,D).
Install the oven in the furniture. To do this, remove the rubber stops and pre-drill a 2-mm diameter hole in the wall of the furniture to avoid splitting the wood. Attach the oven with the two screws. Re-position the rubber stops.

Tip
To be certain that you have properly installed your appliance, do not hesitate to call on a household appliance specialist.

.Warning :
If the electrical installation in your residence requires any changes in order to hook up your appliance, contact a professional electrician. If the oven malfunctions in any way, unplug the appliance or remove the fuse corresponding to the sector where the oven is hooked up.
text_image
A 50 20 20 50 545 585 560 558 592 583 544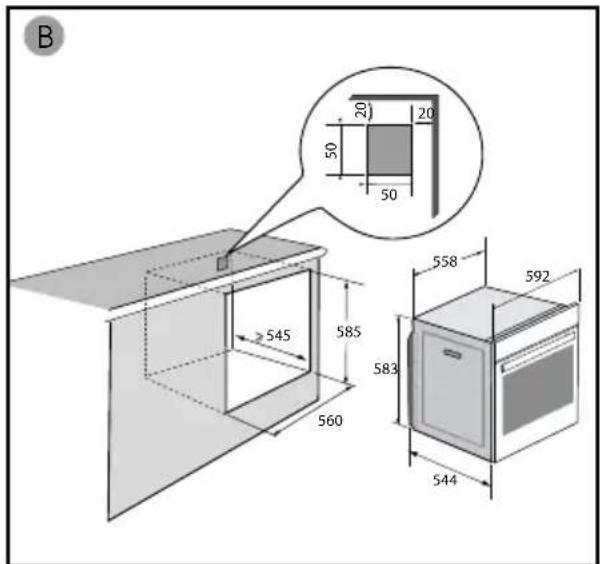
text_image
B 50 20 50 585 545 560 583 558 592 544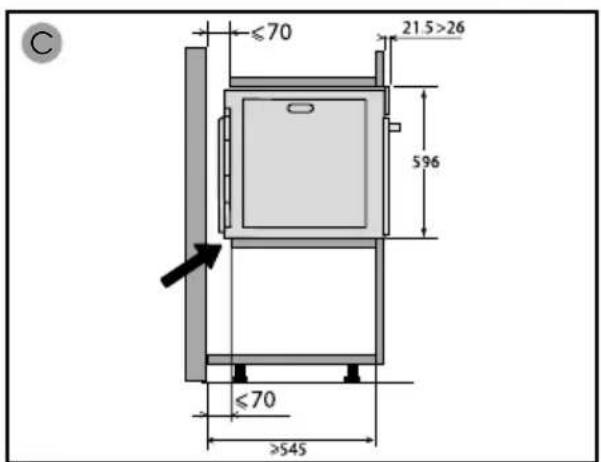
text_image
C ≤70 21.5>26 596 ≤70 >545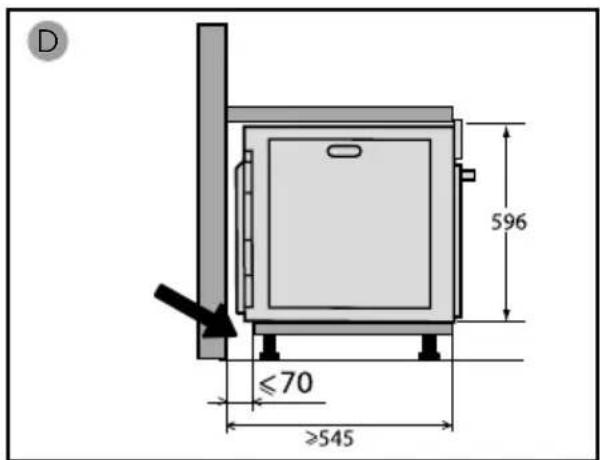
text_image
D ≤70 ≥545 596• 1 INSTALLATION
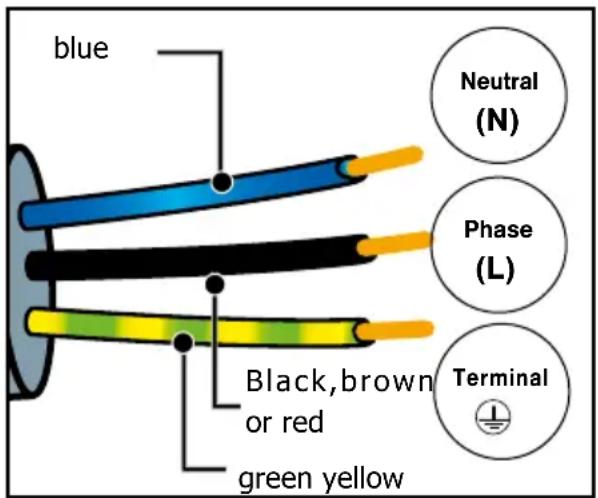
ELECTRICAL CONNECTION
Your oven must be connected with a (standard) power cable with 3 conductors of 1.5mm^2 (1 live + 1 neutral + earth) which must be connected to a 220-240V\~ single-phase grid by means of a 1 live + 1 neutral + earth CEI 60083 standard power socket or via an all-poles cut-off device in compliance with the installation rules.
We cannot be held responsible for any accident resulting from inexistent, defective or incorrect earthing.

Warning
The safety wire (green-yellow) is connected to the appliance's terminal and must be connected to the earth terminal of the electrical set-up.
The fuse in your set-up must be 16 amperes.
text_image
blue Neutral (N) Phase (L) Black, brown or red green yellow Terminal• 2 ENVIRONMENT
CARE FOR THE ENVIRONMENT
The packaging of this appliance can be recycled. Help to recycle them and protect the environment by placing them
in the municipal containers provided for this purpose.
Your appliance also contains many recyclable materials.
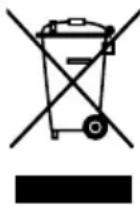
It therefore is marked withthis symbol to indicate that
appliances to be disposed of should not be mixed with other waste.
This way, the appliance recycling
organised by your manufacturer will be done with maximum efficiency, in compliance with European Directive 2002/96/EC on Waste Electrical and Electronic Equipment.
Contact your local authority or retailer for information on used appliance collection points close to your home.
Thank you for co-operation in protecting the environment.
• 3 DESCRIPTION OF THE OVEN
PRESENTATION DU FOUR
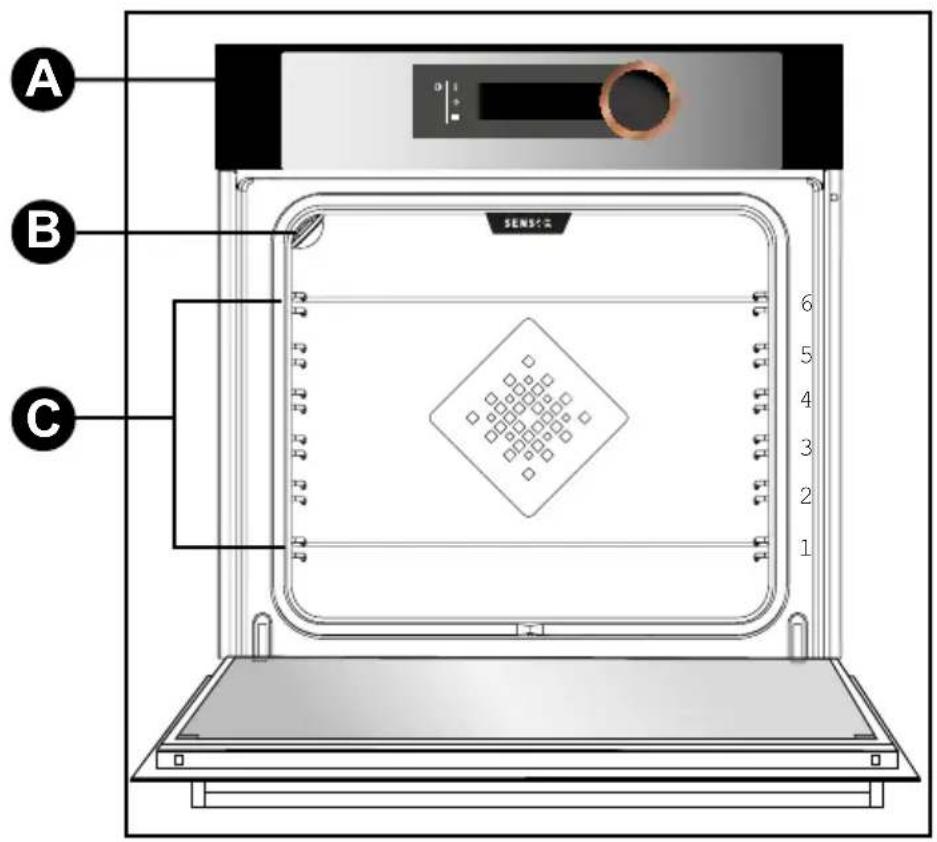
text_image
A B C SENSOR 6 5 4 3 2 1A Control panel
B Lamp
C Shelf runners (6 heights available)
• 3 DESCRIPTION OF THE OVEN
CONTROL PANEL
• THE DISPLAY
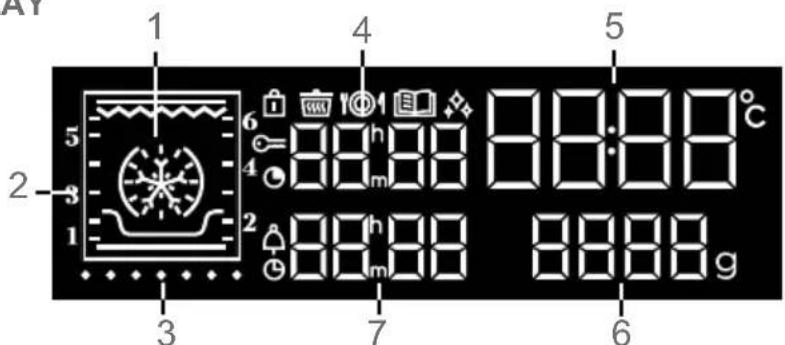
text_image
1 2 3 4 5 6 7 8 8:00 8:00 8:00 8:00 8:00 8:00 8:00 8:00 8:00 8:00 8:00 8:00 8:00 8:00 8:00 8:00 8:00 8:00 8:00 8:00 8:01 Cooking modes display
2 Shelf runner indicator
3 Temperature rise indicator
4 Cooking time display
5 Oven temperature and clock display
6 Weight display
7 Minute minder and cooking end time display
Control locking indicator
«Low temperature» function indicator
101 «Chef» function indicator
«Recipes» function indicator
Cleaning indicator
Cooking time indicator
Minute minder indicator
Cooking end time indicator
- BUTTONS
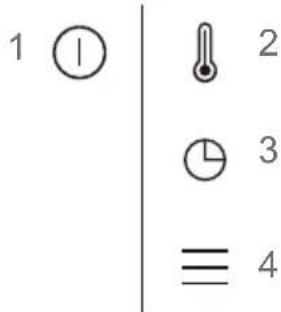
text_image
1 ⏻ 2 3 ≡ 41 On/Off
2 Adjusting the temperature
3 Adjusting the clock, the time and the end of cooking, the minute minder
4 Access the settings MENU
• CONTROL KNOB
This is a rotating knob with central button to choose programmes, increase or reduce values and confirm.
• 3 DESCRIPTION OF THE OVEN
ACCESSORIES (depending on model)
- Anti-tip safety rack
The rack can be used to support all dishes and moulds containing food for cooking or browning. It can be used for grilling (placed directly on top).
Position the anti-tip stop towards the back of the oven.
Multi-purpose tray, drip tray45 mm
When inserted in the shelf runners under the grill with the handle towards the oven door, it collects juice and fat from grilling, and can be used half-filled with water as a double-boiler.
- «Flavour» grills
These half «flavour» grills are used separately, but only when placed in one of the dishes or drip tray with the anti-tip handle towards the back of the oven.
By using just one grill, it is easy to moisten your food with the cooking juices collected in the dish.
- 8mm pastry tray
Insert in the shelf runners. Ideal for baking cookies, shortbread and cupcakes.
The tilted surface makes it easier for you to place your preparations on a dish. Can also be inserted into the runners under the grid to collect juice and fat from grilling.
natural_image
Diagram of a kitchen appliance with a grater rack and an arrow indicating direction (no text or symbols)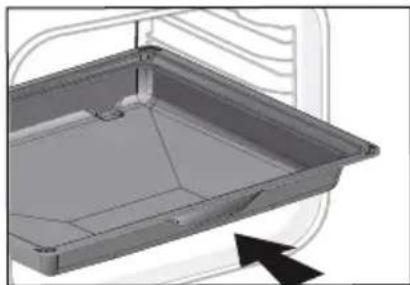
natural_image
3D rendering of a rectangular tray or container with internal compartments and mounting holes, shown without any text or symbols.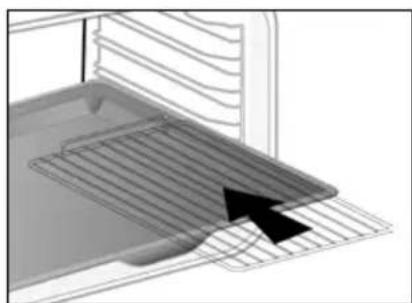
natural_image
Diagram of a kitchen appliance with a grater and a black arrow pointing to a component (no text or symbols)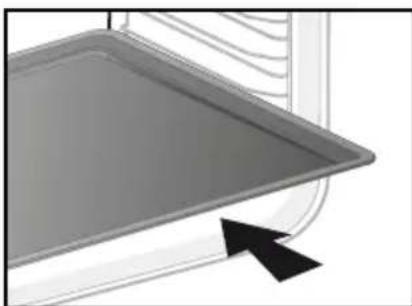
natural_image
Close-up of a gray tray with a black arrow pointing to it, no visible text or symbols• 3 DESCRIPTION OF THE OVEN
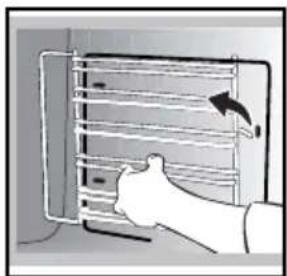
- Sliding rail system
The new sliding rail system makes food more practical and easier to handle as the trays can be effortlessly pulled for simpler handling. The trays can be completely removed, providing full access.
Their stability ensures that food can be handled safely, reducing the risk of burns. This means that you can take food out of the oven far more easily.
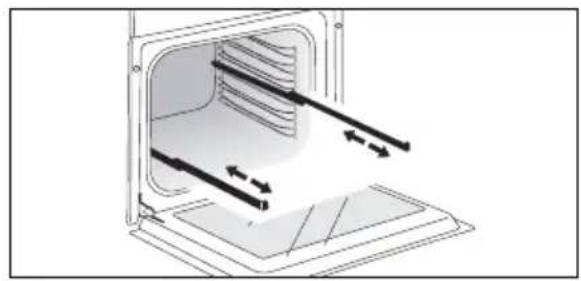
INSTALLING AND REMOVING THE SLIDING RAILS
After removing the 2 shelf runners, choose the height (2 to 5) at which you want to fit your rails. Snap the left rail against the left shelf runner by applying enough pressure to the front and back of the rail so that the 2 tabs on the side of the rail slot into the shelf runner. Do the same for the right-hand rail.
NOTE: the telescopic sliding part of the rail must unfold towards the front of the oven, with the buffer ⊕ opposite you.
Insert your 2 shelf runners and then put your tray on the 2 rails. The system is now ready to use.
To remove the rails, remove the shelf runners again.
Slightly prise apart the bottom of the tabs fixed on each rail to release the shelf runner. Pull the rail towards you.
natural_image
Diagram of an oven with internal airflow arrows indicating material flow (no text or symbols)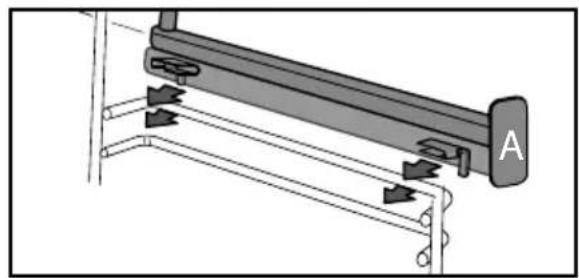
natural_image
Mechanical assembly diagram showing a lever mechanism with labeled component A (no text or symbols present)
natural_image
Diagram of a mechanical component with arrows indicating force or movement (no text or symbols)
natural_image
Mechanical assembly diagram showing a lever mechanism with directional arrows and a magnified inset view (no text or symbols)
To avoid fumes when cooking fatty meats, we recommend you add a small amount of water or oil to the bottom of the drip pan.
The accessories may warp with the effect of heat, but this will not alter their function. They will return to their original shape once cooled.
• 4 SETTINGS
SETTING THE CLOCK
When switching on, the display flashes at 12:00.
Adjust the hour by turning the knob, then press to confirm.
If there is a power cut, the clock flashes.
CHANGING THE CLOCK
Press the Ⓗ button for a few seconds until the clock flashes. Adjust the clock by turning the knob and then press to confirm.
MINUTE MINDER
This function can only be used when the oven is off.
Press Ⓤ.
00:00 flashes. Set the minute minder by turning the knob and then press to confirm. The timer starts.
Once the time has lapsed, there is a sound signal. To stop it, press any key.
NB: You can modify or cancel the minute minder at any time.
To cancel, return to the timer's menu and set to 00:00.
If you do not confirm, it will be saved automatically after a few seconds.
CONTROL LOCKING Child safety
Press ⚡ and ⚠ at the same time until the 🔒 symbol appears on the screen. Control locking is accessible during cooking or when the oven has stopped.
N.B.: only the button remains active.
To unlock the keypad, press ⚠ and ⏱ together until the 🔒 symbol disappears off the screen.
SETTINGS MENU
You can adjust different settings on your oven:
light, contrast, sounds and demo mode. To do this, press≡ for a few seconds to access the settings menu.
See the table below:
To modify the different settings if necessary, turn the control knob and then press Ⓐ to confirm.
To come out of the settings menu at any time, press Ⓘ.
| Default settings | Light:Position ON, la lampe reste allumée durant les cuissons (sauf en fonction ECO). Position AUTO, la lampe du four s'éteint au bout de 90 secondes lors des cuissons. |
 | |
 | Sounds - beeps:Position ON, sounds active. Position OFF, no sounds. |
 | Contrast:The brightness of the display is adjustable from 10 to 100%. |
 | DEMO mode:"DEMO" mode; demonstration mode used in exhibition. Turn it off to make your oven up and running. |
 | Display standby:ON position, display off after 90s.OFF position, reduction, brightness after 90s. |
• 5 COOKING
COOKING
This oven gives you access to three different types of programming depending on the degree of knowledge you have about the recipe in question:
- For a recipe where you know all the settings (you choose the type of cooking, temperature and cooking time yourself), select «EXPERT» mode.
- For a recipe managed entirely by the oven thanks to a specific electronic programme in order to obtain unrivalled tenderness of meat and exceptional flavours, select “LOW TEMPERATURE” mode.
- For a recipe where you need assistance from the oven (simply choose the type of food from a list and the weight; the oven will select the most suitable settings: temperature, cooking time, type of cooking), select «RECIPES» mode.
Select "CHEF" mode for a recipe automatically managed by the oven. Choose from a list of the most common dishes you want to cook.
Before using your oven for the first time, heat it at maximum temperature while empty for approximately 30 minutes. Make sure that the room is sufficiently ventilated.
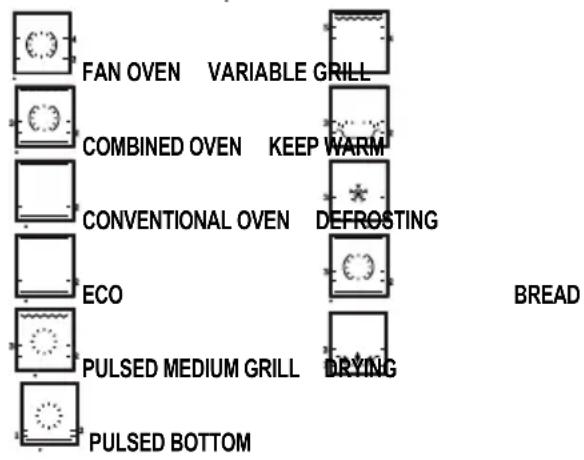
«EXPERT» MODE
The Expert function lets you set the cooking parameters yourself: temperature, cooking type, cooking time.
- Access the "Expert" screen by pressing or turning the knob or by pressing = or ①.
- Then select the type of cooking from the following list by turning the control knob and then press to confirm.
text_image
FAN OVEN VARIABLE GRILL COMBINED OVEN KEEP WARM CONVENTIONAL OVEN DEFROSTING ECO PULSED MEDIUM GRILL DRYING PULSED BOTTOM BREADIMMEDIATE COOKING
The programmer must only display the time. It should not be flashing.
Turn the control knob until you get to the cooking function of your choose, then confirm.
The temperature starts to increase at once. Your oven recommends one (or two) shelf height(s) and a modifiable temperature.
The oven heats up and the temperature indicator flashes. A series of beeps sounds when the oven has reached the programmed temperature.
CHANGING THE TEMPERATURE
When you are in the cooking mode of your choice, press ⬆.
Adjust the temperature by turning the knob and then press to confirm.
• 5 COOKING
PROGRAMMING THE COOKING TIME
Use the immediate cooking programme, then press Ⓗ; the cooking time ⚙lashes and it is now possible to set it.
Turn the knob to adjust the cooking time. Press to confirm.
Your oven has the “SMART ASSIST” function which, when programming a cooking time, will suggest a cooking time which can be modified depending on the selected cooking mode.
| COOKING MODE | RECOMMENDATION OF COOKING TIME |
  | 30 min |
  | 30 min |
  | 30 min |
 | 30 min |
  | 15 min |
  | 30 min |
 VARIABLE GRILL VARIABLE GRILL | 7 min |
  | 60 min |
  | 60 min |
  | 40 min |
 DRYING DRYING | 5 hours |
The time starts to count down as soon as the cooking temperature is reached.
DELAYED START
Proceed as for programmed cooking. After setting the cooking time, press Ⓤ. The display flashes. Set the cooking end time by turning the knob.
Press to confirm.
The cooking end time display stops flashing.
MEMORISE A COOKING MODE
You can memorise 3 cooking programmes of your choice.
- Programme a memory (fig. E):
In Expert mode, select a cooking mode, the temperature and time and then press the knob until you get to «MEM 1». Choose one of the 3 memories by turning the control knob and confirm to memorise it. Confirm again to start cooking.
NB: If the 3 memories are saved, any new memorisation will replace the previous one.
A delayed start cannot be programmed for memorisations.
- Select one of the 3 memories already saved (fig. F):
Turn the knob and go to MEMO, then confirm. Scroll through the memories with the knob and confirm the one you want. Cooking starts, you can now delay your start time.
• 5 COOKING
COOKING FUNCTIONS IN «EXPERT» MODE
(depending on model)

Pre-heat your oven empty before cooking.
| Position | T°C recommended mini - maxi | Use | |
 | Combined oven* | 180°C35°C - 250°C | Recommended for keeping white meat, fish and vegetables moist. For cooking multiple items on up to three levels. |
 | Combined oven | 205°C35°C - 230°C | Recommended for meat, fish, vegetables, preferably in an earthenware dish. |
 | Conventional oven | 200°C35°C - 275°C | Recommended for meat, fish, vegetables, preferably in an earthenware dish. |
 | ECO* | 200°C35°C - 275°C | This setting saves energy while maintaining the quality of the cooking. In this setting, pre-heating is not required. |
 | Pulsed grill | 200°C100°C - 250°C | Roasts and poultry are juicy and crisp all over. Slide the drip tray on to the bottom shelf support.Recommended for all spit-roasted poultry or meat, for sealing and thoroughly cooking a leg or a rib of beef. To retain the moist texture of fish steaks. |
 | Pulsed bot- tom | 180°C75°C - 250°C | Recommended for meat, fish, vegetables, preferably in an earthenware dish. |
* Cooking mode as per standard EN 60350-1: 2016 to demonstrate compliance with requirements of the energy label of European regulation UE/65/2014.
• 5 COOKING
| Position | T°C recommended mini - maxi | Use | |
 | Variable grill | 41 - 4 | Recommended for grilling cutlets, sausages, toasting bread and prawns placed on the grill. Cooking is done by the upper element. The grill covers the entire shelf surface. |
 | Keep warm | 60°C35°C - 100°C | Recommended for letting dough rise for bread, brioche, kügelhopf. Put the mould on the bottom, not exceeding 40°C (plate-warming, defrosting). |
 | Defrosting | 35°C30°C - 50°C | Ideal for delicate dishes (fruit tarts, custard pies, etc.). Meat, rolls, etc. are defrosted at 50°C (meat should be placed under the grill with a dish underneath to catch the drips). |
 | Bread | 205°C35°C - 220°C | Recommended cooking sequence for bread making. Pre-heat, then place the ball of dough on a baking sheet - 2nd shelf. Do not forget to place a dish of water in the bottom to obtain a crisp, golden crust. |
 | Drying | 80°C35°C - 80°C | Sequence to dehydrate certain food such as fruits, vegetables, seeds, roots, seasoning plants and herbs. Refer to the specific drying table below. |

Advice on how to save energy
Avoid opening the door during cooking to avoid heat escaping from the oven.

Never place tin foil directly in contact with the oven floor as the build up of heat may damage the enamel.
• 5 COOKING
DRYING FUNCTION
Drying is one of the oldest methods of preserving food. The aim is to remove all or some of the water in the food to preserve foodstuffs and prevent the development of microbes. Drying preserves the nutritional qualities of food (minerals, proteins and other vitamins). It allows food to be stored in optimal conditions thanks to their reduced size and makes food easy to use once rehydrated.
Only use fresh food.
Wash the food carefully, drain and wipe.
Cover the grill in parchment paper and distribute the cut food evenly on top.
Use shelf level 1 (if you have several grill pans, put them on levels 1 and 3).
Turn the food over several times during drying. The values provided in the table may vary depending on the type of food to dehydrate, its maturity, its thickness and its humidity rate.
Guide table to dehydrate your food

| Fruits, vegetables and herbs | Temperature | Time in hours | Accessories |
| Fruits with seeds (in 3 mm slices, 200 g per grill pan) | 80°C | 5-9 | 1 or 2 grill pans |
| Fruits with stones (plums) | 80°C | 8-10 | 1 or 2 grill pans |
| Edible roots (carrots, parsnips), grated and blanched | 80°C | 5-8 | 1 or 2 grill pans |
| Sliced mushrooms | 60°C | 8 | 1 or 2 grill pans |
| Tomato, mango, orange, banana | 60°C | 8 | 1 or 2 grill pans |
| Sliced red beetroot | 60°C | 6 | 1 or 2 grill pans |
| Herbs | 60°C | 6 | 1 or 2 grill pans |
• 5 COOKING
«LOW TEMPERATURE» MODE (depending on model)
Cooking "BASSE TEMPERATURE" must definitely start cold oven. This cooking mode makes meat fibres tender thanks to slow cooking at low temperature. Cooking quality is optimal.
The oven offers a choice of 10 dishes:

P02 Roast beef rare (3 hours)
P03 Roast beef well done (4 hours)
P04 Roast pork (5 hours)
P05 Pink lamb (3 hours)
P06 Lamb well done (4 hours)
P07 Chicken (6 hours)
*P08 Small fish (1 hour 20)
*P09 Large fish (2 hours 10)
*P10 Yoghurt (3 hours)
IMMEDIATE COOKING
Turn the control knob to the «low temperature» cooking function. The symbol 📋nd «Lt» are displayed on the screen.
- Confirm the selection by pressing the control knob. «P01» flashes, you have to choose your dish by turning the knob.
- Select your dish.
- Once the dish has been selected, for example: P01 (roast veal), put your meat on the grill pan in the upper level (level 2) and slide the drip pan below (level 1).
* N.B: Do not use the grill pan for programmes P08-P09-P10. Put them directly on the drip tray on the shelf level shown on the screen.
- Confirm the selection by pressing the control knob. Cooking starts. When cooking is complete, the oven switches off automatically and rings for 10 minutes.
- Press a button to stop the beeping.
Cooking at low temperature requires food to be extremely fresh. For poultry, it is important to rinse the outside and inside with cold water and to dray with absorbent paper before cooking.
• 5 COOKING
DELAYED START
You can choose a delayed «low temperature» start. After selecting your programme, press Ⓗ. The display flashes. Set the cooking end time by turning the knob. Press to confirm. The cooking end time display stops flashing.
If your oven is too hot to start low temperature cooking, the word «Hot» is displayed on the screen. Leave the oven to cool.
«RECIPES» MODE
The “Recipes” function selects the appropriate cooking parameters for you based on the food being prepared and its weight.
IMMEDIATE COOKING
Select «Guide» on the screen by turning the knob and then confirm.
The symbol 📄 is displayed and «Guide» shows on the screen.
There are 35 (or 15, depending on the model of your oven) pre-programmed recipes. See the 2 tables below.
Use the control knob to scroll through the food choices and press to confirm.
A suggested weight flashes on the screen. Enter the actual weight of your food by turning the knob, then confirm.
The oven automatically calculates the ideal cooking time and displays it. Cooking starts immediately.
DELAYED START
If you wish, you can change the cooking end time by pressing ⏻ and displaying the new cooking end time when the oven has started.
Confirm by pressing the knob.
The oven stops and will start later so that cooking ends at the desired time.
For recipes which require pre-heating, do not use the delayed start function.
• 5 COOKING
| Food | 35 Recipes |
| Chicken | P01 |
| Duck | P02 |
| Duck breast | *P03 |
| Turkey | P04 |
| Rosé shoulder of lamb | P05 |
| Rare beef | P06 |
| Beef medium done | P07 |
| Well-cooked beef | P08 |
| Roast pork | P09 |
| Roast veal | P10 |
| Veal chops | *P11 |
| Salmon | P12 |
| Trout | P13 |
| Fish terrine | P14 |
| Lasagne | P15 |
| Potato gratin | P16 |
| Stuffed tomatoes | P17 |
| Baked potatoes | P18 |
| Puff pastry | P19 |
| Pizza | P20 |
| Quiche | P21 |
| Shortcrust pastry | P22 |
| Leavened dough | P23 |
| Fruit tart | P24 |
| Crumble | P25 |
| Sponge cake | P26 |
| Cupcakes | P27 |
| Crème caramel | P28 |
| Biscuits | *P29 |
| Cake | P30 |
| Yoghurt cake | P31 |
| Chocolate cake | P32 |
| Brioche | P33 |
| Bread | P34 |
| Baguette | P35 |
| Food | 15 Recipes |
| Chicken | P01 |
| Duck breast | *P02 |
| Rare beef | P03 |
| Pizza | P04 |
| Roast pork | P05 |
| Potato gratin | P06 |
| Rosé shoulder of lamb | P07 |
| Roast veal | P08 |
| Salmon | P09 |
| Fish terrine | P10 |
| Quiche | P11 |
| Stuffed tomatoes | P12 |
| Biscuits | *P13 |
| Cake | P14 |
| Brioche | P15 |
*Pre-heat before placing the dish in the oven.
• 5 COOKING
«CHEF» MODE
This mode will make the task all the easier since the oven will automatically calculate all the cooking parameters according to the selected dish (temperature, cooking time, type of cooking) thanks to electronic sensors placed in the oven that continuously measure the humidity and temperature variation.
No preheating is required to use the "CHEF" mode. Cooking must IMPERATIVELY start cold oven.
IMMEDIATE COOKING
- Turn the knob to the "Chef" cooking function.
The symbol 📄 and "CHEF" are displayed on the screen. Validate by pressing the controller. Chef "1" flashes, you have to choose your dish by turning the controller..
The oven offers a choice of 6 dishes (see the list of dishes below).
- Select your dish and then validate.
- Validate again on the controller to start cooking.
ATTENTION:
This method of cooking takes place in two phases:
1- A first phase of research during which the oven begins to heat up and will determine the ideal cooking time. This phase lasts between 5 and 40 minutes depending on the dish.
IMPORTANT: Do not open the door during this phase so as not to disturb the calculation and recording of the data or the cooking will be cancelled.
This research phase is represented by an animation ◆◆◆◆◇◇.
2- A second phase of cooking: the oven has adjusted the necessary time, this research phase is represented by an animation ◇◇◇◇◇◇.
The remaining time taken into account the cooking time of the first phase.
It is now possible for you to open the door, to water or return your meats.
- The oven goes out when the cooking time is over and your screen tells you that the dish is ready.
DEFERRED DEPART COOKING
You can change the end time of cooking before putting your dish in the proposed bleacher.
- If you wish, you can change the end time by pressing the Ⓛ button and displaying the new end-of-cooking time when the oven has started.
Validate by pressing the controller.
The oven stops and will start later so that the cooking finishes at the desired time.
• 5 COOKING
LIST OF «CHEF» DISHES

CHEF 1

CHEF 2

CHEF 3

CHEF 4

CHEF 5

CHEF 6

Pizza (CHEF 1)
300gr to1.2kg
Store-bought pizza - fresh pasta Ready-to-use pizza dough Home-made pizza dough
Place it on the grill for a crispy crust (you can place a sheet of parchment paper between the grid and the pizza to protect the oven from cheese drippings). Place the pizza on the baking tray for a soft crust.

Chicken (CHEF 2)
Chickens (1,4 kg to 2.5 kg) Duck, guinea fowl
Place the chicken on the grill using the grill + drip tray assembly. Pierce the skin of poultry to avoid splat-tering.

Fish (CHEF 3)
(400 gr to 1kg)
Whole fish (bream, hake, trout, mackerel) Roast fish. Not suitable for flat fish.
Use the multipurpose tray.

Savoury tart (CHEF 4)
Fresh quiches Frozen quiches
Use a non-stick aluminium mould: the crust will be crispy on the bottom. Remove the tray from frozen quiches before placing them on the grid.

et tarts (CHEF 5)
Fresh tarts Frozen tarts
Use a non-stick aluminium mould: the crust will be crispier on the bottom.

Small biscuits (CHEF 6)
Small individual cakes : cookies, croissants, buns, fruit bread in a mould, croque-monsieur.
Place the small individual cakes on a pastry tray, itself placed on the grill.
• 5 COOKING
LIST OF «CHEF» DISHES
Pizza
Pizza Base: 1 pizza crust
*with vegetables : 6 tablespoons tomato sauce + 100 g diced courgettes + 50 g diced bell
peppers + 50 g sliced aubergines + 2 small sliced tomatoes + 50 g shredded gruyere + oregano + salt + pepper.
*with roquefort and smoked bacon : 6 tablespoons tomato sauce + 100 g smoked bacon + 100 g roquefort in small chunks + 50 g walnuts + 60 g grated gruyere.
*with sausage and cottage cheese : 200 g drained cottage cheese spread on the crust + 4 sausages, sliced + 150 g ham slivers + 5 olives + 50 g grated gruyere + oregano + salt + pepper.
Quiches:
Base: 1 aluminium mould, diameter 27 to 30 cm
1 ready-to-use short crust pastry 3 beaten eggs + 50 cl heavy cream salt, pepper, nutmeg.
Various garnishes : 200 g precooked larding bacon or - 1 kg cooked endives + 200 g grated gouda or - 200 g broccoli + 100 g larding bacon + 50 g blue cheese or - 200 g salmon + 100 g spinach, cooked and drained.
Chicken
Stuff it with a good bouquet of fresh tarragon or rub it with a mixture of 6 crushed cloves of garlic with a pinch of coarse salt, and some peppercorns.
Flaky praline apple tart:
1 flaky pastry crust rolled and pricked with a fork.
200 ml cream brought to a boil with a vanilla bean.
2 beaten eggs with 30 g sugar, add the cooled cream.
2 apples cut into cubes rolled in 70 g crushed pralines.
Add cream and apples to crust. Place in the oven.
• 5 COOKING
HINTS AND TIPS
- Beef, pork, lamb
- Always remove meat from the refrigerator well before cooking: cold-hot temperature shocks toughen meat; this way you will produce a roast beef that is golden outside, red inside and warm in the middle.
Do not salt before cooking: salt absorbs the blood and dries out the meat. Turn the meat over using spatulas; if you pierce it, the blood will run out. Always leave meat to rest for 5 to 10 minutes after cooking. Wrap it in foil and put it at the oven's entrance; the blood attracted outside during cooking will return inside and moisten the meat.
- Use earthenware roasting dishes; glass tends to get splattered in grease.
- Do not cook in the enamelled drip tray.
- Avoid sticking garlic cloves into a leg of lamb, this will cause it to lose its blood; rather slip the garlic between the meat and the bone or cook unpeeled cloves alongside the lamb and crush them when cooking is complete to season the sauce; strain it and serve it very hot in a gravy boat.
- Fish
- When you buy it, it should smell pleasant and not too "fishy".
- The body should be firm and rigid and the scales should be firmly attached to the skin; the eyes should be bright and rounded and gills will appear shiny and moist.
- Tarts, quiches
- Avoid glass or porcelain dishes as they are too thick and extend the cooking time and the bottom of the crust is not crispy.
- With fruits, the bottom of the tart may become soggy: just add a few spoonfuls of fine semolina, crushed biscuit crumbs, almond powder or tapioca, which will absorb the juice during cooking.
- With high-water content or frozen vegetables (leeks, spinach, broccoli or tomatoes) you can sprinkle a tablespoon of cornmeal.
- Pizza
- To prevent cheese or tomato sauce from dripping in the oven, you can place a piece of parchment paper between the shelf and the pizza.
• 6 CARE
CLEANING AND MAINTENANCE:
EXTERNAL SURFACE
Use a window washing product applied to a soft cloth. Do not use abrasive creams or scouring sponges.
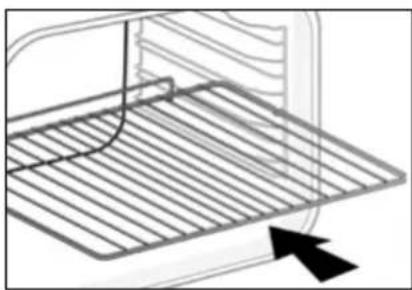
REMOVING THE SHELF RUNNERS
Side liners with shelf runners:
Lift the front part of the shelf runner upwards. Press the entire shelf runner and release the front hook from its housing. Then, gently pull the whole of the shelf runner towards you to release the rear hooks from their housing. Pull out the two shelf supports.
natural_image
Illustration of a hand inserting a rack into a device (no text or symbols visible)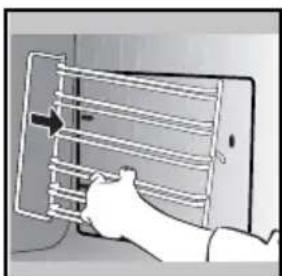
natural_image
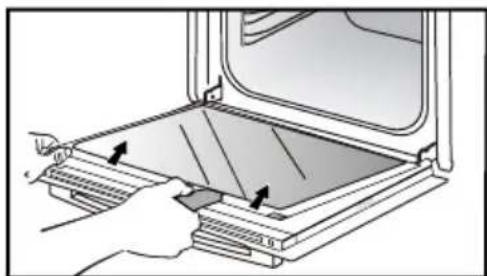
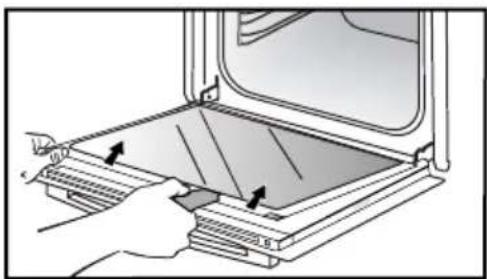
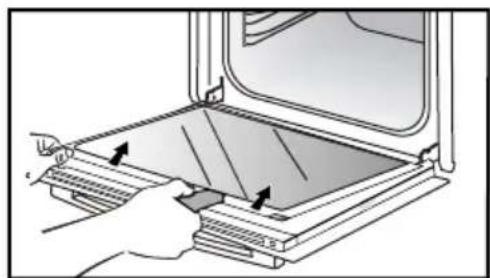
Illustration of a hand holding a tablet with a grid-like structure and an arrow indicating direction (no text or symbols)CLEANING THE DOOR GLASS

Warning
Do not use scouring products, abrasive sponges or metal scrapers to clean the glass oven door as this could scratch the surface and cause the glass to shatter.
First of all remove any excess grease with a soft cloth and washing up liquid.
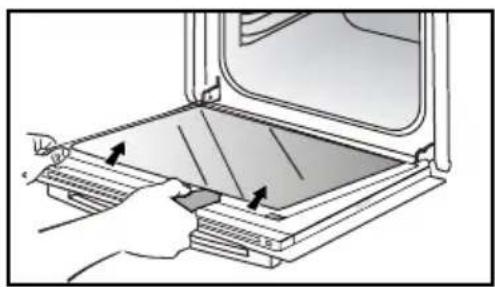
To clean the different inner glass, disassemble them as follows :
Open the door fully and block it with one of the plastic wedges provided in your appliance's plastic pouch.
natural_image
Illustration of a hand using a tool to adjust or install a component, with no visible text or symbols.Remove the first clipped glass panel: Using the other wedge (or a screwdriver), press the slots A to unclip the glass.
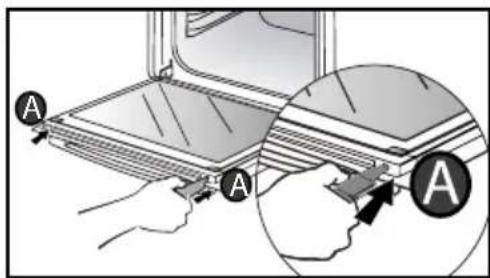
text_image
Diagram showing a hand using a tool to adjust or install a device, with labeled parts A and a magnified view of the component.Remove the glass panel.
natural_image
Illustration of a hand pressing down on a tray with arrows indicating direction (no text or symbols)The door consists of two additional glass panels, with a black rubber spacer at each corner.
• 6 CARE
text_image
x4If necessary, remove them to clean them.
Do not soak the glass panels in water. Rinse with clean water and dry off with a lint-free cloth.
After cleaning, reposition the four rubber stops with the arrow upwards and reposition all of the glass panels.
text_image
Diagram illustrating airflow or ventilation process with labeled arrows and a 3D object inside a chamberInsert the last glass panel into the metal stops, then clip it in with the side with «PYROLYTIC» facing you and legible.
natural_image
Diagram showing a mechanical component with arrows indicating motion, and an inset magnified view of a device (no text or symbols present)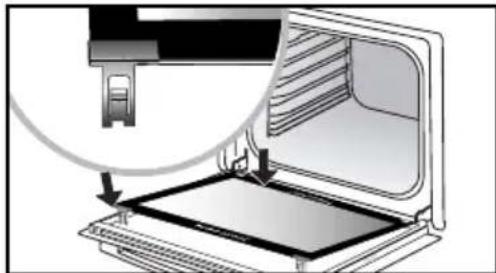
natural_image
Diagram of a printer's internal structure showing paper feeding into a tray (no text or symbols visible)Remove the plastic wedge.
Your appliance is now ready for use again.
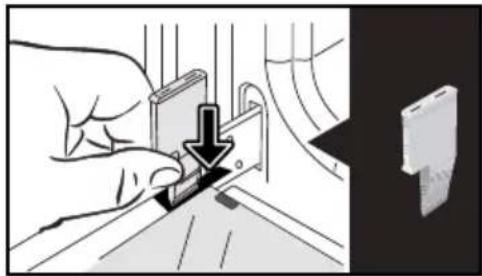
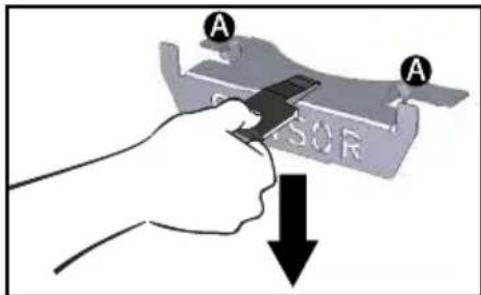
DISASSEMBLY AND REASSEMBLY OF THE "SENSOR" PLATE
You can dismantle the "SENSOR" plate indicating the presence of a humidity sensor linked to the CHEF mode as it is not essential for operation. Use the plastic wedge supplied to dismantle the door glass.
text_image
A A SENSORDisassembly :
Slide the plastic wedge between the "SENSOR" plate and the top of the oven and make a downward movement to unclip it.
Reassembly :
Grasp the "SENSOR" plate and firmly insert the notches A into the corresponding slots upwards.
• 6 CARE
PYROLYTIC SELF-CLEANING
This oven is equipped with a pyrolytic self-cleaning function:
Pyrolysis is a cycle during which the oven cavity is heated to a very high temperature in order to eliminate soiling from splattering and spills.
Before starting pyrolysis cleaning, remove any large overspills, if any. Remove the excess grease on the door using a damp sponge.
As a safety measure, cleaning only occurs after the door locks automatically; it is impossible to unlock the door.
Remove the accessories and supports from the oven before beginning pyrolysis cleaning.
PERFORM A SELF-CLEANING CYCLE
Proposed cycles:

PyroExpress in 59 minutes.
This specific function uses the heat built up during a previous cooking cycle to quickly and automatically clean the inside of the oven: it cleans a mildly dirty oven interior in less than an hour.
The electronic oven temperature monitor determines whether the residual heat remaining in the oven interior is sufficient to provide a good cleaning result. If this is not the case, a 90-minute ECO pyrolysis cycle will automatically begin.

Pyrolysis 2h00
for more in-depth cleaning of the inside of the oven.
IMMEDIATE CLEANING
The programmer must only display the time. It should not be flashing.
Turn the function selector to one of the self-cleaning functions.
The pyrolysis cycle begins. The time starts to count down as soon as it is set (press the knob).
During pyrolysis, the symbol Ⓧ is displayed in the programmer to indicate that the door is locked.
At the end of pyrolysis, a cooling phase takes place and your oven remains unavailable during this time.

When the oven is cool, use a Pdamp cloth to remove the white stones. The oven is clean again and dry for further cooking operations.
DELAYED CLEANING
Follow the instructions in the previous paragraph and then set the end time for the pyrolysis cycle by pressing Ⓗ. The display flashes. Set the end time with + and - . After these steps, the start of pyrolysis is delayed so that it finishes at the programmed time. When the pyrolysis cycle has finished, put the function selector back to 0.
• 6 CARE
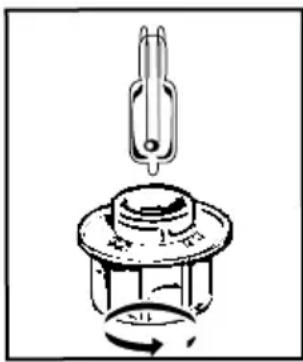
REPLACING THE LIGHT BULB
Warning Make sure the appliance is disconnected from the power before replacing the bulb in order to avoid the risk of electric shock. Carry out the operation when the appliance has cooled.
Bulb specification:
25 W, 220-240 V\~, 300°C, G9.
text_image
Diagram of a rotary knob with labeled parts and rotation arrow, showing mechanical assembly or adjustment mechanism.You can replace the bulb yourself.
Unscrew the view port and remove the bulb (use a rubber glove, which will make it easier to remove). Insert the new bulb and replace the view port.
This product contains a light source of energy e ciency class G.
• 7 ANOMALIES AND SOLUTIONS
- «AS» is displayed (Auto Stop system).
This function stops heating the oven if you forget to switch it off. Turn your oven to STOP.
- Default code starting with «F». Your oven has detected a problem.
Stop the oven for 30 minutes. If the fault is still there, cut off the power supply for at least one minute.
If the fault persists, contact the Customer Service Department.
- The oven is not heating. Check that the oven is correctly connected and that your installation's fuse is not out of service.
Check that the oven is not set to «DEMO» mode (see settings menu).
- The oven light is not working. Replace the bulb or the fuse.
Check that the oven is correctly connected.
- The cooling fan continues to operate after the oven stops. This is normal. It can work for up to one hour after cooking to cool down the oven. If it continues beyond this, contact the Customer Service Department.
- The pyrolysis cleaning cycle does not begin. Check that the door is locked. Call the Customer Services Department if the problem persists.
- The «door locking» symbol flashes in the display. Door locking fault. Contact the Customer Services Department.
- Vibration noise.
Check that the power cord is not coming in contact with the rear wall. This has no impact on the proper operation of your device but can nevertheless generate a vibration noise during ventilation. Remove your device and move the cord. Replace your oven.
• 8 AFTER-SALES SERVICE
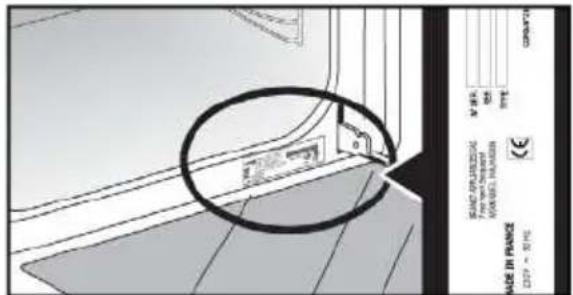
SERVICE CALLS
Any repair made to your appliance must be carried out by a qualified professional authorised to work on the brand. When you call, state your appliance's complete reference information (model, type, serial number). This information appears on the manufacturer's nameplate.
text_image
GROWTH M. 2014 REV. E FANGI DI PARANZA TEN ZERI NEEVED MAZION, INJALIA MODE DI PARANZA L377 - S196ORIGINAL PARTS
During any servicing, ask that only certified genuine replacement parts are used.

| A | B | G | |
| SERVICE: | C | TYPE: | D |
| E | F | I CE | |
| Nr | H | Made in France |
B: Commercial reference
C: Service reference
H: Serial number
| DISHES | * | Cooking time | ||||||||||||||
| °C | LEVEL | °C | LEVEL | °C | LEVEL | °C | LEVEL | °C | LEVEL | |||||||
| MEAT | Roast pork (1kg) 200 2 190 2 60 | |||||||||||||||
| Roast veal (1kg) 200 2 190 2 60-70 | ||||||||||||||||
| Roast beef 240 2 200 2 30-40 | ||||||||||||||||
| Lamb (leg, shoulder, 2.5kg) 220 2 | 220 2 | 200 | 2 210 | 2 | 60 | |||||||||||
| Poultry (1kg) 200 3 220 3 210 | 3 185 | 3 60 | ||||||||||||||
| Chicken thighs 220 3 210 3 20-30 | ||||||||||||||||
| Pork/veal chops 210 3 | 20-30 | |||||||||||||||
| Beef ribs (1kg) | 210 | 3 2 | 0 | 3 | 20-30 | |||||||||||
| Lamb chops | 210 | 3 | 20-30 | |||||||||||||
| FISH | Grilled fish | 275 | 4 | 15-20 | ||||||||||||
| Cooked fish (bream) | 200 | 3 190 | 3 30-35 | |||||||||||||
| Fish in papillotte | 220 | 3 200 | 3 15-20 | |||||||||||||
| VEGETABLES | Gratins (cooked foods) | 275 | 2 | 30 | ||||||||||||
| Potato gratin | 200 | 3 180 | 3 45 | |||||||||||||
| Lasagne | 200 | 3 180 | 3 45 | |||||||||||||
| Stuffed tomatoes | 170 | 3 | 170 | 3 | 30 | |||||||||||
| PASTRIES | Sponge cake | 180 | 3 | 180 | 4 | 35 | ||||||||||
| Swiss roll | 220 | 3 | 180 | 2 | 190 | 3 | 5-10 | |||||||||
| Buns | 180 | 3 | 200 | 3 | 180 | 3 | 180 | 3 | 35-45 | |||||||
| Brownies | 180 | 2 | 180 | 2 | 20-25 | |||||||||||
| Cake - Pound cake | 180 | 3 | 180 | 3 | 180 | 3 | 45-50 | |||||||||
| Clafoutis | 200 | 3 190 | 3 30-35 | |||||||||||||
| Cookies - Shortbread | 175 | 3 | 170 | 3 | 15-20 | |||||||||||
| Kugelhopf | 180 | 2 | 40-45 | |||||||||||||
| Meringues | 100 | 4 | 100 | 4 | 100 | 4 | 60-70 | |||||||||
| Madeleines | 220 | 3 | 210 | 3 | 5-10 | |||||||||||
| Choux pastry | 200 | 3 | 180 | 3 | 200 | 3 | 30-40 | |||||||||
| Flaky pastry hors d'oeuvres | 220 | 3 | 200 | 3 | 5-10 | |||||||||||
| Savarin cake | 180 | 3 | 175 | 3 | 180 | 3 | 30-35 | |||||||||
| Shortcrust tart | 200 | 1 | 200 | 1 | 30-40 | |||||||||||
| Thin flaky crust tart | 215 | 1 | 200 | 1 | 20-25 | |||||||||||
| OTHER | Terrine pâté | 200 | 2 | 190 | 2 | 80-100 | ||||||||||
| Pizza | 240 | 1 | 15-18 | |||||||||||||
| Quiches | 190 | 1 | 180 | 1 | 190 | 1 | 35-40 | |||||||||
| Soufflé | 180 | 2 | 50 | |||||||||||||
| Pies | 200 | 2 190 | 2 40-45 | |||||||||||||
| Bread | 220 | 2 220 | 2 30-40 | |||||||||||||
| Toast bread | 275 | 4-5 | 2-3 | |||||||||||||
N.B : Allow all joints to sit at room temperature for at least 1 hour before roasting.
* depending on model

All the temperatures and cooking times are given for pre-heated ovens.
| RELATIONSHIP OF SETTINGS TO TEMPERATURE → °C / °F | |||||||||
| Setting | 1 | 2 | 3 | 4 | 5 | 6 | 7 | 8 | 9 max. |
| ° Celsius | 30 | 60 | 90 | 120 | 150 | 180 | 210 | 240 | 275 |
| ° Fahrenheit | 85 | 140 | 195 | 250 | 300 | 355 | 410 | 465 | 525 |
PERFORMANCE TESTING ACCORDING TO STANDARD IEC 60350
| FOOD | * COOKING MODES | SHELF ACCESSORIES °C TIME min. PREHEAT | |||
| Shortbread (8.4.1) |  | 5 Deep Tray 45mn 150 30-40 | yes | ||
| Shortbread (8.4.1) |  | 5 Deep Tray 45mn 150 25-35 | yes | ||
| Shortbread (8.4.1) |  | 2 + 5 Deep Tray 45mn + grill 150 | 25-45 yes | ||
| Shortbread (8.4.1) |  | 3 Deep Tray 45mn 175 25-35 | yes | ||
| Shortbread (8.4.1) |  | s Deep Tray 45mn + grill 160 | 30-40 yes | ||
| Small cakes (8.4.2) |  | 5 Deep Tray 45mn 170 25-35 | yes | ||
| Small cakes (8.4.2) |  | 5 Deep Tray 45mn 170 25-35 | |||
| Small cakes (8.4.2) |  | 2 + 5 Deep Tray 45mn + grill 170 | 20-40 yes | ||
| Small cakes (8.4.2) | [5KSH] | 3 Deep Tray 45mn 170 25-35 | yes | ||
| Small cakes (8.4.2) |  | 2 + 5 Deep Tray 45mn + grill 170 | 25-35 yes | ||
| Fatless sponge cake (8.5.1) |  | 4 Grill 150 30-40 yes | |||
| Fatless sponge cake (8.5.1) |  | 4 Grill 150 30-40 yes | |||
| Fatless sponge cake (8.5.1) | [YSAK] | 2 + 5 Deep Tray 45mn + grill 150 | 30-40 yes | ||
| Fatless sponge cake (8.5.1) |  | 3 Grill 150 30-40 yes | |||
| Fatless sponge cake (8.5.1) |  | 2 + 5 Deep Tray 45mn + grill 150 | 30-40 yes | ||
| Apple pie (8.5.2) |  | 1 Grill 170 90-120 yes | |||
| Apple pie (8.5.2) |  | 1 Grill 170 90-120 yes | |||
| Apple pie (8.5.2) |  | 3 Grill 180 90-120 yes | |||
| Surface browning (9.2.2) |  | 5 Grill 275 3-6 yes | |||
*Depending on model
N.B.: To cook on 2 levels, dishes can be taken out at different times.
Recipe with yeast dough (depending on model)
Ingredients:
- Flour 2 kg · Water 1240 ml · Salt 40 g · 4 packets of dehydrated baker's yeast Mix the dough in a mixer and allow to rise in the oven.
Method: For yeast-based pastry recipes. Pour the dough into a heat-resistant dish. Remove the wire shelf supports and put the dish on the bottom.
Pre-heat the oven to 40—50°C with the circulating heat function for five minutes. Stop the oven and allow the dough to rise for 25-30 minutes thanks to the residual heat.
natural_image
Illustration of a cooking pot inside a container with a clock icon and partial view (no text or symbols)| "Domestic Electric Oven - Product Fiche As per the Commission Delegated Regulation (EU) N° 65/204" | |
| Trade Mark DE DIETRICH | |
| Commercial code DOP8360* | |
| Energy Ef ciency Index (EEI cavity) 81,4 | |
| Energy Ef ciency Class A+ | |
| Energy consumption per cycle in conventional mode | 0,70kWh |
| Energy consumption per cycle in fan-forced convection mode | 1,10kWh |
| Number of cavities 1 | |
| Heat source(s) per cavity Electric | |
| Volume of the cavity 73l | |
| European Union eco-label | |
GUÍA DEL USUARIO
HORNO
ES
ESTIMADA CLIENTA, ESTIMADO CLIENTE
text_image
QR code image containing encoded data, no visible human-readable textÍNDICE
ES
natural_image
Diagram of a kitchen appliance with a mesh grille and an arrow indicating direction (no text or symbols)
natural_image
3D rendering of a rectangular tray or container with internal structure and a black arrow pointing to the bottom (no text or symbols)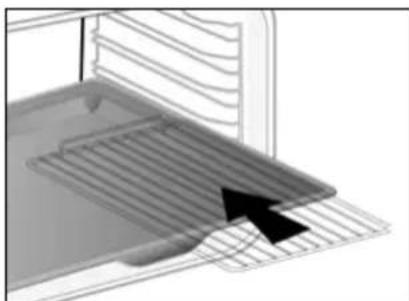
natural_image
Diagram of a kitchen appliance with a grater and ventilation grille (no text or symbols)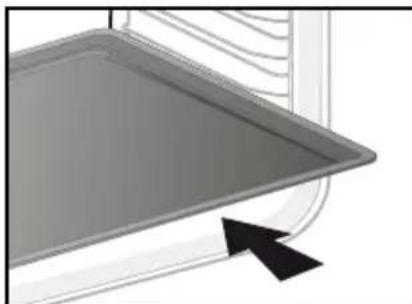
natural_image
Close-up of a gray triangular baking tray with a black arrow pointing to it (no text or symbols visible)natural_image
Diagram of an oven with internal airflow arrows indicating flow direction (no text or symbols)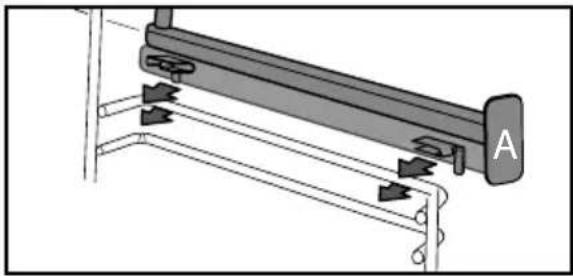
natural_image
Mechanical assembly diagram showing a lever mechanism with labeled component A (no text or symbols beyond label)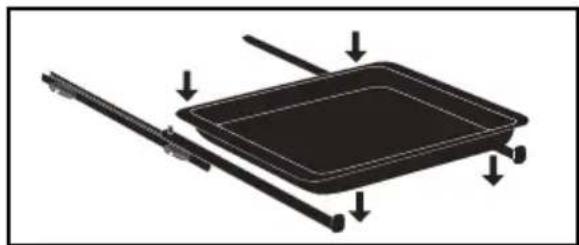
natural_image
Diagram of a rectangular tray with arrows indicating force or movement, no text or symbols present
natural_image
Mechanical assembly diagram showing a lever mechanism with directional arrows and a magnified inset view (no text or symbols)Consejo
natural_image
Illustration of a hand inserting a device into a grid-like structure (no text or symbols visible)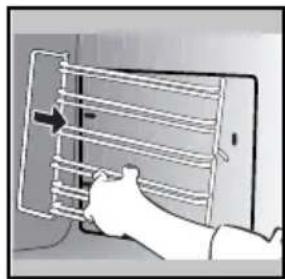
natural_image
Illustration of a hand holding a device with a grid-like structure and an arrow pointing to it (no text or symbols present)natural_image
Illustration of a hand using a tool to adjust or install a component, with no visible text or symbols.text_image
Diagram showing a hand holding a device with labeled components 'A', including a magnified inset of the component being inserted.Quite el cristal.

natural_image
Illustration of a hand using a tool to clean or install a tray inside a microwave oven (no text or symbols visible)text_image
Diagram illustrating a device's internal structure with directional arrows and a magnified view of the component.natural_image
Diagram showing a mechanical component with an inset magnified view of a stepped mechanism (no text or symbols)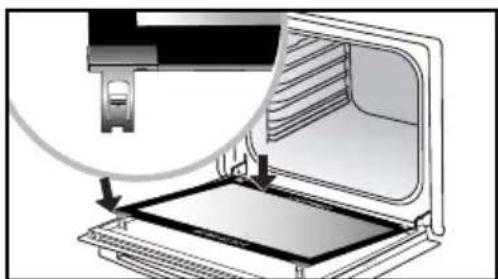
natural_image
Diagram of a laptop with an open screen and cable being inserted, showing internal components (no text or symbols)natural_image
Mechanical component diagram showing a lever and rotating knob (no text or symbols)text_image
Technical diagram showing a door panel with a magnified detail and a specification label in Chinese.PIEZAS ORIGINALES
| A | B | G | |
| SERVICE: | C | TYPE: | D |
| E | F | I CEMade in France | |
| Nr | H |
natural_image
Diagram of a kitchen appliance with a grater and a black arrow indicating direction (no text or symbols)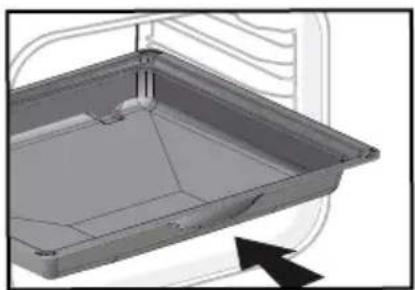
natural_image
3D CAD model of a rectangular tray or enclosure with internal structure, shown without any text or symbols.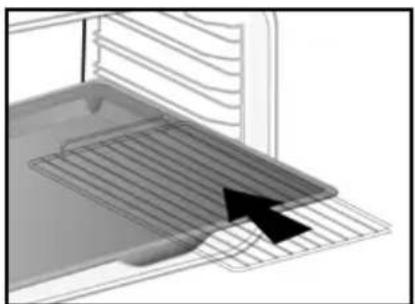
natural_image
Diagram of a kitchen appliance with a grater and ventilation grille (no text or symbols)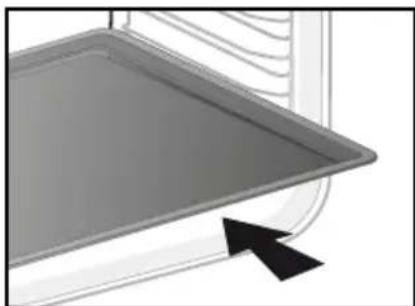
natural_image
Close-up of a gray tray with a black arrow pointing to it, no visible text or symbols• 3 UUNIN YLEISKUVAUS
- Aromiritilät
natural_image
Diagram of an oven with internal airflow arrows indicating flow or movement (no text or symbols)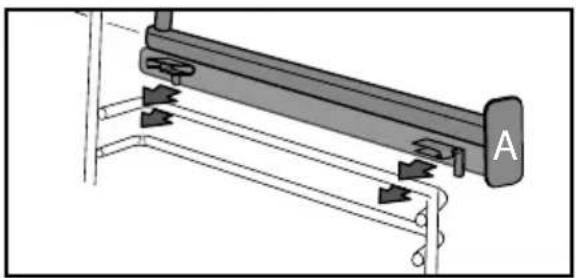
natural_image
Mechanical assembly diagram showing a lever mechanism with labeled component A (no text or symbols present)
natural_image
Diagram of a mechanical component with arrows indicating force or movement (no text or symbols)
natural_image
Mechanical assembly diagram showing a lever mechanism with directional arrows and a magnified inset view (no text or symbols)Vinkki Vältää
KYPSENNYSTOIMINNOT "OHJELMAVALINTA»-TILASSA
(mallista riippuen)

Pitsa, "talon" taikina
natural_image
Two-step diagram showing hand positioning of a device with horizontal lines and arrows indicating motion (no text or symbols)UUNIN SISÄPUOLELLA OLEVAT LASIT
natural_image
Illustration of a hand using a tool to adjust or install a component, with no visible text or symbols.text_image
Diagram showing a hand holding a laptop with labeled parts 'A', including a magnified inset view of the device's handle.Vedä lasi ulos.
natural_image
Illustration of a hand pressing down on a tray with arrows indicating direction (no text or symbols)text_image
Diagram illustrating a device with directional arrows and a magnified view of the screen area, likely indicating movement or orientation.natural_image
Diagram showing a mechanical component with an inset magnified view of a stepped mechanism (no text or symbols)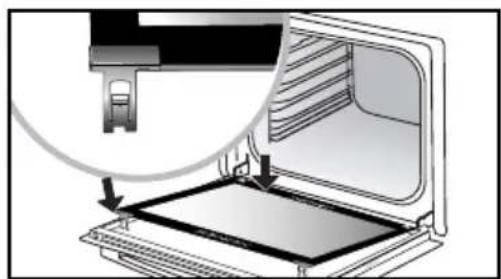
natural_image
Diagram of a computer monitor with an open screen and a magnified view showing internal components (no text or symbols)natural_image
Mechanical component diagram showing a fork inserted into a housing with a rotating arrow indicating rotation (no text or symbols)Lampun tyyppi:
25 W, 220-240 V\~, 300°C, G9.
text_image
Technical diagram showing a door panel with a magnified inset detail, labeled with Chinese text and technical specifications.| A | B | G | |
| SERVICE: | C | TYPE: D | I CEMade in France |
| E | F | ||
| Nr | H |
B : Tuotenumero
C : Huoltotiedot
H : Sarjanumero
HUOMAUTUS:
natural_image
Illustration of a bowl with a lid and a handle, placed on a surface (no text or symbols)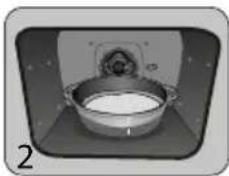
natural_image
3D rendering of a metal bowl with a lid, placed on a platform (no text or symbols visible)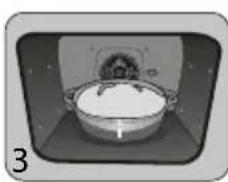
natural_image
Illustration of a bowl with a lid and lid placed inside a container, no text or symbols visible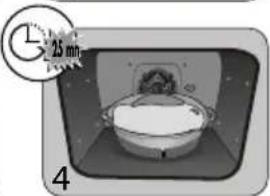
natural_image
Illustration of a cooking pot with a clock icon and 25 mm scale indicator (no text or symbols on the pot itself)FORNO
MANUALE D'USO
IT
CARA CLIENTE, CARO CLIENTE,
text_image
QR code image containing encoded data, no visible human-readable textINDICE
IT
natural_image
Diagram of a kitchen appliance with a rack and a curved handle, showing an arrow pointing to the side (no text or symbols present)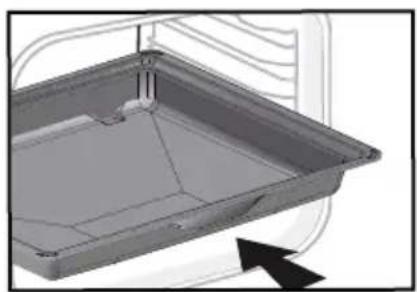
natural_image
3D CAD model of a rectangular tray or enclosure with internal components, shown without any text or symbols.
natural_image
3D diagram of a kitchen appliance with a grater and ventilation grille (no text or symbols)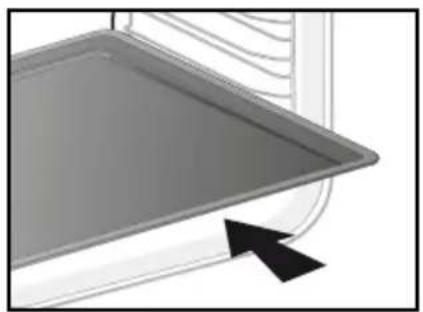
natural_image
Close-up of a gray tray with a black arrow pointing to it, no visible text or symbolsnatural_image
Diagram of an oven with internal airflow arrows indicating flow or movement (no text or symbols)
natural_image
Mechanical assembly diagram showing a lever mechanism with labeled component A (no text or symbols beyond label)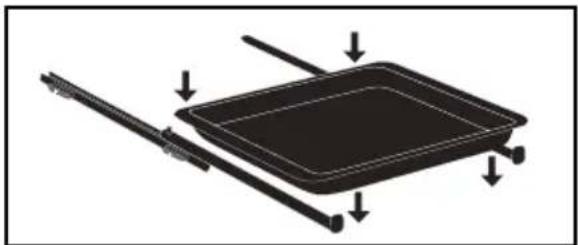
natural_image
Diagram of a rectangular tray with arrows indicating direction or force, no text or symbols present
natural_image
Mechanical assembly diagram showing a lever mechanism with directional arrows indicating motion (no text or symbols present)Consiglio
PROGRAMMARE LA TEMPERATURA
PROGRAMMARE LA DURATA
natural_image
Illustration of a hand holding a rack-mounted device with a curved arrow indicating rotation (no text or symbols)
natural_image
Illustration of a hand holding a grid-like object with an arrow pointing to it, next to a tablet device (no text or symbols visible)PULIZIA DELLE FINESTRE DELLA PORTA
natural_image
Illustration of a hand using a tool to adjust or install a component, with no visible text or symbols.text_image
Diagram showing a hand using a tool to adjust or install a component, with labeled parts A and a magnified view of the component.Rimuovere il vetro.
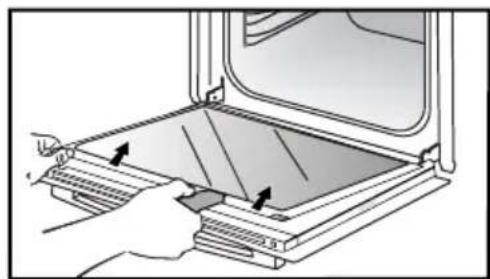
natural_image
Illustration of a hand opening a refrigerator with a tray and drawer, showing internal compartments (no text or symbols)text_image
Diagram illustrating a 3D printer's internal structure with directional arrows and a magnified view of the device's top view.natural_image
Diagram showing a mechanical component with an inset magnified view of a stepped mechanism (no text or symbols)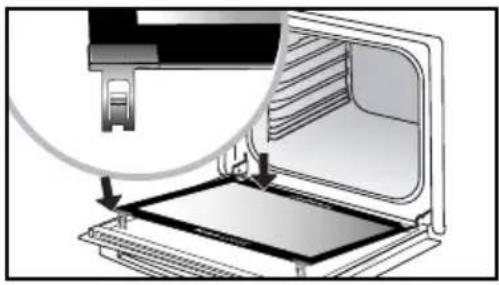
natural_image
Diagram of a laptop with an open screen and a close-up view of the screen (no text or symbols)natural_image
Mechanical component diagram showing a rotating knob with a handle and rotation arrow (no text or symbols)text_image
Technical diagram showing a door with a magnified inset detail and a labeled control panel in Chinese.| A | B | G | |
| SERVICE: | C | TYPE: | D |
| E | F | I CEMade in France | |
| Nr | H |
natural_image
Illustration of a stainless steel pot with a lid and lid placed inside a rectangular frame (no text or symbols)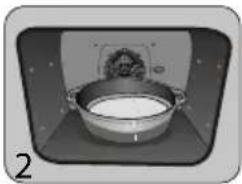
natural_image
Illustration of a bowl with a lid and a small object inside, enclosed in a rectangular frame (no text or symbols)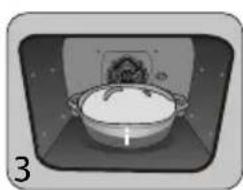
natural_image
Illustration of a pot with a lid and a rose inside, no text or symbols present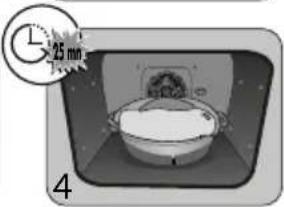
text_image
25 min 4OVEN
GEBRUIKSGIDS
NL
natural_image
Diagram of a kitchen appliance with a mesh tray and an arrow indicating direction (no text or symbols)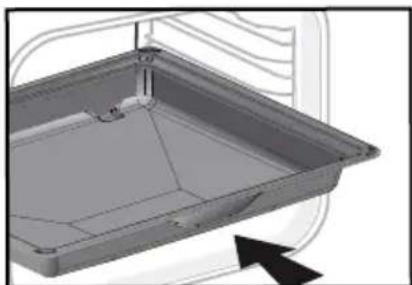
natural_image
3D rendering of a rectangular tray with internal structure and mounting bracket (no text or symbols)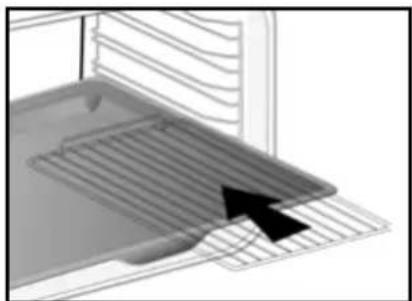
natural_image
Diagram of a kitchen appliance showing a grater with an arrow pointing to the interior (no text or symbols present)
natural_image
Close-up of a gray tray with a black arrow pointing to it, no visible text or symbols• 3 VOORSTELLING VAN DE OVEN
natural_image
Diagram showing airflow or fluid flow between two parallel pipes inside a vehicle (no text or symbols)
natural_image
Mechanical assembly diagram showing a lever mechanism with labeled component A (no text or symbols present)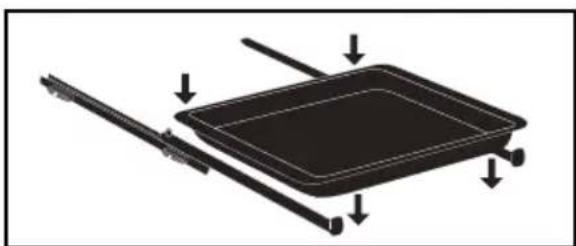
natural_image
Diagram of a rectangular tray with arrows indicating direction, no text or symbols present
natural_image
Mechanical assembly diagram showing a lever mechanism with directional arrows and a magnified inset view (no text or symbols)Advies
natural_image
Illustration of a hand inserting a device into a rack with an arrow indicating rotation (no text or symbols present)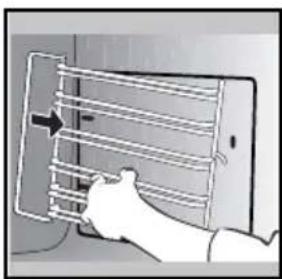
natural_image
Hand holding a device with a rack and directional arrow (no text or symbols visible)BINNENKANT VAN DE RUITEN

Let op
natural_image
Illustration of a hand using a tool to adjust or install a component, with no visible text or symbols.text_image
Diagram showing a hand using a tool to adjust or install a device with labeled components 'A', including a magnified inset view.Verwijder het glas.
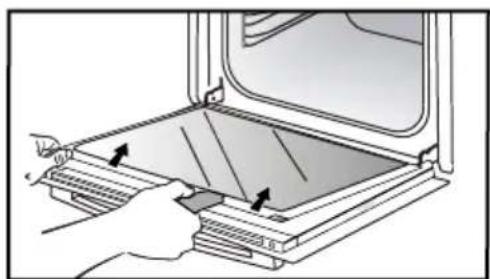
natural_image
Illustration of a hand opening a microwave oven with a tray and ventilation slots (no text or symbols)text_image
Diagram illustrating a 3D printer's internal structure with directional arrows and a magnified view of the device's top view.natural_image
Diagram showing a mechanical assembly with arrows indicating motion or force direction (no text or symbols present)
natural_image
Diagram of a 3D printer or scanner with an open base and a close-up view of the component (no text or symbols visible)natural_image
Mechanical component diagram showing a fork inserted into a housing with a rotating arrow indicating rotation (no text or symbols)text_image
Technical diagram showing a door with a magnified inset highlighting a component labeled 'B' and a numbered section '14-20'| A | B | G | |
| SERVICE: | C | TYPE: D | I CE |
| E | F | ||
| Nr | H | Made in France |
text_image
QR code image containing encoded data, no visible human-readable textINNHOLDSFORTEGNELSE
NO
natural_image
Diagram of a kitchen appliance with a grid-patterned tray and an arrow indicating direction (no text or symbols)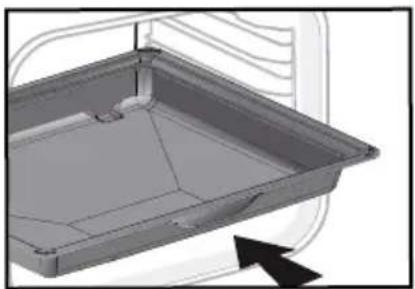
natural_image
3D rendering of a rectangular tray with internal channels and a black arrow pointing to the bottom-right corner (no text or symbols)
natural_image
3D diagram of a kitchen appliance with a grater and ventilation grille (no text or symbols)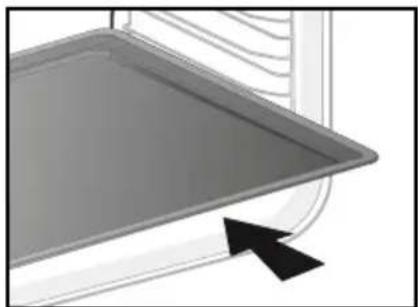
natural_image
Close-up of a kitchen tray with a black arrow pointing to it (no text or symbols visible)• 3 PRESENTASJON AV OVNEN
- Glideskinner
natural_image
Diagram of an oven with airflow arrows indicating material or movement (no text or symbols)
natural_image
Mechanical assembly diagram showing a lever mechanism with labeled component A (no text or symbols present)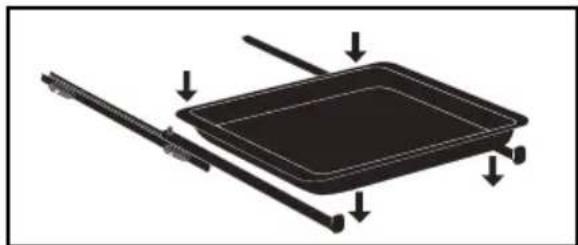
natural_image
Diagram of a rectangular tray with arrows indicating direction or force, no text or symbols present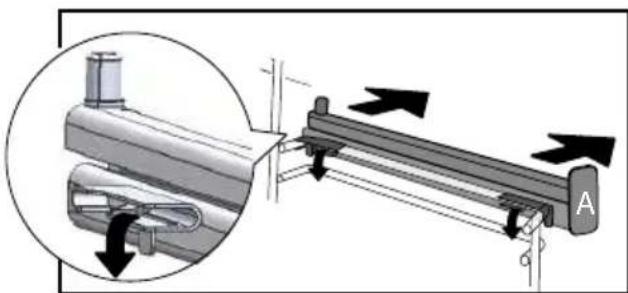
natural_image
Mechanical assembly diagram showing a lever mechanism with directional arrows indicating motion (no text or symbols present)Råd
text_image
VARMLUFT VARIABEL GRILL VARMLUFT + TRADISJONELL HOLD VARM TRADISJONELL TINING ECO BR∅D MEDIUM GRILL MED VARMLUFT T∅RK UNDERVARME MED VARMLUFTUMIDDELBAR STEKESTART (fig. A)
STEKING MED UTSATT START
*P10 - Yoghurt (3 timer)
UMIDDELBAR STEKESTART
- Vri bryteren frem til stekefunksjonen «langtidssteking».
STEKING MED UTSATT START
STEKING MED UTSATT START
STEKING MED UTSATT START
natural_image
Illustration of a hand inserting a rack into a device (no text or symbols visible)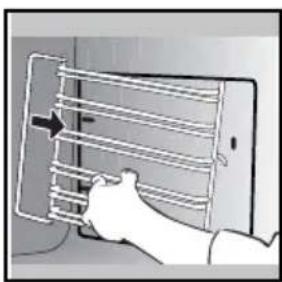
natural_image
Illustration of a hand holding a tablet with a grid and directional arrow (no text or symbols)RENGJ∅RE DE INNVENDIGE GLASSRUTENE

Advarsel
natural_image
Illustration of a hand using a tool to adjust or install a component, with no visible text or symbols.text_image
Diagram showing a hand holding a device with labeled parts 'A', including a magnified inset view of the component.Ta av glassruten.
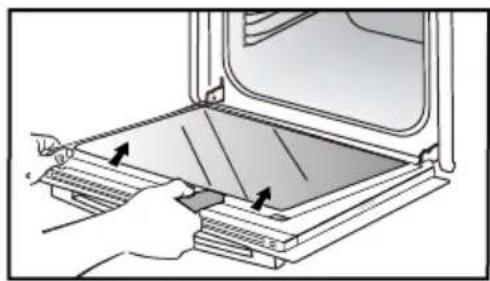
natural_image
Illustration of a hand pressing down on a tray with arrows indicating direction (no text or symbols)Døren består av to ekstra glassruter med et svart avstandsstykke i gummi i hvert hjørne.
• 6 VEDLIKEHOLD
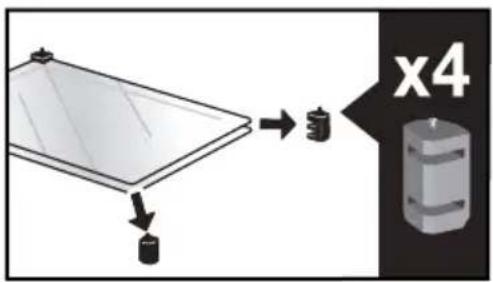
text_image
x4text_image
Diagram illustrating a device's internal structure with directional arrows and a magnified view of the component.Sett den siste glassruten i metallstopperne, klips den fast med påskriften «PYROLYTIC» vendt mot deg slik at du kan lese det.
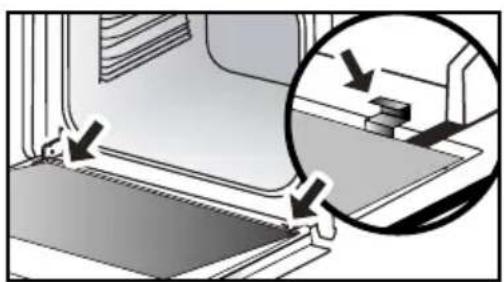
natural_image
Diagram showing a mechanical component with arrows indicating motion, and a magnified inset highlighting a step-like feature (no text or symbols present)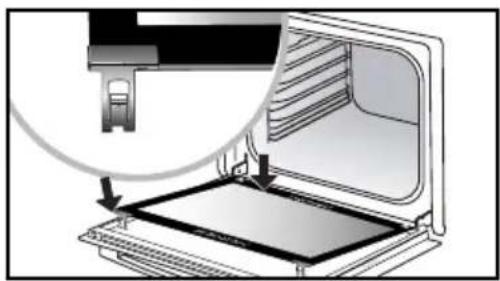
natural_image
Diagram of a laptop with an open screen and a magnified view showing the internal structure (no text or symbols)Fjern plastkilen.
natural_image
Mechanical component diagram showing a pulley and rotating arrow (no text or symbols)text_image
Technical diagram showing a door panel with labeled components and a magnified view of the door handle.| A | B | G | |
| SERVICE: | C | TYPE: D | I CE |
| E | F | ||
| Nr | H | Made in France |
B: Salgsreferanse
C: Servicereferanse
H: Serienummer
| RETTER | * | * | * | * | * | * | * | Steketid i minutter | ||||||||
| RILLE | RILLE | RILLE | RILLE | RILLE | RILLE | RILLE | ||||||||||
| KJ∅TT | Svinestek (1 kg) 200 2 190 2 60 | |||||||||||||||
| Kalvestek (1 kg) 200 2 190 2 60-70 | ||||||||||||||||
| Oksestek 240 2 200 2 30-40 | ||||||||||||||||
| Lam (lår, skulder 2,5 kg) 220 2 220 2 | 200 2 2 | 0 2 60 | ||||||||||||||
| Fjærkre (1 kg) 200 3 220 3 210 3 185 | 3 60 | |||||||||||||||
| Kyllinglår 220 3 210 3 20-30 | ||||||||||||||||
| Svine-/kalvekoteletter 210 3 20-30 | ||||||||||||||||
| Oksekoteletter (1 kg) | 210 3 | 210 3 | 20-30 | |||||||||||||
| Fårekoteletter | 210 3 | 20-30 | ||||||||||||||
| FISK | Grillet fisk | 275 4 | 15-20 | |||||||||||||
| Fiskerett | 200 3 | 190 3 | 30-35 | |||||||||||||
| Foliedampet fisk | 220 3 | 200 3 | 15-20 | |||||||||||||
| GR∅NSAKER | Grateng (kokte grønnsaker) | 275 2 | 30 | |||||||||||||
| Fløtegratinerte poteter | 200 3 | 180 3 | 45 | |||||||||||||
| Lasagne | 200 3 | 180 3 | 45 | |||||||||||||
| Fylte tomater | 170 3 | 170 3 | 30 | |||||||||||||
| BAKVERK | Bløtkakebunn | 180 3 | 1 | 80 4 | 35 | |||||||||||
| Rullekake | 220 | 3 | 180 | 2 | 190 | 3 | 5-10 | |||||||||
| Boller | 180 | 3 | 200 | 3 | 180 | 3 | 180 | 3 | 35-45 | |||||||
| Brownies | 180 2 | 180 2 | 20-25 | |||||||||||||
| Formkake | 180 | 3 | 180 | 3 | 180 | 3 | 45-50 | |||||||||
| Fruktpai | 200 3 | 190 3 | 30-35 | |||||||||||||
| Småkaker | 175 3 | 170 3 | 15-20 | |||||||||||||
| Marmorkake | 180 | 2 | 40-45 | |||||||||||||
| Marengs | 100 | 4 | 100 | 4 | 100 | 4 | 60-70 | |||||||||
| Muffins | 220 3 | 210 3 | 5-10 | |||||||||||||
| Vannbakkelis | 200 | 3 | 180 | 3 | 200 | 3 | 30-40 | |||||||||
| Små former med butterdeig | 220 | 3 | 200 | 3 | 5-10 | |||||||||||
| Formkake med gjærdeig | 180 | 3 | 175 | 3 | 180 | 3 | 30-35 | |||||||||
| Terte med mørdeig | 200 1 | 200 1 | 30-40 | |||||||||||||
| Terte med butterdeig | 215 1 | 200 1 | 20-25 | |||||||||||||
| DIVERSE | Terrin | 200 2 | 190 2 | 30-100 | ||||||||||||
| Pizza | 240 1 | 15-18 | ||||||||||||||
| Quiche | 190 | 1 | 180 | 1 | 190 | 1 | 35-40 | |||||||||
| Sufflé | 180 | 2 | 50 | |||||||||||||
| Pai | 200 2 | 190 2 | 40-45 | |||||||||||||
| Brød | 220 2 | 220 2 | 30-40 | |||||||||||||
| Ristet brød | 275 | 4-5 | 2-3 | |||||||||||||
WYBÓR MIEJSCA INSTALACJI I WBUDOWANIA
natural_image
Diagram of a kitchen appliance with a grid-patterned tray and an arrow indicating direction (no text or symbols)
natural_image
3D CAD model of a rectangular tray or container with internal compartments and mounting holes, shown without any text or symbols.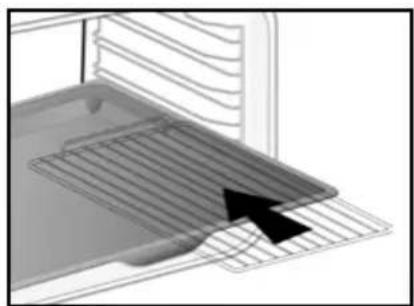
natural_image
Diagram of an oven interior showing a rack with a black arrow pointing to the tray (no text or symbols present)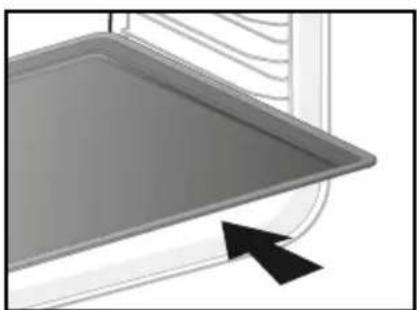
natural_image
Close-up of a gray tray with a black arrow pointing to it, no visible text or symbols• 3 PREZENTACJA PIEKARNIKA
natural_image
Diagram of an oven with internal airflow arrows indicating flow or movement (no text or symbols)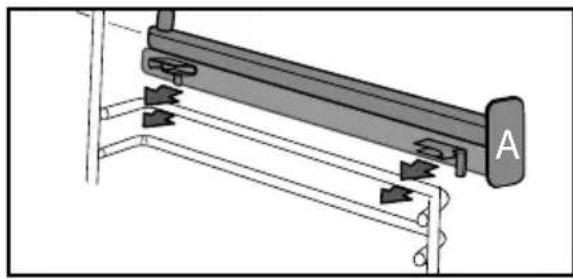
natural_image
Mechanical assembly diagram showing a lever mechanism with labeled component A (no text or symbols beyond label)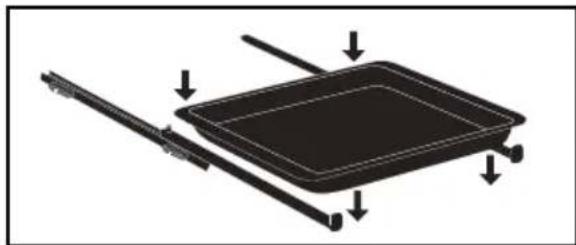
natural_image
Diagram of a rectangular tray with arrows indicating direction or movement, no text or symbols present
natural_image
Mechanical assembly diagram showing a lever mechanism with directional arrows and a magnified inset view (no text or symbols)Porada
natural_image
Two-panel illustration showing a hand holding a device with a rack and a scroll, no text or symbols present.natural_image
Illustration of a hand using a tool to adjust or install a component, with no visible text or symbols.text_image
Diagram illustrating a mechanical or electrical component with labeled parts A, showing hand positioning and magnified detail.natural_image
Illustration of a hand placing a slide into a tray inside an oven (no text or symbols visible)text_image
Diagram illustrating a 3D printer or scanner with an open lid and directional arrows indicating process flow or movement.natural_image
Diagram showing a mechanical assembly with an inset magnified view of a component (no text or symbols present)
natural_image
Diagram of a printer or printer with an open lid and cable inserted, showing internal components (no text or symbols)natural_image
Mechanical component diagram showing a knob with a handle and rotating arrow (no text or symbols)natural_image
Illustration of a stainless steel pot with a lid, placed on a surface (no text or symbols)
natural_image
Simple illustration of a bowl with a lid, placed inside a rectangular frame (no text or symbols)
natural_image
Illustration of a bowl with food inside, no visible text or symbols
text_image
25 mm 4FORNO
GUIA DE UTILIZAÇÃO
PT
CARA CLIENTE,
CARO CLIENTE,
Desmontando as etapas 25
Limpando as janelas das portas 25
natural_image
Diagram of a kitchen appliance with a grid and directional arrow (no text or symbols)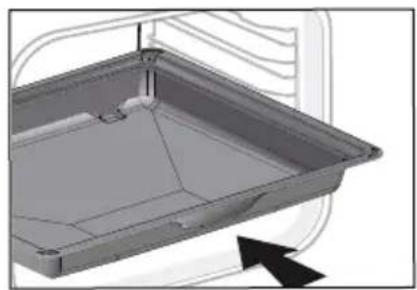
natural_image
3D CAD model of a rectangular tray or enclosure with internal structure and mounting holes, shown without any text or symbols.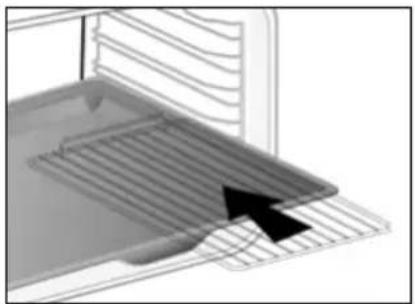
natural_image
Diagram of a kitchen appliance showing a tray with a black arrow pointing to the interior (no text or symbols)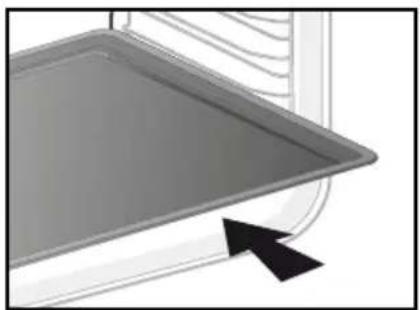
natural_image
Close-up of a gray rectangular tray with a black arrow pointing to it, no visible text or symbols.natural_image
Diagram of an oven with internal airflow arrows indicating flow direction (no text or symbols)
natural_image
Mechanical assembly diagram showing a lever mechanism with labeled component A (no text or symbols present)
natural_image
Diagram of a rectangular tray with arrows indicating direction, no text or symbols present
natural_image
Mechanical assembly diagram showing a lever mechanism with directional arrows and a magnified inset view (no text or symbols)Conselho
natural_image
Illustration of a hand inserting a rack into a device (no text or symbols visible)
natural_image
Illustration of a hand holding a device with a grid-like structure and an arrow pointing to it (no text or symbols present)VIDROS INTERIORES
natural_image
Illustration of a hand using a tool to adjust or install a component, with no visible text or symbols.text_image
Diagram showing a hand holding a device with labeled components 'A', including a magnified inset view of the component being inserted.Retire o vidro.
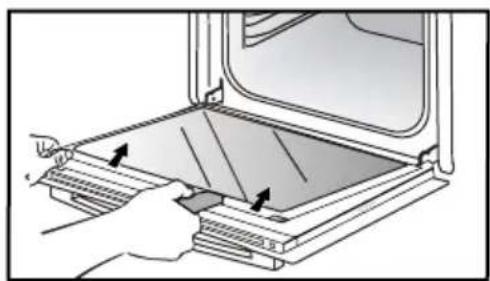
natural_image
Illustration of a hand pressing down on a tray with arrows indicating direction (no text or symbols)text_image
Diagram illustrating airflow or ventilation process with labeled arrows and a 3D object inside a devicenatural_image
Diagram showing a mechanical component with arrows indicating motion or force, and an inset magnified view of a stepped mechanism (no text or symbols present)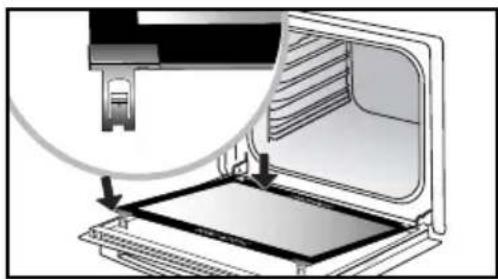
natural_image
Diagram of a device being processed into a rack, showing internal components and a magnified view (no text or symbols)natural_image
Mechanical component diagram showing a pin inserted into a housing with a rotating arrow indicating rotation (no text or symbols)text_image
Diagram showing a device mounted on a door panel with a magnified inset highlighting the component, alongside a vertical label in English.| A | B | G | |
| SERVICE: | C | TYPE: D | I CEMade in France |
| E | F | ||
| Nr | H |
natural_image
Illustration of a pot with a lid placed inside a stove (no text or symbols)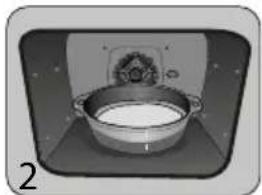
natural_image
Illustration of a bowl with a lid and a small object above it, placed on a flat surface (no text or symbols)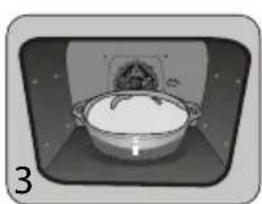
natural_image
Illustration of a bowl with food inside, no visible text or symbols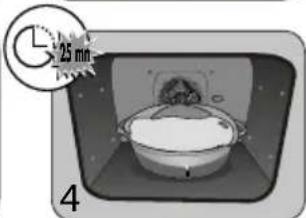
text_image
25 mn 4ДУХОВОЙ ШКАФ
natural_image
Diagram of a kitchen appliance with a grater rack and an arrow indicating direction (no text or symbols)natural_image
3D rendering of a rectangular tray with internal compartments and a handle, shown without any text or symbols.natural_image
Diagram of a kitchen appliance interior showing a grater with a black arrow pointing to the grille (no text or symbols)- Противень 8мм
natural_image
Close-up of a gray tray with a black arrow pointing to it, no visible text or symbolsnatural_image
Mechanical assembly diagram showing a lever mechanism with labeled component A (no text or symbols present)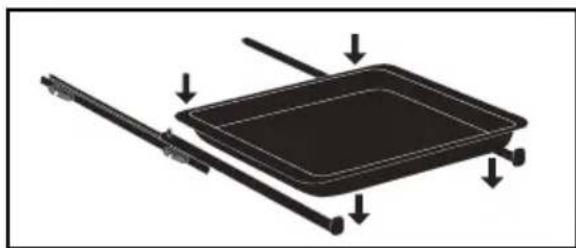
natural_image
Diagram of a rectangular tray with arrows indicating direction, no text or symbols present
text_image
щей ой A
Рекомендация
natural_image
Illustration of a hand inserting a grid into a device (no text or symbols visible)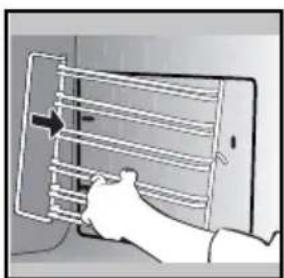
natural_image
Illustration of a hand holding a smartphone with a grid-like panel and an arrow pointing to it (no text or symbols present)natural_image
Illustration of a hand using a tool to adjust or install a device, with no visible text or symbols.text_image
Diagram showing a hand holding a device with labeled points A, illustrating a process with an inset close-up of the component.Извлеките стекло:

natural_image
Illustration of a hand opening a microwave oven with a tray and lid (no text or symbols)text_image
Diagram showing a 3D printer with an open lid and directional arrows indicating orientation or movement, likely illustrating a device or system.natural_image
Diagram showing a mechanical assembly with an inset magnified view of a component (no text or symbols present)natural_image
Diagram of a laptop with an open screen and a magnified view showing the screen area (no text or symbols present)natural_image
Diagram of a mechanical knob with a handle and rotating arrow (no text or symbols)text_image
Technical diagram showing a door panel with a magnified inset highlighting a component, alongside a technical drawing with dimension annotations.| A | B | G | |
| SERVICE: | C | TYPE: | D |
| E | F | I CEMade in France | |
| Nr | H |
text_image
QR code image containing encoded data, no visible human-readable textnatural_image
Diagram of a kitchen appliance with a grid-patterned tray and an arrow indicating direction (no text or symbols)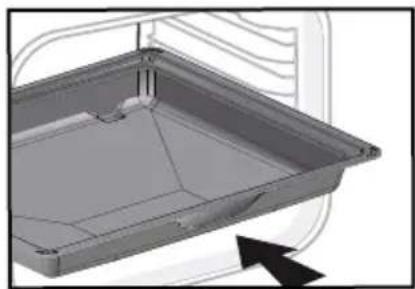
natural_image
3D CAD model of a rectangular metal tray or enclosure with internal compartments and mounting holes (no text or symbols visible)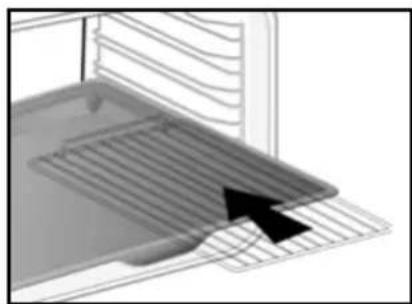
natural_image
Diagram of a kitchen appliance with a grater and ventilation grille (no text or symbols)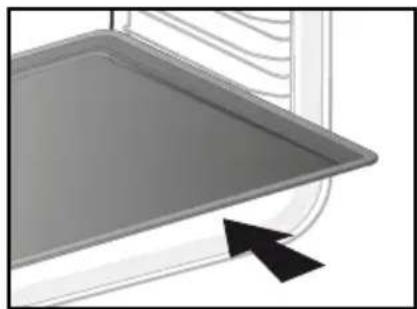
natural_image
Close-up of a gray tray with a black arrow pointing to it, no visible text or symbols• 3 POPIS RÚRY
natural_image
Diagram of an oven with internal airflow arrows indicating flow or movement (no text or symbols)
natural_image
Mechanical assembly diagram showing a lever mechanism with labeled component A (no text or symbols beyond label)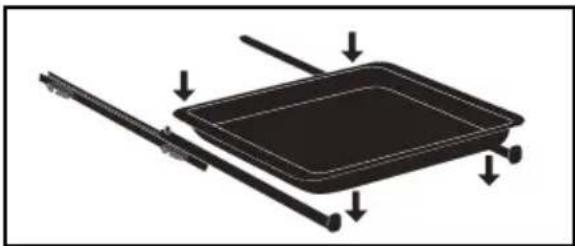
natural_image
Diagram of a tray with arrows indicating movement or force direction (no text or symbols)
natural_image
Mechanical assembly diagram showing a lever mechanism with directional arrows and a magnified inset view (no text or symbols)Odporúčanie
NAPROGRAMOVANIE TEPLOTY
Ked' sa presuniete na požadovanú funkciu pečenia, stlačte tlačidlo ↓.
natural_image
Illustration of a hand inserting a device into a rack with arrows indicating rotation (no text or symbols)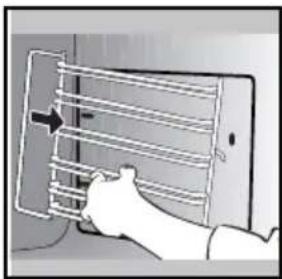
natural_image
Illustration of a hand inserting a grid into a tablet device (no text or symbols visible)VNÚTORNÉ OKNÁ
natural_image
Illustration of a hand using a tool to cut a component, with a magnified view of the device (no text or symbols present)text_image
Diagram showing a hand using a tool to adjust or install a device with labeled components 'A', including an inset magnified view.Odstráňte sklo:
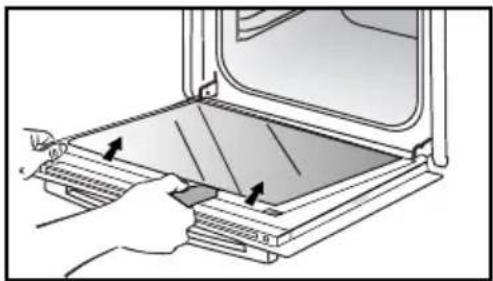
natural_image
Illustration of a hand using a tool to open a microwave oven with a tray and lid (no text or symbols)text_image
Diagram illustrating a 3D printer's internal structure with directional arrows and a magnified view of the device's top view.natural_image
Diagram showing a mechanical component with arrows indicating motion, and a magnified inset highlighting a specific section (no text or symbols present)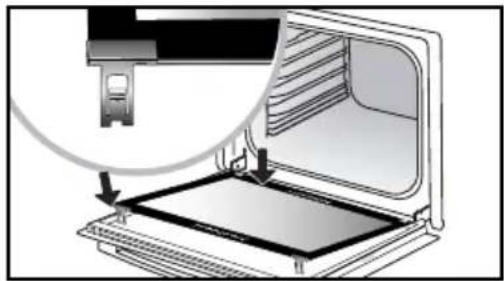
natural_image
Diagram of a computer monitor with an open screen and a magnified view showing the screen area (no text or symbols present)DEMONTÁŽ A MONTÁŽ DOSKY "SENSOR"
text_image
A A C S A C Anatural_image
Mechanical component diagram showing a piston-like assembly with a rotating knob and curved arrow indicating rotation (no text or symbols)text_image
Technical diagram showing a door panel with a magnified inset detail and a label indicating 'MILK 2014' and 'SALAD 2014'.| A | B | G | |
| SERVICE: | C | TYPE: D | I CE |
| E | F | ||
| Nr | H | Made in France |
B: Obchodná referencia
natural_image
Illustration of a cooking pot inside a container with a clock and 25 mm scale indicator (no text or symbols on the pot itself)UGN
SV ANVÄNDARHANDLEDNING
SV
INNEHÅLLSFÖRTECKNING
SV
VAL AV PLACERING OCH INBYGGNAD
natural_image
Diagram of a kitchen appliance with a grater and an arrow indicating direction (no text or symbols)
natural_image
3D rendering of a rectangular tray or container with internal structure, no visible text or symbols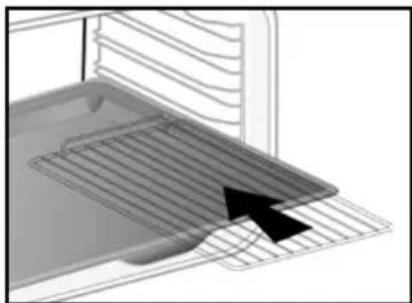
natural_image
Diagram of a kitchen oven with a grater and an arrow pointing to the interior (no text or symbols)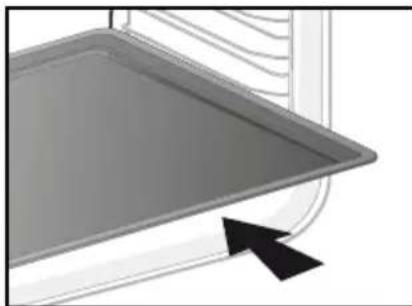
natural_image
Close-up of a gray baking tray with a black arrow pointing to it, no text or symbols visible.• 3 PRESENTATION AV UGNEN
– System med glidskenor
natural_image
Diagram of an oven with airflow arrows indicating material or movement (no text or symbols)
natural_image
Mechanical assembly diagram showing a lever mechanism with labeled component A (no text or symbols beyond label)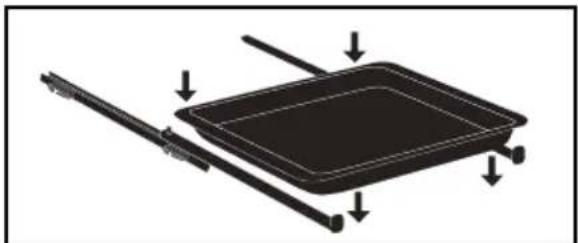
natural_image
Diagram of a rectangular tray with arrows indicating direction or force, no text or symbols present
natural_image
Mechanical assembly diagram showing a lever mechanism with directional arrows indicating motion (no text or symbols present)
Råd
natural_image
Two-panel illustration showing a hand holding a device with a grid-like structure, no text or symbols present.INVÄNDIGA GLASYTOR
natural_image
Illustration of a hand using a tool to adjust or install a component, with no visible text or symbols.text_image
Diagram showing a hand holding a device with labeled components 'A', including a magnified inset view of the component being inserted.Ta ut glasrutan.

natural_image
Illustration of a hand opening a refrigerator with a tray and drawer (no text or symbols)text_image
Diagram showing airflow or ventilation process inside a microwave oven with labeled arrows and a magnified inset of the device.natural_image
Diagram showing a mechanical assembly with an inset magnified view of a component (no text or symbols present)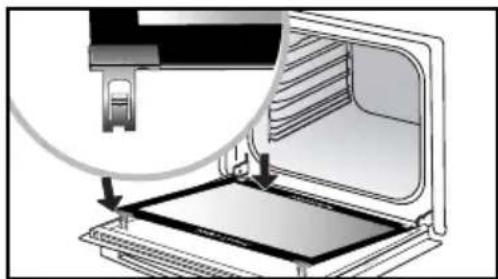
natural_image
Diagram of a 3D printer or scanner with an open panel, showing internal components and a magnified view of the device (no text or symbols present)Ta bort plastkilen.
SJÄLVRENGÖRING MED PYROLYS
SJÄLVRENGÖRING MED FÖRDRÖJD START
natural_image
Mechanical component diagram showing a pin-like assembly with a rotating knob (no text or symbols)text_image
Technical diagram showing a door panel with a magnified inset detail and a labeled scale bar in Chinese.| A | B | G | |
| SERVICE: | C | TYPE: D | I CEMade in France |
| E | F | ||
| Nr | H |
natural_image
Illustration of a bowl with a flower inside, enclosed in a rounded rectangle (no text or symbols)informacje dotyczące domowych plekarników (UE n° 66/2014)
informações relativas a formos domésticos (UE nº 66/2014)
formácie v prípade růr na pečenie pre domácnost (UE n° 66/2014)
information om hushállsaugnar (UE n° 66/2014)
Kotitalpuksien uunien tiedot (UE n° 66/2014)
information for domestic ovens (UE n° 66/2014)
Informations concernant les fours domestiques (UE n° 66/2014)
Informace tykajici se trub pro doměcnost (UE n° 66/2014)
Oplysninger for ovne til husholdningsbrug (UE n° 66/2014)
Πληραφορίες για ακιακούς φρώρνους (UE n° 66/2014)


| Symbol | Unit | Value | EN: Symbol-FR: Symbolo-CS: Znečka-DA:Symbol-DE: Symbol-ES: Simbolo-IT: Simbolo-NL: Symbool-PL: Oznacznie-PT: Simbolo-SK: Symbol-EL: Šužklo-Ft: Symbo-SV: Symbol. EN: Value-FR: Valeur-CS: Hodnota-DA: Vardi-DE: Wert-ES: Valor-IT: Valeur-NL: Waarde-PL: Wartoš-PT: Valor-SK: Hodnota-EL: Apříjním tujá-Fl: Anvo-SV: Várde. EN: Unit-FR: Unité CS: Jednotka-DA: Enlied-DE: Einheit-ES: Unidad-IT: Unità di misura-NL: Enlied-PL: Jednostka-PT: Unidade SK: Jednostka-EL: Movõdu-Fl: Yksikko-SV: Enliel. | |||||||||||||||
| Type norme | XCD25P | XCD25T | XGT25P | XHT25S | XHT25T | XHT25P | XHT15P | XHT25U | XHT25V | XHT25W | XHT15W | XHT45W | XHT35W | XHT71W | EN: Type norme FR: Type norme CS: Model DA: Normtype DE: Typ ES: Modelo-IT: Tipo di norma NL: Type standaard PL: Typ według normy: PT: Tipo de norma SK: Standardý typ: EL: Támoc trpomův-Fi: Standardityppi-SV: Typ av nom. | |||
| Model Identification | EN: Model identification FR: Identification ou modèle-CS: Identifikao modelu-DA: Modelidentifikation-DE: Modelkennung-ES: Identificación del modelo-IT: Identificativo del modelo-NL: Identifica van het model-PL: Identifikator modelu-PT: Identificação do modelo-SK: Identifikacija modelu-EL: Touromonjon povirou-Fl: Mallituniste-SV: Modellbeskrivning. | |||||||||||||||||
| Type of oven | Simple = FR:simple-CS: Jednoduchá-DA:Enkel-DE:Einfach-ES:Simple-IT: Simplice-NL:Simplice-PL:Poljedynczy-PT:Spimples-SK:Jednopostefová-EL:AtAôc-Fl:Yksinkertalten-SV:Enkel. | EN: Type of oven-FR: Type de four-CS: Typ trouby-DA:Ovntype-DE:Art dos Backofone-EL:Támoc gouyou-ES: Tipo de homo-IT: Tipologia di forno-NL: Type oven-PL:typikamika-PT: Tipo do forno-SK:Typ rúny na počenie-EL:Támoc gouyou-Fl: Umin typipi-SV: Typ av ung. | ||||||||||||||||
| Mass of the appliance | M | 34,5 | 30,7 35,7 | 7 33,5 | 36,2 35,6 | 36,0 33,5 36,6 | 36,8,0 33,5 36,6 | 36,8,0 36,8 36,0 36,0 36,0 36,0 36,0 36,0 36,0 36,0 36,0 36,0 36,0 36,0 36,0 36,0 36,0 36,0 36,0 36,0 36,0 36,0 36, 36,0 36,0 36,0 36,0 36,0 36,0 36,0 36,0 36,0 36,0 36,0 36,0 36,0 36,0 36,0 36,0 36,0 36,0 36,0 36, | kg | EN: Mass of the appliance-FR: Masso de l'apparel-CS:Hmotnost spotobito-DA:Apparats masse-DE:Masso des Goratos-ES:Massa del aparato-IT:Massa dell'apparocchio-NL:Massa van het tosetel-PL:Massa urzdzania-PT:Massa do aparelho-SK:Hmotnost spotobita-EL:Motto ng ouxuzunč-Fl: Laitoen masse-SV: Apparatona massa. | ||||||||
| Number of cavities | 11 | 1 111 | 1 111 | 1 111 | EN: Number of cavities-FR:Nombre de cavities-CS:Počet pedicich prostoru-DA:Antal nitrum-DE:Anzahl der Garaume-ES:Numero de cavidades-IT:Numero di cavita-NL:Aantal overruimten-PL:Licza komor-PT:Numero de cavidades-SK:Počet vykurovacion časti. | |||||||||||||
| Heat source per cavity (electricity or gas) | FR:Electricité-CS:Elekifina-DA:DE:Strom-ES:Electricidad-IT:Energia eletrica-NL:Elektriciteil-Electricity = PL:Energia elektryczna-PT:Eletricidade-SK:Elektrická-EL: Halxyparki svápyra-Fl:Sähká-SV: Elektricitet. | EN: Heat source per cavity (electricity or gas): FR: Source de chaleur par cavite (electricité ou gas): CS:Zdro lepla jednotlivých pedicich prostoru (elektílna nebo plyn)-DA:Varnekide pr. ovrum (el eller gas): DE:Wärmequete je Garrum (Strom oder Gas): ES: Fuente de calor por cavidad (electricidad o gas): IT: Fonte di calore di clascuna cavita (energia eletrica o gas):NL:Warmlbron per overruimte (elektricitieli of gas):PL:Zudylergila dla kaidej komory (energia elektryczna lub gas):PT:Fonte de calor por cavidade (elektricidade ou gas):SK:Zdro lepla na vykurovaciu časti (elektrická energia alebo plyn):EL:Thyi Bupuotrus ovni Bóluqo (lyxoparki svápyra) n'pvorsko úspiro-Fl: Kunkin pesán lámnolítade (sähkó tai kassu)-SV: Värmekkila per kavitel (elektricitel eller gas). | ||||||||||||||||
| Volume per cavity | V | 73,0 73,0 73,0 | 73,0 73,0 | 73,0 73,0 | 73,0 73,0 | 73,0 73,0 | 73,0 73,0 | 73,0 73,0 | 73,0 73,0 | I: Volume per cavity FR:Volume par cavite-CS: Objemi jednotlivých pedicich prostoru-DA:Volumen pr. ovrum DR:Volumen je Garaume-ES:Volumen por cavidade-IT:Volume di clascuna cavita-NL:Volume per overruimte-PL:Objetić da kaidej komory-PT:Volume por cavidade-SK:Objemi na vykurovaciu časti-EL:Opyso ovni Bóluqo-Fl: Kunkin persán ilavuus-SV: Volym per kavitel-EL:Tárikos Bóluquo-Fl: Pesien lukumáñá-SV: Anlal kavieler. | ||||||||
| Energy consumption (electricity) required to heat a standardised load in a cavity of an electric heated oven during a cycle in conventional mode per cavity (electric final energy) | EC electric cavity | 0,82 0,82 0,69 | 0,70 0,70 | 0,70 0,70 | 0,70 0,70 | 0,70 0,70 | 0,70 0,70 | 0,70 0,70 | 0,70 0,70 | EN: Energy consumption (electricity) required to heat a standardised load in a cavity of an electric heated oven during a cycle in conventional mode per cavity (electric final energy).FR:Consommation d'énergie (electricite) requise pour chauffer une charge normalisée dans une cavité d'un four électrique au cours d'un cycle en mode conventionnel par cavite (energie électrique finale):CS:Spotieba energie (elektricite) politéné k chirali normalizované napléni ve jednotlivých pedicich prostorech elektricky ohívane troby bühemi jednoto cyku v režinus s pliczenou korvekei (konečna elektricky energie):DA:Krevel energiortbrug (ej) il opvarming en standardiseret last i el involvene su un e cyklu v potrásmed il vlood pr ovium (endelig energie) DE:Energiemele bechaun bauch (Strom) bei der Emführung einer Standardbeding im Garrum eines Electrobackofens während eines Zyklus im konstroje energii elektrickyzna) DE:Consumo de energia (electrédicade) necessario para calenter una carga normalizada en una cavidade de un homo elétrico durante un ciclo en modo convenional, por cavidad (energia elétrica final):IT:Consumo energetico (energia elétrica) necessario per riscalsidare un carico normalizzato in una cavità di un fomo elétrico energio durante un ciclo in modo convenionale per classa cavaita (energia elétrica final):IT:Consumo energetico (energia elétrica) necessario per riscalsidare un carico normalizzato en una veldere con een elektrisch verwarmede oven gedurende en cyclus in conventionale modus, per overruimte (elektrische eindenergie) PL:Zudyrie energii elektrickyzna) konseznej do podgrazonia zormalizowanego wsadu vo kyvrouracej časti ni ry na pečenie s ohrevom na elektricku energiu počas cyku v bežnom rezima na kyvrouraciu časti (konečna elektricky energia):EL:Komutávorn (lyxoparki svápyra) ovni Bóluqo o npiolo centranova yri na Brpavven rumotoronjovu opontou or Bóluqo y Pecupand Oppondovou počiyou kordi m obipučno propoydrotu oppondrotu (lačnu) lyxokrak (kyapvya) y: Energiankulutus (sähko), joka tvantaan vaskuozuman šinnittämiseen sähkämmittelsen uunin pesassä kypserinyjsjakson ajan yla kalsämpöliminoffa kussakin pesassä (lopullinen sähköbergica) SV: Energiortrukking (elektricite) kliva för att varma upp en standardiserd last i en kavitet i en elektriskt uppvärmid ugn under en cykel i konventionelt lige per kavilet elektrisk stukernog). | ||||||||
| Energy consumption required to heat a standardised load in a cavity of an electric heated oven during a cycle in fan-forced mode per cavity (energy Electric Phase I):CE electric cavity | EC electric cavity | 1,23 | 1,34 | 1,23 | - | 1,10 | 1,10 | 1,10 | - | 1,10 | 1,10 | 1,10 | 1,10 | 1,10 | 1,10 | EN: Energy consumption required to heat a standardised load in a cavity of an electric heated oven during a cycle in fan-forced mode per cavity (electric final energy).FR:Consommation d'énergie requise pour chauffer une charge normalisée dans une cavité d'un four électrique au cours d'un cycle en chaleur launtante per cavite (energie électrique finale):CS:Spotieba energie politéné k chirali normalizované napléni ve jednotlivých pedicich prostorech elektricky ohívane troby bühemi jednoto cyku v režinus s pliczenou korvekei (konečna elektricky energie):DA:Krevel energiortbrug ili opvarming af en standardiserel last i el ovrum i en el opvarment ovni en cyklu i vormultabilstand pr ovnum (endelig energie):DE:Energieverbrauch bei der Emführung einer Standardbeding im Garrum eines Elektrickabens während eines Zyklus im vlohmodus je Gamaun elektrische Endenergie-ES:Consumo de energia necessario para calenter una carga normalizada en una velded un modo della curto di un modo del modo del modo del modo del modo del modo del modo del modo del modo del modo del modo del modo del modo del modo del modo del modo del modo del modo del modo del modo del modo del modo del modo del modo del modo del modo del modo del modo del modo del modo del modo del modo del modo del modo del modo del modo del modo del modo del modo del modo del modo del modo del modo del modo del modo del modo del modo del modo del modo del modo del modo DEL:Consumo energetico (energia elétrica final):IT:Consumo energetico necessario per riscalsidare un carico normalizzato in una cavity di un forno elétrico durante un ciclo in modo di cirurgio diaria forzata per classa cavaita (energia elétrica final):NL:Energieverbrauch bi varwaming van een standardisalding in de overruimte van een elektrische energie (elektricite) potrebne na bores standardizanoga obsahu vo kyvrouracej časti ni ry na pečenie s ohrevom na elektricku energiu počas cyku v režnom rezima na kyvrouraciu časti (konečna elektricky energia):EL:Komutávorn (lyxoparki svápyra) ovni Bóluqo o npiolo centranova yri na Brpavven rumotoronjovu opontou or Bóluqo o npiolo centranova yri na Brpavven rumotoronjovu opontou or Bóluqo o npiolo centranova yri na Brpavven rumotoronjovu opontou or Bóluqo o npiolo centranova yri na Brpavven rumotoronjovu opontou or Bóluqo o npiolo centranova. | ||
| Energy Efficiency Index per cavity | EEI cavity | 95,3 95,3 80,2 | 81,4 61,4 81 | 4 81,4 | 4 81,4 | 4 81,4 | 4 81,4 | 4 81,4 | 4,1 | EN: Energy Efficiency Index per cavity-FR:Index d'efficacité energétique par cavite-CS:Index energetiké účinností jednotlivých pedicich prostoru-DA:Energielfeklivileistindek-DE:Energielfizienindex je Garrum-ES Energy Efficiency Index-TÍndice di efficienza energética per classa cavaita-NL:Energielficiëlle-index par overruimte-PL:Waksznik elektryznoisé energetycznej da kaidej komory-PT:Indice de eficiência energética por cavidade-SK:Index energetikje účinností na kyvrouraciu časti-FL: Atking zvprzyckty, možingov ove Baljauo-Fl: Kunkin pesán energiatehkuusundes-SV:Energielfektiveistindek per uqn. | ||||||||