AID420 - Alarm system Chuango - Free user manual and instructions
Find the device manual for free AID420 Chuango in PDF.

| Product Type | 4-beam infrared intrusion detector |
| Brand | Chuango |
| Model | AID420 |
| Dimensions | 42 x 47 x 612 mm |
| Weight | Not specified in the manual (estimated ~500 g with batteries) |
| Power Supply | 5 CR123A batteries (3 V): 2 for transmitter, 3 for receiver |
| Standby Battery Life | 3 years |
| Standby Consumption | Transmitter < 0.03 mA; Receiver < 0.08 mA |
| Alarm Consumption | 16 mA |
| Detection Range | 6 m maximum |
| Ingress Protection Rating | IP66 |
| Wireless Frequency | 433 MHz |
| Maximum ERP Power | -7.44 dBm |
| Transmission Distance | < 80 m in open area |
| Housing Material | Anti-UV polycarbonate |
| Number of Beams | 4 infrared beams |
| Zone Types | 24h, normal, home (adjustable) |
| Adjustable Alarm Duration | 0.3 s / 0.6 s / 0.9 s / 1.2 s |
| Low Battery Indicator | Flashing indicator every 3 seconds |
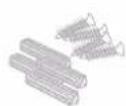
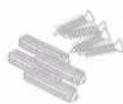
| Package Contents | 5 CR123A batteries, 1 bag of screws, 1 user manual |
| Maintenance | Wipe the beam bars with a damp cloth every 3 months |
| Operating Temperature | Not specified (estimated -10°C to 50°C typical) |
| Installation | Wall mounting with screws, mandatory alignment of transmitter/receiver |
Frequently Asked Questions - AID420 Chuango
User questions about AID420 Chuango
0 question about this device. Answer the ones you know or ask your own.
Ask a new question about this device
Download the instructions for your Alarm system in PDF format for free! Find your manual AID420 - Chuango and take your electronic device back in hand. On this page are published all the documents necessary for the use of your device. AID420 by Chuango.
USER MANUAL AID420 Chuango
natural_image
Two black cylindrical objects with threaded ends, resembling mechanical or electrical components (no text or symbols visible)AID-420
Multi-beam IR Sensors
Introduction
They are four-beam infrared sensors, widely used as a perimeter guarding device in gated houses, shops and indoor garages. The product requires to be paired to a control panel of our brand. When an intruder walks past the detection area and two or more light beams been blocked, the IR sensors will immediately send a warning signal to the control panel.
Packaging List
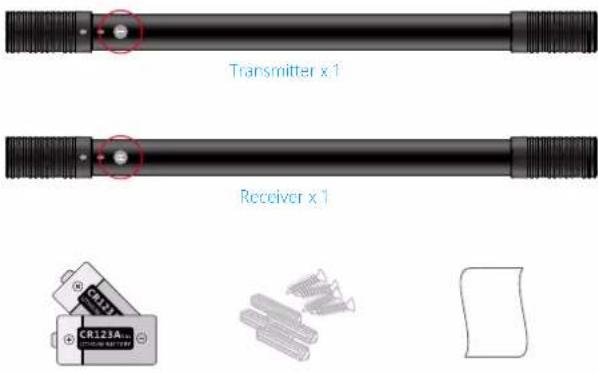
CR123A Battery x 5 Screw pack x 1 Manual x 1
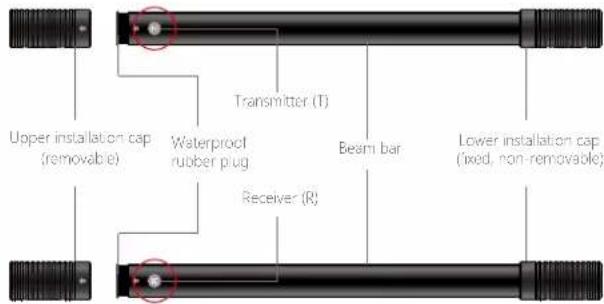
Product Overview
text_image
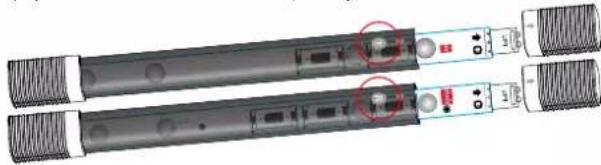
Upper installation cap (removable) Transmitter (T) Waterproof rubber plug Beam bar Lower installation cap (fixed, non-removable) Receiver (R)Transmitter Circuit Board
text_image
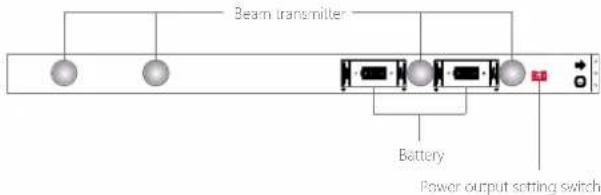
Beam transmitter Battery Power output setting switchReceiver Circuit Board
text_image
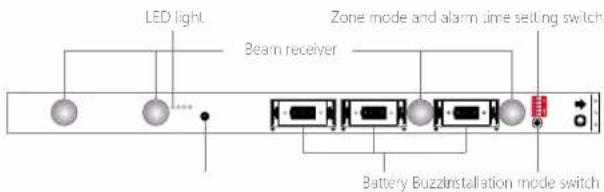
LED light Beam receiver Zone mode and alarm time setting switch Battery Buzzinstallation mode switchLow battery warning
The LED light blinks once every three seconds. When connected with a GSM or Wi-Fi control panel, the user will receive a text message or App push notification for low battery warning. Please replace the batteries as soon as you can.
Settings
Before the settings, remove the upper installation caps (marked ↑) and waterproof rubber plugs on both the transmitter and the receiver, pull out both circuit boards gently and insert the batteries (pay attention to the "+" and "-" polarity).
natural_image
Two black electronic devices with labeled ports and connectors, no visible text or symbolsPower output setting - in the Transmitter (T unit)
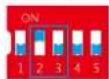
To set the output capacity, slide switch 1 of the power output setting switch to adjust.

High output setting
Factory default.

Low output setting
High output setting: ≥ 3m from the receiver Low output setting: < 3m from the receiver
Zone mode setting - in the Receiver unit(R unit)
The zone mode types determine whether the control panel receives the alarm and responds accordingly. The zone mode setting can be adjusted by sliding switches 2 and 3 of the zone mode and alarm time setting switch.
24-H zone Normal zone(Factory default) Home mode zone
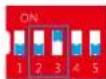
24-H zone: The IR sensors are in alert mode under all circumstances. Upon detecting any intrusion, the control panel immediately gives off an alarm. It is best used for important areas that are usually not accessed
Home mode zone: When the alarm system is armed, the IR sensors are on guard. Upon detecting any intrusion, the control panel immediately gives off an alarm. When the alarm system is disarmed or home armed, the control panel will not give off an alarm even the IR sensors are triggered.
It is best used for common areas where both family members and intruders have access.
Normal zone (Arm Zone): When the alarm system is armed or home armed, the IR sensors are on guard, the control panel gives off an alarm immediately as the sensors are triggered. When the alarm system is disarmed, the control panel will not give off an alarm even the sensors are triggered.
It is best used for areas where intruders may have access, but family members have limited access.
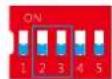
Alarm time setting - in the Receiver unit(R unit)
When two or more beams are been blocking for the pre-set time, the IR sensors send an alarm signal to the control panel. The time setting can be adjusted by sliding switches 4 and 5.
Factory default

text_image
ON 1 2 3 4 5 ON 1 2 3 4 5 ON 1 2 3 4 5 ON 1 2 3 4 5The alarm will be triggered when the light beam is being blocked for 0.3 seconds. The alarm will be triggered when the light beam is being blocked for 0.6 seconds. The alarm will be triggered when the light beam is being blocked for 0.9 seconds. The alarm will be triggered when the light beam is being blocked for 1.2 seconds.
Note: The time setting has to be practice and in conjunction with detection area. It does not mean THE SHORTER THE BETTER.
Pairing
After the settings, pair the IR sensors with the control panel.
- Put the transmitter circuit board and receiver circuit board face to each other in the same direction (the ↑ mark is in the same direction) and make sure the beam transmitters and beam receivers are face to each other.
- Set the control panel in pairing mode (shown in the corresponding control panel user manual), trigger the IR sensors (block at least 2 beams and maintain this up to the pre-set time), and when a "beep" sound is heard, the system pairing is completed.
- Arm the alarm system, trigger the IR sensors again, if the control panel goes off an alarm, means the IR sensors work normally.
Installation
Choosing place
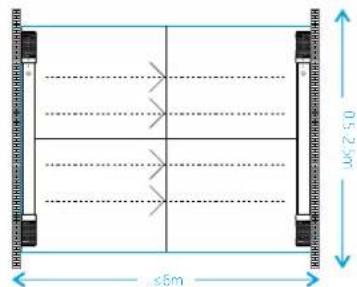
- The IR sensors are suggested to be installed on doors or windows. The gap between the transmitter and receiver should be less than 6 meters, and the control panel can receive the signal from IR sensors.
text_image
0.5 x 2.5m ≤5mNote: The transmitter and receiver must be signed to each other and maintained the same distance from the ground.
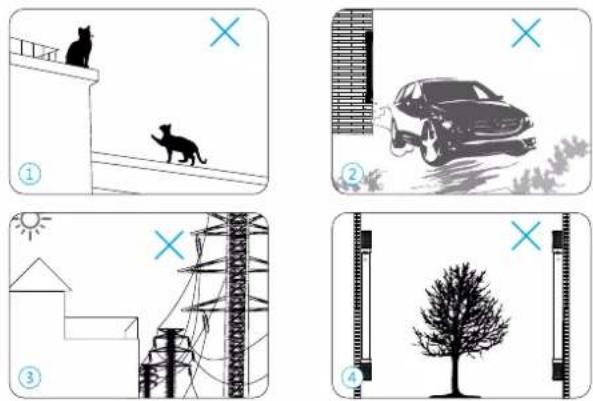
- Do not install the IR sensors at following locations:
EN
① Areas where pets are active
② Dusty and muddy areas
③ Within a 50 cm radius from power cables or network cables
④ Near trees or plants, as leaves or trunks may block the infrared beam
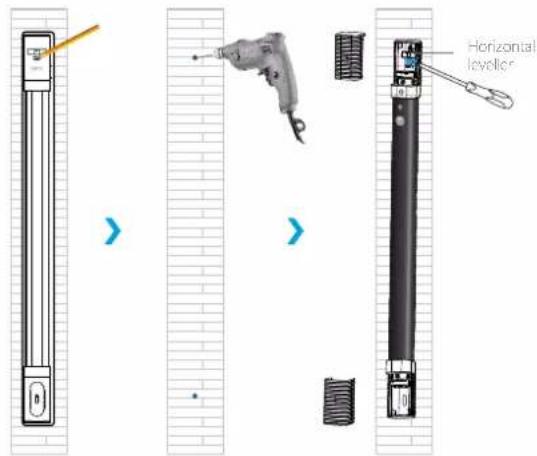
Fixation
- Press the installation mode switch in the receiver circuit board, then put it into the beam bar. Insert the waterproof rubber plug and cover the installation cap.
- Slide the transmitter's upper installation cap cover and lower installation cap cover. Put the transmitter to the target place and adjust the horizontal and vertical distance by watching the horizontal leveller in the upper installation cap.
- Mark the screw holes of the transmitter, then use the hole punch to punch two screw holes, insert the expansion bolt then fix the transmitter with the screws. Cover the covers of the caps.
- Adjust the receiver in the other side of the detection area. Make sure the buzzer rate is high, that is, the buzzer rate is every two "beeps" with a 1-second interval or three "beeps" with a 1-second interval. After adjusting, fix the receiver by following the upper step 2 and 3.
Buzzer frequency
I very one 'beep' with a 3-second interval, no signal
Every one 'beep' with a 1-second interval, weak signal
Every two "beeps" with a 1-second interval, normal signal
Every three "beeps" with a 1-second interval, strong signal
*Generally, the IR sensors will automatically exit the installation mode in 30 minutes. However, when the receiver receives a weak but stable signal continuously for 5 minutes, the IR sensors will exit the installation mode. When the receiver receives a strong and stable signal continuously for 1 minute, the IR sensors will also exit the installation mode
- When the buzzer stops, arm the control panel, if the control panel alarms when walking in between the transmitter and receiver means the installation is successful and the system operates normally.
text_image
Horizontal levelerEN
Precautions
- This product aims to decrease the intrusion, but can not ensure 100% there will be no intrusions at all.
- Please use the product by following the user manual.
- Wipe the beam bars with a wet towel at least 3 months in turns, if there are any dirty dust, mud or heavy snow cover the bars, wipe them immediately.
Specifications
Detector infrared beam: 4 beams Transmitter battery: 2 x CR123A 3V battery Receiver battery: 3 x CR123A 3V battery Standby time: 3 years Standby mode power consumption: Transmitter < 0.03mA; Receiver <0.08mA
Alarm mode power consumption: 16mA
Maximum detection range: 6m
Waterproof rating: IP66
Wireless frequency: 433MHz
Wireless transmission distance: <80m (open area/no interference)
Case material: PC+ANTI-UV
ERP (dBm) Max: -7.44
Size: 42 x 47 x 612mm
Einleitung
natural_image
Pure diagram of a mechanical shaft with threaded ends and a central circular feature, labeled 'Sencer x 1' (no other text or symbols)
natural_image
Two black-and-white images of a handheld electronic device with ports and connectors, no visible text or symbols.natural_image
Illustration of two cats on a balcony with a cross symbol in the sky (no text or symbols present)
natural_image
Illustration of a car on a dirt path with a window frame and a cross symbol (no text or labels)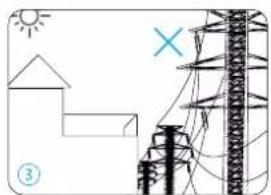
natural_image
Simple line drawing of a house, utility pole, and lightning bolt (no text or symbols)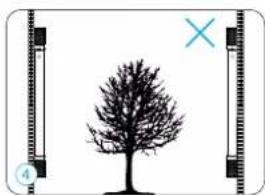
natural_image
Silhouette of a tree with a cross mark between two vertical frames (no text or symbols)natural_image
Two black electronic devices with attached ports and connectors, no visible text or symbolstext_image
De0.5 > a 2.5 m ≤ 5 mnatural_image
Illustration of two cats on a balcony with a cross symbol in the sky (no text or symbols present)
natural_image
Illustration of a car on a grassy path with a blue 'X' symbol (no text or symbols present)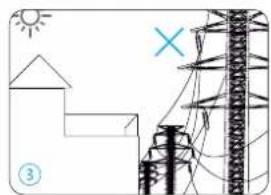
natural_image
Simple line drawing of a house, solar panel, and power transmission tower (no text or symbols)
natural_image
Silhouette of a tree with a cross mark and scale bar, no text or symbols presentFR
natural_image
Pure mechanical shaft component with threaded ends and a central circular feature, labeled '1 Zender' below (no other text or symbols)
text_image
1 Ontvanger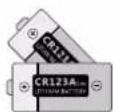
natural_image
Two black audio/video recording devices with earphones and buttons, no visible text or symbolsnatural_image
Illustration of two cats on a balcony with a 'X' symbol and a cross marker (no text or symbols on the cats or background)
natural_image
Illustration of a car on a dirt path with a window and cross symbol (no text or labels)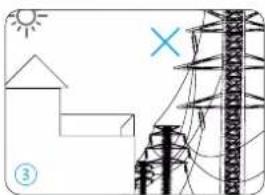
natural_image
Simple line drawing of a house, solar panel, utility pole, and grid structure (no text or symbols)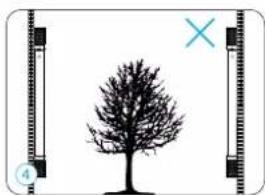
natural_image
Simple line drawing of a tree with a cross mark and scale bar, no text or symbols presentnatural_image
Illustration of two batteries and three screws, one with a label 'Cer123A' and the other blank (no text or symbols on main objects)5 pilas CR123A 1 paquete de tornillos 1 manual
natural_image
Two identical electronic devices with ports and connectors, no visible text or symbolsnatural_image
Illustration of two cats on a balcony with a cross symbol and number ①, no text or symbols present.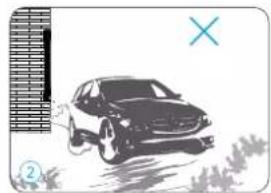
natural_image
Black-and-white illustration of a car on a dirt path with grass and a window frame (no text or symbols)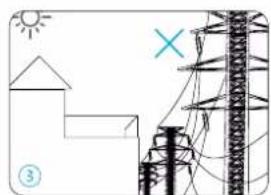
natural_image
Simple line drawing of a house, utility pole, and lightning bolt (no text or symbols)
natural_image
Silhouette of a tree with a cross mark, shown alongside a vertical filmstrip frame (no text or symbols)text_image
1 Transmissor
text_image
1 Recetor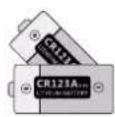

5 Pilhas CR123A 1 Conjunto de paralusos 1 Manual
natural_image
Two black-and-white photo of a handheld electronic device with ports and connectors, no visible text or symbolstext_image
4.0 m - 2.5 m ≤ 6 mnatural_image
Illustration of two cats on a balcony with a 'X' symbol and a cross, no text or symbols present
natural_image
Illustration of a car on a dirt path with a window frame and a cross symbol (no text or labels)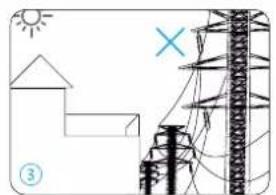
natural_image
Simple line drawing of a house, utility pole, and power transmission tower with sun and cross symbols (no text or labels)
natural_image
Silhouette of a tree with a cross mark and label '4' (no text or symbols on the tree itself)natural_image
Two black electronic devices with attached buttons and ports, no visible text or symbolsnatural_image
Illustration of two cats on a balcony with a 'X' symbol and a cross marker (no text or symbols on the cats or background)
natural_image
Illustration of a car on a dirt path with a blue X symbol (no text or symbols present)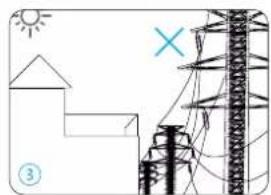
natural_image
Simple line drawing of a house, utility pole, and lightning bolt (no text or symbols)