
KGZ 3300 - Saw Herkules - Free user manual and instructions
Find the device manual for free KGZ 3300 Herkules in PDF.
| Product type | Mitre and cut-off saw |
| Brand | Herkules |
| Model | KGZ 3300 |
| Supply voltage | 230 V ~ 50 Hz |
| Power consumption | 1600 W |
| No-load speed | 4200 min⁻¹ |
| Saw blade (diameter x bore x thickness) | 305 x 30 x 3,2 mm |
| Number of teeth | 60 |
| Table pivot range | -45° / 0° / +45° |
| Cutting capacity at 90° (width x height) | 330 x 102 mm |
| Cutting capacity at 45° | 215 x 102 mm |
| Double mitre cutting capacity (2 x 45°) | 215 x 65 mm |
| Dimensions of the turntable | 522 x 171 mm |
| Sound pressure level LPA | 95,9 dB(A) |
| Sound power level LWA | 108,9 dB(A) |
| Duty type | S1 (continuous operation) |
| Safety devices | Removable protective cover, shaft lock, emergency stop, on/off switch |
| Included accessories | Saw blade, clamping device, extension supports, chip collection bag, blade replacement wrench |
| Recommended maintenance | Regular cleaning of ventilation slots, dust removal, replacement of worn parts |
Frequently Asked Questions - KGZ 3300 Herkules
User questions about KGZ 3300 Herkules
0 question about this device. Answer the ones you know or ask your own.
Ask a new question about this device
Download the instructions for your Saw in PDF format for free! Find your manual KGZ 3300 - Herkules and take your electronic device back in hand. On this page are published all the documents necessary for the use of your device. KGZ 3300 by Herkules.
USER MANUAL KGZ 3300 Herkules
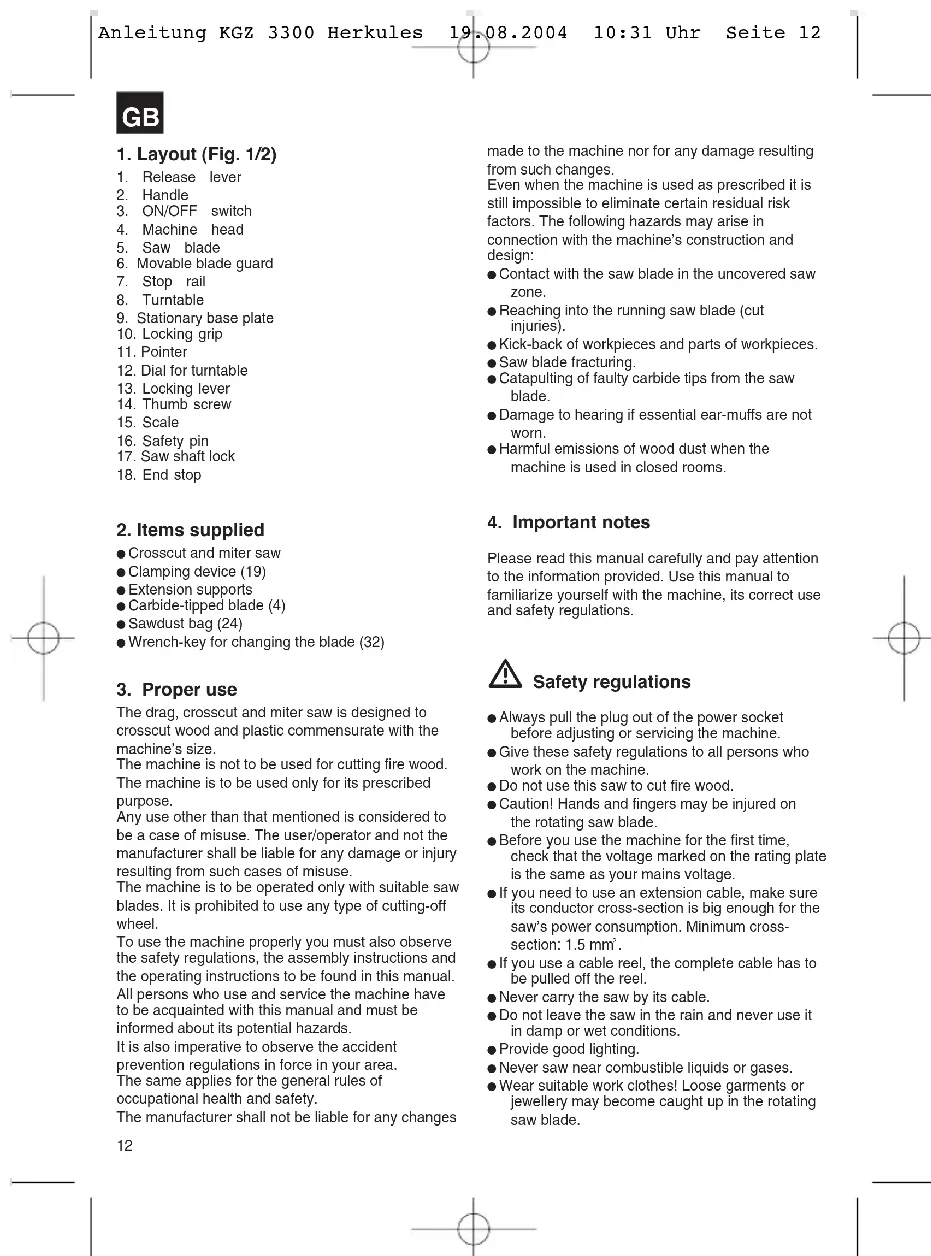
- Release lever
- Handle
- ON/OFF switch
- Machine head
5.Sawblade - Movable blade guard
- Stop rail
- Tumtable
- Stationary base plate
- Locking grip
- Pointer
- Dial for turntable
- Locking lever
- Thumb screw
- Scale
16.Safely pin
17.Saw shaft lock
18.End stop
2. Items supplied
Crosscut and miter saw
Clamping device (19)
- Extension supports
Carbide-tipped blade (4)
Sawdust bag (24)
Wrench-key for changing the blade (32)
3. Proper use
The drag, crosscut and miter saw is designed to crosscut wood and plastic commensurate with the machine's size.
The machine is not to be used for cutting fire wood.
The machine is to be used only for its prescribed purpose.
Any use other than that mentioned is considered to be a case of misuse. The user/operator and not the manufacturer shall be liable for any damage or injury resulting from such cases of misuse.
The machine is to be operated only with suitable saw blades. It is prohibited to use any type of cutting-off wheel.
To use the machine properly you must also observe the safety regulations, the assembly instructions and the operating instructions to be found in this manual. All persons who use and service the machine have to be acquainted with this manual and must be informed about its potential hazards.
It is also imperative to observe the accident prevention regulations in force in your area. The same applies for the general rules of occupational health and safety.
The manufacturer shall not be liable for any changes
made to the machine nor for any damage resulting from such changes.
Even when the machine is used as prescribed it is still impossible to eliminate certain residual risk
factors. The following hazards may arise in
connection with the machine's construction and design:
- Contact with the saw blade in the uncovered saw zone.
- Reaching into the running saw blade (cut injuries)
- Kick-back of workpieces and parts of workpieces.
Saw blade fracturing.
- Catapualting of faulty carbide tips from the saw blade.
- Damage to hearing if essential ear-muffs are not worn.
- Harmful emissions of wood dust when the machine is used in closed rooms.
4. Important notes
Please read this manual carefully and pay attention to the information provided. Use this manual to familiarize yourself with the machine, its correct use and safety regulations.

Safety regulations
Always pull the plug out of the power socket
before adjusting or servicing the machine.
- Give these safety regulations to all persons who
work on the machine
Do not use this saw to cut fire wood.
Caution! Hands and fingers may be injured on
the rotating saw blad
Before you use the machine for the first time, check that the voltage marked on the rating plate is the same as your mains voltage.
- If you need to use an extension cable, make sure its conductor cross-section is big enough for the saw's power consumption. Minimum cross-section: 1.5mm^2
- If you use a cable reel, the complete cable has to be pulled off the reel.
- Never carry the saw by its cable
Do not leave the saw in the rain and never use it in damp or wet conditions.
- Provide good lighting
- Never saw near combustible liquids or gases.
- Wear suitable work clothes! Loose garments or jewellery may become caught up in the rotating saw blade.
GB
- Operators have to be at least 18 years of age. Trainees of at least 16 years of age are allowed to use the machine under supervision.
- Keep children away from the machine when it is connected to the power supply.
- Check the power cable (9). Never use a faulty or damaged power cable.
- Keep your workplace clean of wood scrap and any unnecessary objects.
Persons working on the machine should not be distracted.
Note the direction of rotation of the motor and saw blade.
After you have switched off the motor, never slow down the saw blade by applying pressure to its side. - Fit only blades which are well sharpened and have no cracks or deformations.
The machine is to be operated only with tools which conform with prEN 847-1:2003. - Faulty saw blades have to be replaced immediately.
- Never use saw blades which do not comply with the data specified in this manual.
Make sure that the arrow on the saw blade complies with the arrow marked on the machine.
Make certain that the saw blade does not touch the rotary table in any setting. To do so, pull out the power plug and tilt the saw blade by hand into the 45^ position and the 90^ position. If necessary, re-adjust the saw head as described in Section C/F.
It is imperative to make sure that all the devices used to cover the saw blade are in good working order. - Never wedge the hinged guard hood in open position.
- Never dismantle the machine's safety devices or put them out of operation.
- Damaged or faulty safety devices have to be replaced immediately.
- Never cut workpieces which are too small to hold securely in your hand.
Do not place your hands in awkward positions where one or both may slip suddenly and touch the saw blade. - When working with long workpieces, use an additional support (table, stand, etc.) to prevent the machine from tipping over.
Always clamp round workpieces such as dowel rods etc. with suitable devices. - There must be no nails or other foreign bodies in that part of the workpiece you want to cut.
Always stand to the side of the saw blade when working with the saw. - Never load the machine so much that it cuts out.
Always press the workpiece firmly against the table and the stop rail to prevent it from wobbling or twisting.
- Make sure that off-cuts can be removed from the side of the saw blade. If not, they may catch on the saw blade crown and be catapulted into the surrounding area.
- Never saw several workpieces simultaneously.
- Never remove loose splinters, chips or jammed pieces of wood when the saw blade is running.
To rectify faults or remove jammed pieces of wood, always switch off the machine first. - Pull out the power plug!
- Conversions, adjustments, measurements and cleaning jobs are to be performed only when the motor is switched off. - Pull out the power plug!
Before you switch on the machine, check that all wrenches and adjustment tools have been removed.
- When you leave your workplace, switch off the motor and pull out the power plug.
Electric installation work, repairs and maintenance are to be carried out only by specialists.
- All guards and safety devices have to be refitted immediately after completion of any repairs or maintenance.
It is imperative to observe the manufacturer's safety, operating and maintenance instructions as well as the dimensions quoted in the technical data.
It is imperative to observe the accident prevention regulations in force in your area as well as all other generally recognized rules of safety.
Note the information published by your professional associations.(VBG7)
- Switch on the dust extraction system each time you use the machine.
- The machine may be used in closed rooms only in conjunction with a suitable vacuum extraction system.
The circular cross-cut must be connected to a 230 V socket-outlet with a minimum 16 A fuse
- Never use light-duty machines for heavy-duty work.
- Never use the cable for any purpose other than that for which it is intended!
- Adopt a firm standing position and keep your balance at all times.
Check the tool for signs of damage!
Before you carry on using the tool it is imperative to check that its safety devices and any slightly damaged parts are working properly and in the way intended.
- Check that the moving parts work properly and do not jam or whether any of the parts are
GB
damaged. All parts must be fitted correctly and satisfy all conditions for the tool to work properly.
Unless otherwise stated in these instructions, damaged safety devices and parts must be repaired or replaced by experts in an approved specialist workshop.
- Have damaged switches replaced by a customer service workshop.
- This tool complies with the pertinent safety regulations. Repairs are to be carried out only by qualified electricians using original replacement parts. The user may suffer an accident if this condition is not observed.
The machine is to be operated only with tools which conform with EN 847:1:2003.
Pull out the power plug and twist the blade with your hand into the 45^ and 90^ positions in order to make sure that the blade does not touch the turntable in any position. If necessary, readjust the saw head.
If the table insert is worn, replace it.
- Never use blades made of high-speed steel (HSS).
When cutting mites, make sure that the device for swiveling the arm is fastened securely.
- Be careful when working in vertical mode.
Caution: Take extra care when making double miter cuts!
Do not overload your tool.
Wear safety goggles.
Use a dust mask when working on dusty jobs
- Check the tool cable/extension cable for damage.
- Always wear gloves when handling saw blades.

Wear goggles

Wear ear-muffs

Wear a breathing mask
Noise emission values
- The saw's noise is measured in accordance with DIN EN ISO 3744; EN 60651; 6/93, ISO 7960 Annex A; 2/95. The machine may exceed 85 db (A) at the workplace. The user will require noise protection measures if this is the case. (Wear ear
muffs!)
Sound pressure level LPA 95,9 dB(A)
Sound power level LWA 108,9 dB(A)
The quoted values are emission values and not necessarily reliable workplace values. Although there is a correlation between emission and immission levels it is impossible to draw any certain conclusions as to the need for additional precautions. Factors with a potential influence on the actual immission level at the workplace include the duration of impact, the type of room, and other sources of noise etc., e.g. the number of machines and other neighbouring operations. Reliable workplace values may also vary from country to country. With this information the user should at least be able to make a better assessment of the dangers and risks involved.
5. Technical data
Asynchronous motor 230 V ~ 50 Hz
Output 1600 W
Operating mode S1
Idle speed n
4200min
Carbide-tipped saw blade 305× 30× 3.2mm
Number of teeth 60
Tilting range -45^ / 0^ / +45^
Mitre cuts 0^ to 45^ to the left
Saw bed support 522 x 171 mm
Sawing width at 90^330× 102mm
Sawing width at 45^215 × 102 ~mm
Sawing width at 2 x 45
(double litre cuts) 215 × 65 ~mm
6. Before putting the machine into operation
The machine must be set up where it can stand securely, i.e. it should be bolted to a workbench, a universal base frame or similar.
- All covers and safety devices have to be properly fitted before the machine is switched on.
It must be possible for the saw blade to run freely.
- When working with wood that has been
GB
processed before, watch out for foreign bodies such as nails or screws etc.
Before you actuate the On/Off switch, make sure that the saw blade is correctly fitted and that the machine's moving parts run smoothly.
Before you connect the machine to the power supply, make sure the data on the rating plate is the same as that for your mains.
Important:
This machine was exactly adjusted before it left the factory. For the best results you should check the accuracy of the following settings and make corrections as necessary.
6.1 Setting the angle stop to 90^ and 45^ (Fig. 5/6/7)
- Release the angle clamping lever (13) and move the cutting head (4) all the way to the right. Secure the angle clamping lever (13).
- Use an angular stop (a/b) to set the blade at 90^ in relation to the table.
If an adjustment is necessary, undo the locknut (d) and turn the screw (c) so that the blade makes an angle of 90^ with the table. - Tighten the locknut (d).
- Use the screw (c) to set the angle indicator (15) to 0.
- Use the same procedure to set the stop to 45^ , but instead move the cutting head to the left and use the left screw (e).
6.2 Setting the stop face (Fig. 12)
Lower the cutting head and press in the locking button (16). Make sure that the table shows a miter angle of 0^ .
- Place an angular stop against the stop face and the saw blade.
If the blade does not touch the angular stop, undo the three screws (33).
Adjust the stop face so that it touches the angle gage full-face. Retighten the screws.
7. Assembly and operation
Always place the workpiece against the stop face. A twisted and bent workpiece that cannot be held flat on the table or against the stop face may catch on the blade and should not be used. Keep your hands out of the sawing zone. The entire table area is out of bounds for hands. It is marked with "No Hands" signs.
7.1 Fitting the clamping device and extension supports (Fig. 1/3/4)
Always use the clamping device (19) to secure the workpiece in position. Insert the clamping device in one of the mounts (30) provided and
fasten it in place with the clamping screw.
- Insert the extension supports on the left and right in the mounts (29) provided in the base plate and tighten the clamping screw.
The standard end stop (18) can be used for repeat cuts. In this case, silp the end stop onto one of the extension supports and adjust with the clamping screw.
7.2 Fitting the dust extraction device (Fig. 11/12)
-
Mount the dust extraction nozzle opening under the cutting arm.
-
Mount the big end of the angle piece (35) on the back of the crosscut and miter saw at the outlet opening. The angle piece has to point to the side or down.
- On the angle piece you can either attach the dust bag (24) or a suction hose for drawing off the saw dust.
- Mount the second angle piece on the upper dust extraction socket (34) and plug on the suction hose (26).
With the Y-piece (27) you can join together the upper and lower suction hose and connect them to a suitable vacuum extraction system.
7.3 Setting up the saw unit (Fig. 1/2)
To adjust the turntable (8), loosen the locking grip
(10) by approx. 2 turns, which frees the turntable (8).
- Turn the turntable (8) and scale pointer (11) to the desired angular setting on the dial (12) and look into place with the locking grip (10).
To release the saw from its position at the bottom (transport position), pull the retaining pin (16) out of the motor mounting while pressing down lightly on the machine head (4).
- Swing the machine head (4) up until the retaining hook latches into place.
When the tightening screw (13) is loosened, you can tilt the machine head (4) to the left by up to 45^ .
Warning!
Never connect the plug to a power source before you have completed all the installation work, made all the necessary settings, and read and understood all the safety and operating instructions.
7.4 Crosscut 90^ and turntable 0^ (Fig. 8)
For cutting widths up to 170~mm it is possible to fix the saw's drag function with the thumb screw (14) in
GB
rear position. If the cutting width exceeds 170mm you must ensure that the thumb screw (14) is slackened and that the machine head (4) can be moved.
- Move the machine head (4) to its upper position.
- Use the handle (2) to push back the machine head (4) and fix it in this position if required (dependent on the cutting width).
- Place the piece of wood to be cut against the stop rail (7) and on the turntable (8).
Lock the material with the clamping device (19) on the base plate (9) to prevent the material from moving during the cutting operation.
- Push down the release lever (1) to release the machine head (4).
- Press the ON/OFF switch (3) to start the motor. Use the handle (2) to apply steady and light downward pressure to cut all the way through the workpiece.
- When the cutting operation is completed, move the machine head back to its upper (home) position and release the ON/OFF button (3). Important! The integral resetting springs will automatically lift the machine head. Do not simply let go of the handle (2) after cutting, but allow the machine head to rise slowly, applying slight counterpressure as it does so.
7.5 Crosscut 90^ and turntable 0^ - 45^ (Fig. 9)
The crosscut saw can be used to make right and left angular cuts of 0^ - 45^ in relation to the stop rail.
Using the handle (2), set the turntable (8) to the desired angle, i.e. the scale pointer (11) on the turntable must coincide with the desired angular setting (12) on the stationary base plate (9).
- Reghtenon the locking grip (10) to secure the turntable (8) in place.
Make the cut as described in section 7.4.
7.6 Miter cut 0^ - 45^ and turntable 0^ (Fig. 10/12)
The crosscut saw can be used to make miter cuts of 0^ - 45^ in relation to the work face.
- Move the machine head (4) to its upper position.
- Fasten the turntable (8) in 0^ position.
- Undo the clamping lever (13) and use the handle (2) to tilt the machine head (4) to the left until the pointer (23) coincides with the required angle value (15).
- Religenthen the clamping lever (13) and make the cut as described in section 7.4.
7.7 Miter cut 0^ - 45^ and turntable 0^ - 45^ (Fig. 11) The crosscut saw can be used to make miter cuts to the left of 0^ - 45^ in relation to the work face and, at the same time, 0^ - 45^ in relation to the stop rail (double miter cut).
- Move the machine head (4) to its upper position.
- Release the turntable (8) by slackening the locking grip (10).
- Use the handle (2) to adjust the turntable (8) to the angle required (in this connection see also section 7.5).
Relighten the locking grip (10) in order to secure the turntable in place. - Undo the locknut (13) and use the handle (2) to tilt the machine head (4) to the left until it coincides with the required angle value (in this connection see also section 7.5).
- Relighten the locknut (13). Cut as described under section 7.4.
7.8 Changing the saw blade (Fig. 13)
Pull out the power plug.
- Swing up the machine head (4).
- Swing up the adjustable blade guard (6).
Press the saw shaft lock (17) with one hand while holding the wrench (32) on the flange bolt (25) with the other.
Firmly press on the saw shaft lock (17) and slowly rotate the flange bolt (25) in clockwise direction. The saw shaft lock engages after no more than one rotation.
- Now, using a little more force, slacken the flange bolt (25) in clockwise direction.
- Turn the flange bolt (25) until it is completely removed.
- Take the blade (5) off of the inner flange and pull out.
- Mount and fasten the new blade in reverse order. Important! The cutting angle of the teeth (i.e. the direction of rotation of the saw blade) must coincide with the direction of the arrow on the housing.
- The blade flanges must be thoroughly cleaned prior to mounting the blade.
- Reattach the movable blade guard (6) in reverse order.
- Ensure that the saw shaft lock (17) is slackened.
- Check to make sure that all safety devices are properly mounted and in good working condition
before you begin working with the saw again.
- Important: Every time that you change the saw blade, check to see that it spins freely in the groove of the turntable in both perpendicular and 45^ angle settings.
7.9 Carrying the saw
- Release the miter engagement button (10) and turn the table all the way to the right. Lock the table at a miter angle of 45^ .
Pull the cutting head forward and lock the slide.
Lower the cutting head and press in the locking
button (16)
- Carry the crosscut and miter box saw by its integral carry-handle (31) and the side of the base.
8. Maintenance
Always keep the machine's ventilation slats clean and free of obstructions.
- Remove dust and dirt regularly from the machine. Cleaning is best done with compressed air or a rag.
- Lubricate all moving parts at regular intervals.
- Never use caustic agents to clean plastic parts.
9. Ordering replacement parts
Please provide the following information on all orders for replacement parts:
Model/type of machine
Article number of the machine
ID number of the machine
Number of the required replacement part
F
1.Description de I'appareil (fig. 1/2)
7.5 Celli rez 90^ in vrtjiva miza 0^ - 45^ (Slika 9)
S Ceilino zago lahok lo Ivzavate poševne reze v levo in desno m 0^ in 45^ na prislonkov zovido.
Z rocajem (2) nastavite vrtliivo mizo (8) na zeleni kot, t.p. kazalec (11) na vrtlivi mizi se mora skladati z zeleno koto rvednostjo (12) na fiksno namesceni talni plosci (9).
- Ponomvo zatognite pritridlini rocaj (10), da fiksritate vrtijvo mizo (8).
Izvrslre rez kol je opisano pod locko 7.4.
7.6 Zajeralni rez 0^ - 45^ in vrtjiva miza 0^ (Sika 10/12)
S O'olino zago lahki vazajato zajeralne reze v levo 0^ 45^ na delovno pvosrino.
Postavite glavo stroka (4) v zgomi plozaj.
Eskerikea utilii, miro (8) v plosztoi (9).
- Odvjte pritrdilino rocico (13) in nagnite z rocajam (2) glavo stroja (4) v levo taq, da bo kazalec (23) kazal na zeeleno kotno vrednost (15).
- Ponovino zatogmite priridrino roico (13 in izvrilse rez kot je opisanio pod toko 7.4.
7.7 Zajeralni rez 0^ - 45^ in vrtlijva miza 0^ - 45^ (Sika 11)
S Ceilino Zago lako izvavate zajeralinreze v levo 0^ 45^ na delovno povrsino in istocasno 0^ - 45^ na prisolnko vodilo (dvojni zajeralin)rez.
Postavite glavo stroja (4) v zgomjpolozaj.
Odvijte treetjvivo mlo (8) z odvjanjem prirtdrligne rocaja (10).
Nastavite 2 roczagem 2) vrtijivo mijo (0 z naeleni kot [gloj t va nameim tudi navodilla pod tockoš 7.5].
- Ponomvo zatognite pritrodilino rocaj (10), da fiksrate vrtijlovo mizo.
Odvilte piridlino matico (13) in nagnite z rocagem (2) glavo stroja (4) v levo na zeeleno kotno vrednost (glej v t a namen tudi navodilla pod toko 7.5).
Ponovno zategnite pritrdlino matico (13).
- Izvrsite rez kot je opisano pod tocko 7.4.
7.8 Zamenjava lista zage (Slika 13)
- Potegite vnikac iz vticne elektrichega omrežja.
- Ropakite slavo strain (4) neopor.
Pomaknite gavo sloja (4) nayzgor.
Z eno roko pritsinite zaporo gredi zage (17),z drugo roko postavite kjuic za vijake (32) na vijak prirobnic (25).
Mo no prilisnna zaparo gredi (zage 17) in pocesta obraçete vijak prirobnice (25) v smeri urinega kazalca. Po max, enem obrato se zaskočá zaparo gredi zage v svojpoložaj.
Sadaj z nekaj vece silo odvlje vijak prilobnice (25) v smeri urinega kazala. - Odvjte vijak prirobnice (25) do konca ven.
- Smelite list zage (5) iz notranje prirobnice in ga potegnite ven.
- Novi list Žag vostavite ponovno v obratenm vstrnem redu go zategnite.
Pozar! Nalg rob zo, t.p. smr vterjna lista Žag, se mora skladati s smerjo spublicce na oshiu.
Pred montazo lista zage, mortare skrbno ostiiti prirobnico lista zage.
Pomlncnzaiclti Ista zage (6) morate ponovno
SLO
montirati v obratnem vrstnem redu.
Prepräjale se, āe je zapora gredi āge odpuščaṇa (17).
Preden nadalujete z delom z zago, morate preveriti fungcionalnost zaictno-varvaline opreme.
- Pozor. Po vsaki zamenjavi lista zage preverte, ce se list ze gade vrti navi piocnem polozaju v rezi vrtijive mze, tudi, ko je nagnien zu 45^
7.9 Prenasanje zage
- Odvjite aretini gumb (10) in obmite mizo popolinoma v desno. Zapahnite mizo pod zajeralnim kotom 45°
Potegnite rezalno glavo naprej in zaprite drsnik.
Znizajte rezalno glavo in pritsilnite zaporno tipko (16).
Prenataje to celino in zajeralno zago za montirani nosilni rocaj (31) In na podstavni strani.
8.Vzdrrzevanje
- Prezračevalna reža na stroju mora biti zmeraj prostrau prahnu in cista.
Prah in umazanijo je teba redno distit iz stroja. Ciescenje bosto njolbje izvajali s komprimiranim zrakom ali s krpo.
Vse premiune dele je potrebno obcasno podmazati.
Pri ciścćnju plastiku ne uporabljiţe{jedkh sistiñih sredstev.
The product described in these instructions comes with a 5-year warranty drawing certificate. This 5-year warranty period begins with the passing of risk or defect, and ends when the product is in the condition as shown in the picture. For warranty claims to be accepted, the product has to receive the correct maintenance and be put to the proper use as described in the operating instructions. The statutory rights of warranty are naturally unaffected during these 5 years.
This warranty applies in Germany, or in the respective country of the manufacturer's main regional sales partner, as a supplement to local regulations. Please note the details for contacting the customer service center responsible for your region or the venue address listed below.
CERTIFICADO DE GARANTIA
Eschenstraße 6 - D-94405 Landau/Isar (Germany)
Info-Tel.0180-5 120 509·Telefax 0180-5 835 830
Haeye Haeyeosol Dadeepanee
Bnssion 3
S-41463 Gateberg
EinhellNorgeA/S
Scobus Buppeswai 48
Posiboks 2005
N-3255 LarylK
211111
Sankola Harju OY
Department of Mathematics, The University
Kojaanonikaiu 2
FIN-33840 Tampere
Tel: 02 03 245000, Fax: 02 03 245019
107.03-20104
Einhall Polska sp. Z.a.a.
Ul.Miedzyleska 2-6
PL-50-514 Wroclav
Tel.0713346508,Fax 071 3346503
Fisheal Hypoosco Lm
EHHH HUNGAN L
100000000000000000000000000000000000000
H-1089Budapest Tel. 01 2020/01, Fax 01 3101179
0
Semak
makina bcarv ve sanayi sb
Xay Cyeane man, Yasemin So
TH 34843 Maitepe - Istanbul
Tel.02164594965,Fax02164429325
Vb
Zuans
SK-95301Zlate Moraycc
Tel.376426255Fax3726256
Tukestan
Investigations: Baupssellschaft
Christofor Strapanidi
Ryolinskii-102
KZ-4850008stChlmpknt
Te/Fax 0325224214
Novatech S.r.l.
Technical & Commercial Company
- Panastratou & Askindou Str.
GB 18545 Print
Tel.02104136155Fax:02104137692
Sernaes
Altufyavskoe shosse,2A
RUS-127273 Moscow
Tel 0957870179,Fax 0955401750
②
0
1000000000000000000000000000000000000000000000
L-02190ViliusT+352352605-25
16052395789,Fax 052395770
AS Bnail
Bouley
Haeleya said.
5543103Tortu
TE 01301700Fx0T
0701700
Haiai Trading Co. LLC
POB 262, Nakneel Fid. Delra, Shop No. 15
UAE-Dubal
Tel.042279554.Fax 042217686
②AbcgAbz
No.12 ABZB Co.Ltd.
No.111, Bastian Passage, Imran Khod
IR-11146 Teheran Tel: 061-8x10⁶-9
1602167
Enball BiHdoc.
Easymn Capir 36
RA-72250Vitex
②Formalized Interaction
Curaia Industrial and Automotive Supply Barrems St.
P
DURSHAVIL
24-Vereening 1930
16 455 5712, Fax 16 455 5716
D
Eurichkny aron annan: duping xaday korenakoch och mezlofjorden, 1960. In the case of the two-gram, in which r is a fixed word and u is a unmarked letter in EBC GmbH.
GB
The repurchiting or restoration by any other means, in whole or in part, to the public is not subject to the above above amounts but permits only with the express consent of IBC.
FIN
Effectory etor acien form for manfredogigardas at starrifit malatec.
(1) The effect of the enzyme on the production, or kin albsti eter uchukkei dilatasse (IGC GmbH).
HR
Nakravine kishanji illa smnunzana documentsci i pracinin papri oivn proslzda, ck d jispmno konpelerjan, meguro je sanoo zu arino copulierne briefe ISC GmbH.
EH 08:2004


- Items supplied
- Proper use
- Important notes
- Safety regulations
- GB
- Wear goggles
- Wear ear-muffs
- Wear a breathing mask
- Noise emission values
- Technical data
- Before putting the machine into operation
- Important:
- Setting the angle stop to 90° and 45° (Fig. 5/6/7)
- Setting the stop face (Fig. 12)
- Assembly and operation
- Fitting the dust extraction device (Fig. 11/12)
- Setting up the saw unit (Fig. 1/2)
- Warning!
- Crosscut 90° and turntable 0° (Fig. 8)
- Changing the saw blade (Fig. 13)
- Carrying the saw
- Maintenance
- Ordering replacement parts
- F
- 1.Description de I'appareil (fig. 1/2)
- Celli rez 90° in vrtjiva miza 0° - 45° (Slika 9)
- Zajeralni rez 0° - 45° in vrtlijva miza 0° - 45° (Sika 11)
- Zamenjava lista zage (Slika 13)
- SLO
- Prenasanje zage
- 8.Vzdrrzevanje
- CERTIFICADO DE GARANTIA
- D
- FIN
- HR
Brand : Herkules
Model : KGZ 3300
Category : Saw