SGA 9130 B - Iron BEKO - Free user manual and instructions
Find the device manual for free SGA 9130 B BEKO in PDF.
| Product Type | Steam generator for iron |
| Brand | Beko |
| Model | SGA 9130 B |
| Power supply | 220-240 V ~ 50-60 Hz |
| Power consumption | 2520-3000 W |
| Pump pressure | 8 bar |
| Continuous steam flow | Up to 165 g/min |
| Intense steam (boost) | Up to 600 g per impulse |
| Water tank | Removable, capacity not specified |
| Ironing modes | Smart-Hygiene, Temperature 1/2/3, Max, Turbo |
| Automatic steam detector | Yes |
| Automatic shut-off | 30 s horizontal, 8 min vertical, 10 min inactivity |
| Anti-scale system | CalcBOX with automatic cleaning |
| Transport lock | Yes |
| Cord winding | Yes |
| Safety | Automatic shut-off, overheating protection |
Frequently Asked Questions - SGA 9130 B BEKO
User questions about SGA 9130 B BEKO
0 question about this device. Answer the ones you know or ask your own.
Ask a new question about this device
Download the instructions for your Iron in PDF format for free! Find your manual SGA 9130 B - BEKO and take your electronic device back in hand. On this page are published all the documents necessary for the use of your device. SGA 9130 B by BEKO.
USER MANUAL SGA 9130 B BEKO
natural_image
Simple line icon of a shirt with collar and tie (no text or symbols)SGA 9130 B
EN - FR - RO - IT - PL - SL - CS - SR - SQ - MK - RU
CONTENTS
| ENGLISH | 3-21 |
| FRANÇAIS | 22-41 |
| ROMÂNĂ | 42-65 |
| ITALIANO | 66-86 |
| POLSKI | 87-108 |
| SLOVENŠČINA | 109-127 |
| ČESKY | 128-148 |
| СРПСКИ | 149-167 |
| SHQIPTARE 168-186 | |
| MAKEДОНСКИ | 187-211 |
| РУССКИЙ | 212-239 |
Please read this manual first!
Dear Customer,
Thank you for preferring this Beko product. We hope that you get the best results from your product which has been manufactured with high quality and state-of-the-art technology. Therefore, please read this user manual and all other accompanying documents carefully before using the product and keep it as a reference for future use. If you handover the product to someone else, give the user manual as well. Follow all warnings and information in the user manual.
Meanings of the symbols
Following symbols are used in the various sections of this manual:

Important information and useful hints about usage.

WARNING: Warnings against dangerous situations concerning the security of life and property.
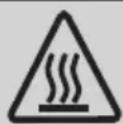
WARNING: Warning for hot surfaces.
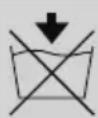
WARNING: Do not immerse the appliance, power cord or power plug in water or in other liquids.
WARNING: Risk of burning and scalding due to steam.

WARNING: Risk of burning and scalding due to steam.
1 Important safety and environmental instructions
This section contains safety instructions that will help protect from risk of personal injury or material damage.
Failure to follow these instructions invalidates the granted warranty.
1.1 General safety
Please pay attention to the cleaning and maintenance for the product in following instruction
- This appliance complies with the international standards.
- This appliance is intended to be used in household and similar applications such as:
- Staff kitchen areas in shops, offices and other working environments;
- Farm houses
- By clients in hotels, and other residential type environments;
- Bed and Breakfast type environments.
• The appliance is not suitable for - outdoor use.
- This appliance can be used the children who are at the age of 8 and above and by people who have limited physical, sensory or mental capacity or who do not have knowledge and experience, provided that they are supervised or they understand the instructions with regard to safe use of the product and potential dangers. Children should not play with the appliance. Cleaning and user maintenance procedures should not be performed by children unless they are supervised by an older person.
- When the appliance is in use or left to cool down, keep the appliance and power cable out of reach of children under 8 years old.
- Do not leave the appliance un-attended while it is plugged in.
- Unplug the appliance before filling the water reservoir with water.
- Do not open the water refill hole during usage.
1 Important safety and environmental instructions
- The iron must be used and rested on a flat, stable surface.
- When the appliance is placed on its base plate, ensure that the surface beneath the plate is level.
- Keep your device in a vertical position or place on the iron dock when you are not using or having a pause during ironing.
- If the appliance is dropped or leaks water or has other failures, contact the authorised service. Do not use the appliance until it is repaired.
- Only use the original parts or parts recommended by the manufacturer.
- Before you start calc cleaning, make sure the calc box on the backside of the steam iron station is empty.
- Do not dismantle the appliance.
- Your mains power supply should comply with the information supplied on the rating plate of the appliance.
- The mains supply of the appliance should be secured with a 16 A fuse minimum.
- Use the appliance with a grounded outlet.
- Do not use the appliance with an extension cable.
- Do not pull the power cable when unplugging the appliance.
- If the power cable is damaged, it should be repaired or replaced by the dealer, service center, or a specialised and authorised service with similar qualifications.
- Unplug the appliance before cleaning.
- Do not wrap the cable around the appliance.
- Do not touch the appliance or its plug with damp or wet hands when the appliance is plugged in.
- The soleplate and the steam station surface may get over-heated. Contact with hot surfaces may cause burns.
1 Important safety and environmental instructions
- Do not use the appliance in or near the areas where combustible or inflammable places and materials exist.
- If you keep the packaging materials, store them out of the reach of children.
- Do not remove calc box from its place during the transfer of water to the container or until you hear an audible warning.
- The filling, or decalcifying, or rinsing, or inspection apertures that are under pressure, shall not be opened during use.
1.2 Compliance with WEEE Directive and Disposing of the Waste Product
This product complies with EU WEEE Directive (2012/19/EU). This product bears a classification symbol for waste electrical and electronic equipment (WEEE).
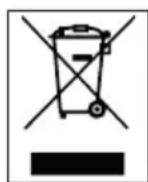
This symbol indicates that this product shall not be disposed with other household wastes at the end of its service life. Used device must be returned to official collection point for recycling of electrical and electronic devices. To find these collection systems please contact to your local authorities or retailer where the product was purchased. Each household performs important role in recovering and recycling of old appliance. Appropriate disposal of used appliance helps pre-
vent potential negative consequences for the environment and human health.
1.3 Compliance with RoHS Directive
The product you have purchased complies with EU RoHS Directive (2011/65/EU). It does not contain harmful and prohibited materials specified in the Directive.
1.4 Package information

Packaging materials of the product are manufactured from recyclable materials in accordance with our National Environment Regulations. Do not dispose of the packaging materials together with the domestic or other wastes. Take them to the packaging material collection points designated by the local authorities.
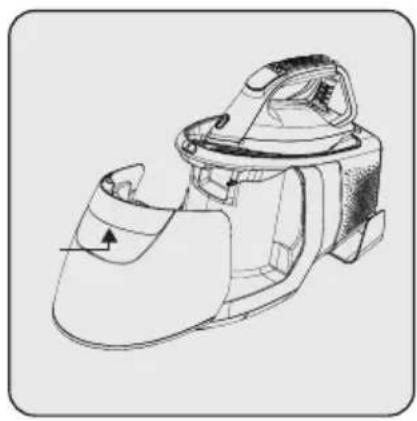
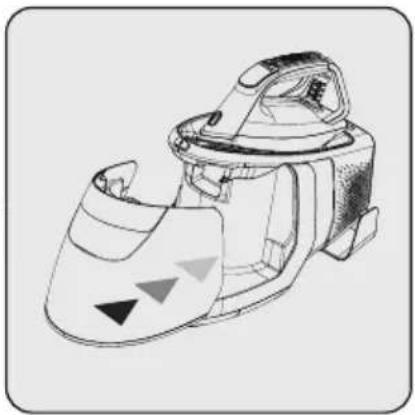
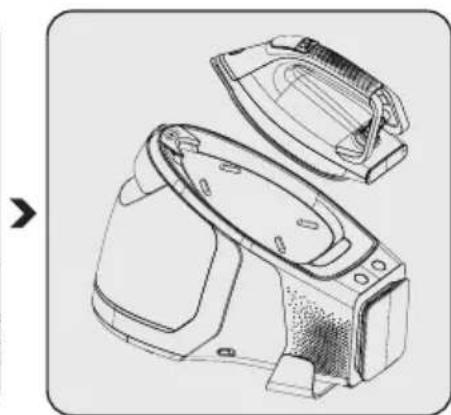
2 Your steam generator
2.1 Overview
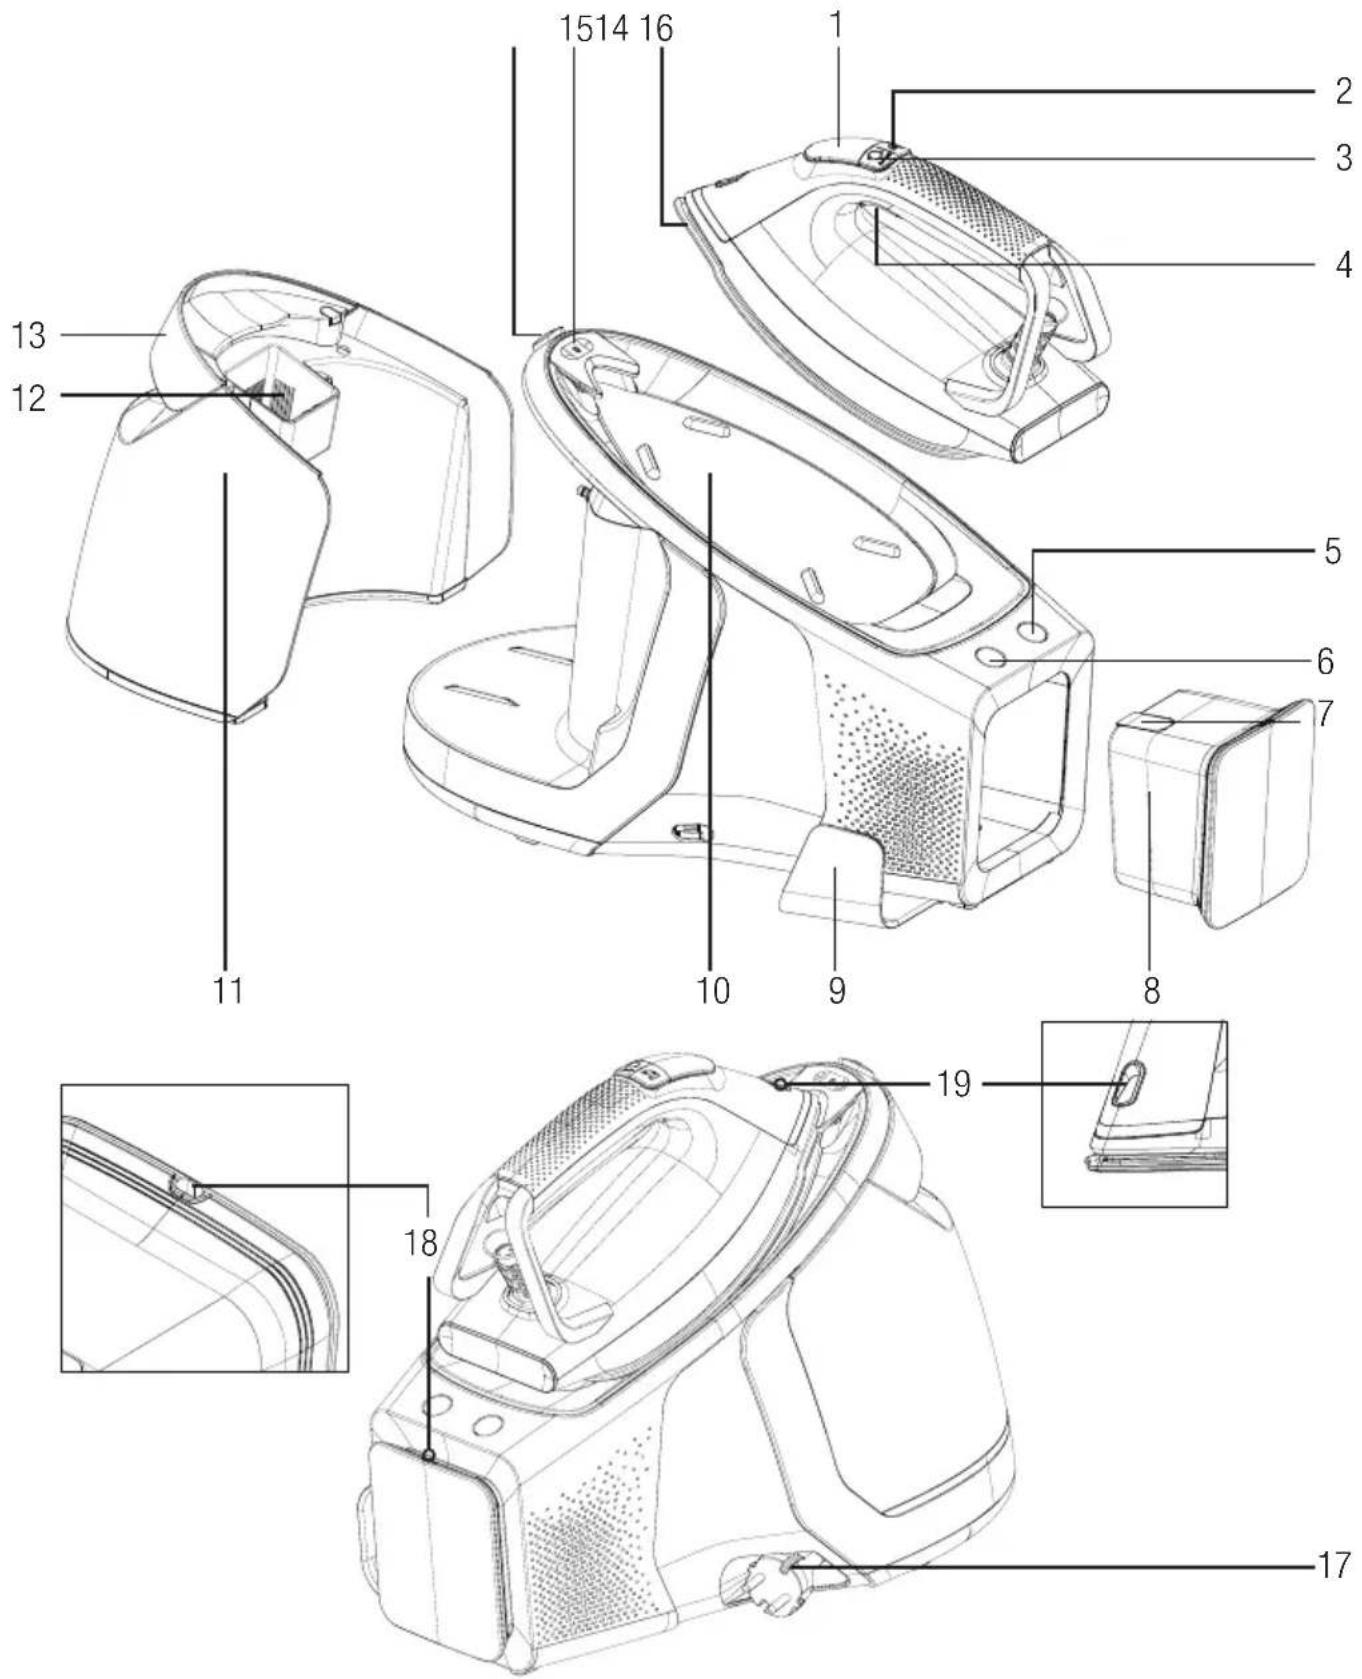
text_image
Technical diagram of a vacuum cleaner with numbered parts for identification and assembly reference.2 Your steam generator
Controls and parts
- LED Display
- Automatic steam button
- Level adjustment button
- Steam trigger
- Calc cleaning button
- On/Off switch
- Calc box lid
- Calc box
- Steam cable clip
- Iron dock
- Detachable water tank
- Water filling hole
- Tank detach handle
- Carrying lock unlock button
- Carrying lock
- Soleplate
- Cord wrapping slot
- Steam release hole
- LED light
2.2 Technical data
| Power source 220-240V~ 50-60Hz | |
| Power consumption 2520-3000 W | |
| Steam pressure 8 bar | |
| Continuous steam amount (up to g/min) | 165 g/min |
| Intense steam (up to g) 600 g* |

*Measured by pulling and releasing the steam trigger (4) in 3 second intervals for 30 minute usage, in maximum heat level and turbo steam mode. Iron mode was switched to turbo steam mode in every 12th minute. (see 3.11)
The rights to make technical and design changes are reserved.
2 Your steam generator
LED display and buttons
| LED Display Symbols Descriptions | ||
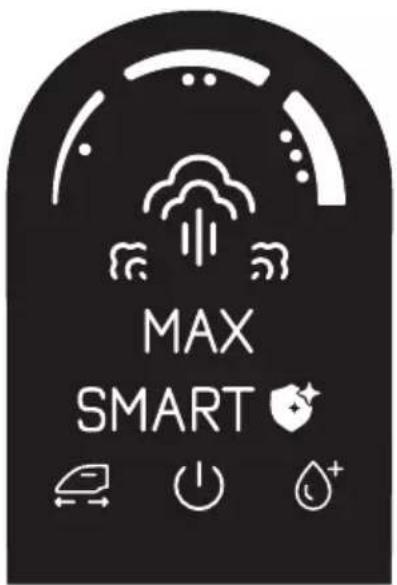 |  | Temperature settings |
 | Steam | |
 | Turbo steam mode | |
 | Smart-Hygiene mode | |
 | Automatic steam sensor indicator | |
 | Auto-Off indicator | |
 | Water tank empty indicator | |
| Buttons | ||
| Level adjustment button |  turbo 3" turbo 3" | Each time you press on level adjustment button (3), you can switch between iron setting modes “Smart-Hygiene, Temperature 1, Temperature 2, Temperature 3, and Max”. Press-ing and holding the button for 3 seconds will activate Turbo steam mode |
| Automatic steam sensor button |  | Use it to activate and disable automatic steam sensor.To activate, press automatic steam sensor button (2). Steam sensor indicator will be dis-played on the LED display.To disable, press automatic steam sensor button (2). Steam sensor indicator on the LED display will fade. |
| Calc cleaning button |  | You can perform descaling with this button. |
On/Off switch You can turn on/off your nce with  | switch. | |
3 Operation
3.1 Intended use
The appliance is intended for home use and ironing only, it is not suitable for professional use.
3.2 First operation
Remove the protecting film on the LED display (1). On initial operation, fill the water tank (11) and generate steam for 10-15 minutes to remove any production residue (see. 3.4).

There may be a light odour on the initial use of the appliance. This will return to normal after a few uses.
3.3 Ironing tips
- The appliance will heat up in short; use low temperature settings when ironing synthetic, silk or similar fabrics.
- Reverse iron flammable fabrics (silk, etc.) or use the appliance in “Smart+Hygiene” mode.
- When ironing fabrics like velvet, use little pressure and iron in one direction.
- In coloured silk fabrics, steaming may cause stains. Do not use steam.
- 100% pure wool fabrics may be ironed using steam.
- Ironing woolen clothes may cause flaming. Iron on the reverse side.

WARNING: Do not contact metal parts like zippers, pins or buttons with the iron. This will damage the iron's soleplate.
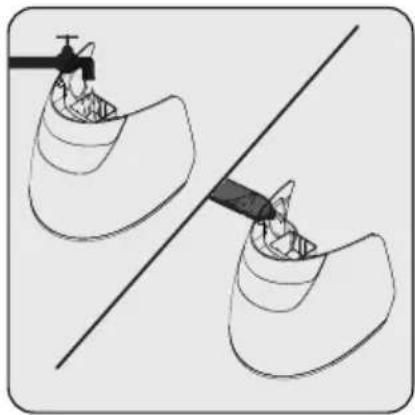
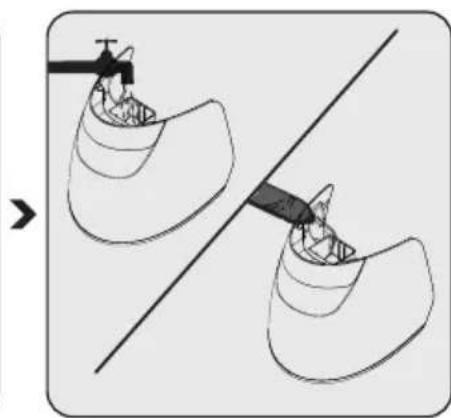
3.4 Filling the water tank

WARNINGS:
- If you are going to fill water while the water tank is still on the steam generator, make sure the appliance is unplugged.
- Do not put perfume, vinegar, soda, descaling agents, ironing aids and other chemicals into the water tank.

- Water tank empty “ ^+ ” sign will illuminate when the tank is empty. Appliance will not produce steam when the steam trigger is pulled.
- Your appliance is designed for using tap water. If the tap water in your region is extremely calcareous, use the tap water mixed with drinking water.
3 Operation
natural_image
Technical line drawing of a mechanical device with no visible text or symbolsRemove the water tank (11) by holding it from the tank detaching handle (13) and pulling.
natural_image
Diagram showing two views of a mechanical component with a tool, no text or symbols presentFill the water tank (11) up to Max line.
natural_image
Line drawing of a mechanical device with internal components and directional arrows (no text or symbols)Place back the water tank (11). Make sure the water tank is properly seated.
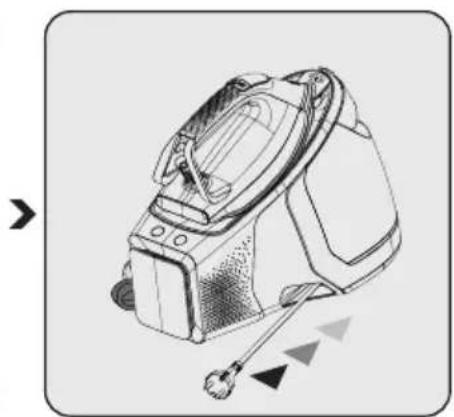
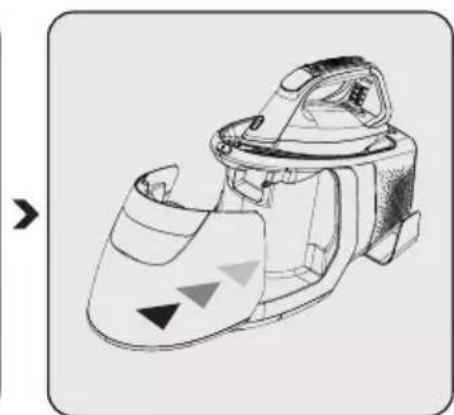
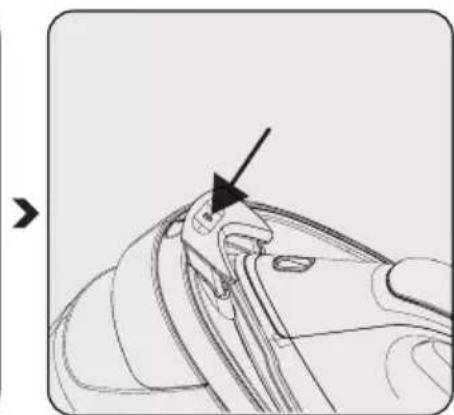
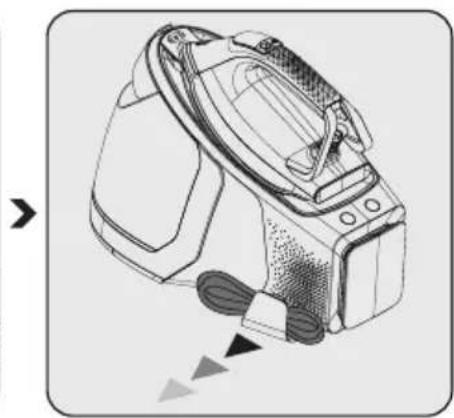
3.5 Carrying lock locking/unlocking
This function is designed to allow easy carriage of iron with the dock.
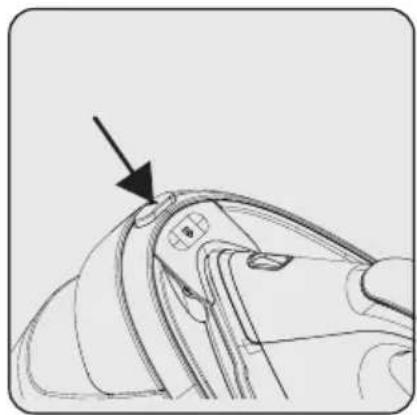
natural_image
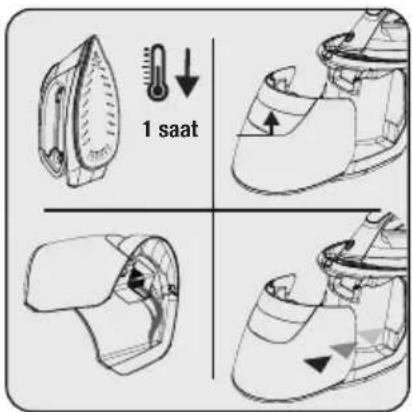
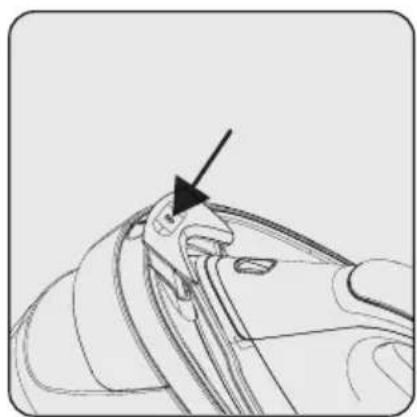
Line drawing of a mechanical component with an arrow pointing to a detail (no text or symbols)To detach the iron from the dock, push on the carrying lock unlock button (14).
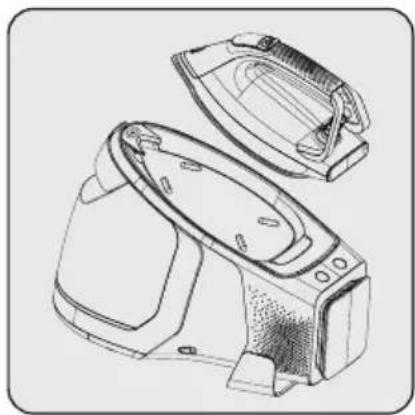
natural_image
Line drawing of a washing machine with open lid and side panel (no text or symbols)The lock will be unlocked and you will be able to lift the iron from the dock.
natural_image
Line drawing of a mechanical component with an arrow pointing to a specific feature (no text or symbols present)To lock the iron to the dock, push on the carrying lock (15).
3.6 Temperature setting

You can safely iron every fabric type that can withstand ironing, using "Smart-Hygiene" mode. You can perform steam ironing by using the steam trigger (4) at this stage.

WARNINGS:
- You can perform steam ironing in every temperature setting except “•” Pull the steam trigger (4) for steam ironing.
- For ironing, follow the ironing instructions on the fabric label.
3 Operation
| Type of Fabric Settings Steam Setting | ||
| Synthetic • No Steam | ||
| Silk goods ••• Steam/Turbo Steam | ||
| Cotton •••• Steam/Turbo Steam | ||
| Linens-Jeans Max Steam/Turbo Steam | ||
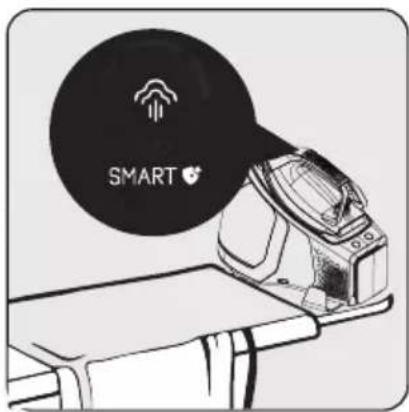
The appliance starts on the "Smart-Hygiene" mode. This level provides a safe temperature and steam amount for every fabric that are suitable for ironing.
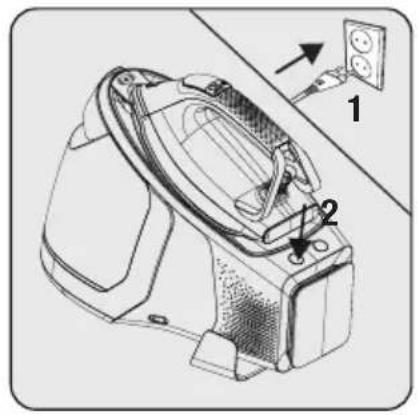
natural_image
Technical line drawing of a mechanical device with labeled parts and an inset showing a wall socket (no text or symbols present)Plug in the power cord and press the on/off switch.
— The light on the on/off button will illuminate and you will hear a beep sound.
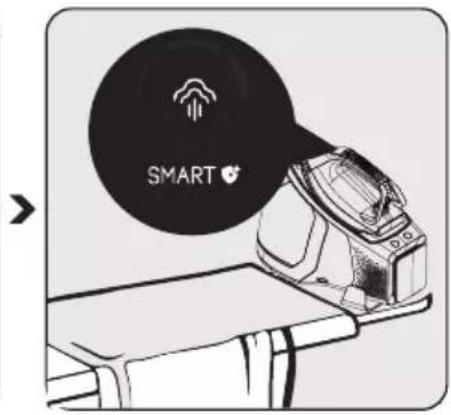
text_image
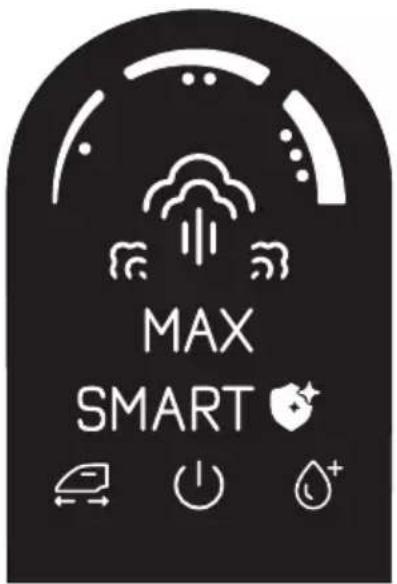
SMART ♥LED display (1) will blink until the appliance is ready.
- LED display (1) will remain on when ready, and you will hear a beep sound.
natural_image
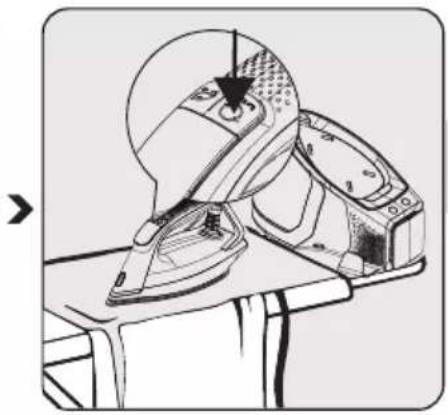
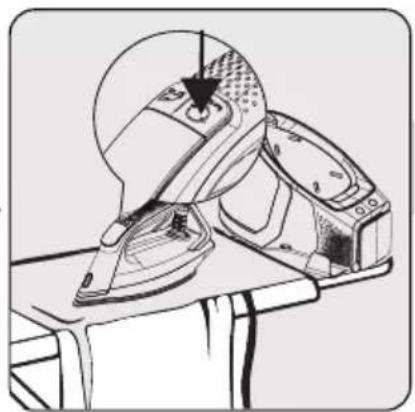
Line drawing of a mechanical device with a hammer indicating the center (no text or symbols present)You can set the fabric-appropriate temperature using the level adjustment button (3) and start ironing.
3.7 Dry ironing

- Unless you pull the steam trigger (4) or push on the automatic steam sensor button (2), your appliance will not generate steam.
- Pulling the steam trigger (4) will not generate steam when the temperature setting is in “•” mode.
3.8 Steam ironing

- Pull the steam trigger (4) for steam ironing. If you keep pulling the steam trigger (4) continuously for 1 minute, the appliance will stop generating steam.
- Pump operation may cause noise during water intake, this is normal.
- To activate automatic steam generation function, you can push on the automatic steam button (2).
• Automatic steam may only be activated when the iron is moving horizontally.
3 Operation
You can use level adjustment button (3) to adjust temperature setting. (see 3.6).
text_image
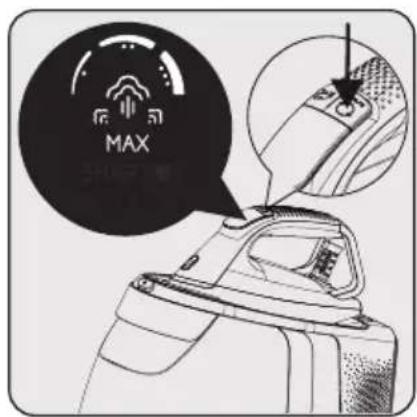
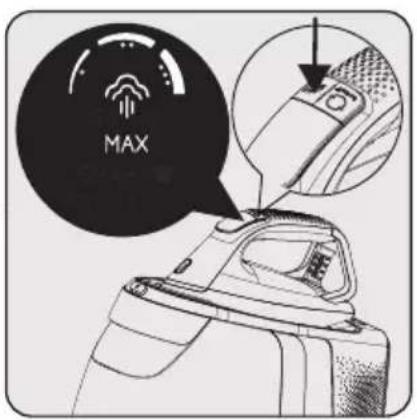
MAXSet the fabric-appropriate temperature and steam using the level adjustment button (3). (See 3.6)
text_image
MAXLED display (1) will blink until the appliance is ready.
text_image
MAXLED display (1) will remain on when ready, and you will hear a beep sound indicating that your appliance is ready for ironing.

WARNINGS:
- Your selection shall comply with the type of the cloth to be ironed.
- Blinking temperature setting symbols on the LED display (1) indicates that the soleplate is being prepared to reach the selected temperature. Constant illuminating setting symbols on the LED display (1) indicates that the soleplate has reached the set temperature.

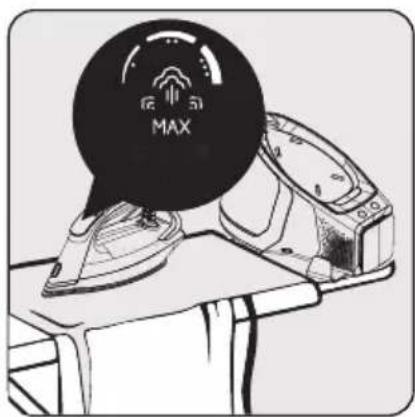
When the appliance is ready for ironing, move the iron horizontally on the cloth to be ironed and press the steam trigger (4). As long as you pull the steam trigger, your appliance will provide steam through the soleplate (16).
WARNINGS:
- Never direct the steam at people or animals.
- Never touch the hot soleplate (16).
3 Operation
3.9 Automatic steam function
Steam sensor detects your irons motion and provides right amount of steam without using the steam trigger (4) according to the mode you selected.
text_image
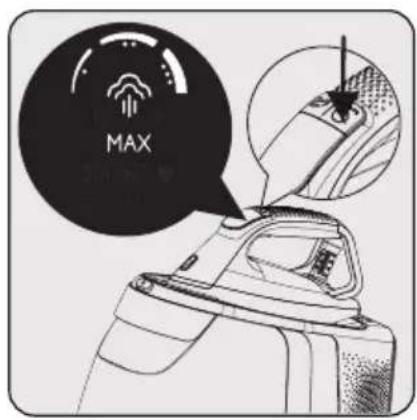
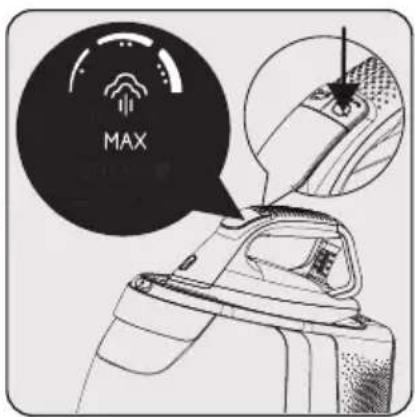
MAX 300 MHzSet the fabric-appropriate temperature and steam using the level adjustment button (3). (See 3.6)
text_image
MAX MAXPush the automatic steam button (2) to activate automatic steam function.
- Sensor will be activated and the LED display will display "☐".
- At the same time, led light (19) in front of the iron will illuminate.
text_image
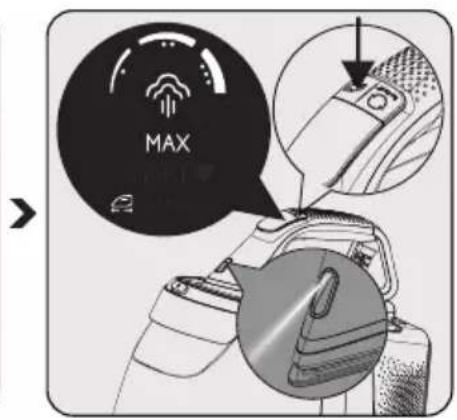
MAXPush the automatic steam button (2) to disable automatic steam function.
- Sensor will be disabled and the "on the LED display will fade.
– Led light (19) will disappear.

Led light in front of the iron will only illuminate when the automatic steam function is activated.
3.10 Intense steam
Pulling and releasing the steam trigger (4) once will provide intense steam.

- Repeatedly pulling the steam trigger (4) may decrease intense steam's effect.
- Intense steam's effect may decrease after using continuous steam by pulling and holding the steam trigger (4) or using the automatic steam function.
WARNING: Never direct the steam at people or animals.
3 Operation
3.11 Turbo mode

- Use the turbo steam feature when you want more steam and for quick ironing performance on thicker clothes.
- After 12 minutes of operation on turbo steam level, the appliance automatically disables turbo steam function.
- You may use the turbo steam function in every mode except “●.
text_image
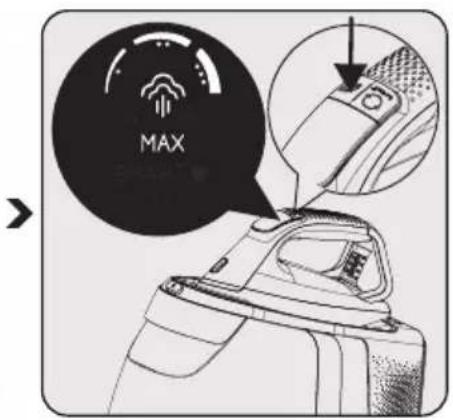
MAXPush the level adjustment button (3) and hold for 3 seconds.
- Turbo steam symbol “” will appear on the display.

text_image
MAXLED display (1) will blink until the appliance is ready.
- LED display (1) will remain on when ready, and you will hear a beep sound indicating that your appliance is ready for ironing.

text_image
MAXTo exit turbo steam mode, push the level adjustment button (3).
- Turbo steam symbol " will disappear from the display.
3.12 Vertical steam
You can use the steam feature also while the iron is in vertical position (see 3.8). Using the vertical steam function, you can iron your curtains or hanged clothes. Keep the appliance 15 - 30cm away from clothing and curtains.

You may also use the turbo steam feature (see 3.11).
- Push the on/off button (6) and hold for 3 seconds when you complete ironing.
– Lights on the LED display (1) will fade.
- Unplug the appliance and let it cool.
3 Operation
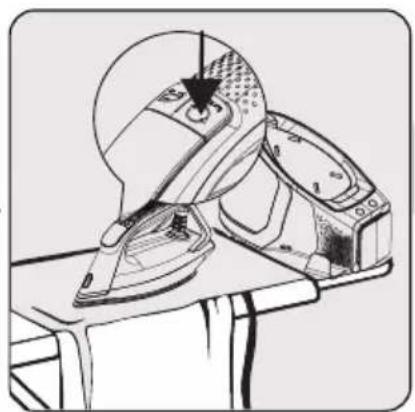
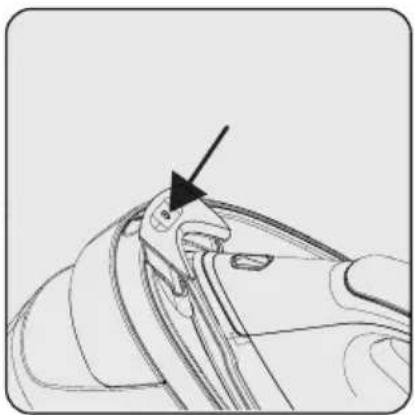
3.13 Automatic shut off

text_image
30 sn Auto-OffIron will automatically turn off if it does not move horizontally for 30 seconds or any buttons are pressed.
- Auto shut off “💡” indicator will continuously illuminate on the LED display (1).

text_image
8 dk Auto-OffIron will automatically turn off if it does not move vertically for 8 minutes or any buttons are pressed.
- Auto shut off “◎” indicator will continuously illuminate on the LED display (1).
natural_image
Illustration of an iron (£) being casted on a table with a magnified view showing the iron's tip (no text or symbols present)Auto shut off “!” indicator will turn off after you move the iron or push any button. LED display (1) will blink until the iron is ready again.
- LED display (1) will remain on when ready, and you will hear a beep sound indicating that your appliance is ready for ironing.

It may take about 60 seconds for the soleplate (16) temperature to reach its previous level.

WARNING: The appliance will turn off automatically if no buttons are pushed or the appliance is not moved in 10 minutes. On/Off switch (6) will start blinking. Press the on/off button (6) to re-operate the appliance.
4 Cleaning and maintenance
4.1 Calc cleaning

- You may start calc cleaning operation when the calc cleaning button (5) "Calc ^A _BOX" is lit by pushing on the button.
- Before starting calc cleaning, make sure that the calc box (8) is empty.
- When the calc cleaning time is reached, the calc cleaning button (5) will remain lit for 20 seconds and a “beep” sound will be heard on intervals. If you do not start calc cleaning, the calc cleaning button (5) will turn off and the cleaning will start automatically next time you start ironing.
- If the appliance is unplugged or power outage occurs during calc cleaning, the operation will continue on the next time the appliance starts.
- Each time you turn on the appliance, the calc cleaning button (5) will illuminate for 10 seconds if the tank is available for cleaning. If you push on the calc cleaning button (5) within this period, cleaning operation will begin. If you do not push, the calc cleaning button (5) will turn off and the appliance will continue regular operation.

You will hear a “beep” sound if the calc box (8) is filled with water during cleaning. First, empty the calc box (8) and then replace properly.

WARNING: During calc cleaning, do not reach for the steam release hole (18) that is located on the calc box (8).
4 Cleaning and maintenance
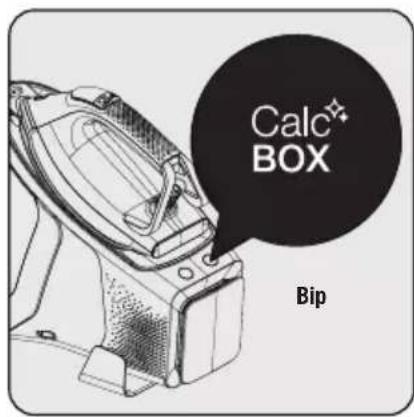
When the “Calc®” sign is lit, you may start your irons calc cleaning operation.
text_image
Calc® BOX BipThe calc cleaning button "Calc" (5) will remain lit for 20 seconds and alerts with a "beep" sound. This indicates the time for calc cleaning.


text_image
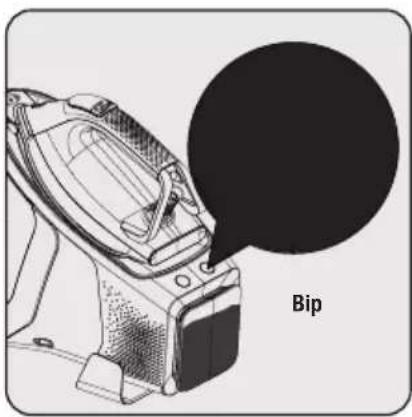
Calc BOX BipPush the calc cleaning button (5).
— A beep sound will be heard and calc cleaning will start.
- During operation, calc cleaning button "Calc" (5) will blink.
- Do not reach for the steam relief hole (18) while the operation continues.
natural_image
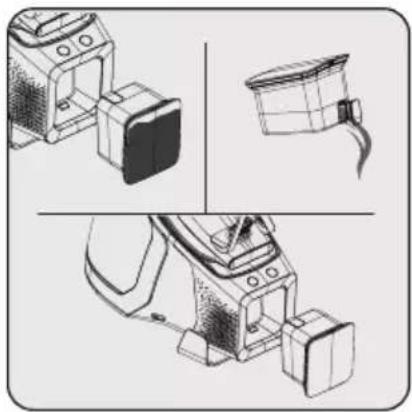
Technical line drawings of mechanical components (no text or symbols)To empty the calc box (8), open the lid (7) and empty. Then, make sure the calc box (8) is properly seated.
- Iron will be ready for ironing in a few minutes.
text_image
BipOnce the calc cleaning is completed, the calc cleaning button "CMKBOX(5) will turn off and a long "beep" sound alert will be heard.
4 Cleaning and maintenance

WARNINGS:
- During calc cleaning operation (before the beep alert) do not remove the calc box (8) from its place.
- If you remove the calc box (8) from its place during calc cleaning, the operation will stop and an audible warning will be given. There may be water leakage at this point. When the calc box (8) is placed back into its place, calc cleaning will continue.
- If the calc box is (8) pulled during ironing, a long "beep" alert will be heard and calc cleaning button (5) will start blinking.
- Do not turn off or unplug your appliance before the Calc" box" light is completely turned off.
4.2 Cleaning

WARNINGS:
- Do not immerse the iron dock (10) in water or other liquids. Never put vinegar, descaler, soda, perfume or other ironing aids into the appliance.
- Do not use benzene, solvents, abrasive cleaners or hard brushes to clean the appliance.
- Do not wash your appliance under running water or immerse it in water or other liquids.
- Do not use abrasive cleaning agents to clean the baseplate (16).
text_image
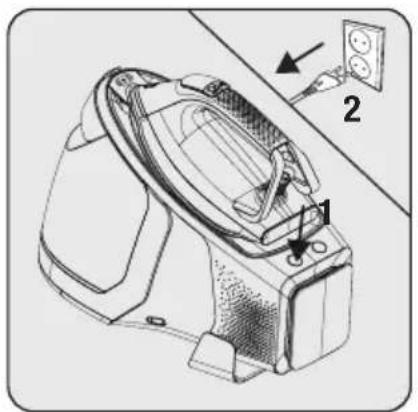
Technical diagram of a device with labeled parts and an inset showing a wall-mounted socket, marked as component 2.Turn off and unplug the appli- ance before cleaning.
text_image
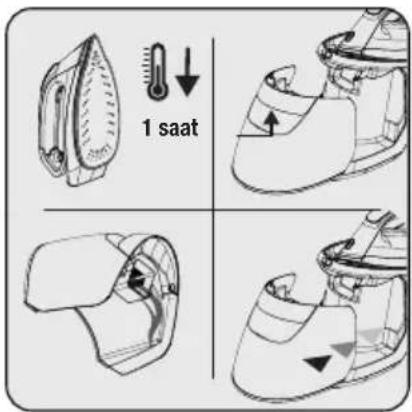
1 saatWait for the appliance to completely cool down. Drain the remaining water from the water tank (11).
natural_image
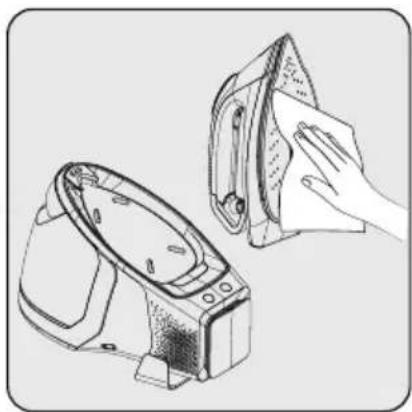
Illustration of two hand-drawn models: one with a cloth covering the other, both placed on a stand (no text or symbols)Use a damp cloth to clean the outer part of the appliance. Then wait for it to dry completely. Wipe the sediments and residues on the soleplate (16) with a lightly dampened cloth.
4 Cleaning and maintenance
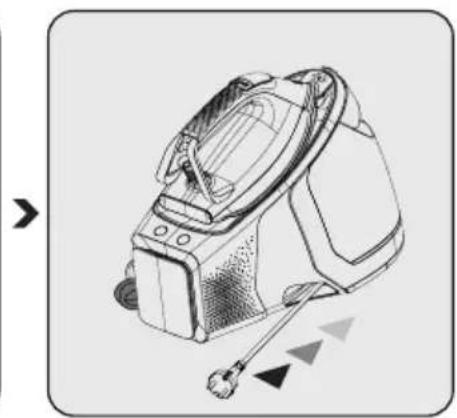
4.3 Carrying lock and cable rewinding
This function is designed to allow easy carriage of iron with the dock.
natural_image
Close-up of a mechanical component with a black arrow pointing to a feature (no text or symbols visible)Place the iron on the dock (10) and push on the carrying lock (15) to lock the iron.
natural_image
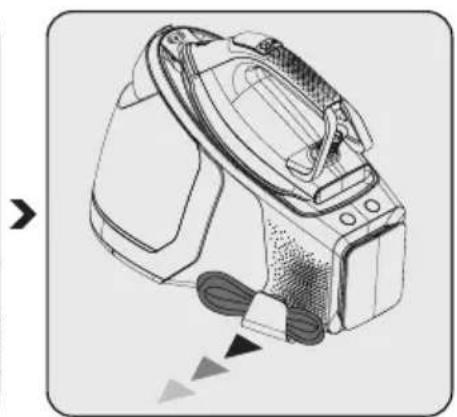
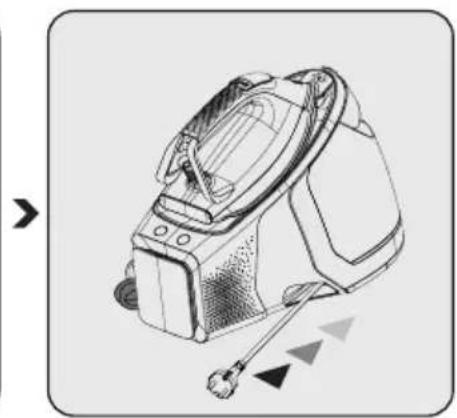
Line drawing of a digital camera with attached cable, showing no text or symbolsPull the steam cable clip (9) and place the cable.
natural_image
Line drawing of a portable electronic device with attached wires and a sensor, no text or symbols presentPull and release the power cord. Cable will be wrapped into the wrapping slot (17).

You may carry the appliance by holding it from the handle.
4.4 Storage
- If you do not intend to use the steam generator for a long time, store it carefully.
- Unplug the appliance and wait for it to cool down before storing.
- Drain the water tank (11).
- Lock the handling lock (10) of the appliance (see 4.3).
- Store the appliance in a cool and dry environment.
- Ensure that the appliance is kept out of reach of children.
4.5 Transport and shipping
- During transport and shipping, carry the appliance with its original packaging. The packaging of the appliance will protect the appliance against physical damage.
- Do not place heavy objects on the appliance or the package. The appliance may get damaged.
- If the appliance is dropped, the appliance may not operate or permanent damage may occur.
5 Troubleshooting
| Problem Possible cause Solution | ||
| The base does not heat (16) although the appliance is plugged. | There may be a problem with the connection. | Check the plug and the power cord of the appliance |
| Press the on/off button (6). | Contact the authorized service if the appliance does not operate although the appliance is plugged and you have pressed the on/off (6) button. | |
| The appliance does not produce steam. | The amount of water in the water tank (11) may be insufficient. | Fill water into the water tank up to the MAX line (see 3.4). |
| Check if the water reservoir (11) is installed in its housing. | The appliance does not provide steam if the temperature is set to “•” position. Adjust the temperature setting as “Smart-Hygiene mode, •••, •••• or MAX” (see 3.6). | |
| Water drips onto the fabric. Water | may come out when you press the steam trigger (4) before the appliance reaches the set temperature. | The appliance is ready for iron-ing the adjusted temperature is shown on the LED display (1). |
| Sediments and residues fall of from the base (16) while ironing. | Such sediments may occur if the water you use in your appliance is too calcareous. | Fill the water reservoir of the appliance by mixing the tap water and drinking water for your next ironing operations. |
| There are stains on the base (16). | Wet clothes are ironed / scale stains have occurred on the base (16). | Wipe the sediments and residues with a lightly dampened cloth after the appliance is cooled down adequately. |
| The on/off button (6) of the appli-ance blinks. | The appliance may have switched to automatic power off mode. | Press the on/off button (7) (see 3.12). |
| Calc cleaning button CalcBOX (5) is blinking. | It is time for calc cleaning. Perfom the calc cleaning opera-tion (see 4.1). | |
| Icons on the LED display (1) are not clear. | The protecting film on the LED display (1) may be still on. | Remove the protecting film on the LED display (1). |
text_image
Technical diagram of a vacuum cleaner with numbered parts for identification and assembly reference.natural_image
Technical line drawing of a mechanical component with no visible text or symbolsnatural_image
Diagram showing two views of a mechanical component with a tool, no text or symbols presentnatural_image
Line drawing of a mechanical device with no visible text or symbolsnatural_image
Line drawing of a mechanical component with an arrow pointing to a circular feature (no text or symbols)natural_image
Line drawing of a washing machine with open lid and side-mounted casing (no text or symbols)natural_image
Close-up of a mechanical component with a black arrow pointing to a detail (no text or symbols visible)text_image
Technical diagram of a device with labeled parts and an electrical outlet, showing mechanical components and wiring connections.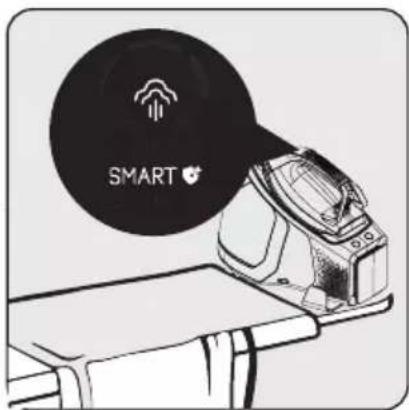
text_image
SMART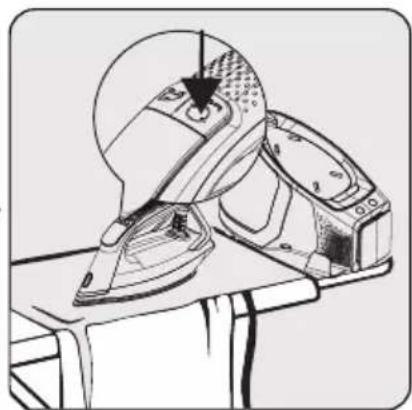
natural_image
Line drawing of a mechanical device with a fan and base, showing internal components (no text or symbols)natural_image
Illustration of a pair of clothes on a table, one emitting a black smoke or vapor bubble (no text or symbols)natural_image
Technical line drawing of a mechanical device with three views (top, front, side), no visible text or symbolstext_image
Technical diagram of a device with labeled parts and an inset showing a socket connection to a wall.natural_image
Illustration of two hand-drawn models: a front-mounted device and a flat iron, with no text or symbols present.natural_image
Line drawing of a mechanical component with an arrow pointing to a feature (no text or symbols present)natural_image
Line drawing of a digital camera with attached cable, showing mechanical components and motion arrows (no text or symbols)natural_image
Technical line drawing of a portable electronic device with attached cable and sensor (no text or symbols)text_image
Technical diagram of a vacuum cleaner with numbered parts for identification and assembly reference.natural_image
Technical line drawing of a mechanical device with no visible text or symbolsnatural_image
Diagram showing two views of a mechanical component with a tool, no text or symbols presentnatural_image
Line drawing of a mechanical device with directional arrows indicating movement or force (no text or symbols)natural_image
Line drawing of a mechanical component with an arrow pointing to a detail (no text or symbols)natural_image
Line drawing of a washing machine with lid and side panel (no text or symbols)natural_image
Close-up of a mechanical component with a black arrow pointing to a feature (no text or symbols visible)text_image
Technical diagram of a washing machine with labeled parts and an electrical outlet indicatornatural_image
Line drawing of a pair of steamers on a table, showing mechanical components and a directional arrow (no text or symbols)natural_image
Illustration of a pair of household appliances on a table, one ironing and the other with a magnifying glass (no text or symbols)natural_image
Technical line drawing of a mechanical device with three views (top, front, side), no visible text or symbolstext_image
Technical diagram of a device with labeled parts and an inset showing a wall socket connectionnatural_image
Illustration of two hand-drawn steam covers, one with a cloth covering the other (no text or symbols)□ Convector electric
Model / Serie:
VÂNZĂTOR
Nr. factură:......Data:......
text_image
Technical diagram of a vacuum cleaner with numbered parts for identification and assembly reference.Comandi e parti
natural_image
Technical line drawing of a mechanical device with no visible text or symbolsnatural_image
Diagram showing two views of a mechanical component with a tool inserted, no text or symbols presentnatural_image
Line drawing of a mechanical device with a handle and internal components, no text or symbols presentnatural_image
Line drawing of a mechanical component with an arrow pointing to a detail (no text or symbols)natural_image
Line drawing of a washing machine with open lid and side panel (no text or symbols)natural_image
Close-up of a mechanical component with an arrow pointing to a detail (no text or symbols visible)natural_image
Technical illustration of a device with labeled parts and an inset showing a wall socket (no text or symbols present)natural_image
Line drawing of a mechanical device with a circular component and a base, showing no text or symbols.natural_image
Illustration of a pair of vintage steamers on a table, one emitting smoke from a circular object (no text or symbols)natural_image
Technical line drawing of a mechanical device with three views (front, top, side), no visible text or symbolstext_image
Technical diagram of a device with labeled parts and an inset showing a socket or socket installation.natural_image
Illustration of a hand cleaning a pair of clothes using an iron (no text or symbols present)natural_image
Line drawing of a mechanical component with an arrow pointing to a specific feature (no text or symbols present)natural_image
Line drawing of a digital camera with attached cable, showing mechanical components and motion arrows (no text or symbols)natural_image
Line drawing of a portable electronic device with attached cable and sensor (no text or symbols)text_image
Technical diagram of a vacuum cleaner with numbered parts for identification and assembly reference.2 Żelazko parowe
Sterowanie i części
natural_image
Technical line drawing of a mechanical component with no visible text or symbolsnatural_image
Diagram showing two views of a shoe with a handle, connected by a diagonal line (no text or symbols)natural_image
Line drawing of a shoe component with no visible text or symbolsnatural_image
Technical line drawing of a mechanical component with an arrow pointing to a specific feature (no text or symbols present)natural_image
Line drawing of a washing machine with an open lid and side panel (no text or symbols)natural_image
Close-up of a mechanical component with an arrow pointing to a feature (no text or symbols visible)text_image
Technical diagram of a device with labeled parts and an electrical outlet, showing mechanical components and wiring connections.natural_image
Line drawing of a mechanical device with a fan and base, showing internal components (no text or symbols)natural_image
Illustration of a pair of vintage steamers on a table, one emitting smoke from a circular object (no text or symbols)natural_image
Technical line drawing of a mechanical device with no visible text or symbolstext_image
Technical diagram of a device with labeled parts and an arrow indicating connection to a power outlet, marked as part 2.natural_image
Illustration of a hand cleaning a pair of clothes using an iron mill (no text or symbols)text_image
Technical diagram of a vacuum cleaner with numbered parts for identification and assembly reference.2 Vaš parni likalnik
Deli naprave
natural_image
Technical line drawing of a mechanical device with no visible text or symbolsnatural_image
Diagram showing two views of a mechanical component with a tool, no text or symbols presentRezervoar za vodo (11) napolnite do oznake Maks.
natural_image
Line drawing of a shoe component with directional arrows indicating movement or force (no text or symbols)Rezervoar za vodo (11) name-stite nazaj na svoje mesto. Pre-pričajte se, da je rezervoar za vodo pravilno nameščen.
3.5 Odklepanje/zaklepanje zaklepa za varno prenašanje
natural_image
Technical line drawing of a mechanical component with an arrow pointing to a detail (no text or symbols present)Da ločite likalnik in stojalo za likalnik, pritisnite na tipko odklep zaklepa za varno prenašanje (14).
natural_image
Technical line drawing of a washing machine component (no text or symbols)natural_image
Close-up of a mechanical component with a black arrow pointing to a detail (no text or symbols visible)Da likalnik zaklenete na stojalo, pritisnite na zaklep za varno prenašanje (15).
3.6 Nastavitev temperature

text_image
Technical diagram of a device with labeled parts and an electrical outlet, showing mechanical components and wiring connections.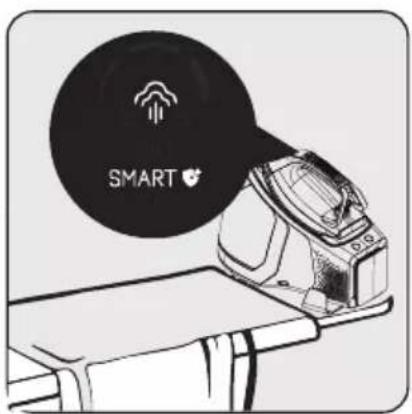
text_image
SMART D20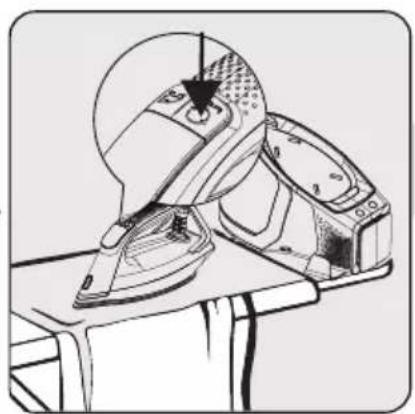
natural_image
Line drawing of a mechanical device with a base and top assembly, no visible text or symbolstext_image
MAX 100% 100% 100%Za aktivacijo samodejne pare (2) pritisnite tipko za samodejni senzor pare.
- Senzor bo aktiviran in LED zaslon bo prikazal "
– Istočasno bo svetila LED lučka (19) na likalniku spredaj.

text_image
MAXZa deaktivacijo samodejne pare (2) pritisnite tipko za samodejni senzor pare.
- Senzor bo deaktiviran in “” na LED zaslonu bo izginila.
– LED lučka (19) bo ugasnila.

LED lučka na likalniku spredaj bo svetila samo, ko je aktivirana funkcija samodejne pare.
3.10 Močna para
natural_image
Illustration of a vintage steam iron and its open lid on a workbench (no text or symbols)Kazalnik za samodejni izklop “☐” se bo izklopil, ko premaknete likalnik ali će pritisnete kateri koli tipko. LED zaslon (1) bo utripal dokler likalnik ne bo znova pripravljen.
natural_image
Technical line drawings of kitchen appliances and a container (no text or symbols)text_image
Technical diagram of a device with labeled parts and an inset showing a wall-mounted socket, marked as part 2.Ugasnite in iz napajanja izključite napravo, preden jih čistite.
text_image
1 saatPočakajte, da se naprava polnoma ohladi. Preostalo vodo izpustite iz rezervoarja za vodo (11).

natural_image
Illustration of a hand cleaning a pair of clothes using an iron (no text or symbols present)natural_image
Line drawing of a mechanical component with an arrow pointing to a specific feature (no text or symbols present)Postavite likalnik na stojalo (10) in potisnite zaklep za varno prenašanje (15), da zaklenete likalnik.

natural_image
Illustration of a digital washing machine with attached cable (no text or symbols)Izvlecite objemko za parno cev (9) in namestite kabel.
natural_image
Technical line drawing of a portable air purifier device with handle and control panel (no text or symbols)Potisnite in sprostite napajalni kabel. Kabel se bo navil v navijalno režo (17).

text_image
Technical diagram of a vacuum cleaner with numbered parts for identification and assembly reference.natural_image
Technical line drawing of a mechanical device with no visible text or symbolsnatural_image
Diagram showing two views of a mechanical component with a central shaft, intersected by a diagonal line (no text or symbols)natural_image
Technical line drawing of a mechanical device with no visible text or symbolsnatural_image
Line drawing of a mechanical component with an arrow pointing to a detail (no text or symbols)natural_image
Line drawing of a steam iron device with open lid and side-mounted housing (no text or symbols)natural_image
Line drawing of a mechanical component with an arrow pointing to a specific feature (no text or symbols present)text_image
Technical diagram of a device with labeled parts and an inset showing a wall socket connectionnatural_image
Line drawing of a pair of iron shavings on a table, showing mechanical components and a directional arrow (no text or symbols)text_image
MAX - 100%natural_image
Illustration of a pair of steamers on a table, one emitting smoke from a circular object (no text or symbols)natural_image
Technical line drawings of mechanical components (no text or symbols)natural_image
Technical line drawing of a mechanical device with labeled parts (1 and 2), showing internal components and mounting points (no text or symbols beyond labels)natural_image
Illustration of a hand cleaning a small iron mill machine (no text or symbols present)natural_image
Line drawing of a mechanical component with an arrow pointing to a specific feature (no text or symbols present)natural_image
Line drawing of a digital camera with attached cable, showing mechanical components and motion arrows (no text or symbols)natural_image
Line drawing of a portable electronic device with attached cable and sensor (no text or symbols)text_image
Technical diagram of a vacuum cleaner with numbered parts for identification and assembly reference.2 Vaša pegla s generatorom pare
Kontrolni instrumenti i delovi
- LED Display
- Automatsko dugme senzora za paru
- Dugme za prilagođavanje nivoa
- Pokretač pare
- Dugme za čišćenje kamenca
- Prekidač za uključivanje/isključivanje
- Poklopac rezervoara za kamenac
- Rezervoar za kamenac
- Stezaljka za kabl za paru
- Postolje za ploču
- Odvojivi rezervoar za vodu
- Otvor za punjenje vode
- Ručka za odvajanje rezervoara
- Dugme za otključavanje brave za nošenje
- Brava za nošenje
- Ploča za peglanje
- Uzani otvor za namotavanje kabla
- Rupa za otpuštanje pare
- LED svetlo
2.2 Tehnički podaci
| Izvor napajanja 220-240V~ 50-60Hz | |
| Potrošnja električne energije 2520-3000 W~ | |
| Pritisak pumpe (bar) 8 bara | |
| Neprekidna količina pare (do g/min) 165 g/min | |
| Intenzivna para (do g) | 600 g* |

*Mereno povlačenjem i otpuštanjem pokretača pare (4) u intervalima od 3 sekunde za upotrebu od 30 minuta, u maksimalnom nivou toplote i režimu turbo pare.
Režim peglanja prebačen je u režim turbo pare u svakom 12. minutu. (videti 3.11)
Prava na tehničke i dizajnerske promene su zadržana.
2 Vaša pegla s generatorom pare
LED ekran i dugmad
| LED Display Simboli Opis | ||
 |  | Podešavanja temperature |
 | Para | |
 | Režim turbo pare | |
 | Režim smart-higijene | |
 | Automatski indikator senzora pare | |
 | Indikator automatskog isključivanja | |
 | Indikator praznog rezervoara za vodu | |
| Dugmad | ||
| Dugme za prilagođavanje nivoa |  turbo 3" turbo 3" | Svaki put kada pritisnete dugme za podešavanje nivoa (3), možete se prebaciti između režima podešavanja pegle „Smart-higijena, temperatura 1, temperatura 2, temperatura 3 i max“. Pritiskom i zadržavanjem dugmadi oko 3 sekunde aktiviraće se režim turbo pare |
| Automatsko dugme senzora za paru |  | Koristite ga za aktiviranje i onemogućavanje automatskog senzora pare.Da biste aktivirali, pritisnite automatsko dugme senzora za paru (2). Na LED ekranu će se prikazati indikator senzora za paru.Da biste onemogućili, pritisnite automatsko dugme senzora za paru (2). Indikator senzora pare na LED ekranu će dobiti bledu boju. |
| Dugme za čišćenje kamenca |  | Pomoću ovog dugmeta možete izvršiti uklanjanje kamenca. |
| Prekidač za uključivanje/isključivanje |  | Pomoću ovog prekidača možete uključiti/isključiti svoj uređaj. |
Vrednosti date na uređaju ili pratećoj dokumentaciji su laboratorijska očitavanja u skladu sa odgovarajućim standardima. Ove vrednosti mogu da se razlikuju u zavisnosti od korišćenja i ambijentalnih uslova.
3 Rad
3.1 Predviđena upotreba
natural_image
Technical line drawing of a mechanical device with no visible text or symbolsUklonite rezervoar za vodu (11) držeći ga za ručicu za odvajanje rezervoara (13) i povlačeći.
natural_image
Diagram showing two views of a mechanical component with a tool, no text or symbols presentNapunite rezervoar za vodu (11) do linije za maksimalan nivo (Max).

natural_image
Line drawing of a mechanical device with a handle and internal components, no text or symbols presentVratite rezervoar za vodu u njegovu poziciju (11). Proverite da li je rezervoar za vodu pravilno postavljen.
natural_image
Technical line drawing of a mechanical component with an arrow pointing to a detail (no text or symbols present)Da biste odvojili peglu od postolja, pritisnite dugme za otključavanje brave za nošenje (14).

natural_image
Line drawing of a washing machine component (no text or symbols)Brava će se otključati i moći ćete da podignete peglu sa postolja.
natural_image
Line drawing of a mechanical component with an arrow pointing to a specific feature (no text or symbols present)Da biste zaključali peglu na postolje, pritisnite bravu za nošenje (15).
3.6 Podešavanje temperature

natural_image
Technical line drawing of a mechanical device with labeled parts (1 and 2), no readable text or symbols present.
text_image
SMART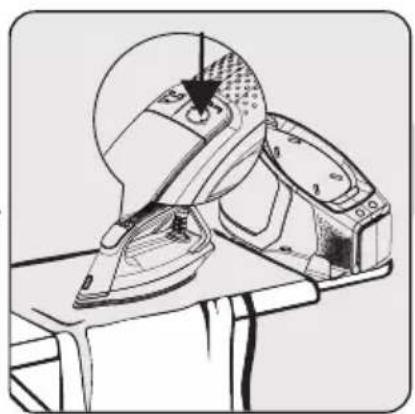
natural_image
Line drawing of a mechanical device with a pair of parts, no text or symbols presentPriključite kabl za napajanje u zidnu utičnicu i pritisnite dugme za uključivanje/isključivanje (6). – Lampica na dugmetu za uključivanje/isključivanje će se upaliti i začućete zvučni signal.
natural_image
Illustration of a pair of household appliances on a table, one emitting a black smoke or vapor (no text or symbols)Indikator automatskog isključivanja “” isključiće se nakon što pomerite peglu ili pritisnete bilo koje dugme. LED ekran (1) će treptati dok pegla ponovo ne bude spremna.
natural_image
Technical line drawings of a device with three views: front, top, and side (no text or symbols)Da biste ispraznili posudu sa kamencem (8), otvorite poklopac (7) i ispraznite je. Zatim proverite da li je rezervoar za kamenac (8) pravilno postavljen.
natural_image
Technical line drawing of a mechanical device with labeled parts and an inset showing a wall socket (no text or symbols present)lsključite uređaj i izvucite utikač uređaja iz napajanja pre čišćenja.


text_image
1 saatnatural_image
Illustration of a hand cleaning a pair of clothes using an iron (no text or symbols present)natural_image
Technical line drawing of a mechanical component with an arrow pointing to a feature (no text or symbols present)Postavite peglu na postolje (10) i pritisnite bravu za nošenje (15) da biste zaključali peglu.
natural_image
Diagram of a digital washing machine with attached cable, showing mechanical components and motion arrows (no text or symbols)Povucite kopču za kabl za paru (9) i postavite kabl.
natural_image
Line drawing of a portable electronic device with attached cable and sensor (no text or symbols)text_image
Technical diagram of a vacuum cleaner with numbered parts for identification and assembly reference.2 Hekuri juaj me kaldajë
natural_image
Technical line drawing of a mechanical device with no visible text or symbolsnatural_image
Diagram showing two views of a mechanical component with a tool inserted, no text or symbols presentnatural_image
Line drawing of a shoe with shading and selection arrows (no text or symbols)natural_image
Technical line drawing of a mechanical component with an arrow pointing to a feature (no text or symbols present)natural_image
Line drawing of a washing machine with lid and side panel (no text or symbols)natural_image
Technical line drawing of a mechanical component with an arrow indicating a specific feature (no text or symbols present)natural_image
Technical line drawing of a mechanical device with labeled parts (1 and 2), no readable text or symbols present.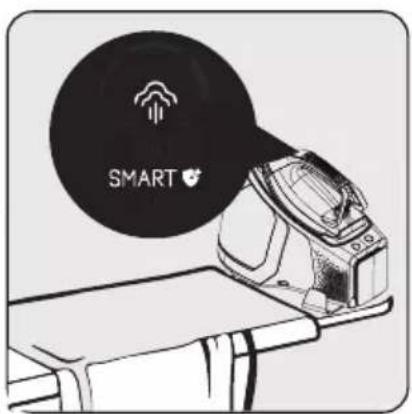
text_image
SMART
natural_image
Line drawing of a mechanical device with a base and top assembly, no visible text or symbolsnatural_image
Illustration of a pair of steamers on a table, one emitting smoke from a circular object (no text or symbols)natural_image
Technical line drawing of a mechanical device with three views: top, side, and bottom (no text or symbols)natural_image
Technical line drawing of a mechanical device with an attached electrical outlet (no text or symbols)natural_image
Illustration of a hand cleaning a pair of clothes using an iron (no text or symbols present)natural_image
Line drawing of a mechanical component with an arrow pointing to a specific feature (no text or symbols present)natural_image
Line drawing of a digital camera with attached cable, showing no text or symbolsnatural_image
Technical line drawing of a portable electronic device with attached cables and sensors (no text or symbols)text_image
Technical diagram of a vacuum cleaner with numbered parts for identification and assembly reference.natural_image
Technical line drawing of a mechanical device with no visible text or symbolsnatural_image
Diagram showing two views of a shoe with a handle, connected by a diagonal line (no text or symbols)natural_image
Line drawing of a mechanical device with no visible text or symbolsnatural_image
Line drawing of a mechanical component with an arrow pointing to a specific feature (no text or symbols present)natural_image
Line drawing of a mechanical device with an open lid and internal components (no text or symbols)natural_image
Line drawing of a mechanical component with an arrow pointing to a specific feature (no text or symbols present)text_image
Technical diagram of a device with labeled parts and directional arrows indicating assembly or installation steps
text_image
SMART
natural_image
Technical line drawing of a mechanical device with a base and clamped parts (no text or symbols)natural_image
Illustration of a pair of steamers on a table, one emitting smoke from a circular object (no text or symbols)Пеглата автоматски ке се исклучи ако не се движи хоризонтално 30 секунди или ако не се притисне кое било копче.
natural_image
Technical line drawing of a mechanical device with three views (front, top, side), no text or symbols present.text_image
Technical diagram of a washing machine with labeled parts and an inset showing electrical outlet connectionnatural_image
Illustration of two hand-drawn photos showing a washing machine and a cloth cover (no text or symbols)natural_image
Technical line drawing of a mechanical component with an arrow pointing to a feature (no text or symbols present)natural_image
Line drawing of a digital camera with attached sensor array and cable (no text or symbols)natural_image
Line drawing of a handheld device with attached sensors and a head-mounted device (no text or symbols)natural_image
Simple line icon of a shirt collar with dotted lines indicating measurement or alignment (no text or symbols)SGA 9130 B
RU
text_image
Technical diagram of a vacuum cleaner with numbered parts for identification and assembly reference.2 Ваш парогенератор
natural_image
Technical line drawing of a mechanical device with no visible text or symbolsnatural_image
Diagram showing two views of a shoe with a tool inserted, no text or symbols presentnatural_image
Line drawing of a mechanical device with no visible text or symbolsnatural_image
Line drawing of a mechanical component with an arrow pointing to a detail (no text or symbols)natural_image
Line drawing of a washing machine with lid and side panel (no text or symbols)natural_image
Line drawing of a mechanical component with an arrow pointing to a specific feature (no text or symbols present)text_image
Technical diagram of a device with labeled parts and an electrical outlet, showing mechanical components and wiring connections.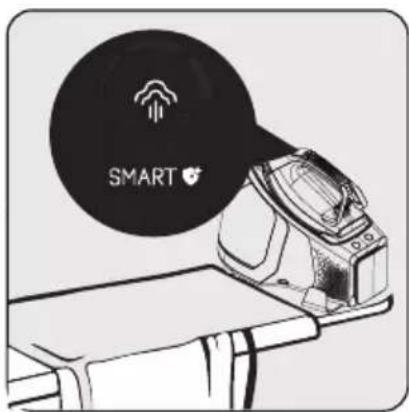
text_image
SMART