
239391 - Cooker Hendi - Free user manual and instructions
Find the device manual for free 239391 Hendi in PDF.
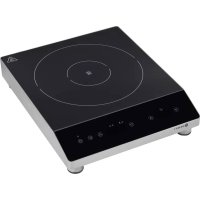
| Product Type | Portable induction cooker |
| Brand | Hendi |
| Model | 239391 |
| Supply Voltage | 220-240 V ~ 50/60 Hz |
| Rated Power | 2000 W |
| Power Range | 100 W - 2000 W |
| Temperature Range | 35 °C - 240 °C |
| Timer | 0 - 180 minutes |
| Dimensions (W x D x H) | 350 x 280 x 65 mm |
| Weight | 3.5 kg |
| Plate Material | Ceramic glass |
| Protection Class | I (grounded) |
| Intended Use | Domestic and light professional use (buffets, staff kitchens) |
| Main Functions | Power adjustment, temperature adjustment, timer, automatic shut-off |
| Included Accessories | Power cord with grounded plug |
| Safety | Overheating protection, automatic shut-off in case of no pan, cooling fan |
| Cleaning and Maintenance | Clean with a damp cloth and mild soap; do not immerse |
| Spare Parts | Power cord (replacement by qualified professional) |
| Repairability | Repairs by the manufacturer or authorized technician only |
| Warranty | 1 year |
Frequently Asked Questions - 239391 Hendi
User questions about 239391 Hendi
0 question about this device. Answer the ones you know or ask your own.
Ask a new question about this device
Download the instructions for your Cooker in PDF format for free! Find your manual 239391 - Hendi and take your electronic device back in hand. On this page are published all the documents necessary for the use of your device. 239391 by Hendi.
USER MANUAL 239391 Hendi
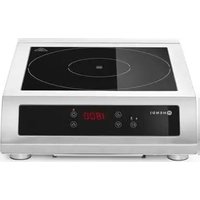
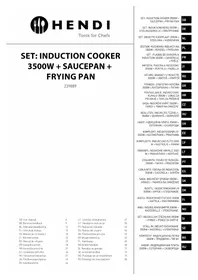
INDUCTION COOKER 2000W
239391
| GB:User manual | 6 | LV:Lietotāja rokasgrāmata | 49 |
| DE:Benutzerhandbuch | 9 | LT:Naudojimo instrukcija | 53 |
| NL:Gebruikershandleiding | 12 | PT:Manual do utilizador | 56 |
| PL:Instrukcja obstugi | 16 | ES:Manual del usuario | 59 |
| FR:Manuel de l'utilisateur | 19 | SK:Použivateľská príručka | 63 |
| IT:Manuale utente | 23 | DK:Brugervejledning | 66 |
| RO:Manual de utilizare | 26 | FI:Käyttöopas | 69 |
| GR:Eyxepiðio xpoňotn | 30 | NO:Brukerhândbok | 72 |
| HR:Korisnički príručník | 33 | SI:Navodila za uporabo | 75 |
| CZ:Uživatelská příručka | 36 | SE:Árvándarhandbok | 78 |
| HU:Felhasználói kézikönyv | 39 | BG:Přkovodство за потребителя | 82 |
| UA:Посібник користувача | 43 | RU:Руководство пользователя | 85 |
| EE:Kasutusjuhend | 46 |
INDUCTION COOKER 2000W
INDUKTIONSKOCHER
2000W
INDUCTIEKOOKPLAAT
2000W
KUCHENKA INDUKCYJNA
PLAQUE DE CUISSON À
INDUCTION 2000W
INDUZIONE 2000W
PLITĂ CU INDUCTIE 2000W
GB: Read user manual and keep this with the appliance.
GB: For indoor use only.
natural_image
Simple line drawing of a wine glass with a fork (no text or symbols)
GB: NOTE: This manual is translated from original English manual using AI and machine translations.
natural_image
Line drawings of six kitchenware items: a pot, lid, tray, pan, kettle, and bulb (no text or symbols)3
natural_image
Three simple line drawings of cooking pots with crossed x marks, no text or symbols presentGB: Technical specifications / DE: Technische Angaben / NL: Technische gegevens / PL: Dane techniczne / FR: Données techniques / IT: Parametri di base / RO: Parametrii de bază / GR: Baoukéç paráµetrot / HR: Tehnički podaci / CZ: Technická specifikace / HU: Műszaki adatok / UA: Texníční характеристики / EE: Tehnilised andmed / LV: Tehniskás specifikacijas / LT: Techninés specifikacijos / PT: Especificações técnicas / ES: Especificaciones técnicas / SK: Technické špecifikácie / DK: Tekniske specifikationer / FI: Tekniset tiedot / NO: Tekniske spesifikasjoner / SI: Tehnične specifikacije / SE: Tekniska specifikationer / BG: Texнически спецификации / RU: Texнические данные
| A 239391 | |
| B 220-240V~ 50/60 Hz / 220-240B ~ 50/60 Гц | |
| C 2000W / Вт | |
| D 100W / Вт ~ 2000W / Вт | |
| E 35°C ~ 240°C | |
| F 0 min ~ 180 min | |
| G | I |
| H Crystallite glass | |
| I 15kg / кг | |
| J 293 x 373 x (H) 56 mm / мм | |
A: GB:Item no. / DE:Art.-Nr. / NL:Artikelnr. / PL:Nr pozycji / FR:N° d'article / IT:N. articolo / RO:Nr. articolului/ GR:Aρ. είδους / HR:Broj stavke / CZ:Položka č. / HU:Cikkszám / UA:Homep el ementa / EE:Artikli nr / LV:Vienums Nr. / LT:Prekès Nr. / PT:Item n.o / ES:N.o de articulo / SK:Č. položky / DK:Varenr. / FI:Kohteen nro / NO:Varenr. / SI:Št. izdelka / SE:Art.nr / BG: Homep na el ement / RU:Homep pozuции
B: GB: Rated voltage and frequency / DE: Nennspannung und Frequenz / NL: Nominale spanning en frequentie / PL: Znamionowe napięcie i częstotliwość / FR: Tension et fréquence nominales / IT: Tensione e frequenza nominali / RO: Tensiune nominală și frecvență / GR: Ovojaotikn táon kai ouxvótnta / HR: Nazivni napon i frekvencija / CZ: Jmenovité napětí a frekvence / HU: Névleges feszültség és frekvencia / UA: Номінальна напруга та частота / EE: Nimipinge ja -sagedus / LV: Nominālais spriegums un frekvence / LT: Vardinė jtampa ir dažnis / PT: Tensão e frequência nominais / ES: Tensión y frecuencia nominales / SK: Menovité napätie a frekvencia / DK: Nominel spænding og frekvens / FI: Nimellisjännite ja -taajuus / NO: Nominell spenning og frekvens / SI: Nazivna napetost in frekvenca / SE: Märkspänning och frekvens / BG: Номинално напрежение и честота / RU: Номинальное напряжение и частота
C: GB: Rated input power / DE: Nenneingangsleistung / NL: Nominaal ingangsvermogen / PL: Znamionowa moc wejściowa / FR: Puissance d'entrée nominale / IT: Potenza nominale in ingresso / RO: Putere nominală de intrare / GR: Овораотиқ юхіс еюбоду / HR: Nazivna ulazna snaga / CZ: Jmenovitý vstupní výkon / HU: Névleges bemeneti teljesítmény / UA: Номінальна вхідна потужність / EE: Nimisisendvõimsus / LV: Nominālā ieejas jauda / LT: Vardinė jėjimo galia / PT: Potência de entrada nominal / ES: Potencia de entrada nominal / SK: Menovitý vstupný výkon / DK: Nominel indgangseffekt / FI: Nimellistuloteho / NO: Nominell inngangseffekt / SI: Nazivna vhodna moč / SE: Märkineffekt / BG: Номинална входяща мощност / RU: Номинальная входная мощность
D: GB:Power settings / DE:Leistungseinstellungen / NL:Stroominstellingen / PL:Ustawienia zasilania / FR:Paramètres d'alimentation / IT:Impostazioni di alimentazione / RO:Setări alimentare / GR:Puθμίσεις ισχύος / HR:postavke napajanja / CZ:Nastavení výkonu / HU:Árambeállítások / UA:Налаштування потужности / EE:Toitesätted / LV:barošanas iestatījumi / LT:maitinimo nuostatos / PT:Definições de alimentação / ES:Ajustes de potencia / SK:Nastavenia výkonu / DK:Strømindstillinger / FI:Virta-asetukset / NO:Strøminnstillinger / SI: Nastavitve moči / SE:Effektinställningar / BG: Настройки на мощността / RU:Настройки мощности
E: GB: Temperature settings / DE: Temperatur-Einstellungen / NL: Temperatuur instellingen / PL: Ustawienia temperatury / FR: Réglages de température / IT: Impostazioni della temperatura / RO: Setări de temperatură / GR: Puθμίσεις θερμοκρασίας / HR: Postavke temperature / CZ: Nastavení teploty / HU: Hőmérséklet-beállítások / UA: Налаштування температури / EE: Temperatuurisätted / LV: Temperatūras iestatījumi / LT: Temperatūros nuostatos / PT: Definições de temperatura / ES: Ajustes de temperatura / SK: Nastavenie teploty / DK: Temperaturindstillinger / FI: Lämpötila-asetukset / NO: Temperaturinnstillinger / SI: Nastavitve temperature / SE: Temperaturinställningar / BG: Настройки на температурата / RU: Настройки температуры
F: GB:Time settings (Min.) / DE:Zeit-Einstellungen (Min.) / NL:Tijd-instellingen (Min.) / PL:Ustawienia czasu (Min.) / FR:Paramètres de temps (Min.) / IT:Impostazioni ora (Minuti) / RO:Setări de timp (Min.) / GR:Ρυθρίσεις ώρας (Ελάχ.) / HR:Postavke vremena (Minuta) / CZ:Nastavení času (Min.) / HU:Időbeállítások (Min.) / UA:Налаштування часу (Шахти) / EE:Kellaaja seaded (Mins) / LV:Laika iestatījumi (Min.) / LT:Laiko nuostatos (Min.) / PT:Definições de hora (Min.) / ES:Ajustes de tiempo (Min.) / SK:Nastavenia času (Min.) / DK:Tidsindstillinger (Min.) / FI:Aika-asetukset (Minuuttia) / NO:Tidsinnstillinger (Minutter) / SI: Časovne nastavitve (Min) / SE:Tidsinställningar (Min) / BG: Настройки за време (Минути) / RU:Настройки времени (Мин.)
G: GB: Protection class (Class) / DE: Schutzklasse (Klasse) / NL: Beschermingsklasse (klasse) / PL: Klasa ochrony (klasa) / FR: Classe de protection (classe) / IT: Classe di protezione (classe) / RO: Clasă de protecție (clasă) / GR: Klăon proostaciaç (katnyopia) / HR: Klasa zaštite (klasa) / CZ: Trída ochrany (trída) / HU: Védelmi osztály (osztály) / UA: Kлас захисту (klac) / EE: Kaitseklass (klass) / LV: Aizsardzības klase (klase) / LT: Apsaugos klasė (klasė) / PT: Classe de proteção (classe) / ES: Clase de protección (clase) / SK: Trieda ochrany (trieda) / DK: Beskyttelsesklasse (klasse) / FI: Suojausluokka (luokka) / NO: Beskyttelsesklasse (klasse) / SI: Razred zaščite (razred) / SE: Skyddsklass (klass) / BG: Kлас на защита (Klac) / RU: Klacc защиты (klacc)
H: GB:Hob surface material: Crystallite glass / DE:Material der Spulenoberfläche: Kristallitglas / NL:materiaal kookplaatoppervlak: Crystallite glas / PL:Material powierzchni ptyty grzejnej: Szkło krystaliczne / FR:Matériau de surface de la table de cuisson : Verre Crystallite / IT:Materiale della superficie del piano di cottura: Vetro Crystallite / RO:Material pentru suprafața plitei: Sticlă Crystallite / GR:Υλικὸ επιφάνειας εστίας: Κρυστάλλινο γυαλὶ / HR:Površinski materijal ploče: Kristalno staklo / CZ:Povrchový materiál varné desky: Sklo Crystallite / HU:Főzőfelület anyaga: Crystallite üveg / UA:Matериал поверхні варильної поверхні: Кристалічне скло / EE:pliidipinna materjal: Kristallklaas / LV:Novirsmas virsmas materiâls: Kristāliskas krāsas stikls / LT:Kulkšnies paviršiaus medžiaga: Kristalinis stiklas / PT:Material da superfície da placa: Vidro Crystallite / ES:Material de la superficie del mando: Cristalita / SK:Povrchový materiál varného panela: Kryštalické sklo / DK:Hoboverflademateriale: Glas af krystalliske glas / Fl:Keittopinnan materiaali: Crystallite-lasi / NO:Koketoppoverflatemateriale: Crystallite-glass / SI: površinski material ohišja: Kristalno steklo / SE:Ytmaterial häll: Crystallite-glas / BG: Материал на повърхността на плочата: Кристалитно стъкло / RU:Материал поверхности варочной панели: Кристаллитовое стекло
I: GB:Maximum loading / DE:Maximale Beladung / NL:Maximaal laden / PL:Maksymalne tadowanie / FR:Chargement maximal / IT:Caricamento massimo / RO:Încărcare maximă / GR:Méyiotn φόρτωση / HR:Maksimalno opterećenje / CZ:Maximální načítání / HU:Maximális betöltés / UA:Mаксимальне завантаження / EE:maksimaalne laadimine / LV:Maksimālā ielāde / LT:didžiausia apkrova / PT:Carregamento máximo / ES:Carga máxima / SK:Maximálne načítanie / DK:Maksimal indlæsning / FI:Enimmäislataus / NO:Maksimal belastning / SI: Največja obremenitev / SE:Max. belastning / BG: Максимално зареждане / RU:Mаксимальная загрузка
J: GB:Dimensions / DE:Abmessungen / NL:Afmetingen / PL:Wymiary / FR:Dimensions / IT:Dimensioni / RO:Dimensiuni / GR:Διαστάσεις / HR:Dimenzije / CZ:Rozměry / HU:Méretek / UA:Pózmípi / EE:Mõõtmed / LV:Izmēri / LT:Matmenys / PT:Dimensões / ES:Dimensiones / SK:Rozmery / DK:Mål / FI:Mitat / NO:Mål / SI: Mere / SE:Mått / BG: Размерi / RU:Размеры
GB: Remark: Technical specification is subjected to change without prior notification.
Thank you for purchasing this HENDI appliance. Read this user manual carefully, paying particular attention to the safety regulations outlined below, before installing and using this appliance for the first time.
Safety instructions
- Only use the appliance for the intended purpose it was designed for, as described in this manual.
- The manufacturer is not liable for any damage caused by incorrect operation and improper use.
- DANGER! RISK OF ELECTRIC SHOCK! Do not attempt to repair the appliance by yourself. Do not immerse the electrical parts of the appliance in water or other liquids. Never hold the appliance under running water.
- NEVER USE A DAMAGED APPLIANCE! Check the electrical connections and cord regularly for any damage. When damaged, disconnect the appliance from the power supply. Any repairs should only be carried out by a supplier or qualified person to avoid danger or injury.
- WARNING! When positioning the appliance, route the power cable safely if necessary to avoid unintentional pulling, being damaged, coming into contact with the heating surface, or causing a tripping hazard.
- WARNING! As long as the plug is in the socket the appliance is connected to the power supply.
- WARNING! ALWAYS switch off the appliance before disconnecting from the power supply, cleaning, maintenance or storage.
- Only connect the appliance to an electrical outlet with the voltage and frequency mentioned on the appliance label.
- Do not touch the plug/electrical connections with wet or damp hands.
- Keep the appliance and electrical plug/connections away from water and other liquids. If the appliance falls into water, remove the power supply connections immediately. Do not use the appliance until it has been checked by a certified technician. Failure to follow these instructions will cause life threatening risks.
- Connect the power supply into an easily accessible electrical outlet so you can disconnect the appliance immediately in case of emergency.
- Make sure the cord does not come in contact with sharp or hot objects and keep it away from open fire. Never pull the power cord to unplug it from the socket, always pull the plug instead.
- Never carry the appliance by its cord.
- Never try to open the housing of the appliance yourself.
- Do not insert objects into the housing of the appliance.
- Never leave the appliance unattended during use.
- This appliance should be operated by trained personnel in kitchen of the restaurant, canteens or bar staff, etc.
- This appliance should not be operated by persons with reduced physical, sensory or mental capabilities, or persons that have a lack of experience and knowledge.
- This appliance should, under any circumstances, not be used by children.
- Keep the appliance and its electrical connections out of reach of children.
- Never use accessories or any extra devices other than those supplied with the appliance or recommended by the manufacturer. Failure to do so could pose a safety risk to the user and could damage the appliance. Only use original parts and accessories.
- Do not operate this appliance by means of an external timer or remote-control system.
- Do not place the appliance on a heating object (gasoline, electric, charcoal cooker, etc.).
- Do not cover the appliance in operation.
- Do not place any objects on top of the appliance.
- Do not use the appliance near any open flames, explosive or flammable materials. Always operate the appliance on a horizontal, stable, clean, heat-resistant and dry surface.
- The appliance is not suitable for installation in an area where a water jet could be used.
- Leave a space of at least 20 cm around the appliance for ventilation during use.
- WARNING! Keep all ventilation openings on the appliance free from obstruction.
Special safety instructions
• This appliance is intended for buffet and household use.
- CAUTION! RISK OF BURNS! HOT SURFACES! The temperature of the glass door or other accessible surfaces are very high during use. Touch only the control panel, handles, switch or temperature dial.
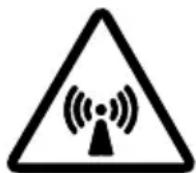
CAUTION! This appliance will emit non-ionizing electromagnetic radiation.
- WARNING! Fat and oil become very hot during operation. Beware of this.
- If the supply cord is damaged, it must be replaced by the manufacturer, its service agent or similarly qualified persons in order to avoid a hazard. (Fixed supply cord inside, but it could be replaced)
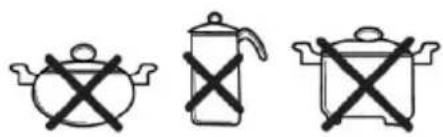
- Only use the cookware of the recommended type and size recommended. (See ---> Suitable cooking equipment).
- Metallic objects such as knives, forks, spoons and lids should not be placed on the heating plate since they can get hot.
- Do not install the appliance near objects and appliances that may be affected by a magnetic field, like, e.g., TVs, radios, bank cards and credit cards.
- WARNING! If the heating surface is cracked or damaged, switch off the appliance to avoid the possibility of electric shock.
- Make sure that the appliance is not installed near water vapour or greasy vapours. The fan of the appliance will absorb these vapours, causing the appliance to accumulate grease or moisture. This may result in a short circuit in the appliance. Clean the grease filter regularly.
- Do not place empty cookware on the appliance during operation as this may damage the cookware and result in serious damage to the appliance.
- Do not place aluminum foil and plastic vessels on hot surfaces
- The surfaces are not to be used for storage.
- When operating the appliance, be aware that rings, watches or similar objects worn by the user may become hot when
they are too close to the heating surface.
- Make sure that the appliance is not installed near water vapour or greasy vapours. The fan of the appliance will absorb these vapours, causing the appliance to accumulate grease or moisture. This may result in a short circuit in the appliance. Clean the grease filter regularly.
- WARNING! DO NOT USE THIS APPLIANCE ON ANY METALIC SURFACE.
Intended use
- This appliance is intended to be used in household and similar applications such as:
- staff kitchen areas in shops, offices and others working environment;
- farm houses;
- by clients in hotels, motels and other residential type environment;
-
bed and breakfast type environment.
-
The appliance is designed for cooking a variety of food via heating the suitable cookware. Any other use may lead to damage to the appliance or personal injury.
- Operating the appliance for any other purpose shall be deemed as a misuse of the device. The user shall be solely liable for improper use of the device.
Grounding installation
This appliance is classified as protection class I and must be connected to a protective ground. Grounding reduces the risk of electric shock by providing an escape wire for the electric current.
This appliance is fitted with a power cord with grounding plug or electrical connections with grounding wire. The connections must be properly installed and grounded.
Control panel
(Fig.1 on page 3)
1.0N/Standbybutton
2. Timer function with indicator light
3. Increase setting: Time / temperature / power
4. Digitaldisplay
5. Decrease setting: Time / temperature / power
6. Power function with indicator light
7. Temperature function with indicator light
Preparation before use
- Remove all protective packaging and wrapping.
- Check that the device is in good condition and with all accessories. In case of incomplete or damaged delivery, please contact the supplier immediately. In this case, do not use the device.
- Clean the accessories and the appliance before use (See == > Cleaning & Maintenance).
• Make sure the appliance is completely dry. - Place the appliance on a horizontal, stable and heat resistant surface that is safe against water splashes.
- Keep the packaging if you intend to store your appliance in the future.
- Keep the user manual for future reference
NOTE! Due to manufacturing residues, the appliance may emit a light odor during the first few uses. This is normal and does not indicate any defect or hazard. Make sure the appliance is well ventilated.
Operating instructions
- Place a suitable pan or pot at the centre of the heating surface of the appliance. (See --> Suitable cooking equipment).
Note: Do not place empty pan as this may damage the pan and the appliance.
- Connect the power plug to a suitable electrical supply outlet. On/Standby button will be light up and the appliance now in Standby mode.
- Then, switch On the appliance by pressing On/Standby button and Power button will flash.
- Next, choose to press either the power button or temperature button to start cooking. If the timer button is not set, the appliance will operate continuously.
- Once you have finished cooking, switch to Standby mode by pressing the On/Standby button. The digital display and all buttons will go off except On/Standby button.
Note: If no any button on the control panel is pressed during operation for 2 hours, the appliance will then switch to Standby mode automatically.
Setting Power level
- During operation, press the power button to activate. The indicator light will light up.
- Use the increase setting or decrease setting button to increase or decrease the power level (Range: 100W \~ 2,000W). Default setting is 100W. Higher power level is suitable for steaming.
Setting Temperature level
- During operation, press the temperature button to activate. The indicator light will light up.
- Use the increase setting or decrease setting button to increase or decrease the temperature level (Range: 35°C \~ 240°C). Default setting is 100°C. Higher temperature level is suitable for roasting, grilling or frying.
Setting Timer
- After power or temperature setting for cooking, you can opt for timer setting. Press the timer button to activate. The indicator light lights up.
- Use the increase setting or decrease setting button to increase or decrease the cooking time (Range: 0 min \~ 180 mins). Default setting is 0 min.
- When the timer is set, it will be stored automatically within 5 seconds. The appliance will then start operation. It will display the remaining time and the power setting / temperature setting alternately on the display.
- The appliance will go into Standby mode when the set time is elapsed.
- If the set time is reduced to "0 min" manually, the appliance will go into Standby mode instantly.
Note:
- Press and hold the increase setting button or decrease setting button for fast adjustment.
- After an extended period of operation, it is normal for the cooling fan inside to continue running in Standby mode for some time. Before unplug the appliance, wait until the cooling fan stops running.
- The appliance's surface is still hot after switch to Standby mode. Wait completely cool down before touching.
Suitable cooking equipment
| Suitable Not suitable | ||
| Bottom of cookware | Flat bottom (Fig.2 on page 3) | Curved, uneven, rounded bottom (Fig.3 on page 3) |
| Material Cookware with iron, cast iron, magnetic stainless steel or enamelled iron bottom. | Cookware with ce-ramic, glass, copper, bronze, or aluminium bottom. | |
| Diameter of the bottom | Between 12 cm and 22 cm. | Less than 12 cm or more than 22 cm. |
| Type of cookware | Cookware with a bottom thickness over 1.5 mm. | Completely closed containers or cans. |
Note: Using a pan or pot that's not suitable for induction cooking may damage the appliance.
Cleaning & maintenance
- ATTENTION! Always disconnect the appliance from the power supply and cool down before storage, cleaning & maintenance.
- Do not use water jet or steam cleaner for cleaning and do not push the appliance under the water as the parts will get wet and electric shock might be resulted.
- If the appliance is not kept in a good state of cleanliness, this can adversely affect the life of the appliance and result in a dangerous situation.
- Food residues should be regularly cleaned and removed from the appliance. If the appliance is not cleaned properly, it will reduce its lifespan and may result in a dangerous condition during use.
Cleaning
- Clean the cooled exterior surface with a cloth or sponge slightly dampened with a mild soap solution.
- For reasons of hygiene, the appliance should be cleaned before and after use.
- Avoid water contacting the electrical components.
- Never immerse the appliance in water or other liquids.
- Never use aggressive cleaning agents, abrasive sponges, or cleaning agents containing chlorine. Do not use steel wool, metallic utensils, or any sharp or pointed objects for cleaning. Do not use petrol or solvents!
Maintenance
- Check the operation of the appliance regularly to prevent serious accidents.
- If you see that the appliance is not working properly or that there is a problem, stop using it, switch it off and contact the supplier.
- All maintenance, installation and repair work must be carried out by specialised and authorised technicians, or recommended by the manufacturer.
Transportation and Storage
- Before storage, always make sure that the appliance has been disconnected from the power supply and completely cooled down.
-
Store the appliance in a cool, clean and dry place.
-
Never place heavy objects on the appliance as this could damage it.
- Do not move the appliance while it is under operation. Dis connect the appliance from power supply when moving and hold it at the bottom.
Troubleshooting
If the appliance does not function properly, please check the below table for the solution. If you are still unable to solve the problem, please contact the supplier/service provider.
| Problems Possible cause Possible solution | ||
| The appliance does not switch ON. | - Power plug is not connected properly with the electrical outlet.- On/Standby button is not pressed. | - Check the power plug to make sure it is connected properly.- Press the On/ Standby button to start operation. |
| Cooling fan is operating even after the appliance is switched to Standby mode. | - This is normal. The cooling fan continues running in Standby mode for some time to cool down all internal elements. | - Wait until the cooling fan stops rotating. |
Error code identification
| Error codes | Possible cause Possible solution | |
| E 1 The temperature of the appliance is too high | Clear all obstacles that around the appliance. Unplug the appliance, remove the pan or pot, wait until the appliance is completely cool down. | |
| Cooling fan defective | ||
| E 2 The pan or pot is overheated. Possibly, the pan becomes empty and appliance will shut down for protection. | Unplug the appliance, remove the pan or pot, wait until the appliance is completely cool down. And make sure water is inside the pan. | |
| E 3 The supply voltage is abnormal. (Supply voltage is too high or too low) | Make sure that the appliance is connected to a suitable electrical power supply. | |
Warranty
Any defect affecting the functionality of the appliance which becomes apparent within one year after purchase will be repaired by free repair or replacement provided the appliance has been used and maintained in accordance with the instructions and has not been abused or misused in any way. Your statutory rights are not affected. If the appliance is claimed under warranty, state where and when it was purchased and include proof of purchase (e.g. receipt).
In line with our policy of continuous product development we reserve the right to change the product, packaging and documentation specifications without notice.
Discarding & Environment
When decommissioning the appliance, the product must not be disposed of with other household waste. Instead, it is your responsibility to dispose to your waste equipment by handing it over to a designated collection point. Failure to follow this
rule may be penalized in accordance with applicable regulations on waste disposal. The separate collection and recycling of your waste equipment at the time of disposal will help conserve natural resources and ensure that it is recycled in a manner that protects human health and the environment.
For more information about where you can drop off your waste for recycling, please contact your local waste collection company. The manufacturers and importers do not take responsibility for recycling, treatment and ecological disposal, either directly or through a public system.
DEUTSCH
Discarding & Environment
Ohutusalased erijuhised
39100 Bolzano (BZ), Italy
Tel: +39 800 727 438
Email: office.italy@hendi.eu
HENDI GmbH
Ehring 15
1201, 12/F Exchange Tower
33 Wang Chiu Road, Kowloon Bay, Hong Kong
Tel: +852 2154 2618
Email: info-hk@hendi.eu
HENDI Romania S.R.L.
https://www.linkedin.com/company/hendi-tools-for-chefs/
www.youtube.com/HendiEquipment
GB: Changes, printing and typesetting errors reserved.

- INDUCTION COOKER 2000W
- Safety instructions
- Special safety instructions
- Intended use
- Grounding installation
- Control panel
- (Fig.1 on page 3)
- Preparation before use
- Operating instructions
- Setting Power level
- Setting Temperature level
- Setting Timer
- Note:
- Cleaning & maintenance
- Cleaning
- Maintenance
- Transportation and Storage
- Troubleshooting
- Warranty
- Discarding & Environment
- DEUTSCH
- Ohutusalased erijuhised
- HENDI GmbH
- HENDI Romania S.R.L.
Brand : Hendi
Model : 239391
Category : Cooker