
Emvatis - Fan Madeira - Free user manual and instructions
Find the device manual for free Emvatis Madeira in PDF.
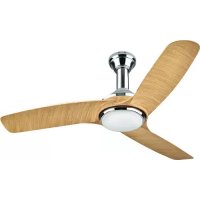
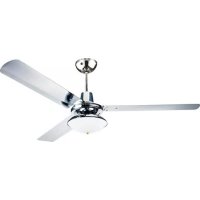
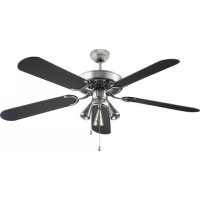
| Product type | Ceiling fan with light |
| Brand | Madeira |
| Model | Emvatis |
| Blade diameter | 106 cm |
| Weight | 4.1 kg |
| Power supply | 220-240 V~ / 50 Hz |
| Nominal power | 50 W |
| Bulb type | E27, max. 60 W (not included) |
| Fan speeds | Low - Med - Hi - Off (pull chain control) |
| Rotation direction | Reversible (summer/winter) via switch |
| Minimum installation height | 2.3 m between blades and floor |
| Protection rating | IP20 (indoor use only) |
| Intended use | Circulation of dry air in private indoor spaces |
| Reversible blades | Yes, two different looks depending on side chosen |
| Electrical installation | By a qualified electrician according to VDE 0100 |
| Cleaning | Dry or slightly damp cloth, no water or detergent |
| Blade material | Plastic or composite material (not specified) |
| Included in delivery | Fan, ceiling mount, light cover, 4 blade holders, 4 blades, screws, 2 pull chains, screw kit |
| Spare parts | Available via HORNBACH or after-sales service |
Frequently Asked Questions - Emvatis Madeira
User questions about Emvatis Madeira
0 question about this device. Answer the ones you know or ask your own.
Ask a new question about this device
Download the instructions for your Fan in PDF format for free! Find your manual Emvatis - Madeira and take your electronic device back in hand. On this page are published all the documents necessary for the use of your device. Emvatis by Madeira.
USER MANUAL Emvatis Madeira
natural_image
Two elongated, curved white panels with black edges, resembling a fan or blade (no text or symbols visible)1
natural_image
Exterior view of a modern office building (no signage)1
natural_image
Exterior view of a modern office building (no signage)1
natural_image
Exterior view of a modern office building (no signage)1
INNEHÅLLSFÖRTECKNING
natural_image
Exterior view of a modern office building (no signage)1
natural_image
Exterior view of a modern office building (no signage)1
natural_image
White and black plastic object with rounded ends, no visible text or symbols1
natural_image
Two elongated, curved white panels with black edges, resembling a flat or plastic sheet (no text or symbols visible)1
We are convinced that this fan will exceed your expectations and wish you joy while using it. Please read this user manual completely, observe the safety instructions and keep it for future reference.
SCOPE OF DELIVERY
1x Fan unit
1x Ceiling bracket
1x Luminaire cover
4x Blade holder
4x Fan blade
12x Blade screws
2x Pull chain
1x Screw kit
Wall anchors and lamp/s not included.
If any parts are missing or damaged, please contact your HORNBACH Store.
TABLE OF CONTENT
Scope of delivery 50
Symbols 50
Safety instructions 51
Overview 52
Intended use 52
Functions 52
Blade design 52
Technical data 54
Troubleshooting 54
Rotation direction 55
Cleaning & Care 55
Replacement parts 55
Disposal 55
SYMBOLS

Please read this user manual carefully and keep it for further reference.

Warning of accident and injury to persons and serious damage to property.

The installation height, i.e. the distance between the blades and the floor, should be at least 2.3 m.
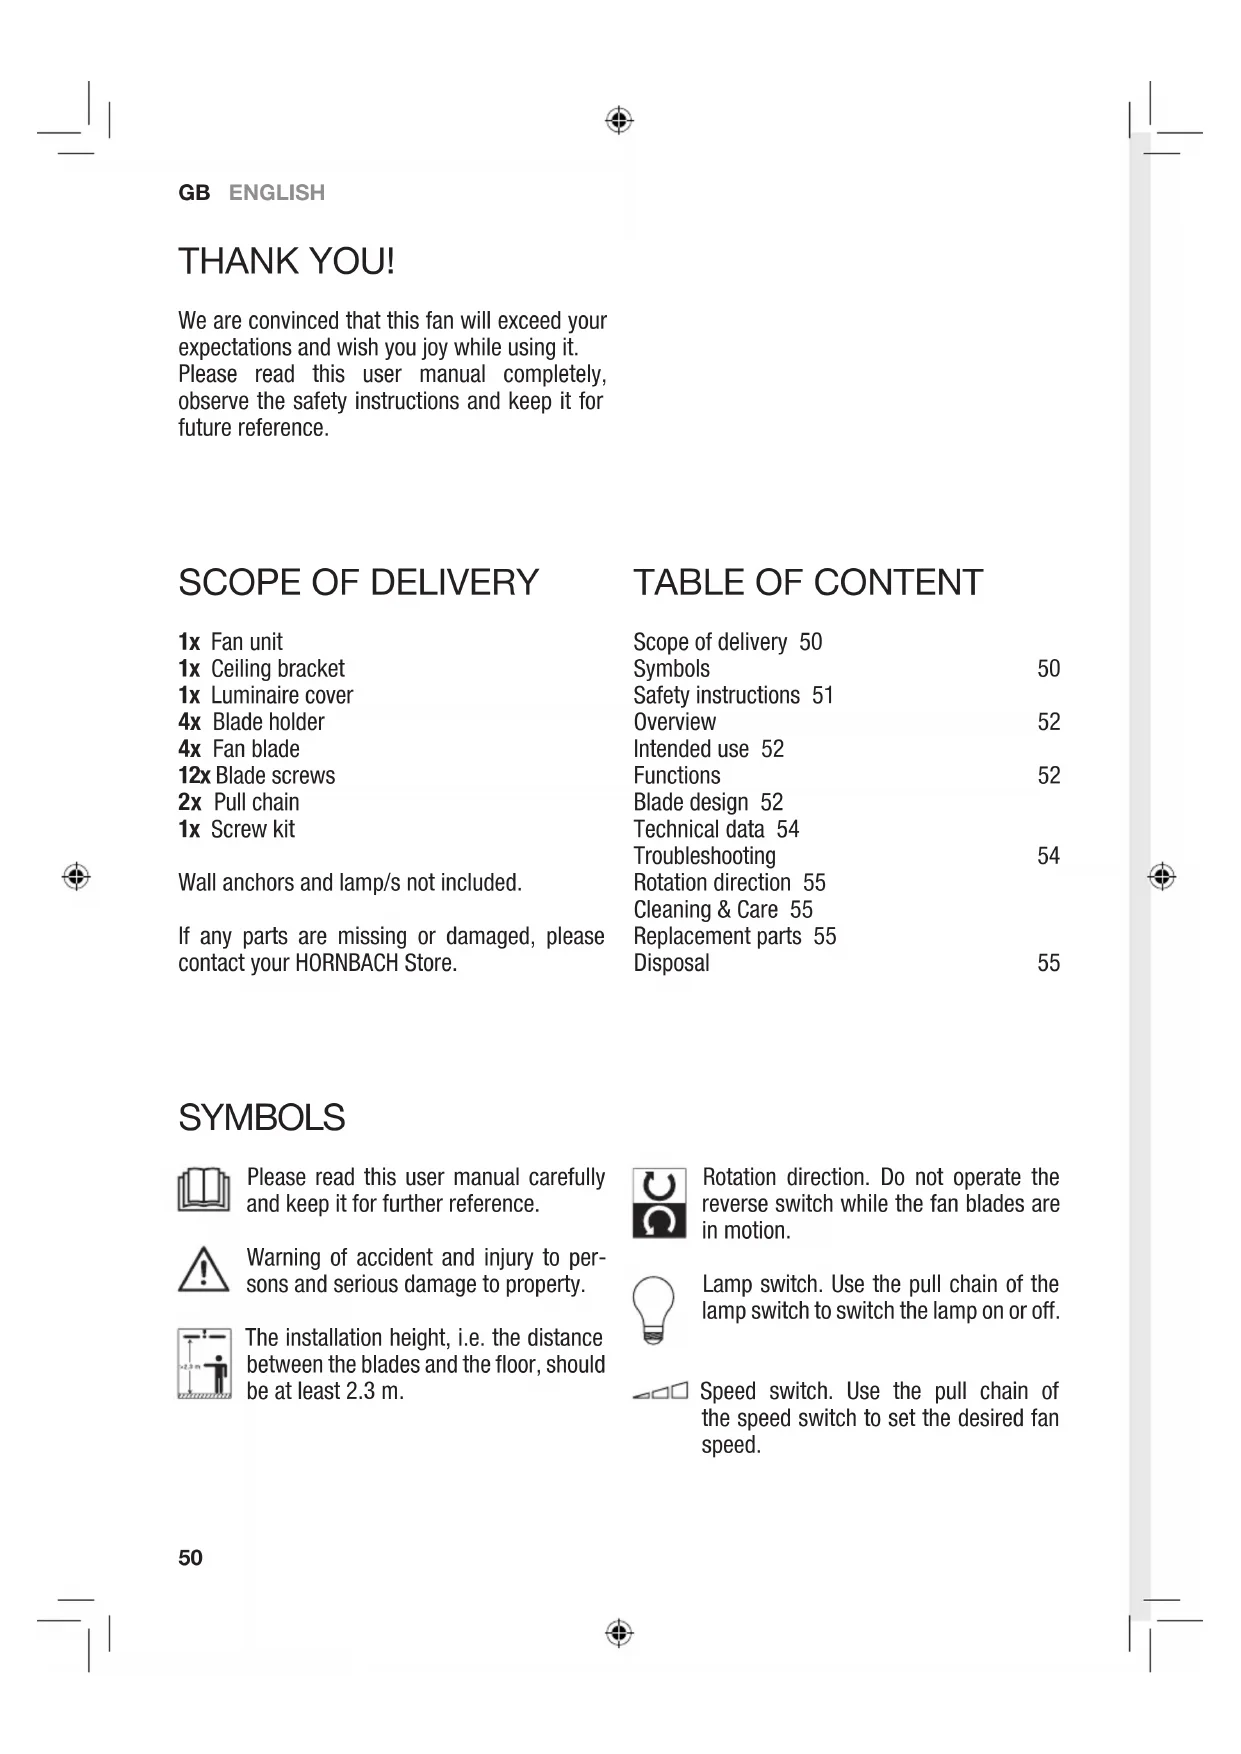
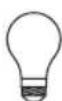
Rotation direction. Do not operate the reverse switch while the fan blades are in motion.
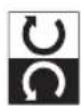
Lamp switch. Use the pull chain of the lamp switch to switch the lamp on or off.

Speed switch. Use the pull chain of the speed switch to set the desired fan speed.

SAFETY INSTRUCTIONS
- Electrical installation should be performed by a qualified licensed electrician. The installation requirements of VDE 0100 must be observed.
- WARNING! To prevent injuries, make sure the blades are not bent and that there are no objects with in the area of rotation.
- WARNING! Do Not use this fan in the same room at the same time as a gas or fuel burning fire, unless the flue has been tested under these conditions of use by a competent person.
- WARNING! If regular operation causes problems, such as noise, vibration, damaged or loose parts, stop using the fan immediately!
- This appliance can be used by children aged from 8 years and above and persons with reduced physical, sensory or mental capabilities or lack of experience and knowledge if they have been given supervision or instruction concerning use of the appliance in a safe way and understand the hazards involved.
- Children shall not play with the appliance.
- Cleaning and user maintenance shall not be carried out by children without supervision.
- Make sure that the fixed installation has a contact separation in all poles that provide full disconnection under over voltage category III conditions.
- Do not install the fan in a room equipped with a smoke alarms, as this might have an influence on the smoke detection.
- WARNING! Do not use a dimmer type switch to control the fan speed.
- Make sure the fan is securely fastened at the ceiling. If in doubt, contact a specialist for proper installation.
- The distance between the blades and the floor, should be at least 2.3 m.
- Always maintain 1 m distance between the lamp and inflammable materials (curtains, wall, etc.).
- Only replace the lamp when it has cooled down.
- Before operation, make sure the luminaire
cover is securely fixed in position.
- The fan is designed for indoor use only. It is not designed for installation in a bathroom or any damp area. Please ensure that the luminaire does not come into contact with water.
- Do not operate the rotation direction switch while the fan blades are in motion. The fan must be off and the blades stand still before reversing the rotation direction.
- WARNING! Before working on the fan, make sure the fan is disconnected from the mains supply in all poles.
• To avoid personal injury or damage to the fan and other items, be cautious when working around or cleaning the fan.
- Do not use water or detergents when cleaning the fan or fan blades. A dry dust cloth or lightly dampened cloth will be suitable for cleaning.
OVERVIEW
1 Cover
2 Fan unit
3 Fan blade
4 Luminaire cover
5 Ceiling bracket screws
6 Blade holder
7 Pull chain
FUNCTIONS
LIGHT
To switch the light on or off, pull the respective pull chain 7 on the fan unit 2.
FAN SPEED
To cycle through the different fan speeds, pull the respective pull chain 7 on the fan unit 2 repeatedly:
$$ \text { LOW } = \text { low speed } $$
$$ \text { MED } = \text { medium speed } $$
$$ \mathrm{HI} = \text { h i g h s p e e d } $$
$$ O F F = \text { fan off } $$
INTENDED USE
The appliance is intended for distribution of dry air in private interiors, as well as lighting (if provided). The appliance is not intended for commercial use.
Any other use or modification to the appliance is considered as improper use and could cause considerable dangers.
BLADE DESIGN
The blades of this fan are reversible. Each blade side has a different design. This way, the fan can be installed in two looks, depending on the blade design you choose.

natural_image
Two elongated, curved white panels with black edges, resembling a flat or plastic sheet (no text or symbols visible)1
Switch off the circuit breaker of the installation site.
2
Remove the right screw of the ceiling bracket screws 5 on both sides.
3
At the installation site, drill two 8 mm holes into the ceiling and insert the wall anchors (not included).
4
Install the ceiling bracket with the screw kit. Make sure the ceiling bracket is securely fastened.
5
Connect the cable to the terminal as follows:
L Brown
N Blue
Yellow/Green
6
Hang the fan unit 2 into the ceiling bracket. Rotate the fan unit 2 until the rotation latch engages.
7
Connect the cable clip of the ceiling bracket with the clip of the fan unit 2.
8
Install the cover 1 of the fan unit 2 by attaching it to the ceiling bracket and reinstall the screws removed in step 2.
9
Install the four blade holders 6 to the motor of the fan unit 2 by use of two screws per blade holder.
10
Install the four blades 3 to the blade holders 6 by use of three screws, washers, spring-washers and nuts per blade.
11
Fit a lamp (max. 60 W / not included) to the socket of the fan unit 2.
12
Install the luminaire cover 4 by carefully tightening the three screws of the fan unit 2 and check it for secure fitting.
13
Install the two pull chains at the speed and light switch of the fan unit 2.
14
Switch on the circuit breaker of the installation site.
TECHNICAL DATA
Nominal voltage 220-240 V\~ / 50 Hz
Rated power 50 W
Fan diameter 106 cm
Lamp 1x E27 / Max 60 W / not included
Speed settings Low - Med - Hi - Off
Protection Class / I
Degree of protection IP20
Weight 4.1 kg

TROUBLESHOOTING
Fan does not start. Check circuit beakers and/or circuit fuses.
Disconnect from mains supply and check connection terminals inside the fan.
Light does not work. Check if the lamp is defective.
Disconnect from mains supply and check connection terminals inside the fan.
Fan runs unevenly and/or wobbles.
Disconnect from mains supply and check if the blades are correctly installed to the motor.
Disconnect from mains supply and check if the ceiling bracket securely fastened at the ceiling.
If the problem persists, start exchanging the position of single blades.
Fan sounds noisy. Disconnect from mains supply and check for loose or overtightened screws.
ROTATION DIRECTION
The fan can be set to operate clock or anticlockwise. The desired rotation direction can be set at the rotation direction switch while the fan is standing still.
REPLACEMENT PARTS
LAMP
The lamp in the luminaire can be replaced. Only replace the lamp when the luminaire has cooled down and the fan is disconnected from the mains supply. Only use lamps as specified in technical data.
CLEANING & CARE
WARNING! Before working on the fan, make sure the fan is disconnected from the mains supply in all poles.
- To avoid personal injury or damage to the fan and other items, be cautious when working around or cleaning the fan.
- Do not use water or detergents when cleaning the fan or fan blades. A dry dust cloth or lightly dampened cloth will be suitable for cleaning.
DISPOSAL

The crossed-out wheeled bin logo requires the separate collection of waste electric and electronic equipment (WEEE). Such equipment may contain dangerous and hazardous substances. These appliances must be returned to a designated collection point for the recycling of WEEE and must not be disposed as unsorted municipal waste. By doing so, you will help to conserve resources and protect the environment. Contact your local authorities for more information.
Children must not play with plastic bags and packaging material, due to possible injury or danger of suffocation. Store such material safely or dispose of environmentally friendly.


Brand : Madeira
Model : Emvatis
Category : Fan