
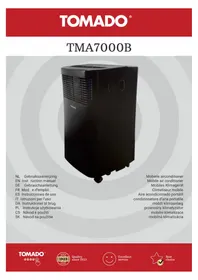
TMA1201W - Air Conditioning Tomado - Free user manual and instructions
Find the device manual for free TMA1201W Tomado in PDF.
| Product type | Mobile monoblock air conditioner |
| Brand | Tomado |
| Model | TMA1201W |
| Dimensions (H x W x D) | 715 x 440 x 335 mm |
| Net weight | 30.0 kg |
| Power supply | 220-240 V ~ 50 Hz |
| Power consumption | 1,346 W |
| Cooling capacity | 12,000 Btu/h (3.4 kW) |
| Energy class | EER 2.6 (class A+ according to old classification) |
| Refrigerant | R290 (propane), 226 g, GWP = 3 |
| Thermostat range | 16 °C to 31 °C |
| Fan speeds | 3 speeds (low, medium, high) |
| Max. air flow | 380 m³/h |
| Max. dehumidification | 1.2 L/h |
| Max. noise level | 65 dB(A) |
| Recommended area | Up to 105 m³ (minimum room size 15 m² for R290) |
| Functions | Cooling, dehumidification, fan only |
| Timer | Yes, 0-24 h (delayed start and auto stop) |
| Remote control | Yes, with AAA batteries (included) |
| Swivel castors | Yes |
| Air filter | Washable, weekly cleaning recommended |
| Condensation drainage | Manual or continuous (via 1/2 inch hose) |
| Max. length of air exhaust hose | 150 cm (for optimal use, keep < 1 m) |
| Protection class | IP20 |
| Warranty | 24 months |
Frequently Asked Questions - TMA1201W Tomado
User questions about TMA1201W Tomado
0 question about this device. Answer the ones you know or ask your own.
Ask a new question about this device
Download the instructions for your Air Conditioning in PDF format for free! Find your manual TMA1201W - Tomado and take your electronic device back in hand. On this page are published all the documents necessary for the use of your device. TMA1201W by Tomado.
USER MANUAL TMA1201W Tomado
- First carefully read the instruction manual in full prior to using the appliance and store the manual in a safe place for future reference.
- Do not use agents that accelerate the defrosting process or other cleaning agents than those recommended by the manufacturer.
- Store the appliance in a room without any continuously active ignition sources (e.g. an open flame, switched on gas appliance or switched on electric heating appliance).
- Do not drill through or burn.
- Caution, certain refrigerants do not have an odour.
- Install, use and store the appliance in a room with a floor surface of at least 15m^2 (for 12000Btu/h).
- Only install this appliance when it complies with local/national legislation and standards.

IMPORTANT
-
This appliance is intended for use as an air conditioner in houses and is only suitable for indoor use in living rooms, kitchens and garages on dry locations, under normal domestic circumstances.
-
If the cord is damaged, have it replaced by the manufacturer, our service department or other skilled persons in order to avoid hazardous situations.
- The installation should fully correspond with the locally applicable regulations, conditions and standards.
The appliance is only suitable for use on dry locations, indoors. - Check the mains voltage.
- This appliance is only suitable for an earthed socket, connection voltage 220-240 Volt/ 50 Hz.
- The appliance MUST always be connected in an earthed condition. If the power supply is not earthed, it is absolutely not permitted to connect the appliance.
- The plug must always be easily accessible when the appliance is connected.
-
Have the electrical system checked by a recognised expert if you are not certain that everything is in order.
-
Never cover the air inlets and outlets.
- Empty the water reservoir via the water drain point, before moving the appliance.
- Never allow the appliance to come into contact with chemicals.
- Do not insert fingers or objects in the openings of the appliance.
- Never allow the appliance to come into contact with water. Do not spray the appliance with water or submerge it in water, in connection with a short circuit hazard.
- Always first remove the plug from the socket before the appliance or a part thereof must be cleaned or replaced.
- NEVER connect the appliance using an extension cord. If there is no earthed socket available, have one installed by a recognised electrician.
- For reasons of safety, always be careful when there are children near this appliance, same as with any other electrical appliance.
- Do not use the appliance if the plug, cord or appliance are damaged, or if the appliance no longer functions properly or if it is damaged in any other way. If this is the case, consult the retailer or our maintenance service. Never replace the plug or cord yourself.
TOMADO®
- Always remove the plug from the socket when the appliance is not being used.
- Only have a damaged electricity cord replaced by the supplier or an authorised person/service point.
- Keep the appliance out of reach of children. Children do not see the dangers associated with handling electrical appliances. Therefore, never allow children to operate electrical appliances without supervision. Keep the appliance and cord out of reach of children younger than 8 years of age.
- The appliance can be used by children of 8 years and older and by persons with limited physical, sensory or mental capacities or lack of experience or knowledge, provided they use the appliance under supervision or have been instructed about its safe use and understand the hazards it may involve. Children are not allowed to play with the appliance. The appliance may not be cleaned or maintained by children, unless this is done under supervision.

CAUTION!
- Never close the room where this appliance is used in such a way that it is fully airtight. This prevents vacuum from being created in this room. Negative pressure (=vacuum) could disrupt the safe operation of geysers, extractor hoods, ovens, etc.
- Non-observation of the instructions could invalidate the warranty on the appliance.
-
Always lift the appliance with two persons.
-
Always make sure the appliance is placed on an sturdy, flat surface.
- Do not leave the appliance unattended when it is in operation.
- If you want to move the appliance, make sure the appliance is switched off. Use both hands when moving the appliance.
- Never use the appliance with components that are not recommended or supplied by the manufacturer.
- Do not pull the cord and/or appliance to remove the plug from the wall socket. Never touch the appliance with wet or damp hands.
- If the appliance does not function after it has been switched on, it is possible that the fuse or earth leakage circuit breaker has been activated in the electrical distribution box. The group can be overloaded or an earth leakage current may have occurred.
- In case of a breakdown, never make repairs yourself; a tripped safety device in the appliance could indicate a defect that cannot be remedied by removing or replacing this safety device. Only original parts should be used.
- The printed circuit board (PCB) of the appliance has been provided with a fuse against overvoltage. The specifications of the fuse are stated on the circuit board, such as: T 2A or higher/250V, etc.
- Never submerge the appliance, cord or plug in water.
- This appliance is only suitable for household use. If the appliance is not used as intended, no compensation can be claimed in case of defects or accidents and the warranty will be invalidated.
WARNING
Specific information for appliances with R290 refrigerant gas.
- Thoroughly read all warnings.
- When defrosting and cleaning the appliance, only use tools recommended by the manufacturer.
- Place the appliance in a room without any continuously active ignition sources (e.g. an open flame, switched on electric or gas appliance).
- Do not drill through or burn.
- Install, use and store the appliance in a room with a floor surface of at least 15m^2
- This appliance contains 226 grams of R290 refrigerant gas (see the information plate at the rear of the appliance).
- R290 is a refrigerant gas that is in accordance with the European environmental directives. Never drill through any part of the cooling circuit.
- If the appliance is installed, operated or stored in a room without ventilation, the room should be made in such a way that accumulation of refrigerant as a result of a leak is prevented. This could lead to a fire or explosion hazard due to the ignition of the refrigerant by an electric heating appliance, stove or other ignition source.
- Store the appliance in such a way that mechanical failures are prevented.
- Persons operating or working at the cooling circuit, must be in the possession of a suitable certificate from an authorised organisation, so that these persons are authorised to handle refrigerants in a safe way in accordance with the specifications that apply within the industry.
- Repairs may only be performed as recommended by the manufacturer of the appliance. Maintenance and repair activities that require assistance from other trained personnel, must be performed under the supervision of a person who knows how combustible refrigerants should be used.
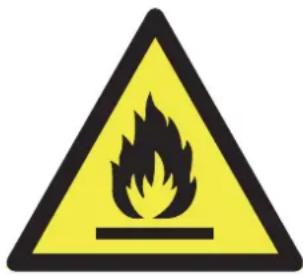
| WARNING This symbol indicates that the appliance contains a combustible refrigerant. If the refrigerant leaks and is exposed to an external ignition source, a fire hazard is created. | |
| CAUTION This symbol indicates that the instruction manual should be read carefully. | |
| CAUTION This symbol indicates that maintenance personnel should consult the installation manual when handling this equipment. | |
| CAUTION This symbol indicates that information is available, such as the instruction manual or installation manual. |
TOMADO®
REFRIGERANT
(CE) N 842/2006: This air conditioner contains the refrigerant R290.
The quantity of refrigerant is less than 1kg and is contained in a closed cooling circuit.
The refrigerant does not have an ozone depletion potential. It is, however, a greenhouse gas according to the Kyoto protocol and could therefore contribute to global warming when released into the atmosphere. Only trained technicians with a suitable refrigerant certificate are permitted to fill or empty the appliance. If used correctly and when the refrigerant circuit is undamaged, your air conditioner does not have to be refilled with refrigerant. GWP: R290: 3.
TOMADO
PRODUCT DESCRIPTION


- Front
- Air outlet
- Operating panel
- Castor
- Handle
- Ai
- Screw cap for water discharge
- Air outlet
- Cord
- Condensation water drain
- Air Inlet

12
12.1 On/off key [POWER]
12.2 Timer key [TIMER]
12.3 Mode selection key [MODE]
12.4 Temperature down key [TEMP-]
12.5 Temperature up key [TEMP +]
12.6 Speed key [SPEED]
- Connection piece
- Connection piece
- Discharge hose - air
- Velcro tape
- Flexible window seal set


PRIOR TO FIRST USE
Follow these instructions when using the appliance for the first time: Carefully unpack the air conditioner and all accessories and remove all packaging material and any promotional stickers. Keep the packaging (plastic bags and cardboard) out of reach of children.
After unpacking the appliance, carefully check it for external damage that may have occurred during transport.
Place the appliance on a sturdy, flat surface and make sure there is enough space all around for sufficient ventilation. Check that all mentioned accessories have been supplied.
Clean the air conditioner with a slightly damp cloth.
Prior to connecting the appliance, check that:
the connection voltage corresponds with what is stated on the information plate;
the socket and cord are suitable for the appliance;
- the plug of the cord fits in the socket;
- the appliance is placed on a stable and flat surface.
PLACEMENT OF THE AIR CONDITIONER
A mobile air conditioner must be placed on a flat surface with sufficient room all around. Do not block the air outlet and ensure a free space of minimum 30 cm around the air conditioner.
After placing the appliance in a straight position, allow it to stand for at least 2 hours before inserting the plug in the socket.


INSTALLING THE AIR DISCHARGE HOSE
Place the appliance near a window or opening, so that the air can flow to the outside via the discharge hose.
- Carefully pull out the discharge hose until the required length is achieved.
- Screw an end of the discharge hose [15] In the round connector [14].
- Screw the round connector [13] on the other end of the discharge hose.
- Attach the connector [14] to the air outlet at the rear of the air conditioner by turning it clockwise.
- Hang the other end of the discharge hose to the outside. Ensure a free passage of the hose. Close the window and door as much as possible. If necessary, use the window seal set.


REMARK: Optimum operation of the air conditioner depends on the length of the discharge hose and the number of bends. Try to limit both. The supplied flexible discharge hose has a maximum length of approx. 150 cm and corresponds with the capacity of the air conditioner. The use of any other hoses or extensions could cause failures in the appliance. The air should be able to flow without hindrance, or else this could lead to overheating of the appliance or condensation of water in the air discharge hose. Therefore make sure there are no kinks or sharp bends in the discharge hose. For an optimum result, the discharge hose should be kept shorter than 1 metre during use of the air conditioner.


TOMADO
INSTALLATION OF THE WINDOW SEAL SET
The flexible window seal set is suitable for many windows. Such as: tilt and turn windows, windows turning to the outside and inside. It ensures that you are able to hang the discharge hose to the outside, without hot air flowing into the room again or having problems with insects.
For windows turning to the outside, we recommend taping all four sides (a + b + c + d) around the window and for windows turning to the inside only three sides (a + b + c) .
- Attach the supplied Velcro tape on the window frame and the window in accordance with one of the drawings below that is similar to your situation.
- Then attach the cloth to the Velcro tape that you attached in the openings.


- Attach the supplied Velcro tape on the window frame.
- Then attach Velcro tape on the window.
- Cut away excess Velcro tape.
- Make sure the Velcro tape on the corners properly overlap to achieve proper sealing.
- Attach the cloth to the velcro tape attached to the window frame and window.
- Make sure the cloth is neatly attached to the Velcro tape on both sides.
- Zip open the cloth.
- Insert the discharge hose through the opening and zip the cloth closed to achieve proper sealing.
OPERATION OF THE AIR CONDITIONER
In addition to cooling, the air conditioner has two other functions, i.e. air circulation and dehumidification.
The air conditioner can be operated via the control panel on the appliance and with the provided remote control.
- Choose a location near a socket.
Install the discharge hose in accordance with the figures and make sure the window is closed as much as possible. - Insert the plug in an earthed socket.
- Press the on/off key (1) to switch on the air conditioner.
The temperature range of the air conditioner Is: 16 to 31^ - Check that the discharge hose is mounted correctly.
- Do not share the socket with any other appliances.

COOLING
- Press the mode key [mode] until the indicator light for cooling [cool] lights up on the display.
- Press the [ temp +/▲ and temp -/▼] keys to set the required room temperature (between 16°C and 31°C).
- Press the [speed / ] key to set the wind speed.
DEHUMIDIFICATION
- Press the mode key [mode] until the indicator light for dehumidification [dry] lights up on the display.
The air conditioner automatically adjusts the temperature to the current room temperature minus 2^
The wind speed is at low speed automatically [low]. This cannot be changed.
When using this position, a garden hose (not included in the delivery) or something similar must be
connected to discharge condensation water.
- Unscrew the screw cap on the back of the appliance.
- Mount the end of a garden hose or a similar discharge hose to the drain and place the other end in
a receptacle, such as a bucket, situated lower than the drain of the appliance, so that the condensate
water can be discharged properly.
Caution:
- Condensation water may run out of the drain when the screw cap is removed and the appliance has been
used in cooling mode. Keep a drip tray at hand when removing the screw cap, in order to collect the condensation water. - Make sure the discharge hose for the condensation water properly descends and is not higher than the drain of the appliance.
- When using this position, the air discharge hose does not have to be connected.
- When using the cooling position, it is recommended to not discharge the condensation water
continuously, but to close the screw cap again. In this way the appliance is able to provide its best
performance.


AIR CIRCULATION
When using this position, the air discharge hose does not have to be connected.
- Press the mode key [mode] until the indicator light for air circulation [fan] lights up on the display.
- Press the [speed / ] key to adjust the wind speed - [low] or [high].
ADJUSTING THE TIMER
The timer function can be used to allow the air conditioner to switch on automatically (delayed start) or switch off automatically at a set time (automatic deactivation).
Delayed start
- Press the timer key [timer/ ①] when the air conditioner is off and select the required time at which you want the air conditioner to switch on
by means of the [ temp + /▲ en temp - /▼ ] keys. The delayed start can be set between 0 and 24 hours. - Confirm the number of hours by pressing the timer key [timer/ ①] once more.
The set number of hours is shown in the display. - When the set number of hours have passed, the air conditioner switches on automatically.
Automatic deactivation
- Press the timer key [timer/ ①] when the air conditioner is on and select the required time at which you want the air conditioner to switch off using the
temperature and time [ temp + /▲ and temp - /▼ ] keys. Automatic deactivation can be set between 0 and 24 hours. - Confirm the number of hours by pressing the timer key [timer/ ①] once more.
- The set number of hours is shown in the display.
- When the set number of hours have passed, the air conditioner switches off automatically.
THE REMOTE CONTROL
Aim the remote control to the sensor of the appliance. The range of the remote control is approx. 8 metres (without obstacles between the appliance and the remote control).
Insert the two supplied AAA 1.5 Volt batteries in the remote control. Do take the plus and minus symbols on the inside of the remote control into account.
Note:
If the remote control is replaced or is no longer used, remove the batteries and dispose them in accordance with applicable legislation, as they are harmful to the environment.
Do not mix old and new batteries. Do not use a mix of alkaline, standard (carbon-zinc) or chargeable (nickel-cadmium) batteries.
- Batteries could explode or leak when exposed to open fire. Hand in batteries at a waste collection facility or recognised waste collection point.
- Remove the batteries from the remote control when the appliance is not being used for a longer period of time (winter storage) and keep them on a cool, dry place.
DRAINING CONDENSATION WATER
When the air conditioner is not used for a longer period of time, remove the rubber cap from the drain opening at the bottom of the appliance and place an empty cup under the outlet. All the water will flow out of the tank.
The water tank is equipped with an alarm sensor. When the water reaches a certain level in the water tank, the indicator light [full] lights up.
Should the water pump be defective, this could be an option for draining the water, as the water pump is not used in this way. The air conditioner will still be able to function properly.
When the water pump is defective, intermediate drainage can also be used. Keep an eye on the indicator light for full water tank [ full ], to see whether it lights.
Once the indicator led [ full ] lights, connect a discharge hose in the same way and all the water will flow out of the tank. In this way the air conditioner is also able to function properly.
Manual discharge- when using the appliance in a room with high air humidity.
- Remove the plug from the socket.
- Place a low receptacle under the lower outlet for condensation water discharge, see drawings 1, 2 and 3.
- Remove the screw cap.
- The water flows out of the drain into the receptacle.
- Place back the screw cap when no more water is flowing out.
- Switch the appliance on again.


Continuous discharge - recommended when using the dehumidification position.
- Remove the plug from the socket.
- Remove the screw cap. Keep a drip tray at hand when removing the screw cap in order to collect the condensation water that may come out of the outlet.
- Connect the discharge hose (1 / 2^ or 12.7mm)
- The water is discharged continuously via the discharge hose.
- Switch the appliance on again.
CLEANING AND MAINTENANCE
Before cleaning the air conditioner, switch off the appliance by means of the ON/OFF key, wait a few minutes and remove the plug from the socket.
Cleaning the exterior
Clean the exterior of the appliance with a slightly damp cloth and then wipe it with a dry cloth. If necessary, you can clean the exterior of the appliance by means of a mild washing-up liquid.
- Never wash the appliance with water. This can be dangerous.
- Do not use petrol, alcohol or similar solvents to clean the appliance.
- Never spray with insect sprays or similar agents.
- Do not use aggressive or abrasive cleaning agents for cleaning the appliance.
- Never submerge the appliance, cord or plug in water or any other liquid.
Cleaning the air filter
In order to allow the appliance to function as well as possible, we recommend cleaning the air filter every week.
The air filter could get clogged with dust and dirt. Remove the air filter as shown in the drawing.
Use a vacuum cleaner to remove all the dust from the air filter.
If the air filter is very dirty, you can clean it with lukewarm water.
- Submerge the air filter in lukewarm water (max. 40^ ) containing a soft cleaning agent. Rinse the air filter a few times
and allow it to dry in the air. Do not place the air filter in the sun or on the heating to dry it. - Place back the air filter. Check that it is fully dry, before using the appliance again.


Cleaning the air inlets
In order to allow the appliance to function as well as possible, you can clean the air inlets by means of a vacuum cleaner with a soft brush nozzle.
Start or end of the season
At the start of the season, check that the cord and plug are undamaged. Observe the installation instructions when placing the appliance.
At the end of the season, make sure there is no condensation water left in the appliance. Drain the water in accordance with the instructions in section DRAINING CONDENSATION WATER and make sure the air filter is clean before storing the appliance.
PROBLEMS AND SOLUTIONS
First check the following before submitting the air conditioner for repair.
| Problem Possible cause Solution | ||
| The appliance does not switch on when pressing the on/off key. | The indicator light on the water tank flashes and the water tank is full. | Empty the water tank. |
| The room temperature is lower than the set temperature. Set the temperature once more. | ||
| The appliance does not cool sufficiently. | Not all doors and windows are closed. Make sure that all doors and windows are closed. | windows are closed. |
| There are heat sources active in the room. Remove the heat source or switch them off if possible. | ||
| The temperature is set too high. Set the temperature once more. | ||
| The air inlet is blocked. Clean the air inlet grille. | ||
| The appliance makes a lot of noise. | The surface on which the appliance is placed is not level of flat enough. | Place the appliance on a flat surface, level if possible. |
| The noise is caused by the flowing refrigerant liquid within the air conditioner. | This is normal. | |
| Error code E0 | The sensor for room temperature is defective. | Have the sensor replaced (the appliance is also able to function without replacing the sensor). |
| Error code E1 Condenser sensor defective. Contact the Tomado service department. | ||
| Error code E2 The water tank is full. Empty the water tank. | ||
| Error code E3 Evaporator sensor defective. Contact the Tomado service department. | ||
| Error code E4 The water tank is full. Empty the water tank. |
TECHNICAL SPECIFICATIONS
Type number
Voltage
Connected load
Cooling capacity*
EE Class*
EER*
Power consumption kW
Power consumption Standby W
Current consumption nom. A
Air displacement max. m³/h
Dehumidification max. ** L/h
Suitable for m
Refrigerant / GWP type/gr
Thermostat range ^ C
Fan speeds
Max. noise level dB(A)
Dimensions (hwxxd)
Nett weight
Protection class
Remote control
TMA1201W
220-240Volt \~50Hz
1346 Watt
12000Btu/h (3.4kW)
A
2.6
1.3
0.5
5.9
380
1.2
105
R-290/3/226g.
16-31
65 dB(A)
715× 440× 335mm
30.0 kg
IP20
yes
RECYCLING

This symbol means that this product should not be disposed of with regular household waste (2012/19/EU). Observe the rules that apply in your country for the separated collection of electric and electronic products. Correct disposal of the product prevents negative consequences for the environment and for public health. The packaging material of this product can be recycled 100% , return packaging material separately.
OPSTILLING AF KLIMAANLEGGET
PROBLEM I ROZWIAZANIA
m = 311 ;
65 dB(A)
715× 440× 335mm
30,0 kg
IP20
tak
RECYKLING

Go to www.tomado.com/support to purchase accessories or spare parts.
WARRANTY CONDITIONS
A 24 month warranty is provided for this product. Your warranty is valid if the product has been used in accordance with the user instructions and for the purpose for which it was made. Also the original proof of purchase must be submitted, stating the date of purchase, the name of the retailer and the item number of the product. For extensive warranty information you are referred to our website: www.tomado.com/support
CONDITIONS DE LA GARANTIE


- IMPORTANT
- TOMADO®
- CAUTION!
- WARNING
- REFRIGERANT
- TOMADO
- PRODUCT DESCRIPTION
- PRIOR TO FIRST USE
- PLACEMENT OF THE AIR CONDITIONER
- INSTALLING THE AIR DISCHARGE HOSE
- INSTALLATION OF THE WINDOW SEAL SET
- OPERATION OF THE AIR CONDITIONER
- COOLING
- DEHUMIDIFICATION
- Caution:
- AIR CIRCULATION
- ADJUSTING THE TIMER
- Delayed start
- Automatic deactivation
- THE REMOTE CONTROL
- Note:
- DRAINING CONDENSATION WATER
- CLEANING AND MAINTENANCE
- Cleaning the exterior
- Cleaning the air filter
- Cleaning the air inlets
- Start or end of the season
- PROBLEMS AND SOLUTIONS
- TECHNICAL SPECIFICATIONS
- RECYCLING
- OPSTILLING AF KLIMAANLEGGET
- PROBLEM I ROZWIAZANIA
- RECYKLING
- WARRANTY CONDITIONS
- CONDITIONS DE LA GARANTIE
Brand : Tomado
Model : TMA1201W
Category : Air Conditioning