WS 8015 - Clock TECHNOLINE - Free user manual and instructions
Find the device manual for free WS 8015 TECHNOLINE in PDF.
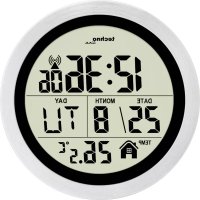
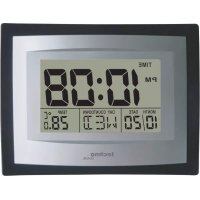
| Product Type | Radio-controlled clock with temperature and humidity display |
| Brand | TECHNOLINE |
| Model | WS 8015 |
| Dimensions | 224 × 224 × 23 mm |
| Power supply | 4 AA 1.5 V batteries |
| Radio-controlled signal | DCF77 (Europe) |
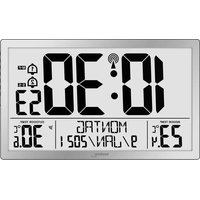
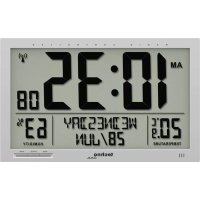
| Time functions | Time/date display, alarm with snooze, automatic daylight saving time, 12/24h format |
| Weather functions | Indoor temperature (-40°C to +70°C) and humidity (20% to 90%) |
| Temperature unit | Selectable °C or °F |
| Number of languages | 7 languages for weekdays (EN, FR, DE, ES, IT, NL, RU) |
| Signal reception | Automatic daily synchronization at 2h, 8h, 14h, and 20h |
| Alarm | With snooze function (5 min) and 24h repetition |
| Viewing angle | Adjustable via switch for tabletop or wall use |
| Wall mounting | Mounting hole on back |
| Maintenance and cleaning | Clean with a soft, dry cloth. Do not use abrasive products or solvents. |
| Safety | Do not open the case, do not expose to water, shocks or extreme temperatures. Keep batteries out of reach of children. |
| Spare parts and repairability | The device contains no user-serviceable parts. Batteries are replaceable. For any issues, contact after-sales service. |
| Battery precautions | Use only AA alkaline batteries. Observe polarity. Do not mix old and new batteries. Remove batteries if not used for extended periods. |
| Recycling | Do not dispose of the device or batteries with household waste. Follow local regulations. |
Frequently Asked Questions - WS 8015 TECHNOLINE
User questions about WS 8015 TECHNOLINE
0 question about this device. Answer the ones you know or ask your own.
Ask a new question about this device
Download the instructions for your Clock in PDF format for free! Find your manual WS 8015 - TECHNOLINE and take your electronic device back in hand. On this page are published all the documents necessary for the use of your device. WS 8015 by TECHNOLINE.
USER MANUAL WS 8015 TECHNOLINE
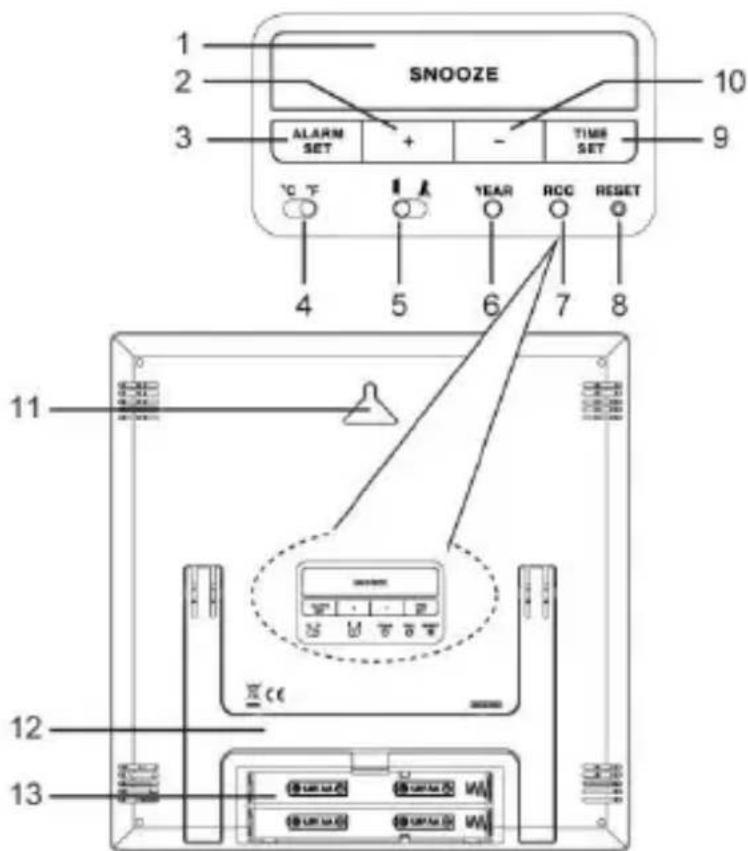
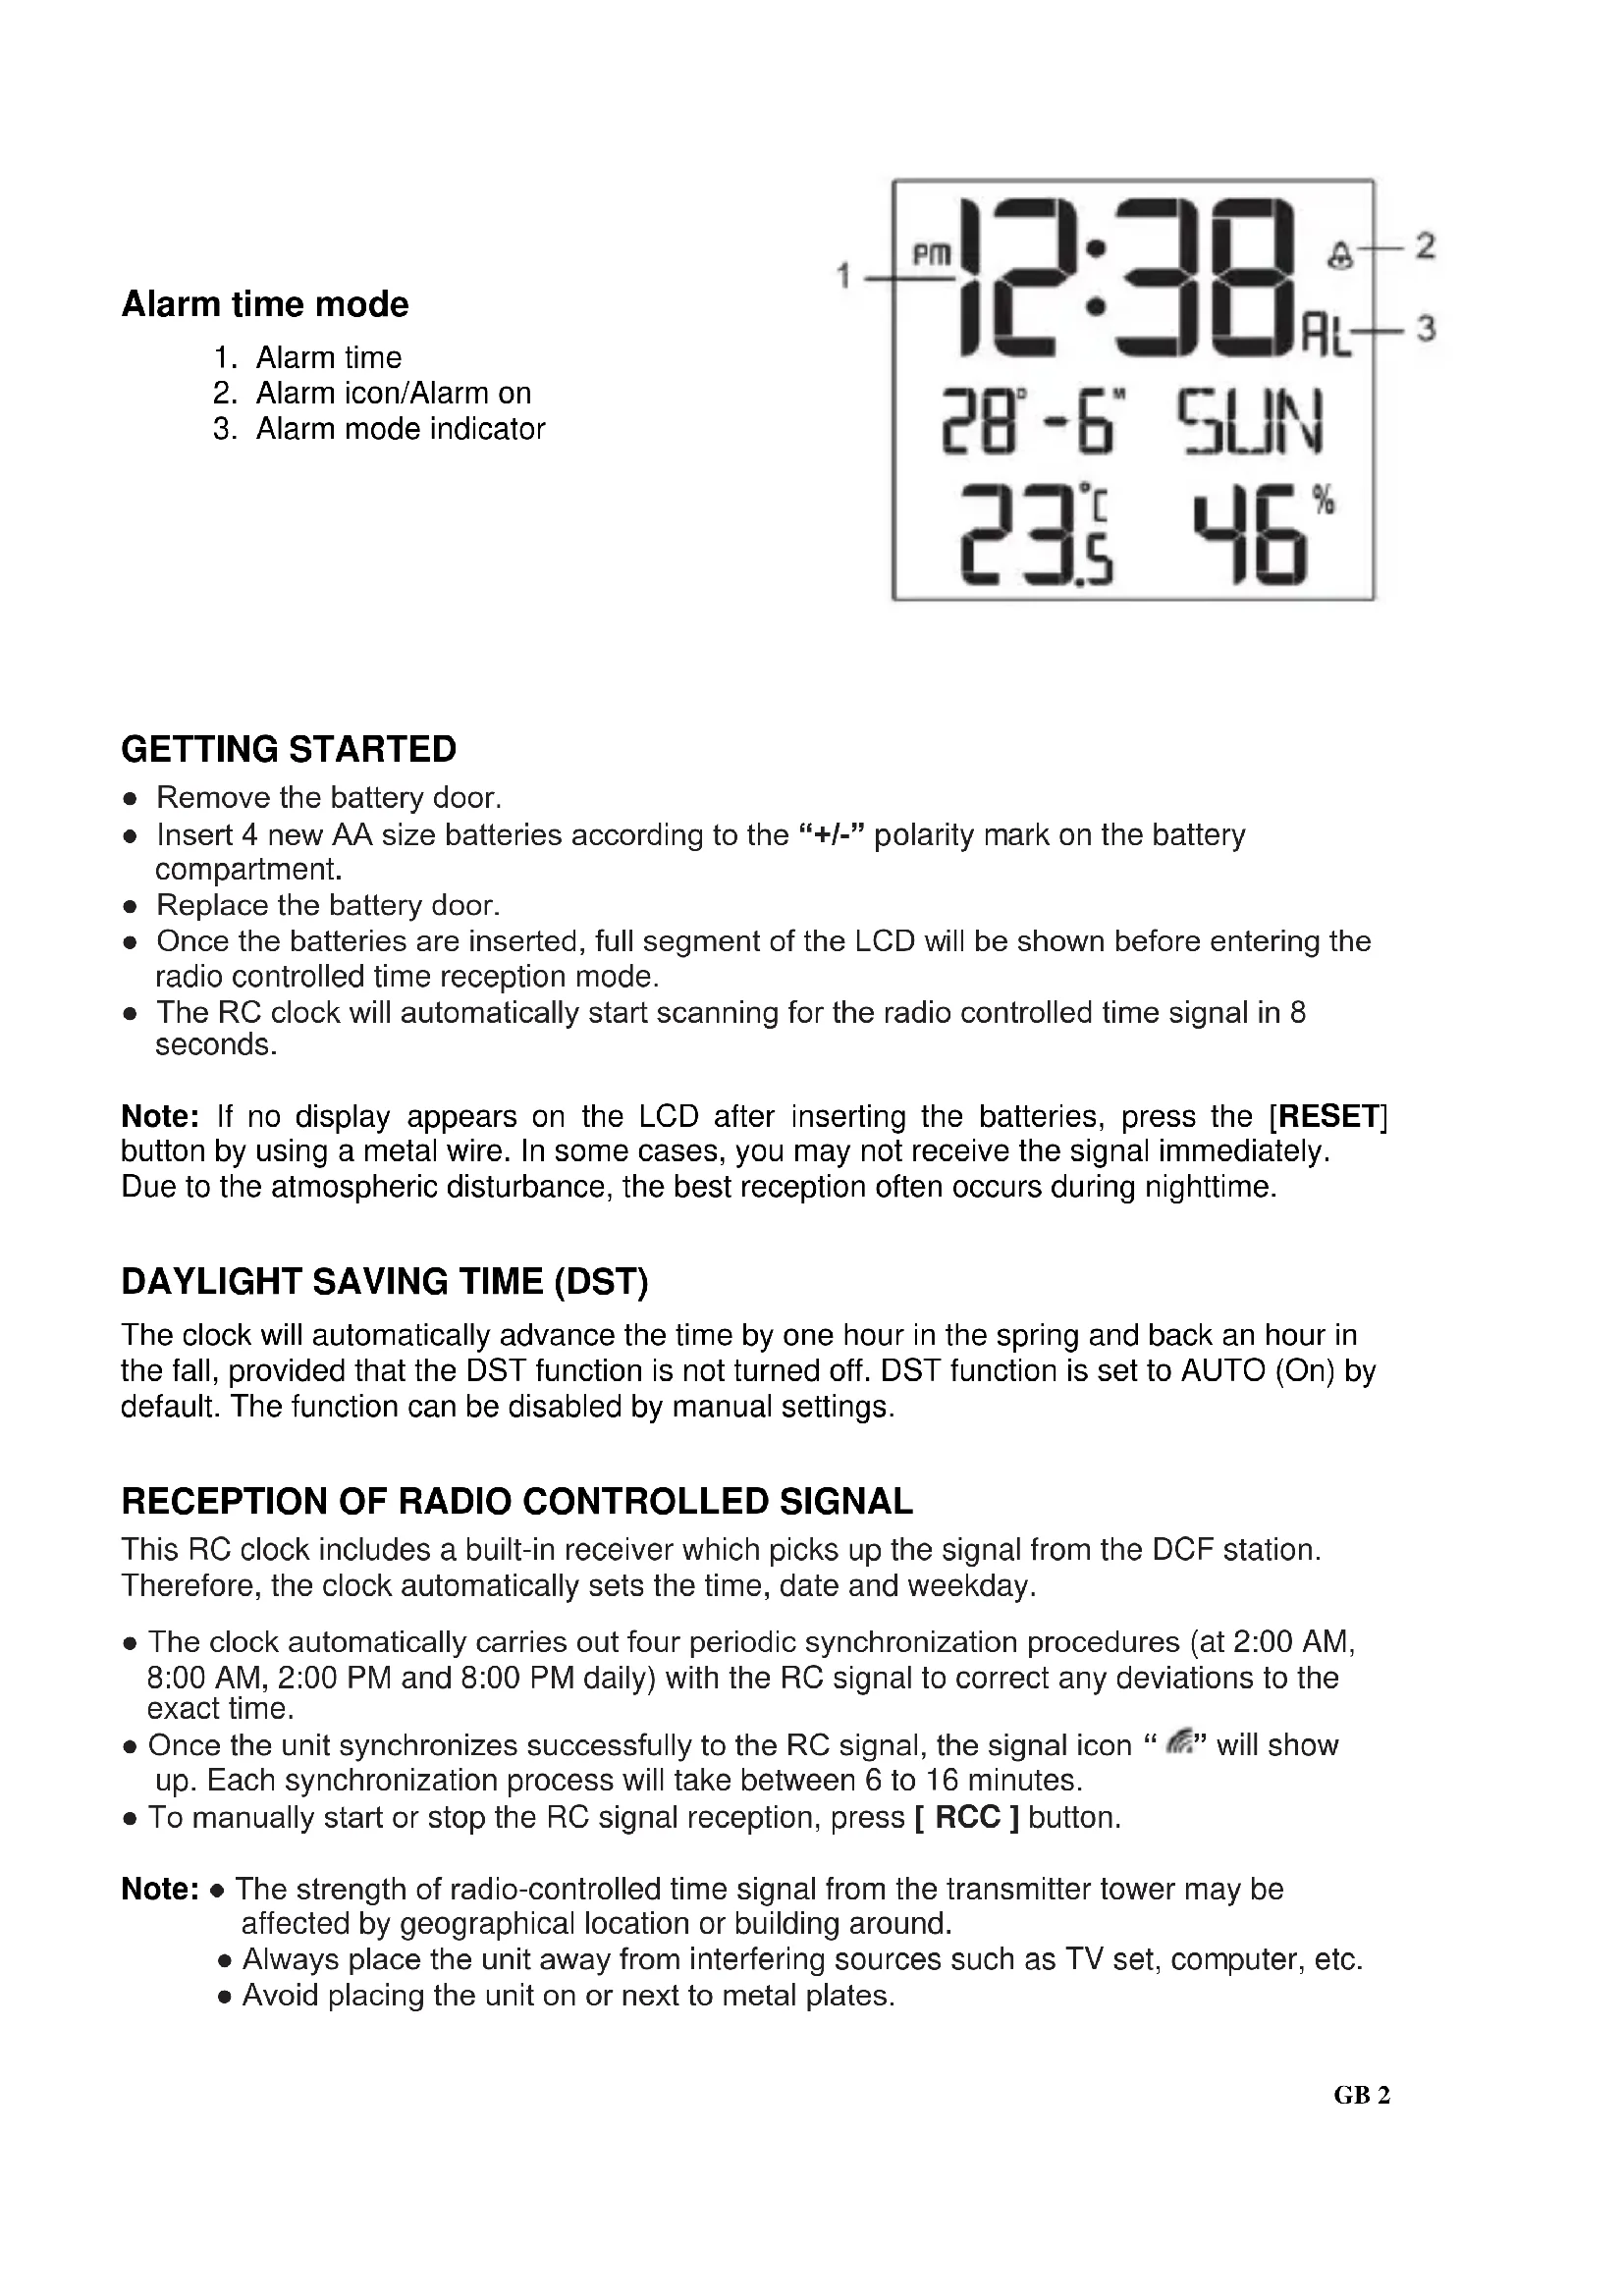
- Remove the battery door.
- Insert 4 new AA size batteries according to the “+/-” polarity mark on the battery compartment.
- Replace the battery door.
- Once the batteries are inserted, full segment of the LCD will be shown before entering the radio controlled time reception mode.
- The RC clock will automatically start scanning for the radio controlled time signal in 8 seconds.
Note: If no display appears on the LCD after inserting the batteries, press the [RESET] button by using a metal wire. In some cases, you may not receive the signal immediately. Due to the atmospheric disturbance, the best reception often occurs during nighttime.
DAYLIGHT SAVING TIME (DST)
The clock will automatically advance the time by one hour in the spring and back an hour in the fall, provided that the DST function is not turned off. DST function is set to AUTO (On) by default. The function can be disabled by manual settings.
RECEPTION OF RADIO CONTROLLED SIGNAL
This RC clock includes a built-in receiver which picks up the signal from the DCF station. Therefore, the clock automatically sets the time, date and weekday.
- The clock automatically carries out four periodic synchronization procedures (at 2:00 AM, 8:00 AM, 2:00 PM and 8:00 PM daily) with the RC signal to correct any deviations to the exact time.
- Once the unit synchronizes successfully to the RC signal, the signal icon "M" will show up. Each synchronization process will take between 6 to 16 minutes.
- To manually start or stop the RC signal reception, press [ RCC ] button.
Note: The strength of radio-controlled time signal from the transmitter tower may be affected by geographical location or building around.
- Always place the unit away from interfering sources such as TV set, computer, etc.
- Avoid placing the unit on or next to metal plates.
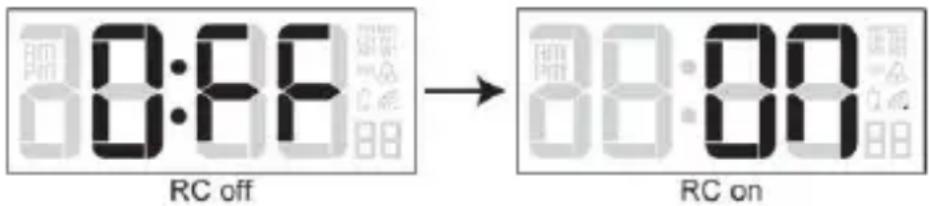
SIGNAL RECEPTION INDICATOR
The signal indicator displays signal strength in 4 levels. Wave segment flashing means time signals are being received. The signal quality could be classified into 4 types:
- RC synchronize process
Weak signal quality
a. Acceptable signal quality
Excellent signal quality
DISABLE / ENABLE RCC SIGNAL RECEPTION
- Press and hold [ RCC ] button for 8 seconds to disable the reception.
- Press and hold [ RCC ] button for 8 seconds to enable automatic RCC reception.
MANUAL SETTINGS
- In normal time mode, press and hold [TIME SET] button for 2 seconds until the 12/24 Hr flashes.
- Press [+/-] button to set 12/24 Hour format.
- Press [TIME SET] button again until Hour digit flashes and press [+/-] button to adjust its value.
- Repeat above operations to set the time and calendar in this sequence:
DCF/MSF version:
12/24Hr>Hour>Minute>Second>Year>Date>Month>+/-23 Hour offset>Language>DST auto/off
Note: - When setting second, press [+/-] button to set its value to 00.
- 7 selectable languages and setting orders: EN(English) FR(French)
DE(German) ES(Spanish) IT(Italian) NL(Dutch) RU(Russian)
SETTING THE ALARM TIME
- In normal time mode, press and hold [ALARM SET] button for 2 seconds until hour digit flashes.
- Press [+/-] button to set its value.
- Press [ALARM SET] button again to step to Minute setting. Press [+/-] button to set its value.
- Press [ALARM SET] button to save the setting and return to normal time mode. Or the clock will automatically exit the setting mode after 1 minute without pressing any button.
Note: After pressing [+/-] button, alarm function is automatically turned on (icon “ ” displayed).
USING THE ALARM AND SNOOZE
- In normal time mode, press [ALARM SET] button to enter alarm time mode.
Press [ALARM SET] button again to turn on (icon “ ” displayed) or turn off alarm function.
If alarm is turned on, alarm beeps at the alarm time.
Alarm beeping can be stopped by:
-
Auto stop if no button is pressed during alarm sound beeping. Alarm beeping lasts for 2 minutes.
-
Press [SNOOZE] button to stop the current alarm and enter snooze. Alarm icon will be flashing continuously. The alarm will sound again in 5 minutes.
Snoopze can be operated continuously in 24 hours.
- Press [ALARM SET] button to turn off alarm function.
VIEW YEAR
In normal time mode, press [YEAR] button to display year for 5 seconds.
TEMPERATURE AND HUMIDITY DISPLAY
Slide the <^ / ^> switch to select the temperature unit ^ or ^ .
The temperature and humidity will display "Hi/Lo/---" on the conditions in the following chart:
| Area | Condition | Display |
| Temperature | Temperature < -40°C | Lo |
| Temperature > 70°C | Hi | |
| Humidity | Humidity < 20% | Lo |
| Humidity > 90 % | Hi | |
| Temperature < 0°C or > 60°C | --- |
TO SET THE VISUAL ANGLE
User can use <1/4> slide switch to set visual angle:
If the clock is placed directly on a flat surface with the table stand, choose the
< > position.
If the clock is hanged on the wall with the wall mounting hole, choose the
<1 >position.
The above right choice ensures high definition of visual angle for the liquid display.
BATTERY REPLACEMENT
When the low battery indicator " " displays, it indicates that the battery power is not enough. You should replace with 4 AA size batteries at once.
Note: If the clock is not used for a long time, please take off the batteries.
- Attention! Batteries should not be exposed to excessive heat such as sunshine, fire or the like. Please dispose of used unit or batteries in an ecologically safe manner.

SPECIFICATIONS
Radio controlled signal: DCF77
Temperature
Display range: -40°C to +70°C (-40°F to 158°F)
Operating range: 0^ to +45^ (32°F to 113°F)
Accuracy - 5^ to 0.1^ + / - 2^
0^ to 40^ + / - 1^
40.1°C to 50^ + / - 2^
( 23^ to 32^ + / - 4^
33°F to 86°F +/- 2°F
87^ to 122^ + / - 4^
Humidity
Display range: 20% to 90%
Accuracy: 20% RH to 40% RH +/- 7% RH
41% RH to 70% RH +/- 5% RH
71% RH to 90% RH +/- 7% RH
Power
4 x AA size 1.5V batteries
Dimension
224 × 224 × 23 ~mm
Precautions
- This main unit is intended to be used only indoors.
- Do not subject the unit to excessive force or shock.
- Do not expose the unit to extreme temperatures, direct sunlight, dust or humidity.
- Do not immerse in water.
- Avoid contact with any corrosive materials.
- Do not dispose this unit in a fire as it may explode.
Do not open the inner back case or tamper with any components of this unit.
Batteries safety warnings
- Use only button cell batteries, not rechargeable batteries.
Install batteries correctly by matching the polarities (+ / - ) - Always replace a complete set of batteries.
- Never mix used and new batteries.
- Remove exhausted batteries immediately.
- Remove batteries when not in use.
- Do not recharge and do not dispose of batteries in fire as the batteries may explode.
- Ensure batteries are stored away from metal objects as contact may cause a short circuit.
- Avoid exposing batteries to extreme temperature or humidity or direct sunlight.
- Keep all batteries out of reach from children. They are a choking hazard.
Consideration of duty according to the battery law
Old batteries do not belong to domestic waste because they could cause damages of health and environment. You can return used batteries free of charge to your dealer and collection points. As end-user you are committed by law to bring back needed batteries to distributors and other collecting points!
Consideration of duty according to the law of electrical devices

This symbol means that you must dispose of electrical devices separated from the General household waste when it reaches the end of its useful life. Take your unit to your local waste collection point or recycling centre. This applies to all countries of the European Union, and to other European countries with a separate waste collection system.
WS 8015 HORLOGE RADIOCOMMANDÉE AVEC INDICATEURS DE TEMPERATURE ET D'HUMIDITÉ