
AF120 - Fan CORSAIR - Free user manual and instructions
Find the device manual for free AF120 CORSAIR in PDF.
| Product Type | RGB Case Fan |
| Brand | Corsair |
| Model | AF120 RGB SLIM |
| Dimensions | 120 x 120 x 25 mm |
| Weight | Approximately 150 g |
| Power Supply | 4-pin PWM + SATA for RGB |
| Rotation Speed | 400 - 1500 RPM (PWM) |
| Airflow | 62 CFM |
| Noise Level | 25 dBA |
| Static Pressure | 1.4 mmH2O |
| Number of LEDs | 8 Addressable RGB LEDs |
| Frame Material | Reinforced Plastic |
| Main Functions | PWM control, RGB lighting, iCUE control |
| Connectors | 4-pin RGB connector, 4-pin PWM connector |
| Software Compatibility | iCUE (requires Lighting Node CORE) |
| Box Contents | 1 AF120 RGB SLIM fan, 1 Lighting Node CORE, mounting screws (short and long), mounting strips |
| Maintenance and Cleaning | Dust with a soft cloth or compressed air. Do not use liquid. |
| Safety | Turn off the computer and disconnect the power supply before any intervention. |
| Spare Parts and Repairability | Mounting screws available as options. The unit is not user-repairable. |
| Warranty | 2 years |
Frequently Asked Questions - AF120 CORSAIR
User questions about AF120 CORSAIR
0 question about this device. Answer the ones you know or ask your own.
Ask a new question about this device
Download the instructions for your Fan in PDF format for free! Find your manual AF120 - CORSAIR and take your electronic device back in hand. On this page are published all the documents necessary for the use of your device. AF120 by CORSAIR.
USER MANUAL AF120 CORSAIR
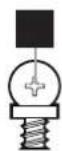
A PHILLIPS-HEAD SCREWDRIVER (not included)
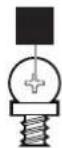
B SHORT FAN MOUNTING SCREWS
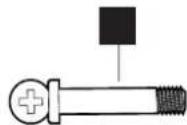
C LONG FAN MOUNTING SCREWS (used when installing fans on a radiator)
FAN INSTALLATION
1 TURN OFF COMPUTER
Turn your system off prior to installing your AF120 RGB SLIM fan.

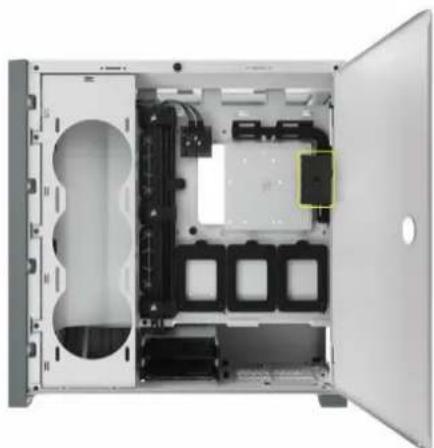
2 MOUNT LIGHTING NODE CORE

Find a location for the Lighting Node CORE that allows the fan RGB LED cables to reach the Lighting Node CORE, then mount it with the provided mounting strips.
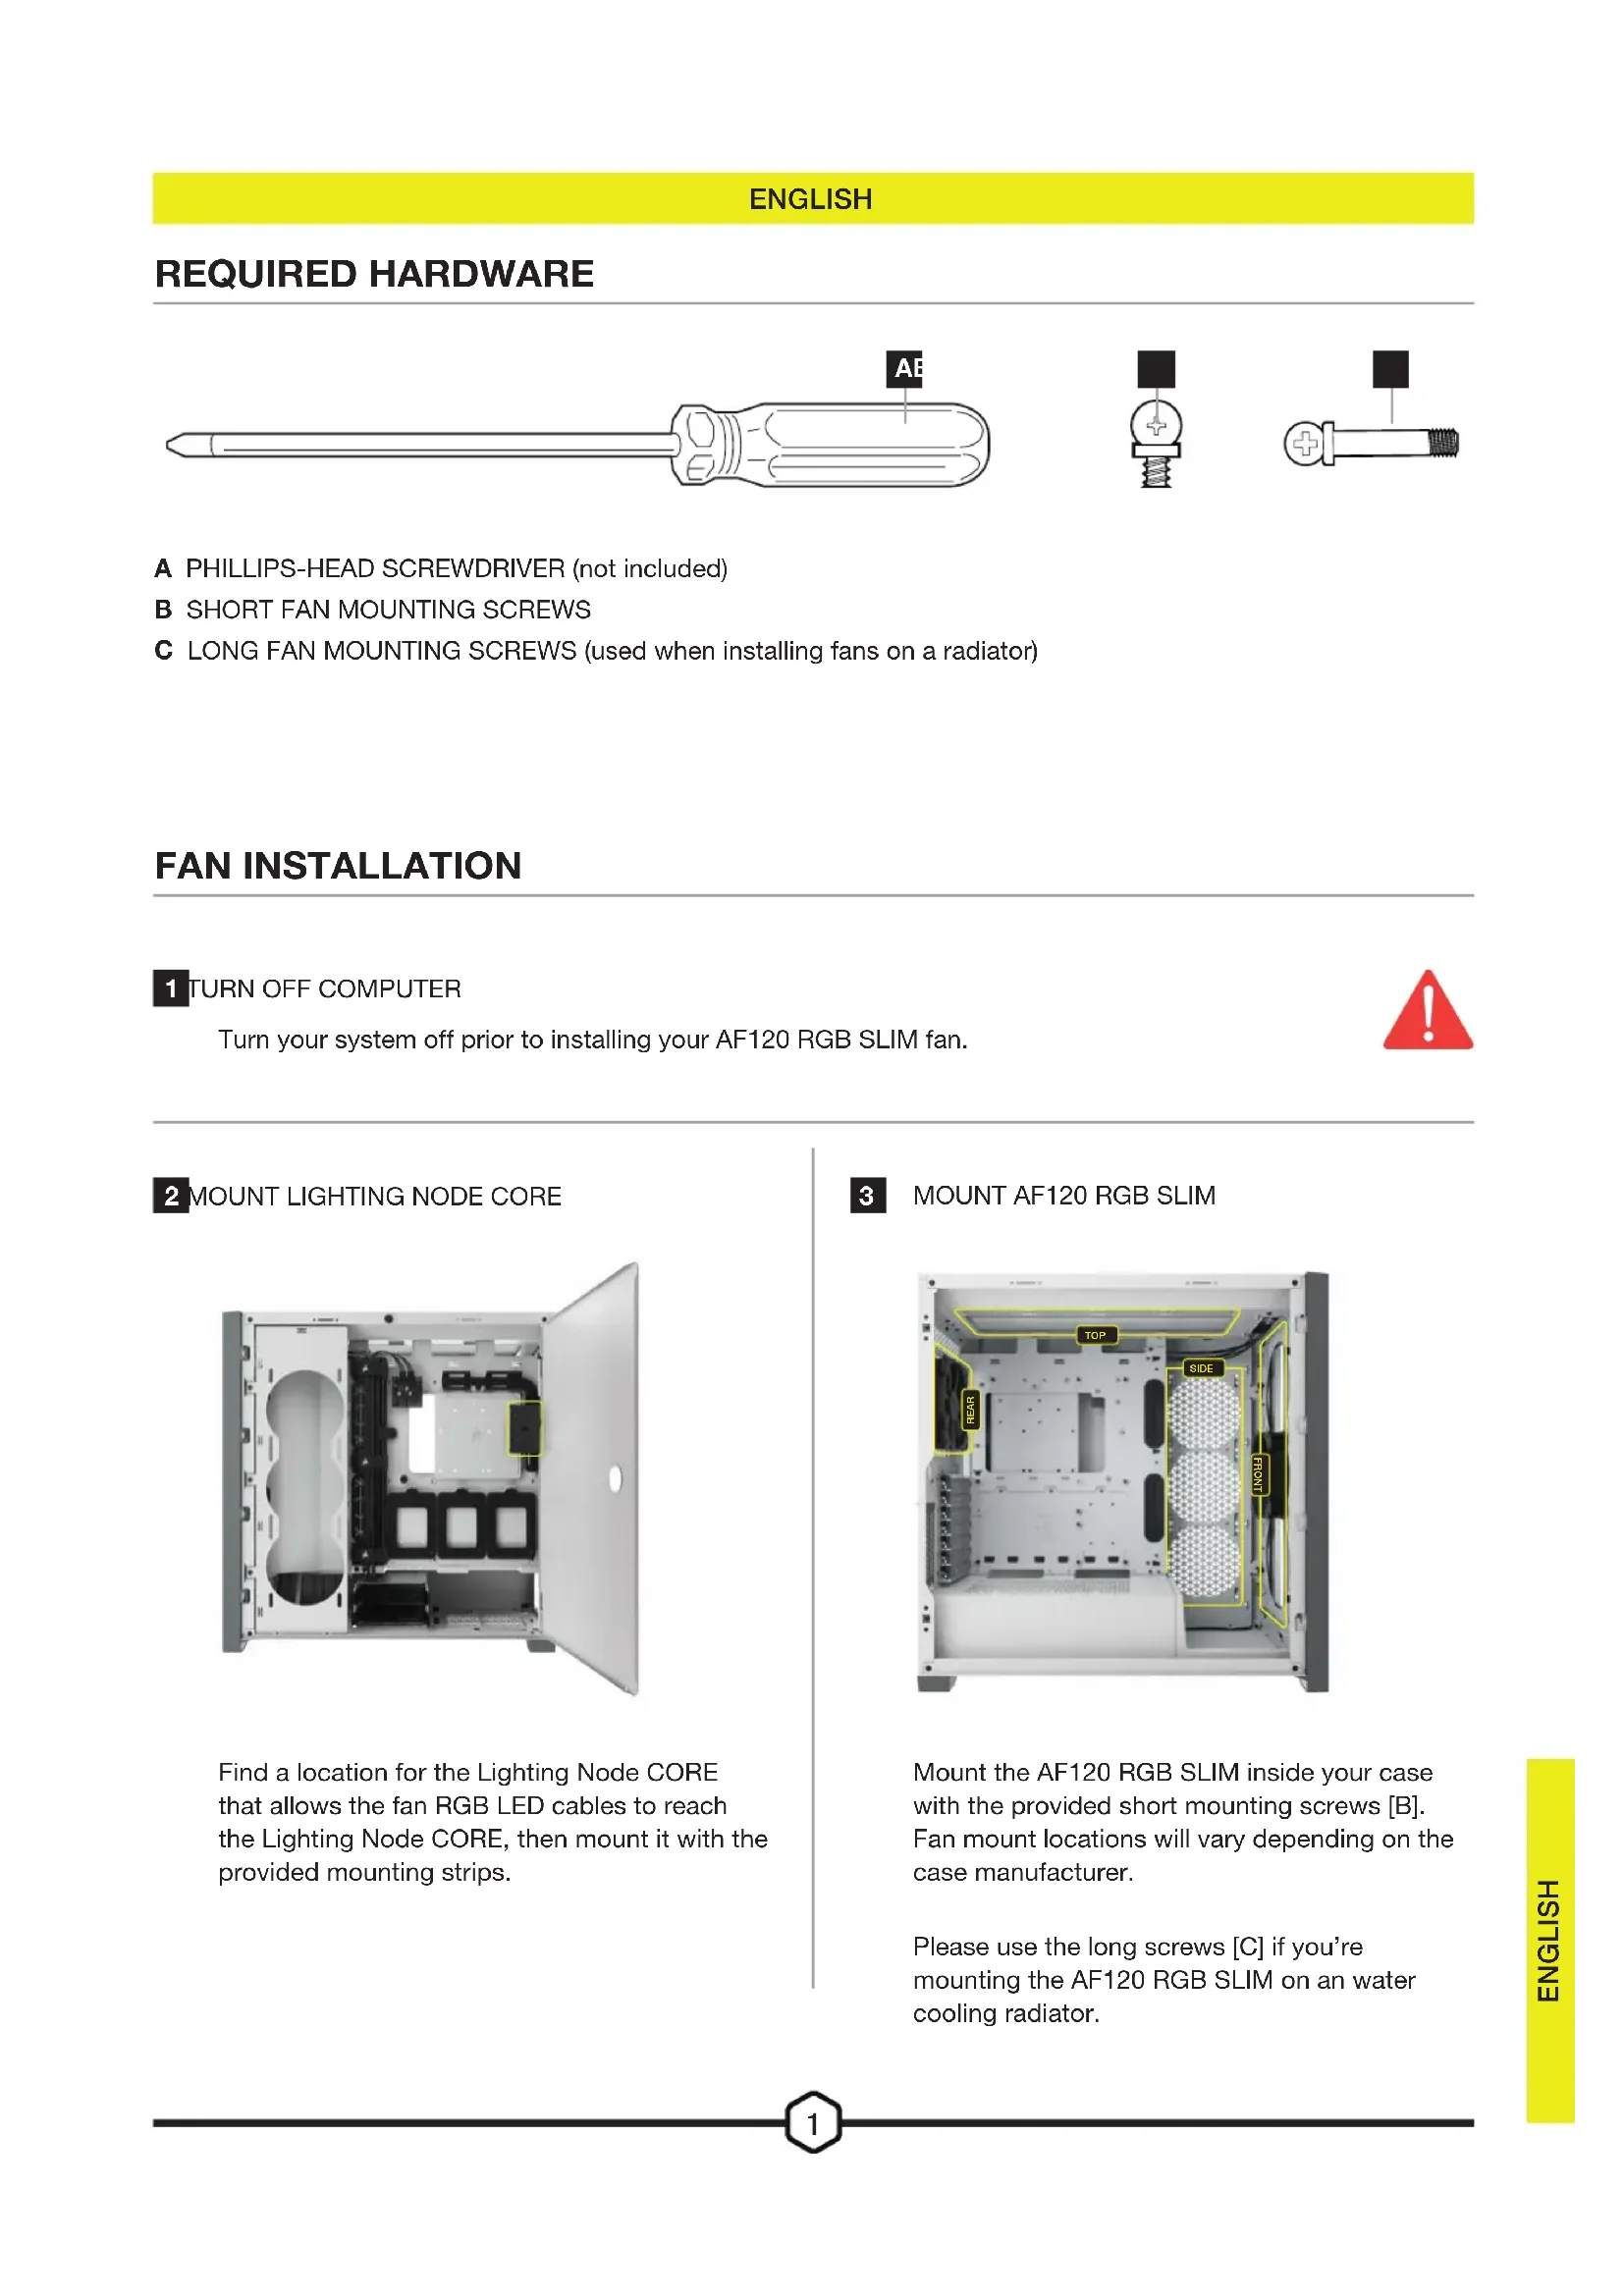
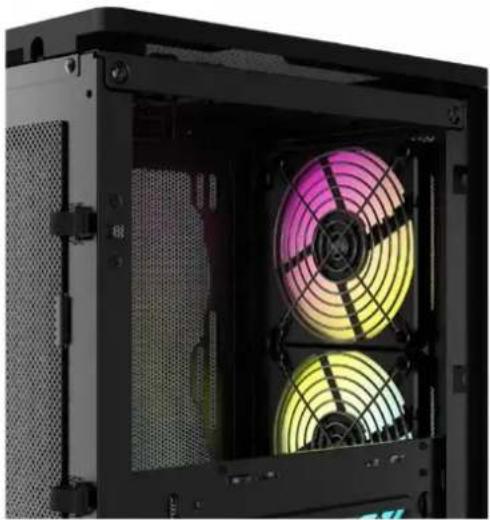
3 MOUNT AF120 RGB SLIM
Mount the AF120 RGB SLIM inside your case with the provided short mounting screws [B]. Fan mount locations will vary depending on the case manufacturer.
Please use the long screws [C] if you're mounting the AF120 RGB SLIM on an water cooling radiator.
FAN INSTALLATION
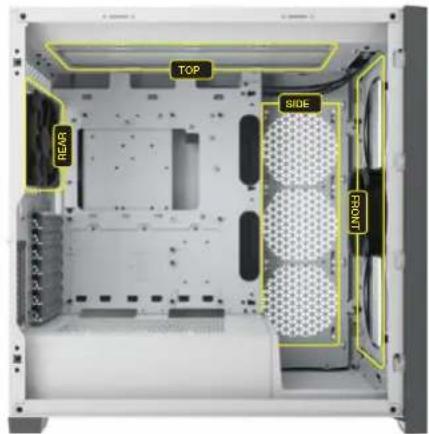
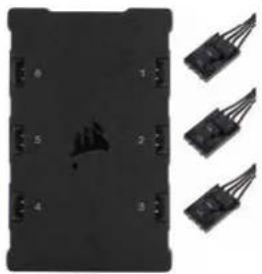
4 CONNECT LIGHTING NODE CORE TO PC
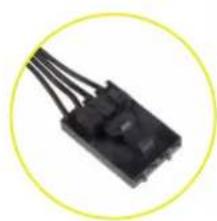
Connect the 4-pin RGB connectors from your AF120 RGB SLIM fans into the Lighting Node CORE controller in sequential order from port #1 to #6.
CONNECT FANTO RGB CONTROLLER
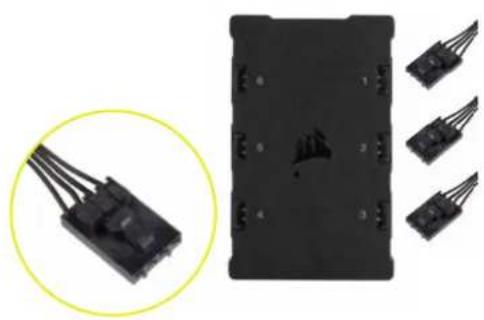
Plug the 9-pin USB cable from the Lighting Node CORE into an available internal USB 2.0 header on your motherboard or USB hub.
Connect the SATA power connector to an available SATA connector from your power supply.
6 CONNECT TO POWER
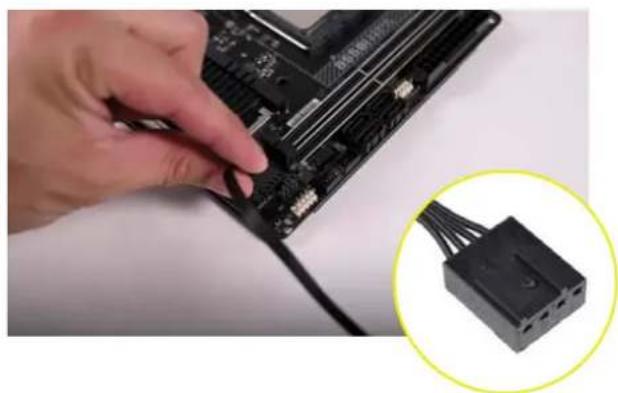
Connect the 4-pin PWM connector into an available 3-pin* or 4-pin (recommended, if available) fan header on your motherboard or fan controller.
You can use fan splitter cables (sold separately) if your motherboard or fan controller does not have enough fan headers.
*Connecting the 4-pin PWM connector into a 3-pin fan header will cause your AF120 RGB SLIM to spin at full speed.
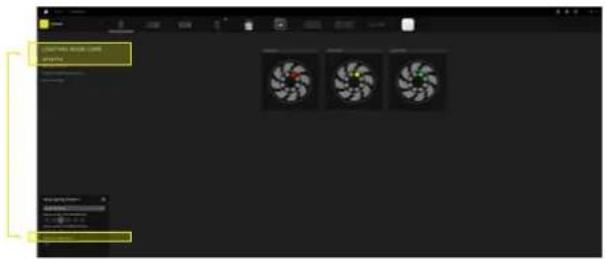
ICUE SETUP

INSTALL iCUE CONFIGURE iCUE
Click the image to download CORSAIR's latest iCUE software.

CUE
A CORSAIR INTERFACE

Once iCUE is installed, select the "8-LED fan Series" in the Lighting Setup page under Lighting Node CORE.

ADDITIONAL RESOURCES
Please visit our CORSAIR LAB YouTube channel for more tips and instructions on how to get the most out of your new CORSAIR fans.
TABLE DES MATIÈRES
MATÉRIEL NÉCESSAIRE
INSTALLATION DU VENTILATEUR
CONFIGURATION iCUE

FRANÇAIS
MATÉRIEL NÉCESSAIRE

INSTALLATION AF BL/ESER
ICUE-KONFIGURATION

DANSK
PAKRAEVET HARDWARE

A STJERNESKRUETRAEKKER (saelges separat)
B KORTE MONTERINGSSKRUER TIL BLAESER
C LANGE MONTERINGSSKRUER TIL BLAESER (anvendes til montering af blaesere pa en koleplade)
INSTALLATION AF BLAESER
1 SLUK FOR COMPUTEREN
Sluk for systemet, for du installerer AF120 RGB SLIM-blaeseren.

2 MONTER LIGHTING NODE CORE
INSTALACJA WENTYLATOROW
KONFIGURACJA iCUE
POLSKI
WYMAGANY SPRZET


INSTALACJA WENTYLATOROW
1 WYlacZ KOMPUTER
INSTALACJA WENTYLATOROW

PODLACZ WENTYLATOR DO KONTROLERA RGB
Podlacz 4-pinowe zlokza RGB wentylatorow AF120 RGB SLIM do kontrlera Lighting Node CORE po kolei do portow o numerach od 1 do 6.

PODŁACZ KONTROLLER LIGHTING NODE CORE DO KOMPUTERA
8-LED aLue iCUE .Lighting Node CORE yIy IyIy


aJsljL
9
Golal
© 2023 CORSAIR MEMORY, Inc. All rights reserved. CORSAIR and the sails logo are registered trademarks of CORSAIR in the United States and/or other countries. All other trademarks are the property of their respective owners. Product may vary slightly from those pictured.
49-002679 AA


- FAN INSTALLATION
- TURN OFF COMPUTER
- MOUNT LIGHTING NODE CORE
- MOUNT AF120 RGB SLIM
- CONNECT LIGHTING NODE CORE TO PC
- CONNECT FANTO RGB CONTROLLER
- CONNECT TO POWER
- ICUE SETUP
- TABLE DES MATIÈRES
- FRANÇAIS
- MATÉRIEL NÉCESSAIRE
- DANSK
- PAKRAEVET HARDWARE
- INSTALLATION AF BLAESER
- SLUK FOR COMPUTEREN
- MONTER LIGHTING NODE CORE
- POLSKI
- WYMAGANY SPRZET
- INSTALACJA WENTYLATOROW
- WYlacZ KOMPUTER
Brand : CORSAIR
Model : AF120
Category : Fan