NSZB 3.7 C4 - Toothbrush NEVADENT - Free user manual and instructions
Find the device manual for free NSZB 3.7 C4 NEVADENT in PDF.
| Product type | Sonic wireless toothbrush |
| Model | NSZB 3.7 C4 |
| Brand | Nevadent |
| Power supply | 100-240 V ~, 50/60 Hz |
| Power consumption | 2 W |
| Built-in battery | Li-ion 3.7 V, 800 mAh, 2.69 Wh |
| Charging time | Approximately 12 hours |
| Protection rating | IPX7 (charger and handle) |
| Brushing programs | Normal, Sensitive, Whitening, Deep Clean |
| Timer | 2-minute cycle with 30-second intervals |
| Clever-Start function | Gradual power increase over 14 uses |
| Travel safety | Anti-start lock |
| Included accessories | 3 brush heads, 1 single-tuft brush head, 1 floss head, 1 charger, 1 travel case |
| Tip compatibility | Original tips and Philips Sonicare™ |
| Maintenance | Clean brush heads under running water; replace every 3 months or according to indicator bristle discoloration |
| Handle cleaning | Rinse under water while tilting shaft downwards; do not immerse |
| Protection class | II (double insulation) |
| Warranty | 3 years (except wear parts) |
| Article number (IAN) | 391068_2201 |
Frequently Asked Questions - NSZB 3.7 C4 NEVADENT
User questions about NSZB 3.7 C4 NEVADENT
0 question about this device. Answer the ones you know or ask your own.
Ask a new question about this device
Download the instructions for your Toothbrush in PDF format for free! Find your manual NSZB 3.7 C4 - NEVADENT and take your electronic device back in hand. On this page are published all the documents necessary for the use of your device. NSZB 3.7 C4 by NEVADENT.
USER MANUAL NSZB 3.7 C4 NEVADENT
Operating instructions
FR BE
Before reading, unfold the page containing the illustrations and familiarise yourself with all functions of the device.
DE AT CH
GB/IE Operating instructions Page 1
Information about these operating instructions 2
Intended use 2
Warning symbols used 2
Safety 3
Basic safety instructions 3
Use 5
Check package contents 5
Requirements for the set-up location 5
Operating components 6
Handling and operation 7
Clever Start function 7
Before first use 7
Using attachments 8
Programmes 8
Cleaning your teeth using the brush head 9
Cleaning with the interdental brush 10
Cleaning with the floss attachment 11
Transportlock 12
Travel case 12
Cleaning and maintenance 12
Disposal 13
Appendix 14
Technical specifications 14
Ordering replacement parts 14
Information about these operating instructions
Congratulations on the purchase of your new appliance.
You have selected a high-quality product. The operating instructions are part of this product. They contain important information about safety, usage and disposal. Before using the product, please familiarise yourself with all the operating and safety instructions. Use the product only as described and for the range of applications specified.
Please also pass these operating instructions on to any future owner.
Intended use
This appliance is intended exclusively for personal dental care at home. This appliance is intended solely for use in private households.
The appliance is not intended for use in industrial or medical environments. It is not suitable for animal care. It is not suitable for commercial use.
Warning symbols used
The following warnings are used in these operating instructions, where applicable:
DANGER
A warning notice at this hazard level indicates an imminently hazardous situation.
If the hazardous situation is not avoided, it could result in death or serious physical injury.
▶ Follow the instructions in this warning to prevent a fatality or serious personal injury.
WARNING
A warning at this hazard level indicates a potentially hazardous situation.
Failure to avoid this hazardous situation could result in injuries.
▶ Follow the instructions in this warning notice to prevent injuries.
CAUTION
A warning at this hazard level indicates a risk of property damage.
Failure to avoid this situation could result in property damage.
▶ Follow the instructions on this warning label to prevent property damage.
NOTE
▶ A note provides additional information which makes handling the appliance easier for you.
Safety
This section contains important safety instructions for handling the appliance. This appliance complies with the statutory safety regulations. Improper use may result in personal injury and property damage.
Basic safety instructions
To ensure safe operation of the appliance, follow the safety guidelines set out below:
■ Prior to use, check the appliance for visible external damage. Do not operate a appliance that has been damaged or dropped.
■ In the event of malfunctions or obvious damage, please contact our Customer Service department.
■ Connect the mains plug only to a properly installed, easily accessible plug socket whose voltage corresponds to the specifications on the rating plate.
The mains socket must also remain easily accessible as long as the appliance is plugged in.
■ Always make sure that the mains cable can never become wet or damp during operation. Route the power cable in such a way that it cannot become trapped or damaged in any other way.
■ Do not submerge the handset or the charging station in water or other liquids.
■ The charger is connected to the mains voltage and must therefore not be used in the shower, in the bath or above washbasins filled with water.
■ Never touch the charger if it has fallen into water. Remove the plug from the wall socket first!
■ The mains cable on this appliance cannot be replaced. If the mains cable is damaged, the appliance must be scrapped.
■ The toothbrush may be used by children and people with reduced physical, sensory or mental capabilities or lack of experience and/or knowledge if they are supervised or have been instructed how to use the appliance safely and have understood the potential risks.
■ Cleaning and user maintenance should not be performed by children unless they are under supervision.
■ Do not allow children to play with the appliance.
■ The handset may only be recharged with the supplied charger. Otherwise, the appliance could be irreparably damaged!
■ Operate the appliance only with the original accessories supplied.
■ Do not make any unauthorised modifications or alterations to the appliance.
■ No user action is required to switch the product between 50 and 60 Hz. The product adapts automatically to either 50 or 60 Hz.
■ Never open the appliance housing.
There are no parts inside the appliance which require user maintenance. In addition, this will invalidate the warranty.

duct is equipped with or supplied with a lithium-ion battery.
■ The battery in this appliance cannot be replaced.
Use
Check package contents
The following components are included in delivery:
- Handset
- Charging station
- 3 brush heads
- Floss attachment
- Interdental brush
• These operating instructions
◆ Unpack all parts of the appliance from the packaging and remove all packaging materials.
DANGER
▶ Do not allow children to play with packaging materials. There is a risk of suffocation!
NOTE
▶ Check the package for completeness and signs of visible damage.
▶ If the delivery is incomplete or damage has occurred as a result of defective packaging or during transport, contact the service hotline (see section Service).
Requirements for the set-up location
To ensure safe and trouble-free operation of the appliance, the set-up location must fulfil the following requirements:
The set-up location must be a horizontal, level and stable surface. In damp rooms, especially in the vicinity of water (bath), the charger must be set up so that it cannot fall into the water.
The mains power socket must be easily accessible so that the power cable can be quickly disconnected in an emergency.
CAUTION
Before connecting the appliance, compare the connection data (voltage and frequency) on the rating plate with that of your mains power supply. This data must agree to ensure that the appliance is not damaged.
▶ Make sure that the power cable is not damaged and is not routed over any hot surfaces and/or sharp edges.
▶ Ensure that the mains cable is not taut or kinked.
Operating components
(See fold-out page for illustrations)
① Brush head
2 Drive shaft
③ On/Off button + programme selection button
4 Programme displays

Normal

Sensitive

Whitening

Deep cleaning
5 Charging indicator lamp
6 Protective cover
⑦ Brush holders
8 Stand
9 Charger
⑩ Floss attachment
11 Locking screw
12 Guide grooves
13 Interdental brush
14 Snap closure
15 Travel case
Handling and operation
This section provides you with important information on handling and using the appliance.
Clever Start function
Ultrasonic toothbrushes can tickle the first time you use them. You can use the Clever Start function to slowly get used to brushing your teeth with a ultrasonic toothbrush. The Clever Start function gradually increases the frequency of the sonic vibrations over the course of the first 14 applications. If the Clever Start function is activated, the corresponding LED on the programme display flashes during use. A cleaning cycle must be carried out completely (2 minutes) in order to be counted. After 14 cleaning cycles, the Clever Start function will shut off automatically. The corresponding LED on the programme display now lights up permanently during use.
Activating/deactivating the Clever Start function
Connect the charger ⑨ to a mains power socket.
Place the switched-off handset on the charger ⑨. The charging indicator lamp ⑤ lights up red.
- Press and hold the On/Off button ③ for around 5 seconds. The LEDs of the programme displays ④ flash 5 x in sequence from the top to the bottom. The Clever Start function is now deactivated.
If you want to reactivate the Clever Start function, replace the switched-off handset on the charger ⑨.
- Press and hold the On/Off button ③ again for around 5 seconds. The LEDs of the programme displays ④ flash 5 x in sequence from the bottom to the top. The Clever Start function is now reactivated.
Before first use
Before the first use, clean the brush head ①, the interdental brush ⑬ and the floss attachment ⑩ with clear water.
Open the protective cover ⑥ and place the replacement brush heads, the interdental brush ⑬ and/or the floss attachment ⑩ into the brush holders ⑦ as required. Replace the protective cover ⑥ onto the stand ⑧.
Place the handset on the charger ⑨. The charging indicator lamp ⑤ lights up red during charging. It takes approximately 12 hours for the battery to charge fully from empty. Once the handset is fully charged, the charging indicator lamp ⑤ lights up green.
If the charging indicator lamp ⑤ starts flashing constantly, the battery is low and needs to be charged.
NOTE
▶ Place the handset back on the charger after use. This ensures that your toothbrush always operates at its optimum performance. The battery is not damaged by regular charging.
Using attachments
3 brush heads ①, one interdental brush ⑬ and one floss attachment ⑩ are supplied with the appliance.
To remove the respective attachment pull it upwards and off the drive shaft ②.
When fitting the attachment, ensure that the drive shaft ② on the handset slides precisely into the socket on the attachment. Push the attachment down until it completely covers the drive shaft ②.
NOTE
We recommend only using original attachments. You can order replacement attachments at any time (see section Ordering replacement parts).
▶ You can also use the replacement brush heads for the Philips Sonicare®* ultrasonic toothbrush for this appliance.
* Sonicare is a registered trademark of Koninklijke Philips N.V. and/or Philips Oral Healthcare, Inc. and/or Koninklijke Philips Electronics N.V.
Programmes
The toothbrush offers 4 different programmes for your personal dental care regime.
Press the On/Off button ③ repeatedly in the first 10 seconds to select the desired programme. The LED of the corresponding programme flashes or lights up (see also the section Clever Start function).
 Normal Normal | For thorough cleaning of teeth and gums |
 Sensitive Sensitive | For gentle cleaning of sensitive teeth and gums |
 Whitening Whitening | For whitening the teeth and thorough cleaning of teeth and gums |
 Deep cleaning Deep cleaning | For extra thorough cleaning of teeth and gums |
NOTE
If you operate one of the programmes for longer than 10 seconds and then press the On/Off button ③, the toothbrush will switch off.
▶ Next time you switch on the toothbrush, it will automatically start in the programme you were using last.
Cleaning your teeth using the brush head
NOTE
▶ Due to the unfamiliar sensation of the toothbrush, there may be some initial gum bleeding. This is normal. If this continues for more than two weeks, you should consult your dentist.
Place the brush head ① on the handset.
◆ Moisten the brush under flowing water.
◆ Put a little toothpaste onto the wet brush.
NOTE
▶ To avoid splashes, do not switch on the appliance until the brush is in your mouth.
◆ Use the On/Off button ⓣ to select the desired programme.
NOTE
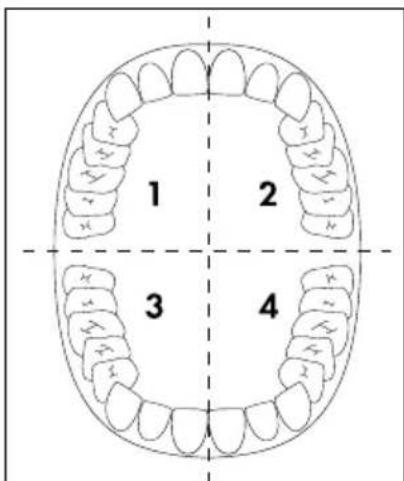
This toothbrush has a 30-second interval timer, so that all four jaw quadrants can be cleaned evenly.
◆ Divide your mouth into four parts (quadrants): upper right, upper left, lower right and lower left.
text_image
1 2 3 4♦ Begin in one quadrant:
Start with the brush head ① on your gums, and move the brush upwards/downwards from the gums to the crown of the tooth. Continue in this manner on both the inside and the outside of the tooth. Start again on the gums for each individual tooth. Do not forget the back surfaces of the rear molars. To clean the chewing surfaces, guide the brush over the chewing surfaces with a little pressure.
After 30 seconds, the toothbrush stops briefly to signal that you should start cleaning the next quadrant. Clean all jaw quadrants using the same technique.
◆ After two minutes, the toothbrush stops. This means that you have complied with the dental recommendation of 2 minutes cleaning.
◆ After use, clean the brush head ① thoroughly under running water.
Remove the brush head ① from the handset. To clean the drive shaft ② and the handset, hold them under running water for a short while. Hold the handset so that the drive shaft ② is pointing downwards at an angle.
Cleaning with the interdental brush
You can use the interdental brush ⑬ to clean the interdental spaces, difficult-to-access parts on the teeth, or the chewing surfaces of your molars.
◆ Attach the interdental brush 13 to the handset.
Moisten the interdental brush 13 under running water.
- Add a little toothpaste onto the wet interdental brush 13.
NOTE
▶ To avoid splashes, do not switch on the appliance until the brush is in your mouth.
Use the On/Off button ③ to select the desired programme and clean the required areas.
◆ After two minutes, the toothbrush stops.
After use, clean the interdental brush 13 thoroughly under running water.
Remove the interdental brush ⑬ from the handset. To clean the drive shaft ② and the handset, hold them under running water for a short while. Hold the handset so that the drive shaft ② is pointing downwards at an angle.
NOTE
The interdental brush 13 is ideal for cleaning braces or false teeth.
Cleaning with the floss attachment
You can use the floss attachment 10 to clean interdental spaces with the aid of dental floss.
◆ Place the floss attachment 10 on the handset.
Take around 15 cm of standard commercial dental floss and wrap one end 2–3 times around the locking screw ⑪.
NOTE
If the dental floss slips off the locking screw ⑪, you can retighten it with a Phillips screwdriver.
◆ Pass the dental floss taut through the guide grooves ⑫ on the floss attachment ⑩.
Then wrap the other end 2–3 times around the locking screw ⑪ so that the dental floss is stretched taut and does not come undone while cleaning the interdental spaces.
◆ Guide the dental floss between two teeth with the toothbrush switched off.
Use the On/Off button ③ to select the programme. When cleaning with the floss attachment ⑩, use the programmes (Normal) or (sensitive).
◆ Clean the interdental space with careful up-and-down movements.
◆ Clean all the interdental spaces as described above.
◆ After two minutes, the toothbrush stops.
Remove the dental floss from the locking screw ⑪ and dispose of it.
◆ After use, clean the floss attachment ⑩ thoroughly under running water.
Remove the floss attachment ⑩ from the handset. To clean the drive shaft ② and the handset, hold them under running water for a short while. Hold the handset so that the drive shaft ② is pointing downwards at an angle.
Transport lock
The toothbrush is equipped with a transport lock to secure it from switching on unintentionally.
Press and hold the On/Off button ③ until the charging indicator lamp ⑤ flashes green 5 times. The transport lock is now activated and the charging indicator lamp ⑤ flashes green 5 times if you attempt to switch on the toothbrush.
Press and hold the On/Off button ③ until the charging indicator lamp ⑤ lights up green. The transport lock is now deactivated and the toothbrush switches on with the last-used programme.
Travel case
The travel case 15 has enough room for the handset and two brush heads.
◆ Press the lower part of the snap closure 14 to open the travel case 15.
To close the travel case ⑮, push the cover down until it clicks into place.
Cleaning and maintenance
DANGER - ELECTRIC SHOCK!
▶ Always remove the plug of the charger ⑨ from the power socket before cleaning the appliance! There is a risk of electric shock!
▶ Never immerse the handset or the charger ⑨ in water or other liquids!
CAUTION - PROPERTY DAMAGE!
▶ Do not use any aggressive cleaning agents or solvents. They can damage the plastic surfaces.
If necessary, push the charger ⑨ downwards out of the stand ⑧.
◆ Clean the stand ⑧ under running water.
- Clean the charger ⑨ with a soft, slightly damp cloth.
Remove the brush head ① from the handset. After use, clean the brush heads ① thoroughly under running water.
We recommend cleaning the brush heads ① in a standard commercial denture cleaning fluid every 2-4 weeks.
The brush heads ① are equipped with indicator bristles (the outer, light-blue bristles).
These bristles lose their colour and thus show that the brush head ① needs to be changed. Change the brush head ① when the indicator bristles lose their colour.
Clean the interdental brush 13 after each use under running water. You should replace the interdental brush 13 after about 3 months of regular use, or when the bristles start to bend outwards (at the latest).
Clean the floss attachment 10 under running water after every use. If it is damaged, however, it must be replaced.
To clean the drive shaft ② and the handset, hold them under running water for a short while. Hold the handset so that the drive shaft ② is pointing downwards at an angle.
- Clean the travel case 15 under running water.
Disposal
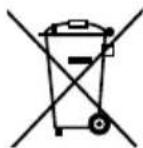
The adjacent symbol of a crossed-out dustbin means that this appliance is subject to Directive 2012/19/EU. This directive states that this appliance may not be disposed of in the normal household waste at the end of its useful life, but must be taken to specially set-up collection locations, recycling depots or disposal companies.
The disposal is free of charge for the user. Protect the environment and dispose of this appliance properly.
If it is possible to do so without destroying the old appliance, remove the old batteries or rechargeable batteries before returning the appliance for disposal and take them to a separate collection point. In the case of permanently installed rechargeable batteries, you must indicate during disposal that the appliance contains a battery.

Your local community or municipal authorities can provide information on how to dispose of the worn-out product.

The product is recyclable, subject to extended producer responsibility and is collected separately.

The packaging is made from environmentally friendly material and can be disposed of at your local recycling centres.
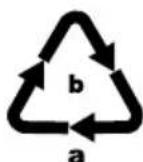
Dispose of the packaging in an environmentally friendly manner. Note the labelling on the packaging and separate the packaging material components for disposal if necessary. The packaging material is labelled with abbreviations (a) and numbers (b) with the following meanings: 1-7: plastics, 20-22: paper and cardboard, 80-98: composites.
Appendix
Technical specifications
| Power supply 100-240 V ~ (AC), 50/60 Hz | |
| Power consumption 2 W | |
| Protection class | II/□(double insulation) |
| Protection type (charger and handset) | IP X7 (protected against the ingress of water during temporary immersion) |
| Integrated battery (Li-ion) 3.7 V | --- (DC) / 800 mAh / 2.69 Wh |
 | detachable supply unit |
Ordering replacement parts
You can order replacement brush heads for this product on the internet at www.kompernass.com.
text_image
NSZB 3.7 C4Scan the QR code with your smartphone/tablet.
You can use this QR code to go directly to our website to view and order the available spare parts.
NOTE
▶ If you have problems with your online order, you can contact our service centre by phone or e-mail.
▶ Please always quote the article number (e.g. IAN 123456_7890) when ordering. You can find it on the title page of these operating instructions.
▶ Please note that online ordering of replacement parts is not possible for all countries.
This appliance has a 3-year warranty valid from the date of purchase. If this product has any faults, you, the buyer, have certain statutory rights. Your statutory rights are not restricted in any way by the warranty described below.
Warranty conditions
The warranty period starts on the date of purchase. Please keep your receipt in a safe place. This will be required as proof of purchase.
If any material or manufacturing fault occurs within three years of the date of purchase of the product, we will either repair or replace the product for you or refund the purchase price (at our discretion). This warranty service requires that you present the defective appliance and the proof of purchase (receipt) within the three-year warranty period, along with a brief written description of the fault and of when it occurred.
If the defect is covered by the warranty, your product will either be repaired or replaced by us. The repair or replacement of a product does not signify the beginning of a new warranty period.
Warranty period and statutory claims for defects
The warranty period is not prolonged by repairs effected under the warranty. This also applies to replaced and repaired components. Any damage and defects present at the time of purchase must be reported immediately after unpacking. Repairs carried out after expiry of the warranty period shall be subject to a fee.
Scope of the warranty
This appliance has been manufactured in accordance with strict quality guidelines and inspected meticulously prior to delivery.
The warranty covers material faults or production faults. The warranty does not extend to product parts subject to normal wear and tear or to fragile parts which could be considered as consumable parts such as switches, batteries or parts made of glass.
The warranty does not apply if the product has been damaged, improperly used or improperly maintained. The directions in the operating instructions for the product regarding proper use of the product are to be strictly followed. Uses and actions that are discouraged in the operating instructions or which are warned against must be avoided.
This product is intended solely for private use and not for commercial purposes. The warranty shall be deemed void in cases of misuse or improper handling, use of force and modifications / repairs which have not been carried out by one of our authorised Service centres.
Warranty claim procedure
To ensure quick processing of your case, please observe the following instructions:
■ Please have the till receipt and the item number (IAN) 391068_2201 available as proof of purchase.
■ You will find the item number on the type plate on the product, an engraving on the product, on the front page of the operating instructions (below left) or on the sticker on the rear or bottom of the product.
If functional or other defects occur, please contact the service department listed either by telephone or by e-mail.
■ You can return a defective product to us free of charge to the service address that will be provided to you. Ensure that you enclose the proof of purchase (till receipt) and information about what the defect is and when it occurred.
You can download these instructions along with many other manuals, product videos and installation software at www.lidl-service.com.
This QR code will take you directly to the Lidl service page (www.lidl-service.com) where you can open your operating instructions by entering the item number (IAN) 391068_2201.
Service
GB Service Great Britain
Tel.: 0800 404 7657
E-Mail: kompernass@lidl.co.uk
IE ServiceIreland
Tel.: 1800 101010
E-Mail: kompernass@lidl.ie
IAN 391068_2201
Importer
Please note that the following address is not the service address. Please use the service address provided in the operating instructions.
KOMPERNASS HANDELS GMBH
BURGSTRASSE 21
44867 BOCHUM
GERMANY
www.kompernass.com
Inhaltsverzeichnis
Einleitung 18
KOMPERNASS HANDELS GMBH
BURGSTRASSE 21
44867 BOCHUM
DEUTSCHLAND
www.kompernass.com
Sommaire
Introduction 34
KOMPERNASS HANDELS GMBH
BURGSTRASSE 21
44867 BOCHUM
ALLEMAGNE
www.kompernass.com
Inhoudsopgave
Inleiding 54
KOMPERNASS HANDELS GMBH
BURGSTRASSE 21
44867 BOCHUM
DUITSLAND
www.kompernass.com
Obsah
Úvod 70
KOMPERNASS HANDELS GMBH
BURGSTRASSE 21
44867 BOCHUM
NĚMECKO
www.kompernass.com
Spis treści
W step 86
KOMPERNASS HANDELS GMBH
BURGSTRASSE 21
44867 BOCHUM
NIEMCY
www.kompernass.com
Obsah
Úvod 102
KOMPERNASS HANDELS GMBH
BURGSTRASSE 21
44867 BOCHUM
NEMECKO
www.kompernass.com
Índice
KOMPERNASS HANDELS GMBH
BURGSTRASSE 21
44867 BOCHUM
ALEMANIA
www.kompernass.com
Indholdsfortegnelse
Indledning 134
KOMPERNASS HANDELS GMBH
BURGSTRASSE 21
44867 BOCHUM
TYSKLAND
www.kompernass.com
Indice
Introduzione....150
KOMPERNASS HANDELS GMBH
BURGSTRASSE 21
44867 BOCHUM
GERMANIA
www.kompernass.com
Tartalomjegyzék
Bevezető....166
KOMPERNASS HANDELS GMBH
BURGSTRASSE 21
44867 BOCHUM
NÉMETORSZÁG
www.kompernass.com
Vsebina
Uvod 182
Informacije o teh navodilih za uporabo 182
Predvidena uporaba 182
Varnostna opozorila v teh navodilih 182
Varna uporaba 183
Osnovna varnostna navodila 183
KOMPERNASS HANDELS GMBH
BURGSTRASSE 21
44867 BOCHUM
NEMČIJA
www.kompernass.com
Pooblaščeni serviser
SI ServisSlovenija
Tel.: 080 080 917
E-Mail: kompernass@lidl.si
IAN 391068_2201
Garancijski list
KOMPERNASS HANDELS GMBH
BURGSTRASSE 21
44867 BOCHUM
GERMANY
www.kompernass.com
Last Information Update · Stand der Informationen · Version des informations
Stand van de informatie · Stav informací · Stan informacji · Stav informácií
Estado de las informaciones · Tilstand af information · Versione delle informazioni